Геймплей (Gameplay) Мира Дождя может показаться очень и очень трудным. Большинство механик игры скрыты от игрока на старте, кроме элементарного управления и некоторых знаний о времени и цикле. Следующие основы можно найти ниже: карма, время, переход, техники, стратегии.
Карма[]
Первоначально, есть пять уровней кармы, каждая со своим индивидуальным символом. На экране спячки, есть вертикальный набор из этих символов. Если слизнекот умирает, уровень его кармы уменьшается. Для того чтобы выйти на новый уровень, слизнекоту нужно успешно пережить цикл и впасть в спячку. Для этого нужно заполнить определённое количество ячеек сытости (их количество зависит от вида слизнекота) и залезть в убежище. Можно заснуть в убежище и если количество заполненных ячеек меньше нужного (зажать клавишу «вниз», находясь в убежище), но при этом прогресс не будет сохранён, а слизнекот на следующий цикл будет очень вялым, пока вы не заполните хотя бы одну ячейку сытости.
Во время спячки на экране появится изображение спящего слизнекота и повышения вашего уровня кармы. Вы можете избежать уменьшения уровня кармы, съев кармацвет. Вне спячки и экрана смерти, ваш уровень кармы отображается в левом нижнем углу экрана, рядом с временем и индикатором еды.
Для того, чтобы достичь определенных областей, вы должны будете пройти через врата кармы. Чтобы пройти нужен уровень кармы равный или выше, чем на символе врат.
Переход[]
Основная страница: Переход
Это игровая механика, позволяющая перемещаться между убежищами в различных регионах. Каждый раз выполняя какое-либо испытание перехода, игрок будет получать возможность перейти в любое открытое убежище любого открытого региона. Ваш запас кармы будет повышен до возможного на данный момент игры максимума. Переход — отличный способ выбраться из ловушки, если вы по каким-то причинам застряли в одном регионе. Стоит помнить, что количество переходов ограничено, поэтому стоит использовать их с умом.
Охотник не может пользоваться переходом.
Время[]
Для того, чтобы определить количество времени оставшееся до начала дождя, посмотрите на нижний левый угол экрана, зажав клавишу карты. Там, вокруг символа кармы, будут крошечные круги. Это длина текущего цикла. Длина — случайное значение, и каждый раз у вас будет больше или меньше времени на действия. Один круг равняется 30 секундам реального времени.
Техники и механики[]
Полное руководство, иллюстрированное примерами — Rain World Movement Guide.
| Название | Описание | Демонстрация |
|---|---|---|
| Смена предметов в лапках | Любой слизнекот кидает предмет сперва с правой лапки. Для смены предметов следует нажать «взять» 2 раза. |
|
| Разворот в тоннеле | Нажмите прыжок во время движение по тоннелю. |
|
| Платформа | Нажмите вниз, чтобы спуститься. На платформах невозможно выполнять техники, требующие направление вниз. |
|
| Длинный прыжок | Примите лежачее положение, зажмите кнопку прыжка. После принятия слизнекотом стойки готовности, отпустите кнопку прыжка. |
|
| Поворот с приростом скорости | Резко развернитесь. Является базовой составляющей других техник. |
|
| Сальто | Нажмите назад и прыжок во время скоростного разворота. Серии сальто можно выполнять, отталкиваясь от тел врагов. |
|
| Кувырок | При приземлении после прыжка с высоты зажмите вперёд и вниз. Из третьего кувырка можно выпрыгнуть на высоту, достаточную для следующей серии кувырков. |
|
| Прыжки по стенам | Нажмите одновременно прыжок и кнопку противоположенного направления как только слизнекот зацепится за стену. |
|
| Прыжки по шестам | По шестам можно прыгать как по земле, последующие прыжки также будут ускоренные. |
|
| Выпрыгивание из труб/тоннелей | Нажмите прыжок при повороте в тоннеле, добавьте кнопку направления движения при выходе из трубы. |
|
| Копьё в пол | При выполнении сальто нажмите вниз и бросить. |
|
| Подкат | Зажмите одновременно вперёд, вниз и прыжок. Из подката можно выпрыгнуть и совершить последующую серию кувырков. |
|
| Отскок при подкате (сальто из подката) | После удачного начала подката нажмите кнопку противоположенного направления и прыжок. Предмет, лежащий под местом отскока берётся автоматически. |
|
| Прыжки по воде | Если скорость летящего в воду слизнекота достаточно велика, при зажатой кнопке вверх слизнекот отпрыгнет от воды. | |
| Прирост скорости за счёт предметов | Инерция брошенного предмета передаётся слизнекоту. Копьё даёт больше скорости чем галька. | |
| Подкат с броском | Усиливает бросок предмета в 2 раза. Невозможно выполнить при игре за Монаха. |
|
| Наиболее быстрый способ перемещения | ||
|
|


Комбинация техник[]
Техники, такие как отскок в подкате и прикалывание можно комбинировать, тем самым пригвождая противника к земле и залетая к нему в тыл, с последующим его убийством. Так-же, существует баг, при котором если в 1 лапке у слизнекота будет копьё, во второй будет пусто, как и за спиной, то с помощью отскока в подкате можно будет взять два копья в обе лапки.
Взаимодействие с существами[]
Система боя – неотъемлемая часть любой игры, Мир Дождя не исключение. По мере продвижения по сюжету, давать бой хищникам станет требованием, а не альтернативой побегу. Ниже описаны некоторые механики, позволяющие избежать хищника или же дать бой.
Боевые техники[]
| Название | Описание |
|---|---|
| Прикалывание | Большинство существ можно «приколоть» копьём к стене или полу в том случае, если незащищённая бронёй или другим способом часть тела находится в вблизи стены/пола, ширина части тела должна составлять менее ~1/2 копья. |
| Использование высоты | Существа могут быть с лёгкостью скинуты с высоты. Стоит учитывать, что некоторые существа станятся на большее количество кадров => не могут предпринять попыток схватиться за шест/стены, другие же на меньше или не оглушаются броском предмета вовсе. |
| Стравливание | Большинство хищников будут охотится на ближайшее к ним существо, таким образом можно скрываться, приводя одного хищника к другому или отвлекая его заготовленной пищей. |
Техники убийства ящеров[]
| Название | Описание | Демонстрация |
|---|---|---|
| Rock Spear | Требуемые предметы: камень в правой лапке, копьё — в левой (целесообразно иметь ещё одно копьё, лежащее на земле рядом). Приняв лежачее положение, оглушите ящера камнем. После того, как ящер перевернётся на спину, следует атаковать копьём. Следует учесть, что иногда ящер может не перевернуться или, в случае зелёных, моментально разворачивается. |
|
| Slide Spear | Попадание в горло наносит увеличенный урон ящеру. Подкат под ящера, как только преодолена голова – воткните в горло ящера копьё. Урон будет увеличен в 1.5 раза, стан также увеличен. |
|
Стратегии[]
- Вы можете заманить одного хищника к другому существу, чтобы он отвлекся на новую добычу. Это сработает с разными видами ящеров, разными племенами мусорщиков, и просто с разными существами, например стервятник и ящер.
- Так как слизнекот — одно из самых быстрых существ, вы всегда сможете убежать. Если враг слишком быстр, вы можете замедлить его, ранив копьем.
- Большинство существ убьет вас сразу как укусят, но если вас схватили щупальцем или языком, вы можете попытаться вырваться из захвата. Также редко вы можете выпасть изо рта хищника и сбежать.
- Старайтесь не злить нейтральных существ, у них есть свои механизмы защиты, которыми они могут убить вас.
- Также не стоит провоцировать мусорщиков — обычно они имеют численное превосходство и могут метко метать копья. Вы можете обменивать жемчуг и некоторые другие предметы у мусорщиков. Это повысит вашу репутацию среди них.
- Головы ящеров имеют иммунитет к копьям: при попадании копья в голову, оно отскочит, а ящер будет ненадолго оглушён. Лучшим вариантом при открытом столкновении будет сначала кинуть камень в голову ящера, чтобы его оглушить, а затем, когда ящер выгнет своё уязвимое тело, кинуть копьё.
- Акцентируйте свое внимание на еде, всегда имейте оружие для защиты или запугивания врага, но не ввязывайтесь в драки, если можете сбежать. Некоторую пищу можно хранить в убежище, что дает вам больше времени для исследования.
- В тёмных регионах, например в Подземке и Затененной цитадели вам понадобится фонарь, чтобы видеть в кромешной тьме.
Rain World Movement Guide
This is a comprehensive guide to movement in Rain World, covering everything from beginner moves to advanced speedrunning techniques and combat.
Please note that this guide was primarily written with keyboard controls in mind. The inputs shown here are still applicable for controllers, but a few moves which require very rapid directional input changes might be a lot more difficult / less reliable. Using D-pad might be easier for some of these moves, but all moves are still possible with analog stick!
“Warehouse” and “Nest” are great sandbox maps for movement practice. To discuss and share tech, or get further advice and help, check out the #movement channel in the Rain World Discord!
This guide was last updated on March 31st 2022.
Recently added:
Wallpouncing! (Cut content)
Ease of use tips
Use ctrl + f to search for moves!

We also recommend that you turn off print layout to remove page breaks and shorten the guide.
Check out recommendations if you’re looking for some useful moves to start with, at any level!
A changelog and future sections list can be seen below the index.
This guide prioritises naming consistency. Use the glossary to find alternate tech names.
Middle click hyperlinks to open in a new tab and avoid losing your place!
Mild spoiler warnings towards the end of the combat section (IC spoilers) and preceding section (SL spoilers).
Difficulty Guide
* — Beginner — Useful in a first playthrough, simple execution (Rubble/Spear)
** — Intermediate — Useful for players who feel confident with basic movement (Slide pounce)
*** — Adept — Worth learning for a second playthrough or hunter run (Down throw)
**** — Advanced — For speedrunning and advanced play (Slide flip pin)
^^^^^ — Academic — Niche tech for those interested in experimentation. (Den boosted slide pounce)
External Links
Official Discord Server
Companion Video Guide
ICED’s Rain World Exploits and Glitches Guide (Major spoilers!)
Official Rain World Wiki
Contents
Recommendations 3
Basic Moves: 4
Jumping * 4
Item management * 9
Charge pouncing * 10
Turning around * 13
Tunnels: 14
Mobility in tunnels * 14
Tunnel boosting * 14
Slides: 16
Basic slide ** 16
Slide pouncing ** 18
Slide flipping *** 20
Extended Sliding *** 22
Rolls: 25
Roll from falling * 25
Fast Rolling *** 25
Chaining from moves ** 26
Roll pouncing ** 27
Fast Fall Rolling *** 31
Tumble Rolling *** 34
Poles: 36
Vertical pole movement ** 36
Pole momentum **** 41
Horizontal pole movement *** 42
Turns: 45
Dash turns * 45
Storing turns ** 46
Basic applications *** 49
Turn stored slide pouncing *** 53
Turn stored slide flipping **** 54
Turn stored Extended Sliding ^^^^^ 57
Crawl turns **** 59
Swimming (spoilers): 64
Boosting * 64
Water hopping **** 66
Combat: 67
Throwing weapons * 67
Slide spearing *** 73
Downwards/upwards throwing ** 76
Creature strategy (minor spoilers) * 78
Other: 80
Cut content 80
Unexplored moves 82
Credits 83
Gif Archive 85
Index 85
Glossary 91
Pending List 92
Changelog 92
Recommendations
Here are a few basic essential moves for players of all skill levels unsure where to start:.
Beginner *
Pulling up onto ledge — Taught in the tutorial, really important for climbing!
Wall jumping — Essential for mid game areas.
Swapping hands — Choose what to throw first!
Throw boosting — Effectively gives you a better jump.
Basic tunnel mobility — Escape from lizards in tunnels!
Rubble/Spear combo — Simple and effective defence strategy!
Intermediate **
Optimal throw boosting — Cross large gaps with ease!
Slides — Important to start practising. Key to unlocking faster movement over time.
Rolls — Survive falls and keep moving.
Landing from pounces — Jump to keep moving!
Adept ***
Fast pole climbing — Go up poles quickly! Invaluable tech.
Crouch mouth spear / Slide spearing — Take on lizards with a single spear!
Extended Sliding — Go really fast on flat surfaces.
Slide flipping — Once consistent, try this.
Advanced ****
Crawl turn jump — Gain extra height from jump!
Backflip pole jump — Saves time in some parts of the game — Extra height from poles!
Downthrowing from slide flips — Essential offensive move for getting the drop on lizards.
Basic Moves:
Jumping *
Pulling up onto ledge *
When hitting a wall just below a ledge, holding forwards and pressing jump allows Slugcat to climb up.
Note that pressing against walls gives Slugcat friction, and so jumping towards the ledge is best to gain maximum height.
Wall jumping *
Slugcat will slide down walls when holding into the wall.
Wall jumping is performed by pressing jump while sliding down a wall (holding into the wall), immediately switching holding direction to the other wall and tapping jump as soon as Slugcat comes into contact with that wall.
Note: It’s important to switch holding direction as soon as possible after jumping. The aim is to jump as soon as possible while holding into the wall, to minimise height lost to sliding, then immediately hold away from the wall to minimise negative aerial drift.
Coyote jump *
It is still possible to jump a few frames after running off an edge. This can be used to maximise horizontal jump distance, or safeguard against tight jumps.
Coyote jump definition
Pole coyote jump **
This can also be done off of poles.![]()
Extended coyote jump ****
Extending coyote jumps off ledges is possible by crouching while running off, then tapping up and jump simultaneously.
Grounded wall hop ***
Hugging a wall then simultaneously tapping outwards + double tapping jump allows Slugcat to jump twice. Jump needs to be double tapped quickly as the window is quite short.
Aerial wall hop ***
While sliding down a wall, holding out then pressing jump allows Slugcat to hop midair for a short window of time. This only works when holding away from the wall.
Note: This is likely a leniency/coyote mechanic for pressing outwards before pressing jump while wall jumping.
This works even when only a small part of Slugcat’s body brushes against a wall, as this counts as being in the sliding state.
Application for wall jumping ***
This allows for wall jumping up shafts where Slugcat’s head initially only brushes against the opposite wall.
Item management *
Right hand usage *
If holding items in both hands, Slugcat will always throw or use the item in its right hand.
Swapping hands *
Double tapping grab causes Slugcat to swap the items in its hands.
Dropping items *
Tapping grab while holding down will drop a held item.
Storing items *
Holding grab when holding a small inedible item in Slugcat’s main hand causes it to store the item in its stomach. Doing the same again will recover the item.
Charge hopping *
Charge hopping *
Entering the crouching position and holding jump until Slugcat’s back is arched, then releasing, allows for a charge-hop. For almost all jumps Slugcat is subject to aerial drift, and so holding forwards allows the player to maximise Slugcat’s horizontal range whenever hopping or pouncing.
Note: In this gif, forward is held immediately after Slugcat’s back is arched. This is useful to avoid accidentally pressing forward too soon, and running off the edge.
Crouching to safely position on edges *
This gif shows the farthest Slugcat can extend over a ledge while crouched, useful for maximising charge pounce distance.
Landing upright out of charge pounce *
Tapping up immediately after charge pouncing puts Slugcat in an upright position, giving it more height. This can help grab ledges upon landing.
Ceiling pounce ^^^^^
When holding forwards and pouncing into a sloped ceiling, Slugcat will slide down until up is pressed. This tech has no application in the base game.
Throw boosting *
Throwing rocks or spears during a jump or pounce increases horizontal velocity, allowing Slugcat to travel further than normal jumps and pounces. This is most effective when done at the start of a jump.
Note: Throw boosting can be used at the start of any aerial move to increase speed / range.
Optimal throw boosting **
This can be done with two objects to further increase speed, optimally either out of a charge pounce or max length roll pounce (Explained later in guide).
Turning around *
Backflipping *
Backflips are performed by jumping immediately after turning around. Note that the rightwards press near the end of the move is only to prevent Slugcat from falling off the platform.
Turn hopping **
Turn hopping involves repeatedly jumping after turning to conserve turn momentum and cover ground quickly. Momentum conserved this way only depletes when in contact with the ground, so will last longer with more precise and better timed jumps.
Tunnels:
Mobility in tunnels *
Turning around *
It is possible to turn around inside tunnels by holding in the opposite direction and pressing jump. This is possible in vertical tunnels as well, but only turning upwards, due to free falling.
Free falling *
It is possible to fall vertically inside tunnels by holding down and pressing jump. This works whether Slugcat is facing forwards or backwards.
Tunnel boosting *
Boost end lag *
Boosts inside tunnels can be performed by pressing jump. This gives a short burst of speed with ending lag. This ending lag makes the boost slow Slugcat down overall, unless this lag is cancelled.
Cancelling boost end lag
Boost ending lag is cancelled by boosting into a room pipe, a shortcut, or into open space. This can be combined with jumps to exit tunnels at running speed.
Boosting out of shortcuts/room pipes **
Pressing jump when exiting tunnels & pipes gives a burst of speed, which represents Slugcat kicking off the wall behind it. This can be combined with jumps to exit tunnels at running speed.
Boosting out of shortcuts/room pipes in tunnels **
The same can be done in tunnels.
Boosting around tunnel corners *
Pressing jump and holding forwards when rounding a corner also gives a boost. As with boosting out of shortcuts and room pipes, this is like kicking off a wall behind you. This can also be done around T junctions, as long as there is ground behind Slugcat’s feet.
Slides:
Basic slide **
Slides can be performed by pressing down and jump together while moving. A specific sound can be heard when performing a slide.
Pressing jump too late will cancel the slide and cause a stumble.
Not holding forward long enough results in a shorter slide which cannot be jumped or flipped out of.
Sliding into a pipe **
This is a more efficient way to enter ground level pipes. This can also be done with regular tunnels..

Sliding into a tunnel ***
Tapping down directly over a tunnel mid slide allows for quickly entering said tunnel. This also works with shortcuts and room pipes in the ground.
Slide into tunnel boost ***
Sliding into a tunnel can be combined with a tunnel boost to gain extra speed on exit.
Slide parkour ***
Pressing jump while sliding into a short wall allows Slugcat to slide up and over the ledge while in a crouched state. This can be used in conjunction with jumping to traverse rough terrain.
Slide pouncing **
Basic slide pounce **
Jumping mid slide results in a long pounce. This is called a rocket jump in the code.
Pressing the second jump too early or late results in a smaller pounce.
Landing upright from pounce **
It is not possible to change to an upright state mid pounce, and so unless able to roll, Slugcat will always land in a crouched state, which slows the player down.
This can be avoided by pressing jump on landing, to enter a temporary upright state, and then pressing up to switch to standing.
This also conserves momentum, which is extremely useful for exiting all pounces and roll chains.
Instant slide pounce ****
Normally only useful/applicable with tool assisted inputs (macros or keybinds), Slugcat can pounce in the first frame of a slide.
This can be done with the following inputs. Each line below represents one frame, and Down, Forward and Jump are abbreviated.
🡲
🡶 J
🡶
🡶 J
This is practically achievable in game by slowing down time, e.g. with mushrooms, as shown in the gif below. It can also be done without slowdown, which is less practical due to the difficulty in pressing a key twice in 3 frames. 
Note: This is specifically useful for speedruns in game here, as shown here (Major ending spoilers)
Additionally, the cleanest input sequence for this move is J, 🡶, J. The extra forwards and down inputs are included for ease of learning; releasing down on the third frame isn’t necessary, and with perfect inputs the move can be done from standing.
Instant slide pounce height can be increased with prior horizontal momentum from either turning or jumping.
Slide flipping ***
Basic slide flip ***
Pressing jump while holding backwards mid slide results in a long backflip. This is called whiplash in the code.
Note:
To slide flip correctly, forward must be released, and backwards held, before jump is pressed.
The jump window is the same as for slide pouncing.
Pressing jump and back too early results in a regular failed slide pounce due to the shorter slide. Forward must be held long enough for a regular slide, to slide flip.
Slide flip pickup ***
Slide flipping at the same point as an item will auto pickup that item.
Instant slide flip ****
Normally only useful/applicable with tool assisted inputs (macros or keybinds), Slugcat can perform a slide flip on the first frame of a slide.
This can be done with the following inputs. Each line below represents one frame of action, and Down, Forward, Jump, and Backwards are all abbreviated.
🡲
🡷 J
🡷
🡷 J
🡶
This is practically achievable in game by slowing down time, e.g. with mushrooms, as shown in the gif below, or without any slowdown. The inputs are more demanding than instant pouncing, which makes this less practical overall but still achievable.
Note: The cleanest input sequence for this move is J, 🡷, J, 🡲. The extra forward, down and backwards inputs are included for ease of learning; holding 🡷 for one frame only isn’t necessary, and with perfect inputs the move can be done from standing.
Extended Sliding ***
This can be done by throwing an item backwards mid slide, and greatly increases distance travelled. As with regular slides, holding forward is needed to get a full length slide.
Extended slide hopping ****
By holding forwards and repeatedly hopping after an extended slide, momentum can be conserved for a long distance, similarly to turn hopping (Explained later in guide). This is unique to extended slides, as they eject the Slugcat into a standing position unlike regular slides.
Extended slide backflip ****
Backflipping out of an extended slide can be done by holding back and pressing jump at the end of the slide. As with extended slide hopping, this works because the extended slide ejects Slugcat into the upright state. This only works if the slide was entered into after running for some time, due to run storage.
Extended slide pounce ****
It is possible to pounce out of an extended slide. This requires holding forward significantly longer than normal, as the extended slide needs to also be extended to full length.
Extended slide flipping ****
It is also possible to slide flip out of extended slides. Like extended slide pouncing, this requires holding forward significantly longer, as the extended slide needs to also be extended to full length.
Remember that you can land upright from pounces, and conserve momentum, by tapping jump on landing, then up!
Extended instant hop ****
An extremely useful tool for quickly travelling horizontal distance and crossing wide gaps, this move is performed by starting an extended slide, pressing jump 1 frame later and then holding forwards. For optimal speed, forwards must be pressed and held within a few frames of the jump input. This move can be performed during any frame in which slide extension is possible.

Extended instant pounce ****
A similarly performed variant of the extended instant pounce, this move is performed by starting an extended slide and pressing jump on the same frame, then pressing forward exactly one frame later.The forward input must be within one frame of the jump input, otherwise a slide-flip will be performed instead. This move can only be performed when started on one of the last 2 possible frames of a slide in which slide extension is possible.
This move can be rolled out of like any other pounce and travels further than regular slide pouncing.
Extended instant crouch hop ****
The fastest known horizontal move to date, performed by starting an extended slide, pressing jump and holding forwards 1 frame later and then pressing down 1 frame after that. For optimal distance, forwards must be pressed and held on the same frame as the jump input. This move can be performed during any frame in which slide extension is possible.
Den boost ****
Holding down and pressing jump over a den mid slide launches Slugcat upwards.
In the example below, the wall directly next to the den makes entering it via slide reliable. This move is a lot less reliable when attempting to enter dens without a wall next to them. Smaller boosts out of dens can also be applicable for gaining height in combat, on a case to case basis.
Rolls:
Rolling from falling *
Holding down and left/right when falling from a height greater than a normal jump (a height of about 4 tiles) will send Slugcat into a roll. This will negate landing stun when falling long distances.
Fast rolling ***
Exclusively possible with analog sticks. Faster roll speed can be achieved by angling the analog stick more closely to the horizontal axis above 🡶 / 🡷. Fast rolls can only be chained into normal rolls, and moving back to the full 🡶 / 🡷 angle mid roll slows the roll to normal speed.
This can also be done with a virtual controller program on PC.
Note that when using input display, the 🡳 input will not be visible during a fast roll. Additionally, this allows Slugcat to pick items up during the roll rather than dropping them (down + grab).
Fast roll angle ***
It is possible to fast roll after a full jump from a single tile height by angling the analog stick slightly sub horizontally midair. This is only possible with a controller/virtual analog stick.
Chaining from moves **
It is possible to roll in either direction upon landing from flips, pounces and bounces (Explained later in guide) by holding left/right and down.
Rolls can be entered from:
Rolling from backflips **

Rolling from slide pounces **

Rolling from slide flips ***

Roll pouncing **
Roll pouncing **
Pouncing can be done by jumping out of a roll.
Rolls can be chained together indefinitely on flat ground by pouncing as late as possible.
This can be done regardless of which way Slugcat is landing, as long as the pounce was initiated late enough.
The longer the roll, the higher the pounce arc. Tapping jump while holding down and left/right will pounce instantly without rolling at all.
A rapid series of beats can be heard when rolling. (1 initial on beginning the roll, then 4 more in total) These can be used to time pounces.
Remember that you can land upright from pounces, and conserve momentum, by tapping jump on landing, then up!
Flat ground movement
A speed comparison of different forms of movement across flat ground.
From top to bottom: Running, backflip to roll chaining, turn hopping, slide pounce to roll chaining, extended slide hopping, extended slide pounce.
It’s worth noting that both turn hopping and backflip roll chaining require setup before moving forwards, which has been included here.
Turn hopping is most effective when turning to move in the opposite direction as the setup is then very small. Backflip roll chaining is most effective when using the pounce to cross gaps without space for a slide pounce.
Sliding out of rolls ***
It is possible to slide immediately after a roll by holding forwards and down, and timing jump at the very end of the roll when Slugcat is in the upright position.
Rolling up single tile heights **
Rolls are not interrupted by single tile blocks, allowing for rolling over more uneven terrain.
Fast fall rolling ***
Dropping off ledges ^^^^^
Pressing down while running off ledges causes Slugcat to enter a fast fall state. This state allows for rolls from any height.
Rapidly turning back then forwards before dropping off the ledge extends this drop window.
Dropping down a tile ^^^^^
While running forwards towards a single tile drop, holding down with correct timing causes Slugcat to enter a roll. This is due to the aforementioned fast fall mechanic where pressing down while dropping off ledges gives a boost of acceleration.
The same can be done with the turning method shown above for slightly more reliable timing.
Ledge hang and fast falling ***
Releasing all controls for a short frame window while pulling up on ledges leaves Slugcat in an indefinite hanging state. Achieving this paused state is not necessary for fast falling, and the hanging state itself currently has little use and no reliable setup.
While pulling up ledges, pressing in the opposite direction causes Slugcat to fall down at an accelerated rate. Fast falling causes landing stun and (for longer falls) death, at much shorter heights. Entering the fast fall state guarantees that a roll can be performed on landing.
Fast falling can be done from any height, including 1 tile high drops. This allows any tile high block to be used for initiating rolls.
Tumble rolling ***
By positioning to hit the ground head first, tumbling, a roll state can be achieved through minimal setup.
Storing up input
By holding upwards, Slugcat leans forwards while running, causing midair rotation when correctly interrupted with a jump. This allows for a roll on landing.
Storing down input
This leaning angle can also be achieved by holding down (such that poles don’t interrupt the move), so long as that input doesn’t result in a crouch. This can be done in the following ways:
• Holding down during a backflip.
• Holding down while jumping off a vertical pole.
• Sliding down a vertical pole onto the ground while holding down.
• Ending an extended slide holding down.
• Holding down while wall jumping.
Rolling from crouching ***
Slugcat can roll from crouch by turning in one direction then another, while holding down from immediately after the second turn onwards.
Note: The most consistent strategy for this move is to begin to press down half way through the second flop, as seen in the next two gifs.
It is also possible to roll from crouch by first running in one direction and quickly tapping crouch, then holding down the opposite direction, and holding down crouch again.
Note: This method can be easier to learn initially, but requires accounting for the necessary setup movement pre roll.
Immediate roll pounce ***
By initiating a roll from crouch but jumping immediately after holding down, Slugcat can pounce immediately before the roll takes place.
Stumble roll ^^^^^
It is also possible to start a roll by tapping jump multiple times while running and holding down. A minimum of 2 jump taps are needed but more can be used. Limited application as more consistent options exist for roll starting.
Poles:
Vertical pole movement **
Boost end lag *
Pressing up + jump while on a pole gives a short upward boost, the ending lag of which can be cancelled by entering room pipes, shortcuts, or jumping off the pole.
Boosting to top *
Boosting to the top of a pole cancels boost end lag and switches Slugcat to the balancing position immediately.
Landing on pole tip ^^^^^
Pressing up when coming into contact with the tip of a vertical pole will cause Slugcat to instantly perch on it. This only works for reasonably small vertical speeds.
Balancing on pole tips ^^^^^
When midair, tapping up at the tip of a pole allows Slugcat to instantly balance there. This can also be done further down from the tip, likely as an unintended result of pole collision.
Cancelling with jump **
It is also possible to cancel boost end lag by holding outwards and jumping off the pole mid boost.
Pole wall jumping **
Wall jumping while holding up allows for climbing tall poles in shafts far quicker than regular climbing.
Hybrid boost jumping ***
Boost ending lag can be cancelled by either reaching the start of a tunnel or pipe, or by jumping off the pole. Both this and pole wall jumping are only applicable in narrow shafts.
Pole regrab ***
Switching to the other side of a pole while also tapping jump causes Slugcat to let go of and instantly regrab the pole in a couple of frames. While not useful on its own, this can be used to cancel boost end lag as described below.
Fast pole climbing ***
Boosting up a pole then immediately re grabbing resets boost lag and immediately allows for another boost. This can be done repeatedly in a rhythm to quickly climb up poles, alternating sides each boost. Pressing jump too early will cause a laggy boost, and switching sides too early will cause Slugcat to jump off the pole.
Unlike other pole climbing methods, this is applicable on all poles and vastly increases climbing speed, allowing Slugcat to outrun fast pole climbing lizards.
Note: This can be done in a slower sequence or as a single instance for practice! The “end” of this move is the pole re grab (the boost end lag cancel).
Dropping down poles *
Pressing jump while holding down (instead of jump in isolation) allows for falling directly downwards from vertical poles instead of drifting to one side.
Vertical pole movement
A speed comparison of different forms of movement up poles.
From left to right: Regular climbing, pole wall jumping, hybrid wall jumping and fast pole climbing..
It’s worth noting that pole wall jumping and hybrid wall jumping are only effective in tall shafts.
Note: The speed, universality and relative simplicity of fast pole climbing makes it invaluable as part of any advanced player’s toolset.
Pole momentum ****
Backflip pole momentum ***
Backflipping onto poles gives an upward boost, which can be paired with a pole boost (jump + up while on pole) to gain height quickly from the ground.
Backflip pole jump ***
This is done first by holding back, and then tapping jump and holding up to initiate a backflip. Once Slugcat has grabbed the pole, tapping jump again while still holding up adds the momentum of a pole boost to the existing momentum of the backflip, causing Slugcat to slide off the top of the pole.
Jump can then be tapped again to perform a regular jump midair.
For practical application, jump is quickly tapped three times in succession while holding up. The initial turn (to initiate a backflip) must be done before jump and up are simultaneously pressed. For ease of use, jump can effectively be tapped more than three times with no effect (as in the gif below)
Note: See Crawl turn backflip pole jump for a 10 tile high version.
Slide pole jump ****
Sufficient pole momentum for a midair jump can also be gained via a slide, most effectively on 2 tile high poles. This can be performed by holding up mid slide to transition to the pole, tapping jump once to boost upwards and then tapping jump midair.
Note: See Slide pole backflip for an additional variant which currently has no known benefit over this version..
Pole momentum height comparison
As shown here, slide pole jumps are effective gaining height from 2 tile high poles, regular backflip pole jumps for gaining height from 3 and 4 tile high poles, and crawl turn backflip pole jumps for 5 tile high poles.
Horizontal pole movement ***
Jump pullups along a pole **
Pressing jump + forward mid pullup propels Slugcat forward, which is useful for long stretches of pole.
Jump pole hopping ***
Pole hopping is done by jumping, holding forward, and tapping jump while hitting the pole.
Note: The timing can be tricky, remember not to press jump too early. This will also not work if holding any other button except forward when pressing jump. It is also possible to pole hop while rising up through a pole from below.
Pounce pole hopping ****
To pole hop from pounce, release and enter the upright position in mid air by immediately pressing up, then let go of up and jump in time to hop. This is significantly faster than jump pole hopping.
Note: Throw boosting can be used for longer pole hops.
Fast pole crawling ****
While hanging on a horizontal pole and moving forwards, quickly alternating down and up causes Slugcat to drop from the pole and immediately regrab, giving a burst of speed. This can be chained to move quickly across horizontal poles while hanging.
Horizontal pole movement
A speed comparison of different forms of movement along poles.
From top to bottom: Walking on pole, jump pull ups, jump pole hopping and pounce pole hopping.
Jump pole hopping and especially pounce pole hopping have tight input windows, so using them over death pits or large falls isn’t advised without a lot of practice.
Note: Jump pole hops can be attempted mid jump pull up with less risk, as long as you’re pressing up immediately after tapping jump to grab in case of failure!
Turns:
Dash turns *
Turning around *
Turns can be performed by reversing movement direction while running at full speed.
A successful turn can be identified by a sound cue, the small “droplets” seen above, and a short burst of speed in the turning direction.
Backflipping *
Backflips are possible as a result of dash turns, and can be done without droplets showing.
Turn hopping **
Turn hopping involves repeatedly jumping after turning, to conserve dash turn speed. Momentum conserved this way only depletes when in contact with the ground, so will last longer with more precise and better timed jumps.
Storing turns **
A dash turn depletes over time for 10 frames. The functionality of a dash turn can be stored by interrupting the turn with other moves during these frames. Most applicable turn storage derives from crouching or sliding.
Crouching **
The first method of storing a dash turn is to start a turn, then immediately interrupt it by crouching. This momentum is then released when Slugcat once again enters the upright position, which can be seen by the small droplets and burst of speed gained when standing up.
Crouching pole grab **
Another simple way to demonstrate dash turn storage is to jump while standing on a horizontal pole, or the tip of a vertical one. This results in a backflip.
Note that simply grabbing a vertical pole from crouch often depletes all available frames of turn storage due to the temporary standing state. This can be avoided by crouch jumping onto the pole.
Crouch backflip **
Backflipping from a turn stored crouch is done by pressing up and jump simultaneously while holding in the direction of the turn.
Note that the original turn direction must be held in order to backflip, even after changing crouching direction.
Turn storage is only ever lost by being in a standing state, or initiating a backflip.
Consequently, stored turns are maintained through:
• Jumping between vertical poles, or dropping down from horizontal ones.
• Pulling up on a ledge (holding down to remain crouched)
• Entering/exiting tunnels (as long as always crouching)
• Entering room pipes / shortcuts (as long as always crouching)
• Jumping while crouched (performing a small crouching hop)
• Slide parkour up walls.
• Turning over while crouched (Original turn direction is immutable and important to keep in mind for several moves)
• Stun, including explosions!
Sliding ***
As sliding involves crouching, turns can also be stored by sliding immediately after turning around. As before, the burst of speed and droplets on standing upright indicate successful turn storage.
Sliding pole grab ***

Note that sliding pole grab does not have the same frame depletion issue as crouching pole grab.
Turning pole grab **
The second method of turn storage is done with poles exclusively, by pressing up to grab the pole immediately after turning. The window for this is very narrow, before the turn appears to have started. Unlike crouching, this does not have any further applications.
Turning ledge fall ***
The third method of turn storage is done by turning when running off a ledge, which interrupts the turn. Holding outwards isn’t necessary to store the turn, but slightly extends the window.
Basic applications ***
Turn hopping **
The speed burst from releasing turn storage by standing from crouch can be prolonged by jumping, as with a normal turn.
Backflip pole coyote jump **
When backflipping off of poles, coyote jumping gives greater horizontal distance.
Turn directionality ****
Note that turn directionality affects backflip rotation. As shown here, backflipping in the direction of the turn gives a lot more horizontal distance.

Turn stored ledge climb ***
It is possible to easily scale 5 tile high ledges by backflipping while pressed against them. Turn storage can be used to easily achieve this from an embedded spear.
Note that for this method, forward turning backflips do not always require a jump to pull up onto the ledge, while backwards turning jumps do. The end result is the same either way.
Slide pole backflip ****
Performed identically to slide pole jumping with a turn stored slide beforehand.
This can at maximum be used to reach a vertical pole 8 tiles in the air.

Slide backflipping ***
The same inputs apply for backflipping from a slide as they do for crouching.
Failed slides can be backflipped out of as well, which insures against failure.
Hanging backflip ^^^^^
With turn storage, tap up and jump at the same time while hanging from the pole base. Tight timing and as of yet limited applications.
Turn stored slide pouncing ***
Turn stored slide pounce to pole ***
Turn storage is conserved through pouncing, and so backflips off poles, both vertical and horizontal, are possible after turnaround slide pounces.
Turnaround slide > slide pounce.
Turn stored slide pounce backflip ***

Turnaround slide > slide pounce > turn stored backflip.
Turn stored slide pounce backflip roll pounce ***

Turnaround slide > slide pounce > turn stored backflip > roll > pounce.
Turn stored slide pounce roll pounce backflip roll pounce ***
Turnaround slide > slide pounce > roll > pounce > turn stored backflip > roll > pounce.
Note:
You can roll from all backflips, regular and turn stored!
Remember that you can infinitely chain roll pounces together!
Backflip out of slide pounce roll ***
It is possible to backflip out of a turn stored roll by holding in the original turn direction and pressing up + jump simultaneously.

Turn stored slide flipping ****
Turn stored slide flip to pole ****
Slide flipping can also store turns, although this is harder to determine as Slugcat lands standing up.
Landing on a pole, horizontal or vertical, after turnaround slide flipping allows for a backflip.
Turnaround slide > slide flip.
Turn stored slide flip bounce ****
This can be done by holding inwards and pressing jump when hitting the ground.
Turnaround slide > slide flip > turn stored bounce.
Note:
This has a set trajectory, unlike pounces and backflips.
Turn stored slide flip backflip ****
This can also be done by holding up and pressing jump when hitting the ground.
Turnaround slide > slide flip > turn stored backflip.
Turn stored slide flip bounce roll pounce ****
As with most advanced moves, these can be chained together into much longer sequences.
Turnaround slide > slide flip > turn stored bounce > roll > pounce.
Turn stored slide flip backflip roll pounce ****

Turnaround slide > slide flip > turn stored backflip > roll > pounce.
Remember that for any pounce out of roll where another roll isn’t desired, you can land in the upright position (instead of crouching) and maintain forward momentum by tapping jump and then up immediately afterwards! (See the slide pouncing section for more details + gif)
Backflip out of slide flip roll ***
Note that the original turn direction still needs to be held in order to backflip. This is worth bearing in mind for slide flips due to their built in directional change.

Turn stored extended sliding ^^^^^
Turn storage is also possible with extended slides. (For these gifs, combos with slide pounces have been omitted because of the essential similarity.
Turn stored extended slide hopping ****
As hopping after a regular extended slide provides as much speed as turn stored hopping, it currently appears that turn stored extended slide hopping has no additional impact on speed.
Turn stored extended slide flip bounce ^^^^^

Turnaround slide > extended slide > slide flip > turn stored bounce.
Turn stored extended slide flip backflip ^^^^^

Turnaround slide > extended slide > slide flip > turn stored backflip.
Turn stored extended slide flip bounce roll pounce ^^^^^

Turnaround slide > extended slide > slide flip > turn stored bounce > roll > pounce.
Turn stored extended slide flip backflip roll pounce ^^^^^

Turnaround slide > extended slide > slide flip > turn stored backflip > roll > pounce.
Crawl turns ****
Crawl turn *
In game motion debug, Default CrawlTurn is part of a series of states that occur when Slugcat is crouching and turns around.
This state has properties allowing it to be used for several moves. Some of these moves have already been shown and explained in the Fast fall Rolling section, but are explored in more detail here.
Crawl turn roll ****
By executing two crawl turns consecutively, then holding down and forward, Slugcat can roll from crouching position. This is possible because the first crawl turn raises Slugcat in the air slightly, giving it enough height to roll after the second crawl turn.

Crawl turn cancel/hop****
While in the middle of a crawl turn, pressing up interrupts the turn by propelling Slugcat into the air while in the Default CrawlTurn state. This is the first part of a crawl turn jump.
Crawl turn jump ****
Pressing jump immediately after a crawl turn cancel causes Slugcat to perform a jump while 1 tile off the ground. This gives 5 tiles of vertical height and exclusively allows for reaching poles at this height.
Climbing 5 tile high ledges & poles ****


Turn stored crawl turn backflip ****
By turn store crouching before beginning the crawl turn jump, Slugcat can backflip from the raised tile height. This does not give enough additional height over the crawl turn jump to be beneficial for reaching poles or ledges.
Climbing 6 tile high ledges ****
This can be used to climb 6 tile high ledges. Note that backflipping in the opposite direction to the initial turn is necessary for Slugcat to reach the ledge in the upright position. Backflipping in the same direction as the initial turn causes Slugcat to reach the ledge upside down.

Crawl turn backflip pole jump ^^^^^
The highest reaching known variant of backflip pole jumping. In order to perform this move both the backflip and crawl turn must be performed in the direction of the original turn and towards the pole, hence the turnaround while crouching. This example covers a height of 10 tiles.
Note: See Backflip pole jump for the basic variant of this move.
Compressed turn crawl turn backflip ****
Backflipping from a crawl turn can also be achieved by initiating a “compressed turn” during an automatically initiated crawl turn. This is done by moving in one direction, initiating a crouch and quickly pressing inwards. This causes Slugcat to attempt to turn while crouching down, which allows for turn storage use. A crawl turn jump will use this turn as a backflip.
Compressed turn crawl turn roll ****
Slugcat can store this otherwise temporary turn by rolling mid crawl turn rather than jumping. This works because the compressed turn crawl turn raises Slugcat into the air, landing in a rollable state.
Crawl turn ledge drop ****
Slugcat enters a crouched/crawl state while pulling up onto ledges. Consequently, holding backwards causes Slugcat to turn. Timing this correctly causes Slugcat to fall away from the ledge while still in the CrawlTurn state, leading to an accelerated rate of fall, and the ability to roll on landing. This is possible with 1 tile high ledges for a similar reason.
Ledge crawl turn jump ****
Holding back then tapping jump while climbing up a ledge in the Default CrawlTurn state allows for a simpler crawl turn jump setup. This is useful for quickly reaching a ledge after climbing up the opposite side. With turn storage, this becomes a backflip similarly to other crawl turn backflips.
Note: Holding back too early initiates a fast fall, so make sure the input is relatively late in the climb up! As shown in the gif below, Slugcat should mostly be on the ledge before pressing back.
Quick crawl turns ****
https://discord.com/channels/291184728944410624/804488985505955912/906603192790437939
(Temporary discord explanation)
Jump Boost:
jumpBoost is a value in the game’s code which allows the player control over Slugcat’s vertical air momentum by holding the jump button midair during some moves.
Some moves set jumpBoost to zero:
• Wall jumping
• Jumping from poles
• Jumping from deer antlers
• Jumping while grounded and pressed against a wall
• Starting a slide flip
These moves therefore always have a set jump height which cannot be varied by holding jump..
Moves which set jumpBoost above zero include:
• Jumping from a neutral position (jumping, turn hopping,
• Pole hopping
• Charge pouncing
• Backflipping (includes slide flip bouncing)
• Jumping on a creature body
The length of time the jump button is held while performing these moves affects the resultant height gained from them, as shown below with regular jumps and backflips.


Storing jump ****
Moves which set jumpBoost above zero can also be interrupted under certain conditions to achieve jump storage; storing a jumpBoost value greater than zero while in a neutral position (not in the air).
Charge pounce ***
Jump storage can be gained from this move, by quickly tapping and releasing jump when transitioning from standing to crouching, such that no jump is performed. This results in a stored jumpBoost of 6. As shown in the gif below, jumpBoost is set to 8 and then depletes rapidly when jumping, overwriting the stored value 6 and removing the storage.

Tunnel slide boost ****
A jumpBoost of 8 can be stored by slide pouncing such that the pounce is performed when Slugcat is inside a tunnel. This can be done in both horizontal and vertical tunnels.

Jump interruption ****
8 jumpBoost can also be stored by jumping just before the start of a slope. With perfect timing, the slope fully interrupts the jump.

Jump storage is also possible via jumping while under a creature body or sloped ceiling.

Keeping storage ****
Jump storage is lost when Slugcat becomes airborne while jump is held. This rapidly decrements any stored jump to 0 within a few frames. jumpBoost is also set to 0 instantly if jump is not held.
Jump storage is also lost when a move sets jumpBoost to a specific value, overwriting any stored jump.
Using storage ****
There are methods to launch Slugcat into the air without initially affecting jumpBoost (jump storage is always lost when midair). These methods can be combined with jump storage, while in a neutral state, to give Slugcat significantly higher upwards velocity.
Tunnel/pipe exit boost ****
Boost upwards out of a tunnel and hold jump as slugcat becomes airborne. Unlike most jumps, boosting in a tunnel doesn’t set the jumpBoost value, so storage can be easily made use of in that way.

Instant pounce ****
An instant slide pounce also gives momentum without setting this value and so can have its height increased by jump boost storage. This gives the current highest known pounce when the stored value is 8.

Jump-stored vault ^^^^^
A 5-frame-perfect-input TAS vault was found which allowed for use of jump boost storage to reach 8 tiles in the air by throwing a rock so slugcat enters a state where it gets vertical momentum using jump boost storage before regaining 6 jumpBoost almost midair.

Jump-stored crawl turn vault ****
(Explanation coming)
 `
`
Swimming (SPOILER WARNING):
Content shown below is from an early-mid-game area.
If playing blind, we recommend that this section is avoided until swimming tips are needed.
Boosting *
Water Boosts *
Pressing jump underwater gives a speed boost but reduces breath.
The amount of speed given reduces each time, and more than a couple will quickly cause Slugcat to start drowning.
Using boosts to escape danger **
Speed boosts are usually best saved for dangerous situations (eg. escaping from salamanders)
Fast horizontal water movement *
Dipping under the surface and boosting once horizontally and slightly down, then resurfacing and repeating is an effective way to travel quickly through large surface bodies of water. This makes use of boosting, using some breath, but preserves most in case of creature attacks.
Buoyancy **
While swimming, Slugcat has a constant upwards drift towards the surface of the water. To swim underneath the surface (and consequently faster), use swim strokes / boosts to swim slightly upwards, angle down slightly to maintain initial depth, and repeat,
Counteracting upwards drift is important for swimming through underwater tunnels, to avoid being trapped against the ceiling.
Note: For swimming vertically, moving straight up makes the best use of natural buoyancy!
Bubble fruit / water nuts can also be used to increase buoyancy when activated.
Wriggling **
Alternating between up and down while swimming horizontally also increases swimming speed. This is important when navigating underwater tunnels. This is most effective on controller analog sticks.

Water hopping ****
Water hopping ****
When moving at a sufficient speed, and by entering Slugcat’s upright position with correct timing, landing on water will flip Slugcat’s vertical speed, launching them back into the air. Throw boosting is not always required to reach this speed, but can be useful for extending the timing window for entering the upright position. Multiple throw boosts can be used to achieve multiple water hops in a row.
Mushrooms can also be used to extend the timing window, which is also easier with Hunter’s extra aerial speed.
Combat:
Throwing weapons *
Throw arcs *
Throwing rubble
Rubble follows this arc when thrown. Rubble damages creatures by 1/100th the damage of a spear, and has a longer stun duration. When thrown, rocks travel through the air slightly more slowly than spears, and as such have a slightly shorter range.
Throwing spears
Spears follow this arc when thrown.
Spears will embed in walls 100% of the time within a 7 tile range.
Spears will embed in walls 33% of the time between the 7 and 28 tile range. For Hunter, this tile range is increased to 35.
Past a 28 tile range, spears will always rebound and drop to the floor to be picked up. Spears also will not embed on slopes, or where a spear is already embedded.
Tossing items
Other items follow this arc when tossed forwards. Items can also be thrown upwards by holding up when pressing throw, which can be useful for throwing items to land directly in front of Slugcat.
Angling throws ***
The angle at which objects (spears and rocks) are thrown depends on Slugcat’s momentum at the point of throwing. Throwing while moving down, either by crouching or falling, will give the object a lower arc, while throwing mid jump will give the object a higher arc.
As seen in the gif below, the spear arc is different depending on Slugcat’s upward or downward momentum.
Rubble/Spear combo *
Lizards have armoured heads which protect them from most spear damage. To hurt them, Slugcat usually needs to spear them in their softer back.
Rubble will flip lizards over when thrown at their heads. A spear can be thrown immediately after for a simple attack.
Remember to keep the rubble in Slugcat’s right hand to throw first!
Note: There are some extremely niche conditions under which a lizard will not flip when hit with rubble. These include the lizard having just climbed up onto a ledge, and being hit with rubble when directly next to Slugcat (essentially touching).
Pinning creatures to walls **
Creatures can be pinned to walls with spears to immobilise them for some time.
Spear lock *
On taking damage, lizards and some other creatures enter a stun state for a short amount of time. As lizards lose more health, this amount of stun per spear increases.
This example gif shows repeated rubble / spearing of a lizard. Note the increased stun duration with each spear.
This can be used to repeatedly spear lizards by pressing grab and instantly throwing again multiple times.

Spear cooldown *
Spears cannot be picked up immediately once thrown, preventing Slugcat from stun locking to death more resilient creatures with one spear.
Double spearing *
Spear cooldown can be circumvented with multiple spears, as the cooldown applies per spear, not for the player. This allows for more rapid stun locking, and is useful for quickly incapacitating tough creatures.
Throwing midair **
Spears can be thrown while midair to catch lizards on poles.
Hitting in front ***
Spears can hit lizards above the head when thrown from a specific distance. Note that this hits the body chunk behind the head and so does normal damage and stun.
Crouch mouth spear ***
Spears that hit the lizard mouth body part do 1.5x damage and stun for much longer.
Spears do not bounce off of lizard head armour when drifting downwards (negative Y velocity) and travelling horizontally.
This can be achieved by throwing mid crouch to angle the spear downwards.
Slide spearing ***
Basic technique ***
Throwing a spear or rock forwards mid slide causes the object to bounce off the floor and travel much further horizontally. This allows spears to embed into walls much further away.
Spears can be slide thrown from further away to hit targets.
Slide spearing lizards ***
Slide spearing also imparts a downwards drift to thrown spears, which can be used to hit lizards in the mouth, dealing 1.5x damage and stunning them for longer than usual..
This allows for consistent stunlocking with a single spear.
Example video of spear sliding
Note that the spear must hit while still travelling downwards, before ricocheting off the ground.
The following gif demonstrates the downwards velocity that slide spears have before bouncing.
Slide spear pounce ****
Spears can be thrown before a pounce. Limited applicability.
Slide spear flip ****
It is also possible to throw a spear prior to slide flipping. Requires precise timing.
Extended slide spear ****
Finally, slide spearing is possible after an extended slide.
Downwards/upwards throwing **
Backflipping to downthrow **
To throw downwards, hold down and throw mid backflip without holding any other buttons. If holding left or right, the object will be thrown in that direction instead.
Spears thrown downwards will become embedded in the ground and can be climbed.
Downthrowing from storage (pole) **
You can use turn storage onto a pole to downthrow from above a creature.
Slide flipping to pass lizards ***
Slide flipping can be used to safely pass lizards without being caught. This works for lizards with high aggression.
Downthrowing from slide flips ****
You can also throw downwards mid slide flip.
Pinning creatures to floors ****
Downthrown spears can pin a creature to the ground.
Combat showcasing spear sliding and slide flipping
Combat showcasing turn storage
Slide spearing into slopes ***
Slide spearing at a slope will cause the object thrown to travel upwards.
Spears thrown upwards will become embedded in the ceiling and can be climbed.
This can also be used to pin creatures to ceilings if above a suitable slope for slide spearing.
Creature strategy (minor spoilers) *
Lizard tracking — Move safety/Laziness *
Lizards have differing levels of aggression depending on multiple factors, including lizard spawn variation and the gamemode.
Less aggressive lizards will have slower reactions and can be backflipped over, for instance, while more aggressive lizards will quickly turn and snap Slugcat out of the air if this is attempted. Backflipping is generally only recommended as a reasonably safe move for green lizards.
Dealing with tongues *
When grabbed by a lizard tongue, reaching the same height and throwing objects at the lizard is often effective.
If not possible, getting close can cause it to snap and miss, especially if done quickly.
Throwing at the same height as a white lizard’s mouth has a chance to hit and is very effective when their tongue is out.
Grace period / Bite lethality *
Lizard bites have a chance to immediately kill Slugcat.
It is possible, for a short window after only being stunned by a lizard bite, to pick up / throw a rock or spear which can often hit the lizard and allow Slugcat to escape.
Information on lizard bite lethality can be found at https://rainworld.gamepedia.com/Lizards
Mask responses *
When wearing a vulture mask, lizards will run from the player for 17.5 seconds, starting from when they first see Slugcat wearing the mask. After this timer has run down, the mask will no longer scare that lizard. This is extremely effective for passing through regions without trouble, or playing as Hunter.
King vulture masks last longer, for 30 seconds.
Other:
Cut content
Wallpouncing ***
By holding towards a wall and pressing jump at the moment of collision, while in the pounce state, Slugcat is able to launch in the opposite direction and gain height.
Please note that this tech was removed in the 1.5 update, 11th Dec 2017.
A mod that re adds wallpouncing to the current version of the game can be found here.

This can be chained to scale otherwise unclimbable wide shafts.
Trivia: Joar’s stated reason for removal.
Corner Wallpouncing ****
Directly hitting a corner causes Slugcat to gain considerably more height from wallpouncing. As with regular wallpouncing this can be chained.
Slide Wallpouncing ***
Corner wallpounces can also be done from slides.

Unexplored moves
Parkour momentum backflip ^^^^^
Similarly to pole momentum, it is possible to get momentum up a small ledge via slide parkour, to perform a midair jump. This move has not yet been found to be applicable in place of a crawl turn jump.
Parkour slide backflipping ^^^^^
In this move, the member Ga appears to gain a ledge crawl turn backflip worth of height significantly early in the pullup animation. We believe that this is just a very frame precise example of this move.
Pole hop save ***
It should be possible to still grab the pole if a pole hop is missed, by holding up from immediately after tapping jump until the next jump input. This has not yet been explored as regular pole hopping is consistent with practice.
Backwards roll out of some pipes ^^^^^
Specifically for tunnels with 1 tile high exits, exiting backwards holding forwards and down sometimes allows for rolls. This isn’t consistent and depends on the tunnel. Examples include the top left tunnel exit in the refinery arena map.
Tunnel slide pounce ^^^^^
Starting a slide pounce over a tunnel shortens the distance before pouncing. Currently has no applicable use.
Credits
This Guide was designed by Axolittle (gwynlttm on discord) and laurapigeon (laurapigoen on discord), with editing feedback from Rob and ICED.
Gifs in this guide were made with screentogif, OBS and Nohboard.
Our Nohboard config + download can be found pinned in #meta and tech on the discord.
Credit also goes to:
Ga — Posted a ton of amazing movement gifs in early 2018, introduced fast pole climbing, backflip pole jumping, grounded wall hopping, and many more invaluable “tipssssss”. Messages can be searched on the Discord server.
Kehtapbi — Communicated a lot of interesting gifs and information from the Chinese rainworld community in early 2018. Possibly led to Ga joining the discord.
Olkinim — Co author of the original turn storage discoveries + guide along with other moves (pole movement, sliding into ground pipes)
Trash Typhoon — Finding pole hopping in the 1.5 beta test.
Turtle — Finding turnaround pole grab, leading to turn storage discoveries.
Applebread — Early player, found a lot of tech and posted tutorials on youtube.
Henpemaz — Experimenting with movement, finding practical applications for instant slide pounces/flips. General guide feedback.
Slime_Cubed — Created the TAS tool for Rain World, experimenting with movement and finding practical applications for instant slide pounces/flips.
DrSunshine for finding 2 tile high pole jumps, & in general along with Antehman and Krogg for experimentation and finding plenty of interesting applications for moves.
Houkou, Xen, Sipik, Butcherberries for noticing moves we forgot to include.
And many others for experimenting, discovering, rediscovering and documenting movement tech online.
If there’s anyone missing here or if you have any questions about contributions, please do contact us! We’d like to give as much credit as possible where due.
There’s a lot more out there to discover! Procedural physics based movement has some really interesting quirks which can take hundreds of hours to find out.
It’s been a collective community effort to find, share and document as much as possible, but it’s always likely that there are undiscovered tricks and options still waiting to be found.
If you notice any mistakes or have any suggestions, feel free to add and DM @gwyn#9899 (Axo) or @laura#2871 (pine) on Discord if you have any questions, or email gwyncardiff@gmail.com or laurahannah44@gmail.com. You could also ping us in the #movement channel on Discord — we check there regularly!
Happy hunting!
Gif Archive
Index
Please note that this index was mostly used as a construction aid, and so has become less accurate as more content has been added to the guide over time
A — Basic Moves:
Aa — Jumping *
Aa1 — Pulling up onto ledge *
Aa2 — Coyote jump*
Aa3 — Pole coyote jump*
Aa4 — Grounded wall hop **
Aa5 — Aerial wall jump **
Aa6 — Contact wall jumping **
Aa7 — Extended coyote jump ****
Ab — Item management *
Ab1 — Right hand usage *
Ab2 — Swapping hands *
Ab3 — Dropping items *
Ac — Charge pouncing *
Ac1 — Charge pouncing *
Ac2 — Crouching to safely position on edges *
Ac3 — Landing upright out of charge pounce *
Ac4 — Throw boosting *
Ac5 — Pounce + throw boosting **
Ad — Backflipping *
Ad1 — Backflipping *
B — Slides:
Ba — Basic slide**
Ba1 — Sliding *
Ae1.1 — Execution
Ae1.2/3 — Failure
Bb — Slide pouncing **
Bb1 — Slide pouncing **
Bb1.1 — Execution
Bb1.2 — Failure
Bb2 — Landing upright from pounce **
Bb3 — Slide parkour ***
Bb4 — Extended Sliding ***
Bc5 — Extended slide hopping ****
Bc5 — Extended slide backflip ****
Bc6 — Extended side pouncing ****
Bc — Slide flipping ***
Bc1 — Slide flipping ***
Bc1.1 — Execution
Bc1.2 — Failure
Bc2 — Slide flip pick up ***
Bd3 — Extended slide flipping ****
C — Rolls:
Ca — Roll from falling *
Ca1 — Drop rolling *
Cb — Chaining from moves **
Cb1 — Rolling from backflips **
Cb2 — Rolling from slide pounces **
Cb3 — Rolling from slide flips ***
Cc — Roll pouncing **
Cc1 — Roll pouncing **
Cc1.1 — Execution
Cc1.2 — Repeated execution
Cc1.3 — Other options
Cc1.4 — Rolling up single tile heights
Cd — Fast fall Rolling ***
Cd0 — Dropping off ledges ^^^^^
Cd1 — Dropping down a tile ^^^^^
Cd2 — Rolling from crouching ***
Cd3 — Instant slide pounce ***
Cd4 — Ledge hang and fast falling ***
Cd4.1 — Positioning
Cd4.2 — Execution
Cd4.3 — Application
Cd5 — Stumble roll ***
Cd6 — Tumble roll ***
D — Turns:
Da — Dash turns*
Da1 — Turning around *
Da2 — Backflipping *
Da3 — Turn hopping *
Db — Storing **
Db1 — Crouching **
Db2 — Crouching pole grab **
Db3 — Backflip pole coyote jump**
Db4 — Sliding ***
Db5 — Sliding pole grab ***
Db6 — Turning pole grab **
Db7 — Turning fast fall ***
Dc — Out of storage ***
Dc1 — Turn hopping **
Dc2 — Crouch backflipping **
Dc3 — Slide backflipping ***
Dc3.1 — Execution
Dc3.2 — Failure
Dc4 — Parkour slide backflipping ****
Dc5 — Hanging backflip ^^^^^
Dd — Turn stored slide pouncing ***
Dd1 — Turn stored slide pounce to pole ***
Dd2 — Turn stored slide pounce backflip ***
Dd3 — Turn stored slide pounce backflip roll pounce ***
Dd4 — Turn stored slide pounce roll pounce backflip roll pounce ***
De — Turn stored slide flipping ****
De1 — Turn stored slide flip to pole ****
De2 — Turn stored slide flip bounce ****
De3 — Turn stored slide flip backflip ****
De4 — Turn stored slide flip bounce roll pounce ****
De5 — Turn stored slide flip backflip roll pounce ****
Df — Turn stored Extended Sliding ^^^^^
Df1 — Turn stored extended slide hopping ****
Df2 — Turn stored extended slide flip bounce ^^^^^
Df3 — Turn stored extended slide flip backflip ^^^^^
Df4 — Turn stored extended slide flip bounce roll pounce ^^^^^
Df5 — Turn stored extended slide flip backflip roll pounce ^^^^^
Dg — Crawl turns ****
Dg1 — Crawl turn *
Dg2 — Crawl turn roll ***
Dg3 — Crawl turn corner jump ****
Dg4 — Crawl turn ledge drop ****
Dg5 — Crawl turn hop ****
Dg6 — Crawl turn jump ****
E — Tunnels
Ee — Mobility in tunnels *
Ee1 — Turning around *
Ee2 — Free falling *
Ea — Tunnel boosting *
Ea1 — Boost end lag *
Ea2 — Boosting to end of/out of tunnel *
Ea3 — Boosting out of shortcuts/room pipes **
Ea4 — Boosting out of shortcuts/room pipes in tunnels **
Ea5 — Boosting around tunnel corners *
Ea6 — Sliding into a tunnel ***
Ea7 — Sliding into a pipe **
Ea8 — Slide into tunnel boost ***
F — Poles
Eb — Vertical pole movement **
Eb1 — Boost end lag *
Eb2 — Boosting to top *
Eb3 — Pole wall jumping **
Eb4 — Hybrid boost jumping **
Eb5 — Pole re grab ***
Eb6 — Fast pole climbing ***
Eb7 — Dropping down poles *
Fa2 — Vertical pole movement
Fb2.1 — Climbing
Fb2.2 — Wall jumping
Fb2.3 — Wall jump boosting
Fb2.4 — Regrab boosting
Ec — Backflip pole momentum ****
Ec1 — Backflip pole momentum ****
Ec2 — Backflip pole jump ****
Ed — Horizontal pole movement ***
Ed1 — Landing on pole tip ^^^^^
Ed2 — Jump pullups along a pole *
Ed3 — Jump pole hopping ***
Ed4 — Pounce pole hopping ****
Ed5 — Pole hop save ***
Fa3 — Horizontal pole movement
Fb3.1 — Hanging
Fb3.2 — Walking
Fb3.3 — Pullup jumping
Fb3.4 — Pole hopping
Fb3.5 — Pounce pole hopping
F — Speedrunning:
Fa — Skip tech
Fa1 — Den boosted slides ****
Fb — Speed comparisons
Fb1 — Flat ground movement
Fb1.1 — Running
Fb1.2 — Backflip rolling
Fb1.3 — Turn hopping
Fb1.4 — Slide pouncing
Fb1.5 — Extended slide hopping
Fb1.6 — Extended slide pouncing
G — Water Movement:
Ga — Boosts *
Ga1 — Water boosts *
Ga2 — Using boosts to escape danger **
Ga3 — Fast horizontal water movement *
Ga4 — Wriggling **
Gb — Hopping ****
Gb1 — Water hopping ****
H — Combat:
Ha — Throwing weapons *
Ha1 — Throw arcs *
Ha1.1 — Tossing items
Ha1.2 — Throwing rubble
Ha1.3 — Throwing spears
Ha1.4 — Angled throws ***
Ha2 — Rubble/Spear combo *
Ha3 — Pinning creatures to walls **
Ha4 — Spear lock *
Ha5 — Spear cooldown *
Ha6 — Double spearing *
Ha7 — Throwing midair **
Ha8 — Hitting above the head ***
Hb — Slide spearing **
Hb1 — Slide spearing **
Hb1.1 — Execution
Hb1.2 — Application ***
Hb1.3 — Angling throws ****
Hc — Downwards/upwards throwing **
Hc1 — Backflipping to downthrow **
Hc2 — Downthrowing from storage (pole) **
Hc3 — Slide flipping to pass lizards ****
Hc4 — Downthrowing from slide flips ****
Hc5 — Pinning creatures to floors ****
Hc6 — Slide spearing into slopes ***
Hd — Creature strategy *
Hd1 — Lizard tracking — Move safety/Laziness *
Hd2 — Dealing with tongues *
Hd3 — Grace period / Bite lethality *
Hd4 — Mask responses *
J — Misc Tech:
Ja — Unidentified moves ^^^^^
Ja1 — Backwards roll out of some pipes ^^^^^
Ja2 — Turn store crouch flop ^^^^^
Ja3 — Turn store crouch turn ^^^^^
Ja4 — Frame jump instant slide pounce
Jb — Miscellaneous moves ^^^^^
Jb1 — Tunnel caught slide pounce ^^^^^
Glossary
Tomato jump / Fliphop / Flip hop — Name used for crawl turn jump before the move was fully understood. Sometimes used by members of the speed and score running community.
Rocket jump — Name used for slide pouncing in the code.
Whiplash — Name used for slide flipping in the code.
Air hop / Airhop / Double jump — Common terms used to refer to a second jump performed midair. This guide uses the terminology “hop” for brevity.
Boosted slide / Backthrow slide — Variant terms for extended sliding.
Spear slide / Throw slide / Slide throw — Variant terms for slide spearing.
Fast fall / Fastfall — Fast fall
Den boost / Den jump — Den slide
Slide flip — Slide flip
Slide pounce / Slide pounce
Pending List
• Add external gif links for down holding roll conditions, determine whether downwards running roll merits adding.
• Add recently documented instant extended slide moves.
• Add jump storage and run storage (and run storage accumulation).
Changelog
22/05/20 — Announced main body of guide, added several gifs, updated several difficulty ratings and added a couple more accurate move descriptions. Began implementing ICED’s feedback
23/05/20 — Finished implementing ICED’s suggestions for clarity — found here. Added additional tunnel boosting and dropping gifs
24/05/20 — Added pole boost endlag jump cancel gif, added 3 speed comparison gifs with links and notes
25/05/20 — Added wall jumping gifs and description
26/05/20 — Began adding Rob’s suggestions for clarity
Updated throwing section, added angled throw section and gif
Updated throwing range info for Hunter
Added mask timer info in the creature strategy section
Added extended slide backflip gif and description
27/05/20 — Updated Aerial wall hop terminology for clarity, condensed explanation and added gif of intermediate state, found and explained failure case for holding inwards, and for the timing window
Added controller disclaimer on title page
Linked to coyote definition on first section
Updated grounded wall hop gif to one without pole, to avoid confusion / conflation
Added reference links to index
Updated primary hand terminology to reflect Slugcat using its right hand.
28/05/20 — Added ceiling slide, added turn hopping to basic moves section and renamed backflipping to turning around
Updated backflip gif for clarity
Added note to throw boosting for general applicability to aerial moves
Split up roll arc variations into side by side for clarity
Reorganised early turn storage section for clarity.
Added glossary for community/code names.
29/05/20 — Renamed re grab pole boosting to fast pole climbing for visibility. It’s really important
30/05/20 — Moved vertical / horizontal pole speed comparisons to appropriate sections.
Dissolved speedrunning section
Moved den boost to slides section
Moved speed comparisons to relevant sections to demonstrate utility.
Split pole and tunnel movement into different sections
Moved pole movement in front of turn storage (more important)
Moved tunnel movement before rolls (more important)
Shortened to tunnels and poles
Renamed misc moves to other
Updated credits section with links
Updated spear cooldown and double spearlock gifs to show effect on resilient green
Added throw boost note to pole hopping
Update: We’re working on making a condensed steam guide at the moment, so won’t be adding creature tech until we’re:
a) Finished with the current round of feedback
b) Happy enough to release the steam version
This should take a couple of days max.
Added throwing midair to combat section
Added wriggling section and gif, updated buoyancy section for accuracy
31/05/20 — Added slide throw angle
Added hitting with spear over head
Added turning fast fall, updated storing turns for clarity
01/06/20 — Created condensed Steam guide!
Overhauled wiki controls page and subpages.
02/06/20 — Updated crawl turn section, updated gifs
Added pole tip balancing
Corrected ledge drop turn store info and updated gif to remove unnecessary input
Updated comparison gifs with freeze frames
Finished implementing Rob’s feedback, found here
07/06/20 — Clarified pounce pole hopping
Codified dash turns
Codified object arcs
Amended rubble arc
Amended spear arc
Added backwards roll out of some pipes gif
10/06/20 — Added short comment in item management on storing items.
19/06/20 — Added fast horizontal pole crawl
Moved recommendations to the start of the guide
16/09/20 — Added instant slide pounce & instant slide flip!
TAS section will be implemented in the near future.
Update: Adding a creature section is less of a priority at the moment; pinecubes has intensive studies and I’m focusing on speedrunning. We’ll look into it once we’ve finished another project.
Added henpemaz and slime cubed to credits
Cleared up Other section, removed now documented/understood moves
17/09/20 — Updated instant slide pounce/flip inputs with 🡸 🡺 🡹 🡻 🡼 🡽 🡾 🡿
27/10/20 — Added fast rolling + rolling from a +1 tile jump!
Added +1 tile jump to Adept recommendations; it’s really good!
08/01/21 — Added glossary terms for easier navigation using synonyms.
22/01/21 — Added cut content, wallpouncing, all variants.
29/01/21 — Added more info on +1 tile rolls, storing up/down inputs. More to come!
01/02/21 — Linked to gif creation programs in Credits. Currently creating intermediate gifs for fast pole climbing, as a discord resource.
12/02/21 — Reorganised misc roll starters into two distinct groups — fast fall & tumble rolling.
24/03/21 — Replaced To Do list with Pending List — more direct relationship between pending items and list.
Added Hanging backflip.
Added Extended coyote jump.
Added Slide spear pounce.
Added Slide spear flip.
Added Extended slide spear.
Added Crouch mouth spear.
Updated wording and explanation for slide spearing, downwards drift for spears.
Updated 3 basic turn storage gifs.
Updated turn storage explanation, wording for clarity. Mentioned frame depletion as an issue.
Added turn directionality gif to illustrate benefit of > clockwise/outwards rotation for horizontal distance.
Added 2 backflip out of slide pounce roll gifs.
Added 2 backflip out of slide flip roll gifs.
Added gifs for climbing 5 + 6 tile high ledges.
Moved landing on pole tips to vertical pole movement with the other pole tip gifs
Adding slide pole jump and slide pole backflip, in backflip pole movement and turn storage applications respectively. Separated because slide pole backflipping requires turn storage and is otherwise identical. Linked between for reference.
25/03/21 — Added turn stored ledge climb.
Added 8 tile high pole momentum jump
Moved parkour momentum backflip and parkour slide backflipping to Unexplored as we have not yet replicated them satisfactorily.
Added stumble roll.
Updated instant slide pounce cleanest input set, two jumps unnecessary.
Update: We haven’t said so explicitly yet but we’re no longer planning to add a creature section to this guide, as it is large enough already and is consistently expanding. A creature section would require its own standalone guide given the breadth and depth of possible interactions. We may take this up in the future, otherwise it’s open for the community!
16/04/2021 — Linked to wallpouncing mod in relevant section
Fixed broken links in contents.
19/04/2021 — Renamed Boosted Sliding to Extended Sliding. This has always been a used term that distinguishes the move from the numerous other uses of “boost” in RW movement, especially in light of recent jump storage/jump boost discoveries. More coming soon!
10/09/2021 — Removed hyphens from move names, making them easier to search with ctrl + f.
11/09/2021 — Added jump boost section outline, gifs
13/09/2021 — Continued expanding jump boost section
31/03/2022 — Repositioned gif
С выходом недавнего дополнения многие игроки погружаются в суровый мир Rain World. Вот несколько советов и рекомендаций по выживанию.

Rain World — культовая классическая инди-игра, единственная в своем роде игра — и даже если бы это было не так, оно легко было бы лучшим. Rain World предлагает уникальный опыт выживания, оставляя вас маленьким кошачьим существом во враждебном и почти чужом мире, с вашей единственной целью &# исследовать и выжить. Вы будете сражаться в суровых постапокалиптических условиях и в ужасающе реалистичной инопланетной экосистеме, где вы находитесь в самом низу пищевой цепочки.
В последнее время игра привлекает все больше и больше людей из-за недавнего дополнения Downpour. , который предлагает новых персонажей и новый контент после игры. Тем не менее, многим было трудно получить титул, несмотря на их интерес. Rain World может быть суровой игрой по дизайну и не самой удобной для новичков для тех, кто не имеет правильного мышления, поэтому для тех, кто хочет хорошо провести время с этой игрой, вот несколько полезных советов!
10 Сосредоточьтесь на выживании

По своей сути Rain World — это не платформер, а чистая игра на выживание. Ваша главная цель не будет заключаться в прохождении областей или прохождении испытаний. Вместо этого ваша главная задача состоит в том, чтобы просто выживать каждый день, находя достаточно еды и убежища, чтобы пережить проливные дожди. Невыполнение этого требования приводит к смерти и перезапуску цикла.
Вам нужно будет узнать свои источники пищи в каждой области, как получить их, не умирая, и какие пути вы можете выбрать, чтобы добраться до убежища. Это не означает, что в конце концов вам не придется проходить сложные испытания навыков, но первое, что вам нужно усвоить, — это основы безопасности и выживания, если вы хотите получить доступ к этим другим областям.
9 Примите свои слабости

Одно из самых больших препятствий при попасть в Мир Дождя — значит занять свое место в Мире Дождя; если вы относитесь к ней как к платформеру, вас ждут плохие времена. Несмотря на то, что в нем есть безумная технология движения для спидраннеров, вы не получите ее во время обычного прохождения и обнаружите, что вы немного медлительны, не можете далеко прыгать и почти полностью беззащитны перед вашими хищниками.
Вместо этого вы должны принять свое место в мире маленького мусорщика, который должен делать все шаг за шагом. Часто вам придется пережидать врагов или уступать им целые пути, а попытка убить большинство врагов — это геркулесов подвиг, требующий планирования и серьезных усилий. Но если вы выберете более безопасные маршруты, вам будет намного легче выжить.
8 Отступление — это не потеря

Одна вещь, из-за которой игроки могут погибнуть и застрять, — это думать, что с каждой проблемой нужно сталкиваться и решать ее, но иногда вы должны знать, когда сдаться. Иногда в игре просто слишком много существ в одной области, иногда все оказывается совершенно против вас, и нет никакой надежды проскочить мимо — независимо от того, сколько копий вы бросите.
Вместо этого вы можете отступить и найти новый путь; почти всегда есть несколько путей к вашим целям, которые вы можете выбрать, иногда требуя некоторого творческого подхода, но они всегда могут увести вас с пути опасности. А иногда вам, возможно, придется просто найти достаточно еды и подождать, потому что в этот день враги повсюду.
7 Просто исследуйте!

Еще одна вещь, которая может стать новой игрокам, застрявшим в Rain World, не хватает направления, они чувствуют, что упускают какую-то цель, когда начинают, и не знают, куда идти. Правда в том, что в Rain World, по крайней мере на начальном этапе, исследование — ваша единственная цель — чтобы найти новые области и более новые области внутри них.
Rain World — это игра о том, как проложить свой собственный путь в этом мире и определить, какие особые пути вы хотите пройти в достижениях, чтобы получить некоторые льготы. На самом деле, когда вы начинаете, просто сосредоточьтесь на том, чтобы пройти через эти первые врата, и мир откроется для вас. Что вам нужно сделать, чтобы победить Rain World, рано или поздно обнаружится.
6 Не торопитесь
 <п>Как уже было сказано, Rain World — суровая игра, и слишком самоуверенным игрокам она не дается легко. Враги Мира Дождя могут изменить свое поведение в любой момент, иногда толпясь на всей территории, а иногда и вовсе отсутствуя. Если вы поторопитесь, вы часто можете оказаться в сложных ситуациях, в которых у вас нет надежды выжить или предсказать.
Не говоря уже о том, сколько угроз попытается наброситься на вас, когда вы меньше всего ожидаете; бросаться напролом в новое существо просто напрашивается на смерть. Вместо этого вы должны действовать медленно и методично, предполагая, что опасность таится за каждым углом, и никогда не отдыхайте рано, если вы боитесь того, что вас ждет впереди.
5 Все, что вы получаете, это знания
 <п>Rain World — суровая игра, и многие игроки тянутся вперед, ожидая, что со временем в ней станет легче ориентироваться и выживать, но это не так. Rain World не предлагает каких-либо улучшений или развития ваших навыков. Вы можете найти вещи, но они будут действовать только как одноразовые инструменты. В противном случае то, что у вас есть, останется у вас навсегда.
Поэтому вместо этого вы можете стать лучше только благодаря знаниям. Вам придется постепенно расти, чтобы узнать лучшие пути через области, где вы можете найти пищу, и, конечно же, поведение других существ. Вы обнаружите, что, хотя вы не можете превзойти большинство из них, вы, безусловно, можете перехитрить их, и в конечном итоге это упростит прохождение областей.
4 Не все хотят вас убить

В то время как Rain World суров мира, не относитесь к нему как к тому, что полностью направлено на то, чтобы вас достать — в то время как вокруг много хищников, множество существ могут помочь вам. Некоторые могут просто оставить вас в покое или служить хорошим отвлечением, поэтому не бойтесь приближаться к существам и наблюдать за их поведением, прежде чем предполагать худшее.
Некоторые из них могут даже помочь вам! Возможно, не по своей воле, но многое можно использовать, чтобы помочь вам обойти сложные препятствия и более смертоносных существ мира. Однако нельзя сказать, что ими легко пользоваться; многих придется тащить за собой или давать наживку, и они всегда могут напасть на вас позже в случае с падальщиками.
3 Но большинство вещей хотят вас убить
 <п>Это не значит, что Rain World не кишит опасными существами; есть так много существ, которые убьют вас самыми разными способами. В Rain World нет абсолютно безопасных мест, кроме ваших бункеров, и даже в них может проникнуть что-то опасное. Будь то небеса, вода или подземелье, опасность таится за каждым углом.
И будьте осторожны; не все так, как кажется, и то, что кажется безобидными существами или растениями, иногда может показать свое истинное лицо в зависимости от вашего поведения. Даже некогда безобидные существа могут стать отличными охотниками, если вы каким-либо образом нанесете им вред или зайдете не в те районы. Всегда держите одну руку на своем копье, независимо от того, насколько дружелюбно выглядит существо. Если только это не олень. Это чистые души.
2 Мир жив

К счастью, не все хочет убить вас конкретно, так как один из самых важных уроков для продвижения в игре — это осознание того, что мир Rain World намного больше, чем просто вы. Игра имитирует полную экосистему со сложной паутиной территорий, динамикой хищник-жертва и адаптацией для определенных областей.
Изучение этого будет вашим лучшим инструментом; в то время как некоторые существа хотят заполучить вас, они также будут сражаться друг с другом. Вы можете уклониться от некоторых врагов, войдя на чужую территорию, если вы можете справиться с ними, или, возможно, даже заставить их сражаться друг с другом вместо вас. Кроме того, изучение поведения и мест обитания поможет вам придумать лучшие способы избегать охотников.
1 Продолжайте пытаться

Одна вещь, которая может удержать многих игроки, отвернувшиеся от истинной красоты Rain World, заключаются в сложности, поскольку игра создает суровую экосистему, и она, безусловно, кажется жесткой. Вы можете умирать снова и снова, иногда даже в самых неблагоприятных ситуациях, и может потребоваться целая вечность, чтобы добраться до любого места в определенных областях. Это игра, которая будет сокрушать вас снова и снова без каких-либо обновлений, помощи или каких-либо облегчающих ее действий.
Но именно это делает Rain World таким особенным — у вас были те особые моменты, когда вы едва выживали из ситуаций и знали, что вы это заслужили, потому что это могло легко уничтожить вас. Ощущение настоящего выжившего во враждебном мире, не созданном для вас, а в том, в котором вы добиваетесь успеха сами. Это то, за что люди любят Rain World, и если вы продолжите в том же духе, возможно, вам тоже понравится.
- Тема: Дождь Мир
- Дата выпуска: 28 марта 2017
- Разработчик: Видеокульт
- Издатель: Akupara Игры
Если вы хотите исследовать Rainworld самостоятельно, без спойлеров и читов, но вы немного перегружены, то это руководство для вас! Это предназначено для новых игроков, но если вы вернувшийся игрок, это может быть и для вас! Я искал руководство без спойлеров, когда впервые играл несколько лет назад, но так и не нашел, поэтому решил сделать его, потому что почему бы и нет.
Это руководство разбито на 4 части.
- Навигация
- Выживание
- Собирательство и охота
- Спящий режим и циклы
Элементы управления/краткое введение
Прежде чем я начну объяснять игровую механику, я хотел бы напомнить вам о базовом наборе приемов Slugcats. Если вы уже знакомы, просто прокрутите вниз до навигации.
клавиатура
- левый Стрелка влево, коснитесь, чтобы сделать один шаг, или удерживайте, чтобы продолжить движение в этом направлении.
- Правильно Стрелка вправо, нажмите или удерживайте
- вставать Стрелка вверх
- Присесть Кнопка «Стрелка вниз
- Jump Z, коснитесь для небольшого прыжка или удерживайте для полного прыжка
- Самовывоз Shift
- Бросать X
- Питание Удерживайте Shift
- Карта Удерживайте пробел
- пауза Esc
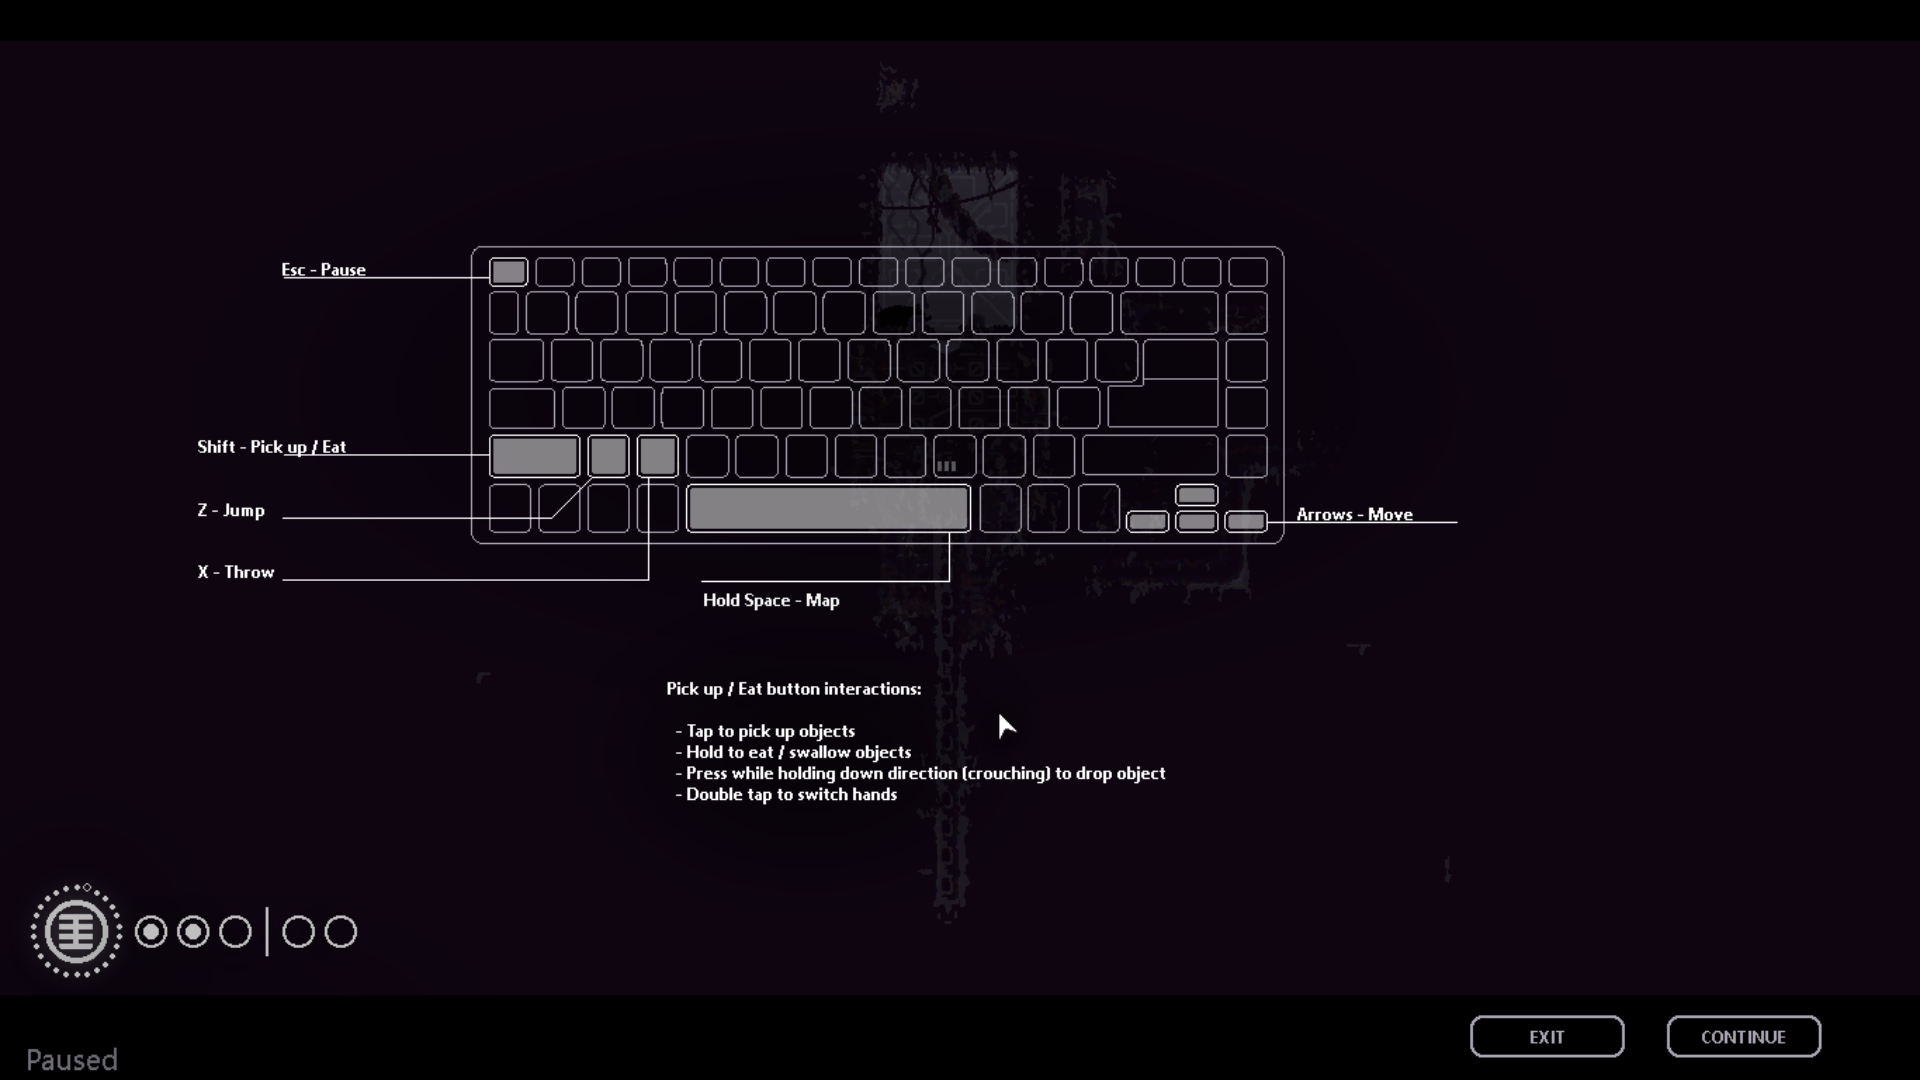
контроллер
- левый Наклоните джойстик влево, коснитесь, чтобы сделать один шаг, или удерживайте, чтобы продолжить движение в этом направлении.
- Правильно Наклоните джойстик вправо, нажмите или удерживайте.
- Встаньте, Наклоните джойстик вверх
- Присесть Наклоните джойстик вниз
- Jump A, нажмите для небольшого прыжка или удерживайте для полного прыжка
- Самовывоз X
- Бросать B
- Питание Держи Х
- Карта Удерживайте RB (кнопка рядом с верхним правым триггером)
- Esc Назад (кнопка в центре слева от контроллера)
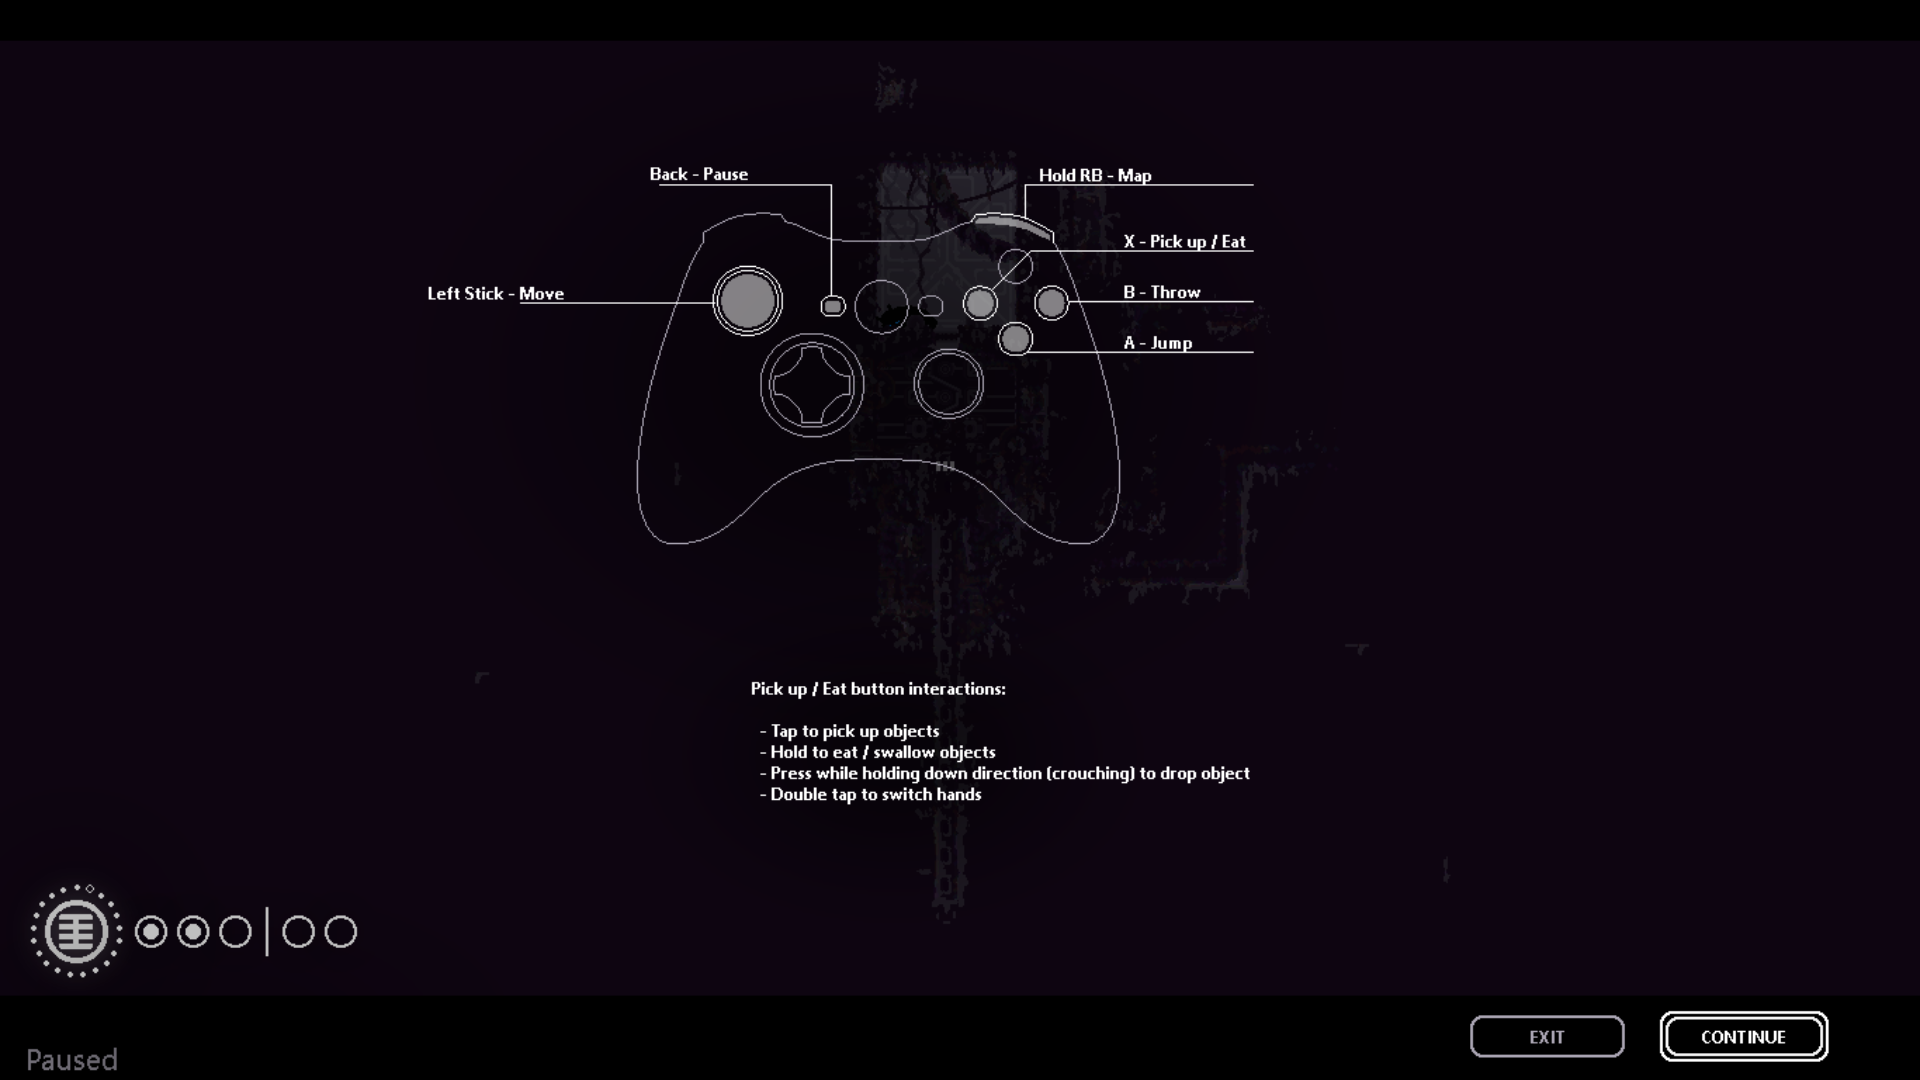
Часть 1: Навигация

Rainworld имеет МАССИВНУЮ карту, и часто она начинает напоминать лабиринт. Вы не всегда можете позволить себе заблудиться, поэтому, когда вы впервые играете в игру, она может быть довольно ошеломляющей. Я расскажу о некоторых инструментах, которые я использую, чтобы упростить составление карт и поиск пути. Я начну с перечисления некоторых типов областей, представленных на карте, чтобы помочь вам закрепить их в памяти.
- Малые пространства. В Rainworld есть много небольших пространств, достаточно больших, чтобы ваш слизнекот мог пройти, они могут помочь вам спрятаться и избежать опасности, но также могут поставить вас в угол. Я всегда быстро осматриваю каждую зону, в которую вхожу, чтобы знать варианты побега еще до того, как они мне понадобятся.
- Открытые площадки. Открытые пространства могут быть как очень полезными, так и очень опасными. Передвигаться легче, но меньше между вами и хищниками, поэтому важно следить за любыми элементами карты, которые могут помочь вам убежать, например, столбы, на которые можно взобраться, могут помочь вам убежать от некоторых хищников или позволить вам карабкаться и перепрыгивать через других.
- Паркур. В Rainworld есть тонна паркура, случайно брошенного в каждую область, это хорошая идея, чтобы повозиться со своим набором движений и посмотреть, что делает вас быстрее и замедляет вас. Часто я ловлю себя на том, что смотрю на конкретное препятствие и задаюсь вопросом, возможно ли его вообще обойти, и как только я пытаюсь, я понимаю, что это возможно, просто для этого нужны правильные движения.
Как вы заметили, к этому моменту камера Rainworld не отслеживает вашего персонажа. Это означает, что камера переключится, чтобы показать вам следующую часть комнаты, только когда ваш слизняк достигнет самого конца экрана. Это делает игру НАМНОГО сложнее и требует некоторого привыкания. Поэтому, приближаясь к концу экрана, будьте осторожны и будьте готовы к опасности при переключении камеры. Хищники могут прятаться вне поля зрения, поэтому еще раз отследите свой план побега и будьте готовы еще до того, как он вам понадобится.
Если вы не можете играть с этим стилем камеры и это вас беспокоит, вы можете попробовать этот мод для отслеживания камеры:
- SBCameraScroll
Наконец, при навигации по области вы столкнетесь с четырьмя типами труб. Вы очень быстро поймете, что делает каждый из этих типов, но я помещу здесь изображение каждого, чтобы вы могли ознакомиться.

Эти трубы обозначены тремя короткими линиями рядом друг с другом и являются наиболее распространенными в игре.

Этот тип трубы является вторым по распространенности, это стрела, они всегда идут парами.

Третий — квадратный, с небольшим отверстием на одном конце.

Последний и самый необычный тип выглядит как две скобки.
Используйте эти различные трубы, они являются одним из ваших самых больших преимуществ против хищников и опасностей.
Часть 2. Выживание

Одной из ключевых механик, конечно же, является выживание. Сохранение жизни вашего слизнекота — это вызов, легко оказаться добычей или во власти природы и самого мира. Конечно, большая часть выживания — это существа в окружающей вас экосистеме, и, по моему опыту, эти существа, как правило, подпадают под 3 категории:
- Хищники. Существа, которые по умолчанию охотятся на вас, что делает их опасными. Окраска хищников важна и может указать, насколько они опасны для вас. Даже один и тот же тип хищника более или менее опасен для вас в зависимости от его цвета, цвет указывает на его набор движений и способности.
- Нейтральная. Эти существа не видят в вас врага или друга, иногда они любопытны или устали. С этими типами существ иногда можно подружиться, однако враждебность к ним может привести к тому, что они увидят в вас угрозу или испугаются вас.
- Prey. Эти существа меньше вас и являются вашей естественной добычей, они могут мешать или доставлять вам неудобства, однако обычно вы можете убить их, а иногда и съесть.
Очень важно всегда помнить о том, что в Rainworld ваш слизняк находится далеко не на вершине пищевой цепи. Хотя вы проворны и сильны, вы также очень слабы и являетесь жертвой многих существ в мире.
В Rainworld есть интересная и хитрая механика с существами вокруг вас, ИИ учится от тебя. Слухи о ваших действиях распространяются быстро, заработайте репутацию агрессивных существ, и существа в этом районе будут более хищными или опасаться вас в зависимости от характера существа. Я обычно оставляю даже хищников в покое, нападая на них только тогда, когда это мой единственный вариант. Вот список нескольких тактик, которые я использую, чтобы убежать от хищников.
При побеге или ускользании от существ наиболее полезными инструментами, по моему опыту, являются окружение самой карты, такое как трубы, столбы, уступы для паркура и многое другое.
- Ползите в небольшой туннель, выйдите на другую сторону и вернитесь на землю, чтобы потерять след того, что преследует вас, или замедлить его.
- Поднимитесь по трубе, а затем спрыгните, приземлившись позади вашего врага, чтобы безопасно обойти его.
- Прыгайте в трубу и ждите на другой стороне, когда вы увидите, как труба мигает цветом вашего врага, возвращайтесь в трубу, ваш враг пойдет в одном направлении, а вы убежите в другом.
- Наконец, бросьте предмет во врага, это на мгновение оглушит его, что позволит вам более безопасно обойти его или сбежать. Однако будьте осторожны, оглушение не продлится долго, и тогда враг нападет на вас быстрее и еще более безумно, чем раньше!
Эти ходы могут быть опасными, но если их выполнять достаточно быстро или с достаточной практикой, игра станет намного проще, и вы сможете справиться с более сложными областями в предстоящей игре. Это не единственные приемы, которые вы можете использовать для побега.
поэкспериментируйте сами, и вы найдете еще много тактик.Важно чувствовать себя комфортно, избегая опасности, но также важно знать, как ее избежать. Когда вы видите хищника, которого хотите обойти, попробуйте отвлечь его или найти обходной путь, который не будет пересекать его путь. Если существо находится в движении, это более сложно, но если оно все же, вы можете использовать трубы, шесты и паркур, чтобы обойти существо, под ним или вокруг него, не привлекая его внимания. Вы также можете бросить предмет рядом с существом или в него, привлекая его внимание и заставляя существо уйти с вашего пути.
Часть 3: Собирательство и охота
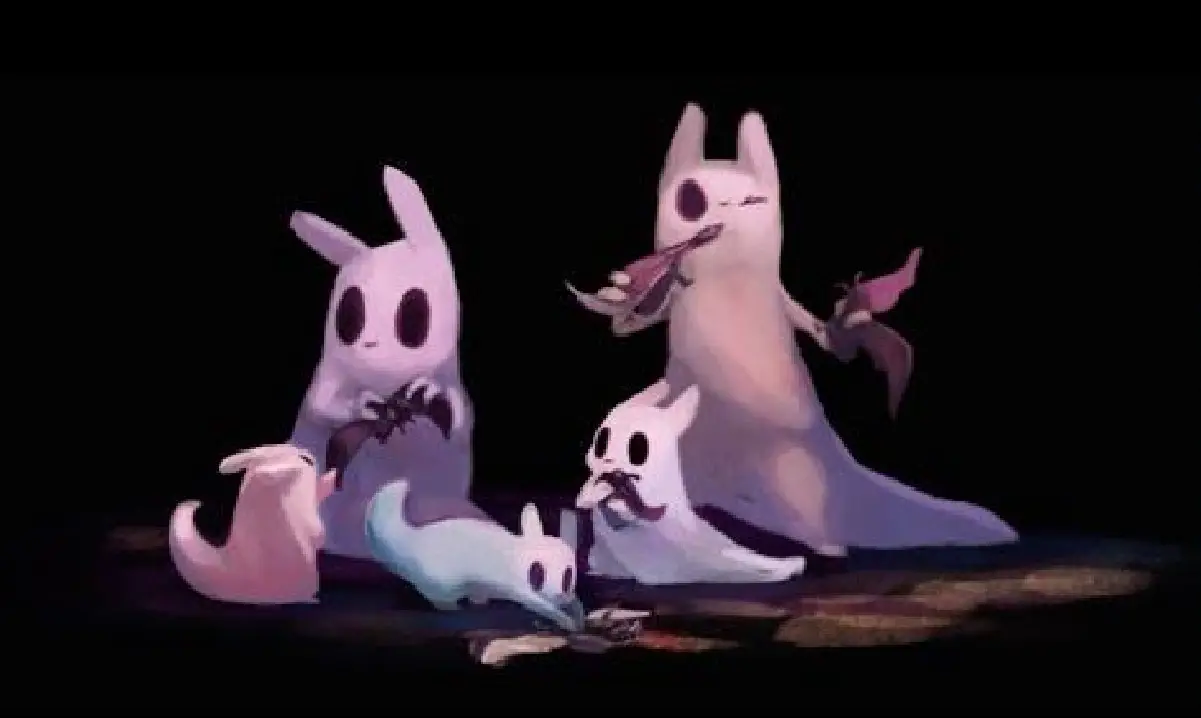
Есть много типов существ и предметов, которые можно использовать в качестве еды. С
некоторые виды еды возрождаются в той же области через несколько циклов, Если вы найдете комнату с чем-нибудь поесть, вы можете вернуться через несколько циклов, и она, возможно, снова выросла или возродилась.
Вот несколько видов еды, на которые стоит обратить внимание.
- Фрукты
- Семена
- ошибки
- Маленькие существа
Имейте в виду, что есть больше видов еды, чем это. Мой совет — просто попробуйте есть все и вся, особенно когда вы углубитесь в игру и познакомитесь с новыми продуктами.
Эмпирическое правило: когда вы найдете что-то новое, попробуйте съесть это, чтобы посмотреть, что произойдет. Если ваша полоса голода в левом нижнем углу светится и издает небольшой «бип», поздравляем! Вы только что нашли новый вид еды. Запомните, где вы его нашли и как он выглядит, чтобы потом охотиться.
Иногда кажется, что ваш слизняк ест предмет, издавая громкий глотающий звук, но ваша шкала голода не изменится. Вместо этого вы могли просто проглотить предмет. Это полезно, но не следует путать с едой, так как это нерасходуемый предмет, который ваш слизнекот хранит на потом, и он не изменит вашу статистику голода.
Часть 4: Спящий режим и циклы
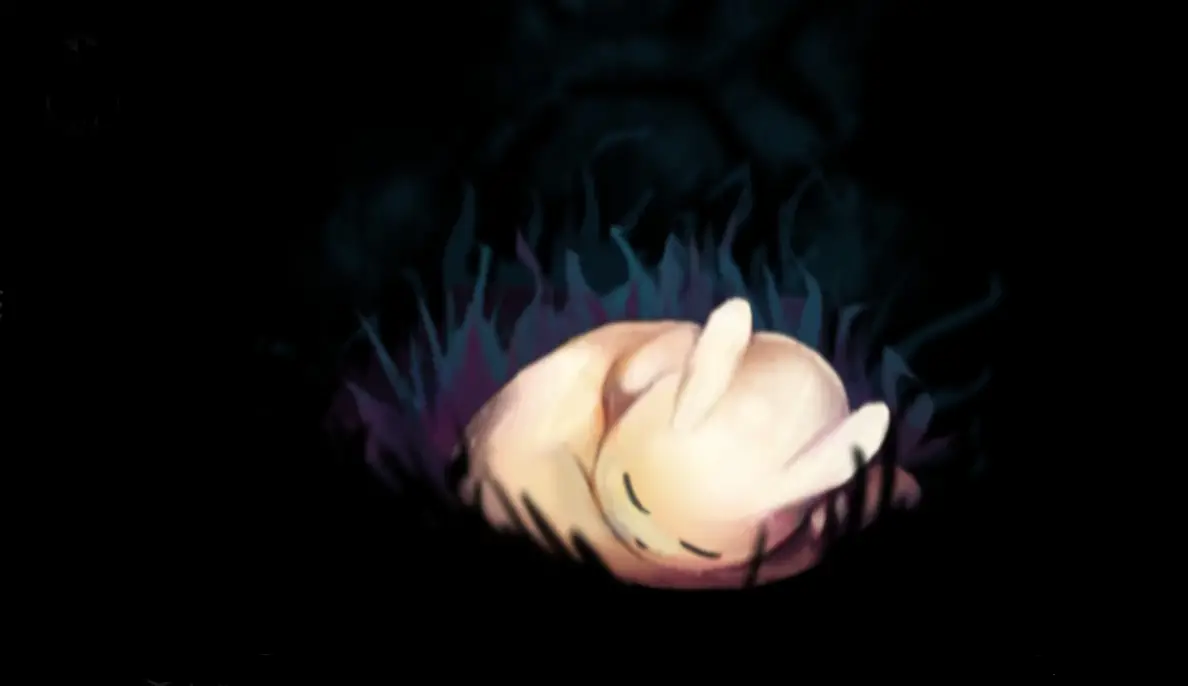
Спящий режим — одна из самых важных механик игры, и она делает следующее.
- Сохраняет игру
- Защитит вас от дождя. Дождь смертелен, если вы обнаружили себя, когда начинается дождь, бегите к ближайшей норе для спячки. Вы можете впадать в спячку только в специально отведенных местах, прячась в любой случайной дыре или маленьком пространстве, которые не защитят вас.
- Запускает кат-сцены Они появляются в виде простого изображения, иногда с описанием или музыкой. Это происходит только тогда, когда вы делаете что-то, чтобы двигаться по истории в цикле, который вы только что разместили.
- Отправляет вас в следующий цикл. Циклы показывают, как долго вы выжили/сколько раз впадали в спячку. В начале нового цикла таймер дождя сбрасывается. Думайте о каждом цикле как о новом дне.
- Увеличивает вашу карму У вас есть 5 уровней кармы. Смерть снизит эту карму на одну ступень, а гибернация увеличит ее на одну ступень. Карма вступает в игру за несколько действий, но для начала игры это не так важно. * Хотя вы обнаружите, что во время гибернации с кармой 5-го уровня происходят определенные вещи.

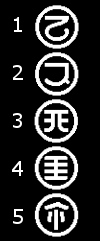
Собираем вместе и прогрессируем
Хорошо, теперь, когда я объяснил 4 основные механики игры, пришло время собрать их воедино, использовать свои навыки навигации и выживания, чтобы перемещаться по карте в поисках еды, а затем вернуться в место гибернации и отдохнуть для следующего цикла. Продолжайте это некоторое время, исследуя больше области вокруг вас в своем собственном темпе и находя новые места для гибернации, дающие вам доступ к новым областям. Продолжайте делать это и исследовать, выживать и исследовать. Мир действительно очень большой, и в нем есть что исследовать, так что получайте удовольствие, исследуя его и наслаждаясь красотой игры. На этом этапе у вас есть навыки, чтобы понять, что происходит, методом проб и ошибок. Вы начнете добиваться прогресса самостоятельно, но обратите внимание
некоторые области игры намного сложнее, чем другиетак что, если вы продолжаете умирать и не продвигаетесь вперед, это может быть знаком, чтобы повернуть назад и попытаться исследовать что-то еще.
Как только вы будете готовы продвигаться по сюжету и относиться к делу серьезно, а не к случайным исследованиям, обратитесь к гидам. Я уверен, что вы уже заметили маленькое желтое существо, похожее на червя, появляющееся на карте, которое всегда движется, прежде чем вы подойдете слишком близко. Он вращается, а иногда проецирует изображения. Они следуют за вами на протяжении всего вашего путешествия, и если вы обращаете внимание на свои движения и жесты, они пытаются направлять вас. Следуйте им, и они приведут вас к продвижению истории.
Заметки
Если вы заметили какие-либо ошибки в этом руководстве, дайте мне знать в комментариях, я могу добавить больше деталей в это руководство или сделать дополнительное руководство с немного большей информацией и большей ясностью для игроков, готовых к большему. Если/когда я это сделаю, это будет указано внизу этого руководства.
Это все, чем мы делимся сегодня для этого Дождь Мир гид. Это руководство было первоначально создано и написано моча комнатной температуры. Если нам не удастся обновить это руководство, вы можете найти последнее обновление, следуя этому ссылке.
Если вы считаете, что какой-либо контент на этом сайте нарушает ваши права, включая ваши права на интеллектуальную собственность, немедленно свяжитесь с нами, используя нашу контактную форму.
Дождь Мир
Теги:Руководство
Other languages:
- English
- 中文(简体)
The ![]()
![]() Slugcat’s controls feature a variety of advanced movements, mostly unexplained in-game. This page exists to detail the variety of moves the Slugcat can perform, and how to do them. Many don’t do much on their own and are very situational, but they can be mixed together to save your life many times! It is always good to have even the most useless tricks in your arsenal.
Slugcat’s controls feature a variety of advanced movements, mostly unexplained in-game. This page exists to detail the variety of moves the Slugcat can perform, and how to do them. Many don’t do much on their own and are very situational, but they can be mixed together to save your life many times! It is always good to have even the most useless tricks in your arsenal.
Buttons and basics[edit | edit source]
- Up: Grabs onto poles and climbs up them. Causes the Slugcat to climb up small ledges and reorient in midair. Also causes the Slugcat to rise up onto two feet when crawling.
- Down: Causes the Slugcat to duck down and crawl on all fours. When on a vertical pole, causes the Slugcat to crawl down it. When on a horizontal pole or the bottom of a vertical pole, causes the Slugcat to drop off of it. Also causes the Slugcat to drop off of corners.
- Left/Right: The basic horizontal movement of the game. Also used to cause the Slugcat to grab onto a wall and slide down it.
- Jump: A basic jump allowing the Slugcat to climb over obstacles, reach poles and leap across gaps.
- Grab: Picks up an object or grabs certain creatures. If the Slugcat’s right hand (left from the perspective of the player) is free, they grab objects with that hand first.
- Throw: Throws held objects, often with considerable force. If the Slugcat is holding two objects, the object in their right hand (left from the perspective of the player) is thrown first. Some objects have an effect when thrown, and others are thrown a much shorter distance.
- Map: When tapped, briefly pulls up the HUD showing the Slugcat’s karma level and hunger. When held slightly longer, brings up a timer depicting when the rain arrives. When held down for about a second, brings up a map from the Slugcat’s memory. The Slugcat cannot move while remembering the map, and this does not pause the game.
- Pause: Opens up the pause menu.
Object management[edit | edit source]
- Swap: Double-tapping grab causes the Slugcat to swap the items held in their left and right hands, letting them throw or drop a different item first.
- Item Storage/Regurgitation: If the player holds down grab, as if to eat, and is unable to eat the item (due to not holding a consumable item or being full), the Slugcat swallows the object they’re holding. If they are holding items in both hands, they store the item in their right hand first. This object can then be regurgitated later on by holding grab again. As long as the Slugcat is not in a tunnel, the object is regurgitated into one of the Slugcat’s hands if they have an empty one. If not, the object is spat on the ground. Food and Spears cannot be stored this way, and the Slugcat can only store one item in them at a time.
Jumping[edit | edit source]
Pulling up onto ledge[edit | edit source]
When hitting a wall just below a ledge, holding forwards and pressing jump allows the Slugcat to climb up.

Wall-jumping[edit | edit source]
The Slugcat slides down walls when holding into the wall.

Wall-jumping is performed by pressing jump while sliding down a wall (holding into the wall), immediately switching holding direction to the other wall and tapping jump as soon as the Slugcat comes into contact with that wall.
Note: It’s important to switch holding direction as soon as possible after jumping. The aim is to jump as soon as possible while holding into the wall, to minimize height lost to sliding, then immediately hold away from the wall to minimize negative aerial drift.

Coyote jump[edit | edit source]
It is still possible to jump a few frames after running off an edge. This can be used to maximize horizontal jump distance, or safeguard against tight jumps.

Pole coyote jump[edit | edit source]
This can also be done off of poles.

Charge-pouncing[edit | edit source]
Entering the crouching position and holding jump until the Slugcat’s back is arched, then releasing, allows for a charge-pounce. For almost all pounces the Slugcat is subject to aerial drift, and so holding forwards mid-pounce allows the player to maximize the Slugcat’s horizontal range whenever jumping or pouncing.

Crouching to safely position on edges[edit | edit source]
This gif shows the farthest the Slugcat can extend over a ledge while crouched, useful for maximizing charge-pounce distance.

Landing upright out of charge-pounce[edit | edit source]
Tapping up immediately after charge-pouncing puts the Slugcat in an upright position, giving it more height. This can help grab ledges upon landing.

Throw-boosting[edit | edit source]
Throwing Rubbish or Spears during a jump or pounce increases horizontal velocity, allowing the Slugcat to travel further than normal jumps and pounces. This is most effective when done at the start of a jump.
Note: Throw-boosting can be used at the start of any aerial move to increase speed / range.

Optimal throw-boosting[edit | edit source]
This can be done with two objects to further increase speed, optimally either out of a charge-pounce or max length roll-pounce (Explained later in guide).

Turning around[edit | edit source]
Backflipping[edit | edit source]
Backflips are performed by jumping immediately after turning around. Note that the rightwards press near the end of the move is only to prevent the Slugcat from falling off the platform.

Turn-hopping[edit | edit source]
Turn-hopping involves repeatedly jumping after turning to conserve turn momentum and cover ground quickly. Momentum conserved this way only depletes when in contact with the ground, and lasts longer with more precise and better timed jumps.

Tunnel Movement[edit | edit source]
Main article: Tunnel Movement
Slides[edit | edit source]
Main article: Slides
Rolls[edit | edit source]
Main article: Rolls
Pole Movement[edit | edit source]
Main article: Pole Movement
Combat[edit | edit source]
Main article: Combat
Swimming[edit | edit source]
Main article: Swimming
Situational controls[edit | edit source]
The ![]() Five Pebbles region features unique controls, which for the sake of spoilers are not listed here. Info on the controls can be found on the page for the region.
Five Pebbles region features unique controls, which for the sake of spoilers are not listed here. Info on the controls can be found on the page for the region.
Source[edit | edit source]
More detailed gifs and more complete move information can be found on the Rain World Movement Guide