- Manuals
- Brands
- Lexmark Manuals
- Printer
- MS421
Manuals and User Guides for Lexmark MS421. We have 2 Lexmark MS421 manuals available for free PDF download: Service Manual, User Manual
Lexmark MS421 Service Manual (318 pages)
Brand: Lexmark
|
Category: Printer
|
Size: 54.39 MB
Table of Contents
-
Product Information
2
-
Edition Notice
2
-
Table of Contents
3
-
-
Notices, Conventions, and Safety Information
9
-
Laser Notice
9
-
Conventions
12
-
Safety Information
13
-
General Caution Statements
18
-
-
Change History
19
-
General Information
21
-
Printer Model Configurations
21
-
Finding the Serial Number
21
-
Paper Support
22
-
Supported Paper Sizes
22
-
Supported Paper Types
23
-
Supported Paper Weights
24
-
-
Tools Required for Service
24
-
-
Diagnostics and Troubleshooting
25
-
Troubleshooting Overview
25
-
Performing the Initial Troubleshooting Check
25
-
-
Fixing Print Quality Issues
25
-
Initial Print Quality Check
26
-
Gray Background or Toner Fog Check
27
-
Blank Pages Check
29
-
Print Is too Dark Check
35
-
Print Is too Light Check
37
-
Paper Curl Check
40
-
Folded or Wrinkled Paper Check
41
-
Solid Black Pages Check
42
-
Repeating Defects Check
45
-
Skewed Print Check
46
-
Streaked Vertical Lines Appear on Prints Check
48
-
Horizontal Light Bands Check
49
-
Vertical Light Bands Check
50
-
Vertical Dark Bands Check
51
-
Vertical Dark Streaks with Print Missing Check
53
-
White Streaks and Voided Areas Check
55
-
Fine Lines Are Not Printed Correctly (Specifically Chinese Characters) Check
58
-
Clipped Pages or Images Check
59
-
Compressed Images Appear on Prints Check
61
-
Incorrect Margins on Prints Check
62
-
Toner Rubs off Check
63
-
Toner Specks Appear on Prints Check
64
-
-
Paper Jams
66
-
Avoiding Jams
66
-
Identifying Jam Locations
67
-
Paper Jam in Door a
68
-
Paper Jam in the Rear Door
71
-
Paper Jam in the Standard bin
72
-
Paper Jam in the Duplex Unit
73
-
Paper Jam in Trays
74
-
Paper Jam in the Multipurpose Feeder
74
-
200 Paper Jams
75
-
202 Paper Jams
86
-
230 Paper Jams
90
-
240-241 Paper Jams
93
-
242-244 Paper Jams
97
-
-
User Attendance Messages (0-99.99)
102
-
User Attendance Messages
102
-
Unsupported or Unresponsive Toner Cartridge Service Check
103
-
Unsupported or Unresponsive Imaging Unit Service Check
105
-
Mismatched Supplies Error Service Check
106
-
Maintenance Kit Low Service Check
106
-
-
Printer Hardware Errors
107
-
111 Errors
107
-
Errors
108
-
126 Errors
114
-
128 Errors
116
-
133 Errors
119
-
140 Errors
120
-
155 Errors
121
-
16Y Errors
122
-
171 Errors
127
-
6Yy Errors
128
-
Procedure before Starting the 9Yy Service Checks
130
-
900 Errors
132
-
-
-
Service Menus
137
-
Understanding the Printer Control Panel
137
-
Using the Printer Control Panel
137
-
Understanding the Status of the Power Button and Indicator Light
138
-
Using the Home Screen
138
-
-
Diagnostics Menu
140
-
Entering the Diagnostics Menu
140
-
Reports
140
-
Advanced Print Quality Samples
140
-
Event Log
140
-
Input Tray Quick Print
141
-
Output bin Quick Feed
142
-
Printer Setup
142
-
Printer Diagnostics and Adjustments
144
-
Additional Input Tray Diagnostics
146
-
-
Configuration Menu
147
-
Service Engineer Menu
150
-
Entering Invalid Engine Mode
150
-
Entering the Service Engineer (SE) Menu
150
-
General SE
150
-
Network SE
150
-
-
-
Parts Removal
153
-
Removal Precautions
153
-
Data Security Notice
153
-
Handling ESD-Sensitive Parts
154
-
Controller Board/Control Panel Replacement
155
-
Restoring the Printer Configuration after Replacing the Controller Board
155
-
Restoring Solutions, Licenses, and Configuration Settings
158
-
Updating the Printer Firmware
159
-
Backing up Esf Solutions and Settings
160
-
Disconnecting Ribbon Cables
161
-
Ribbon Cable Connectors
161
-
Zero Insertion Force (ZIF) Connectors
161
-
Horizontal Top Contact Connector
162
-
Horizontal Bottom Contact Connector
165
-
Vertical Mount Contact Connector
168
-
Horizontal Sliding Contact Connector
171
-
Low Insertion Force (LIF) Connector
174
-
-
Printhead Assembly Adjustment
175
-
-
Removal Procedures
177
-
Left Side Removals
177
-
Left Cover Removal
177
-
Main Drive Gearbox Removal
178
-
MPF Gearbox Removal
179
-
Fuser Actuator Removal
182
-
Reverse Solenoid Removal
183
-
Cartridge Gearbox Removal
184
-
MPF Solenoid Removal
185
-
-
Right Side Removals
186
-
Right Cover Removal
186
-
Interconnect Cable Removal
188
-
Sensor (Tray Present) Removal
189
-
Cooling Fan Removal
190
-
Controller Board Removal
194
-
Toner Cartridge Smart Chip Contact Removal
195
-
Cartridge Barrel Shutter Sensor Kit Removal
198
-
-
Front Removals
201
-
Nameplate Removal
201
-
MPF with Front Access Cover Removal
201
-
Control Panel Assembly Removal (Ms621Dn)
202
-
Control Panel Assembly Removal (Ms622De and Ms622Dte)
203
-
Control Panel (2.4-Inch Display) Cover, Buttons, and Board Removal
204
-
Control Panel (4.3-Inch Display) Cover, Buttons, and Board Removal
205
-
Transfer Roller Removal
206
-
Jam Access Cover Removal
206
-
Sensor (Front Door) Removal
207
-
MPF Pick Roller and Separator Pad Removal
209
-
Sensor (MPF Paper Present) Removal
212
-
Front Input Guide Removal
213
-
Front USB Port Removal
213
-
-
Bottom Removals
216
-
Power Supply Removal
216
-
Duplex Assembly Removal
218
-
Sensors (Duplex and Input) Removal
220
-
Sensor (Index) Removal
222
-
Sensor (Toner Density) Removal
222
-
Sensor (Paper Present) Removal
224
-
Sensor (Trailing Edge) Removal
226
-
Paper Present Sensor Flag Removal
228
-
Pick Roller Assembly Removal
230
-
Pick/Lift Motor Gearbox Removal
232
-
-
Rear Side Removals
234
-
Rear Door and Cover Removal
234
-
Fuser Removal
234
-
Sensor (bin Full) Removal
235
-
Redrive Assembly Removal
236
-
Redrive Gear Plate Removal
237
-
-
Top Side Removals
238
-
Top Cover Removal
238
-
Printhead Removal
239
-
-
Optional 250/550-Sheet Tray Removals
242
-
Separator Roller Assembly Removal
242
-
-
-
Component Locations
245
-
Printer Configurations
245
-
Attaching Cables
245
-
Printer Roller Locations
247
-
Printer Sensor Locations
249
-
Controller Board Connectors
250
-
-
Maintenance
255
-
Inspection Guide
255
-
Scheduled Maintenance
255
-
Maintenance Kits
255
-
Resetting the Maintenance Counter
256
-
-
Cleaning the Printer
256
-
Cleaning the Printhead Lenses
257
-
-
Parts Catalog
258
-
Legend
258
-
Assembly 1: Covers
259
-
Assembly 2: Control Panel
261
-
Assembly 3: Electronics 1
263
-
Assembly 4: Electronics 2
265
-
Assembly 5: Electronics 3
267
-
Assembly 6: Electronics 4
269
-
Assembly 7: Paper Transport 1
271
-
Assembly 8: Paper Transport 2
273
-
Assembly 9: MPF and Standard Tray
275
-
Assembly 10: Optional Trays
277
-
Assembly 11: Maintenance Kits
279
-
Assembly 12: Miscellaneous
281
-
-
Printer Specifications
283
-
Power Consumption
283
-
Product Power Consumption
283
-
Sleep Mode
283
-
Hibernate Mode
283
-
Off Mode
284
-
Total Energy Usage
284
-
-
Selecting a Location for the Printer
284
-
Noise Emission Levels
285
-
Temperature Information
286
-
-
Options and Features
287
-
Available Internal Options
287
-
Input/Output Configurations and Capacities
287
-
-
Theory of Operation
289
-
POR Sequence
289
-
Print Cycle Operation
289
-
Print Engine Layout
289
-
Print Cycle
290
-
-
Printer Operation
296
-
Printer Sections
296
-
Printer Paper Path
297
-
Printer Paper Path Sensors
299
-
Main Drive
300
-
Tray Drive
301
-
-
-
Acronyms
303
-
Index
305
-
Part Number Index
309
-
Part Name Index
313
Advertisement
Lexmark MS421 User Manual (140 pages)
Brand: Lexmark
|
Category: Printer
|
Size: 8.77 MB
Table of Contents
-
Table of Contents
2
-
Safety Information
5
-
Conventions
5
-
Product Statements
5
-
-
Learning about the Printer
8
-
Finding Information about the Printer
8
-
Selecting a Location for the Printer
9
-
Printer Configurations
11
-
Attaching Cables
11
-
Using the Control Panel
12
-
Understanding the Status of the Power Button and Indicator Light
13
-
-
Loading Paper and Specialty Media
14
-
Setting the Size and Type of the Specialty Media
14
-
Configuring Universal Paper Settings
14
-
Loading Trays
14
-
Loading the Multipurpose Feeder
16
-
Linking Trays
17
-
-
Paper Support
18
-
Supported Paper Sizes
18
-
Supported Paper Types
19
-
Supported Paper Weights
20
-
-
Printing
21
-
Printing from a Computer
21
-
Printing from a Mobile Device
21
-
Printing a Font Sample List
22
-
-
Understanding the Printer Menus
23
-
Menu Map
23
-
Device
23
-
Print
30
-
Paper
38
-
Network/Ports
40
-
Reports
51
-
Troubleshooting
52
-
Printing the Menu Settings Page
52
-
-
Securing the Printer
53
-
Locating the Security Slot
53
-
Erasing Printer Memory
53
-
Restoring Factory Default Settings
54
-
Statement of Volatility
54
-
-
Maintaining the Printer
55
-
Networking
55
-
Cleaning the Printer
57
-
Ordering Parts and Supplies
57
-
Replacing Parts and Supplies
60
-
Moving the Printer
70
-
Saving Energy and Paper
71
-
Recycling
72
-
-
Clearing Jams
74
-
Avoiding Jams
74
-
Identifying Jam Locations
75
-
Paper Jam in Door a
76
-
Paper Jam in the Rear Door
79
-
Paper Jam in the Standard bin
80
-
Paper Jam in the Duplex Unit
81
-
Paper Jam in Trays
82
-
Paper Jam in the Multipurpose Feeder
82
-
-
Troubleshooting
84
-
Network Connection Problems
84
-
Issues with Supplies
85
-
Paper Feed Problems
87
-
Printing Problems
90
-
Contacting Customer Support
117
-
-
Upgrading and Migrating
118
-
Hardware
118
-
Software
123
-
Firmware
124
-
-
Notices
126
-
Index
137
Advertisement
Related Products
-
Lexmark MS410d
-
Lexmark MS410dn
-
Lexmark MS417
-
Lexmark MS431
-
Lexmark MS439
-
Lexmark MS417dn
-
Lexmark MS421DN
-
Lexmark MS421DW
-
Lexmark MS825dn
-
Lexmark MS822de
Lexmark Categories
![]()
Printer
![]()
All in One Printer
Printer Accessories
Software
Print Server
More Lexmark Manuals
-
Драйверы
8
-
Инструкции по эксплуатации
2
Языки:

Lexmark MS421 инструкция по эксплуатации
(140 страниц)
- Языки:Русский
-
Тип:
PDF -
Размер:
8.69 MB
Просмотр

Lexmark MS421 инструкция по эксплуатации
(137 страниц)
- Языки:Английский, Испанский, Итальянский, Немецкий, Французский
-
Тип:
PDF -
Размер:
8.38 MB
Просмотр
На NoDevice можно скачать инструкцию по эксплуатации для Lexmark MS421. Руководство пользователя необходимо для ознакомления с правилами установки и эксплуатации Lexmark MS421. Инструкции по использованию помогут правильно настроить Lexmark MS421, исправить ошибки и выявить неполадки.
инструкцияLexmark MS421

B2338, B2442, M1242, MS321,
User’s Guide
April 2018 www.lexmark.com
Machine type(s):
4600
Model(s):
230, 238, 430, 438, 490
Посмотреть инструкция для Lexmark MS421 бесплатно. Руководство относится к категории принтеры, 1 человек(а) дали ему среднюю оценку 7.5. Руководство доступно на следующих языках: английский. У вас есть вопрос о Lexmark MS421 или вам нужна помощь? Задайте свой вопрос здесь
- Contents
- Safety information
- Learning about the printer
- Loading paper and specialty media
- Paper support
- Printing
- Understanding the printer menus
- Securing the printer
- Maintaining the printer
- Clearing jams
- Troubleshooting
- Upgrading and migrating
- Notices
- Index
Главная
| Lexmark | |
| MS421 | MS421DN | |
| принтер | |
| 0734646635974, 0734646659161, 0734646659178, 0734646662567, 0818243126063, 0995478356837, 0997966583527, 4973153197421, 4973163104822, 0734646643542 | |
| английский | |
| Руководство пользователя (PDF), Инструкция/сборка (PDF) |
Не можете найти ответ на свой вопрос в руководстве? Вы можете найти ответ на свой вопрос ниже, в разделе часто задаваемых вопросов о Lexmark MS421.
Как удалить замятую бумагу из принтера?
Лучше всего аккуратно вытянуть бумагу из принтера. Выключите принтер и убедитесь, что печатающий узел не нависает над бумагой и что в принтере не осталось бумаги.
Почему после установки оригинального картриджа принтер не работает?
Принтер может не распознать неоригинальный картридж. В этом случае вы получите сообщение о том, что картридж пуст. В инструкции к приобретенному картриджу обычно указаны способы устранения проблемы. Если это сделать не удалось, рекомендуется обратиться к продавцу.
Чем обусловлено плохое качество печати?
Причины плохого качества печати могут быть разными. Убедитесь, что картридж заполнен, а тонер имеется в достаточном количестве. Если такой проблемы нет, причина может заключаться в том, что струйному принтеру требуется чистка, высох картридж или сломан печатающий узел. Для лазерного принтера рекомендуется выполнить калибровку.
В чем разница между лазерным и струйным принтером?
Лазерный принтер печатает тонером, а струйный — чернилами.
Почему при печати на струйном принтере появляются черные полосы?
В большинстве случаев это обусловлено поломкой картриджа струйного принтера. Необходимо заменить картридж.
Что означает аббревиатура DPI?
DPI обозначает Dots Per Inch и представляет собой количество капель чернил (на дюйм), которые подаются на бумагу при печати.
Инструкция Lexmark MS421 доступно в русский?
К сожалению, у нас нет руководства для Lexmark MS421, доступного в русский. Это руководство доступно в английский.
Не нашли свой вопрос? Задайте свой вопрос здесь
-
Драйверы
8
-
Инструкции по эксплуатации
2
Языки:
Lexmark MS421 инструкция по эксплуатации
(140 страниц)
- Языки:Русский
-
Тип:
PDF -
Размер:
8.69 MB
Lexmark MS421 инструкция по эксплуатации
(137 страниц)
- Языки:Английский, Испанский, Итальянский, Немецкий, Французский
-
Тип:
PDF -
Размер:
8.38 MB
Просмотр
На NoDevice можно скачать инструкцию по эксплуатации для Lexmark MS421. Руководство пользователя необходимо для ознакомления с правилами установки и эксплуатации Lexmark MS421. Инструкции по использованию помогут правильно настроить Lexmark MS421, исправить ошибки и выявить неполадки.
- Manuals
- Brands
- Lexmark Manuals
- Printer
- MS421
Manuals and User Guides for Lexmark MS421. We have 2 Lexmark MS421 manuals available for free PDF download: Service Manual, User Manual
Lexmark MS421 Service Manual (318 pages)
Brand: Lexmark
|
Category: Printer
|
Size: 54.39 MB
Table of Contents
-
Product Information
2
-
Notices, Conventions, and Safety Information
9
-
General Caution Statements
18
-
-
Printer Model Configurations
21
-
Finding the Serial Number
21
-
-
Supported Paper Weights
24
-
Tools Required for Service
24
-
-
Diagnostics and Troubleshooting
25
-
Troubleshooting Overview
25
-
Performing the Initial Troubleshooting Check
25
-
-
Fixing Print Quality Issues
25
-
Initial Print Quality Check
26
-
Gray Background or Toner Fog Check
27
-
Print Is too Dark Check
35
-
Print Is too Light Check
37
-
Folded or Wrinkled Paper Check
41
-
Solid Black Pages Check
42
-
Repeating Defects Check
45
-
Streaked Vertical Lines Appear on Prints Check
48
-
Horizontal Light Bands Check
49
-
Vertical Light Bands Check
50
-
Vertical Dark Bands Check
51
-
Vertical Dark Streaks with Print Missing Check
53
-
White Streaks and Voided Areas Check
55
-
Fine Lines Are Not Printed Correctly (Specifically Chinese Characters) Check
58
-
Clipped Pages or Images Check
59
-
Compressed Images Appear on Prints Check
61
-
Incorrect Margins on Prints Check
62
-
Toner Specks Appear on Prints Check
64
-
-
-
Identifying Jam Locations
67
-
Paper Jam in the Rear Door
71
-
Paper Jam in the Standard bin
72
-
Paper Jam in the Duplex Unit
73
-
Paper Jam in the Multipurpose Feeder
74
-
User Attendance Messages (0-99.99)
102
-
User Attendance Messages
102
-
Unsupported or Unresponsive Toner Cartridge Service Check
103
-
Unsupported or Unresponsive Imaging Unit Service Check
105
-
Mismatched Supplies Error Service Check
106
-
Maintenance Kit Low Service Check
106
-
-
Printer Hardware Errors
107
-
Procedure before Starting the 9Yy Service Checks
130
-
-
-
Understanding the Printer Control Panel
137
-
Using the Printer Control Panel
137
-
Understanding the Status of the Power Button and Indicator Light
138
-
Using the Home Screen
138
-
-
-
Entering the Diagnostics Menu
140
-
Advanced Print Quality Samples
140
-
Input Tray Quick Print
141
-
Output bin Quick Feed
142
-
Printer Diagnostics and Adjustments
144
-
Additional Input Tray Diagnostics
146
-
-
Service Engineer Menu
150
-
Entering Invalid Engine Mode
150
-
Entering the Service Engineer (SE) Menu
150
-
-
-
-
-
Handling ESD-Sensitive Parts
154
-
Controller Board/Control Panel Replacement
155
-
Restoring the Printer Configuration after Replacing the Controller Board
155
-
Restoring Solutions, Licenses, and Configuration Settings
158
-
Updating the Printer Firmware
159
-
Backing up Esf Solutions and Settings
160
-
Disconnecting Ribbon Cables
161
-
Ribbon Cable Connectors
161
-
Zero Insertion Force (ZIF) Connectors
161
-
Horizontal Top Contact Connector
162
-
Horizontal Bottom Contact Connector
165
-
Vertical Mount Contact Connector
168
-
Horizontal Sliding Contact Connector
171
-
Low Insertion Force (LIF) Connector
174
-
-
Printhead Assembly Adjustment
175
-
-
Main Drive Gearbox Removal
178
-
Fuser Actuator Removal
182
-
Reverse Solenoid Removal
183
-
Cartridge Gearbox Removal
184
-
-
Interconnect Cable Removal
188
-
Sensor (Tray Present) Removal
189
-
Controller Board Removal
194
-
Toner Cartridge Smart Chip Contact Removal
195
-
Cartridge Barrel Shutter Sensor Kit Removal
198
-
-
MPF with Front Access Cover Removal
201
-
Control Panel Assembly Removal (Ms621Dn)
202
-
Control Panel Assembly Removal (Ms622De and Ms622Dte)
203
-
Control Panel (2.4-Inch Display) Cover, Buttons, and Board Removal
204
-
Control Panel (4.3-Inch Display) Cover, Buttons, and Board Removal
205
-
Transfer Roller Removal
206
-
Jam Access Cover Removal
206
-
Sensor (Front Door) Removal
207
-
MPF Pick Roller and Separator Pad Removal
209
-
Sensor (MPF Paper Present) Removal
212
-
Front Input Guide Removal
213
-
Front USB Port Removal
213
-
-
Duplex Assembly Removal
218
-
Sensors (Duplex and Input) Removal
220
-
Sensor (Index) Removal
222
-
Sensor (Toner Density) Removal
222
-
Sensor (Paper Present) Removal
224
-
Sensor (Trailing Edge) Removal
226
-
Paper Present Sensor Flag Removal
228
-
Pick Roller Assembly Removal
230
-
Pick/Lift Motor Gearbox Removal
232
-
-
Rear Door and Cover Removal
234
-
Sensor (bin Full) Removal
235
-
Redrive Assembly Removal
236
-
Redrive Gear Plate Removal
237
-
-
Optional 250/550-Sheet Tray Removals
242
-
Separator Roller Assembly Removal
242
-
-
-
-
Printer Configurations
245
-
Printer Roller Locations
247
-
Printer Sensor Locations
249
-
Controller Board Connectors
250
-
-
-
Scheduled Maintenance
255
-
Resetting the Maintenance Counter
256
-
Cleaning the Printhead Lenses
257
-
-
Assembly 2: Control Panel
261
-
Assembly 3: Electronics 1
263
-
Assembly 4: Electronics 2
265
-
Assembly 5: Electronics 3
267
-
Assembly 6: Electronics 4
269
-
Assembly 7: Paper Transport 1
271
-
Assembly 8: Paper Transport 2
273
-
Assembly 9: MPF and Standard Tray
275
-
Assembly 10: Optional Trays
277
-
Assembly 11: Maintenance Kits
279
-
Assembly 12: Miscellaneous
281
-
Printer Specifications
283
-
-
Product Power Consumption
283
-
-
Selecting a Location for the Printer
284
-
Noise Emission Levels
285
-
Temperature Information
286
-
-
-
Available Internal Options
287
-
Input/Output Configurations and Capacities
287
-
-
-
Print Cycle Operation
289
-
-
Printer Paper Path Sensors
299
Advertisement
Lexmark MS421 User Manual (140 pages)
Brand: Lexmark
|
Category: Printer
|
Size: 8.77 MB
Table of Contents
-
Safety Information
5
-
Learning about the Printer
8
-
Finding Information about the Printer
8
-
Selecting a Location for the Printer
9
-
Printer Configurations
11
-
Using the Control Panel
12
-
Understanding the Status of the Power Button and Indicator Light
13
-
-
Loading Paper and Specialty Media
14
-
Setting the Size and Type of the Specialty Media
14
-
Configuring Universal Paper Settings
14
-
Loading the Multipurpose Feeder
16
-
-
-
Supported Paper Weights
20
-
-
Printing from a Computer
21
-
Printing from a Mobile Device
21
-
Printing a Font Sample List
22
-
-
Understanding the Printer Menus
23
-
Printing the Menu Settings Page
52
-
-
Locating the Security Slot
53
-
Erasing Printer Memory
53
-
Restoring Factory Default Settings
54
-
Statement of Volatility
54
-
-
Maintaining the Printer
55
-
Ordering Parts and Supplies
57
-
Replacing Parts and Supplies
60
-
Saving Energy and Paper
71
-
-
Identifying Jam Locations
75
-
Paper Jam in the Rear Door
79
-
Paper Jam in the Standard bin
80
-
Paper Jam in the Duplex Unit
81
-
Paper Jam in the Multipurpose Feeder
82
-
-
Network Connection Problems
84
-
Contacting Customer Support
117
-
-
Upgrading and Migrating
118
Advertisement
Related Products
-
Lexmark MS410d
-
Lexmark MS410dn
-
Lexmark MS417
-
Lexmark MS431
-
Lexmark MS439
-
Lexmark MS417dn
-
Lexmark MS421DN
-
Lexmark MS421DW
-
Lexmark MS719
-
Lexmark MS81x
Lexmark Categories
![]()
Printer
![]()
All in One Printer
Printer Accessories
Software
Print Server
More Lexmark Manuals

PDF инструкция · 140 страниц(ы) английский
инструкцияLexmark MS421
B2338, B2442, M1242, MS321,
User’s Guide
April 2018 www.lexmark.com
Machine type(s):
4600
Model(s):
230, 238, 430, 438, 490
Посмотреть инструкция для Lexmark MS421 бесплатно. Руководство относится к категории Принтеры, 1 человек(а) дали ему среднюю оценку 7.5. Руководство доступно на следующих языках: английский. У вас есть вопрос о Lexmark MS421 или вам нужна помощь? Задайте свой вопрос здесь
- Contents
- Safety information
- Learning about the printer
- Loading paper and specialty media
- Paper support
- Printing
- Understanding the printer menus
- Securing the printer
- Maintaining the printer
- Clearing jams
- Troubleshooting
- Upgrading and migrating
- Notices
- Index
Главная
| Lexmark | |
| MS421 | MS421DN | |
| Принтер | |
| 0734646635974, 0734646659161, 0734646659178, 0734646662567, 0818243126063, 0995478356837, 0997966583527, 4973153197421, 4973163104822, 0734646643542 | |
| английский | |
| Руководство пользователя (PDF), Инструкция/сборка (PDF) |
Не можете найти ответ на свой вопрос в руководстве? Вы можете найти ответ на свой вопрос ниже, в разделе часто задаваемых вопросов о Lexmark MS421.
Как удалить замятую бумагу из принтера?
Почему после установки оригинального картриджа принтер не работает?
Чем обусловлено плохое качество печати?
В чем разница между лазерным и струйным принтером?
Почему при печати на струйном принтере появляются черные полосы?
Что означает аббревиатура DPI?
Инструкция Lexmark MS421 доступно в русский?
Не нашли свой вопрос? Задайте свой вопрос здесь
|
Код: 140367 Извините, товара сейчас нет в наличии Бесплатная доставка Извините, товара сейчас нет в наличии Сравнить Новости интернет-магазина «Лаукар»:28.03.2023 22.02.2023 13.02.2023 Дополнительная информация в категории Принтер:Таблица Авторизованных сервисных центров по брендам. Описание Инструкция Отзывы (0) В интернет-магазине бытовой техники «Лаукар» Вы можете скачать инструкцию к товару Принтер Lexmark MS421dn совершенно бесплатно. Все инструкции, представленные на сайте интернет-магазина бытовой техники «Лаукар», предоставляются производителем товара. Для того чтобы скачать инструкцию, Вам необходимо нажать на ссылку «скачать инструкцию», расположенную ниже, а в случае, если ссылки нет, Скачать инструкцию Смотреть инструкцию
Фирма-производитель оставляет за собой право на внесение изменений в конструкцию, дизайн и комплектацию товара: Принтер Lexmark MS421dn. Пожалуйста, сверяйте информацию о товаре с информацией на |


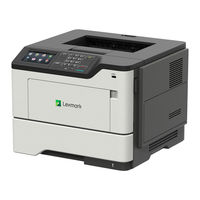
MS320/MS420 Series
Reliability. Security. Productivity.
MS421dw with optional tray

Lexmark MS320/MS420 Series
Strike the perfect balance of performance and affordability in small-workgroup mono printing with standard two-sided output, enhanced security and built-in durability. The Lexmark MS320/420 Series’ multi-core processor supports output at up to 40 pages per minute*, whilst long-lasting printing components reduce downtime. You can connect via standard USB or gigabit ethernet — plus Wi-Fi on the MS421dw.
Get more done
}} Tackle your printing workload with the power of a 1-GHz dual-core processor and 512 MB of memory.
}} Get up to 40-page-per-minute printing (MS421dn, MS421dw) or 36-page-per-minute printing (MS321dn).
}} Two-line LCD lets you configure, interact and monitor vital system information.
}} Use media sizes from A6 to legal via the paper tray, plus smaller media and envelopes via the 100-sheet multipurpose feeder.
Robust, built-in security
}} Lexmark’s full-spectrum security architecture helps keep your information safe — on the document, the device, over the network, and everywhere in between.
}} A range of embedded features harden device against attacks, such as Confidential Print, Audit logging and much more.
}} Standard Confidential Print feature (on MS421dn and
MS421dw) helps ensure output security via simple PIN.
}} Keypoint Intelligence — Buyers Lab honoured Lexmark with a prestigious BLI PaceSetter award for Document Imaging Security***.
Ready when you are
}} Long-life fuser and imaging components extend uptime.
}} Unison™ Toner replacement cartridges deliver up to 20,000 pages** of high-quality printing.
}} Maximum input capacity of 900 pages means fewer interruptions.
}} Durable metal frame is designed for longevity.
Built for planet earth
}} Energy management features reduce power consumption in active use or sleep mode.
}} Standard two-sided printing saves paper.
}} Use of post-consumer recycled content in manufacturing saves natural resources.
}} Device is rated EPEAT® Silver and ENERGY STAR® certified.
}} Recycle cartridges through the award-winning Lexmark Cartridge Collection Programme (LCCP).
*Print and copy speeds measured in accordance with ISO/IEC 24734 and ISO/IEC 24735 respectively (ESAT). For more information see: www.lexmark.com/ISOspeeds. **Average standard page yield value declared in accordance with ISO/IEC 19752.
***Award based on Western Europe data
 lexmark.co.uk
View the manual for the Lexmark MS421dw here, for free. This manual comes under the category printers and has been rated by 1 people with an average of a 5.2. This manual is available in the following languages: English. Do you have a question about the Lexmark MS421dw or do you need help? Ask your question here
Can’t find the answer to your question in the manual? You may find the answer to your question in the FAQs about the Lexmark MS421dw below.
What is the weight of the Lexmark MS421dw?
The Lexmark MS421dw has a weight of 14000 g.
What is the best way to remove jammed paper from my printer?
It is best to gently pull the paper out of the printer. Turn the printer off, and make sure that the printhead is not hanging over the paper and that no paper remains in the printer.
How come my printer does not accept original cartridges?
Non-genuine cartridges may not be recognised by the printer. In that case you will receive a message that the cartridge is empty. The manual of the purchased cartridge usually contains the solution, if this does not work, it is advisable to contact the seller.
How come my prints are of poor quality?
There can be various reasons for poor print quality. Check if the cartridges or toners are full. If so, inkjet printers often require cleaning the printer, the cartridges have dried out, or the print head is broken. With laser printers, calibrating the laser printer is recommended.
What is the difference between a laser printer and an inkjet printer?
A laser printer prints with a toner and an inkjet printer prints with ink.
How come my inkjet printer has black stripes?
In most cases, the inkjet printer cartridge is broken and the cartridge needs to be replaced.
What does DPI stand for?
DPI stands for Dots Per Inch and is the number of ink droplets (per inch) that end up on the paper when printing.
What certifications does the Lexmark MS421dw have?
The Lexmark MS421dw has the following certifications: ICES-003 Class B, BSMI Class B, VCCI Class B, US FDA, UL 60950-1, FCC Class B, cUL CAN/CSA-C22.2 60950-1, NOM, CB EN/IEC 60950-1, CB EN/IEC 60825-1, CE DoC (EN 62301 Class B, EN 62311, CE EN/IEC 60950-1, CE EN/IEC 60825-1, EN 61000-3, EN 55022 Class B, EuP, EN 55024, UL), EFTA (CE), KCC, CCC, CECP, CEL, C-tick DoC, UL-AR, KC mark, UL GS mark, EC 1275, MET-I, ISO 532B, ECMA-370, TED, GOST-R, SII, TER.
How many cartridges can be placed in the Lexmark MS421dw?
1 cartridges can be placed in the Lexmark MS421dw.
What is the height of the Lexmark MS421dw?
The Lexmark MS421dw has a height of 260 mm.
What is the width of the Lexmark MS421dw?
The Lexmark MS421dw has a width of 399 mm.
What is the depth of the Lexmark MS421dw?
The Lexmark MS421dw has a depth of 374 mm.
Is the manual of the Lexmark MS421dw available in English?
Yes, the manual of the Lexmark MS421dw is available in English .
Is your question not listed? Ask your question here