-
Contents
-
Table of Contents
-
Troubleshooting
-
Bookmarks
Quick Links
Related Manuals for Polaris Widetrak LX
Summary of Contents for Polaris Widetrak LX
-
Page 3
Read, understand, and follow all of the instructions and safety precautions in this manual and on all product labels. Failure to follow the safety precautions could result in serious injury or death. The engine exhaust from this product contains chemicals known to the State of California to cause cancer, birth defects or other reproductive harm. -
Page 4
• RANGER utility vehicles • Victory motorcycles We believe Polaris sets a standard of excellence for all utility and recre- ational vehicles manufactured in the world today. Many years of experi- ence have gone into the engineering, design, and development of your Polaris vehicle, making it the finest machine we’ve ever produced. -
Page 5
POLARIS and POLARIS THE WAY OUT are registered trademarks of Polaris Indus- tries Inc. Copyright 2008 Polaris Sales Inc. All information contained within this publication is based on the latest product information at the time of publication. Due to constant… -
Page 6: Table Of Contents
Polaris Products….. . . 105 Suspension Troubleshooting … . 106 Troubleshooting .
-
Page 7: Introduction
INTRODUCTION Important Notes for Owners and Drivers After reading this manual, store it in the snowmobile for convenient ref- erence. It should remain with the snowmobile when the snowmobile is sold. When teaching inexperienced operators to ride, set up a predetermined course for practice.
-
Page 8: Preservation Of The Environment
Polaris snowmobiles are engineered to conform to these SAE standards. Our muffler systems are designed to reduce noise levels and must not be altered or removed. The sound of your snowmobile may not be welcome to non-snowmobilers, so you have a responsibility to operate your snowmobile with concern for others.
-
Page 9: Vehicle Identification Numbers
Remove the spare key and store it in a safe place. Your key can be duplicated only by mating a Polaris key blank with one of your existing keys, so if both keys are lost, the ignition switch must be replaced.
-
Page 10: Safety
Operator Safety The following signal words and symbols appear throughout this manual and on your vehicle. Your safety is involved when these words and sym- bols are used. Become familiar with their meanings before reading the manual. The safety alert symbol indicates a potential personal injury hazard. WARNING A WARNING indicates a hazardous situation which, if not avoided, may result in death or serious injury.
-
Page 11: Operator Safety
All Polaris snowmobiles are designed and tested to provide safe operation when used as directed. Failure of critical machine components may result from operation with any modifications, especially those that increase speed or power.
-
Page 12
Operator Safety Stay Clear of Track Your snowmobile is propelled by a revolving track that must be partially exposed for proper operation. Stay Clear of Engine Never attempt adjustments with the engine running. Turn off the igni- tion, raise the hood, make the adjustment, secure shields and guards, secure the hood, and then restart the engine to check its operation. -
Page 13: Survival Preparation
Operator Safety Survival Preparation For your safety, always ride in a group of other snowmobilers. Always tell someone where you’re going and how long you expect to be gone. If it isn’t possible to ride with others, and you must travel into remote areas, always carry survival equipment that’s appropriate to the condi- tions you may encounter.
-
Page 14: Riding Apparel
Eye Protection Do not depend on eyeglasses or sunglasses for eye protection. When- ever riding a Polaris vehicle, always wear shatterproof goggles or use a shatterproof helmet face shield. Polaris recommends wearing approved Personal Protective Equipment (PPE) bearing markings such as VESC 8, V-8, Z87.1, or CE.
-
Page 15: Disabled Operators
A decal on the console of these models indicates single rider operation. Driving 2-Up — Some Polaris snowmobiles are designed for up to two riders. A decal on the hood of these models indicates that the vehicle is designed for one operator and one passenger only.
-
Page 16: Excessive Speed
Excessive Speed High speed driving, especially at night, could result in serious personal injury or death. Always reduce speed when driving at night or in inclement weather. Observe all state and local laws governing snowmobile operation. They’ve been established for your protection. Always be alert and pay attention to the trail ahead.
-
Page 17: Driver Awareness
SAFETY Operator Safety Driver Awareness Slow down when traveling near poles, posts, or other obstacles. Be especially alert if you’re snowmobiling after dark. Always be on the alert for wire fences. Single strands are especially dangerous, since there may be a great distance between posts.
-
Page 18
Operator Safety Avalanches Snowmobilers should always be properly trained and equipped before traveling in mountainous terrain: • Take an avalanche class • Travel with experienced people • Travel on designated trails • Make sure each person is equipped with a shovel, probe and avalanche beacon. -
Page 19: Ice And Snow Build-Up
SAFETY Operator Safety Ice and Snow Build-up Ice and snow build-up may interfere with the steering of your machine, result- ing in serious injury or death. Keep the underhood area free of snow and ice. Before driving, manually turn the skis to the left and right to be sure ice and snow are not interfering with full left and right steering.
-
Page 20: Driving In Hilly Terrain
Operator Safety Driving in Hilly Terrain Climbing a hill or crossing the face of a slope may result in loss of balance and machine roll-over, causing serious injury or death. Use caution and good judgement when driving in hilly terrain. Operating in hilly terrain requires extreme caution to maintain balance and avoid roll-over.
-
Page 21: Driving Downhill
SAFETY Operator Safety Driving Downhill When riding downhill, shift your weight to the rear of the machine and reduce your speed to a minimum. Apply just enough throttle to keep the clutch engaged, allowing the engine’s compression to help slow the machine and keep it from rolling freely downhill.
-
Page 22: Intake Silencer
SAFETY Operator Safety Intake Silencer Do not operate the engine with the intake silencer or filter removed. Damage to the engine may occur if the intake silencer or filter are removed. Clutches Do not attempt to service the clutches. All clutch service must be performed by your dealer. The clutch is a complex mechanism that rotates at high speeds.
-
Page 23: Inadequate Snow Conditions
Operator Safety Inadequate Snow Conditions Do not drive for prolonged periods on blacktop, gravel, or ice. Doing so could cause irreversible track damage and lead to serious injury. Since snow provides the only lubrication for the power slide suspension and, on liquid cooled models, cooling for the engine, adequate snow cover is a requirement for operation of your machine.
-
Page 24: Driving Responsibly
Operator Safety Driving Responsibly Every snowmobile handles differently, and even the most docile condi- tions may become dangerous if operators drive improperly. If you’re new to snowmobiling, acquaint yourself with the machine and with what it will and won’t do under various conditions. Even seasoned driv- ers should spend some time getting the feel for a machine before attempting ambitious maneuvers.
-
Page 25
Operator Safety Windchill/Temperature Charts The following information is provided to help you determine when tem- peratures become dangerous for riding. WIND CHILL CHART (°F) Wind Speed Calm Frostbite in >> 30 min. WIND CHILL CHART (°C) Wind Speed Calm -10 -13 -17 -21 -24 -28 -32 -36 -39 -43 -47 -50 -54 -58 -62 -11 -15 -19 -22 -26 -30 -34 -38 -42 -45 -49 -53 -57 -61 -65 -12 -16 -20 -24 -28 -32 -36 -39 -43 -47 -51 -55 -59 -63 -67 -13 -17 -21 -25 -29 -33 -37 -41 -45 -49 -53 -57 -61 -65 -69… -
Page 26: Clutch Cover Warning
If any decal becomes illegible or comes off, contact your Polaris dealer to purchase a replacement. Replacement safety decals are provided by Polaris at no charge.
-
Page 27: Safety Decals And Locations
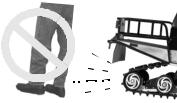
Stay clear of track. Do not sit on seat back. Entanglement with the track or a fall from seat back may result in severe injury or death. Reverse Warning Polaris Widetrak snowmobile is equipped with standard reverse. The reverse warning decal is located above the instrument hous- ing.
-
Page 28: Operation Warning
Safety Decals and Locations Operation Warning An operation warning decal is present on the console of all Polaris snowmobiles: WARNING • To avoid serious injury or death, read and understand all warnings and the Owner’s Manual before operation. If manual is missing, con- tact a Polaris dealer for a replacement.
-
Page 29: Features And Controls
FEATURES AND CONTROLS GeneralRepresentation 1. Fuel Filler Cap (may include a fuel gauge) 2. Ignition Switch 3. Brake Lever 4. Speedometer (may include indicator/warning lights) 5. Reverse Indicator 6. Mountain Bar 7. Engine Stop Switch (see page 54) 8. Throttle Control 9.
-
Page 30: Fuel Valve
Some Polaris snowmobiles are equipped with special features. Controls for these features are illustrated on this page. Not all models come with these features. Refer to your Owner’s Manual Supplement. NOTE: Accessories are available from your Polaris dealer. 1. Headlight Dimmer Switch 2.
-
Page 31
FEATURES AND CONTROLS 1. Hood 2. Headlight 3. Windshield 4. Handlebar 5. Operator Seat 6. Passenger Hand Hold Strap 7. Cargo Rack 8. Taillights 9. Snow Flap 10. Track 11. Suspension 12. Trailing Arm 13. Nosepan 14. Front Bumper (do not use for pulling or dragging the snowmobile) 15. -
Page 32
Backrest The backrest is adjust- able for either operator or passenger use. 1. Loosen the upper adjustment knobs to raise or lower the backrest. 2. Loosen the lower adjustment knobs to move the back- rest forward for operator use or rearward for pas- senger use. -
Page 33: The Perfect Fit
THE PERFECT FIT Front Suspension Adjustments Break in the suspension for approximately 150 miles (240 km) and re- grease all suspension parts before making any fine-tuning adjustments. Settings will vary from rider to rider, depending on rider weight, vehicle speed, riding style, and trail conditions. We recommend starting with factory settings and then customizing each adjustment individually to suit rider preference.
-
Page 34: Shock Components
Front Suspension Adjustments Always verify ski alignment before making adjustments to the IFS. See page 94 to check alignment. If the skis are misaligned, see your dealer, as the camber adjustment may also be affected. The tension at which the shock coil spring is set is called spring preload. For the best ride, the spring preload should be set as low as possible to use the full travel of the ski shock, with occasional light bottoming.
-
Page 35: Shock Spring Preload
Special tools are required to adjust front springs. If you feel that your front suspension needs adjustment see your Polaris dealer for more information. Front Shock Washers…
-
Page 36: Suspension Performance Tips
Bogie wheel kits are available from your dealer. • Polaris offers track kits for improved flotation in deep snow. See your dealer for assistance. NOTE: Keep the suspension pivot points lubricated. This will reduce moisture and rust build-up and ensure proper function of the suspension components.
-
Page 37
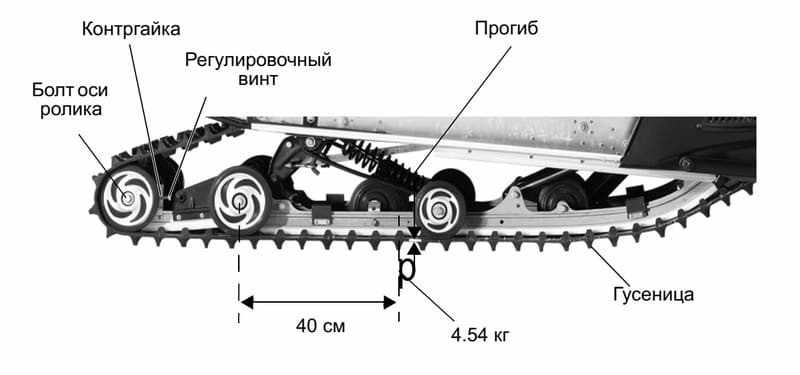
THE PERFECT FIT WideTrak Rear Suspension Adjustments Rear Spring Settings Rear spring adjustment is primarily a control for riding comfort. To check for the recommended settings: 1. Lift the rear of the machine to relieve the rear springs. 2. Slowly lower the machine and measure the distance between the ground and the running board. -
Page 38: Handlebar Adjustments
Handlebar Adjustments Standard Handlebar Follow these steps to adjust handlebar angle at the handlebar block. 1. Remove the mountain bar by removing nuts. 2. Using a 7/16-inch wrench, loosen the four nuts on the bottom of the adjuster block (turn the handlebar either left or right for access to the rear nuts).
-
Page 39: Traction Products
THE PERFECT FIT Traction Products nCarbide Skags A skag is a replaceable bar attached to the underside of the ski to assist in turning the snowmobile and to prevent ski wear caused by contact with roads and other bare terrain. Inspect skags frequently.
-
Page 40
Accessories Polaris offers a wide range of accessories for your snowmobile. From map light to electric start, Polaris has the accessories that will help make each ride more enjoyable. See your dealer for a list of accessories. Use only Polaris parts and accessories on your Polaris snowmobile. Use of unapproved parts and accessories may result in: •… -
Page 41: Pre-Ride Inspections
PRE-RIDE INSPECTIONS Pre-Ride Checklist Inspect all items on the checklist for proper operation or condition before each use of the snowmobile. Procedures are outlined on the refer- enced pages. Look for a checkmark ( locate the pre-ride inspection items Drive Belt Condition Steering System Recoil Rope Parking Brake Lock/Brake Lever/…
-
Page 42: Before Starting The Engine
Before Starting the Engine Before starting the engine, always refer to all safety warnings pertaining to snowmobile operation. Never start the engine without checking all vehicle components to be sure of proper operation. Operating the vehicle with worn, damaged, or malfunctioning components could result in serious injury or death.
-
Page 43: Hydraulic Brakes
See pages 78-79 or see your dealer for service. Replace brake fluid at least every two years. We recommend the use of Polaris DOT 4 high temperature brake fluid. See page 105 for the part numbers of Polaris products.
-
Page 44: Parking Brake Lever Lock
Before Starting the Engine n Parking Brake Lever Lock Your snowmobile may have a parking brake lever lock located over the brake lever. Use the brake lever lock only when you want the machine to remain sta- tionary; for example, when parked on an incline for a period of five minutes or less.
-
Page 45
Before Starting the Engine n Steering System Manually turn the skis completely to the right and to the left. If any dif- ficulty is encountered, check for ice and snow build-up that may be obstructing the steering linkage. Make sure all greasable components are properly lubricated. -
Page 46: Hood Latches
Inspect the recoil rope and handle for excessive wear, and make sure the knot securing the rope inside the handle is secure. If excessive wear is found, see your Polaris dealer for replacement. n Transmission Make sure the transmission is not in reverse before starting the engine…
-
Page 47
Start the Engine and Check Engine Stop Switch Check the auxiliary shut-off switch for proper operation. Push the switch down to stop the engine. Pull it up to allow restarting. Lighting Check the headlight (high and low beam), taillight, and brake light. Replace burned out lamps before operating. -
Page 48: Starting The Engine
Starting the Engine NOTICE: Engaging the starter when the engine is running WILL result in serious engine damage, especially if the transmission is in reverse. Never engage the starter when the engine is running. 1. Turn the fuel valve on. See page 27.
-
Page 49: Operation
Premix the first tank of gasoline with one pint of Polaris injection oil for each five gallons of fuel. This, in addition to the lubrication supplied by the injec- tion system, will assure proper engine break-in.
-
Page 50: Oil Injection System
This snowmobile is equipped with a variable exhaust system (VES). Engine lubrication comes from oil added to the fuel and oil injection systems. Polaris recommends the use of VES II 2 Cycle Oil for this engine. See page 105 for the part numbers of Polaris products.
-
Page 51
OPERATION Track Warm-Up A loose track or flying debris could cause serious personal injury or death. Stand clear of the front of the machine and the moving track. Never hold the snowmobile up or stand behind it while warming up the track. Do not use excessive throttle during warm-up or when the track is free-hanging. -
Page 52
Operate this vehicle only outdoors or in well-ventilated areas. Your Polaris engine is designed to run on 87 octane non-oxygenated or 89 octane oxygenated pump gasoline. There’s a great deal of variability in the quality of the 87 octane gasoline available, so we encourage the use of premium fuel when possible. -
Page 53: Fuel System Deicers
RES. Fuel System Deicers If you use non-oxygenated fuel, Polaris recommends the regular use of isopropyl-based fuel system deicer. Add one to two ounces per gallon (8-16 milliliters per liter) of gasoline to prevent engine damage resulting from fuel system icing and lean fuel mixtures.
-
Page 54: Low Oil Indicator Light
They may also be incompatible and the result could be sludge formation, filter blockage, and reduced cold weather flow rates. All Polaris oils are compatible with each other. Always maintain the oil level above the tank’s low level line. This is especially important when the machine is operated in mountainous ter- rain.
-
Page 55: Low Oil Level
U.S. quart of recommended oil to the tank. See page 47 for oil recommendations. The Polaris oil cap on the oil tank may be vented to allow proper oil flow. See your Polaris dealer for recommended replacement parts.
-
Page 56: Jetting Guidelines
Carburetion Jetting Guidelines Changes in altitude and temperature affect air density, which is the amount of oxygen available for combustion. In low elevations and cold temperatures, the air has more oxygen. In higher elevations and higher temperatures, the air is less dense. RMK carburetors are preset to operate at altitudes of 6000-8000 feet (1800-2400 m) above sea level (see page 74 for more information).
-
Page 57: Engine Stop Switch
OPERATION Engine Stop Switch Push down on the engine stop switch to stop the engine in an emergency. This will ground out the ignition and bring the engine to a quick stop. To restart the engine, the switch must be pulled up to the ON position.
-
Page 58
When these switches are disconnected, the ignition key switch must be used to shut off the engine. DO NOT continue to operate the machine with the throttle safety switch disconnected. Return the machine to an authorized Polaris dealer for service as soon as possible. WARNING OPERATION… -
Page 59: Emergency Stopping
OPERATION Emergency Stopping The following chart lists methods for stopping the snowmobile in the event of an emergency. Refer to page 54 for more information about the engine stop switch and throttle safety switch. SYSTEM Ignition Switch Brake Choke Engine Stop Switch Throttle Safety Switch Excessive or repetitive use of brakes for high speed stops will cause an over- heated brake system.
-
Page 60: Emergency Starting
Emergency Starting Your machine is equipped with a tool kit containing essential tools for emergency use. Snowmobiles equipped with electric start have a recoil for emergency starting. If the recoil starter system fails, an emergency start strap is provided in the kit. Reverse Operation Improper reverse operation, even at low speeds, may cause loss of control, resulting in serious injury or death.
-
Page 61
OPERATION Towing Do not use the front bumper to pull or drag the snowmobile. The front bumper is not designed for this type of use and may detach from the vehicle if force is applied. For your safety, do not attempt to using the tow hitch until you’ve read the following warnings and understand the proper hitch functions. -
Page 62: Maintenance
MAINTENANCE Emission Control Information Any qualified repair shop or qualified person may maintain, replace, or repair the emission control devices or systems on your snowmobile. Emission Control Label Your snowmobile is equipped at the time of sale with an emission con- trol information (ECI) label and a factory-installed emissions informa- tion hangtag.
-
Page 63: Emission Control Information
Please read the Snowmobile Engine Emissions Limited Warranty, and read the maintenance section of your owner’s manual. You are responsi- ble for ensuring that the specified maintenance is performed. Polaris recommends that you contact an authorized Polaris dealer to perform…
-
Page 64
If you’re not familiar with safe service or adjustment procedures and the use of tools, or if you don’t feel comfort- able performing these tasks yourself, contact an authorized Polaris dealer for service. NOTICE: Hot components can cause damage to plastic. Always make sure the exhaust system and engine have cooled before tipping the snowmobile on its side for service or inspection. -
Page 65: Item See Page
The following chart is a guide based on average riding conditions. You may need to increase frequency based on riding conditions. When inspection reveals the need for replacement parts, always use genuine Polaris parts, available from your Polaris dealer. Item Clutch Offset Alignment…
-
Page 66: Brake System
Periodic Maintenance Interval Table Item Hose Routing Hose Condition Fluid Leaks Brake Pads Brake Disc Parking Brakes Brake System Brake fluid Pilot Air Screws Carburetor (synchronize) Idle RPM Throttle Lever Oil Pump Lever (synchronize) Throttle Cable Choke Cable Vent Lines Throttle Position Sensor Choke Fuel Filter…
-
Page 67: Auxiliary Shut-Off Switch
Periodic Maintenance Interval Table Item Auxiliary Shut-Off Switch Throttle Safety Switch Ignition Switch Taillight Brakelight Headlight Ski Toe Alignment Suspension Mounting Bolts Steering Fasteners Rear Suspension Fasteners Suspension Shock Oil Cooling Fins and Shroud Drive Shaft Bearings Jackshaft Bearings Skags (Wear Bars) Ski Saddle/Spindle Bolts Ski Pivots Ski Spindle…
-
Page 68: Rail Slide Condition
Periodic Maintenance Interval Table Item Rear Suspension Pivot Shafts Camber Alignment Radius Rod Bushings Handlebar Centering Track Alignment Track Tension Front Limiter Strap Rail Slide Condition Chaincase Oil Gearcase Oil I — Inspect (clean, adjust, tighten, lubricate, replace if necessary) C — Clean R — Replace Page…
-
Page 69
All-Season Grease at 500 miles (800 km) and annually or every 1000 miles (1600 km) thereafter. A grease gun kit, complete with grease and adaptors, is available to lubricate all fittings on Polaris snowmo- biles. See page 105 for the part numbers of Polaris products. -
Page 70
MAINTENANCE Lubrication Rear Suspension WideTrak Rear Suspension… -
Page 71: Throttle Cable
MAINTENANCE Lubrication Jackshaft Bearing The jackshaft bearing on your model may be equipped with a grease fit- ting, but this component is greased for life at the factory. Additional lubrication is not required. Driveshaft Bearing Inject grease into the fitting on the speedometer drive adaptor until grease purges from inside or outside the bearing seal (approximately two…
-
Page 72: Gearcase Oil Level
Clean the magnetic plug (2) every 500 miles (800 km) and whenever checking or changing lubricant. NOTICE: Mixing brands or using non-recommended lubricants could result in excessive wear to chain, sprockets and bearings. Always use Polaris-recommended products for your vehicle. MAINTENANCE…
-
Page 73: Spark Plugs
Owner’s Manual Supplement. • Spark plug torque is 18-22 ft. lbs. (24.4-29.8 Nm). • Always carry spare spark plugs in case of an emergency. NOTICE: Using non-recommended spark plugs can result in serious engine damage. Always use Polaris-recommended spark plugs.
-
Page 74
Spark Plugs Spark plug condition is indicative of engine operation. The spark plug firing end condition should be read after the engine has been warmed up and the vehicle has been driven at higher speeds. Immediately check the spark plug for correct color. A hot exhaust system and engine can cause serious burns. -
Page 75: Intake Filter
Intake Filter The intake foam filter and screen limits snow ingestion into the intake system. When operating in loose powder snow, check the top of the foam filter and screen periodically to remove any accumulation of snow. NOTICE: Operating the snowmobile with the intake filters removed may cause carburetor icing.
-
Page 76
Carburetor Water/Sediment Trap Service Most Polaris snowmobiles contain patented carburetor bowl water/sedi- ment traps located at the bottom of each carburetor. The trap, consisting of a hose with a plug, should be drained about every 1000 miles (1600 km) and inspected for contamination. -
Page 77: Carburetor Adjustments
It’s your dealer’s responsibility to make sure the correct main jet is installed. NOTICE: Operating the snowmobile with incorrect jetting can result in serious engine damage. Have your Polaris dealer perform all carburetor adjustments to ensure all adjustments are done correctly.
-
Page 78: Oil Filter
Fuel Filter/Fuel Lines The fuel filter is located inside the fuel tank. This component requires no maintenance. Inspect the fuel lines regularly for signs of deterioration or damage. Always check fuel line condition after periods of storage. Normal dete- rioration from weather and fuel compounds may occur. Replace worn or damaged fuel lines promptly.
-
Page 79: Exhaust System
MAINTENANCE Exhaust System Check the exhaust system for wear or damage at approximately 1000 miles (1600 km). To inspect, allow the engine and exhaust system to cool completely. Open the hood and inspect the muffler and pipes for cracks or damage. Check for weak or missing retaining springs or damper/support grommets.
-
Page 80: Brake Components
Brakes n Hydraulic Brake Inspection Inspect the brake lever reserve before each use of the snowmobile. See page 40. Brake pads must be replaced when the brake pad material becomes thin- ner than the backing plate (approximately 1/16 inch/1.5 mm). A kit is available for replacing brake pads.
-
Page 81: Brake Fluid
If the fluid is sufficient, the sight glass will be black. If the sight glass is any color other than black, add brake fluid. We recommend the use of Polaris DOT 4 high temperature brake fluid. See page 105 for the part numbers of Polaris products.
-
Page 82: Bleeding The Hydraulic Brake System
Brakes Bleeding the Hydraulic Brake System Air in the hydraulic brake system will cause spongy brake lever action. Bleed the system before operating the snowmobile. Operating the vehicle with a spongy brake lever can result in loss of brakes, which could cause an accident and lead to serious injury or death. Never operate the vehicle with a spongy-feeling brake lever.
-
Page 83: Headlight Adjustment
Lights Headlight Adjustment The headlight may be adjusted for vertical aim using the following pro- cedure: 1. Place the snowmobile on a level surface with the headlight approxi- mately 25 feet (7.6 m) from a wall. 2. Measure the distance from the floor to the center of the headlight and make a mark on the wall.
-
Page 84: Headlight Bulb Replacement
Lights NOTE: Avoid touching a halogen bulb with bare fingers. Oil from skin leaves a residue, causing a hot spot that will shorten the life of the lamp. If fingers do touch the bulb, clean it with an alcohol- moistened towel. Headlight Bulb Replacement 1.
-
Page 85: Clutch System
Polaris dealer. Any unauthorized modifications to clutches, such as adding or removing weights, will void the warranty. NOTICE: The bushings in the weights and rollers of Polaris clutches are made of a material that may be damaged if lubricated. Do not lubricate clutch bushings.
-
Page 86
Drive Belt Condition Belt width and length must match the center distance of the clutches and sheave width of the drive clutch. For this reason, Polaris recommends that only O.E.M. belts be used. Other belts may match the dimensions, but can drastically change the shift pattern, resulting in poor perfor- mance. -
Page 87: Drive Belt Removal
Clutch System Drive Belt Removal 1. Stop the engine after operating in a forward motion. 2. Turn the ignition key off. Wait for the engine to stop completely. 3. Lock the parking brake (if equipped). 4. Open the hood. 5. Remove the clutch guard retain- ing pin and open the clutch guard.
-
Page 88: Drive Belt Installation
Clutch System Drive Belt Installation 1. Drop the drive belt over the drive clutch and pull back the slack. NOTE: To ensure satisfactory belt life, install belts so they operate in the same direction of rota- tion by positioning the identification numbers so that you can read them.
-
Page 89: Drive Belt Deflection
MAINTENANCE Clutch System n Drive Belt Deflection Measure belt deflection with both clutches at rest and in their full neutral position. Place a straight edge on the belt (1) and apply downward pressure while measuring at point 2. This measurement should be 1 1/4 inches (32 mm).
-
Page 90: Tool Kit
A tool kit is included with each machine for emergency and routine maintenance. Always keep the tool kit with the snowmobile. Chain Tension Maintain the proper chain tension as outlined on page 76. Fall Tune-Up For maximum performance, arrange for a fall service tune-up with your Polaris dealer.
-
Page 91: Track Inspection
MAINTENANCE Track Track Inspection Broken track rods are a serious safety hazard. They can cause a rotating track to come off the machine, which could cause serious injury or death. Never operate with a damaged track. Never rotate a damaged track under power.
-
Page 92: Track Lubrication
Track Track Lubrication Operating with insufficient lubrication between the rail slide and track guide clips can cause track failure, loss of vehicle control and loss of braking ability, which can result in serious injury or death. Avoid operating for extended periods on ice and other surfaces that have lit- tle or no snow for lubrication.
-
Page 93: Track Tension
MAINTENANCE Track Moving parts can cut and crush body parts. When performing the checks and adjustments recommended on the following pages, stay clear of all moving parts. Never perform track measurement or adjustments with the engine run- ning. Track Tension Track adjustment is critical for proper handling.
-
Page 94
Track Track Tension f the track needs adjustment: 5. Loosen the rear idler shaft bolt. 6. Loosen the locknuts. 7. Tighten or loosen the track adjusting screws as necessary to pro- vide equal adjustment on both sides of the track. 8. -
Page 95
MAINTENANCE Track n Track Alignment Periodically check that the track is centered and running evenly on the slide rails. Misalignment will cause excessive wear to the track and slide rail. 1. Safely support the rear of the machine with the track off the ground. -
Page 96: Steering Inspection
MAINTENANCE Steering System Steering Inspection Each week, or before a long ride, check fasteners and tighten if neces- sary. Specific fasteners that should be checked are marked with a the illustration.
-
Page 97: Ski Alignment
Improper ski alignment or adjustment may cause loss of steering control, resulting in serious injury or death. Do not attempt to change the ski align- ment or camber adjustment. See your Polaris dealer. With the handlebars in a straight-ahead position, and with vehicle weight compressing the suspension, measure from the straight edge of the skis at the center of the ski mounting bolt.
-
Page 98: Ski Skags
Steering System n Ski Skags Worn skis and/or skags will adversely affect handling. Loss of vehicle control may result, causing serious injury or death. See your dealer’s studding chart for recommended skags. If you install longer or more aggressive carbide skags than the original equipment, it may also be necessary to add track studs to maintain proper vehicle control while turning on hard-packed snow or ice.
-
Page 99: Suspension Inspections
MAINTENANCE Suspension Maintenance n Rail Slide Wear For ease of inspection, all Polaris rail slides have a wear limit indicator groove to indicate the minimum per- missible slide thickness. Replace the rail slides if they are worn to the top of the groove at any point along their length.
-
Page 100: Battery Fluid
Battery Battery electrolyte is poisonous. It contains acid! Serious burns can result from contact with the skin, eyes, or clothing. If contact occurs, seek immedi- ate medical attention. KEEP OUT OF REACH OF CHILDREN. EXTERNAL: Flush with water. INTERNAL: Drink large quantities of water or milk. Call physician immedi- ately.
-
Page 101: Battery Removal
MAINTENANCE Battery Battery Connections Always keep battery terminals and connections free of corrosion. If cleaning is necessary, remove the corrosion with a stiff wire brush. Wash with a solution of one tablespoon baking soda and one cup water. Rinse well with tap water and dry off with clean shop towels. Coat the terminals with dielectric grease or petroleum jelly.
-
Page 102: Battery Installation
Battery Battery Installation Using a new battery that has not been fully charged can damage the bat- tery and result in a shorter life. It can also hinder vehicle performance. 1. Ensure that the battery is fully charged. 2. Place the battery in the battery holder. Attach the hold down strap. 3.
-
Page 103: Battery Storage
Battery Battery Storage When your snowmobile is placed in storage for one month or more (in summer or in winter): • Remove the battery. • Charge it to the proper level. • Store it in a cool dry place. • Check and/or charge monthly. •…
-
Page 104: Daily Storage
The track should be suspended approximately 4 inches (10 cm) off the ground. Remove the key and cover the machine. NOTE: Polaris has accessory covers and track stands available to fit all mod- els. See your dealer for more infor- mation.
-
Page 105: Cleaning And Preservation
MAINTENANCE Extended Storage Off-season or extended storage of your snowmobile requires preventive measures to aid against deterioration and to prolong the useful life of many components. Cleaning and Preservation Proper storage starts with cleaning, washing, and waxing the hood, chassis, and plastic parts. Wipe down remaining surfaces with a damp cloth.
-
Page 106: Controls And Linkage
(BDC), the lowest position in the cylinder. On twin cyl- inder models, the opposite piston will be up. 5. Pour approximately two ounces of Polaris injector oil into the spark plug hole. 6. Wait one to two minutes and perform steps 3 to 5 on remaining cyl- inders.
-
Page 107: Electrical Connections
Separate electrical connector blocks and clean corrosive build-up from connectors. Lubricate or pack connector blocks with dielectric grease and re-connect. See page 105 for the part numbers of Polaris products. Replace worn or frayed electrical wire and connectors. Be sure wiring harness is properly secured away from sharp edges, steering linkage, moving parts, and hot exhaust parts.
-
Page 108: Polaris Products
Additives / Miscellaneous 2871326 Carbon Clean Plus (12 oz.) 2870652 Fuel Stabilizer (16 oz.) 2872189 DOT4 Brake Fluid (12 oz.) 2872893 Engine Degreaser (12 oz.) 2870505 Isopropyl 2872889 Brake and Clutch Cleaner 2872890 Carb and Throttle Body Cleaner POLARIS PRODUCTS Description…
-
Page 109: Suspension Troubleshooting
SUSPENSION TROUBLESHOOTING Problem Rear suspension bot- • Verify sag dimension (see page 91). Adjust torsion spring toms too easily Rear suspension • Check for binding suspension components and grease all rides too stiff • Verify sag dimension (see page 91). Adjust torsion spring •…
-
Page 110: Troubleshooting
Belt Wear/Burn Troubleshooting Causes Driving at low RPM Insufficient warm-up Towing at low RPM Riding with high RPM and slow speed (8000 RPM/10 MPH) Ice and snow build-up between track and tunnel Poor engine performance Loading machines onto trailers Clutch malfunction Slow, easy clutch engagement Belt Wear/Burn Diagnosis…
-
Page 111
TROUBLESHOOTING Engine Troubleshooting NOTE: Unless you have experience and training in two-cycle engine repair, see your dealer if technical problems arise. Problem Probable Cause Erratic engine Drive clutch binding operating RPM during acceler- ation or load variations Driven clutch malfunction Harsh drive Drive belt worn or too clutch engage-… -
Page 112
Engine Troubleshooting Problem Probable Cause Noise in drive Broken drive clutch system components Bearing failure/ chain- case, jackshaft, or front drive shaft Drive belt surface flat spots Drive chain loose or worn, sprocket teeth broken Poor low RPM Worn drive belt performance Excessive belt/sheave clearance… -
Page 113
Check tank level and fill up with cor- rect fuel. • Ice in fuel line, filter, or pump. On the standard Polaris carburetor, the choke will not function with the throttle depressed. See second item under “Probable Cause” of “Engine contin- ually backfires”. -
Page 114: Warranty
Your dealer is also familiar with Polaris policies and procedures and will be happy to assist you. When contacting us about parts, service, or warranty, always provide the following information: 1.
-
Page 115
Polaris warranty will provide all dealerships with a monthly updated list of all stolen units to further monitor thefts. Polaris warranty will aid in notifying the proper owner when a unit is recovered… -
Page 116: Limited Warranty
WARRANTY Limited Warranty Polaris Sales Inc., 2100 Highway 55, Medina, MN 55340, provides a ONE YEAR LIM- ITED WARRANTY on all components of the Polaris snowmobile against defects in material or workmanship. This warranty covers the parts and labor charges for repair or replacement of defective parts that are covered by this warranty.
-
Page 117: Engine Oil
How to Obtain Warranty Service If your snowmobile requires warranty service, you must take it to a Polaris dealer autho- rized to repair Polaris snowmobiles. When requesting warranty service you must present your copy of the Warranty Registration form to the dealer. (The cost of transportation to and from the dealer is YOUR responsibility).
-
Page 118
In order to qualify for warranty, the product must have been properly set up and tested by a Polaris Dealer (if applicable). Failure of any dealer to perform the required vehicle Pre-Delivery Inspection, perform all applicable service bulletins and have the consumer sign the PDI form prior to delivery may void the warranty. -
Page 119
• Failures caused due to improper adjustments. • Failure due to unauthorized service. • Failures due to lack of service as required in the owner’s manual or Polaris updates. This includes off-season storage as listed in the owner’s manual. • Failure due to use of unauthorized parts or modifications. -
Page 120
If Purchased From A Private Party: If you purchase a Polaris product from a private citizen outside of the country in which the vehicle was originally purchased, all warranty coverage will be denied. -
Page 121
This snowmobile engine emissions limited warranty is in addition to the Polaris standard limited warranty for snowmobiles. Polaris Industries Inc. warrants that at the time it is first purchased, this emissions- certified snowmobile engine is designed, built and equipped so it conforms with U.S. -
Page 122
Polaris dealer to perform any service that may be necessary for your snow- mobile. Polaris also recommends that you use only Pure Polaris parts. It is a potential violation of the Clean Air Act if a part supplied by an aftermarket parts manufacturer reduces the effectiveness of the vehicle’s emission controls. -
Page 123: Maintenance Log
Present this section of your manual to your dealer each time your snow- mobile is serviced. This will provide you and future owners with an accurate log of maintenance and services performed on the snowmobile. DATE MILES (KM) 150 mi. (240 km) 500 mi.
-
Page 124
MAINTENANCE LOG DATE MILES TECHNICIAN SERVICE PERFORMED / COMMENTS (KM) -
Page 125
MAINTENANCE LOG DATE MILES TECHNICIAN SERVICE PERFORMED / COMMENTS (KM) -
Page 126
MAINTENANCE LOG DATE MILES TECHNICIAN SERVICE PERFORMED / COMMENTS (KM) -
Page 127: Index
Accessories ….37 Air Box Warning ….23 Air Pollution .
-
Page 128: Index
Periodic Maintenance Table ..62-65 Polaris Products ….105 Pre-Ride Checklist ….38 Pre-Ride Inspections .
-
Page 129
INDEX Throttle Lever ….39, 55 Throttle Safety Switch ..39, 54 Tool Kit ….. . 87 Torque Stop .
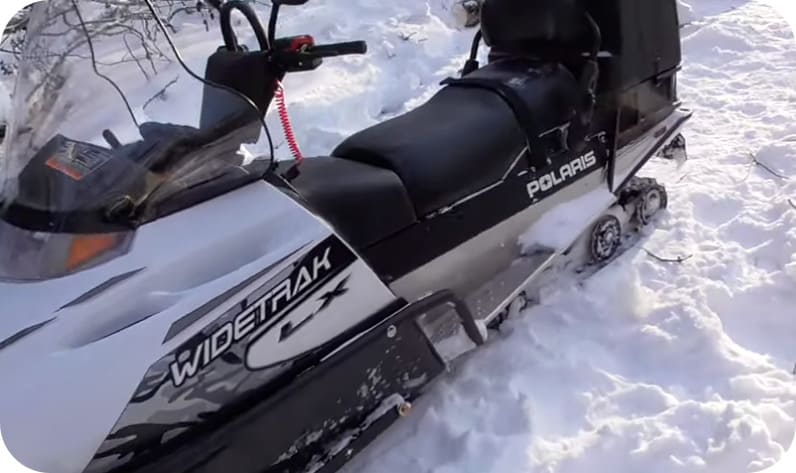
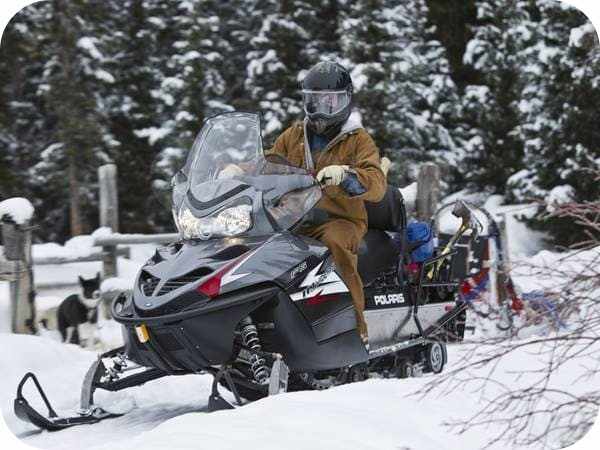
Американская машиностроительная компания Polaris известна на весь мир как производитель качественной мотовездеходной техники. Хотя с конвейера завода сходят мотоциклы и гидроциклы, основной специализацией все же являются снегоходы. Первый снегоход компании появился спустя два года после ее основания. Модель имела ошеломительный успех, поэтому производитель решил сосредоточить все свои силы именно на выпуске снегоходной техники.
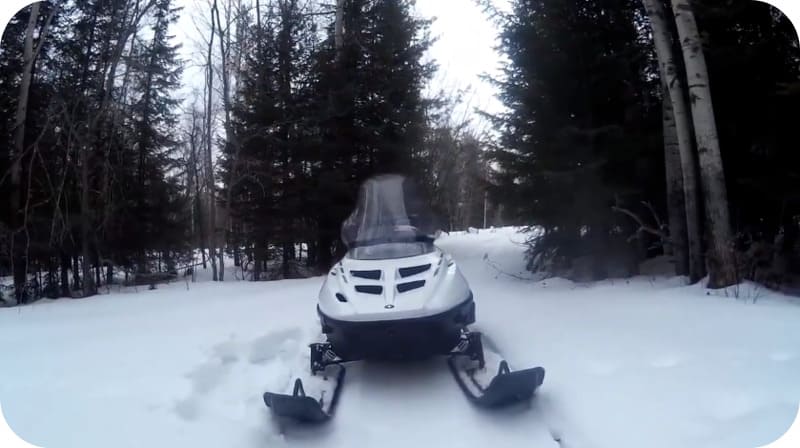
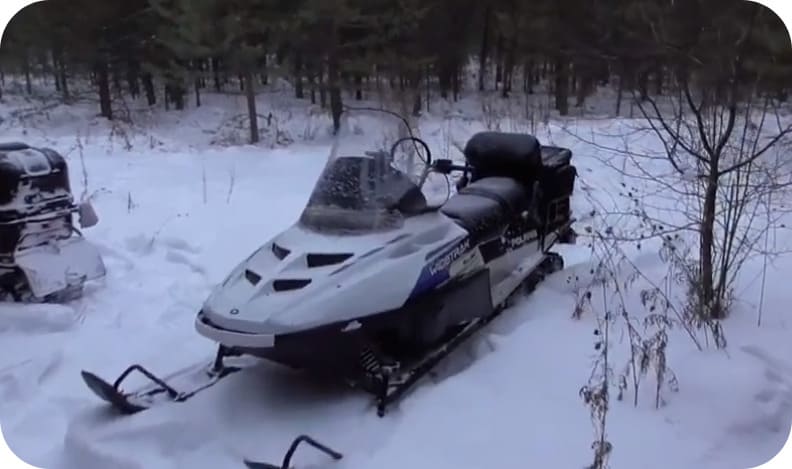
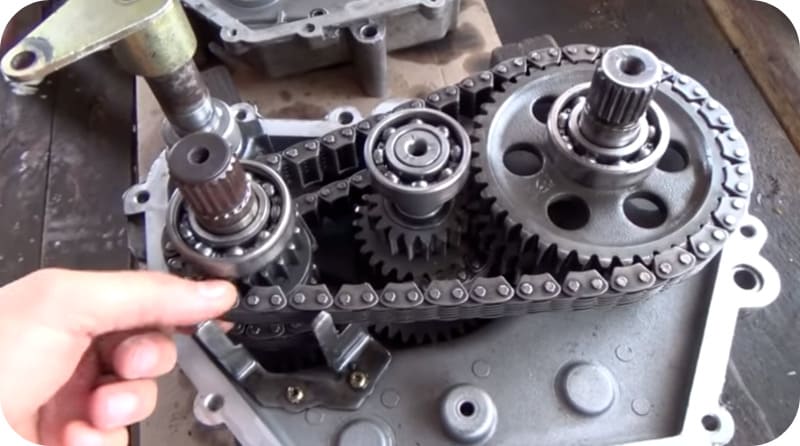
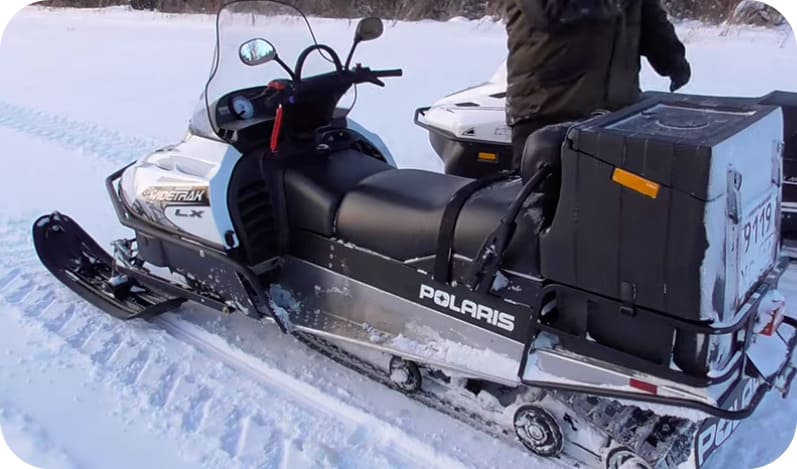
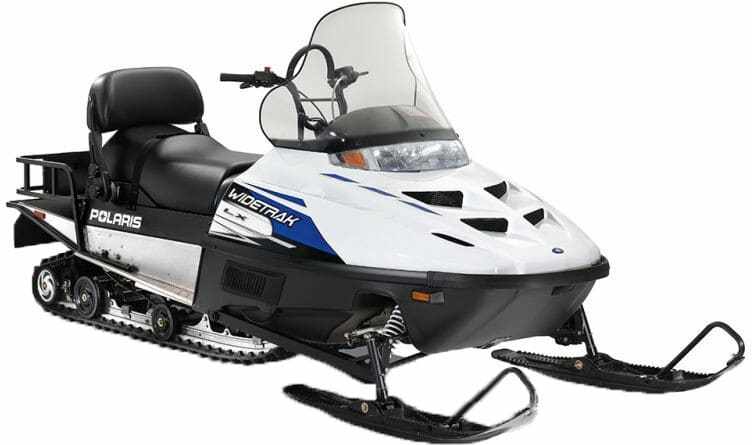
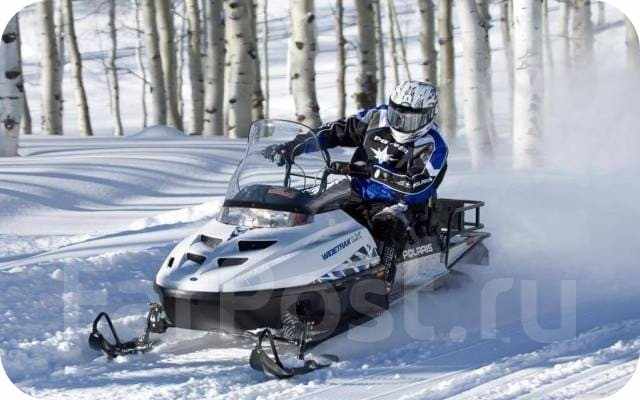
Снегоход «Поларис Вайдтрак 500» представляет классический утилитарный мотовездеход с широкой гусеницей. Модель отличает простота и надежность конструкции. Машина довольно маневренна, одинаково хорошо ведет себя как на укатанной трассе, так и на пухляке. Манера управления в чем-то схожа с вождением полноприводного автомобиля. Благодаря хорошим техническим характеристикам и надежности всех важных узлов, данный трак пользуется большой популярностью у жителей нашей страны.
Трак имеет особую конструкцию шасси, которая позволяет с легкостью передвигаться по глубокому снегу. Каждая модель линейки «Вайдтрак» отлично справляется с тяжелой работой. Однако вездеход вполне может выполнять функции туристического трака. Вездеход оснащен вместительным топливным баком, что позволяет ездить на большие расстояния и не тратить время на дозаправку. Комфорта добавляет регулируемая задняя подвеска, встроенный источник питания для подключения внешних приборов и обогрев рукояток.
Содержание
- Инструкция по эксплуатации
- Основные органы управления
- Регулировки
- Проверки перед поездкой
- Технические характеристики
- Размеры и вес
- Двигатель
- Трансмиссия
- Передняя и задняя подвеска
- Размеры гусеницы
- Топливная система
- Электроника
- Рекомендуемая цена
- Отзывы владельцев
Инструкция по эксплуатации
К каждому снегоходу прилагается руководство по использованью. Мануал «Полариса» содержит подробную информацию о техническом обслуживание основных элементов и узлов трака, правила безопасного вождения, а также указания по обкатке и дальнейшей эксплуатации. В конце инструкции расположен журнал ТО, данные о гарантийном обслуживании.
Основные органы управления
Все главные органы управления данным траком расположены на руле и контрольной панели.
Цифрами на рисунке обозначены следующие элементы:
- крышка бака;
- замок зажигания;
- тормозной рычаг;
- спидометр;
- контрольная лампочка включения реверса;
- специальный захват;
- кнопка экстренного выключения двигателя;
- рычаг газа;
- ручной стартер;
- кнопка обогатителя.
Регулировки
В данном мануале также помещены пошаговые рекомендации по регулировке следующих элементов:
- сидения;
- руля;
- передней и задней подвески;
- натяжения гусеницы;
- торсионных пружин.
Все инструкции дополнены понятными иллюстрациями. В разделе технического обслуживания производитель поместил руководство по ТО, которое должен проводить владелец снегохода, а также дополнительно указал операции, для выполнения которых следует обратиться в сервисный центр.
Проверки перед поездкой
Перед каждым выездом на вездеходе следует выполнять ряд обязательных процедур. Необходимо проверять:
- состояние ремня привода;
- руль;
- зажигание, ручной стартер;
- тормозную систему (включая стояночный и экстренный для остановки мотора);
- крепления (подвески, капота);
- натяжение и центровку гусеницы;
- работу светотехники;
- коньки лыж;
- рычаг дросселя;
- состояние сменных направляющих гусеницы.
Также необходимо проверять уровень моторного масла в коробке передач и в двигателе. В мануале в соответствующем разделе помещена таблица с перечнем основных операций. Рядом с каждым пунктом указаны номера страниц, в которых можно посмотреть последовательность проведения работ, а также расположение соответствующих элементов конструкции.
Технические характеристики
Снегоход Polaris Widetrak lx 500 имеет хорошие технические характеристики и привлекательный внешний вид. Это не просто надежная «рабочая лошадка», но и настоящий туристический байк.
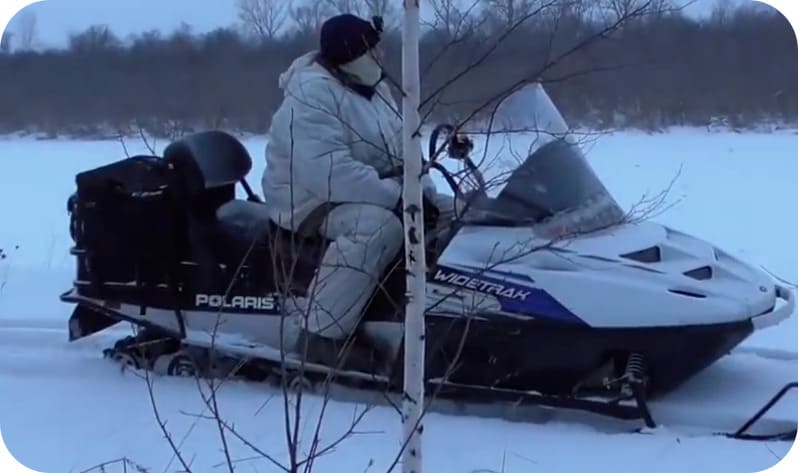
Базовая комплектация данной модели весьма впечатлительная:
- электростартер;
- багажный отсек и дополнительная полка (для крепления кофра);
- фаркоп и буксировочное устройство;
- спидометр (аналоговый);
- обогрев курка газа и рулевых рукояток;
- розетка для внешних приборов (12 вольт);
- двухместное сидение;
- высокое ветровое стекло;
- датчики топлива и температуры.

Специалист по снегоходу «Буран». Занимаюсь рыболовством в свободное время.
Задать вопрос
Зеркала заднего вида не входят в базовую комплектацию, но владелец может установить их при желании опционно.
Размеры и вес
Размеры и вес снегохода «Поларис Вайдтрак ЛХ 500» вполне внушают доверие, ставят трак в один ряд с более мощными утилитарными машинами. Сухая масса мотовездехода составляет 278.1 кг. Благодаря встроенному заднему фаркопу, трак может тянуть грузовые сани. Их вес может достигать 300 кг при глубине снега 30 – 60 см.
Габариты:
| Длина | 3.25 м |
| Ширина | 1.105 м |
| Высота | 1.295 м |
| База лыж | 96.5 см |
Емкость топливного бака составляет 46.1 л.
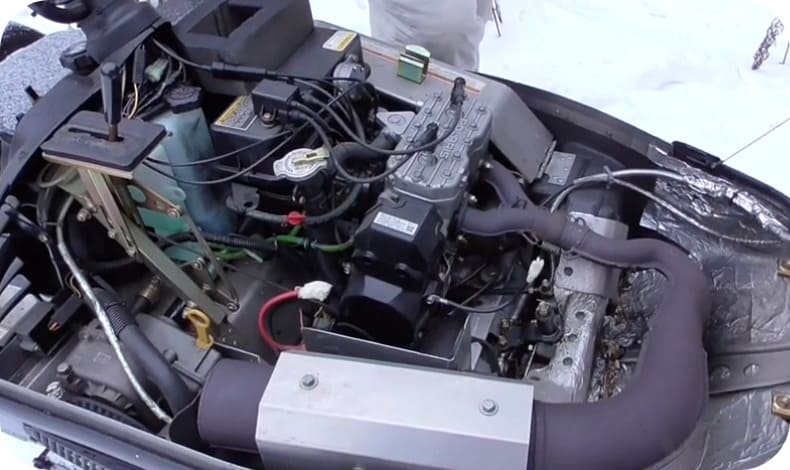
Двигатель
Под капотом данного снегоходного трака установлена двухтактная силовая установка Fuji Heavy японского производства. Система жидкостного охлаждения обеспечивает надежную защиту от перегрева даже при продолжительной эксплуатации мотора на высоких оборотах.
Характеристики двигателя:
| Количество цилиндров, расположение | 2, рядное |
| Суммарный объем | 488 куб. см |
| Мощность | 85 л. с. |
| Система питания | Карбюраторная (2х VM34) |
| Зажигание | Бесконтактное (CDI) |
| Диаметр цилиндра | 7.2 см |
| Ход поршня | 6 см |
| Система выпуска | Одиночная труба |
Максимальная скорость трака составляет 120 км/ч по заснеженному льду и 80 км/ч – по глубокому снегу.
Трансмиссия
В качестве трансмиссии на Widetrak LX 500 используется автоматическая коробка передач с ременным вариатором P-85/Polaris Button.
Рычаг управления передачами имеет четыре положения:
- пониженная вперед;
- повышенная вперед;
- нейтральное положение;
- задний ход (реверс).
Пониженная передача предназначена для эксплуатации трака в тяжелых условиях, а также при буксировке грузовых саней. Категорически запрещено ездить на пониженной передача со скоростью выше 40 км/ч.
Также на шасси установлена дисковая тормозная система с гидравлическим приводом. Основные органы управления находятся на левой рулевой рукоятке. Здесь же расположено смотровое окно главного тормозного цилиндра.
Передняя и задняя подвеска
Трак имеет независимую переднюю подвеску, задняя же представлена стандартным шарнирным механизмом.
Основные характеристики подвески:
| Параметр | Передняя | Задняя |
| Тип | IFS | WideTrak (шарнирное удлинение) |
| Ход (см) | 18.4 | 22.9 |
| Амортизаторы трака | Nitrex | Nitrex |
Размеры гусеницы
На траке установлен стандартный гусеничный механизм с ременным приводом. Сама лента изготовлена из композитного материала и имеет следующие параметры:
| Длина | 3.453 м |
| Ширина | 50 см |
| Высота грунтозацепов | 3.17 см |
Топливная система
Поскольку двигатель двухтактный, то он предполагает смешанную систему смазки – моторное масло добавляют прямо в бензин. Система питания мотора представлена двумя карбюраторами VM34 – по одному на цилиндр.
Специалист по снегоходу «Буран». Занимаюсь рыболовством в свободное время.
Задать вопрос
Производитель крайне не рекомендует заливать масло в бензобак. Топливную смесь необходимо готовить заранее в специально отведенной для этого емкости.
Для смазки мотора следует выбирать полусинтетическое масло для двухтактных двигателей. При этом важно соблюдать пропорцию 40:1, получится следующее соотношение:
| Полусинтетическое масло | Топливо | |
| Рекомендации (из мануала) | 473 мл | 19 л |
| Для полного бака | 1л 35 мл | 41.6 л |
Для заправки можно использовать бензин марки Аи-92 или Аи-95.
Электроника
В базовую комплектацию данного мотовездехода входит электрический стартер и источник питания для внешних приборов.
Рекомендуемая цена
Модель уже снята с производства, поэтому купить новый трак без пробега не получится. Самый свежий вездеход, который можно найти на сайтах подержанной техники, датируется 2015 годом выпуска.
Цена на данный трак зависит от года выпуска, пройденного километража и общего технического состояния. Варьируется в пределах 320 – 690 тыс. рублей. Так, вездеход 2010 года с пробегом 3 тыс. км обойдется в 370 тыс. руб., а образец 2013 г с пробегом более 5 тыс. км – в 475 тыс. руб. Дороже всего обойдется байк 15-го года, который прошел около 100 км. Меньше 320 тыс. руб. будут стоить старые модели 1990-х годов.
Отзывы владельцев
Евгений, Иркутск:
«Купил Полярис ЛХ в 2011 году. С первого дня сразу же сел за руль, чтобы опробовать. В дальнейшем каждый две недели я выезжал на нем на охоту. Выезжали в разные места – и в лес, и в равнинную местность. Снежик одинаково хорошо себя показывает как на целине, так и на укатанной трассе. До этого у меня был Викинг 540. В начале постоянно сравнивал эти модели, и пришел к выводу, что «американец» все же лучше. Очень понравилась система жидкостного охлаждения. Благодаря ей мой байк заводится даже при самых низких температурах».
Владимир, Владивосток:
«Купил Вайдтрак 500 два года назад. За это время успел накатать больше 5 тыс. км. В основном использую трак как «тягач». Грузовые сани массой 300 кг тянет на скорости 30-35 км/ч. При этом расход топлива составляет около 25 литров на сотню, что в общем-то неплохо, учитывая, что ЛХ 500 – двухтактник. За два года вроде серьезных проблем не было, разве что на подвеске пара болтов потерялась. Запускается с первого раза при -20, а вот дальше с первой попытки не всегда получается».
Михаил, Рыбинск:
«Данный вездеход купил с рук в 2016 году. За три года эксплуатации проехал больше 6000 км. Могу сказать, что есть у него как плюсы, так и минусы. Аппарат довольно добротно сделан, да и тянет очень даже неплохо, но вот подвеска, на мой взгляд, слабовата. За время пользования мне пришлось менять рычаг обогатителя, что обошлось в довольно внушительную сумму. Заводские крепления тоже оставляют желать лучшего. Из плюсов – здесь просто отличный мотор».
Снегоход американского производителя Polaris Widetrak lx 500 представляет собой практичную машину с широкой гусеницей и мощным двигателем. Несмотря на то, что модель далеко не новая, до сих пор продолжает пользовать популярностью среди любителей активного отдыха и зимнего спорта. Линейка Widetrak представляет сплав современных технологий с лучшими традициями производителя.
Благодаря особой конструкции шасси, снегоход можно использовать для передвижения по глубокому и рыхлому снегу без риска увязнуть. Все модели линейки LX также отлично подойдут для тяжелых работ, связанных с транспортировкой грузов.
Инструкция по эксплуатации
Прежде чем сесть на снегоход «Поларис ВайдТрак 500», следует внимательно изучить предлагающееся руководство пользователя. В нем подробно описаны правила безопасной эксплуатации, периодичность и подробные инструкции техобслуживания каждого важного узла внедорожника.
Рекомендуется дополнительно брать в поездку:
- запасные свечи, ремень,
- инструменты,
- моторное масло,
- размораживатель топлива,
- аптечку и набор спасателя,
- трос для буксировки.
Производитель рекомендует проводить комплексную проверку и ТО снегохода после преодоления планки в 240, 800 и 1600 км пробега. При этом желательно обращаться в специализированный сервисный центр. Далее, чтобы увеличить продолжительность службы машины, следует проводить полное техническое обслуживание через каждые 1600 км.
Снегоход имеет стандартные рукоятки руля, механический спидометр, индикаторы уровня масла и температуры. В базовую комплектацию модели входят электрический стартер, система обогрева курка газа и рукояток. На Widetrak lx 500 установлено прозрачное ветровое стекло высотой 56 см.
«Вайдтрак» имеет фиксированное рулевое управление, гидравлический тормоз. Комфорт при езде обеспечивает регулируемая спинка и парные передние и задние амортизаторы. В базовую комплектацию дополнительно входит устройство буксировки. Владелец также может дополнительно установить зеркала заднего вида.
Технические характеристики
Комфортную езду обеспечивают:
- система обогрева ручек,
- настраиваемая задняя подвеска,
- вместительный багажный отсек,
- регулируемая спинка водительского сидения,
- встроенный источник постоянного тока.
Кроме этого снегоход отличается хорошей проходимостью, которую обеспечивают широкие лыжи и задний туннель наклонного типа.
Размеры и вес
Модель относится к профессиональной спецтехнике. Собственный вес внедорожника составляет 278,1 кг, при этом снегохода «Поларис ВайдТрак ЛХ 500» имеет размеры:
- Длина 325,1 см.
- Ширина 110,5 см.
- Высота 129,5 см.
- Высота со стеклом 142,2 см.
- Расстояние между лыжами 96,5 см.
Двигатель
Снегоход Polaris WideTrak lx 500 имеет достаточные технические характеристики в плане силового агрегата, чтобы выдержать водителя с пассажиром, а также прикрепить прицеп.
Внедорожник оснащен двигателем типа Fuji с жидкостным охлаждением, мощностью 85 лошадиных сил. Во время езды по ровной поверхности двигатель нагревается до 65-75 градусов. Во время сильных нагрузок температура может увеличиваться до 90 градусов.

Основные параметры силового агрегата:
- Тип двигателя двухтактный, карбюраторный
- Мощность 85 л.с.
- Количество цилиндров 2
- Кубатура 0, 488 л
- Ход поршня 6 см
- Диаметр 7,2 см
Кроме этого Widetrak lx имеет одиночную систему выпуска. Запас мощности двигателя позволяет разгоняться на ровной поверхности до 70-80 км/ч. По льду можно разогнать до 100 км/ч. При этом крейсерская скорость снегохода составляет около 45 км/ч. Благодаря современной системе пуска мотора CDI, внедорожник заводится даже на сильном морозе.
Трансмиссия
Снегоход имеет коробку передач с реверсом и пониженной передачей. Тип трансмиссии снегохода 325.1. Фирменный вариатор имеет четыре скоростных режима:
- повышающая,
- понижающая,
- нейтральная,
- задний ход.
На этой модели от «Полярис» установлен вариатор P-85 / P2, который позволяет плавно разогнаться до максимальной скорости. Хорошее торможение обеспечивает гидравлический дисковый тормоз.
Передняя и задняя подвеска
Движитель «Полариса» состоит из независимой передней подвески типа IFS и задней, представляющей регулируемый шарнирный механизм. При этом ход задней составляет 22, 9 см, а передней − 18,4 см.
Также на снегоходе установлены передние и задние амортизаторы Nitrex, которые обеспечивают комфортную езду как по ровной, так и по пересеченной местности.
Размеры гусеницы
Модель ЛХ 500 имеет спаренные полозья с лыжами типа Gripper. При этом гусеницы имеют следующие технические параметры:
- Длина 3,96 м.
- Ширина 50,8 см.
- Грунтозацепы 3,17 см.
Топливная система
Снегоход оснащен двухтактным двигателем, поэтому в нем используется смешанная система смазки. Для подачи топлива используется пара карбюраторов типа VM34. Производитель не рекомендует лить моторное масло прямо в топливный бак. При первой полной заправке необходимо смешать бензин со смазывающей жидкостью в отдельной емкости в соотношении 40:1. Это значит, что на каждые 20 л топлива следует взять 500 мл полусинтетического масла для двухтактных двигателей.
Номинальный объем топливного бака составляет 41,6 литров, а средний расход на 100 км − 16-17 литров. Производитель рекомендует заправлять снегоход бензином марки АИ-95. При этом содержание этанола в топливе не должно превышать 10 %.
Электроника
Стандартная комплектация данного снегохода включает источник постоянного тока (розетка 12 В) и электрический стартер.
Рекомендуемая цена
На вторичном рынке можно найти снегоход lx 500 выпуска начала 2000-х годов. Стоимость на б/у-машины зависит от общего технического состояния, года выпуска. Так можно купить исправную спецтехнику с пробегом можно от 185 тысяч рублей.
Отзывы владельцев
Большинство владельцев хвалят такие качества снегохода, как надежность, комфортабельность и безопасность. Также отмечают хорошую ходовую часть и мощность двигателя.
Комментарий на сайте-отзовике:
«За три года машина не подвела ни разу. Купил с рук модель 2003 года. Отлично тянул груз и двух пассажиров по 90 кг».
Пользователь форума:
«За два года проехал на этом снегоходе около 5 000 км. Поломки были только мелкие с заменой запчастей. Кстати, обошлось недорого. Практически всегда ездил с грузом от 150 до 350 кг, по ровной и пересеченной местности. Зажигание не подвело ни раза, хотя несколько раз приходилось выезжать при температуре ниже минус 35 градусов».
Отзыв на сайте магазина:
«За два года проехал больше пяти тысяч км. На путь в 300 км я тратил около 75 л бензина. Иногда приходилось тянуть груз почти в полтонны и, надо сказать, «рабочая лошадка» справилась блестяще».
Как пользоваться?
Наша цель — обеспечить Вам самый быстрый доступ к руководству по эксплуатации устройства Polaris Widetrak LX. Пользуясь просмотром онлайн Вы можете быстро просмотреть содержание и перейти на страницу, на которой найдете решение своей проблемы с Polaris Widetrak LX.
Для Вашего удобства
Если просмотр руководства Polaris Widetrak LX непосредственно на этой странице для Вас неудобен, Вы можете воспользоваться двумя возможными решениями:
- Полноэкранный просмотр -, Чтобы удобно просматривать инструкцию (без скачивания на компьютер) Вы можете использовать режим полноэкранного просмотра. Чтобы запустить просмотр инструкции Polaris Widetrak LX на полном экране, используйте кнопку Полный экран.
- Скачивание на компьютер — Вы можете также скачать инструкцию Polaris Widetrak LX на свой компьютер и сохранить ее в своем архиве. Если ты все же не хотите занимать место на своем устройстве, Вы всегда можете скачать ее из ManualsBase.
Руководство по эксплуатации Polaris Widetrak LX
Печатная версия
Многие предпочитают читать документы не на экране, а в печатной версии. Опция распечатки инструкции также предусмотрена и Вы можете воспользоваться ею нажав на ссылку, находящуюся выше — Печатать инструкцию. Вам не обязательно печатать всю инструкцию Polaris Widetrak LX а только некоторые страницы. Берегите бумагу.
Резюме
Ниже Вы найдете заявки которые находятся на очередных страницах инструкции для Polaris Widetrak LX. Если Вы хотите быстро просмотреть содержимое страниц, которые находятся на очередных страницах инструкции, Вы воспользоваться ими.
-
#1
-
1,8 MB
Просмотры: 7.599
-
#2
-
84,5 KB
Просмотры: 972
-
#3
mservis написал(а):
ftp://chadt.us
username: snowmobile@chadt.us
password: manual
заходить через оперу или тотал командер, эксплоер не пойдет.
Кстати, там и на ямахи, кошки и скидушки есть много.
-
#4
-
22,9 MB
Просмотры: 5.352 -
22,9 MB
Просмотры: 2.953 -
22,9 MB
Просмотры: 2.631 -
8 MB
Просмотры: 2.598 -

210,7 KB
Просмотры: 18.133
-
#5
Может кому пригодится выкладываю сервис мануал IQ 2007-2008  :)")
-
13,3 MB
Просмотры: 3.869
-
#6
некоторая информация по двигателям MPE 750 FS/FST
-
1.010,8 KB
Просмотры: 998 -
1,6 MB
Просмотры: 873
-
#7
polaris transport 550 юзерский
-
2,5 MB
Просмотры: 1.324
-
#8
POLARIS SWITCHBACK 2012 модельный. Инструкция пользователя
-
3,4 MB
Просмотры: 1.224

ГАД
Активный участник
-
#9
2010-2012 PRO-RIDE RUSH/Switchback/RMK Service Manual
-
18 MB
Просмотры: 2.052
-
#10
может кому пригодится
-
4,5 MB
Просмотры: 2.962
-
#11
Service manual 2007-2008.
-
13,3 MB
Просмотры: 1.963
-
#12
Polaris 2006-2007 FS/FST service manual
Имеется полное описание 4-х тактного двигателя 750куб. см, в том числе с турбиной.
-
20,9 MB
Просмотры: 1.587
-
#13
WarMan написал(а):
Где взять мануал на polaris EDGE touring 550 выпуск 2004г заранее благодарен
Тут с 2007 г. Может он не сильно отличается?
-
7,3 MB
Просмотры: 1.323
-
#14
Доброго времени суток. Не могу найти литературу на Polaris switchback 800. 2004 юбилейный. Ткните, может плохо ищу.
-
#15
Есть у кого мануал на IQ 750 2008г
-
#17
У кого есть нормальная книжка на поларис вт лх 500 с моментами затяжек гаек, болтов, размерами итд, поделитесь

Widetrak LX
Snowmobile Owner’s Manual
for Maintenance and Safety
Pantone 269 CVC
![]()
Widetrak LX
Snowmobile Owner’s Manual
for Maintenance and Safety

 WARNING
Read, understand, and follow all of the instructions and safety precautions in this manual and on all product labels.
Failure to follow the safety precautions could result in serious injury or death.
 WARNING
The engine exhaust from this product contains chemicals known to the State of California to cause cancer, birth defects or other reproductive harm.

The text is printed on 100% recycled with 40% post-consumer waste (PCW).

For your nearest Polaris dealer, call 1-800-POLARIS
or visit www.polarisindustries.com Polaris Sales Inc.,
2100 Hwy. 55, Medina, MN 55340 Phone 1-888-704-5290
Part No. 9922897 Rev 02 Printed in USA
*9922897 *

WELCOME
Thank you for purchasing a POLARIS vehicle, and welcome to our world-wide family of POLARIS owners. We proudly produce an exciting line of utility and recreational products.
•Snowmobiles
•All-terrain vehicles (ATVs)
•RANGER® utility vehicles
•Victory Motorcycles®
•Low emission vehicles (LEVs)
We believe POLARIS sets a standard of excellence for all utility and recreational vehicles manufactured in the world today. Many years of experience have gone into the engineering, design, and development of your POLARIS vehicle, making it the finest machine we’ve ever produced.
For safe and enjoyable operation of your vehicle, be sure to follow the instructions and recommendations in this owner’s manual. Your manual contains instructions for minor maintenance, but information about major repairs is outlined in the POLARIS Service Manual and should be performed only by a factory certified Master Service Dealer® (MSD) technician.
Your POLARIS dealer knows your vehicle best and is interested in your total satisfaction. Be sure to return to your dealership for all of your service needs during, and after, the warranty period.
We also take great pride in our complete line of apparel, parts and accessories, available through our online store at www.purepolaris.com. Have your accessories and clothing delivered right to your door!
1
POLARIS and THE WAY OUT are registered trademarks of POLARIS Industries Inc.
Copyright 2010 POLARIS Sales Inc. All information contained within this publication is based on the latest product information at the time of publication. Due to constant improvements in the design and quality of production components, some minor discrepancies may result between the actual vehicle and the information presented in this publication. Depictions and/or procedures in this publication are intended for reference use only. No liability can be accepted for omissions or inaccuracies. Any reprinting or reuse of the depictions and/or procedures contained within, whether whole or in part, is expressly prohibited.
The original instructions for this vehicle are in English. Other languages are provided as translations of the original instructions.
Printed in U.S.A.
2011 Widetrak LX Owner’s Manual P/N 9922897
2
TABLE OF CONTENTS
Introduction . . . . . . . . . . . . . . . . . . . . . . . . . . . . 4
This section contains helpful information for owners and drivers and illustrates the location of important identification numbers that should be recorded in the owner’s manual.
Safety . . . . . . . . . . . . . . . . . . . . . . . . . . . . . . . . . 7
This section describes safe vehicle operation and identifies warning labels and their locations.
Features and Controls . . . . . . . . . . . . . . . . . . . 26
This section identifies the locations of your snowmobile’s controls and features.
The Perfect Fit . . . . . . . . . . . . . . . . . . . . . . . . . 30
This section explains how to tailor the suspension and other features for an optimum riding experience.
Pre-Ride Inspections . . . . . . . . . . . . . . . . . . . . 38
This section explains procedures that must be performed before riding.
Operation . . . . . . . . . . . . . . . . . . . . . . . . . . . . . 45
This section explains proper engine break-in, operation of features and general operating procedures.
Maintenance . . . . . . . . . . . . . . . . . . . . . . . . . . . 59
This section defines your role, and your dealer’s role, in your snowmobile’s regular maintenance.
POLARIS Products. . . . . . . . . . . . . . . . . . . . . 103 Troubleshooting . . . . . . . . . . . . . . . . . . . . . . . 104
This section is a quick reference guide to solving general problems.
Warranty . . . . . . . . . . . . . . . . . . . . . . . . . . . . . 109 Maintenance Log . . . . . . . . . . . . . . . . . . . . . . 118
Record maintenance and service in the log for your reference and for future owners of the vehicle.
Index . . . . . . . . . . . . . . . . . . . . . . . . . . . . . . . . 122
3
INTRODUCTION
Important Notes for Owners and Drivers
After reading this manual, store it in the snowmobile for convenient reference. It should remain with the snowmobile when the snowmobile is sold.
When teaching inexperienced operators to ride, set up a predetermined course for practice. Make sure they know how to drive and control the snowmobile before allowing them to make longer trips. Teach them proper snowmobile courtesy, and enroll them in driver’s training and safety courses sponsored by local or state organizations.
Follow the maintenance program outlined in this manual. Preventive maintenance ensures that critical components of the snowmobile are inspected by your dealer at specific mileage intervals.
You and your dealer must complete the registration form included with your snowmobile and forward it to us. This completed form is necessary to ensure warranty coverage.
Protect and preserve your right to ride by joining your local trail riding clubs.
Some of the illustrations and photos used in this manual are general representations. Your model may differ.
4
INTRODUCTION
Preservation of the Environment
POLARIS is committed to supporting an environmental education campaign. We encourage state and provincial governments across the snowbelt to adopt rigorous safety training programs that encourage protection of our environment, including wildlife and vegetation.
Snowmobile clubs and other organizations are working together to protect our environment. Please support their efforts and operate your snowmobile with consideration for the protection and preservation of our environment.
Noise Level
One of the most publicized issues about snowmobiles is noise. The Society of Automotive Engineers (SAE), the standard-setting body for snowmobile development, recommends that snowmobiles conform to prescribed sound levels.
POLARIS snowmobiles are engineered to conform to these SAE standards. Our muffler systems are designed to reduce noise levels and must not be altered or removed. The sound of your snowmobile may not be welcome to non-snowmobilers, so you have a responsibility to operate your snowmobile with concern for others. We do our part by manufacturing quieter snowmobiles; we ask your help to further reduce the impact of noise by operating your snowmobile safely and responsibly.
Air Pollution
POLARIS engineers continuously investigate ways to reduce emission levels of two-stroke engines. We expect our efforts to lead to the reduction of potential air pollution.
In addition to our technological research, we encourage government agencies, manufacturers, distributors, dealers, ecologists, and other interested parties to work together to develop data on environmental topics.
5
INTRODUCTION
Vehicle Identification Numbers
Record your snowmobile’s identification numbers and key number in the spaces provided. Remove the spare key and store it in a safe place. Your key can be duplicated only by mating a POLARIS key blank with one of your existing keys, so if both keys are lost, the ignition switch must be replaced.
Vehicle Model Number: ___________________________________________________
Tunnel VIN: ____________________________________________________________
(lower right side of the tunnel)
Engine Serial Number: ___________________________________________________
(right front side of engine crankcase)
Key Number: ___________________________________________________________
6
![]()
SAFETY
Operator Safety
The following signal words and symbols appear throughout this manual and on your vehicle. Your safety is involved when these words and symbols are used. Become familiar with their meanings before reading the manual.
The safety alert symbol indicates a potential personal injury hazard.
WARNING
A WARNING indicates a hazardous situation which, if not avoided, may result in death or serious injury.
CAUTION
A CAUTION indicates a hazardous situation which, if not avoided, may result in minor or moderate injury.
NOTICE
A NOTICE indicates a situation that may result in property damage.
7

SAFETY
Operator Safety
Follow the recommended maintenance program outlined beginning on page 60 of this manual to ensure that all critical components on the snowmobile are thoroughly inspected by your dealer at specific mileage intervals.
 WARNING
Driving a snowmobile requires your full attention. DO NOT drink alcohol or use drugs or medications before or while driving or riding as a passenger. They will reduce your alertness and slow your reaction time.
Snowmobiles are capable of traveling at high speeds. Use extra caution to ensure operator safety. Make sure your snowmobile is in excellent operating condition at all times. Always check major and vital safety components before every ride.
All POLARIS snowmobiles are designed and tested to provide safe operation when used as directed. Failure of critical machine components may result from operation with any modifications, especially those that increase speed or power. DO NOT MODIFY YOUR SNOWMOBILE. The snowmobile may become aerodynamically unstable at speeds higher than those for which it is designed. Loss of control may occur at higher speeds. Modifications may also create a safety hazard and lead to bodily injury.
The warranty on your entire machine is terminated if any equipment has been added, or any modifications have been made, to increase the speed or power of the snowmobile.
8
SAFETY
Operator Safety
Stay Clear of Track
Your snowmobile is propelled by a revolving track that must be partially exposed for proper operation.
WARNING! Serious injuries may result if hands, feet, or clothing become entangled in the track. Be alert when riding, and remain properly seated to stay clear of the
track. Never hold the snowmobile up or stand behind it while warming up the track. A loose track or flying debris could cause serious injury or death. We recommend having your dealer perform all track service
and alignment procedures.
Stay Clear of Engine
Never attempt adjustments with the engine running. Turn off the ignition, raise the hood, make the adjustment, secure shields and guards, secure the hood, and then restart the engine to check its operation.
WARNING! Serious injury can occur if fingers or clothing contact the moving parts of an engine. Always stop the engine before attempting adjustments.
9
SAFETY
Operator Safety
Survival Preparation
For your safety, always ride in a group of other snowmobilers. Always tell someone where you’re going and how long you expect to be gone. If it isn’t possible to ride with others, and you must travel into remote areas, always carry survival equipment that’s appropriate to the conditions you may encounter. Such equipment may include, but is not limited to: extra clothing, a sleeping bag, a flashlight, food and water, a signaling mirror, a means of building a fire, and a two-way radio or cellular telephone.
Always carry the owner’s manual on your snowmobile. For added protection, purchase and carry the following items on your snowmobile as
well:
|
• |
Spare Drive Belt |
• |
Winter Survival Kit |
|
• |
Extra Set of Spark Plugs |
• |
Trail Map |
|
• |
Tow Rope |
• |
First Aid Kit |
|
• |
Extra Oil |
• |
Tool Kit |
|
• |
Fuel Deicer |
Riding Position
Operating a snowmobile requires skill and balance for proper control. Rider positions may vary with experience; but under many conditions, the proper position is to be seated with both feet on the running boards and both hands on the handlebar grips for proper throttle, brake and steering control.
WARNING! Improper riding position may reduce control and could result in serious injury or death. Always ride in a position that allows for control of your vehicle.
10

SAFETY
Operator Safety
Riding Apparel
Helmet
Wearing a helmet can prevent a severe head injury. Whenever riding a POLARIS vehicle, always wear a helmet that meets or exceeds established safety standards.
Approved helmets in the USA and Canada bear a U.S. Department of Transportation (DOT) label.
Approved helmets in Europe, Asia and Oceania bear the ECE 22.05 label. The ECE mark consists of a circle surrounding the letter E, followed by the distinguishing number of the country which has granted approval. The approval number and serial number will also be displayed on the label.
Eye Protection
Do not depend on eyeglasses or sunglasses for eye protection. Whenever riding a POLARIS vehicle, always wear shatterproof goggles or use a shatterproof helmet face shield. POLARIS recommends wearing approved Personal Protective Equipment (PPE) bearing markings such as VESC 8, V-8, Z87.1, or CE. Make sure protective eye wear is kept clean.
Clothing
Be prepared, be warm and be comfortable when riding. Be aware of the weather forecast, especially the windchill, and dress accordingly. See the chart on page 22.
WARNING! Avoid wearing loose clothing or long scarves, which can become entangled in moving parts and cause serious injury. Always wear an approved helmet and eye protection.
11
SAFETY
Operator Safety
Cargo Overload
Too much weight on the rear of the snowmobile may reduce your ability to steer. Do not exceed carrier and rack weight limits, and do not allow a passenger to sit on the seat back or the cargo carrier.
Disabled Operators
Safe operation of this rider-active vehicle requires good judgement and physical skills.
WARNING! Operators with cognitive or physical disabilities have an increased risk of loss of control, which could result in serious injury or death. Do not allow disabled persons to operate this vehicle.
Rider Capacity
Driving 1-Up — Some POLARIS snowmobiles are designed for a single rider only. A label on the console of these models indicates single rider operation.
Driving 2-Up — Some POLARIS snowmobiles are designed for up to two riders. A label on the hood of these models indicates that the vehicle is designed for one operator and one passenger only. See page 23 for label location.
Snowmobiles designed for two riders should never be operated with more than two people on board. When traveling with a passenger, it’s the driver’s responsibility to operate the snowmobile safely.
Slow down! Control becomes more difficult with two people on board. More space is required to make turns, and longer distances are necessary for stopping.
12
SAFETY
Operator Safety
Excessive Speed
WARNING! High speed driving, especially at night, could result in serious injury or death. Always reduce speed when driving at night or in inclement weather.
Observe all state and local laws governing snowmobile operation. They’ve been established for your protection.
Always be alert and pay attention to the trail ahead. Multiplying speed (MPH) by 1.5 will equal the approximate number of feet per second your snowmobile travels. If your speed is 40 MPH, your snowmobile is traveling about 60 feet per second. If you look back for only two seconds, your snowmobile will travel about 120 feet. If your speed is 60 MPH, your snowmobile will travel about 180 feet in two seconds.
Traveling at night requires extra caution. Check headlight and taillight to ensure proper operation, and don’t over-drive your headlight beam. Always be able to bring your snowmobile to a stop in the distance illuminated by the headlight.
13
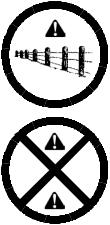
SAFETY
Operator Safety
Driver Awareness
Slow down when traveling near poles, posts, or other obstacles. Be especially alert if you’re snowmobiling after dark. Always be on the alert for wire fences. Single strands are especially dangerous, since there may be a great distance between posts. Guy wires on utility poles are also difficult to distinguish.
|
Make sure the way is clear before crossing |
||
|
railroads and other roads and highways. |
||
|
The noise of your snowmobile will drown |
R |
R |
|
out the sound of approaching vehicles. |
||
|
Look ahead, behind, and to both sides |
||
|
before turning or crossing railroad tracks |
||
|
or highways. Steep embankments may |
||
|
also hide your view. Always leave yourself |
||
|
a way out. |
Variances in snow depth and/or water currents may result in uneven ice thickness. Always check with local residents or authorities for general information on conditions when traveling on lakes and streams that are strange to you. Before riding your snowmobile on a frozen body of water, be sure the ice is thick enough to support the snowmobile and its operator, as well as the force created by a moving vehicle. You may drown if you and the snowmobile break through the ice.
When teaching inexperienced operators to ride, set up a predetermined course for practice. Make sure they know how to drive and control the snowmobile before allowing them to make longer trips. Teach them proper snowmobile courtesy, and enroll them in driver’s training and safety courses sponsored by local or state organizations.
14

SAFETY
Operator Safety
Avalanches
Snowmobilers should always be properly trained and equipped before traveling in mountainous terrain:
•Take an avalanche class
•Travel with experienced people
•Travel on designated trails
•Make sure each person is equipped with a shovel, probe and avalanche beacon.
You don’t have to be snowmobiling on a slope for an avalanche to occur. Be aware that all of the snow is connected. You may be riding on a flat slope or snow covered road, but if the snowpack above is unstable enough you can trigger an avalanche on a steeper slope above you. Always be aware of snow conditions above you as you travel in mountainous terrain.
Before riding in mountainous terrain, call or log on to your local avalanche advisory to get current weather and snow stability information.
For more information about avalanche training and avalanche conditions, contact local law enforcement in your area, or visit the American and Canadian online avalanche centers at www.avalanche.org.
15
SAFETY
Operator Safety
Ice and Snow Build-up
WARNING! Ice and snow build-up may interfere with the steering of your snowmobile, resulting in serious injury or death. Keep the underhood area free of snow and ice.
Before driving, manually turn the skis to the left and right to be sure ice and snow are not interfering with full left and right steering. If difficulty is encountered, check for ice and snow build-up that may be obstructing the steering linkage. Snow screens and bib kits are available through your dealer to help reduce snow and ice build-up.
Driving on Slippery Surfaces
WARNING! Never attempt an abrupt change of direction when operating on slippery surfaces. Proceed slowly and use extra caution. Driving on ice or hardpacked snow reduces steering and braking control, which may result in loss of control and serious injury or death. Slow down and use extra caution when operating on slippery surfaces.
16
SAFETY
Operator Safety
Driving on Slopes
WARNING! Climbing a hill or crossing the face of a slope may result in loss of balance and snowmobile rollover, causing serious injury or death. Use caution and good judgement when driving in hilly terrain.
Use extra caution when operating in hilly terrain. If climbing a hill is unavoidable, keep your weight low and forward. If you must cross the face of a slope, keep your weight on the uphill side of the snowmobile to maintain proper balance and avoid possible rollover.
Slow down when reaching the crest of a hill. Be prepared to react to obstacles, sharp drops, or other people or vehicles that may be on the other side of the hill.
If you’re unable to continue up a hill, turn the snowmobile downhill before it loses momentum. If this isn’t possible, spin the track just enough to dig in to prevent it from rolling back down the hill. Stop the engine and set the parking brake (if equipped). Keeping away from the downhill side of the snowmobile, pull the rear of the snowmobile around and point the front end and skis downhill. Remount the snowmobile, restart the engine, release the parking brake, and descend the hill carefully.
17
SAFETY
Operator Safety
Driving Downhill
When riding downhill, shift your weight to the rear of the snowmobile and reduce your speed to a minimum. Apply just enough throttle to keep the clutch engaged, allowing the engine’s compression to help slow the snowmobile and keep it from rolling freely downhill.
WARNING! When driving on long downhill stretches, pump the brakes. Riding the brakes may cause the brake system to overheat, which may result in brake failure. Excessive or repetitive use of the brakes for high speed stops will also cause an overheated brake system. This condition may lead to a sudden loss of brakes and/or fire and may result in serious injury or death.
Clutch Guard
Do not operate the engine with the clutch guard removed.
The clutch guard is designed to protect the operator from metal parts if the clutch should fail. Although the chance of failure is extremely remote, don’t defeat the purpose of the guard by removing it. It’s provided for your safety.
Drive Belt
Do not operate the engine with the drive belt removed.
Any servicing that requires operation without a belt must be performed by your dealer.
CAUTION! Operation of the engine with the belt removed may result in personal injury or damage to the engine.
18
SAFETY
Operator Safety
Intake Silencer
Do not operate the engine with the intake silencer or filter removed.
NOTICE: Damage to the engine may occur if the intake silencer or filter are removed.
Clutches
Do not attempt to service the clutches.
All clutch service must be performed by your dealer. The clutch is a complex mechanism that rotates at high speeds. Each clutch is dynamically balanced before installation. Any tampering may disrupt this precision balancing and create an unstable condition.
Cold Weather Drive-Away
Whenever your snowmobile has been parked for a length of time, especially overnight, always make sure the skis and track are loosened from ice and snow before attempting to drive. Apply the throttle with enough authority to put the snowmobile into motion, but always operate within safety limits and, on 2-up snowmobiles, with respect for a passenger.
Maneuverability
While much control and maneuverability is achieved through the steering system and skis, maximum control is achieved by the shifting of your body weight. Maneuverability will change for lighter operators or snowmobiles designed to carry a load or a passenger.
19
SAFETY
Operator Safety
Inadequate Snow Conditions
Since snow provides the only lubrication for the power slide suspension and, on liquid cooled models, cooling for the engine, adequate snow cover is a requirement for operation of your snowmobile.
WARNING! Inadequate cooling and lubrication will lead to overheating of the slide rail and track, causing premature wear, damage and failure, which can result in serious injury. Reduce speeds and frequently drive into fresh snow to allow adequate cooling and polishing of the slide rail and track surfaces. Avoid operating for prolonged periods on ice, hard-packed surfaces or roads.
Operating in Deep Snow
If the snowmobile becomes stuck in snow, clear the running board area of snow, then step down the snow in front of the snowmobile so that when the throttle is opened, the snowmobile will be able to climb up and over the snow.
20
SAFETY
Operator Safety
Driving Responsibly
Every snowmobile handles differently, and even the most docile conditions may become dangerous if operators drive improperly. If you’re new to snowmobiling, acquaint yourself with the snowmobile and with what it will and won’t do under various conditions. Even seasoned drivers should spend some time getting the feel for a snowmobile before attempting ambitious maneuvers.
•A snowmobile depends on the rider’s body position for proper balance in executing turns, traversing hills, etc. Always start on a smooth, level area to begin building your operating experience.
•Before allowing someone else to use your snowmobile, know the extent of their operating skills. Check to see if they’ve taken a snowmobile safety course and have an operator’s certificate. For their protection, as well as yours, make sure they take a snowmobile safety course. Everyone can benefit from the course.
•Don’t «jump» your snowmobile over large drifts or similar terrain. Jumping may injure your back because of spinal compression that could occur when the snowmobile impacts the ground. The seat and suspension of your snowmobile have been designed to provide protection under normal riding conditions. Your snowmobile is not intended for this kind of use.
•Be courteous to oncoming traffic by dimming your headlights and reducing your speed.
•When traveling in a group of snowmobiles, don’t tailgate (follow too closely). Leave enough distance between snowmobiles to provide ample stopping room and to provide protection from flying snow and debris. Allow even more distance when driving on slippery surfaces or when driving in darkness or other low visibility conditions. Be aware of any snowmobile traffic around your vehicle. Drive defensively to avoid accidents.
•Remove the key from the ignition when you leave the snowmobile unattended.
21
SAFETY
Operator Safety
Windchill/Temperature Charts
The following information is provided to help you determine when temperatures become dangerous for riding.
WIND CHILL CHART (°F)
|
Wind |
Actual Thermometer Reading (_F) |
|||||||||||||||||
|
Speed |
||||||||||||||||||
|
in |
40 |
35 |
30 |
25 |
20 |
15 |
10 |
5 |
0 |
-5 |
-10 |
-15 |
-20 |
-25 |
-30 |
-35 |
-40 |
-45 |
|
MPH |
Equivalent Temperature (_F) |
|||||||||||||||||
|
Calm |
40 |
35 |
30 |
25 |
20 |
15 |
10 |
5 |
0 |
-5 |
-10 |
-15 |
-20 |
-25 |
-30 |
-35 |
-40 |
-45 |
|
5 |
36 |
31 |
25 |
19 |
13 |
7 |
1 |
-5 |
-11 |
-16 |
-22 |
-28 |
-34 |
-40 |
-46 |
-52 |
-57 |
-63 |
|
10 |
34 |
27 |
21 |
15 |
9 |
3 |
-4 |
-10 |
-16 |
-22 |
-28 |
-35 |
-41 |
-47 |
-53 |
-59 |
-66 |
-72 |
|
15 |
32 |
25 |
19 |
13 |
6 |
0 |
-7 |
-13 |
-19 |
-26 |
-32 |
-39 |
-45 |
-51 |
-58 |
-64 |
-71 |
-77 |
|
20 |
30 |
24 |
17 |
11 |
4 |
-2 |
-9 |
-15 |
-22 |
-29 |
-35 |
-42 |
-48 |
-55 |
-61 |
-68 |
-74 |
-81 |
|
25 |
29 |
23 |
16 |
9 |
3 |
-4 |
-11 |
-17 |
-24 |
-31 |
-37 |
-44 |
-51 |
-58 |
-64 |
-71 |
-78 |
-84 |
|
30 |
28 |
22 |
15 |
8 |
1 |
-5 |
-12 |
-19 |
-26 |
-33 |
-39 |
-46 |
-53 |
-60 |
-67 |
-73 |
-80 |
-87 |
|
35 |
28 |
21 |
14 |
7 |
0 |
-7 |
-14 |
-21 |
-27 |
-34 |
-41 |
-48 |
-55 |
-62 |
-69 |
-76 |
-82 |
-89 |
|
40 |
27 |
20 |
13 |
6 |
-1 |
-8 |
-15 |
-22 |
-29 |
-36 |
-43 |
-50 |
-57 |
-64 |
-71 |
-78 |
-84 |
-91 |
|
45 |
26 |
19 |
12 |
5 |
-2 |
-9 |
-16 |
-23 |
-30 |
-37 |
-44 |
-51 |
-58 |
-65 |
-72 |
-79 |
-86 |
-93 |
|
50 |
26 |
19 |
12 |
4 |
-3 |
-10 |
-17 |
-24 |
-31 |
-38 |
-45 |
-52 |
-60 |
-67 |
-74 |
-81 |
-88 |
-95 |
|
55 |
25 |
18 |
11 |
4 |
-3 |
-11 |
-18 |
-25 |
-32 |
-39 |
-46 |
-54 |
-61 |
-68 |
-75 |
-82 |
-89 |
-97 |
|
60 |
25 |
17 |
10 |
3 |
-4 |
-11 |
-19 |
-26 |
-33 |
-40 |
-48 |
-55 |
-62 |
-69 |
-76 |
-84 |
-91 |
-98 |
|
Frostbite in >> |
30 min. |
10 min. |
5 min. |
|||||||||||||||
WIND CHILL CHART (°C)
|
Wind |
Actual Thermometer Reading (_C) |
|||||||||||||||||
|
Speed |
||||||||||||||||||
|
in |
5 |
2 |
-1 |
-4 |
-7 |
-10 |
-13 |
-16 |
-19 |
-22 |
-25 |
-28 |
-31 |
-34 |
-37 |
-40 |
-43 |
-46 |
|
KPH |
Equivalent Temperature (_C) |
|||||||||||||||||
|
Calm |
5 |
2 |
-1 |
-4 |
-7 |
-10 |
-13 |
-16 |
-19 |
-22 |
-25 |
-28 |
-31 |
-34 |
-37 |
-40 |
-43 |
-46 |
|
8 |
3 |
0 |
-4 |
-7 |
-11 |
-14 |
-18 |
-22 |
-25 |
-29 |
-32 |
-36 |
-39 |
-43 |
-46 |
-50 |
-53 |
-57 |
|
16 |
2 |
-2 |
-6 |
-10 |
-13 |
-17 |
-21 |
-24 |
-28 |
-32 |
-36 |
-39 |
-43 |
-47 |
-50 |
-54 |
-58 |
-62 |
|
24 |
1 |
-3 |
-7 |
-11 |
-15 |
-19 |
-22 |
-26 |
-30 |
-34 |
-38 |
-42 |
-45 |
-49 |
-53 |
-57 |
-61 |
-65 |
|
32 |
0 |
-4 |
-8 |
-12 |
-16 |
-20 |
-24 |
-28 |
-32 |
-36 |
-39 |
-43 |
-47 |
-51 |
-55 |
-59 |
-63 |
-67 |
|
40 |
-1 |
-5 |
-9 |
-13 |
-17 |
-21 |
-25 |
-29 |
-33 |
-37 |
-41 |
-45 |
-49 |
-53 |
-57 |
-61 |
-65 |
-69 |
|
48 |
-1 |
-5 |
-9 |
-13 |
-18 |
-22 |
-26 |
-30 |
-34 |
-38 |
-42 |
-46 |
-50 |
-54 |
-58 |
-62 |
-66 |
-70 |
|
56 |
-2 |
-6 |
-10 |
-14 |
-18 |
-22 |
-26 |
-31 |
-35 |
-39 |
-43 |
-47 |
-51 |
-55 |
-59 |
-64 |
-68 |
-72 |
|
64 |
-2 |
-6 |
-10 |
-15 |
-19 |
-23 |
-27 |
-31 |
-35 |
-40 |
-44 |
-48 |
-52 |
-56 |
-61 |
-65 |
-69 |
-73 |
|
72 |
-2 |
-7 |
-11 |
-15 |
-19 |
-23 |
-28 |
-32 |
-36 |
-40 |
-45 |
-49 |
-53 |
-57 |
-61 |
-66 |
-70 |
-74 |
|
80 |
-3 |
-7 |
-11 |
-15 |
-20 |
-24 |
-28 |
-33 |
-37 |
-41 |
-45 |
-50 |
-54 |
-58 |
-62 |
-67 |
-71 |
-75 |
|
88 |
-3 |
-7 |
-12 |
-16 |
-20 |
-24 |
-29 |
-33 |
-37 |
-42 |
-46 |
-50 |
-55 |
-59 |
-63 |
-67 |
-72 |
-76 |
|
96 |
-3 |
-8 |
-12 |
-16 |
-21 |
-25 |
-29 |
-34 |
-38 |
-42 |
-47 |
-51 |
-55 |
-60 |
-64 |
-68 |
-73 |
-77 |
|
Frostbite in >> |
30 min. |
10 min. |
5 min. |
|||||||||||||||
22

SAFETY
Safety Labels and Locations
Warning labels have been placed on the snowmobile for your protection. Read and follow the instructions of the labels and other warnings on the snowmobile carefully. If any of the labels depicted in this manual differ from the labels on your snowmobile, always read and follow the instructions of the labels on the snowmobile.
If any label becomes illegible or comes off, contact your POLARIS dealer to purchase a replacement. Replacement safety labels are provided by POLARIS at no charge. The part number is printed on the label.
Clutch Cover Warning
This warning label is found under the hood on the clutch cover:
WARNING
Do not operate engine with hood open.
Do not attempt adjustment with engine running. Do not operate engine with this guard open. Never run engine with drive belt removed.
Never service clutches yourself — see your dealer.
Air Box Warning
This warning label is found under the hood on applicable models:
CAUTION
Do not operate above 40 mph with hood-to-air box foam removed or engine failure will result.
Your POLARIS Widetrak snowmobile is designed for the operator and one passenger. For more information on operating with a passenger, see Page 12.
WARNING
This vehicle is designed for operator and ONE passenger
23
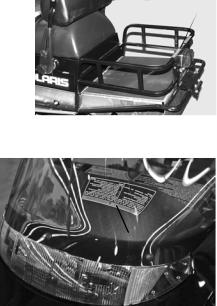
SAFETY
Safety Labels and Locations
The track/seat warning label is on the rear of the tunnel:
WARNING
Stay clear of track. Do not sit on seat back. Entanglement with the track or a fall from seat back may result in severe injury or death.
Reverse Warning
POLARIS Widetrak snowmobile is equipped with standard reverse. The reverse warning label is located above the instrument housing.
Reverse operation, even at low speeds, can cause loss of control resulting in serious injury or death. To avoid loss of control, always:
•Look behind before and while backing up.
•Avoid sharp turns.
•Shift to or from reverse only when stopped.
•Apply throttle slowly.
NOTE: For more information, see Owner’s Manual.
24
SAFETY
Safety Labels and Locations
Operation Warning
An operation warning label is present on the console of all POLARIS snowmobiles:
WARNING
•To avoid serious injury or death, read and understand all warnings and the Owner’s Manual before operation. If manual is missing, contact a POLARIS dealer for a replacement.
•This vehicle is capable of high speeds. Buried objects or uneven terrain can cause loss of control. Reduce speed and use extreme caution when operating in unfamiliar terrain.
•Excessive speed, especially at night or with limited visibility, can result in insufficient time for you to react to terrain changes, to avoid unexpected obstacles, or to stop safely.
•Never consume alcohol or drugs before or while operating this vehicle.
•In an emergency, push down the Auxiliary Shut-Off Switch, located on the top of the throttle control assembly, to stop the engine. Then pull the brake lever to stop.
•Always wear an approved helmet, eye protection, and adequate clothing while operating this vehicle.
•This vehicle is designed for adult use only. Check local laws for age requirements.
•When operating with a passenger (on approved models only), reduce speed and allow extra space for steering and stopping. A passenger reduces your ability to control the vehicle.
•When operating on hard-packed snow, ice, or when crossing roads, steering and braking ability are greatly reduced. Reduce speed and allow extra space to turn or stop.
•To maintain vehicle control on ice or hard-packed surfaces, you should have a proper balance of ski carbides to track studs. See Owner’s Manual for proper use of traction products.
•Repeated stops from high speed may cause fading or sudden loss of braking ability.
•Parking brake may relax when used for long periods. Do not leave brake engaged for more than five minutes.
•Before starting the engine, check throttle, brake, and steering for proper operation. Make sure hood is latched. Be seated and in position to control the vehicle.
Oil injection system: Use unmixed fuel only. Check oil level when refueling.
25

FEATURES AND CONTROLS
General Representation
7
3
1.Fuel Filler Cap (may include a fuel gauge)
2.Ignition Switch
3.Brake Lever
4.Speedometer (may include indicator/warning lights)
5.Reverse Indicator
6.Mountain Bar
7.Engine Stop Switch (see page 54)
8.Throttle Control
9.Choke
10.Recoil Starter Handle
 8
8
 9
9
26
![]()
FEATURES AND CONTROLS
Some POLARIS snowmobiles are equipped with special features. Controls for these features are illustrated on this page. Not all models come with these features.
Refer to your Owner’s Manual Supplement.
1.Headlight Dimmer Switch
2.Parking Brake Lock
3.Handlebar Grip Warmer Switch
4.Thumbwarmer Switch
5.Electronic Reverse Button
1
Fuel Valve
The fuel valve is located under the hood. Turn the fuel valve off whenever the snowmobile is stored or parked.
|
1. |
Turn the valve clockwise to |
||
|
turn off the fuel supply. |
|||
|
2. |
Turn the valve counter-clock- |
OFF |
ON |
|
wise to turn on the fuel supply. |
|||
27

FEATURES AND CONTROLS
2
8 7
1
9 
10
11
12
1.Hood
2.Headlight
3.Windshield
4.Handlebar
5.Operator Seat
6.Passenger Hand Hold Strap
7.Cargo Rack
8.Taillights
9.Snow Flap
10.Track
11.Suspension
12.Trailing Arm
13.Nosepan
14.Front Bumper (do not use for pulling or dragging the snowmobile)
15.Skis
28

FEATURES AND CONTROLS
Backrest |
|
|
The backrest is adjustable |
|
|
for either operator or pas- |
|
|
senger use. |
Raise/Lower |
1. Loosen the upper adjustment knobs to raise or lower the backrest.
2. Loosen the lower adjustment knobs to move the backrest forward for operator use or rearward for passenger use.
|
3. Always tighten the |
Operator/Passenger |
|
|
knobs. |
||
Cargo Rack
Always secure cargo before operating. Do not exceed the rack weight limit specified on the cargo rack label. Do not allow a passenger to sit on the seat back or the cargo rack.
29

THE PERFECT FIT
Front Suspension Adjustments
Break in the suspension for approximately 150 miles (240 km) and regrease all suspension parts before making any fine-tuning adjustments.
Settings will vary from rider to rider, depending on rider weight, vehicle speed, riding style, and trail conditions. We recommend starting with factory settings and then customizing each adjustment individually to suit rider preference. The snowmobile should be methodically tested under the same conditions after each adjustment (trail and snow conditions, vehicle speed, riding position, etc.) until the best ride is achieved. Adjustments should be made to one area at a time in order to properly evaluate the change.
IFS Components
1.Skis
2.Front shocks and springs
3. Rod ends
IFS Adjustment Options
•Front shock spring preload
•Optional springs
1
3
30

THE PERFECT FIT
Front Suspension Adjustments
Always verify ski alignment before making adjustments to the IFS. See page 92 to check alignment. If the skis are misaligned, see your dealer, as the camber adjustment may also be affected.
The tension at which the shock coil spring is set is called spring preload. For the best ride, the spring preload should be set as low as possible to use the full travel of the ski shock, with occasional light bottoming. To determine if your snowmobile is using full travel of the ski shock, push the jounce bumper down as far as it will go on the shock rod and test ride the snowmobile. The bumper will move up on the rod in direct relation to the amount of travel. If the shock travel is full, the bumper will be seated at the top of the shock.
Shock Components
|
1. |
Retainer |
1 |
|
|
2. |
Shock Rod |
||
|
3. |
Jounce Bumper |
2 |
|
|
4. |
Body |
3 |
|
|
5. |
Spring Preload Adjuster Nut |
||
|
4 |
 5
5
31

THE PERFECT FIT
Front Suspension Adjustments
Shock Spring Preload
Increasing spring preload will increase ski-to-ground pressure. Decreasing spring preload will decrease ski- to-ground pressure.
Front Springs
For models without externally adjustable or revalvable shocks, the front springs can be changed if spring preload alone isn’t sufficient and further adjustment is desired to control suspension stiffness. Special tools are required to adjust front springs. If you feel that your front suspension needs
adjustment see your Front Shock Washers POLARIS dealer for more
information.
32
THE PERFECT FIT
Rear Suspension Adjustments
Rider weight, riding style, trail conditions, and vehicle speed all affect suspension action. Each rear suspension can be adjusted to suit rider preference and deliver excellent performance for a given set of conditions. However, all suspension designs and adjustments involve a compromise, or trade-off. For example, a suspension set up for snow-cross racing would provide a very stiff ride on the trail. A suspension set up for trail riding would bottom out harshly on a snow-cross course.
See your POLARIS dealer for initial suspension setup information. Additional adjustments can be made after initial setup. Make adjustments to one area at a time so you can evaluate the change. For further assistance, see your dealer.
Suspension Performance Tips
•Rider weight usually determines the position at which the spring preload should be set. However, this may vary with riding style. With a little experimentation, each rider can find a preferred set-up. These adjustments are easy to make, involve very little time or effort, and greatly affect the ride.
•In deep snow, a new rail slide will offer improved performance over a worn rail slide. It can also improve top speed.
•When riding on ice or hard-packed snow, adding a set of bogie wheels to the rail may enhance the snowmobile’s performance. Bogie wheel kits are available from your dealer.
•POLARIS offers track kits for improved flotation in deep snow. See your dealer for assistance.
Tip: Keep the suspension pivot points lubricated. This will reduce moisture and rust build-up and ensure proper function of the suspension components. Grease rear suspension pivots before adjusting the rear suspension. See page 65.
Track Tension
Track adjustment is critical for proper handling. Always maintain correct tension and alignment. Refer to the track tension maintenance section beginning on page 88.
33

THE PERFECT FIT
WideTrak Rear Suspension Adjustments
Suspension Coupling
1.On level ground, turn the adjuster knob clockwise to align the arrow markers. This setting is suitable for most riding conditions.
2.If more ski pressure is preferred
(for riding in hilly terrain on hard surfaces with a high vehicle load), turn the adjuster knob clockwise. Ski pressure will increase as vehicle load increases.
Tip: For maximum comfort, set the suspension to bottom out occasionally.
3.If less ski pressure is preferred, turn the adjuster knob counterclockwise. Ski pressure will decrease as vehicle load increases.
4.Turn the knob fully counter-clockwise (minimum setting) for riding in deep snow without a passenger and with a low vehicle load.
Tip: Do not exaggerate adjustments. A couple of turns on the adjuster knob will usually give the desired effect.
Rear Spring Settings
1.To check for the recommended rear spring settings, lift the rear of the snowmobile, then slowly lower it. Measure the distance between the ground and the running board.
2.Without letting the suspension settle, the rider should carefully mount the snowmobile. Measure the distance between the ground and the same spot on the running board.
3.The difference between the two measurements should be approximately 1.5 inches (3.8 cm). If the difference is greater, adjust the rear spring equally on both sides and repeat steps 1-3.
4.Compensate for heavy or light drivers or cargo loads by adjusting the rear spring eye bolt length. Adjust spring tension so there is equal tension on the long leg of each spring.
Tip: Rear spring settings affect ski-to-ground pressure. If ski pressure is too light, tighten the rear springs.
Eye  Bolt
Bolt
34

THE PERFECT FIT
Handlebar Adjustments
Standard Handlebar
Follow these steps to adjust handlebar angle at the handlebar block.
1.Remove the mountain bar by removing nuts.
2.Using a 7/16-inch wrench, loosen the four nuts on the bottom of the adjuster block (turn the handlebar either left or right for access to the rear nuts). If necessary, pry the blocks apart with a screwdriver.
3.Adjust the handlebar to the desired angle. Be sure the handlebar, brake lever and throttle lever operate smoothly and do not hit the gas tank, windshield or any other part of the snowmobile when the handlebar is turned fully to the left or right.
4.Torque the front bolts first, then torque the rear bolts. Torque the bolts to 11-13 ft. lbs. (15-18 Nm).
5.Reinstall the mountain bar.
35
 Loading…
Предложите, как улучшить StudyLib
(Для жалоб на нарушения авторских прав, используйте
другую форму
)
Ваш е-мэйл
Заполните, если хотите получить ответ
Оцените наш проект
1
2
3
4
5