Support for MVH-S120UB | Pioneer
- Главная
- Продукция
- Автомобильные ресиверы
- Support for MVH-S120UB
Support for MVH-S120UB
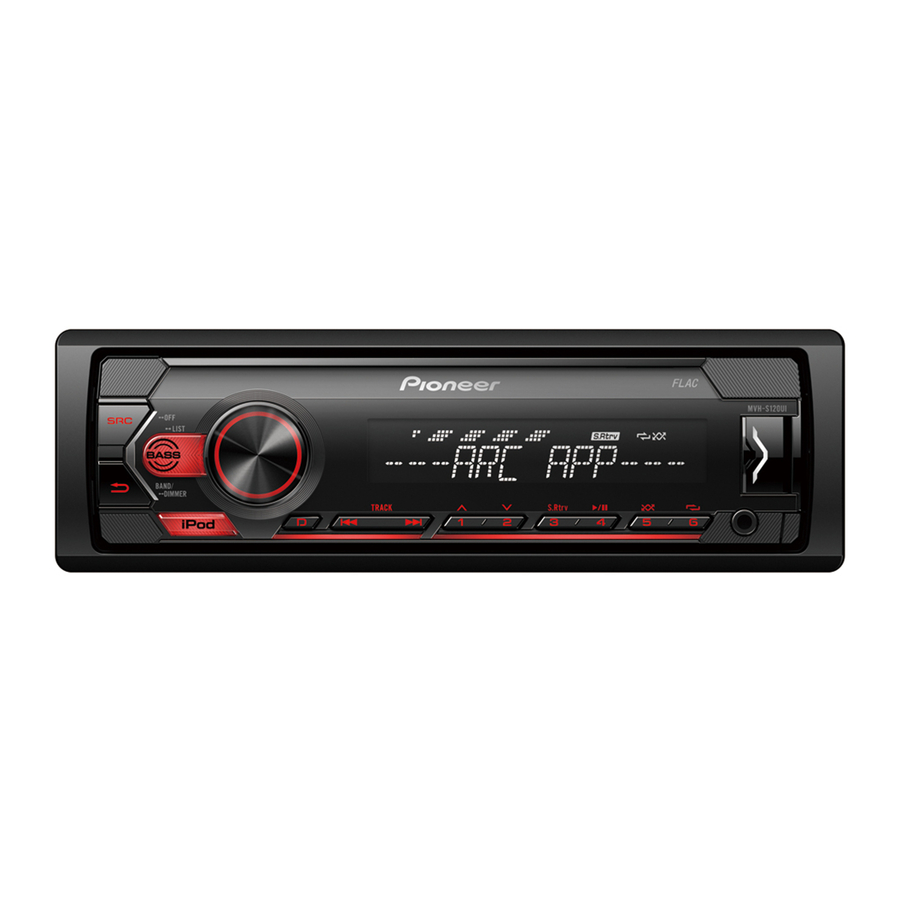
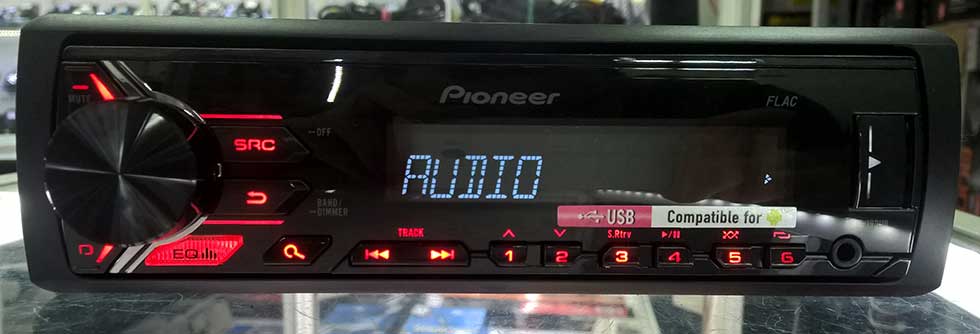
Автомобильный цифровой ресивер с тюнером, USB, Aux-входом, поддержкой аудиоформата FLAC, совместимый с смартфонами на Android
- Программное обеспечение
- Руководства
- Назад к обзору
Программное обеспечение
Для данного продукта нет файлов, доступных для загрузки
Руководства
Pioneer MVH-S120UI/UIG/UB/UBG/UBA/UBW MVH-S12UI Quick Start Guide
Before You Start
Thank you for purchasing this PIONEER product
To ensure proper use, please read through this guide before using this product. It is especially important that you read and observe WARNINGS and CAUTIONS in this guide. Please keep the guide in a safe and accessible place for future reference.

If you want to dispose this product, do not mix it with general household waste. There is a separate collection system for used electronic products in accordance with legislation that requires proper treatment, recovery and recycling.
Private households in the member states of the EU, in Switzerland and Norway may return their used electronic products free of charge to designated collection facilities or to a retailer (if you purchase a similar new one).
For countries not mentioned above, please contact your local authorities for the correct method of disposal. By doing so you will ensure that your disposed product undergoes the necessary treatment, recovery and recycling and thus prevent potential negative effects on the environment and human health.
- Do not attempt to install or service this product by yourself. Installation or servicing of this product by persons without training and experience in electronic equipment and automotive accessories may be dangerous and could expose you to the risk of electric shock, injury or other hazards.
- Do not attempt to operate the unit while driving. Make sure to pull off the road and park your vehicle in a safe location before attempting to use the controls on the device.
- Do not allow this unit to come into contact with moisture and/or liquids. Electrical shock could result. Also, damage to this unit, smoke, and overheating could result from contact with liquids.
- Always keep the volume low enough to hear outside sounds.
- The Pioneer CarStereo-Pass is for use only in Germany.
- This product is evaluated in moderate and tropical climate condition under the Audio, video and similar electronic apparatus — Safety requirements, IEC 60065.
If you experience problems
Should this unit fail to work properly, please contact your dealer or nearest authorized PIONEER Service Station.
Connections
- When installing this unit in a vehicle without an ACC (accessory) position on the ignition switch, failure to connect the red cable to the terminal that detects operation of the ignition key may result in battery drain.

- Use of this unit in conditions other than the following could result in fire or malfunction.
- Vehicles with a 12-volt battery and negative grounding.
- When speaker output is used by 4 channels, use speakers over 50 W (maximum input power) and between 4 Ω to 8 Ω (impedance value). Do not use 1 Ω to 3 Ω speakers for this unit.
- When rear speaker output is used by 2 Ω of subwoofer, use speakers over 70 W (maximum input power).
* Please refer to connections for a connection method.
- To prevent a short-circuit, overheating or malfunction, be sure to follow the directions below.
- Disconnect the negative terminal of the battery before installation.
- Secure the wiring with cable clamps or adhesive tape. Wrap adhesive tape around wiring that comes into contact with metal parts to protect the wiring.
- Place all cables away from moving parts, such as the shift lever and seat rails.
- Place all cables away from hot places, such as near the heater outlet.
- Do not connect the yellow cable to the battery by passing it through the hole to the engine compartment.
- Cover any disconnected cable connectors with insulating tape.
- Do not shorten any cables.
- Never cut the insulation of the power cable of this unit in order to share the power with other devices. The current capacity of the cable is limited.
- Use a fuse of the rating prescribed.
- Never wire the negative speaker cable directly to ground.
- Never band together negative cables of multiple speakers.
- When this unit is on, control signals are sent through the blue/white cable. Connect this cable to the system remote control of an external power amp or the vehicle’s auto-antenna relay control terminal (max. 300mA 12 V DC). If the vehicle is equipped with a glass antenna, connect it to the antenna booster power supply terminal.
- Never connect the blue/white cable to the power terminal of an external power amp. Also, never connect it to the power terminal of the auto antenna. Doing so may result in battery drain or a malfunction.
- The graphical symbol placed on the product means direct current.
- The function and audio settings other than the setting of RCA pre-outs are stored in memory if the unit is disconnected from power supply.

 placed on the product means direct current.
This unit

- Power cord input
- Rear output or subwoofer output
- Front output (Only for MVH-S120UI/S120UIG/S12UI)
- Antenna input
- Fuse (10 A)
- Wired remote input (Only for MVH-S120UI/S120UIG/S12UI)
Hard-wired remote control adapter can be connected (sold separately).
Power cord

- To power cord input
- Depending on the kind of vehicle, the function of and may be different.
In this case, be sure to connect to and to . - Yellow
Back-up (or accessory) - Yellow
Connect to the constant 12 V supply terminal. - Red
Accessory (or back-up) - Red
Connect to terminal controlled by the ignition switch (12 V DC). - Connect leads of the same colour to each other.
- Black (chassis ground)
- Blue/white
The pin position of the ISO connector will differ depending on the type of vehicle. Connectand when Pin 5 is an antenna control type. In another type of vehicle, never connect and . - Blue/white
Connect to the system control terminal of the power amp (max. 300 mA 12 V DC). - Blue/white
Connect to the auto-antenna relay control terminal (max. 300 mA 12 V DC). - Yellow/black (Only for MVH-S120UI/S120UIG/S12UI)
If you use equipment with a Mute function, wire this lead to the Audio Mute lead on that equipment. If not, keep the Audio Mute lead free of any connections. - Speaker leads
White: Front left
White/black: Front left
Gray: Front right
Gray/black: Front right
Green: Rear left or subwoofer
Green/black: Rear left or subwoofer
Violet: Rear right or subwoofer
Violet/black: Rear right or subwoofer - ISO connector
In some vehicles, the ISO connector may be divided into two. In this case, be sure to connect to both connectors.
 and
and  may be different.
 to
to  to
to  and
and  when Pin 5 is an antenna control type. In another type of vehicle, never connect

NOTES
- Change the initial menu of this unit. Refer to [SP-P/O MODE]. The subwoofer output of this unit is monaural.
- When using a subwoofer of 2 Ω, be sure to connect the subwoofer to the violet and violet/ black leads of this unit. Do not connect anything to the green and green/black leads.
Power amp (sold separately)
Perform these connections when using the optional amplifier.
- System remote control
Connect to blue/white cable. - Power amp (sold separately)
- Connect with RCA cables (sold separately)
- To front output*
- Front speaker*
- To rear output or subwoofer output
- Rear speaker or subwoofer
* Only for MVH-S120UI/S120UIG/S12UI
Installation
DIN mount installation
- Insert the supplied mounting sleeve into the dashboard.
- Secure the mounting sleeve by using a screwdriver to bend the metal tabs (90°) into place.

- Dashboard
- Mounting sleeve
- Make sure that the unit is installed securely in place. An unstable installation may cause skipping or other malfunctions.
When not using the supplied mounting sleeve
- Line up the holes on the mounting bracket with the holes on the sides of the unit to attach the bracket.
- Screw in one screw on each side to hold the unit in place.


- Tapping screw (5 mm × 9 mm, not supplied with product)
- Mounting bracket
- Dashboard or console
Using the included bracket
Check to make sure that the included bracket matches your particular model of vehicle and then attach it to the unit as shown below.

- Screw
- Bracket
Removing the unit (installed with the supplied mounting sleeve)
- Remove the trim ring.

- Trim ring
- Notched tab
- Releasing the front panel allows easier access to the trim ring.
- When reattaching the trim ring, point the side with the notched tab down.
- Insert the supplied extraction keys into both sides of the unit until they click into place.
- Pull the unit out of the dashboard.

Basic operation
MVH-S120UI/S120UIG/S12UI/S120UB/S120UBG/S120UBA/S120UBW
About the main menu
You can adjust various settings in the main menu.
- Press the M.C. dial to display the main menu.
- Turn the M.C. dial to select one of the categories below, then press to confirm.
- FUNCTION settings
- AUDIO settings
- SYSTEM settings
- ILLUMINATION settings
- Turn the M.C. dial to select the options, then press to confirm.
Frequently used operations
| Purpose | Operation |
| Turn on the power | Press SRC/OFF to turn on the power. Press and hold SRC/OFF to turn off the power. |
| Adjust the volume | Turn the M.C. dial. |
| Select a source | Press SRC/OFF repeatedly. |
| Change the display information | Press DISP repeatedly. |
| Return to the previous display/list | Press BAND/ . . |
| Return to the normal display from the menu | Press and hold BAND/ . |
| Change the display brightness | Press and hold BAND/ . |
| Boost the bass level | Press BASS.
|
Setup operation
When you turn the ignition switch to ON after installation, [SET UP:YES] appears in the display.
- Press the M.C. dial.
- Turn the M.C. dial to select the options, then press to confirm.
To proceed to the next menu option, you need to confirm your selection.
| Menu Item | Description |
|
LANGUAGE [ENG](English), |
Select the language to display the text information from a compressed audio file. |
| CLOCK SET | Set the clock.
|
| FM STEP [100], [50] |
Select the FM tuning step from 100 kHz or 50 kHz. |
- [QUIT:YES] appears when all the settings have been made.
To return to the first item of the setup menu, turn the M.C. dial to select [QUIT:NO], then press to confirm. - Press the M.C. dial to confirm the settings.
Tuner operation
Receiving preset stations
- Press SRC/OFF to select [RADIO].
- Press BAND/
 to select the band.
[FM1][FM2] [FM3][MW]/[LW] - Press a number button (1/
 to 6/
to 6/ ).
).
 [FM2]
[FM2] Best stations memory (BSM)
- After selecting the band, press the M.C. dial to display the main menu.
- Turn the M.C. dial to select [FUNCTION], then press to confirm.
- Turn the M.C. dial to select [BSM], then press to confirm.
To store stations manually
- While receiving the station you want to store, press and hold one of the number buttons (1/ to 6/) until it stops flashing.
USB/iPod®/AUX operation
NOTE
MVH-S120UB/S120UBG/S120UBA/S120UBW is not compatible with Apple® devices.
USB/iPod
- Open the USB port cover.
- Plug in the USB device/iPod using an appropriate cable.
MTP connection
A device installed with Android OS 4.0 or most of later versions can be connected to the unit via MTP, using the cable supplied with the Android device. However, depending on the connected device, OS version or the numbers of the files in the device, audio files/songs may not be able to be played back via MTP. NOTE
If you use an MTP connection, [ANDROID WIRED] needs to be set to [MEMORY] in the SYSTEM settings.
AUX
- Insert the stereo mini plug into the AUX input jack.
- Press SRC/OFF to select [AUX] as the source.
Making a connection with Pioneer ARC APP
Pioneer’s Advanced app converts your compatible smartphone into a powerful touchscreen remote control.
NOTE
MVH-S120UB/S120UBG/S120UBA/S120UBW is not compatible with Apple devices.
Do not attempt to operate the application while driving. Make sure to pull off the road and park your vehicle in a safe location before attempting to use the controls on the application.
When making a connection with an Android device
NOTE
This function is compatible with a phone that runs Android 4.1 up to 7.1.2 and also supports AOA (Android Open Accessory) 2.0, but the compatibility depends on the smartphone.
- Enter the SYSTEM menu (refer to «About the main menu»).
- Turn the M.C. dial to select [ANDROID WIRED], then press to confirm.
- Turn the M.C. dial to select [APP CONTROL], then press to confirm.
- Turn the M.C. dial to select [P.APP AUTO ON], then press to confirm.
- Turn the M.C. dial to select [ON], then press to confirm.
- Connect this unit with the device via USB.
Pioneer ARC APP on the Android device starts automatically.
When making a connection with an iPhone
- Connect this unit with the iPhone via USB.
- Press SRC/OFF to select any source.
- Press and hold the M.C. dial.
Pioneer ARC APP on the iPhone starts.NOTE
If the connection fails, launch Pioneer ARC APP on the iPhone.
Listening to Spotify®
(Only compatible with Spotify installed on iPhone)
NOTE
MVH-S120UB/S120UBG/S120UBA/S120UBW is not compatible with Apple devices.
Update the firmware of the Spotify application to the latest version before use.
Before you start, connect this unit with the mobile device via USB (iPhone only).
- Press SRC/OFF to select [SPOTIFY].
- Launch the Spotify application on the mobile device and start playback.

Documents / Resources
Download manual
Here you can download full pdf version of manual, it may contain additional safety instructions, warranty information, FCC rules, etc.
Download Pioneer MVH-S120UI/UIG/UB/UBG/UBA/UBW MVH-S12UI Quick Start Guide
Содержание
- Учимся настраивать звук колонок и сабвуфера на магнитоле Pioneer своими руками
- Эквалайзер
- Фильтр высоких частот
- Фильтр низких частот (сабвуфер)
- Настройка радио
- Выключение режима Demo
- Заключение
⭐ ⭐ ⭐ ⭐ ⭐ Настройка магнитолы Pioneer в машине начинается со сброса текущих установок. В результате эквалайзер фильтры для колонок HPF и сабвуфера LPF вернётся к заводским установкам. Это можно сделать двумя способами, найти соответствующий раздел в меню автомагнитолы или отключить клемму масса от аккумулятора. Отметим что, нижеприведённая методика настройки магнитолы рассчитана на пользователя начального уровня, и в ней нет ничего сверхсложного. Но также, качество воспроизводимого звука только на 33% зависит от состава и качества компонентов аудио системы. Ещё на треть оно зависит от правильности установки оборудования, и оставшиеся 33% — от грамотности настройки аудиосистемы.
Если у вас сбрасываются настройки при выключении зажигания, проверьте схему подключения магнитолы. Скорее всего желтый провод подключен к замку зажигания а не на прямую к аккумулятору.
Эквалайзер
Эквалайзер позволяет сделать звучание более ровным — поднять или понизить басовые, средние и высокие частоты.Это довольно тонкая настройка аудиосистемы. Регулируется не весь диапазон звука сразу, как в других пунктах меню, а конкретные полосы частот. У разных моделей встречается разное их количество, в зависимости от класса оборудования. В магнитолах Pioneer их пять: 80 Гц, 250 Гц, 800 Гц, 2,5 кГц 8 кГц.
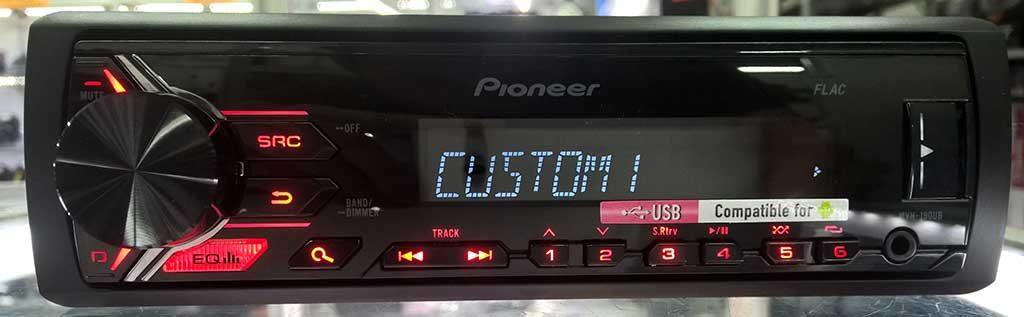
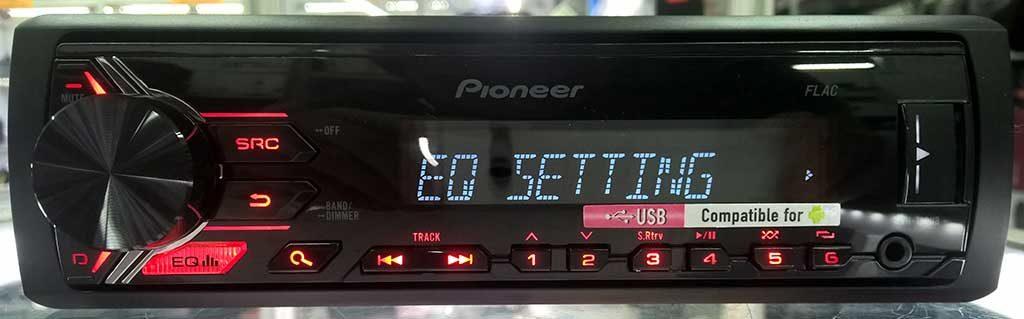
Эквалайзер находится в разделе «Аудио» меню настроек, пункт EQ. В нём можно выбрать одну из предустановленных стандартных настроек. Для тех, кого эти варианты не устраивают, предусмотрено два набора пользовательских настроек (Custom).Переключаться между ними можно как из меню, так и кнопкой EQ рядом с джойстиком.
Чтобы произвести изменения частотных параметров в пользовательской настройке, нужно выбрать её колёсиком и нажать на джойстик. Затем поворотом колеса выбрать одну из полос частот эквалайзера. Снова нажать на джойстик и выставить положение от -6 (ослабление частоты) до +6 (усиление). Действуя таким образом можно сделать одни частоты громче, другие — тише.
Универсального рецепта настройки эквалайзера на магнитоле не существует. Производится она на слух в зависимости от предпочтений потребителя. Кроме того, разные варианты регулировки подбираются под определённый жанр музыки.
Можно дать лишь приблизительные рекомендации:
- если будет воспроизводиться тяжёлая музыка, стоит усилить бас — 80 Гц (но не слишком, +2–+3 достаточно).Ударные же инструменты звучат в районе- 250 Гц;
- для музыки с вокалом нужны частоты примерно 250-800+ Гц (мужские голоса ниже, женские — выше);
- для электронной музыки понадобятся высокие частоты — 2,5-5 кГц.
Настройка эквалайзера является очень важным этапом.С помощью данного инструмента можно кратно улучшить качество звучания. Даже в случае, если акустика не является очень дорогой и качественной.
Также рекомендуется изучить информацию о наиболее распространенной неисправности магнитолы ошибке 23.
Фильтр высоких частот
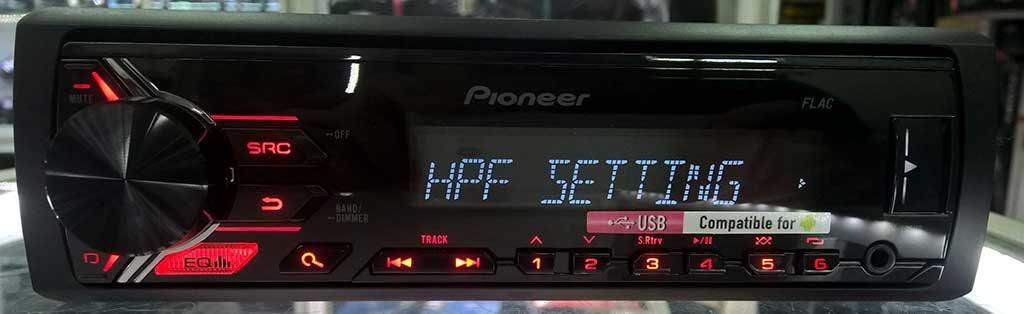
Далее находим пункт HPF (High-passFilter). Это фильтр высоких частот, который обрезает частоту звука, подаваемого на динамики, ниже их граничного паспортного значения. Делается это из — за того, что,стандартным динамикам (13–16 см) из-за небольшого диаметра диафрагмы и малой мощности очень сложно воспроизводить низкие частоты. Вследствие этого звук воспроизводится с искажениями даже на небольшой громкости. Если обрезать низкие частоты, можно будет получить чистое звучание в большем диапазоне громкости.
Если у вас нет сабвуфера, то рекомендуем установить HPF фильтр на частоте 50 или 63 Гц.
Затем можно выйти из меню кнопкой возврата и проверить результат. Делать это лучше на громкости 30.
Если качество звука не устраивает, или если вы находитесь на природе, и хочется устроить громкую дискотеку, можно поднять нижнюю границу от 80–120 Гц и более. Такой же уровень граничного среза рекомендуется применить при наличии сабвуфера. Эти мероприятия позволят кратно увеличить чистоту и громкость воспроизводимого звука.
Также здесь есть регулировка крутизны затухания частот. На Pioneer она бывает в двух положениях — это 12 и 24 дБ на октаву. Советуем вам установить данный показатель на 24 дБ.
Фильтр низких частот (сабвуфер)
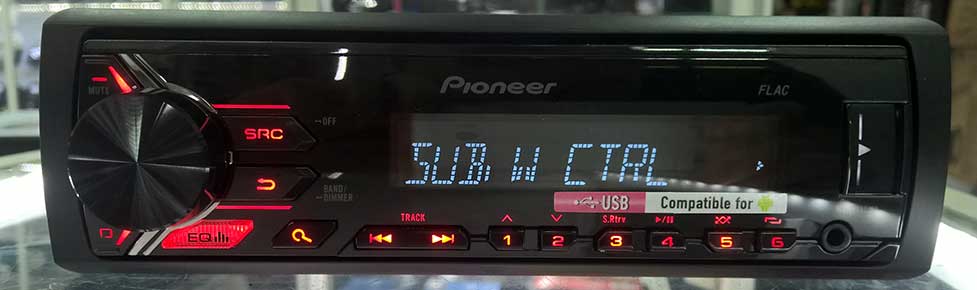
После того, как мы разобрались с колонками, выполним настройку магнитолы под сабвуфер. Для этого нам понадобится фильтр низких частот. С его помощью мы состыкуем частоты колонок и сабвуфера.
Ситуация выглядит следующим образом. Когда мы убрали с акустики бас (установили HPF на 80+), у нас получился громкий и качественный звук. Следующим этапом мы должны «пристыковать» к нашим колонкам сабвуфер. Для этого заходим в меню, выбираем пункт аудио, в нём находим раздел управление сабвуфером.
Здесь имеются три значения:
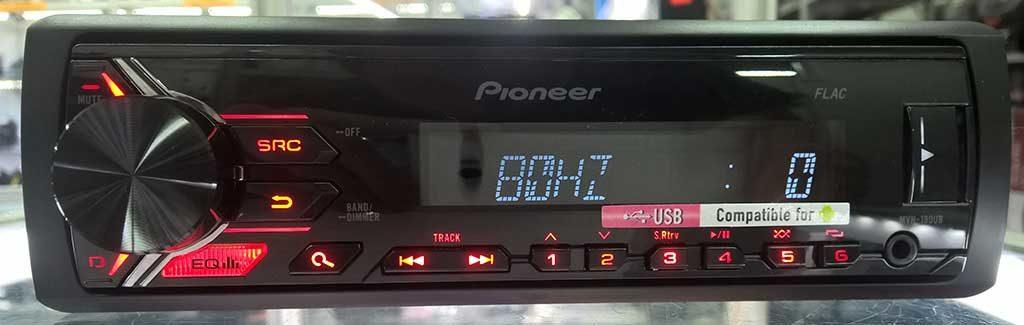
- Первая цифра — это частота среза сабвуфера. Здесь всё так же, как и с эквалайзером. Конкретных значений установки просто не существует, а диапазон, в котором можно «поиграться», составляет от 63 до 100 Гц.
- Следующая цифра — это громкость нашего сабвуфера. Думаем, тут всё просто, можно сделать сабвуфер громче или тише относительно акустики, шкала от -6 до +6.
- Следующая цифра — это крутизна затухания частот. Она также, как и в HPF может быть или 12 или 24. Здесь также небольшой совет: если устанавливаете высокий срез, то сделайте крутизну спада на 24, если более низкий, то можно установить на 12 или 24.
Качество звучания зависит не только от настройки вашей аудиосистемы, но и оттого какие динамики у вас установлены. Если вы хотите заменить их, советуем ознакомиться со статьей «что необходимо знать при выборе автомобильной акустики»
Настройка радио
Даже любимая музыка, записанная на флешку или USB накопитель, со временем может надоесть. Поэтому многие автолюбители любят слушать радио во время поездки. Правильно настроить радио у магнитолы Pioneer несложно и может осуществиться буквально в несколько движений — нужно лишь выбрать диапазон, найти и сохранить станции.
Настроить радио можно тремя способами:
- Автоматический поиск станций. Для этого нужно найти пункт BSM в меню настроек и запустить поиск. Автомагнитола найдёт станцию с самой высокой частотой в радиодиапазоне и остановится — её можно сохранить, нажав кнопку с цифрой 1–6. Далее поиск станций продолжится в сторону уменьшения частоты. Если ничего не найдётся, в скрытом меню настроек можно изменить шаг поиска со 100 кГц на 50кГц.
- Полуавтоматический поиск. Находясь в режиме радио, нужно зажать кнопку «вправо». Запустится сканирование диапазона, и произойдёт поиск, такой же, как в автоматическом режиме.
- Ручная настройка. Короткими нажатиями кнопки «вправо» в режиме радио можно переключиться на определённую частоту. Затем станция сохраняется в памяти.
Когда все 6 мест для сохранённых станций заполнятся, можно переключиться на следующий раздел памяти. Всего их 3. Таким образом можно сохранить до 18 радиостанций.
Выключение режима Demo
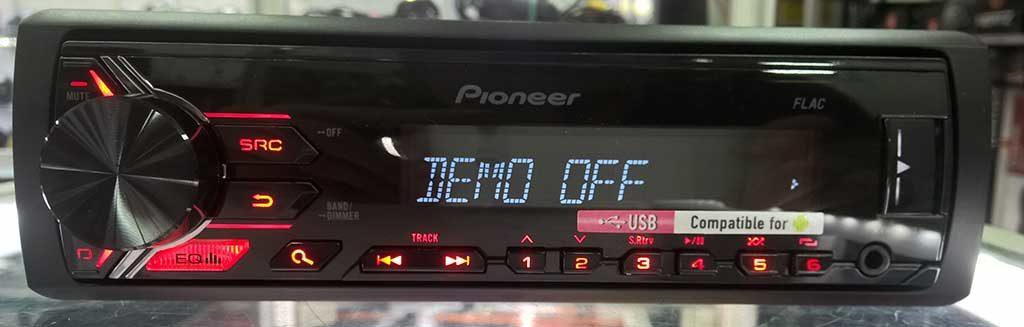
Сразу после покупки и подключения магнитолы следует разобраться, как отключить демо-режим, предназначенный для показа устройства в магазине. Использовать магнитолу в этом режиме можно, но неудобно, так как при выключении его не гаснет подсветка, а по дисплею бегают надписи с различной информацией.
Отключение демо-режима осуществляется очень просто:
- Заходим в скрытое меню, выключив магнитолу и зажав кнопку SRC.
- В меню поворотом колеса доходим до пункта DEMO.
- Переключаем демо-режим из положения ON в OFF.
- Выходим из меню кнопкой BAND.
Также в скрытом меню можно настроить дату и время, зайдя в раздел System. Здесь переключается отображение времени (12/24-часовой режим). Затем открываем пункт «Настройка часов», и поворотами колеса настраиваем время. В разделе System также имеется настройка языка (английский/русский).
Таким образом, после покупки современной модели Pioneer, настройкой магнитолы вполне можно заняться самостоятельно. Правильно отрегулировав параметры аудио, можно добиться весьма качественного звучания даже простой аудиосистемы и получить хорошую звуковую картину при минимальных затратах.
Заключение
Мы приложили не мало усилий для создания этой статьи, старались написать ее простым и понятным языком. Но получилось у нас это сделать или нет решать только Вам. Если остались вопросы, создайте тему на «Форуме», мы и наше дружное сообщество обсудим все детали, и найдем на него оптимальный ответ.
И напоследок, есть желание помочь проекту? Подпишись на наше сообщество «Вконтакте».
Источник