ENGLISH
1
Safety instructions
•
This video recorder is intended for the reception,
recording and playback of picture and sound
signals. Every other use is explicitely excluded.
•
Danger — high voltage in this appliance!
Do not open! The video recorder does not contain
any parts that can be repaired by the user. As long
as the video recorder is connected to the mains,
there are parts of it still in operation. To switch off
the video recorder completely you must disconnect
it from the mains.
•
Please note that this video recorder is intended for
a mains voltage of 220 — 240V~, /50Hz.
•
The manufacturer cannot be held responsible for
any damage which is incurred by not using the
video recorder in compliance with the national
guarantee conditions or safety instructions.
•
Ensure that no objects or liquids enter the device.
If a liquid enters, pull out the power plug of the
video recorder immediately and consult customer
services.
Dear customer,
with this video recorder (VCR), you own one of the
most sophisticated yet simple-to-use video recor-
ders on the market.
Naturally, you can’t wait to use your new video
recorder, but before you start, it’s worthwhile
taking the time to read through this operating
manual. Acquainting yourself with the video recor-
der’s features is the best way to guarantee
trouble-free operation.
This video recorder is supplied with additional
abridged operating instructions which are to be
found in its packaging.
If you should nevertheless get difficulties in
operating this video recorder, please contact a
consumer help desk responsible for your country.
You will find the telephone numbers in the guaran-
tee information supplied.
Contents
Page
0
1. BUTTONS, CONTROLS AND
2
SOCKETS
The remote control at a glance
2
The back of the video recorder
3
The front of the video recorder
3
0
2. INSTALLATION. HOW DO I
5
INSTALL THE VIDEO RECORDER ?
Connecting the video recorder
5
Inserting the batteries into the remote control
6
Connecting to the aerial
6
Connecting to the TV set
7
Connecting to the mains supply
7
Some notes on operation
7
Saving energy
8
Further connecting possibilities
8
Emergency interrupt
8
OSD – the on-screen user’s guide
9
0
3. STORING TV CHANNELS
10
The «Easy Link» function
10
Automatic channel search (ATS Euro+)
10
Assigning TV channels automatically (Follow TV) 11
Assigning TV channels manually
12
Manual search
13
0
4. PLAYING A RECORDED CASSETTE
14
S-VHS Playback
14
The JOG/SHUTTLE functions
15
0
5. HOW CAN I RECORD DIRECTLY ?
18
Direct recording
19
0
6. HOW DO I PROGRAMME A
20
RECORDING ?
Programming with ShowView
21
Programming with TXT pages
22
Normal TIMER programming
23
Recording from a satellite receiver
24
Checking, correcting and clearing
25
a TIMER block
0
7. EDITING VIDEO RECORDINGS
27
Audio dubbing
27
The Insert functions
29
Synchro-edit
30
Insert-edit functions
33
Programme-edit functions
35
0
8. ADDITIONAL FUNCTIONS
37
OF THE RECORDER
Personal preferences
37
Checking/setting time and date on the
37
video recorder
Special settings for the video recorder
38
and the TV set
0
9. NOTES
45
10. BEFORE YOU CALL A TECHNICIAN
46
11. TECHNICAL DATA, ACCESSORIES
47
OPERATING MANUAL VR 969/02
-
Contents
-
Table of Contents
-
Bookmarks
Quick Links
OPERATING MANUAL VR 969/02
Dear customer,
with this video recorder (VCR), you own one of the
most sophisticated yet simple-to-use video recor-
ders on the market.
Naturally, you can’t wait to use your new video
recorder, but before you start, it’s worthwhile
taking the time to read through this operating
manual. Acquainting yourself with the video recor-
der’s features is the best way to guarantee
trouble-free operation.
This video recorder is supplied with additional
abridged operating instructions which are to be
found in its packaging.
If you should nevertheless get difficulties in
operating this video recorder, please contact a
consumer help desk responsible for your country.
You will find the telephone numbers in the guaran-
tee information supplied.
Safety instructions
•
This video recorder is intended for the reception,
recording and playback of picture and sound
signals. Every other use is explicitely excluded.
•
Danger — high voltage in this appliance!
Do not open! The video recorder does not contain
any parts that can be repaired by the user. As long
as the video recorder is connected to the mains,
there are parts of it still in operation. To switch off
the video recorder completely you must disconnect
it from the mains.
•
Please note that this video recorder is intended for
a mains voltage of 220 — 240V~, /50Hz.
•
The manufacturer cannot be held responsible for
any damage which is incurred by not using the
video recorder in compliance with the national
guarantee conditions or safety instructions.
•
Ensure that no objects or liquids enter the device.
If a liquid enters, pull out the power plug of the
video recorder immediately and consult customer
services.
Contents
INSTALL THE VIDEO RECORDER ?
OF THE RECORDER
Page
2
2
3
3
5
5
6
6
7
7
7
8
8
8
9
10
10
10
12
13
14
14
15
18
19
20
21
22
23
24
25
27
27
29
30
33
35
37
37
37
38
45
46
47
1
Summary of Contents for Philips VR969/02
This manual is also suitable for:
Vr902
-
Руководства по ремонту
1
-
Инструкции по эксплуатации
3
Языки:

Philips VR969/02 инструкция по эксплуатации
(48 страниц)
- Языки:Английский
-
Тип:
PDF -
Размер:
744.34 KB
Просмотр

Philips VR969/02 инструкция по эксплуатации
(48 страниц)
- Языки:Греческий
-
Тип:
PDF -
Размер:
2.43 MB
Просмотр

Philips VR969/02 инструкция по эксплуатации
(48 страниц)
- Языки:Итальянский
-
Тип:
PDF -
Размер:
753.85 KB
Просмотр
На NoDevice можно скачать инструкцию по эксплуатации для Philips VR969/02. Руководство пользователя необходимо для ознакомления с правилами установки и эксплуатации Philips VR969/02. Инструкции по использованию помогут правильно настроить Philips VR969/02, исправить ошибки и выявить неполадки.
Краткое содержание страницы № 1
OPERATING MANUAL VR 969/05
Contents Page
Dear customer,
with this video recorder (VCR), you own one of the
most sophisticated yet simple-to-use video recor-
01. BUTTONS, CONTROLS AND 2
ders on the market.
SOCKETS
Naturally, you can’t wait to use your new video
The remote control at a glance 2
recorder, but before you start, it’s worthwhile
The back of the video recorder 3
taking the time to read through this operating The front of the video recorder 3
02. INSTALLATION. HOW DO I 5
manual. Acquai
Краткое содержание страницы № 2
1. BUTTONS, CONTROLS AND SOCKETS For detailed explanations of the functions, see the corresponding chapters. The remote control g Recording d Switching off H / I / F / G Cursor up/down, left/right l Call up the OSD page MAIN MENU RECORD STANDBY B Confirm entry m Reset/clear o TIMER programming p Select function MENU O Numeric buttons OK TIMER 1 Rewind/picture search reverse CLEAR SELECT e Playback 2 Wind/picture search forwards 2 1 3 q Search index mark ZU Still picture, Jog/Shuttle on/off 5 4 6
Краткое содержание страницы № 3
The back of the video recorder RS 232 2 EXTERNAL / DEC.- AV 2 AUDIO L L 1 EXTERNAL / EURO-AV 1 O I U N S-VHS OUT T R R Mains socket cv Scart socket DEC.- AV 2 yx Scart socket EURO-AV 1 # Socket for the connection of a cut- ting device or a personal computer ? S-VHS output socket LÄ Audio output, left/right channel 3 Aerial input socket L Audio input, left/right channel 4 Aerial output socket The front of the video recorder LOW POWER RECORD TIMER CASSETTE STANDBY TM Buttons and display indica
Краткое содержание страницы № 4
RD A OW F The front of the video recorder V SYNCHRO EDIT L MEI EDIT EJECT FOLLOW TV R S VHS RECORD LEVEL MIC. U LEFT RIGHT JOG SHUTTLE/STILL PLAYER RECORDER TIMER SELECT CLEAR LOW POWER STANDBY EDIT RECORD MENU OK IN OUT MIC. U Buttons and connections behind the front cover: © Video input socket (E3) S Automatic channel search Eject cassette » + ¼ Left/Right, Audio input ª sockets, (for E3 and E4) D Synchro-edit socket / MEI-edit socket S-VHS input socket (E4) Buttons and connections in the fr
Краткое содержание страницы № 5
2. INSTALLATION. HOW DO I INSTALL THE VIDEO RECORDER ? Connecting the video recorder The scart socket yx has an input/output function. Connect your TV set to this socket. The socket cv has an input function. Connect additional units to this socket. A detailed explanation to this illustration is to be found in the next paragraphs. CUTTING DEVICE, or VIDEORECORDER, or PERSONAL COMPUTER PAY — TV — DECODER, or TV RF SAT RECEIVER RS 232 2 EXTERNAL / DEC.- AV 2 AUDIO L L 1 EXTERNAL / EURO-AV 1 O I U N
Краткое содержание страницы № 6
Inserting the batteries into Remove the aerial cable plug from the TV set and ! the remote control insert it into the 3 socket at the rear of the video recorder. Use the aerial cable supplied to connect the 4 » socket on the video recorder with the aerial input socket on your TV set. Connecting to the TV set If your TV set does not have a Scart socket, do not read here but continue with chapter «Additional functions of your video recorder». In the chapter «Playback via the aerial cable» you wi
Краткое содержание страницы № 7
Connecting to the mains supply Warning ! In case this appliance is supplied with a Safety Standard Approved mains lead fitted with a non- rewireable 13 Amp mains plug which, if unsuitable for your socket, should be cut off and an appropriate plug fitted by a qualified electrician. The fuse and fuse holder must be removed from the plug as accidental insertion of the redundant plug into a 13 Amp socket is RS 232 2 EXTERNAL / DEC.- AV 2 likely to cause an electrical hazard. AUDIO L L 1 EXTERNAL / E
Краткое содержание страницы № 8
Saving energy Connecting to a satellite receiver There are two ways of switching off to choose from. It is possible to connect a satellite receiver to this video 1. Normal switch-off. recorder. Switch off by pressing the button Ä . The time remains visible. 2. Energy-saving mode. Press the button Ä once again. The time in the display disappears. You can switch back on again by pressing the same button. Note: * It is not possible to switch to energy-saving mode as long as a TV set connected wit
Краткое содержание страницы № 9
OSD – On Screen Display, the user’s guide on the picture screen The user’s guide on the picture screen enables you to dialogue with your video recorder. The indications given in the bottom line of the picture screen designate the buttons on the remote control which are to be used to carry out the various functions. You will be guided in a simple and understandable way to the next possible operating steps. The following example explains the user’s guide with the help of the «MAIN MENU». Switch th
Краткое содержание страницы № 10
3. STORING TV CHANNELS For the video recorder to be able to record TV program- Autostore (Automatic channel search) mes, the TV channels must first be stored in the video recorder. You can store up to 99 TV channels. The video recorder makes a search for all TV channels. It Your video recorder has a receiver of its own. This orders them in the following sequence in the memory: means it can be used independently of the TV set. BBC 1, BBC 2, ITV, CH 4, CH 5, SKY, others. The clock and calender inf
Краткое содержание страницы № 11
Assigning TV channels automatically Wait until the video recorder display indicates, / (Follow TV) for example, «SELECT TV P02». 8 8 The following setting is not necessary if the TV chan- SE:LE:CT:TV D W nels have been set using the «Easy Link» function. VPS SVHS STEREO I P 028 PDC NICAM II n n DEC z LP MONO HiFi Only if the video recorder (socket t) and the TV set are connected by means of a scart cable the Select the programme position «2» on the TV set. ( TV channels can be allocated aut
Краткое содержание страницы № 12
Assigning TV channels manually Confirm by pressing the button B. The TV & channel line is inserted and the other channel lines The following setting is not necessary if the TV chan- are moved on a line. If you wish to cancel an nels have been set using the «Easy Link» function. undesired TV channel, press the button m instead of button B. You can allocate any TV channel found to the program- me number of your choice so that you have, for exam- Sort all of the TV channel lines (steps — ) into /
Краткое содержание страницы № 13
Manual search If you wish to set a new TV channel, press the & button _ until you have found the right one. In certain cases, the «Automatic channel search» will A changing channel or frequency number appears not be able to find all TV channels (e.g. encoded chan- on the screen. nels). If you know the channel transmission frequency or In this case, you can set the channels using the channel number, the frequency (4-digit) or channel «Manual search» function. number (2-digit) can also be direc
Краткое содержание страницы № 14
4. PLAYING A RECORDED CASSETTE In chapter 2, you have learned how to connect the Notes: video recorder to the TV set. When this is done, play- * Some functions are switched off automatically back of a cassette is very easy. after a certain time (e.g., pause, slow motion, still If you wish to record first, go to chapter 5. picture, picture search). This is to avoid unnecessary cassette wear and energy consumption. Switch the video recorder and the TV set on. ! * It is possible to play on this vid
Краткое содержание страницы № 15
n a c S t s Fa y a Pl d r w a o w l S r o F l il Still picture/super slow motion The JOG/SHUTTLE functions Press the e button. There is a large rotary knob both on the remote ! control and on the video recorder. Press the ZU button. The picture » «freezes» and the display indicates » eIr «. Each Switch the function on by pressing the ! time you press the ZU button, the NM button. A still picture is still picture advances one step. visible on the screen. Press and hold the ZU button. The vide
Краткое содержание страницы № 16
Correcting picture interference. Selecting the audio track, audio-mix The cleaning function You can select the audio track you want to hear during playback or in tuner mode. This is especially useful for Each time you start a new playback, the video recorder two-channel sound (multi-language) transmissions. automatically adjusts the correct tracking for the cassette. Press the p button. The display indicates ! For cassettes recorded on another recorder, it is possi- the current setting. If you
Краткое содержание страницы № 17
How do I know where I am currently on Index search the tape? The video recorder writes a mark on the tape every time a recording is started. With the q, 1, The length of the tape indicated in minutes on 2 buttons on the remote control you can find these the cassette, e.g. «E180» corresponds to 180 minutes marks on the tape. playing time (= 3: 00 hrs). The length indication is found on the front narrow side Press the q and 2 buttons to find the ! of the cassette to the left. The actual playing
Краткое содержание страницы № 18
5. HOW CAN I RECORD DIRECTLY ? If you wish to record, proceed as follows: General notes: * If recording on a S-VHS cassette should only be Switch the video recorder on. ! made in VHS standard, then press the l but- Insert a cassette not protected against recording. ton on the remote control before recording The OSD page «MAIN MENU» appears on the Use the I or H button to select the » screen. Select the line «Record mode». programme position from which you wish to Confirm with the G. button. S
Краткое содержание страницы № 19
Direct recording with TV sets Longplay function without «Easy Link» function You can reduce the recording speed by half. This makes it possible to record, for example, 8 hours If you wish to record a TV programme you are instead of 4 hours with an «E240» cassette. watching, press the button g on the video recorder when the VCR is switched off. To do this, you must select «LP» for the tape speed ! in paragraph «Personal preferences» in chapter 8. The video recorder «calls up» the current program
Краткое содержание страницы № 20
6. HOW DO I PROGRAMME A RECORDING? This chapter deals with the ways in which the video What is «PDC» recorder can be programmed. It switches itself on (Programme Delivery Control)? automatically, records the desired programme and then switches itself off automatically. With PDC, the TV station controls when the video What information does the video recorder need? recorder is switched on and off. This means that the video recorder switches itself on and off at the right For each programmed reco
Товары для хобби
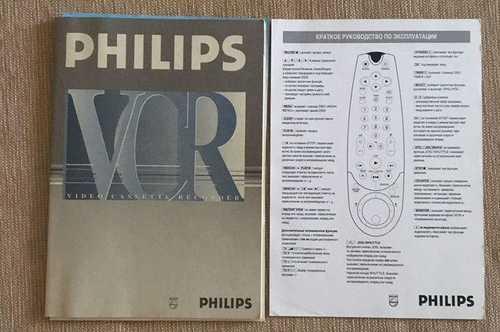
Руководство по эксплуатации S-VHS видеомагнитофона PHILIPS VR 969/58 на русском языке
Мы нашли это объявление год назад
Нажмите Следить и система автоматически будет уведомлять Вас о новых предложениях со всех досок объявлений
Еще объявления
Руководство по эксплуатации. Седан, универсал, оутбек. У меня был субару легаси B4, твин турбо. SIBARU LEGASY & OUTBACK. Осталась литература. Еще осталась литнратура от шевролет блэйзера. Смотрите так же еще мои интересные предложения в моем профиле.

Продам руководство пользователя для велосипедов forward Хранились в плёнке отметок нет
Мастер Терион (А.Кроули). Книга Тота. Краткое эссе о Таро египтян. Серия: Звезды. Числа. Символы. Пер. с англ. Москва София. 2006г. 272с твердый переплет, увеличенный формат. цена 650 рублей `Таро Тота`, созданное Фридой Харрис под личным руководством выдающегося оккультиста Алистера Кроули, на сегодняшний день является одним из самых популярных во всем мире. Каждая карта представляет собой самостоятельное художественное произведение, а все вместе они образуют модель магической вселенной Кроули, в которой переплелись Древо Жизни и буквы еврейской Каббалы, европейская астрология, алхимия, геомантия, енохианская космология доктора Ди, китайский `И-цзин`, греческая и египетская мифологии и многое другое. Это последний труд Мастера, в котором обобщаются все познания и убеждения Кроули. Читатель найдет здесь анализ структуры Таро, подробные описания символизма каждой из 78 карт, аутентичную `кроулианскую` процедуру гадания, основные положения герметической философии и религии Телемы, обширные выдержки из `Книги Закона` и других важнейших текстов Кроули. Отправлю в любой город почтой РФ, или Авито-доставкой
Руководство по эксплуатации Hyunday Santa Fe 2006-2009. Новая
Руководство по эксплуатации S-класс W220, в мягком переплете. Здесь вы найдете как подробные и иллюстрированные технические статьи, так и практические советы для водителей. Отличный подарок для владельца S класс w220. Состояние НОВОГО на 5+!!! Подписана в печать в 1998г. Оригинальный номер A2205845081
Руководство по эксплуатации C-класс W203, в мягком переплете. Здесь вы найдете как подробные и иллюстрированные технические статьи, так и практические советы для водителей. Отличный подарок для владельца C класс w203. Состояние НОВОГО на 5+!!! Подписана в печать в 2000г. Оригинальный номер A2035840897
Филипп Капло. Дзен жизни и смерти для живых и мертвых. Практическое и духовное руководство. 2005г. Новая.
Куничев Л. Лечебный массаж. Практическое руководство. Киев. Вища школа. 1981 г. 328 стр. Переплет: твердый. Формат: стандартный. В пособии освещены история лечебного массажа, сущность и механизм физиологического влияния массажа на организм. Приводятся сведения о сегментарно-рефлекторном массаже, подводном массаже, вакуум-массаже, самомассаже. Описаны методики массажа при заболеваниях сердечно-сосудистой и нервной систем, органов дыхания, пищевого канала, опорно-двигательного аппарата, а также массажа, назначаемого при умственном и физическом утомлении, в профилактических и закаливающих целях. Для врачей-физиотерапевтов, массажистов, методистов лечебной физкультуры.
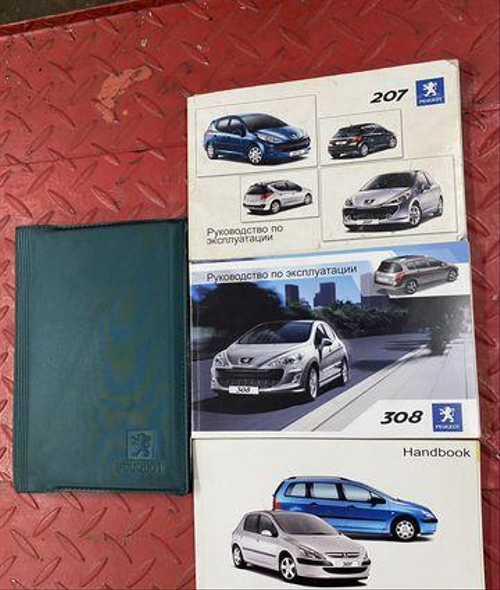
Оригинальные инструкции по эксплуатации Peugeot 308 Peugeot 307 Peugeot 207 Citroen c4
Цареубийство 1918 года: источники, вопросы, версии. Отв. ред. А.Б.Безбородов; Автор: Е.В.Пчелов; Издательство: М.: РГГУ; Год издания: 2020; Количество страниц: 192; Тираж 500 экз. Книга посвящена некоторым вопросам истории убийства царской семьи и расследования этого преступления. В центре внимания автора — история документов белого следствия, находки на местности в 1918-1919 гг. и сделанные из этого выводы, вопросы о так называемых тайных надписях в Ипатьевском доме и о санкции высшего советского руководства на расстрел. На основе исключительно документальных материалов автор показывает гипотетичность или несостоятельность ряда версий, бытующих вокруг «Царского дела». Для специалистов-историков.
Руководство по эксплуатации Subaru Forester. Оригинальное полное руководство по эксплуатации и обслуживанию (идет с новым автомобилем) 2006 г. Состояние идеальное.
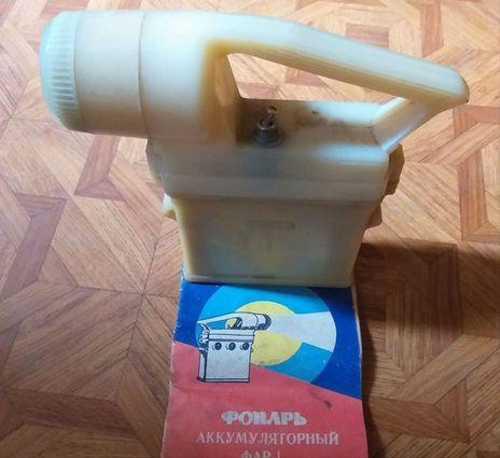
Продается Фонарь аккумуляторный ФАР — 1 , производства Луганский завод щелочных аккумуляторов , руководство по эксплуатации в наличии , работоспособность не известна , внешнее состояние хорошее , фото родные . ПЕРЕСЫЛКОЙ НЕ ЗАНИМАЮСЬ , ОБМЕНА НЕТ . Цена 1400
Хранилось дома. Не читали. Немного надорвана задняя обложка (есть на фото)
Шахматный самоучитель. Пособие. -Первая ступень — Шахматная азбука. -Вторая ступень — Элементы шахматной партии. -Третья ступень — Основы шахматной тактики. Москва. Физкультура и спорт. 1986 г. 288 стр. Переплет: мягкий. Формат: стандартный. Если вы хотите самостоятельно научиться играть в шахматы и совершенствоваться дальше, советуем вам изучить эту книгу. В ней собран обширный учебный материал. Автор в соответствии с современными педагогическими принципами знокомит читателей с основами шахматной игры. Поурочный метод изложения, а также многочисленные упражнения способствуют последовательному усвоению материала. Книга может быть использована и для занятий в школах и Домах пионеров под руководством тренера. Состояние: хорошее.
Руководство по эксплуатации Рено Кангу 2006 и 2007 года . В наличии 2 штуки . Также есть руководство по настройке и управлению встроенного радио (на 7 языках- фр , анг, нем, нидерл, итал, испан, португ.) 2006 г. в количестве 1 шт. Цена указана за 1 штуку.
Отправляем заказы через Авито Доставку и не только, товар у нас новый, так как мы — это магазин подарков «Остров Сокровищ» Логическая игра IQ-ХОХО Заполните игровое поле 10-тью двухсторонними деталями головоломки разной формы, располагая «Х» и «О» в определённой последовательности, указанной в задании. Выполните все 120 заданий этой увлекательной игры-головоломки! Развивающая логическая игра BONDIBON для 1 игрока. В названии игры зашифрованы «крестик и нолик», на построение в линию которых строятся задания игры. На ячейках поля формата 5х10 в шахматном порядке расположены маленькие столбики. На этих клетках смогут расположиться только «нолики». Фигуры состоящие из «Х» и «0» нужно расположить таким образом, чтобы они все уместились на нем, не оставляя свободных ячеек. В «IQ-Хо-Хо» 5 уровней сложности. Игра сделана из пластиковых двухсторонних деталей разного цвета. Инструкция написана понятным языком с наглядными картинками. Задачи разного уровня сложности расположенны от простого к более сложному. Игру можно брать с собой в дорогу, в качестве развлечения, а еще на прогулку, в гости к друзьям. Она компактная и легкая, не занимает много места в сумке, ее удобно переносить. Игра сделана из безопасных и экологически чистых материалов, ребенок может играть в нее самостоятельно или с друзьями, под руководством взрослых, которые смогут проконтролировать правильность выполнения заданий. В комплекте: разноцветные детали головоломки- 10 шт, буклет со 120 заданиями и ответами-решениями на последних страницах, компактное игровое поле с крышкой, позволяющее брать игру с собой в дорогу. Размер в упаковке (ШхВxГ): 9,7х14,4х2,8cм, Вес: 300г. Возраст: от 6 лет. Страна производства: Китай Если вы ещё сомневаетесь с покупкой? Просто прочитайте ОТЗЫВЫ о нас на Авито! Если у вас есть вопросы по товару или его доставке — пишите или звоните нам, ответим очень оперативно. Всегда поможем и подскажем нужную информацию по товару. Отправляем заказы любыми службами доставки, такими как АВИТО-доставка, Боксберри, Почта России и СДЭК. Самовывоз заказов осуществляется с нашего склада — Варшавское шоссе, дом 37А, с 10:00 до 20:00 по рабочим дням и по договорённости по субботам и воскресеньям (обязательно заранее предупредите что едете к нам). Ближайшая станция метро Нагатинская — 7 мин. пешком, или МЦК Верхние Котлы — 5 мин. пешком. Магазин подарков «Остров Сокровищ», с 2005 года радуем людей и приносим хорошее настроение

Этот яркий и жизнерадостный плотик станет прекрасным другом и помощником в играх для вашего ребенка. Вы можете играть в сёрферов, охотников на акул или представить, что вы саночники, даже жарким летом. Он отлично подойдет для первых знакомств ребенка с открытыми водоемами. Две удобные ручки позволят ему крепко держаться на плоту и не испытывать дискомфорта. — Детский надувной плот для плавания — это специальный плавательный инструмент, который помогает ребенку научиться правильно плавать и развивать свои навыки в воде. — Такой плот помогает ребенку удерживать равновесие в воде, улучшает его плавательные навыки и укрепляет мышцы ног. — Плот может использоваться как для индивидуальных занятий плаванием, так и для занятий в группах под руководством тренера. Он подходит для детей от 3 лет и может быть использован как в бассейне, так и на открытых водоемах. Размеры надувного плота 94*59 см Больше товаров в профиле. Возможна доставка по городу курьером компании — 200 руб. Самовывоз: Уралмаш, ВИЗ.

Галлахер Энн — Мари. Викканская магия. История, философия, практика. М., Кладезь-Букс. 2007 г. 400 с. Мягкий переплет, уменьшенный формат. Викка — это направление в магии, которое появилось в Англии в 20 веке. Викканская магия опирается на традиции и мифологию народов мира, а основной ее принцип — `не навреди`. Последователи Викки видят вселенную как единое целое и с уважением относятся к окружающему миру. Это подробное руководство познакомит вас с викканской магией, а тем, кто с ней знаком, поможет расширить уже имеющиеся знания. Здесь есть все, что нужно знать о Викке: обычаи и традиции, визуализации, ритуалы, заклинания, техники предсказания и работы в священном круге, а также этикет ковенов (викканских общин). Состояние очень хорошее.
фирменные мануал, руководства по техническому обслуживанию автомобилей ШЕВРОЛЕ АВЕО 2008 Целый в хор состояние! Могу отправить СДЭКом и почтой
Сервисная книжка ВАЗ / ГАЗ Оригинал СССР . Цена указана за одну , любую книгу. Все вместе 2000 . Возможна отправка Почтой России заказным письмом или Авито-доставкой. Сервисная книжка ВАЗ / Заполненная со штампом о продаже и прохождении предпродажной подготовки / 1984 год ВАЗ-21013 Приличное состояние,все страницы на месте. Сервисная книжка ВАЗ / Частично заполнена на ВАЗ 2102 Приличное состояние,все страницы на месте. Сервисная книга от ГАЗ-31029 Волга и его модификаций / заполнена / 1995 год Среднее состояние,все страницы на месте. Руководство Жигули 21011 Копейка 21013 Лада 2101 Нива 21023 Ретро 2106 2121 Советская Книга 2103 газ 31029 Волга Ретро 3102
Внимание! Festima.Ru является поисковиком по объявлениям с популярных площадок.
Мы не производим реализацию товара, не храним изображения и персональные данные.
Все изображения принадлежат их авторам
Отказ от ответственности
![]()
PHILIPS VR666 668 768 967 969

Type:  (PDF)
(PDF)
Size
29.3 MB
Page
255
Category
VIDEO-DVD
SERVICE MANUAL
If you get stuck in repairing a defective appliance
download
this repair information for help. See below.
Good luck to the repair!
Please do not offer the downloaded file for sell only
use it for personal usage!
Looking for similar philips manual?
Document preview [1st page]

Click on the link for free download!
Document preview [2nd page]

Click on the link for free download!
Please tick the box below to get download link:
- Also known:
PHILIPS VR-666 VR666 668 768 967 969 VR 666
- If you have any question about repairing write your question to the Message board. For this no need registration.
- Please take a look at the below related repair forum topics. May be help you to repair.
Warning!
If you are not familiar with electronics, do not attempt to repair!
You could suffer a fatal electrical shock! Instead, contact your nearest service center!
Note! To open downloaded files you need acrobat reader or similar pdf reader program. In addition,
some files are archived,
so you need WinZip or WinRar to open that files. Also some files are djvu so you need djvu viewer to open them.
These free programs can be found on this page: needed progs
If you use opera you have to disable opera turbo function to download file!
If you cannot download this file, try it with CHROME or FIREFOX browser.
Sziasztok!
Egy nyugdíjas ismerősöm minden (igen sok) archivált felvétele ennek a gépnek a nem tudom hogy is hívják (sem LP, sem SP, talán EP, de inkább valami más kompromisszumos) sebességével készült, ezért mással nem tudja lejátszani.
A gép mechanikájában eltört a baloldali szalagbefűző fogaskerék, amit (miután egy kolléga itt a tanyán kisegített, és küldött egyet) kicseréltem, aztán rövid hibátlan üzem után eltört egy másik műanyag alkatrész.
Sajnos meg kellett állapítanom, hogy ez így fog menni, amíg mindent egyenként ki nem cserélek, mert a műanyagok annyira elöregedtek, hogy már nem bírják a normál igénybevételt sem. Ennek javítása tehát már nem gazdaságos. :szetver:
Szeretnék segíteni az ismerősömnek, hogy ne kelljen kidobnia a felvételeit, ezért keresek teljesen üzemképes, vagy fejdobhibás, elektronika hibás komplett gépet, vagy csak kevésbé használt teljes mechanikát akár fejdob nélkül is. (Csak a címbeli típusszámú gép érdekel!) :help:
Üdv:
Fülesmester
Üdvözlet mindenkinek!
A fenti gép kijelzőjén «BLOCCATO» felirat jelenik meg, taszt egyik gombjára sem reagál, távra sem reagál.
Gyerekzárra gondolnék, de az gondolom nem így jelenne meg!
Köszönettel várnék ötleteket!
Olvastad?
Válaszd ki a megfelelő fórumot, majd adj neki címet és írd be a kérdésed.
A téma címe tartalmazza a hibás eszköz márkáját és típusát. Szintén tartalmazza röviden a problémát.
pl:ACER AL1711 monitor képernyője 5 másodperc után kikapcsol
A helytelenül elnevezett topik felfüggesztésre, majd 48 óra után törlésre kerül! Felfüggesztett állapotban nem tudnak mások addig hozzászólni, amíg ki nem javítod a címet!
A hibás cím utólagos javítása (48 órán belül) a «Szerkesztés» fülre kattintva végezhető el.
Üdv!
Olyat tesz a gép, hogy kb félorán belül visszaáll a beállitott dátum , ill. csak az év 2099-re, óra, nap-honap megmarad.
Ha beállitom és kihuzom akár tiz perc mulva is marad minden a helyén, később ránézve egyszercsak 2099-et ir ki, és nem lehet észrevenni mert az óra jot mutat.
Időzitett felvételre használnák azért volna fontos, kontakthibát nem találtam, hidegre-melegre nem érzékeny, merre induljak?
Sziasztok. Olyan problémám lenne hogy a fent említett videónak 7 kiválasztható menü nyelvezete van. Meglehet e valahogy oldani hogy magyar menü is szerepeljen benne. Vagy tudja e valaki hogy ezeket hol tárolja a videó.Valami memóriában esetleg?
Előre is köszi….
Similar manuals:
If you want to join us and get
repairing help
please sign in or sign up by completing a simple electrical test
or write your question to the Message board without registration.
You can write in English language into the forum (not only in Hungarian)!
E-Waste Reduce
Руководства Philips VR969 58 Размер файлов: 7019 KB, Язык: English, Формат: pdf, Платформа: Windows/Linux, Дата: 2014-12-07
На данной странице вы можете скачать руководства Philips VR969 58. Мы предлагаем вам ознакомиться с руководством пользователя, инструкцией по сервисному обслуживанию и ремонту.
Также здесь вы найдете список заказных номеров на комплектующие Philips VR969 58.
Все файлы предоставляются исключительно в ознакомительных целях. И не являютя руководством по ремонту, а направлены лишь на то чтобы помочь вам более детально ознакомиться с принципом построения устройства.
Содержимое представленных здесь руководств требуют от вас знания технического английского языка.
Если вы собираетесь скачать руководство по сервисному обслуживанию Philips VR969 58, иными словами сервис мануал, вы дожны обладать хотя бы минимальными познаниями в области электроники и пониманием базовых принципов работы электромеханических устройств.
Для просмотра руководств вам понадобится Adobe Acrobat Reader версии 9 и выше либо другая программа для просмотра pdf файлов.
В связи с популярностью информации представленной на сайте и ее бесплатного предоставления конечному пользователю, убедительная просьба использовать специальные программные продукты для многопотокового скачивания файлов.
Руководства для Philips VR969 58
- Руководство пользователя (User manual)
- Руководство по сервисному обслуживанию (Service manual)
- Руководство по ремонту (Repair manual)
- Перечень комплектующих (PartList)
Краткое содержание страницы № 1
OPERATING MANUAL VR 969/05
Contents Page
Dear customer,
with this video recorder (VCR), you own one of the
most sophisticated yet simple-to-use video recor-
01. BUTTONS, CONTROLS AND 2
ders on the market.
SOCKETS
Naturally, you can’t wait to use your new video
The remote control at a glance 2
recorder, but before you start, it’s worthwhile
The back of the video recorder 3
taking the time to read through this operating The front of the video recorder 3
02. INSTALLATION. HOW DO I 5
manual. Acquai
Краткое содержание страницы № 2
1. BUTTONS, CONTROLS AND SOCKETS For detailed explanations of the functions, see the corresponding chapters. The remote control g Recording d Switching off H / I / F / G Cursor up/down, left/right l Call up the OSD page MAIN MENU RECORD STANDBY B Confirm entry m Reset/clear o TIMER programming p Select function MENU O Numeric buttons OK TIMER 1 Rewind/picture search reverse CLEAR SELECT e Playback 2 Wind/picture search forwards 2 1 3 q Search index mark ZU Still picture, Jog/Shuttle on/off 5 4 6
Краткое содержание страницы № 3
The back of the video recorder RS 232 2 EXTERNAL / DEC.- AV 2 AUDIO L L 1 EXTERNAL / EURO-AV 1 O I U N S-VHS OUT T R R Mains socket cv Scart socket DEC.- AV 2 yx Scart socket EURO-AV 1 # Socket for the connection of a cut- ting device or a personal computer ? S-VHS output socket LÄ Audio output, left/right channel 3 Aerial input socket L Audio input, left/right channel 4 Aerial output socket The front of the video recorder LOW POWER RECORD TIMER CASSETTE STANDBY TM Buttons and display indica
Краткое содержание страницы № 4
RD A OW F The front of the video recorder V SYNCHRO EDIT L MEI EDIT EJECT FOLLOW TV R S VHS RECORD LEVEL MIC. U LEFT RIGHT JOG SHUTTLE/STILL PLAYER RECORDER TIMER SELECT CLEAR LOW POWER STANDBY EDIT RECORD MENU OK IN OUT MIC. U Buttons and connections behind the front cover: © Video input socket (E3) S Automatic channel search Eject cassette » + ¼ Left/Right, Audio input ª sockets, (for E3 and E4) D Synchro-edit socket / MEI-edit socket S-VHS input socket (E4) Buttons and connections in the fr
Краткое содержание страницы № 5
2. INSTALLATION. HOW DO I INSTALL THE VIDEO RECORDER ? Connecting the video recorder The scart socket yx has an input/output function. Connect your TV set to this socket. The socket cv has an input function. Connect additional units to this socket. A detailed explanation to this illustration is to be found in the next paragraphs. CUTTING DEVICE, or VIDEORECORDER, or PERSONAL COMPUTER PAY — TV — DECODER, or TV RF SAT RECEIVER RS 232 2 EXTERNAL / DEC.- AV 2 AUDIO L L 1 EXTERNAL / EURO-AV 1 O I U N
Краткое содержание страницы № 6
Inserting the batteries into Remove the aerial cable plug from the TV set and ! the remote control insert it into the 3 socket at the rear of the video recorder. Use the aerial cable supplied to connect the 4 » socket on the video recorder with the aerial input socket on your TV set. Connecting to the TV set If your TV set does not have a Scart socket, do not read here but continue with chapter «Additional functions of your video recorder». In the chapter «Playback via the aerial cable» you wi
Краткое содержание страницы № 7
Connecting to the mains supply Warning ! In case this appliance is supplied with a Safety Standard Approved mains lead fitted with a non- rewireable 13 Amp mains plug which, if unsuitable for your socket, should be cut off and an appropriate plug fitted by a qualified electrician. The fuse and fuse holder must be removed from the plug as accidental insertion of the redundant plug into a 13 Amp socket is RS 232 2 EXTERNAL / DEC.- AV 2 likely to cause an electrical hazard. AUDIO L L 1 EXTERNAL / E
Краткое содержание страницы № 8
Saving energy Connecting to a satellite receiver There are two ways of switching off to choose from. It is possible to connect a satellite receiver to this video 1. Normal switch-off. recorder. Switch off by pressing the button Ä . The time remains visible. 2. Energy-saving mode. Press the button Ä once again. The time in the display disappears. You can switch back on again by pressing the same button. Note: * It is not possible to switch to energy-saving mode as long as a TV set connected wit
Краткое содержание страницы № 9
OSD – On Screen Display, the user’s guide on the picture screen The user’s guide on the picture screen enables you to dialogue with your video recorder. The indications given in the bottom line of the picture screen designate the buttons on the remote control which are to be used to carry out the various functions. You will be guided in a simple and understandable way to the next possible operating steps. The following example explains the user’s guide with the help of the «MAIN MENU». Switch th
Краткое содержание страницы № 10
3. STORING TV CHANNELS For the video recorder to be able to record TV program- Autostore (Automatic channel search) mes, the TV channels must first be stored in the video recorder. You can store up to 99 TV channels. The video recorder makes a search for all TV channels. It Your video recorder has a receiver of its own. This orders them in the following sequence in the memory: means it can be used independently of the TV set. BBC 1, BBC 2, ITV, CH 4, CH 5, SKY, others. The clock and calender inf
Краткое содержание страницы № 11
Assigning TV channels automatically Wait until the video recorder display indicates, / (Follow TV) for example, «SELECT TV P02». 8 8 The following setting is not necessary if the TV chan- SE:LE:CT:TV D W nels have been set using the «Easy Link» function. VPS SVHS STEREO I P 028 PDC NICAM II n n DEC z LP MONO HiFi Only if the video recorder (socket t) and the TV set are connected by means of a scart cable the Select the programme position «2» on the TV set. ( TV channels can be allocated aut
Краткое содержание страницы № 12
Assigning TV channels manually Confirm by pressing the button B. The TV & channel line is inserted and the other channel lines The following setting is not necessary if the TV chan- are moved on a line. If you wish to cancel an nels have been set using the «Easy Link» function. undesired TV channel, press the button m instead of button B. You can allocate any TV channel found to the program- me number of your choice so that you have, for exam- Sort all of the TV channel lines (steps — ) into /
Краткое содержание страницы № 13
Manual search If you wish to set a new TV channel, press the & button _ until you have found the right one. In certain cases, the «Automatic channel search» will A changing channel or frequency number appears not be able to find all TV channels (e.g. encoded chan- on the screen. nels). If you know the channel transmission frequency or In this case, you can set the channels using the channel number, the frequency (4-digit) or channel «Manual search» function. number (2-digit) can also be direc
Краткое содержание страницы № 14
4. PLAYING A RECORDED CASSETTE In chapter 2, you have learned how to connect the Notes: video recorder to the TV set. When this is done, play- * Some functions are switched off automatically back of a cassette is very easy. after a certain time (e.g., pause, slow motion, still If you wish to record first, go to chapter 5. picture, picture search). This is to avoid unnecessary cassette wear and energy consumption. Switch the video recorder and the TV set on. ! * It is possible to play on this vid
Краткое содержание страницы № 15
n a c S t s Fa y a Pl d r w a o w l S r o F l il Still picture/super slow motion The JOG/SHUTTLE functions Press the e button. There is a large rotary knob both on the remote ! control and on the video recorder. Press the ZU button. The picture » «freezes» and the display indicates » eIr «. Each Switch the function on by pressing the ! time you press the ZU button, the NM button. A still picture is still picture advances one step. visible on the screen. Press and hold the ZU button. The vide
Краткое содержание страницы № 16
Correcting picture interference. Selecting the audio track, audio-mix The cleaning function You can select the audio track you want to hear during playback or in tuner mode. This is especially useful for Each time you start a new playback, the video recorder two-channel sound (multi-language) transmissions. automatically adjusts the correct tracking for the cassette. Press the p button. The display indicates ! For cassettes recorded on another recorder, it is possi- the current setting. If you
Краткое содержание страницы № 17
How do I know where I am currently on Index search the tape? The video recorder writes a mark on the tape every time a recording is started. With the q, 1, The length of the tape indicated in minutes on 2 buttons on the remote control you can find these the cassette, e.g. «E180» corresponds to 180 minutes marks on the tape. playing time (= 3: 00 hrs). The length indication is found on the front narrow side Press the q and 2 buttons to find the ! of the cassette to the left. The actual playing
Краткое содержание страницы № 18
5. HOW CAN I RECORD DIRECTLY ? If you wish to record, proceed as follows: General notes: * If recording on a S-VHS cassette should only be Switch the video recorder on. ! made in VHS standard, then press the l but- Insert a cassette not protected against recording. ton on the remote control before recording The OSD page «MAIN MENU» appears on the Use the I or H button to select the » screen. Select the line «Record mode». programme position from which you wish to Confirm with the G. button. S
Краткое содержание страницы № 19
Direct recording with TV sets Longplay function without «Easy Link» function You can reduce the recording speed by half. This makes it possible to record, for example, 8 hours If you wish to record a TV programme you are instead of 4 hours with an «E240» cassette. watching, press the button g on the video recorder when the VCR is switched off. To do this, you must select «LP» for the tape speed ! in paragraph «Personal preferences» in chapter 8. The video recorder «calls up» the current program
Краткое содержание страницы № 20
6. HOW DO I PROGRAMME A RECORDING? This chapter deals with the ways in which the video What is «PDC» recorder can be programmed. It switches itself on (Programme Delivery Control)? automatically, records the desired programme and then switches itself off automatically. With PDC, the TV station controls when the video What information does the video recorder need? recorder is switched on and off. This means that the video recorder switches itself on and off at the right For each programmed reco