
This Crusade Mode guide for Wrath of the Righteous is written not from a tactical perspective where one is told how much of one unit to make and what formations to use. Instead, this guide aims to provide as much information as possible to help the player create and execute a strategic plan to successfully raise armies and defeat the demonic forces of the Worldwound.
As fair warning there are SPOILERS in this guide.
Foreward
This guide was written purely out of spite for Crusade mode, which is a combination of Kingmaker’s Kingdom Management mode and Heroes of Might & Magic III. Much like Kingmaker’s Kingdom Management mode it felt like a massive disconnect from the main game and the drama found therein. Unlike Heroes of Might & Magic III the strategy is also very bland and uninteresting.
Nonetheless, it is incredibly important to the game that you come to grips with Crusade mode because to play in Auto mode (which was not even originally present) is to roll the dice and it will guarantee you are locked out of certain outcomes, such as the secret ending. With any luck this guide will provide a safeguard from you, the player, pulling out your hair.
One other important note: this guide is written under the assumption that your character is NOT playing as a Lich or a Swarm-That-Walks. The latter is a guaranteed lock-out from Crusade mode and the former has mechanics that may not align with that is written here. If anyone wants to contribute to a Lich Crusade in this gude feel free to comment.
And finally, I want to give a shout-out to TrueMaxx for the contributions and double-checking that helped make this guide come to be. The assistance is incredibly appreciated!
Without further ado, the Crusade awaits!
Author’s Tactics Summed Up
While this guide is meant more to help players plan out the development of their individual Crusade rather than tell players how to fight their individual battles, I can at least provide the general tactics and decisions I’ve used because those have flavored how I’ve written this guide.
- My “best” armies are made up of large numbers of archers and cavalry, usually Marksmen and Hedge Knights respectively, and are led by generals with Master of Maneuver and Caravan Masters.
- My archers fire first and knock out spellcasters and ranged units first, then whittle down melee troops. Any survivors are tied up in melee by cavalry.
- My cities, once sorted out by teleport hubs and defensive chokepoints, are given Garrison Stables and Garrison Ranges to boost production. Archers get damage and HP boosts, Cavalry get HP and AC boosts.
- Regardless of roleplay motivations my Council decisions and decrees are meant to find additional boosts.
- I keep at least four armies, three of which play zone defense in key areas and the fourth of which is my hammer to bash the demonic forces.
- Infantry are emergency Cavalry.
If your individual play style goes counter to this you can choose and adjust accordingly! This way has worked pretty well for me.
Act 2: A Humorously Brief Instruction
The Crusade mode “officially” begins in Act 2, just after you retake the Gray Garrison and have a rousing celebration in the tavern. You are appointed as Knight Commander, given an expeditionary force, and are commanded to go forth and retake Drezen. Sounds simple enough, right?
It more or less is, as it turns out. You can only recruit a handful of units, plus a few more types after some development during Act 2, and the annoyances of city development and being counter-attacked are totally absent. The trick is to build up as large of a single consolidated army as you can, ensure it has a general, and use that army to take over all the territory available in Act 2.
The two primary concerns that affect the rest of the game are how you handle Leper’s Smile and whether you go to rescue the Hellknights, both of which happen after you conquer the first fort (Vilareth Ford’s Outpost). It is strongly advised that you rescue the Hellknights and recruit Regill into your party as he will open up some good options later and it is strongly advised that you kill the Bug Queen in Leper’s Smile ASAP and burn the corpse immediately.
Eventually you should make it to Drezen, hopefully with as many party members in tow as possible, and by the time you’re done with Act 2 most of your gang will be ready to join you for the REAL Crusade Mode experience.
The 20 Most Important Spots
When you’re making your expedition from Kenabres to Drezen in Act 2 you don’t get a full appreciation for just how large the map is, you don’t have to worry about any counter-attacks from any direction, and as long as you have soldiers to throw out at enemy armies and forts you can clear out the map at your own pace without any sense of urgency.
The instant you move into Act 3, though, the world begins to open up drastically and there is a lot of territory to cover and account for. The good news, for the most part, is that as long as you have a strong army to play offense and a strong army to play defense you can also take your time to clear out the map of enemy forces. The bad news is that without proper planning you could be caught with your pants down by an approaching enemy army, especially when there are hundreds of points on the map to consider.
Luckily, there is a pattern to how the enemy operates and to where certain Crusade Quests take place and all the territory on the map can, for Crusade purposes, be narrowed down to 20 specific dots. Those points are specified below and are noted for their importance. Points 12 and 16-20 are only reachable on foot in Act 5. All red arrows are the direction enemies are confirmed to attack from, all red squares are confirmed enemy spawn points.
Act 3 Locations

- 1 – Drezen – The single most important location throughout the game’s Crusade mode. This is the city where you enable the recruitment of trainable units, where your adventuring party can rest and remove corruption, a primary quest hub, and the ultimate target for any and every invading demon army that spawns on the map. Unfortunately, it is totally exposed to invading armies from the west.
- 2 – Keeper’s Canyon – The sole fort south of Drezen and the last buffer from any invading army that comes from the south.

- 3 – Vilareth Ford’s Outpost – While not important from an army standpoint, this city is the closest city to three quest locations: Nameless Ruin, Chilly Creek, and Kenabres.
- 4 – Stone Maze – The fort between Wintersun and Keeper’s Canyon is a key chokepoint that prevents invading armies from the south from getting closer to Drezen.
- 5 – During Act 5 a friendly Crusader army will spawn here during the Crusade Errand “Blockade of Reinforcements”, which must be completed to advance the Military Council.
- 6 – During Act 5 an enemy army will spawn here during the Crusade Errand “Blockade of Reinforcements”, which must be completed to advance the Military Council.
- 7 – During Act 5 an enemy army will spawn here during the Crusade Errand “Khorramzadeh’s Trap”, which must be completed to advance the Military Council.

- 8 – Gloomy Gorge – This fort, while unfortunately located, is still a key defensive position against invading armies from its northwest and southwest.
- 9 – During Act 3 an enemy army will spawn at this point during the Crusade Errand “Repelling the Assault”, which must be completed to advance the Military Council. This army will head slowly towards Drezen until defeated.
- 10 – This is one of four confirmed spawn points that invader armies will spawn from. It will sometimes try to attack Gloomy Gorge and it will sometimes just go around Gloomy Gorge.

- 11 – Camp on the Ferry – This fort is ideally situated to block attacks that come from Iz and from Pulura’s Fall and for that same reason is an ideal fort to teleport to.
- 12 – Pulura’s Fall is a confirmed spawn point for invading enemy armies, who will sometimes attack Camp on the Ferry and will sometimes make a straight march towards Drezen. You and your armies cannot march to this point until Act 5.

- 13 – Tower of Yath – The closest fort to The Heart of Mystery and also the single closest point to a confirmed enemy spawn point, this will completely plug southern invasions from the source.
- 14 – This point is a confirmed spawn point for invading armies, capturing Tower of Yath will completely cut this point off attack.
- 15 – During Act 3 an enemy army will spawn at this point during the Crusade Errand “Storms Peak” which is not technically required to continue advancing the Military Council but should still be cleared out.
Act 5 Locations

- 16 – Necromancer’s Grave – While it is not important from an army standpoint it is the closest fort to three quest locations during Act 5. Could also be interchanged with Tyrant’s Keep.

- 17 – The Castle of Desires – This fort is ideally situated between several quest locations and is a guaranteed blocker to invading armies that come from Threshold in Act 5.
- 18 – Last Barrier – The closest fort to Threshold, the final quest location in the game. One could fortify this location, but it is not confirmed whether invading armies spawn at Threshold or at this location. It is recommended to fortify The Castle of Desires instead.
- 19 – During Act 5 an enemy army will spawn at this point during the Crusade Errand “Champions of the Abyss” which must be completed in order to conclude the Military Council.
- 20 – This point is a confirmed spawn point for invading armies, capturing Camp on the Ferry will cut this point off from the map
City Planning: What to Build and Where
During the course of the Crusade you will attack enemy forts, which are identical to armies except that 1) your adventuring party cannot ignore and travel past them and 2) will reward you with a city to develop by constructing buildings in. The ultimate goal of the Crusade is to reclaim all twenty forts and then close the Worldwound, but some prove to be more important than others during the course of the game and need to be developed as such.
All buildings in the game can be broken down into six categories:
- Teleportation Circle
- Citadel
- Recruitment Buildings
- Upgrade Buildings
- Economy Buildings
- Shelter
Teleportation Circles are what allow your party to instantly teleport from anywhere on the map to a specific city, and require at least one city ugrade (4 squares to 9 squares) to be built. These are your highest priority, since there can only be six at most.
Citadels are unique buildings in that they add time to how long any given city can block an invading army, which will be needed to move an army to counter it ASAP. Key defensive cities require this building and are a close second.
Recruitment Buildings are the buildings that enable the training of non-Mercenary units and subsequently improve the weekly growth rate, so the more the better. After Teleportation Circles and Citadels these are your best buildings, as large armies are the best way to defeat enemy armies.
Upgrade Buildings add specific bonuses to your individual units or to your generals, and some of them require direct adjacency (touching sides, touching corners don’t count) in order to apply. If you choose your units and upgrades carefully they will significantly improve your units, but should only be built once the previous types are built or unless you have specific aims.
Economy Buildings simply increase the amount of Finance Points, Materials Points, and Energy Points gained on a daily basis. Over the course of the game your incomes grow substantially as-is, so building these should be on an as-needed basis.
And finally, Shelters. On paper a Shelter sounds decent: resting on the travel map in a city with a Shelter won’t increase your corruption gain. In practice, this is completely redundant as you can teleport to Drezen to remove all corruption and then go back to wherever you were. You should avoid building these unless you’re in a completely distant location and unwilling to go back to Drezen.
All of those considered, the below table is my recommended build priority for all of the cities in the game. If you are in Act 3 and see a city name on this table that isn’t on your map you either haven’t claimed it yet or it is not available to claim until Act 5.
City and Build Priority
| City Name | Teleportation Circle Recommended | Citadel Recommended | Recruitment Buildings Recommended | Upgrade Buildings Recommended | Economy Buildings Recommended |
|---|---|---|---|---|---|
| Drezen | Yes (Mandatory) | Yes (Mandatory) | Yes (Mandatory) | As Available | As Needed |
| Camp on the Ferry | Yes | Yes | Yes | As Available | As Needed |
| Tower of Yath | Yes | Yes | Yes | As Available | As Needed |
| The Castle of Desires | Yes | Yes | Yes | As Available | As Needed |
| Vilareth Ford’s Outpost | Yes | No | Yes | As Available | As Needed |
| Necromancer’s Grave | Yes | No | Yes | As Available | As Needed |
| Keeper’s Canyon | No | Yes | Yes | As Available | As Needed |
| Stone Maze | No | Yes | Yes | As Available | As Needed |
| Gloomy Gorge | No | Yes | Yes | As Available | As Needed |
| Treasonhome | No | Maybe | Yes | As Available | As Needed |
| Last Barrier | No | Maybe | Yes | As Available | As Needed |
| Gargoyle Canyon | No | No | Yes | As Available | As Needed |
| Hamlet of Sork | No | No | Yes | As Available | As Needed |
| Sorcerers’ Fortress | No | No | Yes | As Available | As Needed |
| Tyrant’s Keep | No | No | Yes | As Available | As Needed |
| Mountain Warden | No | No | Yes | As Available | As Needed |
| Cave Citadel | No | No | Yes | As Available | As Needed |
| Camp of the Mammoth Lords | No | No | Yes | As Available | As Needed |
| Sinister Mansion | No | No | Yes | As Available | As Needed |
| Death Bridge | No | No | Yes | As Available | As Needed |
Information Table: City Buildings (WIP)
The following table is the list of buildings as best as I have access to. I know there are some buildings missing that primarily belong to other mythic paths, so as those are discovered they will be added into this table. For the time being it is kept as a WIP.
2021-10-03 = Prices have been removed due to reports of varying prices.
| BUILDING NAME | ROLE | FUNCTION | ADJACENCY | NOTES |
| Teleportation Circle | 1 Teleportation Circle | Allows party to teleport here from anywhere on map | No | |
| Citadel | 2 Citadel | Adds 3 days to siege timer | No | |
| Garrison Archery Range | 3 Recruitment | +25% growth for trainable Archers | No | Cannot be built if Inn is present |
| Garrison Barracks | 3 Recruitment | +25% growth for trainable Infantry | No | Cannot be built if Inn is present |
| Garrison Hall of Champions | 3 Recruitment | +25% growth for trainable Veterans | No | Cannot be built if Inn is present |
| Garrison Spellcasters’ Lodge | 3 Recruitment | +25% growth for trainable Spellcasters | No | Cannot be built if Inn is present |
| Garrison Stables | 3 Recruitment | +25% growth for trainable Cavalry | No | Cannot be built if Inn is present |
| Hall of Glory | 3 Recruitment | Mercenary Recruitment 5% cheaper | No | |
| Main Archery Range | 3 Recruitment | Enables training of Archer troops | No | Only 1 total, Drezen only |
| Main Barracks | 3 Recruitment | Enables training of Infantry troops | No | Only 1 total, Drezen only |
| Main Hall of Champions | 3 Recruitment | Enables training of Veteran troops | No | Only 1 total, Drezen only, Act 5 |
| Main Spellcasters’ Lodge | 3 Recruitment | Enables training of Spellcaster troops | No | Only 1 total, Drezen only |
| Main Stables | 3 Recruitment | Enables training of Cavalry troops | No | Only 1 total, Drezen only |
| Mercenary Guild | 3 Recruitment | Can recruit 1 additional mercenary unit | No | |
| Stronghold (Lann) | 3 Recruitment | +25% Recruitable Unit Growth | No | Only 1 total, Act 5 |
| Stronghold (Wenduag) | 3 Recruitment | Mercenary Recruitment 12.5% cheaper | No | Only 1 total, Act 5 |
| Alchemist’s Laboratory | 4 Upgrade | +10 Energy for Generals | No | |
| Apothecary | 4 Upgrade | +10 HP for trainable units | Yes | |
| Arsenal | 4 Upgrade | +1 AC for trainable units | Yes | |
| Bulletin Board | 4 Upgrade | +2% chance to act twice, -2% chance to skip action | No | |
| Cathedral | 4 Upgrade | All units: +15% HP, +3 attack, +3 AC, and +10 damage vs demons | No | Only 1 total, Act 5 |
| Fighting Pit | 4 Upgrade | +1 initiative for trainable units | Yes | |
| Gallows | 4 Upgrade | -3% chance to skip action | No | |
| Hall of Strategy | 4 Upgrade | Generals get +1 Attack, +1 AC, and +2 Energy | No | |
| Hospital | 4 Upgrade | Generals get +5% infirmary size | No | |
| Military Academy | 4 Upgrade | +1 bonus to attack, AC, and saving throw for all trainable units | No | |
| Monument | 4 Upgrade | +5% chance to act twice | No | |
| Pathfinder Society Lodge | 4 Upgrade | +1 bonus to attack, AC, and saving throw for all mercenary units | No | |
| Smithy | 4 Upgrade | +1 attack for trainable units | Yes | |
| Spiritual Garden | 4 Upgrade | +25 combat morale for all units, +50% generals’ energy recovery, +20 %mythic unit recruitment | No | Only 1 total, Act 5 |
| Tavern | 4 Upgrade | 10% reduction in morale status effects | No | |
| Training Grounds | 4 Upgrade | +10% damage for trainable units | Yes | |
| Watchtower | 4 Upgrade | +1 bonus to attack, AC, saving throw, and initiative for all units | No | Only applies to region town is in |
| Engineers’ Workshop | 5 Economy | Building Cost reduced by 10% | No | Only 1 total |
| Inn | 5 Economy | +200 Finance Points | No | Cannot be built if any Garrison buildings are present |
| Market | 5 Economy | +20 Finance Points, +1 Materials Points | No | |
| Palace | 5 Economy | +25% Finance, Materials, and Energy Points | No | Only 1 total, Act 5 |
| Salvager’s Post | 5 Economy | +1 Materials and Energy Points | No | |
| Sanctuary | 5 Economy | +4 Energy Points | No | |
| Shrine | 5 Economy | +10 Finance Points, +1 Energy Point | No | |
| Supply Center | 5 Economy | +3 Material Points | No | |
| Warehouse | 5 Economy | +100 Finance Points (Inn), +1 Material Point (Supply Center), +1 Energy Point (Sanctuary) | Yes | |
| Shelter | 6 Shelter | Allows party to rest without increasing corruption | No | Not Recommended |
Crusade Stats and Councils
Like in Kingmaker, your progress through the Crusade is tracked by individual statistics, which have mercifully been reduced from ten down to four:
- Leadership = The overall effectiveness of your command during the Crusade, which is increased from a number of sources including Card events, fighting and winning battles, etc.
- Logistics = The underpinning supply lines to building up your crusade, this stat is primarily increased by constructing buildings in your cities.
- Diplomacy = How influential you are to the rest of the world, this stat increases passively over time and can be increased by purchasing Finance and Materials Points out of your own gold wallet.
- Military = How large and powerful your overall might is, as it is increased by the recruitment of units and hiring of mercenaries.
In Wrath of the Righteous, instead of appointing a single companion to be an advisor for each and every stat, there are four councils that are chaired by NPCs and supported by up to three or four of your companions, depending on which ones are in your party during Act 3 and Act 5. The councils compositions are listed below:
Leadership: Captain Harmattan (NPC), Seelah, Regill, Daeran
Logistics: Dorgelinda Stranglehold (NPC), Arueshalae, Lann, Wenduag, Woljif
Diplomacy: Lady Konomi (NPC), Daeran, Lann, Sosiel, Woljif
Military: Captain Odan (NPC), Greybor, Regill, Seelah, Wenduag
You have to be mindful that the companions in question must be in your party for each and every meeting, so in some special circumstances you are guaranteed to not have every available companion. For example: while it is possible to recruit Lann in Act 1 and Wenduag in Act 3 it won’t be possible for them both to be in Act 5, so if you want Wenduag’s later options be sure to reject her in Act 3 so she joins in Act 5.
Every Council’s events are tied to that specific Crusade Stat rank, and starting at Rank 1 means there are a total of 7 rank up events (8 if you count a handful of follow-up events).
Leadership Council: Only the Best and Brightest!
Several of your armies’ unit upgrades come from this Council, which is headed by The Rock Captain Harmattan. If you want unit bonuses, bonuses for your generals, or even morale bonuses this is the place to come. Except when Harmattan turns traitor, then they come from one of his aides. There’s a lot more to it in the game.
Act 3
| Level 2: Repeatable Decree | Effect | Duration | Companion Required |
| Glory to the Heroes | 5-10 Morale | Instant | Seelah |
| Hunting Down Mutiny | 16-25 Morale, -10% Recruitment Growth, +10% Mercenary Cost | Instant | Regill |
| Bribes for the Officers | 15-20 Morale | Instant | Daeran |
| Distributing Provisions | 10-15 Morale | Instant | N/A |
Author’s Choice: Any. The only thing that changes is how much each one costs, but given that the best morale boosts come from winning battles the decrees are largely redundant.
| Level 3: Generals Bonus | Effect | Companion Required |
| Pious Officers | +10% Infirmary Size | Seelah |
| Striving for Distinction | +10% Experience Bonus | Regill |
| Master of Maneuver | +1 Army Unit Size | Daeran |
| Heroic Officers | +5 Combat Morale Bonus | N/A |
Author’s Choice: Pious Officers or Master of Maneuver. If your army takes a lot of hits better unit recovery is important, otherwise having more units in your army is wonderful.
| Level 4: Repeatable Decree | Effect | Duration | Companion Required |
| Preachers | +7% Recruitment Growth | 20 Days | Seelah |
| Refugees’ Recruitment | +20% Recruitment Growth, -20 Crusade Morale | 14 Days | Regill |
| Generous Recruiters | +1 Available Mercenary Unit | 14 Days | Daeran |
| Royal Conscription | +10% Recruitment Growth | 14 Days | N/A |
Author’s Choice: Preachers. The 7% growth over 20 days is higher than anything else provided.
| Level 5: City Building | Effect | Companion Required |
| Monument | +5% bonus to act twice with high morale | Seelah |
| Gallows | -3% bonus to skipping turn with low morale | Regill |
| Tavern | -10% reduction to all morale effects | Daeran |
| Bulletin Board | +2% bonus to act twice with high morale and -2% bonus to skipping turn with low morale | N/A |
Author’s Choice: Monument or Bulletin Board. Bonuses to acting twice with high morale are better than the alternatives.
Act 5
| Level 6: Generals Bonus | Effect | Companion Required |
| Charismatic Officers | Units start with +15 combat morale bonus | Seelah |
| Strict Officers | Units gain +3 bonus to combat morale when damaged | Regill |
| Intimidating Officers | Enemies start with -15 combat morale penalty | Daeran |
| Negotiations with the Wary | N/A, Crusde morale reduces by 25 | N/A |
| Persistent Officers | Units gain +1 combat morale bonus per turn | N/A |
Author’s Choice: Charismatic Officers. The initial high boost to morale works well with strong armies. I’d recommend never negotiating with the Wary.
| Level 7: Generals Bonus | Effect | Companion Required |
| Relic Keeper (Level 20) | +15 General Power | Seelah |
| Brilliant Strategist | +15% Damage for Archers and Infantry | Regill |
| Noble Recruits | +20% Damage for Cavalry and Elites | Daeran |
| Universal Support (non-General) | +100 Finance, +5 Materials, +4 Energy | N/A |
Author’s Choice: Brilliant Strategist or Noble Recruits. Damage bonus to archers or cavalry outweighs the other options.
| Level 8: Repeatable Decree | Effect | Companion Required |
| Feast of the Sacred Host | Generals gain +1 Heavenly Ward for 30 Days | Seelah |
| Military Exercise | Generals gain 50k experience, ranged units gain +20% damage to infantry, infantry units gain +20% damage to cavalry, cavalry units gain +20% damage to archers | Regill |
| Dark Bonds | Generals gain +1 Mighty Servant feat | Daeran |
| Great Commemoration | Random Army is recruited instantly | N/A |
Author’s Choice: Great Commemoration or Military Exercise. If you have many generals the latter is best, otherwise a new army can tip the scales.
The Level 8 Decree must be used at least once to trigger the finale event.
| Finale: Alignment Shift | Effect | Companion Required |
| “I forgive you…” | Alignment Shift: Good | N/A |
| “I am demoting you…” | Alignment Shift: Lawful | N/A |
| “I spared your life…” | Alignment Shift: Evil | N/A |
This choice is purely a roleplay one, as the end result is the same: Captain Harmattan is no longer your advisor and the Council comes to an end.
Logistics Council: Keep On Building!
The Logistics Council is meant to ensure that all of your troops are armed, armored, fed, and paid, which is a hell of a job for Dorgelinda Stranglehold. This requires the establishment of supply lines and garrisons which, in crunch speak, means the more buildings you build the better your Logistics get. Most of the bonuses here are economy-based, with some military stuff in there as well.
Act 3
| Level 2: Passive Unit Trait | Effect | Unit Type | Companion Required |
| Expensive Equipment | +1 Attack and AC Bonus | Trainable | Woljif |
| Ready for Anything | +2 Saving Throw Bonus | Trainable | Arueshalae |
| Experiences Intendants | +10% HP Bonus | Trainable | Lann |
| Only the Essentials | +10% HP Bonus | Mercenary | Wenduag |
| Equipment from the State | +1 Attack and Saving Throw Bonus | Mercenary | N/A |
Author’s Choice: Expensive Equipment or Experienced Intendants. Anything that increases the survival factor of my core units is phenomenal.
| Level 3: City Building | Effect | Companion Required |
| Market | +20 Finance Points, +1 Materials Point | Woljif |
| Shrine | +10 Finance Points, +1 Energy Point | Arueshalae |
| Salvager’s Post | +1 Materials Point, +1 Energy Point | Lann |
| Fighting Pit | +1 Initiative Bonus for Adjacent Trainable Unit Buildings | Wenduag |
| Warehouse | +100 Finance Points (by Inn), +1 Material Point (by Supply Center), +1 Energy Point (by Sanctuary) | N/A |
Author’s Choice: Shrine or Salvager’s Post. The Energy Point is the primary factor here.
| Level 4: Specific Bonus | Effect | Companion Required |
| Favortism | Generals gain +33% experience | Woljif |
| Reminder of Piety | +7 Energy Points | Arueshalae |
| Fighting the Marauders | +20 Materials Points | Lann |
| Hired Caravan Guards | -5% Mercenary Cost | Wenduag |
| Caravan Masters | +15 Movement Points for Generals | N/A |
Author’s Choice: Caravan Masters. The ability for general-led armies to move 37.5% farther in a day is critical in closing large distances, especially when forts are under attack. Reminder of Piety is a distant second.
| Level 5: Crusade Bonus | Effect | Companion Required |
| Insiders in the Field | +10 Finance Points and +1 Materials Point per controlled region | Woljif |
| Demonstration of Mercy | +33% morale bonus to Finance, Materials, and Energy Points | Arueshalae |
| Demonstration of Rigor | Generals that defeat armies produce +1000 Finance Points | Lann |
| Demonstration of Rigor | Generals that defeat armies produce +1000 Finance Points | Wenduag |
| Demonstration of Loyalty | +5% bonus to Finance, Materials, and Energy Points | N/A |
Author’s Choice: Demonstration of Mercy or Demonstration of Loyalty. Demonstration of Rigor is a hard pass as you will eventually run out of armies to defeat and Insiders in the Field neglects Energy production.
Act 5
| Leve 6: Repeatable Decree | Effect | Duration | Companion Required |
| Tricky Steal | Adds 10% -or- 10k Finance Points, whichever is lower | Instant | Woljif |
| Acquiring Unclaimed Property | Adds 750 Materials Points | Instant | Arueshalae |
| Selling Excesses / Distribution of Trophies | 2250 Finance Points / 220 Materials Points | Instant | Lann |
| Warehouse Raiding | Adds 10k Finance, 600 Materials, 65 Energy | One-Time Only | Wenduag |
| Corruption | +120 Finance, +10 Materials, +2 Energy | 16 days | N/A |
| Self Confidence (Non-Decree) | +10 Crusade Morale | N/A | N/A |
Author’s Choice: Selling Excesses & Distribution of Trophies. The ability to nearly-instantly trade off resources is surprisingly more useful than the number two choice, Corruption.
| Level 7: Recruitment Bonus | Effect | Companion Required |
| Meritocracy | +30% growth for Support and Elite units, -20% growth for Infantry and Archer units | Woljif |
| Strength is Responsibility | +30% growth for Infantry and Archer units, -20% growth for Support and Elite units | Arueshalae |
| Holy War | +25% growth for mythic units, -15% growth for all trainable units | Lann |
| Paid Loyalty | +2 Available Mercenary units, -15% growth for all trainable units | Wenduag |
| Propoganda Instead of Bread | +10% growth for all trainable units | N/A |
| Self Confidence (Non-Decree) | +10 Crusade Morale | N/A |
Author’s Choice: Propoganda Instead of Bread or Strength is Responsibility. Archers and Cavalry are the main stars, the other options are unattractive for me.
| Level 8: Repeatable Decree | Effect | Duration | Companion Required |
| Requisitions | 15k Finance, 1k Materials, -35 Crusade Morale | Instant | Anyone |
It doesn’t matter who is in your party and whose option you choose, all options unlock the same decree. This decree must be used to unlock the finale.
| Finale: Unique Building | Effect | Companion Required |
| Palace | +25% Finance, Materials, and Energy Income | Woljif |
| Spiritual Garden | +25 combat morale bonus, +50% general energy recovery, +20% mythic unit growth | Arueshalae |
| Stronghold (Recruitable) | +25% Recruitable Unit Growth | Lann |
| Stronghold (Mercenary) | Mercenary Recruitment 12.5% cheaper | Wenduag |
| Cathedral | All units: +15% HP, +3 attack, +3 AC, and +10 damage vs demons | N/A |
Author’s Choice: Cathedral or Stronghold (Lann). If I have Lann I take his Stronghold, if not I go with Cathedral.
Congratulations, you’ve built yourself a massive crusader presence that can generate lots of income and equipment to arm your armies!
Diplomacy Council: My Way or the Highway!
The Diplomacy Council, from a purely fluff standpoint, is there to help strengthen your relations with Queen Galfrey’s Royal Council and to extract benefits from the neighboring countries who also stand to lose a lot if the Crusade fails. Heading that council is Lady Konomi, who in the most polite of terms is a two-faced witch of a fox lady who gets upset if you ignore her options in favor of one of your companions’ options. This is also the briefest Council line in the game, has no “follow-up” stage, and can even be aborted early by choosing a specific option.
Act 3
| Level 2: Repeatable Decree | Effect | Duration | Companion Required |
| Religious Feast | 20% Energy Points, 10% Finance Points | 30 Days | Sosiel |
| Commander’s Parade | 7.5% Mercenary Discount, 25% Material Points | 30 Days | Daeran |
| Helping Those In Need | +10 Morale, or +20 Morale if below 0 | 10 Days | Lann |
| Bribery | 20% Material Points, -10% Finance Points | 30 Days | Woljif |
| Royal Parade | 10% Finance Points | 30 Days | N/A |
Author’s Choice: Religious Feast. It is a pure improvement over Royal Parade and while perhaps costlier to use it generates Energy Points, which are the hardest Crusade currency to come by.
| Level 3: Mercenary Unit | Unit HP | Unit Damage | Spells Known | Immunities/Resistances | Misc Notes | Companion Required |
| Inquisitors | 106 | 14-16 | Lightning Arc, Divine Favor | Electricity (10) | N/A | Sosiel |
| Duelists | 158 | 9-11 | N/A | N/A | N/A | Daeran |
| Barbarians | 59 | 7-9 | N/A | N/A | N/A | Lann |
| Rogues | 43 | 9-11 | N/A | N/A | Backstabbing(?) | Woljif |
| Sorcerers | 26 | 4-6 | Scorch Ray, Grow Claws | Electricity (5) | N/A | N/A |
Author’s Choice: Inquisitors or Sorcerers. Inquisitors are decent tanks and heavy hitters, but Sorcerers in large numbers can burn most enemies to ash with Scorch Ray. Leaning towards Inquisitors.
| Level 4: Recruitment Decree | Units Recruited | Companion Required |
| Help from the Queen | 12 Paladins and 30 Champions | Sosiel |
| The Help of Noble Houses | 12 Cuirassiers and 20 Marksmen | Daeran |
| People’s Help | 35 Light Cavalry and 75 Shield Bearers | Lann |
| Royal Court’s Help | 15 Hedge Knights and 30 Headhunters | Woljif |
| Royal Council’s Help | 70 Slingers and 100 Conscripts | N/A |
| Soldiers Trust (Non-Decree) | None, +10 Crusade Morale | N/A |
Author’s Choice: Royal Court’s Help, because Hedge Knights and Headhunters are a combination almost as deadly as Hedge Knights and Marksmen.
| Level 5: Multiple Bonuses | Bonus 1 | Bonus 2 | Companion Required |
| Andoran Equipment | +6000 Finance Points | +3% HP for Recruitable Infantry | Sosiel |
| Andoran Army | 28 Hedge Knights | +3 AC for Recruitable Cavalry | Daeran |
| Greenskin Stalkers Company | 45 Rangers | Recruitable Archers inflict Saving Throw Damage | Lann |
| Free Banners | 28 Hedge Knights | +1 AC for Mercenary Units | Woljif |
| Reinforcements from the Homeland | 10 Cuirassers, 30 Champions, 30 Marksmen | +20 Crusade Morale | N/A |
Authors Choice: Andoran Army or Reinforcements from the Homeland. The Hedge Knights with +3 AC make them an even greater mobile meat grinder, but getting Marksmen with Cuirassers as a meat shield and glass cannon Champions is an acceptable alternative.
Act 5
| Level 6: Item Unlock | Item Gained | Enchantment | Companion Required |
| Gift from the High Priest | Robe of Angelic Prudence | +4 WIS, +4 CHA, Greater Angelic Aspect spell | Sosiel |
| Gift from the Nobility | Cloak of Astounding Prowess | +5 Saving Throws, Killing Blow causes Blindness (Will DC) | Daeran |
| Gift from the Mendevian Generals | Overlord’s Chainmail | +5 mithral chainmail, +7 Persuasion bonus (Intimidate) | Lann |
| Gift from the Young Kingdom | Elixir of Inconceivable Transmutations of Body, Soul, and Mind | Permanent +2 increase to all Ability Scores (consumable) | Woljif |
| Gift from the Royal Council | Goggles of Quick Grasp | +15 Persuasion, Lore, and Knowledge Checks | N/A |
| Declaring Independence (Decree) | N/A (Decree) | +7 Generals’ Power, +100k Finance, +10k Materials, +4k Energy | N/A |
Author’s Choice: Gift from the Young Kingdom. Even as a one-time consumable, gaining +2 to all ability scores permanently outstrips any individual equipment item.
AUTHOR’S WARNING: CHOOSING AND CONFIRMING “DECLARING INDEPENDENCE” WILL END THE DIPLOMACY COUNCIL AT THIS POINT!
| Level 7: Random Bonus | Effect | Companion Required |
| Foreign Advisors | Generals gain +10 Power | Sosiel |
| New Lands for the Nobility | Recruitment Growth increases by 1% per captured region | Daeran |
| Sisters of the Golden Erinyes | Unlocks Sisters of the Golden Erinyes mercenary unit, provides 8 at HQ | Lann |
| Mendevian Cavaliers | Unlocks Mendevian Cavaliers mercenary unit, provides 6 at HQ | Woljif |
| Restoring Order | No recruiting for 2 weeks, after which all trainable uits gain +20 combat morale bonus | N/A |
Author’s Choice: New Lands for the Nobility. If you were diligent and claimed all available regions in Act 3 you’ll gain 6% trainable unit growth, which is better than recruiting mercenaries or having recruitment locked out for a combat morale bonus.
| Level 8: Decree | Effect | Companion Required |
| Glorification of the Gods | All generals learn Judgment Day (d6xPower damage to enemies, d6xPower healing to allies) | Sosiel |
| Tax of the Righteous | -50% Building Construction Cost | Daeran |
| Elections to the Royal Council | -10% Mercenary unit cost | Lann |
| Tieflings’ Rights | +15% mythic unit growth, +5 Energy Points | Woljif |
| Mobilization | -10% trainable unit cost | N/A |
Author’s Choice: Mobilization or Tax of the Righteous. If there is a lot of building to be done then the Tax is more sensible, but unless you rely on mercenaries having cheaper trainable units is a great deal.
After this point your Diplomacy is maxed out and you never have to see Lady Konomi’s face ever again, unless you want to. Why would you want to?
Military Council: Middlegame (Act 3)
The Military Council, headed by the pragmatic and honorable Captain Odan, is tasked with devising the best solution to beat back the demons and to close the Worldwound forever. For all intents and purposes the main point of this Council is to decide how to upgrade your weak default units and how to empower some of them to be used to their maximum tactical potential.
When choosing a unit to upgrade a default unit into, all the unselected options (whether they were available or not) will become Mercenary units for the duration of your game.
It is also highly recommended to make sure you have all possible companions to choose from before starting this so you can find the army units and abilities that best fit your play style. Woljif, Greybor, and Wenduag can be recruited in Act 3 (if Wendy wasn’t already recruited or killed).
| Level 2: Infantry Unit | Cost Per Unit | Weekly Recruitment | Unit Hitpoints | Unit Damage | Spells Known | Immunities/Resistances | Misc Detail | Companion Required |
| Champions | 65 | 12 | 26 | 16-18 | N/A | N/A | N/A | Seelah |
| Shield Bearers | 40 | 22 | 164 | 5-7 | N/A | N/A | Damage Reduction 1/- | Regill |
| Spearmen | 45 | 18 | 45 | 9-11 | N/A | N/A | N/A | Greybor |
| Convicts | 12 | 55 | 22 | 5-7 | N/A | N/A | N/A | Wenduag |
| Conscripts | 20 | 43 | 78 | 7-9 | N/A | N/A | N/A | N/A |
Author’s Choice: Conscripts or Spearmen. By process of elimination: Shield Bearers don’t die but also don’t kill, Champions are expensive glass cannons, and Convicts (if I can even choose them) only operate well in large numbers. Conscripts are more reasonable, but Spearmen do better damage.
| Level 3: Archer Unit | Cost Per Unit | Weekly Recruitment | Unit Hitpoints | Unit Damage | Spells Known | Immunities/Resistances | Misc Detail | Companion Required |
| Rangers | 80 | 14 | 85 | 18-20 | N/A | N/A | Can Melee Shoot | Seelah |
| Marksmen | 100 | 12 | 25 | 36-38 | N/A | N/A | N/A | Regill |
| Headhunters | 110 | 11 | 50 | 27-29 | N/A | N/A | Bonus VS Ranged/Spellcasters(?) | Greybor |
| Bandits | 140 | 8 | 52 | 28-30 | N/A | N/A | N/A | Wenduag |
| Slingers | 50 | 24 | 24 | 12-14 | N/A | N/A | N/A | N/A |
Author’s Choice: Marksmen or Headhunters. The sheer damage increase over default archers makes Marksmen and Headhunters the ideal choice. Rangers are a decent fifth wheel alternative, but their primary selling point of being able to shoot in melee implies your archers are being caught in melee a lot. Ideally that shouldn’t happen.
CRUSADE MISSION: “Repelling the Assault”
At this point an invading army will spawn northwest of Blackwater and march slowly towards Drezen. It is required to defeat this army in order to proceed to Level 4 of the Military Council.
| Level 4: Cavalry Unit | Cost Per Unit | Weekly Recruitment | Unit Hitpoints | Unit Damage | Spells Known | Immunities/Resistances | Misc Detail |
| Paladins | 270 | 6 | 97 | 9-11 | Smite Evil, Lay On Hands | Fear, Disease | N/A |
| Cuirassiers | 240 | 7 | 382 | 2-4 | N/A | N/A | Damage Reduction 3/- |
| Hedge Knights | 150 | 12 | 157 | 11-13 | N/A | N/A | Critical (20% chance, 1.5x damage) |
| Raiders | 155 | 12 | 175 | 7-9 | N/A | N/A | N/A |
| Light Cavalry | 85 | 22 | 87 | 9-11 | N/A | N/A | More Damage Per Square Moved |
Author’s Choice: Hedge Knights. No contest, Hedge Knights hit the hardest and take the second-most damage. What they lack in immunities they make up for in sheer muscle.
| Level 5: Unit Abilities | Effect | Companion Required |
| Charge (Cavalry) | Unit gains +1 speed, +20% damage, and -2 AC for 1 round | Seelah |
| Charge (Infantry) | Unit gains +1 speed, +20% damage, and -2 AC for 1 round | Regill |
| Independence (Archers and Cavalry) | Unit gains +2 bonus to initiative (passive) | Greybor |
| Debilitating Poison (Infantry) | Next attack by unit reduce enemy speed to 0 for 1 round | Wenduag |
| Tough (All Units) | Unit gains +2 saving throw vs disease and poison | N/A (Odan) |
Author’s Choice: Independence. The improved initiative is not only passive, but archers that fire first mitigate (if not eliminate) enemy threats before they can be threats. Cavalry are also ideal for tying up enemy units so the initiative only helps them out.
CRUSADE MISSION: “Storms Peak”
At this point an enemy army will spawn just southeast of Tower of Yath. Unlike before this is just a standing army and will not move. It is not technically required to complete this mission, but it is recommended to do so before ending Act 3.
Military Council: Endgame (Act 5)
| Level 6: Support Unit | Cost Per Unit | Weekly Recruitment | Unit Hitpoints | Unit Damage | Spells Known | Immunities/Resistances | Misc Detail | Companion Required |
| Warpriests | 750 | 5 | 182 | 16-18 | Cure Moderate Wounds, Dispel | Fear | Aura of Courage | Seelah |
| Monks | 630 | 6 | 614 | 17-19 | N/A | Poison, Disease | N/A | Regill |
| Assassins | 1100 | 4 | 161 | 47-49 | N/A | N/A | Teleporting Unit | Greybor |
| Witches | 1025 | 4 | 83 | 5-7 | Agony, Dispel, Infected Wounds, Misfortune | N/A | N/A | Wenduag |
| Bards | 950 | 4 | 161 | 5-7 | Aura of Superiority, Aura of Caution, Aura of Onslaught, Aura of Protection | N/A | N/A | N/A (Odan) |
Author’s Choice: Warpriests. The passive Aura of Courage combined with healing potential make for a good support role, although the teleporting Assassin is an incredible second choice.
CRUSADE MISSION: “Blockade of Reinforcements”
Two armies will spawn, one friendly south of Leper’s Smile and one hostile north of Leper’s smile. You have to eliminate the hostile army to proceed to the next mission.
CRUSADE MISSION: “Khorramzadeh’s Trap”
Immediately after the previous mission a newer and stronger army appears north of the one you just defeated. This army must be defeated to proceed to the next Military Council event.
| Level 7: Unit Abilities | Effect | Companion Required |
| Contain the Enemy (Cavalry) | Next attack by unit reduce enemy speed to 0 for 1 round | Seelah |
| Bait (Infantry) | All units within 3×3 of this unit converge and attack it for 1 round | Regill |
| Taunt (Cavalry) | Target unit moves to this unit and attacks for 3 rounds | Greybor |
| Harassing Shooting (Archers) | Pulls target enemy 2 squares toward this unit | Wenduag |
| Juicy Target (Infantry) | All units target this unit for 1 round | N/A (Odan) |
Author’s Choice: Juicy Target. This works best on a large stack of infantry, who can free up your cavalry and archers to continue attacking.
| Level 8: Elite Unit | Cost Per Unit | Weekly Recruitment | Unit Hitpoints | Unit Damage | Spells Known | Immunities/Resistances | Misc Detail | Companion Required |
| Knights of Ozem | 1850 | 2 | 643 | 18-20 | Cure Serious Wounds | N/A | N/A | Seelah |
| Arcanists | 1500 | 4 | 262 | 1-3 | Cone of Cold, Greater Magic Missile | N/A | N/A | Regill |
| Dragonslayers | 2500 | 2 | 173 | 165-167 | N/A | N/A | Range + Melee | Greybor |
| Bloodragers | 2800 | 2 | 298 | 85-87 | Tempest Strike | N/A | N/A | Wenduag |
| Honor Guards | 2600 | 2 | 285 | 14-16 | N/A | N/A | Heroic Gait | N/A (Odan) |
Author’s Choice: Any. Elite units can’t be recruited in large enough numbers to emulate the sheer damage potential of mass archers or cavalry, though if I had to pick one it would be Dragonslayers.
CRUSADE MISSION: “Odan’s Request”
A purely optional errand, Odan wants to go fight. You can say yes to get him as a general or you can say no for 15k points in the other three Crusade stats.
CRUSADE MISSION: “Champions of the Abyss”
Arguably the most deadly army spawns near Threshold and holds position. Defeating this army is required to proceed to the Military Council Finale.
| Finale: Player Bonus | Effect | Companion Required |
| “The biggest battle…” | Player gets +3 luck bonus damage | N/A |
| “Place all the trophies…” | Player gets +3 luck bonus attack | N/A |
| “Let the clerics…” | Player gets +3 luck bonus AC | N/A |
| BONUS: Exhaust Dialogue | Item: Headband of Mental Perfection +6 | N/A |
Author’s Choice: Any, but be sure to exhaust all dialogue so you get the luck bonus and the Headband.
And with that you have proven you have a strong enough army to defeat the forces of the Abyss!
Super-Duper Secret Research Projects!
Aside from being in control of your own Crusade to fight it on your own terms, the other reason to never use Auto-Crusade mode is because it will lock you out of a certain ending of the game. In order to complete this ending you will need to research and complete four projects in Crusade Management:
Studying the Sword of Valor – Act 3, requires 14 days to complete
Studying the Unusual Crystal – Act 5, requires 14 days to complete
Northern Lights – Act 5, requires 20 days to complete
Records of Pulura’s Stargazers – Act 5, requires 14 days to complete
Areelu Vorlesh’s Drafts – Act 5, requires 14 days to complete
All of these are required for that certain ending of the game, and guides currently exist that will point you towards how to unlock these projects. The details won’t be put here, only that they have to be done and they cannot be done in Auto mode.
End Notes
This is the current end of my guide. I might in the future add more raw data including all city buildings, all unit data, and so forth. Sadly, mythic path data will take a lot of time to collect. Regardless, I am hopeful that this has provided some of the information you need to plan out your next game or help salvage your current one.
If there are any small particular details I have missed please let me know and I will do my best to correct them, if there are major things I have missed that fundamentally alter the guide please let me know and you will be credited when they are corrected.
This guide is explicitly written for Steam Guides and is not permitted to be copied or posted on any other sites.
Hope you enjoy the post for Pathfinder: Wrath of the Righteous Best Strategy & Tactics Crusade Mode Guide, If you think we should update the post or something is wrong please let us know via comment and we will fix it how fast as possible! Thank you and have a great day!

Можно потратить часы, просто пытаясь создать своего идеального героя в Pathfinder: Wrath of the Righteous. Игра предлагает немалую вариативность в построении персонажа, и вдумчивый игрок может растеряться. Вот наш гайд по созданию персонажа Pathfinder: Wrath of the Righteous, который облегчит вам эту задачу.
Готовые и пользовательские персонажи
Pathfinder: Wrath of the Righteous позволяет вам выбирать из нескольких готовых персонажей. Варианты включают кавалера-полуэльфа, клирика-ореада, разбойника-гнома и других. Однако, если вы хотите убедиться, что все соответствует вашим предпочтениям, вы также можете создать собственного персонажа.
Прежде чем мы продолжим, убедитесь, что вы включили «Разрешить переобучение персонажа» в параметрах сложности. Вы сможете изменить/переобучить своего главного героя и компаньонов, как только доберетесь до Покоя Защитника. Это гарантирует, что вы не будете скованы, когда сделаете неоптимальный выбор.

Портреты
Наша первая задача – выбрать портрет. Десятки уже доступны по умолчанию. Некоторые из этих портретов создания персонажей являются новыми в Pathfinder: Wrath of the Righteous, а другие — в Kingmaker. Также можно добавить свой собственный портрет, если вас не устраивает то, что доступно.

Классы
Далее нам нужно выбрать класс. Теперь, чтобы внести ясность, вы проведете здесь много времени, потому что Pathfinder: Wrath of the Righteous имеет 25 классов по умолчанию, и каждый из них имеет несколько архетипов/подклассов. Точно так же есть 13 престиж-классов, которые вы не сможете выбрать сейчас, поскольку они требуют, чтобы вы немного продвинулись в кампании, чтобы приобрести некоторые умения или навыки.
Мы не будем подробно обсуждать все классы в этом руководстве. Однако достаточно сказать, что вы должны принять во внимание три фактора:
- Какой стиль игры вам удобен? Вы хотите попасть в самую гущу схватки или предпочитаете колдовать, пока союзники защищают вас?
- Говоря о союзниках, обратите внимание на спутников, которых вы встретите во время своих путешествий. Например, первый человек, которого вы можете нанять во время пролога, — это паладин по имени Сила. Через несколько мгновений вы столкнетесь с шаманкой по имени Камелия. Хотя вы можете настраивать их по мере повышения уровня, их особый стиль игры и способности должны дополнять класс вашего главного героя.
- Наконец, вы захотите рассмотреть сложность класса. В Pathfinder: Wrath of the Righteous есть всплывающая подсказка «сложность» (обозначенная кружками), которая говорит вам, является ли класс довольно простым или его лучше использовать тем, у кого больше опыта в игре. В этом примере Монах имеет уровень сложности «2», что означает, что он подходит для новичков. Сравните это с Алхимиком или Военным жрецом (уровень сложности 4) или Кинетиком (уровень сложности 5).

Расы
Далее вы сможете выбрать свою расу. Опять же, мы не будем вдаваться в подробности здесь. Вам просто нужно принять к сведению расовые бонусы, которые вы можете получить, а также возможное наследие (подраса).

Предыстория
Ваше прошлое играет роль в дополнительных бонусах, которые вы можете получить, таких как навыки (т. е. проверки навыков) и/или владение оружием. Например, если вы пойдете с монахом мастером боевого посоха, вы нанесете больший урон этим конкретным оружием. Между тем, на панели предысторий вы увидите, что Странник — Отшельник добавляет бонус к нескольким навыкам владения оружием, включая боевой посох.

Способности
Способности (то есть атрибуты) относятся к вашей силе (СИЛ), ловкости (ЛВК), телосложению (ТЕЛ), интеллекту (ИНТ), мудрости (МДР) и харизме (ХА). Каждая способность управляет несколькими проверками навыков, и игра также подсказывает вам, на каких из них следует сосредоточиться, в зависимости от выбранного вами класса. Например, большинство сборок для Разбойника, Убийцы, Охотника и Монаха делают упор на высокий ЛВК.

Навыки
Ваши навыки определяют вероятность успеха ваших действий при исследовании, всплывающих дополнительных диалогах или преодолении врагов:
- Атлетичность (STR) — преодоление препятствия или прыжок на другой участок карты.
- Мобильность (DEX) — Шанс пройти мимо противников, не давая им возможности атаковать.
- Обман (DEX) – Взлом и обезвреживание ловушек.
- Скрытность (DEX) — проходите мимо противников незамеченными и избегайте случайных встреч на карте мира.
- Знание: Тайна (INT) – изучение заклинаний из книг заклинаний, создание свитков тайных заклинаний и определение магических предметов.
- Знания: Мир (INT) – Варка зелий, расшифровка текстов и получение информации о земле.
- Знания: Природа (WIS) — снижает усталость при путешествии по карте мира и получает способность лечить болезни.
- Знания: Религия (WIS) — создание свитков божественных заклинаний и запоминание информации о религиозных верованиях.
- Восприятие (WIS) — позволяет замечать ловушки и скрытые объекты/лут; не дает вам застать врагов врасплох во время кемпинга.
- Убеждение (CHA) — вероятность успеха дополнительных вариантов диалога (например, дипломатии, запугивания и обмана).
- Использование магического устройства (CHA) — возможность активировать жезлы и свитки, которые вы обычно не сможете использовать.
Ваш выбор здесь поможет в построении вашего персонажа (например, если вы хотите побудить неигровых персонажей давать вам лучшие награды, вам понадобится высокое Убеждение). Кроме того, учитывайте навыки своих спутников.
Помните, что Pathfinder: Wrath of the Righteous автоматически выбирает персонажа с наивысшим навыком для определенного действия (т. е. попытка взлома сундука, когда выбрана вся группа, заставит персонажа с наивысшим уровнем Обмана выполнить действие).

Специальные навыки
Дальше нас ждут специальные навыки. Обычно здесь можно выбрать оружие или заклинание. Дополнительные параметры станут доступны позже, когда вы повысите уровень или выполните предварительные условия.
Да, и в некоторых случаях выбранный вами класс/подкласс и раса позволят вам выбрать бонусные умения с самого начала.

Божество и мировоззрение
Божества в Pathfinder: Wrath of the Righteous предлагают несколько преимуществ. Они также помогают использовать определенные заклинания, если для них требуется определенное божество.
Однако некоторые из них могут быть недоступны в зависимости от вашего класса или мировоззрения. Также можно выбрать Атеизм. Это открывает несколько уникальных опций, умение Восприятие и бонус +2 к спасброскам против заклинаний божественного типа. К сожалению, за это вы не сможете использовать божественные заклинания или те, для которых требуется конкретное божество.
Точно так же мировоззрение зависит от вашего предыдущего выбора в создании персонажа. Например, Паладины часто в начале оказывались в спектре Законопослушного добра. Но это может измениться, когда вы продолжите играть в кампанию. Когда представлены определенные решения относительно морального компаса вашего персонажа, вы можете использовать законные, хаотические, добрые или злые ответы.

Внешний вид, голос, имя, день рождения и экран сводки
Наконец, вы можете настроить внешний вид, голос, имя и день рождения вашего персонажа. Выберите параметры и эстетику, которые вам нравятся, и перейдите к сводному экрану. Это даст вам подробную информацию обо всех решениях, которые вы сделали во время создания персонажа Pathfinder: Wrath of the Righteous.
Если вас все устраивает, вперед и начните свое приключение. В качестве альтернативы, настройте своего персонажа еще немного или, что еще лучше, сыграйте в пролог и перезапустите кампанию, если вы хотите попробовать разные комбинации.

Table of Contents
- Getting Started
- Difficulty Levels
- Installing Mods
- Creating a Character
- Ability Scores
- Classes
- Multiclassing
- Mythic Path
- Companions
- Frequently Asked Questions
After the success of Pathfinder: Kingmaker, Owlcat Games went on to develop another one of Paizo’s adventure paths as Pathfinder: Wrath of the Righteous. This game will take you to the northern reaches of Golarion toward the Worldwound, a magical scar in the land through which demons can easily cross over. The story follows a mysterious individual who soon shows some Mythic powers and leads the crusade against the demonic hordes — but it’s up to you, the player, to decide how they go about doing so.
Wrath of the Righteous is a deep, complex RPG that evokes the gameplay of the Pathfinder tabletop game. You’ll have to solve puzzles, finish quests, and carefully build various characters to be able to face the difficult combat encounters that the game holds. If you’re looking for a helping hand on your journey, we have you covered — from companion build guides to equipment recommendations, and more.
Getting Started
There are a few things that are handy to know before jumping into the world of Golarion and rushing into the danger that this game holds. Forewarned is forearmed, after all. We have a few tips to get you started.
- Wrath Of The Righteous: Beginner Tips
- Wrath Of The Righteous: Pro Tips
- Wrath Of The Righteous: Best Weapons To Look Out For
- Wrath Of The Righteous: Most Powerful Accessories To Look Out For
Getting Started: Which Difficulty Level Should You Choose?
One of the biggest topics of discussion with Pathfinder: Wrath of the Righteous is the game’s level of difficulty. The devs have made it clear that the game absolutely caters to those who like a bit of difficulty. With that said, here are some recommendations for which difficulty to pick:
- Story and Casual are great starting points for this game, even for those who are very familiar with RPGs. This game’s system punishes those who aren’t acquainted with it very harshly and these difficulties provide some breathing room.
- Normal and Daring are recommended for people who are comfortable with the idea that the game will be difficult. These settings will require you to come up with effective strategies if you want a chance of being successful.
- Core and Hard are for those who have a lot of experience with the Pathfinder system and feel very confident in their experiences with the combat system. These difficulties come with bright red warnings in their description for a reason: it is very easy to lose due to both inexperience and random chance in these difficulties.
- Unfair is exactly what it sounds like. It’s the toughest difficulty and the game is not balanced around it.

A banner depicting a loading screen from Pathfinder Wrath of the Righteous
Getting Started: How To Install Mods
Wrath of the Righteous has a very active community of modders who love to tweak settings, add features, and change entire parts of the game. You can find mods in the usual places, though Nexus Mods seems to be the premier location.
To install most of these mods, you will need to download the Unity Mod Manager. Follow the instructions on that page to install a mods folder for Pathfinder: Wrath of the Righteous, and you can start installing mods.
- To install a mod, simply drag the zip file that the mod is inside into the box in the Unity Mod Manager.
- Check the Mod Manager often — it will alert you to any out-of-date mods. Right-click on the mod’s name and select «Home Page» to be taken directly to the mod’s page.
If you want some pointers as to what mods to go for, check out our favorites:
- Best Mods For The Game
Back to top
Creating a Character
Pathfinder Wrath of the Righteous Companions Art
Once you’ve customized your difficulty options, you will be presented with a very complex set of menus with which you’ll create your main character. Most of these options are self-explanatory but some others are a little more complicated.
We’ve prepared some handy explanations of some of them below.
Creating a Character: Ability Scores
Of all the stats a character has, their ability scores may be the most important, whilst also being a bit tricky to understand. There are six of them: Strength, Dexterity, Constitution, Intelligence, Wisdom, and Charisma. They are all responsible for different aspects of the game.
|
Ability Score |
Combat Use |
Skills |
Other Uses |
|---|---|---|---|
|
Strength |
Melee weapon damage |
Athletics |
Personal encumbrance and party carry weight |
|
Dexterity |
Ranged and finesse weapon damage |
Acrobatics, Trickery, and Stealth |
Reflex saving throws² and determining initiative |
|
Constitution |
Health points |
None |
Fortitude saving throws² |
|
Intelligence |
Certain spellcasters’ magic ability¹ |
Knowledge skills (Arcana, World) |
Number of skill points upon leveling up |
|
Wisdom |
Certain spellcasters’ magic ability¹ |
Lore skills (Religion, Nature), Perception |
Will saving throws² |
|
Charisma |
Certain spellcasters’ magic ability¹ |
Persuasion, Use Magic Device |
None |
¹The ability score used for determining a character’s spellcasting ability depends on their class. For example, Wizards use Intelligence, Druids use Wisdom, and Bards use Charisma.
²Saving throws are called for whenever a character needs to attempt to resist or avoid a negative effect.
- Reflex saving throws are used against effects that may be avoided physically, for example jumping out of the way of a Fireball.
- Fortitude savings throws are used against skills that affect the body, for example resisting the effects of poison.
- Will savings throws are used against mind-affecting skills, for example, the charming ability of a Succubus.

A banner depicting character creation in Pathfinder Wrath of the Righteous
Creating a Character: All About Classes
Which class you choose for your character will have important implications on your gameplay and how your adventure unfolds. We have some guides to help you with classes, as well as individual guides for certain class builds.
- Best Classes
- All Animal Companions, Ranked
- How To Respec Your Character
We have also prepared some guides on how to build characters with the base classes in the game.
More build guides coming soon!

Back to top
Creating a Character: Multiclassing
In Wrath of the Righteous, the maximum level for a character is level 20 and you will very likely hit that quite a while before the end of the game’s story.
Pathfinder and certain other tabletop systems make it possible for characters to do something called multiclassing, which means taking levels in more than one class. This is something that can seem very complex to newcomers, but it’s a true highlight of the game, and creating complex builds to fit a character or a strategy is something many players adore.
Here’s how it works:
Every class has certain features that it will provide when you hit a certain level in it. For example, a Paladin will get an AoE healing ability when they take their third level in that class.
- Base classes have features for every level up to level 20.
- Prestige classes only have features that go up to level 10.
- Prestige classes are specialist classes that must be unlocked by leveling up certain skills. For example, the Arcane Trickster requires some Sneak Attack ranks, and the Dragon Disciple requires levels in a spontaneous arcane caster class.
It is possible to spend a level in any class that you have available to you when you level up. This will only make progress in that class, and not any classes you have chosen before.
For example, a Bard could reach level five and then take three levels in Paladin until they get the AoE healing ability.
- This would result in a level eight character with levels in two classes. This would usually be written as «Bard 5 Paladin 3» for clarity.
- While this character would not be as good at Bard-ing or Paladin-ing as characters who take eight levels in either of these classes, they will have a certain flexibility that those characters would lack.
While it is entirely possible (and not a bad idea) to level a character up in one class for the entire game, many high-tier character builds use multiclassing to their advantage and can produce fantastic results.
Back to top

Creating a Character: The Mythic Paths
Wrath of the Righteous is based on an adventure path where the players are eventually granted supreme powers from mythic sources, and this is reflected in the game as various Mythic Paths that you can select. These will grant your main character special powers and abilities that reflect their sources.
There are ten Mythic Paths in the game. Most of these are very easy to unlock, but some require more in-depth explanations. Here are the more simple ones:
- The Angel and Demon Mythic Paths are unlocked in the Prologue automatically.
- The Aeon Mythic Path is unlocked during Act One. You must interact with an odd warped object in the Market Square in Kenabres to obtain a purple crystal knife. At the end of the Act, you must select the [Aeon] option when interacting with the Wardstone.
- The Azata Mythic Path requires that you complete the Starward Gaze quest by singing along with the priests of Desna.
- The Trickster Mythic Path requires that you head to the Blackwing Library during Act One and use the [Trickster] dialogue options when confronting the cultists there.
- The Legend Mythic Path is technically just an extra option provided to you once you hit the eighth Mythic Rank.
Here are the guides for those that require a bit more work
- How To Unlock The Lich Mythic Path
- How To Unlock The Gold Dragon Mythic Path — coming soon
- How To Unlock The Swarm-That-Walks Mythic Path — coming soon
- How To Unlock The Devil Mythic Path — coming soon
Back to top
Companions

Banner depicting many of the companions from Pathfinder Wrath of the Righteous
You don’t have to go it alone in the world of Golarion — the game has a large number of companions to recruit. They all have their own classes, personalities, and storylines with quests to pursue if you are so inclined. Some of them can even be romanced!
> How To Recruit All Companions
> Every Companion, Ranked
We have also prepared some guides with recommendations for how to build specific companions. Click the images in the table below to be taken to that companion’s guide:
Frequently Asked Questions
A demonic statue in Pathfinder Wrath of the Righteous
Is there romance in the game?
Yes. A male main character can romance Camellia, Wenduag, Daeran, Sosiel, Arueshalae, or Queen Galfrey. A female main character can romance Lann, Wenduag, Daeran, Arueshalae, or Queen Galfrey.
It is possible to break romances by picking the wrong dialogue choices when speaking to them, and it’s also possible to start romances without really intending to. Pay attention to your choices and how your companions react.
Should I play turn-based mode?
This is largely up to you and what you prefer. There are two modes in the game for combat, TB (Turn-based) and RTWP (Real-time with pause). You will find that RTWP battles will go far quicker than TB battles, but they will likely feel more chaotic and are harder to control on large battlefields.
TB battles, on the other hand, give you far more time to think about your movement and your strategies. Note that you can toggle between these modes at any time, even in the middle of a battle.
Will there be updates?
Yes. There are currently regular updates to the game that fix bugs and balancing issues. On Steam, there is also a Beta Test branch of the game for players to experience larger updates before they drop.
To opt into the Beta Branch for earlier updates, right-click on the game’s title in Steam and open its Properties. From there, click on the Betas option, and in the drop-down menu, select «Betatest version.» The game should start automatically downloading the most recent update.
Why does the game load so slowly?
While this may be a problem with your system not meeting the recommended requirements of the game, but there is a problem in the game where saves get too bulky as you make progress. One way you can counter this is by downloading the Cleaner mod from newman55.
The reason that save files become bloated is that they have to track all of the loot dropped in every single area. This mod adds a button that will erase unwanted loot from the game whenever you leave an area, keeping your save file size low.
When will the DLC be released?
There is currently one piece of DLC available for free for Pathfinder that adds a number of new portraits to your game.
In addition to this, there will be three additional DLCs released in the future. These DLCs do not yet have release dates but you can purchase the Season Pass which will grant access to all three of them upon their respective releases:
- A new additional campaign that takes place after the end of the main campaign and can be played with the character you used in the original.
- Another additional campaign that takes place alongside the main campaign focused on Kenabres.
- A rogue-like game mode with partial integration into the main campaign.
Back to top
NEXT: Pathfinder: Wrath Of The Righteous — Things To Do After You Beat The Game

The present treatise serves as a comprehensive guide detailing all of the restored relics available in Crusade mode within the context of the game. Our focus shall be on providing a detailed overview of the equipment that may be obtained from each relic. However, it is important to note that certain relics may not be appropriately rewarded or adequately and may necessitate the use of the Toybox to obtain them. Additionally, some items may not perform precisely as described in their corresponding tooltips. Owing to the profusion and abundance of items available within the game, the tooltips have been truncated and condensed to a certain extent while preserving their fundamental essence and salient features.
It is worth bearing in mind that while restoration of these artifacts is only feasible in Act 3, certain artifacts that are exclusively accessible in Act 3 can nonetheless be obtained during the antecedent Act 2. Similarly, some Act 5 relics can only be procured through restoration in Act 5, not Act 4.
Our ardent hope and commitment is to continually update this guide to provide the most comprehensive and up-to-date information available. As such, we humbly request our esteemed readers to kindly notify us of any missing relics or additional information they may possess.
Without further ado, we shall now examine the plethora of restored relics available in the game and the equipment that may be acquired from each.
Act 3 – Unholy Symbol of Rovagug – Handaxe, Battle Axe, and Great Axe
Next up in Act 3 is the Unholy Symbol of Rovagug offers a choice of Handaxe, Battle Axe, or Great Axe. The effects of these weapons are the same across all three types.
- Provides a +2 bonus to the Radiant trait. Whenever a critical strike is confirmed, the wielder can absorb a portion of the target’s magical essence and banish one unrelated spell of up to level 5 in the process. This ability makes the Unholy Symbol of Rovagug a formidable weapon that can effectively neutralize the magic of even the most powerful adversaries.
- Provides a +2 bonus to the Corrosive Burst trait and a +3 bonus to attack rolls when performing an attack of opportunity. Additionally, the critical threat range is doubled, making it more likely for the wielder to land a critical hit. If the wielder successfully lands an attack of opportunity, the target must pa*s a fortitude saving throw (DC 17) or become paralyzed for one round. However, the wielder is vulnerable to attacks of opportunity from their foes, who must pa*s a Reflex saving throw (DC 15) or suffer 2d6 acid damage.
- Provides a +2 bonus and possesses the unique ability to immediately release the wielder from being stunned, paralyzed, staggered, petrified, or entangled while simultaneously dealing damage with the weapon. Moreover, the critical threat range for this weapon is an impressive 18-20, making it a highly versatile and effective weapon in any combat scenario.
Act 3 – First Retriever – Shirt and Padded Armor
Here’s a list summarizing the Padded Armor and Shirt options available in Act 3’s First Retriever:
Shirt:
- This attribute pertains to mobility ability checks, which are subject to a penalty of -5 while also providing a resistance of 30 to electricity. If the wearer is struck by a non-slashing weapon or becomes staggered from the first attack in a round, they must pa*s a Reflex saving throw (DC 20) or suffer a penalty of -2 to all checks and two fewer attack attempts for one round. This attribute can greatly impact a character’s ability to move and attack effectively in combat and should be considered when making decisions on equipment and strategy.
- This attribute pertains to spells cast from a spellbook, which receive a +10 competence bonus on Lore (Nature) skill tests, treating it as one level higher. This attribute can greatly enhance a Druid’s ability to cast spells and interact with the natural world, making them a powerful force to be reckoned with.
- This attribute pertains to the ability to polymorph into any creature, which enhances the wearer’s attack and damage rolls with limbs, granting them a +4 enhancement boost. Additionally, when a melee strike from the creature strikes the wearer, the creature takes 1d6 piercing damage. This attribute can greatly enhance a character’s combat abilities, allowing them to deal more damage and survive longer in battle.
Padded Armor:
- This attribute pertains to a type of armor with certain advantages and disadvantages. On the one hand, it incurs a penalty of -2 to attack rolls and constitution. On the other hand, it provides a boost of +4 to the constitution and a resistance of 30 to electricity. If the wearer sustains any electrical damage, the object becomes charged with electricity, adding 1d12 electric damage to strikes for the following round. Moreover, casting spells with the electric descriptor quickens the user, allowing for faster spellcasting.
- Dexterity gains a +3 bonus and a +2 morale boost.
- This attribute pertains to armor that bonuses +3 to saving attempts against nausea and fear. Additionally, it affects spell attacks, where the target must succeed on a Will saving attempt (DC 19) or suffer from nausea for one round.
Act 3 – Phylactery of Stevanius – Ring and Scythe
Let’s look at the Phylactery of Stevanius in Act 3, where you can obtain either a Ring or a Scythe.
For Ring:
- You have a potent talent, thanks to the Ring. Your HP is recovered twice as much as your character level once daily whenever it drops to 0. Furthermore, the ring calls 1d4+2 skeleton undead champions for two minutes to surround you.
- It has a unique kind of strength to offer. A portion of your spirit has been joined to the ring, giving you a +4 bonus on saving throws made in opposition to compulsion, death, mind-affecting effects, emotions, confusion, and dread. You’ll suffer a -2 disadvantage when making saves against poison, elemental, paralyzing, and movement-impairing effects. Gain a +2 bonus to attack rolls and change the damage type of a target creature for 1 round by taking damage equivalent to half your level in health as a free action. Please let me know if you discover that this choice performs a standard action rather than a free one since that is what has been reported to have happened.
As for the Scythe:
- This attribute pertains to equipment that offers a +2 boost when used with the Bleed property. Additionally, it has a unique ability to focus on the pulsating beat of a single creature and sense nearly any heartbeat within a 15-foot radius. This ability can be helpful in various situations, allowing the user to detect hidden or invisible creatures that rely on a heartbeat to function. Furthermore, when the user or party members use the Rapid Shot feat to strike, they do so without suffering a -2 attack penalty and instead receive a +2 damage bonus. This can greatly enhance the effectiveness of ranged combat and provide an advantage in battle.
- This attribute pertains to equipment that offers a +2 boost when used with Ghost Touch. Ghost Touch allows the user to interact with incorporeal creatures, bypa*sing their incorporeal defenses. Furthermore, this scythe can tear the enemy’s soul whenever it misses a blow, inflicting 1d12 harmful energy damage. This can be a powerful addition to a character’s arsenal, allowing them to deal additional damage even when their attacks miss.
Act 3 – Crest of the Fallen Knight – Belt, Shortsword, and Chainmail
In Act 3, you can obtain the Crest of the Fallen Knight, which offers a choice of Belt, Chainmail, or Shortsword.
Belt:
- The Belt enables a monk to cover the target’s heart and lungs in a thin green veil for one ki point. The creature is made more vulnerable and has a -2 AC disadvantage. Until the battle’s conclusion, all bludgeoning damage it sustains is multiplied by 1.5 unless it succeeds on a fortitude saving throw (DC 19).
- It enables you to envelop yourself in the corroded unseen fire. All of your fire spells cause an extra 2d6 unholy damage while it is active. You lose your vulnerability to cold and holy damage but acquire immunity to fire.
For the Shortsword
- It gives a +2 boost and can cause a wound covered in emeralds. The struck target from this shortsword must succeed on a Reflex saving attempt (DC 18) or experience a -2 penalty to reflex saves for 5 minutes. This creature is vulnerable to an additional 3d6 piercing damage on all critical strikes. It should be noted that this impact cannot be applied more than once.
- It provides a +2 boost and has an ethereal flame that it can glow with. You can use this flame once daily to charge both of your hands-on weaponry for ten minutes. Any of these weapons also inflict an additional 3d6 unholy damage with each hit.
For the Chainmail
- It gives Fortitude saving throws a +2 advantage and a +2 sacred bonus. All party members can receive a +1 boost to AC in exchange for the wearer taking a -2 penalty to AC. An adversary who attacks the wearer while this effect is in effect must succeed on a Reflex saving throw (DC 17) or take 3d4 piercing damage.
- It provides a +2 bonus and can partly absorb chaotic or evil creatures’ magic. The wearer receives a +2 profane bonus to attack, damage rolls, and caster-level tests to overcome spell resistance for the following rounds when such creatures use magic to attack the wearer. When this effect expires, the wearer’s initial strike will have a -4 penalty to attack, damage rolls, and caster-level checks to break through spell resistance (if needed).
Act 3 – Chillboar’s Hide and Tusks – Shortspear and Spiked Light Shield
For the Shortspear:
- On each hit, it provides a +2 bonus and takes water from the victim. As a wizard of level 12, every fifth hit instantly casts the Cold Ice Strike spell in the enemy’s direction.
- Gives the Speed properties a +2 boost. The next strike against the affected creature delivers an additional 3d6 sonic damage each time the wielder uses the Cleave or Vital Strike feat. Please note that this choice might be null when moused over in Crusade mode.
The Spiked Light Shield also has two options:
- For spells with a cold descriptor, it provides a +2 bonus and an extra +1 bonus damage per die rolled. The enemy must succeed on a Fortitude saving throw (DC 20), or they become susceptible to cold damage and take 50% more damage until the end of the fight.
- It offers a +2 advantage on saving throws against sound-based effects and a +2 bonus with 20 Sonic resistance. The wielder of this shield must succeed on a Reflex saving throw (DC 19) for Sonic damage to echo from an attack, inflicting 3d6 Sonic damage to all enemies within a 10-foot radius.
Act 3 – Faultless Daybreak – Heavy Flail, Scalemail, and Light Shield
Heavy Flail:
- There is a +3 enchantment bonus on a critical strike and an additional 1d10 holy damage. 2d10 is dealt with if the ratio is x3. In that case, 3d10 is given.
- A radiant effect gives you a +3 enchantment boost. An enemy within the area of effect receives a “Burst with Light” effect whenever the wielder confirms a critical strike. The creature takes 2d6 positive energy damage over two rounds, and each round’s effect requires a successful Will saving attempt (DC 20). The damage is reduced in half if the save is effective. If the affected entity fails a save, nearby creatures take half the damage.
Scalemail:
- With a +3 enchantment bonus, the wearer can raise a fallen friend three times per day for 2d3 rounds. The ally, however, dies once more after the impact wears off.
- The Mithral Light Shield’s Option 2 has the same impact as the +3 enchantment bonus. Every adversary within 30 feet of the wearer must succeed on a Fortitude saving throw (DC 20) to avoid being blinded for 1d4 rounds and taking 4d6 positive energy damage. The blindness is removed, and the damage is reduced by half if the save is effective.
Mithral Light Shield:
- Each shield bash the war priest makes while equipped with his Sacred Shield delivers an extra 1d6 holy damage. To avoid being marked, an opponent hit by the shield must succeed on a Will saving attempt (DC 18). A will-o-the-wisp (CR
will emerge for 10 minutes and attempt to heal and aid your characters if a marked creature perishes. The shield also increases the holy harm dealt to undead creatures by 2d8 points.
- Every enemy within 30 feet of the wielder of this shield must succeed on a Fortitude saving throw (DC 20), or they will be blinded for 1d4 rounds and take 4d6 positive energy damage whenever an enemy critically strikes the wielder of this shield. The blindness is removed, and the damage is reduced by half if the save is effective.
Act 3 – Wicked Dope – Quarterstaff and Banded Armor
Quarterstaff:
- When casting a spell on an ally with fewer than all of their hit points, the wielder of this +2 quarterstaff gains rapid healing 5 for 1d3 rounds.
- If a spell is cast three times in succession, the wielder of this +3 quarterstaff empowers and maximizes the next spell they cast.
Banded Armor:
- The user of this +3 banded armor gains ferocity, enabling them to continue fighting even after their hit points fall below 0. They stagger, lose one hit point per round, and eventually perish when their hit points drop to a level below their constitution score.
- Every time the wearer of this +4 banded armor is struck, they receive fast healing 1 (stacks up to 10) until the end of the battle.
Act 3 – Dirty Squealer – Belt and Amulet
Belt:
- Constitution is given a +2 enhancement boost. When the wearer is struck, the attacker must succeed on a Reflex saving throw (DC 20), failing which will result in a -10 penalty for 1 round on damage rolls.
- Strength gains a +2 enhancement boost. The exploding head effect is applied to an enemy for 1d3 rounds whenever the wearer is mounted, or their mount confirms a critical strike against an enemy. The creature under this influence begins to hear loud noises, which results in a -2 penalty to attack and damage scores as well as AC.
Amulet:
- Every time you cast a grease magic, all creatures nearby are subject to a Reflex saving throw, failing, which results in 5d6 acid damage.
- An ear-piercing scream spell’s damage no longer has a maximum of 5d6. Instead, it causes damage equal to (1d6 + 1 per two caster levels). For two rounds instead of one, creatures who fail the saving throw against it become stunned. Using the sonic descriptor, the amulet raises your powers’ DC by 2.
Act 3 – Stone of Ghostly Pathways – Ring, Circlet, and Sai
Ring:
- The enemy has been pushed 10 feet away and rendered prone for one round whenever the wearer is engaged in defensive combat and successfully lands the first strike.
- Every level six and under summoning magic is enhanced as if using the Maximize Spell feat. The wearer’s attack rolls against strangers also receive a +1 insight advantage.
- When activated, a nearly transparent silver lining that connects the entire group within a 30-foot radius is created. This creates an unbreakable bond between all members, allowing them to work together seamlessly and effectively. Furthermore, while this effect is in force, each group member gets an extra attack of opportunity each round. If an attack of opportunity scores a critical blow, the enemy is stunned, providing an additional advantage in combat. Additionally, when one of the party members is knocked out, a three-round battle with a giant spider is summoned to fight alongside them. This can be a valuable a*set in combat, providing additional support and allowing the party to recover and regroup.
Circlet:
- Gives summoned elementals 50 extra hit points and a +2 enhancement boost to Wisdom.
- Gives the enhancement benefit of +2 to Charisma. The wielder may try to subjugate outsiders three times per day. The outsider creature must succeed in a Will saving attempt (DC 22), or it will be subordinated until the battle is over. The wielder’s AC against hostile creatures also receives a +1 insight boost.
- This attribute pertains to equipment that offers a boost of +2 to Intelligence. Additionally, affected enemies must succeed on a Reflex saving throw (DC 20) each time the wielder performs a spell on them or become entangled in a web for 1d4 rounds. While entangled, the enemy must attempt to escape the trap each round, taking 1d6+3 bludgeoning damage. However, it is essential to note that this ability’s effects do not compound when used more than once.
Sai:
- Provides thundering talent as well as a +4 enhancement boost. Until the conclusion of combat, the wielder of this SAI receives a +1 bonus to damage rolls for each hit they score with it. This advantage is invalidated if the wielder is struck. Up to +5, the benefit may be stacked.
- It grants a +3 enhancement bonus, has the speed ability, and when it hits summoned creatures, it also gives an extra 1d12 piercing damage. When this weapon confirms a critical strike against an outsider, the outsider is subject to the plane distortion effect for 1d4 rounds unless they succeed on a Fortitude saving throw (DC 25). During this period, the wielder is completely hidden from the affected outsider.
- Provides a keen aptitude and an enhancement bonus of +4. This SAI causes a new living adversary that the wielder sneak attacks to become infested with little spiders. These spiders eat through the flesh of the adversary, dealing 1d6 damage per two levels of the wielder. Until the battle’s conclusion, the enemy’s saving throws are also subject to a -2 penalty. Multiple uses of this ability do not have cumulative impacts.
Act 3 – Voracious Jumble – Flail and Club
Flail and Club (same effects for both):
- Deals 2d6 of (bludgeoning, piercing, and slashing) damage per strike with a +3 enhancement bonus. The enemy must succeed on a Fortitude saving throw (DC 20) each time it attempts to attack after a critical hit, or it cannot do so for one round. It lasts for 1d3 cycles.
- The wielder can never become unprepared, thanks to the speed enchantment and the +2 enhancement boost. After killing an opponent with this weapon, the wielder becomes immune to all eye effects for 1d4 rounds. (Although you can select a club, this choice still displays as a flail. It’s not obvious if this will appear as a flail or a club.)
- Violent enchantment, +3 enhancement boost. When the wielder strikes an enemy without a weapon, the enemy must succeed on a Fortitude saving throw (DC 21) or have their claws or other natural weapons deformed, taking a -6 disadvantage to damage over time when using natural weapons. An enemy holding a weapon should succeed on the same saving throw but will have a -2 attack disadvantage for one round if the wielder hits them.
Act 3 – Attractive Impulse – Gloves, Metamagic Rod, and Light Crossbow
Light Crossbow:
- +3, When the wielder strikes an enemy for the first time in a round, the enemy’s awareness and love for all life awaken. The enemy begins to question whether using force is the best course of action, and as a result, attack scores will be penalized by -1d4 for one round.
- When an item strikes an enemy with a +3 unholy bonus, their armor is pierced for 1d3 rounds, and they must succeed on a Will saving attempt (DC 20).
Metamagic Rod:
- With this rod, you can change up to six spells each day so that they have a dominant person effect on the target in addition to their main effect.
- You can use this rod to change up to six spells daily so that the damage they inflict now has an unholy energy type. Additionally, the changed spell is maximized as if by the maximize spell feat. Greater rods are compatible with powers up to level nine.
Gloves:
- The enemy loses its mind and receives a -1 penalty to intellect, wisdom, or charisma whenever the wielder confirms a critical strike with any bow.
- The target of every melee touch strike the wielder makes must succeed on a Will saving attempt (DC 20), or else they become engulfed in agonizing lust. Any critical strike against the affected enemy makes them even crazier and renders them immobile for one round.
Act 3 – Branch of the Last Ash (Sakoris Map) – Heavy Pick and Bardiche
Both options for Bardiche and Heavy Pick have the same enchantments.
- Bonus for an increase of +3. Breath of Life grants a +2 bonus to AC, attack, and damage rolls for 1 round to the targeted ally each time the wielder performs a spell on that ally.
- An additional benefit of +4. Instead of muscle, the wielder increases damage with their intellect modifier. In addition, they add their intelligence modifier when making attack throws rather than using strength. It is unknown if intellect and muscle modifiers provide a damage bonus.
- Bonus for an increase of +3. This weapon scorches the adversary whenever the user strikes them with it. The enemy gets a +2 bonus to attack rolls made against it after three scorches and starts to glow. The adversary bleeds after 5 scorches, and the scorches turn foul. Each scorch deals 1d4 unholy damage to the afflicted entity.
Act 3 – Soulshear
Soulshear:
- Enhances the firearm by +3 adamantine points. Furthermore, if you have the lay-on hands, fervor, and channel energy cla*s skills, it gives you +2 more daily uses of them (applied after rest).
- No changes to the weapon. It stays as it is.
- Enhances the firearm by +3 adamantine points. Additionally, your mount receives a +3 bonus to CMD and a +3 boost to all saving throws.
Act 5 – Mask of the Facestealer – Belt and Mask
Belt:
- When the wearer makes an attack attempt to confirm a critical hit, it always succeeds and gives them a +4 bonus to their physical attributes.
- In addition to giving the wearer a +4 bonus to their physical attributes, this item causes all enemies within a 30-foot radius to become staggered for 1 round when they are defeated with a single strike against an opponent who is at full health.
Mask:
(Despite being a mask, this item occupies the helmet slot.)
- It gives the wearer a +4 boost to their mental attributes and allows them to reroll three unsuccessful attempts at saving throws against fatalities each day.
- When the wearer casts a 9th-level spell, all opponents within a 30-foot radius must make a will-saving attempt (DC 30), failing which prevents them from casting spells for 1 round. This increases the wearer’s mental attributes by +4.
Act 5 – Burning Brand – Bardiche, Sling Staff, and Trident
The same effects apply to all three weapons.
- The +5 enhancement boost and the Vicious quality are both features of this weapon. The wielder deals extra damage equal to the number of hits multiplied by three whenever they score successive hits in a full-round attack.
- This firearm has the flaming burst feature and a +5 enhancement boost. The target of the wielder’s first attack must succeed on a Fortitude saving throw (DC 32), or else they will be engulfed in cursed fire and unable to perform spells for 1d3 rounds.
- This weapon provides axiomatic properties and a +5 enhancement boost. A new adversary is labeled with “Obedience” each time the wielder damages it. At any given moment, only one target may have this mark. The target who attempts to attack the weapon’s wielder must succeed on a Will saving throw (DC 29) or experience a two-round -3 penalty to attack rolls and a -8 penalty to damage rolls.
Act 5 – Baphomet’s Fire – Gloves and Shirt
Garment:
- The wearer’s fire spells are amplified by this clothing, dealing an extra 4d6 fire damage to the target at the cost of a -2 penalty to the wearer’s Armor Cla*s (AC).
- The wearer of this robe gains a temporary +6 boost to their mental ability scores for three rounds when they use a fire spell to kill an opponent, making them immune to harm to ability scores. On successful weapon attacks for one round, all the wearer’s allies inflict an additional 3d6 fire damage.
Gauntlets:
- The wearer of these gauntlets can rekindle their inner flames. While active, the wearer takes 2d6 fire damage per round (which bypa*ses all defenses and immunities), but every melee attack deals an equivalent level of damage to the enemy. Additionally, when mounted, the wearer can use this power on their mount rather than themselves.
- The target of a sneak attack made by the holder of these gauntlets takes an extra 2d6 fire damage and becomes vulnerable to fire for 1 round. Additionally, the wearer experiences a -3 penalty on all saves for two rounds whenever an opponent they previously struck takes fire damage from any source.
Act 5 – Zaori’s Pin – Ring and Circlet
Ring:
- The target develops paranoia when the wearer of this ring delivers sneak attack damage to an enemy for the first time during a fight. They take a -1 penalty on saving throws and a -2 penalty on damage rolls for each nearby ally of the affected enemy. This effect lasts for 1d4 rounds and can compound up to three times.
- Each effective melee strike by the wearer’s companions deals an extra 1d6 points of precision damage to the same target as the wearer. Additionally, they receive a +2 circumstance advantage when attacking this target.
Circlet:
- Both charisma and intelligence receive an improvement bonus of +6 from this circle. Additionally, all saving throws against confusion, insanity, and domination spells for the wearer’s entire group receive a +3 insight bonus.
- Both charisma and intelligence receive an enhancement boost of +6 from wearing this circle. Additionally, the Shield Caster, Allied Spellcaster, and Shield Wall feats affect the wearer and all friends within a 10-foot radius.
Act 5 – Voice of the Cursed Bard – Amulet and Lyre
Amulet:
- This amulet improves the wearer’s voice, enabling them to continue their raging songs and bardic performances for ten more daily rounds (if they possess the respective cla*s abilities).
- The maximum hit points for power word powers are increased by 150% by this amulet, which also improves the wearer’s voice. For instance, instead of 100 HP, the power word kill would immediately kill all targets with less than 150 HP.
Lyre:
- This lyre may be used once each day by the proprietor. All enemies within a 10-foot circle of the owner must successfully complete a Will saving throw (DC 36) or they will be subject to a -5 penalty to saving throws against mind-affecting spells, a -2 penalty to saving throws against enchantment school spells, and a 5 round vulnerability to sonic damage.
- This lyre allows the user to use a standard action to inflict 10d10 sonic damage to a single target up to three times daily. The damage is halved if a successful Fortitude saving attempt (DC 36) is made.
Act 5 – Remains of the Colourless One – Arrows, Spectacles, and Br*ast Plate
Arrows:
- The target of this ammunition’s first hit must succeed on a Will saving throw (DC 32) or experience 2d4 ability damage to intelligence (which doesn’t affect creatures with intelligence lower than 3), confusion for three rounds, and a penalty to attack success. A day’s supply for the user is 20 units.
- When this ammunition strikes a target, it forces the victim to attempt a Fortitude saving throw (DC 32) or suffer a stun and three rounds of exposure to sonic harm. A day’s supply for the individual is 20 units.
Spectacles:
- The Maddening Gaze power can be used three times per day while wearing these spectacles. The wearer can gaze in a specific direction as a swift action, causing all adversaries within a cone of 50 feet to make a will saving throw (DC 32) or be confused for 1d4 rounds and take 2d4 ability damage to intelligence (which doesn’t affect creatures with intelligence lower than 3).
- Attack rolls are penalized by -2 due to the wearer’s trouble seeing through these heavy crystal gla*ses. The victim must make a Fortitude saving throw (DC 32), be stunned, and be exposed to sonic damage for three rounds whenever the wearer deals their first melee damage to a new foe.
Br*ast Plate:
- Druids can put on this armor of crystal +5. All enemies within 50 feet of the wearer must attempt a Will saving throw (DC 32) at the beginning of every fight, failing which will cause them to become confused for two rounds.
- Druids can put on this armor of crystal +5. The wearer is given DR 3/- and modest fortification, which leaves them susceptible to sonic harm.
We hope you found our Pathfinder: Wrath of the Righteous – All Restored Relics in Game – Act Guide Information enjoyable. If you notice any errors or have suggestions for improving this post, please share them with us in the comments below. Thank you for reading, and have a wonderful day! Don’t forget to bookmark our page if you found this post helpful; we regularly update new content.
- Pathfinder: Wrath of the Righteous
Итак, вы только что завоевали цитадель Дрезена, но мы только на полпути кампании в Pathfinder: Wrath of the Righteous. У нас есть новая механика, с которой можно играть, защищаясь от воинства демонов. Вот наш гайд по управлению крестовым походом Pathfinder: Wrath of the Righteous, которое поможет вам с вашей оперативной базой в Дрезене, вашими дополнительными фортами, зданиями, которые вы можете построить, и бесконечными угрозами, которые нападают на вас со всех сторон.
Примечание. Для получения дополнительной информации ознакомьтесь с нашим центром гайдов и прохождений Pathfinder: Wrath of the Righteous. Вы также можете ознакомиться с нашим основным гайдом по механике крестового похода в игре.
Что нового в третьем акте?
В начале третьего акта войдите в цитадель Дрезена. Вы можете щелкнуть значок руки, чтобы увидеть новую механику управления крестовым походом в Pathfinder: Wrath of the Righteous (некоторые концепции могут даже напомнить вам Kingmaker ). Во всяком случае, первое, что вы заметите, это то, что орды демонов могут перемещаться и осаждать поселения на карте мира. Это означает, что нам нужно будет набирать новых юнитов на основе построенных нами зданий (каждую неделю появляется больше юнитов).
Также можно получить новых набираемых юнитов и наемников на основе указов и событий, а также выбранного вами Мифического Пути. Вы можете увидеть пример на изображении ниже, где я сразу же получил 600x Зомби и 600x Скелетов, потому что я выбрал Мифический Путь Лича.

Строительство зданий, чтобы вы могли нанимать больше юнитов
Говоря о зданиях, вы можете построить их в Дрезене и других фортах или аванпостах (вы можете увидеть пример аванпоста на изображении выше). В Дрезене есть несколько слотов для строительства, которые вы можете заполнить, хотя есть и более крупные варианты. Что касается аванпостов, то они, как правило, очень ограничены.
Строительство зданий занимает несколько дней, пока строительство не будет завершено. Некоторые из них можно построить только один раз, а другие можно построить несколько раз (стоимость увеличивается). Старайтесь быть осторожным, опуская их. Несмотря на то, что вы можете отменить процесс, вам возвращается только часть потраченных ресурсов, даже если еще не прошел день.
Примечание. Не забывайте, что вы можете использовать золото для покупки финансовых очков и материалов. Эти ресурсы также можно получить, побеждая в тактических сражениях, как обычно.
| Тип здания | Строительство | Эффект | Финансовые/материальные/энергетические затраты |
| Набор воинской части | Главный полигон для стрельбы из лука | Нанимайте лучников, рейнджеров, бандитов, стрелков, пращников и охотников за головами | 500/250/0 |
| Набор воинской части | Главные казармы | Нанимайте новобранцев, пехотинцев, копейщиков, заключенных, чемпионов и щитоносцев. | 500/200/0 |
| Набор воинской части | Главные конюшни | Нанимайте конных разведчиков, паладинов, кирасиров, межевых рыцарей, рейдеров и легкую кавалерию. | 1000/500/0 |
| Усилители соседства при наборе персонала
— дает баффы юнитам, обученным в соседних зданиях. |
аптекарь | +10% бонус к ОЗ | 450/110/5 |
| Усилители соседства при наборе персонала
— дает баффы юнитам, обученным в соседних зданиях. |
Арсенал | +1 КД | 150/150/0 |
| Усилители соседства при наборе персонала
— дает баффы юнитам, обученным в соседних зданиях. |
Кузница | +1 бонус к атаке | 350/125/0 |
| Усилители соседства при наборе персонала
— дает баффы юнитам, обученным в соседних зданиях. |
Тренировочные площадки | +10% бонус к урону | 650/100/0 |
| Усилители соседства при наборе персонала
— дает баффы юнитам, обученным в соседних зданиях. |
Военная академия | +1 к атаке, КД и спасброскам для обучаемых юнитов; не обязательно находиться рядом с каким-либо рекрутинговым зданием (эффект для всей фракции) |
3500/400/25 |
| Наемники | Гильдия наемников | Увеличивает количество доступных наемников (например, тип войск) на 1. | 2000/400/0 |
| Наемники | Ложа Общества следопытов | +1 бонус к атаке, КД и спасброскам для всех отрядов наемников; не обязательно быть рядом |
7500/100/10 |
| Наемники | Зал Славы | -5% затраты на вербовку наемников | 1200/300/0 |
| Баффы для генералов | Лаборатория алхимика | +10 энергии для всех генералов | 500/50/0 |
| Баффы для генералов | Зал стратегии | +1 к атаке и защите; +2 силы для всех генералов |
200/500/50 |
| Баффы для генералов | Больница | Размер лазарета для генералов: +5% (т. е. послебоевое лечение и возрождение юнитов) | 350/60/0 |
| Скидки на создание ресурсов и строительство | гостиница | +200 финансовых очков | 400/200/0 |
| Скидки на создание ресурсов и строительство | Центр снабжения | +3 материала | 100/50/0 |
| Скидки на создание ресурсов и строительство | Святилище | +4 энергии | 250/250/10 |
| Скидки на создание ресурсов и строительство | Мастерская инженеров | -10% стоимость строительства здания | 2000/300/0 |
| Хозяйственные и оборонительные постройки | Цитадель | +3 дня к осаде фортов при нападении армий демонов | 300/100/0 |
| Хозяйственные и оборонительные постройки | Приют | Позволяет вашей группе отдыхать в этом форте, не подвергаясь воздействию Бездонной порчи. | 200/150/15 |
| Хозяйственные и оборонительные постройки | Телепортационный круг | Позволяет вашей группе телепортироваться в этот форт из любой точки на карте мира. | 500/200/30 |
| Хозяйственные и оборонительные постройки | Сторожевая башня | +1 к атаке, КД, спасброскам и инициативе для всех юнитов в пределах зоны контроля форта. | 250/75/0 |

Моральные изменения
Боевой дух также претерпел изменения с новой системой управления крестовым походом в третьем акте Pathfinder: Wrath of the Righteous:
- Знамя побед. Как и прежде, это знамя остается зеленым в течение четырех дней, когда вы побеждаете армии демонов в тактических сражениях.
- Знамя завоевания — это добавляет 30 дней, в течение которых это знамя будет оставаться зеленым, пока вы захватываете новые удерживаемые демонами форты в Землях Ят, Серой Дороге, Озере, Затерянном для Солнца, и Землях Зимнего Солнца. Захват старых фортов не будет засчитываться.
- Знамя обороны — это знамя останется зеленым, пока ни один форт не будет осажден армией демонов. Три дня он будет желтеть, а потом краснеть. Пока форт удерживается демонами, это знамя останется красным и вызовет проблемы с боевым духом.

Бесконечный цикл
Я не совсем уверен, столкнулся ли я с ошибкой или это работает так, как задумано. По сути, мои армии крестоносцев вышли из Дрезена, и он был осажден армией демонов. У меня там были только слабые гарнизоны, поэтому я знал, что проиграю.
Я решил посмотреть, как будут развиваться события, если мои части продолжат отступление. Все они были уничтожены, и, к моему удивлению, произошло еще одно сражение. Опять же, у меня были слабые войска, поэтому я позволил их уничтожить. Это продолжалось и продолжалось, бесконечная петля безвыигрышных сражений. Также нет способа избежать этого, так как это Дрезен, и я не думаю, что враги могут снова захватить его. Таким образом, всегда убедитесь, что у вас есть армия или две, которые могут расчистить путь или защитить его от захватчиков.

Pathfinder: Wrath of the Righteous доступна в Steam.
У нас есть масса полезной информации и ссылок на наши подробные руководства на одной удобной странице.
Содержание
- Содержание
- Начало работы
- Начало работы: какой уровень сложности выбрать?
- Начало работы: как установить моды
- Создание персонажа
- Создание персонажа: очки способностей
- Создание персонажа: все о классах
- Создание персонажа: мультиклассирование
- Создание персонажа: Мифические пути
- Companions
- Часто задаваемые вопросы
- Есть ли в игре романтика?
- Стоит ли мне играть в пошаговом режиме?
- Будут ли обновления?
- Почему игра загружается так медленно?
Содержание
- Начало работы
- Уровни сложности
- Установка модов
- Создание персонажа
- Оценка способностей
- Классы
- Мультиклассирование
- Mythic Path
- Товарищи
- Часто задаваемые вопросы
< p> После успеха Pathfinder: Kingmaker, Owlcat Games продолжила разработку еще одного приключенческого пути Пайзо под названием Следопыт: Гнев праведников . Эта игра перенесет вас в северные пределы Голариона к Worldwound, волшебному шраму на земле, через который демоны могут легко перейти. История рассказывает о таинственном человеке, который вскоре проявляет некоторые мифические силы и возглавляет крестовый поход против демонических орд mdash; но решать, как им это делать, решать вам, игроку.
Wrath of the Righteous — это глубокая и сложная ролевая игра, напоминающая игровой процесс настольной игры Pathfinder. Вам придется решать головоломки, выполнять квесты и тщательно создавать различных персонажей, чтобы иметь возможность столкнуться с трудными боевыми столкновениями, которые предлагает игра. Если вы ищете руку помощи на своем пути, мы поможем вам mdash; от сопутствующих руководств по сборке до рекомендаций по оборудованию и т. д.

Начало работы
Есть несколько вещей, которые полезно знать, прежде чем прыгать в мир Голариона и бросаться в опасность, которую таит в себе эта игра. . В конце концов, предупрежден значит вооружен. У нас есть несколько советов для начала.
- Wrath Of The Righteous: советы для начинающих
- Wrath Of The Righteous: советы профессионалов
- Wrath Of The Righteous: лучшее оружие, на которое стоит обратить внимание
- Wrath Of The Righteous: самые мощные аксессуары, на которые стоит обратить внимание
Начало работы: какой уровень сложности выбрать?
Одна из главных тем обсуждения Pathfinder: Wrath of the Righteous — уровень сложности игры. Разработчики ясно дали понять, что игра абсолютно подходит тем, кто любит небольшие сложности. С учетом сказанного, вот несколько рекомендаций по выбору сложности:
- Сюжетная и казуальная игры — отличные отправные точки для этой игры, даже для тех, кто хорошо знаком с ролевыми играми. Система этой игры очень сурово наказывает тех, кто с ней не знаком, и эти трудности дают некоторую передышку.
- Нормальный и дерзкий рекомендуются людям, которым комфортна идея, что игра будет сложной. Эти настройки потребуют от вас разработки эффективных стратегий, если вы хотите иметь шанс на успех.
- Core и Hard предназначены для тех, кто имеет большой опыт работы с системой Pathfinder и очень уверен в своем опыте работы с боевой системой. Эти трудности сопровождаются ярко-красными предупреждениями в их описании по определенной причине: очень легко проиграть из-за неопытности и случайности в этих трудностях.
- Нечестно — именно так это звучит. Это самая сложная сложность, и игра не сбалансирована вокруг нее.
Начало работы: как установить моды
Wrath of the Righteous имеет очень активное сообщество моддеров, которые любят настраивать параметры, добавлять функции и изменять целые части игры. Вы можете найти моды в обычных местах, хотя Nexus Mods, кажется, является лучшим местом.
Чтобы установить большинство этих модов, вам необходимо загрузить Unity Mod Manager. Следуйте инструкциям на этой странице, чтобы установить папку модов для Pathfinder: Wrath of the Righteous, и вы можете начать установку модов.
Рекомендуем ознакомится с другими гайдами на популярные игры tattoo-mall.ru. Расскажем про секреты и хитрости, которые можно использовать в играх со своей выгодой. А также про полезные и интересные историй в видеоиграх.
- Чтобы установить мод, просто перетащите zip-файл, внутри которого находится мод, в поле в Unity Mod Manager .
- Часто проверяйте Диспетчер модов mdash; это будет сообщать обо всех устаревших модах . Щелкните правой кнопкой мыши имя мода и выберите «Домашняя страница». чтобы попасть прямо на страницу мода.
Если вам нужны подсказки относительно того, какие моды использовать, ознакомьтесь с нашими избранными:
- Лучшие моды для игры
К началу
Создание персонажа
После того, как вы настроите свои параметры сложности, вам будет представлен очень сложный набор меню, с помощью которого вы сможете я создам вашего главного героя. Большинство из этих параметров говорят сами за себя, но некоторые другие немного сложнее.
Ниже мы подготовили удобные объяснения некоторых из них.
Создание персонажа: очки способностей
Из всех характеристик персонажа его характеристики могут быть самыми важными, но при этом их сложно понять. Всего их шесть: Сила, Ловкость, Телосложение, Интеллект, Мудрость и Харизма. Все они несут ответственность за разные аспекты игры.
| Оценка способностей | Боевое использование | Навыки | Другое применение |
|---|---|---|---|
| Сила | Урон от оружия ближнего боя | Легкая атлетика | Личное обременение и вес группы |
| Ловкость | Урон от оружия дальнего боя и ловкость | Акробатика, обман и скрытность | Рефлексные спасброски sup2; и определение инициативы |
| Телосложение | Очки здоровья | Нет | Спасброски стойкости sup2 ; |
| Интеллект | Некоторые заклинатели магическая способность sup1; | Навыки знаний (Арканы, Мир) | Количество очков навыков при повышении уровня |
| Мудрость | Определенные заклинатели и магические способности sup1; | Знания (Религия, Природа), Восприятие | Спасброски воли sup2; |
| Харизма | Некоторые заклинатели магическая способность sup1; | Убеждение, Используйте волшебное устройство | Нет |
sup1; Оценка способности, используемая для определения способности персонажа к колдовству, зависит от его класса . Например, волшебники используют интеллект, друиды используют мудрость, а барды используют харизму.
sup2; Спасброски вызываются всякий раз, когда персонажу нужно попытаться сопротивляться или избежать негативного эффекта.
- Рефлекторные спасброски используются против эффектов, которых можно избежать физически, например, прыжок с пути огненного шара.
- Экономия на стойкость используются против умений, влияющих на тело, например противостоять воздействию яда.
- Сбережения воли используются против умственных способностей, например, против очаровательной способности суккуба.
Создание персонажа: все о классах
Какой класс вы выберете для своего персонажа, будет иметь важное значение для вашего игрового процесса и того, как разворачивается ваше приключение. У нас есть несколько руководств, которые помогут вам с классами, а также отдельные руководства для определенных сборок классов.
- Лучшие классы
- Все животные-компаньоны, ранжированные
- Как добиться уважения к вашему персонажу
У нас также есть подготовили несколько руководств о том, как создавать персонажей с базовыми классами в игре.
| Как создать алхимика | Как создать варвара |
| Как создать паладина | Как построить волшебника |
Дополнительная сборка скоро появятся руководства!
Создание персонажа: мультиклассирование
В Wrath of the Righteous максимальный уровень для персонажа — 20 уровень , и вы, скорее всего, достигнете его задолго до конца сюжета игры.
Pathfinder и некоторые другие настольные системы позволяют персонажам делать что-то, называемое мультиклассированием ., что означает прохождение уровней более чем в одном классе. Это то, что может показаться очень сложным для новичков, но это настоящая изюминка игры, а создание сложных сборок, подходящих для персонажа или стратегии, — это то, что многие игроки обожают.
Вот как это работает:
Каждый класс имеет определенные функции, которые он предоставит при достижении определенного уровня в нем. Например, паладин получит способность исцеления AoE, когда достигнет третьего уровня в этом классе.
- Базовые классы имеют функции для каждого уровня до 20 уровня .
- Престиж-классы имеют только функции до 10 уровня .
- Престиж-классы — это специальные классы, которые нужно открывать, повышая уровень определенных навыков. Например, Чародейскому Обманщику требуются некоторые ранги Скрытой атаки, а Ученику Дракона требуются уровни спонтанного класса заклинателя тайной магии.
Можно потратить уровень в любом классе, который у вас есть, когда вы повышаете уровень. Это будет способствовать прогрессу только в этом классе, а не в любых классах, которые вы выбрали ранее.
Например, Бард может достичь пятого уровня, а затем пройти три уровня Паладина, пока он не получит исцеляющую способность AoE.
- Это приведет к персонажу восьмого уровня с уровнями двух классов. Обычно это записывается как «Бард 5 Паладин 3». для ясности.
- Хотя этот персонаж не так хорошо владеет бардингом или паладином, как персонажи, прошедшие восемь уровней в любом из этих классов, он будет обладать определенной гибкостью, которой не хватало бы этим персонажам.
Хотя вполне возможно (и неплохая идея) повысить уровень персонажа в одном классе для всей игры, многие сборки персонажей высокого уровня используют мультиклассирование в своих интересах и могут дать фантастические результаты.
К началу
Создание персонажа: Мифические пути
Wrath of the Righteous основан на приключенческом пути, где игрокам в конечном итоге предоставляются высшие силы из мифических источников, и это отражается в игре в виде различных мифических путей, которые вы можете выбрать. Они предоставят вашему главному герою особые силы и способности, отражающие их источники.
В игре десять мифических путей. Большинство из них очень легко разблокировать, но некоторые требуют более подробных объяснений. Вот более простые:
- Мифические пути Ангела и Демона открываются в Прологе автоматически.
- Эон Мифический путь открывается во время первого акта. Вы должны взаимодействовать со странным деформированным объектом на Рыночной площади в Кенабресе, чтобы получить нож из пурпурного кристалла. В конце акта вы должны выбрать опцию [Aeon] при взаимодействии с Wardstone.
- Азата Mythic Path требует, чтобы вы выполнили квест Starward Gaze, подпевая жрецам Десны.
- Обманщик Mythic Path требует, чтобы вы направились в Библиотеку Крыла Тьмы во время первого акта и использовали параметры диалога [Трикстер], когда столкнулись с тамошними культистами.
- Легенда Mythic Path технически является просто дополнительной возможностью, предоставляемой вам после достижения восьмого мифического ранга.
Вот руководства для тех, кому требуется немного больше работы
- Как разблокировать мифический путь Лича
- Как разблокировать мифический путь Золотого Дракона — скоро
- Как разблокировать Swarm-That-Walks Mythic Path — скоро
- Как разблокировать Devil Mythic Path — скоро
К началу
Companions
Вам не нужно идти в одиночку в мире Голариона mdash; в игре есть большое количество товарищей для набора. У каждого из них есть свои классы, личности и сюжетные линии с заданиями, которые нужно выполнить, если вы так склонны. С некоторыми из них можно даже завязать роман!
Ознакомьтесь с нашим руководством о том, как нанять всех товарищей.
Мы также подготовили несколько руководств с рекомендациями по созданию конкретных компаньонов. Щелкните изображения в таблице ниже, чтобы перейти к этому сопутствующему руководству:
| Сила Паладин | Камелия Охотница за Духами | Ланн Дзен Лучник |
| Вендуаг Воитель | Вольджиф Жуткий негодяй | Ненио Спаситель свитков |
| Эмбер, стигматизированная ведьма | Даэран Оракул | Клерик Сосиэль |
Часто задаваемые вопросы
Есть ли в игре романтика?
Да. Главный герой-мужчина может влюбиться в Камелию, Вендуаг, Дэран, Сосиэль, Аруешала или Королеву Галфри. Главная героиня может завязать роман с Ланном, Вендуагом, Дэраном, Аруешалой или королевой Галфри.
Можно разорвать романтические отношения, выбрав неправильный вариант диалога, разговаривая с ними, а также возможно завязать романы, на самом деле не намереваясь этого. Обратите внимание на свой выбор и реакцию товарищей.
Стоит ли мне играть в пошаговом режиме?
Это во многом зависит от вас и того, что вы предпочитаете. В игре есть два режима боя: TB (пошаговый) и RTWP (в реальном времени с паузой) .. Вы обнаружите, что битвы RTWP будут проходить намного быстрее, чем битвы TB, но они, вероятно, будут более хаотичными и их сложнее контролировать на больших полях сражений.
Битвы с туберкулезом, с другой стороны, дают вам гораздо больше времени, чтобы подумать о своем движении и своих стратегиях. Обратите внимание, что вы можете переключаться между этими режимами в любое время, даже в разгар битвы .
Будут ли обновления?
Да. В настоящее время есть регулярные обновления игры, исправляющие ошибки и проблемы с балансировкой . В Steam также есть ветка Бета-тестирование .игры, чтобы игроки могли ознакомиться с более крупными обновлениями, прежде чем они выпадут.
Чтобы выбрать бета-ветку для более ранних обновлений, щелкните правой кнопкой мыши название игры в Steam и откройте ее свойства. Оттуда нажмите на опцию Бета-версии и в раскрывающемся меню выберите «Лучшая версия». Игра должна начать автоматически загружать самое последнее обновление.
Почему игра загружается так медленно?
Хотя это может быть проблемой из-за того, что ваша система не отвечает рекомендуемые требования игры, но в игре есть проблема, когда сохранения становятся слишком громоздкими по мере вашего продвижения. Один из способов противостоять этому — загрузить мод Cleaner с сайта newman55.
Причина, по которой файлы сохранения становятся раздутыми, заключается в том, что они должны отслеживать всю добычу, выпавшую в каждой отдельной области. Этот мод добавляет кнопку, которая удаляет ненужную добычу из игры всякий раз, когда вы покидаете область, сохраняя при этом небольшой размер файла сохранения.
К началу
Скорее всего, вы потратите часы, просто пытаясь сделать своего главного героя в Pathfinder: Wrath of the Righteous. Имея на выбор множество вариантов, вы обязательно будете ошеломлены. Вот наше руководство по созданию персонажей Pathfinder: Wrath of the Righteous, которое поможет вам.
Готовые и нестандартные персонажи
Pathfinder: Wrath of the Righteous позволяет вам выбирать из нескольких готовых персонажей. Варианты: Кавалер-полуэльф, Клерик Оред, Гном-разбойник и другие. Однако, если вы хотите, чтобы все соответствовало вашему вкусу, вы также можете создать собственного персонажа.
Примечание 1. Прежде чем мы продолжим, убедитесь, что вы включили «Разрешить переобучение персонажа» в параметрах сложности. Вы должны иметь возможность изменить все аспекты, связанные с вашим главным героем и товарищами, когда достигнете Покоя Защитника. Это гарантирует, что вы не попадете в затруднительное положение, сделав неоптимальный выбор.
Примечание 2: напоминаем, что это руководство не предназначено специально для целей минимального максимума. Информация предназначена просто для того, чтобы дать новичкам представление о том, чего они могут ожидать от системы создания персонажей.

Портреты
Наша первая задача — выбрать портрет. По умолчанию уже доступны десятки. Некоторые из этих портретов создания персонажей являются новыми в Pathfinder: Wrath of the Righteous , а другие — от Kingmaker .
Также можно добавить свой собственный портрет, если вас не устраивает то, что доступно.

Классы
Далее нам нужно выбрать класс. Теперь, чтобы прояснить, вы собираетесь проводить здесь много времени, потому что Pathfinder: Wrath of the Righteous имеет 25 классов по умолчанию, и каждый имеет несколько архетипов / подклассов. Точно так же есть 13 престиж-классов, которые вы не сможете выбрать сейчас, так как они требуют от вас немного продвинуться в кампании, чтобы приобрести некоторые умения или навыки.
Мы не будем подробно обсуждать все классы в этом руководстве. Однако достаточно сказать, что вы захотите принять во внимание три фактора:
- Какой стиль игры вам удобен? Вы хотите попасть в самую гущу битвы или предпочитаете читать заклинания, пока союзники защищают вас?
- Говоря о союзниках, стоит отметить товарищей, которых вы встретите во время своих путешествий. Например, первый человек, которого вы можете нанять во время пролога, — это паладин по имени Сила. Спустя несколько мгновений вы встретите шамана по имени Камелия. Хотя вы можете настраивать их по мере повышения уровня, их особый стиль игры и способности должны дополнять класс вашего главного героя.
- Наконец, вы захотите рассмотреть сложность класса. Pathfinder: Wrath of the Righteous имеет всплывающую подсказку о «сложности» (обозначенную кружками), которая сообщает вам, является ли класс достаточно простым или его лучше использовать тем, у кого больше опыта в игре. В этом примере уровень сложности Монаха равен «2», что означает, что он подходит для новичков. Сравните это с Алхимиком или Воином (уровень сложности 4) или Кинетиком (уровень сложности 5).

Скачки
Затем вы сможете выбрать свою расу. Опять же, мы не будем здесь вдаваться в подробности. Вам просто нужно принять во внимание расовые бонусы, которые вы можете получить, а также возможное наследие (подрасу).

Фоны
Ваш опыт играет роль в дополнительных бонусах, которые вы можете получить, таких как навыки (например, проверки навыков) и / или владение оружием. Например, если вы идете с Мастером-Монахом из Quarterstaff, вы нанесете более высокий урон этим конкретным оружием. Между тем, на панели фонов вы увидите, что фон Странник — Отшельник добавляет бонус к нескольким навыкам владения оружием, включая боевой посох.

Способности
Способности (т.е. атрибуты / характеристики) относятся к вашей силе (STR), ловкости (DEX), телосложению (CON), интеллекту (INT), мудрости (WIS) и харизме (CHA). Каждая способность управляет несколькими проверками навыков, и игра также говорит вам, на каких из них следует сосредоточиться, в зависимости от выбранного вами класса. Например, большинство билдов для Rogue, Slayer, Hunter и Monk делают упор на высокий DEX.

Навыки и умения
Ваши навыки определяют степень успеха ваших действий во время исследования, всплывающих дополнительных диалоговых окон или обхода врагов:
- Легкая атлетика (STR) — Восхождение на препятствие или прыжок на другой участок карты.
- Мобильность (DEX) — движение мимо противников, не вызывая атак при возможности в бою.
- Обман (DEX) — Взлом и обезвреживание ловушек.
- Скрытность (DEX) — движение мимо противников незаметно и избегание случайных встреч на карте мира.
- Знание: Аркана (INT) — Изучение заклинаний из книг заклинаний, создание свитков тайных заклинаний и идентификация магических предметов.
- Знание: Мир (INT) — варить зелья, расшифровывать тексты и вспоминать информацию о земле.
- Знания: Природа (WIS) — снимает усталость при путешествии по карте мира и получает способность лечить болезни.
- Знания: Религия (WIS) — Создание свитков божественных заклинаний и вспоминание информации о религиозных верованиях.
- Восприятие (WIS) — позволяет замечать ловушки и спрятанные предметы / добычу; предотвращает удивление врагов во время кемпинга.
- Убеждение (CHA) — процент успеха дополнительных вариантов диалога (например, дипломатия, запугивание и обман).
- Используйте волшебное устройство (CHA) — возможность активировать жезлы и свитки, которые вы обычно не можете использовать.
Примечание 1: ваш выбор здесь поможет со сборкой вашего персонажа (то есть, если вы хотите побудить NPC дать вам лучшие награды, вам понадобится высокое Убеждение, чтобы убедить их). Кроме того, учитывайте навыки своих товарищей.
Примечание 2: помните, что Pathfinder: Wrath of the Righteous автоматически выбирает персонажа с наивысшим навыком для определенного действия (например, попытка взломать сундук, когда выбран весь ваш отряд, заставит персонажа с самым высоким навыком выполнять действие).

Подвиги
Далее у нас есть подвиги. Здесь вы увидите то, что вы можете выбрать. Обычно здесь подойдет выбор оружия или умения заклинания. Дополнительные возможности станут доступны позже, когда вы повысите уровень или приобретете необходимые условия.
Да, и в некоторых случаях выбранный вами класс / подкласс и раса позволят вам выбрать бонусные умения с самого начала.

Божество и мировоззрение
Божества в Pathfinder: Wrath of the Righteous предлагают несколько преимуществ. Они также помогают определить определенные заклинания, которые можно использовать, если они требуют определенного божества.
Однако некоторые могут быть недоступны в зависимости от вашего класса или мировоззрения. Также можно выбрать атеизм. Это открывает несколько уникальных опций, навык Восприятия и бонус +2 к спасброскам от заклинаний божественного типа. К сожалению, вы не сможете использовать божественные заклинания или те, для которых требуется божество.
Точно так же выбранный вами мировоззрение зависит от вашего предыдущего выбора в Pathfinder: Wrath of the Righteous при создании персонажа. Например, паладины в начале часто оказывались в спектре «Законное добро». Но это может измениться, если вы продолжите играть в кампанию. Когда представлены определенные решения относительно морального компаса вашего персонажа, вы можете использовать законные, хаотические, добрые или злые ответы.

Внешний вид, голос, имя, день рождения и итоговый экран
Наконец, вы можете настроить внешний вид, голос, имя и день рождения вашего персонажа. Выберите параметры и эстетику, которые вам нравятся, и перейдите на экран сводки. Это даст вам подробную информацию обо всех вариантах, которые вы сделали во время создания персонажа Pathfinder: Wrath of the Righteous .
Если тебе все нравится, вперед и начинай свое приключение. В качестве альтернативы вы можете еще немного подправить своего персонажа или, что еще лучше, сыграть пролог и перезапустить кампанию, если вы хотите попробовать разные комбинации. Есть множество вещей, которые вы можете сделать, и мы только начали.

Pathfinder: Wrath of the Righteous доступен в Steam .
Steam Exclusive Offer

Special Offer

About This Game
Discover the Story
Your path will lead you to the Worldwound, where the opening of a rift to the Abyss has unleashed all-consuming terror across the land. For over a century, the neighboring nations have fought fearlessly, trying to drive the enemy back — but to little avail.

Now, you have the chance to put an end to this conflict, but the path to salvation is far from clear-cut. Will you become a shining angel, backed by noble paladins? Or a powerful necromancer with hordes of immortal undead in your thrall? Or something else entirely? Lead your army and challenge mighty demon lords. Your crusade will set in motion a chain of events that will leave you — and the world itself — forever changed.
PLAY YOUR HERO, YOUR WAY
Create any character imaginable with the flexibility, richness, and depth of the Pathfinder First Edition ruleset. Choose from 25 classes, 12 character races, and more than a thousand spells, feats, and abilities to suit your personal playstyle.

FOR EVERY CHOICE, A CONSEQUENCE
Your decisions have more weight than ever before. Your goal is clear, but you must forge your own path to it. Who will die, and who will live? Who will stay, and who will go? Make your choices, and watch the world around you change.

A NEW WAY TO FIGHT
Enjoy two combat modes as you slay your enemies – real-time with pause or turn-based. Switch between them on the fly, so you can always take things as slowly — or as quickly — as you like. The unique Pathfinder ruleset also allows you to perform advanced combat maneuvers, like mounted combat. Use them wisely!

GATHER YOUR PARTY
A cast of more than 10 unique companions is ready to join your cause. Earn their trust and respect, and they will have your back no matter what dangers lie ahead. And if you get on their bad side, well… Maybe it’s time to part ways.

LEAD THE CRUSADE
You will need much more than a party of adventurers to cleanse the land of its demonic scourge. Take command of the crusaders and lead them to victory – both as a strategist, controlling the battle from above, and as a field commander, in a new tactical combat mode.

CHOOSE YOUR PATH
Explore nine unique Mythic Paths: obtain extraordinary abilities and shape everything that comes next. Your decisions might transform you into a celestial Angel, a raging Demon, a powerful Lich, a cunning Trickster, an otherworldly Aeon, a rebellious Azata, a wise Gold Dragon, an insatiable Swarm That Walks — or remain mortal and walk the arduous fantasy path toward becoming a living Legend.

Mature Content Description
The developers describe the content like this:
This game contains scenes and texts some people may find disturbing. They are not graphically detailed and presented from an isometric point of view, and most of them occur episodically. However, we consider it our duty to inform our players about them. You may see depictions of blood, gore, dismemberment, torture, slavery, and kidnapping in this game. It also contains textual descriptions and mentions of abuse, child abuse, sexual abuse, sexual assault, self-harm, suicide, cannibalism, and miscarriage. Player discretion is advised.
What Curators Say
155 Curators have reviewed this product. Click here to see them.
Like Pathfinder: Kingmaker before it, Wrath of the Righteous is a CRPG so deep that there are probably whales down there. With a huge selection of classes to choose from, each split into sub-class archetypes, as well as prestige classes that can only be entered after bouncing between multiple base classes as you level up, it’s a theorycrafter’s dream. That’s before you even get into the mythic ranks that bolt on top.
It’s an intimidating system that only gets more complex, adding kingdom management and army-scale battle systems, as well as pitting you against enemies with resistances and quirks. Fortunately pop-ups explain some of the basics or point out when you’ve given someone two items of gear with bonuses that don’t stack, but there’s other stuff worth knowing too. Here are some beginner’s tips.
You won’t be locked into a mythic path
Mythic paths let you become basically immortal, choosing between several flavors of demigodhood. You’ll be well into the story before you have to choose one, however.
There are multiple steps to this. First, you’ll have opportunities to «unlock» mythic paths as you’re exposed to the relevant kinds of supernatural energy. You can unlock as many as you want, and it’s impossible to miss the first two—angel and demon. Others show up in the first chapters as you do sidequests and explore. Having mythic paths unlocked means related dialogue options will appear, but you won’t be committed to them.
When you become a mythic hero you choose your first power from a list of generics, but it’s not until the third rank of mythic hero much later that you actually need to settle on one of the paths you’ve unlocked. Even more will become available later—some paths only show up if you choose another first, and then are tempted away from it.
You can change the speed in turn-based mode
Wrath of the Righteous lets you choose between realtime-with-pause and turn-based combat, and you can switch between the two by pressing T. If you prefer the precision of turn-based but would like to switch to RTWP to blitz through some trash mobs, you can.
But you don’t need to, because you can just speed up the animations instead. In the «Game» section of the options menu you’ll find toggles related to turn-based mode, at the bottom of which are two sliders to increase party animation speed and enemy animation speed. Push both up to 3.0 and battles will fly by.
Maybe don’t be an archer
It’s worth a heads-up that early on your party will lean toward ranged characters. It’s not quite as rough as Kingmaker, which threw you into the tutorial with only a flimsy gnome illusionist and a halfling bard as backup, but there’s still a slight bias in the companions. While you do get a paladin to tank with, the rest of your party will be an archer, a spirit hunter (tough later, fragile at low levels), and then a rogue, witch, oracle, and wizard. Hours later you accrue a selection of frontline fighters to choose from, but even then you’ll probably end up with multiple archers competing for any magic longbows.
Which is why, if you’re having trouble choosing between the 25 (!) base classes, it’s worth narrowing it down to those good at going toe-to-toe. Bloodrager is a popular choice—a barbarian with supernatural powers based on their bloodline. Cavalier and warpriest both seem apt for a game about joining a crusade, and cavaliers get to try the new mounted combat system. If you play a bard, their ability to cast spells while holding a shield means you may as well go sword-and-board, and if you want to be a magus they’ve got an archetype called sword saint that’s all about magically buffing weapons and armor.
Any class can work, but if you like to leave companions in their roles rather than giving them a respec makeover, you’ll end up with a surplus of back-row choices. A protagonist who leads from the front can balance that.
Swarms still suck
Kingmaker had an infamous early-game encounter with spider swarms that demolished many a new player because in the Pathfinder rules those spider swarms can only be hurt by elemental damage, which low-level parties don’t have much of. Wrath of the Righteous isn’t quite as punishing, but its rat swarms may still come as a shock. They’re far more dangerous than the cultists and dretches you’ll be used to when they show up. The burning hands spell is a good way to deal with them. Don’t underestimate the rat.
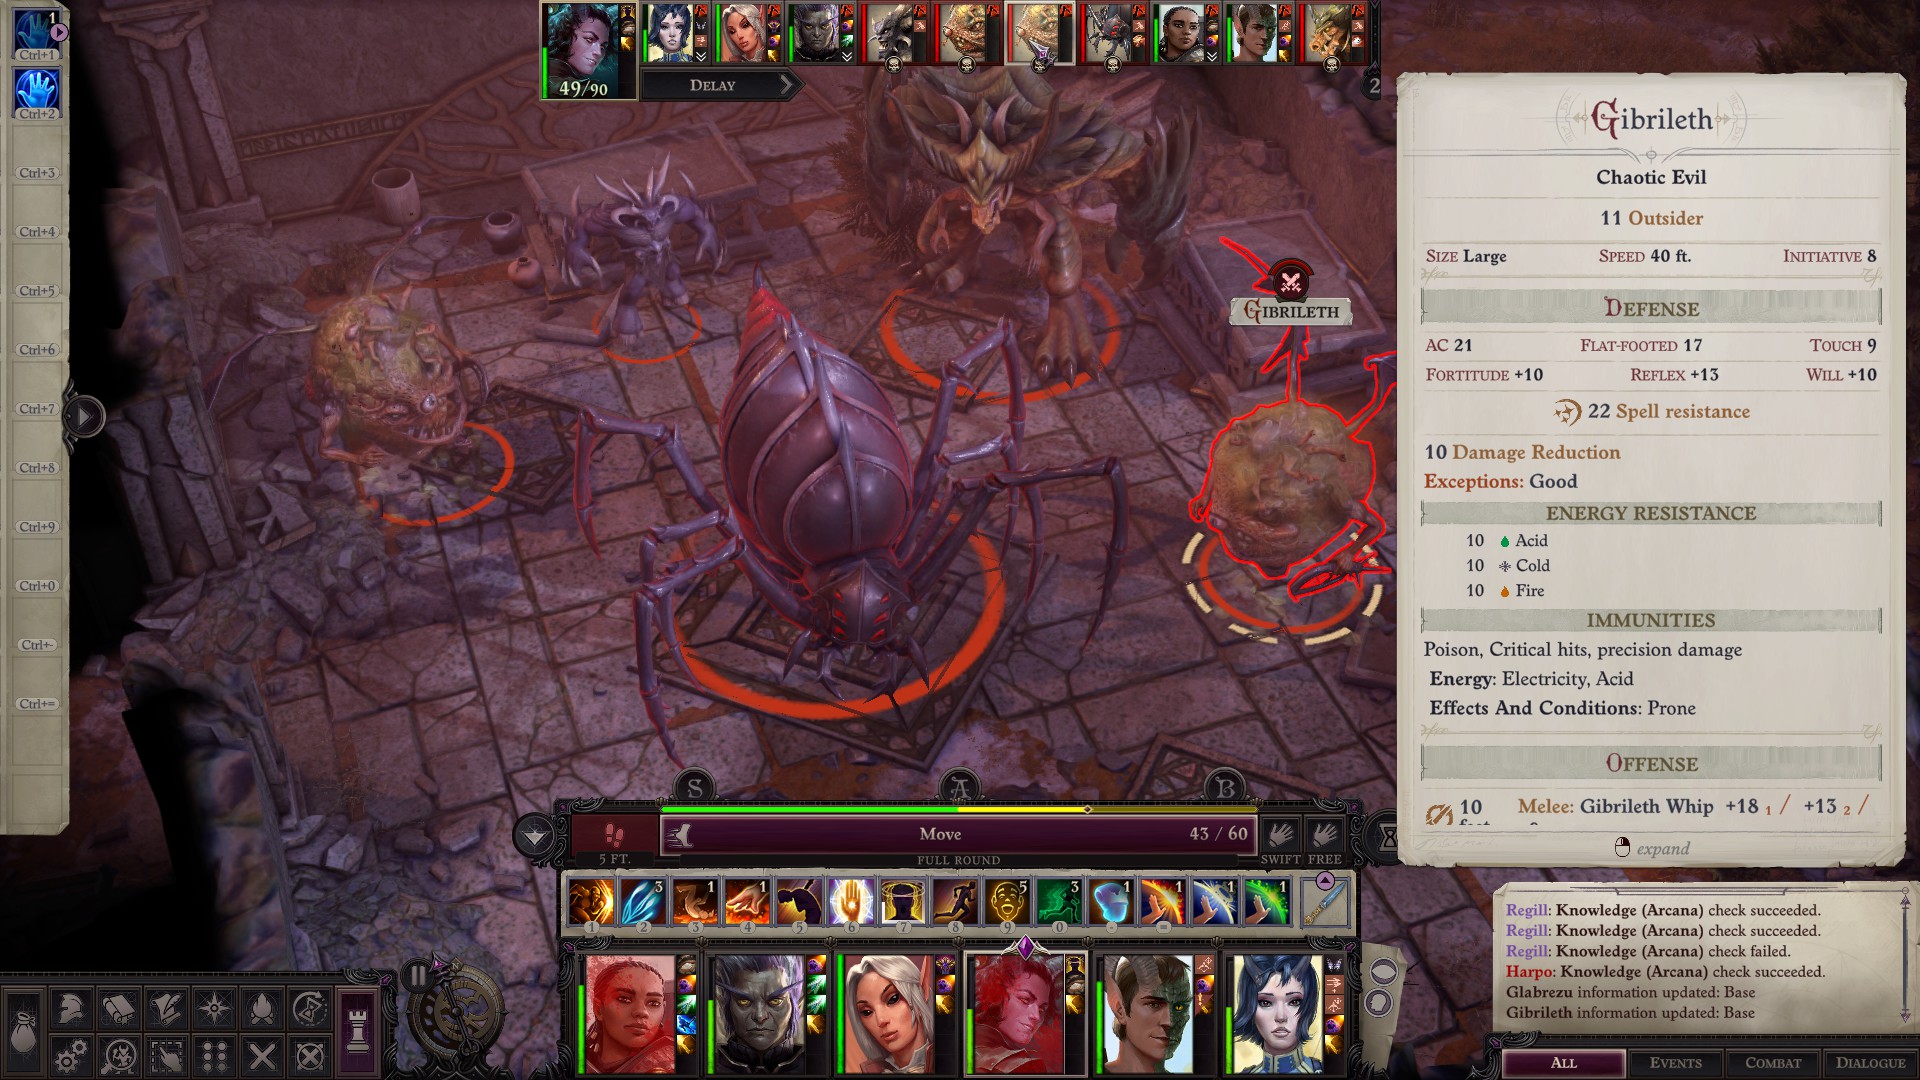
Demons don’t care about lightning
The main enemies in Wrath of the Righteous are demons, who have a laundry list of resistances. Mouse over the portrait of a demon in the initiative order for a closer look at their stats and you’ll usually see elemental resistances to fire, acid, and cold, and often straight-up immunity to electricity and poison. They’ll have damage resistance, spell resistance, and some are immune to mind-affecting spells or have true seeing, which makes them immune to illusions.
If a specific kind of damage can bypass damage resistance, it’ll be listed after the slash, so «DR 3/holy» will ignore the first three points of damage unless it’s from a holy weapon. Cold iron weapons are a reliable way to bypass most DR. Weapons with a high enough enhancement bonus (the + after their name) ignore DR too. There’s also a mythic feat that lets you pick an elemental damage type, which will then ignore resistance.
To defeat spell resistance, choose the feats spell penetration and greater spell penetration for your casters.
Hex for success
When you recruit the stigmatized witch Ember she’s carrying a crossbow, but her burned hands make her terrible at shooting. She’s even worse at stabbing. After a few levels Ember will be working wonders with fire-based spells, which is kind of ironic considering, but before that you may not know what to make of her.
The secret is that her hexes aren’t limited the way most abilities are. Instead of a set number of uses per day, most hexes can be used over and over, though only once per target. That means you can sling a slumber hex at every enemy in every fight. They’ll have a saving throw, but odds are you’ll send some cultists to sleepyland. When they’re down, ignore them until other threats are dealt with, then select coup de grace (it’s in the actions section above the middle of your hotbar) to take them out.
The vulnerability curse hex provides another way around demonic resistances, and cackle will extend the duration of other hexes. You can cackle as a move action too, which is convenient in turn-based mode, and paints a delightful image.
You can take your time
Kingmaker had quests with strict time limits, but Wrath of the Righteous is more generous. Quests with an hourglass next to them in the journal need to be done before the end of the current chapter, but otherwise there’s no rush. Just prioritize sidequests with hourglasses ahead of anything that advances the chapter’s storyline.
If you spend too much time resting away from the current home base your corruption level will go up, eventually resulting in penalties. That can be reset by having your next rest somewhere sanctified against the energies of the Worldwound, like the Defender’s Heart or your capital.
Respec yourself before you wreck yourself
The Pathfinder rules have plenty of traps for new players, suboptimal feats and other options you won’t realize are flawed until you’ve seen them in action. If you don’t like how a build is turning out, talk to Hilor to retrain for gains. You can respec party members too. Your first few retrains are free, but after that it’ll cost you.
Hilor starts out at the Defender’s Heart, then in chapter three moves to the second storey of Drezen’s nameless inn.
You can also respec by downloading one of the handy Pathfinder: Wrath of the Righteous mods.
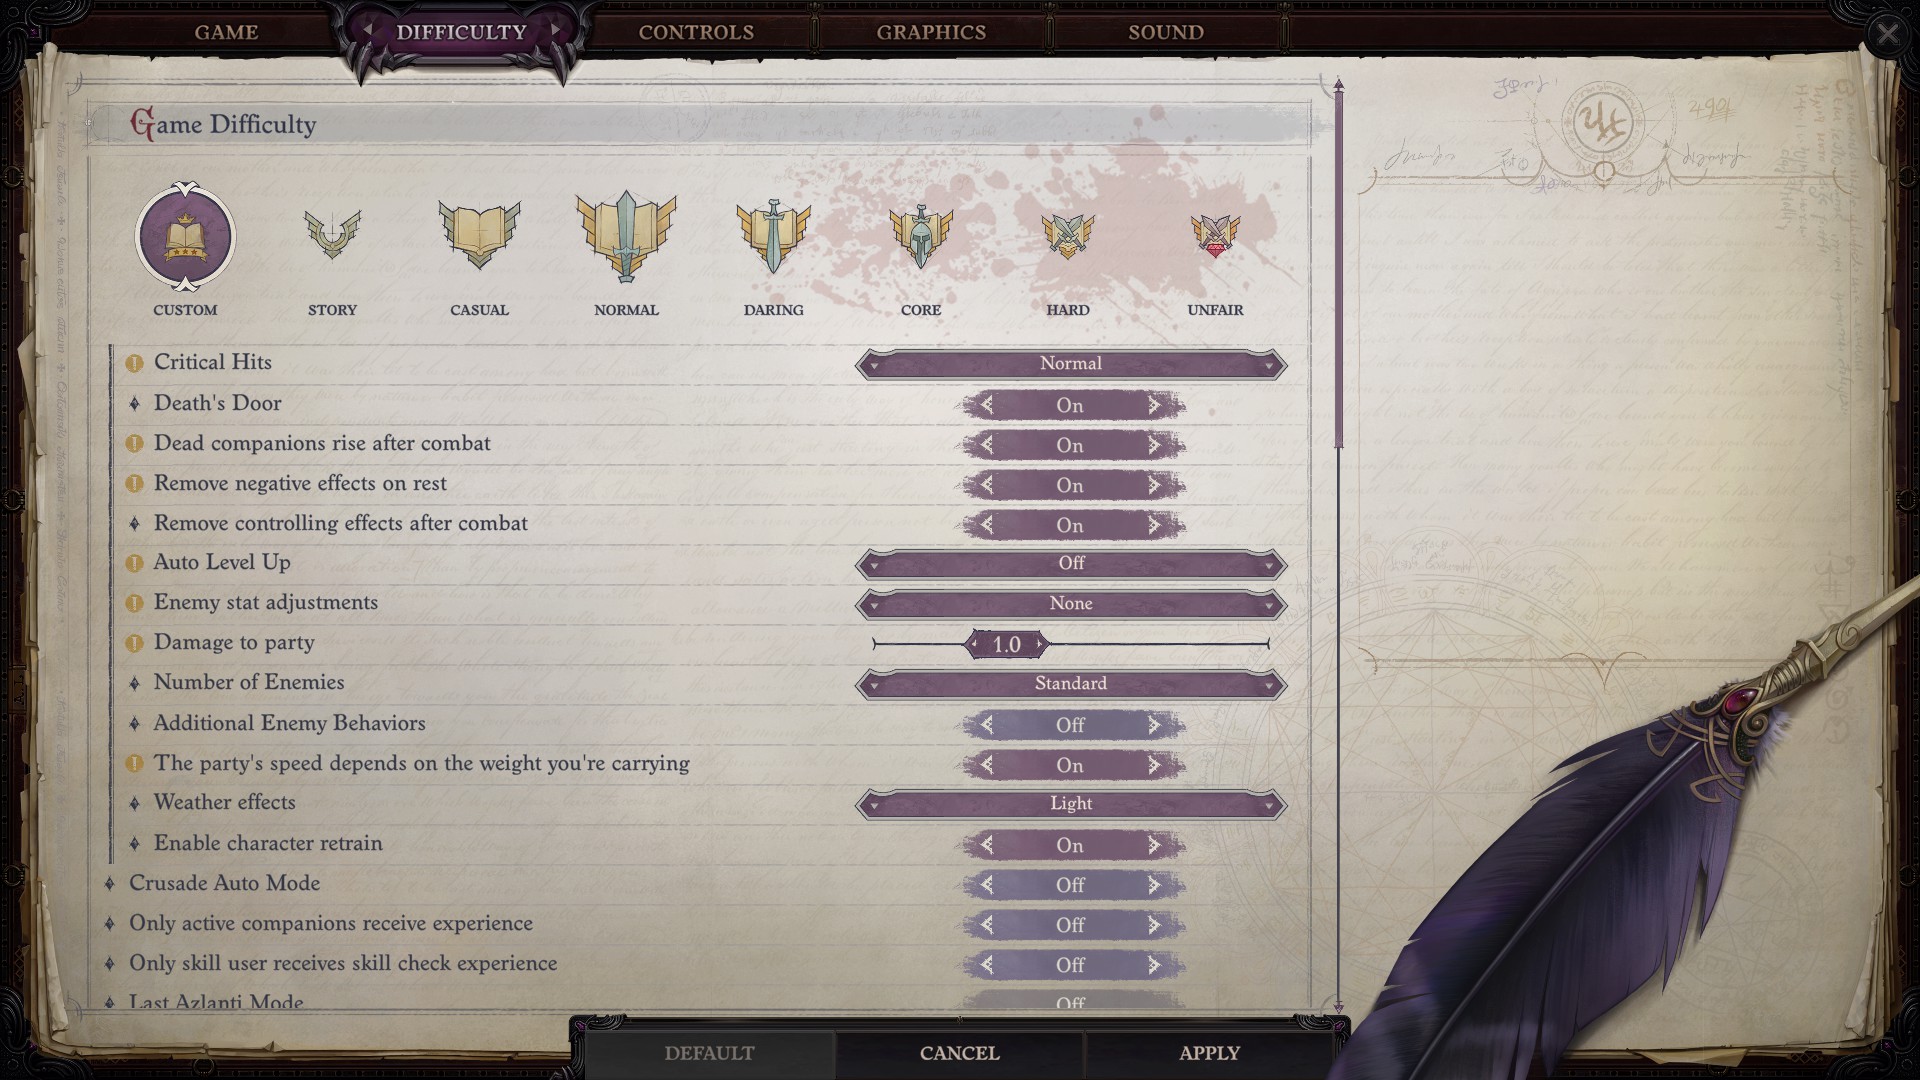
The difficulty options are there for a reason
Unlike Kingmaker, in Wrath of the Righteous «normal difficulty» doesn’t translate to «the Dungeon Master hates you.» That said, you may still want to tweak it. You can change how many enemies are in fights, whether control effects like paralysis end immediately after combat, whether equal experience points are earned by your inactive Pokémon—I mean party members—and so on. There’s even an auto-mode for the crusade if you don’t want to bother with the tactical battles.
Most options can be altered on the fly, so don’t worry about being stuck with your initial choices. Only the «Last Azlanti mode», which limits you to a single save, can’t be toggled midway.
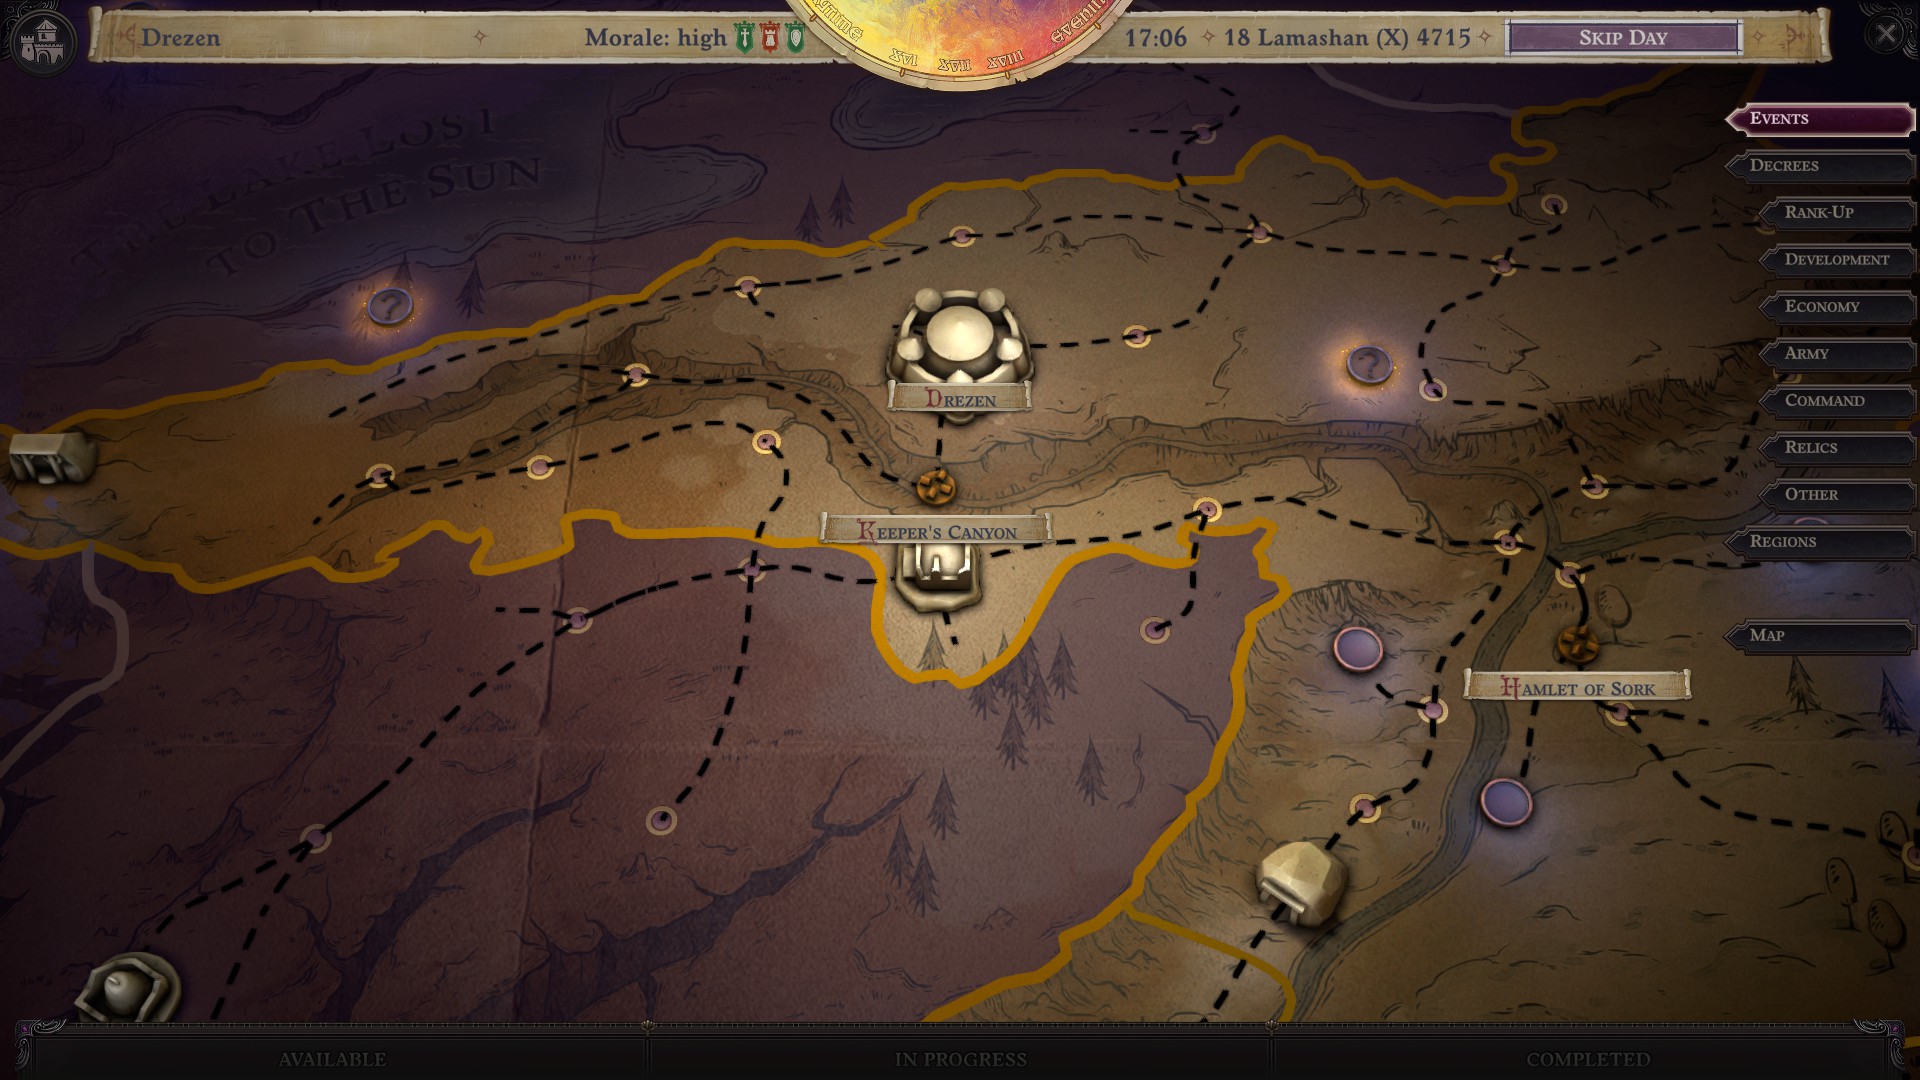
Crusade aid
Once you get access to the crusade menu, you’ll be able to move armies across the map. Make sure to recruit a general for your first army, preferably one with the master of maneuver feat. Each level of that increases the number of units an army can have by one. Use the army to clear a path for your party, since you can’t pass forts otherwise and will have to make a stealth roll to bypass demon armies without a fight.
At the top right of the crusade management map are some options you might have missed, including one to autoresolve tactical combats. It’ll lose more units than you would doing it manually, and sometimes straight-up lose battles you could easily win, but you’ll have the option to go back and re-do the fight yourself each time.
Be fast and slippery
Flashy high-damage magic is tempting but two of the best spells available, especially at lower levels, are haste and grease. Use haste to give everyone an extra attack, a boost of speed, and some extra armor class, and use grease to trip enemies. Dropping a quick grease spell on a chokepoint turns a tricky defense into an easy win, unless you’re up against fliers. Coup de grace anyone who falls.
Spells that remove conditions will eventually become situational lifesavers, like dispel magic, restoration, and delay poison, communal. Learn and memorize those when you can. It’s hard to cast fireball when you’ve been simultaneously poisoned and level-drained back to preschool.
Read books and know things
Some books give small bonuses to skills and stats. Right-click on books in your inventory and click info to see the full text, and then check the abilities tab to see what you’ve learned. Only the main character earns these bonuses.
Sign up to get the best content of the week, and great gaming deals, as picked by the editors.
Jody’s first computer was a Commodore 64, so he remembers having to use a code wheel to play Pool of Radiance. A former music journalist who interviewed everyone from Giorgio Moroder to Trent Reznor, Jody also co-hosted Australia’s first radio show about videogames, Zed Games. He’s written for Rock Paper Shotgun, The Big Issue, GamesRadar, Zam, Glixel, Five Out of Ten Magazine, and Playboy.com, whose cheques with the bunny logo made for fun conversations at the bank. Jody’s first article for PC Gamer was about the audio of Alien Isolation, published in 2015, and since then he’s written about why Silent Hill belongs on PC, why Recettear: An Item Shop’s Tale is the best fantasy shopkeeper tycoon game, and how weird Lost Ark can get. Jody edited PC Gamer Indie from 2017 to 2018, and he eventually lived up to his promise to play every Warhammer videogame.
Most Popular

Можно потратить часы, просто пытаясь создать своего идеального героя в Pathfinder: Wrath of the Righteous. Игра предлагает немалую вариативность в построении персонажа, и вдумчивый игрок может растеряться. Вот наш гайд по созданию персонажа Pathfinder: Wrath of the Righteous, который облегчит вам эту задачу.
Готовые и пользовательские персонажи
Pathfinder: Wrath of the Righteous позволяет вам выбирать из нескольких готовых персонажей. Варианты включают кавалера-полуэльфа, клирика-ореада, разбойника-гнома и других. Однако, если вы хотите убедиться, что все соответствует вашим предпочтениям, вы также можете создать собственного персонажа.
Прежде чем мы продолжим, убедитесь, что вы включили «Разрешить переобучение персонажа» в параметрах сложности. Вы сможете изменить/переобучить своего главного героя и компаньонов, как только доберетесь до Покоя Защитника. Это гарантирует, что вы не будете скованы, когда сделаете неоптимальный выбор.

Портреты
Наша первая задача – выбрать портрет. Десятки уже доступны по умолчанию. Некоторые из этих портретов создания персонажей являются новыми в Pathfinder: Wrath of the Righteous, а другие — в Kingmaker. Также можно добавить свой собственный портрет, если вас не устраивает то, что доступно.

Классы
Далее нам нужно выбрать класс. Теперь, чтобы внести ясность, вы проведете здесь много времени, потому что Pathfinder: Wrath of the Righteous имеет 25 классов по умолчанию, и каждый из них имеет несколько архетипов/подклассов. Точно так же есть 13 престиж-классов, которые вы не сможете выбрать сейчас, поскольку они требуют, чтобы вы немного продвинулись в кампании, чтобы приобрести некоторые умения или навыки.
Мы не будем подробно обсуждать все классы в этом руководстве. Однако достаточно сказать, что вы должны принять во внимание три фактора:
- Какой стиль игры вам удобен? Вы хотите попасть в самую гущу схватки или предпочитаете колдовать, пока союзники защищают вас?
- Говоря о союзниках, обратите внимание на спутников, которых вы встретите во время своих путешествий. Например, первый человек, которого вы можете нанять во время пролога, — это паладин по имени Сила. Через несколько мгновений вы столкнетесь с шаманкой по имени Камелия. Хотя вы можете настраивать их по мере повышения уровня, их особый стиль игры и способности должны дополнять класс вашего главного героя.
- Наконец, вы захотите рассмотреть сложность класса. В Pathfinder: Wrath of the Righteous есть всплывающая подсказка «сложность» (обозначенная кружками), которая говорит вам, является ли класс довольно простым или его лучше использовать тем, у кого больше опыта в игре. В этом примере Монах имеет уровень сложности «2», что означает, что он подходит для новичков. Сравните это с Алхимиком или Военным жрецом (уровень сложности 4) или Кинетиком (уровень сложности 5).

Расы
Далее вы сможете выбрать свою расу. Опять же, мы не будем вдаваться в подробности здесь. Вам просто нужно принять к сведению расовые бонусы, которые вы можете получить, а также возможное наследие (подраса).

Предыстория
Ваше прошлое играет роль в дополнительных бонусах, которые вы можете получить, таких как навыки (т. е. проверки навыков) и/или владение оружием. Например, если вы пойдете с монахом мастером боевого посоха, вы нанесете больший урон этим конкретным оружием. Между тем, на панели предысторий вы увидите, что Странник — Отшельник добавляет бонус к нескольким навыкам владения оружием, включая боевой посох.

Способности
Способности (то есть атрибуты) относятся к вашей силе (СИЛ), ловкости (ЛВК), телосложению (ТЕЛ), интеллекту (ИНТ), мудрости (МДР) и харизме (ХА). Каждая способность управляет несколькими проверками навыков, и игра также подсказывает вам, на каких из них следует сосредоточиться, в зависимости от выбранного вами класса. Например, большинство сборок для Разбойника, Убийцы, Охотника и Монаха делают упор на высокий ЛВК.

Навыки
Ваши навыки определяют вероятность успеха ваших действий при исследовании, всплывающих дополнительных диалогах или преодолении врагов:
- Атлетичность (STR) — преодоление препятствия или прыжок на другой участок карты.
- Мобильность (DEX) — Шанс пройти мимо противников, не давая им возможности атаковать.
- Обман (DEX) – Взлом и обезвреживание ловушек.
- Скрытность (DEX) — проходите мимо противников незамеченными и избегайте случайных встреч на карте мира.
- Знание: Тайна (INT) – изучение заклинаний из книг заклинаний, создание свитков тайных заклинаний и определение магических предметов.
- Знания: Мир (INT) – Варка зелий, расшифровка текстов и получение информации о земле.
- Знания: Природа (WIS) — снижает усталость при путешествии по карте мира и получает способность лечить болезни.
- Знания: Религия (WIS) — создание свитков божественных заклинаний и запоминание информации о религиозных верованиях.
- Восприятие (WIS) — позволяет замечать ловушки и скрытые объекты/лут; не дает вам застать врагов врасплох во время кемпинга.
- Убеждение (CHA) — вероятность успеха дополнительных вариантов диалога (например, дипломатии, запугивания и обмана).
- Использование магического устройства (CHA) — возможность активировать жезлы и свитки, которые вы обычно не сможете использовать.
Ваш выбор здесь поможет в построении вашего персонажа (например, если вы хотите побудить неигровых персонажей давать вам лучшие награды, вам понадобится высокое Убеждение). Кроме того, учитывайте навыки своих спутников.
Помните, что Pathfinder: Wrath of the Righteous автоматически выбирает персонажа с наивысшим навыком для определенного действия (т. е. попытка взлома сундука, когда выбрана вся группа, заставит персонажа с наивысшим уровнем Обмана выполнить действие).

Специальные навыки
Дальше нас ждут специальные навыки. Обычно здесь можно выбрать оружие или заклинание. Дополнительные параметры станут доступны позже, когда вы повысите уровень или выполните предварительные условия.
Да, и в некоторых случаях выбранный вами класс/подкласс и раса позволят вам выбрать бонусные умения с самого начала.

Божество и мировоззрение
Божества в Pathfinder: Wrath of the Righteous предлагают несколько преимуществ. Они также помогают использовать определенные заклинания, если для них требуется определенное божество.
Однако некоторые из них могут быть недоступны в зависимости от вашего класса или мировоззрения. Также можно выбрать Атеизм. Это открывает несколько уникальных опций, умение Восприятие и бонус +2 к спасброскам против заклинаний божественного типа. К сожалению, за это вы не сможете использовать божественные заклинания или те, для которых требуется конкретное божество.
Точно так же мировоззрение зависит от вашего предыдущего выбора в создании персонажа. Например, Паладины часто в начале оказывались в спектре Законопослушного добра. Но это может измениться, когда вы продолжите играть в кампанию. Когда представлены определенные решения относительно морального компаса вашего персонажа, вы можете использовать законные, хаотические, добрые или злые ответы.

Внешний вид, голос, имя, день рождения и экран сводки
Наконец, вы можете настроить внешний вид, голос, имя и день рождения вашего персонажа. Выберите параметры и эстетику, которые вам нравятся, и перейдите к сводному экрану. Это даст вам подробную информацию обо всех решениях, которые вы сделали во время создания персонажа Pathfinder: Wrath of the Righteous.
Если вас все устраивает, вперед и начните свое приключение. В качестве альтернативы, настройте своего персонажа еще немного или, что еще лучше, сыграйте в пролог и перезапустите кампанию, если вы хотите попробовать разные комбинации.
