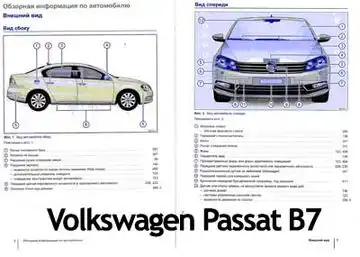
-
Contents
-
Table of Contents
-
Bookmarks
Quick Links
Service
Workshop Manual
Passat 2011 ➤
Passat Variant 2011 ➤
Wheels and Tyres Guide
Edition 03.2019
Service Department. Technical Information
Related Manuals for Volkswagen Passat 2011
Summary of Contents for Volkswagen Passat 2011
-
Page 1
Service Workshop Manual Passat 2011 ➤ Passat Variant 2011 ➤ Wheels and Tyres Guide Edition 03.2019 Service Department. Technical Information… -
Page 2
In addition, the normal basic safety precautions for working on motor vehicles must, as a matter of course, be observed. All rights reserved. No reproduction without prior agreement from publisher. Copyright © 2019 Volkswagen AG, Wolfsburg D3E8045E4B7… -
Page 3: Table Of Contents
Passat 2011 ➤ , Passat Variant 2011 ➤ Wheels and Tyres Guide — Edition 03.2019 Contents 44 — Wheels, tyres, vehicle geometry ……..
-
Page 4
Passat 2011 ➤ , Passat Variant 2011 ➤ Wheels and Tyres Guide — Edition 03.2019 Contents… -
Page 5: Wheels, Tyres, Vehicle Geometry
⇒ “1.4 Passat Alltrack — Model year 2012 to model year 2015 (sales type 365)”, page 6 General information Volkswagen vehicles are built according to the latest findings in safety engineering. To keep it that way, we recommend the use of only genuine Volkswagen spare parts. These can be recog‐…
-
Page 6: Explanations Regarding World Regions
Passat 2011 ➤ , Passat Variant 2011 ➤ Wheels and Tyres Guide — Edition 03.2019 ♦ The sizes of the winter tyres listed in the table are the most sensible from the handling and economic aspects. Of course, all other wheel-and-tyre combinations listed in the COC paper (EEC Certificate of Conformity) and/or in part I of the registra‐…
-
Page 7
Passat Limousine, Passat Variant, type approval model code 3C and 3c Appendix for certificate statement 8111178717 The certificate statement can be found on the Volkswagen Serv‐ iceNet under Accessories/Tyres, Wheels and Tyres, Wheels and Tyres Guide. Type approval no. for model code 3C: e1*2001/116*0307*24 to e1*2001/116*0307*36 Type approval no. -
Page 8
Passat 2011 ➤ , Passat Variant 2011 ➤ Wheels and Tyres Guide — Edition 03.2019 Model/ Tyre Tyre size Wheel rim Whe Snow Comments engine output el off‐ chains set in ♦ ⇒ “4 Recommen‐ 215/55 R 16 93H/V 7 J x 16 ded all-season ⇒… -
Page 9
Passat 2011 ➤ , Passat Variant 2011 ➤ Wheels and Tyres Guide — Edition 03.2019 Model/ Tyre Tyre size Wheel rim Whe Snow Comments engine output el off‐ chains set in Wheels and Tyres, 235/45 R 17 94V / 2 J x 17 Wheels and Tyres ⇒… -
Page 10
♦ Passat Alltrack, type approval model code 3C and 3c Appendix for certificate statement 8111178717 The certificate statement can be found on the Volkswagen Serv‐ iceNet under Accessories/Tyres, Wheels and Tyres, Wheels and Tyres Guide. Rep. gr.44 — Wheels, tyres, vehicle geometry… -
Page 11
Passat 2011 ➤ , Passat Variant 2011 ➤ Wheels and Tyres Guide — Edition 03.2019 Type approval no. for model code 3C: e1*2001/116*0307*30 to e1*2001/116*0307*36 Type approval no. for model code 3c: DE*2007/46*0547*00 Type approval no. for model code 3c: e1*2007/46*0547*00 to… -
Page 12: Wheel Allocation
Passat 2011 ➤ , Passat Variant 2011 ➤ Wheels and Tyres Guide — Edition 03.2019 Wheel allocation ⇒ “2.1 61/2 J x 16”, page 8 ⇒ “2.2 7 J x 16”, page 9 ⇒ “2.3 6 J x 17”, page 10 ⇒…
-
Page 13
Passat 2011 ➤ , Passat Variant 2011 ➤ Wheels and Tyres Guide — Edition 03.2019 7 J x 16 Note Always observe the allocation of wheels and tyres to the respec‐ tive engines, which are listed in the overview table. -
Page 14: 61/2 J X 17 Offset
Passat 2011 ➤ , Passat Variant 2011 ➤ Wheels and Tyres Guide — Edition 03.2019 3AA 601 025 B — aluminium wheel “ALICANTE” Only for vehicles to maximum permissible axle load of 1,230 kg. Dimensions: 7 J x 16 Wheel offset in mm:…
-
Page 15
Passat 2011 ➤ , Passat Variant 2011 ➤ Wheels and Tyres Guide — Edition 03.2019 Winter wheel 3C8 601 025 F — aluminium wheel“ST. MORITZ” Dimensions: / 2 J x 17 Wheel offset in mm: Wheel load in kg: / 2 J x 17 offset 42 Note Always observe the allocation of wheels and tyres to the respec‐… -
Page 16
Passat 2011 ➤ , Passat Variant 2011 ➤ Wheels and Tyres Guide — Edition 03.2019 3AA 601 025 R — aluminium wheel “VALLEY” Dimensions: 7 J x 17 Wheel offset in mm: Wheel load in kg: / 2 J x 17 Note Always observe the allocation of wheels and tyres to the respec‐… -
Page 17
Passat 2011 ➤ , Passat Variant 2011 ➤ Wheels and Tyres Guide — Edition 03.2019 3AA 601 025 F — aluminium wheel “SAO PAULO” Dimensions: / 2 J x 17 Wheel offset in mm: Wheel load in kg: 3AA 601 025 G — aluminium wheel “MINNEAPOLIS”… -
Page 18: X 18 Offset
Passat 2011 ➤ , Passat Variant 2011 ➤ Wheels and Tyres Guide — Edition 03.2019 3AA.601.025.T — aluminium wheel “BUENOS AIRES” Dimensions: / 2 J x 17 Wheel offset in mm: Wheel load in kg: 8 J x 18 offset 40 Note Always observe the allocation of wheels and tyres to the respec‐…
-
Page 19: Wheel Offset In Mm: Wheel Load In Kg
Passat 2011 ➤ , Passat Variant 2011 ➤ Wheels and Tyres Guide — Edition 03.2019 Caution 8 J x 18 wheels can only be fitted under the following condi‐ tions: • The vehicle must be fitted with the sport suspension for 18″…
-
Page 20: Wheel Load In Kg: 650
Passat 2011 ➤ , Passat Variant 2011 ➤ Wheels and Tyres Guide — Edition 03.2019 3C0 601 025 T, 3C0 601 025 AN — aluminium wheel “CHICAGO” Dimensions: 8 J x 18 Wheel offset in mm: Wheel load in kg:…
-
Page 21: Recommended Summer Tyres
Passat 2011 ➤ , Passat Variant 2011 ➤ Wheels and Tyres Guide — Edition 03.2019 Recommended summer tyres ⇒ “3.1 Recommended summer tyres, worldwide except North America, China, Japan, South America, Taiwan, India”, page 17 ⇒ “3.2 Recommended summer tyres, Japan”, page 18 ⇒…
-
Page 22: Recommended Summer Tyres, Japan
Passat 2011 ➤ , Passat Variant 2011 ➤ Wheels and Tyres Guide — Edition 03.2019 Recommended summer tyres, Japan Notes regarding the recommended tyres ⇒ page 1 ⇒ “1.2 Explanations regarding world regions”, page 2 Tyre size Manufacturer Tread pattern…
-
Page 23: Recommended All-Season Tyres
Passat 2011 ➤ , Passat Variant 2011 ➤ Wheels and Tyres Guide — Edition 03.2019 Recommended all-season tyres ⇒ “4.1 Recommended all-season tyres, worldwide except North America and China”, page 19 ⇒ “4.2 Recommended all-season tyres, worldwide except North America, China, Brazil and Taiwan”, page 19 Recommended all-season tyres, worldwide except North America and Chi‐…
-
Page 24: Recommended Winter Tyres
Passat 2011 ➤ , Passat Variant 2011 ➤ Wheels and Tyres Guide — Edition 03.2019 Recommended winter tyres ⇒ “5.1 Recommended winter tyres, Passat Saloon, Passat Var‐ iant, worldwide except North America and China”, page 20 ⇒ “5.2 Recommended winter tyres, Passat Alltrack, worldwide except North America and China”, page 20…
-
Page 25: Recommended Temporary Spare Tyres And Wheels
Passat 2011 ➤ , Passat Variant 2011 ➤ Wheels and Tyres Guide — Edition 03.2019 Recommended temporary spare tyres and wheels Inform your customers about the following notes and, if appropri‐ ate, refer also to the user’s manual of the vehicle as the need arises.
- Manuals
- Brands
- Volkswagen Manuals
- Automobile
- Passat 2011
Manuals and User Guides for Volkswagen Passat 2011. We have 11 Volkswagen Passat 2011 manuals available for free PDF download: Workshop Manual, Body Repair Manual, Maintenance Manual
Volkswagen Passat 2011 Workshop Manual (475 pages)
General body repairs, exterior
Brand: Volkswagen
|
Category: Automobile
|
Size: 18.84 MB
Table of Contents
-
Table of Contents
3
-
Technical Data
11
-
Safety Information
11
-
Safety Measures When Working on Vehicles with a Start/Stop System
11
-
-
Body — Front
12
-
Lock Carrier
12
-
Assembly Overview — Lock Carrier
12
-
Service Position
13
-
Removing and Installing Lock Carrier
18
-
Wings
21
-
Assembly Overview — Front Wing
21
-
Removing and Installing Front Wing
22
-
Bulkhead
25
-
Assembly Overview — Plenum Chamber Bulkhead
25
-
Assembly Overview — Plenum Chamber Cover
27
-
Removing and Installing Plenum Chamber Cover
27
-
-
Bonnet, Rear Lid
31
-
Bonnet (Hood)
31
-
Assembly Overview — Bonnet
31
-
Removing and Installing Bonnet
31
-
Removing Gas Strut
35
-
Releasing Gas from Gas Strut
35
-
Assembly Overview — Bonnet Hinge
35
-
Removing and Installing Bonnet Hinge
36
-
Removing and Installing Insulation
39
-
Assembly Overview — Bonnet Lock and Release Components
41
-
Removing and Installing Bonnet Lock
41
-
Detaching Bowden Cable
43
-
Adjusting Bonnet
43
-
Removing and Installing Release Lever
46
-
Rear Lid (Saloon)
47
-
Tools
47
-
Assembly Overview — Rear Lid
47
-
Removing and Installing Rear Lid
48
-
Removing Gas Strut
50
-
Installing Gas Strut
51
-
Releasing Gas from Gas Strut
52
-
Assembly Overview — Rear Lid Hinge
52
-
Removing and Installing Rear Lid Hinge
53
-
Assembly Overview — Hinge Seal
56
-
Removing and Installing Hinge Seal
57
-
Removing and Installing Striker Pin
59
-
Adjusting Rear Lid
59
-
Assembly Overview — Release Element
62
-
Removing and Installing Release Element
63
-
Removing and Installing Bonnet Lock
65
-
Rear Lid Seal
66
-
Removing and Installing Rear Lid Seal
67
-
Rear Lid (Estate)
69
-
Tools
69
-
Assembly Overview — Rear Lid
69
-
Removing and Installing Rear Lid
70
-
Removing and Installing Rear Lid Hinge
72
-
Removing and Installing Bonnet Lock
74
-
Removing and Installing Striker Pin
76
-
Removing and Installing Release Button (Vehicle Identification Number > 3C-8E108000 / 3C-8P064070)
77
-
Removing and Installing Release Button (Vehicle Identification Number 3C-8E108001 / 3C-8P064071 >)
79
-
Adjusting Rear Lid
81
-
Removing and Installing Gas Strut
85
-
Releasing Gas from Gas Strut
85
-
Removing and Installing Motor in Control Unit for Electrically Operated Rear Lid
85
-
Rear Lid Seal
89
-
Removing and Installing Rear Lid Seal
89
-
Assembly Overview — Cover
92
-
Tank Flap Unit
93
-
Tools
93
-
Assembly Overview — Tank Flap Unit and Actuator
93
-
Assembly Overview — Tank Flap Unit for Natural Gas Vehicles
95
-
Removing and Installing Tank Flap Unit
96
-
Removing and Installing Actuator
98
-
-
Front Doors, Door Components, Central Locking
99
-
Rear Door
99
-
Tools
99
-
Assembly Overview — Front Door
100
-
Assembly Overview — Door Hinges
102
-
Removing and Installing Door
103
-
Adjusting Door
105
-
Door Components
107
-
Tools
107
-
Assembly Overview — Assembly Carrier
108
-
Removing and Installing Subframe
108
-
Assembly Overview — Door Handle and Door Lock
114
-
Removing and Installing Lock Cylinder Housing Cover Cap
115
-
Removing and Installing Lock Cylinder Housing
116
-
Removing and Installing Door Handle
117
-
Removing and Installing Door Handle with Access and Start Authorisation
118
-
Removing and Installing Door Lock
120
-
Removing and Installing Mounting Bracket
124
-
Removing and Installing Retaining Bracket
127
-
Inner Door Seal
128
-
Removing and Installing Inner Door Seal
129
-
Removing and Installing Outer Door Seal
130
-
Assembly Overview — Insulation
134
-
Central Locking
135
-
Fitting Location Overview — Central Locking Components
135
-
Adapting Remote Control Keys to Remote Control
137
-
System)
137
-
Adapting Remote Control Keys to Immobilizer (Vehicles with or Without Entry and Start Authorisation System)
137
-
Removing and Installing Remote Control Key Battery
137
-
-
Rear Doors, Door Components
140
-
Rear Door (Saloon)
140
-
Tools
140
-
Assembly Overview — Rear Door
141
-
Assembly Overview — Door Hinges
143
-
Removing and Installing Door
144
-
Adjusting Door
146
-
Rear Door (Estate)
148
-
Tools
148
-
Assembly Overview — Rear Door
149
-
Assembly Overview — Door Hinges
150
-
Removing and Installing Door
152
-
Adjusting Door
155
-
Door Components
157
-
Tools
157
-
Assembly Overview — Assembly Carrier
158
-
Removing and Installing Subframe
158
-
Assembly Overview — Door Handle and Door Lock
165
-
Removing and Installing Lock Cylinder Housing Cover Cap
166
-
Removing and Installing Lock Cylinder Housing
167
-
Removing and Installing Door Handle
168
-
Removing and Installing Door Handle with Access and Start Authorisation
169
-
Removing and Installing Door Lock
171
-
Removing and Installing Mounting Bracket
174
-
Removing and Installing Retaining Bracket
177
-
Door Inner Seals
178
-
Removing and Installing Inner Door Seal
179
-
Removing and Installing Outer Door Seal
180
-
Assembly Overview — Insulation
184
-
-
Sunroof
185
-
Sliding/Tilting Sunroof with Glass Panel (Meritor)
185
-
Tools
185
-
Function
185
-
Assembly Overview — Sliding/Tilting Sunroof with Glass Panel
186
-
Removing and Installing Bellows
189
-
Removing Sliding/Tilting Sunroof Glass Panel
190
-
Installing Sliding/Tilting Sunroof Glass Panel
191
-
Adjusting Height of Sliding/Tilting Sunroof Glass Panel
191
-
Adjusting Panel Seal
192
-
Removing and Installing Panel Seal
193
-
Removing and Installing Wind Deflector
193
-
Removing and Installing Sliding Headliner
194
-
Removing and Installing Sliding/Tilting Sunroof Glass Panel Drive
195
-
Adjusting Drive for Sliding/Tilting Sunroof Glass Panel («0» Position)
196
-
Removing and Installing Sliding/Tilting Sunroof Glass Panel Automatic Preselection Switch
197
-
Checking Parallel Running
197
-
Adjusting Parallel Running
197
-
Assembly Overview — Carrier Unit
198
-
Removing and Installing Carrier Unit
199
-
Operating Without Current
202
-
Removing and Installing Guide Plate
202
-
Removing and Installing Guide Plate
203
-
Cleaning Water Drainage Hoses
204
-
Sliding/Tilting Sunroof with Solar Panel (Webasto)
207
-
Tools
207
-
Function
207
-
Assembly Overview — Sliding/Tilting Sunroof with Solar Panel
208
-
Removing Sliding/Tilting Sunroof Solar Panel
209
-
Installing Sliding/Tilting Sunroof Solar Panel
210
-
Adjusting Sliding/Tilting Sunroof Solar Panel Height
210
-
Checking Parallel Running of Solar Panel
211
-
Adjusting Parallel Running of Solar Panel
212
-
Renewing Panel Seal
212
-
Removing Wind Deflector
212
-
Removing Solar Panel Trim
213
-
Removing Sliding/Tilting Sunroof Drive
213
-
Adjusting Drive for Sliding/Tilting Sunroof (Zero Position)
214
-
Removing Pre-Selector Control for Sliding/Tilting Sunroof
215
-
Removing Electrical Contact in Solar Roof
215
-
Removing Electrical Contact for Sliding/Tilting Sunroof Solar Panel in Carrier Unit
215
-
Removing and Installing Carrier Unit
216
-
Operating Without Current
219
-
Cleaning Water Drainage Hoses
219
-
Panorama Sliding Sunroof (Arvin-Meritor)
222
-
Tools
222
-
Function
222
-
Basic Setting, Panoramic Sliding Sunroof
223
-
Assembly Overview — Panoramic Sliding Roof
223
-
Removing and Installing Front Glass Panel
225
-
Removing and Installing Rear Glass Panel
229
-
Adjusting Height of Front and Rear Glass Panel
231
-
Renewing Seals for Rear Glass Panel
233
-
Removing and Installing the Exterior Seal
237
-
Removing and Installing Interior Seal
239
-
Removing and Installing Wind Deflector
241
-
Removing and Installing Preselector for Glass Panel and Sunroof Sun Blind
244
-
Removing and Installing Sliding Sunroof Motor
245
-
Removing and Installing Sun Blind Motor
248
-
Removing and Installing Sun Blind
251
-
Removing and Installing Sunroof Sun Blind Cross Strut
259
-
Assembly Overview — Assembly Frame
260
-
Removing and Installing Sun Blind Bowden Cable
261
-
Removing and Installing Assembly Frame
265
-
Removing and Installing Rear Part
268
-
Removing and Installing Front Motor Plate
272
-
Removing and Installing Tilting Mechanism and Front Glass Panel Cable
275
-
Maintenance and Care
279
-
Operating Without Current
280
-
Cleaning Water Drainage Hoses
281
-
-
Bumpers
284
-
Front Bumper Cover
284
-
Tools
284
-
Repairing Front Bumper Cover
284
-
Installing Brackets for Parking Aid System
284
-
Assembly Overview — Front Bumper Cover
289
-
Removing and Installing Front Bumper Cover
290
-
Front Bumper Cover Add-On Parts
292
-
Front Bumper Cover Add-On Parts, Passat Alltrack
294
-
Front Bumper Cover Substructure Parts
295
-
Assembly Overview — Front Bumper Carrier
296
-
Assembly Overview — Front Bumper Carrier (USA)
297
-
Number Plate Carrier
298
-
Rear Bumper Cover (Saloon)
301
-
Tools
301
-
Repairing Rear Bumper Cover
301
-
Installing Brackets for Parking Aid System
301
-
Bumper, Rear
306
-
Rear Bumper Cover Add-On Parts 11.2010
311
-
Assembly Overview — Rear Bumper Carrier
312
-
Assembly Overview — Towing Bracket
312
-
Removing and Installing Drive for Swivelling Ball Head
314
-
Rear Bumper Cover (Estate)
315
-
Tools
315
-
Repairing Rear Bumper Cover
315
-
Installing Brackets for Parking Aid System
315
-
Bumper, Rear
320
-
Rear Bumper Cover Add-On Parts
325
-
Rear Bumper Cover Add-On Parts, Passat Alltrack
326
-
Assembly Overview — Rear Bumper Carrier
327
-
Assembly Overview — Towing Bracket
327
-
Removing and Installing Drive for Swivelling Ball Head
329
-
Advertisement
Volkswagen Passat 2011 Body Repair Manual (381 pages)
Brand: Volkswagen
|
Category: Automobile
|
Size: 57.11 MB
Table of Contents
-
Table of Contents
3
-
Technical Data
7
-
Vehicle Identification Data
7
-
Vehicle Identification Number
7
-
Passat 2011 ➤ , Passat Variant
7
-
Safety Instructions
9
-
Moulded Foam Elements
10
-
Galvanized Body Parts, High/Higher-Strength and Hot-Formed Body Panels
12
-
Body
12
-
Laser Welding
15
-
Body Panel Gaps/Shut Lines
16
-
Body — Front
16
-
Body — Centre
17
-
Body — Rear
18
-
Body — Rear (Variant)
19
-
Body Dimensions
20
-
Body — Front
20
-
Body — Centre
22
-
Body — Centre (Variant)
27
-
Body — Rear
28
-
Body — Rear (Variant)
29
-
Floor Group — Front
30
-
Floor Group — Centre
31
-
Floor Group — Rear
32
-
Tools
33
-
Alignment Bracket Set
34
-
Overview
34
-
Portal Gauge
35
-
Overview
35
-
-
Body — Front
37
-
Renewing Left Console
37
-
Tools
37
-
Removing
38
-
Installing
40
-
Renewing Right Console
42
-
Tools
42
-
Removing
43
-
Installing
44
-
Renewing Retaining Bracket for Subframe
46
-
Tools
46
-
Removing
47
-
Installing
48
-
Renewing Bumper Bracket
50
-
Tools
51
-
Removing
51
-
Installing
52
-
Renewing Upper Wheel Housing Longitudinal Member
54
-
Tools
55
-
Removing
56
-
Installing
58
-
Renewing Front Wheel Housing
62
-
-
Tools
63
-
Removing
63
-
Installing
65
-
Repairing Threads for Securing Subframe (Suspension Subframe)
72
-
Tools
73
-
Contents of Thread Repair Kit
73
-
Repairing Threads
74
-
Renewing Front Longitudinal Member
77
-
Tools
78
-
Removing
78
-
Installing
81
-
Renewing Front Longitudinal Member — Part Section
88
-
Tools
89
-
Removing
89
-
Installing
92
-
Body — Centre
97
-
Renewing Roof
97
-
Tools
98
-
Removing
100
-
Installing
102
-
Renewing Roof — Vehicles with Sliding/Tilting Sunroof
113
-
Tools
114
-
Removing
116
-
Installing
118
-
Renewing Roof (Variant)
130
-
Tools
131
-
Removing
133
-
Installing
135
-
Renewing Roof — Variant with Panorama Sliding Sunroof
146
-
Tools
147
-
Removing
149
-
Installing
151
-
Renewing Roof Side Member
163
-
Tools
164
-
Removing
164
-
Installing
166
-
Foam Treating Roof Side Member
172
-
Renewing Front Roof Cross Member
175
-
Tools
176
-
Removing
176
-
Installing
177
-
Renewing Rear Roof Cross Member (Saloon)
179
-
Tools
180
-
Removing
180
-
Installing
181
-
Renewing Rear Roof Cross Member (Variant)
183
-
Tools
184
-
Removing
184
-
Installing
185
-
Renewing A-Pillar
188
-
Tools
189
-
Removing
189
-
Installing
191
-
Renewing A-Pillar Reinforcement — Part Section
198
-
Tools
199
-
Removing
199
-
Installing
201
-
Renewing B-Pillar
205
-
Tools
206
-
Removing
206
-
Installing
208
-
Renewing B-Pillar Reinforcement — Part Section
216
-
Tools
217
-
Removing
217
-
Installing
219
-
Renewing Inner B-Pillar
229
-
Tools
230
-
Removing
230
-
Installing
232
-
Renewing Side Member
235
-
Tools
236
-
Removing
236
-
Installing
238
-
Renewing Front Side Member Reinforcement
244
-
Tools
245
-
Removing
245
-
Installing
246
-
Renewing Rear Side Member Reinforcement
251
-
Tools
252
-
Removing
252
-
Installing
253
-
Renewing Seat Middle Cross Member
256
-
Volkswagen Passat 2011 Workshop Manual (281 pages)
General body repairs, interior
Brand: Volkswagen
|
Category: Automobile
|
Size: 8.45 MB
Table of Contents
-
Table of Contents
3
-
Interior Equipment
7
-
Interior Mirror
7
-
Removing and Installing Interior Mirror
7
-
Bonding on Retaining Plate for Interior Mirror Without Rain Sensor
8
-
Removing and Installing Interior Mirror with Rain Sensor
9
-
Bonding on Retaining Plate for Interior Mirror with Rain Sensor
10
-
Removing and Installing Interior Mirror in Vehicles with a Multifunction Camera
10
-
Compartments, Covers and Trims
12
-
Tools
12
-
Removing and Installing Centre Console
12
-
Removing and Installing Footwell Trim
15
-
Removing and Installing Front Ashtray/Storage Tray
16
-
Removing and Installing Infotainment Surround
18
-
Removing and Installing «Climatronic/Climatic» Cover
19
-
Removing and Installing Rear Trim
20
-
Removing and Installing Centre Console Air Duct
21
-
Removing and Installing Centre Console Compartment
23
-
Removing and Installing Centre Console Extension
24
-
Removing and Installing Centre Console Armrest
27
-
Removing and Installing Armrest Compartment
28
-
Removing and Installing Upper Part of Armrest
29
-
Removing and Installing Dash Panel End Trims
30
-
Removing and Installing Steering Column Trim
31
-
Removing and Installing Glove Compartment
32
-
Removing and Installing Glove Compartment Lock Cylinder
34
-
Removing and Installing Footwell Cover on Driver Side
35
-
Removing and Installing Dash Panel Trim, Front Passenger Side
36
-
Removing and Installing Dash Panel Insert Trim
37
-
Removing and Installing Analogue Clock Holder
38
-
Removing and Installing Analogue Clock
39
-
Removing and Installing Trim on Driver Side
40
-
Removing and Installing Spectacles Holder in Moulded Headliner
41
-
Removing and Installing Spectacles Holder in Moulded Headliner
42
-
Removing and Installing Single Sun Visors
43
-
Removing and Installing Double Sun Visor (Saloon and Estate)
45
-
Removing and Installing Permit/Pass Holder
47
-
Sill Panel Mouldings
49
-
Removing and Installing Sill Panel Mouldings
49
-
Removing and Installing Wheel Housing Liner
51
-
Grab Handles
54
-
Removing and Installing Roof Grab Handles
54
-
Rear Shelf/Roller Sunblind
56
-
Removing and Installing Rear Shelf (Saloon with no Roller Sunblind)
56
-
Removing and Installing Rear Shelf (Saloon with Roller Sunblind)
57
-
Removing and Installing Roller Sunblind (Saloon)
59
-
Removing and Installing Sunblind on Rear Door Trim
61
-
Net Partition
65
-
Removing and Installing Net Partition
65
-
Removing and Installing Net Partition Mountings
66
-
-
Passenger Protection
67
-
Seat Belts
67
-
General Safety Regulations When Working on Airbag, Belt Tensioner and Battery Isolator Units (Pyrotechnic Components)
68
-
Special Instructions for Belt Tensioners
69
-
Storage, Transportation and Disposal of Airbag, Belt Tensioner and Battery Isolator Units (Pyrotechnic Components)
69
-
Removing and Installing Front Seat Belts (Saloon and Estate)
69
-
Removing and Installing Front Belt Height Adjuster (Saloon and Estate)
72
-
Removing and Installing Front Belt Buckle
73
-
Removing and Installing Rear Outer Seat Belts with Belt Tensioner (Saloon)
75
-
Removing and Installing Rear Outer Seat Belts with no Belt Tensioner (Saloon)
77
-
Removing and Installing Rear Outer Seat Belts with Belt Tensioner (Estate)
79
-
Removing and Installing Rear Outer Seat Belts with no Belt Tensioner (Estate)
82
-
Removing and Installing Middle, Rear Seat Belt
85
-
Removing and Installing Rear Double Belt Buckle
86
-
Inspecting Seat Belts
88
-
Points to Check
88
-
Checking Child Seat Anchors (ISOFIX) after an Accident
91
-
Points to Check
91
-
Airbag
92
-
Tools
92
-
Overview of Locations — Airbag Systems
93
-
General Safety Regulations When Working on Airbag, Belt Tensioner and Battery Isolator Units (Pyrotechnic Components)
95
-
Special Instructions for Driver and Front Passenger Airbag
96
-
Special Instructions for Curtain Airbag Modules
96
-
Storage, Transportation and Disposal of Airbag, Belt Tensioner and Battery Isolator Units (Pyrotechnic Components)
97
-
Deactivating the Airbag
97
-
Renewing Airbag Units Following an Accident
97
-
Removing and Installing Airbag Control Unit J234
98
-
Removing and Installing Driver Airbag Unit
100
-
Removing and Installing Airbag Coil Connector and Return Spring with Slip Ring F138
103
-
Removing and Installing Front Passenger Airbag Unit
104
-
Removing and Installing Front Side-Airbag
106
-
Removing and Installing Rear Side-Airbag
109
-
Removing and Installing Curtain Airbag (Saloon)
110
-
Removing and Installing Curtain Airbag (Estate)
113
-
Removing and Installing Seat Occupied Sensor, Front Passenger Side G128
115
-
Adapting Components
116
-
Crash Sensors
117
-
Tools
117
-
Removing and Installing Front Airbag Crash Sensor, Driver Side G283
117
-
Removing and Installing Side-Airbag Crash Sensor, Driver Side G179
118
-
Removing and Installing Side-Airbag Crash Sensor, Front Passenger Side G180
121
-
Removing and Installing Rear Side-Airbag Crash Sensor, Driver Side G256
124
-
Removing and Installing Rear Side-Airbag Crash Sensor, Front Passenger Side G257
125
-
Advertisement
Volkswagen Passat 2011 Workshop Manual (222 pages)
6-cylinder direct-injection engine (3.6 l engine, 4V)
Brand: Volkswagen
|
Category: Automobile
|
Size: 11.59 MB
Table of Contents
-
Table of Contents
3
-
Technical Data
7
-
Identification
7
-
Engine Number/Engine Data
7
-
General Information
9
-
Numbering of Cylinders
9
-
Safety Information
10
-
Safety Precautions During Work on Fuel System
10
-
Safety Precautions When Using Testers and Measuring Instruments During a Road Test
10
-
Safety Precautions When Working on the Cooling System
11
-
Safety Precautions When Working on Ignition System
11
-
Repair Notes
12
-
Rules for Cleanliness
12
-
Foreign Objects in Engine
12
-
-
Removing and Installing Engine
13
-
Removing Engine
13
-
Separating Engine and Gearbox
21
-
Securing Engine on Engine and Gearbox Support
23
-
Installing Engine
25
-
Assembly Mountings
27
-
Assembly Overview — Assembly Mountings
27
-
Removing and Installing Engine Mounting
28
-
Adjusting Assembly Mountings
30
-
Checking Adjustment of Assembly Mountings (Engine and Gearbox Mountings)
33
-
-
Crankshaft Group
34
-
Cylinder Block (Pulley End)
34
-
Assembly Overview — Cylinder Block (Pulley End)
34
-
Assembly Overview — Poly V-Belt Drive
36
-
Removing and Installing Poly-V Belt
37
-
Removing and Installing Tensioner for Poly V-Belt
38
-
Removing and Installing Vibration Damper
38
-
Removing and Installing Bracket for Ancillaries
39
-
Removing and Installing Sealing Flange on Pulley End
40
-
Cylinder Block, Gearbox End
42
-
Assembly Overview — Cylinder Block, Gearbox End
42
-
Removing and Installing Flywheel
42
-
Renewing Crankshaft Oil Seal (Gearbox End)
43
-
Crankshaft
46
-
Assembly Overview — Crankshaft
46
-
Renewing Needle Bearing in Crankshaft
48
-
Crankshaft Dimensions
50
-
Measuring Axial Clearance of Crankshaft
50
-
Measuring Radial Clearance of Crankshaft
50
-
Allocation of Main Bearing Shells
51
-
Removing and Installing Sender Wheel
55
-
Pistons and Conrods
57
-
Assembly Overview — Pistons and Conrods
57
-
Removing and Installing Pistons
58
-
Checking Pistons and Cylinder Bores
61
-
Separating New Conrod
62
-
-
Cylinder Head, Valve Gear
64
-
Cylinder Head
64
-
Assembly Overview — Cylinder Head
64
-
Removing and Installing Cylinder Head
66
-
Removing and Installing Cylinder Head Cover
74
-
Assembly Overview — Vacuum Pump
75
-
Removing and Installing Vacuum Pump
76
-
Checking Compression
77
-
Cover for Timing Chain
81
-
Assembly Overview — Cover for Timing Chain
81
-
Removing and Installing Timing Chain Cover
82
-
Removing and Installing the Camshaft Control Valve Seal
84
-
Assembly Overview — Valve Timing Housing
85
-
Chain Drive
87
-
Assembly Overview — Camshaft Timing Chains
87
-
Removing and Installing Camshaft Timing Chain
89
-
Removing and Installing Chain Drive Sprocket for High-Pressure Pump
92
-
Removing and Installing Timing Chain and Chain Drive for Oil Pump
93
-
Checking Valve Timing
97
-
Adjusting Valve Timing
99
-
Valve Gear
104
-
Assembly Overview — Valve Gear
104
-
Measuring Axial Play of Camshaft
106
-
Removing and Installing Camshaft
107
-
Removing and Installing Camshaft Adjuster
111
-
Removing and Installing Camshaft Control Valve
118
-
Removing and Installing Valve Stem Seals
122
-
Inlet and Exhaust Valves
125
-
Checking Valve Guides
125
-
Reworking Valve Seats
125
-
Valve Dimensions
127
-
-
Lubrication
128
-
Sump, Oil Pump
128
-
Assembly Overview — Sump/Oil Pump
128
-
Removing and Installing Oil Spray Jet
130
-
Removing and Installing Sump
131
-
Removing and Installing Oil Pump
133
-
Engine Oil
137
-
Oil Filter, Oil Pressure Switch
139
-
Assembly Overview — Oil Filter Housing, Oil Pressure Switch
139
-
Checking Oil Pressure and Oil Pressure Switch
141
-
Volkswagen Passat 2011 Maintenance Manual (188 pages)
Brand: Volkswagen
|
Category: Automobile
|
Size: 11.93 MB
Table of Contents
-
Table of Contents
3
-
1 Engine List
5
-
2 Service Work
7
-
Information about Flexible or Fixed Service
7
-
Service Tables
11
-
-
3 General Information
25
-
Raising Vehicle with Lifting Platform or Trolley Jack
25
-
Stickers
26
-
Connecting Vehicle Diagnostic Tester
27
-
Vehicle Identification Number
28
-
Vehicle Data Sticker
29
-
Country Overview for Diesel Not Compliant with en 590
30
-
Country Overview for Petrol Not Compliant with en 228
31
-
Engine Code and Engine Number
32
-
Severe Operating Conditions
32
-
Countries with Hot Climate
33
-
Countries with High Levels of Dust
34
-
Identification Plate
35
-
Shortened Intervals for Spark Plug Replacement
35
-
-
4 Descriptions of Work
40
-
Swivel Joints, Axle Mountings, Coupling Rod Bearings and Anti-Roll Bar Rubber Mounting
42
-
Inspecting for Damage
42
-
-
Activation of Environment Monitoring System (Front Assist): Checking
43
-
Automatic Headlight Control and Static Cornering Light: Checking Function
43
-
Front Passenger Front Airbag: Checking Key Switch and «ON/OFF Function
44
-
Battery: Checking Battery Terminal Clamps for Secure Seating
46
-
Battery: Checking with Battery Tester (Always Refer to Workshop Manual)
49
-
Status of Battery: Reading, Sending Diagnosis Protocol Online
49
-
Reducing Agent (Adblue®/Def): Replenishing
50
-
Reducing Agent (Adblue®/Def): Changing
55
-
Tyres: Checking Condition, Wear Pattern, Tyre Pressure and Tread Depth
55
-
Brake and Clutch System: Changing Brake Fluid
81
-
Brake System and Shock Absorbers: Inspecting for Leaks and Damage
85
-
Brakes, Front and Rear: Checking Thickness of Brake Pads and Condition of Brake Discs
86
-
Brake Fluid Level: Checking
88
-
Diesel Particulate Filter: Checking
89
-
Dual Clutch Gearbox 02E: Changing Gear Oil and Filter
89
-
Electric Windows: Checking Positioning (Open and Close Functions)
90
-
Natural Gas Tank: Renew
91
-
Natural Gas Filler Connection and Sealing Cap: Check Condition, Clean if Necessary and Check Seal
91
-
Fault Memory of All Systems: Reading with Vehicle Diagnostic Tester , Correcting Possible Faults
91
-
According to Repair Guidelines
91
-
-
Bonnet Catch Hook: Grease
92
-
Gearbox, Final Drive and Drive Shaft Boots: Inspect for Leaks and Damage
92
-
All-Wheel Drive Coupling: Changing Oil
93
-
Interior and Exterior Body: Inspecting for Corrosion with Doors and Flaps Open
97
-
Poly V-Belt: Renewing
97
-
Poly V-Belt: Check Condition
97
-
Cooling System: Checking Frost Protection and Coolant Level
99
-
Diesel Fuel Filter: Renewing
101
-
Air Filter: Cleaning Housing and Renewing Filter Element
103
-
Multi-Purpose Additive for Diesel Fuel: Adding
106
-
Multi-Purpose Additive for Petrol Fuel: Adding
108
-
Memory Seat: Initialising
109
-
Engine and Components in Engine Compartment: Inspecting for Leaks and Damage (from above and Below)
109
-
Engine Cover Panel «Top»: Removing and Installing
110
-
Engine Compartment Cover (Noise Insulation) «Bottom»: Removing and Installing
113
-
Engine Oil Level: Checking
113
-
Engine Oil: Draining or Extracting, Renewing Oil Filter and Replenishing Engine Oil
114
-
Engine Oil: Capacities and Specifications
120
-
Panorama Tilting/Sliding Roof with Rear Panorama Roof: Checking Function, Cleaning and Greasing Guide Rails, and Cleaning Wind Deflector
120
-
Road Test: Performing (Driving Behaviour, Noises, Air Conditioner Etc.)
123
-
Wheel Securing Bolts: Tightening to Specified Torque
124
-
Radio Code: Reading Using Vehicle Diagnostic Tester
127
-
Radio/Navigation System: Entering PIN of Anti-Theft Coding and Storing Local Radio Stations to Station Buttons
128
-
Tyre Pressure Monitoring : Performing Basic Setting
128
-
Tyre Repair Set: Checking
131
-
Window Wash/Wipe System and Headlight Washer System: Checking Function
131
-
Wiper Blade Protection: Removing
135
-
Headlight Adjustment: Checking Halogen Headlights
138
-
Headlight Adjustment: Checking Gas Discharge Headlights Without DLA
141
-
Headlight Adjustment: Checking Gas Discharge Headlights with DLA
145
-
Headlight Adjustment: Checking Fog Lights
151
-
Sliding Sunroof Drains: Checking for Blockage, Cleaning if Necessary
153
-
Service Interval Display: Resetting
153
-
Service Interval Display: Recoding
156
-
Sunroof: Checking Function, Cleaning and Greasing Guide Rails
158
-
Track Rods: Checking Clearance, Attachment and Boots
158
-
Auxiliary Heater: Setting Weekday in Menu of Dash Panel Insert
158
-
Dust and Pollen Filter: Cleaning Housing and Renewing Filter Element
159
-
Transportation Mode: Switching off
160
-
Transportation Devices: Removing Blocking Pieces from Springs on Front Axle
160
-
Transportation Devices: Removing Tie-Down Rings
162
-
Door Arrester: Grease
164
-
Clock and Date: Setting
165
-
Underbody: Inspecting for Damage to Underbody Sealant, Underbody Panels, Routing of Lines, Plugs
165
-
Camshaft Drive Toothed Belt (Diesel Engines): Renewing
165
-
Spark Plugs: Renewing
166
-
Natural Gas System: Inspect Natural Gas Tank for Corrosion and Leakage
174
-
Natural Gas System: Checking Wax Layer between Natural Gas Fuel Tank and Fuel Tank Shut-Off Valve
179
-
Volkswagen Passat 2011 Workshop Manual (180 pages)
Brand: Volkswagen
|
Category: Automobile
|
Size: 1.72 MB
Table of Contents
-
Table of Contents
5
-
Technical Data
7
-
1 General Notes on Air Conditioning Systems
7
-
Introduction
7
-
Additional Information
7
-
Basics of Air Conditioning
8
-
Vapour Pressure Table for Refrigerant R134A
9
-
Refrigerant R134A
10
-
Characteristics of Refrigerant R134A
11
-
Refrigerant Machine Oil
13
-
Comfort
15
-
How Air Conditioning Works
15
-
General Safety
16
-
Safety Precautions for When Working on Vehicles with Air Conditioning and When Handling
19
-
Refrigerant R134A
19
-
-
Basics for Working on Refrigerant Circuit
20
-
-
2 General Information on Refrigerant Circuit
23
-
Refrigerant Circuit Components
23
-
Design of Refrigerant Circuit
31
-
Evacuation and Charging Valves for Quick-Release Couplings of Air Conditioner Service Station
31
-
On Refrigerant Circuit
31
-
-
Switch and Sender in Refrigerant Circuit and Related Connections
33
-
Electrical Components Not Installed in Refrigerant Circuit
36
-
Pressures and Temperatures in the Refrigerant Circuit
38
-
Refrigerant Circuit with Expansion Valve
38
-
Refrigerant Circuit with Restrictor and Reservoir
40
-
Test and Measurement Work that Can be Performed Using a Pressure Gauge
42
-
Air Conditioner Service and Recycling Equipment
43
-
Notes to Repairs on Refrigerant Circuit
44
-
-
3 Statutory Texts and Instructions
45
-
Statutes and Regulations
45
-
Recycling and Refuse Law
50
-
Converting R12 Refrigerant Circuits to R134A Refrigerant Circuits and Repairing Them (Retrofitting)
51
-
Maintaining Records on Refrigerant
51
-
-
4 Refrigerant Circuit
52
-
Important Repair Notes on Air Conditioning
52
-
Retrofitting Refrigerant Circuit from R12 Refrigerant to R134A Refrigerant
52
-
-
5 Working with the Air Conditioner Service Station
53
-
Important Notes for Working with the Air Conditioner Service Station
54
-
Connecting Air Conditioner Service Station for Measuring and Checking
54
-
Draining Refrigerant Circuit Using Air Conditioner Service Station
55
-
Evacuating Refrigerant Circuit Using Air Conditioner Service Station
56
-
Charging Refrigerant Circuit Using Air Conditioner Service Station
57
-
Bringing Air Conditioning System into Service after Charging
58
-
Charging Container in Air Conditioner Service Station with Refrigerant
59
-
Draining Air Conditioner Service Station
59
-
-
6 Detecting Leaks in Refrigerant Circuit
61
-
Leak Detection in Refrigerant Circuit Using Compressed Air or Nitrogen
62
-
Searching for Leaks in Refrigerant Circuits Using Leak Detector V.A.G 1796
64
-
Detecting Leaks in Refrigerant Circuit Using Leak Detecting System VAS 6196 or Leak Detecting
65
-
System VAS 6201 or a Later Model
65
-
-
Volkswagen Passat 2011 Workshop Manual (130 pages)
Heating, air conditioner
Brand: Volkswagen
|
Category: Automobile
|
Size: 7.27 MB
Table of Contents
-
Table of Contents
3
-
Technical Data
5
-
Safety Information
5
-
Safety Precautions When Working on Air Conditioning Systems
5
-
Safety Measures When Working on Vehicles with a Start/Stop System
5
-
Safety Precautions When Working on the Cooling System
5
-
General Information
7
-
Notes Concerning Odours in Air Conditioned Vehicles
7
-
Notes for Vehicles with Start-Stop System
7
-
Repair Notes
8
-
Checking Cooling Output
8
-
Working on Refrigerant Circuit
9
-
Refrigerant Circuit Seals
9
-
Notes on Control Motors
10
-
Technical Data
16
-
Refrigerant Capacity
16
-
Refrigerant Oil Capacities
16
-
Oil Distribution
17
-
-
Heating
18
-
Air Conditioning System
19
-
Overview of Fitting Locations — Air Conditioning System
19
-
Overview of Fitting Locations — Components Located in Front Section of Passenger Compartment
19
-
Refrigerant Circuit
24
-
System Overview — Refrigerant Circuit
24
-
Assembly Overview — Condenser
26
-
Removing and Installing High-Pressure Sender G65
26
-
Removing and Installing Expansion Valve
28
-
Removing and Installing Condenser
30
-
Removing and Installing Desiccant Bag or Cartridge
32
-
Removing and Installing Evacuating and Charging Valves on Low and High-Pressure Side
38
-
Air Conditioner Compressor
41
-
Assembly Overview — Pulley
41
-
Removing Air Conditioning Compressor from and Installing on Bracket
42
-
Removing and Installing Air Conditioner Compressor
44
-
Checking High-Pressure Safety Valve on Air Conditioner Compressor
47
-
Removing and Installing Pulley
48
-
Control Motors
51
-
Overview of Fitting Locations — Front Control Motors
51
-
Removing and Installing Temperature Flap Control Motor V68
53
-
Removing and Installing Defroster Flap Control Motor V107
55
-
Removing and Installing Air Recirculation Flap Control Motor V113
57
-
Removing and Installing Left Temperature Flap Control Motor V158
62
-
Removing and Installing Right Temperature Flap Control Motor V159
64
-
Removing and Installing Right Temperature Flap Control Mo- Tor V159
64
-
Removing and Installing Indirect Ventilation Flap Control Motor V213
66
-
Removing and Installing Fresh Air/Recirculated Air, Air Flow Flap Control Motor V425
67
-
Removing and Installing Front Air Distribution Flap Control Motor V426
69
-
Removing and Installing Air Distribution Flap Control Motor V428
70
-
Removing and Installing Fresh Air/Air Recirculation, Air Flow Flap Actuator
71
-
Front Heater and Air Conditioning Unit
72
-
Assembly Overview — Heater and Air Conditioning Unit
72
-
Removing and Installing Evaporator
77
-
Dismantling and Assembling Evaporator Housing
77
-
Removing and Installing Heater and Air Conditioning Unit
78
-
Dismantling and Assembling Heater and Air Conditioning Unit
82
-
Removing and Installing Air Distribution Housing
84
-
Dismantling and Assembling Air Distribution Housing
85
-
Checking Auxiliary Air Heater Element Z35
87
-
Removing and Installing Auxiliary Air Heater Element Z35
88
-
Removing and Installing Evaporator Temperature Sensor G308
89
-
Removing and Installing Dust and Pollen Filter
89
-
Removing and Installing Fresh Air Blower Series Resistor with Overheating Fuse N24
90
-
Removing and Installing Fresh Air Blower V2
91
-
Removing and Installing Fresh Air Blower Control Unit J126
93
-
Removing and Installing Heat Exchanger
93
-
Removing and Installing Condensation Drain
97
-
Checking Condensation Drain
98
-
Air Duct
99
-
Assembly Overview — Air Duct and Air Distribution in Passenger Compartment
99
-
Removing and Installing Centre Vent
100
-
Removing and Installing Driver or Front Passenger Side Air Vents
101
-
Removing and Installing Rear Vents
102
-
Removing and Installing Driver Side Footwell Vents
103
-
Removing and Installing Front Passenger Side Footwell Vents
104
-
Removing and Installing Left or Right Side Window Vents
105
-
Removing and Installing Rear Footwell Vent
106
-
Removing and Installing Rear Centre Console Vent Duct
107
-
Removing and Installing Rear Footwell Vent
108
-
Removing and Installing Fresh Air Intake
108
-
Removing and Installing Glove Box Cooling
109
-
Checking Forced Ventilation for Passenger Compartment
109
-
Removing and Installing Forced Ventilation for Passenger Compartment
110
-
Operating and Display Unit
112
-
Overview of Operating and Display Unit
112
-
Overview of Control and Display Unit, Air Conditioning System with Electric and Manual Controls, as of WEEK 22/2012
115
-
-
Overview of Operating and Display Unit, Climatronic up to Week 44/2011
116
-
Overview of Operating and Display Unit, Climatronic up to Week 21/2012
119
-
Overview of Operating and Display Unit, Climatronic from Week 22/2012
121
-
Removing and Installing Operating and Display Unit
122
-
Other Controlling and Regulating Components
126
-
Removing and Installing Sunlight Penetration Photosensor G107
126
-
Principle of Operation of Air Quality Sensor G238
126
-
Removing and Installing Air Quality Sensor G238
128
-
Removing and Installing Ambient Temperature Sensor G17
128
-
Removing and Installing Left Vent Temperature Sender G150
129
-
Removing and Installing Right Vent Temperature Sender G151
129
-
Removing and Installing Left Footwell Vent Temperature Sender G261
130
-
Removing and Installing Right Footwell Vent Temperature Sender G262
130
-
Volkswagen Passat 2011 Workshop Manual (140 pages)
Brake systems
Brand: Volkswagen
|
Category: Automobile
|
Size: 9.45 MB
Table of Contents
-
Table of Contents
3
-
Technical Data
5
-
Identification
5
-
Allocation of PR Number — Brakes
5
-
Technical Data
6
-
Technical Data for Brakes
6
-
Brake Test
8
-
General Information
8
-
Checking Vehicles with Front-Wheel Drive
8
-
Checking Vehicles with Four-Wheel Drive
8
-
Checking Parking Brake
9
-
-
Anti-Lock Brake System
11
-
General Information
11
-
Repair Instructions for Repair Work on ABS
11
-
Vehicle Diagnosis, Testing and Information System
12
-
Overview of Fitting Locations
14
-
Abs/Esp
14
-
Control Unit and Hydraulic Unit
18
-
Assembly Overview
18
-
Removing and Installing Control Unit and Hydraulic Unit
21
-
Connecting Brake Lines to Hydraulic Unit
29
-
Sensors
32
-
Assembly Overview — Speed Sensor on Front Axle
32
-
Removing and Installing Speed Sensor on Front Axle
33
-
Assembly Overview — Speed Sensor on Rear Axle
33
-
Removing and Installing Speed Sensor on Rear Axle
35
-
Removing and Installing ESP Sensor Unit
36
-
Removing and Installing Steering Angle Sender
37
-
Removing and Installing Brake Servo Vacuum Sender
37
-
-
Brakes — Mechanism
39
-
Front Brakes
39
-
Assembly Overview — Front Brakes
39
-
Removing and Installing Brake Pads/Linings
42
-
Removing and Installing Brake Caliper
47
-
Rear Brakes
51
-
Assembly Overview — Rear Brakes
51
-
Removing and Installing Brake Pads/Linings
54
-
Removing and Installing Brake Caliper
57
-
Handbrake
60
-
Overview of Fitting Locations — Parking Brake
60
-
Removing and Installing Control Unit
61
-
Removing and Installing Parking Brake Motor
61
-
Brake Pedal
64
-
Assembly Overview — Brake Pedal
64
-
Separating Brake Pedal from Brake Servo
66
-
Connecting Brake Pedal to Brake Servo
67
-
Removing and Installing Brake Pedal
67
-
Removing and Installing Mounting Bracket
70
-
-
Brakes — Hydraulics
75
-
Front Brake Calipers
75
-
Assembly Overview — Front Brake Caliper
75
-
Removing and Installing Brake Caliper Piston
76
-
Rear Brake Calipers
82
-
Assembly Overview — Rear Brake Caliper
82
-
Removing and Installing Rear Brake Caliper Piston
83
-
Brake Servo and Brake Master Cylinder
86
-
Assembly Overview — Brake Servo/Brake Master Cylinder
86
-
Removing and Installing Brake Light Switch
90
-
Removing and Installing Brake Master Cylinder
92
-
Removing and Installing Brake Servo
106
-
Vacuum System
124
-
Assembly Overview — Vacuum Pump
124
-
Assembly Overview — Electric Vacuum Pump
125
-
Checking Non-Return Valve
126
-
Removing and Installing Brake Servo Pressure Sensor
126
-
Checking Vacuum System
126
-
Brake Lines
131
-
Repairing Brake Lines
131
-
Hydraulic System
136
-
General Notes on Brake Fluid
136
-
Pre-Bleeding Hydraulic System
136
-
Bleeding Hydraulic System Following Standard Procedure
138
-
Subsequent Bleeding of Hydraulic System
139
-
Testing for Leaks
139
-
Volkswagen Passat 2011 Workshop Manual (134 pages)
Communication
Brand: Volkswagen
|
Category: Automobile
|
Size: 7.16 MB
Table of Contents
-
Table of Contents
3
-
Technical Data
5
-
Repair Instructions
5
-
General Information
5
-
Suppression Measures
5
-
Overview of Battery, Transmitter and Receiver Unit, Fuse and Wiring Harness
6
-
Installation and Operation of Two-Way Radios with a Transmitting Power above 10 Watts
7
-
Mobile Telephones or Portable Two-Way Radios Without Separate External Aerial
7
-
Transmitting Power and Aerial Fitting Locations
7
-
General Repair Instructions
9
-
-
Communication
12
-
Radio / Radio Navigation Systems R / J503
13
-
Components of Radio / Radio Navigation Systems R / J503
13
-
Overview of Fitting Locations — Radio / Radio Navigation System R / J505
28
-
Removing and Installing Radio / Radio Navigation Systems R / J503
45
-
Interface for External Multimedia Unit R215
48
-
Pin Assignments
50
-
-
-
2 Sound System
69
-
General Notes on Amplifiers
69
-
System Overview — Amplifier R12
69
-
Removing and Installing Amplifier R12
72
-
General Notes on Loudspeaker Systems
74
-
Removing and Installing Front Bass and MID-Range Loud- Speakers
74
-
Removing and Installing Front Bass and MID-Range Loudspeakers
74
-
Removing and Installing Rear Bass Loudspeakers R17 / R15
75
-
Removing and Installing Front Treble Loudspeakers R22 / R20
76
-
R14
77
-
Removing and Installing Rear Treble Loudspeakers R16
77
-
Removing and Installing Rear Treble Loudspeakers R16 / R14
77
-
Aerial Systems
79
-
System Overview — Aerial Systems, Saloon
79
-
System Overview — Aerial Systems, Estate
85
-
Removing and Installing Aerial Modules and Aerial Amplifiers
90
-
Removing and Installing Roof Aerial RX5
93
-
CD Changer
95
-
General Information
95
-
Removing and Installing CD Changer R41
95
-
-
5 Telephone System
98
-
General Notes on Universal Preparation for Mobile Phone UTP
98
-
System Overview of Universal Mobile Phone Preparation
99
-
Utp
99
-
Removing and Installing Telephone Bracket
102
-
Removing and Installing Mobile Telephone Operating Elec- Tronics Control Unit J412
104
-
Removing and Installing Mobile Telephone Operating Electronics Control Unit J412
104
-
Changing Mobile Phone Cradle from Old to New Dash Pan- el
105
-
Changing Mobile Phone Cradle from Old to New Dash Panel
105
-
Removing and Installing Emergency Button E276
107
-
Removing and Installing Telephone Microphone R38
108
-
Components of Reversing Camera System
110
-
Reversing Camera
110
-
Assembly Overview — Reversing Camera
111
-
Removing and Installing Reversing Camera R189
112
-
Calibrating Reversing Camera
114
-
Removing and Installing Reversing Camera System Control Unit J772
117
-
Renewing Video Cable
118
-
General Information
121
-
Multifunction Steering Wheel
121
-
Removing and Installing Steering Wheel Multifunction Buttons E441 / E440
121
-
Components of Connection for External Multimedia Units
123
-
Connection for External Multimedia Devices
123
-
Connectors, Connection for External Multimedia Devices
128
-
Removing and Installing Connection for External Audio Sources R199
131
-
Removing and Installing Interface for External Multimedia Devices R215
132
-
Volkswagen Passat 2011 Workshop Manual (120 pages)
Brand: Volkswagen
|
Category: Automobile
|
Size: 4.84 MB
Table of Contents
-
Table of Contents
3
-
Technical Data
5
-
Safety Information
5
-
Safety Regulations for Working on Fuel Supply
5
-
Safety Precautions When Using Testers and Measuring Instruments During a Road Test
5
-
Safety Precautions When Working on Vehicles with a Start/Stop System
6
-
Identification
7
-
Engine Number/Engine Data
7
-
General Information
8
-
Rules for Cleanliness When Working on Auxiliary/Supplementary Heater and Fuel System
8
-
Repair Notes
9
-
Routing and Attaching Lines
9
-
General Repair Instructions
9
-
-
Assembly Overview — Fuel Tank, Vehicles with Front-Wheel Drive
10
-
Fuel Supply System
10
-
Assembly Overview — Fuel Tank, Vehicles with Four-Wheel Drive
14
-
Emptying Fuel Tank
18
-
Emptying Fuel Tank When Fuel Pump Is Intact
18
-
Continued for All Vehicles
20
-
Vehicles with Auxiliary Heater
20
-
Special Tools and Workshop Required
26
-
Emptying Fuel Tank at Fuel Delivery Unit Flange
27
-
-
Removing and Installing Fuel Tank
30
-
Continuation for All Other Engine Codes
33
-
Vehicles with Engine Code BWS or CCZB
39
-
Vehicles with Engine Code CNNA
39
-
-
Assembly Overview — Fuel Delivery Unit/Fuel Gauge Sender
45
-
Fuel Delivery Unit, Fuel Gauge Sender
45
-
Installation Position of Fuel Delivery Unit
46
-
Removing and Installing Fuel Delivery Unit, Fuel Gauge Sender
47
-
If a New Fuel Delivery Unit Is Installed
54
-
Installing Fuel Line
54
-
Assignment of Plug-In Connectors
55
-
Colour Assignment
55
-
-
Plug-In Connectors
55
-
Separating Plug-In Connectors
55
-
Fuel Filter
59
-
Activated Charcoal Filter with Fuel Tank Leak Detection
60
-
Assembly Overview — Activated Charcoal Filter System
60
-
Removing and Installing Activated Charcoal Filter
61
-
Checking Fuel System for Leaks
62
-
Schematic Overview of Activated Charcoal Filter System
67
-
Activated Charcoal Filter Without Fuel Tank Leak Detection
70
-
Assembly Overview — Activated Charcoal Filter System
70
-
Removing and Installing Activated Charcoal Filter
70
-
Checking Fuel Tank Breather
71
-
Accelerator Pedal
74
-
Assembly Overview — Accelerator Module
74
-
Removing and Installing Accelerator Pedal Module — GX2-
74
-
Checking Fuel System Pressurisation Pump G6
77
-
Checking Function and Voltage Supply
77
-
Fuel Pump
77
-
Test Sequence
78
-
Vehicle Diagnostic Tester
78
-
Checking Fuel Pressure
80
-
If no Fault Is Found
85
-
If Reading Matches Specification
85
-
If Specification Is Not Obtained
85
-
Checking Holding Pressure
88
-
Checking Residual Pressure at Flange for Delivery Unit
90
-
If no Fault Can be Determined
90
-
If Pressure Drops Again (Leak on Fuel Tank Side)
90
-
-
Removing and Installing Suction-Jet Pump
110
-
Function of Suction-Jet Pump
112
-
If Engine Starts OK Now
112
-
Removing Suction-Jet Pump
112
-
Installing Suction-Jet Pump
113
-
-
Removing and Installing Fuel Gauge Sender G
115
-
Senders and Sensors
115
-
Removing and Installing Fuel Gauge Sender 2 G169
116
-
Volkswagen Passat 2011 Workshop Manual (25 pages)
Wheels and Tyres Guide
Brand: Volkswagen
|
Category: Automobile
|
Size: 1.76 MB
Table of Contents
-
Table of Contents
3
-
Wheels, Tyres, Vehicle Geometry
5
-
Wheel and Tyre Combinations
5
-
General Information
5
-
Explanations Regarding World Regions
6
-
-
Wheel Allocation
12
-
61/2 J X
12
-
61/2 J X 17 Offset
14
-
X 18 Offset
18
-
Dimensions:
18
-
-
Wheel Offset in MM: Wheel Load in Kg
19
-
Dimensions: / 2 J X
20
-
Wheel Load in Kg: 650
20
-
Recommended Summer Tyres
21
-
Recommended Summer Tyres, Worldwide Except North America, China, Japan, South America, Taiwan, India
21
-
Recommended Summer Tyres, India
22
-
Recommended Summer Tyres, Japan
22
-
Recommended Summer Tyres, South America
22
-
Recommended Summer Tyres, Taiwan
22
-
Recommended All-Season Tyres
23
-
Recommended All-Season Tyres, Worldwide Except North America and China
23
-
Recommended All-Season Tyres, Worldwide Except North America, China, Brazil and
23
-
Recommended Winter Tyres
24
-
Recommended Winter Tyres, Passat Alltrack, Worldwide Except North America and China
24
-
Recommended Winter Tyres, Passat Saloon, Passat Variant, Worldwide Except North America
24
-
Recommended Temporary Spare Tyres and Wheels
25
-
Advertisement
Related Products
-
Volkswagen Passat 2006
-
Volkswagen Passat 2012
-
Volkswagen Passat 2015
-
Volkswagen Passat 2020
-
Volkswagen Passat 2021
-
Volkswagen Passat 2022
-
Volkswagen Passat Estate 2020
-
Volkswagen Passat Variant 1997
-
Volkswagen Passat 1994
-
Volkswagen Passat Estate Highline
Volkswagen Categories
Automobile
Automobile Accessories
Adapter
Cables and connectors
Car Receiver
More Volkswagen Manuals
Welcome to the Auto Repair Manuals.
- Forum
- Легковые автомобили
- VolksWagen
- Volkswagen Passat B7 (2011) руководство пользователя
Volkswagen Passat B7 (2011) руководство пользователя
4 stars based on
3 reviews
-
Volkswagen Passat B7 (2011) — руководство для автомобиля.
Руководство пользователя для автомобиля VolksWagen Passat B7.
Выпуск: 2011
Автор: Volkswagen AG
Издательство: «ФОЛЬКСВАГЕН Груп Рус»Скачать Volkswagen Passat B7 руководство пользователя на AutoRepManS:
-
-
-
-
Привет там как делать я могу скачать его?
-
bogumil, ссылки для ознакомления с руководством по автомобилю Volkswagen Passat B7 находятся в первом сообщении этой темы
-
Здравствуйте где является первой администрации. Не существует нигде
-
tomtom5551, ответил личным сообщением
-
-
radoman, ответил личным сообщением. Также ссылки есть в первом сообщении этой темы — под спойлером.
Similar Threads
-
Replies: 1
Last Post: 30.08.2014, 19:34
-
Replies: 0
Last Post: 27.07.2011, 08:29
-
Replies: 1
Last Post: 11.05.2011, 00:59
-
Replies: 0
Last Post: 31.03.2010, 18:52
-
Replies: 0
Last Post: 28.08.2008, 14:07
Tags for this Thread
Вообщем, решил попытаться найти тех. документацию именно по ремонту Passat CC и хочу сказать, что в бесплатном доступе очень и очень трудно это сделать( говорю именно о книге. Я начал свой серфинг интернета с телефона, потом психанул и сел за пк… Потратил около 3 часов, чтобы найти хоть что то похожее на то, что я искал.
Кому будет полезно и интересно кидаю ссылку: disk.yandex.ru/d/qAGb-TNQT2MMAw
Все файлы в пдф, присутствует и руководство по эксплуатации и отдельная книга совсместно с passat b6 и b7 ремонту, также там есть информация о имеющихся комплектациях и вариациях моторов!
Спасибо за внимание, надеюсь мой труд еще кому-нибудь будет полезен!
Войдите или зарегистрируйтесь, чтобы писать комментарии, задавать вопросы и участвовать в обсуждении.
Руководство на английском языке по кузовному ремонту автомобилей Volkswagen Passat/Passat Variant с 2011 года выпуска.
- Автор: —
- Издательство: Volkswagen AG
- Год издания: 2011
- Страниц: 381
- Формат: PDF
- Размер: 54,5 Mb

Руководство на английском языке по техническому обслуживанию и ремонту автомобиля Volkswagen Passat с 1995 года выпуска.
- Автор: —
- Издательство: Bentley Publishers
- Год издания: —
- Страниц: 4313
- Формат: PDF
- Размер: 49,8 Mb
Руководство на английском языке по техническому обслуживанию и ремонту автомобиля Volkswagen Passat B2 syncro.
- Автор: —
- Издательство: —
- Год издания: —
- Страниц: 47
- Формат: PDF
- Размер: 3,6 Mb
Руководство по техническому обслуживанию и ремонту автомобиля Volkswagen Passat 1988-1996 годов выпуска с бензиновыми и дизельными двигателями.
- Автор: —
- Издательство: Машсервис
- Год издания: 2002
- Страниц: 289
- Формат: PDF
- Размер: 38,7 Mb

Руководство на польском языке по техническому обслуживанию и ремонту автомобиля Volkswagen Passat B5
- Автор: H.R Etzold
- Издательство: WKT
- Год издания: 2004
- Страниц: 429
- Формат: PDF
- Размер: 23,0 Mb

Руководство по техническому обслуживанию и ремонту автомобиля Volkswagen Passat с 2005 года выпуска.
- Автор: Г.Р. Этцольд
- Издательство: Алфамер
- Год издания: —
- Страниц: 296
- Формат: —
- Размер: —
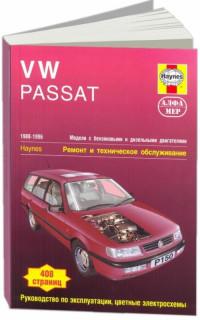
Руководство по эксплуатации, техническому обслуживанию и ремонту автомобиля Volkswagen Passat 1988-1996 годов выпуска с бензиновыми и дизельными двигателями.
- Автор: —
- Издательство: Алфамер
- Год издания: —
- Страниц: 408
- Формат: —
- Размер: —
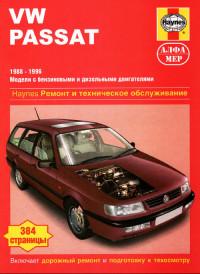
Руководство по техническому обслуживанию и ремонту автомобиля Volkswagen Passat 1988-1996 годов выпуска с бензиновыми и дизельными двигателями.
- Автор: —
- Издательство: Алфамер Паблишинг
- Год издания: 2003
- Страниц: 365
- Формат: PDF
- Размер: 89,0 Mb
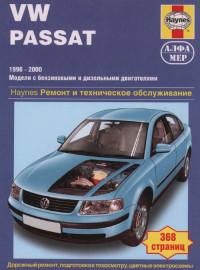
Руководство по техническому обслуживанию и ремонту автомобиля Volkswagen Passat 1996-2000 годов выпуска с бензиновыми и дизельными двигателями.
- Автор: —
- Издательство: Алфамер Публишинг
- Год издания: 2003
- Страниц: 359
- Формат: PDF
- Размер: 99,8 Mb
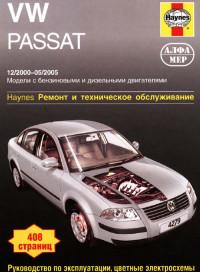
Руководство по эксплуатации, техническому обслуживанию и ремонту автомобиля Volkswagen Passat 2000-2005 годов выпуска с бензиновыми и дизельными двигателями.
- Автор: А.К. Легг
- Издательство: Алфамер Паблишинг
- Год издания: —
- Страниц: 389
- Формат: —
- Размер: —
Мультимедийное руководство по эксплуатации и ремонту автомобиля Volkswagen Passat B5/Syncro/B6 1996-2004 годов выпуска с бензиновыми двигателями.
- Автор: —
- Издательство: —
- Год издания: —
- Страниц: —
- Формат: —
- Размер: 301,5 Mb

Мультимедийное руководство по эксплуатации и ремонту автомобиля Volkswagen Passat B5 c 1996 года выпуска.
- Автор: —
- Издательство: —
- Год издания: —
- Страниц: —
- Формат: —
- Размер: 111,7 Mb
Руководство по эксплуатации, техническому обслуживанию и ремонту автомобиля Volkswagen Passat 1988-1996 годов выпуска.
- Автор: —
- Издательство: Алфамер Публишинг
- Год издания: 1997
- Страниц: 318
- Формат: PDF
- Размер: 164,9 Mb
Руководство по ремонту автомобилей Volkswagen Passat и Volkswagen Santana 1981-1988 годов выпуска.
- Автор: —
- Издательство: —
- Год издания: 1995
- Страниц: 177
- Формат: DjVu
- Размер: 8,7 Mb
Руководство по ремонту автомобилей Volkswagen Passat B3 1988-1996 годов выпуска.
- Автор: —
- Издательство: Motorist
- Год издания: —
- Страниц: 358
- Формат: —
- Размер: —
Руководство по эксплуатации, техническому обслуживанию и ремонту + каталог расходных запчастей автомобиля Volkswagen Passat 1996-2000 годов выпуска с бензиновыми и дизельными двигателями.
- Автор: —
- Издательство: Легион-Автодата
- Год издания: —
- Страниц: 404
- Формат: —
- Размер: —

Руководство по эксплуатации и ремонту автомобилей Volkswagen Passat и Volkswagen Santana 1980-1988 годов выпуска с бензиновыми и дизельными двигателями
- Автор: —
- Издательство: Ozino
- Год издания: 1995
- Страниц: 268
- Формат: PDF
- Размер: 9,8 Mb
Руководство по эксплуатации и ремонту автомобилей Volkswagen Passat и Volkswagen Santana 1980-1988 годов выпуска с бензиновыми и дизельными двигателями.
- Автор: —
- Издательство: Петит
- Год издания: 2002
- Страниц: 300
- Формат: PDF
- Размер: 142,1 Mb
Руководство по эксплуатации и ремонту автомобилей Volkswagen Passat и Volkswagen Santana 1980-1988 годов выпуска с бензиновыми и дизельными двигателями.
- Автор: —
- Издательство: Гуси-Лебеди
- Год издания: —
- Страниц: 304
- Формат: —
- Размер: —

Руководство по эксплуатации и ремонту автомобиля Volkswagen Passat 1988-1994 годов выпуска.
- Автор: —
- Издательство: Ассоциация независимых издателей
- Год издания: 1998
- Страниц: 253
- Формат: PDF
- Размер: 51,8 Mb

Руководство по эксплуатации и ремонту автомобиля Volkswagen Passat 1988-1996 годов выпуска.
- Автор: —
- Издательство: Ассоциация независимых издателей
- Год издания: 1999
- Страниц: 358
- Формат: PDF
- Размер: 81,8 Mb
Руководство по эксплуатации и ремонту автомобилей Volkswagen Passat и Volkswagen Passat Variant 1994-1997 годов выпуска с бензиновыми и дизельными двигателями.
- Автор: —
- Издательство: Гуси-Лебеди
- Год издания: —
- Страниц: 360
- Формат: —
- Размер: —

Руководство по эксплуатации и ремонту автомобилей Volkswagen Passat B5/Passat B5 Variant с 1996 года выпуска с бензиновыми и дизельными двигателями
- Автор: —
- Издательство: Монолит
- Год издания: —
- Страниц: 470
- Формат: —
- Размер: —

Руководство по эксплуатации и ремонту автомобиля Volkswagen Passat B5 с 2000 года выпуска с бензиновыми и дизельными двигателями.
- Автор: —
- Издательство: Монолит
- Год издания: —
- Страниц: 404
- Формат: —
- Размер: —
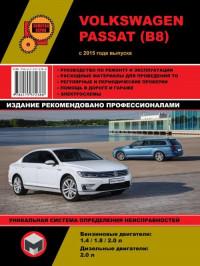
Руководство по эксплуатации и ремонту автомобиля Volkswagen Passat B8 с 2015 года выпуска с бензиновыми и дизельными двигателями.
- Автор: —
- Издательство: Монолит
- Год издания: —
- Страниц: 524
- Формат: —
- Размер: —

Руководство по эксплуатации и ремонту автомобиля Volkswagen Passat B8 с 2015 года выпуска с бензиновыми и дизельными двигателями.
- Автор: —
- Издательство: Монолит
- Год издания: —
- Страниц: 523
- Формат: —
- Размер: —

Руководство по эксплуатации и ремонту автомобилей Volkswagen Passat B6 с 2005, Volkswagen Passat CC с 2008 и Wolkswagen Passat B7/Alltrack с 2010 года выпуска с бензиновыми и дизельными двигателями.
- Автор: —
- Издательство: Монолит
- Год издания: —
- Страниц: 386
- Формат: —
- Размер: —
Руководство по эксплуатации, техническому обслуживанию и ремонту автомобиля Volkswagen Passat 1988-1993 годов выпуска.
- Автор: —
- Издательство: АСТ
- Год издания: 2006
- Страниц: 273
- Формат: DjVu
- Размер: 13,1 Mb
Руководство по эксплуатации и техническому обслуживанию автомобиля Volkswagen Passat B6 с 2005 года выпуска.
- Автор: —
- Издательство: Volkswagen AG
- Год издания: —
- Страниц: 612
- Формат: PDF
- Размер: 290,4 Mb
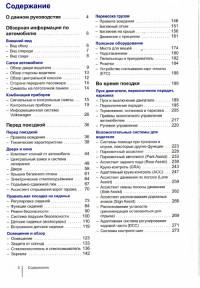
Руководство по эксплуатации и техническому обслуживанию автомобиля Volkswagen Passat B7 с 2011 года выпуска.
- Автор: —
- Издательство: Volkswagen AG
- Год издания: 2011
- Страниц: 443
- Формат: PDF
- Размер: 161,9 Mb
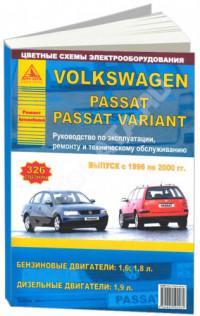
Руководство по эксплуатации, техническому обслуживанию и ремонту автомобилей Volkswagen Passat/Passat Variant 1996-2000 годов выпуска с бензиновыми и дизельными двигателями
- Автор: —
- Издательство: Арго-Авто
- Год издания: —
- Страниц: 325
- Формат: —
- Размер: —

Руководство по эксплуатации, техническому обслуживанию и ремонту автомобилей Volkswagen Passat/Passat Variant с 2005 года выпуска с бензиновыми и дизельными двигателями.
- Автор: —
- Издательство: Арго-Авто
- Год издания: —
- Страниц: 760
- Формат: —
- Размер: —
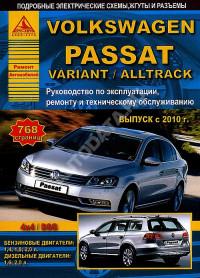
Руководство по эксплуатации, техническому обслуживанию и ремонту автомобилей Volkswagen Passat/Passat Variant/Passat Alltrack с 2010 года выпуска с бензиновыми и дизельными двигателями.
- Автор: —
- Издательство: Арго-Авто
- Год издания: —
- Страниц: 768
- Формат: —
- Размер: —

Мультимедийное руководство по эксплуатации, техническому обслуживанию и ремонту автомобиля Volkswagen Passat с 2004 года выпуска с бензиновыми и дизельными двигателями.
- Автор: —
- Издательство: —
- Год издания: —
- Страниц: —
- Формат: MDF
- Размер: 265,1 Mb
Руководство по эксплуатации, техническому обслуживанию и ремонту автомобиля Volkswagen Passat B5 2000-2005 годов выпуска.
- Автор: —
- Издательство: Делия
- Год издания: 2009
- Страниц: 632
- Формат: PDF
- Размер: 290,9 Mb

Схемы электрооборудования автомобилей Volkswagen Passat B3/B5.
- Автор: —
- Издательство: —
- Год издания: —
- Страниц: 43
- Формат: PDF
- Размер: 38,1 Mb

Руководство по эксплуатации, техническому обслуживанию и ремонту автомобиля Volkswagen Passat с 1996 года выпуска.
- Автор: —
- Издательство: Арус
- Год издания: —
- Страниц: 345
- Формат: PDF
- Размер: 85,5 M

Руководство по эксплуатации, техническому обслуживанию и ремонту автомобиля Volkswagen Passat с 2005 года выпуска.
- Автор: О.Н. Попков
- Издательство: Арус
- Год издания: 2006
- Страниц: 318
- Формат: PDF
- Размер: 61,2 Mb

