Раздел: Бытовая, кухонная техника, электроника и оборудование
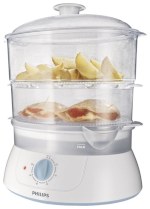
Тип: Пароварка
Характеристики, спецификации
Тип управления:
механическое
Максимальная потребляемая мощность:
900 Вт
Таймер:
на 60 мин, с отключением
Отключение при недостатке воды:
есть
Материал изготовления корпуса:
пластик
Материал изготовления паровых корзин:
прозрачный пластик
Объем паровых корзин:
2.5/2.6 л
Объем резервуара для воды:
1.1 л
Чаша для риса:
есть, на 1.2 л
Индикатор уровня воды:
есть
Функция «Отсрочка старта»:
нет
Габариты (ШхВхГ):
31.2x45x22.8 см
Отсек для сетевого шнура:
есть
Инструкция к Пароварке Philips HD9110
HD9110
2

3
1
A
B
C
3
D
2
E
F
1
G
H
I
J

ENGLISH 6
13
20
27
34
41
48
56
63
70
77
84
91
98
105
112
HD9110
Аннотация для Пароварки Philips HD9110 в формате PDF
Топ 10 инструкций
Другие инструкции
Register your product and get support at
www.philips.com/welcome
HD9110
HD9120
User manual
EN
Gebruiksaanwijzing
NL
DA
Brugervejledning
NO
Brukerhåndbok
DE
Benutzerhandbuch
PT
Manual do utilizador
EL
Εγχειρίδιο χρήσης
SV
Användarhandbok
ES
Manual del usuario
TR
Kullanım kılavuzu
Käyttöopas
FI
FR
Mode d’emploi
IT
Manuale utente
Specifications are subject to change without notice
© 2013 Koninklijke Philips Electronics N.V.
All rights reserved.
3140 035 36441
HD9110_HD9120_WEU_UM_V1.0
English
1 Introduction
Congratulations on your purchase and welcome to Philips! To fully benefit from the support
that Philips offers, register your product at www.philips.com/welcome.
For recipes to use with your steamer, go to www.philips.com/kitchen.
2 Important
Read this user manual carefully before you use the appliance, and save the user manual for
future reference.
Danger
• Never immerse the base in water or rinse it under
the tap.
Warning
• Check if the voltage indicated on the appliance
corresponds to the local mains voltage before you
connect the appliance.
• Only connect the appliance to an earthed wall
socket. Always make sure the plug is inserted firmly
into the socket.
• Do not use the appliance if the plug, the mains cord
or the appliance itself is damaged.
• If the mains cord is damaged, you must have it
replaced by Philips, a service centre authorised by
Philips or similarly qualified persons in order to
avoid a hazard.
• This appliance is not intended for use by persons
(including children) with reduced physical, sensory
or mental capabilities, or lack of experience and
knowledge, unless they have been given supervision
or instruction concerning use of the appliance by a
person responsible for their safety.
• Children should be supervised to ensure that they
do not play with the appliance.
• Keep the mains cord out of the reach of children.
Do not let the mains cord hang over the edge of
the table or worktop on which the appliance stands.
• Keep the mains cord away from hot surfaces.
• Never steam frozen meat, poultry or seafood.
Always thaw these ingredients completely before
you steam them.
• Never use the food steamer without the drip tray,
otherwise hot water splashes out of the appliance.
• Only use steaming bowls 1, 2 and 3 and the soup/
rice bowl (HD9110) or the XL steaming bowl
(HD9120) in combination with the original base.
Caution
• Never use any accessories or parts from other
manufacturers or that Philips does not specifically
recommend. If you use such accessories or parts,
your guarantee becomes invalid.
• Do not expose the base of the appliance to high
temperatures, hot gas, steam or damp heat from
other sources than the steamer itself.
• Do not place the food steamer on or near an
operating or still hot stove or cooker.
1/4
1
a
c
d
e
3
f
g
2
h
1
i
j
k
AR
FA
l
m
n
5
6
HD9110
HD9120
3
2
2
1
• Always make sure the appliance is off before you
unplug it.
• Always unplug the appliance and let it cool down
before you clean it.
• This appliance is intended for household use only. If
the appliance is used improperly or for professional
or semi-professional purposes or if it is not used
according to the instructions in the user manual, the
guarantee becomes invalid and Philips refuses any
liability for damage caused.
• Place the food steamer on a stable, horizontal and
level surface and make sure there is at least 10cm
free space around it to prevent overheating.
• For HD9120, while using steaming bowls 2 and 3
with their removable bottoms, always make sure
the rim of the bottom points upwards and that the
bottom locks into place (‘click’).
• Beware of the hot steam that comes out of the food
steamer during steaming or when you remove the
lid.When you check food, always use kitchen utensils
with long handles.
• Always remove the lid carefully and away from
you. Let condensation drip off the lid into the food
steamer to avoid scalding.
• Always hold the steaming bowls by one of their
handles when you stir hot food or remove it from
the bowls.
• Always hold the steaming bowls by their handles
when the food is hot.
• Do not move the food steamer while it is operating.
• Do not reach over the food steamer while it is
operating.
• Do not touch the hot surfaces of the appliance.
Always use oven mitts when you handle hot parts of
the appliance.
• Do not place the appliance near or underneath
objects that would be damaged by steam, such as
walls and cupboards.
• Do not operate the appliance in the presence of
explosive and/or flammable fumes.
• This appliance is not intended to be operated by
means of an external timer or a separate remote-
control system.
• There is a small sieve inside the water tank. If the
sieve becomes detached, keep it out of the reach of
children to prevent them from swallowing it.
Automatic switch-off
The appliance switches off automatically after the set steaming time has elapsed.
Boil-dry protection
This food steamer is equipped with boil-dry protection. The boil-dry protection automatically
switches off the appliance if it is switched on when there is no water in the water tank or if
the water runs out during use. Let the food steamer cool down for 10 minutes before you
use it again.
Electromagnetic fields (EMF)
This Philips appliance complies with all applicable standards and regulations regarding
exposure to electromagnetic fields.
2
(MAX)
(MAX)
b
400 g
400 g
400 g
250 g
250 g
200g
300ml
250 ml
6-8
7
2
Recycling
Your product is designed and manufactured with high quality materials and components,
which can be recycled and reused.
When you see the crossed-out wheel bin symbol attached to a product, it means the
product is covered by the European Directive 2002/96/EC:
Never dispose of your product with other household waste. Please inform yourself about
the local rules on the separate collection of electrical and electronic products. The correct
disposal of your old product helps prevent potentially negative consequences on the
environment and human health.
3 Overview (fig.1)
a Lid
h Steaming bowl 1 (HD9120 only)
b Soup/rice bowl (HD9110 only)
i Drip tray
c XL steaming bowl (HD9120 only)
j Flavor booster
d Removable bottom (HD9120 only)
k Water inlet
e Steaming bowl 3
l Base with water tank
f Removable bottom (HD9120 only)
m Steaming light
g Steaming bowl 2
n Steaming time adjustment knob
4 Before first use
Thoroughly clean the parts that come into contact with food before you use the appliance
for the first time (see chapter ‘Cleaning and maintenance’).
Wipe the inside of the water tank with a damp cloth.
5 Using the appliance
Tip
•
Put the appliance on a stable, horizontal and level surface.
•
Fill the water tank with water up to the maximum level. with a full water tank, the steamer can steam
approximately 1 hour.
Note
•
When you want to steam foods that require different steaming times, start steaming the food that
requires the longest steaming time in bowl 2. Set the steaming time adjustment knob to a time
that you calculate by deducting the shorter steaming time from the longest steaming time. When
the steaming is finished, carefully remove the lid with oven mitts and place bowl 3 containing the
ingredients with the shorter steaming time on top of bowl 2. Put the lid on bowl 3 and set the
shorter steaming time with the steaming time adjustment knob.
•
Only fill the water tank with water. Never put seasoning, oil, or other substances in the water tank.
•
Food in the top bowl takes usually a little longer to steam than food in the lower bowls.
•
If you use ground herbs and spices, rinse the drip tray to wet the flavor booster. This prevents ground
herbs or spices from falling through the openings of the flavor booster. If desired, put dried or fresh
herbs or spices on the flavor booster to add extra flavor to the food to be steamed.
Food steaming table (fig.2)
The steaming time mentioned in the food table is just an indication. Steaming time may vary
depending on the size of the food pieces, the space between the food in the steaming bowl,
the amount of food in the bowl, the freshness of the food and your personal preference.
If desired, put dried or fresh herbs or spices on the flavor booster to add extra flavor to the
food to be steamed.
Steaming food (fig.3, 4, 5 & 6)
Put the food to be steamed in one or more steaming bowls and/or in the soup/rice bowl
(HD9110) or the XL steaming bowl (HD9120). You can use the bowl for melting chocolate/
butter and cooking rice.
Steaming egg (fig.7)
Put the egg holders to steam eggs conveniently.
Note
•
Use a needle to make a small hole on the bottom of the egg before placing it on the egg holder.
•
Make sure you place the bowl properly so they do not wobble.
3
4
(MAX)
(MAX)
13-15 min
16-18 min
16-18 min
2
30-35 min
10-12 min
40 min
12-16 min
15 min
8
2
2
4
5
2
2
1
3
Steaming bowls
You do not have to use all steaming bowls.
The steaming bowls are numbered. You can find the number on their handles.
•
For HD9110, the top steaming bowl is No. 3 and the bottom steaming bowl is No.2.
•
For HD9120, the top steaming bowl is No. 3, the middle steaming bowl is No.2, and
the bottom steaming bowl is No.1.
Only stack the steaming bowls in the following order: steaming bowl 1, steaming bowl 2,
steaming bowl 3.
Note
•
For HD9120, if you use steaming bowls 2 and 3 with their removable bottoms (when using XL
steaming bowl), always make sure the rim of the bottom points upwards and that the bottom locks
into place when you hear a click.
6 Cleaning and maintenance (fig.8)
Note
•
Never use scouring pads, abrasive cleaning agents or aggressive liquids such as petrol or acetone to
clean the appliance.
•
If the vinegar starts to boil over the edge of the base, unplug the appliance and reduce the amount
of vinegar.
Caution
•
Do not clean the base in the dishwasher.
•
If the sieve in the water tank becomes detached, keep it out of the reach of children to prevent
them from swallowing it.
•
Never immerse the base in water, nor rinse it under the tap.
Descaling
You have to descale the appliance after it has been used for 15 hours. It is important that
you descale the food steamer regularly to maintain optimal performance and to extend the
lifetime of the appliance.
1
Fill the water tank with white vinegar (8% acetic acid) up to the maximum level.
2
Put the drip tray, steaming bowls, and lid on top of the steamer.
3
Turn the steaming time adjustment knob to set a steaming time of 25 minutes.
4
Let the vinegar cool down completely and empty the water tank. Rinse the water tank
with cold water several times.
Note
•
Do not use any other kind of descaler.
•
Repeat the procedure if there is still some scale in the water tank.
7 Storage
1
Make sure all parts are clean and dry before you store the appliance (see chapter
«Cleaning and maintenance»).
2
For HD9120, place the removable bottoms in steaming bowls 2 and 3.
3
Place steaming bowl 3 on the drip tray.
4
Place steaming bowl 2 in steaming bowl 3. For HD9120, place steaming bowl 1 in
steaming bowl 2.
5
Place the soup/rice bowl (HD9110) or the XL steaming bowl (HD9120) on the other
steaming bowls.
6
Place the lid on the soup/rice bowl (HD9110) or the XL steaming bowl (HD9120).
7
To store the mains cord, push it into the cord storage compartment in the base.
8 Guarantee & service
If you need service or information or if you have a problem, please visit the Philips website at
www.philips.com or contact the Philips Consumer Care Center in your country (you can find
its phone number in the worldwide guarantee leaflet). If there is no Consumer Care Centre
in your country, go to your local Philips dealer.
HD9120
3
2
3
2
1
3
25 min.
6
Страницы и текст этой инструкции
 Руководство пользователя пароварки Philips HD 9110_70
 Информация отображена на картинке
 Информация отображена на картинке
 Информация отображена на картинке
 Информация отображена на картинке
Как использовать наш сайт инструкций OnlineManuals.ru
Наша цель состоит в том, чтобы предоставить вам быстрый доступ к содержанию инструкции для пароварки Philips HD 9110_70.
С помощью онлайн просмотра, Вы можете быстро просмотреть содержимое инструкции и найти решение проблемы с пароварки Philips HD 9110_70.
Для Вашего удобства
Если листать руководство пользователя пароварки Philips HD 9110_70 прямо на сайте, не очень удобно для Вас, есть два возможных решения:
• Просмотр в полноэкранном режиме — легко просмотреть руководство пользователя (без загрузки его на свой компьютер), Вы можете использовать режим полноэкранного просмотра.
Для просмотра инструкции пользователя пароварки Philips HD 9110_70 на полном экране, используйте кнопку «Открыть в Pdf-viewer».
• Загрузка на компьютер — Вы можете также скачать Руководство пользователя пароварки Philips HD 9110_70 на свой компьютер и сохранить его в файлах.
Многие люди предпочитают читать документы не на экране, а в печатной версии.
Возможность печати руководства пользователя также была предусмотрена на нашем сайте,
и вы можете использовать ее, нажав на иконку «печать» в Pdf-viewer.
Нет необходимости печатать все руководство пароварки Philips HD 9110_70, можно выбрать только нужные страницы инструкции.

7
Закрывайте крышкой верхнюю чашу для варки (Рис. 8).
Примечание: Если крышка установлена неправильно или не установлена вовсе, продукты не
будут сварены как следует.
использование прибора
1
Вставьте вилку сетевого шнура в розетку электросети.
2
Установите необходимое значение при помощи регулятора времени варки (Рис. 9).
, Загорится индикатор пара.
, Примерно через 30 секунд начнет поступать пар.
3
По истечении времени варки прибор подаст звуковой сигнал и индикатор варки
погаснет.
4
Аккуратно снимите крышку.
Остерегайтесь выхода горячего пара из пароварки при снятии крышки.
Во время приготовления горячих блюд всегда берите чашу за ручку.
Для предотвращения ожогов надевайте кухонные рукавицы при снятии крышки, извлечении
чаши для супа/риса и чаш для варки. Снимайте крышку медленно, держась при этом на
отдалении. Сливайте капли конденсата с крышки в чашу.
5
Отключите прибор от электросети и дайте ему остыть, пред тем как снять поддон.
— Снимайте поддон с осторожностью, так как вода в емкости и поддоне может оставаться
горячей, даже если другие части пароварки остыли.
6
Выливайте воду из поддона после каждого использования.
Примечание: При необходимости приготовления дополнительных порций используйте свежую
воду.
Очистка и уход
Запрещается использовать для чистки прибора губки с абразивным покрытием, абразивные
чистящие средства или растворители типа бензина или ацетона.
1
Отключите прибор от электросети и дайте ему остыть.
2
Протрите наружную поверхность влажной тканью.
Запрещается погружать основание в воду или мыть его под струей воды.
Основание нельзя мыть в посудомоечной машине.
3
Очищайте емкость для воды тканью, смоченной теплой водой с добавлением
моющего средства. Промывайте сетчатый фильтр емкости для воды. Затем протрите
емкость чистой влажной тканью.
Если сетчатый фильтр емкости для воды отсоединен, берегите его от детей, так как
ребенок может его проглотить.
4
Извлеките поддоны 2 и/или 3. Чаши для варки, чашу для супа/риса и крышку можно
мыть вручную или в посудомоечной машине, используя короткий цикл мойки при
невысокой температуре.
Постоянная мойка чаш для варки, чаши для супа/риса и крышки в посудомоечной машине
может привести к незначительному помутнению пластика.
русский
87
|
Код: 23111 Извините, товара сейчас нет в наличии
Бесплатная доставка
Извините, товара сейчас нет в наличии Сравнить Новости интернет-магазина «Лаукар»:28.03.2023 22.02.2023 13.02.2023 Дополнительная информация в категории Пароварка:Пароварки — словарь терминов Таблица Авторизованных сервисных центров по брендам. Описание Отзывы (0) В интернет-магазине бытовой техники «Лаукар» Вы можете скачать инструкцию к товару Пароварка Philips HD9110 совершенно бесплатно. Все инструкции, представленные на сайте интернет-магазина бытовой техники «Лаукар», предоставляются производителем товара. Для того чтобы скачать инструкцию, Вам необходимо нажать на ссылку «скачать инструкцию», расположенную ниже, а в случае, если ссылки нет,
Фирма-производитель оставляет за собой право на внесение изменений в конструкцию, дизайн и комплектацию товара: Пароварка Philips HD9110. Пожалуйста, сверяйте информацию о товаре с информацией на |