-
Contents
-
Table of Contents
-
Troubleshooting
-
Bookmarks
Quick Links
Instruction Manual
HI 9146
Dissolved Oxygen
and
Temperature Meter
w w w. h a n n a i n s t . c o m
1
Related Manuals for Hanna Instruments HI 9146
Summary of Contents for Hanna Instruments HI 9146
-
Page 1
Instruction Manual HI 9146 Dissolved Oxygen Temperature Meter w w w. h a n n a i n s t . c o m… -
Page 2: Table Of Contents
W A R R A N T Y W A R R A N T Y HI 9146 is guaranteed for two years against defects in workmanship and materials when used for its intended purpose and maintained according to instructions. Electrodes and probes are guaranteed for six months. This warranty is limited to repair or replacement free of charge.
-
Page 3: Preliminary Examination
GENERAL DESCRIPTION GENERAL DESCRIPTION GENERAL DESCRIPTION HI 9146 is state-of-the-art, heavy-duty DO meter, designed to provide laboratory results and accuracy under harsh industrial conditions. This instrument is provided with a series of new diagnostic features and messages on the LCD which add an entirely new dimension to the measurement of DO, by allowing the user to dramatically improve the reliability of the measurement.
-
Page 4: Probe Functional Description
PROBE FUNCTIONAL DESCRIPTION PROBE FUNCTIONAL DESCRIPTION PROBE FUNCTIONAL DESCRIPTION PROBE FUNCTIONAL DESCRIPTION PROBE FUNCTIONAL DESCRIPTION 1. D.O. Probe 2. Protective Cap 3. Watertight Shielded Cable 4. Polypropylene Probe Body 5. Temperature Sensor 6. O-Ring Seal 7. Silver Chloride Anode 8. Platinum Cathode (sensor) 9.
-
Page 5: Meter Functional Description
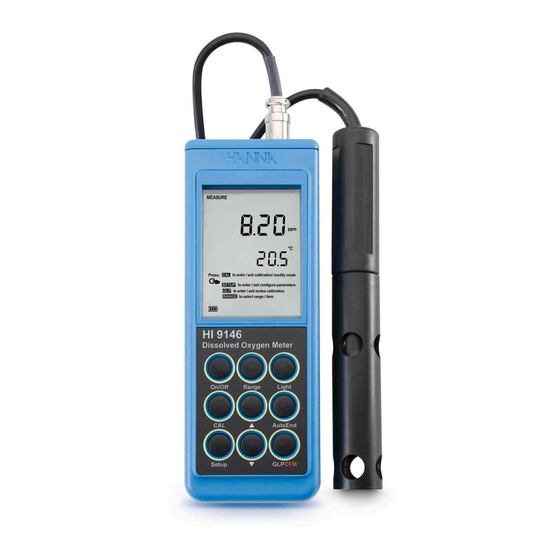
METER FUNCTIONAL DESCRIPTION METER FUNCTIONAL DESCRIPTION METER FUNCTIONAL DESCRIPTION METER FUNCTIONAL DESCRIPTION METER FUNCTIONAL DESCRIPTION 1) Liquid Crystal Display (LCD). 2) Range key, to select ppm or % range. 3) On/Off key, to turn the instrument ON and OFF. 4) CAL key, to enter/exit calibration mode. 5) Setup key, to enter/exit SETUP mode.
-
Page 6
10) GLP key, to display Good Laboratory Practice information. CFM key, to confirm different values. 11) AutoEnd key, to freeze first stable reading on the LCD. 12) Light key, to toggle display backlighting. 13) Secondary LCD. 14) Primary LCD. -
Page 7: Specifications
SPECIFICATIONS SPECIFICATIONS SPECIFICATIONS SPECIFICATIONS SPECIFICATIONS 0 . 0 0 . 5 . 0 0 0 . 0 C º 0 . 0 I T U 1 . 0 C ° ± l u f c s l e l a ±…
-
Page 8: Operational Guide
Probes shipped from Hanna Instruments are dry. To hydrate the probe and prepare it for use, connect it to the meter and proceed as follows: 1.
-
Page 9
Turn the instrument ON by pressing On/Off. At start-up the display will show all the used segments for a few seconds (or while the button is held), followed by the percentage indication of the remaining battery life. • After a few seconds “Cond” message appears, the “… -
Page 10
With the probe properly polarized, oxygen is continually consumed when it passes through the sensitive diaphragm and dissolves in the electrolyte solution contained in the probe. If polarization is interrupted, the electrolyte solution continues to be enriched with oxygen until it reaches an equilibrium with the surrounding solution. -
Page 11
For accurate Dissolved Oxygen measurements, a water movement of 0.3 m/s is required. This is to ensure that the oxygen-depleted membrane surface is constantly replenished. A moving stream will provide adequate circulation. The use of a magnetic stirrer to ensure a certain fluid velocity is recommended. -
Page 12: Autoend
For an accurate calibration, it is recommended to wait at least 15 minutes to ensure precise conditioning of the probe. The zero calibration of the HI 9146 is very stable, therefore this procedure needs to be performed only whenever the probe or the membrane is replaced.
-
Page 13
INITIAL PREPARATION • Pour small quantities of HI 7040 Zero Oxygen solution into a beaker. If possible, use a plastic beaker to minimize any EMC interferences. • Make sure the probe is ready for measurements (see probe preparation on page 8), i.e. the membrane is filled with electrolyte and the probe is connected to the meter. -
Page 14
• If the temperature is out of range “WRONG” tag together with the temperature and “°C” tag will blink. • HI 9146 has automatic buffer recognition function. If the ARROW keys are pressed to select the desired calibration value, the automatic buffer recognition function is disabled. -
Page 15: Good Laboratory Practice (Glp)
GOOD LABORATORY PRACTICE (GLP) GOOD LABORATORY PRACTICE (GLP) GOOD LABORATORY PRACTICE (GLP) GOOD LABORATORY PRACTICE (GLP) GOOD LABORATORY PRACTICE (GLP) GLP is a set of functions that allows storage and retrieval of data regarding the maintenance and status of the probe. All data regarding DO calibration is stored for the user to review when necessary.
-
Page 16
• The altitude value. • The salinity value. Press GLP at any moment and the instrument will return to measurement mode. -
Page 17: Setup
S E T U P S E T U P S E T U P S E T U P S E T U P Setup mode allows viewing and modifying the following parameters: • Salinity value (SAL) • Altitude value (ALt) •…
-
Page 18: Do Concentration Versus Salinity Chart
DISSOLVED OXYGEN CONCENTRATION DISSOLVED OXYGEN CONCENTRATION DISSOLVED OXYGEN CONCENTRATION DISSOLVED OXYGEN CONCENTRATION DISSOLVED OXYGEN CONCENTRATION VERSUS SALINITY CHART VERSUS SALINITY CHART VERSUS SALINITY CHART VERSUS SALINITY CHART VERSUS SALINITY CHART Salinity affects the Dissolved Oxygen concentration expressed in ppm, decreasing its value. The table below shows the maximum oxygen solu- bility at various temperatures and salinity levels.
-
Page 19: Do Concentration Versus Altitude Chart
DISSOLVED OXYGEN CONCENTRATION DISSOLVED OXYGEN CONCENTRATION DISSOLVED OXYGEN CONCENTRATION DISSOLVED OXYGEN CONCENTRATION DISSOLVED OXYGEN CONCENTRATION VERSUS ALTITUDE CHART VERSUS ALTITUDE CHART VERSUS ALTITUDE CHART VERSUS ALTITUDE CHART VERSUS ALTITUDE CHART Altitude affects Dissolved Oxygen concentration expressed in ppm, de- creasing its value. The table shows the maximum oxygen solubility at various temperatures and altitudes.
-
Page 20: Temperature Calibration (For Technical Personnel Only)
TEMPERATURE CALIBRATION TEMPERATURE CALIBRATION TEMPERATURE CALIBRATION TEMPERATURE CALIBRATION TEMPERATURE CALIBRATION (for technical personnel only) All the instruments are factory calibrated for temperature. Hanna’s temperature probes are interchangeable and no temperature calibration is needed when they are replaced. If the temperature measurements are inaccurate, temperature recalibration should be performed.
-
Page 21: Batteries Replacement
BATTERIES REPLACEMENT BATTERIES REPLACEMENT BATTERIES REPLACEMENT BATTERIES REPLACEMENT BATTERIES REPLACEMENT If the batteries become weak, the display will flash the battery symbol to advise the user that approx. 1 hour of working time is left. It is recommended to change the batteries as soon as the battery indicator blinks (lower frequency).
-
Page 22: Lcd Message Guide
LCD MESSAGE GUIDE LCD MESSAGE GUIDE LCD MESSAGE GUIDE LCD MESSAGE GUIDE LCD MESSAGE GUIDE TAGS & SYMBOLS • Mode tags light up for indicating the corresponding active mode, and blink for warning the user. MEASURE on: Instrument in measurement mode. SETUP on: SETUP menu mode has been entered.
-
Page 23: Probe & Membrane Maintenance
PROBE & MEMBRANE MAINTENANCE PROBE & MEMBRANE MAINTENANCE PROBE & MEMBRANE MAINTENANCE PROBE & MEMBRANE MAINTENANCE PROBE & MEMBRANE MAINTENANCE The oxygen probe body is made of reinforced plastic for maximum durability. A thermistor temperature sensor provides temperature measurements of the sample.
-
Page 24
IMPORTANT In order to have accurate and stable measurements, it is important that the membrane surface is in perfect condition. This semipermeable membrane isolates the sensor elements from the environment but allows oxygen to enter. If any dirt is observed on the membrane, rinse carefully with distilled or deionized water. -
Page 25: Troubleshooting Guide
T R O U B L E S H O O T I N G G U I D E T R O U B L E S H O O T I N G G U I D E T R O U B L E S H O O T I N G G U I D E T R O U B L E S H O O T I N G G U I D E T R O U B L E S H O O T I N G G U I D E…
-
Page 26: Accessories
A C C E S S O R I E S A C C E S S O R I E S A C C E S S O R I E S A C C E S S O R I E S A C C E S S O R I E S HI 98501 Electronic thermometer (range: -50.0 to 150.0 °C)
-
Page 27
24 Vac or 60 Vdc. To avoid damage or burns, do not perform any measurement in microwave ovens. Hanna Instruments reserves the right to modify the design, construction and appearance of its products without advance notice. -
Page 28
Hanna Instruments Inc. Highland Industrial Park 584 Park East Drive Woonsocket, RI 02895 USA Technical Support for Customers Tel. (800) 426 6287 Fax (401) 765 7575 E-mail tech@hannainst.com www.hannainst.com Local Sales and Customer Service Office Printed in EUROPE (ROMANIA) MAN9146Y 09/10…
Скачать
Instruction Manual
HI 9146
Portable Waterproof
Microprocessor
Dissolved Oxygen Meter
w w w . h a n n a i n s t . c o m

1
Dissolved Oxygen
and
Temperature Meter
HI 9146
Instruction Manual
w w w. h a n n a i n s t . c o m
Hanna Instruments HI 9146 Multimeter PDF User Guides and Manuals for Free Download: Found (2) Manuals for Hanna Instruments HI 9146 Device Model (Instruction Manual)
More Multimeter Device Models:
-
UNI-T
UT120A
4000-count notebook type auto-ranging “Safety Information»Safety InformationDI. Meter Description(See Figure 1)International Electrical Symbols2. SELECT Button to toggle between Resistance, Capacitance, Diode and Continuity functions.(Capacitance for UT120B only).Knobwhich, however, will if under DCV and AC …
UT120A Multimeter, 3
-
Greenlee
DML-430
999 3262.8 © 2000 Greenlee Textron IM 1406 REV 1 6/00DML-54 • DML-430DIGITALMULTIMETERSMULTÍMETROSDIGITALESMULTIMETRESNUMERIQUESSELECTStartRANGE HOLDHzCOMmA µAAVTempµAmVVVmAAOFFOFFTempMAXMAX10AHBC FUSEDMAX 0.5AHBC FUSED600V1000VCAT IIICAT II-+MkΩHzH CAUTO0123455000mVmVAF%nµINSTRUCTION MANUALMANUAL DE INSTRU …
DML-430 Multimeter, 68
-
ELBRO
BM27
BM22, BM25 & BM27 USER’S MANUAL 1) PRODUCT DESCRIPTION Note: Top of the line model is used as representative for illustration purposes. Please refer to your respective model for function availability. 1) LCD display 2) Rotary Selector to Select additional functions (BM27 & BM22 only), …
BM27 Multimeter, 2
-
UNI-T
UT60D
TitleOverviewUnpacking InspectionSafety InformationRules For Safe OperationInternational Electrical SymbolsThe Meter StructureRotary SwitchFunctional ButtonsDisplay SymbolsMeasurement RangesA. Selecting a Measurement RangeB. Manual Ranging and AutorangingMeasurement OperationA. AC & DC Voltage MeasurementB. Measuri …
UT60D Multimeter, 42
Recommended Documentation:
Table of Contents for Hanna Instruments HI 9146:
-
14 15 • Make sure that the rubber O-ring is seated properly inside the membrane cap. • With the sensor facing down, screw the membrane cap clockwise. Some electro- lyte will overflow. The Platinum cathode sensor (#8 in the Func- tional Description on page 2) should always be bright and untarnished. If it is tarnished or stained, which could be due to contact with certain gases or extended use with a loose or damaged membrane,
-
67 PROBE PREPARATION All probes are shipped dry by Hanna Instru- ments. To hydrate the probe and prepare it for use, connect it to the meter and proceed as follows. 1 Remove the red and black plas- tic cap which is for shipping purposes and can be discarded. 2 Wet the sensor by soaking the bottom 2½ cm (1″) of the probe in electrolyte (HI 7041S) for 5 minutes. 3 Take a membrane (HI 76407A sup- plied with the meter) and Make sure that the rub
-
12 13 ALTITUDE COMPENSATION Press FACTOR and “F1” will be displayed. Use the UP and the DOWN keys to set the altitude from 0 and 4.0 km (4000 m), in steps of 0.1 km (100 m). The table provides an idea of the error that can be introduced at different altitudes and the quantity to be subtracted to correct the reading. FACTOR SAMPLE ppm F1 or FACTOR or SAMPLE F2 ppm 35 g/L 9.0 8.6 8.3 8.0 7.6 7.4 7.1 6.9 6.6 6.4 30 g/
-
10 11 If the sample contains significant salinity or if the measurement is taken at a higher altitude than sea level, the read-out values must be corrected (by taking into account the lower degree of oxygen solubility in such conditions — see below). Set the altitude and/or the salinity before calibration and taking mg/L measurements. The meter will automatically compensate for these factors. % O 2 SATURATION READINGS The % O 2 reading provides the rate of oxygen saturation with reference to 100.0% at sea level. TEMPERATURE READINGS The lower part of the di
-
18 19 CE DECLARATION OF CONFORMITY Recommendations for Users Before using these products, make sure that they are entirely suitable for the environment in which they are used. Operation of this instrument in residential area could cause unacceptable interference to radio and TV equipment, requiring the operator to take all necessary steps to correct interferences. Any variation introduced by the user to the supplied equipment may degrade the instrument’s EMC performance. To avoid electrical shock, do not use these inst
-
Instruction Manual HI 9146 Portable Waterproof Microprocessor Dissolved Oxygen Meter www.hannainst.com
-
89 • For an accurate calibration, it is recom- mended to wait an additional 5 or 10 min- utes to ensure optimum conditioning of the probe. • Remove the protective cap. • Press CAL. «—-» appears on the larger LCD together with «CAL» to indicate that the instrument is in calibra- tion mode. • The instrument will auto- matically standardize itself to the actual saturation value. After approx. 1 minute it will show «100%» on the LCD and a small «SAMPLE» to indicate
-
45 FUNCTIONAL DESCRIPTION — PROBE 9 1 3 4 4 5 6 7 8 9 2 10 8 7 6 1. D.O. Probe 2. Protective Cap 3. Watertight Shielded Cable 4. Polypropylene Probe Body 5. Temperature Sen- sor 6. O-Ring Seal 7. AgCl Anode (sensor element) 8. Platinum Cathode (sensor element) 9. Oxygen Permeable Teflon Membrane 10. Membrane Protec- tive Cap FUNCTIONAL DESCRIPTION — METER 1) Battery Compartment 2) Probe Connector 3) Liquid Crystal Display 4) ON/OFF key 5) CAL key (to enter/exit calibration mode) 6) FACTOR key (to select altitude F1 and salinity F2) 7) UP and DOWN arr
-
16 17 BATTERY REPLACEMENT When the batteries are run down «LOBAT» is displayed on the Liquid Crystal Dis- play. This is to inform the user that the display will be shut-off after about 4 hours of use to prevent erroneous measurements due to low voltage. Battery replacement must only take place in a non-hazardous area using alkaline batteries. In order to replace run down batteries, simply remove the two sc
-
MAN9146R1 05/05 SALES AND TECHNICAL SERVICE CONTACTS Australia: Tel. (03) 9769.0666 • Fax (03) 9769.0699 China: Tel. (10) 88570068 • Fax (10) 88570060 Egypt: Tel. & Fax (02) 2758.683 Germany: Tel. (07851) 9129-0 • Fax (07851) 9129-99 Greece: Tel. (210) 823.5192 • Fax (210) 884.0210 Indonesia: Tel. (21) 4584.2941 • Fax (21) 4584.2942 Japan: Tel. (03) 3258.9565 • Fax (03) 3258.9567 Korea: Tel. (02) 2278.5147 • Fax (02) 2264.1729 Malaysia: Tel. (603) 563
Questions, Opinions and Exploitation Impressions:
You can ask a question, express your opinion or share our experience of Hanna Instruments HI 9146 device using right now.