-
Contents
-
Table of Contents
-
Bookmarks
Quick Links
MICRO COMPONENT
SYSTEM
MP3-CD / CD-R/RW PLAYBACK
MM-ZL7
Instruction Manual
Related Manuals for Samsung MM-ZL7
Summary of Contents for Samsung MM-ZL7
-
Page 1
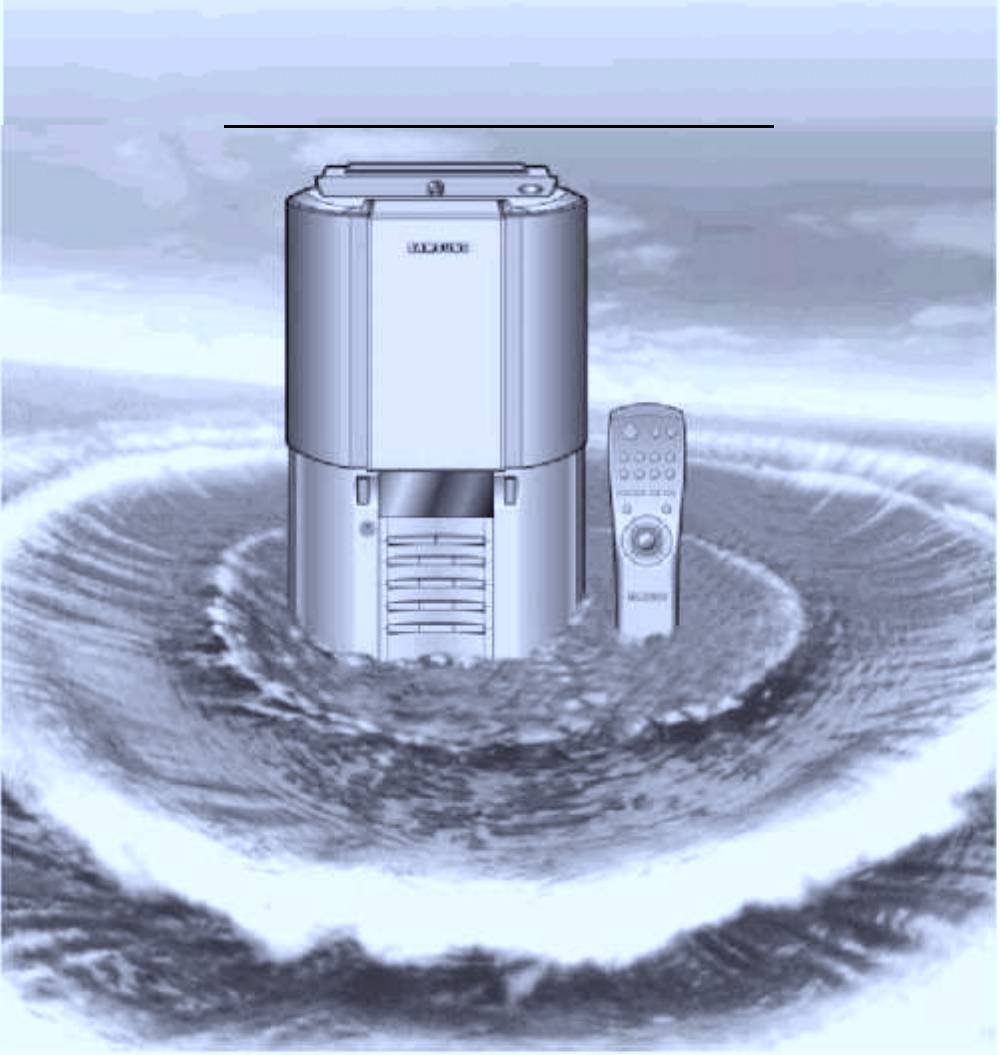
MICRO COMPONENT SYSTEM MP3-CD / CD-R/RW PLAYBACK MM-ZL7 Instruction Manual… -
Page 2: Installing Your Micro Component System Safety Warnings
Safety Warnings CLASS 1 LASER PRODUCT KLASSE 1 LASER PRODUKT LUOKAN 1 LASER LAITE KLASS 1 LASER APPARAT PRODUCTO LASER CLASE 1 CAUTION RISK OF ELECTRIC SHOCK. DO NOT OPEN CAUTION: TO REDUCE THE RISK OF ELECTRIC SHOCK, DO NOT REMOVE REAR COVER, NO USER SERVICEABLE PARTS INSIDE, REFER SERVICING TO QUALIFIED SERVICE PERSONNEL.
-
Page 3: Table Of Contents
Before Contacting the After-Sales Service …22 Technical Specifications…23 Press You have just purchased a SAMSUNG micro component system. Please take the time to read these instructions, as they will enable you to set up your player easily and take full advantage of its features.
-
Page 4: Front Panel View
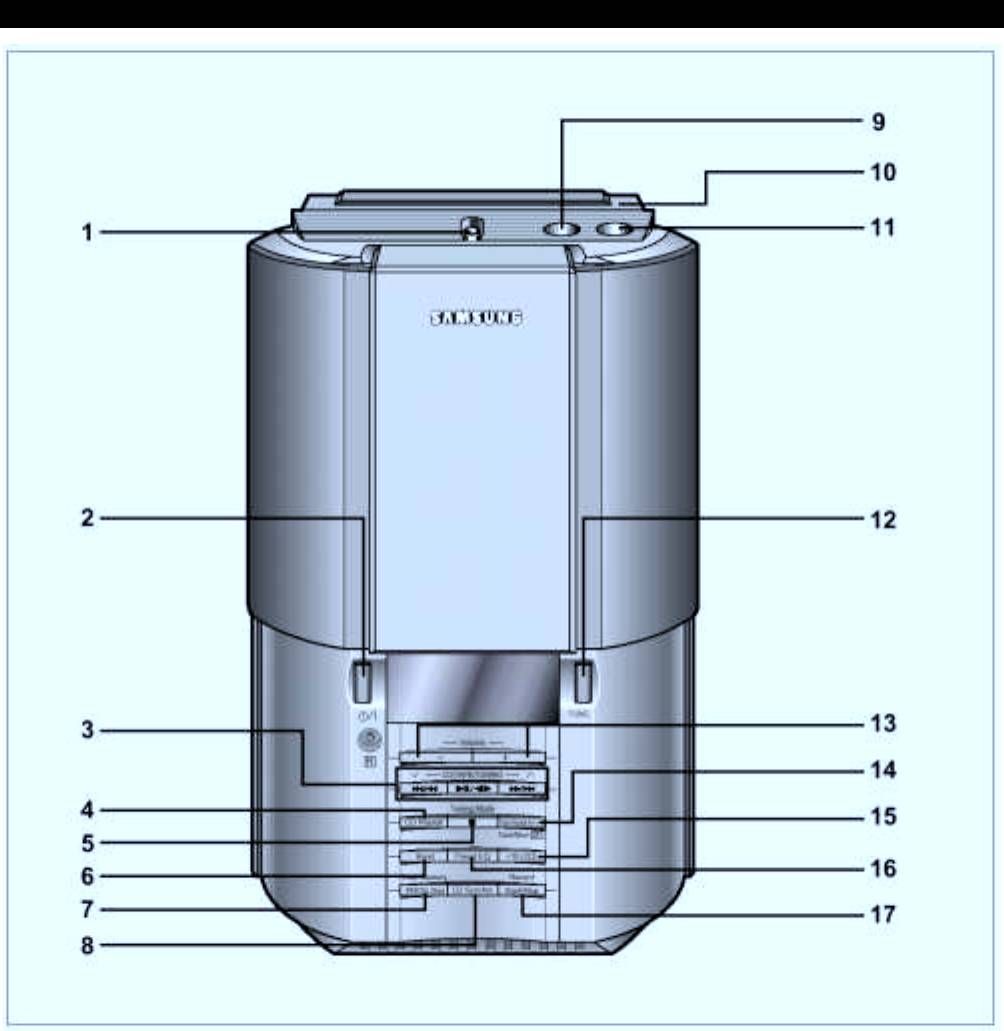
Front Panel View 1. CD Door Open/Close( ) 2. On / Standby 3. Multi-Function(CD/TAPE/TUNING) 4. CD Repeat 5. Tuning Mode(Stop) 6. Band 7. PROG./Set 8. CD Synchro 9. Push Eject( ) FUNC. Volume CD/TAPE/TUNING Tuning Mode Display CD Repeat Tape Repeat A<—>B Track/Album Band Preset EQ…
-
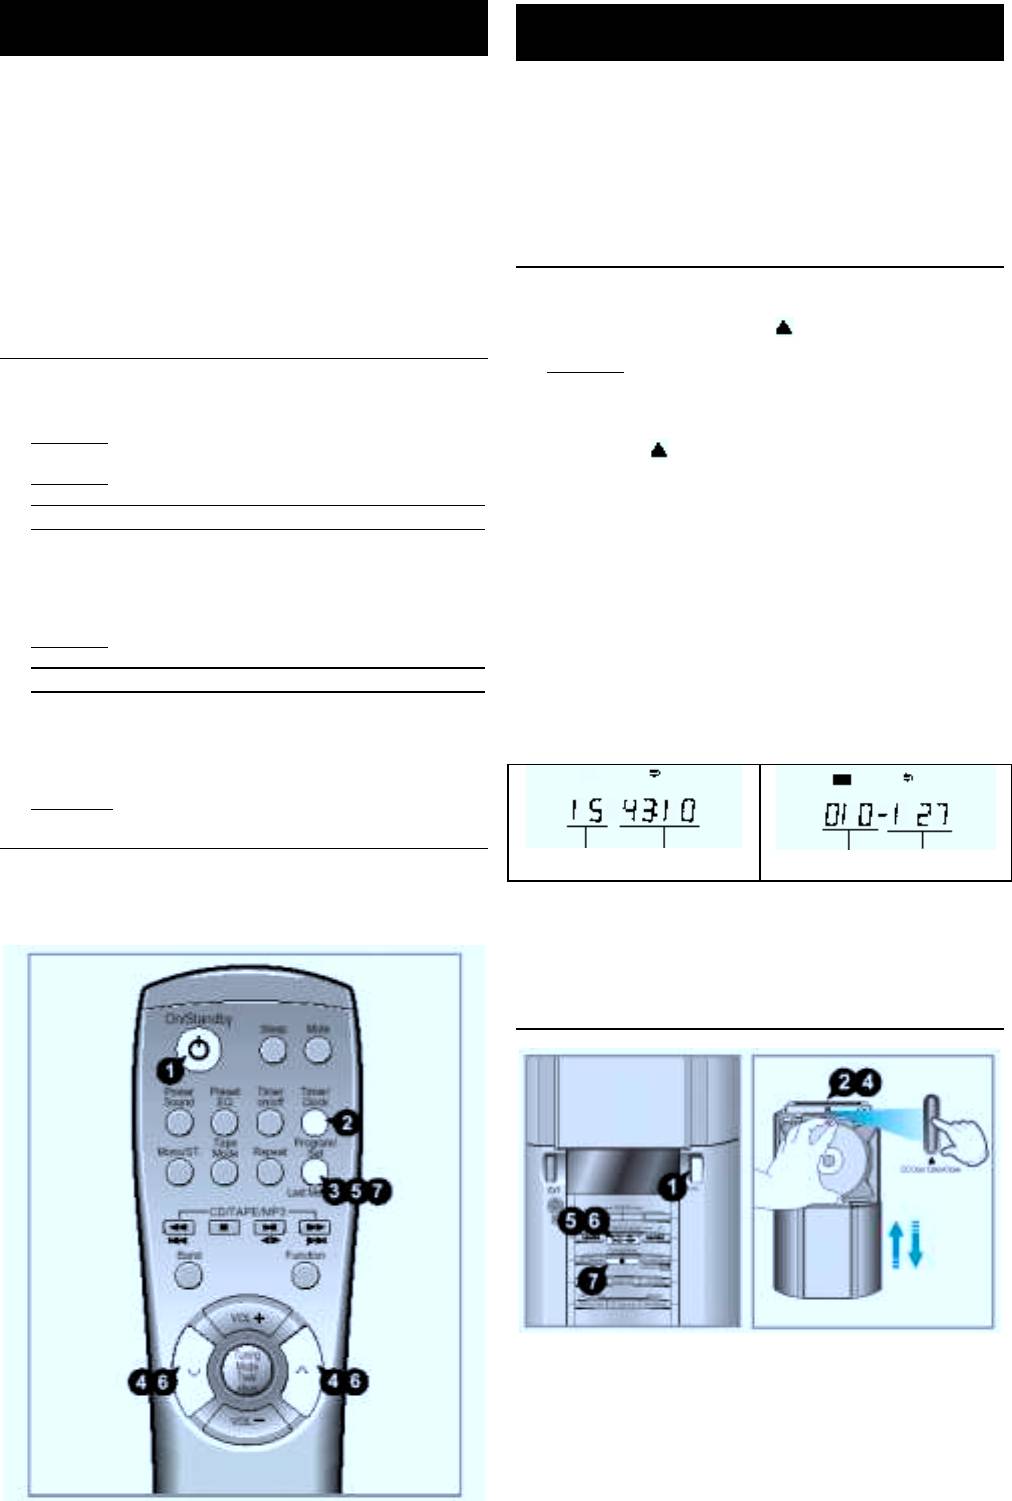
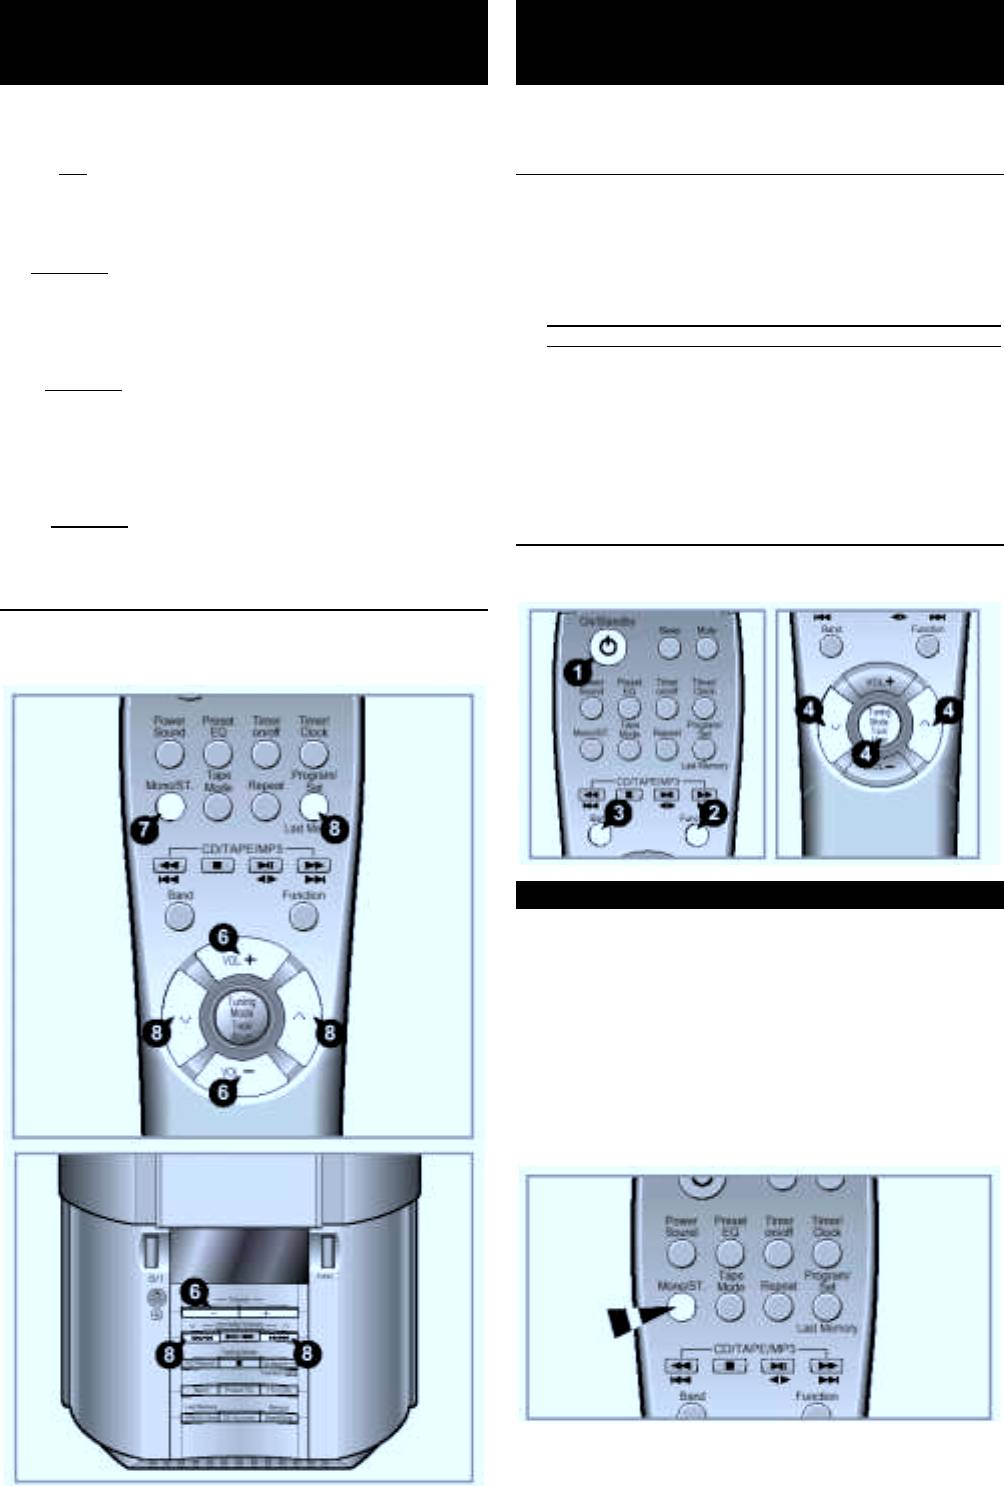
Page 5: Remote Control
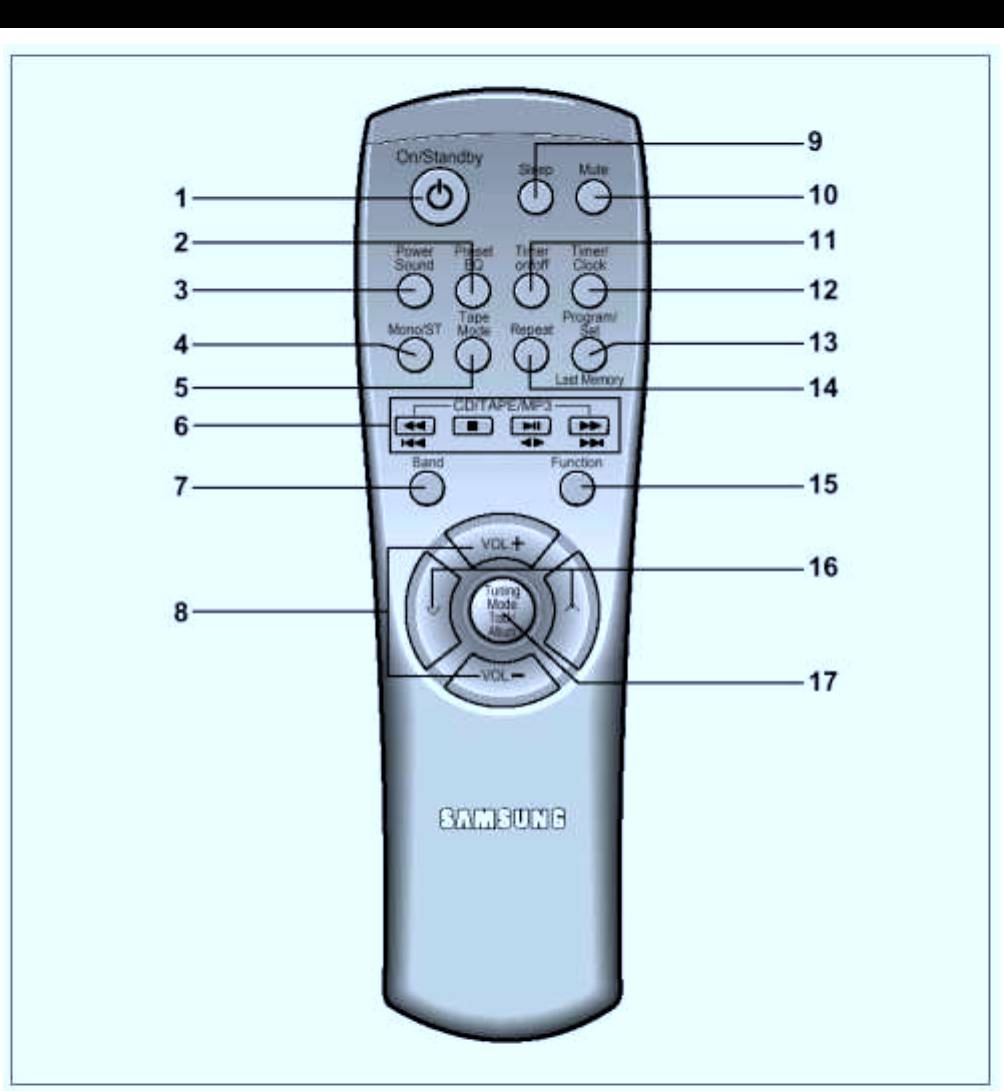
Remote Control 1. On/Standby 2. Preset EQ 3. Power Sound 4. Mono / ST. 5. Tape Mode 6. Multi-Function (CD / TAPE / MP3) 7. Band 8. Volume Control 9. Sleep On/Standby Sleep Mute Power Preset Timer Timer/ Sound on/off Clock Tape Program/…
-
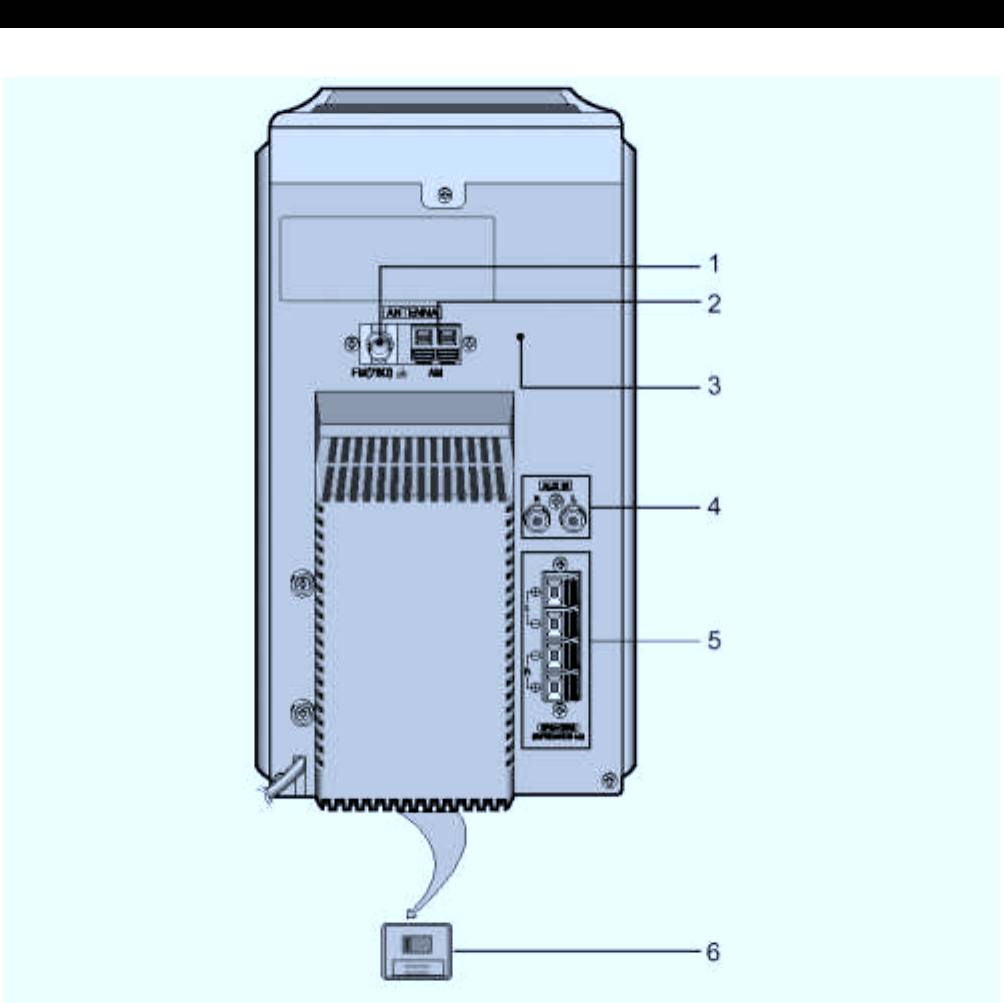
Page 6: Rear Panel View
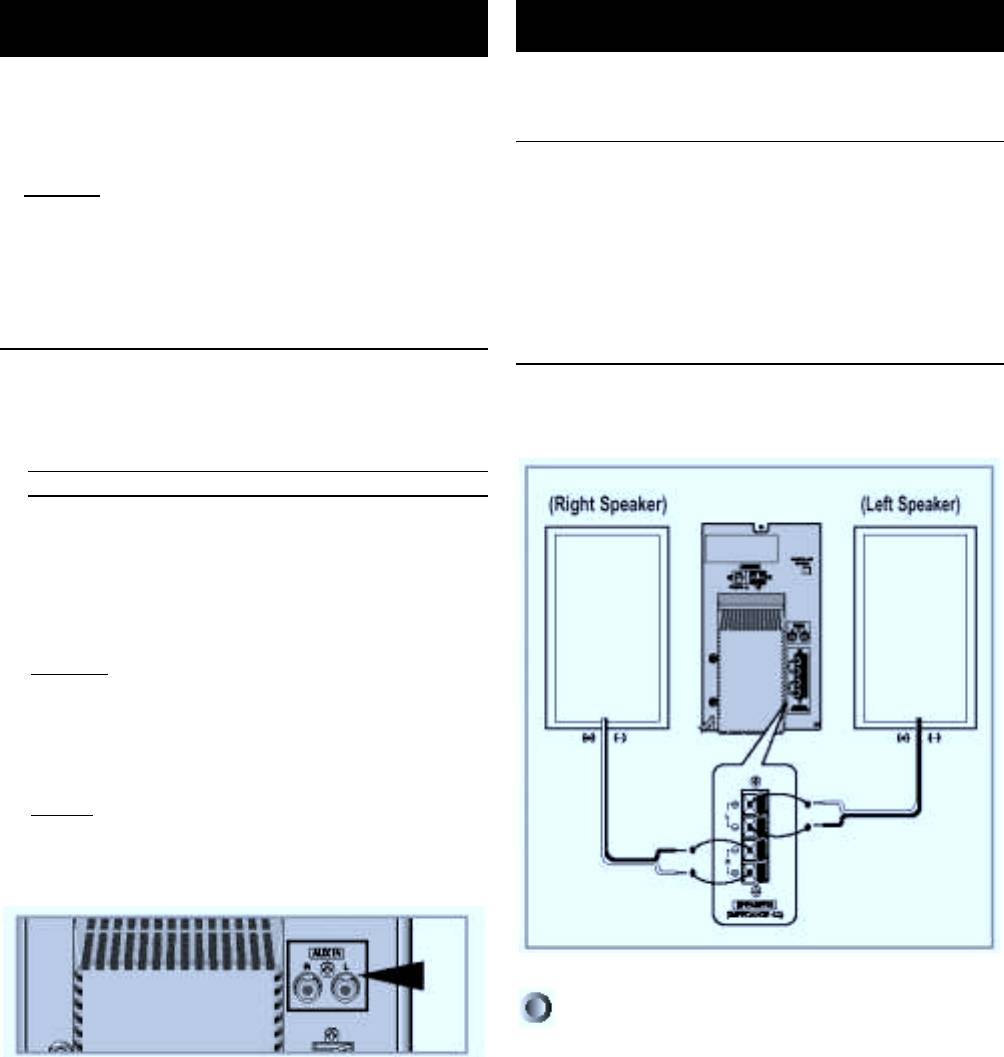
Rear Panel View 1. FM AERIAL CONNECTOR TERMINAL 2. CD DIGITAL OUT JACK 3. AM(MW)/LW AERIAL CONNECTOR TERMINALS 4. AUX INPUT 5. LOUDSPEAKERS CONNECTOR TERMINALS…
-
Page 7: Where To Install Your Micro-Component System
Where to Install Your Micro-Component System To take full advantage of your new MICRO component system, follow these installation instructions before connecting the unit. Install the system on a flat, stable surface. Never place this unit on carpeting. Never locate this unit in an outdoor area. Maintain an open space of approximately 6 inches (15 cm) on the sides and rear of the system, for ventilation purposes.
-
Page 8: Connecting To An External Source
Connecting to an External Source The auxiliary input can be used to take advantage of the sound quality of your MICRO component compact system when listening to other sources. Example: A television A video disc player A Hi-Fi stereo video cassette recorder To connect the external source, the source must have an audio output.
-
Page 9: Connecting The Am (Mw)/Lw Aerial
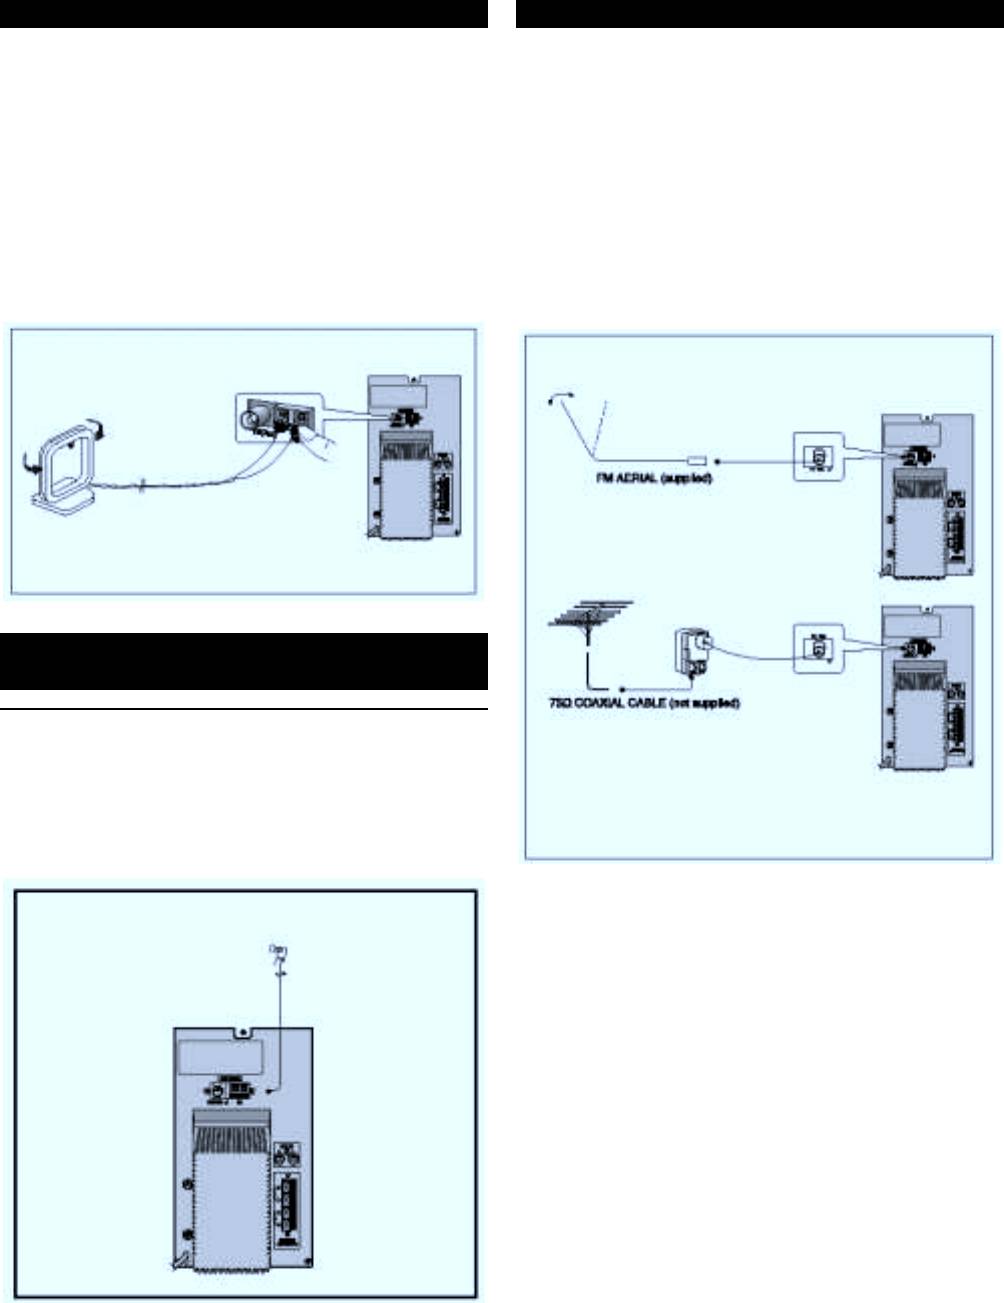
Connecting the AM (MW)/LW Aerial The AM aerial (for long and medium waves) can be: Placed on a stable surface Fixed to the wall (you must first remove the base) The AM aerial connector terminals are located on the rear of the system and are marked AM. To avoid noise interference, check that the loudspeaker wires do not run close to the aerial wires.
-
Page 10: Setting The Clock
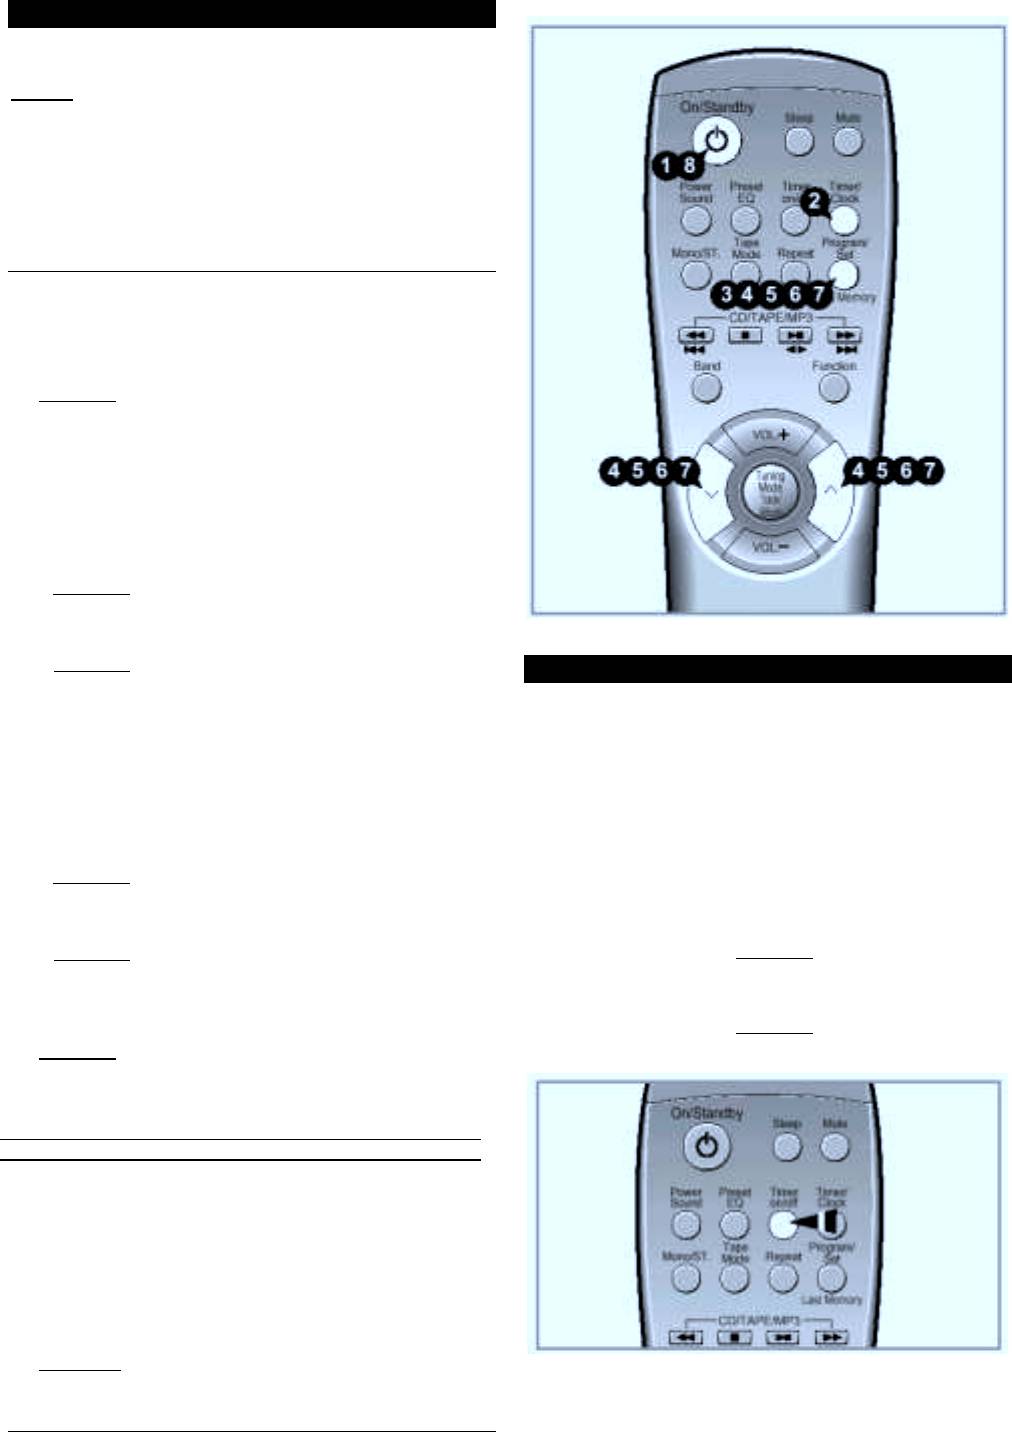
Setting the Clock Your system is equipped with a clock which allows you to turn your system on and off automatically. You should set the clock: When you purchase the Micro component system After a power failure After unplugging the unit For each step, you have a few seconds to set the required options.
-
Page 11: Selecting A Track
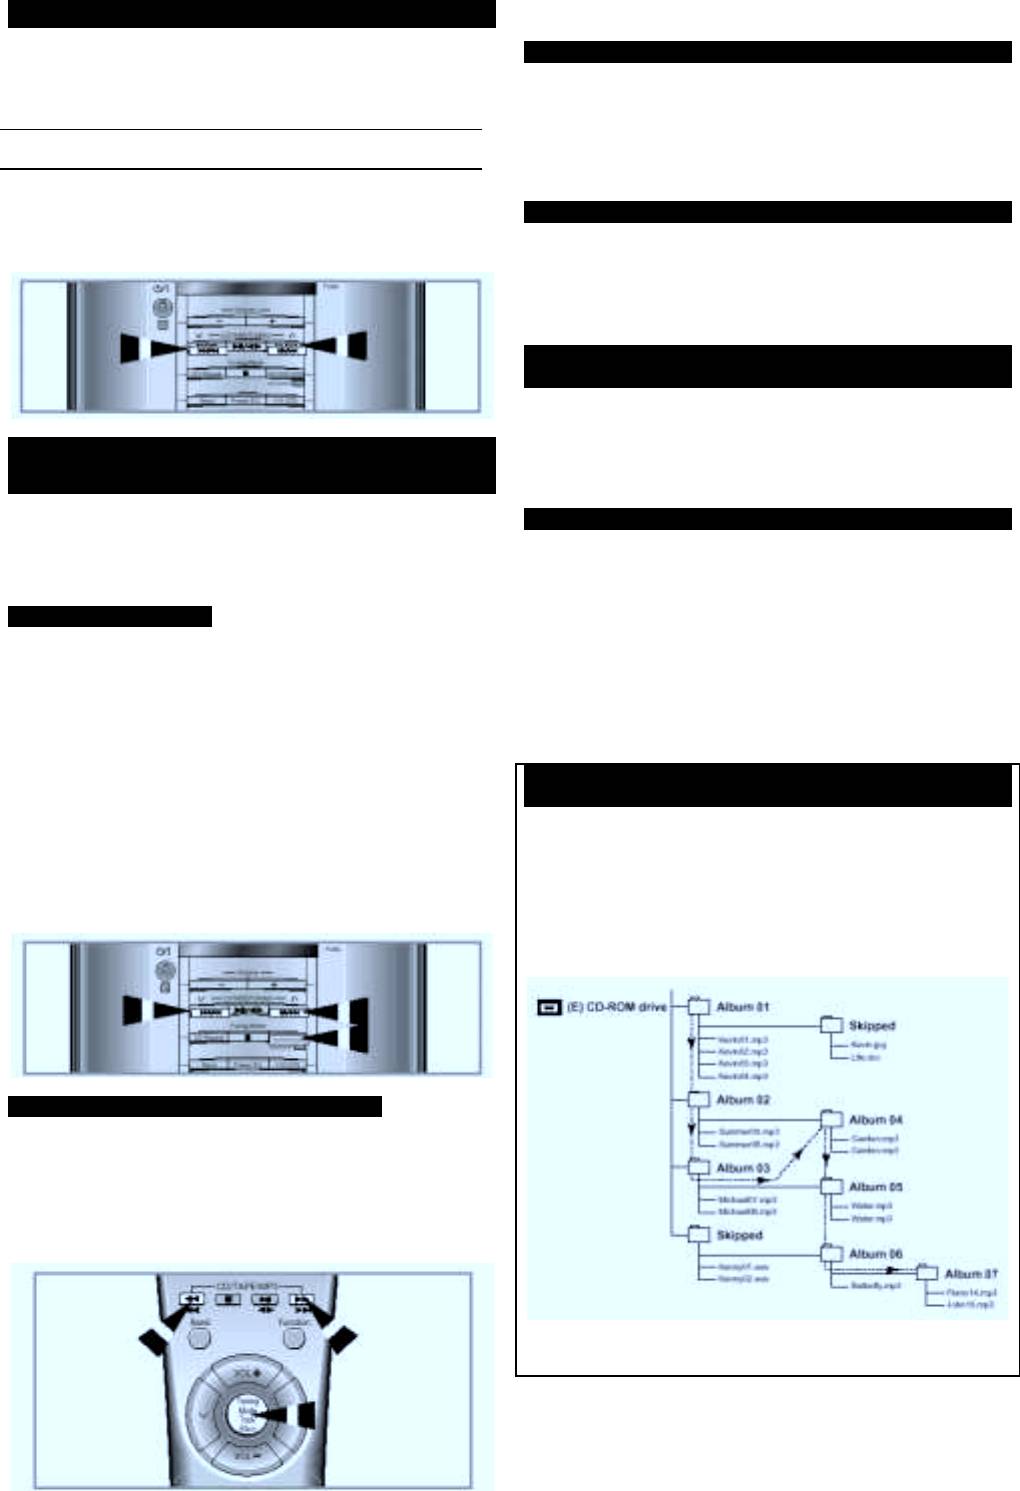
Selecting a Track You can select the track you wish to listen to, either when the compact disc player is stopped or when a disc is playing. To start playback at the beginning of the… Press… Next track … I once Current track …
-
Page 12: Searching For A Specific Music Passage On A Cd
Searching for a Specific Music Passage on a CD When listening to a compact disc, you can quickly search for a specific music passage on a track. To search through the tracks… Forwards … Backwards … It is recommended that you turn the volume down before using this function.
-
Page 13: Programming The Order Of Playback
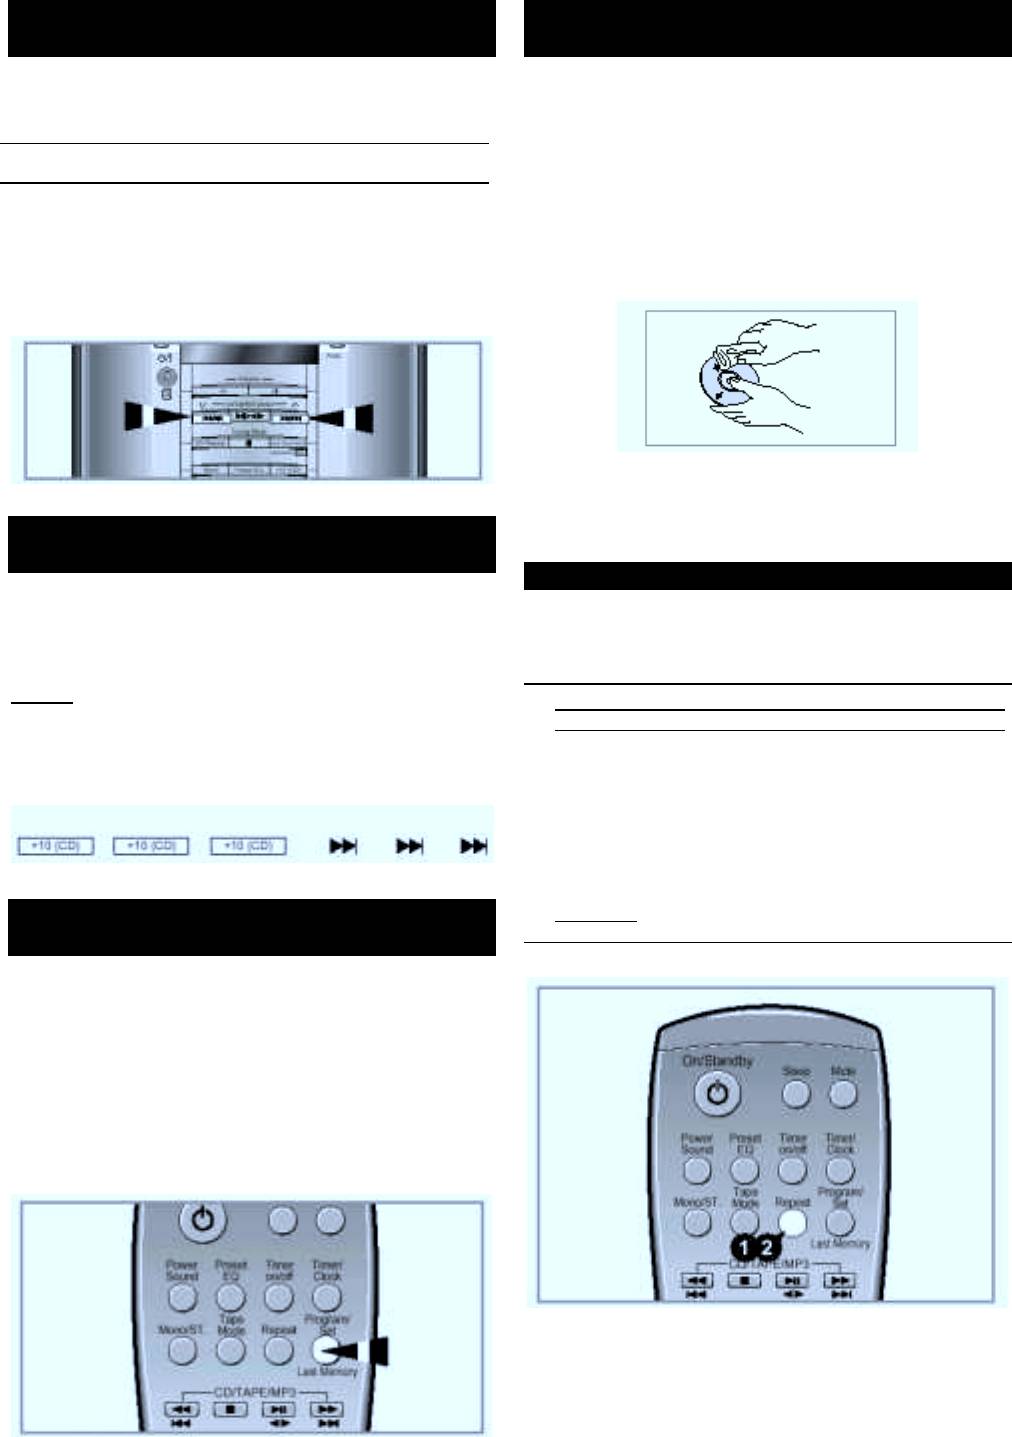
Programming the Order of Playback *This function dose not operate in the MP3-CD. You can decide for yourself: The order in which you listen to the tracks The tracks to which you do not wish to listen This feature can be combined with the Repeat function. If necessary, stop the player by pressing STOP ( ).
-
Page 14: Selecting A Stored Station
Searching for and Storing the Radio Stations(continued) Adjust the volume by: Pressing Volume + or — on the front panel Pressing the VOL. + or — buttons on the remote control Select the stereo or mono mode by pressing Mono/ST. Result: The STEREO indicator is displayed when selected.
-
Page 15: About Rds Broadcasting
About RDS broadcasting This unit has the RDS (Radio Data System) function, which enables for the various information such as broadcasting station, radio text, time and 30 types of programs (News, Rock, Classic, etc.) to be received from the FM RDS station together with normal radio signal. Press the On/Standby button.
-
Page 16: Pty(Program Type) Indication And Pty-Search Function
PTY(Program Type) indication and PTY-SEARCH function The PTY information is composed of an identification symbol, which helps the FM radio to recognize the program type of each FM station. The below 30 PTY information is shown on the display by pressing the Pty button.
-
Page 17: Listening To A Cassette
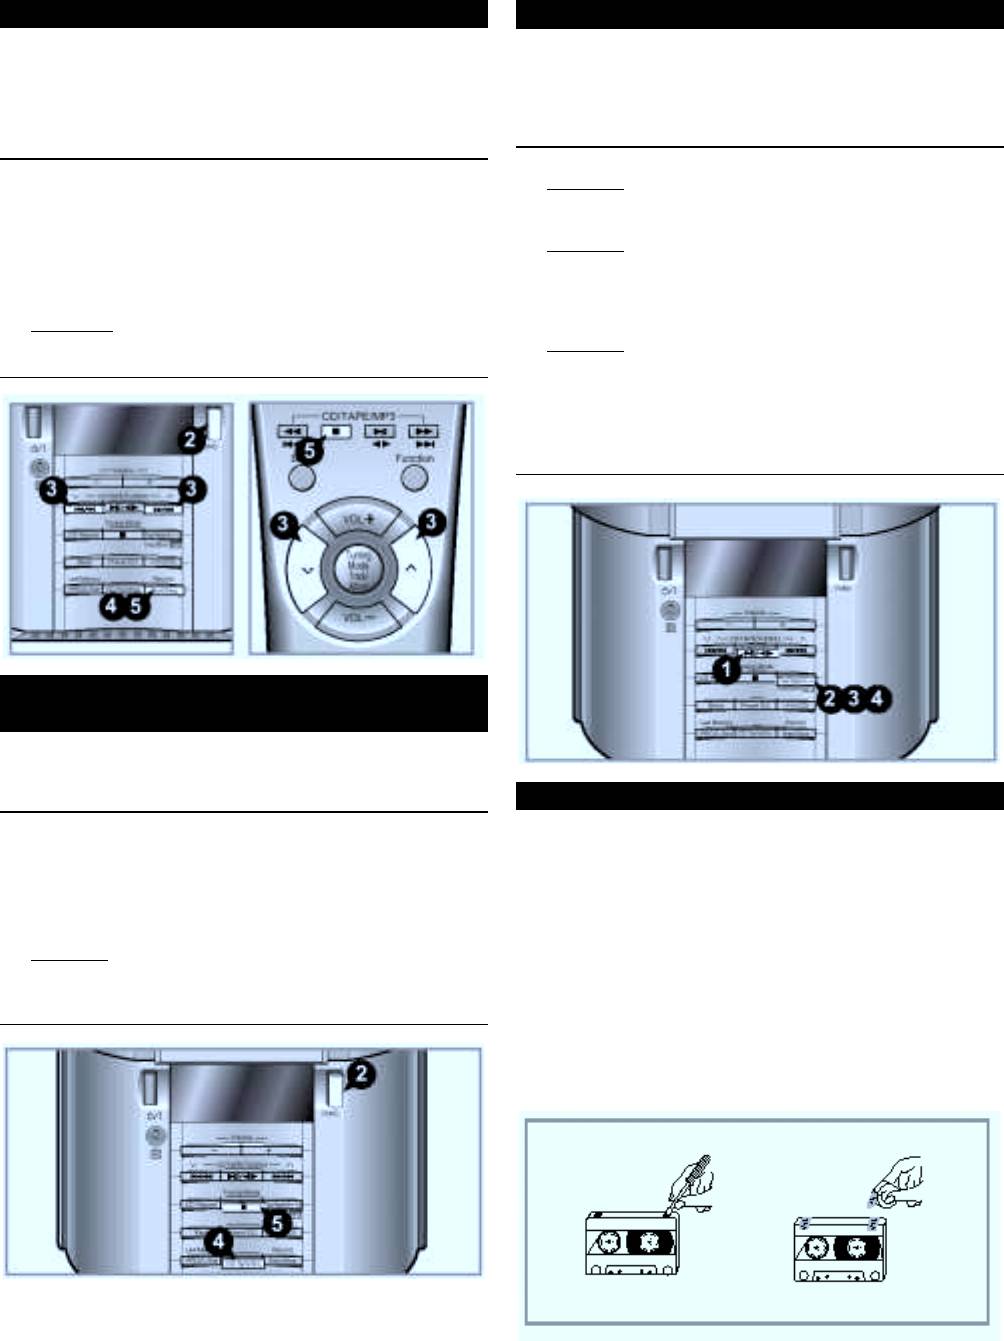
Listening to a Cassette Switch the system on by pressing On/Standby. Select the TAPE function by pressing FUNC. on the front panel. Open the cassette deck by pushing on the corner of the cover marked Push Eject until you hear a click and then releasing it. Insert the pre-recorded cassette with the open edge of the tape facing downwards.
-
Page 18: Recording A Radio Programme
Recording a Radio Programme You can record a radio programme of your choice and listen to it at a later date. Insert a blank cassette in the cassette deck. Select the TUNER function by pressing FUNC. button. Select the radio station that you wish to record by pressing õ…
-
Page 19: Timer Function
Timer Function The timer enables you to switch the system on or off at specific times. Example: You wish to wake up to music every morning. If you no longer want the system to be switched on or off automatically, you must cancel the timer. Before setting the timer, check that the current time is correct.
-
Page 20: Setting The System To Switch Off Automatically
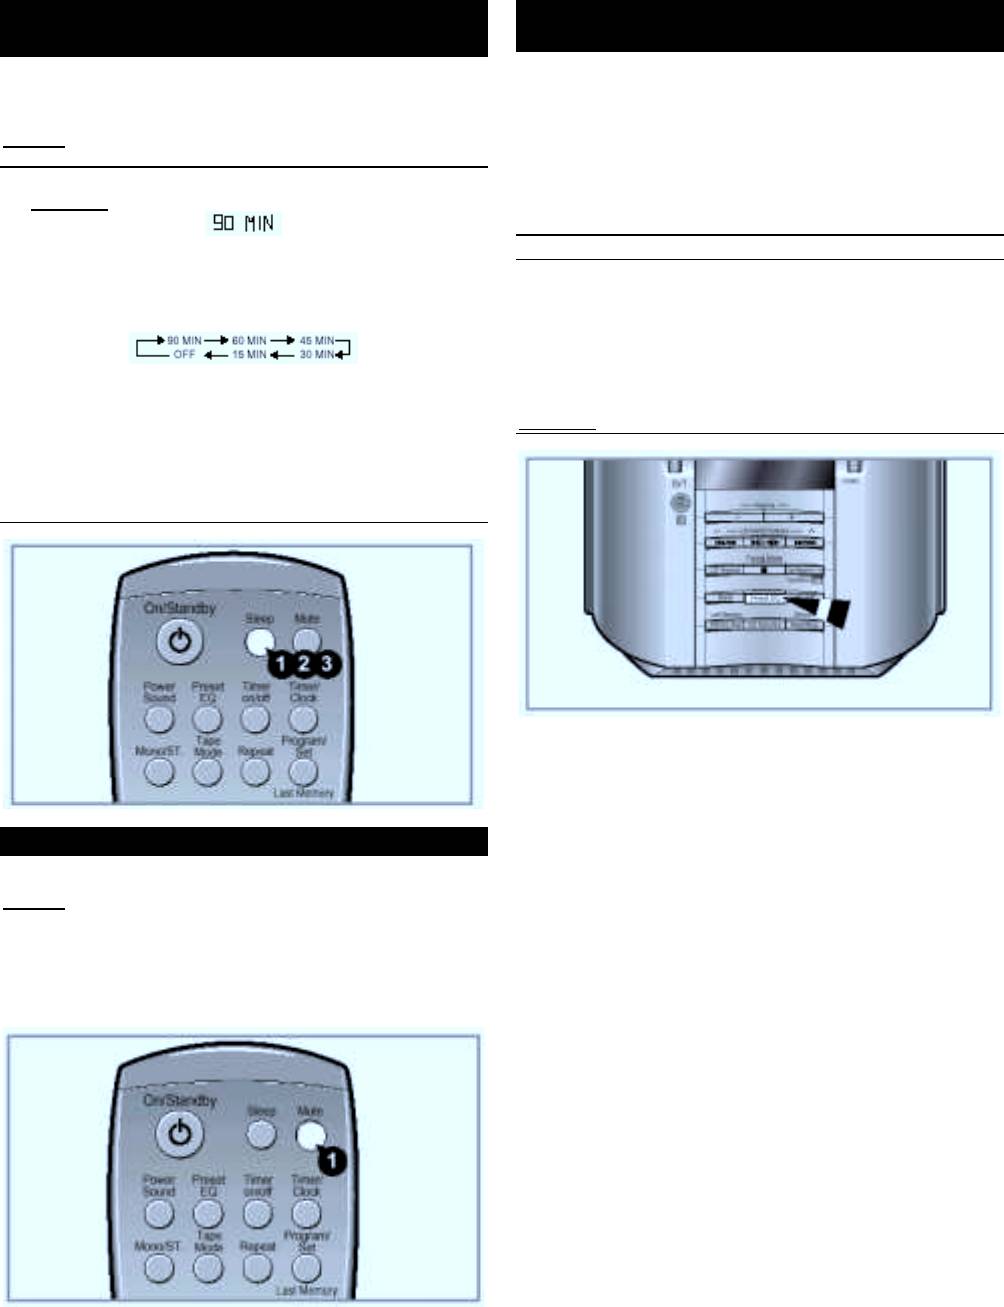
Setting the System to Switch Off Automatically While listening to a compact disc or a cassette, you can set the system to switch off automatically. Example: You wish to go to sleep to music. Press Sleep. Result: The following indications are displayed: Press Sleep one or more times to indicate how long the system should continue playing before it switches off: 90 MIN…
-
Page 21: Power Sound Function
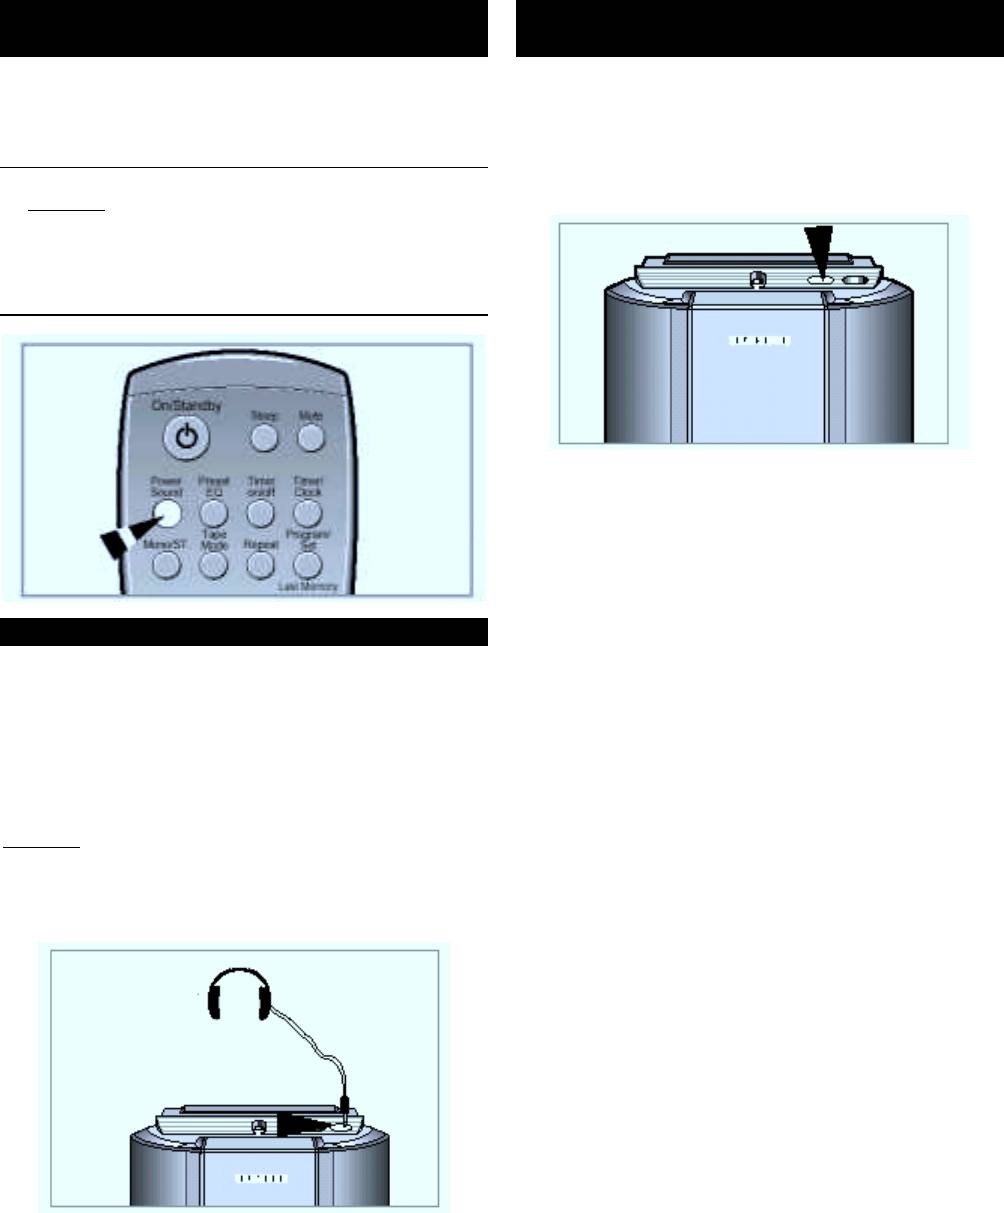
Power Sound function This machine is equipped with the function of Power Sound which amplifies bass treble output to twice as much for powerful real sound. Press the Power Sound button. Result: P, SOUND is displayed for a few seconds. A more powerful resonant sound is diffused.
-
Page 22: Safety Precautions
The model and serial numbers, normally printed on the rear of the system Your warranty details A clear description of the problem Then contact your local dealer or SAMSUNG after-sales service. FUNC. Volume CD/TAPE/TUNING Tuning Mode Display CD Repeat Tape Repeat A<—>B…
-
Page 23: Technical Specifications
Technical Specifications SAMSUNG strives to improve its products at all times. Both the design specifications and these user instructions are thus subject to change without notice. RADIO Usable sensitivity Signal/noise ratio Usable sensitivity Total harmonic distortion AM (MW) Signal/noise ratio…
-
Page 24
THIS APPLIANCE IS MANUFACTURED BY: ELECTRONICS AH68-00772B…
Раздел: Бытовая, кухонная техника, электроника и оборудование
Тип: Музыкальный Центр
Характеристики, спецификации
Тип загрузки дисков:
фронтальный
Экранное меню:
не русифицир.
Потребляемая мощность:
50 Вт
Разъем для наушников 3.5 мм:
1 шт
Вход оптический (Toslink):
1 шт
Тип управления:
электронный
Текстовые сообщения RDS:
Да
Цифровой тюнер:
УКВ+FM/MW/LW
Фиксированные настройки тюнера:
15 FM/8 MW/7 LW
Материал фронт. панели:
пластик
Габаритные размеры (В*Ш*Г):
28*17*32 см
Размер фронт. АС (В*Ш*Г):
28*16*24 см
Количество полос фронт. АС:
2
Акустич. оформ. фронт. АС:
фазоинвертор
Материал корпуса фронт. АС:
металл/MDF
Цвет фронтальных АС:
серый
Мощность фронтальных АС:
2 x 20 Вт
Дистанционное управление:
полное
Воспроизведение CD/-R/-RW:
Да
Инструкция к Музыкальному Центру Samsung MM-ZL7
MP3-CD/CDRRW
MM
ZL7
$%&'()&*+,-.&/0+,&*1%/+*’.,-2/.01′-/&*3--‘-
*4%&’,.,-.%/&5.61/,.&%-$+,,47*6+,,&8
,$9/135—:&;.9%/-*.$9-3&%+$,&:1&<‘1=.,->
‘+)./&:
9&9$-:*&’13+)4*+.9=9&*,19/-6+,,&0&
-)6.’-2-:..9$2&%+$,&.,+%/2;.,-.
3&9&/&.:&;.9%/-*.$9-3%&/+;.,->
?’.39/-=.$3-:9&3&:
$%&’
!
$%(
»##
)($(%*
+$)*#
9&<41:.,(@-9(/-$3
*&)0&/+,-2-‘-%&/+;.,-2
?’.39/-=.$3-:9&3&:,.
6&%1$3+89.%&%+6+,-26+,,&0&
!!»#
-)6.’-2%&66&;6(-‘-*
1$’&*-2*4$&3&8*’+;,&$9-
#

,
Samsung
!
♦
♦ ♦
♦ !»#$ # %&’()$*»$»(+»!&!!»‘)&(,
/.61%/.;6.,-2%&9.7,-3.<.)&%+$,&$9- A
-6%./.6,.8%+,.’-B
1′(96-$9+,5-&,,&0&1%/+*’.,-2 C
-6)+6,.8%+,.’- D
6.1$9+,+*’-*+9(*+@1:-3/&3&:%&,.,9,1>$-$9.:1 E
&6$&.6-,.,-.*+@.8$-$9.:43$.9-%./.:.,,&0&9&3+E
$9+,&*3+<+9+/.8*%1′(96-$9+,5-&,,&0&1%/+*’.,-2 E
&6$&.6-,.,-.3*,.@,.:1-$9&=,-31$-0,+’+ F
&6$&.6-,.,-.+31$9-=.$3-7$-$9.: F
&6$&.6-,.,-.GHIJK+,9.,,4 L
&6$&.6-,.,-.+,9.,,4I,.*&*$.7:&6.’27J L
&6$&.6-,.,-.MH+,9.,,4 L
$9+,&*3+=+$&* NO
♦
♦ ♦
♦ *»)-*,# &./$»(+ $0)$»#
&$%/&-)*.6.,-.3&:%+39P6-$3+K6-$3+MP3-CD NO
4<&/6&/&;3-,+3&:%+39P6-$3. NN
4<&/+'(<&:+-6&/&;3-,+6-$3.MP3-CD NN
&-$33&,3/.9,&0&:.$9+,+3&:%+39P6-$3. NA
«1,35-2%/&%1$3+NO6&/&;.3)+&6-,/+) NA
«1,35-2%&*9&/+%&$’.6,.8*&$%/&-)*&6-*@.8$26&/&;3- NA
./4%/.6&$9&/&;,&$9-%/--$%&'()&*+,—3&:%+39P6-$3&* NA
«1,35-2Q&*9&/3&:%+39P6-$3+Q NA
/&0/+::-/&*+,-.%&/263+*&$%/&-)*.6.,-2 NR
&,9/&'(-‘--):.,.,-.)+%/&0/+::-/&*+,,476&/&;.3 NR
♦ 1!&*
♦
♦ ♦
&-$3/+6-&$9+,5-8-)+%&:-,+,-.,+$9/&83-,+,-7*%+:29-$-$9.:4 NR
4<&/)+%&:,.,,&8/+6-&$9+,5— NB
’1=@.,-.3+=.$9*+%/-.:+ NB
♦
♦ ♦
♦ &! 20&$
/&$’1@-*+,-.3+$$.94 NC
4<&//.;-:+*&$%/&-)*.6.,-23+$$.94 NC
&66./;+,-.3+=.$9*+)*1=+,-2 NC
+%-$(%./.6+=-/+6-&$9+,5— ND
-,7/&,-)-/&*+,,+2)+%-$(3&:%+39P6-$3+ ND
«1,35-2Q&*9&/IG↔SJQ ND
.3&:.,6+5—%&)+%-$-3+$$.9 ND
♦ *3-)&43!$5))
♦ ♦
♦
«1,35-29+8:./+ NE
9:.,+6.8$9*-29+8:./+ NE
$9+,&*3+$-$9.:4,++*9&:+9-=.$3&.*43′>=.,-. NF
/.:.,,&.&93′>=.,-.)*13+IMuteJ NF
3*+’+8)./ NF
«1,35-2 Power Sound…………………………………………………………………………………………….. NL
&6$&.6-,.,-.,+1@,-3&* NL
«1,35-2:-3/&T&,+I,.*&*$.7:&6.’27J NL
♦
♦ ♦
♦ &$»(&!0 5))+»)+»./6″# !)1
./4%/.6&$9&/&;,&$9- AO
/.;6.=.:&</+U+9($2*5.,9/%&$’.%/&6+;,&0&&<$’1;-*+,-2 AO
.7,-=.$3-.7+/+39./-$9-3- AN
7 / ».$!3/ 7!» *)(&8 !)&
—
,&%3+&93/49-2&9$.3+6’23&:%+39P6-$3&*
A ,&%3+PushEjectI+;:-9.6’2*4</&$+3+$$.94J
9 ,&%3+-9+,-.K &9&*,&$9(
,.)6&6’2%&6$&.6-,.,-2,+1@,-3&*
: ,&0&T1,35-&,+'(,4.3,&%3-I6’2&:%+39P6-$3+K
9 ,&%3+*4<&/+T1,35-8$-$9.:4
+$$.94K>,./+J
: ,&%3-/.01′-/&*3-0/&:3&$9-
; ,&%3+Q&*9&/3&:%+39P6-$3+Q
; ,&%3+Q&*9&/IG↔SJQK&/&;3+K'(<&:6’2
< ,&%3+Q.;-:,+$9/&83-,+/+6-&$9+,5—QI9&%J
6-$3+MP3-CD
= ,&%3+*4<&/+6-+%+)&,+=+$9&99>,./+
< ,&%3+QVNOQ (3&:%+39P6-$3J
> ,&%3+/&0/+::+K$9+,&*3+K&*9&/%&$’.6,.8
= ,&%3+*4<&/+%/.61$9+,&*’.,,47,+$9/&.3
*&$%/&-)*&6-*@.8$26&/&;3-
?3*+’+8)./+
? ,&%3+$-,7/&,-)-/&*+,,&8)+%-$-3&:%+39P6-$3+
> ,&%3+,+=+’+K&$9+,&*+)+%-$-
@ ,.)6&6’2%&6$&.6-,.,-2:-3/&T&,+I,.*&*$.7
:&6.’27J
.
,&%3+-9+,-.K &9&*,&$9(
A ,&%3+*/.:.,,&0&&93′>=.,-2)*13+
9 ,&%3+*4<&/+,+$9/&.3?3*+’+8)./+
,&%3+3′>=.,-2K43′>=.,-29+8:./+
: ,&%3+ T1,35— Power Sound
9 ,&%3+1$9+,&*3-+8:./+K+$&*
; ,&%3+*4<&/+/.;-:+&,&K9./.&
: ,&%3+/&0/+::+K$9+,&*3+K&*9&/%&$’.6,.8
< ,&%3+*4<&/+/.;-:+/.*./$+3+$$.94
*&$%/&-)*&6-*@.8$26&/&;3-
= ,&0&T1,35-&,+'(,4.3,&%3-I6’2&:%+39P6-$3+K
; ,&%3+Q&*9&/Q
+$$.94K>,./+J
< ,&%3+*4<&/+T1,35-8$-$9.:4
> ,&%3+*4<&/+6-+%+)&,+=+$9&99>,./+
= ,&%3+%&-$3+/+6-&$9+,5-8
? ,&%3-/.01′-/&*3-0/&:3&$9-
> ,&%3+Q.;-:,+$9/&83-,+/+6-&$9+,5—QK
@ ,&%3+Q&,Q
&/&;3+K'(<&:6’26-$3+MP3-CD
/
FM
9 GHIJK
: FMIJ
;
<
= IJPPPPPPPPP!
0
!
«#
$
.
#
♦
♦
♦ ♦
/’
!
♦
♦ ♦
♦
0
♦ $
♦ ♦
♦
%!
/**,
♦ ♦
♦ &’!
♦
/**
♦
♦
♦ ♦
&’#!
Alkaline)0/
♦ ♦
♦ (
♦
)*%
/*0
%!
/* *
♦
♦ ♦
♦ $
,)
*
+!
1/2223456
♦ ,
♦
♦ ♦
7//
%%
8
% -!
♦ 9/*:9:
♦ &
♦
♦ ♦
♦ ;/*<;=
!
!
♦ (
♦ ♦
♦
!
!
!»!# $%»& ‘($)
!*
ACCord+
)),
On/Standby -.)/
1
»
»
1%
#%
!
#
%!
*G
,
♦ /
*
♦
!0
♦ -HI+FIstereo
,
♦ /*
>//*
0**)8?*9)
,?
**9)*;)
/*/@
**;)
4AB<=)
#0G
H*
*
/
,*
**
?* !*)
9
C* «*)
&
***
!
On/Standby -.)/
!/,
FUNC D0)
E8&*/#$%
!*
*/,,
/8
♦ E
♦ F*
8!G
/
/
)
I;JK;’
! »
#
♦ 1/,/
,*
,70
,,
♦ *
*,*
*,/
,
*
♦ */
*
,
/7
2
#$%&’(
*$
&’()
-&43&.50-1-23&
*+
♦ ML
ΩNO;
♦ *,
♦ !NO;,*
♦
MLΩ)
)
NO*
.*
♦ #*067/
AM
0
0
!/
♦ ,/
,
>/7NO;
!,
NO*ML
Ω
L
//)
)%
&
9
,--.-/0-1-23&
♦ E?!0
/
♦ ,
/0
/)
I;NO;2P 2*)J
K;MLΩ?»2?#H2’QRS?2C ‘Q)
«3
!»
+’
$,-+./
+
)23!
!.
4
#%.
♦ 1
+CDTextCD+RCD+RWMP3-CD!
(%+
♦
-5-
♦
!!6
!
!/G0AU?;)
/,*
FUNC.D0)
70
Open8Close
)»-V)
*
E8»;
! On/Standby -
1/
.)
7*/,
&Timer8ClockP*->)
V*;
E8/9″:9;>)
Open8Close
)
Program8Set-1)
E8TG
-4,-3<=>=03=8&?<&
II)
♦ !/
/
/+ 0
OW6;AU
∧
♦
∨
*
?**
MP3-CD
Program8Set
E8TG
)*//
,,*)
/+ 0
♦ !,
∧
MP3-CD*
∨
<CD> <MP3-CD>
$ ?/
Program8Set
E8>
,
Standby)
!*
*G0*
Timer8Clock
>/
-4,-3<=>=03=8&?<&(
II*
>//
-4,-3<=>=03=8&?<&(
II*
$ V42-
)
«»
+
+
» $»&CD:E
56
OW6OWXYI3ayer6*
+%
,!7
789!
0G,,
/+@
0
/
@
IK;,,,/
#*
I
P*
I
»#(&)(«/4 ‘.»#
*
I
&/
I
I
♦ FG*
GOW6OWXYI3Z[\]6)^_`6
♦ «G*
GOWKOWXYI3Z[\]K)
^_`K
$»./$»4 ‘.»#4″*( CD:(«7!»6 +) /!
0)$FGH).)FGHIE
%AU;4AU;4a
bc5%/*
«/G*GOW6
d%/*/
$,-+./
/IM5G*
MP3-CD
»+*»)6#&0&!)&0)$»#FGH).)GHI
♦ &CD;R*)#D;RW
+%
)
789!
G,;
!»#!»‘B.»$
::,
,,
*Track/Album &-2/)
*)
*//ALBUM 2/)
♦ «/#D;RW
*I
I/
*//,;
/
7G0
0
//
/)
* Track/Album*/
».&0″# &./!»/#»+*»)6#&0&!)2 ./B»(«#)
/TRACK &)
0″*»7&$0)$
*I
I/
♦ #aefghij
♦ ,
aefghijXk`lh]\])
,/
♦ #
♦ *I
I
/
/,
♦ ,G*
,/
^m`n^iZo^ghpG*
,G
6
7
G
F
3./0) !5)»!!»-«3+* #.&!)2
D
*Track/Album&-2/)/
/«TRACK»&)«ALBUM»2/)
E
C
*I
I
♦ /«TRACK»
G
♦ /«ALBUM»
B
//
A
I;&AU;4OME)JK;2/5IJ6;J
d;2/5KJL;2/56Jb;2/5dJM;2/5LJ
c;2/5bJq;2/5M
«
+
3
+
+
«
’!
+.
♦
♦
♦ ♦
/+
0
#%!
♦
♦ ♦
♦ +
C0 ?
H
#!
***
♦ &
♦
♦ ♦
C?H
%!
***
♦ «+#
♦ ♦
♦
#!
%
7*G0*
012
04+4
IJ6KI
L0@
.
++
♦ ♦
♦
♦ 1+
6K
♦ #+
♦ ♦
♦
8 IL
!STSUV)
,/d6
/+ 0Repeat
:J6K:
P
I
«*
/REPEAT6)
→
→→
→%→
→%→
→→
→%→
→→
→→
→→
→→
→→
→→
→
&
&*
/REPEATALL
,))
,;
!STSUV*
0
E8 &*//
REPEAT
MNO)
PQGL9R
/
//OW6;
AU7G0/
**
♦ Last Memory *)
OW6;AU?*
7(ON)
(OFF)G0*
*
«,
.
%.
♦ ♦
♦
♦
♦ ILFM0*
♦ ♦
♦ (%
♦
♦ ILAM0*
)
♦ ILFM0*
FG0
♦ cOa#!)0*
G0*4\`\Zr)
♦ M3a&!)0*
)
♦ ILFM0*
/,
♦ LOa#!)0*
42-)
♦ L?!0*saI
)
QWXYWUZ8[SV-1)
♦ L?!0*saK
E8/ PROGRAM
PLLK6LLLL
!On/Standby -
!//
.)
,-?48
!/G0tuvX4P)FUNC.
♦ H
/
D0)
♦
H/
!/*
4
Program/Set.
Band &)
E8/PLK7LLLL
E8
&/,*+GF
8
!Kd
♦ ♦
♦
♦ FM
>0
♦
♦ ♦
♦ AM (MW)
#
V/9R
HH)/
♦ ♦
♦ «\)
&
/
♦
♦
♦ SW6 [\7
?
/
♦ ♦
)
$ >//
42-)
>
0]^_`_YPXaS
)
(,*
!
«
*/
P#b$#»E*)
2
«
*/
AUTO2*)
)
!/0*,
,8
♦ ]^_`_Y*)∨∧*
!
♦ ]^_`_Y*)∨∧
,/
0
♦ >//
/
*]^_`_Y∨∧
42-)
♦ !
*0
Program8[SV-1)
7*
Program8[SV*
/
QWXYWUZ8[SV
,
,-?4H
I/*
Program8[SV
9R
HH)/
/
E8!/
!
/,
«-
%&
«*8
#
♦ Volume.)9;
#
*
♦ VOL9;0
!On/Standby -
.)
$ !/<=<=
!/G0tuvX4P)FUNC.
Mono8ST%-#)
D0)
E8?/::
!/*
STEREO#)
Band &)
& ,,**
!/0/8
0+d*0
/+ 0
!8
#0*
?]^_`_YPXaS
Program8Set-1)
*
E8!,*
/:Q!c[c]:
/
0)
PROGRAM)
+?Tuning
∨∧
+Tuning
∨∧/
/*0
IIL
&0
Program8Set/,
?Tuning∨∧
*0
E8&*//
*0
PROGRAM*0
,
&,/0**
‘ &,*/
/0+6c
]^_`_YPXaS
♦ D0W4wY4BO//
0
!»»
.
♦
♦ ♦
♦ #56:;<;586
!
♦
♦ ♦
♦
:;<;586%
!
*0NO
,PX_X8[]
%-#)<=
<=F
«.
!On/Standby -
.)
!
!/G0tBWX&)FUNC.
D0)
FG0//
«*
Q^decfSgV/)
TapePXaSE)
*
!/**
/
4
V*,
«/*
/+h 0
#2
♦ «
#!
♦ &
E8?
«/
7
/+ 0
/
«
?VOL.9x (/
*
Volume9;*
)
)
«
?42-)
& ?/,
G0*/8
/+ 0
?
0
()) *+ !
( %%
5
#6!
«*
WyjzXm\prH0
08
♦ .
)
♦ *)
♦ !*)
«
%.
♦
♦
♦ ♦
% !
♦
♦ ♦
♦ =
%!
♦
♦ ♦
♦ )2>%
%!
«/
5»
04%#↔
↔6&4
↔↔
+@
1
i) @+
?5@
↔
↔↔
↔
A6?
-
♦ !/
B
#
]#Qc
HH)
1/
E8
!/G0tuvX4P)FUNC.
Tape Repeat(&↔
↔↔
↔* G2
D0)
↔{))
!/0*
E8/START
Tuning*)∨∧
)
>/Record Start/Stop
/&↔
↔↔
↔
#-#)
♦
♦ ♦
♦ V2
E8V
Tape Repeat(&↔
↔↔
↔*
>/Record
E8/END
Start/Stop
?0)
♦ V{
♦ ♦
♦ !/*G6
♦
?
Tape Repeat(#↔
↔↔
↔j*
+
MNO)+@PQGL9R
+!
7
1/
0#
!/G0AU?;)
!
FUNC.D0)
V;
(#
9RSynchro#,0;
%%
)
#%!»
E8
;
!
,)
?/42-)
1-
%-
#%%
%
!
«0
0
#
!
%
!
/,/
*
♦ */
♦
/,
** 7
!On/Standby -
.)
*Timer8ClockP*->)
*/TIMERP*)
Program8Set-1)
E8!,*/
/ONTIME!
)7*)
J
1*
1Tuning∨
∧*)
+ Program/Set.
E8TG
1Tuning∨
∧
Program/Set.
E8!,*/
8
/:kk]HPc!
)7*)
J
!C %
!
1*
!*/
1Tuning∨
∧
,)
+ Program/Set.
E8TG
/+ 0TimerOn8Off
1Tuning∨
(i@8i@
∧
*
Program/Set.
«* «
E8&*/l:»%%
E8#/
.$$)mm
!* &
Tuning∨∧*
E8
Program8Set
E8&*/
/
$ Tuning∨∧/
*//
*
=+
TAPE) 1
TUNER)
Program/Set
+!/
0
Tuning∨∧
CD;)
V;
& On/Standby
E8 !*
**
#
*
ERROR»/)
«1
!»
<
«
+
‘
!
%#
.% !
%%#
!
Sleep#)
*QWSdSVco*
E8&*/8
7*)//*
q5)
/+@ +
Sleep/
«/*/**)PASS
/
C,* D.CLUB
C,*0 HALL
C,*0STADIUM
C,*; !:9;
C,*;Q:Q
C,**9″#[[H9
!/8
♦
E8&*/
[nSST
♦ H+IK
>/G0
[nSST
*/:kk!)
«%$9:;&
i@
O
P^VS!)
>/*/
)P^VSVolume
.)
«2
0PowerSound
0=%
&
-PowerSound5D#
‘Oi
6
@+
#
E!
G@6L
G
Power
Sound
E8
♦
/
P
SOUND
♦ V/
&*7*G0
Power
Sound
%#!
& EB*
#!
Phones)
*)
E82
/*,
3
3
>»?
&
‘
!C
!
+%
!0
’
!
•
•
•
!»#$%&»‘()*+#
,-
5
•
,
‘(
6
•
./
((
7
*01 23456+740894:2 07
° !»°
()*+
‘
5+5: 902:; <=905> 94-
#$!%&
(
•
?@
1
,
•
A
@
*
•
0@BCDEF
!»#!GG*?@#@-
……………….
Preset EQ
8
•
./HI*8-
5
•
JKLM
L/
9
•
:L
—
L
:
•
8
LK
(
;
•
+/L
(,)*
,*
<
LN
-
/(0
@@
=
0(
‘
.
*
/
*.)
8
)
•
./BOPQ*:-
*
8
•
4
:
•
4
•
:K
/
•
,L
/
1
•
+AL
;
>
•
:
!»
•
./BRSQT*0-
•
@
#
/
:
$
•
7
=
/+@
1
‘
-,
@/
(
5
•
?
,
N
0
,(*
2(
-
*
,,(
-.
C
,)*
%
*
.
♦ ♦
♦ &
♦
♦ ♦
♦ F-
♦
♦ «
♦ ♦
♦
G
SAMSUNG
!
,
)
*-
,)*
(,
0
)
)0
34
(
.
.*
*

»
@»
!»#!$%%$#
!
(,
JK
&’.),+2=1*$9*-9.'(,&$9( 6O6
JK
&’.),+2=1*$9*-9.'(,&$9( BO6
LC
9,&@.,-.$-0,+’K@1: DO6
&’.),+2=1*$9*-9.'(,&$9( D6
&’,483&?TT-5-.,90+/:&,-3 NCW
MCIJ
9,&@.,-.$-0,+’K@1: BO6
&’.),+2=1*$9*-9.'(,&$9( CB6
&’,483&?TT-5-.,90+/:&,-3 AW
(-./01,(02/
-+%+)&,=+$9&9 AO 5PAO3 5I±N6J
9,&@.,-.$-0,+’K@1: LO6I,+=+$9&9.N3 5J$T-‘(9/&:
$3+;.,-2 OOCWI,+=+$9&9.N3 5J
./.7&6,&.)+917+,-.:.;613+,+’+:- FO6
+):./46-$3&* -+:.9/NAO-‘-FO::&’U-,+NA::
03
-+%+)&,=+$9&9 NAC 5XNA3 5
9,&@.,-.$-0,+’K@1: BO6
./.7&6,&.)+917+,-.:.;613+,+’+:- RC6
9-/+>U-8?TT.39 DO6
45600
47&6,+2:&U,&$9( A7AO9I%&’,483&?TT-5-.,90+/:&,-3NOWJ
+<+/-9,4./+):./4 NFOIJ7ADCIJ7AEOI J::

Аннотации для Музыкального Центра Samsung MM-ZL7 в формате PDF
Топ 10 инструкций
Другие инструкции
Страницы и текст этой инструкции
 Инструкция музыкального центра Samsung MM-ZL7
 Информация отображена на картинке
 Информация отображена на картинке
 Информация отображена на картинке
 Информация отображена на картинке
Как использовать наш сайт инструкций OnlineManuals.ru
Наша цель состоит в том, чтобы предоставить вам быстрый доступ к содержанию инструкции для музыкального центра Samsung MM-ZL7.
С помощью онлайн просмотра, Вы можете быстро просмотреть содержимое инструкции и найти решение проблемы с музыкального центра Samsung MM-ZL7.
Для Вашего удобства
Если листать руководство пользователя музыкального центра Samsung MM-ZL7 прямо на сайте, не очень удобно для Вас, есть два возможных решения:
• Просмотр в полноэкранном режиме — легко просмотреть руководство пользователя (без загрузки его на свой компьютер), Вы можете использовать режим полноэкранного просмотра.
Для просмотра инструкции пользователя музыкального центра Samsung MM-ZL7 на полном экране, используйте кнопку «Открыть в Pdf-viewer».
• Загрузка на компьютер — Вы можете также скачать Инструкция музыкального центра Samsung MM-ZL7 на свой компьютер и сохранить его в файлах.
Многие люди предпочитают читать документы не на экране, а в печатной версии.
Возможность печати руководства пользователя также была предусмотрена на нашем сайте,
и вы можете использовать ее, нажав на иконку «печать» в Pdf-viewer.
Нет необходимости печатать все руководство музыкального центра Samsung MM-ZL7, можно выбрать только нужные страницы инструкции.
- About
- Blog
- Projects
- Help
-
Donate
Donate icon
An illustration of a heart shape - Contact
- Jobs
- Volunteer
- People
Bookreader Item Preview
texts
Samsung MM-ZL7 User manual
- Topics
- manualzz, manuals, MMZL7QH/XFO, 34223, Керівництво користувача, Samsung, ee, UM, 10003>, 11>, 1102, Lietotāja rokasgrāmata, Kasutusjuhend, lv, MM-ZL7, ua, lv, MM-ZL7,
- Collection
- manuals_samsung; manuals; additional_collections
- Addeddate
- 2021-01-02 00:23:01
- Coverleaf
- 0
- Identifier
- manualzz-id-961393
- Identifier-ark
- ark:/13960/t50h3kp6c
- Ocr
- tesseract 4.1.1
- Ocr_autonomous
- true
- Ocr_detected_lang
- ru
- Ocr_detected_lang_conf
- 1.0000
- Ocr_detected_script
- Cyrillic
- Ocr_detected_script_conf
- 1.0000
- Ocr_module_version
- 0.0.10
- Ocr_parameters
- -l bul+rus+kaz+srp+Cyrillic
comment
Reviews
There are no reviews yet. Be the first one to
write a review.
18
Views
DOWNLOAD OPTIONS
Uploaded by
chris85
on
SIMILAR ITEMS (based on metadata)
(Ocr-Read Summary of Contents of some pages of the Samsung MM-ZL7 Document (Main Content), UPD: 04 September 2023)
-
13, GB 13 You can store up to: 15 FM stations 8 MW stations 7 LW stations 1 Switch the system on by pressing On/Standby. 2 Select the TUNER function by pressing FUNC. button. 3 Select the required frequency band by pressing Band button. Result: The appropriate indication is displayed: FM Frequency Modulation AM(MW) Medium Wave LW Long Wave 4 To search for a Press Tuning Mode button station… on the front panel…. Manually One or more times until MANUAL is displayed. Automatically One or more …
-
7, GB 7 To take full advantage of your new MICRO component system, follow these installation instructions before connecting the unit. ◆ Install the system on a flat, stable surface. ◆ Never place this unit on carpeting. ◆ Never locate this unit in an outdoor area. ◆ Maintain an open space of approximately 6 inches (15 cm) on the sides and rear of the system, for ventilation purposes. ◆ Make sure that you have enough room to open the compact di…
-
9, GB 9 The AM aerial (for long and medium waves) can be: ◆ Placed on a stable surface ◆ Fixed to the wall (you must first remove the base) The AM aerial connector terminals are located on the rear of the system and are marked AM. To avoid noise interference, check that the loudspeaker wires do not run close to the aerial wires. Always keep them at least 2 inches (5 cm) away. How to connect a COAXIAL TYPE aerial. ◆ Connect a 75Ω …
-
19, Samsung MM-ZL7 GB 19 The timer enables you to switch the system on or off at specific times. Example: You wish to wake up to music every morning. If you no longer want the system to be switched on or off automatically, you must cancel the timer. Before setting the timer, check that the current time is correct. For each step, you have a few seconds to set the required options. If you exceed this time, you must start again. 1 Switch the system on by pressing On/Standby. 2 Pre…
-
21, GB 21 This machine is equipped with the function of Power Sound which amplifies bass treble output to twice as much for powerful real sound. 1 Press the Power Sound button. Result: P, SOUND is displayed for a few seconds. A more powerful resonant sound is diffused. 2 To cancel this function, press Power Sound button again. You can connect a set of headphones to your micro component system so that you can listen to music or radio programs w…
-
3, Samsung MM-ZL7 Contents GB 3 ◆ INSTALLING YOUR MICRO COMPONENT SYSTEM Safety Warnings …………………………………………………………………………………………………………… 2 Front Panel View ………………………………………………………………………………………………………….. 4 Remote Control ……………………………………………………………………………………………………………. 5 …
-
10, GB 10 Your system is equipped with a clock which allows you to turn your system on and off automatically. You should set the clock: When you purchase the Micro component system After a power failure After unplugging the unit For each step, you have a few seconds to set the required options. If you exceed this time, you must start again. 1 Switch the system on by pressing On/Standby. 2 Press Timer/Clock twice. Result: CLOCK is displayed. 3 Press Program/Se…
-
5, GB 5 Remote Control 1 9 10 11 12 13 14 15 16 17 2 3 4 5 6 7 8 On/Standby Sleep CD/TAPE/MP3 Mono/ST Band Function Tape Mode Program/ Set Last Memory Repeat Timer on/off Timer/ Clock Preset EQ Power Sound Mute VOL. VOL. Tuning Mode Track/ Album 1. On/Standby 2. Preset EQ 3. Power Sound 4. Mono / ST. 5. Tape Mode 6. Multi-Function (CD / TAPE / MP3) 7. Band 8. Volume Control 9. Sleep 10. Mute 11. Timer on / off 12. Timer / Clock 13. Program/Set / Last Memory 14. Repeat 15. Function 16. …
-
4, GB 4 Front Panel View 1 9 10 11 12 13 14 15 16 2 3 4 5 6 7 8 Volume FUNC. CD/TAPE/TUNING R Tuning Mode Display PTY CD Repeat Preset EQ +10 (CD) Record Start/Stop Band PROG./Set Last Memory CD Synchro Tape Repeat A< — >B Track/Album MP3 1. CD Door Open/Close( ) 2. On / Standby 3. Multi-Function(CD/TAPE/TUNING) 4. CD Repeat 5. Tuning Mode(Stop) 6. Band 7. PROG./Set / Last Memory 8. CD Synchro 9. Push Eject( ) 10…
-
20, Samsung MM-ZL7 GB 20 While listening to a compact disc or a cassette, you can set the system to switch off automatically. Example : You wish to go to sleep to music. 1 Press Sleep. Result: The following indications are displayed: 2 Press Sleep one or more times to indicate how long the system should continue playing before it switches off: At any time, you can: Check the remaining time by pressing Sleep. Change the remaining time by repeating steps 1 and 2.…
-
11, Samsung MM-ZL7 GB 11 Selecting a Track Volume FUNC. CD/TAPE/TUNING R Tuning Mode CD Repeat Preset EQ +10 (CD) PTY Display Band Tape Repeat A< — >B Track/Album MP3 You can select the track you wish to listen to, either when the compact disc player is stopped or when a disc is playing. To start playback at the beginning of the… Press… Next track …………………………………………. I once Current track …………………………………….. I once Previous…
-
2, Safety Warnings GB 2 CAUTION: TO REDUCE THE RISK OF ELECTRIC SHOCK, DO NOT REMOVE REAR COVER, NO USER SERVICEABLE PARTS INSIDE, REFER SERVICING TO QUALIFIED SERVICE PERSONNEL. RISK OF ELECTRIC SHOCK. DO NOT OPEN CAUTION Wiring the Mains Power Supply Plug (UK only) IMPORTANT NOTICE The main lead on this equipment is supplied with a moulded plug incorporating a fuse. The value of the fuse is indicated on the pin face of the plug and if it requires replacing, a fuse approved …
-
15, GB 15 This unit has the RDS (Radio Data System) function, which enables for the various information such as broadcasting station, radio text, time and 30 types of programs (News, Rock, Classic, etc.) to be received from the FM RDS station together with normal radio signal. 1 Press the On/Standby button. 2 Receive the FM radio. See the radio receiving method on the page 13. FM and frequency are shown on the display If the received station transfers the …
-
18, GB 18 Record on normal bias cassettes only. To prevent erasing a cassette that you wish to keep, remove the safety tabs on the upper edge of the cassette. To re-record a cassette, where the tabs have been broken, simply cover the openings with adhesive tape. It is an infringement of copyright laws to copy records and pre-recorded cassettes or to re-record them in any form without the permission of the owners …
-
12, GB 12 Precautions When Using Compact Discs CD Repeat Function To guarantee hours of enjoyable listening with your compact discs: Always hold them by the edges to avoid leaving fingerprints on the shiny surface Always replace them in their cases after listening to them Do not fix paper or adhesive tape to the discs and do not write on the label Clean the player with a special cleaning disc You can repeat: A specific track on a compact disc All tracks on the compact disc 1 Press the Repeat butt…
-
16, GB 16 ◆ The PTY information is composed of an identification symbol, which helps the FM radio to recognize the program type of each FM station. ◆ The below 30 PTY information is shown on the display by pressing the Pty button. If the PTY MODE which agrees with the PTY MODE selected in the course of auto-search, isn’t received, it is returned to the first frequency at beginning the PTY SEARCH and the auto-search and PTY SEARCH are susp…
-
8, GB 8 Connecting to an External Source When the CD DIGITAL OUT jack is not being used Attach the supplied dust cap. CD Digital Out Jack (1) This unit can output CD digital sound signals through this jack. Use an optical cable to connect digital audio equipment. (DAT deck, MD recorder, etc.). Remove the dust cap (1) from the CD DIGITAL OUT jack. Then, connect an optical cable plug to the CD DIGITAL OUT jack. The auxiliary input can be used to take advantage of the sound qual…