-
Contents
-
Table of Contents
-
Troubleshooting
-
Bookmarks
Quick Links
Инструкция
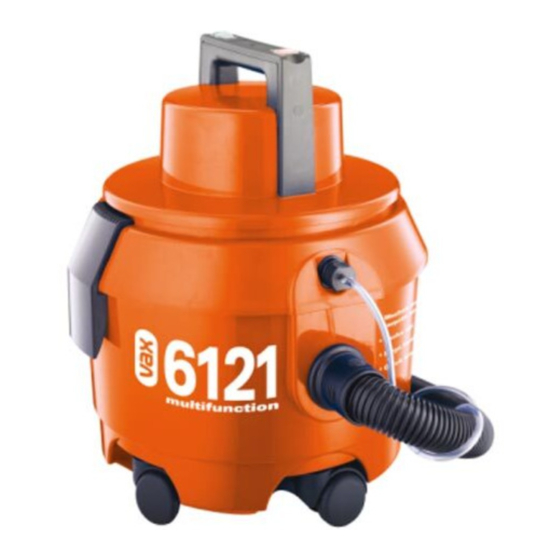
Vax 6121
Перейти в карточку товара
8 800 775 98 98
Related Manuals for Vax 6121
Summary of Contents for Vax 6121
-
Page 1
Инструкция Vax 6121 Перейти в карточку товара 8 800 775 98 98… -
Page 2
Vax 6121(C) User Guide v1.qxd 19/11/07 15:10 Page 1 Multifunction Vax model number: 6121 6121C Please read carefully before using this cleaner. www.vax.co.uk Always fully extend the mains cable before use. Retain for future reference. -
Page 3
Vax 6121(C) User Guide v1.qxd 19/11/07 15:10 Page 2 www.vax.co.uk 1. Diagram 6121 A N T I A L L E R G E N A D D I T I V E Fig.1/1 1 Water pump button (green) 13 Solution tube to machine connector… -
Page 4: Safety Information
Do not use with a damaged cord or plug. If the supply cord and/or plug is damaged, they must be replaced PLEASE KEEP THESE INSTRUCTIONS by the manufacturer, a Vax Service Agent or similarly FOR FURTHER USE. qualified persons in order to avoid hazard.
-
Page 5: 2. Remove The Motor Top From The Unit, Turn On Its Side
Vax 6121(C) User Guide v1.qxd 19/11/07 15:10 Page 4 www.vax.co.uk 3. Vacuuming 4. Fit the plug to the solution intake port (Fig.3/4). IMPORTANT: Always remove the power plug from the wall outlet before assembling, servicing or removing accessories. IMPORTANT: Only the red power button should be “ON”…
-
Page 6
Vax 6121(C) User Guide v1.qxd 19/11/07 15:10 Page 5 Fig.3/10 Fig.3/7 Fit the combination floor tool by pushing on to the Replace the motor top, ensuring that the dust bag is not extension tube (Fig 3/11). trapped. Ensure the motor top is secured to the base with the two clips (Fig.3/8). -
Page 7
Vax 6121(C) User Guide v1.qxd 19/11/07 15:10 Page 6 www.vax.co.uk 4. Accessories Carpet Cleaning For carpet cleaning, press the rocker switch on the combination floor tool as shown to raise the brushes The accessories can be attached directly to the handle by (Fig.3/13). -
Page 8: Preparing The Carpet
Water Tank and fill with warm (max 40°C) water to point • Allow carpet to dry completely. Try not to walk on the indicated on the tank. Add 1 capful of Vax AAA solution carpet until it is dry. (for carpets) per litre of water (unless otherwise stated on •…
-
Page 9
Vax 6121(C) User Guide v1.qxd 19/11/07 15:10 Page 8 www.vax.co.uk 7. Assembly 1. Push solution tube to machine connector (A) firmly into Solution Port (A1). Twist solution tube connector (A1) a quarter turn to the right to lock into place (Fig.7/1). -
Page 10
Vax 6121(C) User Guide v1.qxd 19/11/07 15:10 Page 9 8. Usage 1. Plug in machine to power supply. 2. Press the red button to turn on the power. 3. Press the green button to activate the pump. Washing Carpets 1. On the Fibreflow wash head ensure that the rocker switch (A) is towards the back of the head to allow water to flow through the head (Fig.8/1). -
Page 11: Dust Bag And Filters
Vax 6121(C) User Guide v1.qxd 19/11/07 15:10 Page 10 www.vax.co.uk 9. Dust Bag and Filters: Removal and Replacement IMPORTANT: Always unplug the machine from the electrical output before removing the dust bag. IMPORTANT: Do NOT use the vacuum cleaner without ALL of the filters in place.
-
Page 12
Vax 6121(C) User Guide v1.qxd 19/11/07 15:10 Page 11 10. Maintenance IMPORTANT: Ensure that the machine is switched off and unplugged from the socket before carrying out any maintenance. Cleaning the Pre-Motor Filter. 1. Remove the motor top from the unit, turn on its side and remove the float housing in an anti-clockwise direction to unscrew (Fig.10/1). -
Page 13: Troubleshooting
Vax 6121(C) User Guide v1.qxd 19/11/07 15:10 Page 12 www.vax.co.uk 11. Troubleshooting Technical Specification WARNING: To reduce the risk of personal injury, Voltage: 220-240V ~50Hz unplug the vacuum cleaner before performing Wattage: 1300W maintenance or troubleshooting checks. Capacity: Clean water tank — 4 litres Dirty water tank — litres PROBLEM: The cleaner won’t run.
-
Page 14
Vax 6121(C) User Guide v1.qxd 19/11/07 15:10 Page 13 This page has been left intentionally blank. technical specification… -
Page 15
Vax 6121(C) User Guide v1.qxd 19/11/07 15:10 Page 14 www.vax.co.uk This page has been left intentionally blank. -
Page 16
Vax 6121(C) User Guide v1.qxd 19/11/07 15:10 Page 15 This page has been left intentionally blank. -
Page 17
15:10 Page 16 EEC STATEMENT OF COMPLIANCE Manufacturer/EEC importer: Vax Limited, hereby on our own responsibility, declare that the product 6121/6121C Multifunction is manufactured in compliance with the following Directives: Safety: 2006/95/EC Low Voltage Directive EMC: 2004/108/EC Electromagnetic Compatibility Directive Waste electrical products should not be disposed of with household waste. -
Page 18
Vax 6121 Описание…
This manual is also suitable for:
6121c
инструкцияVax 6121

vax.co.uk
Multifunction
6121 series
User Guide
Vax Careline: (UK) 0844 412 8455
(ROI) 1-800 928 308
Get Cleaning…
What’s your Vax model number? (Located on the top flap of the packaging)What’s your serial number? (Located on the base of the machine)
Note these down in case you need them in future. Please keep instructions for further use.
– – – – –
e.g. 6 12 1 T
6121 Multivax Series User Guide v1.2.qxd:User guide 28/1/11 14:58 Page 1
Посмотреть инструкция для Vax 6121 бесплатно. Руководство относится к категории пылесосы, 1 человек(а) дали ему среднюю оценку 9.2. Руководство доступно на следующих языках: английский. У вас есть вопрос о Vax 6121 или вам нужна помощь? Задайте свой вопрос здесь
Главная
| Vax | |
| 6121 | |
| пылесос | |
| английский | |
| Руководство пользователя (PDF) |
Не можете найти ответ на свой вопрос в руководстве? Вы можете найти ответ на свой вопрос ниже, в разделе часто задаваемых вопросов о Vax 6121.
Мой пылесос Vax не всасывает как раньше. В чем может быть проблема?
Потеря вашим пылесосом Vax мощности всасывания может быть обусловлена следующими причинами: — Мощность всасывания не установлена на максимальную — Контейнер или мешок для сбора пыли переполнен — Шланг, щетка или трубка засорены
Как часто следует проверять фильтр?
Чистый фильтр очень важен для поддержания мощности всасывания пылесоса. В связи с этим регулярно проверяйте его. При забитом фильтре мощность всасывания уменьшается, а потребление энергии возрастает.
Что делать при появлении от пылесоса неприятного запаха?
Распространенный метод решения проблемы появления неприятного запаха — насыпать немного стирального порошка в контейнер или сумку для сбора пыли.
С какой частотой необходимо пылесосить помещения?
Людям, страдающим аллергией, рекомендуется пылесосить не менее двух раз в неделю.
Инструкция Vax 6121 доступно в русский?
К сожалению, у нас нет руководства для Vax 6121, доступного в русский. Это руководство доступно в английский.
Не нашли свой вопрос? Задайте свой вопрос здесь
(Ocr-Read Summary of Contents of some pages of the Vax 6121 Document (Main Content), UPD: 05 June 2023)
-
1, лчиттничюнльтцию. глтчн.Бзвыдны www.sotmarket.ru дбняинфмциятв, тзывы,бзыиы Инструкция Vax 6121 Перейти в карточку товара 8 800 775 98 98
… -
2, www.vax.co.uk Please read carefully before using this cleaner. Always fully extend the mains cable before use. Retain for future reference. instruction manual Multifunction Vax model number: 6121 6121C Vax 6121(C) User Guide v1.qxd 19/11/07 15:10 Page 1
… -
3, Vax 6121 6121 1. Diagram www.vax.co.uk 2 parts overview 4 3 9 2 1 14 12 13 10 11 Fig.1/1 1 Water pump button (green) 2 Power button (red) 3 Carry handle 4 Power cord 5 Container release clips 6 Casters 7 Hose connection port 8 Solution tube port 9 Exhaust filter 10 Hose 11 Solution tube 12 Hose connector 13 Solution tube to machine connector 14 Solution tube to wash head/upholstery tool connector 15 2 x stainless steel extension tubes 16 Fibreflow carpet was…
-
4, 3 safety information 2. Safety Information FOR HOUSEHOLD USE ONLY. When using the cleaner, basic safety precautions should always be observed, including the following: 1. Do not leave the machine unattended when plugged in. Unplug it from socket when not in use. 2. To prevent electric shock do not use outdoors. 3. Not to be used as a toy. Children should be supervised to ensure that they do not play with the appliance. 4. This appliance is not intended for use by persons (including children) w…
-
5, Vax 6121 www.vax.co.uk 4 vacuuming 3. Vacuuming IMPORTANT: Always remove the power plug from the wall outlet before assembling, servicing or removing accessories. IMPORTANT: Only the red power button should be “ON” when the machine is in dry vacuuming mode. The green pump button should be “OFF”. 1. Unclip Container Release Clips (A) on both sides of machine (Fig.3/1). 2. Remove the motor top from the unit, turn on its side and remove the float housing in an anti-clockwise direction to unsc…
-
6, 5 vacuuming Replace the motor top, ensuring that the dust bag is not trapped. Ensure the motor top is secured to the base with the two clips (Fig.3/8). Insert the flexible hose into the inlet on the main body of the vacuum cleaner. Push in and twist clockwise a quarter turn until tight (Fig.3/9). Push the extension tubes onto the end of the handle (Fig.3/10). Fit the combination floor tool by pushing on to the extension t…
-
7, www.vax.co.uk 6 vacuuming / accessories Carpet Cleaning For carpet cleaning, press the rocker switch on the combination floor tool as shown to raise the brushes (Fig.3/13). Hard Floor Cleaning For hard floor cleaning, press the rocker switch on the combination floor tool as shown to lower the brushes (Fig.3/14). 4. Accessories The accessories can be attached directly to the handle by removing the extension tubes and pushing in the desired accessory (Fig.4/1). The ac…
-
8, Vax 6121 7 preparing the carpet / getting ready to wash 5. Preparing the Carpet for Washing IMPORTANT: Do not use the cleaner as a dry vacuum when set up in carpet washing mode. 1. Vacuum carpet thoroughly. 2. Remove as much furniture from the room as possible. If unable to remove the furniture, place plastic or foil under and around the legs until the carpet has dried completely. Helpful hints for cleaning carpet: 1. Only use Vax recommended solution with th…
-
9, www.vax.co.uk 8 getting ready to wash / assembly 5. Replace Motor Container (A) ensuring that the Solution Pump Hose (B) is aligned with the hole in the Clean Water Tank (C) so that it goes inside when the Motor Container is clipped back into position (Fig.6/5). WARNING: Machine must not be plugged in during this stage. 7. Assembly 1. Push solution tube to machine connector (A) firmly into Solution Port (A1). Twist solution tube connector (A1…
-
10, 9 assembly / usage 5. After wrapping the tube around the hose, affix Solution Tube (A) to Hose (B) using Clips provided (C) to hold it in place (Fig.7/5). 6. Push the second extension tube into the wash head to be used and push the end of the solution tube onto the connection port on the Wash Head / Upholstery Tool (Fig.7/6). 8. Usage 1. Plug in machine to power supply. 2. Press the red button to turn on the power. 3. Press the green button to activate the pump. Washing Carpets 1. On the…
-
11, www.vax.co.uk 10 usage / dust bag and filters 4. To start water and solution flow, push the collar on the wash tool forwards 5. To recover excess water and solution, pull the collar backwards NOTE: Do not store cleaner with solution in clean water tank or dirty water in dirty water tank. Mineral deposits and mildew can form which will affect the performance of the machine. 9. Dust Bag and Filters: Removal and Replacement IMPORTANT: Always unplug the machine fr…
-
12, 11 maintenance 10. Maintenance IMPORTANT: Ensure that the machine is switched off and unplugged from the socket before carrying out any maintenance. Cleaning the Pre-Motor Filter. 1. Remove the motor top from the unit, turn on its side and remove the float housing in an anti-clockwise direction to unscrew (Fig.10/1). 2. Remove the blue filter (Fig.10/2) and wash under a tap. Allow to dry thoroughly before replacing back into the machine. Replace with a new filter a…
-
13, www.vax.co.uk 12 troubleshooting / 11. Troubleshooting WARNING: To reduce the risk of personal injury, unplug the vacuum cleaner before performing maintenance or troubleshooting checks. PROBLEM: The cleaner won’t run. Cause: Not properly plugged into electrical outlet. Solution: Plug in firmly. Cause: No electricity in electrical outlet. Solution: Check fuse or breaker. Cause: On/off switch not turned on. Solution: Push on/off switch to ‘on’. Cause: Blown fuse/tripped breaker. Solu…
-
14, 13 technical specification Vax 6121(C) User Guide v1.qxd 19/11/07 15:10 Page 13 This page has been left intentionally blank.
… -
15, www.vax.co.uk 14 This page has been left intentionally blank. Vax 6121(C) User Guide v1.qxd 19/11/07 15:10 Page 14
… -
16, 15 This page has been left intentionally blank. Vax 6121(C) User Guide v1.qxd 19/11/07 15:10 Page 15
… -
17, — EEC STATEMENT OF COMPLIANCE Manufacturer/EEC importer: Vax Limited, hereby on our own responsibility, declare that the product 6121/6121C Multifunction is manufactured in compliance with the following Directives: Safety: 2006/95/EC Low Voltage Directive EMC: 2004/108/EC Electromagnetic Compatibility Directive Waste electrical products should not be disposed of with household waste. Please recycle where facilities exist…
-
18, Vax 6121 лтззлюбым дбнымбм глтчня лжбдджи Дтвззв вии фмлнидит нлнз2минты мнииДтвилт…
3.0
Rated 3 out of 5
3 out of 5 stars (based on 1 review)
Your overall rating
VAX 6121 MULTIVAX (01) PDF MANUAL
Click here to download VAX 6121 MULTIVAX (01) PDF MANUAL
VAX 6121 MULTIVAX (01) PDF MANUAL
FREE ENGLISH PDF
OPERATING INSTRUCTIONS
USER GUIDE – USER MANUAL
OWNER GUIDE – OWNER MANUAL
REFERENCE GUIDE – REFERENCE MANUAL
INSTRUCTION GUIDE – INSTRUCTION MANUAL
Your overall rating
- YouTube
VAX 6121 MULTIVAX (01) PDF MANUAL
VAX 6121 MULTIVAX (01) PDF MANUAL
![]()
6121 Multivax Series User Guide v1.2.qxd:User guide 28/1/11 14:58 Page 1
User Guide
Vax Careline: (UK) 0844 412 8455
(ROI) 1-800 928 308
Multifunction
Get Cleaning…
What’s your Vax model number? (Located on the top flap of the packaging)
e.g. 6121T
What’s your serial number? (Located on the base of the machine)
– 


 –
– 
 –
– 
 –
– 
 –
–
Note these down in case you need them in future. Please keep instructions for further use.

6121 Multivax Series User Guide v1.2.qxd:User guide 28/1/11 14:58 Page 2
—
Machine Overview
1 Solution pump button (green)
2Power button (red)
3Carry handle
4Power cord
5Lid release clips
6Hose connection port
7Solution tube port
8Post motor filter cover(hidden)
9Hose
10 Solution delivery tube
11 Hose connector
12Solution delivery tube to machine connector
13Solution delivery tube to wash head/tool connector
142 piece extension tube
15Fibreflow wash head
16Wash tool
17Vax carpet cleaning solution
18Combination floor head
193 x paper dust bags
20 Crevice tool
21 Dusting brush
22Upholstery tool
23Pleated pre motor filter
24Foam post-motor filter
25Foam pre-motor filter
PLEASE NOTE: some parts may vary according to model. Please check inside flap of box for more details.
|
1 |
14 |
|
|
2 |
||
|
3 |
||
|
8 |
||
|
4 |
||
|
5 |
||
|
7 |
15 |
|
|
6 |
||
|
16 |
||
|
9 |
17 |
|
|
10 |
||
|
12 |
||
|
11 |
18 |
|
|
13 |
||
|
19 |
||
|
20 |
21 |
|
|
22 |
Unit and accessories
Filters
|
2 |
Vax Careline: (UK) 0844 412 8455 |
|
(ROI) 1-800 928 308 |

6121 Multivax Series User Guide v1.2.qxd:User guide 28/1/11 14:58 Page 3
General Safety Information
FOR HOUSEHOLD USE ONLY.
When usingthe multifunction cleaner basicsafetyprecautions shouldalways be observed, includingthefollowing:
1.Do notleavethe multifunction cleanerunattended when plugged in. Unplug it from the socketwhennot in use.
2.To prevent electricshock do not useoutdoors.
3.Notto be used as a toy.
4.Childrenshouldbe supervised to ensurethatthey do not playwiththeappliance.
5.Thisappliance is not intended for useby persons (including children)withreduced physical,sensory or mental capabilities, or lack of experience andknowledge,unless they have been given supervisionor instruction concerningthe use of the appliance by a person responsiblefortheir safety.
6.Use onlyas described in this manual. Use onlyVax recommendedattachments.
7.Do not use the multifunctioncleaner if it has been dropped, damaged, left outdoors or dropped into water. Do not use the multifunctioncleaner with a damaged cord or plug. If the supply cord is damaged, it must be replaced by the manufacturer or a recommended Service Agent to avoid hazard and invalidating the guarantee.
8.Do nothandlethe plug or multifunctioncleanerwith wet hands. Do not useoutdoors.
9.Do notput any objects into openingsor operatewith openings blocked. Keep them free of anythingthatmight reduce airflow.
10.Keep hair,looseclothing,fingersandallparts of body away from openings andmoving parts.
11.Do notpick up hot coals,cigarette butts,matchesor any hot, smoking or burningobjects.
12.Do notuse thecarpet washing function without the solutiontankand dirty watertank in place.
13.Do notuse themultifunction cleanerin dry mode without the dust bag in place.
14.Turnoffallcontrolsbefore unplugging.
15.Do notvacuumup harmful or toxicmaterial(chlorine, bleach,ammonia,draincleaner etc.).
16.Do notvacuumup hardor sharpobjectssuchas glass, nails,screws, coins, etc.
17.Use only CE-approved 13 amp extension cords. Non-approved cords may overheat. Care should be taken to arrange the cord so that the cordcannotbe tripped over.
18.Store the multifunction cleaner in a cool, dry area.
19.To prevent dirty water from running into motor,do not hold the appliance upside-downor lay on its side. Use appliance in normal vacuuming/carpet washing position.
20.Take extra care when cleaning on stairs.
21.Turn off the on/off switch before unplugging the multifunction cleaner.
22.Do not carry appliance while motor is running.
WARNING: Always switch off and unplug the
! multifunction cleaner from the electrical outlet before assembling, opening, emptying the dirt container/dirty water tank, before connecting/disconnecting the attachments, or carrying out maintenance or troubleshooting checks.
NOTE: Carpets should be dry vacuumed thoroughly
! before washing.
IMPORTANT: If the inlet, hose or telescopic tube is
! blocked, switch off the multifunction cleaner and remove the blockage(s) before re-starting the multifunction cleaner.
IMPORTANT: Cleaning filters maintains vacuum
! performance. Vax recommends that your filters should be checked and cleaned periodically. If your filters are washable make sure they are completely dry before inserting back into the multifunction cleaner.
IMPORTANT: The motor is equipped with a thermal ! cut-out. If for any reason the unit should overheat, the
thermostat will automatically turn the unit off. Should this occur, unplug the multifunction cleaner from the electrical outlet and turn off the switch. Clean filters. Allow the unit to cool for approximately one (1) hour. To re-start, plug into an electrical outlet and switch back on.
This multifunction is intended for household use only and NOT for commercial or industrial use.
PLEASE KEEP INSTRUCTIONS FOR FURTHER USE.

6121 Multivax Series User Guide v1.2.qxd:User guide 28/1/11 14:58 Page 4
—
Operation
WARNING: Unplug your multifunction cleaner before performing ! maintenance/troubleshooting checks.
Vacuuming
Assembling your multifunction cleaner (dry vacuuming)
1 


 1
1


 2 2
2 2 

|
Lift up clips to remove |
Remove the float |
Fit the plug. |
|
lid. |
housing from the lid. |
|
Remove clean water |
Fit the pleated pre- |
Slide dust bag into the |
Press down on clips |
||
|
tank from unit. |
motor filter to the lid. |
slots inside the base of |
to secure. |
||
|
the unit. |
|||||
|
1 |
|||||
|
2 |
2 |
||||
|
1 |
|||||
|
! |
NOTE: The crevice tool, dusting |
! |
NOTE: Fully unwind |
||
|
brush and upholstery tool, can all be |
power cord. |
attached to the telescopic tube/handle.
|
4 |
Vax Careline: (UK) 0844 412 8455 |
|
(ROI) 1-800 928 308 |

6121 Multivax Series User Guide v1.2.qxd:User guide 28/1/11 14:58 Page 5
Operation
Before you begin carpet washing
!IMPORTANT: Do not use the cleaner as a dry vacuum when set up in carpet washing mode.
!NOTE: Do not over saturate your carpet.
•Vacuum your carpets thoroughly.
•Test for colourfastness — Wet a white absorbent cloth with the solution. In a small, hidden area of your carpet, gently rub the surface with the dampened cloth. Wait ten minutes and check for colour removal or bleed with white paper towel or cloth. If your carpet has more than one colour, check all colours.
•When cleaning an entire room, move furniture out of the area to be cleaned. If the furniture is too heavy to move, place aluminium foil or wax paper under legs. This will prevent wood finishes from staining your carpet. Pin up furniture skirts and curtains.
Helpful hints for washing carpet:
1.For heavy soiled areas, additional applications may be necessary.
2.Allow plenty of time to dry carpet thoroughly.
3.Try not to walk on carpet until it is completely dry.
4.After carpet is thoroughly dry, vacuum the carpet using your vacuum cleaner in dry mode.
5.Before cleaning, determine where to start and end, making sure not to walk over previously cleaned areas.
6.Thoroughly clean the dirty water tank and clean water tank after use with warm water (max 40°C).
.
 Loading…