- Manuals
- Brands
- Mini Manuals
- Automobile
- COOPER, COOPER
Manuals and User Guides for Mini COOPER, COOPER. We have 21 Mini COOPER, COOPER manuals available for free PDF download: Workshop Manual, Owner’s Manual
Mini COOPER, COOPER Owner’s Manual (275 pages)
MINI COUNTRYMAN, MINI PACEMAN
Brand: Mini
|
Category: Automobile
|
Size: 3.11 MB
Table of Contents
-
-
-
Additional Sources of Information
5
-
Event Data Recorder Edr
8
-
Reporting Safety Defects
8
-
-
Indicator and Warning Lamps
14
-
-
-
-
Voice Activation System
22
-
Central Locking System
28
-
Automatic Transmission
35
-
-
Interior Rearview Mirror
46
-
Transporting Children Safely
47
-
Latch Child Restraint Fixing System
48
-
-
-
Switching off the Engine
52
-
Automatic Transmission with Steptronic
53
-
-
Settings and Information
63
-
-
Technology for Driving Comfort and Safety
72
-
Driving Stability Control Systems
73
-
Dynamic Stability Control Dsc
73
-
Dynamic Traction Control Dtc
74
-
-
Automatic Deactivation of the Front Passenger Airbags
83
-
-
Automatic Headlamp Control
85
-
Adaptive Light Control
86
-
Daytime Running Lights
86
-
-
-
Roadside Parking Lamps
87
-
-
Automatic Climate Control
91
-
-
-
Integrated Universal Remote Control
94
-
-
Practical Interior Accessories
94
-
To Reprogram Individual Buttons
95
-
Cupholders and Ashtray
101
-
Cigarette Lighter Socket
102
-
-
Things to Remember When Driving
105
-
General Driving Notes
105
-
Driving through Water
106
-
Driving on Poor Roads
115
-
-
-
Entering the Destination
126
-
Entering Destination Via Voice
127
-
Hands-Free Device Bluetooth
165
-
Mobile Phone Preparation Bluetooth
175
-
Muting the Microphone
182
-
-
Tire Inflation Pressures
204
-
Tire Identification Marks
211
-
Tire Identification Number
211
-
Special Characteristics of Winter Tires
214
-
-
-
Mini Maintenance System
219
-
-
-
Repairing a Flat Tire
231
-
Distributing the Sealant
232
-
Giving and Receiving Assistance
237
-
Short Commands for the Voice Activation
253
-
Everything from a to Z
261
Mini COOPER, COOPER Owner’s Manual (283 pages)
MINI COUPE, MINI ROADSTER, MINI CONVERTIBLE
Brand: Mini
|
Category: Automobile
|
Size: 9.83 MB
Table of Contents
-
-
California Proposition 65 Warning
6
-
Reporting Safety Defects
7
-
-
Indicator and Warning Lamps
14
-
Voice Activation System
24
-
-
Central Locking System
30
-
Automatic Transmission
38
-
-
-
Interior Rearview Mirror
56
-
Transporting Children Safely
57
-
-
Switching off the Engine
62
-
Automatic Transmission with Steptronic
63
-
-
-
Average Fuel Consumption
73
-
Settings and Information
74
-
Technology for Driving Comfort and Safety
83
-
Driving Stability Control Systems
84
-
Dynamic Traction Control Dtc
85
-
Automatic Deactivation of the Front Passenger Airbags
94
-
MINI COOPER, COOPER Owner’s Manual (267 pages)
Brand: MINI
|
Category: Automobile
|
Size: 3.7 MB
Table of Contents
-
-
-
Additional Sources of Information
5
-
California Proposition 65 Warning
6
-
Event Data Recorder Edr
8
-
Reporting Safety Defects
8
-
-
-
Indicator and Warning Lamps
14
-
-
-
-
-
Voice Activation System
22
-
-
Central Locking System
28
-
Automatic Transmission
35
-
-
Interior Rearview Mirror
43
-
Transporting Children Safely
45
-
Latch Child Restraint Fixing System
46
-
-
-
Switching off the Engine
49
-
Automatic Transmission with Steptronic
50
-
-
Average Fuel Consumption
59
-
Current Fuel Consumption
60
-
Settings and Information
61
-
Technology for Driving Comfort and Safety
69
-
Driving Stability Control Systems
70
-
Dynamic Stability Control Dsc
70
-
Dynamic Traction Control Dtc
71
-
-
Automatic Headlamp Control
82
-
Adaptive Light Control
83
-
Daytime Running Lights
83
-
-
-
Automatic Climate Control
88
-
-
Practical Interior Accessories
91
-
To Reprogram Individual Buttons
92
-
Cupholders and Ashtray
97
-
Cigarette Lighter Socket
98
-
-
-
Things to Remember When Driving
101
-
General Driving Notes
101
-
Driving through Water
102
-
-
-
-
-
Entering the Destination
118
-
Starting Route Guidance
120
-
-
-
Muting the Microphone
174
-
Tire Inflation Pressures
196
-
Tire Identification Number
203
-
Uniform Tire Quality Grading
204
-
Special Characteristics of Winter Tires
207
-
Mini Maintenance System
212
-
Repairing a Flat Tire
225
-
Distributing the Sealant
227
-
Jacking up the Vehicle
229
-
Connecting Jumper Cables
233
Mini COOPER, COOPER Owner’s Manual (263 pages)
Brand: Mini
|
Category: Automobile
|
Size: 3.99 MB
Table of Contents
-
-
-
California Proposition 65 Warning
6
-
-
Reporting Safety Defects
8
-
-
Indicator and Warning Lamps
14
-
-
-
Central Locking System
28
-
Automatic Transmission
35
-
-
Interior Rearview Mirror
43
-
Latch Child Restraint Fixing System
46
-
Switching off the Engine
49
-
Automatic Transmission with Steptronic
50
-
Average Fuel Consumption
59
-
Current Fuel Consumption
60
-
Settings and Information
61
-
Dynamic Stability Control DSC
76
-
-
Adaptive Light Control
82
-
Daytime Running Lights
82
-
Roadside Parking Lamps
83
-
-
Automatic Climate Control
87
-
-
-
To Reprogram Individual Buttons
91
-
Cupholders and Ashtray
96
-
Cigarette Lighter Socket
97
-
-
Things to Remember When Driving
101
-
General Driving Notes
101
-
Driving through Water
102
-
-
-
Entering the Destination
117
-
Hands-Free Device Bluetooth
157
-
Mobile Phone Preparation Bluetooth
166
-
Muting the Microphone
173
-
-
Tire Inflation Pressures
192
-
Tire Identification Number
199
-
Mini Maintenance System
208
-
Repairing a Flat Tire
221
-
Distributing the Sealant
223
-
Jacking up the Vehicle
225
-
Connecting Jumper Cables
229
-
Short Commands for the Voice Activation
242
-
Everything from a to Z
249
Mini COOPER, COOPER Owner’s Manual (276 pages)
Mini Automobile
Brand: Mini
|
Category: Automobile
|
Size: 6.69 MB
Table of Contents
-
-
Maintenance and Repairs
7
-
California Proposition 65 Warning
7
-
Reporting Safety Defects
9
-
Event Data Recorder Edr
9
-
All Around the Center Console
18
-
Voice Activation System
26
-
-
Central Locking System
33
-
Automatic Transmission
40
-
-
-
Interior Rearview Mirror
48
-
Transporting Children Safely
50
-
-
Automatic Transmission with Steptronic
61
-
-
Average Fuel Consumption
66
-
Settings and Information
67
-
-
Daytime Running Lights
75
-
Adaptive Light Control
76
-
Mini COOPER, COOPER Owner’s Manual (273 pages)
Brand: Mini
|
Category: Automobile
|
Size: 6.03 MB
Table of Contents
-
The Fastest Way to Find Information on a Partic
6
-
The Topics of Navigation, Entertainment, and
6
-
Communication Can be Called up Via the Follow
6
-
Ing Owner’s Manuals: Integrated Owner’s
6
-
-
Event Data Recorder Edr
11
-
Vehicle Identification Number
12
-
Reporting Safety Defects
13
-
Central Information Display (CID)
20
-
Voice Activation System
28
-
Voice Activation System
29
-
-
MINI Motorer’s Guide App
33
-
Frequently Asked Questions
34
-
-
-
CONTROLS Opening and Closing
38
-
-
-
Automatic Dimming Feature
62
-
Transporting Children Safely
64
-
Transporting Children Safely
65
-
-
Cleaning the Windshield
77
-
-
-
Daytime Running Lights
111
-
Mini COOPER, COOPER Owner’s Manual (266 pages)
Brand: Mini
|
Category: Automobile
|
Size: 6.02 MB
Table of Contents
-
-
-
Event Data Recorder Edr
10
-
Vehicle Identification Number
10
-
Reporting Safety Defects
10
-
Voice Activation System
26
-
Integrated Owner’s Manual in the Vehicle
29
-
-
Interior Motion Sensor
45
-
-
Automatic Dimming Feature
58
-
Transporting Children Safely
60
-
-
Automatic Deactivation
69
-
Selector Lever Position
75
-
-
-
Indicator/Warning Lights Check Control
81
-
-
Daytime Running Lights
102
-
Driving Stability Control Systems
123
-
MINI Driving Modes Switch Status
125
-
-
-
Automatic Climate Control
148
-
Rear Window Defroster
151
-
Things to Remember When Driving
172
-
General Driving Notes
173
-
Driving through Water
173
-
-
-
Tire Inflation Pressure
190
-
Tire Identification Number
196
-
Tire Identification Marks
196
-
Uniform Tire Quality Grading
196
-
Changing Wheels and Tires
198
-
Repairing a Flat Tire
200
-
-
-
Mini Maintenance System
218
-
-
-
Wiper Blade Replacement
220
-
-
-
Vehicle Care Products
238
-
-
Everything from a to Z
256
Mini COOPER, COOPER Owner’s Manual (218 pages)
Brand: Mini
|
Category: Automobile
|
Size: 4.72 MB
Table of Contents
-
-
Additional Sources of Information
5
-
Reporting Safety Defects
8
-
-
-
-
Indicator and Warning Lamps
14
-
-
-
-
Central Locking System
24
-
Using the Remote Control
25
-
-
-
Automatic Transmission
33
-
Closing the Convertible Top
38
-
-
Interior Rearview Mirror
51
-
Transporting Children Safely
52
-
Latch Child Restraint Fixing System
53
-
-
-
-
Switching off the Engine
57
-
Automatic Transmission with Steptronic
58
-
-
Activating/Deactivating Cruise Control
64
-
Resuming Cruise Control
64
-
Resetting the Trip Odometer
66
-
Current Fuel Consumption
68
-
-
3 MINI Roadster, MINI Convertible: Always
69
-
Initializing the Flat Tire Monitor
69
-
-
Settings and Information
69
-
Resetting to Factory Settings
71
-
-
Technology for Driving Comfort and Safety
76
-
Driving Stability Control Systems
77
-
Dynamic Stability Control Dsc
77
-
Dynamic Traction Control Dtc
78
-
-
MINI Coupe/Mini Roadster
79
-
Automatic Deactivation of the Front Passenger Airbags
86
-
-
-
-
Automatic Headlamp Control
89
-
Daytime Running Lights
90
-
Adaptive Light Control
91
-
Roadside Parking Lamps
92
-
-
-
Automatic Climate Control
97
-
-
Practical Interior Accessories
100
-
Cupholders and Ashtray
102
-
Things to Remember When Driving
107
-
General Driving Notes
107
-
Driving through Water
108
-
Determining Cargo Limit
111
-
-
-
Setting Tone Controls
118
-
Additional Information
122
-
-
-
-
Activating/Deactivating Bluetooth Link
131
-
Pairing/Unpairing Mobile Phone
131
-
-
-
Tire Identification Number
151
-
-
Mini Maintenance System
160
-
-
Repairing a Flat Tire
171
-
Distributing the Sealant
173
-
Jacking up the Vehicle
175
-
Giving and Receiving Assistance
178
Mini COOPER, COOPER Owner’s Manual (212 pages)
Brand: Mini
|
Category: Automobile
|
Size: 3.61 MB
Table of Contents
-
-
Additional Sources of Information
6
-
-
California Proposition 65 Warning
7
-
Reporting Safety Defects
8
-
-
-
-
Online Edition for Part No. 01 40 2 608 455 — © 07/11 BMW AG Online Edition for Part No. 01 40 2 608 455 — © 07/11 BMW AG
17
-
-
-
-
Central Locking System
25
-
Automatic Transmission
33
-
-
-
Automatic Dimming Feature
41
-
Transporting Children Safely
43
-
Latch Child Restraint Fixing System
44
-
-
Switching off the Engine
47
-
Automatic Transmission with Steptronic
48
-
-
Average Fuel Consumption
57
-
Current Fuel Consumption
58
-
Settings and Information
58
-
Resetting to Factory Settings
60
-
Technology for Driving Comfort and Safety
65
-
Driving Stability Control Systems
66
-
Dynamic Stability Control Dsc
66
-
Dynamic Traction Control DTC
67
-
-
-
Daytime Running Lights
78
-
Adaptive Light Control
79
-
Roadside Parking Lamps
80
-
-
-
Automatic Climate Control
84
-
Practical Interior Accessories
87
-
To Reprogram Individual Buttons
88
-
Cupholders and Ashtray
92
-
Cigarette Lighter Socket
93
-
-
Mini COOPER, COOPER Owner’s Manual (210 pages)
Brand: Mini
|
Category: Automobile
|
Size: 3.34 MB
Table of Contents
-
-
-
Additional Sources of Information
6
-
California Proposition 65 Warning
7
-
Reporting Safety Defects
8
-
-
Around the Center Console
17
-
-
Central Locking System
23
-
Unlocking the Liftgate
26
-
-
-
Automatic Transmission
31
-
-
Closing the Convertible Top
37
-
-
Interior Rearview Mirror
44
-
Transporting Children Safely
45
-
Latch Child Restraint Fixing System
46
-
-
-
Switching off the Engine
49
-
-
-
Settings and Information
61
-
Resetting to Factory Settings
63
-
-
-
Technology for Driving Comfort and Safety
68
-
Driving Stability Control Systems
69
-
Dynamic Stability Control Dsc
69
-
Dynamic Traction Control Dtc
70
-
-
-
Automatic Deactivation of the Front Passenger Airbags
78
-
-
-
Daytime Running Lights
81
-
-
Adaptive Light Control
82
-
Roadside Parking Lamps
83
-
-
-
Automatic Climate Control
88
-
-
Practical Interior Accessories
91
-
Cupholders and Ashtray
95
-
Cigarette Lighter Socket
95
-
-
Things to Remember When Driving
98
-
Determining Cargo Limit
102
-
-
-
Additional Information
113
-
-
Activating/Deactivating Bluetooth Link
122
-
Pairing/Unpairing Mobile Phone
122
-
Tire Identification Number
144
-
Uniform Tire Quality Grading
144
-
Special Characteristics of Winter Tires
147
-
Checking Coolant Level
151
-
Mini Maintenance System
153
-
Repairing a Flat Tire
165
-
Distributing the Sealant
167
-
Connecting Jumper Cables
172
-
Mini COOPER, COOPER Owner’s Manual (196 pages)
CLUBMAN
Brand: Mini
|
Category: Automobile
|
Size: 3.23 MB
Table of Contents
-
-
-
Additional Sources of Information
6
-
California Proposition 65 Warning
7
-
Reporting Safety Defects
8
-
-
Around the Center Console
17
-
Central Locking System
23
-
Transporting Children Safely
40
-
Latch Child Restraint Fixing System
41
-
-
-
Automatic Transmission
44
-
Switching off the Engine
44
-
-
-
Settings and Information
55
-
Resetting to Factory Settings
57
-
-
-
Technology for Driving Comfort and Safety
62
-
Driving Stability Control Systems
62
-
-
Dynamic Stability Control
63
-
Dynamic Traction Control Dtc
64
-
Activating/Deactivating Dtc/Together
64
-
-
-
Automatic Deactivation of the Front Passenger Airbags
72
-
-
Daytime Running Lights
75
-
Adaptive Light Control
76
-
Roadside Parking Lamps
77
-
-
Automatic Climate Control
82
-
-
Practical Interior Accessories
85
-
Cupholders and Ashtray
89
-
Cigarette Lighter Socket
89
-
Things to Remember When Driving
92
-
Determining Cargo Limit
96
-
Roof-Mounted Luggage Rack
97
-
-
Additional Information
107
-
COMMUNICATIONS Telephone
114
-
Pairing/Unpairing Mobile Phone
116
-
Activating/Deactivating Bluetooth Link
116
-
-
-
Tire Identification Number
134
-
Uniform Tire Quality Grading
134
-
Special Characteristics of Winter Tires
137
-
-
Checking Coolant Level
141
-
-
Mini Maintenance System
142
-
-
-
Repairing a Flat Tire
153
-
Distributing the Sealant
155
-
Jacking up the Vehicle
156
-
In the Engine Compartment
158
-
Giving and Receiving Assistance
159
-
Indicator and Warning Lamps
163
-
-
Everything from a to Z
182
Mini COOPER, COOPER Workshop Manual (356 pages)
Brand: Mini
|
Category: Automobile
|
Size: 14.23 MB
MINI COOPER, COOPER Owner’s Manual (226 pages)
MINI CLUBMAN
Brand: MINI
|
Category: Automobile
|
Size: 3.99 MB
Table of Contents
-
Using this Owner’s Manual
6
-
-
California Proposition 65 Warning
7
-
Reporting Safety Defects
8
-
Indicator and Warning Lamps
15
-
-
Central Locking System
29
-
Automatic Transmission
36
-
-
-
Interior Rearview Mirror
43
-
Transporting Children Safely
45
-
-
Switching off the Engine
49
-
-
Everything under Control
57
-
Average Fuel Consumption
58
-
Settings and Information
61
-
Mini COOPER, COOPER Owner’s Manual (174 pages)
Brand: Mini
|
Category: Automobile
|
Size: 3.1 MB
Table of Contents
-
-
Using this Owner’s Manual
6
-
-
California Proposition 65 Warning
7
-
Reporting Safety Defects
8
-
-
Indicator and Warning Lamps
15
-
-
-
Around the Center Console
17
-
-
Central Locking System
21
-
Unlocking the Liftgate
23
-
-
1 MINI: Microphone for Voice Processing Sys-
26
-
-
Automatic Transmission
29
-
-
-
Interior Rearview Mirror
41
-
Transporting Children Safely
43
-
Latch Child-Restraint Fixing System
44
-
-
-
Switching off the Engine
47
-
Activating/Deactivating Cruise Control
54
-
-
Average Fuel Consumption
56
-
Settings and Information
58
-
Resetting to Factory Settings
60
-
-
Driving Stability Control Systems
65
-
Technology for Driving Comfort and Safety
65
-
Dynamic Stability Control Dsc
66
-
Dynamic Traction Control Dtc
66
-
-
10 AUX-IN Port, USB Audio Interface* 86
65
-
-
-
Daytime Running Lights
77
-
-
-
Automatic Climate Control
83
-
Practical Interior Accessories
86
-
Cupholders and Ashtray
90
-
Things to Remember When Driving
94
-
-
Tire Identification Number
114
-
-
Checking Coolant Level
120
-
-
Repairing a Flat Tire
131
-
Distributing the Sealant
133
-
Giving and Receiving Assistance
138
-
Indicator and Warning Lamps
142
-
Everything from a to Z
162
-
7 Switching Audio Sources On/Off and Adjust-
82
-
Mini COOPER, COOPER Owner’s Manual (176 pages)
Brand: Mini
|
Category: Automobile
|
Size: 2.87 MB
Table of Contents
-
-
Using this Owner’s Manual
6
-
-
California Proposition 65 Warning
7
-
-
Reporting Safety Defects
8
-
-
Around the Center Console
17
-
Central Locking System
21
-
1 MINI: Microphone for Voice Processing
26
-
-
Automatic Transmission
29
-
-
Interior Rearview Mirror
41
-
Transporting Children Safely
43
-
Latch Child-Restraint Fixing System
44
-
-
-
Switching off the Engine
47
-
Activating/Deactivating Cruise Control
54
-
-
Everything under Control
55
-
Average Fuel Consumption
56
-
Settings and Information
58
-
Resetting to Factory Settings
60
-
Technology for Driving Comfort and Safety
65
-
-
-
-
Automatic Climate Control
83
-
-
Practical Interior Accessories
86
-
Things to Remember When Driving
94
-
-
Tire Identification Number
114
-
-
Checking Coolant Level
120
-
-
Repairing a Flat Tire
132
-
Checking Tire Inflation Pressure
134
-
In the Engine Compartment
138
-
Giving and Receiving Assistance
139
-
Indicator and Warning Lamps
143
-
-
7 Switching Audio Sources On/Off and Adjust-
82
Mini COOPER, COOPER Owner’s Manual (168 pages)
Brand: Mini
|
Category: Automobile
|
Size: 2.25 MB
Table of Contents
-
About this Owner’s Manual
8
-
Additional Sources of Information
8
-
Your Individual Vehicle
8
-
Symbol on Vehicle Parts
10
-
Reporting Safety Defects
11
-
Central Locking System
26
-
Opening and Closing: from Outside
27
-
Opening and Closing: from Inside
30
-
Electric Power Windows
33
-
Glass Sunroof, Electric
35
-
Convertible Top with Integrated Sliding Sunroof
37
-
Transporting Children Safely
52
-
Switching off the Engine
56
-
Automatic Transmission with Steptronic
58
-
Parking Lamps/Low Beams
61
-
Turn Signal Indicator/Headlamp Flasher
62
Mini COOPER, COOPER Owner’s Manual (165 pages)
BMW Cooper 2004 Mini Convertible Cooper Owner’s Manual
Brand: Mini
|
Category: Automobile
|
Size: 2.8 MB
Table of Contents
-
About this Owner’s Manual
8
-
Additional Sources of Information
8
-
Your Individual Vehicle
8
-
Symbol on Vehicle Parts
10
-
Reporting Safety Defects
11
-
Central Locking System
26
-
Opening and Closing: from Outside
27
-
Opening and Closing: from Inside
30
-
Electric Power Windows
33
-
Glass Sunroof, Electric
35
-
Transporting Children Safely
50
-
Switching off the Engine
54
-
Continuously Variable Automatic Transmission (CVT)
56
-
Parking Lamps/Low Beams
59
-
Signal/Headlamp Flasher
60
-
Coolant Temperature Gauge
66
Mini COOPER, COOPER Owner’s Manual (158 pages)
MINI CLUBMAN
Brand: Mini
|
Category: Automobile
|
Size: 2.63 MB
Table of Contents
-
-
Using this Owner’s Manual
6
-
-
California Proposition 65 Warning
7
-
-
Reporting Safety Defects
8
-
-
Indicator and Warning Lamps
15
-
-
-
Around the Center Console
17
-
Central Locking System
21
-
Automatic Transmission
28
-
Glass Sunroof, Electric
29
-
-
Interior Rearview Mirror
35
-
Transporting Children Safely
36
-
Latch Child-Restraint Fixing System
37
-
-
-
Switching off the Engine
40
-
-
Everything under Control
48
-
Settings and Information
50
-
Resetting to Factory Settings
52
-
Technology for Driving Comfort and Safety
57
-
-
Dynamic Traction Control Dtc
59
-
-
11 Driving Stability Control Systems
59
-
-
Automatic Climate Control
74
-
Practical Interior Accessories
77
-
Cigarette Lighter Socket
81
-
Things to Remember When Driving
84
-
-
Tire Identification Number
100
-
-
Repairing a Flat Tire
118
-
-
-
Checking Tire Inflation Pressure
120
-
Giving and Receiving Assistance
124
-
Indicator and Warning Lamps
128
-
-
7 Switching Audio Sources On/Off and Adjust-
73
Mini COOPER, COOPER Owner’s Manual (160 pages)
Brand: Mini
|
Category: Automobile
|
Size: 2.71 MB
Table of Contents
-
-
Using this Owner’s Manual
6
-
-
California Proposition 65 Warning
7
-
Reporting Safety Defects
8
-
-
Indicator and Warning Lamps
15
-
-
-
Around the Center Console
17
-
Central Locking System
23
-
Automatic Transmission
30
-
-
Interior Rearview Mirror
37
-
Transporting Children Safely
39
-
Latch Child-Restraint Fixing System
40
-
-
-
Switching off the Engine
43
-
Activating/Deactivating Cruise Control
50
-
-
-
Average Fuel Consumption
52
-
Settings and Information
53
-
Technology for Driving Comfort and Safety
59
-
-
-
Daytime Running Lights
70
-
-
-
-
Automatic Climate Control
76
-
-
Practical Interior Accessories
79
-
Cupholders and Ashtray
83
-
Things to Remember When Driving
86
-
-
Tire Identification Number
103
-
-
Repairing a Flat Tire
120
-
Distributing the Sealant
122
-
-
Giving and Receiving Assistance
126
-
Indicator and Warning Lamps
130
-
7 Switching Audio Sources On/Off and Adjust-
75
Mini COOPER, COOPER Owner’s Manual (148 pages)
Brand: Mini
|
Category: Automobile
|
Size: 3.23 MB
Table of Contents
-
About this Owner’s Manual
8
-
Your Individual Vehicle
8
-
Symbol on Vehicle Parts
10
-
Reporting Safety Defects
10
-
-
Display Elements with Navigation System
16
-
Indicator and Warning Lamps
17
-
-
Central Locking System
25
-
Opening and Closing — from Outside
25
-
Opening and Closing — from Inside
28
-
Electric Power Windows
30
-
Transporting Children Safely
43
-
Continuously Variable Automatic Trans
48
-
Switching off the Engine
49
-
Parking Lamps/Low Beams
54
-
Coolant Temperature Gauge
61
Mini COOPER, COOPER Owner’s Manual (140 pages)
MINI OWNER’S MANUAL Automobile MINI COOPER, MINI COOPER S
Brand: Mini
|
Category: Automobile
|
Size: 1.76 MB
Table of Contents
-
Notes on the Owner’s Manual
8
-
Symbol for Vehicle Parts
8
-
Your Individual Vehicle
8
-
Reporting Safety Defects
11
-
-
Display Elements with Navigation System
16
-
Indicator and Warning Lamps
17
-
-
Multifunction Steering Wheel MFL
20
-
Central Locking System
25
-
Opening and Closing — from Outside
25
-
Opening and Closing — from Inside
28
-
Electric Power Windows
30
-
Correct Sitting Posture
33
-
Transporting Children Safely
40
-
Switching off the Engine
45
-
Continuously Variable Automatic
45
-
Continuously Variable Automatic Transmission (CVT)
48
-
Parking Lamps/Low Beams
51
-
Service Interval Display
59
Related Products
-
Mini COOPER Convertible
-
Mini COOPER CLUBMAN
-
Mini COOPER COUNTRYMAN
-
Mini Cooper Clubman 2019
-
Mini Cooper Countryman 2019
-
Mini cooper 2008
-
Mini COOPER S CLUBMAN
-
Mini COOPER S Convertible
-
MINI Cooper 2002
-
MINI Cooper 2005
Mini Categories
Automobile
Automobile Accessories
Dash Cameras
Washer
Car Receiver
More Mini Manuals
ТЕХНИЧЕСКАЯ ДОКУМЕНТАЦИЯ MINI ONE БЕСПЛАТНО
Руководство по ремонту, эксплуатации и техническому обслуживанию MINI ONE
— полные технические характеристики
— особенности эксплуатации
— устранение неисправностей
— цветные электросхемы
скачать
ИНФОРМАЦИЯ О ФАЙЛЕ
Автор: ОО САГУ
Год: 2013
Язык: русский/английский
Формат:ZIP
Качество: отличное
Размер: 114 Мб
Руководство по ремонту в фотографиях MINI ONE
— полные технические характеристики
— особенности эксплуатации
— устранение неисправностей
— более 2000 фотографий
СКАЧАТЬ
ИНФОРМАЦИЯ О ФАЙЛЕ
Автор: Коллектив авторов
Год: 2014
Язык: русский/английский
Формат:PDF
Качество: хорошее
Каталог деталей и сборочных единиц MINI ONE
— полное технические описание
— предназначен для работников СТО и владельцев автомобилей
— каталог деталей
скачать
ИНФОРМАЦИЯ О ФАЙЛЕ
Автор: Коллектив механиков
Год: 2013
Язык: русский/английский
Формат:7ZIP
Качество: отличное
Размер: 11 Мб
Подробная электросхема MINI ONE
— полное описание электрооборудования
— подробно описан алгоритм поиска неисправностей
— подробная схема электрооборудования ( электро схема )
скачат
ь
ИНФОРМАЦИЯ О ФАЙЛЕ
Автор:Коллектив механиков
Год: 2013
Язык: русский/английский
Формат:ZIP
Качество: отличное
Размер: 64 Мб
Руководство по ремонту двигателя MINI ONE
-полные технические характеристики двигателя
— особенности конструкции и ремонта двигателя
— устранение неисправностей
— подробное описание процессов разборки, дефектовки и сборки двигателя сфотографиями
скачать
ИНФОРМАЦИЯ О ФАЙЛЕ
Автор: Коллектив механиков
Год: 2014
Язык: русский
Формат:PDF
Качество: отличное
Размер: 128 Мб
Руководство по ремонту коробок передач КПП MINI ONE
— полные технические характеристики КПП
— особенности конструкции и ремонта КПП
— устранение неисправностей КПП
— подробное описание процессов разборки, дефектовки и сборки КПП с фотографиями
скачать
ИНФОРМАЦИЯ О ФАЙЛЕ
Автор: OO Автосила
Год: 2014
Язык: русский
Формат:PDF
Качество: хорошее
Размер: 243 Мб
Цены носят информационный характер и ни при каких условиях не являются публичной офертой, определяемой положениями Статьи 435 ГК РФ.
Все содержащиеся на Сайте сведения носят исключительно справочный характер и не являются исчерпывающими. Информация о продаже автомобилей, о наличии и или отсутствии автомобилей у официальных дилеров может не соответствовать действительности и/или утратить актуальность на момент обращения к официальному дилеру.
Все условия приобретения автомобилей, цены, спецпредложения и комплектации автомобилей указаны с целью ознакомления и ни при каких обстоятельствах не являются публичной офертой, как она определена положениями статьи 435 ГК РФ.
ООО «БМВ Русланд Трейдинг» не участвует во взаимоотношениях между официальными дилерами и покупателями автомобилей, не является поверенным/агентом/комиссионером в отношении автомобилей, не несет никакой ответственности по обязательствам, вытекающим из сделок, заключенных с официальными дилерами на основании информации на Сайте, а также не несет ответственности за любые убытки, возникшие в связи с использованием информации на Сайте.
На этой странице вы можете совершенно бесплатно скачать Руководство по эксплуатации Mini COOPER.
У документа PDF Руководство по эксплуатации 140 страниц, а его размер составляет 1.01 Mb.
Читать онлайн Автомобили Mini COOPER Руководство по эксплуатации
Скачать файл PDF «Mini COOPER Руководство по эксплуатации» (1.01 Mb)
Популярность:
39099 просмотры
Подсчет страниц:
140 страницы
Тип файла:
Размер файла:
1.01 Mb
Вы робот?
Скачать: mini-cooper-1-owner-s-manual.pdf
BB кодПрямая ссылка
-
Mini SPARE AIR Инструкция по эксплуатации
Популярность:
3696 просмотры
Подсчет страниц:
20 страницы
Тип файла:
PDF
Размер файла:
250 Kb
Скачать (PDF 250 Kb)Читать онлайн (20 страницы)
-
Mini car Инструкция по эксплуатации
Популярность:
8058 просмотры
Подсчет страниц:
19 страницы
Тип файла:
PDF
Размер файла:
1.96 Mb
Скачать (PDF 1.96 Mb)Читать онлайн (19 страницы)
-
Mini COOPER Руководство по эксплуатации
Популярность:
65535 просмотры
Подсчет страниц:
140 страницы
Тип файла:
PDF
Размер файла:
1.01 Mb
Скачать (PDF 1.01 Mb)Читать онлайн (140 страницы)
-
Mini COOPER Инструкция по эксплуатации
Популярность:
65535 просмотры
Подсчет страниц:
140 страницы
Тип файла:
PDF
Размер файла:
1.68 Mb
Скачать (PDF 1.68 Mb)Читать онлайн (140 страницы)
Прочие инструкции Mini
-
Mini Автомобильные стереосистемы R52 Инструкция по эксплуатации
Популярность:
4389 просмотры
Подсчет страниц:
5 страницы
Тип файла:
PDF
Размер файла:
263 Kb
Скачать (PDF 263 Kb)Читать онлайн (5 страницы)
-
Mini Автомобильные аксессуары R53 Инструкция по эксплуатации
Популярность:
5109 просмотры
Подсчет страниц:
13 страницы
Тип файла:
PDF
Размер файла:
532 Kb
Скачать (PDF 532 Kb)Читать онлайн (13 страницы)

Руководство на английском языке по ремонту автомобилей Mini Cooper 2002-2006 годов выпуска.
- Автор: —
- Издательство: Motorist
- Год издания: —
- Страниц: 1077
- Формат: —
- Размер: —
Руководство на английском языке по техническому обслуживанию и ремонту автомобилей Mini.
- Автор: —
- Издательство: British Leyland Ltd.
- Год издания: 1972
- Страниц: 362
- Формат: PDF
- Размер: 53,9 Mb
Руководство по эксплуатации и техническому обслуживанию автомобилей Mini.
- Автор: —
- Издательство: Bayerishe Motoren Werke
- Год издания: 2007
- Страниц: 168
- Формат: PDF
- Размер: 27,0 Mb

Мультимедийные схемы электрооборудования автомобилей Mini серий R50/52/53. Многоязычный интерфейс (русский язык присутствует).
- Автор: —
- Издательство: MINI Service
- Год издания: 2005
- Страниц: —
- Формат: ISO
- Размер: 148,3 Mb
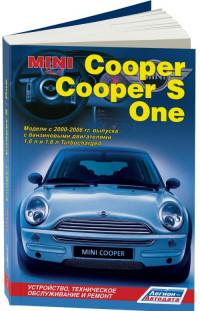
Руководство по техническому обслуживанию и ремонту автомобилей Mini Cooper/Cooper S/One 2000-2006 годов выпуска с бензиновыми двигателями объемом 1,6 л.
- Автор: —
- Издательство: Легион-Автодата
- Год издания: —
- Страниц: 320
- Формат: —
- Размер: —
Free ONE Workshop, Owners, Service and Repair Manuals download
Find your ONE pdf manuals easily from below;
We have collected Mini’s ONE manuals and the list is being increasing day by day. find the below list and you can check preview before download as well in the next page.
Popular Manuals
People are enjoying the manuals we provide
Let us keep you updated for a new Mini ONE Manuals
We’ll send Spam Free and maximum one(1) mail per month once a new ONE pdf/documents is added.
Didn’t find it above? Check out all vehicles we covered from Mini ONE
-
Contents
-
Table of Contents
-
Bookmarks
Quick Links
Contents
A to Z
Owner’s Manual
MINI
MINI CLUBMAN
Online Edition for Part no. 01 41 0 014 704 — © 11/07 BMW AG
Related Manuals for Mini Cooper
Summary of Contents for Mini Cooper
-
Page 1
Contents A to Z Owner’s Manual MINI MINI CLUBMAN Online Edition for Part no. 01 41 0 014 704 — © 11/07 BMW AG… -
Page 2
Online Edition for Part no. 01 41 0 014 704 — © 11/07 BMW AG… -
Page 3
COOPER Congratulations on your new MINI COOPER S This Owner’s Manual should be considered a permanent part of this vehicle. It should stay with the vehicle when sold to provide the next owner with important operating, safety and mainte- nance information. -
Page 4
© 2007 Bayerische Motoren Werke Aktiengesellschaft Munich, Germany Reprinting, including excerpts, only with the written consent of BMW AG, Munich. Order No. 01 41 0 014 704 US English XI/07, 07 09 500 Printed in Germany Printed on environmentally friendly paper, bleached without chlorine, suitable for recycling. -
Page 5: Table Of Contents
Contents Mobility 157 The fastest way to find information on a particu- lar topic or item is by using the index, refer to Refueling page 208. Wheels and tires Under the bonnet Using this Owner’s Manual Maintenance Notes Care Reporting safety defects Replacing components Giving and receiving assistance At a glance 9…
-
Page 6: Using This Owner’s Manual
Owner’s Manual for find this in the first chapter. information on a particular part or assembly. Should you wish to sell your MINI at some time in the future, remember to hand over this Owner’s The individual vehicle Manual to the new owner;…
-
Page 7: For Your Safety
MINI safely and without risk to either the vehicle, its operation, or its occu- pants. Service and warranty…
-
Page 8: Reporting Safety Defects
National Highway Traffic Safety Administration, NHTSA, in addition to notifying MINI of North America, LLC, P.O. Box 1227, Westwood, New Jersey 07675-1227, Telephone 1-800-831- 1117.
-
Page 9
Online Edition for Part no. 01 41 0 014 704 — © 11/07 BMW AG… -
Page 10
Online Edition for Part no. 01 41 0 014 704 — © 11/07 BMW AG… -
Page 11: At A Glance
At a glance At a glance Controls Driving tips Navigation Entertainment Mobility Reference Online Edition for Part no. 01 41 0 014 704 — © 11/07 BMW AG…
-
Page 12: Cockpit
Cockpit Around the steering wheel: Controls and displays Adjusting the exterior mirrors, folding them High beams in and out Headlamp flasher Parking lamps Roadside parking lamps Low beams Computer Automatic headlamp control Turn signals Online Edition for Part no. 01 41 0 014 704 — © 11/07 BMW AG…
-
Page 13
Tachometer Instrument lighting Resetting the trip odometer Wiper system Switching the ignition on/off and starting/stopping the engine Ignition lock Buttons on steering wheel Continuing cruise control Right: Storing speed and accelerating or decelerating Left: Volume Activating/deactivating cruise control Telephone > Press: accepting and ending a call, starting dialing selected phone number and… -
Page 14
Displays Tachometer Display for > with indicator and warning lamps Position of automatic transmission > Display for Computer > > Clock Date of next scheduled service, and remaining distance to be driven > Outside temperature > Odometer and trip odometer >… -
Page 15: Indicator And Warning Lamps
Indicator and warning In urgent cases, this information will be shown as soon as the corresponding lamp comes on. lamps Indicator lamps without text messages The concept The following indicator lamps in display area 1 indicate certain functions: High beams/headlamp flasher Fog lamps Rear fog lamp Lamp flashes:…
-
Page 16
Around the center console Online Edition for Part no. 01 41 0 014 704 — © 11/07 BMW AG… -
Page 17
> Dynamic Stability Control DSC Changing the frequency 11 Changing to a different menu on the Control Display 12 MINI joystick Automatic climate control Move in four directions, turn or press Temperature 13 Opening the start menu on the Control… -
Page 18: Onboard Monitor
The following section provides an Controls Menu overview Control Display MINI joystick The MINI joystick can be used to select menu Navigation items and to adjust settings: > Navigation system > Move in four directions, arrows 5 >…
-
Page 19: Operating Principle
Navigation, Communication, Entertain- > Display of service requirements and dates ment and Setup: move the MINI joystick forward for statutory emissions and vehicle inspec- or backward or press it. Depending on the selec- tions tion, the menu last opened is displayed.
-
Page 20
Changing between menu items Press the button. Pressing the button repeatedly opens the Com- munication, Navigation and Entertainment menu items in succession. The screen that was last open is displayed. Displays in menu Each menu is subdivided into fields. White symbol: the field is active. Gray symbol: the field is inactive. -
Page 21
Setting the time, page 63. Highlighting a menu item: Switching between fields: > > Turn the MINI joystick; the highlight Briefly move the MINI joystick to the left, marker moves right, forward or backward > > Menu items that are displayed in color on… -
Page 22
Status information Select «Display off». To switch on, press the MINI joystick. Display for: > Entertainment: Radio, CD and external audio source > Telephone in «Communication»: Name of the connected mobile phone, network search or no network Entertainment audio output off or display for traffic information >… -
Page 23: Voice Command System
Individual menu items on the Control Display can be spoken as commands. It is not necessary to use the MINI joystick. The voice command system transforms oral commands into control signals for the selected systems and provides support in the form of instructions or questions.
-
Page 24
Opening the start menu Having the possible commands read aloud: {Options} {Main menu} Example: selecting a track For instance, if you have selected «CD», the com- mands available for operating the CD player and Press the button on the steering wheel. CD changer are read out. -
Page 25
Notes For information on voice control of the telephone, refer also to the separate Owner’s Manual.< For voice commands, bear in mind the follow- ing: > Pronounce the commands and digits smoothly and at normal volume, avoiding excessive emphases and pauses. The same applies to spelling when entering a destina- tion for navigation. -
Page 26
Online Edition for Part no. 01 41 0 014 704 — © 11/07 BMW AG… -
Page 27: Controls
At a glance Controls Controls Driving tips Navigation Entertainment Mobility Reference Online Edition for Part no. 01 41 0 014 704 — © 11/07 BMW AG…
-
Page 28: Opening And Closing
In vehicles equipped with convenient access The concept the remote control contains a replaceable bat- The functions of your MINI can be set individu- tery, page 34. ally. By means of Personal Profiles, most of these If more than one remote control is used, the set-…
-
Page 29: Central Locking System
> Fuel filler door Press the button. This opens the start menu. Operating from outside Move the MINI joystick to highlight «Setup» > Via the remote control and press the MINI joystick. > Via the door lock Online Edition for Part no. 01 41 0 014 704 — © 11/07 BMW AG…
-
Page 30
To have the vehicle confirm when it has been locked or unlocked. Press the button. This opens the start menu. Move the MINI joystick to highlight «Setup» and press the MINI joystick. Select «Settings». Select «Central locking». Select «Vehicle and tires». -
Page 31: Manual Operation
Unlocking the tailgate/splitdoor Using the door lock Press the button. When opened, the splitdoor swings back- ward and the tailgate swings backward and up. Ensure that there is sufficient clearance. To prevent accidentally locking yourself out, do not place the key down in the cargo bay. If the tailgate/splitdoor was locked before opening, it will be locked again after it is closed.
-
Page 32: Unlocking And Opening
The setting is stored for the remote con- trol in use. Press the button. This opens the start menu. Move the MINI joystick to highlight «Setup» and press the MINI joystick. Select «Settings». Select «Vehicle and tires». Closing Select «Door locks».
-
Page 33: Alarm System
MINI The handle recesses on the interior trim panel of the tailgate make it easier to pull it down. MINI Clubman Press the button in the handle, arrow, or the button of the remote control, for an extended period. The tailgate is unlocked and can be opened.
-
Page 34
Arming and disarming The interior movement detector is not acti- vated. Whenever the car is locked or unlocked, the alarm system is armed or disarmed. > LEDs go out after the vehicle is unlocked: No attempt was made to tamper with the Even when the alarm system is armed, you can car. -
Page 35
Convenient access* Unlocking Convenient access enables you to enter your vehicle without having to hold the remote con- trol in your hand. All you need to do is wear the remote control close to your body, e.g. in your jacket pocket. The vehicle automatically detects the remote control within the immediate vicinity or in the passenger compartment. -
Page 36: Starting The Engine
Take the old battery to a battery collection Convenient access may malfunction due to local radio waves. point or to your MINI Dealer.< If this happens, open or close the vehicle via the buttons on the remote control or using the inte- Glass sunroof, electric* grated key.
-
Page 37
MINI recommends that you have this work done by your MINI Dealer. Windows To prevent injuries, exercise care when closing the windows and keep them in your field of vision until they are shut. Take the remote control with you when you… -
Page 38
electric windows and possibly injure them- selves.< Pinch protection system If the closing force exceeds a specific value as a window closes, the closing action is interrupted and the window reopens slightly. Even though there is the pinch protection system, always ensure that the window’s travel path is clear, otherwise the safety system might fail to detect certain kinds of obstructions, such as thin objects, and the window would con-… -
Page 39: Adjustments
Adjustments Sitting safely Head restraint A correctly adjusted head restraint reduces the The ideal sitting position can make a vital contri- risk of neck injury in the event of an accident. bution to relaxed, fatigue-free driving. In con- Adjust the head restraint in such a way junction with the safety belts, the head restraints that its center is at approx.
-
Page 40: Seat Adjustment
Backrest incline the backrest too far to the rear while the vehicle is being driven, otherwise there is a dan- ger in the event of an accident of sliding under the safety belt, eliminating the protection nor- mally provided by the belt.<…
-
Page 41: Height Adjustment
Height adjustment Pull up the lever on the seat backrest, arrow 1. To raise: pull up. The backrest folds forward. To lower: press the button, arrow 1, and slide the head restraint down. Move the seat forward by pushing on the backrest, arrow 2.
-
Page 42: Seat Heating
Have this work carried out they do not represent a substitute. only by a MINI Dealer or by a workshop that has specially trained personnel working in accor- Front and rear seats…
-
Page 43: Interior Rearview Mirror
Interior rearview mirror seen in the mirror are closer than they appear. Do not gauge your distance from traffic behind you on the basis of what you see in the mirror; otherwise there is an increased risk of an acci- dent.<…
-
Page 44
Fold the lever down. Move the steering wheel to the preferred distance and angle to suit your seated posi- tion. Swing the lever back up. Do not use force to swing the lever back up, otherwise the mechanism will be damaged.<… -
Page 45: Transporting Children Safely
Transporting children safely The right place for chil- Child-restraint systems, dren installation Do not leave children unattended in the Observe the child-restraint system manu- vehicle, otherwise they could endanger facturer’s instructions when selecting, themselves and/or other persons by opening the installing and using child-restraint systems.
-
Page 46
Allow the safety belt strap to retract all the way. LATCH child-restraint fix- ing system LATCH: Lower Anchors and Tethers for CHildren. To install and use the LATCH child- restraint system, follow the operating and There are two additional anchors for child- safety instructions provided by the manufac- restraint systems with tether straps, arrows. -
Page 47
Pull the retaining strap tight. Online Edition for Part no. 01 41 0 014 704 — © 11/07 BMW AG… -
Page 48: Driving
Driving Ignition lock When you press the start/stop button and depress the clutch if the car has manual transmission or the brake if the car has auto- Inserting the key into the ignition lock matic transmission, the engine starts.< Radio readiness Individual electrical consumers can operate.
-
Page 49: Switching Off The Engine
and death. Exhaust gases contain carbon mon- The starter operates automatically for a certain oxide, an odorless and colorless, but highly toxic time, and stops automatically as soon as the gas. Never leave an unattended vehicle with the engine has started. engine running, otherwise such a vehicle repre- sents a potential safety hazard.
-
Page 50: Manual Transmission
In exceptional cases, if the parking brake Remove the key. has to be used to slow or stop the car, do Selector lever positions not pull the lever up too hard. In doing so, con- tinuously press the button of the parking brake P R N D M/S + –…
-
Page 51
Overriding the selector lever lock Sport program and manual operation Press the button on the front of the selector lever, arrow. Move the selector lever from position D to the left into the M/S shifting slot: P Park The Sport program is activated and DS is dis- played. -
Page 52
This opens the start menu. Take the hub cover remover 1 out of the Move the MINI joystick to highlight «Setup» onboard tool kit and insert it in the loop on and press the MINI joystick. the front passenger side. -
Page 53: Wiper System
Intermittent wipe or rain sensor* Select «Lighting». If the car is not equipped with a rain sensor, the intermittent-wipe time is preset. If the car is equipped with a rain sensor, the time between wipes is controlled automatically and depends on the intensity of the rainfall. The rain sensor is mounted on the windshield, directly in front of the interior rearview mirror.
-
Page 54: Rear Window Wiper
Window washer nozzles Press and hold the button until the display changes. The window washer nozzles are heated auto- matically while the engine is running or the ignition is switched on. Rear window wiper Press the button to select the desired sensi- tivity.
-
Page 55: Cruise Control
Activating spills constitute a fire hazard and a risk to per- sonal safety.< Resuming cruise control Fill with water and, if required, with a washer Activating/deactivating cruise control antifreeze, according to manufacturer’s recom- Maintaining, storing and increasing speed mendations. Maintaining, storing and decreasing speed Mix the water and antifreeze before filling Indicator lamp in the speedometer lights up.
-
Page 56
Increasing speed Press button 3 repeatedly until the desired speed is reached. Every time you press the but- ton, the speed increases by approx. 1 mph or 2 km/h. Accelerating using the button Press and hold button 3. The vehicle accelerates without pressure on the accelerator pedal. -
Page 57: Everything Under Control
Everything under control Odometer, outside tem- Press the button in the turn indicator lever repeatedly until the current speed appears perature display, clock in the lower display. Wait for the speed display to automatically move to the upper display. The outside temperature then appears in the lower display.
-
Page 58: Fuel Gauge
> Average speed example, the indicator may fluctuate slightly. > Current vehicle speed MINI Cooper, MINI Cooper S To set the corresponding units of measure, refer Approx. 13.2 US gallons/50 liters. to Units of measure on page 60. Reserve Cruising range…
-
Page 59
To reset the values for the average speed and average fuel consumption: Select the respective menu entry. Press the MINI joystick to confirm the mes- sage. Online Edition for Part no. 01 41 0 014 704 — © 11/07 BMW AG… -
Page 60: Trip Computer
> «Start» > «Stop» > «Reset» Turn the MINI joystick to select the distance to your destination. Press the MINI joystick to apply the setting. The distance is mandated automatically during destination guidance. Trip computer The trip computer is suitable e.g. for a holiday trip.
-
Page 61: Settings And Information
Settings and information Operating principle Certain settings and information are only avail- Calling up Check Control able when the ignition is switched on, the vehi- Displaying vehicle check cle is at a standstill and the doors are closed. Setting the time Button for: Setting the date >…
-
Page 62: Service Requirements
Personal Profile on page 26. Press the button. This opens the start menu. Move the MINI joystick to highlight «Setup» and press the MINI joystick. Select «Settings». Select «Language / Units». Select «Units».
-
Page 63
Front brakes Exit display Rear brakes Next setting or item of information Vehicle check More information on the MINI Maintenance Sys- tem can be found on page 174. Supplementary information Select «Service Info». You can have further information on the scope Select «Service requirements». -
Page 64
You can have further information displayed on each entry: Select an entry. Select «Set service date». The month is highlighted. Turn the MINI joystick to make the adjust- ment. Exiting the menu Select the arrow. Symbols No service is currently required. -
Page 65
Press and hold the button until the display changes. Briefly press the button repeatedly until the symbol and «SET» are displayed. Turn the MINI joystick until «Time / Date» is selected and press the MINI joystick. Press and hold the button until the display changes. -
Page 66: Date
Briefly press the button in the turn indicator lever repeatedly until «SET/INFO» is dis- played. Turn the MINI joystick to set the hours and press the MINI joystick. Turn the MINI joystick to set the minutes and press the MINI joystick.
-
Page 67: Check Control
Indicator and warning lamps can light up in var- Select «Set date». ious combinations and colors in the indicator Turn the MINI joystick to make the adjust- areas 1 and 2. ment. Press the MINI joystick to apply the setting.
-
Page 68
Other Check Control messages are automatically hidden after approx. 20 seconds, but remain stored. They are marked with the symbol shown here. For most Check Control messages, you can view more information later, e.g. regarding the cause of a malfunction and how to respond, refer to page 67. -
Page 69: Speed Limit
Press the button. This opens the start menu. Speed limit Move the MINI joystick to highlight «Setup» and press the MINI joystick. Enter a speed, and a Check Control message will indicate when you reach this speed. This enables Select «Info sources».
-
Page 70
Select «Change limit:». Select «Interim time». The interim time appears below the ongoing pri- Turn the MINI joystick to set the limit. mary stopwatch count. Press the MINI joystick to apply the setting. All of the remaining functions remain available The limit is automatically activated. -
Page 71
MINI joystick. Select «Settings». Select «Display settings». Select «Brightness». Select «Brightness». Turn the MINI joystick until the desired set- ting is reached. Online Edition for Part no. 01 41 0 014 704 — © 11/07 BMW AG… -
Page 72: Technology For Driving Comfort And Safety
This opens the start menu. Automatic mode Move the MINI joystick to highlight «Setup» and press the MINI joystick. With the engine running or the ignition switched on, the system is activated automatically after Select «Settings».
-
Page 73: System Limitations
This system optimizes driving stability and trac- systems tion, especially when driving off, accelerating and cornering, by reducing engine output and, if Your MINI has a number of systems that help to necessary, braking the front wheels. maintain the vehicle’s stability even in adverse driving conditions.
-
Page 74: Sport Button
When driving with snow chains or to ‘rock free’ in snow, it can be helpful to switch off ASC/DSC Sport button* for a brief period. Pressing the button causes your MINI to respond To increase vehicle stability, activate ASC/DSC again as soon as possible. even more sportily.
-
Page 75: Flat Tire Monitor Ftm
Activating the system In the following situations, the system could be delayed or malfunction: > System has not been initialized > Driving on snowy or slippery road surface > Performance-oriented style of driving: slip in the drive wheels, high lateral acceleration >…
-
Page 76
Onboard monitor, for operating principle refer to page 16. Press the button. This opens the start menu. Select «Yes». Move the MINI joystick to highlight «Setup» Start driving. and press the MINI joystick. The initialization is completed during driv- Select «Settings». ing. -
Page 77: Tire Pressure Monitor
If this cannot be determined, contact cause accidents. Do not continue driving and your MINI Dealer.< contact your MINI Dealer.< Repair the flat tire, refer to page 183, or change the damaged tire, refer to page 186. Malfunction The warning lamps light up in yellow.
-
Page 78: Resetting The System
Status indicator on the onboard monitor Using the button in the turn indicator lever The tire and system condition is indicated by the color of the tires. Start the engine, but do not start driving. TPM takes into account the fact that tire pres- Briefly press the button in the turn indicator sure changes while the vehicle is being driven.
-
Page 79
If a flat tire is detected while the system is being reset and while it is determining the inflation pressures, all tires on the onboard mon- itor are displayed in yellow. The message «Tire Select «Vehicle and tires» and press the MINI low!» is shown.< joystick. -
Page 80
Do not continue driving and Accordingly, when the low tire pressure telltale contact your MINI Dealer.< illuminates, you should stop and check your tires as soon as possible, and inflate them to the proper pressure. -
Page 81
and can lead to tire failure. Underinflation also reduces fuel efficiency and tire tread life, and may affect the vehicle’s handling and stopping ability. Please note that the TPMS is not a substi- tute for proper tire maintenance, and it is the driver’s responsibility to maintain correct tire pressure, even if underinflation has not reached the level at which the TPMS low tire pressure tell-… -
Page 82
The front airbags help protect the driver and bag generators executed only by a MINI Dealer front passenger by responding to frontal or a workshop that works according to repair… -
Page 83
MINI. Operational readiness of airbag system Do not place any items under the seat which could press against the seat from below. -
Page 84: Lamps
Lamps Parking lamps/low beams ing on ambient light conditions, e.g. in a tunnel, in twilight, or if there is precipitation. The headlamps may also come on when the sun is sitting low on a blue sky. When driving into tunnels with bright overhead lights, there may be a delay before the head- lamps come on.
-
Page 85: Daytime Running Lamps
The daytime running lamps are switched on. High beams/roadside parking lamps Select «Pathway lighting». Turn the MINI joystick to select the corre- sponding duration. Press the MINI joystick to apply the setting. Daytime running lamps* The light switch can remain in the lamps off, parking lamps or automatic headlamp control position.
-
Page 86: Fog Lamps
Switching off Press the lever up or down to the pressure point. Fog lamps* Increasing brightness Press and hold the button until the desired brightness is reached. Reducing brightness Press the button briefly. Fog lamps The brightness decreases every time the button Rear fog lamp is pressed briefly.
-
Page 87: Ambient Lighting
Reading lamps* To switch the reading lamps on and off. Press the switch. Ambient lighting* The color of the ambient lighting can be changed. > Press the switch forward. The color changes in stages, ultimately to orange. > Press the switch toward the rear. The color changes in stages, ultimately to blue.
-
Page 88: Climate
Climate Airflow directed toward the windshield and Maximum cooling side windows Air distribution, manual Air to the upper body area Setting the temperature Draft-free ventilation 10 Defrosting windows and removing conden- Air to the footwell sation Air flow rate, manual 11 Manual cooling function Automatic recirculated-air control AUC/ 12 Rear window defroster…
-
Page 89: Maximum Cooling
Automatic climate con- Automatic recirculated-air control AUC/ Recirculated-air mode trol Switch on the desired operating mode by pressing the button Comfortable interior climate repeatedly. AUTO program 6 offers the ideal air distribution and air flow rate for almost all conditions, refer Display of operating modes to AUTO program below.
-
Page 90: Windshield Heating
Rear window defroster tection by filtering gaseous pollutants from the outside air. Your MINI Dealer replaces this com- The defroster is switched off auto- bined filter as a standard part of your scheduled matically after a certain time.
-
Page 91
Direction of air flow Swivel the entire jet. Online Edition for Part no. 01 41 0 014 704 — © 11/07 BMW AG… -
Page 92: Practical Interior Accessories
15 sec- For additional information, please contact your onds, alter the distance. MINI Dealer or call: 1-800-355-3515. To program other original hand-held trans- You can also obtain information on the Internet mitters, repeat steps 3 and 4.
-
Page 93: Glove Compartment
The corresponding memory button 1 is now The corresponding memory button 1 is now programmed with the signal of the original programmed with the signal of the original hand-held transmitter. hand-held transmitter. You can operate the system with the engine Clearing stored programs running or with the ignition switched on.
-
Page 94: Center Armrest
Closing Fold cover up. To prevent injury in the event of an acci- dent, close the glove compartment after use while the vehicle is being driven.< Ventilation* Depending on your vehicle’s equipment, it may be possible to ventilate the glove compartment. Opening The cover slides along guide rails and can be opened fully by pushing it back and lifting it.
-
Page 95
Push the cover back into its original position. of the center console. To prevent injury in the event of an acci- In the MINI Clubman there are two additional dent, close the storage compartment after cup holders in the armrests in the rear. -
Page 96: Cigarette Lighter Socket
Connecting electrical appliances In your MINI, you can use electrical devices such as a flashlight, car vacuum cleaner, etc., up to approx. 200 watts at 12 volts, as long as one of the following sockets is available. Avoid damag- ing the sockets by attempting to insert plugs of unsuitable shape or size.
-
Page 97
Online Edition for Part no. 01 41 0 014 704 — © 11/07 BMW AG… -
Page 98
Online Edition for Part no. 01 41 0 014 704 — © 11/07 BMW AG… -
Page 99: Driving Tips
At a glance Controls Driving tips Driving tips Navigation Entertainment Mobility Reference Online Edition for Part no. 01 41 0 014 704 — © 11/07 BMW AG…
-
Page 100: Things To Remember When Driving
Things to remember when driving Break-in period Following part replacement The same break-in procedures should be Moving parts need breaking-in time to adjust to observed if any of the components mentioned each other. Please follow the instructions below above have to be renewed in the course of the in order to achieve the optimal service life and vehicle’s operating life.
-
Page 101: Driving Through Water
Braking safely used at all, and in operating conditions where Your MINI is equipped with ABS. If you are in a brake applications are less frequent, there is an situation which requires full braking, it is best to increased tendency for corrosion to form on brake using maximum brake pressure.
-
Page 102: Cargo Loading
MINI Clubman For general information about vehicle care for your MINI, refer to the chapter beginning on In the MINI Clubman, the cargo bay cover can be page 176. locked in the intermediate positions 1 to 3. With convenient access and automatic transmission Insert the key into the ignition lock.
-
Page 103
2. If the rear seat backrests are positioned at a steeper angle, do not install child- Level load floor* in MINI Clubman restraint systems in the rear of the vehicle as The maximum load capacity of the level their protective features may be ineffective.<… -
Page 104: Stowing Cargo
Subtract the combined weight of the driver backrests. and passengers from XXX kilograms or YYY pounds. In addition in the MINI Clubman: The resulting figure equals the available > Use the partition net, refer to page 101. amount of cargo and luggage load capacity.
-
Page 105
Roof-mounted luggage rack* A special rack system is available as an option for your MINI. Your MINI Dealer will be glad to advise you. Comply with the installation instruc- tions supplied with the rack system. Mounting points Securing cargo Remove the cover panel. -
Page 106: Saving Fuel
The man- tion and tire wear. ufacturer of your MINI recommends having the vehicle serviced by a MINI Dealer. Also note the Drive off immediately MINI Maintenance System, page 174. Do not wait for the engine to warm up while the vehicle remains stationary.
-
Page 107
Online Edition for Part no. 01 41 0 014 704 — © 11/07 BMW AG… -
Page 108
Online Edition for Part no. 01 41 0 014 704 — © 11/07 BMW AG… -
Page 109: Navigation
At a glance Controls Driving tips Navigation Navigation Entertainment Mobility Reference Online Edition for Part no. 01 41 0 014 704 — © 11/07 BMW AG…
-
Page 110: Navigation Dvd
Press the button. This opens the start menu. Press the button, arrow, and remove the cover. Move the MINI joystick to highlight «Setup» and press the MINI joystick. Insert the navigation DVD with the labeled side up. Select «Settings». To replace the cover, first insert it on the left Turn the MINI joystick until «Language /…
-
Page 111
The arrow display is shown. Online Edition for Part no. 01 41 0 014 704 — © 11/07 BMW AG… -
Page 112: Destination Entry
Select «Navigation». This opens the start menu. «New destination» is highlighted. Move the MINI joystick to highlight «Naviga- Press the MINI joystick. tion» and press the MINI joystick. Online Edition for Part no. 01 41 0 014 704 — © 11/07 BMW AG…
-
Page 113
Delete letters if necessary: > The system also supports you with the following To delete individual letters: features: Move the MINI joystick to the right to highlight and press the MINI joystick. > If you do not enter a street, the system will guide you to the downtown area of a town >… -
Page 114
Delete digits if necessary: > To delete digits individually: Entering a street without entering a Move the MINI joystick to the right to town/city highlight and press the MINI joystick. You can also enter a street without specifying a >… -
Page 115: Entering Destination
Entering a destination by If necessary, enter more letters. The list gradually grows smaller each time voice commands* you enter a new letter. You can enter a desired destination via the voice command system. During the destination input, you can switch between voice entry and entry via the onboard monitor at any time.
-
Page 116
> To enter the town/city by spelling: via the onboard monitor: {Spell} Turn the MINI joystick until the town/city is The town/city can also be selected from the list selected. via the onboard monitor: Turn the MINI joystick until the town/city is Entering the destination as an entire selected. -
Page 117
«New destination» is highlighted. MINI joystick in the corresponding direc- Press the MINI joystick. tion. The MINI joystick can be moved to the left, right, forward and backward. Transfer the destination for destination guidance or store it: press the MINI joystick. -
Page 118
Destinations are shown on the Control Dis- Select the symbol. play. Select a destination and press the MINI joy- stick. Selecting destination using information To have selected destinations, e.g. hotels, sights or hospitals, displayed, called up and transferred for destination guidance. -
Page 119: Destination List
Transferring destination for destination The symbols are hidden. guidance To show the symbols: Select the desired destination from the des- Select «Show map icons» and press the MINI joy- tination list. stick. Select «Start guidance». To exit from the menu: Select the arrow.
-
Page 120: Address Book
Select «Address book». Onboard monitor, for operating principle refer Move the highlight marker to the third field to page 16. from the top. Turn the MINI joystick until «New address» is selected. Select «Address book». Select «Use current location as address».
-
Page 121
Select «Start guidance». Deleting all destinations from address book Press the button. This opens the start menu. Move the MINI joystick to highlight «Setup» and press the MINI joystick. Select «Settings». Select «Vehicle / Tires». Select «Delete data». Changing destinations from address book Select «Address book». -
Page 122
Storing home address Changing route criteria Select «Address book». Select «Navigation». Select «Home address». Select «Route preference». Select «Use current location as address» or The various criteria are listed on the Control select «Save current destination» during Display. destination guidance. Select a route criterion for the route: >… -
Page 123
obstruction, the guided route may lead through the traffic obstruction. > «Avoid tollroads» Toll roads are avoided as far as possible. > «Avoid ferries» Ferries are avoided as far as possible. The route criterion is selected. The route criteria can also be changed in the arrow or map view: Select the corresponding sym- bol. -
Page 124: Destination Guidance
Destination guidance Starting destination Terminating/continuing guidance destination guidance Onboard monitor, for operating principle refer In the arrow or map view to page 16. Select the symbol. If necessary, move the highlight marker to the uppermost field. Select «Navigation». Select the destination from the destination list or enter a new destination, page 110.
-
Page 125
journey: Arrow to destination as the crow flies «Continue guidance to destination?». Distance to the next change of direction The destination guidance starts automatically Direction of travel after a short time. > Outline of an arrow: Destination guidance on the calculated Starting destination guidance route immediately… -
Page 126
The next map view is displayed. Changing the scale In the map view, change to the top left field. Turn the MINI joystick to change the scale. Online Edition for Part no. 01 41 0 014 704 — © 11/07 BMW AG… -
Page 127: Voice Instructions
This opens the start menu. The distances remaining to be traveled within Move the MINI joystick to highlight «Setup» each section of the route are also shown. and press the MINI joystick. Select «Navigation».
-
Page 128: Changing A Route
Select «Traffic Info settings». A detour can be made around a specified section of the total route length. Turn the MINI joystick to enter the desired number and press the MINI joystick. The route is recalculated. Exiting the menu without changing the route Select «Traffic Info».
-
Page 129
This opens the start menu. other information is displayed.< Move the MINI joystick to highlight «Naviga- Calling up traffic information manually tion» and press the MINI joystick. Select «Traffic Info». During destination guidance… -
Page 130
Displaying detailed traffic information Select a traffic information item from the list. Exiting the menu Select the arrow. Online Edition for Part no. 01 41 0 014 704 — © 11/07 BMW AG… -
Page 131
Traffic information icons Slow traffic Traffic event displayed with map scales larger than 5 miles/10 km; Traffic backup arrow points in the relevant direc- tion of travel. Stopped traffic There are several traffic events. Switch to a smaller map scale to show more detail. -
Page 132
25 miles/40 km away from the traffic obstruction. The current position of your MINI is displayed. The last possible detour exit is indicated just before you reach it. -
Page 133: What To Do If
What to do if … What to do if … you will see an arrow which indicates the general direction of your planned route. Or > a navigation DVD is inserted, but an instruc- you have left the recommended route and tion to insert the DVD appears on the Control the system requires a few seconds to calcu- Display?
-
Page 134
Online Edition for Part no. 01 41 0 014 704 — © 11/07 BMW AG… -
Page 135: Entertainment
At a glance Controls Driving tips Navigation Entertainment Entertainment Mobility Reference Online Edition for Part no. 01 41 0 014 704 — © 11/07 BMW AG…
-
Page 136: Switching Audio On/Off
CD player Press the button. This opens the start menu. > CD changer Move the MINI joystick to highlight «Enter- tainment» and press the MINI joystick. Controls The audio sources can be operated using: > Buttons near the CD player >…
-
Page 137: Adjusting Volume
11. The setting is stored for the remote control cur- rently in use, refer to Personal Profile, page 26. Move the MINI joystick to the left or right to Tone control select «Treble» or «Bass». Turn the MINI joystick until the desired set- You can alter various tone settings, e.g.
-
Page 138
Resetting tone settings You can reset all tone settings to the default set- ting. Press the button. This opens the start menu. Move the MINI joystick to highlight «Setup» and press the MINI joystick. Select «Settings». Select «Audio». Select «Reset». Select «Yes». -
Page 139: Radio
Changing selection criteria This opens the start menu. In addition to the stations currently displayed, Move the MINI joystick to highlight «Enter- you can have stations with another selection cri- tainment» and press the MINI joystick. terion displayed. If necessary, move the highlight marker to You can choose from the following selection cri- the uppermost field.
-
Page 140
Select «Manual». Sampling stations, scan The displayed stations in the current waveband are automatically sampled in succession. Turn the MINI joystick to set a certain fre- Select «FM» or «AM». quency. Select the selection criterion. Press the MINI joystick. -
Page 141: Storing Stations
Select «Autostore». Turn the MINI joystick until the desired memory location is selected. The number of the memory location appears beside the name or frequency of the station. The display of the stations with the strongest reception is updated. The frequencies of the sta- tions are displayed.
-
Page 142: Radio Data System Rds
In this This opens the start menu. case it may be preferable to switch off digital Move the MINI joystick to highlight «Setup» reception. and press the MINI joystick. Online Edition for Part no. 01 41 0 014 704 — © 11/07 BMW AG…
-
Page 143: Satellite Radio
To receive the channels of your choice, you must have the corresponding pack- ages enabled. Press the MINI joystick. With this new technology, signal losses Other menu items are displayed. can occur from time to time and result in audio interruptions.<…
-
Page 144
Select an enabled channel. to page 16. Press the button. This opens the start menu. Move the MINI joystick to highlight «Enter- tainment» and press the MINI joystick. Select «SAT». Select «ESN». The electronic serial number, ESN, is dis- played. -
Page 145: Additional Information
Select a menu item: Press the MINI joystick. The selected station is played. > «Presets»: Up to twelve channels you previously stored. Additional information > «All channels»: Select a channel. All channels are displayed. Select «Details». > «Categories»: All channels, sorted by categories, e.g.
-
Page 146
Turn the MINI joystick to select the memory location and press the MINI joystick. The channel is stored. The channels of the last selection criterion are displayed again after a short time. Changing channels with buttons next to CD player Press the button for the corresponding direction. -
Page 147: Cd Player And Cd Changer
Press the button. Onboard monitor, for operating principle refer This opens the start menu. to page 16. Move the MINI joystick to highlight «Enter- Press the button. tainment» and press the MINI joystick. This opens the start menu. If necessary, move the highlight marker to Move the MINI joystick to highlight «Enter-…
-
Page 148: Selecting A Track
Selecting a track To change the directory: Select a directory and press the MINI joystick. Buttons on the CD player Press the button for the desired direction repeatedly until the desired track on the current CD is reached. Playback of the CD starts at the beginning of the track.
-
Page 149
To scan all tracks in the current directory: select «Scan directory». Stop repeating > To scan all tracks on the CD: select «Scan Press the MINI joystick again. all». Select «Repeat». Online Edition for Part no. 01 41 0 014 704 — © 11/07 BMW AG… -
Page 150
Press the MINI joystick. Select «Repeat track» or «Repeat directory». Random play sequence The tracks on the current CD are played once The MINI CD changer for 6 CDs is installed in the each in random order. dashboard. Select a track. -
Page 151: Controls And Displays
Controls and displays Only insert the CD when the LEDs 1 next to the CD slot are flashing, other- wise the CD or CD changer may be dam- aged. Do not push the CD while it is being drawn in as this may cause it to jam and become impossible to eject.<…
-
Page 152
CD/DVD can jam and will no longer eject.< General malfunctions MINI CD/DVD changers and players have been optimized for performance in vehicles. In some instances they may be more sensitive to faulty CDs/DVDs than stationary devices would be. -
Page 153: Aux-In Port
16. Press the button. This opens the start menu. Move the MINI joystick to highlight «Enter- tainment» and press the MINI joystick. Select «AUX». Online Edition for Part no. 01 41 0 014 704 — © 11/07 BMW AG…
-
Page 154: Usb-Audio Interface
USB device and the number of tracks. During transfer, you can call up the tracks using Ask your MINI Dealer about suitable audio the directories and file names. devices. After transfer, you can also call up the tracks using the information and playlists.
-
Page 155
Repeating tracks Playback begins with the first track. Select a current track and press the MINI joy- Selecting a track stick. Select «Repeat track» and press the MINI You can call up the tracks using the playlists and joystick. information. With USB devices you can also call up tracks using the file directory. -
Page 156
very high temperatures, refer to the operating instructions of the audio device. Otherwise the audio device may become damaged, which could compromise safety while driving.< Depending on the configuration of the audio files, e.g. bit rates greater than 256 kbit/s, the files may not play back correctly in every case. -
Page 157
Online Edition for Part no. 01 41 0 014 704 — © 11/07 BMW AG… -
Page 158
Online Edition for Part no. 01 41 0 014 704 — © 11/07 BMW AG… -
Page 159
At a glance Controls Driving tips Navigation Entertainment Mobility Mobility Reference Online Edition for Part no. 01 41 0 014 704 — © 11/07 BMW AG… -
Page 160
Fuel filler door Pull on the green knob with the fuel pump symbol. The fuel filler door is released. Opening MINI Clubman Open fuel filler door. Turn the gas cap counterclockwise. Place the gas cap in the bracket attached to the fuel filler door. -
Page 161: Fuel Specifications
Should you encounter driveability problems MINI Cooper, MINI Cooper S which you suspect could be related to the fuel Approx. 13.2 US gallons/50 liters, including the you are using, we recommend that you respond reserve capacity of 2.1 US gallons/8 liters.
-
Page 162
After correcting the tire inflation pressure, MINI. Your MINI Dealer will be glad to advise reinitialize the Flat Tire Monitor, page 73, you.< or reset the Tire Pressure Monitor, page 76.<… -
Page 163
umns for traveling speeds up to a maximum of 100 mph or 160 km/h. These tire inflation pressures can also be found on the driver’s-side door post when the driver’s door is open. The maximum permissible speed for these tire pressures is 100 mph or 160 km/h. Do not exceed this speed, otherwise tire damage and accidents could occur.<… -
Page 164
MINI Cooper tire inflation pressures Tire size Pressure specifications in psi/kPa Speeds up to a max. of 100 mph / Speeds including those exceeding 160 km/h 100 mph / 160 km/h All pressure specifications in the table are indicated in psi/kilopascal with cold tires. -
Page 165
MINI Cooper S tire inflation pressures Tire size Pressure specifications in psi/kPa Speeds up to a max. of 100 mph / Speeds including those exceeding 160 km/h 100 mph / 160 km/h All pressure specifications in the table are indicated in psi/kilopascal with cold tires. -
Page 166
MINI Clubman Cooper tire inflation pressures Tire size Pressure specifications in psi/kPa Speeds up to a max. of 100 mph / Speeds including those exceeding 160 km/h 100 mph / 160 km/h All pressure specifications in the table are indicated in psi/kilopascal with cold tires. -
Page 167
MINI Clubman Cooper S tire inflation pressures Tire size Pressure specifications in psi/kPa Speeds up to a max. of 100 mph / Speeds including those exceeding 160 km/h 100 mph / 160 km/h All pressure specifications in the table are indicated in psi/kilopascal with cold tires. -
Page 168: Tire Coding
Tire coding DOT Quality Grades Tread wear Knowledge of the labeling on the side of the tire Traction AA A B C makes it easier to identify and choose the right Temperature A B C tires. All passenger car tires must conform to Federal Safety Requirements in addition Tire size to these…
-
Page 169: Tire Condition
To do so, drive carefully to the nearest Tread depth MINI Dealer or tire shop that works according to The tread depth should not drop below 1/8 in/ MINI repair procedures with correspondingly 3 mm, although, for example, European legisla- trained personnel.
-
Page 170: New Wheels And Tires
Your MINI Dealer will be glad to inform you about the correct wheel and tire combination for your vehicle. The symbol identifying Run-Flat Tires is a circle with the letters RSC on the sidewall.
-
Page 171: Snow Chains
Run-Flat Tires for your own safety. Keep in mind > 175/65 R 15 M+S that no space-saver spare tire is available in the event of a flat. Your MINI Dealer will be glad to > 175/60 R 16 M+S advise you.
-
Page 172
If you are not familiar with the regulations to be observed, have the necessary work on your vehicle carried out only by a MINI Dealer or a workshop that has specially trained personnel working in accordance with the specifications of the MINI manufacturer. -
Page 173: Engine Oil
Important parts of the engine compartment Battery, under the cover Coolant expansion tank Engine oil dipstick Reservoir for washer fluid for the headlamp and window washer system Engine oil filler neck Engine compartment fuse box Engine oil The engine oil consumption is dependent on driving style and driving conditions.
-
Page 174: Adding Engine Oil
Oil change Coolant consists of half water and half additive. Have the oil changed only by a MINI Dealer or a Not all commercially available additives are suit- workshop that has specially trained personnel able for your MINI. Your MINI Dealer knows…
-
Page 175
If the coolant is low, slowly add coolant up to the specified level; do not overfill. Turn the cap until there is an audible click. Have the reason for the coolant loss elimi- nated as soon as possible. Online Edition for Part no. 01 41 0 014 704 — © 11/07 BMW AG… -
Page 176
MINI Dealer. costs. Take the time to ensure that these service pro- If and when you come to sell your MINI, a com- cedures are confirmed by entries in your vehi- prehensive record of servicing will prove a signif- cle’s Service and Warranty Information Booklet icant benefit. -
Page 177
This indicates excessive misfiring or a malfunction in the engine. If this happens, reduce your speed and visit the nearest MINI Dealer as soon as possible. Severe misfiring can quickly lead to serious dam- age of emissions-related components, espe- cially the catalytic converter. -
Page 178
You can wash your new MINI in an automatic car Do not remove accumulated ice and snow with wash from the first day. Preference should be an ice scraper;… -
Page 179
Vehicle storage Do not dry clean, as the fabric can be Your MINI Dealer will be glad to advise you on destroyed.< what is important if the vehicle is to be decom- Only clean using mild soap, leaving the belts missioned for longer than three months. -
Page 180
Changing the front wiper blades Replacing the rear wiper blade in the Fold up the wiper arm. MINI Clubman Position the wiper blade horizontally. Fold out the wiper arm and hold it. Press the securing spring, arrow. -
Page 181: Lamps And Bulbs
MINI Dealer or a workshop that has bulb’s surface and reduce its service life. Use a specially trained personnel working in accor-…
-
Page 182
Turn signal indicators, parking lamps, Follow the same steps in reverse order to reat- roadside parking lamps and fog lamps tach the cover. Be careful when installing the cover, oth- Accessing the lamps via the wheel well erwise leaks could occur and cause dam- age to the headlamp system.<… -
Page 183
To insert the new bulb and replace the cover, proceed in reverse order. Tail lamps To insert the new bulb and replace the cover, proceed in reverse order. MINI Replacing a fog lamp bulb H8 bulb, 35 watts Turn in the wheel. Remove cover 2. -
Page 184
MINI Clubman Replacing bulbs in MINI Clubman Using the screwdriver from the onboard tool kit, remove the screw at the top. Brake lamp/tail lamp 21 watt/5 watt bulb, W 5 W Turn signal lamp Swing out the tail lamp and remove it 21 watt bulb, P 21 W toward the top. -
Page 185: Repairing A Flat Tire
To insert the new bulb and bulb holder, pro- Remove the lamp, arrow 2. ceed in reverse order. Replace the bulb. In the MINI Clubman, the rear fog lamp is Insert the lamp. located in the left tail lamp, refer to Tail lamps, page 182.<…
-
Page 186
Filling canister ineffective if the tire puncture measures Allen wrench /screwdriver approx. 1/8 in/4 mm or more. Contact the near- est MINI Dealer if the tire cannot be made driv- Vehicle jack able with the MINI Mobility System.< Wheel stud wrench… -
Page 187
Remove the filling hose. cannot be reached, the tire is too severely Screw the valve core into the tire valve with damaged. Please contact the nearest MINI the valve remover. Dealer.< In the event of a lost or dirty valve core… -
Page 188: Changing Wheels
Special wrench for removing the space- and have the new wheel/tire assembly bal- saver spare tire anced. Flat screwdriver/Phillips screwdriver Have the MINI Mobility System refilled. Towing eyelet Wrench Tire change set Lifting handle When changing a tire, always observe the safety…
-
Page 189
MINI Clubman tire change set with Squeeze the securing spring. space-saver spare tire* The space-saver spare tire is released and In vehicles with the space-saver spare tire, the must be held by the lifting handle. tire change set with the onboard tool kit is… -
Page 190
Driving with the space-saver spare tire If the wheel is equipped with a hub cover, pry it off using the screwdriver from the tire Drive cautiously and do not exceed a speed of change kit. 50 mph/80 km/h. Loosen the lug bolts by a half turn. You must expect changes in vehicle handling such as lower track stability during braking, Jacking up the vehicle… -
Page 191: Vehicle Battery
MINI Dealer or a workshop that has specially the vehicle resulting from a circuit overload. trained personnel working in accordance with Have the fuse changed only by a MINI Dealer or the specifications of the MINI manufacturer.< a workshop that has specially trained personnel…
-
Page 192
In the vehicle interior On the right side of the footwell. Opening the cover Press out at the recess. Online Edition for Part no. 01 41 0 014 704 — © 11/07 BMW AG… -
Page 193
Giving and receiving assistance Roadside Assistance MINI Clubman The Roadside Assistance service is there to assist you around the clock in the event of a break- down, including on weekends and public holi- days. The phone numbers of the Roadside Assistance in your home country can be found in the Con- tact brochure. -
Page 194: Jump Starting
Attach the second terminal clamp of the plus/+ jumper cable to the positive terminal If the car’s own battery is flat, your MINI’s engine of the battery or a starting-aid terminal of can be started by connecting two jumper cables the vehicle to be started.
-
Page 195: Being Towed
The screw-in tow fitting must always be carried in the car. It can be screwed in at the front or rear of the MINI. It is stored in the onboard tool kit in the cargo bay underneath the cover on the right-hand side, page 178.
-
Page 196
Towing with a tow truck Have the MINI transported with a tow truck with a so-called lift bar or on a flat bed. Do not lift the vehicle by a tow fitting or body and chassis parts, otherwise damage result.<… -
Page 197
Online Edition for Part no. 01 41 0 014 704 — © 11/07 BMW AG… -
Page 198
Online Edition for Part no. 01 41 0 014 704 — © 11/07 BMW AG… -
Page 199
At a glance Controls Driving tips Navigation Entertainment Mobility Reference Reference Online Edition for Part no. 01 41 0 014 704 — © 11/07 BMW AG… -
Page 200
Technical data Engine data MINI/MINI Clubman Cooper Cooper S Displacement cu in/cmμ 97.5/1,598 97.5/1,598 Number of cylinders Maximum power output At engine speed 6,000 5,500 Maximum torque lb ft/Nm 114/155 177/240 with overboost – 192/260 At engine speed 4,250 1,600-5,000 with overboost –… -
Page 201
All dimensions given in inches/mm. Smallest turning circle diam.: 35 ft 2 in/10.7 m. Figures following the semicolons: values that differ for the MINI Cooper S. Online Edition for Part no. 01 41 0 014 704 — © 11/07 BMW AG… -
Page 202
All dimensions given in inches/mm. Smallest turning circle diam.: 36 ft/11 m. Figures following the semicolon: values that differ for the MINI Clubman Cooper S. Online Edition for Part no. 01 41 0 014 704 — © 11/07 BMW AG… -
Page 203
Weights MINI MINI COOPER MINI COOPER S Curb weight, ready for travel, with all optional extras > Manual transmission lbs/kg 2,546/1,155 2,668/1,210 > Automatic transmission lbs/kg 2,634/1,195 2,723/1,235 Approved gross weight > Manual transmission lbs/kg 3,362/1,525 3,483/1,580 > Automatic transmission… -
Page 204
Never exceed either the approved axle loads or the gross vehicle weight. Capacities MINI/MINI Clubman US gal/US quarts Liters Notes Fuel tank Fuel grade: page MINI Cooper, MINI Cooper S 13.2/– approx. 50 including reserve of 2.1/– approx. 8 Window washer system incl. headlamp washer system –/4.8 approx. -
Page 205
To display «Received calls» To display «Missed calls» {Missed calls} To display «Bluetooth» {Bluetooth} {MINI Contact} To open «MINI Contact» To open «MINI Contact Numbers» {MINI Contact numbers} To open «Nearest MINI dealer» {Nearest MINI Dealer} Navigation Function Command To open navigation… -
Page 206
Function Command {Input map} To display «Input map» To display address book {Address book} To display destination list {Destination list} To switch on destination guidance {Start guidance} {Stop guidance} To switch off destination guidance {Route preference} To display route criteria {Navigation info on} To switch on voice instructions To switch off voice instructions… -
Page 207
Function Command {Limit on} To activate speed limit To deactivate speed limit {Limit off} {Stopwatch} To open stopwatch Entertainment Function Command Tone control {Audio} {Radio on}, To switch on radio {FM on} or {AM on} {FM menu} To open «FM» To open «AM»… -
Page 208
Function Command {CD} To switch on CD player To open CD changer {CD changer menu} To switch on CD changer {CD changer} To select CD {CD 1…6} {CD track …} To select track {CD 1…6 track …} To select CD and track {Audio Aux} To start sound output for external audio device… -
Page 209
Function Command {PDC} To open «PDC» To open «FTM» {FTM} {Bluetooth} To display «Bluetooth» Online Edition for Part no. 01 41 0 014 704 — © 11/07 BMW AG… -
Page 210
From A to Z Index «…» Identifies Control Display Air pressure, checking, refer to Assistant systems, refer to texts used to select Tire inflation pressure – All-Season Traction Control individual functions and Air recirculation, refer to refers you to the page where Recirculated-air mode –… -
Page 211
Brake fluid, refer to Service Suitable car-care navigation requirements products «Avoid highways» in Brake lamps «Car Data» navigation – replacing bulbs in MINI Care Avoid highways in – replacing bulbs in MINI Cargo, securing navigation Clubman Cargo area «Avoid tollroads» in Brake pads, breaking in –… -
Page 212
CD changer Chrome parts, refer to Control Display – controls Care – settings – fast forward/reverse Cigarette lighter – switching off/on – playing a track Cleaning headlamps Control Display, refer to – random order – washer fluid Onboard monitor – repeating a track Clock Controls and displays –… -
Page 213
Data Destination guidance Distance warning, refer to Park – capacities – changing specified route Distance Control PDC – dimensions – displaying route «Dist. to dest.» – engine – distance and arrival Diving stability control – weights 200, – interrupting systems «Date»… -
Page 214
Floor mats, care Engine – folding in and out Floor panel, refer to Level load – breaking in External audio device floor in MINI Clubman – data External audio device, refer to «FM», waveband 134, – overheated, refer to Coolant AUX-In port… -
Page 215
Fuel filler door HD radio, refer to High – releasing in the event of Definition Radio electrical malfunction Head airbags IBOC, refer to High Definition Fuses Headlamp control, Radio automatic Ice warning Headlamp flasher Icy roads, refer to Outside – indicator lamp 11, temperature warning Garage door opener, refer to Headlamps… -
Page 216
Interlock Length, refer to refer to Tailgate Intermittent mode of the Dimensions Luggage rack, refer to Roof- wipers Level load floor in MINI mounted luggage rack Internet page Clubman Lumbar support License plate lamp – replacing bulbs in MINI – replacing bulbs in MINI… -
Page 217
– selecting route criteria Microphone for telephone instructions on/off – starting destination MINI Internet page Navigation drive, location guidance MINI joystick, refer to Onboard Navigation DVD – switching off, refer to monitor Terminating/continuing MINI Maintenance System destination guidance Mirror dimming feature –… -
Page 218
– displays, menus bulb – selecting – menu guidance Parking lamps/low beams waveband 134, – operating principles Partition net in MINI – station search – overview Clubman – stations with best – selecting menu items Parts and accessories, refer to reception –… -
Page 219
Rear double doors, refer to Reservoir for washer Run-Flat Tires Splitdoor systems – flat tire Rear fog lamp «Reset» – new tires – indicator lamp Reset, refer to Resetting tone – tire inflation pressure – replacing bulb settings – winter tires Rear lamps, refer to Tail «Reset»… -
Page 220
SDARS, refer to Satellite Shifting gears Sound, adjusting during audio radio – automatic transmission with playback, refer to Tone Seat adjustment Steptronic control – mechanical – manual transmission Sound output for Seats Shiftlock entertainment on/off – adjusting the seats – automatic transmission, refer Space-saver spare tire –… -
Page 221
Tire inflation pressure – storage compartments Tail lamps – loss 74, «Store in address book» in – replacing bulbs in MINI – space-saver spare tire navigation – replacing bulbs in MINI Tire pressure monitoring, refer «Store» on the radio 139,… -
Page 222
Tires Track width, refer to Tying down loads, refer to – age Dimensions Cargo loading – breaking in Traction control, refer to – changing, refer to Changing – Dynamic Stability Control wheels – condition Traffic congestion Uniform Tire Quality Grading –… -
Page 223
Voice commands Windows – overview – closing – short commands – convenient operation Voice instructions from – opening navigation system – pinch protection system – switching on/off Windows, indicator on Control – volume Display Volume Window washer, refer to – audio sources Washer fluid –… -
Page 224
Online Edition for Part no. 01 41 0 014 704 — © 11/07 BMW AG… -
Page 225
Online Edition for Part no. 01 41 0 014 704 — © 11/07 BMW AG… -
Page 226
*BL001470400M* DRIVE ME. Online Edition for Part no. 01 41 0 014 704 — © 11/07 BMW AG…
This manual is also suitable for:
Cooper s
-
Page 1
Contents OWNER’S MANUAL. MINI. Online Edition for Part no. 01 40 2 961 168 — II/15… -
Page 3
The more familiar you are with your vehicle, the better control you will have on the road. We therefore strongly suggest: Read this Owner’s Manual before starting off in your new MINI. Also use the Integrated Owner’s Manual in your vehicle. It con‐… -
Page 4
© 2015 Bayerische Motoren Werke Aktiengesellschaft Munich, Germany Reprinting, including excerpts, only with the written consent of BMW AG, Munich. US English II/15, 03 15 490 Printed on environmentally friendly paper, bleached without chlorine, suitable for recycling. Online Edition for Part no. 01 40 2 961 168 — II/15… -
Page 5
At page 155 under the heading: “Objects in While MINI, at no cost to you, will pay for re- the area around the pedals” and at page pairs required by the limited warranties pro- 217 under the heading: “Carpets and floor… -
Page 6
“Have in lieu thereof should be read as follows: mounting and balancing …” should be dis- MINI recommends that you have the oil regarded and the following text should be changed at your MINI dealer’s service center read in lieu thereof: “BMW recommends that… -
Page 7
Addendum “check control” messages of these comfort functions are no longer displayed. Online Edition for Part no. 01 40 2 961 168 — II/15… -
Page 9: Table Of Contents
Contents MOBILITY The fastest way to find information on a partic‐ ular topic or item is by using the index, refer to Refueling page 230. Fuel Wheels and tires Engine compartment Notes Engine oil Coolant AT A GLANCE Maintenance Cockpit Replacing components Onboard monitor Breakdown assistance…
-
Page 10: Notes
This also applies to safety-related functions and center will be glad to advise you at any time. systems. Information about MINI, e.g., on technology, is The respectively applicable country provisions available on the Internet: www.miniusa.com must be observed when using the respective features and systems.
-
Page 11: Basic Information
MINI. MINI cannot test every product made by other man‐ Manufacturer ufacturers to verify if it can be used on a MINI The manufacturer of this MINI is Bayerische safely and without risk to either the vehicle, its Motoren Werke Aktionengesellschaft, BMW AG.
-
Page 12
Service and warranty damage to the vehicle. Such damage is not covered by the MINI New Vehicle Limited War‐ We recommend that you read this publication ranty. thoroughly. Your vehicle is covered by the fol‐… -
Page 13: Vehicle Identification Number
Notes ▷ Malfunctions and faults in important system ▷ How various systems in your vehicle were components, e.g., lights and brakes. operating. ▷ Responses by the vehicle to special situa‐ ▷ Whether or not the driver and passenger tions such as airbag deployment or engag‐ safety belts were fastened.
-
Page 14: Reporting Safety Defects
National Highway Traffic Safety Administration NHTSA, in addition to notifying MINI of North America, LLC, P.O. Box 1227, Westwood, New Jersey 07675-1227, Telephone 1-800-831-1117.
-
Page 15
Notes Online Edition for Part no. 01 40 2 961 168 — II/15… -
Page 16
WATCH ME. Online Edition for Part no. 01 40 2 961 168 — II/15… -
Page 17: At A Glance
AT A GLANCE CONTROLS DRIVING TIPS MOBILITY REFERENCE Online Edition for Part no. 01 40 2 961 168 — II/15…
-
Page 18: At A Glance Cockpit
AT A GLANCE Cockpit Cockpit Vehicle features and op‐ necessarily available in your car, e. g., due to the selected options or country versions. This tions also applies to safety-related functions and sys‐ tems. The respectively applicable country provi‐ This chapter describes all standard, country- sions must be observed when using the respec‐…
-
Page 19
AT A GLANCE Cockpit Cruise control on/off, inter‐ Cleaning windows 67 rupt 115 Cruise control on/off, inter‐ Rear window wiper 67 rupt 121 Store speed 115, 121 Cleaning rear window 67 Resume speed 117, 122 Steering wheel buttons, right Voice activation 27 speed 117, 121 Telephone Reduce distance 121 Confirm the selection 81 Increase distance 115 Move selection up 81… -
Page 20: All Around The Center Console
AT A GLANCE Cockpit All around the center console Hazard warning system 209 Start/stop the engine and switch the ignition on/off 63 Intelligent Safety 103 DSC Dynamic Stability Con‐ trol 111 Head-up Display 86 Control Display 18 Radio/Multimedia Glove compartment 147 Steptronic transmission selector lever 68 Climate control 132 Manual transmission selector lever 68 PDC Park Distance…
-
Page 21
AT A GLANCE Cockpit All around the roofliner Emergency Request Ambient light 94 Indicator lamp, front-seat passen‐ Glass sunroof 46 airbag 97 Reading lights 94 Interior lights 93 Online Edition for Part no. 01 40 2 961 168 — II/15… -
Page 22: Onboard Monitor
AT A GLANCE Onboard monitor Onboard monitor Vehicle features and op‐ Control elements at a tions glance This chapter describes all standard, country- Control elements specific and optional features offered with the series. It also describes features that are not necessarily available in your car, e.
-
Page 23
AT A GLANCE Onboard monitor Switch off Move in four directions. Press button. «Turn off control display» Buttons on controller Press button Function Controller with navigation system MENU Open the main menu. The buttons can be used to open the menus di‐ RADIO Opens the Radio menu. -
Page 24
AT A GLANCE Onboard monitor Press. The main menu is displayed. All onboard monitor functions can be called up Move in two directions. via the main menu. Selecting menu items Highlighted menu items can be selected. Turn the controller until the desired menu item is highlighted. -
Page 25: Options Menu
AT A GLANCE Onboard monitor Options menu ▷ Move the controller to the right. Opens new display on top of previous The «Options» menu consists of various areas: screen. ▷ Screen settings, e.g., «Split screen». This area remains unchanged. ▷ Control options for the selected main menu, e.g., for «Radio».
-
Page 26
AT A GLANCE Onboard monitor «Touchpad» Function Controls Select the desired function. Interactive map. Swipe into respective direction. ▷ «Speller»: enter letters and numbers. ▷ «Interactive map»: viewing the interac‐ Enlarge/shrink in‐ Drag in or out on the tive map. teractive map. -
Page 27
AT A GLANCE Onboard monitor Telephone symbols Turn the controller until «Time:» is high‐ lighted, and then press the controller. Symbol Meaning Incoming or outgoing call. Missed call. Wireless network reception strength. Symbol flashes: network search. Wireless network is not available. Bluetooth is switched on. -
Page 28: General Information
AT A GLANCE Onboard monitor Split screen Programmable memory buttons General information Additional information can be displayed on the General information right side of the split screen, e.g., information The onboard monitor functions can be stored from the on-board comupter. on the programmable memory buttons and In the divided screen view, the so-called split called up directly, e.g., radio stations, naviga‐…
-
Page 29
AT A GLANCE Onboard monitor «OK» «Continue» «OK» Deleting personal in the Entering letters and vehicle numbers The concept General information Depending on the usage, the vehicle saves per‐ sonal data, such as stored radio stations. These On the Control Display: personal data can be permanently deleted via Turn the controller: select letters or num‐… -
Page 30
AT A GLANCE Onboard monitor Entries are continuously compared with data stored in the vehicle. ▷ Only those letters are offered during input for which data is available. ▷ Target search: names of locations may be entered in languages available through Control Display. -
Page 31: Voice Activation System
AT A GLANCE Voice activation system Voice activation system Vehicle features and op‐ Using voice activation tions Activating the voice activation system This chapter describes all standard, country- specific and optional features offered with the Press button on the steering wheel. series.
-
Page 32: Adjusting The Volume
AT A GLANCE Voice activation system Executing functions using short Setting the voice dialog commands Set system to standard dialog or use a short Execute functions on the main menu via short version. commands. It almost doesn’t matter which The short version of the voice dialog plays back menu item is selected, e.g., ›Vehicle status‹.
-
Page 33
AT A GLANCE Voice activation system ▷ Avoid making other noise in the vehicle while speaking. Online Edition for Part no. 01 40 2 961 168 — II/15… -
Page 34: Integrated Owner’s Manual In The Vehicle
AT A GLANCE Integrated Owner’s Manual in the vehicle Integrated Owner’s Manual in the vehicle Owner’s Manual Vehicle features and op‐ Search for information and descriptions by en‐ tions tering terms selected from the index. This chapter describes all standard, country- Select components specific and optional features offered with the series.
-
Page 35
AT A GLANCE Integrated Owner’s Manual in the vehicle Scroll forward. To alternate permanently between the last dis‐ played function and the Owner’s Manual re‐ peat steps 4 & 5. Opens a new display every time. Context help — Owner’s Manual to the temporarily selected function Programmable memory buttons You may open the relevant information di‐… -
Page 36
HANDLE ME. Online Edition for Part no. 01 40 2 961 168 — II/15… -
Page 37
AT A GLANCE CONTROLS DRIVING TIPS MOBILITY REFERENCE Online Edition for Part no. 01 40 2 961 168 — II/15… -
Page 38: Opening And Closing
CONTROLS Opening and closing Opening and closing Overview Vehicle features and op‐ tions This chapter describes all standard, country- specific and optional features offered with the series. It also describes features that are not necessarily available in your car, e. g., due to the selected options or country versions.
-
Page 39
CONTROLS Opening and closing The battery compartment is accessible. ▷ Interference from radio transmissions through mobile devices in close proximity to remote control. ▷ Interference of radio transmission by charger while charging items such as mo‐ bile devices in the vehicle. A Check Control message is displayed if an at‐… -
Page 40: Profile Management
CONTROLS Opening and closing Profile management If the vehicle is unlocked using a remote con‐ trol, the assigned personal profile will be acti‐ Opening profiles vated. All settings stored in the profile are auto‐ matically applied. Regardless of the remote control in use a differ‐ If several drivers use their own remote control, ent profile may be activated.
-
Page 41
CONTROLS Opening and closing Display profile list during start This can be helpful for securing and retrieving personal settings, before delivering the vehicle The profile list can be displayed during each to a workshop, e.g. Profiles can be taken to an‐ start to select the desired profile. -
Page 42: Courtesy Lights
CONTROLS Opening and closing Panic mode The alarm system, refer to page 43, is dis‐ armed. You can trigger the alarm system if you find yourself in a dangerous situation. Convenient opening Press button on the remote control for Press and hold this button on the re‐ at least 3 seconds.
-
Page 43
CONTROLS Opening and closing Without remote control ▷ Shielding of the remote control due to metal objects. ▷ Interference of the radio connection from From the outside mobile phones or other electronic devices Locking from the outside in direct proximity. Do not lock the vehicle from the outside Do not transport the remote control together with people inside the car, as the vehicle can‐… -
Page 44: Locking And Unlocking
CONTROLS Opening and closing From the inside Do not place the remote control in the cargo area Locking and unlocking Take the remote control with you and do not leave it in the cargo area; otherwise, the re‐ mote control is locked inside the vehicle when the tailgate is closed.◀…
-
Page 45
CONTROLS Opening and closing Closing Unlocking Recessed grips on the inside trim of the tailgate On the driver’s or front passenger’s door han‐ can be used to conveniently pull down the tail‐ dle, press the button, arrow. gate. This corresponds to pressing the remote control button: Comfort Access Locking… -
Page 46
CONTROLS Opening and closing ▷ Interference of the radio connection from mobile phones or other electronic devices in direct proximity. Do not transport the remote control together with metal objects or electronic devices. In the case of a malfunction, unlock and lock the vehicle using the buttons of the remote control or using the integrated key, refer to page 39. -
Page 47: Alarm System
CONTROLS Opening and closing Tailgate Alarm system Depending on optional features and country version, this setting is not offered in some The concept cases. When the vehicle is locked, the vehicle alarm system responds to: «Settings» ▷ Opening a door, the hood or the tailgate. «Doors/key»…
-
Page 48: Interior Motion Sensor
CONTROLS Opening and closing Interior motion sensor To reel off the alarm: press any button. The windows and glass sunroof must be closed Indicator lamp on the interior rearview for the system to function properly. mirror Avoiding unintentional alarms The tilt alarm sensor and interior motion sensor can be switched off together, such as in the fol‐…
-
Page 49: Power Windows
CONTROLS Opening and closing Closing Power windows Keep the closing path clear Note Monitor closing and make sure that the closing path of the window is clear; otherwise, Take the remote control with you injuries may result.◀ Take the remote control with you when leaving the vehicle so that children, e.g., cannot Pull switch up.
-
Page 50
CONTROLS Opening and closing At a glance Pull the switch past the resistance point again within approx. 4 seconds and hold it there. The window closes without jam protection. On 5-door models: safety switch The safety switch in the driver’s door can be used to prevent children, e.g., from opening and closing the rear windows using the switches in the rear. -
Page 51
After a power failure, it can happen that the ance point and release it twice. glass sunroof can only be raised. The system must be initialized in this case. MINI recom‐ The glass sunroof is closed. mends having this work performed by your Pressing the reel again stops the motion. -
Page 52: Adjusting
CONTROLS Adjusting Adjusting Vehicle features and op‐ would eliminate the protection normally pro‐ vided by the belt.◀ tions Keep the movement area unobstructed This chapter describes all standard, country- When changing the seat position, keep specific and optional features offered with the the seat’s area of movement unobstructed;…
-
Page 53: Lumbar Support
CONTROLS Adjusting After releasing the lever, move the seat forward or back slightly making sure it engages prop‐ erly. Height Turn the wheel in order to increase or decrease the curvature. Thigh support Pull the lever up or press it down as often as needed to reach the desired height.
-
Page 54: Safety Belts
CONTROLS Adjusting Fold down seat back If the journey is continued within approx. 15 minutes, the seat heating is activated automat‐ Pull lever up to the stop. ically with the temperature selected last. When Green mode, refer to page 162, is acti‐ vated, the heater output is reduced.
-
Page 55: Front Head Restraints
CONTROLS Adjusting Hints Unbuckling the belt Hold the belt firmly. One person per safety belt Press the red button in the belt buckle. Never allow more than one person to wear a single safety belt. Never allow infants or Guide the belt back into its roll-up mecha‐ small children to ride on a passenger’s lap.◀…
-
Page 56: Rear Head Restraints
CONTROLS Adjusting Height Before transporting passengers Adjust the head restraint so that its center is Reinstall the head restraint before trans‐ approximately at ear level. porting anyone in the seat; otherwise, the pro‐ tective function of the head restraint is unavail‐ Distance able.◀…
-
Page 57: Exterior Mirrors
CONTROLS Adjusting Mirrors in the rear; otherwise, there is increased risk of injury in the event of an accident.◀ Exterior mirrors General information The mirror on the passenger side is more curved than the driver’s side mirror. Depending on the vehicle equipment, the mir‐ ror setting is stored for the profile currently in use.
-
Page 58: Automatic Dimming Feature
CONTROLS Adjusting Adjusting electrically Fold in the mirror in a car wash Before washing the car in an automatic The setting corresponds to the direction car wash, fold in the exterior mirrors by hand or in which the button is pressed. with the button;…
-
Page 59: Steering Wheel
CONTROLS Adjusting Turn knob Steering wheel Note Do not adjust while driving Do not adjust the steering wheel while driving; otherwise, an unexpected movement could result in an accident.◀ Adjusting Turn the knob to reduce the blinding effect by the interior mirror. Interior rearview mirror, automatic dimming feature The concept…
-
Page 60: Transporting Children Safely
CONTROLS Transporting children safely Transporting children safely Vehicle features and op‐ necessarily available in your car, e. g., due to the selected options or country versions. This tions also applies to safety-related functions and sys‐ tems. The respectively applicable country provi‐ This chapter describes all standard, country- sions must be observed when using the respec‐…
-
Page 61: Deactivating Airbags
CONTROLS Transporting children safely there is an increased risk of injury because of move the passenger seat carefully forward until unexpected movement of the seat backrest.◀ the best possible belt guide position is reached. In order to faciliate the installation of a back- Child seat security facing child restraint system in the rear: move the front passenger’s seat as far up as…
-
Page 62
CONTROLS Transporting children safely Mounting points and CRS weight of 65 lb when the child is re‐ strained by the internal harnesses. The respective symbol shows the an‐ Properly engage the lower LATCH an‐ chor for the upper retaining strap. Seats chors with an upper Top Tether are marked with this symbol. -
Page 63
CONTROLS Transporting children safely No persons on the back seat when there This locks various functions so that they cannot is a child restraint system with an upper be operated from the rear: safety switch, refer retaining strap on the front passenger seat. to page 46. -
Page 64: Driving
CONTROLS Driving Driving Vehicle features and op‐ To save battery power when the engine is off, switch off the ignition and any unnecessary tions electronic systems/power consumers. This chapter describes all standard, country- Ignition off specific and optional features offered with the Manual transmission: press the Start/Stop but‐…
-
Page 65: Manual Transmission
CONTROLS Driving ▷ After approx. 8 minutes. posing a risk of overheating and damage to the catalytic converter.◀ ▷ When the vehicle is locked using the central locking system. Do not wait for the engine to warm-up while ▷ Shortly before the battery is discharged the vehicle remains stationary.
-
Page 66: Automatic Operation
CONTROLS Driving hicle, e.g., by turning the steering wheel in the the Auto Start/Stop function is active, it is avail‐ direction of the curb.◀ able when the vehicle is traveling faster than about 3 mph, approx. 5 km/h. Before driving into a car wash Engine stop So that the vehicle can roll into a car wash ob‐…
-
Page 67: Functional Limitations
CONTROLS Driving Functional limitations Some indicator lights light up for a varied length of time. The engine is not switched off automatically in the following situations: The engine can only be started via the Start/ Stop button. ▷ External temperature too low. ▷…
-
Page 68: Parking Brake
CONTROLS Driving ▷ LED comes on: Auto Start/Stop function is The indicator lamp lights up red. The deactivated. parking brake is set. The engine is started during an automatic Lower lamp: indicator lamp in Canadian engine stop. models The engine can only be stopped or started via the Start/Stop button.
-
Page 69: Headlight Flasher
CONTROLS Driving High beams, headlight flasher Turn signal, high beams, headlight flasher Turn signal Using turn signals ▷ High beams, arrow 1. ▷ Headlight flasher, arrow 2. Washer/wiper system Press the lever beyond the resistance point. Switching the wipers on/off and brief To switch off manually, press the lever to the wipe resistance point.
-
Page 70
CONTROLS Driving Switching on Interval mode or rain sensor The concept Without the rain sensor, the frequency of the wiper operation is preset. The rain sensor automatically controls the time between wipes depending on the intensity of the rainfall. The sensor is located on the wind‐ shield, directly behind the interior rearview mir‐… -
Page 71: Washer Fluid
CONTROLS Driving Washing the windshield Cleaning rear window In interval mode: turn the switch further, ar‐ row 2. The switch automatically returns to its interval position when released. In idle position: turn switch downward, arrow 3. The switch automatically returns to its idle posi‐ tion when released.
-
Page 72
CONTROLS Driving Follow the notes and instructions on the con‐ Recommended minimum fill quantity: 0.2 US tainer. gal/1 liter. United States: The washer fluid mixture ratio is regulated by the U.S. EPA and many individual Manual transmission states; do not exceed the allowable washer fluid dilution ratios limits that apply. -
Page 73
CONTROLS Driving Kickdown Sport program and manual mode M/S Kickdown is used to achieve maximum driving Activating the sport program performance. Step on the accelerator pedal be‐ yond the resistance point at the full throttle po‐ sition. Engaging a selector lever position Press on the brake pedal until you start driving To prevent the vehicle from creeping after you… -
Page 74
CONTROLS Driving The selected gear is briefly displayed in the in‐ ▷ Shift down: briefly pull left shift paddle. strument cluster, followed by the currently se‐ ▷ With the respective transmission version, lected gear. the lowest possible gear can be selected by pulling and holding the left shift paddle. -
Page 75: The Concept
CONTROLS Driving Before unlocking the transmission lock man‐ An experienced driver may be able to achieve ually, engage the parking brake forcefully to better acceleration values in DSC OFF mode, re‐ prevent the vehicle from rolling away. fer to page 111. Loosen the sleeve of the selector lever.
-
Page 76: Displays
CONTROLS Displays Displays Vehicle features and op‐ necessarily available in your car, e. g., due to the selected options or country versions. This tions also applies to safety-related functions and sys‐ tems. The respectively applicable country provi‐ This chapter describes all standard, country- sions must be observed when using the respec‐…
-
Page 77: Check Control
CONTROLS Displays Electronic displays Driver assistance systems On-board computer 81 Messages, e.g. Check Control Selector lever position display 68 Time 77 Gear shift indicator 79 External temperature 77 Driving Dynamics Control 113 Selection lists 81 Status Total miles/trip odometer 77 Indicator/warning lights Check Control General information The concept The indicator and warning lights can light up in The Check Control system monitors functions in a variety of combinations and colors.
-
Page 78
CONTROLS Displays Orange lights be activated if objects are placed on the front passenger seat. Active Cruise Control Make sure that the safety belts are positioned correctly. The number bars shows the selected distance from the vehicle driving ahead. Airbag system For more information, see Camera- based cruise control, ACC, refer to page 115. -
Page 79
CONTROLS Displays DSC Dynamic Stability Control is deactivated Steering system or DTC Dynamic Traction Control is activated Steering system in some cases defec‐ Dynamic Stability Control DSC is tive. switched off or Dynamic Traction Con‐ Have the steering system checked by trol DTC is switched on. -
Page 80
CONTROLS Displays Symbols High-beam Assistant Within the supplementary text, the following High-beam Assistant is switched on. functions can be selected independent of the High beams are activated and off auto‐ check control message. matically as a function of the traffic sit‐ ▷… -
Page 81: Resetting The Trip Odometer
CONTROLS Displays Displaying stored Check Control Resetting the trip odometer messages Press the knob. On the Control Display: ▷ The odometer is displayed when the ignition is switched «Vehicle info» off. «Vehicle status» ▷ When the ignition is switched «Check Control» on, the trip odometer is re‐…
-
Page 82: Service Requirements
CONTROLS Displays Range Service requirements Display The concept After the ignition is turned on the instrument With a low remaining range: cluster briefly displays available driving distance ▷ A Check Control message is or time to the next scheduled maintenance. displayed briefly.
-
Page 83: Gear Shift Indicator
CONTROLS Displays Steptronic transmission: Displaying On the Control Display: «Vehicle info» Example Description «Vehicle status» Fuel efficient gear is set. «Service required» «§ Vehicle inspection» Shift into fuel efficient gear. «Date:» Adjust the settings. Confirm. The entered date is stored. Speed limit detection Gear shift indicator The concept…
-
Page 84
CONTROLS Displays The system assists the driver and does not re‐ With navigation system: speed place the human eye.◀ limit detection is not available. At a glance Camera Without navigation system: speed limit detection switched on but no speed limit or cancel‐ lation is detected. -
Page 85
CONTROLS Displays Selection lists in the in‐ On-board computer strument cluster Calling up information on the info display The concept With the buttons on the steering wheel and the display in the instrument cluster the following can be displayed or operated: ▷… -
Page 86: Average Fuel Consumption
CONTROLS Displays ▷ Speed. temperature has been attained, the indicator is in the center position. If the engine oil or coolant, thus the engine, be‐ Adjusting the info display come too hot, a Check Control message is dis‐ You can select what information from the com‐ played.
-
Page 87
CONTROLS Displays Display on the Control Display Vehicle state Display the computer or trip computer on the The following vehicle and surrounding area Control Display. data are automatically checked and evaluated in succession: On the Control Display: ▷ Range. «Vehicle info» ▷… -
Page 88
CONTROLS Displays Turn the controller until the desired limit is Turn the controller until the desired hours displayed. are displayed. Press the controller. Press the controller. The speed limit is stored. Turn the controller until the desired mi‐ nutes are displayed. Activating/deactivating the limit Press the controller. -
Page 89: Instrument Cluster
CONTROLS Displays Language Depending on the light conditions, the bright‐ ness settings may not be clearly visible. Setting the language To set the language on the Control Display: LED ring on the central «Settings» instrument cluster «Language/Units» «Language:» The concept Select the desired language.
-
Page 90: Head-Up Display
CONTROLS Displays Hints ▷ Arrow 3: warning field. Do not move the moving parts manually Switching on/off LED ring Do not move the moving parts manually, «Settings» and keep the area of movement of these parts «Center Instrument» clear; otherwise, the system is damaged.◀…
-
Page 91
CONTROLS Displays On the Control Display: «Settings» «Head-Up Display» «Brightness» Turn the controller. When the low beams are activated, the bright‐ ness of the Head-up Display can be additionally influenced using the instrument lighting, refer Press button. to page 93. Settings are stored for the profile currently in use. -
Page 92
CONTROLS Displays Overview, buttons tal times can be measured using the stop watch. The display elements of the Chrono package mainly support a sporty driving style, e,g, on racetracks. Overview ▷ MODE button, arrow 1. ▷ START/STOP button, arrow 2. ▷… -
Page 93
CONTROLS Displays watch, e.g., LAP 1 with the measured time. The stop watch continues running in the background. If needed, press button, arrow 3, again to measure a further lap time. Calling up lap times Press button, arrow 1, repeatedly until LAP 1 is shown on the display. -
Page 94: Lights
CONTROLS Lights Lights Vehicle features and op‐ Parking lights, corner‐ tions ing lights and roadside parking lights This chapter describes all standard, country- specific and optional features offered with the General information series. It also describes features that are not necessarily available in your car, e.
-
Page 95: Daytime Running Lights
CONTROLS Lights Switching on Automatic headlight With the ignition switched off, press the lever control either up or down past the resistance point for approx. 2 seconds. Position of switch : the low beams are acti‐ vated and off automatically, e.g., in tunnels, in Switch off twilight or if there is precipitation.
-
Page 96
CONTROLS Lights Activating Cornering lamp Position of switch : going around corners, the cornering lamp also lights the interior area of the curve. Below a speed of approx. 25 mph/40 km/h when the flasher is switched on and the steering angle is detected, there is automatic activation. -
Page 97: Instrument Lighting
CONTROLS Lights Rear fog lights The High-beam Assistant can be switched off when manually adjusting the light. To reacti‐ The low beams or front fog lights must be vate the High-beam Assistant, press the button switched on. on the turn signal lever. Press button.
-
Page 98: Reading Lights
CONTROLS Lights Overview Changing color Push the switch forward or back: manual color change. Push and hold the switch forward or back: automatic color change. Push the switch again to end color changes. Setting the brightness The brightness of the ambient light can be ad‐ Interior lights justed via the thumbwheel for the instrument Reading lamp…
-
Page 99: Safety
CONTROLS Safety Safety Vehicle features and op‐ necessarily available in your car, e. g., due to the selected options or country versions. This tions also applies to safety-related functions and sys‐ tems. The respectively applicable country provi‐ This chapter describes all standard, country- sions must be observed when using the respec‐…
-
Page 100
CONTROLS Safety Knee airbag ▷ Do not apply adhesive materials to the air‐ bag cover panels, do not cover them or The knee airbag supports the legs in a frontal modify them in any way. impact. ▷ Never modify either the individual compo‐ Protective action nents or the wiring in the airbag system. -
Page 101
CONTROLS Safety In case of a malfunction have airbag sys‐ ▷ Do not attach covers, cushions, ball mats or tem checked immediately. other items to the front passenger seat un‐ less they are specifically recommended by In case of a malfunction have airbag system your vehicle’s manufacturer. -
Page 102: Tire Pressure Monitor
CONTROLS Safety Tire Pressure Monitor After installing a child seat, make sure that the indicator lamp for the front-seat passenger air‐ bags lights up. This indicates that the child seat has been detected and the front-seat passen‐ The concept ger airbags are not activated. The system monitors tire inflation pressure in Strength of the driver’s and front-seat the four mounted tires.
-
Page 103
CONTROLS Safety Status control display After driving faster than 19 mph/30 km/h for a short period, the set tire inflation pressures are Tire and system status are indicated by the accepted as reference values. The resetting color of the tires and a text message on the process is completed automatically while driv‐… -
Page 104
CONTROLS Safety Do this by checking the air pressure in all A vehicle with a damaged tire reacts differently, four tires. e.g., it has reduced lane stability during brak‐ ing, a longer braking distance and different The tire pressure gauge of the Mobility Sys‐ self-steering properties. -
Page 105
CONTROLS Safety ▷ Carry out a reset of the system after a tire pressure label, you should determine the change. proper tire inflation pressure for those tires.) As an added safety feature, your vehicle has been System limits equipped with a tire pressure monitoring sys‐ tem (TPMS) that illuminates a low tire pressure The system does not function properly if a reset telltale when one or more of your tires is signifi‐… -
Page 106
CONTROLS Safety FTM Flat Tire Monitor «Perform reset» Start the engine — do not drive off. The concept Start the initialization with «Perform reset». The system does not measure the actual infla‐ Drive away. tion pressure in the tires. The initialization is completed while driving, It detects a tire inflation pressure loss by com‐… -
Page 107
CONTROLS Safety ▷ When the system has not been initialized. Possible driving distance with complete loss of tire inflation pressure: ▷ When driving on a snowy or slippery road surface. The possible driving distance after a loss of tire inflation pressure depends on cargo load, driv‐ ▷… -
Page 108
CONTROLS Safety At a glance The intelligent safety systems can hel prevent an imminent collision. Button in the vehicle ▷ Front-end collision warning with City Brak‐ ing function, refer to page 105. ▷ Pedestrian warning with city braking func‐ tion, refer to page Hints Personal responsibility The system does not serve as a substitute… -
Page 109
CONTROLS Safety Hints Front-end collision warning with City Brak‐ Personal responsibility The system does not serve as a substitute ing function for the driver’s personal judgment of the traffic situation. The concept Be aware of the traffic situation and the vehi‐ The ystem can help prevent accidents. -
Page 110
CONTROLS Safety Camera Setting the warning time The warning time can be set via the onboard monitor. «Settings» «Frontal Coll. Warning» Activate the desired warning time on the Control Display. The selected warning time is stored for the pro‐ file currently in use. The camera is found near the interior rearview Warning with braking function mirror. -
Page 111
CONTROLS Safety Acute warnings can also be triggered without ▷ In heavy fog, rain, sprayed water or snow‐ previous prewarning. fall. ▷ In tight curves. Braking intervention ▷ If the camera viewing field or the front The warning prompts the driver himself/herself windshield are dirty or covered. -
Page 112
CONTROLS Safety Under those circumstances it reacts to people Be alert who are within the detection range of the sys‐ Due to system limitations, warnings may tem. be not issued at all, or may be issued late or im‐ properly. Therefore, always be alert and ready Detection range to intervene;… -
Page 113
CONTROLS Safety Switching on/off is sufficiently quick and sufficiently hard step‐ ping on the brake pedal. The system can assist Switching on automatically with some braking intervention if there is risk of a collision. At low speeds vehicles may thus The system is automatically active after every come to a complete stop. -
Page 114: Brake Force Display
CONTROLS Safety ▷ If the driving stability control systems are deactivated, e.g. DSC OFF. ▷ Up to 10 seconds after the start of the en‐ gine, via the Start/Stop knob. ▷ During calibration of the camera immedi‐ ately after vehicle shipment. ▷…
-
Page 115: Driving Stability Control Systems
CONTROLS Driving stability control systems Driving stability control systems Vehicle features and op‐ DSC Dynamic Stability tions Control This chapter describes all standard, country- The concept specific and optional features offered with the DSC prevents traction loss in the power wheels series.
-
Page 116
CONTROLS Driving stability control systems The DSC system is switched off. ▷ When freeing vehicle from deep snow or driving off from loose grounds. ▷ When driving with snow chains. Activating DSC Press button. Deactivating/activating DTC Dynamic DSC OFF and the DSC OFF indicator Traction Control lamp go out. -
Page 117
CONTROLS Driving stability control systems MID/GREEN Configuring GREEN Balanced tuning of the shock absorbers for Via the Driving Dynamics Control more comfort. Activate GREEN. SPORT «Configure GREEN» Consistently sporty tuning of the shock absorb‐ Configure the program. ers for greater driving agility. This configuration is retrieved when GREEN is activated. -
Page 118: Drive-Off Assistant
CONTROLS Driving stability control systems Drive-off assistant Configure the program. SPORT can also be configured before it is acti‐ This system supports driving off on inclines. The vated: parking brake is not required. «Settings» Hold the vehicle in place with the foot «Driving mode»…
-
Page 119: Driving Comfort
CONTROLS Driving comfort Driving comfort General information Vehicle features and op‐ The system is functional at speeds beginning at tions approx. 20 mph/30 km/h. This chapter describes all standard, country- Depending on the set drive mode, refer to specific and optional features offered with the page 113, the features of the cruise control can series.
-
Page 120
CONTROLS Driving comfort At a glance Switching on/off and interrupting cruise control Buttons on the steering wheel Switching on Press button Function Press button on the steering wheel. Cruise control on/off, interrupt, re‐ fer to page Display in the instrument cluster lights Store/maintain speed, refer to page Display in the instrument cluster lights… -
Page 121: While Driving
CONTROLS Driving comfort ▷ The detection range of the camera is im‐ If active, the displayed speed is stored and the paired, e.g., by soiling, heavy precipitation vehicle reaches the stored speed when the or glare effects from the sun. road is clear.
-
Page 122
CONTROLS Driving comfort Brief status display lected distance is briefly displayed in the info display. Selected desired speed. In the following cases, the stored speed value is deleted and cannot be called up again: If — appears briefly on the display for Check ▷… -
Page 123
CONTROLS Driving comfort pressing on the brake pedal or accelerator Comply with the legal speed limit and safety pedal. distance in every situation when using the sys‐ tem. The vehicle symbol flashes red and an acoustic signal sounds: Detection range You are requested to intervene by brak‐… -
Page 124: Swerving Vehicles
CONTROLS Driving comfort Swerving vehicles In tight curves the system offers only restricted detection where a vehicle ahead of you might be detected late or not at all. A vehicle driving in front of you is not detected until it is completely within the same lane as your vehicle.
-
Page 125: Cruise Control
CONTROLS Driving comfort Cruise control Press button Function Increasing, maintaining or storing The concept the speed The system is functional at speeds beginning at Reducing, maintaining or storing approx. 20 mph/30 km/h. the speed It maintains the speed that was set using the control elements on the steering wheel.
-
Page 126: Indicator Lamp
CONTROLS Driving comfort ▷ Selector lever position N is set. The maximum speed that can be set de‐ pends on the vehicle. ▷ DTC Dynamic Traction Control is activated or DSC is deactivated. ▷ button: pressing it to the resist‐ ance point and holding it there accelerates ▷…
-
Page 127
CONTROLS Driving comfort At a glance PDC Park Distance Con‐ trol Button in the vehicle The concept PDC supports you when parking. Slowly ap‐ proaching an object behind or, with the appro‐ priate equipment, also in front of your vehicle is signaled by: ▷… -
Page 128
CONTROLS Driving comfort Switching on/off manually A display appears as soon as Park Distance Control (PDC) is activated. Press button. The range of the sensors is represented in col‐ ors: red, green and yellow. ▷ On: the LED lights up. When the image of the rearview camera is dis‐… -
Page 129: Rearview Camera
CONTROLS Driving comfort False warnings Rearview camera PDC may issue a warning under the following conditions even though there is no obstacle The concept within the detection range: The rearview camera provides assistance in ▷ In heavy rain. parking and maneuvering backwards. The area behind the vehicle is shown on the Control Dis‐…
-
Page 130
CONTROLS Driving comfort Clean the camera lens, refer to page 217. Lanes and turning radius are indicated. ▷ Obstacle marking Switching on/off «Obstacle marking» Spatially-shaped markings are displayed. Switching on automatically With the engine running, engage lever in posi‐ Pathway lines tion P R. -
Page 131: Display Settings
CONTROLS Driving comfort Obstacle marking Display settings Brightness With the rearview camera switched on: Select the symbol. Turn the controller until the desired setting is reached and press the controller. Contrast With the rearview camera switched on: ▷ Obstacle markings can be faded into the image of the rearview camera.
-
Page 132
CONTROLS Driving comfort This system assists the driver in parking parallel Curbs to the road. The parking assistant may steer the vehi‐ Ultrasound sensors measure parking spaces on cle over or onto curb if need be. both sides of the vehicle. Therefore, always be alert and ready to inter‐… -
Page 133
CONTROLS Driving comfort At a glance Parking assistant is activated automatically. Button in the vehicle Switching on with reverse gear Shift into reverse. The current status of the parking space search is indicated on the Control Display. To activate: «Parking Assistant» Switch off The system can be deactivated as follows: ▷… -
Page 134
CONTROLS Driving comfort Interrupting automatically is active, suitable parking spaces are high‐ lighted. The system is interrupted automatically in the ▷ The parking procedure is ac‐ following situations: tive. Steering control has ▷ If the driver grasps the steering wheel or if been taken over by system. -
Page 135
CONTROLS Driving comfort Limits of ultrasonic measurement Ultrasonic measuring might not function under the following circumstances: ▷ For small children and animals. ▷ For persons with certain clothing, e.g. coats. ▷ With external interference of the ultra‐ sound, e.g. from passing vehicles or loud machines. -
Page 136: Climate Control
CONTROLS Climate control Climate control Vehicle features and op‐ necessarily available in your car, e. g., due to the selected options or country versions. This tions also applies to safety-related functions and sys‐ tems. The respectively applicable country provi‐ This chapter describes all standard, country- sions must be observed when using the respec‐…
-
Page 137
CONTROLS Climate control Note Temperature Sufficient ventilation Turn the ring to set the desired temperature. When remaining in the vehicle for an ex‐ tended period of time, ensure sufficient exter‐ nal ventilation. Do not continuously use recircu‐ lated-air mode; otherwise the air quality in the interior continuously deteriorates and window Cooling function condensation… -
Page 138: Rear Window Defroster
CONTROLS Climate control Switching the system on/off Sufficient ventilation When remaining in the vehicle for an ex‐ Switch off tended period of time, ensure sufficient exter‐ nal ventilation. Do not continuously use recircu‐ Turn wheel for air quantity to the lated-air mode;…
-
Page 139: Automatic Climate Control
CONTROLS Climate control Automatic climate control Temperature, left 10 Cooling function Display 11 Automatic recirculated-air control/recircu‐ lated-air mode Air flow, AUTO intensity 12 Rear window defroster AUTO program 13 Windshield defroster Air distribution, manual 14 Defrosts windows and removes condensa‐ Display tion Temperature, right…
-
Page 140: Maximum Cooling
CONTROLS Climate control by increasing the cooling or heating output, Turn the ring to set the desired and then keeps it constant. intensity. Do not rapidly switch between different tem‐ perature settings. The automatic climate con‐ trol will not have sufficient time to adjust the The selected intensity is displayed on the auto‐…
-
Page 141
CONTROLS Climate control Depending on the weather, the windshield may The rear window defroster switches off auto‐ fog up briefly when the engine is started. matically after a certain period of time. The cooling function is switched on automati‐ When Green mode, refer to page 162, is acti‐ cally with the AUTO program. -
Page 142
CONTROLS Climate control Switching on/off directly Ventilation On the Control Display: «Settings» «Climate» «Activate comf. ventilation» The symbol on the automatic climate con‐ trol flashes if the system is switched on. Preselecting the reel-on time On the Control Display: ▷ Turn knob for continuous opening and clos‐… -
Page 143: Interior Equipment
CONTROLS Interior equipment Interior equipment Compatibility Vehicle features and op‐ tions If this symbol is printed on the packag‐ ing or in the instructions of the system This chapter describes all standard, country- to be controlled, the system is generally specific and optional features offered with the compatible with the Universal Integrated Re‐…
-
Page 144
CONTROLS Interior equipment Hold the hand-held transmitter for the sys‐ and continuous illumination of the LED will re‐ tem to be controlled approx. 1 to 3 in/2.5 peat for approximately 20 seconds. to 8 cm away from the buttons of the inte‐ For systems with an alternating-code system, rior rearview mirror. -
Page 145: Digital Compass
CONTROLS Interior equipment Digital compass button on the interior rearview mirror has been programmed. The system can then be controlled by the button on the interior Overview rearview mirror. If the LED does not flash faster after at least 60 seconds, change the distance and re‐ peat the step.
-
Page 146
CONTROLS Interior equipment World map with magnetic zones Procedure Procedure Press and hold the control button for ap‐ Make sure that there are no large metallic prox. 3 to 4 seconds. The number of the set objects or overhead power lines near the compass zone appears in the mirror. -
Page 147: Sun Visor
CONTROLS Interior equipment Settings are stored automatically after approxi‐ Switch off the ignition and take the remote mately 10 seconds. control with you when leaving the vehicle so that children cannot use the lighter and burn themselves.◀ Sun visor Replace the cover after use Reinsert the lighter or socket cover after Glare shield use, otherwise objects may get into the lighter…
-
Page 148: Cargo Area
CONTROLS Interior equipment nition switched on. The total load of all sockets ▷ Do not connect devices such as fans or must not exceed 140 watts at 12 volts. lights to the USB interface. Do not damage the socket by using unsuitable ▷…
-
Page 149
CONTROLS Interior equipment Pull the cargo cover out of the brackets on stability of the child seat can be affected, and the left and right. there is an increased risk of injury because of unexpected movement of the seat backrest.◀ Using the middle safety belt If the middle safety belt in the rear is used, the larger side of the backrest must be… -
Page 150
CONTROLS Interior equipment Fold up the backrest and press it into the latch. Make sure that the safety belt is not pinched. Adjusting the backrest tilt Do not install any child restraint systems When the backrests are set at steeper po‐ sition, do not install any child restraint systems on the backrest;… -
Page 151: Storage Compartments
CONTROLS Storage compartments Storage compartments Vehicle features and op‐ ▷ Storage compartment in the center arm‐ rest. tions ▷ Compartments in the doors. This chapter describes all standard, country- ▷ Pockets on the backrests of the front seats. specific and optional features offered with the series.
-
Page 152: Storage Compartment
CONTROLS Storage compartments Opening Storage compartment above the glove com‐ partment Note Immediately close the storage compart‐ ment Close the storage compartment immediately after use while driving; otherwise, injury may Press button, arrow 1, and open center arm occur during accidents.◀…
-
Page 153: Clothes Hooks
CONTROLS Storage compartments Front No heavy objects Do not hang heavy objects from the hooks; otherwise, they may present a danger to passengers during braking and evasive ma‐ neuvers.◀ The clothes hooks are located above the side windows in the rear. Storage space under In the center console.
-
Page 154
CONTROLS Storage compartments Removing the cargo floor panel Folded up position The variable cargo floor panel may not be used as a partition net to separate the trunk and the vehicle interior. ▷ Only use the variable cargo floor in the folded-up position when the backrests are folded up and locked. -
Page 155
CONTROLS Storage compartments ▷ On 5-door models: Maximum load in this position: 441 lbs/200 kg. ▷ Space for objects remains between the fixed and variable trunk floor. Online Edition for Part no. 01 40 2 961 168 — II/15… -
Page 156
DRIVE ME. Online Edition for Part no. 01 40 2 961 168 — II/15… -
Page 157: Driving Tips
AT A GLANCE CONTROLS DRIVING TIPS MOBILITY REFERENCE Online Edition for Part no. 01 40 2 961 168 — II/15…
-
Page 158: Things To Remember When Driving
DRIVING TIPS Things to remember when driving Things to remember when driving Tires Vehicle features and op‐ Tire traction is not optimal due to manufactur‐ tions ing circumstances when tires are brand-new; they achieve their full traction potential after a This chapter describes all standard, country- break-in time.
-
Page 159: Driving Through Water
DRIVING TIPS Things to remember when driving ▷ Close all windows and the glass sunroof. loss of contact between the tires and the road surface, ultimately undermining your ability to ▷ Greatly increase the air flow from the vents. steer and brake the vehicle. ▷…
-
Page 160: Driving In Wet Conditions
DRIVING TIPS Things to remember when driving Driving in wet conditions Corrosion buildup on the brake discs will cause a pulsating effect on the brakes in their re‐ When roads are wet or in heavy rain, press sponse — generally that cannot be corrected. brake pedal ever so gently every few miles.
-
Page 161: Loading
DRIVING TIPS Loading Loading Vehicle features and op‐ Determining the load tions limit This chapter describes all standard, country- Locate the following statement on your ve‐ specific and optional features offered with the hicle’s placard: series. It also describes features that are not ▷…
-
Page 162: Securing Cargo
DRIVING TIPS Loading Load Securing cargo On 3-door models Lashing eyes in the cargo area Without storage compartment package: to se‐ On 5-door models cure the cargo there are two lashing eyes, ar‐ row 1, in the cargo area. With storage compartment package: to secure the cargo there are six lashing eyes, arrows 1 and 2, in the cargo area.
-
Page 163: Rear Luggage Rack
DRIVING TIPS Loading Securing Securing Follow the installation instructions of the roof COOPER/COOPER D/ONE/ONE D rack. Loading Be sure that adequate clearance is maintained for tilting and opening the glass sunroof. Because roof racks raise the vehicle’s center of gravity when loaded, they have a major effect on vehicle handling and steering response.
-
Page 164
DRIVING TIPS Loading ▷ Backup lamp: 42 watts in total. Online Edition for Part no. 01 40 2 961 168 — II/15… -
Page 165: Saving Fuel
DRIVING TIPS Saving fuel Saving fuel Vehicle features and op‐ Close the windows and tions glass sunroof This chapter describes all standard, country- Driving with the glass sunroof and windows specific and optional features offered with the open results in increased air resistance and series.
-
Page 166: Online Edition For Part No. 01 40 2 961 168 — Ii/15
Have the maintenance carried out by your erator and let the vehicle roll. service center. The flow of fuel is interrupted while coasting. Please also note the MINI Maintenance System, refer to page 195. Switch off the engine during longer stops GREEN mode Switch off the engine during longer stops, e.g.,…
-
Page 167: Online Edition For Part No. 01 40 2 961 168 — Ii/15
DRIVING TIPS Saving fuel The Coasting driving condition is enabled under «GREEN Mode» certain conditions. Under certain conditions the engine is auto‐ «Settings» matically decoupled from the transmission in «Driving mode» selector lever position D. The vehicle continues traveling with the engine idling to reduce fuel «Configure GREEN»…
-
Page 168: Online Edition For Part No. 01 40 2 961 168 — Ii/15
DRIVING TIPS Saving fuel Display in the instrument cluster GREEN tip driving instruction GREEN bonus range An adjusted driving style helps you extend your driving range. This may be displayed as the bo‐ nus range in the instrument clus‐ ter. The bonus range is shown in the range display.
-
Page 169: Online Edition For Part No. 01 40 2 961 168 — Ii/15
DRIVING TIPS Saving fuel idling to reduce fuel consumption. Selector Symbol Measure lever position D remains engaged. Manual transmission: follow shifting This driving condition is referred to as coasting. instructions. As soon as the brake or accelerator pedal is de‐ Manual transmission: engage neutral pressed, the engine is automatically coupled to for engine stop.
-
Page 170: Online Edition For Part No. 01 40 2 961 168 — Ii/15
MINI and a table of values that rates the driving style in various cat‐ Online Edition for Part no. 01 40 2 961 168 — II/15…
-
Page 171: Online Edition For Part No. 01 40 2 961 168 — Ii/15
DRIVING TIPS Saving fuel egories. The bonus range achieved by driving style that minimizes fuel consumption is dis‐ played below the table of values. The fish and the movements of the water in the glass symbolize the efficiency of the driving style.
-
Page 172: Online Edition For Part No. 01 40 2 961 168 — Ii/15
MOVE ME. Online Edition for Part no. 01 40 2 961 168 — II/15…
-
Page 173: Mobility
AT A GLANCE CONTROLS DRIVING TIPS MOBILITY REFERENCE Online Edition for Part no. 01 40 2 961 168 — II/15…
-
Page 174: Refueling
MOBILITY Refueling Refueling Vehicle features and op‐ Turn the tank lid counterclockwise. tions This chapter describes all standard, country- specific and optional features offered with the series. It also describes features that are not necessarily available in your car, e. g., due to the selected options or country versions.
-
Page 175
MOBILITY Refueling Remove the cover. Pull the green knob with the fuel pump symbol, arrow. This releases the fuel filler flap. Observe the following when refueling The fuel tank is full when the filler nozzle clicks off the first time. Do not overfill the fuel tank Do not overfill the fuel tank;… -
Page 176: Fuel
Gasoline Minimum fuel grade For the best fuel efficiency, the gasoline should Do not use any gasoline below the mini‐ be sulfur-free or very low in sulfur content. mum fuel grade as this may impair engine per‐ Fuels that are marked on the gas pump as con‐…
-
Page 177
MOBILITY Fuel mental conditions such as high ambient tem‐ perature and high altitude, may occur. If drivability problems are encountered, we rec‐ ommend switching to a high quality gasoline brand and a higher octane grade — AKI num‐ ber — for a few tank fills. To avoid harmful en‐ gine deposits, it is highly recommended to pur‐… -
Page 178: Wheels And Tires
MOBILITY Wheels and tires Wheels and tires Vehicle features and op‐ relate to cold tires or tires with the ambient temperature. tions Only check the tire inflation pressure when the tires are cold. This means after driving no more This chapter describes all standard, country- than 1.25 miles/2 km or when the vehicle has specific and optional features offered with the been parked for at least 2 hours.
-
Page 179
MOBILITY Wheels and tires Tire inflation pressure values up to To identify the correct tire inflation pressure, 100 mph/160 km/h please note the following: ▷ Tire sizes of your vehicle. On 3-door models: COOPER ▷ Maximum permitted driving speed. Tire size Pressure specifications in Tire inflation pressures up to 100 mph/ bar/PSI… -
Page 180
MOBILITY Wheels and tires On 3-door models: COOPER S On 3-door models: JOHN COOPER WORKS Tire size Pressure specifications in bar/PSI Tire size Pressure specifications in bar/PSI Specifications in bar/PSI with cold Specifications in tires bar/PSI with cold tires 195/55 R 16 87 H M 2.4 / 35 2.4 / 35 +S RSC… -
Page 181
MOBILITY Wheels and tires Tire inflation pressure values over Tire size Pressure specifications in bar/PSI 100 mph/160 km/h 205/45 R 17 88 V M 2.5 / 36 2.4 / 35 On 3-door models: COOPER +S XL A/S RSC 205/45 R 17 88 V M Tire size Pressure specifications in +S XL RSC… -
Page 182: Tire Identification Marks
MOBILITY Wheels and tires On 3-door models: JOHN COOPER On 5-door models: COOPER WORKS Tire size Pressure specifications in bar/PSI Tire size Pressure specifications in bar/PSI Specifications in Specifications in bar/PSI with cold bar/PSI with cold tires tires 175/65 R 15 84 H M 2.8 / 41 2.6 / 38 185/50 R 17 86 H…
-
Page 183: Tire Identification Number
MOBILITY Wheels and tires 45: aspect ratio in % All passenger car tires must conform to Federal Safety Requirements in addition to these R: radial tire code grades. 17: rim diameter in inches 84: load rating, not for ZR tires Treadwear F: speed rating, before the R on ZR tires The treadwear grade is a comparative rating…
-
Page 184: Tire Damage
MOBILITY Wheels and tires Minimum tread depth laboratory test wheel than the minimum re‐ quired by law. Temperature grade for this tire The temperature grade for this tire is es‐ tablished for a tire that is properly inflated and not overloaded. Excessive speed, underinfla‐ tion, or excessive loading, either separately or in combination, can cause heat buildup and possible tire failure.
-
Page 185: Changing Wheels And Tires
MOBILITY Wheels and tires In case of tire damage Following tire damage, have the original wheel and tire combination remounted on the vehicle If there are indications of tire damage, re‐ as soon as possible. duce your speed immediately and have the rims and tires checked right away;…
-
Page 186
MOBILITY Wheels and tires Storage Retreaded tires Possibly substantial variations in the de‐ Store wheels and tires in a cool, dry place with sign and age of the tire casing structures can as little exposure to light as possible. limit service life and have a negative impact on Always protect tires against all contact with oil, road safety.◀… -
Page 187: Repairing A Flat Tire
MOBILITY Wheels and tires Repairing a flat tire ▷ If possible, do not remove foreign bodies that have penetrated the tire. Safety measures in case of a breakdown ▷ Pull the speed limit sticker off the sealant Park the vehicle as far away as possible container and apply it to the steering from passing traffic and on solid ground.
-
Page 188
MOBILITY Wheels and tires Compressor Take the connection hose completely out of the compressor housing. Do not kink the hose. On/off reel Holder for bottle Attach the connection hose to the connec‐ Reduce inflation pressure tor of the sealant container, ensuring that it Inflation pressure dial engages audibly. -
Page 189: Distributing The Sealant
MOBILITY Wheels and tires Screw the connection hose onto the tire Switch off the compressor after 10 mi‐ valve of the defective wheel. nutes Do not allow the compressor to run longer than 10 minutes; otherwise, the device will overheat and may be damaged.◀…
-
Page 190: Snow Chains
MOBILITY Wheels and tires To correct the tire inflation pressure Continuing the trip Stop at a suitable location. Do not exceed the maximum permissible speed of 50 mph/80 km/h. Screw the connection hose onto the tire valve stem. Reinitialize the Flat Tire Monitor, refer to page 102.
-
Page 191
MOBILITY Wheels and tires Maximum speed with snow chains Do not exceed a speed of 30 mph/50 km/h when using snow chains. Online Edition for Part no. 01 40 2 961 168 — II/15… -
Page 192: Engine Compartment
MOBILITY Engine compartment Engine compartment Vehicle features and op‐ necessarily available in your car, e. g., due to the selected options or country versions. This tions also applies to safety-related functions and sys‐ tems. The respectively applicable country provi‐ This chapter describes all standard, country- sions must be observed when using the respec‐…
-
Page 193
MOBILITY Engine compartment Never reach into the engine compart‐ ment Never reach into spaces or gaps in the engine compartment; otherwise, there is a risk of in‐ jury, e.g., from rotating or hot parts.◀ Fold down wiper arm Before opening the hood, ensure that the wiper arms are against the windshield, or this may result in damage.◀… -
Page 194: Engine Oil
MOBILITY Engine oil Engine oil Vehicle features and op‐ Electronic oil measure‐ tions ment This chapter describes all standard, country- Status display specific and optional features offered with the series. It also describes features that are not The concept necessarily available in your car, e. g., due to The engine oil level is monitored electronically the selected options or country versions.
-
Page 195: Adding Engine Oil
MOBILITY Engine oil Adding engine oil Too much engine oil Have the vehicle checked immediately; otherwise, surplus engine oil can lead to engine General information damage.◀ Switch off the ignition and safely park the vehi‐ cle before engine oil is added. Detailed measurement Oil filler neck The concept…
-
Page 196: Engine Oil Change
Gasoline engine BMW Longlife-01 BMW Longlife-01 FE Further information regarding the oil specifica‐ tions and viscosities of MINI engine oils can be inquired with the service center. Alternative engine oil types If an engine oil suitable for continuous use is not available, up to 1 US quart/liter of an en‐…
-
Page 197: Coolant
MOBILITY Coolant Coolant Vehicle features and op‐ Turn the coolant reservoir lid counterclock‐ wise to unscrew and open it. tions This chapter describes all standard, country- specific and optional features offered with the series. It also describes features that are not necessarily available in your car, e.
-
Page 198
MOBILITY Coolant Close cap. Have the cause of the coolant loss elimi‐ nated as soon as possible. Disposal Comply with the relevant environmen‐ tal protection regulations when dispos‐ ing of coolant and coolant additives. Online Edition for Part no. 01 40 2 961 168 — II/15… -
Page 199: Maintenance
If this occurs, have a service center update the MINI maintenance system time-dependent maintenance procedures, such as checking brake fluid and, if needed, chang‐ The maintenance system indicates required…
-
Page 200
MOBILITY Maintenance Socket for OBD Onboard components, in particular the catalytic con‐ verter. Diagnosis Note Socket for Onboard Diagnosis The socket for onboard diagnostics may only be used by the service center or a work‐ shop that operates in accordance with the specifications of the vehicle manufacturer with correspondingly trained personnel and other authorized persons. -
Page 201: Replacing Components
MOBILITY Replacing components Replacing components Vehicle features and op‐ Folding down wipers before opening the hood tions Before opening the hood, ensure that the wiper arms with the wiper blades are against the This chapter describes all standard, country- windshield to prevent damage.◀…
-
Page 202
MOBILITY Replacing components Replace the rear wiper blade Working on the lighting system Fold up and hold the wiper arm firmly. When working on the lighting system, you should always reel off the lights affected to Turn the wiper blade all the way back. prevent short circuits. -
Page 203
MOBILITY Replacing components Front lights, bulb replacement Bug light Overview Halogen headlights Parking lights Daytime running lights Fog lights Low beams/high beams LED bug light Turn signal LED headlights Parking lights Fog lights Daytime running lights LED low beams/LED high beams Low beams/high beams Follow the general instructions on lights and Turn signal… -
Page 204: Turn Signal
MOBILITY Replacing components Bulbs: H4 With white turn signal lights: PWY24W Open the hood, refer to page 189. Turn the steering wheel. Turn the lid counterclockwise, arrow, and Turn the lid counterclockwise, arrow 1, and remove. remove. Pull off the connector. Unscrew the inner lid counterclockwise, and remove it.
-
Page 205: Running Lights
MOBILITY Replacing components LED parking lights/LED fog lights ▷ Turn the bulb holder of the fog lamp counterclockwise, arrow 3, and re‐ Follow the general instructions on lights and move. bulbs, refer to page 198. The lights feature LED technology. Contact your service center in the event of a malfunction.
-
Page 206
MOBILITY Replacing components Vehicle with two rear fog lights Brake light Reversing lights Side tail lights Follow the general instructions on lights and bulbs, refer to page 198. Bulbs: P21W Open the tailgate, refer to page 40. Remove left or right cover. Side tail lights Rear fog lights License plate lamp… -
Page 207
MOBILITY Replacing components ▷ Arrow 3: reversing light The wire is long enough to guide the socket down and through between any heat shield that may be installed and the bumper. Proceed in the reverse order to insert the new bulb and attach the bulb holder. Make sure that the bulb holder engages in all fas‐… -
Page 208: Changing Wheels
MOBILITY Replacing components The wire is long enough to guide the socket ▷ With white lens: WY5W diadem down and through between any heat shield Pull the turn signal housing at the top out that may be installed and the bumper. of the catch, then unhook it at the bottom.
-
Page 209
MOBILITY Replacing components Jacking points for the vehicle jack Use the vehicle jack only for changing wheels Use the vehicle jack only for changing wheels. Do not attempt to use it to jack up a different type of vehicle or cargo of any kind; otherwise, this could cause material damage and personal injury.◀… -
Page 210: Jacking Up The Vehicle
Put the new wheel or emergency wheel on and screw in at least two bolts. Prepare wheel change If original MINI light alloy wheels are not Follow the Safety instructions, refer to mounted, any accompanying lug bolts also page 205.
-
Page 211: Charging The Battery
MOBILITY Replacing components The defective wheel cannot be stored in the systems or functions may not be fully availa‐ emergency wheel bracket because of its ble.◀ size. After a battery replacement, have the battery Check tire inflation pressure at the next op‐ registered on the vehicle by your service center portunity and correct as needed.
-
Page 212
MOBILITY Replacing components ▷ Date: update. ▷ Navigation system: wait for the operability of the navigation. Disposing of old batteries Have old batteries disposed of by your service center or bring them to a recy‐ cling center. Maintain the battery in an upright position for transport and storage. -
Page 213: Breakdown Assistance
MOBILITY Breakdown assistance Breakdown assistance Vehicle features and op‐ Warning triangle tions This chapter describes all standard, country- specific and optional features offered with the series. It also describes features that are not necessarily available in your car, e. g., due to the selected options or country versions.
-
Page 214
MOBILITY Breakdown assistance Preparation Bodywork contact between vehicles Make sure that there is no contact be‐ tween the bodywork of the two vehicles; other‐ wise, there is a danger of short circuits.◀ Check whether the battery of the other ve‐ hicle has a voltage of 12 volts. -
Page 215: Tow-Starting And Towing
MOBILITY Breakdown assistance Tow truck Let both engines run for several minutes. Disconnect the jumper cables in the reverse order. Check the battery and recharge if needed. Tow-starting and towing Note Tow-starting and towing Have your vehicle transported with a tow truck For towing the vehicle turn, switch off the with a so-called lift bar or on a flat bed.
-
Page 216
The screw-in tow fitting should always be car‐ cause damage.◀ ried in the vehicle. It can be screwed in at the front or rear of the MINI. It is located under the Online Edition for Part no. 01 40 2 961 168 — II/15… -
Page 217
MOBILITY Breakdown assistance cargo floor panel, next to the onboard vehicle tool kit, refer to page 197. Tow fitting, information on use ▷ Use only the tow fitting provided with the vehicle and screw it all the way in. ▷ Use the tow fitting for towing on paved roads only. -
Page 218: Care
MOBILITY Care Care Vehicle features and op‐ Cleaning sensors/camera lenses with high-pressure washers tions When using high-pressure washers, do not spray the sensors and camera lenses on the This chapter describes all standard, country- outside of the vehicle for long periods and specific and optional features offered with the maintain a distance of at least 12 in/30 cm.◀…
-
Page 219: Vehicle Care
Car care products Steptronic transmission: MINI recommends using cleaning and care Drive into the car wash. products from MINI, since these have been Engage selector lever position N. tested and approved. Press the Start/Stop button to reel off the Car care and cleaning products engine.
-
Page 220
MOBILITY Care Use leather care products; otherwise, dirt and When cleaning rubber seals, do not use any sili‐ grease will gradually break down the protective con-containing car care products in order to layer of the leather surface. avoid damage or noises. Suitable care products are available from the Fine wood parts service center. -
Page 221
MOBILITY Care Carpets and floor mats For stubborn soiling on the projection lens of the Head-up Display, dampen the microfiber No objects in the area around the pedals cloth with alcohol. Extending projection lens, Keep floor mats, carpets, and any other refer to page 86. -
Page 222
FIND ME. Online Edition for Part no. 01 40 2 961 168 — II/15… -
Page 223: Reference
AT A GLANCE CONTROLS DRIVING TIPS MOBILITY REFERENCE Online Edition for Part no. 01 40 2 961 168 — II/15…
-
Page 224: Technical Data
The specified heights do not take into account attached parts, for example, a roof antenna, MINI 3-door Width with mirrors inches/mm 76.1/1,932 Width without mirrors inches/mm 68.0/1,727…
-
Page 225
36.2/11.02 Weights The values preceding the slash apply to vehicles the slash apply to vehicles with Steptronic with manual transmission; the values following transmission. MINI Cooper, 3-door Approved gross vehicle weight 3,565 1,617 Load 790/725 358/329 Approved front axle load… -
Page 226
1,995/2,065 905/937 Approved rear axle load 1,880/1,860 853/844 Approved roof load capacity Cargo area capacity cu ft 13.1–40.7 278–941 MINI Cooper S, 3-door Approved gross vehicle weight 3,620/3,650 1,642/1,656 Load 775/770 352/349 Approved front axle load 2,025/2,060 919/934 Approved rear axle load… -
Page 227
2,085/2,125 946/964 Approved rear axle load 1,880 Approved roof load capacity Cargo area capacity cu ft 13.1–40.7 278–941 MINI John Cooper Works, 3-door Approved gross vehicle weight 3,720/3,765 1,687/1,708 Load Approved front axle load 2,065/2,105 937/955 Approved rear axle load… -
Page 228
REFERENCE Technical data Capacities MINI Fuel tank, approx. Cooper, Cooper S, John Cooper Works US gal/liters 11.6/44 Online Edition for Part no. 01 40 2 961 168 — II/15… -
Page 229: Appendix
REFERENCE Appendix Appendix Current engine speed Warning field, speed Any updates to the Owner’s Handbook for Ve‐ Shift point indicator hicle are listed here. The concept Shift point indicator in the Head-up Display in‐ Additional information on the description of dicates the optimum shifting point.
-
Page 230
REFERENCE Online Edition for Part no. 01 40 2 961 168 — II/15… -
Page 231
REFERENCE Online Edition for Part no. 01 40 2 961 168 — II/15… -
Page 232
REFERENCE Online Edition for Part no. 01 40 2 961 168 — II/15… -
Page 233
REFERENCE Online Edition for Part no. 01 40 2 961 168 — II/15… -
Page 234: Everything From A To Z
REFERENCE Everything from A to Z Everything from A to Z Index Alternating-code hand-held transmitter ABS, Antilock Brake Sys‐ Alternative oil types Backrest curvature, refer to Antifreeze, washer fluid Lumbar support ACC, Active Cruise Control Antilock Brake System, Band-aids, refer to First aid Acceleration Assistant, refer to Launch Control Anti-slip control, refer to…
-
Page 235
REFERENCE Everything from A to Z Camera-based cruise control, Children, seating position Configuring driving pro‐ Children, transporting gram Camera lenses, care safely Confirmation signal Camera, rearview cam‐ Child restraint fixing sys‐ Control Display Control Display, settings Can holder, refer to Cu‐ Child restraint fixing system Controller pholder… -
Page 236
REFERENCE Everything from A to Z Dimmable exterior mirrors Dynamic Stability Control Engine start, refer to Starting Dimmable interior rearview the engine mirror Dynamic Traction Control Engine stop Direction indicator, refer to Engine temperature, dis‐ Turn signals play Display, electronic, instrument Entering a car wash cluster Equipment, interior… -
Page 237
REFERENCE Everything from A to Z Floor mats, care GREEN mode, bonus Horn Fogged up windows range Hot exhaust system Folding back rear seat back‐ GREEN mode driving style HUD Head-up Display rests analysis Hydroplaning Fold-out position, windshield GREEN mode indicator wipers GREEN — program, driving dy‐… -
Page 238
Load Manual operation, rearview sion Loading camera Jump-starting Lock, door Manual transmission Locking/unlocking via door Manufacturer of the MINI lock Marking on approved Locking/unlocking with re‐ tires Key/remote control mote control Marking, run-flat tires Keyless Go, refer to Comfort Locking, automatic… -
Page 239
REFERENCE Everything from A to Z MINI Connected, refer to Office, refer to Integrated Passenger side mirror, tilting Integrated Owner’s Manual Owner’s Manual downward MINI maintenance sys‐ Pathway lines, rearview cam‐ Oil, adding MINIMALISM Analyser Oil additives PDC Park Distance Con‐… -
Page 240
REFERENCE Everything from A to Z Recirculated-air filter Socket, OBD Onboard Diag‐ Recirculated-air nostics mode 133, Safe braking Spare fuse Recommended fuel Safety belt reminder for driv‐ Spare tire, refer to Emergency grade er’s seat and front passenger wheel Recommended tire seat Specified engine oil types brands… -
Page 241
REFERENCE Everything from A to Z Switch for Dynamic Driv‐ Tone, refer to Integrated Updates made after the edito‐ Owner’s Manual rial deadline Switch-on times, parked-car Tools Upholstery care ventilation Total vehicle weight USB interface Switch, refer to Cockpit Touchpad Symbols Tow fitting Symbols in the status field… -
Page 242
REFERENCE Everything from A to Z Welcome lights Wheels, changing Wheels, everything on wheels and tires Wheels, Flat Tire Monitor Wheels, Tire Pressure Monitor Window defroster, rear 134, Windows, powered Windshield de‐ froster 134, Windshield washer fluid Windshield washer nozzles Windshield washer system Windshield wiper Windshield wipers, fold-out… -
Page 244
*BL296116800D* DRIVE ME. Online Edition for Part no. 01 40 2 961 168 — II/15…
На этой странице вы можете совершенно бесплатно скачать Руководство по эксплуатации Mini COOPER.
У документа PDF Руководство по эксплуатации 140 страниц, а его размер составляет 1.01 Mb.
Читать онлайн Автомобили Mini COOPER Руководство по эксплуатации
Скачать файл PDF «Mini COOPER Руководство по эксплуатации» (1.01 Mb)
Популярность:
40203 просмотры
Подсчет страниц:
140 страницы
Тип файла:
Размер файла:
1.01 Mb
Вы робот?
60
Скачать: mini-cooper-1-owner-s-manual.pdf
BB кодПрямая ссылка
Прочие инструкции Mini Автомобили
-
Mini SPARE AIR Инструкция по эксплуатации
Популярность:
3755 просмотры
Подсчет страниц:
20 страницы
Тип файла:
PDF
Размер файла:
250 Kb
Скачать (PDF 250 Kb)Читать онлайн (20 страницы)
-
Mini car Инструкция по эксплуатации
Популярность:
8247 просмотры
Подсчет страниц:
19 страницы
Тип файла:
PDF
Размер файла:
1.96 Mb
Скачать (PDF 1.96 Mb)Читать онлайн (19 страницы)
-
Mini COOPER Руководство по эксплуатации
Популярность:
65535 просмотры
Подсчет страниц:
140 страницы
Тип файла:
PDF
Размер файла:
1.01 Mb
Скачать (PDF 1.01 Mb)Читать онлайн (140 страницы)
-
Mini COOPER Инструкция по эксплуатации
Популярность:
65535 просмотры
Подсчет страниц:
140 страницы
Тип файла:
PDF
Размер файла:
1.68 Mb
Скачать (PDF 1.68 Mb)Читать онлайн (140 страницы)
Прочие инструкции Mini
-
Mini Автомобильные стереосистемы R52 Инструкция по эксплуатации
Популярность:
4507 просмотры
Подсчет страниц:
5 страницы
Тип файла:
PDF
Размер файла:
263 Kb
Скачать (PDF 263 Kb)Читать онлайн (5 страницы)
-
Mini Автомобильные аксессуары R53 Инструкция по эксплуатации
Популярность:
5279 просмотры
Подсчет страниц:
13 страницы
Тип файла:
PDF
Размер файла:
532 Kb
Скачать (PDF 532 Kb)Читать онлайн (13 страницы)


