Всем доброго времени суток.
Сегодня пишу свой отзыв о детской швейной машинке «Mini Appliance Set», Китай.

Начну с того, что бродя по магазину игрушек, натолкнулись на детские швейные машинки. Их было там несколько видов. Покрутя коробки, остановили свой выбор на этой. И обошлось сие чудо в 680 рублей+ 3 пальчиковые батарейки ( в комплект не входят)
У дочки моей радости не было предела. Чуть позже, радость сменилась разочарованием. Но об этом чуть позже. Ну теперь о самой машинке.
Машинка работает от 3 пальчиковых батареек. Шьет она нажатием на левую кнопку мыши.

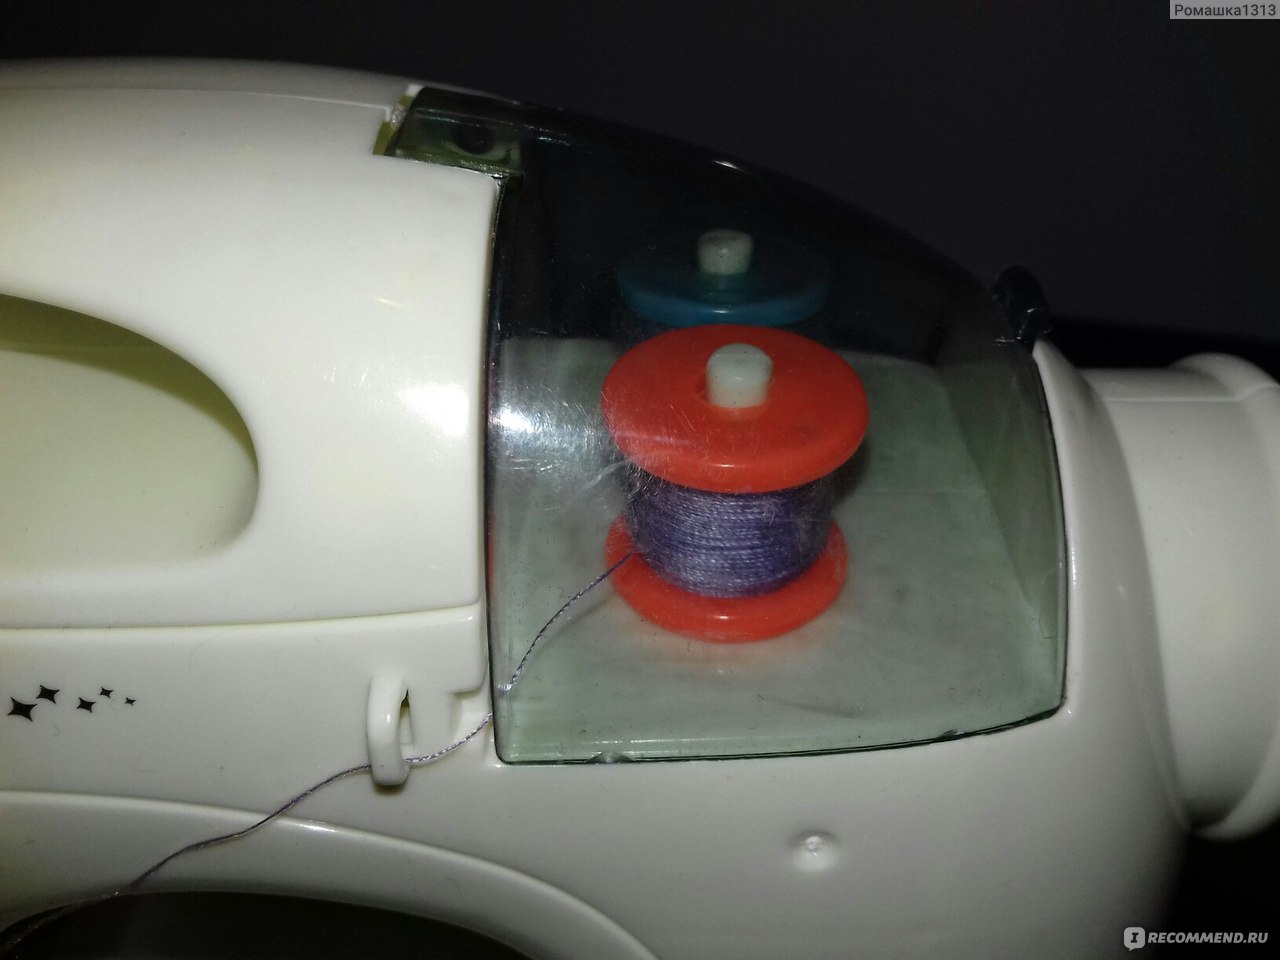
На машинке установлены 2 катушки с нитками.
Есть выдвижной ящичек, для мелочевки. И кнопочка для включения подсветки. Подсветка синего цвета.
И….. тадам. В коробке также помимо машинки, есть кабель. Только вот зачем он не понятно!!!!
На самой игрушке нет разъема для него. Зачем он нужен????))))
Дочь долго искала разъем, потом мы искали его. Но нет….

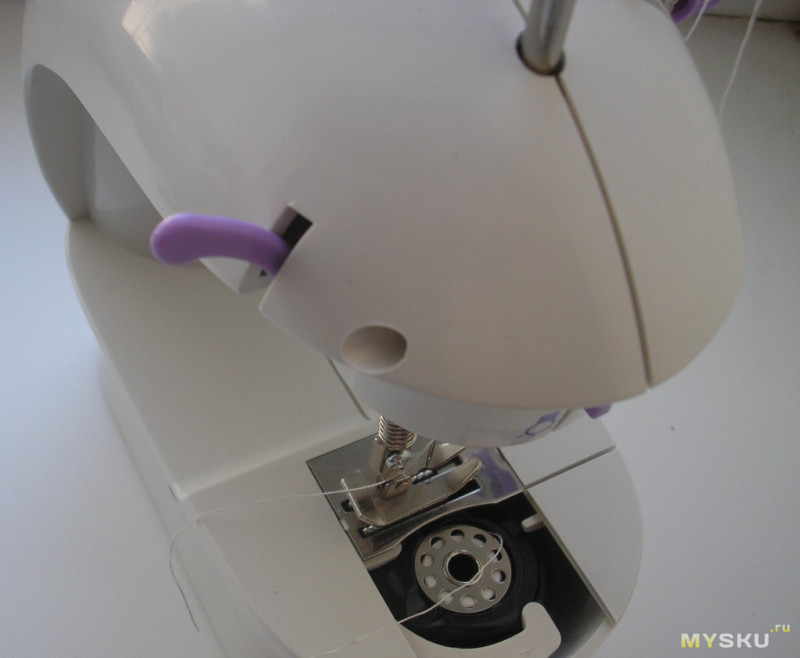
Теперь об иголочке. Иголка закрыта прозрачным пластиком, благодаря этому пальчик не поранишь. Это плюс. НО, есть большое но, если нитка вылетает из иголочки, то вдеть ее ой как трудно!!!! Ребенок точно ее не вденет. А значит замучает взрослых. А вылетает эта нитка постоянно.

Ну а теперь о самом главном, о сшивании материала швейной машинкой.
Сшивает, соединяет ? Да
Но когда начинаешь убирать ткань, то шов распускается. Если взрослый прошьет и аккуратно подтянет нить, то не сразу не распустится. Но ребенок- то не может выполнить таких манипуляций. В итоге шьет, шьет, радуется, а потом сплошное огорчение.
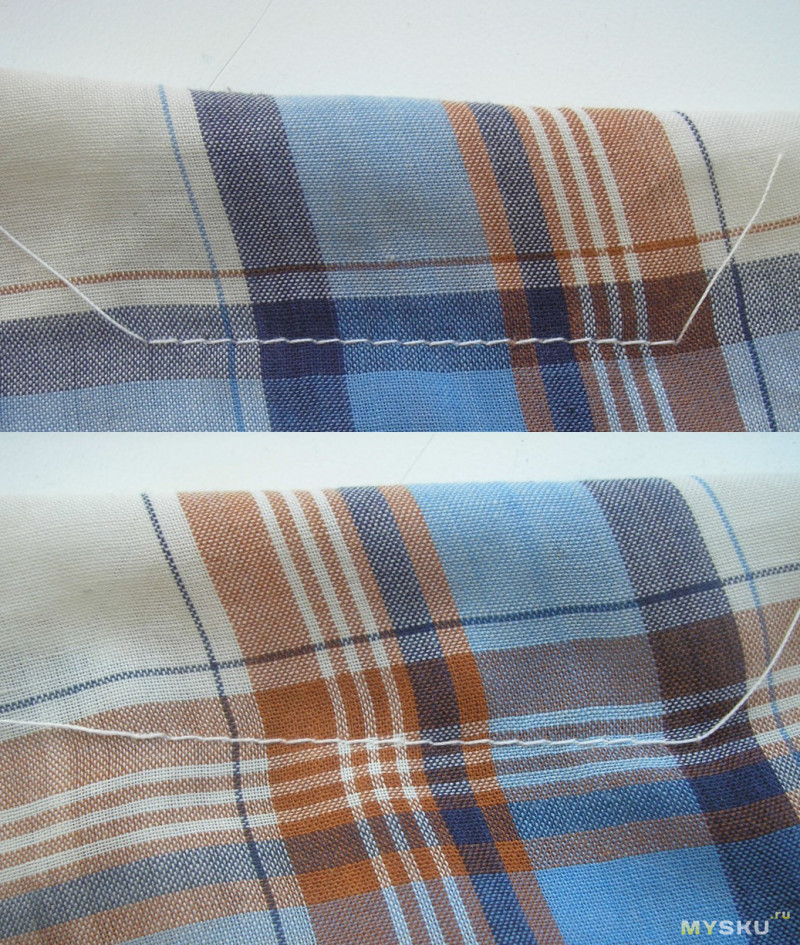
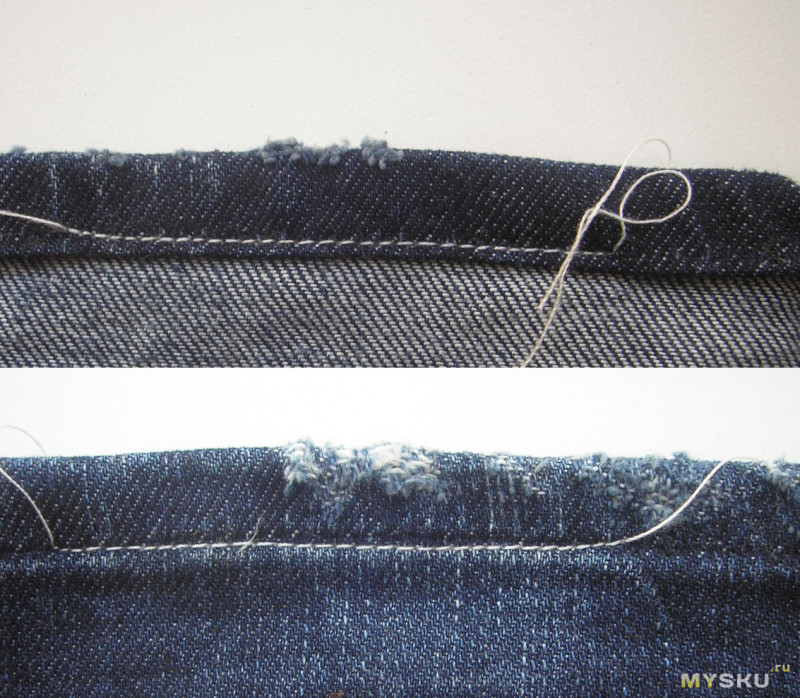
Ну и вот так выглядит сам шов.

А вот так быстро распускается этот шов. Слегка потянуть ткань и все.

Вывод.
Мне жаль потраченных денег, именно из- за расстройства ребенка. Ожидание- реальность. Можно было добавить 400 рублей и купить мини швейную машинку дочке. Ребенку, которой любит шить, было бы самое то.
Хватило ей на один вечер, теперь эта швейная машинка пылится в ящике с игрушками.)
![]()
Download Article
![]()
Download Article
The affordable price and straightforward features of mini sewing machines make them a great choice for sewers and crafters of all ages and skill levels. Whether you’re learning how to sew on a mini sewing machine, or you’re using a mini machine as an alternative to a heavier-duty machine, you’ll enjoy the ease and portability of your new sewing tool. You’ll want to refer to the instruction manual to familiarize yourself with the correct process for threading your machine and adjusting the settings. In general, though, you’ll thread and operate your mini machine much like you would a standard machine.
-

1
Place a spool of thread on the thread spindle. Some mini sewing machines have retractable thread spindles (vertical metal or plastic posts on the top-right of the machine). Fully extend the thread spindle by pulling it directly upwards. Then, slide a spool of thread onto the spindle.[1]
- Some mini sewing machines feature a secondary bobbin spindle on the front of the machine, towards the right side. You can place a bobbin here instead of using a full-sized spool for the top thread.
- To use this secondary bobbin spindle, remove the cap and slide the bobbin onto the post. Then push the cap back on so the bobbin clicks into place securely.[2]
- Keep the machine turned off while you thread it to avoid any accidents.
-
2
Wind an empty bobbin to fill it up with thread. Find an empty bobbin that’s compatible with your machine. With the spool of thread positioned on the thread spindle, wrap the loose end of the thread around the central post of the bobbin about 4 or 5 times in a counterclockwise direction. Press the bobbin onto the winding post, which is in the center of the hand wheel on many mini sewing machines.[3]
Hold the thread out with your hands, turn on the machine, and press down on the foot pedal.- Guide the thread from side to side so it fills up around the entire post of the bobbin.[4]
- When the bobbin is completely full, cut the thread to separate the bobbin from the spool.
Advertisement
- Guide the thread from side to side so it fills up around the entire post of the bobbin.[4]
-
3
Guide the loose end of the thread through threading mechanisms. The threading procedure for each sewing machine is slightly different, but you can pinch the end of the thread to guide it along, as directed by your machine’s instructions. Usually, you’ll pass the thread through a series of holes or hooks called thread guides along the way.
- With most machines, you’ll push the thread through one loop and then pull it firmly between two tension disks.[5]
- After this, you’ll direct the thread through a hole or hook on the take-up lever, which moves up and down and is located on the left half of the machine, above the needle.[6]
- Finally you’ll draw the thread down towards the needle, often passing through a hole below the take-up lever and another right above the needle.[7]
- With most machines, you’ll push the thread through one loop and then pull it firmly between two tension disks.[5]
-
4
Pass the thread through the eye of the needle. Once the machine is threaded correctly, you’ll direct the end of the thread through the hole (called the eye) in the tip of the machine’s needle. Use the hand wheel to bring the needle to its highest point. Then push the thread through the eye from front to back or left to right, depending on the position of the needle.[8]
- Refer to the machine’s instructions if you’re not sure which direction to thread the needle.
- Trim the end of the thread so that it’s smooth and not frayed, and wet it with your tongue to keep the fibers together.
- Once the needle is threaded, tug about 5 in (13 cm) of thread towards the back. This will prevent it from slipping back through the eye as you begin moving the machine’s mechanisms.
-
5
Drop the bobbin into the bobbin compartment. Slide off the cover to the bobbin compartment first. Pick up the bobbin and press it into the bobbin-shaped chamber. The bobbin should be sitting horizontally in the compartment, with the thread winding around it in a counterclockwise direction.[9]
You’ll usually need to slip the bobbin thread behind a narrow strip of metal or plastic to keep it in alignment, but check the machine’s threading instructions for guidance.- The cover is a thin plastic piece that rests on top of the bobbin compartment. Slide it off, either towards the left (if the bobbin compartment is to the left of the needle) or towards you (if the compartment is directly in front of the needle).[10]
- The bobbin thread should match the color and fiber content of the top spool of thread you’re using.
- The cover is a thin plastic piece that rests on top of the bobbin compartment. Slide it off, either towards the left (if the bobbin compartment is to the left of the needle) or towards you (if the compartment is directly in front of the needle).[10]
-
6
Turn the hand wheel to lower the needle so it catches the bobbin thread. Hold the loose ends of the bobbin thread and the spool of thread together in your left hand. Use your right hand to turn the hand wheel (on the right side of the machine) towards you.[11]
This will move the needle down and the top thread will catch the bobbin thread.- Pull the loose ends of thread until there’s about 5 in (13 cm) of each strand extending past the needle before you turn the hand wheel.
- If your machine has a thread channel next to the bobbin compartment, you can slip both threads into this channel to line them up while you turn the hand wheel.[12]
Make sure you’re still holding the loose ends firmly.
-
7
Pull the loop of bobbin thread out above the feed dogs. Keep turning the hand wheel to bring the needle back up. It will pull a loop of bobbin thread up through the gap between the feed dogs (metal bars featuring a toothy texture). Tug on this loop out so that the loose end of the bobbin thread comes out of the bobbin compartment.[13]
- You can gently pull the top thread upwards to expose the loop so it’s easier to grab onto.
- Pull the loose ends of both threads towards the back of the machine, passing them under the presser foot.[14]
Now you have a correctly-threaded machine! - Slide the bobbin compartment cover back into place when you’re done.


Advertisement
-
1
Add batteries to the machine or plug it into an external power source. If your mini sewing machines takes batteries, look at the manual to determine which type and quantity to use.[15]
If your machine uses a power cord, plug the pronged end of the power cord into the power source. Plug the other end into the correct slot (it’s usually labeled) on the lower-right side of the machine.[16]
- Keep the machine turned off as you connect it to its power source to prevent any accidents.
-
2
Plug in the foot pedal and place it on the floor. The foot pedal jack connects to another slot on the right side of the machine. It’s usually labeled and will be located near the slot for the power cord.[17]
With your machine situated on your work table, and your chair set up in at the table, position the foot pedal on the floor. Your right foot should be able to comfortably reach and press the pedal.- The narrow end of the pedal should be closest to you.
- Think of the foot pedal like the gas pedal of a car. When you press it, the machine will run.
-
3
Position your fabric under the raised presser foot and needle. Turn the hand wheel towards you to raise the needle to its highest position. Then, push the presser foot lever upwards with your left hand to raise the presser foot. The lever can usually be found on the back of the machine.[18]
With both mechanisms lifted, slip the edge of the fabric underneath the presser foot. Center the fabric you want to stitch directly under the needle.[19]
- It’s helpful to start with a test scrap of fabric before moving onto your project.
- Align the fabric so that only about 1⁄2 in (1.3 cm) of fabric extends past the needle. The end of the fabric should align with the back side of the presser foot.[20]
- If you don’t have enough fabric past the needle to begin with, it might get sucked down between the presser feet. This will jam up the machine.
- You should never sew directly over pins. Remove any pins as you go, before sewing the seam.
-
4
Lower the presser foot and needle. Push the presser foot lever downwards so that it comes into contact with the fabric.[21]
Then turn the hand wheel to lower the needle into the fabric.[22]
- Before you begin stitching, hold onto the loose ends of both threads, gently pulling them them taut towards the back of the machine. This will ensure your stitching gets off to a good start and that the machine doesn’t come unthreaded.
-
5
Apply steady pressure to the foot pedal to begin sewing. Once the machine is correctly threaded and the fabric is in place, you can turn the machine on using the power switch. Press the foot pedal with your right foot, as you would press the gas pedal on a car, to engage the machine and begin stitching.[23]
- The fabric will move away from you, towards the back of the machine.
- Use your hands to gently guide the fabric, but keep them well away from the needle for safety.
- You can press the backstitch button or lever (usually located on the front of the machine) to make a few stitches in the opposite direction. Do this at the start and end of your row of stitches to prevent them from unraveling.
-
6
Lift up the presser foot and needle before pulling out the fabric. When you’re done stitching, turn the hand wheel towards you to raise the needle out of the fabric. Pull up the presser foot lever to lift the presser foot as well.[24]
With the fabric freed up, you can pull it out from under the machine’s mechanisms.- Move the fabric gently, since the threads are still connected.
- You also don’t want to tug on the fabric too hard as this could break the needle.
-
7
Cut the threads loose. Some machines have a small blade called a thread cutter on the left side or the back of the machine. Pull both threads taut over the blade and tug firmly to cut it.[25]
Alternatively, you can use a pair of snips or scissors to trim the thread.- Trim the thread as closely to the fabric as you can for the neatest finish. This will also help prevent the thread from coming out of the needle, so you’ll be ready for your next stitching project.[26]
- Trim the thread as closely to the fabric as you can for the neatest finish. This will also help prevent the thread from coming out of the needle, so you’ll be ready for your next stitching project.[26]


Advertisement
-
1
Turn the tension dial to get even stitch tension. If you notice your top row of stitches is loose and loopy, twist the tension dial clockwise to tighten the tension on the top thread.[27]
If you have the opposite problem, with tight top stitches and loose bottom stitches, turn the tension dial counterclockwise to loosen the tension on the top thread.[28]
- The tension dial controls the tension disks that you sandwiched the top thread between when you threaded the machine. Sometimes it will feature numbers to indicate which tension setting you’re using.
- If you’re switching between thin fabric and thick fabric or bulky layers of material, you’ll likely need to adjust the tension. It’s always useful to do a test row of stitches on a scrap piece of your fabric to see if you need to adjust the tension.
-
2
Select a high or low speed setting. Although you can control the up-and-down movement of the needle by pressing the foot pedal, you can choose whether you want the needle to move quickly or slowly with the speed setting. Many mini sewing machines come with a button for controlling this. If you push the button inwards, it’ll select the low speed setting, and if you leave it outwards, it’ll operate on the high speed setting.[29]
- Other machines have a side-to-side switch or a numbered speed setting. Check the machine’s manual to for instructions on how to control your machine’s speed.
-
3
Choose a stitch type and length. Some mini sewing machines come with additional features that let you choose between straight, zig-zag, and decorative stitches as well as short, medium, and long stitch lengths. Typically these can be controlled by twisting a dial which is printed with each stitch type, as well as another dial or switch that selects the stitch length.
- Refer to your machine’s manual for the full range of settings.
- Select the stitch type and length before you begin sewing, not while you’re sewing.


Advertisement
Add New Question
-
Question
What do I do if the thread is knotting on my fabric?

Andrea Beaulieu is a Professional Tailor, Fashion Designer, and the Owner of MOORE, a Brooklyn, New York based storefront and apparel workshop for gender-neutral, contemporary streetwear as well as custom-tailored products. Andrea has over 20 years in the fashion design and marketing industries and specializes in pattern making, draping, and the construction of garments. She holds a BS in Fashion Design and Merchandising from the University of North Carolina at Greensboro.
Professional Tailor & Fashion Designer
Expert Answer
-
Question
Why am I having trouble threading the bobbin?
Andrea Beaulieu is a Professional Tailor, Fashion Designer, and the Owner of MOORE, a Brooklyn, New York based storefront and apparel workshop for gender-neutral, contemporary streetwear as well as custom-tailored products. Andrea has over 20 years in the fashion design and marketing industries and specializes in pattern making, draping, and the construction of garments. She holds a BS in Fashion Design and Merchandising from the University of North Carolina at Greensboro.
Professional Tailor & Fashion Designer
Expert Answer
Support wikiHow by
unlocking this expert answer.The tension and bobbin are the most challenging parts of the machine to master, so be patient with yourself and your machine. Make sure to read through the manual before you start, and keep it handy in case you need to do any troubleshooting.
-
Question
Can you make clothes with a mini sewing machine?
This answer was written by one of our trained team of researchers who validated it for accuracy and comprehensiveness.
wikiHow Staff Editor
Staff Answer


See more answers
Ask a Question
200 characters left
Include your email address to get a message when this question is answered.
Submit
Advertisement
Video
-
Use the same safety precautions with a mini sewing machine as you would with any other power tool or electrical appliance. Keep it away from water, turn it off and unplug it while it’s not in use, and use your common sense to prevent accidents.[30]
-
Machine needles can easily break if they strike something or are tugged too hard. Do not sew directly over pins and refrain from yanking the fabric as it runs through the machine.[31]
Advertisement
About This Article
Thanks to all authors for creating a page that has been read 159,037 times.
Did this article help you?
🍒ВСЕМ ЗДРАВСТВУЙТЕ!!!🍒
Хочу оставить свой отзыв на игрушку швейная машинка для девочек Mini Appliance set»
Швейная машинка понравится девочке, которая мечтает научиться шить и стать знаменитым дизайнером

🍒КОМПЛЕКТАЦИЯ🍒
Данная игрушка — функциональная, оснащена ручной педалью в виде мышки и ящичком для хранения швейных принадлежностей. Также в наборе можно найти кусок материала и две катушки ниток.
С таким комплектом девочка может освоить первые азы шитья, ведь машинка шьет по-настоящему, если нажимать на ручную педаль.
Игрушка продается в полупрозрачной упаковке. Это очень удобно, сразу видно что покупаешь.
На коробке есть вся необходимая информация о том, как правильно пользоваться, правда только на английском языке…


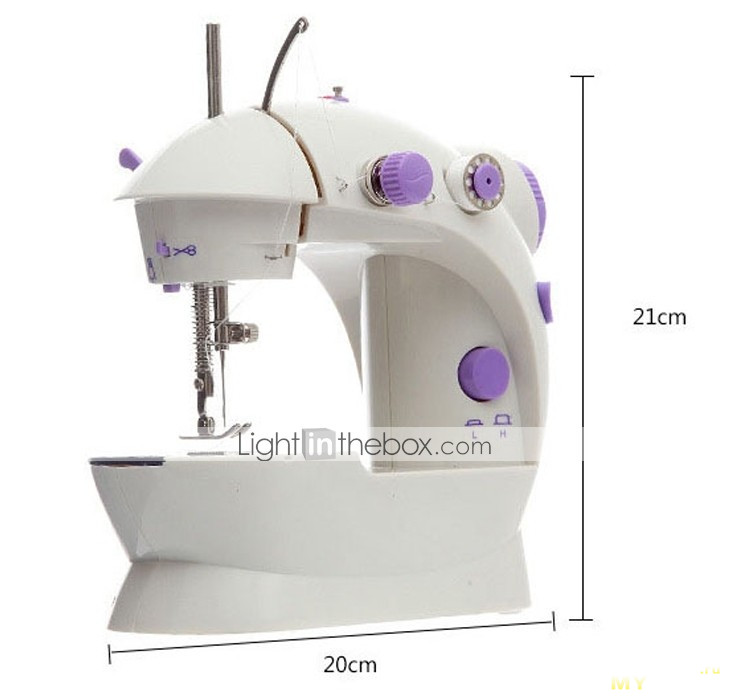
Размер машинки:
18х16х6.5 см
Размер упаковки:
29 х 20 х 9?5 см
Для детей от: 3 лет.
Производитель :КНР
Инструкция о том, как правильно заправлять нить (самое нелюбимое мое дело)

Внешне игрушка выглядит достаточно интересно!
Работает от 2-ух АА батареек. Во время работы светится.

Шить можно с помощью педальки или с помощью махового колеса ( если педалька выйдет из строя, так как она держится на тоненьком шнуре)

Продуман даже ящик для хранения мелких деталей))

Катушечные нити спрятаны в небольшой отсек, удобно чтобы ребенок не поранился во время шитья))

👆В ИГРУШКЕ УСТАНОВЛЕНА НАСТОЯЩАЯ ИГОЛКА!!!
Несмотря на то, что в игрушке установлена настоящая игла, опасности для ребёнка она не представляет, так как до неё практически не добраться, даже для заправки нити…

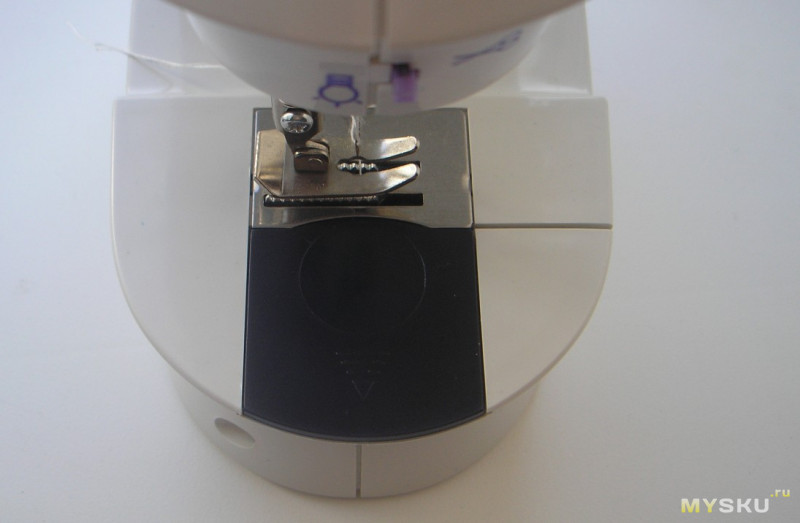
На фото 👇 максимальная высота поднятия лапки)
Посмотриие на фото и представьте, как втянуть нить в ушко иголки)) Нить тонкая, часто рвётся, за весь процес шитья ребенок просит раз 5 заправить нить(( ТЕРПЕНИЕ,ТОЛЬКО ТЕРПЕНИЕ 🤪🧐

🍒ПЛЮСЫ🍒
—развивает мелкую моторику рук
🧐МИНУСЫ
— постоянно рвётся нить
-крайне неудобно заправлять нити
КУПИЛА ЭТУ ИГРУШКУ НА АКЦИИ ЗА 6$, ЕСЛИ БЫ СТОИЛА ДОРОЖЕ, НЕ ПОКУПАЛА БЫ ТОЧНО!!!!
Это руководство для вас, если вы никогда раньше не пользовались мини-швейной машинкой и только начинаете заниматься шитьем. В этом уроке я расскажу вам о достоинствах и недостатках этой швейной машинки, покажу, как заправить нить в швейную машинку и дам несколько советов по шитью.
Эта мини-швейная машинка действительно шьет. Если вы ищете недорогую, портативную и простую швейную машинку, то эта машинка подойдет для вас. Ее можно использовать для подшивки брюк и для других простых работ. Однако вы будете ограничены только одной прямой строчкой. Эта машинка не имеет функции обратного хода, поэтому, чтобы усилить строчку, нужно будет повернуть ткань и прошить по этому месту в обратном направлении еще раз. Эта машинка не занимает много места, она очень маленькая. Она даже может работать от батареек АА.
К концу этого урока вы станете профессионалом и узнаете, как пользоваться этой мини-швейной машинкой!
Итак, что вам понадобится:
- Мини-швейная машинка
- Нитки (я не рекомендую использовать нитки, которые идут в комплекте с машинкой. Только если у вас больше нет никаких)
- Пустая металлическая шпулька
- Нитевдеватель

Как начать работу на мини-швейной машинке:
Шаг 1: Подключите блок питания
Я заменила нитки и ткань, которые шли с этой швейной машинкой на свои.
Подключаем блок питания, либо батарейки (вставляются снизу), подключаем ножную педаль.
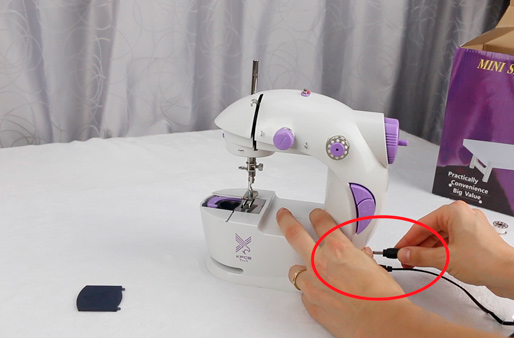
Будьте осторожны! Когда включается питание, машинка включается, если вы случайно нажмете педаль или кнопку включения/выключения, машинка начнет шить.
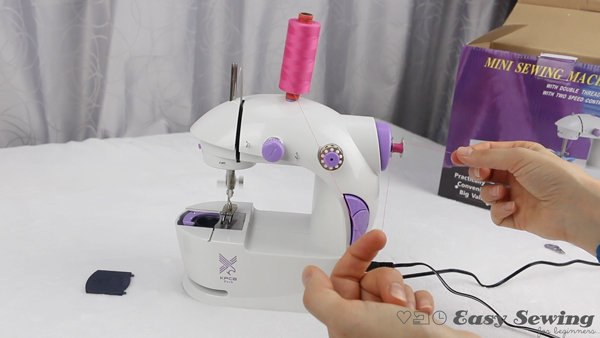
Шаг 2: Намотайте нить на шпульку
Далее вам нужно будет перемотать немного ниток с основной катушки на шпульку. Вам понадобится катушка ниток, которыми вы собираетесь шить и пустая шпулька. Поместите катушку ниток на шпиндель, расположенный в верхней части машинки (он убран, но вытаскивается при необходимости). Освобождаем штифт для намотки шпульки (он находится посередине маховика). Он освобождается путем нажатия указательным пальцем и поворотом против часовой стрелки. Проденьте конец нити через шпульку и наденьте шпульку на стержень для намотки шпульки. Другой рукой удерживайте нить, чтобы обеспечить натяжение нити, пока она наматывается на шпульку.
Нажмите на педаль или нажмите кнопку включения/выключения, чтобы начать намотку.
Остановитесь, когда на шпульку будет намотано нужное количество нити. Снимите шпульку со стержня и обрежьте нить. Вставьте стержень для намотки шпульки на место.
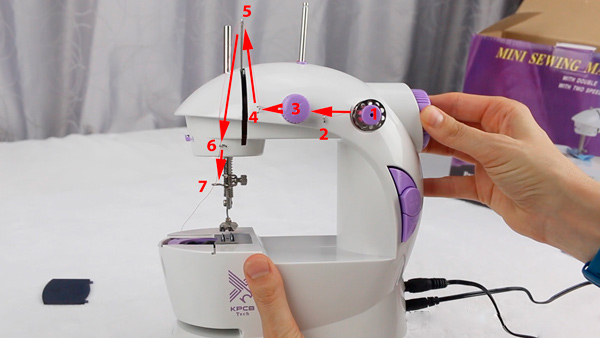
Шаг 3: Заправьте верхнюю нить
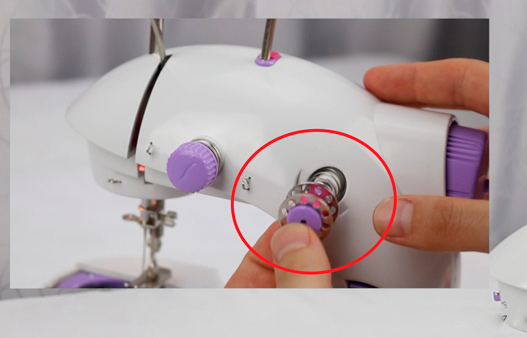
Поместите катушку на стержень катушки, расположенную на верхней части машинки (можно также заправить верхнуюю нить со шпульки, которая закрепляется на передней части корпуса машинки (см. фото ниже).
Следуйте нитенаправителям, чтобы заправить нить.
Шаг 4: Вставляем нить в иглу
Чтобы заправить нить в иглу, проденьте конец нити в игольное отверстие слева направо. Я считаю, что заправлять нить в иглу намного проще, если использовать нитевдеватель.
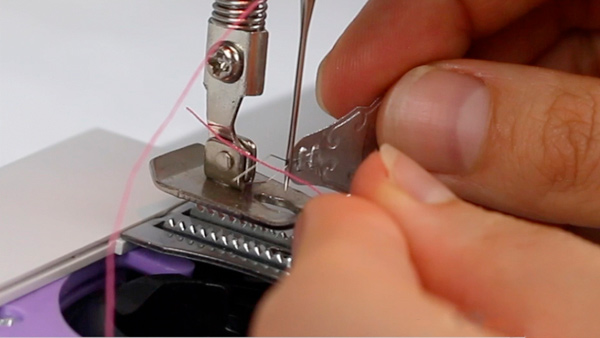
Потяните за нить, чтобы верхняя нить не провисала и оставьте конец нити свободным.
Шаг 5: Загружаем шпульку в швейную машинку
Держите шпульку так, чтобы нить находилась с правой стороны, и нить на шпульку была намотана по часовой стрелке.
Опустите шпульку в шпульный колпачек так, чтобы она осталась лежать ровно. Поместите нить в предусмотренную канавку.
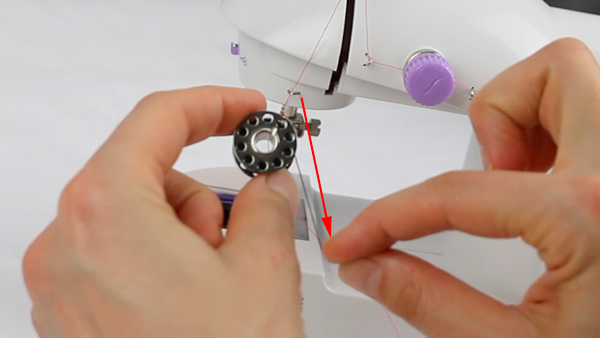
Шаг 6: Поднимите шпульную нить
Чтобы поднять нижнюю нить, держите верхнюю нить в левой руке, слегка тянув на себя. В то де время правой рукой поворачивайте маховик на себя. Это переместит иглу вниз, и вы заметите, что верхняя нить проходит через шпульку. Как только игла полностью опустится и снова поднимется, потяните верхнюю нить на себя, и вы увидите, как нижняя нить поднимается вместе с ней. Возьмите нижнюю нить пальцами или вытяните ее чем-то длинным и тонким.
Поместите концы ниток с задней части машинки. Закройте крышку отверстия для шпульки, и вы готовы к шитью!
Шаг 7: Вы готовы шить!

Дам вам несолько советов, которые помогут вам успешно шить на этой мини-машинке.
Совет №1
Сделайте несколько стежков на ткани с помощью маховика, прежде чем нажимать на педаль и приступить к шитью. Это не даст нити вытягиваться. Это происходило со мной, пока я не приспособилась таким образом.
Совет №2
Эта машинка не имеет функции реверса. Я обычно пользуюсь обратным ходом на большой машинке, чтобы закреплять шов. Если вы хотите закрепить строчку, я рекомендую повернуть ткань, а затем прошить по этим стежкам.
Совет №3
Когда вы дойдете до конца строчки, продолжайте шить, чтобы вытянуть длиннее нить, которую можно обрезать, и оставить достаточно длинный хвостик для следующей строчки. Этой машинке не очень нравится, когда мы тянем нить из нее.
Я надеюсь, что этот урок и дополнительные советы будут полезны для вас. Удачного мини-шитья, увидимся в следующий раз!
Данную технику приобрели на день рождение племяннице. Долго выбирали, консультант магазина порекомендовала именно эту модель. Упакована хорошо в картонную упаковку, в которой еще пластмассовая, прозрачная упаковка. Страна производитель: Китай.


Сама машинка сделана из пластика, качество пластика не очень хорошее. Вид спереди:

Вид сзади:


В комплект входит: сама швейная машинка с педалькой, нажимая на которую машинка начинает шить; три моточка ниток, нитки: белая, фиолетовая и розовая, в прочем цвета везде разные, кусочек ткани.

Машинка работает от трех пальчиковых батареек.


Крышечка закрывающая батарейки прикручивается на болтик.

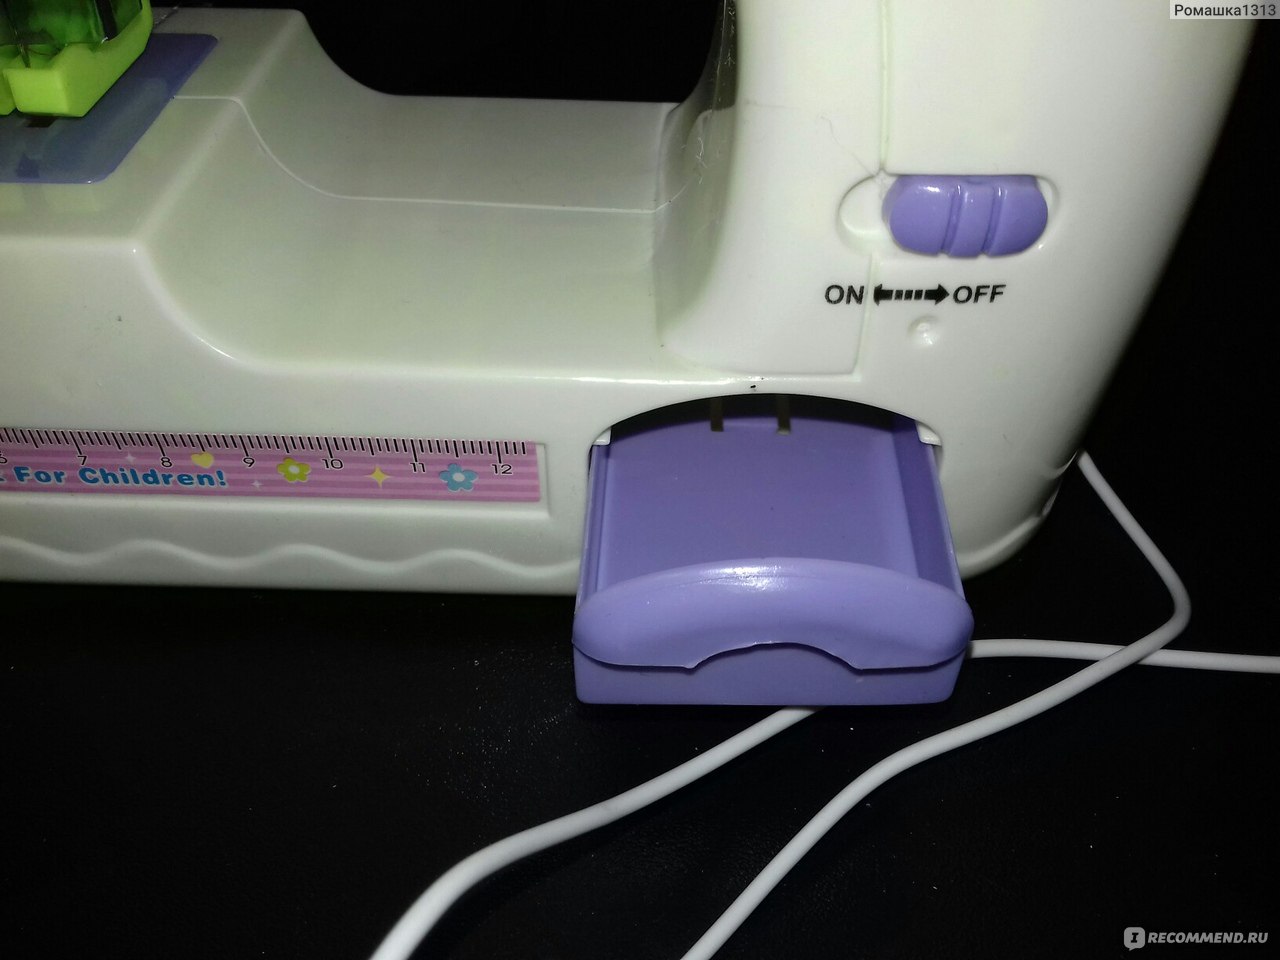
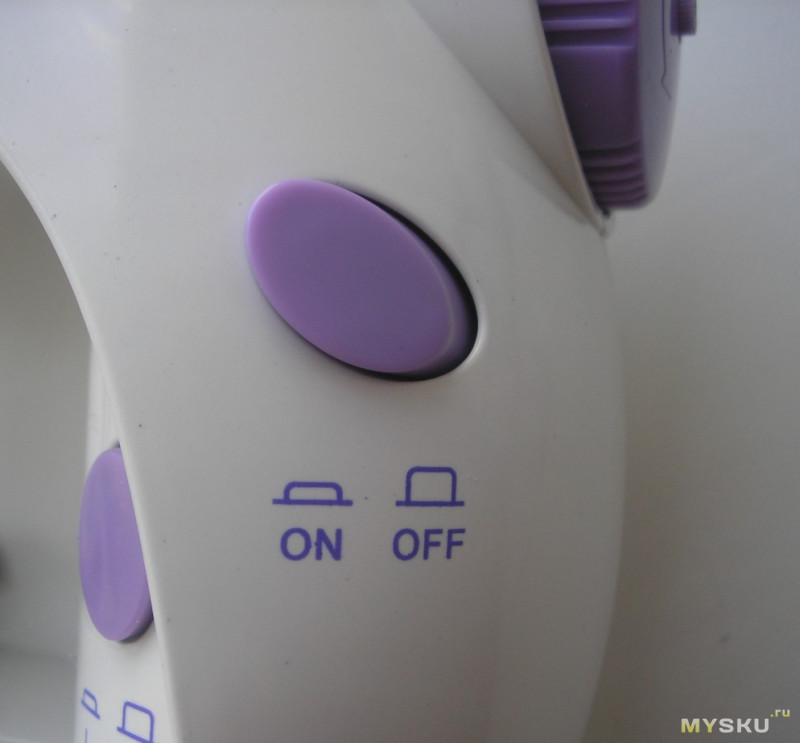
На переднем плане швейной машинки имеется выключатель при включении в режим off, машинка включается, о чем свидетельствует горящая лампочка и можно начинать шить нажимая на педальку.

Так же имеется небольшой ящичек, в который можно сложить какую-нибудь мелочь, булавочки, пуговки и прочее.

На саму машинку приклеена линеечка.

Что касается шитья: машинка не шьет как обычная взрослая машинка, поскольку нет шпульки и нижней нитки, но она делает стежки. Ребенок может взять любую свою вещь, и прошить ее, тем самым не испортив ее, Вам не придется ее распарывать, так как стежок данной машинкой не делается, дернув за веревочку, она легко вытаскивается из ткани. Можно сказать машинка для баловства.


Тем не менее, я считаю, что данная игрушка может научить Вашего ребенка пользоваться швейными машинками, вдевать нитку в иголку, самой технике работы швейной машинки.
Игла производителем установлена безопасно, со всех сторон ее закрывает пластиковая лапка, под которую ребенок не сможет засунуть свой пальчик.

Стоимость данной игрушки от 500 до 900 рублей. Рекомендую для детей от 3 до 8, более старшим детям она будет не интересна, поскольку не выполняет функцию настоящего шитья.
-
Contents
-
Table of Contents
-
Bookmarks
Quick Links
MINI SEWING MACHINE
MINIMÁQUINA DE COSER
User Manual
Manual
del usuario
English……3
Español…..18
Summary of Contents for EASYHOME MS-201
-
Page 1
User Manual Manual del usuario MINI SEWING MACHINE MINIMÁQUINA DE COSER English……3 Español…..18… -
Page 2: Table Of Contents
Contents Parts list …………….3 Contents …………..3 General information …………4 Safety instructions …………. 5 User instructions …………. 6 Before first use …………7 Operating the machine ……….7 With the foot pedal ……….7 Without the foot pedal ……..8 Winding the bobbin ………..
-
Page 3: Parts List
Parts list Main parts Pre-threaded Sewing Machine Foot Pedal Power Adapter Sewing Accessories (in separate bag) a. 4 Bobbins b. 3 Needles c. 1 Needle Threader Contents of packaging Pre-threaded Sewing Machine with 2 bobbins and 1 needle Power Adapter …
-
Page 4: General Information
General information General information When using the Mini Sewing Machine, basic safety precautions should be observed. PLEASE READ AND SAVE ALL INSTRUCTIONS BEFORE USING THE MINI SEWING MACHINE. Close supervision is necessary when any appliance is used near children. The Mini Sewing Machine is not intended for use by children.
-
Page 5: Safety Instructions
User instructions Safety instructions WARNING: Read and understand all instructions. Failure to follow all instructions listed below may result in electric shock, fire or serious personal injury. The warnings, cautions, and instruction discussed in this instruction manual cannot cover all possible conditions and situations that may occur. It must be understood by the operator that common sense and caution are a factor which cannot be built into this product, but must be supplied by the operator.
-
Page 6: User Instructions
User instructions User instructions Thread Guide 1 (K1) Thread Takeup Spindle (J) Tension Adjusting Lever (I) Screw (L) Thread Guide 1 (K2) Thread Guide 2 (H) Bobbin Holder (M) Bobbin Spindle (N) Needle Clamp (G) Light Button (O) Thread Guide 3 (F) Needle (E) Power Button (P) Presser Foot (D)
-
Page 7: Before First Use
User instructions Before first use: 1. Read ALL instructions carefully. 2. Place Mini Sewing Machine on a flat, stable surface. 3. Make sure sewing machine is in the ‘OFF’ position before attaching any accessories. The ON/OFF button will be flush with the other buttons. It will not be pushed in.
-
Page 8: Operating The Machine
User instructions Operating the sewing machine With the foot pedal: 1. Make sure the machine is in the ‘OFF’ position. Please Note: When using the foot pedal, the Power Button (P) should always be in the ‘OFF’ position. 2. Plug the foot pedal plug into the Foot Pedal Jack (Z) located on the side of machine.
-
Page 9: Without The Foot Pedal
User instructions Without the foot pedal: 1. Make sure the sewing machine is in the ‘OFF’ position. 2. Lift the needle above the presser foot by turning the Hand Wheel (W) slightly in a clockwise direction (away from you). 3. Raise the Presser Foot (D) by lifting up the Presser Foot Lever (V) on the back of the machine.
-
Page 10: Winding The Bobbin
User instructions Winding the bobbin Please Note: For safety precautions, always remove the bobbin from the Bobbin Compartment (B). 1. Raise Thread Spindle (J) by grasping the notch on the top of the spindle and pulling upward until thread spindle is fully extended. 2.
-
Page 11: Threading The Sewing Machine
User instructions Threading the sewing machine NOTE: The machine comes pre-threaded from the factory. Look at this threading carefully before removing it to replace the thread or bobbin with different thread. Then follow the instructions to re-thread. Using side bobbin: Note: When threading machine, use above numbered image for reference.
-
Page 12: Using Thread Spindle
User instructions 5. Bring thread over and across the Tension Adjusting Screw (3), positioning thread between the 2 washers behind the tension adjusting screw. This is what provides the lock stitch tension to the thread. 6. Pull thread from the Tension Adjusting Screw (3) guide through the 2 Thread Guide (4) pulling thread from right to left.
-
Page 13: Bottom Bobbin Placement
User instructions 4. Bring thread over and across the Tension Adjusting Screw (3), positioning thread between the 2 washers behind the tension adjusting screw. This is what provides the lock stitch tension to the thread. 5. Pull thread from the Tension Adjusting Screw (3) guide through the 2 Thread Guide (4) pulling thread from right to left.
-
Page 14: Adjusting Tension
User instructions when needle starts to go down again. Needle will go down, picking up the bobbin thread. Note: The bobbin thread will not get pulled through if the hand wheel is turned clockwise (away from you). 5. Pull the spool thread gently towards you, seeing it has caught the bottom bobbin thread.
-
Page 15: Helpful Hints
Helpful hints / cleaning and maintenance Helpful hints 1. To replace batteries, remove the Battery Compartment Cover (T) and insert new batteries. Pay close attention to the polarity and make sure the batteries are inserted properly as the machine will not function and it could cause damage to the machine.
-
Page 16: Other Useful Information
Other useful information Other useful information Technical specifications Model Number MS-201 Rating Voltage Output 12V Nominal Power 4.8W Storing Store the Mini Sewing Machine in a dry location. Do not place any heavy items on top of the Mini Sewing Machine during storage as this may result in possible damage.
-
Page 17: Fcc
FCC PART 15 This device complies with Part 15 of the FCC Rules. Operation is subject to the following two conditions: (1) this device may cause harmful interference, and (2) this device must accept any interference received, including interferences that may cause undesired operation.
-
Page 18
Lista de componentes Contenido Lista de componentes ……….19 Contenido …………19 Información general ……….20 Instrucciones de seguridad ……..22 Modo de empleo …………23 Antes del primer uso ……….. 23 Uso de la máquina ……….24 Con el pedal ………… 25 Sin el pedal …………. -
Page 19: Lista De Componentes
Lista de componentes Componentes principales Máquina de coser enhebrada Pedal Adaptador de alimentación Accesorios de cosido (en una bolsa aparte) a. 4 bobinas b. 3 agujas c. 1 enhebrador Contenido del embalaje Máquina de coser enhebrada con 2 bobinas y 1 aguja …
-
Page 20: Información General
Información general Información general Al utilizar la minimáquina de coser, es necesario seguir unas precauciones de seguridad básicas. POR FAVOR, LEA Y GUARDE TODAS LAS INSTRUCCIONES ANTES DE UTILIZAR LA MINIMÁQUINA DE COSER. 1. Es necesaria una atenta supervisión cuando el aparato se usa cerca de los niños.
-
Page 21
Información general 17. Desenchufe o desconecte la fuente de alimentación siempre antes y después de usar este aparato. 18. Desenchufe o desconecte la fuente de alimentación siempre al cambiar las agujas o al enhebrar la máquina. 19. Esta máquina de coser no es un juguete y no está diseñada para ser usada por o cerca de los niños. -
Page 22: Instrucciones De Seguridad
Instrucciones de seguridad Instrucciones de seguridad ADVERTENCIA: Lea y comprenda todas las instrucciones. Si no se cumplen todas las instrucciones indicadas a continuación se pueden producir descargas eléctricas, incendios o lesiones graves. Las advertencias, precauciones e instrucciones que se detallan en este manual de instrucciones no cubren todas las condiciones y situaciones posibles que podrían suceder.
-
Page 23: Modo De Empleo
Modo de empleo Modo de empleo Guía de hilo 1 (K1) Portahilo (J) Palanca del Tornillo de ajuste tirahilo (I) de la tensión (L) Guía de hilo 1 (K2) Guía de hilo 2 (H) Portabobina (M) Eje del portabobina (N) Cierre de la aguja (G) Botón de Guía de hilo 3 (F)
-
Page 24: Antes Del Primer Uso
Modo de empleo Antes del primer uso: 1. Lea TODAS las instrucciones atentamente. 2. Coloque la minimáquina de coser en una superficie plana y estable. 3. Asegúrese de que la máquina de coser esté apagada antes de conectar cualquier accesorio. El botón de encendido/apagado (ON/OFF) debe estar al mismo nivel que el resto de los botones.
-
Page 25: Uso De La Máquina
Modo de empleo Uso de la máquina de coser Con el pedal: 1. Asegúrese que la máquina esté apagada (OFF). Importante: Cuando use el pedal, el botón de encendido (P) siempre debe estar en la posición de apagado (OFF). 2. Inserte el enchufe del pedal en la conexión del pedal (Z) situada en el lateral de la máquina.
-
Page 26: Sin El Pedal
Modo de empleo Sin el pedal: 1. Asegúrese que la máquina de coser esté apagada (OFF). 2. Eleve la aguja por encima del pie prensatelas girando la rueda de mano (W) ligeramente en sentido horario (alejándose de usted). 3. Suba la palanca del pie prensatelas (V) situada en la parte posterior de la máquina para elevar el pie prensatelas (D).
-
Page 27: Enrollado De La Bobina
Modo de empleo Enrollado de la bobina Importante: Por seguridad, quite siempre la bobina del compartimento de la bobina (B). 1. Ayudándose con la muesca situada en la parte superior del portahilo (J), tire de él y elévelo hasta que quede completamente extendido. 2.
-
Page 28: Enhebrado De La Máquina De Coser
Modo de empleo Enhebrado de la máquina de coser NOTA: La máquina viene enhebrada de fábrica. Observe el enhebrado atentamente antes de quitarlo para reemplazar el hilo o la bobina con hilo de otro tipo. A continuación, siga las instrucciones para volver a enhebrarla. Uso de la bobina lateral: Nota: Siga la imagen numerada previa a modo de guía para enhebrar la máquina.
-
Page 29
Modo de empleo 4. Tire del hilo de la bobina en el eje del portabobina (1A) e introdúzcalo en la 1. guía de hilo (2) llevando el hilo de derecha a izquierda. 5. Pase el hilo por encima y a través del tornillo de ajuste de la tensión (3), colocando el hilo entre las 2 arandelas detrás del tornillo de ajuste de la tensión. -
Page 30: Uso Del Portahilo
Modo de empleo Uso del portahilo: Nota: Siga la imagen numerada previa a modo de guía para enhebrar la máquina. 1. Ayudándose con la muesca situada en la parte superior del portahilo, tire de él y elévelo hasta que quede completamente extendido. 2.
-
Page 31: Colocación De La Bobina Inferior
Modo de empleo Colocación de la bobina inferior 1. Quite la cubierta del compartimento de la bobina (C) deslizándola hacia la izquierda. 2. Ponga una bobina con el hilo que haya elegido en el compartimento de la bobina (B), dejando unas 5 pulgadas de hilo fuera del soporte de la bobina y colóquelo en la muesca para hilo (A).
-
Page 32: Cambio De La Aguja
Modo de empleo Cambio de la aguja 1. Gire la rueda de mano (W) para elevar la aguja a su posición más alta. 2. Afloje el tornillo de ajuste de la aguja (R) girándolo en sentido antihorario (hacia usted). Quizá necesite usar un pequeño destornillador plano o unos alicates pequeños.
-
Page 33: Consejos Útiles
Consejos útiles / Limpieza y mantenimiento Consejos útiles 1. Para cambiar las pilas, quite la tapa del compartimento de las pilas (T) y ponga pilas nuevas. Preste atención a la polaridad y asegúrese de insertar las pilas correctamente, ya que de lo contrario la máquina no funcionará y podría sufrir algún daño.
-
Page 34: Información Adicional De Utilidad
Información adicional de utilidad Información adicional de utilidad Especificaciones técnicas Número de modelo MS-201 Voltaje nominal Salida 12 V Potencia nominal 4.8 W Almacenamiento Guarde la minimáquina de coser en un lugar seco. No coloque objetos pesados sobre la minimáquina de coser durante el almacenamiento, ya que esto puede dar lugar a posibles daños.
-
Page 35: Fcc
FCC Parte 15 Este dispositivo cumple la Parte 15 de las Normas de la FCC. Su funcionamiento está sujeto a las dos condiciones siguientes: (1) este dispositivo no puede causar interferencias perjudiciales, y (2) este dispositivo debe aceptar cualquier interferencia recibida, incluyendo interferencias que puedan causar un funcionamiento no deseado.
-
Page 37
Description of malfunction: Return your completed warranty card to: AFTER SALES SUPPORT 50714 888 367 7373 Wachsmuth & Krogmann, Inc. help@myproduct.care 1015 Hawthorn Drive MODEL: MS-201 11/2017 Itasca, IL 60143 Hotline: 888-367-7373 help@myproduct.care Operating hours: Monday – Friday 10:00am – 5:00pm EST… -
Page 38
ALDI INC. FULL WARRANTY CONDITIONS Dear Customer: The ALDI warranty is a fully warranty offering you the following benefits: Warranty period: 2 years from date of purchase. 6 months for movable parts and consumables under normal and proper conditions of use (e.g. rechargeable batteries). Costs: Free repair/exchange or refund. -
Page 39
50714 Envie la tarjeta de garantía completada a: 888 367 7373 help@myproduct.care Wachsmuth & Krogmann, Inc. NO. DEL MODELO: 1015 Hawthorn Drive MS-201 11/2017 Itasca, IL 60143 Horario de Servicio al cliente de lunes a viernes help@myproduct.care de 10:00a.m. – 5:00p.m. -
Page 40
CONDICIONES DE LA GARANTÍA COMPLETA DE ALDI INC. Estimado cliente: La Garantía ALDI es una garantía completa que le ofrece los siguientes beneficios: Período de garantía: 2 años a partir de la fecha de la compra. 6 meses para las piezas de recambio y consumibles en condiciones normales y adecuadas de uso (por ejemplo, baterías recargables). -
Page 42
DISTRIBUTED BY • DISTRIBUIDO POR: ALDI INC., BATAVIA, IL 60510 WWW.ALDI.US 50714 MODEL: MS-201 11/2017…
🍒ВСЕМ ЗДРАВСТВУЙТЕ!!!🍒
Хочу оставить свой отзыв на игрушку швейная машинка для девочек Mini Appliance set»
Швейная машинка понравится девочке, которая мечтает научиться шить и стать знаменитым дизайнером
🍒КОМПЛЕКТАЦИЯ🍒
Данная игрушка — функциональная, оснащена ручной педалью в виде мышки и ящичком для хранения швейных принадлежностей. Также в наборе можно найти кусок материала и две катушки ниток.
С таким комплектом девочка может освоить первые азы шитья, ведь машинка шьет по-настоящему, если нажимать на ручную педаль.
Игрушка продается в полупрозрачной упаковке. Это очень удобно, сразу видно что покупаешь.
На коробке есть вся необходимая информация о том, как правильно пользоваться, правда только на английском языке…
Размер машинки:
18х16х6.5 см
Размер упаковки:
29 х 20 х 9?5 см
Для детей от: 3 лет.
Производитель :КНР
Инструкция о том, как правильно заправлять нить (самое нелюбимое мое дело)
Внешне игрушка выглядит достаточно интересно!
Работает от 2-ух АА батареек. Во время работы светится.
Шить можно с помощью педальки или с помощью махового колеса ( если педалька выйдет из строя, так как она держится на тоненьком шнуре)
Продуман даже ящик для хранения мелких деталей))
Катушечные нити спрятаны в небольшой отсек, удобно чтобы ребенок не поранился во время шитья))
👆В ИГРУШКЕ УСТАНОВЛЕНА НАСТОЯЩАЯ ИГОЛКА!!!
Несмотря на то, что в игрушке установлена настоящая игла, опасности для ребёнка она не представляет, так как до неё практически не добраться, даже для заправки нити…
На фото 👇 максимальная высота поднятия лапки)
Посмотриие на фото и представьте, как втянуть нить в ушко иголки)) Нить тонкая, часто рвётся, за весь процес шитья ребенок просит раз 5 заправить нить(( ТЕРПЕНИЕ,ТОЛЬКО ТЕРПЕНИЕ 🤪🧐
🍒ПЛЮСЫ🍒
—развивает мелкую моторику рук
🧐МИНУСЫ
— постоянно рвётся нить
-крайне неудобно заправлять нити
КУПИЛА ЭТУ ИГРУШКУ НА АКЦИИ ЗА 6$, ЕСЛИ БЫ СТОИЛА ДОРОЖЕ, НЕ ПОКУПАЛА БЫ ТОЧНО!!!!
Я не знаю, что меня сподвигло заказать именно швейную машинку. Наверное, любопытство. Тем более обзор (больше похожий на приговор) про подобное изделие уже был. Я же не раз доказывал себе, что многое зависит не только от качества изделия, но и от рук, в которые оно попадает.
Лет …ндцать назад мы с женой купили подольскую швейную машинку. И мне пришлось её настраивать.
Скажу сразу, я не силён в швейных машинках, но жизнь порой заставляла налаживать изделия куда сложнее.
Распаковка, оценка содержимого.
Смотрим, как обычно, в каком виде присылают. Иногда бывает немаловажно. То, что это машинка модели SM-202, можно увидеть только на коробке. Ни в инструкции, ни на самом изделии подобных надписей нет.
Размеры коробки 23x21x13 см.
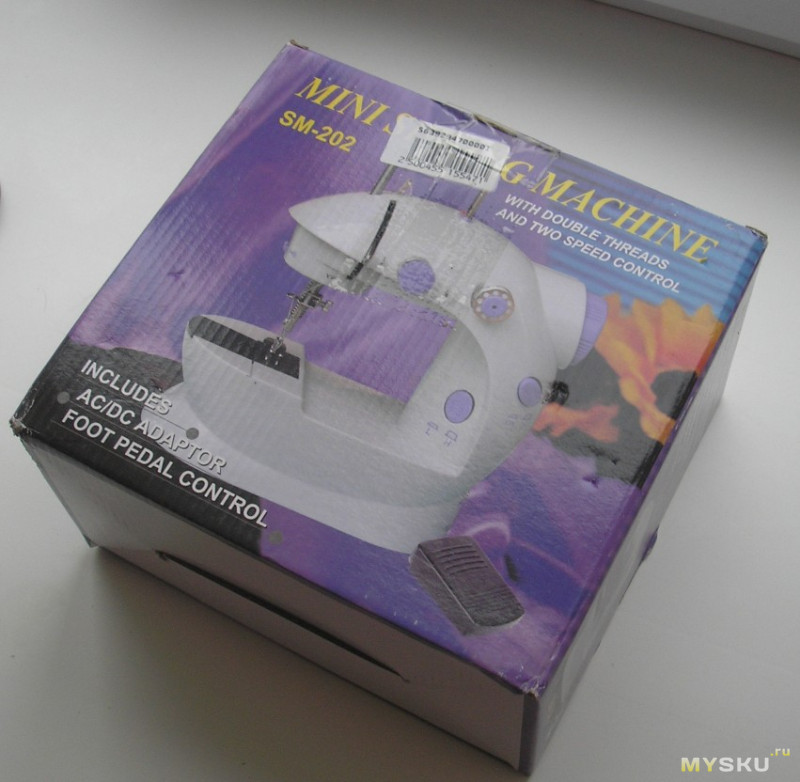
Доставили без повреждений, даже упаковка не помялась. Внутреннее содержимое поломать ещё сложнее. Хотя при желании…
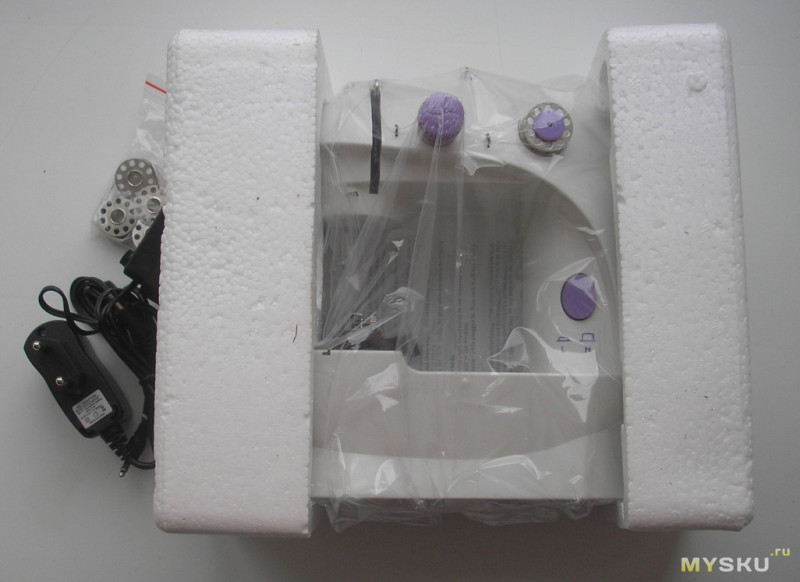
Вот всё, что было в комплекте.
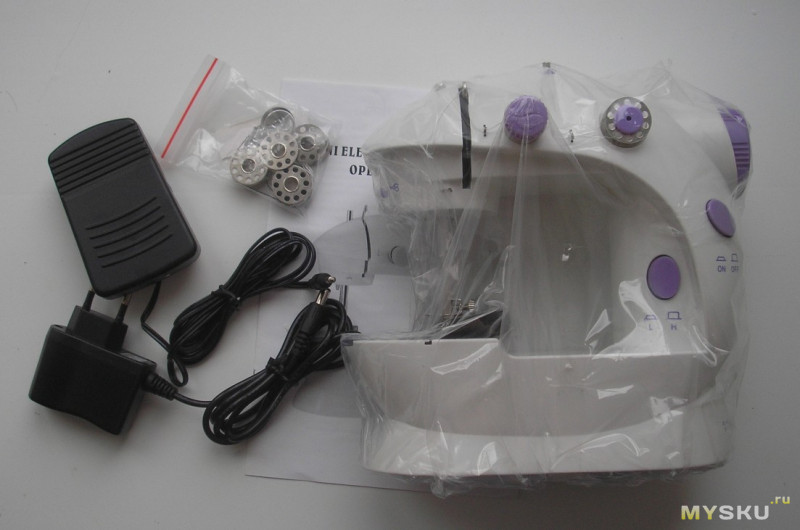
В состав посылки входят:
1.Швейная машинка.
2.Инструкция на английском языке.
3. Адаптер питания.
4. Запасная иголка, нитевдеватель, шпульки (в отдельном пакетике).
5. Педаль «газа».
Педаль небольшая, длина 88 мм, ширина 50-57 мм. Длина кабеля 134 см. Штекер обыкновенный mini-jack (3,5 мм) моно:)
На самом деле педаль скорости скорость не регулирует. Работает тупо на вкл/выкл.
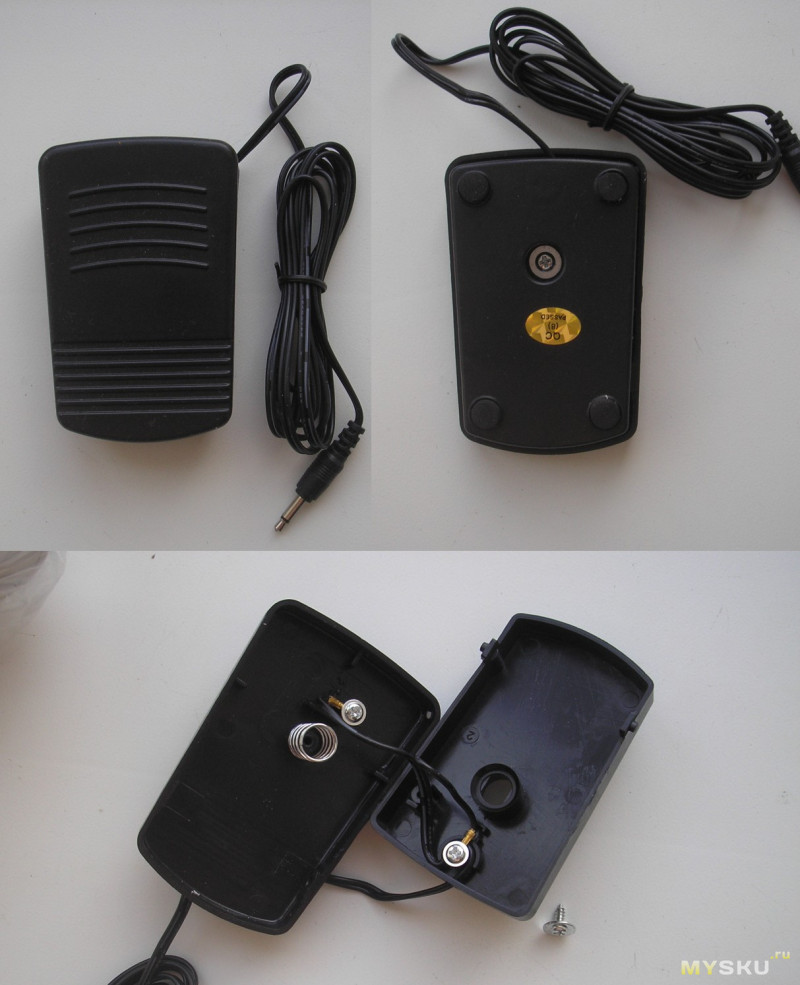
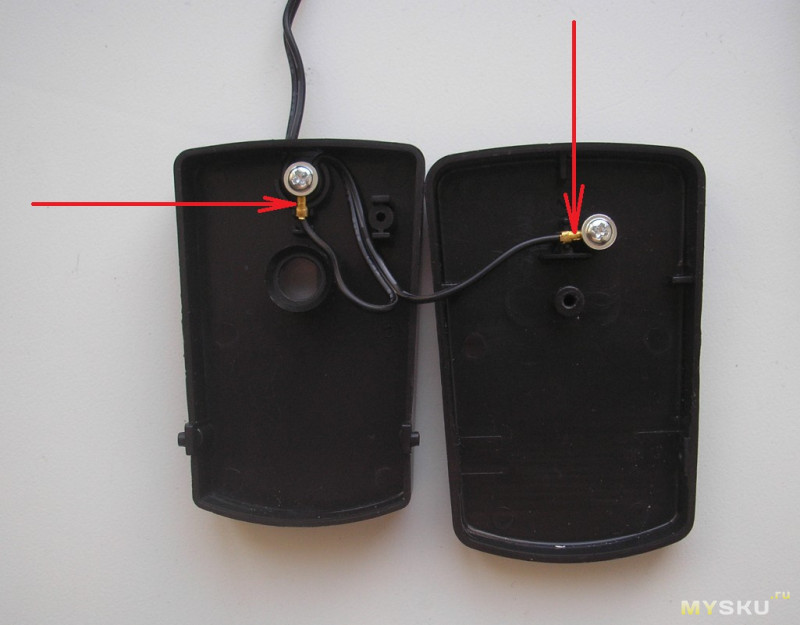
Устройство наипростейшее: возвратная пружинка и два провода прикрученных к пластмасске.
При нажатии на педаль замыкается цепь и включается двигатель машинки. Но фишка в том, что она не работала. Пришлось немного отогнуть импровизированные контакты.
В отдельном пакете были: запасная иголка, нитевдеватель, две пустых шпульки и две с нитками (черной и белой).
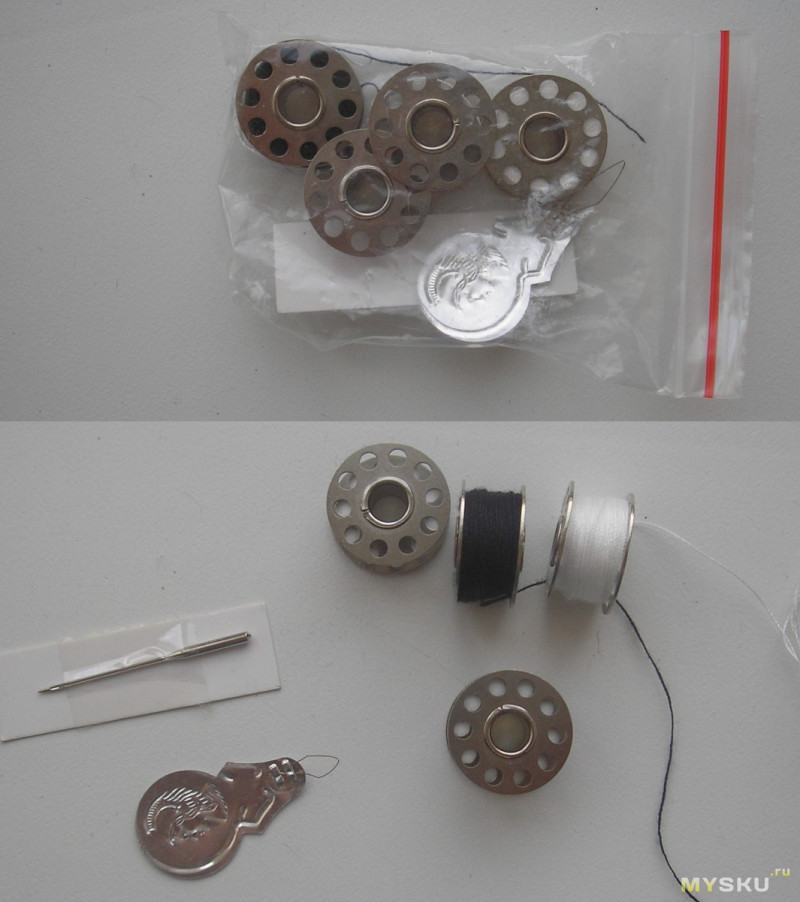
Всего же шпулек шесть (две уже вставлены в машинку).
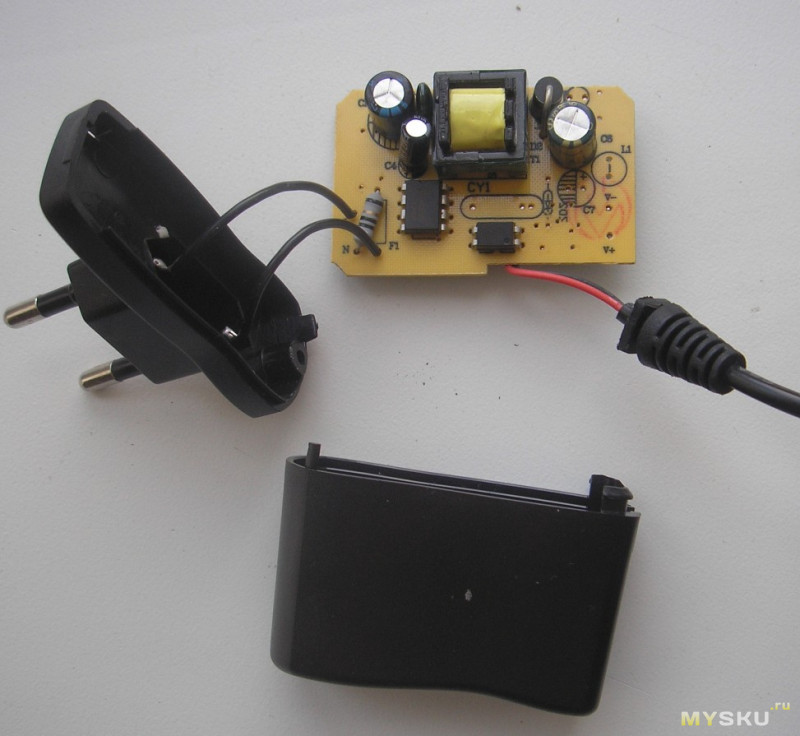
Двигатель швейной машинки может запитываться как от батареек формата AA, так и от адаптера. Адаптер питания с европейской вилкой с выходом на 6 В (макс. 1 А). Характеристики указаны на корпусе. Длина кабеля 110 см. Штекер стандартный.
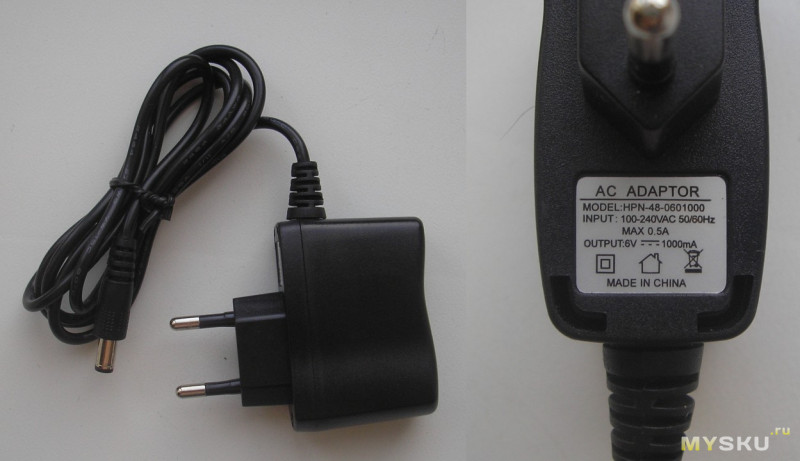
Кстати, взаимозаменяем с адаптером тонометра.
Схемотехника тоже стандартная с оптопарой в обратной связи.
Отсканировал вложенную инструкцию.
yadi.sk/i/k7W9q3HT3ZTFgM
yadi.sk/i/dwHbfFMi3ZTFgS
yadi.sk/i/J-7LAg8A3ZTFgP
yadi.sk/i/TrJwWUoG3ZTFgQ
Если кому надо, можно и перевести, качество скана как у оригинала.
Перехожу к изучению машинки.
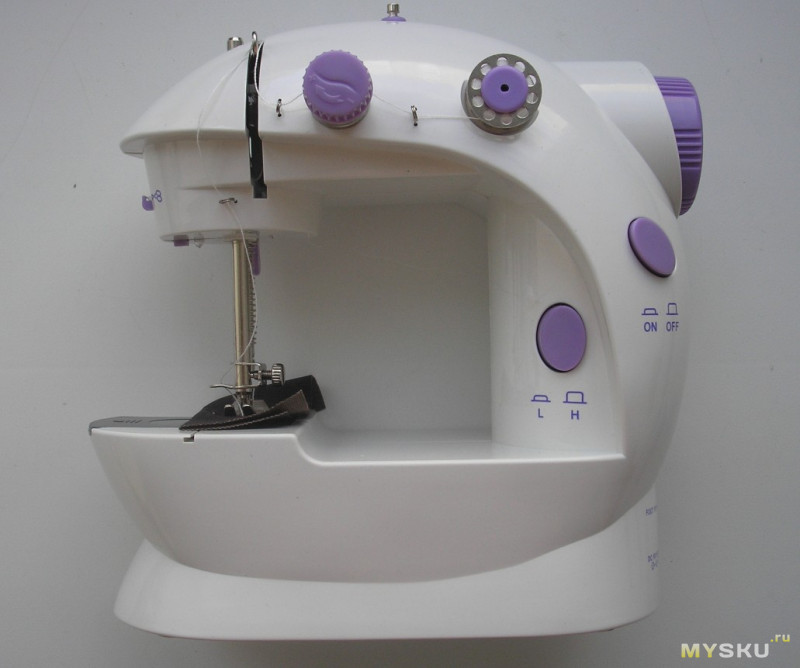
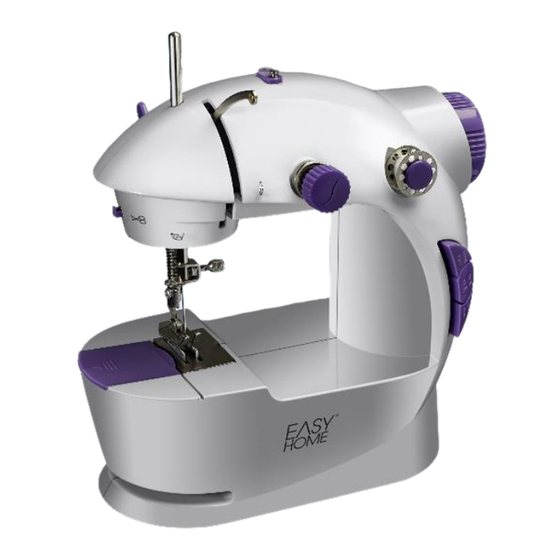
По размерам очень похожа на детскую игрушку.
Сзади место для подключения адаптера и педали «скорости».
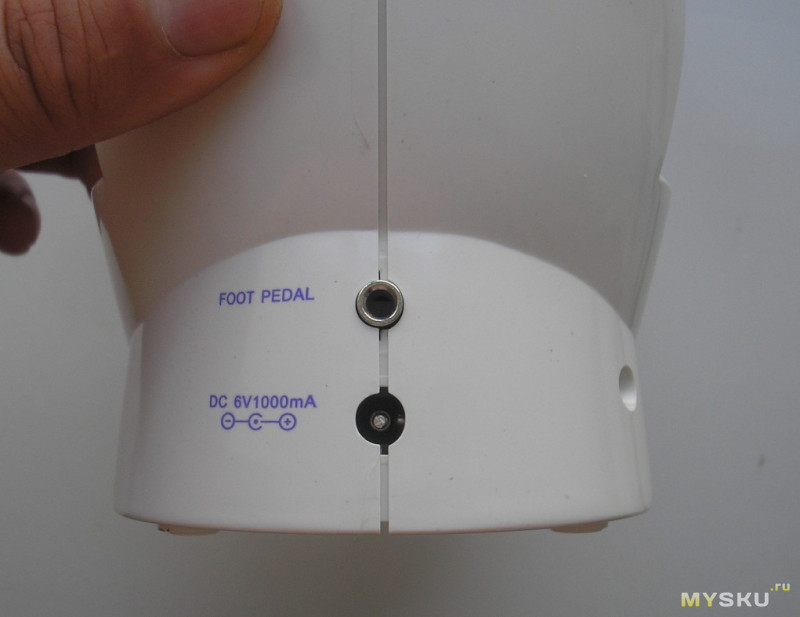
Можно и без адаптера. Батарейный отсек под 4 батарейки формата АА имеется.

Кстати, можно и без педали «скорости. Сбоку копка включения/выключения (с фиксацией).
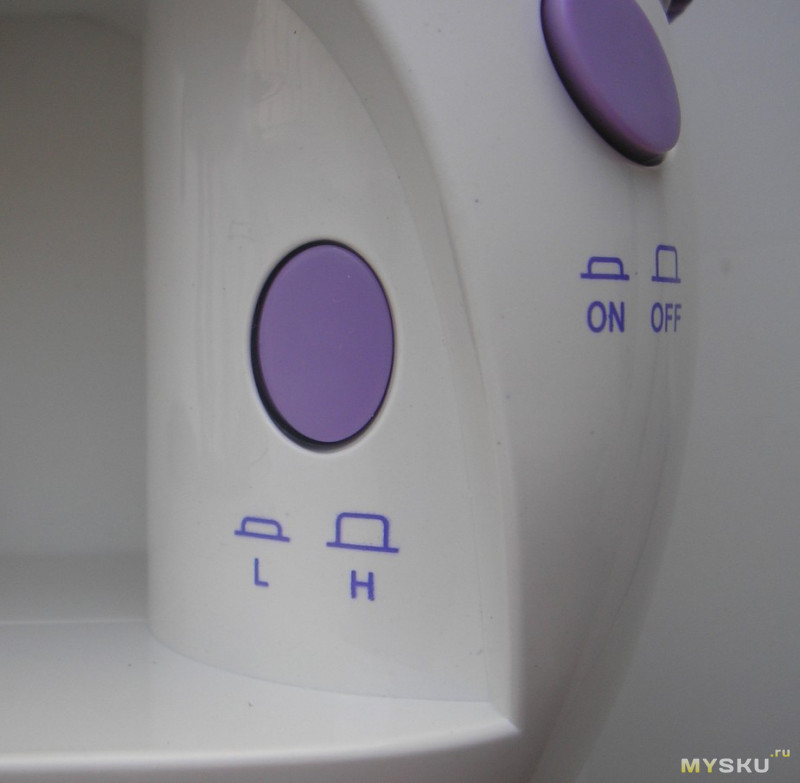
Скорости всего две, переключаются тоже кнопкой. И она с фиксацией, расположена рядом.
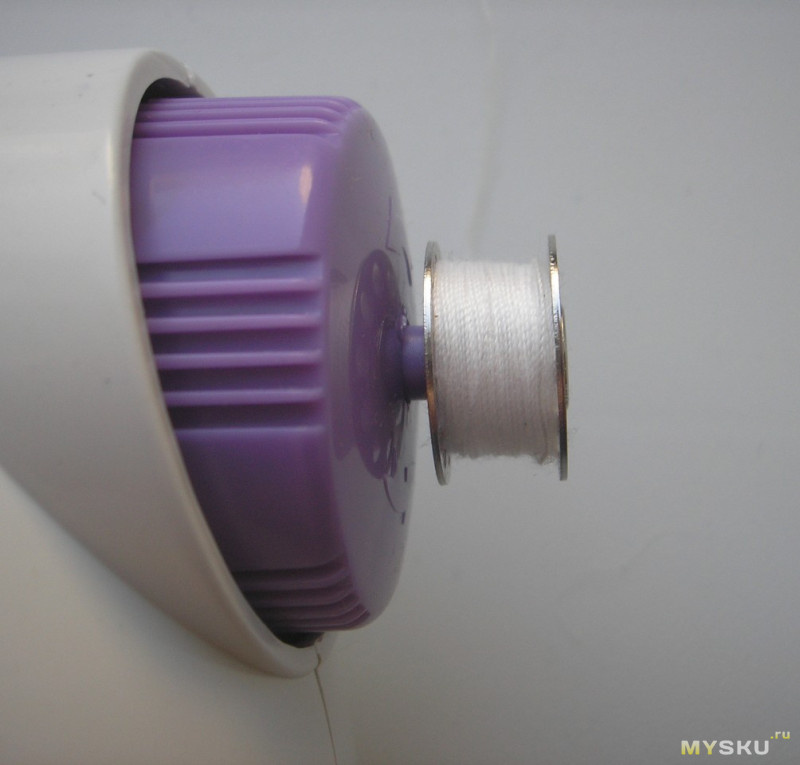
Место для катушки стандартно сверху.
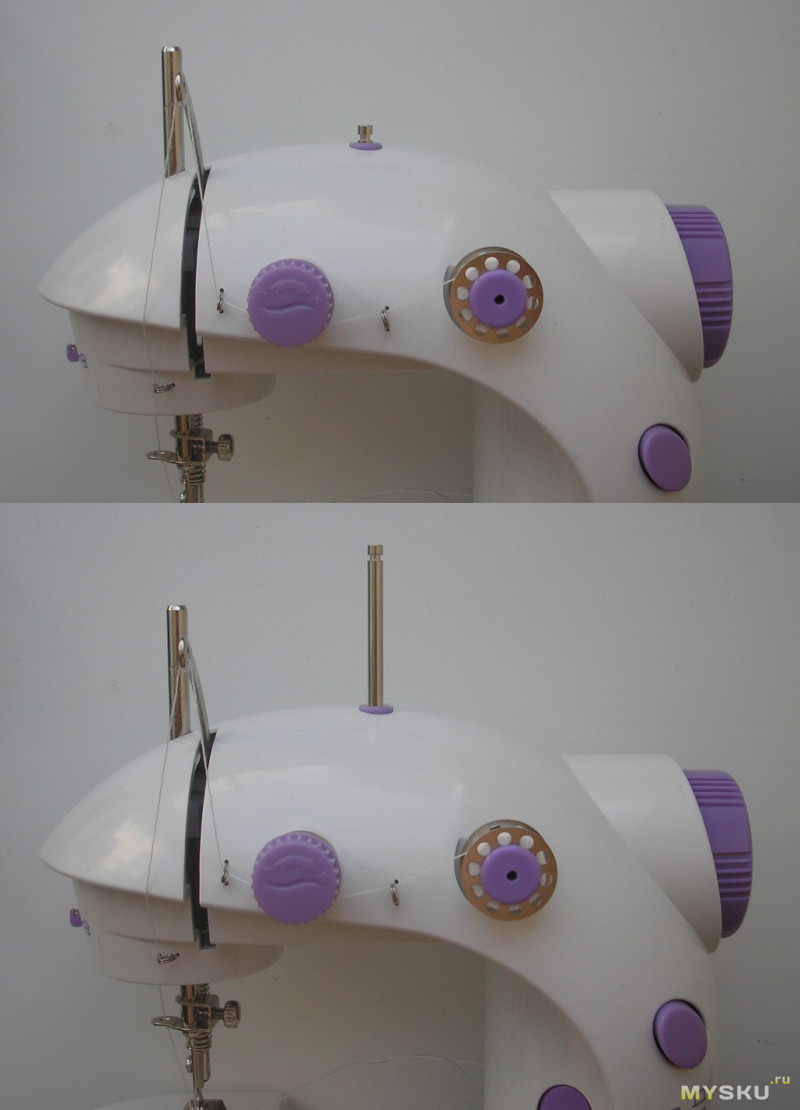
Но от шпульки работать удобнее. Машинка слишком миниатюрная, чтобы её обвешивать со всех сторон.
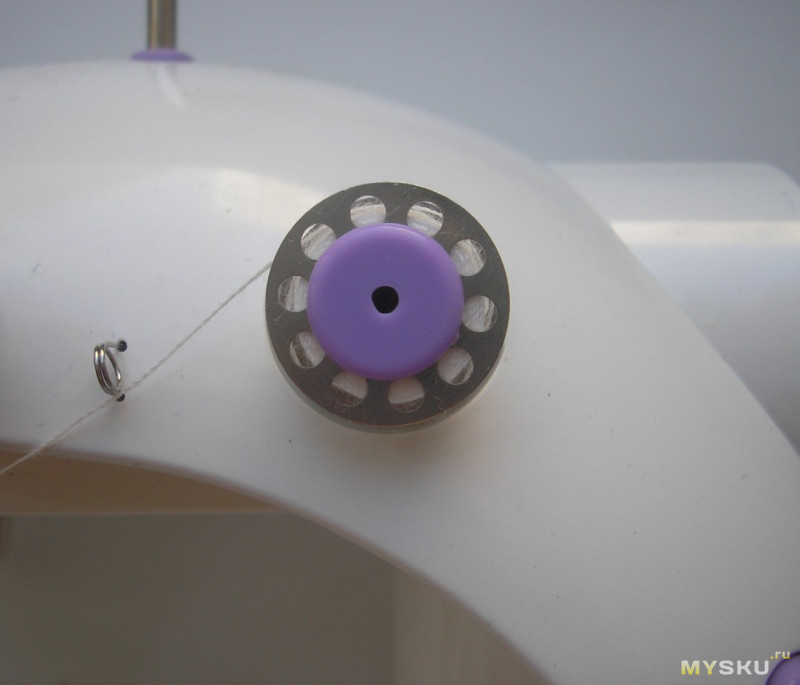
Левее ручка регулировки натяжения нити.
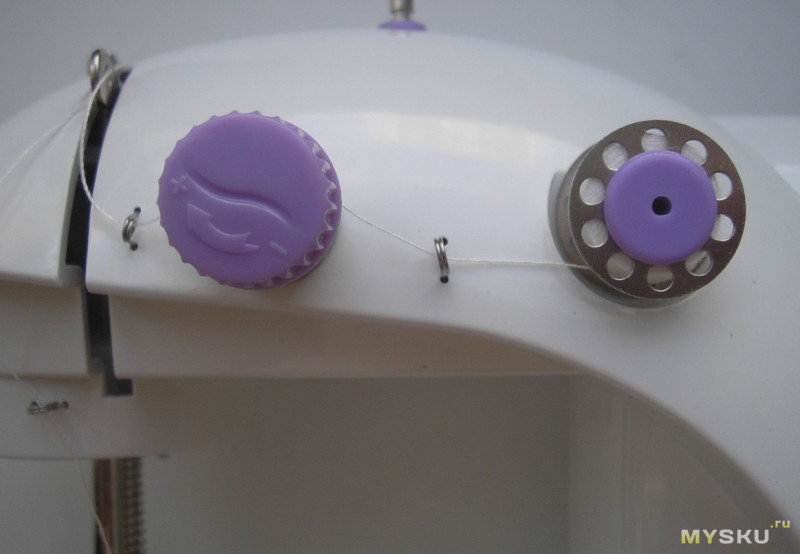
ОЧЕНЬ ответственная деталь. От правильной настройки зависит качество шитья. Важно, чтобы нитка попала в зажим. Иначе никакой регулировки не будет.
Крепёж шпульки снимается не так однозначно. Нужно приложить усилия.
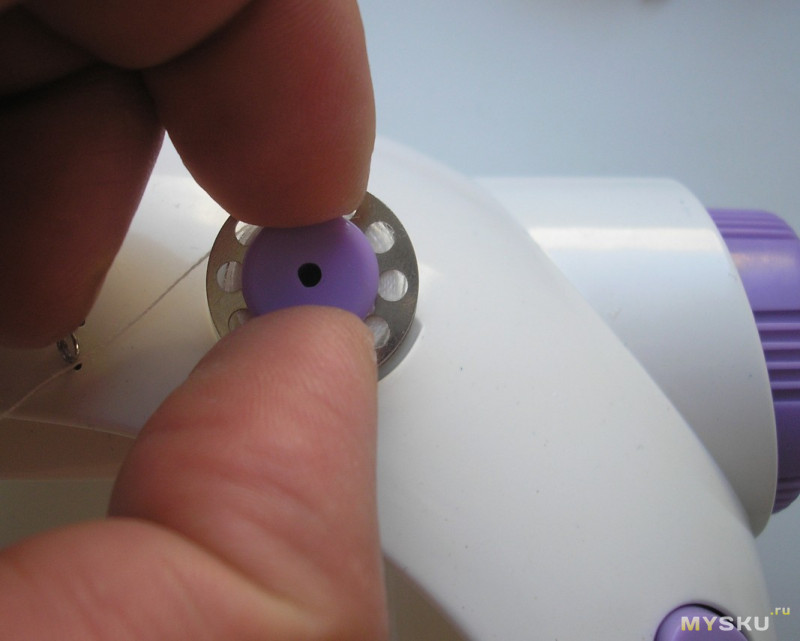
А чтобы не прилагать усилий, не надо его туда загонять со всей дури, так как вставляется с натягом.
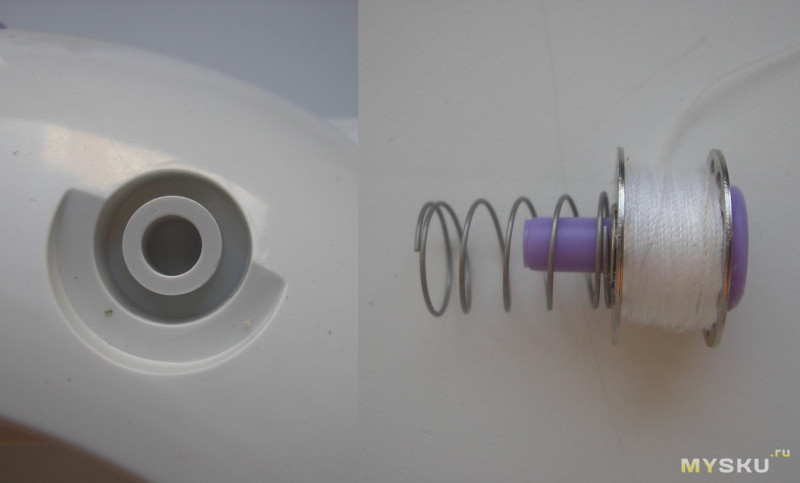
Стандартное маховое колесо, только с пимпочкой.
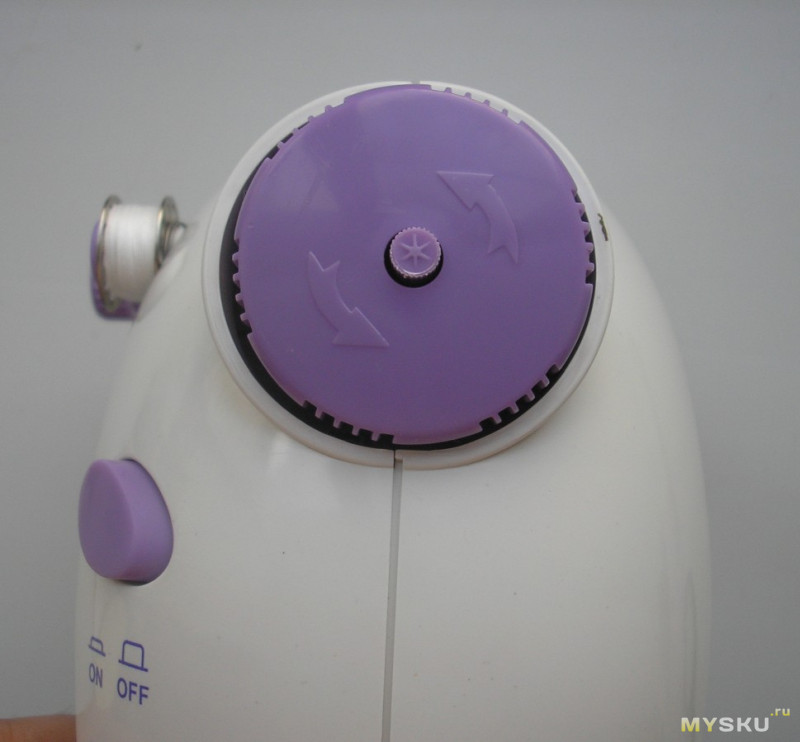
При нажатии с поворотом на которую выдвигается шток для намотки нитки на шпульку.
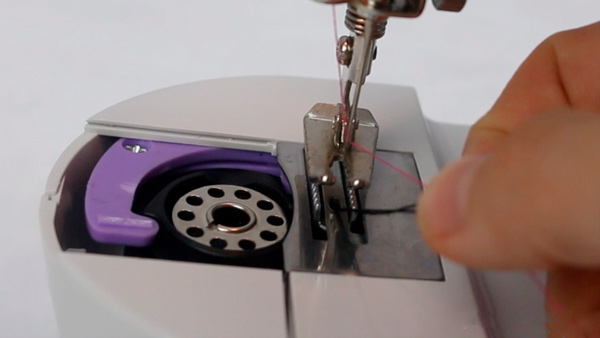
Рабочая часть. Сверху над рабочей частью находится небольшое лезвие для обрезания нитки (слева от ножничек).
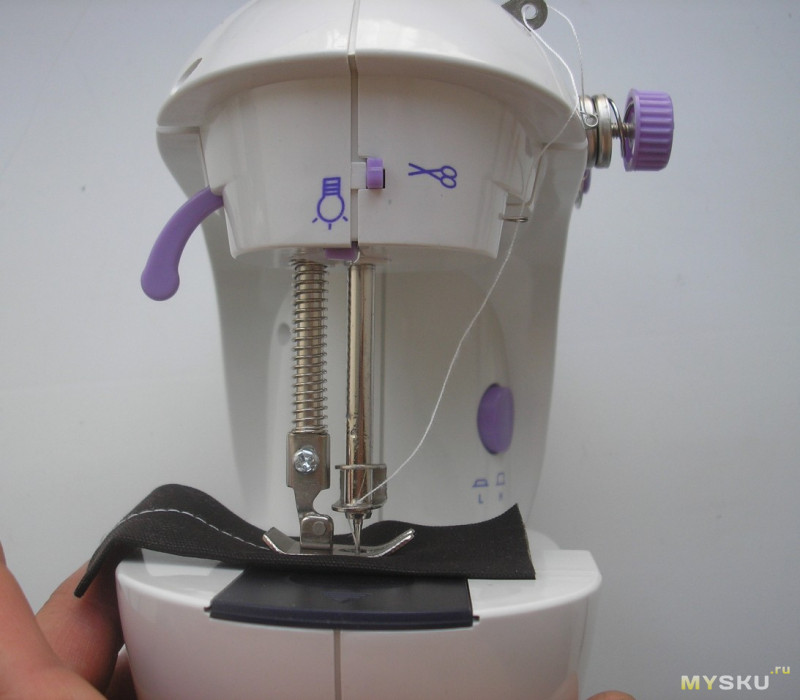
И небольшая лампочка снизу, кнопочка рядом.
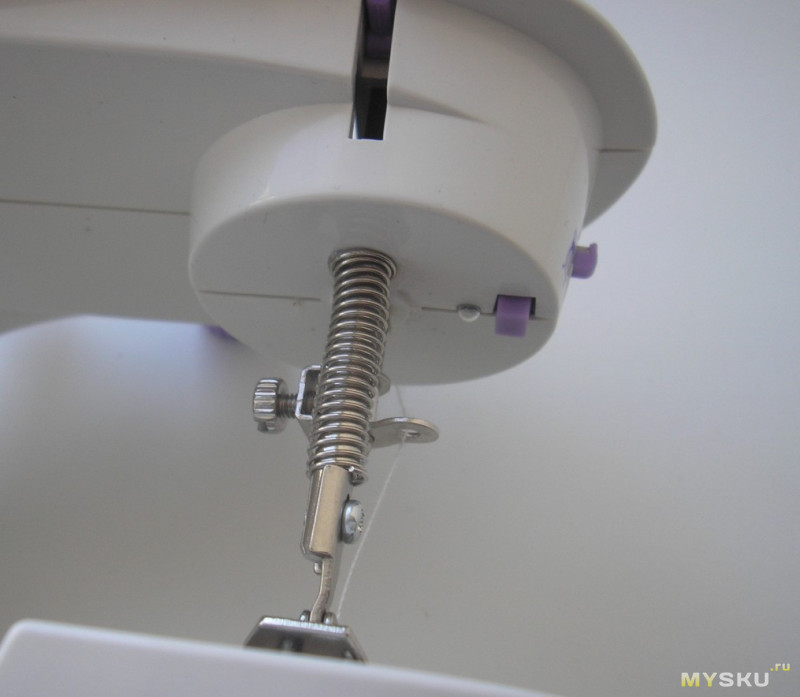
Рычаг подъёма прижимной лапки сделан из пластика.
Перехожу к отсеку для нижней шпульки.
Закрыт полупрозрачной чёрной крышкой.
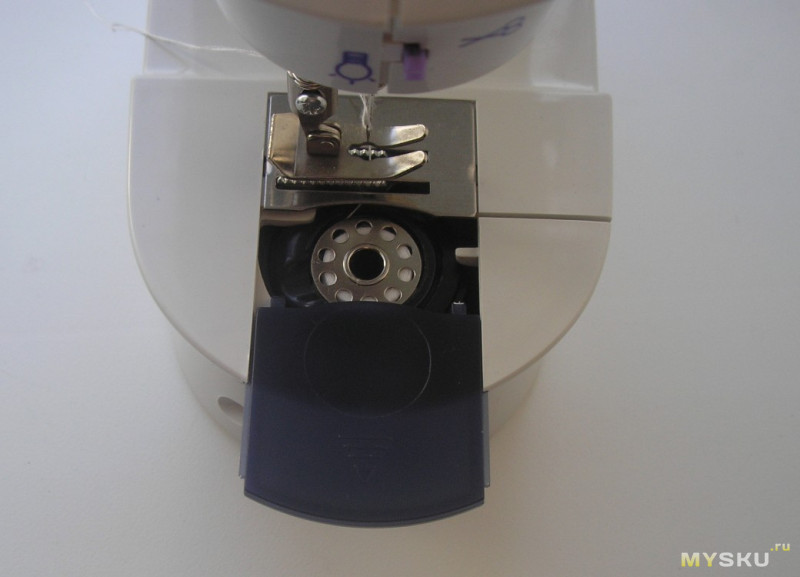
И не имеет абсолютно никакого значения, какой стороной шпульку туда вставлять. Прорезь под нитку расположена сверху под прямым углом.
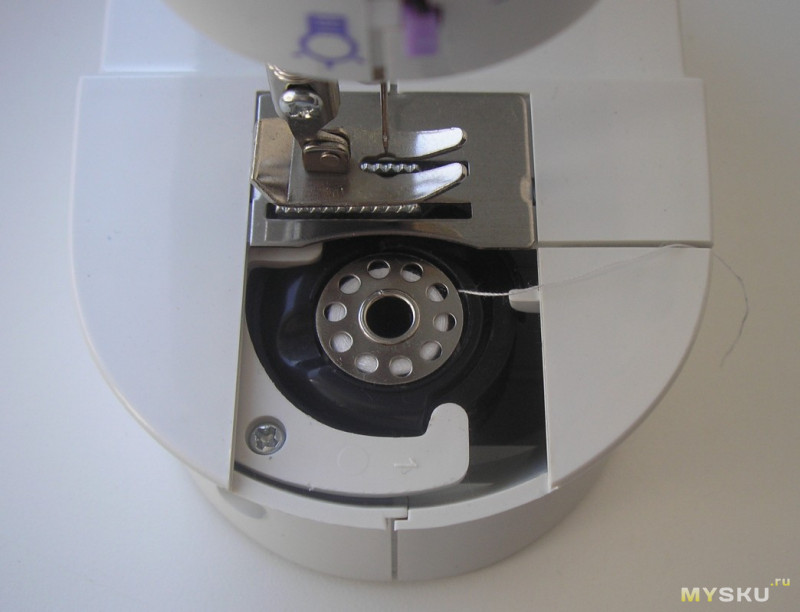
Держатель шпульки магнитный.
Натяжение нижней нити не регулируется, и не надо. Для бытовых целей того, что есть достаточно. Ни одна домохозяйка никогда этого не делала.
Посмотрю, что внутри. Многим будет интересно.
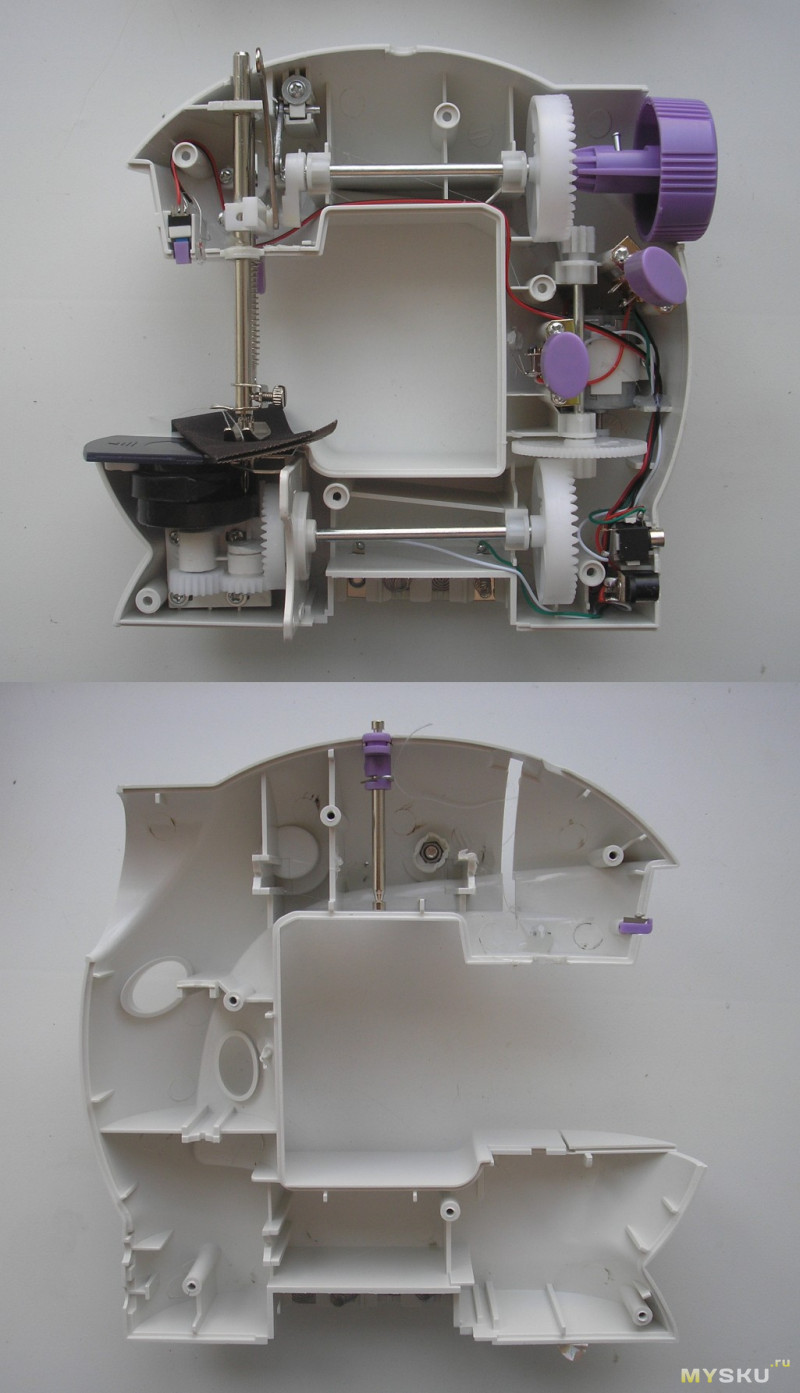
Оси и валы изготовлены из стали, шестерни — из пластмассы. Вспомнилось строение импортных видаков. Полное дежавю. Вот только программной шестерёнки не хватает. Кстати в подольской машинке тоже много деталей из пластмассы. Таково современное веяние мировой техники.
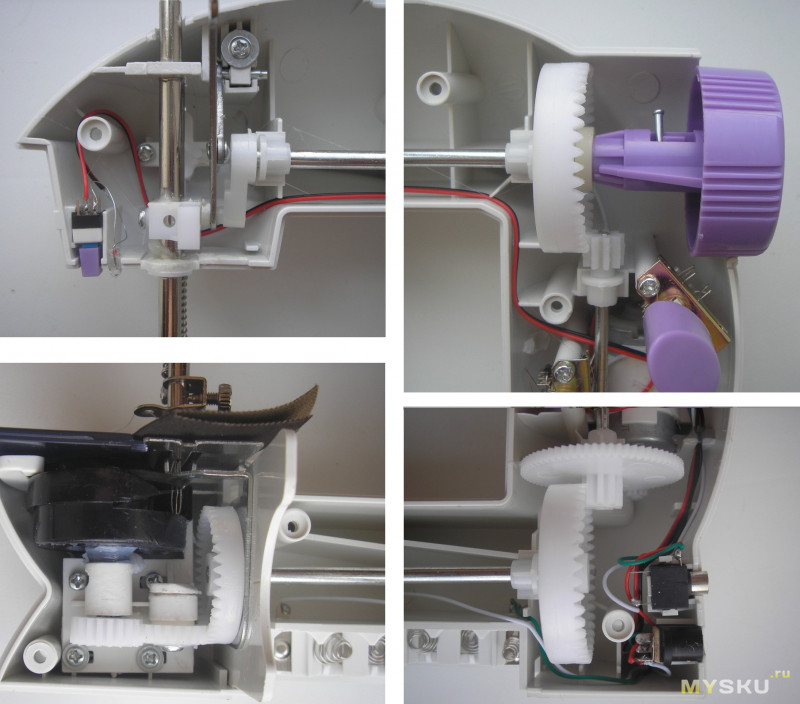
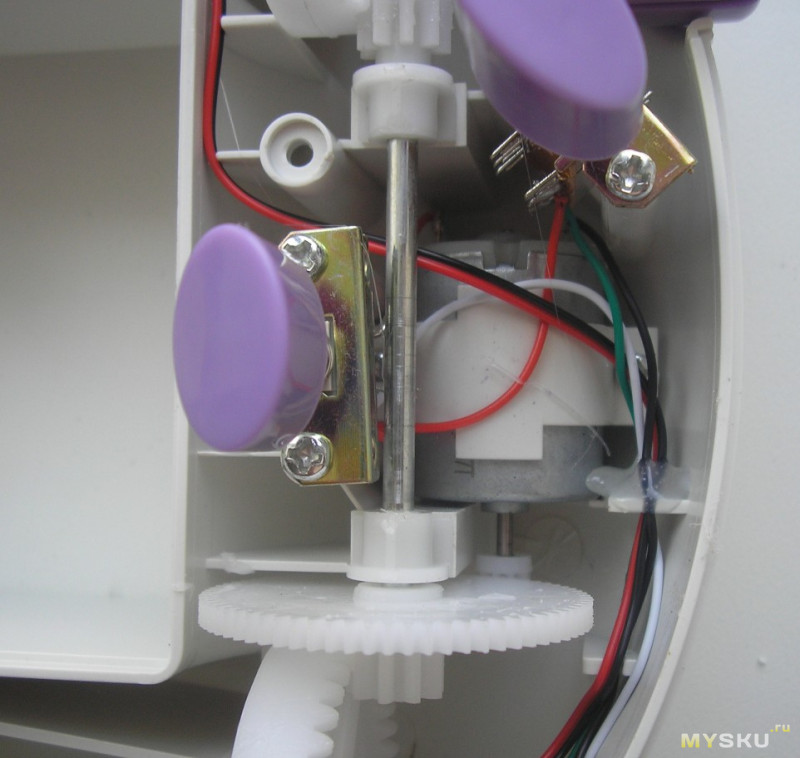
Фото двигателя отдельно.
Тестирование машинки доверил жене, и зря. Прочитав обзор по ссылке вначале, она слишком халатно отнеслась к моей просьбе и забраковала машинку.
Пришлось садиться за штурвал самому.
Оказалась машинка не так плоха, как её размалевали.
После того, как разобрался и выставил натяжение нити, машинка работает как часы. Шьёт и джинсу и тонкие рубашечные ткани. Никаких затягов и пропусков. Не верите – смотрите видео.
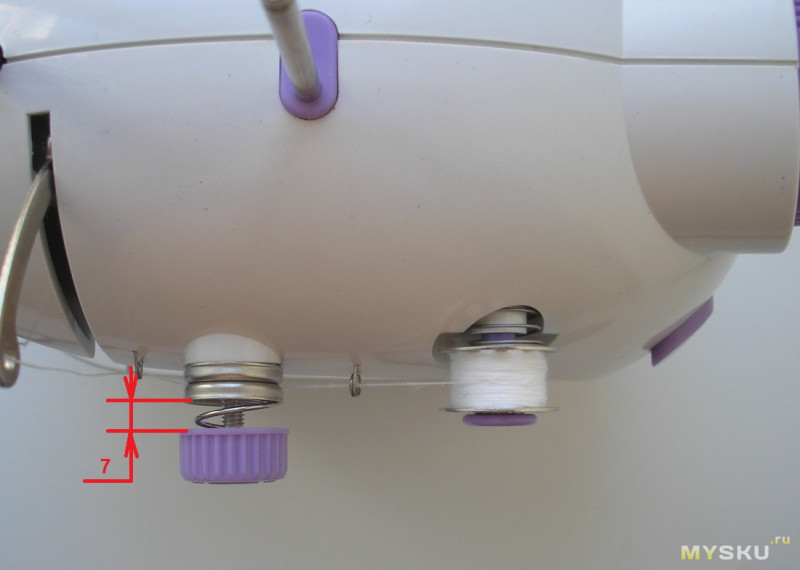
Для холостяков самое то. Главное, чтоб было желание и руки росли из правильного места. При правильном натяге у меня получился зазор около 7 мм.
Вот джинса из видео.

Старая рубашка.
А это фото из заключительного видео. Джинса в три слоя (жена шила).
Плюсы:
— Размеры.
Минусы:
— Размеры.
— Длина стежка не регулируется.
— Цена.
В данном случае её размеры занёс и в плюсы и минусы. Объясню. Для меня несомненный плюс, если придётся откуда-либо доставать. Пользуемся машинкой не часто, каждый раз, когда приходиться её доставать (подольскую) приходиться сначала убирать кучу сопутствующих вещей в шкафу.
Минус то, что она маленькая. Какие-либо серьёзные вещи ей шить неудобно. Маленькие проёмы, небольшой вес самого девайса значительно усложняют процесс.
Эта машинка не для профессионалов. Больше подходит для детей и холостяков 
На этом всё. Надеюсь, хоть кому-то помог.
Удачи!
Товар для написания обзора предоставлен магазином. Обзор опубликован в соответствии с п.18 Правил сайта.