- Manuals
- Brands
- MIMAKI Manuals
- Printer
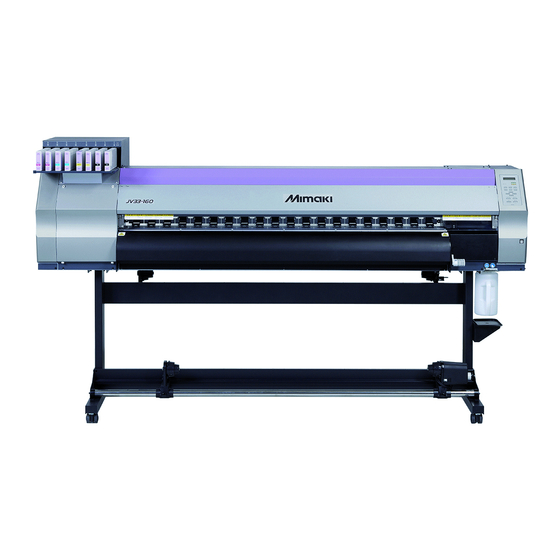
- JV33-160
- Operation manual
-
Contents
-
Table of Contents
-
Troubleshooting
-
Bookmarks
Quick Links
MIMAKI ENGINEERING CO., LTD.
TKB Gotenyama Building, 5-9-41, Kitashinagawa, Shinagawa-ku,
Tokyo 141-0001, Japan
Phone: +81-3-5420-8671 Fax: +81-3-5420-8687
D201694-13
URL: http: // www.mimaki. co. jp/
Downloaded From ManualsPrinter.com Manuals
Related Manuals for MIMAKI JV33-160
Summary of Contents for MIMAKI JV33-160
-
Page 1
MIMAKI ENGINEERING CO., LTD. TKB Gotenyama Building, 5-9-41, Kitashinagawa, Shinagawa-ku, Tokyo 141-0001, Japan Phone: +81-3-5420-8671 Fax: +81-3-5420-8687 D201694-13 URL: http: // www.mimaki. co. jp/ Downloaded From ManualsPrinter.com Manuals… -
Page 2: Table Of Contents
TABLE OF CONTENTS CAUTION …………….. v DISCLAIMER OF WARRANTY ……..v Requests …………….. v FCC Statement (USA) …………. v Interference to televisions and radios ……v Foreword …………….. vi On This Operation manual ……….vi Features …………….vii Safety Precautions …………ix Symbols …………….ix CHAPTER 1 Before Use Moving this machine ……….
-
Page 3
Turning the power ON/OFF ……..2-4 Turning the power ON ……….2-4 Turning the power OFF ……….2-5 Setting medias …………2-6 Useable medias …………2-6 Adjusting the head height ……… 2-6 Setting a roll media ……….. 2-8 Take-up device …………2-13 Setting leaf media ……….. -
Page 4
Setting Priority …………3-20 Setting Auto cleaning ……….. 3-22 Setting cleaning while printing ……3-24 Setting media detection ……..3-26 Other settings …………3-28 Initializing the settings ………. 3-30 Machine settings ……….. 3-31 Setting the deodorize fan ……..3-31 Setting Dryness feeding ……….3-33 Setting Stamp …………3-34 Setting Test draw arrange ……..3-36 Setting confirmation feeding ……..3-38… -
Page 5
If dots misalign …………. 4-23 Preventing nozzle clogging while power-off ..4-25 Setting refreshing interval in Sleep mode ….4-25 Setting tube washing interval in Sleep mode ..4-26 Setting cleaning interval in Sleep mode ….4-27 Setting Routine operations ……..4-28 Setting Routine wiping operations in Standby mode ………… -
Page 6: Caution
Operation of this equipment in a residential area is likely to cause harmful interference in which case the user will be required to correct the interference at his own expense. In the case where MIMAKI-recommended cable is not used for connection of this device, limits provided by FCC rules can be exceeded.
-
Page 7: Foreword
Foreword Congratulations on your purchase of MIMAKI color ink jet printer «JV33-130/160» . The JV33-130/160 is a color ink-jet printer for high quality printing with solvent ink (4-color and 6-color) or aqueos ink (4-color and 6-color). • 4-colors version : 2 each of Cyanogen, Magenta, Yellow and Black color ink cartridge are useable.
-
Page 8: Features
Features The features of the machine are described below. Understanding them together with the operating instructions given in this manual will help you use the machine properly. High image quality and High-speed printing realized by the new generation printer head. Newly developed printer head, 1 head consisting of 1440 nozzles (180 nozzles x 8 lines), is adopted.
-
Page 9
Features Easy maintenance The automatic capping system for the heads eliminates the need of head cleaning before turning off the power. Ink discharge passage is automatically cleaned from the cap. Nozzles can be unclogged by performing the cleaning function. If the machine is not in use for a prolonged period of time, it automatically performs nozzle clogging preventive operation at fixed intervals. -
Page 10: Safety Precautions
Safety Precautions Symbols Symbols are used in this Operation Manual for safe operation and for prevention of damage to the machine. The indicated sign is different depending on the content of caution. Symbols and their meanings are given below. Please follow these instructions as you read this manual. Examples of symbols Meaning Failure to observe the instructions given with this symbol can result in death or serious injuries to…
-
Page 11: Warning For Use
Check first that the machine no longer produces smoke, and then contact your distributor or a sales office of MIMAKI for repair. • Never repair your machine by yourself since it is very dangerous for you to do so.
-
Page 12: Precautions In Use
MIMAKI. Note on maintenance • When cleaning the ink-station or the heads, make sure to wear the attached gloves. Further, when the solvent ink is used, it is necessary to wear the attached goggles.
-
Page 13: Cautions And Notes
Handling of media • The machine does not operate with any ink • Use media recommended by MIMAKI to other than the JV33 genuine ink. ensure reliable, high-quality printing. • Do not use the JV33 genuine ink with other •…
-
Page 14
Safety Precautions Warning Notes on maintenance • It is strongly recommended to use the machine in a room that is not dusty. Set the Refresh level 2 or 3 when the machine is to be used in an unfavorable environment. (P.3-29 «Setting of Refreshing») •… -
Page 15
CHAPTER 1 Before Use This chapter describes the items required to understand before use, such as name of each part of the machine or the installation procedures. Moving this machine ….1-2 Connecting cables ….1-10 Where to install this machine ..1-2 Connecting USB2.0 interface Working environmental cable ……….. -
Page 16: Moving This Machine
1000 mm or more JV33-130 : 3289 mm JV33-160 : 3538 mm Working environmental temperature Use this machine in an environment of 20 to 35°C to ensure reliable printing. Depending on the ambient temperature, the heater temperature may not rise to the set value.
-
Page 17: Moving This Machine
If you move it by yourself, failure or damage may occur. Be sure to request your distributor or a sales office of MIMAKI to move this machine. • When moving this machine, take care not to give a significant impact on it.
-
Page 18: Names Of Parts And Functions
Names of Parts and Functions Front Maintenance cover Front cover Open the cover in maintenance. Open the cover in setting of medias, taking of measures Even when the power switch is off, keep against jamming of medias or in maintenance inside the all covers closed.
-
Page 19: Rear / Sides
Names of Parts and Functions Rear / Sides Clamp lever (rear) Interlocks with the clamp lever in the font of this machine. Pre-heater Preheats the media before printing. (Located inside the platen) Cleaning solution cartridge Set a dedicated Washings cartridge (optional).
-
Page 20: Operation Panel
Operation Panel Use the operation panel to make settings for printing or operate this machine. Display CONSTANT lamp Displays the status of the Lights in green when the heater temperature machine, set items and errors. reaches the set temperature. HEAT lamp Lights in orange during heating up of the ACTIVE lamp heater.
-
Page 21: Heater
Names of Parts and Functions Heater Pre-heater /Print heater / Post-heater are equipped on the platen. The Pre-heater is used for pre-heating of the media prior to printing to prevent rapid temperature changing. The Print-heater improves the image quality in printing. The Post-heater dries ink after printing.
-
Page 22: Carriage
Carriage The carriage is provided with the ink heads for printing, the cutter unit for cutting off the sheet of media, etc. A lever is also provided to adjust the height of Head in 2 stages according to the thickness of media. ( P.2-6) Cutter blade and cutting line The carriage is provided with a cutter unit for cutting off the media that has been printed on.
-
Page 23: Capping Station
Names of Parts and Functions Capping station • Be sure to wear the attached goggles in cleaning within the capping station to protect your eyes against ink. The capping station consists of the ink caps, the wiper for cleaning the heads, etc. The ink caps prevent the nozzles in the ink heads from drying up.
-
Page 24: Connecting Cables
Connecting cables Connecting USB2.0 interface cable Connect the PC and this machine with the USB2.0 interface cable. USB cable • Your RIP must be compatible with USB 2.0. • Contact a RIP maker near your location or our office when the USB2.0 interface is not attached to the PC.
-
Page 25: Connecting The Power Cable
Connecting cables ● Removing USB memory If a USB memory module is inserted in the personal computer to which a JV33 machine is connected, click «Stop» in the «Safely Remove Hardware» window by following the instructions given there first and then remove the module.
-
Page 26: Inserting Ink Cartridges
Inserting ink cartridges Insert an ink cartridges. Shake the ink cartridge as shown on the right. Insert the ink cartridge. • Insert the ink cartridge lengthwise directing the surface having IC chips to the left side. • Colors are displayed on the display as follows. Black: K, Cyanogen: C, Magenta: M, Yellow: Y,Light cyanogen: c, Light magenta: m Changing an ink cartridge…
-
Page 27: Caution In Handling Of Ink Cartridges
• Do not shake ink cartridges violently. This may result in ink leakage from the ink cartridges. • Never refill the ink cartridges with ink. This may result in troubles. MIMAKI will not bear any responsibility for any damage caused by the use of the ink cartridges refilled with ink.
-
Page 28: Media
Caution in handling of medias Pay attention to the followings for handling of medias. • Use media recommended by MIMAKI to ensure reliable, high-quality printing. Set the heater temperature to meet the characteristics of the media. • Set the temperature of the Pre-heater, Print heater and Post-heater according to the type and characteristics of the media used.
-
Page 29: Menu Mode
Menu mode This machine has 4 modes. Each menu mode is described below. NOT-READY mode This is the mode in which the media has not been detected yet. The keys other than the key and the / key are effective. LOCAL mode Local mode is the mode for the drawing preparation state.
-
Page 30
1-16 Downloaded From ManualsPrinter.com Manuals… -
Page 31
CHAPTER 2 Basic Operations The procedures from the ink and media preparation to drawing and the setting procedures are described. User type……..2-2 Preparing Heaters ….2-18 Set items registrable to User type 2-2 Changing temperature settings of Using the registered user type ..2-2 Heater …….. -
Page 32: User Type
User type Drawing of higher quality prints is available by making (setting of User type) the print set matching to the characteristics of media when this machine is used for drawing. On this machine, 4 types of User type 1 to 4 are settable. Set items registrable to User type For the registering procedures to User type (1 to 4), refer to P.3-2 .
-
Page 33: Workflow
Workflow Turning the power ON/OFF Referring to «Turning the power ON/ OFF» ( P.2-4). Setting medias Referring to «Setting medias» P.2-6). Preparing Heaters Referring to «Preparing Heaters» P.2-18). Test printing Referring to «Test printing» P.2-20). Drawing data Referring to «Drawing data» P.2-22).
-
Page 34: Turning The Power On/Off
Turning the power ON/OFF Turning the power ON The machine is provided with the following two power switches. Main power switch : At the side of this machine. Keep it «ON» always. Power switch : Normally, use this switch to turn the power ON/OFF. The power switch lights in green when the power is ON and blinks in green when it is OFF.
-
Page 35: Turning The Power Off
Turning the power ON/OFF Turning the power OFF Turn the power OFF by pressing the power switch located on the side of after using. Check the followings when the power is turned off. • If it is in receiving of data from the PC, or there is any data un-output. •…
-
Page 36: Setting Medias
Setting medias Useable medias This machine can be used with roll media and leaf sheet media. For useable medias, refer to P.1-14 «Usable sizes of media». Adjusting the head height Adjust the head height according to the thickness of the media used. •…
-
Page 37
Setting medias Keeping the height adjusting lever held at the aforementioned position, tighten the two screws. • Be sure to fasten the screws, pressing the height- adjusting lever, otherwise the head can not be secured at the correct position. • Fasten the screws securely. Return the carriage to the station position. -
Page 38: Setting A Roll Media
Setting a roll media Set a roll media to the roll media hanger located on the back of this machine. • Take care not to drop the media on a foot or so when the media is set. It may cause an injury due to the media.
-
Page 39: This Machine
Setting medias Move the roll holder to the roll setting position. Roll holder Set the base position Basis of roll holder within this range. 3 Inch Roll Media Roll Holder Set Position 2 Inch Roll Media Setting position of 3inch tube 3 Inch Roll Media Roll Holder Set Position…
-
Page 40
Insert the roll media in this machine. Pinch roller • The roll media can be smoothly inserted by slanting the media. ( 1 ) Pull the media out of the roll to the head of the platen. ( 2 ) Insert the media between the platen and the pinch roller. •… -
Page 41
Setting medias Hold the media with the media press gently. • Set the media so that no media sticks out from the right end pinch roller to the right side. • When using a thick media, remove the media press from the media before printing. Media press •… -
Page 42
Secure the media on the take-up device. P.2-13) ( 1 ) Feed the media up to the core of the roll media of the take-up device by pressing the key. ( 2 ) Fix the middle of the media with adhesive tape. ( 3 ) In the same manner, fix the left side and right side of the media. -
Page 43: Take-Up Device
Setting medias Take-up device The take-up direction of media is selectable by using the switch of the take-up device. Lever in top position (REVERSE) : The take-up device winds the media with the printed side facing Lever in middle position (OFF) : The take-up device does not wind the media.
-
Page 44: Setting Leaf Media
Setting leaf media Unlike roll media, leaf media does not need to be retained with the roll holders. Open the front cover. Front cover Raise the clamp lever. Clamp lever Insert the leaf media between the platen and the pinch rollers. •…
-
Page 45
Setting medias Press the key. Press the key to select “LEAF” . MED I A SE L EC T RO L L < > L E A F The media detection is started. DE T EC T I NG MED I A NOW P L E AS E WA I T ( 1 ) The media width is detected. -
Page 46: Changing The Printing Origin
Changing the printing origin The position of the printing origin can be changed. Moving the LED pointer to the changing position and deciding the position. In the local mode, OR I G I N S E TUP 0 . 0 — — — — press the keys.
-
Page 47
Setting medias Typical setting position of printing origin The printing origin in the depth direction (X’) is positioned at about 40 mm rearward from the cutting line. The printing origin in the scanning direction (Y’) is positioned at 15 mm from the right end of the media. The value in the scanning direction (Y’) can be changed using [MARGIN] in FUNCTION mode. -
Page 48: Preparing Heaters
Preparing Heaters Changing temperature settings of Heater The set temperature of Heater can be changed and stored by [HEATER] of the setup mode. ( P.3-8) The adjusting procedures of the temperature set in the setup mode are described below. Set the Heater temperature according to the media used. •…
-
Page 49: Confirming The Heater Temperature
Preparing Heaters Reference for the temperature set (When solvent ink is used) Type of ink ES3 ink SS21 ink Glossy Type of media Tarpaulin All medias chloroethylene Set of the Pre-heater 40°C 40°C 40°C 35°C Set of the Print-heater 40°C 40°C 40°C 35°C…
-
Page 50: Test Printing
Test printing Perform the test printing to check if printing failures (blurring or missing) due to nozzle clogging or the like occur on the printed. Test printing • When a leaf media is used, set a larger media than the A4 size in longitudinal feeding. •…
-
Page 51: Head Cleaning
Test printing Head cleaning Three head cleaning types are available. Select it depending on the result of pattern drawings. NORMAL :Select this if any line is missing. :When only head wiping is desirable. (in case of bent lines) SOFT :Select this if inferior printing cannot be improved even by [NORMAL] or [SOFT] cleaning. HARD In the local mode, C L E AN I NG…
-
Page 52: Drawing Data
Drawing data Starting the print • When a roll media is used, rewind the roll media by hands prior to printing so that it is set in the tightened condition. The loosened may result in failures of the image quality. Set the media.
-
Page 53: Stopping The Print Temporarily
Drawing data Stopping the print temporarily Perform the following operations when stopping the print halfway. Press the key in printing. < L OCA L . 1 > [ # 0 1 ] w i d t h : 1 2 7 2 mm •…
-
Page 54: Cutting A Media
Drawing data Cutting a media For a roll media, two ways are available to cut the media after printing is completed, as follows. • Pay attention so that printed surface does not touch to a floor or other printed surfaces when the media is cut.
-
Page 55
CHAPTER 3 Convenient use This section describes the operation procedures for using the machine more conveniently and each setting procedure. User type……..3-2 Setting Priority ……3-20 Registering the drawing conditions Setting Auto cleaning ….. 3-22 together (Type registration) ..3-2 Setting cleaning while Registering Type …… -
Page 56: User Type
User type Registering the drawing conditions together (Type registration) The drawing conditions are registered in each type (1-4). The most suitable drawing conditions are settable only by changing the type when replaced by a different type of media, if the drawing conditions that meet the media to be used have been registered in the type. Example of type registration When solvent ink is used.
-
Page 57: List Of Functions
User type List of functions This section describes the outline of each SET UP function registerable to the user type and the setting value. The underlined has been set when purchased. Function name Set value Outline Prints a pattern to correct the MEDIA COMP.
-
Page 58
User type Function name Set value Outline Sets the priority of settings (host / panel) Sets each item of the followings individually when the individual setting is selected. • MEDIA COMP. • HEATER INDIVIDUALLY/ ALL HOST / • PRINT MODE PRIORITY ( P.3-20) ALL PANEL… -
Page 59: Setting Media Compensation
Setting media compensation Correct the feeding rate of media after the type of media is replaced or the temperature of Heater is changed. If the correction value is not appropriate, stripes may appear on the print, thus resulting in a poor print. •…
-
Page 60
Press the key twice. [ 1 ] MED I A COMP . PR I N T S T AR T Print the compensation pattern by PR I N T I NG P L E AS E WA I T pressing the key. -
Page 61
Setting media compensation When you need to correct the media feed during printing The media feeding amount can be corrected even in the remote mode or when printing image data. Press the key in the * REMOT E . 1 * [ # 0 1 ] * * . -
Page 62: Changing The Set Value Of Heater
Changing the set value of Heater Rough guide for temperature setting (When solvent ink is used) Type of ink ES3 ink SS21 ink Type of media Tarpaulin All medias Pre-heater 40°C 40°C 40°C 35°C Print-heater 40°C 40°C 40°C 35°C Post-heater 50°C 50°C 50°C…
-
Page 63
Changing the set value of Heater Press the key. [ 1 ] MED I A COMP . < e n t > Select [HEATER] by pressing the [ 1 ] HEA T ER < e n t > keys. Press the key twice. -
Page 64: Adjusting Suitable Temperature Adjustment (When Solvent Ink Is Used)
Adjusting suitable temperature adjustment (When solvent ink is used) This section describes the procedure for setting the heater temperatures properly. The proper heater temperatures depend on the media type and ambient temperature. Set temperatures that are appropriate to the media. For non-coated media or media on which ink is slow to dry, set the heater temperatures so that the ink fixing and drying characteristics will be improved.
-
Page 65: In Case The Heater Temperature Is Too Low
Changing the set value of Heater In case the heater temperature is too low When solvent ink is used, this may result in printing failures such as beading or banding if the heater temperature or the ink acceptable amount (the ink limit) is too low. Beading is a phenomenon that adjacent dots attract each other and join.
-
Page 66: Setting Print Mode
Setting print mode Upon the setting of the print mode, set each item for printing as follows. • Print quality (DRAFT) : Setting the print quality in the DRAFT mode (Resolution in the scanning direction: 540dpi) • Print quality (FINE) : Setting the print quality in the FINE mode (Resolution in the scanning direc- tion: 720dpi) •…
-
Page 67
Setting print mode When changing the details of printing quality at each resolution. [ 1 ] DRA F T QUA L I T Y 5 4 0 x 7 2 0 < e n t > Select the resolution by pressing the key. -
Page 68: Setting Scanning Direction
Setting scanning direction Perform operations up to P.3-12 the [ 1 ] PR I N T MODE DRA F T QUA L I T Y < e n t > step 5. Select [SCAN DIRECTION] by pressing [ 1 ] PR I N T MODE SCAN D I REC T I ON <…
-
Page 69: Setting Logical-Seek
Setting print mode Setting Logical-seek The motion of Head varies depending on the set of Logical-seek. UNI-DIRECTIONAL BI-DIRECTIONAL Movement of heads when LOGICAL seek is OFF Movement of heads when UNI-DIRECTIONAL BI-DIRECTIONAL LOGICAL seek is ON Perform operations up to P.3-12 the [ 1 ] PR I N T MODE DRA F T QUA L I T Y <…
-
Page 70: Setting Whitelay Print
Setting WhiteLay Print When using SS21 white ink, you can print with other colors after printing with white ink, without returning the media. In this page, set the printing method of white ink and other color ink. Set Value Outline Printing the white ink and the color ink at the same time.
-
Page 71
Setting print mode Press the key. [ 1 ] PR I N T MODE Wh i t e L a y P r t < e n t > Press the key several times to end. 3-17 Downloaded From ManualsPrinter.com Manuals… -
Page 72: Setting Drying Time
Setting drying time Upon the setting of drying time, set each item for ink drying as follows. • SCAN : Set the time to wait for ink drying after each pass. During bidirectional printing, the machine stops temporarily after every scanning back and forth. •…
-
Page 73: Setting Margins
Setting margins Set a non-printing area along the right and left edges of the media. The offset value against the standard margin 15mm is set hereupon. Press the key in the local F UNC T I ON S E T UP <…
-
Page 74: Downloaded From Manualsprinter.com Manuals
Setting Priority For the following items, the priority is selected either the setting by the machine (by the panel) or the setting by the PC (by the host). Items to be selected : MEDIA COMP. / HEATER / PRINT MODE / INK LAYERS / DRYING TIME / AUTO CUT / PRE-FEED / MARGIN / COLOR PATTERN / REFRESH / VACUUM / FeedSPEED LEVEL Press the…
-
Page 75
Setting Priority Select either “HOST” or “PANEL” by [ 1 ] PR I OR I T Y MED I A COMP . ANE L pressing the keys. Press the key. • You can also press keys to move between items. Be sure to press the key to register the setting. -
Page 76: Setting Auto Cleaning
Setting Auto cleaning The machine is settable so that the head cleaning is automatically carried out when printing is completed for the set length. At the completion of printing, the machine counts the length printed after the previous head cleaning and performs the cleaning automatically if required.
-
Page 77
Setting Auto cleaning Select “ON” by pressing the [ 1 ] AU TO CREAN I NG S E T UP : ON keys. • Proceed to the step 9 when “OFF” is selected. Press the key. I N T ERV A L : T YP E 0 0 0 mm : NORMA L… -
Page 78: Setting Cleaning While Printing
Setting cleaning while printing Set it whether the head cleaning is carried out automatically during printing or not. Upon cleaning during printing, set the cleaning interval to the length printed. The printing is interrupted each in the set length and the head cleaning is carried out automatically. Press the key in the local F UNC T I ON…
-
Page 79
Setting cleaning while printing Press the key. Press the key several times to end. • This function does not operate when ink near-end occurs. Solve the ink near-end, referring to P.1-12. • Depending on the conditions of the heads, etc., the defective printing could not be recovered even performing this function. -
Page 80: Setting Media Detection
Setting media detection Set the method for detecting a media when the media is set and the detecting type when the media is cut. Press the key in the local F UNC T I ON S E T UP < EN T > mode.
-
Page 81
Setting media detection Press the key. [ 1 ] MED I A DE T EC T DE T EC T : BOT H EDGE Select the set value by pressing the keys. • Set value:BOTH EDGE / LEFT EDGE / RIGHT EDGE / NONE Press the key. -
Page 82: Other Settings
Other settings Change the setting according to the use. Press the key in the local F UNC T I ON S E T UP < EN T > mode. Press the key. S E T UP S E L EC T : T Y PE .
-
Page 83: List Of Settings
Other settings List of Settings The underlined has been set when purchased. Item Outline Set value Setting of Media Corrects the feeding rate of media Refer to P.3-5 compensation Setting Heater temperature Setting of Heater Refer to P.3-8 Setting Heater standby time and OFF time Setting Print quality Setting Scanning direction…
-
Page 84: Initializing The Settings
Initializing the settings Initialize the settings to the conditions that have been set when purchased. (Set resetting) The set resetting can be executed per type. Press the key in the local F UNC T I ON S E T UP <…
-
Page 85: Machine Settings
Machine settings It is each type of setting for using this machine more comfortably. [MACHINE SETUP] and [MACHINE SETUP2] are available in this machine. The following items are settable in MACHINE SETUP 1, 2. Item Outline Set value 0 ~ 120 ~ 240min/ Setting the time until the rotation of the exhaust STOP TIME DEODORIZE…
-
Page 86
Select [MACHINE SETUP] by pressing F UNC T I ON MACH I NE S E T UP < EN T > keys. Press the key twice. DEODOR I Z E F AN S TOP T I ME < e n t > Select the item to be set by pressing keys. -
Page 87: Setting Dryness Feeding
Machine settings Setting Dryness feeding Setting whether feeding for drying a media is performed after the completion of printing or not. Press the key in the local F UNC T I ON S E T UP < EN T > mode.
-
Page 88: Setting Stamp
Setting Stamp Set whether information such as the drawing conditions or the date printed is output after the completion of printing or not. Press the key in the local F UNC T I ON S E T UP < EN T > mode.
-
Page 89
Machine settings Examples of Output 3-35 Downloaded From ManualsPrinter.com Manuals… -
Page 90: Setting Test Draw Arrange
Setting Test draw arrange You can set the deployment direction of the test pattern to be printed when performing test printing repeatedly. (This function can be used in F/W Ver.1.50 or later.) : when the setting value is “FEED DIR.” : when the setting value is “SCAN DIR.”…
-
Page 91
Machine settings Press the key. Press the key several times to end. 3-37 Downloaded From ManualsPrinter.com Manuals… -
Page 92: Setting Confirmation Feeding
Setting confirmation feeding Set whether media feeding is performed for checking the result after test printing or not Press the key in the local F UNC T I ON S E T UP < EN T > mode. Select [MACHINE SETUP 2] by pressing F UNC T I ON keys.
-
Page 93: Setting Time
Machine settings Setting time Press the key in the local F UNC T I ON S E T UP < EN T > mode. Select [MACHINE SETUP 2] by pressing F UNC T I ON MACH I NE S E T UP 2 < EN T > keys.
-
Page 94: Setting Unit
Setting Unit Set a unit of measurement to be used in the machine. Press the key in the local F UNC T I ON S E T UP < EN T > mode. Select [MACHINE SETUP 2] by pressing F UNC T I ON keys.
-
Page 95: Setting Machine Name
Machine settings Setting Machine name Set a machine name (machine No.) for recognizing each machine when plural machines are connected through USB2.0 interface. Press the key in the local F UNC T I ON S E T UP < EN T > mode.
-
Page 96: Setting Key Buzzer
Machine settings Setting Key buzzer Set a buzzer sound of the time when a key is pressed. Press the key in the local F UNC T I ON S E T UP < EN T > mode. Select [MACHINE SETUP 2] by pressing F UNC T I ON keys.
-
Page 97: Confirming Machine Information
Confirming machine information The machine information of the machine is confirmable. Confirmable items of the machine information are as follows. Item Description Displays the history of errors and warnings. ERROR HISTORY Using the key, the errors and warnings can be displayed one by one in the order of occurrence.
-
Page 98
Confirming machine information For the information displayed This section describes the way to read the information displayed. ERROR HISTORY MAINTE. HISTORY Displaying the Displaying the ERROR H I STORY [ 0 1 ] 0 7 . 1 0 . 1 0 1 2 : 1 5 occurrence date contents of… -
Page 99
CHAPTER 4 Routine Maintenance This section describes the items required to use this machine more comfortably, which are the procedures of ink replacing, cleaning or the like. Maintaining……..4-2 Preventing nozzle clogging while Precautions in cleaning …… 4-2 power-off ……..4-25 Notes on cleaning solution …. -
Page 100: Maintaining
Maintaining Be sure to perform maintenance of the machine periodically or whenever necessary so that the machine can be used with its inherent accuracy for a long time. Precautions in cleaning Pay attentions to the following items when the machine is maintained. •…
-
Page 101: Cleaning Exterior Surfaces
Maintaining Cleaning exterior surfaces If exterior surfaces of the machine is stained, dampen a soft cloth with water or a neutral detergent diluted with water, squeeze it and wipe the surfaces with the cloth. Cleaning the platen On the platen, it is easy to become dirt due to lint, paper dust or the like caused by cutting medias. For a conspicuous stain, wipe it off with a soft-hair brush, a dry cloth, a paper towel or the like.
-
Page 102: Cleaning The Media Sensor
Maintaining Cleaning the media sensor A media sensor is located at the platen on the backside. It may cause misdetection of media when dust or the like is accumulated on the sensor. Using a cotton swab, clean the surface of the sensor of dust and dirt. When cleaning the sensor on the lower surface of the head is cleaned, move the carriage to the left end by the operations of step 1 of P.4-16 «Cleaning the heads and their surrounding parts», and then clean it.
-
Page 103: Maintaining Capping Station
Maintaining Capping station Maintain Ink cap, Wiper or the like, which are located in the capping station. [ST.MAINTENANCE] The ink cap and wiper function respectively as follows. • Wiper : Wiping ink sticking to the head nozzle off. • Ink cap : Preventing the head nozzle from clogging due to drying. As the machine is used, the wiper and ink caps gradually become stained with ink and dust.
-
Page 104
Wiper Clean the wiper and bracket. • Wipe ink sticking to the wiper and the bracket off with a cotton swab dipped in the cleaning solution. Bracket Clean the wiper slider. • Wipe ink sticking to the wiper slider off with a cotton swab dipped in the cleaning solution. -
Page 105: Replacing The Wiper
• The wiper to be newly installed is available as an option. Order it from your dealer or a sales office of MIMAKI. • Do not select [WIPER EXCHANGE] at any time other than when the wiper is to be replaced.Once it is selected, the number of wiper operations that is counted in the machine…
-
Page 106: Prior To Pump Tube Washing
Prior to Pump tube washing Prior to washing of the pump tube, it is required that the cleaning solution has been filled within the tube. • When the following messages are indicated, check the waste ink tank, and then operate it, referring to P.4-37 «If Waste ink tank confirming message is displayed»…
-
Page 107
Maintaining Capping station Discharging Cleaning solution Perform the following operations to discharge the cleaning solution within the tube. Select [HD.MAINTENANCE] of the maintenance menu. (1) Press the key in the local mode. (2) Select [MAINTENANCE] by pressing the keys then press the key. -
Page 108: Washing Of Head Nozzle
Washing of Head nozzle Perform cleaning of the nozzles in the heads to prevent them being clogged with coagulated ink. Is [NEAR END] or [INK END] displayed ? Make sure the • The cleaning solution or ink is absorbed in washing. followings in At this time, washing is unable to operate if the ink end or near-end is advance.
-
Page 109
Maintaining Capping station Press the key then fill the cap with the cleaning solution. • The cleaning solution is applied by drops when is pressed. • When the is pressed again, drops stop. • Repeat the drops several times to fill the cap with the cleaning solution just before the solution overflows from the cap. -
Page 110: Cleaning The Ink Discharge Passage (Pump Tube Wash)
Cleaning the ink discharge passage (PUMP TUBE WASH) Perform washing of the ink discharge passage (the pump tube) periodically to prevent ink from clogging due to the coagulation of ink within the ink discharge passage. • When the following messages are indicated, check the waste ink tank, and then operate it, referring to P.4-37 «If Waste ink tank confirming message is displayed»…
-
Page 111
Maintaining Capping station Close the front cover and press the * B e i n g I n i t i a l i z e d * P L E AS E WA I T key. • It returns to the local mode after the idle absorbing <… -
Page 112: When Not Using For A Long Term (Custody Wash)
When not using for a long term (CUSTODY WASH) When the operation of the machine is to be suspended for a week or more, use the [CUSTODY WASH] function to clean the nozzles in the heads and the ink discharge passage. After the cleaning, store the machine properly.
-
Page 113
Maintaining Capping station Press the key. F i l l t h e l i q u i d COMP L E T ED ( NE X T ) : e n t Press the key to fill the cap with the cleaning solution. -
Page 114: Cleaning Heads And Surroundings Parts
Cleaning heads and surroundings parts Take great care, especially during cleaning, not to damage the heads, which employ very precise mechanisms. Using a cotton swab, rub off the gelatinous ink that may be adhering to the lower part of the slider and surrounding parts of the heads.
-
Page 115
Cleaning heads and surroundings parts Press the key after the C l o s e a c o v e r cleaning. Close the maintenance cover then ( COVER OP EN ) PRE S S < EN T > K EY press the key. -
Page 116: When Nozzle Clogged After Cleaning
When Nozzle clogged after cleaning When the nozzle clogging is not improved even after the head cleaning( P.2-21) or the head nozzle washing ( P.4-10), execute two functions as follows. FILL UP INK • Supplies ink to correct nozzle clogging. •…
-
Page 117: Discharge & Wash
When Nozzle clogged after cleaning DISCHARGE & WASH Discharge ink from the heads, dampers and ink tubes, and then wash them. • When the following messages are indicated, check the waste ink tank, and then operate it, referring to P.4-37 «If Waste ink tank confirming message is displayed» according to the situation.
-
Page 118
Remove the cleaning solution * D I SCHARGE * 0 0 : 0 0 cartridge. • The ink left in the head or tube is discharged to the waste ink tank. • The right display on the right is displayed after S e t : Wa s h i n g C a r t r i d g e discharging. -
Page 119: Initial Ink Fill Up
• You cannot change the current ink set to other ink set yourselves. • If you want to change the ink set, contact sales office of MIMAKI. Press the key. S e t : ES 3 — 4 c o l o r…
-
Page 120
When Nozzle clogged after cleaning Set an ink cartridge to the ink station. S e t : ES 3 — 4 c o l o r I n k — — C — Y — K K • When the ink cartridge is set, filling is F I L L I NG UP NOW. -
Page 121: If Dots Misalign
If dots misalign When the thickness of the media, the height of the head, or the type of the ink used is changed, follow the steps below and adjust the ink drop position for Bi-directional (Bi) printing to print properly. Example of Pattern printing Output The dots at the fourth position counted from the zero…
-
Page 122
If dots misalign As the same as the step 4, correct the dot position of the from pattern 2 then press the key. Press the key several times to end. 4-24 Downloaded From ManualsPrinter.com Manuals… -
Page 123: Preventing Nozzle Clogging While Power-Off
Preventing nozzle clogging while power-off Even while the power switch is off, the machine starts periodically and executes various functions to prevent nozzle clogging. [SLEEP SETUP] includes the following functions. Function name Descriptions Set the interval at which refreshing operation is to be performed REFRESH periodically.
-
Page 124: Setting Tube Washing Interval In Sleep Mode
Setting tube washing interval in Sleep mode Set the interval at which cleaning of the caps and pump tubes is to be performed using the cleaning solution during sleep mode. Select [SLEEP SETUP] of the maintenance menu. (1) Press the key in the local mode.
-
Page 125: Setting Cleaning Interval In Sleep Mode
Preventing nozzle clogging while power-off Setting cleaning interval in Sleep mode This function is to be executed instead of TUBE WASH after the cleaning solution has been used up. Set the cleaning type and the interval at which cleaning operation is to be performed during sleep mode. Select [SLEEP SETUP] of the maintenance menu.
-
Page 126: Setting Routine Operations
Setting Routine operations Troubles such as ink clogging or the like are preventable by performing each periodical operation in the condition of the power ON. (Initial setting) The [ROUTINE SETUP] function is available for the following items : Function name Descriptions While printing, the nozzle surface is wiped with a certain interval to remove ROUTINE WIPING…
-
Page 127
Setting Routine operations Press the key. ROU T I NE WI P I NG SCAN COUN T Set the number of scans by pressing ROU T I NE WI P I NG SCAN COUN T keys. • Set value : 0 to 9990 times •… -
Page 128: Setting Refreshing Interval In Standby Mode
Setting Refreshing interval in Standby mode Set the interval at which refreshing operation is to be performed periodically. Select [ROUTINE SETUP] of the maintenance menu. (1) Press the key in the local mode. (2) Select [MAINTENANCE] by pressing the keys then press the key.
-
Page 129: Setting Pump Tube Washing Interval In Standby Mode
Setting Routine operations Setting Pump tube washing interval in Standby mode Perform the pump tube washing periodically to prevent ink from clogging due to the coagulation of ink, which occurs within the tube. • This function is operable only under the condition that the machine is left in the following displays.
-
Page 130: Setting Cleaning Interval In Standby Mode
Setting Cleaning interval in Standby mode This function is to be executed instead of TUBE WASH after the cleaning solution has been used up. Set the cleaning type and the intervals at which cleaning operation is to be performed. • This function does not operate when the error message relating to ink, such as [NEAR END] or [INK END], is displayed.
-
Page 131
Setting Routine operations Press the key several times to end. 4-33 Downloaded From ManualsPrinter.com Manuals… -
Page 132: Other Maintenance Functions
Other maintenance functions Changing the warning time of wiper replacement The wiper is consumable. The heads are easily soiled in a dusty environment. The heads cannot be cleaned adequately with a curled or worn wiper. Setting the wiper level so that a warning for the wiper replacement period is indicated earlier than the standard depending on the operating environment.
-
Page 133: Setting The Media Remaining Display
Other maintenance functions Setting the media remaining display Set the media remaining amount display. When the media remaining The media remaining amount is displayed in the remote mode. amount display is turned to (The print length is displayed when a leaf media is used.) «ON»…
-
Page 134
Print the media remaining amount You can print the current media remaining amount. • Set [MEDIA RESIDUAL] to “ON”. ( P.4-35) • When changing the media, it is recommended to print the remaining amount to the currently used media. If you print the media remaining amount in advance, for using the changed media, you can enter the correct value in the screen for entering media remaining amount after detecting the media ( P.2-12). -
Page 135: If Waste Ink Tank Confirming Message Is Displayed
Other maintenance functions If Waste ink tank confirming message is displayed Waste ink which was used for cleaning the heads and other parts, gathers in the waste ink tank. Upon the machine, the ink discharging amount is counted by accumulated counting then a message for suggesting the check is displayed when it reaches a certain amount.
-
Page 136
Check message in Local mode The right message is displayed. < L OCA L . 1 > [ # 0 1 ] ! WA S T E T ANK Check the waste ink tank, and then replace the waste ink tank P.4-39) if required. -
Page 137
Other maintenance functions Replacing waste ink tank When the right message is displayed, check the waste ink tank < L OCA L . 1 > [ # 0 1 ] immediately, and then replace it according to the condition. ! WA S T E T ANK Remove the waste ink tank guard. -
Page 138
Other maintenance functions Close the waste ink tank guard. • Hook the waste ink tank guard in a hole of the machine then lock it. Hole Hook Select [Ink Tank Exchange] of the maintenance menu. (1) Press the key in the local mode. (2) Select [MAINTENANCE] by pressing the keys then press the key. -
Page 139: Replacing The Cutter Blade
Replacing the cutter blade The cutter blade is consumable. When the cutter blade gets dull, replace it with a new one (SPA-0107). • The blade is sharp. Be careful not to hurt yourself or anyone else. • Keep the cutter blades away from the reach of children. Be sure to dispose of the worn-out cutter blades according to the applicable national and local laws and regulations.
-
Page 140
Replacing the cutter blade Close the front cover. Press the key. • The machine returns to LOCAL mode. 4-42 Downloaded From ManualsPrinter.com Manuals… -
Page 141
CHAPTER 5 Troubleshooting This section describes the corrective measures to be taken for a phenomenon suspected to be trouble and the procedures to clear the error number displayed on the LCD. Troubleshooting ………… 5-2 Power does not turn on ……….5-2 The machine does not start printing …… -
Page 142: Troubleshooting
Troubleshooting Take appropriate actions as described below before taking the trouble as a failure. If still the problem is not solved after troubleshooting, contact your dealer or an office of MIMAKI. Power does not turn on In most cases, this is due to improper connection of the power cable for the machine or computer. Check that the power cable is connected properly.
-
Page 143: Media Get Jammed / Media Is Soiled
Troubleshooting Media get jammed / media is soiled Media jamming or stained media is considered to be due to the use of an unsuitable media or improper setting of media. Is a recommended media used ? Use recommended media. Avoid using any media with curls or bent Is the media not curled or bent ends ? ends.
-
Page 144: Image Quality Is Poor
This section describes the corrective actions to be taken in case the image quality is not satisfactory. Take remedy for particular problems with image quality. If the remedy does not work, contact your dealer or an office of MIMAKI. Phenomenon Measures (1) Execute the head cleaning.
-
Page 145: Ink Cartridge Warning Appears
• Once cartridge trouble is displayed, do not leave the ink cartridge without replacing it for a long time; otherwise, the machine will lose the nozzle clogging prevention function. If nozzles are clogged, the machine must be repaired by MIMAKI’s service engineer. Displaying the description of ink cartridge trouble The contents of cartridge error are confirmable by the following operations.
-
Page 146: Warning / Error Messages
Warning / Error Messages If some trouble occurs, the buzzer sounds and the display shows a corresponding error message. Take an appropriate remedy for the displayed error. Warning messages Message Cause Solution Check the front cover and maintenance covers. The front cover or the maintenance C l o s e a c o v e r .
-
Page 147: Warning Messages
— — — — Y Y K K The ink cartridge is not MIMAKI Replace the cartridge generating the NON — OR I G I N A L I N K genuine.
-
Page 148
Message Cause Solution The cleaning liquid cartridge has Install the cleaning solution cartridge. not been installed. ! w a s h L i q u i d C a r t . NON There is trouble with cleaning liquid Check the cleaning solution cartridge. cartridge. -
Page 149: Error Messages
Warning / Error Messages Error messages When an error message is displayed, eliminate the error according to the chart below. If the same error message appears again, contact your dealer or an office of MIMAKI to call for service. Message Cause…
-
Page 150
Message Cause Solution Turn off the main power to the machine Any parameter outside the range of and turn it on after a while. * * * * * E R ROR 1 1 * * * * * acceptable numeric values was If the same error message appears again, P A R AME T E R E R ROR received. -
Page 151
Warning / Error Messages Message Cause Solution Turn off the main power to the machine and turn it on after a while. An error occurred in the wiper * * * * * E R ROR 4 6 * * * * * If the same error message appears again, control. -
Page 152
Warning / Error Messages Message Cause Solution Turn off the main power to the machine An error was detected during * * * * E R ROR 2 5 0 * * * * and turn it on after a while. scanning operation. -
Page 153
CHAPTER 6 Appendix This section attaches a list of the specifications and a list of the functions of this printer. Machine specifications ……… 6-2 Ink specifications ……….6-4 Sheet for inquiry ………… 6-5 Warning labels …………6-6 Function Flowchart ……….6-8 Downloaded From ManualsPrinter.com Manuals… -
Page 154: Machine Specifications
Machine specifications Item JV33-130 JV33-160 Method Drop-on-demand piezoelectric print heads Print head Specification 1 head 720 x 540dpi 540 or 720 x 720dpi 540 x 900dpi Drawing mode (scan x feed) 540 or 720 x 1080dpi 720 x 1440dpi 1440 x 1440dpi…
-
Page 155
Machine specifications Item JV33-130 JV33-160 Maximum 1371mm 1620mm Leaf media size Minimum 210mm Left end and right end : 15 mm (Default) Leaf media Front : 40.0 mm Rear : 98.5 mm Margin Left end and right end: 15 mm (Default) -
Page 156: Ink Specifications
Ink specifications When aqueos-color ink is used Item When solvent ink is used Dedicated aqueos pigment ink cartridge Supply Dedicated solvent ink cartridges Dedicated sublimation dye ink cartridge (Sb51) Black ink cartridge Black ink cartridge Cyan ink cartridge (Blue ink Cyan ink cartridge cartridge Magenta ink cartridge…
-
Page 157: Sheet For Inquiry
Sheet for inquiry Use this sheet for troubles and abnormal functions of the machine. Fill in the following necessary items, and then fax the sheet to our sales office. Company name Person in charge Telephone number machine model Operating OS Machine information Error message Contents of inquiry…
-
Page 158: Warning Labels
Warning labels Warning labels are stuck on the machine. Be sure to fully understand the warning given on the labels. If a warning label is illegible due to stains or has come off, purchase a new one from a distributor or our sales office.
-
Page 159
Warning labels Reorder Label M901549 M903239 M903330 M903405 M904810 Downloaded From ManualsPrinter.com Manuals… -
Page 160: Function Flowchart
Function Flowchart < L OCA L . 1 > [ # 0 1 ] w i d t h : * * * * mm OR I G I N S E T UP OR I G I N S E T UP 0 .
-
Page 161
Function Flowchart MED I A RE S I DUA L DR AW < EN T > Only when [MEDIA RESIDUAL] is “ON” NON — OR I G I NA L I NK WRONG I NK I C K i n d o f I NK M — C — — — — K… -
Page 162
< L OCA L . 1 > [ # 0 1 ] F UNC T I ON SETUP w i d t h : * * * * mm S E T UP < EN T > F UNC T I ON MAINTENANCE MA I N T ENANCE <… -
Page 163
Function Flowchart To P.6-12 To P.6-18 To P.6-24 To P.6-25 To P.6-26 6-11 Downloaded From ManualsPrinter.com Manuals… -
Page 164
SETUP S E T UP [ 1 ] [ 1 ] MED I A COMP . S E L EC T : T Y P E . 1 MED I A COMP . < e n t > PR I N T S T AR T TYPE.2 TYPE.3 TYPE.4… -
Page 165
Function Flowchart End the P L E A S E WA I T [ 1 ] ME D I A COMP . printing PR I N T I NG V A L UE -255 ~ 255 PR T POS T 5 °… -
Page 166
From P6-12 From P6-12 [ 1 ] PR I N T MODE Wh i t e L a y P r t < e n t > When SS21 (6+ white) ink is filled [ 1 ] [ 1 ] I NK L A Y ERS I NK L A Y ERS <… -
Page 167
Function Flowchart [ 1 ] Wh i t e L a y P r t S E L . : OF F OFF / LEVEL 1~3 6-15 Downloaded From ManualsPrinter.com Manuals… -
Page 168
From P6-14 When INDIVIDUALLY is selected [ 1 ] [ 1 ] PR I OR I T Y PR I OR I T Y < e n t > S E T U P ND I V I DUA L L Y INDIVIDUALLY / ALL HOST / ALL PANEL… -
Page 169
Function Flowchart [ 1 ] PR I OR I T Y [ 1 ] PR I OR I T Y [ 1 ] PR I OR I T Y MED I A COMP . : HOS T HE A T ER : HOS T P R I N T MODE : HOS T… -
Page 170
MAINTENANCE MA I N T ENANCE S T . MA I N T ENA NCE S T . MA I N T ENANCE S T . MA I N T ENANCE < e n t > CARR I AGE OU T <… -
Page 171
Function Flowchart Close a cover C l o s e a c o v e r RESTART Close a cover C l o s e a c o v e r RESTART F i l l t h e l i q u i d S T . -
Page 172
From P6-18 MA I N T ENANCE HD . MA I N T ENA NCE F I L L I NG U P NOW . HD . MA I N T ENANCE < e n t > F I L L UP I NK <… -
Page 173
Function Flowchart * D I S CHARGE * S e t : Wa s h i n g C a r t r i d g e * A B SORP T I ON * 0 0 : 0 0 1 2 3 4 5 6 7 8 0 0 : 0 0 R e mo v e : C a r t r i d g e s… -
Page 174
From P6-20 MA I N T ENANCE ROU T I NE S E T UP ROU T I NE W I P I NG ROU T I NE S E T UP < e n t > ROU T I NE W I P I NG < e n t > SCAN COUN T <… -
Page 175
Function Flowchart ROU T I NE W I P I NG SC AN COUN T ROU T I NE W I P I NG T EMP . D i f f e r e n c e = 0 ° C Settable except for OFF ROU T I NE S E T UP C L E AN . -
Page 176
MACHINE SETUP MACH I NE S E T UP DEODOR I Z E F AN DEODOR I Z E F AN DEODOR I Z E F AN < e n t > S TOP T I ME < e n t > S TOP T I ME 2 0 M i n 0 ~ 240 min… -
Page 177
Function Flowchart MACHINE SETUP2 Only when CONFIRM.FEED is set ON MACH I NE S E T UP 2 CON F I RM . F E E D CON F I RM . F E ED CON F I RM . F E ED <… -
Page 178
Function Flowchart INFOMATION I N FOMA T I ON ERROR H I S TORY Error is displayed ERROR H I S TORY < e n t > [ 0 1 ] 0 5 . 0 9 . 2 9 0 8 : 1 8 I N FOMA T I ON [ 0 1 ] 0 5 . -
Page 179
D201694-13-12122007 Downloaded From ManualsPrinter.com Manuals… -
Page 180
Printed in Japan © MIMAKI ENGINEERING CO., LTD.2007 FW : 1.5 Downloaded From ManualsPrinter.com Manuals…
This manual is also suitable for:
Jv33-130
-
Page 1
MIMAKI ENGINEERING CO., LTD. TKB Gotenyama Building, 5-9-41, Kitashinagawa, Shinagawa-ku, Tokyo 141-0001, Japan Phone: +81-3-5420-8671 Fax: +81-3-5420-8687 D201694-13 URL: http: // www.mimaki. co. jp/ Downloaded From ManualsPrinter.com Manuals… -
Page 2: Table Of Contents
TABLE OF CONTENTS CAUTION …………….. v DISCLAIMER OF WARRANTY ……..v Requests …………….. v FCC Statement (USA) …………. v Interference to televisions and radios ……v Foreword …………….. vi On This Operation manual ……….vi Features …………….vii Safety Precautions …………ix Symbols …………….ix CHAPTER 1 Before Use Moving this machine ……….
-
Page 3
Turning the power ON/OFF ……..2-4 Turning the power ON ……….2-4 Turning the power OFF ……….2-5 Setting medias …………2-6 Useable medias …………2-6 Adjusting the head height ……… 2-6 Setting a roll media ……….. 2-8 Take-up device …………2-13 Setting leaf media ……….. -
Page 4
Setting Priority …………3-20 Setting Auto cleaning ……….. 3-22 Setting cleaning while printing ……3-24 Setting media detection ……..3-26 Other settings …………3-28 Initializing the settings ………. 3-30 Machine settings ……….. 3-31 Setting the deodorize fan ……..3-31 Setting Dryness feeding ……….3-33 Setting Stamp …………3-34 Setting Test draw arrange ……..3-36 Setting confirmation feeding ……..3-38… -
Page 5
If dots misalign …………. 4-23 Preventing nozzle clogging while power-off ..4-25 Setting refreshing interval in Sleep mode ….4-25 Setting tube washing interval in Sleep mode ..4-26 Setting cleaning interval in Sleep mode ….4-27 Setting Routine operations ……..4-28 Setting Routine wiping operations in Standby mode ………… -
Page 6: Caution
Operation of this equipment in a residential area is likely to cause harmful interference in which case the user will be required to correct the interference at his own expense. In the case where MIMAKI-recommended cable is not used for connection of this device, limits provided by FCC rules can be exceeded.
-
Page 7: Foreword
Foreword Congratulations on your purchase of MIMAKI color ink jet printer «JV33-130/160» . The JV33-130/160 is a color ink-jet printer for high quality printing with solvent ink (4-color and 6-color) or aqueos ink (4-color and 6-color). • 4-colors version : 2 each of Cyanogen, Magenta, Yellow and Black color ink cartridge are useable.
-
Page 8: Features
Features The features of the machine are described below. Understanding them together with the operating instructions given in this manual will help you use the machine properly. High image quality and High-speed printing realized by the new generation printer head. Newly developed printer head, 1 head consisting of 1440 nozzles (180 nozzles x 8 lines), is adopted.
-
Page 9
Features Easy maintenance The automatic capping system for the heads eliminates the need of head cleaning before turning off the power. Ink discharge passage is automatically cleaned from the cap. Nozzles can be unclogged by performing the cleaning function. If the machine is not in use for a prolonged period of time, it automatically performs nozzle clogging preventive operation at fixed intervals. -
Page 10: Safety Precautions
Safety Precautions Symbols Symbols are used in this Operation Manual for safe operation and for prevention of damage to the machine. The indicated sign is different depending on the content of caution. Symbols and their meanings are given below. Please follow these instructions as you read this manual. Examples of symbols Meaning Failure to observe the instructions given with this symbol can result in death or serious injuries to…
-
Page 11: Warning For Use
Check first that the machine no longer produces smoke, and then contact your distributor or a sales office of MIMAKI for repair. • Never repair your machine by yourself since it is very dangerous for you to do so.
-
Page 12: Precautions In Use
MIMAKI. Note on maintenance • When cleaning the ink-station or the heads, make sure to wear the attached gloves. Further, when the solvent ink is used, it is necessary to wear the attached goggles.
-
Page 13: Cautions And Notes
Handling of media • The machine does not operate with any ink • Use media recommended by MIMAKI to other than the JV33 genuine ink. ensure reliable, high-quality printing. • Do not use the JV33 genuine ink with other •…
-
Page 14
Safety Precautions Warning Notes on maintenance • It is strongly recommended to use the machine in a room that is not dusty. Set the Refresh level 2 or 3 when the machine is to be used in an unfavorable environment. (P.3-29 «Setting of Refreshing») •… -
Page 15
CHAPTER 1 Before Use This chapter describes the items required to understand before use, such as name of each part of the machine or the installation procedures. Moving this machine ….1-2 Connecting cables ….1-10 Where to install this machine ..1-2 Connecting USB2.0 interface Working environmental cable ……….. -
Page 16: Moving This Machine
1000 mm or more JV33-130 : 3289 mm JV33-160 : 3538 mm Working environmental temperature Use this machine in an environment of 20 to 35°C to ensure reliable printing. Depending on the ambient temperature, the heater temperature may not rise to the set value.
-
Page 17: Moving This Machine
If you move it by yourself, failure or damage may occur. Be sure to request your distributor or a sales office of MIMAKI to move this machine. • When moving this machine, take care not to give a significant impact on it.
-
Page 18: Names Of Parts And Functions
Names of Parts and Functions Front Maintenance cover Front cover Open the cover in maintenance. Open the cover in setting of medias, taking of measures Even when the power switch is off, keep against jamming of medias or in maintenance inside the all covers closed.
-
Page 19: Rear / Sides
Names of Parts and Functions Rear / Sides Clamp lever (rear) Interlocks with the clamp lever in the font of this machine. Pre-heater Preheats the media before printing. (Located inside the platen) Cleaning solution cartridge Set a dedicated Washings cartridge (optional).
-
Page 20: Operation Panel
Operation Panel Use the operation panel to make settings for printing or operate this machine. Display CONSTANT lamp Displays the status of the Lights in green when the heater temperature machine, set items and errors. reaches the set temperature. HEAT lamp Lights in orange during heating up of the ACTIVE lamp heater.
-
Page 21: Heater
Names of Parts and Functions Heater Pre-heater /Print heater / Post-heater are equipped on the platen. The Pre-heater is used for pre-heating of the media prior to printing to prevent rapid temperature changing. The Print-heater improves the image quality in printing. The Post-heater dries ink after printing.
-
Page 22: Carriage
Carriage The carriage is provided with the ink heads for printing, the cutter unit for cutting off the sheet of media, etc. A lever is also provided to adjust the height of Head in 2 stages according to the thickness of media. ( P.2-6) Cutter blade and cutting line The carriage is provided with a cutter unit for cutting off the media that has been printed on.
-
Page 23: Capping Station
Names of Parts and Functions Capping station • Be sure to wear the attached goggles in cleaning within the capping station to protect your eyes against ink. The capping station consists of the ink caps, the wiper for cleaning the heads, etc. The ink caps prevent the nozzles in the ink heads from drying up.
-
Page 24: Connecting Cables
Connecting cables Connecting USB2.0 interface cable Connect the PC and this machine with the USB2.0 interface cable. USB cable • Your RIP must be compatible with USB 2.0. • Contact a RIP maker near your location or our office when the USB2.0 interface is not attached to the PC.
-
Page 25: Connecting The Power Cable
Connecting cables ● Removing USB memory If a USB memory module is inserted in the personal computer to which a JV33 machine is connected, click «Stop» in the «Safely Remove Hardware» window by following the instructions given there first and then remove the module.
-
Page 26: Inserting Ink Cartridges
Inserting ink cartridges Insert an ink cartridges. Shake the ink cartridge as shown on the right. Insert the ink cartridge. • Insert the ink cartridge lengthwise directing the surface having IC chips to the left side. • Colors are displayed on the display as follows. Black: K, Cyanogen: C, Magenta: M, Yellow: Y,Light cyanogen: c, Light magenta: m Changing an ink cartridge…
-
Page 27: Caution In Handling Of Ink Cartridges
• Do not shake ink cartridges violently. This may result in ink leakage from the ink cartridges. • Never refill the ink cartridges with ink. This may result in troubles. MIMAKI will not bear any responsibility for any damage caused by the use of the ink cartridges refilled with ink.
-
Page 28: Media
Caution in handling of medias Pay attention to the followings for handling of medias. • Use media recommended by MIMAKI to ensure reliable, high-quality printing. Set the heater temperature to meet the characteristics of the media. • Set the temperature of the Pre-heater, Print heater and Post-heater according to the type and characteristics of the media used.
-
Page 29: Menu Mode
Menu mode This machine has 4 modes. Each menu mode is described below. NOT-READY mode This is the mode in which the media has not been detected yet. The keys other than the key and the / key are effective. LOCAL mode Local mode is the mode for the drawing preparation state.
-
Page 30
1-16 Downloaded From ManualsPrinter.com Manuals… -
Page 31
CHAPTER 2 Basic Operations The procedures from the ink and media preparation to drawing and the setting procedures are described. User type……..2-2 Preparing Heaters ….2-18 Set items registrable to User type 2-2 Changing temperature settings of Using the registered user type ..2-2 Heater …….. -
Page 32: User Type
User type Drawing of higher quality prints is available by making (setting of User type) the print set matching to the characteristics of media when this machine is used for drawing. On this machine, 4 types of User type 1 to 4 are settable. Set items registrable to User type For the registering procedures to User type (1 to 4), refer to P.3-2 .
-
Page 33: Workflow
Workflow Turning the power ON/OFF Referring to «Turning the power ON/ OFF» ( P.2-4). Setting medias Referring to «Setting medias» P.2-6). Preparing Heaters Referring to «Preparing Heaters» P.2-18). Test printing Referring to «Test printing» P.2-20). Drawing data Referring to «Drawing data» P.2-22).
-
Page 34: Turning The Power On/Off
Turning the power ON/OFF Turning the power ON The machine is provided with the following two power switches. Main power switch : At the side of this machine. Keep it «ON» always. Power switch : Normally, use this switch to turn the power ON/OFF. The power switch lights in green when the power is ON and blinks in green when it is OFF.
-
Page 35: Turning The Power Off
Turning the power ON/OFF Turning the power OFF Turn the power OFF by pressing the power switch located on the side of after using. Check the followings when the power is turned off. • If it is in receiving of data from the PC, or there is any data un-output. •…
-
Page 36: Setting Medias
Setting medias Useable medias This machine can be used with roll media and leaf sheet media. For useable medias, refer to P.1-14 «Usable sizes of media». Adjusting the head height Adjust the head height according to the thickness of the media used. •…
-
Page 37
Setting medias Keeping the height adjusting lever held at the aforementioned position, tighten the two screws. • Be sure to fasten the screws, pressing the height- adjusting lever, otherwise the head can not be secured at the correct position. • Fasten the screws securely. Return the carriage to the station position. -
Page 38: Setting A Roll Media
Setting a roll media Set a roll media to the roll media hanger located on the back of this machine. • Take care not to drop the media on a foot or so when the media is set. It may cause an injury due to the media.
-
Page 39: This Machine
Setting medias Move the roll holder to the roll setting position. Roll holder Set the base position Basis of roll holder within this range. 3 Inch Roll Media Roll Holder Set Position 2 Inch Roll Media Setting position of 3inch tube 3 Inch Roll Media Roll Holder Set Position…
-
Page 40
Insert the roll media in this machine. Pinch roller • The roll media can be smoothly inserted by slanting the media. ( 1 ) Pull the media out of the roll to the head of the platen. ( 2 ) Insert the media between the platen and the pinch roller. •… -
Page 41
Setting medias Hold the media with the media press gently. • Set the media so that no media sticks out from the right end pinch roller to the right side. • When using a thick media, remove the media press from the media before printing. Media press •… -
Page 42
Secure the media on the take-up device. P.2-13) ( 1 ) Feed the media up to the core of the roll media of the take-up device by pressing the key. ( 2 ) Fix the middle of the media with adhesive tape. ( 3 ) In the same manner, fix the left side and right side of the media. -
Page 43: Take-Up Device
Setting medias Take-up device The take-up direction of media is selectable by using the switch of the take-up device. Lever in top position (REVERSE) : The take-up device winds the media with the printed side facing Lever in middle position (OFF) : The take-up device does not wind the media.
-
Page 44: Setting Leaf Media
Setting leaf media Unlike roll media, leaf media does not need to be retained with the roll holders. Open the front cover. Front cover Raise the clamp lever. Clamp lever Insert the leaf media between the platen and the pinch rollers. •…
-
Page 45
Setting medias Press the key. Press the key to select “LEAF” . MED I A SE L EC T RO L L < > L E A F The media detection is started. DE T EC T I NG MED I A NOW P L E AS E WA I T ( 1 ) The media width is detected. -
Page 46: Changing The Printing Origin
Changing the printing origin The position of the printing origin can be changed. Moving the LED pointer to the changing position and deciding the position. In the local mode, OR I G I N S E TUP 0 . 0 — — — — press the keys.
-
Page 47
Setting medias Typical setting position of printing origin The printing origin in the depth direction (X’) is positioned at about 40 mm rearward from the cutting line. The printing origin in the scanning direction (Y’) is positioned at 15 mm from the right end of the media. The value in the scanning direction (Y’) can be changed using [MARGIN] in FUNCTION mode. -
Page 48: Preparing Heaters
Preparing Heaters Changing temperature settings of Heater The set temperature of Heater can be changed and stored by [HEATER] of the setup mode. ( P.3-8) The adjusting procedures of the temperature set in the setup mode are described below. Set the Heater temperature according to the media used. •…
-
Page 49: Confirming The Heater Temperature
Preparing Heaters Reference for the temperature set (When solvent ink is used) Type of ink ES3 ink SS21 ink Glossy Type of media Tarpaulin All medias chloroethylene Set of the Pre-heater 40°C 40°C 40°C 35°C Set of the Print-heater 40°C 40°C 40°C 35°C…
-
Page 50: Test Printing
Test printing Perform the test printing to check if printing failures (blurring or missing) due to nozzle clogging or the like occur on the printed. Test printing • When a leaf media is used, set a larger media than the A4 size in longitudinal feeding. •…
-
Page 51: Head Cleaning
Test printing Head cleaning Three head cleaning types are available. Select it depending on the result of pattern drawings. NORMAL :Select this if any line is missing. :When only head wiping is desirable. (in case of bent lines) SOFT :Select this if inferior printing cannot be improved even by [NORMAL] or [SOFT] cleaning. HARD In the local mode, C L E AN I NG…
-
Page 52: Drawing Data
Drawing data Starting the print • When a roll media is used, rewind the roll media by hands prior to printing so that it is set in the tightened condition. The loosened may result in failures of the image quality. Set the media.
-
Page 53: Stopping The Print Temporarily
Drawing data Stopping the print temporarily Perform the following operations when stopping the print halfway. Press the key in printing. < L OCA L . 1 > [ # 0 1 ] w i d t h : 1 2 7 2 mm •…
-
Page 54: Cutting A Media
Drawing data Cutting a media For a roll media, two ways are available to cut the media after printing is completed, as follows. • Pay attention so that printed surface does not touch to a floor or other printed surfaces when the media is cut.
-
Page 55
CHAPTER 3 Convenient use This section describes the operation procedures for using the machine more conveniently and each setting procedure. User type……..3-2 Setting Priority ……3-20 Registering the drawing conditions Setting Auto cleaning ….. 3-22 together (Type registration) ..3-2 Setting cleaning while Registering Type …… -
Page 56: User Type
User type Registering the drawing conditions together (Type registration) The drawing conditions are registered in each type (1-4). The most suitable drawing conditions are settable only by changing the type when replaced by a different type of media, if the drawing conditions that meet the media to be used have been registered in the type. Example of type registration When solvent ink is used.
-
Page 57: List Of Functions
User type List of functions This section describes the outline of each SET UP function registerable to the user type and the setting value. The underlined has been set when purchased. Function name Set value Outline Prints a pattern to correct the MEDIA COMP.
-
Page 58
User type Function name Set value Outline Sets the priority of settings (host / panel) Sets each item of the followings individually when the individual setting is selected. • MEDIA COMP. • HEATER INDIVIDUALLY/ ALL HOST / • PRINT MODE PRIORITY ( P.3-20) ALL PANEL… -
Page 59: Setting Media Compensation
Setting media compensation Correct the feeding rate of media after the type of media is replaced or the temperature of Heater is changed. If the correction value is not appropriate, stripes may appear on the print, thus resulting in a poor print. •…
-
Page 60
Press the key twice. [ 1 ] MED I A COMP . PR I N T S T AR T Print the compensation pattern by PR I N T I NG P L E AS E WA I T pressing the key. -
Page 61
Setting media compensation When you need to correct the media feed during printing The media feeding amount can be corrected even in the remote mode or when printing image data. Press the key in the * REMOT E . 1 * [ # 0 1 ] * * . -
Page 62: Changing The Set Value Of Heater
Changing the set value of Heater Rough guide for temperature setting (When solvent ink is used) Type of ink ES3 ink SS21 ink Type of media Tarpaulin All medias Pre-heater 40°C 40°C 40°C 35°C Print-heater 40°C 40°C 40°C 35°C Post-heater 50°C 50°C 50°C…
-
Page 63
Changing the set value of Heater Press the key. [ 1 ] MED I A COMP . < e n t > Select [HEATER] by pressing the [ 1 ] HEA T ER < e n t > keys. Press the key twice. -
Page 64: Adjusting Suitable Temperature Adjustment (When Solvent Ink Is Used)
Adjusting suitable temperature adjustment (When solvent ink is used) This section describes the procedure for setting the heater temperatures properly. The proper heater temperatures depend on the media type and ambient temperature. Set temperatures that are appropriate to the media. For non-coated media or media on which ink is slow to dry, set the heater temperatures so that the ink fixing and drying characteristics will be improved.
-
Page 65: In Case The Heater Temperature Is Too Low
Changing the set value of Heater In case the heater temperature is too low When solvent ink is used, this may result in printing failures such as beading or banding if the heater temperature or the ink acceptable amount (the ink limit) is too low. Beading is a phenomenon that adjacent dots attract each other and join.
-
Page 66: Setting Print Mode
Setting print mode Upon the setting of the print mode, set each item for printing as follows. • Print quality (DRAFT) : Setting the print quality in the DRAFT mode (Resolution in the scanning direction: 540dpi) • Print quality (FINE) : Setting the print quality in the FINE mode (Resolution in the scanning direc- tion: 720dpi) •…
-
Page 67
Setting print mode When changing the details of printing quality at each resolution. [ 1 ] DRA F T QUA L I T Y 5 4 0 x 7 2 0 < e n t > Select the resolution by pressing the key. -
Page 68: Setting Scanning Direction
Setting scanning direction Perform operations up to P.3-12 the [ 1 ] PR I N T MODE DRA F T QUA L I T Y < e n t > step 5. Select [SCAN DIRECTION] by pressing [ 1 ] PR I N T MODE SCAN D I REC T I ON <…
-
Page 69: Setting Logical-Seek
Setting print mode Setting Logical-seek The motion of Head varies depending on the set of Logical-seek. UNI-DIRECTIONAL BI-DIRECTIONAL Movement of heads when LOGICAL seek is OFF Movement of heads when UNI-DIRECTIONAL BI-DIRECTIONAL LOGICAL seek is ON Perform operations up to P.3-12 the [ 1 ] PR I N T MODE DRA F T QUA L I T Y <…
-
Page 70: Setting Whitelay Print
Setting WhiteLay Print When using SS21 white ink, you can print with other colors after printing with white ink, without returning the media. In this page, set the printing method of white ink and other color ink. Set Value Outline Printing the white ink and the color ink at the same time.
-
Page 71
Setting print mode Press the key. [ 1 ] PR I N T MODE Wh i t e L a y P r t < e n t > Press the key several times to end. 3-17 Downloaded From ManualsPrinter.com Manuals… -
Page 72: Setting Drying Time
Setting drying time Upon the setting of drying time, set each item for ink drying as follows. • SCAN : Set the time to wait for ink drying after each pass. During bidirectional printing, the machine stops temporarily after every scanning back and forth. •…
-
Page 73: Setting Margins
Setting margins Set a non-printing area along the right and left edges of the media. The offset value against the standard margin 15mm is set hereupon. Press the key in the local F UNC T I ON S E T UP <…
-
Page 74: Downloaded From Manualsprinter.com Manuals
Setting Priority For the following items, the priority is selected either the setting by the machine (by the panel) or the setting by the PC (by the host). Items to be selected : MEDIA COMP. / HEATER / PRINT MODE / INK LAYERS / DRYING TIME / AUTO CUT / PRE-FEED / MARGIN / COLOR PATTERN / REFRESH / VACUUM / FeedSPEED LEVEL Press the…
-
Page 75
Setting Priority Select either “HOST” or “PANEL” by [ 1 ] PR I OR I T Y MED I A COMP . ANE L pressing the keys. Press the key. • You can also press keys to move between items. Be sure to press the key to register the setting. -
Page 76: Setting Auto Cleaning
Setting Auto cleaning The machine is settable so that the head cleaning is automatically carried out when printing is completed for the set length. At the completion of printing, the machine counts the length printed after the previous head cleaning and performs the cleaning automatically if required.
-
Page 77
Setting Auto cleaning Select “ON” by pressing the [ 1 ] AU TO CREAN I NG S E T UP : ON keys. • Proceed to the step 9 when “OFF” is selected. Press the key. I N T ERV A L : T YP E 0 0 0 mm : NORMA L… -
Page 78: Setting Cleaning While Printing
Setting cleaning while printing Set it whether the head cleaning is carried out automatically during printing or not. Upon cleaning during printing, set the cleaning interval to the length printed. The printing is interrupted each in the set length and the head cleaning is carried out automatically. Press the key in the local F UNC T I ON…
-
Page 79
Setting cleaning while printing Press the key. Press the key several times to end. • This function does not operate when ink near-end occurs. Solve the ink near-end, referring to P.1-12. • Depending on the conditions of the heads, etc., the defective printing could not be recovered even performing this function. -
Page 80: Setting Media Detection
Setting media detection Set the method for detecting a media when the media is set and the detecting type when the media is cut. Press the key in the local F UNC T I ON S E T UP < EN T > mode.
-
Page 81
Setting media detection Press the key. [ 1 ] MED I A DE T EC T DE T EC T : BOT H EDGE Select the set value by pressing the keys. • Set value:BOTH EDGE / LEFT EDGE / RIGHT EDGE / NONE Press the key. -
Page 82: Other Settings
Other settings Change the setting according to the use. Press the key in the local F UNC T I ON S E T UP < EN T > mode. Press the key. S E T UP S E L EC T : T Y PE .
-
Page 83: List Of Settings
Other settings List of Settings The underlined has been set when purchased. Item Outline Set value Setting of Media Corrects the feeding rate of media Refer to P.3-5 compensation Setting Heater temperature Setting of Heater Refer to P.3-8 Setting Heater standby time and OFF time Setting Print quality Setting Scanning direction…
-
Page 84: Initializing The Settings
Initializing the settings Initialize the settings to the conditions that have been set when purchased. (Set resetting) The set resetting can be executed per type. Press the key in the local F UNC T I ON S E T UP <…
-
Page 85: Machine Settings
Machine settings It is each type of setting for using this machine more comfortably. [MACHINE SETUP] and [MACHINE SETUP2] are available in this machine. The following items are settable in MACHINE SETUP 1, 2. Item Outline Set value 0 ~ 120 ~ 240min/ Setting the time until the rotation of the exhaust STOP TIME DEODORIZE…
-
Page 86
Select [MACHINE SETUP] by pressing F UNC T I ON MACH I NE S E T UP < EN T > keys. Press the key twice. DEODOR I Z E F AN S TOP T I ME < e n t > Select the item to be set by pressing keys. -
Page 87: Setting Dryness Feeding
Machine settings Setting Dryness feeding Setting whether feeding for drying a media is performed after the completion of printing or not. Press the key in the local F UNC T I ON S E T UP < EN T > mode.
-
Page 88: Setting Stamp
Setting Stamp Set whether information such as the drawing conditions or the date printed is output after the completion of printing or not. Press the key in the local F UNC T I ON S E T UP < EN T > mode.
-
Page 89
Machine settings Examples of Output 3-35 Downloaded From ManualsPrinter.com Manuals… -
Page 90: Setting Test Draw Arrange
Setting Test draw arrange You can set the deployment direction of the test pattern to be printed when performing test printing repeatedly. (This function can be used in F/W Ver.1.50 or later.) : when the setting value is “FEED DIR.” : when the setting value is “SCAN DIR.”…
-
Page 91
Machine settings Press the key. Press the key several times to end. 3-37 Downloaded From ManualsPrinter.com Manuals… -
Page 92: Setting Confirmation Feeding
Setting confirmation feeding Set whether media feeding is performed for checking the result after test printing or not Press the key in the local F UNC T I ON S E T UP < EN T > mode. Select [MACHINE SETUP 2] by pressing F UNC T I ON keys.
-
Page 93: Setting Time
Machine settings Setting time Press the key in the local F UNC T I ON S E T UP < EN T > mode. Select [MACHINE SETUP 2] by pressing F UNC T I ON MACH I NE S E T UP 2 < EN T > keys.
-
Page 94: Setting Unit
Setting Unit Set a unit of measurement to be used in the machine. Press the key in the local F UNC T I ON S E T UP < EN T > mode. Select [MACHINE SETUP 2] by pressing F UNC T I ON keys.
-
Page 95: Setting Machine Name
Machine settings Setting Machine name Set a machine name (machine No.) for recognizing each machine when plural machines are connected through USB2.0 interface. Press the key in the local F UNC T I ON S E T UP < EN T > mode.
-
Page 96: Setting Key Buzzer
Machine settings Setting Key buzzer Set a buzzer sound of the time when a key is pressed. Press the key in the local F UNC T I ON S E T UP < EN T > mode. Select [MACHINE SETUP 2] by pressing F UNC T I ON keys.
-
Page 97: Confirming Machine Information
Confirming machine information The machine information of the machine is confirmable. Confirmable items of the machine information are as follows. Item Description Displays the history of errors and warnings. ERROR HISTORY Using the key, the errors and warnings can be displayed one by one in the order of occurrence.
-
Page 98
Confirming machine information For the information displayed This section describes the way to read the information displayed. ERROR HISTORY MAINTE. HISTORY Displaying the Displaying the ERROR H I STORY [ 0 1 ] 0 7 . 1 0 . 1 0 1 2 : 1 5 occurrence date contents of… -
Page 99
CHAPTER 4 Routine Maintenance This section describes the items required to use this machine more comfortably, which are the procedures of ink replacing, cleaning or the like. Maintaining……..4-2 Preventing nozzle clogging while Precautions in cleaning …… 4-2 power-off ……..4-25 Notes on cleaning solution …. -
Page 100: Maintaining
Maintaining Be sure to perform maintenance of the machine periodically or whenever necessary so that the machine can be used with its inherent accuracy for a long time. Precautions in cleaning Pay attentions to the following items when the machine is maintained. •…
-
Page 101: Cleaning Exterior Surfaces
Maintaining Cleaning exterior surfaces If exterior surfaces of the machine is stained, dampen a soft cloth with water or a neutral detergent diluted with water, squeeze it and wipe the surfaces with the cloth. Cleaning the platen On the platen, it is easy to become dirt due to lint, paper dust or the like caused by cutting medias. For a conspicuous stain, wipe it off with a soft-hair brush, a dry cloth, a paper towel or the like.
-
Page 102: Cleaning The Media Sensor
Maintaining Cleaning the media sensor A media sensor is located at the platen on the backside. It may cause misdetection of media when dust or the like is accumulated on the sensor. Using a cotton swab, clean the surface of the sensor of dust and dirt. When cleaning the sensor on the lower surface of the head is cleaned, move the carriage to the left end by the operations of step 1 of P.4-16 «Cleaning the heads and their surrounding parts», and then clean it.
-
Page 103: Maintaining Capping Station
Maintaining Capping station Maintain Ink cap, Wiper or the like, which are located in the capping station. [ST.MAINTENANCE] The ink cap and wiper function respectively as follows. • Wiper : Wiping ink sticking to the head nozzle off. • Ink cap : Preventing the head nozzle from clogging due to drying. As the machine is used, the wiper and ink caps gradually become stained with ink and dust.
-
Page 104
Wiper Clean the wiper and bracket. • Wipe ink sticking to the wiper and the bracket off with a cotton swab dipped in the cleaning solution. Bracket Clean the wiper slider. • Wipe ink sticking to the wiper slider off with a cotton swab dipped in the cleaning solution. -
Page 105: Replacing The Wiper
• The wiper to be newly installed is available as an option. Order it from your dealer or a sales office of MIMAKI. • Do not select [WIPER EXCHANGE] at any time other than when the wiper is to be replaced.Once it is selected, the number of wiper operations that is counted in the machine…
-
Page 106: Prior To Pump Tube Washing
Prior to Pump tube washing Prior to washing of the pump tube, it is required that the cleaning solution has been filled within the tube. • When the following messages are indicated, check the waste ink tank, and then operate it, referring to P.4-37 «If Waste ink tank confirming message is displayed»…
-
Page 107
Maintaining Capping station Discharging Cleaning solution Perform the following operations to discharge the cleaning solution within the tube. Select [HD.MAINTENANCE] of the maintenance menu. (1) Press the key in the local mode. (2) Select [MAINTENANCE] by pressing the keys then press the key. -
Page 108: Washing Of Head Nozzle
Washing of Head nozzle Perform cleaning of the nozzles in the heads to prevent them being clogged with coagulated ink. Is [NEAR END] or [INK END] displayed ? Make sure the • The cleaning solution or ink is absorbed in washing. followings in At this time, washing is unable to operate if the ink end or near-end is advance.
-
Page 109
Maintaining Capping station Press the key then fill the cap with the cleaning solution. • The cleaning solution is applied by drops when is pressed. • When the is pressed again, drops stop. • Repeat the drops several times to fill the cap with the cleaning solution just before the solution overflows from the cap. -
Page 110: Cleaning The Ink Discharge Passage (Pump Tube Wash)
Cleaning the ink discharge passage (PUMP TUBE WASH) Perform washing of the ink discharge passage (the pump tube) periodically to prevent ink from clogging due to the coagulation of ink within the ink discharge passage. • When the following messages are indicated, check the waste ink tank, and then operate it, referring to P.4-37 «If Waste ink tank confirming message is displayed»…
-
Page 111
Maintaining Capping station Close the front cover and press the * B e i n g I n i t i a l i z e d * P L E AS E WA I T key. • It returns to the local mode after the idle absorbing <… -
Page 112: When Not Using For A Long Term (Custody Wash)
When not using for a long term (CUSTODY WASH) When the operation of the machine is to be suspended for a week or more, use the [CUSTODY WASH] function to clean the nozzles in the heads and the ink discharge passage. After the cleaning, store the machine properly.
-
Page 113
Maintaining Capping station Press the key. F i l l t h e l i q u i d COMP L E T ED ( NE X T ) : e n t Press the key to fill the cap with the cleaning solution. -
Page 114: Cleaning Heads And Surroundings Parts
Cleaning heads and surroundings parts Take great care, especially during cleaning, not to damage the heads, which employ very precise mechanisms. Using a cotton swab, rub off the gelatinous ink that may be adhering to the lower part of the slider and surrounding parts of the heads.
-
Page 115
Cleaning heads and surroundings parts Press the key after the C l o s e a c o v e r cleaning. Close the maintenance cover then ( COVER OP EN ) PRE S S < EN T > K EY press the key. -
Page 116: When Nozzle Clogged After Cleaning
When Nozzle clogged after cleaning When the nozzle clogging is not improved even after the head cleaning( P.2-21) or the head nozzle washing ( P.4-10), execute two functions as follows. FILL UP INK • Supplies ink to correct nozzle clogging. •…
-
Page 117: Discharge & Wash
When Nozzle clogged after cleaning DISCHARGE & WASH Discharge ink from the heads, dampers and ink tubes, and then wash them. • When the following messages are indicated, check the waste ink tank, and then operate it, referring to P.4-37 «If Waste ink tank confirming message is displayed» according to the situation.
-
Page 118
Remove the cleaning solution * D I SCHARGE * 0 0 : 0 0 cartridge. • The ink left in the head or tube is discharged to the waste ink tank. • The right display on the right is displayed after S e t : Wa s h i n g C a r t r i d g e discharging. -
Page 119: Initial Ink Fill Up
• You cannot change the current ink set to other ink set yourselves. • If you want to change the ink set, contact sales office of MIMAKI. Press the key. S e t : ES 3 — 4 c o l o r…
-
Page 120
When Nozzle clogged after cleaning Set an ink cartridge to the ink station. S e t : ES 3 — 4 c o l o r I n k — — C — Y — K K • When the ink cartridge is set, filling is F I L L I NG UP NOW. -
Page 121: If Dots Misalign
If dots misalign When the thickness of the media, the height of the head, or the type of the ink used is changed, follow the steps below and adjust the ink drop position for Bi-directional (Bi) printing to print properly. Example of Pattern printing Output The dots at the fourth position counted from the zero…
-
Page 122
If dots misalign As the same as the step 4, correct the dot position of the from pattern 2 then press the key. Press the key several times to end. 4-24 Downloaded From ManualsPrinter.com Manuals… -
Page 123: Preventing Nozzle Clogging While Power-Off
Preventing nozzle clogging while power-off Even while the power switch is off, the machine starts periodically and executes various functions to prevent nozzle clogging. [SLEEP SETUP] includes the following functions. Function name Descriptions Set the interval at which refreshing operation is to be performed REFRESH periodically.
-
Page 124: Setting Tube Washing Interval In Sleep Mode
Setting tube washing interval in Sleep mode Set the interval at which cleaning of the caps and pump tubes is to be performed using the cleaning solution during sleep mode. Select [SLEEP SETUP] of the maintenance menu. (1) Press the key in the local mode.
-
Page 125: Setting Cleaning Interval In Sleep Mode
Preventing nozzle clogging while power-off Setting cleaning interval in Sleep mode This function is to be executed instead of TUBE WASH after the cleaning solution has been used up. Set the cleaning type and the interval at which cleaning operation is to be performed during sleep mode. Select [SLEEP SETUP] of the maintenance menu.
-
Page 126: Setting Routine Operations
Setting Routine operations Troubles such as ink clogging or the like are preventable by performing each periodical operation in the condition of the power ON. (Initial setting) The [ROUTINE SETUP] function is available for the following items : Function name Descriptions While printing, the nozzle surface is wiped with a certain interval to remove ROUTINE WIPING…
-
Page 127
Setting Routine operations Press the key. ROU T I NE WI P I NG SCAN COUN T Set the number of scans by pressing ROU T I NE WI P I NG SCAN COUN T keys. • Set value : 0 to 9990 times •… -
Page 128: Setting Refreshing Interval In Standby Mode
Setting Refreshing interval in Standby mode Set the interval at which refreshing operation is to be performed periodically. Select [ROUTINE SETUP] of the maintenance menu. (1) Press the key in the local mode. (2) Select [MAINTENANCE] by pressing the keys then press the key.
-
Page 129: Setting Pump Tube Washing Interval In Standby Mode
Setting Routine operations Setting Pump tube washing interval in Standby mode Perform the pump tube washing periodically to prevent ink from clogging due to the coagulation of ink, which occurs within the tube. • This function is operable only under the condition that the machine is left in the following displays.
-
Page 130: Setting Cleaning Interval In Standby Mode
Setting Cleaning interval in Standby mode This function is to be executed instead of TUBE WASH after the cleaning solution has been used up. Set the cleaning type and the intervals at which cleaning operation is to be performed. • This function does not operate when the error message relating to ink, such as [NEAR END] or [INK END], is displayed.
-
Page 131
Setting Routine operations Press the key several times to end. 4-33 Downloaded From ManualsPrinter.com Manuals… -
Page 132: Other Maintenance Functions
Other maintenance functions Changing the warning time of wiper replacement The wiper is consumable. The heads are easily soiled in a dusty environment. The heads cannot be cleaned adequately with a curled or worn wiper. Setting the wiper level so that a warning for the wiper replacement period is indicated earlier than the standard depending on the operating environment.
-
Page 133: Setting The Media Remaining Display
Other maintenance functions Setting the media remaining display Set the media remaining amount display. When the media remaining The media remaining amount is displayed in the remote mode. amount display is turned to (The print length is displayed when a leaf media is used.) «ON»…
-
Page 134
Print the media remaining amount You can print the current media remaining amount. • Set [MEDIA RESIDUAL] to “ON”. ( P.4-35) • When changing the media, it is recommended to print the remaining amount to the currently used media. If you print the media remaining amount in advance, for using the changed media, you can enter the correct value in the screen for entering media remaining amount after detecting the media ( P.2-12). -
Page 135: If Waste Ink Tank Confirming Message Is Displayed
Other maintenance functions If Waste ink tank confirming message is displayed Waste ink which was used for cleaning the heads and other parts, gathers in the waste ink tank. Upon the machine, the ink discharging amount is counted by accumulated counting then a message for suggesting the check is displayed when it reaches a certain amount.
-
Page 136
Check message in Local mode The right message is displayed. < L OCA L . 1 > [ # 0 1 ] ! WA S T E T ANK Check the waste ink tank, and then replace the waste ink tank P.4-39) if required. -
Page 137
Other maintenance functions Replacing waste ink tank When the right message is displayed, check the waste ink tank < L OCA L . 1 > [ # 0 1 ] immediately, and then replace it according to the condition. ! WA S T E T ANK Remove the waste ink tank guard. -
Page 138
Other maintenance functions Close the waste ink tank guard. • Hook the waste ink tank guard in a hole of the machine then lock it. Hole Hook Select [Ink Tank Exchange] of the maintenance menu. (1) Press the key in the local mode. (2) Select [MAINTENANCE] by pressing the keys then press the key. -
Page 139: Replacing The Cutter Blade
Replacing the cutter blade The cutter blade is consumable. When the cutter blade gets dull, replace it with a new one (SPA-0107). • The blade is sharp. Be careful not to hurt yourself or anyone else. • Keep the cutter blades away from the reach of children. Be sure to dispose of the worn-out cutter blades according to the applicable national and local laws and regulations.
-
Page 140
Replacing the cutter blade Close the front cover. Press the key. • The machine returns to LOCAL mode. 4-42 Downloaded From ManualsPrinter.com Manuals… -
Page 141
CHAPTER 5 Troubleshooting This section describes the corrective measures to be taken for a phenomenon suspected to be trouble and the procedures to clear the error number displayed on the LCD. Troubleshooting ………… 5-2 Power does not turn on ……….5-2 The machine does not start printing …… -
Page 142: Troubleshooting
Troubleshooting Take appropriate actions as described below before taking the trouble as a failure. If still the problem is not solved after troubleshooting, contact your dealer or an office of MIMAKI. Power does not turn on In most cases, this is due to improper connection of the power cable for the machine or computer. Check that the power cable is connected properly.
-
Page 143: Media Get Jammed / Media Is Soiled
Troubleshooting Media get jammed / media is soiled Media jamming or stained media is considered to be due to the use of an unsuitable media or improper setting of media. Is a recommended media used ? Use recommended media. Avoid using any media with curls or bent Is the media not curled or bent ends ? ends.
-
Page 144: Image Quality Is Poor
This section describes the corrective actions to be taken in case the image quality is not satisfactory. Take remedy for particular problems with image quality. If the remedy does not work, contact your dealer or an office of MIMAKI. Phenomenon Measures (1) Execute the head cleaning.
-
Page 145: Ink Cartridge Warning Appears
• Once cartridge trouble is displayed, do not leave the ink cartridge without replacing it for a long time; otherwise, the machine will lose the nozzle clogging prevention function. If nozzles are clogged, the machine must be repaired by MIMAKI’s service engineer. Displaying the description of ink cartridge trouble The contents of cartridge error are confirmable by the following operations.
-
Page 146: Warning / Error Messages
Warning / Error Messages If some trouble occurs, the buzzer sounds and the display shows a corresponding error message. Take an appropriate remedy for the displayed error. Warning messages Message Cause Solution Check the front cover and maintenance covers. The front cover or the maintenance C l o s e a c o v e r .
-
Page 147: Warning Messages
— — — — Y Y K K The ink cartridge is not MIMAKI Replace the cartridge generating the NON — OR I G I N A L I N K genuine.
-
Page 148
Message Cause Solution The cleaning liquid cartridge has Install the cleaning solution cartridge. not been installed. ! w a s h L i q u i d C a r t . NON There is trouble with cleaning liquid Check the cleaning solution cartridge. cartridge. -
Page 149: Error Messages
Warning / Error Messages Error messages When an error message is displayed, eliminate the error according to the chart below. If the same error message appears again, contact your dealer or an office of MIMAKI to call for service. Message Cause…
-
Page 150
Message Cause Solution Turn off the main power to the machine Any parameter outside the range of and turn it on after a while. * * * * * E R ROR 1 1 * * * * * acceptable numeric values was If the same error message appears again, P A R AME T E R E R ROR received. -
Page 151
Warning / Error Messages Message Cause Solution Turn off the main power to the machine and turn it on after a while. An error occurred in the wiper * * * * * E R ROR 4 6 * * * * * If the same error message appears again, control. -
Page 152
Warning / Error Messages Message Cause Solution Turn off the main power to the machine An error was detected during * * * * E R ROR 2 5 0 * * * * and turn it on after a while. scanning operation. -
Page 153
CHAPTER 6 Appendix This section attaches a list of the specifications and a list of the functions of this printer. Machine specifications ……… 6-2 Ink specifications ……….6-4 Sheet for inquiry ………… 6-5 Warning labels …………6-6 Function Flowchart ……….6-8 Downloaded From ManualsPrinter.com Manuals… -
Page 154: Machine Specifications
Machine specifications Item JV33-130 JV33-160 Method Drop-on-demand piezoelectric print heads Print head Specification 1 head 720 x 540dpi 540 or 720 x 720dpi 540 x 900dpi Drawing mode (scan x feed) 540 or 720 x 1080dpi 720 x 1440dpi 1440 x 1440dpi…
-
Page 155
Machine specifications Item JV33-130 JV33-160 Maximum 1371mm 1620mm Leaf media size Minimum 210mm Left end and right end : 15 mm (Default) Leaf media Front : 40.0 mm Rear : 98.5 mm Margin Left end and right end: 15 mm (Default) -
Page 156: Ink Specifications
Ink specifications When aqueos-color ink is used Item When solvent ink is used Dedicated aqueos pigment ink cartridge Supply Dedicated solvent ink cartridges Dedicated sublimation dye ink cartridge (Sb51) Black ink cartridge Black ink cartridge Cyan ink cartridge (Blue ink Cyan ink cartridge cartridge Magenta ink cartridge…
-
Page 157: Sheet For Inquiry
Sheet for inquiry Use this sheet for troubles and abnormal functions of the machine. Fill in the following necessary items, and then fax the sheet to our sales office. Company name Person in charge Telephone number machine model Operating OS Machine information Error message Contents of inquiry…
-
Page 158: Warning Labels
Warning labels Warning labels are stuck on the machine. Be sure to fully understand the warning given on the labels. If a warning label is illegible due to stains or has come off, purchase a new one from a distributor or our sales office.
-
Page 159
Warning labels Reorder Label M901549 M903239 M903330 M903405 M904810 Downloaded From ManualsPrinter.com Manuals… -
Page 160: Function Flowchart
Function Flowchart < L OCA L . 1 > [ # 0 1 ] w i d t h : * * * * mm OR I G I N S E T UP OR I G I N S E T UP 0 .
-
Page 161
Function Flowchart MED I A RE S I DUA L DR AW < EN T > Only when [MEDIA RESIDUAL] is “ON” NON — OR I G I NA L I NK WRONG I NK I C K i n d o f I NK M — C — — — — K… -
Page 162
< L OCA L . 1 > [ # 0 1 ] F UNC T I ON SETUP w i d t h : * * * * mm S E T UP < EN T > F UNC T I ON MAINTENANCE MA I N T ENANCE <… -
Page 163
Function Flowchart To P.6-12 To P.6-18 To P.6-24 To P.6-25 To P.6-26 6-11 Downloaded From ManualsPrinter.com Manuals… -
Page 164
SETUP S E T UP [ 1 ] [ 1 ] MED I A COMP . S E L EC T : T Y P E . 1 MED I A COMP . < e n t > PR I N T S T AR T TYPE.2 TYPE.3 TYPE.4… -
Page 165
Function Flowchart End the P L E A S E WA I T [ 1 ] ME D I A COMP . printing PR I N T I NG V A L UE -255 ~ 255 PR T POS T 5 °… -
Page 166
From P6-12 From P6-12 [ 1 ] PR I N T MODE Wh i t e L a y P r t < e n t > When SS21 (6+ white) ink is filled [ 1 ] [ 1 ] I NK L A Y ERS I NK L A Y ERS <… -
Page 167
Function Flowchart [ 1 ] Wh i t e L a y P r t S E L . : OF F OFF / LEVEL 1~3 6-15 Downloaded From ManualsPrinter.com Manuals… -
Page 168
From P6-14 When INDIVIDUALLY is selected [ 1 ] [ 1 ] PR I OR I T Y PR I OR I T Y < e n t > S E T U P ND I V I DUA L L Y INDIVIDUALLY / ALL HOST / ALL PANEL… -
Page 169
Function Flowchart [ 1 ] PR I OR I T Y [ 1 ] PR I OR I T Y [ 1 ] PR I OR I T Y MED I A COMP . : HOS T HE A T ER : HOS T P R I N T MODE : HOS T… -
Page 170
MAINTENANCE MA I N T ENANCE S T . MA I N T ENA NCE S T . MA I N T ENANCE S T . MA I N T ENANCE < e n t > CARR I AGE OU T <… -
Page 171
Function Flowchart Close a cover C l o s e a c o v e r RESTART Close a cover C l o s e a c o v e r RESTART F i l l t h e l i q u i d S T . -
Page 172
From P6-18 MA I N T ENANCE HD . MA I N T ENA NCE F I L L I NG U P NOW . HD . MA I N T ENANCE < e n t > F I L L UP I NK <… -
Page 173
Function Flowchart * D I S CHARGE * S e t : Wa s h i n g C a r t r i d g e * A B SORP T I ON * 0 0 : 0 0 1 2 3 4 5 6 7 8 0 0 : 0 0 R e mo v e : C a r t r i d g e s… -
Page 174
From P6-20 MA I N T ENANCE ROU T I NE S E T UP ROU T I NE W I P I NG ROU T I NE S E T UP < e n t > ROU T I NE W I P I NG < e n t > SCAN COUN T <… -
Page 175
Function Flowchart ROU T I NE W I P I NG SC AN COUN T ROU T I NE W I P I NG T EMP . D i f f e r e n c e = 0 ° C Settable except for OFF ROU T I NE S E T UP C L E AN . -
Page 176
MACHINE SETUP MACH I NE S E T UP DEODOR I Z E F AN DEODOR I Z E F AN DEODOR I Z E F AN < e n t > S TOP T I ME < e n t > S TOP T I ME 2 0 M i n 0 ~ 240 min… -
Page 177
Function Flowchart MACHINE SETUP2 Only when CONFIRM.FEED is set ON MACH I NE S E T UP 2 CON F I RM . F E E D CON F I RM . F E ED CON F I RM . F E ED <… -
Page 178
Function Flowchart INFOMATION I N FOMA T I ON ERROR H I S TORY Error is displayed ERROR H I S TORY < e n t > [ 0 1 ] 0 5 . 0 9 . 2 9 0 8 : 1 8 I N FOMA T I ON [ 0 1 ] 0 5 . -
Page 179
D201694-13-12122007 Downloaded From ManualsPrinter.com Manuals… -
Page 180
Printed in Japan © MIMAKI ENGINEERING CO., LTD.2007 FW : 1.5 Downloaded From ManualsPrinter.com Manuals…
-
Драйверы
3
-
Инструкции по эксплуатации
1

Mimaki JV33-160 инструкция по эксплуатации
(228 страниц)
- Языки:Английский
-
Тип:
PDF -
Размер:
8.19 MB
Просмотр
На NoDevice можно скачать инструкцию по эксплуатации для Mimaki JV33-160. Руководство пользователя необходимо для ознакомления с правилами установки и эксплуатации Mimaki JV33-160. Инструкции по использованию помогут правильно настроить Mimaki JV33-160, исправить ошибки и выявить неполадки.
инструкцияMimaki JV33-160

MIMAKI ENGINEERING CO., LTD.
TKB Gotenyama Building, 5-9-41, Kitashinagawa, Shinagawa-ku,
Tokyo 141-0001, Japan
Phone: +81-3-5420-8671 Fax: +81-3-5420-8687
URL: http: // www.mimaki. co. jp/
D201694-13
Посмотреть инструкция для Mimaki JV33-160 бесплатно. Руководство относится к категории принтеры, 1 человек(а) дали ему среднюю оценку 7. Руководство доступно на следующих языках: английский. У вас есть вопрос о Mimaki JV33-160 или вам нужна помощь? Задайте свой вопрос здесь
- TABLE OF CONTENTS
Главная
Не можете найти ответ на свой вопрос в руководстве? Вы можете найти ответ на свой вопрос ниже, в разделе часто задаваемых вопросов о Mimaki JV33-160.
Как удалить замятую бумагу из принтера?
Лучше всего аккуратно вытянуть бумагу из принтера. Выключите принтер и убедитесь, что печатающий узел не нависает над бумагой и что в принтере не осталось бумаги.
Почему после установки оригинального картриджа принтер не работает?
Принтер может не распознать неоригинальный картридж. В этом случае вы получите сообщение о том, что картридж пуст. В инструкции к приобретенному картриджу обычно указаны способы устранения проблемы. Если это сделать не удалось, рекомендуется обратиться к продавцу.
Чем обусловлено плохое качество печати?
Причины плохого качества печати могут быть разными. Убедитесь, что картридж заполнен, а тонер имеется в достаточном количестве. Если такой проблемы нет, причина может заключаться в том, что струйному принтеру требуется чистка, высох картридж или сломан печатающий узел. Для лазерного принтера рекомендуется выполнить калибровку.
В чем разница между лазерным и струйным принтером?
Лазерный принтер печатает тонером, а струйный — чернилами.
Почему при печати на струйном принтере появляются черные полосы?
В большинстве случаев это обусловлено поломкой картриджа струйного принтера. Необходимо заменить картридж.
Что означает аббревиатура DPI?
DPI обозначает Dots Per Inch и представляет собой количество капель чернил (на дюйм), которые подаются на бумагу при печати.
Инструкция Mimaki JV33-160 доступно в русский?
К сожалению, у нас нет руководства для Mimaki JV33-160, доступного в русский. Это руководство доступно в английский.
Не нашли свой вопрос? Задайте свой вопрос здесь
Струйный принтер Mimaki серии JV330

Введение
Благодарим вас за приобретение струйного принтера серии 330. Внимательно прочитайте меры предосторожности (далее «данный документ») и убедитесь, что вы понимаете его содержание, чтобы обеспечить безопасное и правильное использование продукта. Обратите внимание, что иллюстрации, содержащиеся в данном руководстве, предназначены для демонстрации функций, процедур или операций и иногда могут немного отличаться от реальной машины. Несанкционированное воспроизведение любой части этого документа строго запрещено. © 2022 MIMAKI ENGINEERING Co., Ltd.
ОТКАЗ
- КОМПАНИЯ MIMAKI ENGINEERING НЕ НЕСЕТ НИКАКОЙ ОТВЕТСТВЕННОСТИ ЗА УЩЕРБ, ВОЗНИКШИЙ ПРЯМО ИЛИ КОСВЕННО В РЕЗУЛЬТАТЕ ИСПОЛЬЗОВАНИЯ МАШИНЫ серии 330 (далее — «ЭТА МАШИНА»), НЕЗАВИСИМО ОТ НЕИСПРАВНОСТИ ПРОДУКТА. КОМПАНИЯ MIMAKI ENGINEERING НЕ НЕСЕТ ЛЮБОЙ ОТВЕТСТВЕННОСТИ ЗА УЩЕРБ, ПРЯМОЙ ИЛИ КОСВЕННЫЙ, ВОЗНИКШИЙ В РЕЗУЛЬТАТЕ ИСПОЛЬЗОВАНИЯ ЭТОЙ МАШИНЫ.
- MIMAKI ENGINEERING ОТКАЗЫВАЕТСЯ ОТ ЛЮБОЙ ОТВЕТСТВЕННОСТИ ЗА УЩЕРБ, ПРЯМОЙ ИЛИ КОСВЕННЫЙ, СВЯЗАННЫЙ С МАТЕРИАЛАМИ, СОЗДАННЫМИ ПРИ ИСПОЛЬЗОВАНИИ ЭТОЙ МАШИНЫ.
- ИСПОЛЬЗОВАНИЕ ЭТОЙ МАШИНЫ С УСТРОЙСТВАМИ, НЕ РЕКОМЕНДОВАННЫМИ КОМПАНИЕЙ MIMAKI ENGINEERING, МОЖЕТ ПРИВЕСТИ К ПОЖАРУ ИЛИ АВАРИИ. НА ТАКИЕ ПРОИСШЕСТВИЯ НЕ ПОКРЫВАЕТСЯ ГАРАНТИЯ НА ПРОДУКТ. MIMAKI ENGINEERING ОТКАЗЫВАЕТСЯ ОТ ЛЮБОЙ ОТВЕТСТВЕННОСТИ ЗА УЩЕРБ, ПРЯМОЙ ИЛИ КОСВЕННЫЙ, ВОЗНИКШИЙ В РЕЗУЛЬТАТЕ ТАКИХ ПРОИСШЕСТВИЙ.
- ИСПОЛЬЗУЙТЕ ТОЛЬКО ПОДЛИННЫЕ ТЕХНИЧЕСКИЕ ЧЕРНИЛА И ЖИДКОСТЬ ДЛЯ ОБСЛУЖИВАНИЯ MIMAKI. ИСПОЛЬЗОВАНИЕ ДРУГИХ ПРОДУКТОВ МОЖЕТ ПРИВЕСТИ К СБОЯМ ИЛИ СНИЖЕНИЮ КАЧЕСТВА ПЕЧАТИ. НА ТАКИЕ ПРОИСШЕСТВИЯ НЕ ПОКРЫВАЕТСЯ ГАРАНТИЯ НА ПРОДУКТ. MIMAKI ENGINEERING ОТКАЗЫВАЕТСЯ ОТ ЛЮБОЙ ОТВЕТСТВЕННОСТИ ЗА УЩЕРБ, ПРЯМОЙ ИЛИ КОСВЕННЫЙ, ВОЗНИКШИЙ В РЕЗУЛЬТАТЕ ТАКИХ ПРОИСШЕСТВИЙ.
- НЕ ПЫТАЙТЕСЬ ПОПОЛНИТЬ ПАКЕТЫ С ЧЕРНИЛАМИ НЕСАНКЦИОНИРОВАННЫМИ ЧЕРНИЛАМИ. НА ТАКИЕ ПРОИСШЕСТВИЯ НЕ ПОКРЫВАЕТСЯ ГАРАНТИЯ НА ПРОДУКТ. MIMAKI ENGINEERING ОТКАЗЫВАЕТСЯ ОТ ЛЮБОЙ ОТВЕТСТВЕННОСТИ ЗА УЩЕРБ, ПРЯМОЙ ИЛИ КОСВЕННЫЙ, ВОЗНИКШИЙ В РЕЗУЛЬТАТЕ ТАКИХ ПРОИСШЕСТВИЙ.
ТВ и радио помехи
- Этот продукт излучает высокочастотное электромагнитное излучение во время работы. При определенных обстоятельствах это может привести к телевизионным или радиопомехам. Мы не гарантируем, что данное устройство не повлияет на специальное радио- или телевизионное оборудование. Если возникают радио- или телевизионные помехи, проверьте прием радио- или телесигнала после выключения этого устройства. Если помехи исчезают при отключении питания, вероятно, эта машина является причиной помех. Попробуйте любое из следующих решений или их комбинаций:
- Измените ориентацию телевизионной или радиоантенны, чтобы найти положение, при котором помех не возникает.
- Отодвиньте телевизор или радио от аппарата.
- Включите телевизор или радиоприемник в электрическую розетку в цепи питания, отличной от цепи питания, к которой подключено данное устройство.
Правила FCC (Федеральной комиссии по связи)
Этот продукт был протестирован и сертифицирован на соответствие ограничениям, применимым к цифровым устройствам класса A в соответствии с частью 15 правил FCC. Эти ограничения предназначены для обеспечения надлежащей защиты от вредных помех при использовании принтера в коммерческих целях. Этот продукт может генерировать, использовать или излучать радиочастотную энергию и может создавать вредные помехи для радиосвязи, если он установлен или используется не в соответствии с руководством по эксплуатации. Использование данного изделия в жилых районах может вызвать вредные помехи. Если это так, пользователь несет ответственность за устранение таких помех.
- При подключении к этому изделию используйте только кабели, рекомендованные Mimaki Engineering. Использование других кабелей может привести к тому, что продукт превысит ограничения, установленные правилами FCC. Чтобы обеспечить соответствие нормам FCC, используйте кабели, рекомендованные Mimaki Engineering.
Для обеспечения безопасного использования
Символы
В данном руководстве символы обозначают и объясняют меры предосторожности. Убедитесь, что вы полностью понимаете значение каждого символа и используете машину безопасно и правильно.
| объяснение | ||
| Предупреждение | Указывает на потенциальную опасность, которая может привести к смерти или серьезной травме при неправильном обращении или несоблюдении инструкций. | |
| Предупреждение | Указывает на потенциальную опасность, которая может привести к травме легкой или средней степени тяжести при неправильном обращении или несоблюдении инструкций. | |
| Уведомление | Указывает на потенциальную опасность, которая может привести к материальному ущербу при неправильном обращении или несоблюдении инструкций. | |
| Предупреждающий знак | Указывает на то, что требует внимания. Детали предупреждения нарисованы внутри символа. | |
| Знак обязательного действия | Указывает на действие, которое необходимо выполнить. Особенности обязательного действия нарисованы внутри символа. | |
| Запрещающий знак | Указывает на запрещенное действие. Специфика запрещенного действия нарисована внутри символа. | |
| Важно Указывает на важную информацию, связанную с использованием данного аппарата. | ||
| Функции | Указывает на полезную справочную информацию. | |
| Справочная информация | Указывает соответствующую страницу для соответствующей информации. |
Меры предосторожности при использовании
В случае нештатных ситуаций
- В случае ненормальных условий, таких как дым или необычный запах, немедленно отключите питание и отсоедините кабель питания. Продолжение использования продукта в этих условиях может привести к неисправности, поражению электрическим током или возгоранию. Убедившись, что дым больше не идет, обратитесь к местному дилеру или в наш сервисный центр. Никогда не пытайтесь ремонтировать изделие самостоятельно. Это опасно.
- Немедленно вытрите любые чернила, жидкость для ухода, отработанные чернила или другую жидкость, использованную с продуктом, которая попала на кожу. Затем вымойте с мылом и сполосните большим количеством воды. Если не смыть чернила, это может привести к воспалению кожи. Если ваша кожа становится раздраженной или болезненной, немедленно обратитесь за медицинской помощью.
- Если чернила, жидкость для ухода, отработанные чернила или любая другая жидкость, используемая в устройстве, попала в глаза, немедленно промойте их большим количеством чистой воды. Промывать не менее 15 минут. Если вы носите контактные линзы и их можно легко снять, снимите их после промывания в течение не менее 15 минут чистой водой. Не забудьте также промыть нижнюю часть век. Если не смыть чернила, это может привести к слепоте или ухудшению зрения. Если ваши глаза раздражаются или болят, немедленно обратитесь за медицинской помощью.
- Если чернила, жидкость для обслуживания, отработанные чернила или любая другая жидкость, используемая в устройстве, попала в рот или была проглочена, немедленно прополощите горло водой. Не вызывает рвоту. Немедленно обратитесь за медицинской помощью. Вызов рвоты может привести к попаданию жидкости в дыхательные пути.
- При вдыхании большого количества паров переместитесь в хорошо проветриваемое помещение, согрейтесь и отдохните в позе, обеспечивающей легкое дыхание. Если состояние не улучшится, срочно обратитесь за медицинской помощью.
- Если произошла утечка чернил, немедленно отключите питание и отсоедините кабель питания. Затем обратитесь к местному дилеру или в наш сервисный центр.
Меры предосторожности при подаче питания
- Используйте прилагаемый кабель питания. В противном случае существует риск выхода из строя, поражения электрическим током или возгорания. Не используйте кабель питания с другими электронными устройствами.
- Всегда беритесь за вилку при отключении шнура питания. Если тянуть за кабель питания, это может привести к повреждению кабеля, что может привести к поломке, поражению электрическим током или возгоранию.
- Не используйте вилку питания с пылью на ней. В противном случае существует риск выхода из строя, поражения электрическим током или возгорания.
- Не касайтесь ножа вилки питания металлическими предметами. В противном случае существует риск выхода из строя, поражения электрическим током или возгорания.
- Не пытайтесь модифицировать кабель. Избегайте повреждения кабеля. Не кладите тяжелые предметы на кабель питания, не тяните за кабель и не подвергайте его нагреву. Это может привести к повреждению кабеля, что может привести к поражению электрическим током или возгоранию.
- Не используйте удлинители или удлинители с несколькими розетками. В противном случае существует риск выхода из строя, поражения электрическим током или возгорания.
- Не используйте, если силовой кабель поврежден или жила жилы имеет оголенную или оборванную жилу. В противном случае существует риск выхода из строя, поражения электрическим током или возгорания.
- Не беритесь за вилку питания мокрыми руками. Существует риск поражения электрическим током.
- Вставьте вилку кабеля питания в розетку с заземлением. В противном случае существует риск выхода из строя, поражения электрическим током или возгорания.
- При установке электрических розеток выполняйте работы по заземлению во избежание поражения электрическим током. Все электромонтажные работы (заземление класса C; ранее заземление типа 3) должны выполняться лицензированным электриком.
- Не выключайте основной источник питания. Отключение основного источника питания приведет к отключению функции автоматического обслуживания (включая функцию предотвращения засорения дюз и функцию очистки канала выпуска чернил). Это повысит риск дефектов печати (например, засорение сопла, отклонение).

- Используйте эту машину с блоком питания, который соответствует спецификациям.
- Убедитесь, что шнур питания подключен к сетевой розетке рядом с машиной. Надежно вставьте штекер штепсельной вилки.
- При подключении кабеля питания проверьте входную мощностьtagэлектросети и мощность выключателя. Также подключите каждый кабель к отдельному источнику питания с независимым выключателем. Подключение к розеткам, подключенным к одному и тому же выключателю, приведет к срабатыванию выключателя.

Предостережение относительно движущихся частей
- Держите части тела, такие как лицо и руки, вдали от движущихся частей. Также держите подальше от машины одежду (например, свободную одежду и аксессуары), которая может мешать работе. Невыполнение этого требования может привести к травме.
- Длинные волосы должны быть собраны сзади. Невыполнение этого требования может привести к травме.
Не разбирать и не ремонтировать
- Не пытайтесь разбирать или ремонтировать эту машину. В противном случае существует риск выхода из строя, поражения электрическим током или возгорания.
Обращение с резаком
- Не прикасайтесь к режущему лезвию. Невыполнение этого требования может привести к травме.
- Не трясите и не раскачивайте держатель резака. Это может привести к отрыву лезвия.
подогреватель
- В зависимости от температуры и влажности окружающей среды на поверхности сопла печатающей головки может образовываться конденсат. Образование конденсата может вызвать дефекты печати (например, засорение или отклонение сопла). Выполните очистку печатающей головки, если во время печати возникают какие-либо дефекты печати (например, засорение или отклонение сопла). Очистка головки Настройте плиточный нагреватель на температуру, не превышающую 35 °C, и убедитесь, что температура окружающей среды находится в пределах допустимого диапазона рабочих температур (от 20 до 30 °C). Меры предосторожности» (стр. 12)
Другие меры предосторожности при использовании
- Держите детей подальше от этой машины.
- Не тяните носитель, когда clamp рычаг опущен (среда кл.ampред.). Это может привести к повреждению машины.
- Нижняя сторона носителя может быть загрязнена в зависимости от условий хранения печатного носителя (из-за веса при горизонтальной укладке рулонов печатного носителя, напримерample) и тип носителя. Заранее выполните тест, чтобы убедиться, что носитель не переносит чернила на нижнюю сторону соседнего носителя.
Утилизация продукта
- Обратитесь к местному продавцу или в сервисный центр.
- При самостоятельной утилизации продукта обратитесь к оператору по утилизации промышленных отходов или утилизируйте продукт в соответствии с местными законами и правилами.
Чернила или любая другая жидкость, используемая с аппаратом
Меры предосторожности в отношении чернил, жидкости для обслуживания или других жидкостей, используемых с этим аппаратом, прилагаются к контейнерам. Внимательно прочитайте их и убедитесь, что вы понимаете содержание.
- Примите меры для предотвращения утечки в природные системы водоснабжения или бытовые сточные воды. Некоторые компоненты токсичны для водных организмов.
- Обязательно прочитайте паспорт безопасности (SDS) перед использованием. https://mimaki.com/supply/sds/
- Обратите особое внимание на вентиляцию и обязательно надевайте защитные очки, перчатки и маску при работе с чернилами, жидкостью для обслуживания, отработанными чернилами или другими растворами, используемыми в этом аппарате. Вытекающие чернила могут прилипнуть к коже или попасть в глаза или рот.
- Не подвергайте футляры с чернилами сильным ударам или сильному встряхиванию. Не пытайтесь заправить чернила. Вытекающие чернила могут прилипнуть к коже или попасть в глаза или рот.
- Не разбирайте футляры, содержащие чернила. Вытекающие чернила могут прилипнуть к коже или попасть в глаза или рот.
- Не храните этот продукт в местах, доступных для детей.
- При утилизации продукта обратитесь к оператору по утилизации промышленных отходов или утилизируйте продукт в соответствии с местными законами и правилами.
- Не используйте чернила, жидкость для обслуживания или другие жидкости, используемые с этим аппаратом, с другими принтерами. Это может привести к повреждению машины.
- Не прикасайтесь к металлическим частям микросхемы чернил. Статическое электричество может повредить микросхему чернил, а грязь или повреждения могут сделать ее нечитаемой.
- Хранить в низком месте не выше 1 м от пола. Падение аппарата может привести к разбрызгиванию чернил.
- Хранить в герметичных контейнерах.
- Хранить в прохладном и темном месте.
- Храните чернила в среде, где они не замерзнут. Обратите внимание, что использование размороженных чернил может повлиять на качество печати из-за их ухудшения.
- При перемещении чернил из холодного места в теплое дайте им постоять не менее трех часов, прежде чем использовать их в тех же условиях, что и машина.
- Откройте чернила перед использованием и израсходуйте как можно быстрее. Качество печати может ухудшиться, если бутылки остаются открытыми в течение длительного времени.
- Печать отключена, если используется другая микросхема чернил.
- Не храните чернила, жидкость для обслуживания или другие жидкости, используемые с аппаратом, в местах, подверженных воздействию прямых солнечных лучей.
- Не храните чернила, жидкость для обслуживания или другие жидкости, используемые с аппаратом, в среде, где смазочно-охлаждающая жидкость или другие летучие вещества (такие как амины или модифицированный аминовый спирт) присутствуют в значительных количествах. Хранение в таких местах увеличивает риск выхода из строя или дефектов печати (например, засорение сопла, отклонение).
Ограничения относительно продукта
Срок годности чернил указан на упаковке чернил. Чернила с истекшим сроком годности могут вызвать дефекты печати или изменить цветовой тон. Печать возможна, даже если срок годности чернил истек. Тем не менее, мы рекомендуем заменить чернила новыми или израсходовать их как можно быстрее. Бывшийample: Когда срок годности истекает в апреле 2023 г.
- Май: замените новыми чернилами или израсходуйте их как можно быстрее. Возможна печать.
- Июнь: замените чернила новыми или израсходуйте их как можно быстрее. Возможна печать.
- Июль: Печать невозможна.
- Сообщение появляется на дисплее.
Меры предосторожности при установке
- Не устанавливайте данное устройство в местах, где присутствуют легковоспламеняющиеся вещества (например, бензин, легковоспламеняющиеся аэрозоли, спирт, растворитель, лак или порошок). Эта машина не является взрывозащищенной. Продукт представляет опасность взрыва.
- Не устанавливайте эту машину в местах, где присутствует открытый огонь. Чернила могут воспламениться.
- Не ставьте вазы, горшечные растения, чашки, косметику, контейнеры с химикатами или водой, а также мелкие металлические предметы на аппарат. Существует риск отказа, поражения электрическим током или возгорания, если внутрь устройства попадут жидкости или предметы.
- Не устанавливайте данное устройство во влажных местах или местах, где на него могут попасть брызги воды. В противном случае существует риск выхода из строя, поражения электрическим током или возгорания.
- Не устанавливайте эту машину в местах, доступных для детей.
- Если машина установлена в плохо проветриваемом помещении или закрытом помещении, необходимо предусмотреть систему вентиляции.
- При установке вытяжного выхода обязательно соблюдайте следующие пункты:
- Выход вытяжки должен быть установлен в соответствии с применимыми местными правилами EHS (окружающая среда, здоровье и безопасность).
- Если выпускное отверстие экстрактора оснащено запорным клапаном, этот клапан должен быть открыт во время работы машины.
- Не устанавливайте эту машину в местах, где присутствует пыль или порошок. Попадание пыли внутрь аппарата может привести к сбою или дефектам печати (например, засорению сопла, отклонению).
- Не устанавливайте эту машину в местах, подверженных сквознякам (например, от кондиционера). Несоблюдение этой меры предосторожности может привести к попаданию пыли или порошка внутрь аппарата.
- Не устанавливайте этот аппарат в неустойчивых местах или местах, подверженных вибрации. Это повысит риск отказа или дефектов печати (например, засорение сопла, отклонение).
- Не устанавливайте эту машину в местах, подверженных воздействию прямых солнечных лучей.
- Не устанавливайте этот аппарат в местах, подверженных резким перепадам температуры. Это повысит риск отказа или дефектов печати (например, засорение сопла, отклонение).
- Не устанавливайте эту машину в местах, подверженных чрезмерному шуму от крупного оборудования.
- Не устанавливайте данный аппарат в местах, где фотофиксаторы выделяют пары или кислые газы (например, уксусная кислота, соляная кислота), а также в местах, заполненных жидкостями для обработки металлов или легколетучими веществами (например, аминами, модифицированными аминами спиртами). Это может привести к сбоям в работе или дефектам печати (например, засорение сопла, отклонение), поскольку чернила печатающей головки с большей вероятностью затвердеют в таких условиях.
- Условия эксплуатации: от 20 °C до 30 °C (от 68 °F до 86 °F), относительная влажность от 35 % до 65 % (без конденсации)
- Диапазон температур с гарантированной точностью: от 20 °C до 25 °C (от 68 °F до 77 °F)
Место установки
Обеспечьте следующее пространство вокруг аппарата для безопасной и правильной замены чернил и носителя:
| Товары | JV330-130 | CJV330-130 | JV330-160 | CJV330-160 | TS330-1600 |
| Ширина*1 | Не менее 3,920 мм (2,920 мм) | Не менее 4,170 мм (3,170 мм) | |||
| Глубина*1 | Не менее 4,050 мм (2,050 мм*2) | Не менее 2,820 мм (820 мм) | |||
| Высота* 1 | (1,305 мм) | ||||
| Вес | 358 кг | 363 кг | 368 кг | 373 кг | 240 кг |
- В скобках указаны размеры машины.
- Включая медиаканал


При перемещении этой машины
Обратитесь к местному дилеру или в наш сервисный центр. Попытка справиться с перемещением самостоятельно может привести к сбою или повреждению.
Блокировки безопасности
Эта машина оснащена блокировками для обеспечения безопасности во время использования. Печать будет прервана, если вы откроете крышки во время печати. В этом случае вам потребуется повторно отправить данные RIP.
- Расположение защитной блокировки


Предупреждающая этикетка
Убедитесь, что вы полностью понимаете детали, указанные на различных предупреждающих этикетках. Если какая-либо из предупредительных этикеток загрязнится, станет неразборчивой или отклеится, обратитесь к местному дилеру или в наш сервисный центр, чтобы запросить новые предупреждающие этикетки.
| Нет. | Код заказа | этикетка | Подробнее |
| 1 | M910931 |  |
Остерегайтесь открывающихся и закрывающихся частей. Защемление рук может привести к травме. |
| 2 | M907833 |  |
Указывает на опасные движущиеся части. |
| 3 | M903239 |  |
Указывает на горячие детали.
• JV/CJV: Предварительный нагреватель, дополнительный нагреватель • TS: Догреватель |
| 4 | M903330 |  |
Во время работы надевайте защитные очки и перчатки. |
| 5 | M906144 |  |
Указывает на горячие детали.
• Только СП/CJV |
| 6 | M903405 |  |
Остерегайтесь резака.
• СП: Каретка, каретка XY • CJV: каретка, режущий блок, каретка XY • ТС: Перевозка |
| 7 | M905811 |  |
Указывает на опасные движущиеся части. |
| 8 | M906031 |  |
Описывает силовой кабель. |
| 9 | M907935 |  |
Указывает на опасные токоведущие части. |
| 10 | M917747 |  |
Остерегайтесь резака.
• Только СП/CJV |
| 11 | M917991 |  |
Указывает на то, что светодиоды освещают горячие части. |
| Нет. | Код заказа | этикетка | Подробнее |
| 12 | M905935 |  |
Не прикасайтесь к рычагу прижимного ролика.
• Только ЗАО |
Приложение
В этой главе перечислены технические характеристики и функции данного аппарата.
Блок реле
- При использовании внешнего сушильного нагревателя другого производителя может возникнуть пожар. Убедитесь, что для подключения к машине используется либо компактный релейный блок, либо релейный блок 2, указанные в качестве опций.
- Серия 330 позволяет подключить только один релейный блок (OPT-J0370 или OPT-J0407).
- Дополнительный соединительный кабель реле (комплект для подключения осушителя OPT-J0512) требуется при использовании блока реле.
Обзор
Релейный блок автоматически включает и выключает питание нагревателя в соответствии с работой машины.
- Нагреватель выключается, когда печать останавливается, чтобы предотвратить нагрев, когда машина не движется.
- Блок реле не может управлять температурой внешнего сушильного нагревателя. Температуру следует устанавливать на самом внешнем нагревателе.
Характеристики
| Малый релейный блок (OPT-J0370)
|
Характеристики источника питания | Однофазный от 100 В до 120 В переменного тока, 12 А, однофазный от 200 В до 240 В переменного тока, 8 А, 50/60 Гц, одноконтурный основной источник питания |
| Тип | Нагреватель сопротивления или электрический нагреватель с использованием lamp | |
| Блок реле 2 (OPT-J0407)
|
Характеристики источника питания | Однофазный от 100 В до 240 В переменного тока, 30 А, 50/60 Гц, одноконтурный источник питания |
| Тип | Нагреватель сопротивления или электрический нагреватель с использованием lamp |

