
The CRS326 is a network switch with 24 10G SFP+ ports and two QSFP+ 40G ports. The device is ready to use as a switch.
Safety Warnings
Before you work on any equipment, be aware of the hazards involved with electrical circuitry, and be familiar with standard practices for preventing accidents.
Ultimate disposal of this product should be handled according to all national laws and regulations.
The Installation of the equipment must comply with local and national electrical codes.
This unit is intended to be installed in the rackmount. Please read the mounting instructions carefully before beginning installation. Failure to use the correct hardware or to follow the correct procedures could result in a hazardous situation to people and damage to the system.
This product is intended to be installed indoors. Keep this product away from water, fire, humidity or hot environments.
Use only the power supply and accessories approved by the manufacturer, and which can be found in the original packaging of this product.
Read the installation instructions before connecting the system to the power source.
We cannot guarantee that no accidents or damage will occur due to the improper use of the device. Please use this product with care and operate at your own risk!
In the case of device failure, please disconnect it from power. The fastest way to do so is by unplugging the power plug from the power outlet.
It is the customer’s responsibility to follow local country regulations, including operation within legal frequency channels, output power, cabling requirements, and Dynamic Frequency Selection (DFS) requirements. All Mikrotik devices must be professionally installed.
Quick start
- Mount unit or place on the flat surface, please see Mounting paragraph for instructions.
- Choose your powering solution, please see the Powering section for possibilities.
- The Initial connection has to be done via the Ethernet cable, using the MikroTik Winbox utility.
- Use Winbox to connect to the default IP address of 192.168.88.1 from any port, with the username admin and no password, the device is set up as a switch (or, for some models, check user and wireless passwords on the sticker).
- Update the device by clicking the «Check for updates» button to v6.46 or the latest RouterOS software to ensure the best performance and stability. The device needs to have an active internet connection.
- To manually update the device, go to our download page https://mikrotik.com/download
- Choose your architecture (MIPSBE) and download the latest packages from any channel to your PC.
- Open Winbox and upload packages in the Files menu.
- Reboot the device.
- Updating software will ensure the latest security fixes and regulations set by local law.
- Set up your password to secure the device.
Mounting
The device is designed to use indoors and it can be mounted in a rackmount enclosure using provided rack mounts, or it can be placed on the desktop. Please attach rubber pegs on the bottom of the router if the desired placement is on the flat surface or use a Phillips screwdriver to attach rackmount ears on both sides of the device if designated use is for rackmount enclosure:
- Attach rack ears to both sides of the device and tighten four screws to secure them in place, as shown in the picture.
- Place the device in a rackmount enclosure and align with the holes so that the device fits conveniently.
- Tighten screws to secure it in place.


The IP rating scale for this device is IPX0. The device has no protection from water contamination, please ensure the placement of the device in a dry and ventilated environment.
Mounting and configuration of this device should be done by a qualified person. We recommend using Cat5/6 cables for our devices.
Powering
The device accepts powering from two inputs of 100 – 240 V AC ⏦.
The power consumption of this device under maximum load is up to 42 W. With attachments up to 69 W.
Booting process
The device supports booting RouterOS (for complete routing and switching configuration) or SwOS (for only using as a switch). By default, the device will boot RouterOS, but you can reboot into the other operating system in the following ways:
- From SwOS: In the System menu, click the «Boot RouterOS» button on the bottom of the page.
- From RouterOS: in the System, RouterBOARD menu, click «Settings» and there select «Boot OS».
It is also possible to select the OS and configure other boot settings via the serial console menu.
Configuration
Serial console for configuration is an RS-232 serial port, set by default to 115200 bit/s, 8 data bits, 1 stop bit, no parity. Standard RJ45 to COM cable can be used. To find detailed serial console configuration and pinout please visit serial console section in our wiki pages here: https://wiki.mikrotik.com/wiki/Manual:System/Serial_Console![]() https://wiki.mikrotik.com/wiki/Manual:System/Serial_Console%20
https://wiki.mikrotik.com/wiki/Manual:System/Serial_Console%20
RouterOS and SwOS include many configuration options in addition to what is described in this document. We suggest starting here to get yourself accustomed to the possibilities: https://mt.lv/help![]() . In case the IP connection is not available, the Winbox tool (https://mt.lv/winbox
. In case the IP connection is not available, the Winbox tool (https://mt.lv/winbox![]() ) can be used to connect to the MAC address of the device.
) can be used to connect to the MAC address of the device.
Extension slots and ports
- Twenty four 10G SFP+ ports.
- Two 40G QSFP+ ports.
- 1x RJ45 console port (set at 115200bits/s, 8 data bits, 1 stop bit no parity).
- 1x 10/100Mbit Ethernet port for management access.
- USB Type-A port.
- Three cooling fans with automatic speed control.
- Two integrated power supply units with AC ⏦ inputs for redundancy.
Please visit wiki pages for MikroTik SFP module compatibility and configuration table: https://wiki.mikrotik.com/wiki/MikroTik_SFP_module_compatibility_table
Reset button
The RouterBOOT reset button has the following functions. Press the button and apply the power, then:
- Release the button when green LED starts flashing, to reset RouterOS configuration to defaults.
- Release the button when the LED turns solid green to clear all configuration and defaults.
- Release the button after LED is no longer lit (~20 seconds) to cause a device to look for Netinstall servers (required for reinstalling RouterOS over the network).
Regardless of the above option used, the system will load the backup RouterBOOT loader if the button is pressed before power is applied to the device. Useful for RouterBOOT debugging and recovery.
Accessories
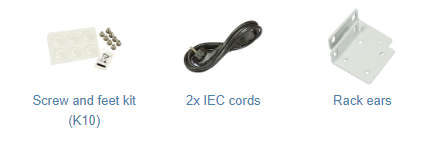
Package includes the following accessories that come with the device:
Specifications
For more information about this product, specification and pictures please visit our web page: https://mikrotik.com/product/crs326_24s_2q_rm
Operating system support
The device supports dual boot SwOS software version 2.9 and RouterOS v6. The specific factory-installed version number is indicated in the RouterOS menu /system resource. Other operating systems have not been tested.
Safety Notice 
Electric shock hazard. This equipment is to be serviced by trained personnel only.
Federal Communication Commission Interference Statement
This equipment has been tested and found to comply with the limits for a Class B digital device, pursuant to Part 15 of the FCC Rules. These limits are designed to provide reasonable protection against harmful interference in a residential installation.
![]()
This equipment generates, uses and can radiate radio frequency energy and, if not installed and used in accordance with the instructions, may cause harmful interference to radio communications. However, there is no guarantee that interference will not occur in a particular installation. If this equipment does cause harmful interference to radio or television reception, which can be determined by turning the equipment off and on, the user is encouraged to try to correct the interference by one of the following measures:
- Reorient or relocate the receiving antenna.
- Increase the separation between the equipment and receiver.
- Connect the equipment into an outlet on a circuit different from that to which the receiver is connected.
- Consult the dealer or an experienced radio/TV technician for help.
FCC Caution: Any changes or modifications not expressly approved by the party responsible for compliance could void the user’s authority to operate this equipment.
This device complies with Part 15 of the FCC Rules. Operation is subject to the following two conditions: (1) This device may not cause harmful interference, and (2) this device must accept any interference received, including interference that may cause undesired operation.
Note: This unit was tested with shielded cables on the peripheral devices. Shielded cables must be used with the unit to ensure compliance.
Innovation, Science and Economic Development Canada
This device complies with Industry Canada licence-exempt RSS standard(s). Operation is subject to the following two conditions: (1) this device may not cause interference, and (2) this device must accept any interference, including interference that may cause undesired operation of the device.
Le présent appareil est conforme aux CNR d’Industrie Canada applicables aux appareils radio exempts de licence. L’exploitation est autorisée aux deux conditions suivantes: (1) l’appareil ne doit pas produire de brouillage, et (2) l’utilisateur de l’appareil doit accepter tout brouillage radioélectrique subi, même si le brouillage est susceptible d’en compromettre le fonctionnement.
This Class B digital apparatus complies with Canadian ICES-003.
Cet appareil numérique de la classe [B] est conforme à la norme NMB-003 du Canada.
CAN ICES-003 (B) / NMB-003 (B)
UKCA marking

Eurasian Conformity Mark
Информация о дате изготовления устройства указана в конце серийного номера на его наклейке через дробь. Первая цифра означает номер года (последняя цифра года), две последующие означают номер недели.
Изготовитель: Mikrotikls SIA, Aizkraukles iela 23, Riga, LV-1006, Латвия, support@mikrotik.com. Сделано в Китае, Латвии или Литве. Cм. на упаковке.
Для получения подробных сведений о гарантийном обслуживании обратитесь к продавцу. Информация об импортерах продукции MikroTik в Российскую Федерацию: https://mikrotik.com/buy/europe/russia
Продукты MikroTik, которые поставляются в Евразийский таможенный союз, оцениваются с учетом соответствующих требований и помечены знаком EAC, как показано ниже:

Norma Oficial Mexicana
EFICIENCIA ENERGETICA CUMPLE CON LA NOM-029-ENER-2017.
La operacion de este equipo esta sujeta a las siguientes dos condiciones:
- Es posible que este equipo o dispositivo no cause interferencia perjudicial y.
- Este equipo debe aceptar cualquier interferencia, incluyendo la que pueda causar su operacion no deseada.
Fabricante: Mikrotikls SIA, Brivibas gatve 214i, Riga, LV-1039, Latvia.
País De Origen: Letonia; Lituania; China (Republica Popular); Estados Unidos De America; Mexico.
Por favor contacte a su distribuidor local para preguntas regionales específicas. La lista de importadores se puede encontrar en nuestra página de inicio – https://mikrotik.com/buy/latinamerica/mexico.
CE Declaration of Conformity
Manufacturer: Mikrotikls SIA, Brivibas gatve 214i Riga, Latvia, LV1039.
The full text of the EU Declaration of Conformity is available at the following internet address: https://mikrotik.com/products![]()
Information contained here is subject to change. Please visit the product page on www.mikrotik.com for the most up to date version of this document.
CRS326-24G-2S+RM
CRS326-24G-2S+RM
Safety Warnings
Before you work on any equipment, be aware of the hazards involved with electrical circuitry, and be familiar with standard practices for preventing
accidents.
Ultimate disposal of this product should be handled according to all national laws and regulations.
The Installation of the equipment must comply with local and national electrical codes.
This unit is intended to be installed in the rackmount. Please read the mounting instructions carefully before beginning installation. Failure to use the
correct hardware or to follow the correct procedures could result in a hazardous situation to people and damage to the system.
This product is intended to be installed indoors. Keep this product away from water, fire, humidity or hot environments.
Use only the power supply and accessories approved by the manufacturer, and which can be found in the original packaging of this product.
Read the installation instructions before connecting the system to the power source.
We cannot guarantee that no accidents or damage will occur due to the improper use of the device. Please use this product with care and operate at your
own risk!
In the case of device failure, please disconnect it from power. The fastest way to do so is by unplugging the power plug from the power outlet.
It is the customer’s responsibility to follow local country regulations, including operation within legal frequency channels, output power, cabling
requirements, and Dynamic Frequency Selection (DFS) requirements. All Mikrotik devices must be professionally installed.
Quick start
Mount unit in a rackmount cabinet or place on the flat surface (see «
Connect two powering units to the AC source using power cords.
The Initial connection has to be done via the Ethernet cable, using the MikroTik Winbox utility.
Use Winbox to connect to the default IP address of 192.168.88.1 from any port, with the username
check user and wireless passwords on the sticker)
address.
Update the device by clicking the «Check for updates» button to v6.46 or the latest RouterOS software to ensure the best performance and
stability. The device needs to have an active internet connection.
To manually update the device, go to our download
Choose your architecture (ARM) and download the latest packages from any channel to your PC.
Open Winbox and upload packages in the Files menu.
Reboot the device.
Updating software will ensure the latest security fixes and regulations set by local law.
Set up your password to secure the device.
Mounting
The device is designed to use indoors and it can be mounted in a rackmount enclosure using provided rack mounts, or it can be placed on the desktop.
Use a Phillips screwdriver to attach rackmount ears on both sides of the device if designated use is for rackmount enclosure:
Attach rack ears to both sides of the device and tighten four screws to secure them in place, as shown in the picture.
Mounting
«).
. If IP is no available choose the Neighbors tab and connect to the device using the MAC
page https://mikrotik.com/download
admin
and no password
(or, for some models,
МикроТик CRS326-24G-2S+RM 24x RJ45
Руководство пользователя коммутатора 1000 Мбит/с
Приборная панель / Руководства пользователя / Переключатели
CRS326-24G-2S + RM
CRS326-24G-2S + RM
Предупреждения о безопасности
Прежде чем приступить к работе с каким-либо оборудованием, осознайте опасности, связанные с электрическими схемами, и ознакомьтесь со стандартными методами предотвращения несчастных случаев.
Полная утилизация этого продукта должна производиться в соответствии со всеми национальными законами и постановлениями.
Установка оборудования должна соответствовать местным и национальным электротехническим нормам и правилам.
Неспособность использовать правильное оборудование или следовать правильным процедурам может привести к опасной ситуации для людей и повреждению системы.
Прочтите инструкции по установке перед подключением системы к источнику питания.
Быстрый старт
- Установите блок в стоечный шкаф или разместите на ровной поверхности (см. «Монтаж»).
- Подключите два блока питания к источнику переменного тока с помощью шнуров питания.
- Первоначальное подключение должно быть выполнено через кабель Ethernet с помощью утилиты MikroTik Winbox.
- Используйте Winbox для подключения к IP-адресу по умолчанию 192.168.88.1 с любого порта с именем пользователя admin и без пароля. Если IP недоступен, выберите вкладку «Соседи» и подключитесь к устройству, используя MAC-адрес.
- Обновите устройство, нажав кнопку «Проверить наличие обновлений», до версии 6.46 или последней версии программного обеспечения RouterOS, чтобы обеспечить наилучшую производительность и стабильность. Устройство должно иметь активное подключение к Интернету.
- Чтобы вручную обновить устройство, перейдите на нашу страницу загрузки. https://mikrotik.com/download
- Выберите свою архитектуру (ARM) и загрузите последние пакеты с любого канала на свой компьютер.
- Откройте Winbox и загрузите пакеты в Fileменю.
- Перезагрузите устройство.
- Обновление программного обеспечения гарантирует наличие последних исправлений безопасности и правил, установленных местным законодательством.
- Установите пароль для защиты устройства.
Исполнение
Устройство предназначено для использования в помещении, и его можно установить в стойку с помощью предоставленных стоечных креплений или разместить на рабочем столе. Используйте крестовую отвертку, чтобы прикрепить монтажные проушины к обеим сторонам устройства, если они предназначены для монтажа в стойку:
- Прикрепите ушки стойки к обеим сторонам устройства и затяните четыре винта, чтобы закрепить их на месте, как показано на рисунке.

- Поместите устройство в корпус для монтажа в стойку и совместите с отверстиями, чтобы устройство удобно помещалось.
- Затяните винты, чтобы закрепить его на месте.

Устройство не имеет защиты от попадания воды, пожалуйста, обеспечьте размещение устройства в сухом и проветриваемом помещении. Мы рекомендуем кабели Cat6 для наших устройств. Монтаж и настройка данного устройства должны выполняться квалифицированным специалистом.
Слоты и порты расширения
- 24 порта Gigabit Ethernet.
- Два порта 10G SFP +.
- 1x консольный порт RJ45 (установлен на 115200 бит / с, 8 бит данных, 1 стоповый бит без контроля четности).
Посетите вики-страницы с таблицей совместимости и конфигурации модуля MikroTik SFP: https://wiki.mikrotik.com/wiki/MikroTik_SFP_module_compatibility_table
Включение питания
Устройство принимает питание следующими способами:
- Порт Ethernet принимает пассивный PoE 10–30 В пост. тока ⎓.
- Гнездо питания прямого ввода (5.5 мм снаружи и 2 мм внутри, розетка, контактный положительный штекер) принимает 10–30 В постоянного тока⎓.
Потребляемая мощность при максимальной нагрузке может достигать 24 Вт.
Подключение к адаптеру PoE:
- Подключите кабель Ethernet от устройства к порту PoE + DATA адаптера PoE;
- Подключите кабель Ethernet от вашей локальной сети (LAN) к адаптеру PoE;
- Подключите шнур питания к адаптеру, а затем вставьте шнур питания в розетку.
Процесс загрузки
Устройство поддерживает загрузку RouterOS (для полной конфигурации маршрутизации и коммутации) или SwOS (только для использования в качестве коммутатора). По умолчанию устройство загружает RouterOS, но вы можете перезагрузить другую операционную систему следующими способами:
- Из SwOS: В системном меню нажмите кнопку «Boot RouterOS» внизу страницы.
- В RouterOS: в меню «Система», RouterBOARD нажмите «Настройки» и выберите «Загрузочная ОС».
Также можно выбрать ОС и настроить другие параметры загрузки через меню последовательной консоли.
Кнопка сброса
Кнопка сброса RouterBOOT выполняет следующие функции. Нажмите кнопку и включите питание, затем:
- Отпустите кнопку, когда зеленый светодиод начнет мигать, чтобы восстановить настройки RouterOS по умолчанию.
- Отпустите кнопку, когда индикатор загорится зеленым, чтобы очистить всю конфигурацию и настройки по умолчанию.
- Отпустите кнопку после того, как светодиод перестанет гореть (~ 20 секунд), чтобы устройство начало поиск серверов Netinstall (требуется для переустановки RouterOS по сети).
Независимо от используемого выше варианта, система загрузит резервный загрузчик RouterBOOT, если кнопка будет нажата до подачи питания на устройство. Полезно для отладки и восстановления RouterBOOT.
Используйте порт Ethernet 1 при подключении к NetInstall.
Поддержка операционной системы
Устройство поддерживает двойную загрузку программного обеспечения SwOS версии 2.9 и RouterOS v6. Номер версии, установленной на заводе, указан в меню / системном ресурсе RouterOS. Остальные операционные системы не тестировались.
https://wiki.mikrotik.com/wiki/SwOS
инструкция по технике безопасности
Опасность поражения электрическим током. Это оборудование должно обслуживаться только обученным персоналом. ![]()

Заявление Федеральной комиссии по связи о помехах
Это оборудование было протестировано и признано соответствующим ограничениям для цифровых устройств класса B в соответствии с частью 15 правил FCC. Эти ограничения разработаны для обеспечения разумной защиты от вредных помех при установке в жилых помещениях.
Это оборудование генерирует, использует и может излучать радиочастотную энергию и, если оно установлено и используется не в соответствии с инструкциями, может создавать вредные помехи для радиосвязи. Однако нет гарантии, что помехи не возникнут при конкретной установке. Если это оборудование действительно создает недопустимые помехи для приема радио или телевидения, что можно определить путем включения и выключения оборудования, пользователю рекомендуется попытаться устранить помехи одним из следующих способов:
![]()
- Изменить ориентацию или местоположение приемной антенны.
- Увеличьте расстояние между оборудованием и приемником.
- Подключить оборудование к розетке в цепи, отличной от той, к которой подключен приемник.
- Обратитесь за помощью к дилеру или опытному радио / телевизионному технику.
Предупреждение Федеральной комиссии по связи: любые изменения или модификации, явно не одобренные стороной, ответственной за соответствие, могут лишить пользователя права на эксплуатацию этого оборудования.
Это устройство соответствует требованиям части 15 правил FCC. Эксплуатация возможна при соблюдении следующих двух условий: (1) это устройство не может создавать вредных помех, и (2) это устройство должно принимать любые принимаемые помехи, включая помехи, которые могут вызвать нежелательную работу.
Примечание. Это устройство было протестировано с экранированными кабелями на периферийных устройствах. Для обеспечения соответствия с устройством необходимо использовать экранированные кабели.
Промышленность Канада
Это устройство соответствует стандарту (стандартам) RSS Министерства промышленности Канады, не требующему лицензии. Эксплуатация осуществляется при следующих двух условиях: (1) это устройство не должно создавать помех, и (2) это устройство должно принимать любые помехи, включая помехи, которые могут вызвать нежелательную работу устройства.
Декларация соответствия CE
Производитель: Mikrotikls SIA, Бривибас гатве 214i Рига, Латвия, LV1039.
Настоящим Mikrotīkls SIA заявляет, что тип радиооборудования Router BOARD соответствует Директиве 2014/53/ЕС. Полный текст декларации о соответствии ЕС доступен по следующему адресу в Интернете: https://mikrotik.com/products
Примечание. Информация, содержащаяся здесь, может быть изменена. Посетите страницу продукта на сайте www.mikrotik.com, чтобы получить самую последнюю версию этого документа.
![]()
Инструкция по эксплуатации: Подключите адаптер питания, чтобы включить устройство. Откройте 192.168.88.1 в своем web Браузер, чтобы настроить его. Дополнительная информация о {_}{+}https://mt.lv/help+_
Документы / Ресурсы
Рекомендации
Powering
The device accepts powering from two inputs of 100 – 240 V AC .
The power consumption of this device under maximum load is up to 42 W. With attachments up to 69 W.
Booting process
The device supports booting RouterOS (for complete routing and switching configuration) or SwOS (for only using as a switch). By default, the device will boot RouterOS, but you can reboot into the other operating system in the following ways:
•From SwOS: In the System menu, click “Boot RouterOS” button on the bottom of the page.
•From RouterOS: in the System, RouterBOARD menu, click “Settings” and there select “Boot OS”.
It is also possible to select the OS and configure other boot settings via the serial console menu.
Configuration
Serial console for configuration is an RS-232 serial port, set by default to 115200 bit/s, 8 data bits, 1 stop bit, no parity. Standard RJ45 to COM cable can be used. To find detailed serial console configuration and pinout please visit serial console section in our wiki pages here: https://wiki.mikrotik.com/wiki/Manual:System/Serial_Console
RouterOS and SwOS include many configuration options in addition to what is described in this document. We suggest starting here to get yourself accustomed to the possibilities: http://mt.lv/help. In case the IP connection is not available, the Winbox tool (http://mt.lv/winbox) can be used to connect to the MAC address of the device.
Extension slots and ports
•Twenty four 10G SFP+ ports.
•Two 40G QSFP+ ports.
•1x RJ45 console port (set at 115200bits/s, 8 data bits, 1 stop bit no parity).
•1x 10/100Mbit Ethernet port for management access.
•USB type-A port.
•Three cooling fans with automatic speed control.
•Two integrated power supply units with AC inputs for redundancy.
Please visit wiki pages for MikroTik SFP module compatibility and configuration table: https://wiki.mikrotik.com/wiki/MikroTik_SFP_module_compatibility_table
Reset button
The RouterBOOT reset button has the following functions. Press the button and apply the power, then:
•Release the button when green LED starts flashing, to reset RouterOS configuration to defaults.
•Release the button when the LED turns solid green to clear all configuration and defaults.
•Release the button after LED is no longer lit (~20 seconds) to cause a device to look for Netinstall servers (required for reinstalling RouterOS over the network).
Regardless of the above option used, the system will load the backup RouterBOOT loader if the button is pressed before power is applied to the device. Useful for RouterBOOT debugging and recovery.
Accessories
Package includes the following accessories that come with the device:
•K-10 Fastening set for rackmount case.
•White rackmount bracket – 2 pcs.
•EU/US power cord, AC D03+QT3 H05VV-F 3×0.75mm2, 1.83m RoHS – 2 pcs.
CRS326-24G-2S+RM
Safety Warnings
Before you work on any equipment, be aware of the hazards involved with electrical circuitry, and be familiar with standard practices for preventing
accidents.
Ultimate disposal of this product should be handled according to all national laws and regulations.
The Installation of the equipment must comply with local and national electrical codes.
This unit is intended to be installed in the rackmount. Please read the mounting instructions carefully before beginning installation. Failure to use the
correct hardware or to follow the correct procedures could result in a hazardous situation to people and damage to the system.
This product is intended to be installed indoors. Keep this product away from water, fire, humidity or hot environments.
Use only the power supply and accessories approved by the manufacturer, and which can be found in the original packaging of this product.
Read the installation instructions before connecting the system to the power source.
We cannot guarantee that no accidents or damage will occur due to the improper use of the device. Please use this product with care and operate at your
own risk!
In the case of device failure, please disconnect it from power. The fastest way to do so is by unplugging the power plug from the power outlet.
It is the customer’s responsibility to follow local country regulations, including operation within legal frequency channels, output power, cabling
requirements, and Dynamic Frequency Selection (DFS) requirements. All Mikrotik devices must be professionally installed.
Quick start
Mount unit in a rackmount cabinet or place on the flat surface (see « «).Mounting
Connect two powering units to the AC source using power cords.
The Initial connection has to be done via the Ethernet cable, using the MikroTik Winbox utility.
Use Winbox to connect to the default IP address of 192.168.88.1 from any port, with the username and no password
admin
(or, for some models,
. If IP is no available choose the Neighbors tab and connect to the device using the MAC check user and wireless passwords on the sticker)
address.
Update the device by clicking the «Check for updates» button to v6.46 or the latest RouterOS software to ensure the best performance and
stability. The device needs to have an active internet connection.
To manually update the device, go to our download pagehttps://mikrotik.com/download
Choose your architecture (ARM) and download the latest packages from any channel to your PC.
Open Winbox and upload packages in the Files menu.
Reboot the device.
Updating software will ensure the latest security fixes and regulations set by local law.
Set up your password to secure the device.
Mounting
The device is designed to use indoors and it can be mounted in a rackmount enclosure using provided rack mounts, or it can be placed on the desktop.
Use a Phillips screwdriver to attach rackmount ears on both sides of the device if designated use is for rackmount enclosure:
Attach rack ears to both sides of the device and tighten four screws to secure them in place, as shown in the picture.