Перейти к контенту
![]()
Русские электронные инструкции по эксплуатации
Постоянно обновляемый большой каталог документации по эксплуатации и использованию современных устройств и оборудования на русском языке. Бесплатное скачивание файлов.
Поиск:
Главная
♥ В закладки
Просмотр инструкции в pdf


Инструкция по эксплуатации метеостанции VITEK VT-3532 BK.
Скачать инструкцию к метеостанции VITEK VT-3532 BK (344,65 КБ)

Инструкции метеостанций VITEK
« Инструкция к метеостанции Kitfort КТ-3318
» Инструкция к метеостанции STM WS100
Вам также может быть интересно

Инструкция к кофеварке VITEK VT-1527

Инструкция к тостеру Vitek VT-7163

Инструкция к метеостанции VITEK VT-6408

Инструкция к фену VITEK VT-8210 BK

Инструкция к кухонным весам VITEK VT-8006

Инструкция к обогревателю VITEK VT-2057

Инструкция к фену VITEK VT-8230

Инструкция к электровафельнице Vitek VT-1592 ST
Добавить комментарий
Имя *
Email *
Сайт
Комментарий


![]()


Сохранить моё имя, email и адрес сайта в этом браузере для последующих моих комментариев.
- Добавить инструкцию
- Заказать инструкцию
- Политика конфиденциальности
| Отображение комнатной температуры | есть |
| Отображение наружной температуры | есть |
| Индикатор влажности | есть |
| Будильник | есть |
| Отображение времени на дисплее | есть |
| Память минимальных и максимальных значений температуры | есть |
показать все характеристики
Метеорологи ошибаются. Используйте устройство, чтобы узнать точную температуру и влажность в помещении и на улице. Метеостанция также напомнит вам о дате и дне недели и разбудит вас с утра.
 Aneroid control
Данная технология позволяет прогнозировать погоду с повышенной точностью и помогает следить за изменением атмосферного давления.

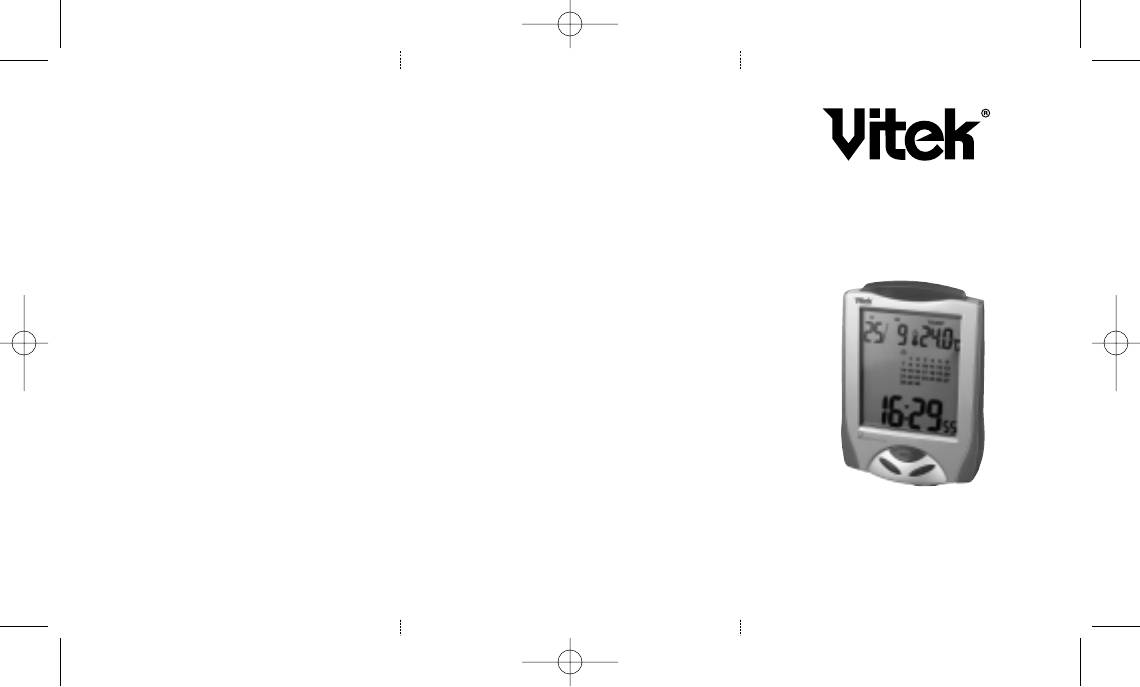
WIRELESS WEATHER STATION
The wireless weather station is intended for temperature and
relative humidity level measurement. Use the base unit for
measurement of indoor parameters and the remote sensor for
outdoor or indoor measurement. Besides, the unit displays the
current time, date and has a built-in alarm.
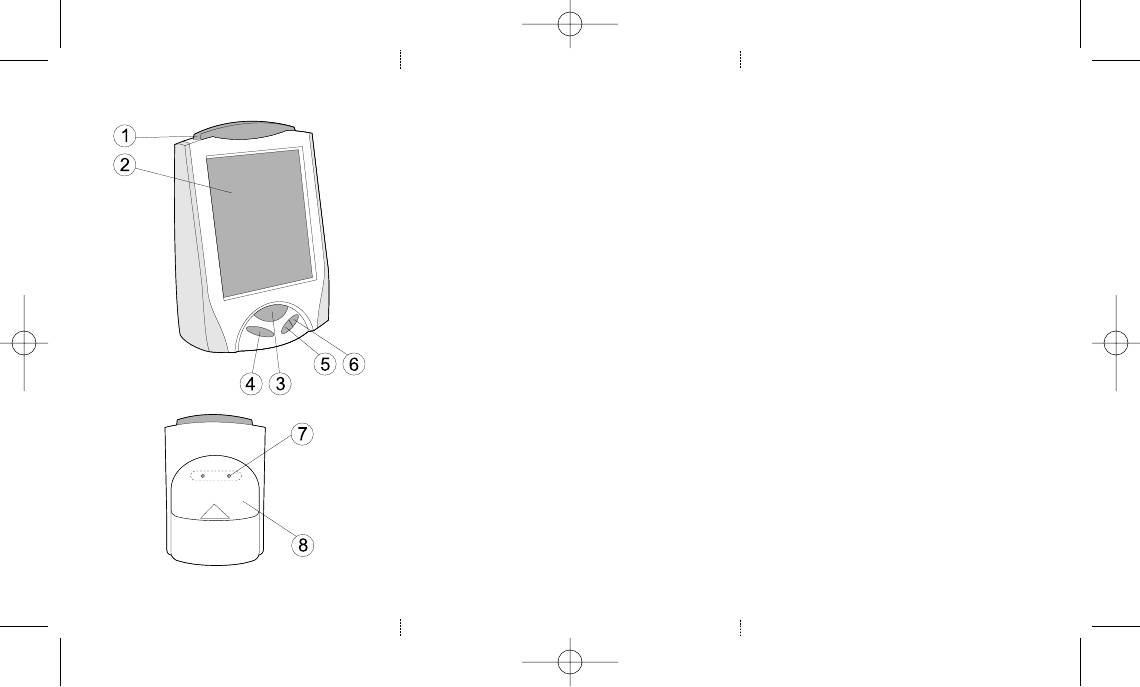
DESCRIPTION
Main unit
1. «ALARM» button
2. «SNZ» button
3. «DOWN» button
4. «UP» button
5. «CH» button
6. «SET» button
7. Sensor wall mounting hole
8. Battery compartment lid
9. Flap stand
Display
10. Integrated temperature and humidity sensor indication
11. Remote temperature and humidity sensor indication
12. Date field
13. Current time indication
Remote sensor
14. Sensor
15. Display
16. Sensor wall mounting hole
17. Battery compartment lid
18. Flap stand
19. Temperature measurement units selection button «°C/°F»
20. Transfer channel number selection button «CH»
21. Wire temperature sensor
SAFETY MEASURES
Before using the unit, read this instruction manual carefully and
keep it for future reference.
Use the unit for intended purposes only, as specified in this
manual. Mishandling the unit can lead to its breakage and
cause harm to the user or damage to his/her property.
•
Do not subject the units to impacts (dust and moisture
are also to be avoided), as it can lead to failures, reduc-
tion of service life, battery damage and to deformation of
the unit body parts.
•
Provide that no liquid gets inside the unit body. To pre-
vent the unit damage, do not expose the it to rain or
moisture, do not place the unit in the places with high
humidity, (near bathtubs, containers filled with water,
kitchen sinks, washing machines, near a swimming pool,
in wet basements, etc.). Protect the unit from dripping
and splashing.
•
The unit should not be placed near heat sources such as
radiators, electric heaters, stoves, or in places exposed
to direct sunlight, excessive dust, vibration or mechani-
cal shocks.
•
Install the unit on flat stable surface in places with proper
ventilation. Do not block the unit ventilation openings.
•
Make sure that the wire sensor is not bent or pinched.
•
Do not let foreign objects get into the unit openings.
•
Do not repair the unit or make any changes in it by your-
self. If you find any damages, switch the unit off by remov-
ing the batteries from the battery compartment and apply
to the authorized service center.
•
If you disassemble the unit, it will lead to warranty cancel-
lation. No parts inside the unit require user’s attention.
•
This unit is not intended for usage by children under
8 years of age.
•
Children aged 8 and over as well as disabled persons can
use this unit only under supervision of a person who is
responsible for their safety, if they are given all the neces-
sary and understandable instructions concerning the safe
usage of the unit and information about danger that can be
caused by its improper usage.
•
Do not leave children unattended to prevent using the
unit as a toy.
•
For children safety reasons do not leave polyethylene bags
used as packaging unattended.
Attention!
Do not allow children to play with polyethylene
bags or packaging film.
Danger of suffocation!
•
Do not disassemble the unit by yourself, if any malfunc-
tion is detected or after the unit was dropped, apply to the
nearest authorized service center.
•
Do not use abrasives or substances causing damages of
body and inner parts of the units for cleaning.
•
Transport the unit in the original package only.
•
Keep the unit out of reach of children and disabled
persons.
THE UNIT IS INTENDED FOR HOUSEHOLD USAGE ONLY
BEFORE THE FIRST USE
After unit transportation or storage under cold (winter)
conditions, it is necessary to keep it for at least two hours
at room temperature before switching on.
– Unpack the unit, remove any stickers that can prevent
unit operation.
– Examine the unit for possible damages. In case of dam-
ages do not switch the unit on.
BATTERY INSTALLATION
Attention!
Batteries leakage can cause injuries or the unit damage.
To avoid the unit damage, follow the instructions given below:
•
insert batteries following the polarity;
•
use only new batteries specified in the instruction;
•
do not insert the batteries of different types, new and the
old ones, the batteries of different brands as well as the
accumulator batteries of different capacity.
•
remove the batteries if you are not planning to use the
unit for a long time;
•
do not dismantle the batteries, do not subject them to
high temperatures;
•
replace the batteries in time.
Notes:
•
If the batteries are already installed into the bat-
tery compartment you need to remove the isola-
tion insert.
•
Long operation under low or high temperatures can
reduce the voltage of the batteries of the sensor (14) that
causes decreasing of transmission range.
•
The symbol
indicates that the base unit batteries are
discharged, in this case replace the batteries.
Remote sensor
– Move the battery compartment lid (17). Insert two “AAA”
batteries (supplied), strictly following the polarity.
– Select the temperature measurement units by pressing
the
°C/°F
button (19). The selected measurement units are
shown on the display (15).
– By sequential pressing the button (20)
CH
select the
transfer channel number (from 1 to 3).
– Install the battery compartment lid (17) back to its place.
Main unit
– Remove the battery compartment lid (8) and insert
two “AAA” batteries (supplied), strictly following the
polarity.
– Install the battery compartment lid (8) back to its place.
UNIT INSTALLATION
– Use the flap stand (9) to install the base unit on a flat
stable surface, use the stand (18) to install the remote
sensor (14).
– You can also hang up the base unit and the remote sen-
sor (14) on the wall by using the holes (7) and (16),
respectively.
– Place the remote sensor (14) outdoors so that it is not
exposed to direct sunlight, rain or snow. The remote
sensor should be installed up to 30 meters away from the
base unit in the line of sight. The distance from the base
unit and the remote sensor to any interference sources
(such as computers, television receivers etc.) should be
at least 1,5-2 meters.
– Do not place the unit near the metal frames; do not use the
units (for example, headphones) with the same frequency
range (433 MHz) near the weather station.
– The remote sensor (14) operates at the temperature from
–40°C to +60° C. If the outdoor temperature is below -20
°C or if the remote sensor (14) can’t be installed outside,
set it indoors and install the wire temperature sensor (21)
outside. In such a case the outdoor temperature and the
indoor humidity (at the place of remote sensor (14) instal-
lation) are displayed in the field (11).
Note: Make sure that the wire sensor (21) is not bent or
pinched.
DATE AND TIME SETTING
Notes:
The available languages for week days indication: English
(EN), German (GE), Italian (IT), French (FR), Dutch (NE),
Spanish (ES) and Danish (DA).
If during setting the buttons (3) DOWN and (4) UP are not
pressed within 30 seconds, the unit will be switched to the
current time mode without saving the new settings.
– Press and hold the
SET
button (6) for 3 seconds, the year
numerical value (
Yr
) will start flashing in the field (13).
– Use the buttons (3)
DOWN
and (4)
UP
to set the required
year.
– Press the
SET
button (6), the month numerical value (
M
)
will be flashing in the field (12).
– Use the buttons (3)
DOWN
and (4)
UP
to set the required
month.
– Press the
SET
button (6), the day numerical value (D) will
be flashing in the field (12).
– Use the buttons (3)
DOWN
and (4)
UP
to set the required
day.
– Press the
SET
button (6), the language symbol used for
week day indication will be flashing in the field (12).
– Use the buttons (3)
DOWN
and (4)
UP
to set the language
for week day indication (for example, English (EN)).
– Press the
SET
button (6), the time indication format sym-
bols will be flashing in the field (13).
– Use the buttons (3)
DOWN
and (4)
UP
to select the
time indication format: «12H» (12 hour format) or «24H»
(24 hour format).
– Press the
SET
button (6), the hour digits will be flashing
in the field (13).
– Use the buttons (3)
DOWN
and (4)
UP
to set time in hours.
To set the afternoon time in the 12 hour format press the
buttons (3)
DOWN
and (4)
UP
until a flashing symbol
«PM» appears.
– Press the
SET
button (6), the minute digits will be flashing.
– Use the buttons (3)
DOWN
and (4)
UP
to set the time in
minutes.
– To save the settings press the
SET
button (6).
– After the date is set, the day of week in the preset lan-
guage will be displayed in the field (12). See the symbols
interpretation in the table below.
2
3
DAY OF WEEK
Day of
week/
lan-
guage
Eng-
lish
(EN)
Ger-
man
(GE)
Ital-
ian
(IT)
French
(FR)
Dutch
(NE)
Span-
ish
(ES)
Dan-
ish
(DA)
Mo.
MO
MO
LU
LU
MA
LU
MA
Tu.
TU
DI
MA MA
DI
MA
TI
We
WE
MI
ME ME
WO
MI
ON
Th.
TH
DO
GI
JE
DO
JU
TO
Fr.
FR
FR
VE
VE
VR
VI
FR
Sa.
SA
SA
SA
SA
ZA
SA
LO
Su.
SU
SO
DO DI
ZO
DO
SO
ALARM SETTING
Note: If during alarm setting the buttons (3) DOWN and (4)
UP are not pressed within 30 seconds, the unit will be switched
to the current time mode without saving the new settings.
– Press and hold the
ALARM
button (1) for 3 seconds, the
alarm hour digits will be flashing.
– Use the buttons (3)
DOWN
and (4)
UP
to set the first alarm
signal time in hours.
– Press the
ALARM
button (1), the alarm minute digits
will be flashing.
– Use the buttons (3)
DOWN
and (4)
UP
to set the alarm
signal time in minutes.
– To save the settings, press the
ALARM
button (1).
– To switch the alarm on/off, press the
SET
button (6) in
the current time mode. If the alarm is on, the symbol
appears in the field (13).
– To view the alarm settings, press the
ALARM
button (1)
once in the current time mode, the indicator «AL» will
appear in the field (12), and the alarm signal time will be
shown in the field (13). The alarm settings will be shown
on the display for about a minute and a half. To return to
the current time mode during this time, press the
ALARM
button (1) again.
Repeating alarm signal
– The alarm signal will sound for 2 minutes if you do not
press any buttons.
– You can switch the alarm signal off for 5 minutes by press-
ing the «SNZ»button (2). The symbol «Zz» will appear in the
field (13), the alarm signal will be repeated in 5 minutes.
– To switch the alarm sound signal off, press any other
button.
DISPLAY ILLUMINATION
To switch the display illumination on, press the «SNZ» button
(2). The illumination will be on within 20 seconds.
TEMPERATURE AND HUMIDITY MEASUREMENT
The built-in thermometer is used for temperature measure-
ment within the range from 0 °С to +50°С, the remote sensor
(14) can operate outdoors at the temperature from -40°C to
+60° C. The humidity meters (built-in and remote one) operate
within the relative humidity range from 20% to 90%. If the tem-
perature and humidity values are below the specified range,
the symbols «LL» will be shown in the corresponding field.
– The indoor temperature and humidity data are displayed in
the field (10) «
in
». The outdoor temperature and humidity
values are displayed in the field (11) «
out
».
– The temperature and relative humidity level are measured
minutely by the unit, the data are updated automatically.
– The temperature measurements are indicated with arrows
(temperature increases, temperature remains constant,
temperature decreases) in the field (10) and (11).
– Temperature and humidity data are used for evaluating
of comfort level, that is displayed by one of the three
symbols:
”Favorable”– optimal temperature and humidity values;
“Arid”– indoor humidity level is lower than the opti-
mal one;
“Damp”– indoor humidity level is higher than the
optimal one;
Measurement units selection
To select the measurement units (Celsius degrees or
Fahrenheit degrees) press the DOWN button (3).
Remote sensor data transfer
When the batteries are inserted in the remote sensor (14), it will
start data transfer with about 1-minute interval.
– After you set the batteries in the base unit select the
transfer channel number. To do it press the
CH
button (5)
repeatedly. The selected channel number should match
the channel number on the remote sensor display (15).
– The signal search takes about 3 minutes. During the
search the symbol
is shown on the display of the
base unit.
– Remote sensor data (14) will be shown in the field (11)
«
out
».
– If there is no remote sensor signal, the symbols «- -» will be
shown in the field (11) «
out
».
– To start a new channel search press and hold the
CH
but-
ton (5) for 3 seconds.
Note: You can connect the unit with two additional sensors
operating on the frequency of 433 MHz. To do so every sen-
sor should be assigned with its channel number (from 1 to
3). To view the different sensors data press the СH button
(5) repeatedly. If the sensor does not support the humidity
measurement function, the symbols «LL» will be shown in the
field (11) «out» in humidity values.
Memory function
The unit memory keeps the data of maximal and minimal
temperature values and relative humidity level.
– Press the
UP
button (4) repeatedly for displaying the fol-
lowing data:
•
maximal temperature and humidity values (the symbol
«MAX» in the corresponding field),
•
minimal temperature and humidity values (the symbol
«MIN»),
•
current temperature and humidity values.
– Maximal or minimal temperature and humidity values are
shown on the display within 10 seconds.
– To clear the unit memory press and hold the
UP
button
(4) for 2 seconds in the mode of displaying of the maximal
and minimal values.
Warning signal of temperature change
If the outdoor temperature is out of the preset range, the unit
will give a tone signal.
– To switch the warning signal on or off press and hold the
DOWN
button (3) for 2 seconds, the values in the field (11)
will be flashing. Pressing the button
DOWN
(3) repeatedly
switch the warning signal on and off:
Off
– the signal is off,
on
– the signal is on.
– Press the
SET
button (6), the symbol
▲
(the upper limit of
the temperature range) will appear in the field (11).
– Use the buttons (3)
DOWN
and (4)
UP
to set the upper
limit of the temperature range.
– Press the
SET
button (6), the symbol
▼
(the lower limit of
the temperature range) will appear in the field (11).
– Use the buttons (3)
DOWN
and (4)
UP
to set the lower limit
of the temperature range.
– To save the settings, press the
SET
button (6).
– When the temperature is out of the preset range, you will
hear a tone signal, the temperature values in the field
(11) and the corresponding symbol of the temperature
range will be flashing. The signal will sound every min-
ute for 5 seconds till the outdoor temperature is within
the preset range.
– To switch the warning signal off press and hold the
DOWN
button (3) for 2 seconds, then press the
DOWN
button (3)
(the symbol «
Off
») and press the
SET
button (6) thrice (or
wait 30 seconds).
CLEANING AND CARE
– Switch the unit off before cleaning by removing the bat-
teries from the battery compartment of the base unit and
the remote sensor.
– Use a soft cloth to clean the unit.
– Do not use liquid or aerosol detergents for the unit
cleaning.
STORAGE
– Unplug and clean the unit before you take it away for
storage.
– Wind the wire temperature sensor (21). Do not wind the
sensor wire round the unit.
– Keep the unit away from children in a dry cool place.
DELIVERY SET
Weather station base unit – 1 pc.
Remote sensor – 1 pc.
«AAA» batteries – 4 pcs.
Instruction manual – 1 pc.
TECHNICAL SPECIFICATIONS
Measurements
Main unit
From 0°C to + 50°C
Remote sensor
From -40°C to +60°C
Temperature measurement
precision
0,1°C
Relative humidity
measurement
from 20% to 90%
Relative humidity
measurement precision
1%
Remote sensor data transfer
Data transfer frequency
433 mHz
Number of sensors
connected
3
Transmission range
Max. 30m
Power supply
Base unit
2 «AAA» type batteries 1,5 V
Remote sensor
2 « AAA» type batteries
1,5 V
The manufacturer preserves the right to change the specifica-
tions of the unit without a preliminary notification
Unit operating life is 3 years
Guarantee
Details regarding guarantee conditions can be obtained from
the dealer from whom the appliance was purchased. The bill
of sale or receipt must be produced when making any claim
under the terms of this guarantee.
This product conforms to the EMC-Requirements
as laid down by the Council Directive 2004/108/ЕС
and to the Low Voltage Regulation (2006/95/ЕС)
ENGLISH
VT-3532.indd 1
24.06.2014 12:20:42
3532.qxd
29.10.03
12:29
Page 1
FEATURES:
•
12/24 Hour time display selectable.
•
Temperature in °C/°F selectable.
•
Calendar display up to Year 2050.
•
Week count display.
•
Snooze Alarm function.
SET UP:
•
Remove the insulator (8).
•
2 x AA batteries inserted.
•
Press «RESET» (7) hole on the back of the unit with a
pin.
MANUAL TIME SETTING
•
Hold MODE (3) button until Hour digit flashes.
•
Press «+» (6) or » » (5) to adjust Hour, Minute,
Second, Year, Month, Date, and Time Zone.
•
Press MODE (3) button to confirm each setting.
Note: Second can only be adjusted to zero only.
DAILY ALARM SETTING:
•
Press MODE (3) button once to select Alarm Time
Display. Icon «AL» appears on the LCD (2).
•
Hold MODE (3) button for 3 seconds and press «+»
(6) or » » (5) buttons to adjust the alarm time.
•
Press MODE (3) button to confirm each setting.
•
Press «ALARM» (4) button to switch the alarm on or
off.
«
» will appear on the LCD if the alarm is on.
<<•>>
SNOOZE ALARM FUNCTION:
•
Press SNOOZE button (1) when alarming. The alarm
snoozes for 5 minutes, then it alarms again.
•
Simply press other buttons to stop snooze alarm.
THERMOMETER:
•
Press » » (5) button to select the temperature to be
displayed in °C/°F.
12/24 HOUR FORMAT:
•
Press «+» (6) to select hour to be displayed in 12
hour or 24 hour format.
NOTES/REMARKS:
•
All function keys do not work when the radio signal
is being scanned.
•
Avoid placing the clock near interference
sources/metal frames such as computer monitor or
TV sets.
•
Placing the clock closer to a window/towards the
general direction of the Transmitter. The signal is
weaker in basement.
•
Never use the clock in bathroom or any other area
with high humidity.
•
The operating temperature of the clock is 0° 60°.
•
The clock loses its time information when the bat
tery is removed.
SERVICE LIFE OF THE LCD ALARM CLOCK WITH
CALENDAR NOT LESS THAN 3 YEARS
FEATURES:
• Simply press other buttons to stop snooze alarm.
• 12/24 Hour time display selectable.
• Temperature in °C/°F selectable.
THERMOMETER:
• Calendar display up to Year 2050.
• Press «» (5) button to select the temperature to be
displayed in °C/°F.
• Week count display.
• Snooze Alarm function.
12/24 HOUR FORMAT:
• Press «+» (6) to select hour to be displayed in 12
SET UP:
hour or 24 hour format.
• Remove the insulator (8).
• 2 x AA batteries inserted.
NOTES/REMARKS:
• Press «RESET» (7) hole on the back of the unit with a
• All function keys do not work when the radio signal
pin.
is being scanned.
• Avoid placing the clock near interference
MANUAL TIME SETTING
sources/metal frames such as computer monitor or
• Hold MODE (3) button until Hour digit flashes.
TV sets.
• Press «+» (6) or «» (5) to adjust Hour, Minute,
• Placing the clock closer to a window/towards the
Second, Year, Month, Date, and Time Zone.
general direction of the Transmitter. The signal is
• Press MODE (3) button to confirm each setting.
weaker in basement.
Note: Second can only be adjusted to zero only.
• Never use the clock in bathroom or any other area
with high humidity.
DAILY ALARM SETTING:
• The operating temperature of the clock is 0° 60°.
• Press MODE (3) button once to select Alarm Time
• The clock loses its time information when the bat
Display. Icon «AL» appears on the LCD (2).
tery is removed.
• Hold MODE (3) button for 3 seconds and press «+»
(6) or «» (5) buttons to adjust the alarm time.
SERVICE LIFE OF THE LCD ALARM CLOCK WITH
• Press MODE (3) button to confirm each setting.
CALENDAR NOT LESS THAN 3 YEARS
• Press «ALARM» (4) button to switch the alarm on or
off.
«
<<•>>» will appear on the LCD if the alarm is on.
SNOOZE ALARM FUNCTION:
• Press SNOOZE button (1) when alarming. The alarm
snoozes for 5 minutes, then it alarms again.
3532.qxd 29.10.03 12:29 Page 1
ХАРАКТЕРИСТИКИ
кнопок «+» (6) или «» (5) установите время
• Выбор 12/24 часовой индикации времени.
будильника.
• Выбор индикации температуры по шкале
• Каждую установку подтверждайте нажатием
Цельсия/Фаренгейта.
кнопки MODE (3).
• Календарь до 2050 года.
• Для включения / отключения будильника
• Отсчет недель.
используйте кнопку ALARM (4).
Если будильник включен, то на экране (2) появится
• Кнопка короткого сна.
обозначение «
<<•>>«.
LCD ALARM CLOCK WITH CALENDAR
ПОДГОТОВКА К РАБОТЕ
КНОПКА КОРОТКОГО СНА
• Снимите крышку отсека для элементов питания
• Нажмите кнопку SNOOZE (1) во время звучания
ЧАСЫ7БУДИЛЬНИК С КАЛЕНДАРЕМ
(8).
сигнала будильника. Сигнал прервется на 5 мин.,
• Вставьте 2 элемента питания (размер «АА»).
после чего раздастся вновь.
• С помощью булавки нажмите кнопку RESET (7),
• Для отмены функции короткого сна нажмите
расположенную на задней панели часов под
любую кнопку.
крышкой .
ТЕРМОМЕТР
УСТАНОВКА ВРЕМЕНИ
• Для выбора индикации температуры по шкале
• Удерживайте кнопку MODE (3) в нажатом
Цельсия/Фаренгейта нажмите кнопку «» (5).
положении до тех пор, пока цифры,
указывающие время, не начнут мигать.
ВЫБОР 12/24 ЧАСОВОЙ ИНДИКАЦИИ ВРЕМЕНИ
• Нажатием «+» (6) или «» (5) установите часы,
• Нажмите кнопку «+» (6) для выбора
минуты, секунды, год, месяц, дату и часовой
соответствующего формата индикации времени
пояс.
(12/24 часа).
• Каждую установку подтверждайте нажатием
кнопки MODE (3).
ПРИМЕЧАНИЯ
Примечание: секунды могут быть установлены
• Не используйте часы в ванной комнате и в других
только на «0».
помещениях с повышенной влажностью.
• Температура в помещении, где используются
УСТАНОВКА БУДИЛЬНИКА
часы, должна быть в пределах 060°C.
• Однократным нажатием кнопки MODE (3)
• При выемке элементов питания все установки
MANUAL INSTRUCTION
выберите режим установки будильника. На
часов аннулируются.
ИНСТРУКЦИЯ ПО ЭКСПЛУАТАЦИИ
экране (2) появится обозначение AL.
• Удерживайте кнопку MODE (3) в нажатом
СРОК СЛУЖБЫ ЧАСОВ НЕ МЕНЕЕ 3$Х ЛЕТ
MOD. VT73532
положении в течение 3 сек., затем с помощью
3532.qxd 29.10.03 12:29 Page 2