- Manuals
- Brands
- Mercury Manuals
- Automobile
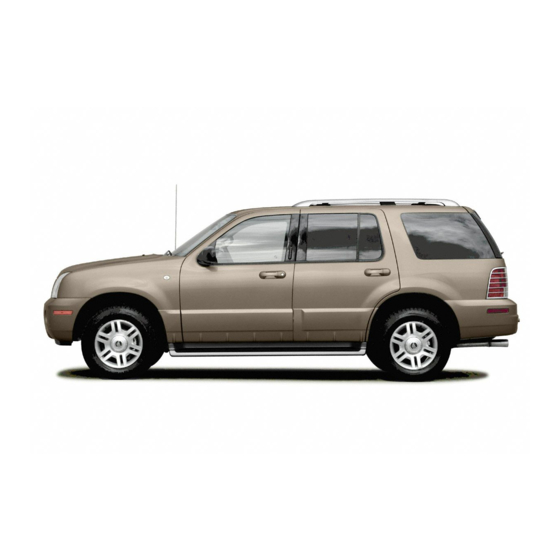
- 2004 Mountaineer
- Owner’s manual
-
Contents
-
Table of Contents
-
Bookmarks
Quick Links
AM/FM stereo with CD
AM/FM stereo with in-dash six CD
Electronic automatic temperature control
Mirrors
Locks
Table of Contents
10
18
27
33
43
79
4
10
15
18
21
27
28
31
32
43
44
48
49
51
63
79
79
81
1
Related Manuals for Mercury 2004 Mountaineer
Summary of Contents for Mercury 2004 Mountaineer
-
Page 1
Introduction Instrument Cluster Warning and control lights Gauges Entertainment Systems AM/FM stereo with CD AM/FM stereo with in-dash six CD Climate Controls Manual heating and air conditioning Electronic automatic temperature control Rear passenger climate control Rear window defroster Lights Driver Controls Windshield wiper/washer control Steering wheel adjustment Power windows… -
Page 2: Table Of Contents
Table of Contents Seating and Safety Restraints Seating Safety restraints Air bags Child restraints Driving Starting Brakes Traction control/AdvanceTrac Transmission operation Vehicle loading Trailer towing Recreational towing Roadside Emergencies Getting roadside assistance Hazard flasher switch Fuel pump shut-off switch Fuses and relays Changing tires Jump starting Wrecker towing…
-
Page 3: Table Of Contents
Maintenance and Specifications Engine compartment Engine oil Battery Fuel information Tire Information Part numbers Refill capacities Lubricant specifications Accessories Index All rights reserved. Reproduction by any means, electronic or mechanical including photocopying, recording or by any information storage and retrieval system or translation in whole or part is not permitted without written authorization from Ford Motor Company.
-
Page 4: Introduction
State of California to cause cancer and birth defects or other reproductive harm. CONGRATULATIONS Congratulations on acquiring your new Mercury. Please take the time to get well acquainted with your vehicle by reading this handbook. The more you know and understand about your vehicle, the greater the safety and pleasure you will derive from driving it.
-
Page 5
Emissions Defect and Emissions Performance Warranties. For a detailed description of what is covered and what is not covered, refer to the Warranty Guide that is provided to you along with your Owner’s Guide. 2004 Mountaineer (mnt) Owners Guide (post-2002-fmt) USA English (fus) -
Page 6
Ford Motor Company and Ford of Canada do not access event data recorder information without obtaining consent, unless pursuant to court order or where required by law enforcement, other government authorities or other third parties acting with lawful 2004 Mountaineer (mnt) Owners Guide (post-2002-fmt) USA English (fus) -
Page 7
By referring to the pages in the provided supplement, you can properly identify those features, recommendations and specifications that are unique to your vehicle. Refer to this Owner’s Guide for all other required information and warnings. 2004 Mountaineer (mnt) Owners Guide (post-2002-fmt) USA English (fus) Introduction… -
Page 8
Child Seat Tether Anchor Anti-Lock Brake System Traction Control Master Lighting Switch Fog Lamps-Front Fuel Pump Reset Windshield Defrost/Demist 2004 Mountaineer (mnt) Owners Guide (post-2002-fmt) USA English (fus) See Owner’s Guide Air Bag-Front Child Seat Child Seat Lower Anchor Brake System… -
Page 9
Do Not Open When Hot Avoid Smoking, Flames, or Sparks Explosive Gas Power Steering Fluid Emission System Passenger Compartment Air Filter Check fuel cap 2004 Mountaineer (mnt) Owners Guide (post-2002-fmt) USA English (fus) Introduction Power Window Lockout Interior Luggage Compartment Release Symbol Engine Oil… -
Page 10: Instrument Cluster
Solid illumination after the engine is started indicates the On Board Diagnostics System (OBD-II) has detected a malfunction. Refer to On board diagnostics (OBD-II) in the Maintenance and Specifications 2004 Mountaineer (mnt) Owners Guide (post-2002-fmt) USA English (fus)
-
Page 11
ABS light stays illuminated or continues to flash, a malfunction has been detected, have the system serviced immediately. Normal braking is still functional unless the brake warning light also is illuminated. 2004 Mountaineer (mnt) Owners Guide (post-2002-fmt) USA English (fus) Instrument Cluster CHECK FUEL… -
Page 12
Low tire warning in the Maintenance and Specifications chapter. If this light fails to illuminate when ignition is turned to ON, continues to flash or remains on, have the system serviced immediately. 2004 Mountaineer (mnt) Owners Guide (post-2002-fmt) USA English (fus) -
Page 13
Driving chapter. If the light flashes steadily or does not illuminate, have the transmission serviced soon, or damage may occur. 2004 Mountaineer (mnt) Owners Guide (post-2002-fmt) USA English (fus) Instrument Cluster Customer Action •… -
Page 14
Headlamps on warning chime: Sounds when the headlamps or parking lamps are on, the ignition is off (the key is not in the ignition) and the driver’s door is opened. 2004 Mountaineer (mnt) Owners Guide (post-2002-fmt) USA English (fus) -
Page 15: Gauges
Instrument Cluster GAUGES Standard instrument cluster gauges Optional instrument cluster gauges Speedometer: Indicates the current vehicle speed. 2004 Mountaineer (mnt) Owners Guide (post-2002-fmt) USA English (fus)
-
Page 16
Press and release the SELECT/RESET button to toggle between odometer and trip odometer display. • Optional instrument cluster Press and release the TRIP/RESET button to toggle between odometer and trip odometer display. 2004 Mountaineer (mnt) Owners Guide (post-2002-fmt) USA English (fus) TRIP TRIP… -
Page 17
The arrow next to the fuel pump icon indicates which side of the vehicle the fuel filler door is located. Refer to Filling the tank in the Maintenance and Specifications chapter for more information. 2004 Mountaineer (mnt) Owners Guide (post-2002-fmt) USA English (fus) -
Page 18: Entertainment Systems
CD tracks. Press again to stop. 4. CLK: To set the hour, press and hold CLK and press SEEK to decrease or increase hours. 2004 Mountaineer (mnt) Owners Guide (post-2002-fmt) USA English (fus) TREB DISC to shift to shift…
-
Page 19
12. Seek: Press and release SEEK for previous/next strong station, selection or track. 13. Power/volume: Press to turn ON/OFF; turn to increase or decrease volume levels. 2004 Mountaineer (mnt) Owners Guide (post-2002-fmt) USA English (fus) -
Page 20
CD to become jammed. It is recommended that homemade CDs be identified with permanent felt tip marker rather than adhesive labels. Ballpoint pens may damage CDs. Please contact your dealer for further information. 2004 Mountaineer (mnt) Owners Guide (post-2002-fmt) USA English (fus) -
Page 21
TEXT: TEXT is only available when equipped with Satellite radio. Your Audiophile radio comes equipped with Satellite ready capability. The kit to enable Satellite reception is available through your Mercury dealer. Detailed Satellite instructions are included with the dealer installed kit. -
Page 22
Telecommunications Commission (CRTC) recommend that FM radio broadcasters use RDS technology to transmit information. FM radio stations are independently operated and individually elect to use RDS technology to transmit station ID and program type as desired. 2004 Mountaineer (mnt) Owners Guide (post-2002-fmt) USA English (fus) -
Page 23
11. SAT (if equipped): Your Audiophile radio comes equipped with Satellite Ready capability. The kit to enable the Satellite reception is available through your Mercury dealer. Detailed satellite instructions are included with the dealer installed kit. 12. AM/FM: Press to select AM/FM frequency band. -
Page 24
CAT: CAT is only available when equipped with Satellite Radio. Your Audiophile radio comes equipped with Satellite ready capability. The kit to enable Satellite reception is available through your Mercury dealer. Detailed Satellite instructions are included with the dealer installed kit. -
Page 25
Ford CD players. Irregular shaped CDs, CDs with a scratch protection film attached, and CDs with homemade paper (adhesive) labels should 2004 Mountaineer (mnt) Owners Guide (post-2002-fmt) USA English (fus) Entertainment Systems… -
Page 26
Ballpoint pens may damage CDs. Please contact your dealer for further information. AUDIO SYSTEM WARRANTY AND SERVICE Refer to the Warranty Guide for audio system warranty information. If service is necessary, see your dealer or qualified technician. 2004 Mountaineer (mnt) Owners Guide (post-2002-fmt) USA English (fus) -
Page 27: Climate Controls
OFF when the vehicle is parked. This allows the vehicle to “breathe” using the outside air inlet vents. • Remove any snow, ice or leaves from the air intake area at the base of the windshield. 2004 Mountaineer (mnt) Owners Guide (post-2002-fmt) USA English (fus) Climate Controls…
-
Page 28: Electronic Automatic Temperature Control
Press to turn on/off. 2004 Mountaineer (mnt) Owners Guide (post-2002-fmt) USA English (fus) DUAL…
-
Page 29
13. Manual override controls: Allows you to manually determine where airflow is directed. To return to fully automatic control, press AUTO. 2004 Mountaineer (mnt) Owners Guide (post-2002-fmt) USA English (fus) Climate Controls DUAL… -
Page 30
1. Select 2. Select A/C. 3. Set the temperature control to maintain comfort. 4. Set the highest fan speed. 5. Direct the outer instrument panel vents towards the side windows. 2004 Mountaineer (mnt) Owners Guide (post-2002-fmt) USA English (fus) position. -
Page 31
Otherwise, the front controls will determine the settings for the entire vehicle cabin. If set to OFF, the front and rear auxiliary controls will not function. 2004 Mountaineer (mnt) Owners Guide (post-2002-fmt) USA English (fus) Climate Controls… -
Page 32: Rear Window Defroster
The defroster turns off automatically after 10 minutes or when the ignition is turned to the OFF position. To manually turn off the defroster before 10 minutes have passed, push the control again. 2004 Mountaineer (mnt) Owners Guide (post-2002-fmt) USA English (fus)
-
Page 33: Lights
To activate DRL: • the ignition must be in the ON position and • the headlamp control is in the OFF or Parking lamps position • the parking brake must be disengaged. 2004 Mountaineer (mnt) Owners Guide (post-2002-fmt) USA English (fus) Lights…
-
Page 34
Operates only when the exterior lights are switched on. Move the control to the full upright position (past detent) to turn on the interior lamps. 2004 Mountaineer (mnt) Owners Guide (post-2002-fmt) USA English (fus) INT1 INT1… -
Page 35
3. Turn on the low beam headlamps. The brightest part of the light should be below the horizontal line (4). If it is above the line the headlamp will need to be adjusted. 4. Open the hood. 2004 Mountaineer (mnt) Owners Guide (post-2002-fmt) USA English (fus) -
Page 36
• any of the remote entry controls are pressed and the ignition is OFF. The reading portion, the two outer lights, can only be toggled on and off at the lamp. 2004 Mountaineer (mnt) Owners Guide (post-2002-fmt) USA English (fus) INT1… -
Page 37
Function Number of bulbs Park/turn lamps (front) Headlamps Rear stop/turn/tail lamps Rear license plate lamps Backup lamp High-mount brake lamps 2004 Mountaineer (mnt) Owners Guide (post-2002-fmt) USA English (fus) Lights Trade number 3157 AK (amber) 9007 3057 3156K… -
Page 38
Do not touch the glass of a halogen bulb. 1. Turn off the headlamps and open the hood. 2. Remove two retainer pins, then pull headlamp forward. 2004 Mountaineer (mnt) Owners Guide (post-2002-fmt) USA English (fus) Trade number WY5W (amber) -
Page 39
Grasp the bulb only by its plastic base and do not touch the glass. The oil from your hand could cause the bulb to break the next time the headlamps are operated. Reverse steps to reinstall bulb(s). 2004 Mountaineer (mnt) Owners Guide (post-2002-fmt) USA English (fus) Lights… -
Page 40
2. Remove the two headlamp retainer pins, then pull headlamp forward. 3. Remove the bulb socket from the lamp assembly. 4. Carefully pull old bulb out of the lamp assembly Reverse steps to reinstall bulb(s). 2004 Mountaineer (mnt) Owners Guide (post-2002-fmt) USA English (fus) -
Page 41
3. Remove the lamp assembly. 4. Rotate the bulb socket counterclockwise and remove it from the lamp assembly. 5. Pull the bulb straight out of the socket. Reverse steps to reinstall bulb(s). 2004 Mountaineer (mnt) Owners Guide (post-2002-fmt) USA English (fus) -
Page 42
1. Remove the two screws and lamp assembly from vehicle. 2. Remove the bulb socket from the lamp assembly by depressing the snaps and pull the bulb straight out. Reverse steps to reinstall bulb(s). 2004 Mountaineer (mnt) Owners Guide (post-2002-fmt) USA English (fus) -
Page 43: Driver Controls
For rear wash cycle, rotate (and hold as desired) the rear wiper/washer control to either position. From either position, the control will automatically return to the INT 2 or OFF position. 2004 Mountaineer (mnt) Owners Guide (post-2002-fmt) USA English (fus) Driver Controls INT1…
-
Page 44
Lift the lever back to its original position to lock the steering column. Never adjust the steering column when the vehicle is moving. 2004 Mountaineer (mnt) Owners Guide (post-2002-fmt) USA English (fus) -
Page 45
The most important thing you can do to prevent a crash is to avoid distractions and pay attention to the road. Wait until it is safe to operate Mobile Communications Equipment. 2004 Mountaineer (mnt) Owners Guide (post-2002-fmt) USA English (fus) -
Page 46
OVERHEAD CONSOLE (IF EQUIPPED) The appearance of your vehicle’s overhead console will vary according to your option package. Storage compartment Press the latch to open the storage compartment. 2004 Mountaineer (mnt) Owners Guide (post-2002-fmt) USA English (fus) -
Page 47
• Close the door. • Press the depression in the door to activate the transmitter. Illuminated visor mirror Lift the mirror cover to turn on the visor mirror lamps. Type A 2004 Mountaineer (mnt) Owners Guide (post-2002-fmt) USA English (fus) Driver Controls… -
Page 48: Power Windows
It is accessible from the rear seats. POWER WINDOWS When closing the power windows, you should verify they are free of obstructions and ensure that children and/or pets are not in the proximity of the window openings. 2004 Mountaineer (mnt) Owners Guide (post-2002-fmt) USA English (fus)
-
Page 49: Mirrors
2. Move the control in the direction you wish to tilt the mirror. 3. Return to the center position to lock mirrors in place. 2004 Mountaineer (mnt) Owners Guide (post-2002-fmt) USA English (fus)
-
Page 50
R(reverse) to ensure a clear view while backing up. Do not block the sensor located to the right of the mirror button or the sensor located on the back side of the mirror as this may impair mirror performance. 2004 Mountaineer (mnt) Owners Guide (post-2002-fmt) USA English (fus) -
Page 51: Speed Control
The controls for using your speed control are located on the steering wheel for your convenience. 1. Press the ON control and release 2. Accelerate to the desired speed. 2004 Mountaineer (mnt) Owners Guide (post-2002-fmt) USA English (fus) Driver Controls…
-
Page 52
This will automatically return the vehicle to the previously set speed. The RES control will not work if the vehicle speed is not faster than 48 km/h (30 mph). 2004 Mountaineer (mnt) Owners Guide (post-2002-fmt) USA English (fus) COAST COAST… -
Page 53
1.6 km/h (1 mph). • Depress the brake pedal until the desired vehicle speed is reached, press the SET + control. 2004 Mountaineer (mnt) Owners Guide (post-2002-fmt) USA English (fus) Driver Controls COAST… -
Page 54
These controls allow you to operate some radio and climate control features. Audio control features Press to select: • AM, FM1, FM2, • CD (if equipped), or • DVD (if equipped). 2004 Mountaineer (mnt) Owners Guide (post-2002-fmt) USA English (fus) -
Page 55
• Press MEM to select the next selection on the CD. In any mode: • Press VOL + or − to adjust volume. Climate control features Press TMP + or — to adjust temperature. 2004 Mountaineer (mnt) Owners Guide (post-2002-fmt) USA English (fus) Driver Controls… -
Page 56
The moon roof has a sliding shade that can be opened or closed when the glass panel is shut. To close the shade, pull it toward the front of the vehicle. 2004 Mountaineer (mnt) Owners Guide (post-2002-fmt) USA English (fus) -
Page 57
HomeLink . It is also recommended that a new battery be placed in the hand-held transmitter of the device being programmed to HomeLink for quicker training and accurate transmission of the radio-frequency signal. 2004 Mountaineer (mnt) Owners Guide (post-2002-fmt) USA English (fus) -
Page 58
“learn” or “smart” button (usually near where the hanging antenna wire is attached to the unit). 7. Press and release the “learn” or “smart” button. (The name and color of the button may vary by manufacturer.) 2004 Mountaineer (mnt) Owners Guide (post-2002-fmt) USA English (fus) -
Page 59
HomeLink . The red indicator light will flash slowly and then rapidly after HomeLink accepts the radio frequency signal. • Proceed with step 4 in the “Programming” section. 2004 Mountaineer (mnt) Owners Guide (post-2002-fmt) USA English (fus) Driver Controls… -
Page 60
2. The red indicator light will begin to flash after 20 seconds. Without releasing the HomeLink button, follow step 2 in the “Programming” section. For questions or comments, contact HomeLink at www.homelink.com or 1–800–355–3515. 2004 Mountaineer (mnt) Owners Guide (post-2002-fmt) USA English (fus) -
Page 61
1. Determine which magnetic zone you are in for your geographic location by referring to the zone map. 2. Turn ignition to the ON position. 2004 Mountaineer (mnt) Owners Guide (post-2002-fmt) USA English (fus) Driver Controls 7 8 9 1011… -
Page 62
(approximately eight seconds) and release. 4. Drive the vehicle slowly (less than 5 km/h [3 mph]) in circles until CAL indicator turns off (4–5 complete circles). 5. The compass is now calibrated. 2004 Mountaineer (mnt) Owners Guide (post-2002-fmt) USA English (fus) -
Page 63: Message Center
This control displays the following control displays: • Odometer/Compass • Trip odometer/Odometer/Compass • Average Fuel Economy • Trip Elapsed Drive Time • Distance to Empty Odometer/Trip odometer Refer to Gauges in the Instrument Cluster chapter. 2004 Mountaineer (mnt) Owners Guide (post-2002-fmt) USA English (fus)
-
Page 64
5. Press and hold the RESET and SETUP control until the message center display changes to show the current zone setting. 2004 Mountaineer (mnt) Owners Guide (post-2002-fmt) USA English (fus) 7 8 9 1011… -
Page 65
2. Record the highway fuel economy for future reference. It is important to press the RESET control after setting the speed control to get accurate highway fuel economy readings. 2004 Mountaineer (mnt) Owners Guide (post-2002-fmt) USA English (fus) -
Page 66
800 km (500miles). This value is not the same as the average fuel economy display. The running average fuel economy is reinitialized to a factory default value if the battery is disconnected. 2004 Mountaineer (mnt) Owners Guide (post-2002-fmt) USA English (fus) -
Page 67
1. FUEL LEVEL 2. WASHER FLUID LEVEL 3. OIL LIFE IN XX% 4. ENGINE TEMP 5. OIL PRESSURE 6. TIRE PRESSURE SYSTEM (if equipped) 7. BRAKE FLUID LEVEL 8. CHARGING SYSTEM 2004 Mountaineer (mnt) Owners Guide (post-2002-fmt) USA English (fus) -
Page 68
2. Press the RESET control to select the autolamp delay time. Oil Change 1. Select this function from the SETUP control for the current display mode. 2. Press the RESET control to reset oil change. 2004 Mountaineer (mnt) Owners Guide (post-2002-fmt) USA English (fus) -
Page 69
The message center will display the last selected feature if there are no more warning messages. This allows you to use the full functionality of the message center after you acknowledge the warning by pressing the RESET control and clearing the warning message. 2004 Mountaineer (mnt) Owners Guide (post-2002-fmt) USA English (fus) -
Page 70
Low brake fluid level Low oil pressure Warning-tire very low (if equipped) ETC-engine failsafe mode AWD disabled lock (vehicles equipped with AdvanceTrac only) 2004 Mountaineer (mnt) Owners Guide (post-2002-fmt) USA English (fus) Status Displays for 4 seconds Warning returns after 10 minutes… -
Page 71
Refer to Transmission fluid in the Maintenance and specifications chapter. If the warning stays on or continues to come on, contact your dealer for transmission service as soon as possible. 2004 Mountaineer (mnt) Owners Guide (post-2002-fmt) USA English (fus) -
Page 72
Refer to Servicing your tires in the Maintenance and specifications chapter. CHECK TIRE PRESSURE (if equipped). Displayed when any of the tire pressures are low. Refer to Checking the tire pressure in the Maintenance and specifications chapter. 2004 Mountaineer (mnt) Owners Guide (post-2002-fmt) USA English (fus) -
Page 73
0%, the OIL CHANGE REQUIRED message will be displayed. An oil change is required whenever indicated by the message center and according to the recommended maintenance schedule. USE ONLY RECOMMENDED ENGINE OILS. 2004 Mountaineer (mnt) Owners Guide (post-2002-fmt) USA English (fus) -
Page 74
• Fuel computer • Oil life • Charging system • Door sensor • Washer fluid 2004 Mountaineer (mnt) Owners Guide (post-2002-fmt) USA English (fus) • Brake fluid • Compass • Outside temperature • Engine sensor… -
Page 75
The liftgate door and window should be closed before driving. If not, possible damage may occur to your vehicle. 2004 Mountaineer (mnt) Owners Guide (post-2002-fmt) USA English (fus) Driver Controls… -
Page 76
Do not place any objects on the cargo area cover. They may obstruct your vision or strike occupants of the vehicle in the case of a sudden stop or collision. 2004 Mountaineer (mnt) Owners Guide (post-2002-fmt) USA English (fus) -
Page 77
90 kg (200 lbs), evenly distributed. If it is not possible to distribute the load, position it as far rearward as possible. Use the tie down loops (on the thumbwheels) to secure the load. 2004 Mountaineer (mnt) Owners Guide (post-2002-fmt) USA English (fus) -
Page 78
Avoid sharp turns, excessive speed and abrupt maneuvers in these vehicles. Failure to drive cautiously could result in an increase risk of loss of vehicle control, vehicle rollover, personal injury and death. 2004 Mountaineer (mnt) Owners Guide (post-2002-fmt) USA English (fus) -
Page 79: Locks And Security
The button is located either on the top of the left-hand quarter trim panel underneath the rear window, or on the bottom of the left-hand quarter trim panel. Press this button to lock or unlock all the doors. 2004 Mountaineer (mnt) Owners Guide (post-2002-fmt) USA English (fus)
-
Page 80
10 meters (33 feet). A decrease in operating range could be caused by: • weather conditions, • nearby radio towers, • structures around the vehicle, or • other vehicles parked next to your vehicle. 2004 Mountaineer (mnt) Owners Guide (post-2002-fmt) USA English (fus) -
Page 81
The lamps will flash.Note: If any door, the liftgate or the liftgate glass are not closed properly, the lamps will not flash. 2004 Mountaineer (mnt) Owners Guide (post-2002-fmt) USA English (fus) -
Page 82
Driver 1 or Driver 2 positions. 4. Repeat this procedure for another remote transmitter if desired. Deactivating the memory seat feature To deactivate this feature: 1. Press the SET control on the driver’s door panel. 2004 Mountaineer (mnt) Owners Guide (post-2002-fmt) USA English (fus) -
Page 83
5. Snap the two halves back together. Note: Replacement of the battery will not cause the remote transmitter to become deprogrammed from your vehicle. The remote transmitter should operate normally after battery replacement. 2004 Mountaineer (mnt) Owners Guide (post-2002-fmt) USA English (fus) -
Page 84
9. Turn the ignition to the 1 (OFF/LOCK) position after you have finished programming all of the remote entry transmitters. 10. The doors will lock, then unlock, to confirm that the programming mode has been exited. 2004 Mountaineer (mnt) Owners Guide (post-2002-fmt) USA English (fus) -
Page 85
When pressing the controls on the keypad, press the middle of the controls to ensure a good activation. Programming a personal entry code To create your own personal entry code: 1. Enter the factory set code. 2004 Mountaineer (mnt) Owners Guide (post-2002-fmt) USA English (fus) Locks and Security… -
Page 86
Each number must be pressed within five seconds of each other. The interior lamps will illuminate. To unlock all doors and liftgate, press the 3 • 4 control within five seconds. 2004 Mountaineer (mnt) Owners Guide (post-2002-fmt) USA English (fus) -
Page 87
30 seconds. 1. Turn the ignition to the 3 (ON) position. 2. Press the power door unlock control three times. 2004 Mountaineer (mnt) Owners Guide (post-2002-fmt) USA English (fus) Locks and Security… -
Page 88
Note: The SecuriLock passive anti-theft system is not compatible with non-Ford aftermarket remote start systems. Use of these systems may result in vehicle starting problems and a loss of security protection. 2004 Mountaineer (mnt) Owners Guide (post-2002-fmt) USA English (fus) -
Page 89
• The theft indicator will illuminate for three seconds and then go out. • If the theft indicator stays on for an extended period of time or flashes rapidly, have the system serviced by your dealer. 2004 Mountaineer (mnt) Owners Guide (post-2002-fmt) USA English (fus) -
Page 90
3. Turn the ignition to the 1 (OFF/LOCK) position and remove the first coded key from the ignition. 4. Within ten seconds of turning the ignition to the 1 (OFF/LOCK) position, insert the second previously coded key into the ignition. 2004 Mountaineer (mnt) Owners Guide (post-2002-fmt) USA English (fus) -
Page 91
Steps 1 through 5. If failure repeats, bring your vehicle to your dealer to have the new key(s) programmed. To program additional new unprogrammed key(s), wait twenty seconds and then repeat this procedure from Step 1. 2004 Mountaineer (mnt) Owners Guide (post-2002-fmt) USA English (fus) -
Page 92: Seating And Safety Restraints
The seats in your vehicle may have adjustable head restraints. Adjust your head restraint so that it is located directly or as close as possible behind your head. The head restraints can be moved up and down. 2004 Mountaineer (mnt) Owners Guide (post-2002-fmt) USA English (fus)
-
Page 93
Always drive and ride with your seatback upright and the lap belt snug and low across the hips. Lift handle to move seat forward or backward. Pull lever up to adjust seatback. 2004 Mountaineer (mnt) Owners Guide (post-2002-fmt) USA English (fus) -
Page 94
Press rear to raise or lower the rear portion of the seat cushion. Press the control to move the seat forward, backward, up or down. 2004 Mountaineer (mnt) Owners Guide (post-2002-fmt) USA English (fus) -
Page 95
(if room is available) when the key is removed from the ignition. It will automatically move the seat forward to the original position when the key is inserted into the ignition. 2004 Mountaineer (mnt) Owners Guide (post-2002-fmt) USA English (fus) -
Page 96
Folding down the 60/40 rear seats (if equipped) If the rear seat is equipped with adjustable head restraints, they should be placed in the full down position before folding the seat back down. 2004 Mountaineer (mnt) Owners Guide (post-2002-fmt) USA English (fus) -
Page 97
Adjusting the 2nd row recline The 2nd row reclines for additional comfort. To adjust the 2nd row recline, pull the handle forward and push the seat back rearward. 2004 Mountaineer (mnt) Owners Guide (post-2002-fmt) USA English (fus) -
Page 98
Your seats are equipped with an Interlock Safety Mechanism which will not allow the seats to return to a usable position if the seat is not fully latched to the floor! 2004 Mountaineer (mnt) Owners Guide (post-2002-fmt) USA English (fus) -
Page 99
2. Pull the lever up and push the seatback toward the front of the vehicle. 3. Press down on the top outboard area of the seatback until a click is heard. 2004 Mountaineer (mnt) Owners Guide (post-2002-fmt) USA English (fus) -
Page 100
The 3rd row seat has a tip/stow feature to increase cargo space without removing the seat from the vehicle. Lower the head restraints before putting the seat in the stowed position. 2004 Mountaineer (mnt) Owners Guide (post-2002-fmt) USA English (fus) -
Page 101
3. Push the closeout panel forward over the space between the seats. To put seat in upright position: 1. Pull back the slider panel on the seatback to release the closeout panel. 2004 Mountaineer (mnt) Owners Guide (post-2002-fmt) USA English (fus) -
Page 102: Safety Restraints
• Restraint system warning light and back-up tone. • The electrical wiring for the air bags, crash sensor(s), safety belt pretensioners, front safety belt usage sensors, driver seat position sensor, and indicator lights. 2004 Mountaineer (mnt) Owners Guide (post-2002-fmt) USA English (fus)
-
Page 103
The front safety belt usage sensors detect whether or not the driver and front outboard passenger safety belts are fastened. This information allows your Personal Safety System to tailor the air bag deployment and 2004 Mountaineer (mnt) Owners Guide (post-2002-fmt) USA English (fus) -
Page 104
If any of these things happen, even intermittently, have the Personal Safety System serviced at your dealership or by a qualified technician immediately. Unless serviced, the system may not function properly in the event of a collision. 2004 Mountaineer (mnt) Owners Guide (post-2002-fmt) USA English (fus) -
Page 105
Never swing the safety belt around your neck over the inside shoulder. 3) Never use a single belt for more than one person. Always transport children 12 years old and under in the back seat and always properly use appropriate child restraints. 2004 Mountaineer (mnt) Owners Guide (post-2002-fmt) USA English (fus) -
Page 106
Make sure the tongue is securely fastened in the buckle. • Front and rear seats 2004 Mountaineer (mnt) Owners Guide (post-2002-fmt) USA English (fus) -
Page 107
(if equipped). Children 12 years old and under should be properly restrained in the rear seat whenever possible. Refer to Safety restraints for children or Safety seats for children later in this chapter. 2004 Mountaineer (mnt) Owners Guide (post-2002-fmt) USA English (fus) -
Page 108
How to disengage the automatic locking mode Unbuckle the combination lap and shoulder belt and allow it to retract completely to disengage the automatic locking mode and activate the vehicle sensitive (emergency) locking mode. 2004 Mountaineer (mnt) Owners Guide (post-2002-fmt) USA English (fus) -
Page 109
Safety Canopy pretensioners. Refer to the Safety belt maintenance section in this chapter. 2004 Mountaineer (mnt) Owners Guide (post-2002-fmt) USA English (fus) and safety belt… -
Page 110
Safety belt warning light and indicator chime The safety belt warning light illuminates in the instrument cluster and a chime sounds to remind the occupants to fasten their safety belts. 2004 Mountaineer (mnt) Owners Guide (post-2002-fmt) USA English (fus) -
Page 111
The driver’s safety belt is buckled before the ignition switch is turned to the ON position… 2004 Mountaineer (mnt) Owners Guide (post-2002-fmt) USA English (fus) Then… The safety belt warning light illuminates 1-2 minutes and the warning chime sounds 4-8 seconds. -
Page 112
“Traffic is light” “Belts wrinkle my clothes” “The people I’m with don’t wear belts” “I have an air bag” 2004 Mountaineer (mnt) Owners Guide (post-2002-fmt) USA English (fus) Consider… 36700 crashes occur every day. The more we drive, the more we are exposed to “rare”… -
Page 113
2. Wait until the safety belt warning light turns off. (Approximately 1–2 minutes) • Steps 3–5 must be completed within 60 seconds or the procedure will have to be repeated. 2004 Mountaineer (mnt) Owners Guide (post-2002-fmt) USA English (fus) Consider… -
Page 114
Safety belt assemblies not in use during a collision should also be inspected and replaced if either damage or improper operation is noted. 2004 Mountaineer (mnt) Owners Guide (post-2002-fmt) USA English (fus) -
Page 115: Air Bags
All occupants of the vehicle, including the driver, should always properly wear their safety belts, even when an air bag supplemental restraint system (SRS) is provided. 2004 Mountaineer (mnt) Owners Guide (post-2002-fmt) USA English (fus)
-
Page 116
Additional equipment may affect the performance of the air bag sensors increasing the risk of injury. Please refer to the Body Builders Layout Book for instructions about the appropriate installation of additional equipment. 2004 Mountaineer (mnt) Owners Guide (post-2002-fmt) USA English (fus) -
Page 117
Front air bags are designed to inflate in frontal and near-frontal collisions, not rollover, side-impact, or rear-impacts unless the collision causes sufficient longitudinal deceleration. 2004 Mountaineer (mnt) Owners Guide (post-2002-fmt) USA English (fus) -
Page 118
If the air bag has deployed, the air bag will not function again and must be replaced immediately. If the air bag is not replaced, the unrepaired area will increase the risk of injury in a collision. 2004 Mountaineer (mnt) Owners Guide (post-2002-fmt) USA English (fus) -
Page 119
If any of these things happen, even intermittently, have the SRS serviced at your dealership or by a qualified technician immediately. Unless serviced, the system may not function properly in the event of a collision. 2004 Mountaineer (mnt) Owners Guide (post-2002-fmt) USA English (fus) -
Page 120
SRS and Safety Canopy system is provided. To reduce risk of injury, do not obstruct or place objects in the deployment path of the inflatable Safety Canopy . 2004 Mountaineer (mnt) Owners Guide (post-2002-fmt) USA English (fus) could… -
Page 121
Safety Canopy a certain likelihood of a rollover event is detected by the rollover sensor. 2004 Mountaineer (mnt) Owners Guide (post-2002-fmt) USA English (fus) system work? deployment. -
Page 122
• The readiness light (same light as for front air bag system) will either flash or stay lit. • The readiness light will not illuminate immediately after ignition is turned on. 2004 Mountaineer (mnt) Owners Guide (post-2002-fmt) USA English (fus) system will be activated,… -
Page 123: Child Restraints
(as specified by your child safety seat manufacturer) should always wear safety belts. Follow all the important safety restraint and air bag precautions that apply to adult passengers in your vehicle. 2004 Mountaineer (mnt) Owners Guide (post-2002-fmt) USA English (fus)
-
Page 124
• Does the lap belt rest low across the hips? • Is the shoulder belt centered on the shoulder and chest? • Can the child stay seated like this for the whole trip? 2004 Mountaineer (mnt) Owners Guide (post-2002-fmt) USA English (fus) -
Page 125
It is best to use a booster seat with lap/shoulder belts in the back seat- the safest place for children to ride. 2004 Mountaineer (mnt) Owners Guide (post-2002-fmt) USA English (fus) -
Page 126
• Keep the buckle release button pointing up and away from the safety seat, with the tongue between the child seat and the release button, to prevent accidental unbuckling. • Place seat back in upright position. 2004 Mountaineer (mnt) Owners Guide (post-2002-fmt) USA English (fus) -
Page 127
If you must use a forward-facing child seat in the front seat, move the seat all the way back. Children 12 and under should be properly restrained in the rear seat whenever possible. 2004 Mountaineer (mnt) Owners Guide (post-2002-fmt) USA English (fus) -
Page 128
3. While holding the shoulder and lap belt portions together, route the tongue through the child seat according to the child seat manufacturer’s instructions. Be sure the belt webbing is not twisted. 2004 Mountaineer (mnt) Owners Guide (post-2002-fmt) USA English (fus) -
Page 129
7. Pull the lap belt portion across the child seat toward the buckle and pull up on the shoulder belt while pushing down with your knee on the child seat. 2004 Mountaineer (mnt) Owners Guide (post-2002-fmt) USA English (fus) -
Page 130
(shown from top view): • 5 passenger vehicle For the center seat, use either of the two tether anchors/cargo tie-downs in the scuff plate along the back edge of the floor. 2004 Mountaineer (mnt) Owners Guide (post-2002-fmt) USA English (fus) -
Page 131
When placing a child safety seat in the 2nd row center seating position of the 5 passenger vehicle, the tether straps may be attached to either of the tether anchors located at the rear of the cargo area. • Behind 2nd row seat 2004 Mountaineer (mnt) Owners Guide (post-2002-fmt) USA English (fus) -
Page 132
6. Tighten the child safety seat tether strap according to the manufacturer’s instructions. If the safety seat is not anchored properly, the risk of a child being injured in a collision greatly increases. 2004 Mountaineer (mnt) Owners Guide (post-2002-fmt) USA English (fus) -
Page 133
Never attach two LATCH child safety seats to the same anchor. In a crash, one anchor may not be strong enough to hold two child safety seat attachments and may break, causing serious injury or death. 2004 Mountaineer (mnt) Owners Guide (post-2002-fmt) USA English (fus) -
Page 134
Follow the child seat manufacturer’s instructions to properly install a child seat with LATCH attachments. Two plastic LATCH guides can be obtained at no charge from any Ford or Lincoln-Mercury dealer. They snap onto the LATCH lower anchors in the seat to help attach a child seat with rigid attachments. -
Page 135: Driving
Seating and Safety Restraints chapter. 2. Make sure the headlamps and electrical accessories are off. • Make sure the parking brake is set. 2004 Mountaineer (mnt) Owners Guide (post-2002-fmt) USA English (fus)
-
Page 136
Make sure the corresponding lights illuminate or illuminate briefly. If a light fails to illuminate, have the vehicle serviced. • If the driver’s safety belt is fastened, the 2004 Mountaineer (mnt) Owners Guide (post-2002-fmt) USA English (fus) light may not illuminate. -
Page 137
Your vehicle is designed to operate on E ethanol alone, unleaded gasoline alone, or any mixture of the two. See Choosing the right fuel in the Maintenance and specifications chapter for more information on ethanol. 2004 Mountaineer (mnt) Owners Guide (post-2002-fmt) USA English (fus) -
Page 138
If the engine is idling while the vehicle is stopped for a long period of time, open the windows at least one inch (2.5 cm) or adjust the heating or air conditioning to bring in fresh air. 2004 Mountaineer (mnt) Owners Guide (post-2002-fmt) USA English (fus) -
Page 139: Brakes
The system is deactivated by releasing the brake pedal. When the system activates, the brake pedal will travel with very little effort; this is normal. 2004 Mountaineer (mnt) Owners Guide (post-2002-fmt) USA English (fus)
-
Page 140
Since the parking brake applies only the rear brakes, the vehicle’s stopping distance will increase greatly and the handling of your vehicle will be adversely affected. 2004 Mountaineer (mnt) Owners Guide (post-2002-fmt) USA English (fus) -
Page 141
AdvanceTrac will attempt to correct the sliding motion by applying brake force at individual tires and, if necessary, by reducing engine power. 2004 Mountaineer (mnt) Owners Guide (post-2002-fmt) USA English (fus) Driving button. -
Page 142
If the vehicle is stuck in snow or mud or when driving in deep sand, switching off the AdvanceTrac system may be beneficial so the wheels are allowed to 2004 Mountaineer (mnt) Owners Guide (post-2002-fmt) USA English (fus) include:… -
Page 143
• Do not operate the vehicle with a low power steering pump fluid level (below the MIN mark on the reservoir). 2004 Mountaineer (mnt) Owners Guide (post-2002-fmt) USA English (fus) -
Page 144
Loaded vehicles, with a higher center of gravity, may handle differently than unloaded vehicles. Extra precautions, such as slower speeds and increased stopping distance, should be taken when driving a heavily loaded vehicle. 2004 Mountaineer (mnt) Owners Guide (post-2002-fmt) USA English (fus) -
Page 145: Transmission Operation
1. Apply the parking brake, turn ignition key to LOCK, then remove the key. 2. Locate the access plug to the brake-shift interlock override. It is located on the underside of the steering column. 2004 Mountaineer (mnt) Owners Guide (post-2002-fmt) USA English (fus)
-
Page 146
If the parking brake is fully released, but the brake warning lamp remains illuminated, the brakes may not be working properly. See your dealer or a qualified service technician. 2004 Mountaineer (mnt) Owners Guide (post-2002-fmt) USA English (fus) -
Page 147
Always come to a complete stop before shifting into and out of R (Reverse). N (Neutral) With the gearshift lever in N (Neutral), the vehicle can be started and is free to roll. Hold the brake pedal down while in this position. 2004 Mountaineer (mnt) Owners Guide (post-2002-fmt) USA English (fus) Driving… -
Page 148
• Provides maximum engine braking. • Allows upshifts by moving gearshift lever. • Will not downshift into 1 (First) at high speeds; allows for 1 (First) when vehicle reaches slower speeds. 2004 Mountaineer (mnt) Owners Guide (post-2002-fmt) USA English (fus) -
Page 149
The system is designed to provide a warning to assist the driver in detecting large stationary objects to avoid damaging the vehicle. The system may not detect smaller objects, particularly those close to the ground. 2004 Mountaineer (mnt) Owners Guide (post-2002-fmt) USA English (fus) Driving… -
Page 150
Keep the RSS sensors (located on the rear bumper/fascia) free from snow, ice and large accumulations of dirt (do not clean the sensors with sharp objects). If the sensors are covered, it will affect the accuracy of the RSS. 2004 Mountaineer (mnt) Owners Guide (post-2002-fmt) USA English (fus) -
Page 151
Avoid sharp turns or abrupt maneuvers in these vehicles. The following sections, Normal operation, Autolock operation and Disabling AWD, apply only to vehicles which allow the driver to change AWD modes through the message center. 2004 Mountaineer (mnt) Owners Guide (post-2002-fmt) USA English (fus) Driving… -
Page 152
• the AWD LOCK indicator light in the instrument cluster will flash eight times every two minutes in the message center. • The message center will then display AWD DISABLED for four seconds, then SEE OWNER’S MANUAL. A warning chime will also 2004 Mountaineer (mnt) Owners Guide (post-2002-fmt) USA English (fus) only) -
Page 153
Do not grip the spokes. Drive cautiously to avoid vehicle damage from concealed objects such as rocks and stumps. 2004 Mountaineer (mnt) Owners Guide (post-2002-fmt) USA English (fus) Driving… -
Page 154
Press lightly on the accelerator in each gear. Do not rock the vehicle if the engine is not at normal operating temperature or damage to the transmission may occur. 2004 Mountaineer (mnt) Owners Guide (post-2002-fmt) USA English (fus) -
Page 155
Avoid sharp turns, excessive speed and abrupt maneuvers in these vehicles. Failure to drive cautiously could result in an increased risk of loss of vehicle control, vehicle rollover, personal injury and death. 2004 Mountaineer (mnt) Owners Guide (post-2002-fmt) USA English (fus) Driving… -
Page 156
When driving through water, determine the depth; avoid water higher than the bottom of the hubs (if possible) and proceed slowly. If the ignition system gets wet, the vehicle may stall. 2004 Mountaineer (mnt) Owners Guide (post-2002-fmt) USA English (fus) -
Page 157
Do not drive over the crest of a hill without seeing what conditions are on the other side. Do not drive in reverse over a hill without the aid of an observer. 2004 Mountaineer (mnt) Owners Guide (post-2002-fmt) USA English (fus) -
Page 158
Apply the accelerator slowly and steadily when starting from a full stop. Avoid sudden braking as well. Although an AWD vehicle may accelerate better than a two-wheel drive vehicle in snow and ice, it won’t stop any 2004 Mountaineer (mnt) Owners Guide (post-2002-fmt) USA English (fus) -
Page 159
Make sure all tires and wheels on the vehicle are of the same size, type, tread design and load-carrying capacity. If you have questions regarding tire replacement, see an authorized Ford or Lincoln Mercury dealer. If you nevertheless decide to equip your AWD for off-road use with tires larger than what Ford Motor Company recommends, you should not use these tires for highway driving. -
Page 160
Driving You should carefully observe the recommended tire inflation pressure found on the safety compliance certification label attached to the left front door lock facing or door latch post pillar. Failure to follow tire pressure recommendations can adversely affect the way your vehicle handles. -
Page 161: Vehicle Loading
DRIVING THROUGH WATER If driving through deep or standing water is unavoidable, proceed very slowly especially if the depth is not known. Never drive through water that is higher than the bottom of the hubs (for trucks) or the bottom of the wheel rims (for cars).
-
Page 162
Driving payload listed on the tire label is the maximum payload for the vehicle as built by the assembly plant. If any aftermarket or dealer installed equipment has been installed on the vehicle, the weight of the equipment must be subtracted from the payload listed on the tire label in order to determine the new payload. -
Page 163
Cargo Weight – includes all weight added to the Base Curb Weight, including cargo and optional equipment. When towing, trailer tongue load or king pin weight is also part of cargo weight. GAW (Gross Axle Weight) – is the total weight placed on each axle (front and rear) –… -
Page 164
Driving GVWR (Gross Vehicle Weight Rating) – is the maximum allowable weight of the fully loaded vehicle (including all options, equipment, passengers and cargo). The GVWR is shown on the Safety Compliance Certification Label located on the driver’s door or door pillar. The GVW must never exceed the GVWR. -
Page 165
Maximum Loaded Trailer Weight – is the highest possible weight of a fully loaded trailer the vehicle can tow. It assumes a vehicle with only mandatory options, no cargo (internal or external), a tongue load of 10–15% (conventional trailer) or king pin weight of 15–25% (fifth wheel trailer), and driver only (150 lbs. -
Page 166
Driving 5. Determine the combined weight of luggage and cargo being loaded on the vehicle. That weight may not safely exceed the available cargo and luggage load capacity calculated in Step 4. 6. If your vehicle will be towing a trailer, load from your trailer will be transferred to your vehicle. -
Page 167: Trailer Towing
TRAILER TOWING Trailer towing with your vehicle may require the use of a trailer tow option package. Trailer towing puts additional loads on your vehicle’s engine, transmission, axle, brakes, tires, and suspension. For your safety and to maximize vehicle performance, be sure to use the proper equipment while towing.
-
Page 168
Driving GCWR (Gross Combined Weight Rating)/Trailer Weight Engine Rear axle ratio Maximum 4.0L SOHC/4.6L* 3.55 Class II towing 4.0L SOHC Class 3.73 LS III/IV Towing 4.6L* Class III/IV 3.73/3.73 LS Towing Notes: — For high altitude operation, reduce GCW by 2% per 1,000 ft. (300 meters) elevation. -
Page 169
4×4/AWD GCWR (Gross Combined Weight Rating)/Trailer Weight Engine Rear axle ratio Maximum 4.0L SOHC Class 3.55 II towing 4.6L* Class II 3.55 towing 4.0L SOHC Class 3.73 LS III/IV Towing 4.6L* Class III/IV 3.73/3.73 LS Towing Notes: — For high altitude operation, reduce GCW by 2% per 1,000 ft. (300 meters) elevation. -
Page 170
Driving • Class III/IV receiver: 227 kg (500 lbs.) (weight carrying); 349 kg (770 lbs.) (weight distributing) Safety chains Always connect the trailer’s safety chains to the frame or hook retainers of the vehicle hitch. To connect the trailer’s safety chains, cross the chains under the trailer tongue and allow slack for turning corners. -
Page 171
• Consult your local motor vehicle speed regulations for towing a trailer. • To eliminate excessive shifting, use a lower gear. This will also assist in transmission cooling. (For additional information, refer to the Driving with a 5–speed automatic transmission section in this chapter.) •… -
Page 172: Recreational Towing
Driving When backing down a ramp during boat launching or retrieval: • do not allow the static water level to rise above the bottom edge of the rear bumper. • do not allow waves to break higher than 6 inches (15 cm) above the bottom edge of the rear bumper.
-
Page 173: Roadside Emergencies
In the United States, this card is found in the Owner Guide portfolio in the glove compartment in Ford vehicles and is mailed to you if you own a Mercury or Lincoln. In Canada, the card is found in the Owner Information Guide in the glove compartment.
-
Page 174
If you need to arrange roadside assistance for yourself, Ford Motor Company will reimburse a reasonable amount. To obtain reimbursement information, U.S. Ford or Mercury vehicles customers call 1-800-241-3673; Lincoln vehicle customers call 1–800–521–4140. Canadian customers who need to obtain reimbursement information, call 1–800–665–2006. -
Page 175: Fuel Pump Shut-Off Switch
FUEL PUMP SHUT-OFF SWITCH The fuel pump shut-off switch is a device intended to stop the electric fuel pump when your vehicle has been involved in a substantial jolt. After a collision, if the engine cranks but does not start, the fuel pump shut-off switch may have been activated.
-
Page 176: Fuses And Relays
Roadside Emergencies FUSES AND RELAYS Fuses If electrical components in the vehicle are not working, a fuse may have blown. Blown fuses are identified by a broken wire within the fuse. Check the appropriate fuses before replacing any electrical components. Note: Always replace a fuse with one that has the specified amperage rating.
-
Page 177: Passenger Compartment Fuse Panel
Passenger compartment fuse panel The fuse panel is located below the instrument panel on the driver’s side. To remove a fuse use the fuse puller tool provided on the fuse panel box. REVIEW COPY: 2004 Explorer (exp), Owners Guide (post-2002-fmt) (own2002), Market: USA English (fus) Roadside Emergencies…
-
Page 178
Roadside Emergencies The fuses are coded as follows: Fuse/Relay Fuse Amp Location Rating REVIEW COPY: 2004 Explorer (exp), Owners Guide (post-2002-fmt) (own2002), Market: USA English (fus) Passenger Compartment Fuse Panel Description Memory seat module, Driver power seat Moonroof Radio, Amplifier, DVD Front wiper module Flasher relay (Turn, hazards) Key-in-chime… -
Page 179
Fuse/Relay Fuse Amp Location Rating 7.5A 7.5A REVIEW COPY: 2004 Explorer (exp), Owners Guide (post-2002-fmt) (own2002), Market: USA English (fus) Roadside Emergencies Passenger Compartment Fuse Panel Description Not used Cigar lighter, OBD II Mode-Temperature actuator for auxiliary climate control, Trailer tow battery charge relay coil, TPMS Reverse park aid, Brake shift… -
Page 180
Roadside Emergencies Passenger compartment fuse panel (top side) These relays are located on the reverse side of the passenger compartment fuse panel. See your dealer or a certified technician for service of this relay box. Fuse/Relay Location Relay 1 Flasher Relay 2 Rear defrost Relay 3… -
Page 181: Power Distribution Box
Power distribution box The power distribution box is located in the engine compartment. The power distribution box contains high-current fuses that protect your vehicle’s main electrical systems from overloads. Always disconnect the battery before servicing high current fuses. To reduce risk of electrical shock, always replace the cover to the Power Distribution Box before reconnecting the battery or refilling fluid reservoirs.
-
Page 182
Roadside Emergencies The high-current fuses are coded as follows: Fuse/Relay Fuse Amp Location Rating 60A** 30A** — 30A** 40A** 60A** 20A** — 20A** 30A** 40A** 50A** 40A** — 15A* REVIEW COPY: 2004 Explorer (exp), Owners Guide (post-2002-fmt) (own2002), Market: USA English (fus) Power Distribution Box Description PJB #1… -
Page 183
Fuse/Relay Fuse Amp Location Rating 15A* — 20A* 20A** 30A** 30A** 20A** 30A** — 15A* 20A* 20A* 20A* 60A** 20A** — — 30A** 30A** — 40A** 15A* 15A* 15A* 15A* 15A* 10A* 10A* REVIEW COPY: 2004 Explorer (exp), Owners Guide (post-2002-fmt) (own2002), Market: USA English (fus) Roadside Emergencies Power Distribution Box… -
Page 184
Roadside Emergencies Fuse/Relay Fuse Amp Location Rating 15A* 20A* — — — — — — — — — — — — — — — 30A CB * Mini Fuses ** Cartridge Fuses Rear relay box The relay box is located on the rear passenger side quarter trim panel. See your dealer or a certified technician for service of this relay box. -
Page 185
The relays are coded as follows: Fuse/Relay Location Relay 14 Not used Relay 15 Trailer tow back-up lamps Relay 16 Not used Relay 17 Not used Relay 18 Not used Relay 19 Trailer tow park lamps Relay 20 Trailer tow battery charge Relay 21 Not used Relay 22… -
Page 186
Roadside Emergencies CHANGING THE TIRES If you get a flat tire while driving: • do not brake heavily. • gradually decrease the vehicle’s speed. • hold the steering wheel firmly. • slowly move to a safe place on the side of the road. The use of tire sealants may damage your tires. -
Page 187
The usage of a dissimilar spare tire/wheel can lead to impairment of the following: • Handling, stability and braking performance • Comfort and noise • Ground clearance and parking at curbs • Winter weather driving capability • Wet weather driving capability •… -
Page 188
Roadside Emergencies Stopping and securing the vehicle 1. If you get a flat tire while driving, do not apply the brake heavily; instead, gradually decrease your speed. Hold the steering wheel firmly and slowly move to a safe place on the side of the road. 2. -
Page 189
Removing the jack and tools 1. Open liftgate and remove the carpeted floor lid, then the jack. 2. Turn jack screw eyelet counterclockwise and remove the jack from the bracket. 3. Remove the tools from the provided bag. Rotate the wrench socket out from the handle. -
Page 190
Roadside Emergencies Removing the spare tire Do not use an impact wrench on the winch drive nut. This will damage the spare tire winch. 1. Open the cover from the carpeting on cargo floor to expose the winch drive nut. 2. -
Page 191
3. Turn the wrench counterclockwise until the tire is lowered to the ground and the cable has slack. When turning the wrench, make sure that it does not scuff the kick plate. 4. Slide the tire rearward, lift one side and remove the retainer from the spare tire. -
Page 192
Roadside Emergencies 3. Assemble the jack handle extension on the lug nut wrench by sliding the square end of the jack handle through the plastic grommet on the lug nut wrench and into the square hole on the other side. 4. -
Page 193
To lessen the risk of personal injury, do not put any part of your body under the vehicle while changing a tire. Do not start the engine when your vehicle is on the jack. The jack is only meant for changing the tire. •… -
Page 194
Roadside Emergencies ability, to the point where the ratchet/slip occurs, if possible. The spare tire carrier will not allow you to overtighten. If the spare tire carrier ratchets or slips with little effort, take the vehicle to your dealer for assistance at your earliest convenience. -
Page 195: Jump Starting
JUMP STARTING YOUR VEHICLE The gases around the battery can explode if exposed to flames, sparks, or lit cigarettes. An explosion could result in injury or vehicle damage. Batteries contain sulfuric acid which can burn skin, eyes and clothing, if contacted. Do not attempt to push-start your vehicle.
-
Page 196
Roadside Emergencies Connecting the jumper cables 1. Connect the positive (+) jumper cable to the positive (+) terminal of the discharged battery. Note: In the illustrations, lightning bolts are used to designate the assisting (boosting) battery. 2. Connect the other end of the positive (+) cable to the positive (+) terminal of the assisting battery. -
Page 197
3. Connect the negative (-) cable to the negative (-) terminal of the assisting battery. 4. Make the final connection of the negative (-) cable to an exposed metal part of the stalled vehicle’s engine, away from the battery and the carburetor/fuel injection system. -
Page 198
Roadside Emergencies Jump starting 1. Start the engine of the booster vehicle and run the engine at moderately increased speed. 2. Start the engine of the disabled vehicle. 3. Once the disabled vehicle has been started, run both engines for an additional three minutes before disconnecting the jumper cables. -
Page 199
4. Remove the jumper cable from the positive (+) terminal of the disabled vehicle’s battery. After the disabled vehicle has been started and the jumper cables removed, allow it to idle for several minutes so the engine computer can relearn its idle conditions. REVIEW COPY: 2004 Explorer (exp), Owners Guide (post-2002-fmt) (own2002), Market: USA English (fus) -
Page 200: Wrecker Towing
Roadside Emergencies WRECKER TOWING If you need to have your vehicle towed, contact a professional towing service or, if you are a member of a roadside assistance program, your roadside assistance service provider. It is recommended that your vehicle be towed with a wheel lift or flatbed equipment.
-
Page 201: Customer Assistance
GETTING THE SERVICES YOU NEED At home You must take your Lincoln or Mercury vehicle to an authorized Lincoln Mercury dealer for warranty repairs. While any Ford, Lincoln or Mercury dealership handling your vehicle line will provide warranty service, we recommend you return to your selling dealer who wants to ensure your continued satisfaction.
-
Page 202
What kinds of cases does the Board review? Unresolved warranty repair concerns or vehicle performance concerns as on Ford and Lincoln Mercury cars and Ford and Lincoln Mercury light trucks which are within the terms of any applicable written new vehicle warranty are eligible for review, except those involving: •… -
Page 203
• A Ford or Lincoln Mercury dealership representative Consumer candidates for Board membership are recruited and trained by an independent consulting firm. The dealership Board member is chosen from Ford and Lincoln Mercury dealership management, recognized for their business leadership qualities. What the Board needs… -
Page 204
Customer Assistance • The names (if known) of all the people you contacted at the dealership(s). • A description of the action you expect to resolve your concern. You will receive a letter of explanation if your application does not qualify for Board review. -
Page 205
UTILIZING THE MEDIATION/ARBITRATION PROGRAM (CANADA ONLY) In those cases where you continue to feel that the efforts by Ford and the dealer to resolve a factory-related vehicle service concern have been unsatisfactory, Ford of Canada participates in an impartial third party mediation/arbitration program administered by the Canadian Motor Vehicle Arbitration Plan (CAMVAP). -
Page 206
Customer Assistance If your vehicle must be serviced while you are traveling or living in Central or South America, the Caribbean, or the Middle East, contact the nearest Ford dealership. If the dealership cannot help you, write or call: FORD MOTOR COMPANY WORLDWIDE DIRECT MARKET OPERATIONS 1555 Fairlane Drive Fairlane Business Park #3… -
Page 207
IN CALIFORNIA (U.S. ONLY) California Civil Code Section 1793.2(d) requires that, if a manufacturer or its representative is unable to repair a motor vehicle to conform to the vehicle’s applicable express warranty after a reasonable number of attempts, the manufacturer shall be required to either replace the vehicle with one substantially identical or repurchase the vehicle and reimburse the buyer in an amount equal to the actual price paid or payable by the consumer (less a reasonable allowance for consumer… -
Page 208: Reporting Safety Defects (U.s. Only)
Customer Assistance REPORTING SAFETY DEFECTS (U.S. ONLY) If you believe that your vehicle has a defect which could cause a crash or could cause injury or death, you should immediately inform the National Highway Traffic Safety Administration (NHTSA) in addition to notifying Ford Motor Company. If NHTSA receives similar complaints, it may open an investigation, and if it finds that a safety defect exists in a group of vehicles, it may order a recall and remedy campaign.
-
Page 209: Cleaning
Cleaning WASHING THE EXTERIOR Wash your vehicle regularly with cool or lukewarm water and a neutral Ph shampoo, such as Motorcraft Detail Wash (ZC-3–A), which is available from your dealer. • Never use strong household detergents or soap, such as dish washing or laundry liquid.
-
Page 210
Cleaning PAINT CHIPS Your dealer has touch-up paint and sprays to match your vehicle’s color. Take your color code (printed on a sticker in the driver’s door jam) to your dealer to ensure you get the correct color. • Remove particles such as bird droppings, tree sap, insect deposits, tar spots, road salt and industrial fallout before repairing paint chips. -
Page 211
• Cover the highlighted areas to prevent water damage when cleaning the engine. 4.0L SOHC V6 Engine 4.6L V8 Engine • Never wash or rinse the engine while it is running; water in the running engine may cause internal damage. REVIEW COPY: 2004 Explorer (exp), Owners Guide (post-2002-fmt) (own2002), Market: USA English (fus) -
Page 212
Cleaning PLASTIC (NON-PAINTED) EXTERIOR PARTS Use only approved products to clean plastic parts. These products are available from your dealer. • For routine cleaning, use Motorcraft Detail Wash (ZC-3–A). • If tar or grease spots are present, use Motorcraft Bug and Tar Remover (ZC-42). -
Page 213
INTERIOR TRIM • Clean the interior trim areas with a damp cloth, then dry by wiping with a dry, soft, clean cloth. • Do not use household or glass cleaners as these may damage the finish. INTERIOR For fabric, carpets, cloth seats and safety belts: •… -
Page 214
Cleaning FORD, LINCOLN AND MERCURY CAR CARE PRODUCTS Your Ford, Lincoln or Mercury dealer has many quality products available to clean your vehicle and protect its finishes. These quality products have been specifically engineered to fulfill your automotive needs; they are custom designed to complement the style and appearance of your vehicle. -
Page 215: Maintenance And Specifications
Maintenance and Specifications Maintenance and Specifications SERVICE RECOMMENDATIONS • Use the Scheduled Maintenance Guide to track routine service. • Use only recommended fuels, lubricants, fluids and service parts conforming to specifications. • Your dealership can provide parts and service. PRECAUTIONS WHEN SERVICING YOUR VEHICLE •…
-
Page 216
Maintenance and Specifications OPENING THE HOOD 1. Inside the vehicle, pull the hood release handle located under the bottom left corner of the instrument panel. 2. Go to the front of the vehicle and release the auxiliary latch that is located under the front center of the hood. -
Page 217: Engine Compartment
Maintenance and Specifications IDENTIFYING COMPONENTS IN THE ENGINE COMPARTMENT 4.0L SOHC V6 engine 1. Engine coolant reservoir 2. Engine oil filler cap 3. Power steering fluid reservoir 4. Brake fluid reservoir 5. Power distribution box 6. Battery 7. Engine oil dipstick 8.
-
Page 218
Maintenance and Specifications 4.6L V8 engine 1. Engine coolant reservoir 2. Engine oil dipstick 3. Brake fluid reservoir 4. Power distribution box 5. Battery 6. Power steering fluid reservoir 7. Engine oil filler cap 8. Air filter assembly 9. Windshield washer fluid reservoir REVIEW COPY: 2004 Explorer (exp), Owners Guide (post-2002-fmt) (own2002), Market: USA English (fus) -
Page 219
Maintenance and Specifications WINDSHIELD WASHER FLUID Add fluid to fill the reservoir if the level is low. In very cold weather, do not fill the reservoir completely. Only use a washer fluid that meets Ford specification WSB-M8B16–A2. Refer to Lubricant specifications in the Capacities and specifications chapter. -
Page 220: Engine Oil
Maintenance and Specifications ENGINE OIL Checking the engine oil Refer to the scheduled maintenance guide for the appropriate intervals for checking the engine oil. 1. Make sure the vehicle is on level ground. 2. Turn the engine off and wait a few minutes for the oil to drain into the oil pan.
-
Page 221
Maintenance and Specifications • 4.6L V8 engine 6. Wipe the indicator clean. Insert the indicator fully, then remove it again. • If the oil level is between the MIN and MAX marks, the oil level is acceptable, DO NOT ADD OIL. •… -
Page 222
Maintenance and Specifications • 4.6L V8 engine • Oil levels above the MAX mark may cause engine damage. Some oil must be removed from the engine by a service technician. 7. Put the indicator back in and ensure it is fully seated. Adding engine oil 1. -
Page 223
Maintenance and Specifications Engine Oil Recommendations 4.6L Engine Look for this certification trademark. Use SAE 5W-20 engine oil. Only use oils “Certified For Gasoline Engines” by the American Petroleum Institute (API). To protect your engine’s warranty use Motorcraft SAE 5W-20 or an equivalent 5W-20 oil meeting Ford specification WSS-M2C153-H. -
Page 224: Battery
Maintenance and Specifications Use SAE 5W-30 engine oil. Only use oils “Certified For Gasoline Engines” by the American Petroleum Institute (API). To protect your engine’s warranty use Motorcraft SAE 5W-30 or an equivalent 5W-30 oil meeting Ford specification WSS-M2C205-A. Do not use supplemental engine oil additives, cleaners or other engine treatments.
-
Page 225
Maintenance and Specifications If your battery has a cover/shield, make sure it is reinstalled after the battery has been cleaned or replaced. For longer, trouble-free operation, keep the top of the battery clean and dry. Also, make certain the battery cables are always tightly fastened to the battery terminals. -
Page 226
Maintenance and Specifications 3. Run the engine until it reaches normal operating temperature. 4. Allow the engine to idle for at least one minute. 5. Turn the A/C on and allow the engine to idle for at least one minute. 6. -
Page 227
Maintenance and Specifications Your vehicle was factory-filled with a 50/50 engine coolant and water concentration. If the concentration of coolant falls below 40% or above 60%, the engine parts could become damaged or not work properly. A 50–50 mixture of coolant and water provides the following: •… -
Page 228
Maintenance and Specifications Note: Automotive fluids are not interchangeable; do not use engine coolant, antifreeze or windshield washer fluid outside of its specified function and vehicle location. Adding engine coolant When adding coolant, make sure it is a 50/50 mixture of engine coolant and distilled water. -
Page 229
Maintenance and Specifications • Do not add extra inhibitors or additives to the coolant. These can be harmful and compromise the corrosion protection of the engine coolant. For vehicles with overflow coolant systems with a non-pressurized cap on the coolant recovery system, add coolant to the coolant recovery reservoir when the engine is cool. -
Page 230
Maintenance and Specifications system may have a leak. Operating an engine with a low level of coolant can result in engine overheating and possible engine damage. Recycled engine coolant Ford Motor Company does NOT recommend the use of recycled engine coolant in vehicles originally equipped with Motorcraft Premium Gold Engine Coolant since a Ford-approved recycling process is not yet available. -
Page 231
Maintenance and Specifications How fail-safe cooling works If the engine begins to overheat: • The engine coolant temperature gauge will move to the red (hot) area. • HIGH TEMP LOW OIL (if equipped) or CHECK GAUGE (if equipped) will illuminate. •… -
Page 232
Maintenance and Specifications Driving the vehicle without repairing the engine problem increases the chance of engine damage. Take your vehicle to a service facility as soon as possible. WHAT YOU SHOULD KNOW ABOUT AUTOMOTIVE FUELS Important safety precautions Do not overfill the fuel tank. The pressure in an overfilled tank may cause leakage and lead to fuel spray and fire. -
Page 233
Maintenance and Specifications • Avoid inhaling fuel vapors. Inhaling too much fuel vapor of any kind can lead to eye and respiratory tract irritation. In severe cases, excessive or prolonged breathing of fuel vapor can cause serious illness and permanent injury. •… -
Page 234
Maintenance and Specifications become brittle and crack, especially when mixed with gasoline. Special materials and procedures have been developed for flexible fuel vehicles and the dispensers used by ethanol fuel providers. Flexible fuel components and standard unleaded gasoline fuel components are not interchangeable. If your vehicle is not serviced in accordance with flexible fuel vehicles procedures, damage may occur and your warranty may be invalidated. -
Page 235
Maintenance and Specifications these additives can cause your vehicle’s emission control system to deteriorate more rapidly. In Canada, many fuels contain critical fuel system components. Do not use fuel containing methanol. It can damage critical fuel system components. Repairs to correct the effects of using a fuel for which your vehicle was not designed may not be covered by your warranty. -
Page 236
Maintenance and Specifications rating. Aftermarket products could cause damage to the fuel system. Repairs to correct the effects of using an aftermarket product in your fuel may not be covered by your warranty. Unleaded Gasoline engines If you are experiencing starting, rough idle or hesitation driveability problems during a cold start, try a different brand of “Regular”… -
Page 237
Maintenance and Specifications When fueling your vehicle: 1. Turn the engine off. 2. Carefully turn the filler cap counterclockwise 1/4 of a turn until it stops. 3. Pull to remove the cap from the fuel filler pipe. 4. To install the cap, align the tabs on the cap with the notches on the filler pipe. -
Page 238
Maintenance and Specifications possible. Fuel expense, frequency of fill-ups or fuel gauge readings are NOT accurate as a measure of fuel economy. We do not recommend taking fuel economy measurements during the first 1,600 km (1,000 miles) of driving (engine break-in period). You will get a more accurate measurement after 3,000 km–5,000 km (2,000 miles-3,000 miles). -
Page 239
Maintenance and Specifications Calculating fuel economy 1. Fill the fuel tank completely and record the initial odometer reading (in kilometers or miles). 2. Each time you fill the tank, record the amount of fuel added (in liters or gallons). 3. After at least three to five tank fill-ups, fill the fuel tank and record the current odometer reading. -
Page 240
Maintenance and Specifications • You may want to turn off the speed control in hilly terrain if unnecessary shifting between third and fourth gear occurs. Unnecessary shifting of this type could result in reduced fuel economy. • Warming up a vehicle on cold mornings is not required and may reduce fuel economy. -
Page 241
Maintenance and Specifications Per Gallon (MPG) and your driving range to decrease by about 30% compared to gasoline operation. EPA window sticker Every new vehicle should have the EPA window sticker. Contact your dealer if the window sticker is not supplied with your vehicle. The EPA window sticker should be your guide for the fuel economy comparisons with other vehicles. -
Page 242
Maintenance and Specifications Exhaust leaks may result in entry of harmful and potentially lethal fumes into the passenger compartment. Do not make any unauthorized changes to your vehicle or engine. By law, vehicle owners and anyone who manufactures, repairs, services, sells, leases, trades vehicles, or supervises a fleet of vehicles are not permitted to intentionally remove an emission control device or prevent it from working. -
Page 243
Maintenance and Specifications Readiness for Inspection/Maintenance (I/M) testing In some localities, it may be a legal requirement to pass an I/M test of the on-board diagnostics system. If your Check engine/Service engine soon light is on, refer to the description in the Warning lights and chimes section of the Instrument Cluster chapter. -
Page 244
Maintenance and Specifications • 4.6L V8 engine 1. Start the engine and let it run until it reaches normal operating temperature (the engine coolant temperature gauge indicator will be near the center of the normal area between H and C). 2. -
Page 245
Maintenance and Specifications TRANSMISSION FLUID Checking automatic transmission fluid The automatic transmission does not have a transmission fluid dipstick. Refer to your Scheduled Maintenance Guide for scheduled intervals for fluid checks and changes. Your transmission does not consume fluid. However, the fluid level should be checked if the transmission is not working properly, (i.e., if the transmission slips or shifts slowly) or if you notice some sign of fluid leakage. -
Page 246
Maintenance and Specifications 3. Add only enough fluid through the filler opening so that the fluid level is at the bottom of the opening. Use only fluid that meets Ford specifications. Refer to Lubricant specifications in this chapter. DRIVELINE UNIVERSAL JOINT AND SLIP YOKE Your vehicle may be equipped with universal joints that require lubrication. -
Page 247
Maintenance and Specifications Treadwear The treadwear grade is a comparative rating based on the wear rate of the tire when tested under controlled conditions on a specified government test course. For example, a tire graded 150 would wear one and one-half (1 1/2) times as well on the government course as a tire graded 100. -
Page 248
Maintenance and Specifications TIRES Tires are designed to give many thousands of miles of service, but they must be maintained in order to get the maximum benefit from them. Glossary of tire terminology • Tire label: A label showing the OE (Original Equipment) tire sizes, recommended inflation pressure and the maximum weight the vehicle can carry. -
Page 249
Maintenance and Specifications Information on “P” type tires P215/65R15 95H is an example of a tire size, load index and speed rating. The definitions of these items are listed below. (Note that the tire size, load index and speed rating for your vehicle may be different than this example.) 1. -
Page 250
Maintenance and Specifications Note: You may not find this information on all tires because it is not required by federal law. Letter rating Note: For tires with a maximum speed capability over 149 mph (240 km/h), tire manufacturers sometimes use the letters ZR. For those with a maximum speed capability over 186 mph (299 km/h), tire manufacturers always use the letters ZR. -
Page 251
Maintenance and Specifications 12. Treadwear, Traction and Temperature Grades • Treadwear: The treadwear grade is a comparative rating based on the wear rate of the tire when tested under controlled conditions on a specified government test course. For example, a tire graded 150 would wear one and one-half (1 course as a tire graded 100. -
Page 252
Maintenance and Specifications Additional information contained on the tire sidewall for “LT” type tires “LT” type tires have some additional information than those of “P” type tires; these differences are described below: 1. LT: Indicates a tire, designated by the Tire and Rim Association (T&RA), that is intended for service on light trucks. -
Page 253
Maintenance and Specifications Information on “T” type tires T145/80D16 is an example of a tire size. Note: The temporary tire size for your vehicle may be different than this example. 1. T: Indicates a type of tire, designated by the Tire and Rim Association (T&RA), that is intended for temporary service on cars, SUVs, minivans and light… -
Page 254
Maintenance and Specifications Use a tire gauge to check the tire inflation pressure, including the spare, at least monthly and before long trips. You are strongly urged to buy a reliable tire pressure gauge, as automatic service station gauges may be inaccurate. -
Page 255
Wheel misalignment in the front or the rear can cause uneven and rapid treadwear of your tires and should be corrected by a qualified technician at a Ford or Lincoln/Mercury dealer. Front wheel drive (FWD) vehicles, and those with an independent rear suspension require alignment of all four wheels. -
Page 256
Maintenance and Specifications • Front Wheel Drive (FWD) vehicles (front tires at top of diagram) • Rear Wheel Drive (RWD) vehicles/Four Wheel Drive (4WD) vehicles (front tires at top of diagram) Sometimes irregular tire wear can be corrected by rotating the tires. REVIEW COPY: 2004 Explorer (exp), Owners Guide (post-2002-fmt) (own2002), Market: USA English (fus) -
Page 257
Maintenance and Specifications Note: If your tires show uneven wear ask a qualified technician at a Ford or Lincoln/Mercury dealership to check for and correct any wheel misalignment, tire imbalance or mechanical problem involved before tire rotation. Note: Your vehicle may be equipped with a dissimilar spare tire/wheel. A dissimilar spare tire/wheel is defined as a spare tire and/or wheel that is different in brand, size or appearance from the road tires and wheels. -
Page 258
If you have questions regarding tire replacement, see an authorized Ford or Lincoln/Mercury dealer. Make sure all tires and wheels on the vehicle are of the same size, type, tread design, brand, load-carrying capacity and speed rating because it… -
Page 259: Tire Information
Maintenance and Specifications Never spin the tires in excess of the 35 mph (55 km/h) point indicated on the speedometer. Highway hazards No matter how carefully you drive there’s always the possibility that you may eventually have a flat tire on the highway. Drive slowly to the closest safe area out of traffic.
-
Page 260
Maintenance and Specifications temperature. Contained air temperature is dependent upon several factors such as rate of tire rotation, tire deflection, amount of braking, etc. In similar manner, the tire pressure will decrease if the contained air temperature decreases. For example, if the vehicle is stationary over night with the outside temperature significantly lower than the daytime temperature, the tire pressure may decrease approximately 3 psi (20.7 kPa) for a drop of 30°… -
Page 261: Changing Tires
Maintenance and Specifications Changing tires with TPMS It is recommended that you always have your tires serviced by a dealer or qualified technician. Each road tire is equipped with a tire pressure sensor mounted on the wheel inside the tire connected to the valve stem.
-
Page 262: Part Numbers
Maintenance and Specifications • Do not exceed 48 km/h (30 mph) with tire cables or chains on your vehicle. Consult your dealer for information on other Ford approved methods of traction control. MOTORCRAFT PART NUMBERS Component 4.0L SOHC V6 engine 4.6L V8 engine Air filter element FA-1695 Fuel filter…
-
Page 263: Refill Capacities
Maintenance and Specifications REFILL CAPACITIES Fluid Ford Part Name Brake fluid Motorcraft High Performance DOT 3 Motor Vehicle Brake Fluid Engine oil Motorcraft SAE (including filter 5W-30 Super change) Premium Motor Motorcraft SAE 5W-20 Premium Synthetic Blend Motor Oil (US) Motorcraft SAE 5W-20 Super Premium Motor…
-
Page 264
Maintenance and Specifications Fluid Ford Part Name Engine coolant Motorcraft Premium Gold Engine Coolant (yellow-colored) Front axle Motorcraft SAE lubricant 80W-90 Premium Rear Axle Lubricant Rear axle Motorcraft SAE lubricant 75W-90 Fuel Efficient High Performance Synthetic Rear Axle Lubricant Windshield Motorcraft washer fluid Premium… -
Page 265: Lubricant Specifications
Maintenance and Specifications Add the coolant type originally equipped in your vehicle. Limited Slip differentials must add 118ml (4oz) of additive Friction Modifier XL-7 or equivalent to the rear axle whenever the axle has been serviced. Use of synthetic or synthetic blend motor oil is not mandatory. Engine oil need only meet the requirements of Ford specification WSS-M2C153–H and the API Certification mark.
-
Page 266
Maintenance and Specifications Ford Part Item Name or equivalent Motorcraft SAE 5W30 Super 4.0L Engine oil Premium Motor Motorcraft SAE 5W20 Premium Synthetic Blend Motor Oil (US) 4.6L Engine oil Motorcraft SAE 5W-20 Super Premium Motor Oil (Canada) Motorcraft Automatic MERCON V transmission Motorcraft… -
Page 267
Maintenance and Specifications Ford Part Item Name or equivalent Motorcraft Premium Windshield Windshield washer fluid Washer Concentrate Ensure the correct automatic transmission fluid is used. MERCON and MERCON V are not interchangeable. DO NOT mix MERCON and MERCON V. Refer to your Scheduled Maintenance Guide to determine the correct service interval. -
Page 268
Maintenance and Specifications REVIEW COPY: 2004 Explorer (exp), Owners Guide (post-2002-fmt) (own2002), Market: USA English (fus) -
Page 269
Maintenance and Specifications IDENTIFYING YOUR VEHICLE Certification label The National Highway Traffic Safety Administration Regulations require that a Certification label be affixed to a vehicle and prescribe where the Certification label may be located. The Certification label is located on the front door latch pillar on the driver’s side. -
Page 270
Maintenance and Specifications 7. Assembly plant 8. Production sequence number Engine number The engine number (the last eight numbers of the vehicle identification number) is stamped on the engine block, transmission, frame and transfer case (if equipped). Transmission/Transaxle code designations You can find a transmission/transaxle code on the vehicle certification label which is located on the door pillar. -
Page 271
Maintenance and Specifications Code Transmission Description Automatic transmission Automatic 4–speed overdrive (CD4E) Automatic 4–speed overdrive (4R70W) Automatic 4–speed overdrive (4R44E) Automatic 4–speed overdrive (4R100) Automatic 5–speed overdrive (5R55E) Electric One speed electric Automatic 5–speed overdrive (5R44E) Automatic 5–speed overdrive (5R55S) Passenger car application: Code Transmission/Transaxle Description… -
Page 272: Accessories
Accessories Accessories GENUINE FORD ACCESSORIES FOR YOUR VEHICLE A wide selection of Genuine Ford Accessories are available for your vehicle through your local authorized Ford or Ford of Canada dealer. These quality accessories have been specifically engineered to fulfill your automotive needs;…
-
Page 273
Interior style Electrochromatic compass/temperature interior mirrors Floor mats Scuff plates Lifestyle Bike racks Cargo organization and management Engine block heaters Trailer hitches, wiring harnesses and accessories Peace of mind Airbag anti-theft locks First aid and safety kits Full vehicle covers Locking gas cap Navigation systems Remote start… -
Page 274: Index
Index Index Accessory delay …49 AdvanceTrac …141 Air bag supplemental restraint system …115, 120 and child safety seats …117 description …115, 120 disposal …123 driver air bag …117, 121 indicator light …119, 122 operation …117, 121 passenger air bag …117, 121 Air cleaner filter …262 Air conditioning …28 All Wheel Drive (AWD),…
-
Page 275
plastic parts …212 safety belts …213 washing …209 waxing …209 wheels …210 wiper blades …212 Climate control (see Air conditioning or Heating) …28 Clock adjust 6-CD in dash …23 AM/FM/CD …18 Compass, electronic …61 calibration …62 set zone adjustment …61, 64 Console …45 overhead …46 rear …46, 48… -
Page 276
Index refill capacities …263 service points …217–218 starting after a collision …175 Engine block heater …138 Engine oil …220 checking and adding …220 dipstick …220 filter, specifications …223, 262 recommendations …223 refill capacities …263 specifications …265, 267 Exhaust fumes …138 Fail safe cooling …230 Flexible Fuel Vehicle (FFV) …232 Floor mats …75… -
Page 277
HomeLink universal transceiver (see Garage door opener) …60 Homelink wireless control system …57 Hood …216 Ignition …135, 267 Infant seats (see Safety seats) …126 Inspection/maintenance (I/M) testing …243 Instrument panel cleaning …212 cluster …10 Jack …186, 189 positioning …186, 191 storage …186, 188–189 Jump-starting your vehicle …195 Keyless entry system …85… -
Page 278
Index Parking brake …140 Parts (see Motorcraft parts) …262 Pedals (see Power adjustable foot pedals) …51 Power adjustable foot pedals …51 Power distribution box (see Fuses) …181 Power door locks …79 Power point …48 Power Point Cigar lighter …48 Power steering …143 fluid, checking and adding …243 fluid, refill capacity …263 fluid, specifications …265, 267… -
Page 279
Tire Pressure Monitoring System (TPMS) Driving …156 Maintenance and Specifications …259 Roadside Emergencies …186 Warning Displays …15, 69 Tires …186, 246–248 alignment …255 care …253 changing …186, 191, 194 checking the pressure …253 label …253 replacing …191, 258 rotating …255 safety practices …258 sidewall information …248 snow tires and chains …261…
инструкцияMercury Mountaineer (2002)

Before driving
Introduction 2
Instrumentation 6
Controls and features 30
Seating and safety restraints 123
Starting and driving
Starting 167
Driving 172
Roadside emergencies 199
Servicing
Maintenance and care 224
Capacities and specifications 282
Customer assistance 291
Reporting safety defects 303
Index 304
All rights reserved. Reproduction by any means, electronic or mechanical including
photocopying, recording or by any information storage and retrieval system or translation
in whole or part is not permitted without written authorization from Ford Motor Company.
Ford may change the contents without notice and without incurring obligation.
Copyright © 2001 Ford Motor Company
Contents
1
Посмотреть инструкция для Mercury Mountaineer (2002) бесплатно. Руководство относится к категории автомобили, 2 человек(а) дали ему среднюю оценку 8.5. Руководство доступно на следующих языках: английский. У вас есть вопрос о Mercury Mountaineer (2002) или вам нужна помощь? Задайте свой вопрос здесь
Главная
Не можете найти ответ на свой вопрос в руководстве? Вы можете найти ответ на свой вопрос ниже, в разделе часто задаваемых вопросов о Mercury Mountaineer (2002).
Как перевести мили в километры?
1 миля равна 1,609344 километрам, а 1 километр — 0,62137119 милям.
Где я могу узнать идентификационный номер транспортного средства Mercury?
Место размещения идентификационного номера транспортного средства зависит от марки и типа транспортного средства. Номер может быть выбит на раме транспортного средства или указан на номерном знаке. Чтобы узнать место расположения идентификационного номера транспортного средства лучше всего ознакомиться с руководством по эксплуатации Mercury Mountaineer (2002).
Что такое идентификационный номер транспортного средства (VIN)?
Идентификационный номер транспортного средства — уникальный для каждого транспортного средства идентификационный номер. Аббревиатура VIN расшифровывается как «Vehicle Identification Number» (Идентификационный номер транспортного средства).
Когда транспортному средству Mercury требуется техническое обслуживание?
Регулярное техническое обслуживание необходимо всем транспортным средствам. С информацией о том, как часто необходимо проходить техническое обслуживание и чему именно стоит уделять особое внимание можно ознакомиться в инструкции по техническому обслуживанию. Как правило, транспортное средство требует технического обслуживания каждые 2 года или 30 000 километров пробега.
Когда следует заменять тормозную жидкость на Mercury?
Тормозную жидкость рекомендуется менять каждые два года.
В чем разница между топливом E10 и E5?
В топливе E10 содержится до десяти процентов этанола, в то время как в E5 содержится менее пяти процентов. Соответственно, топливо E10 менее вредит окружающей среде.
Одна или несколько дверей не открываются изнутри. Что мне делать?
Скорее всего, замок оснащен защитой от детей и поэтому не может быть открыт изнутри. Процедура открытия замка с защитой от детей зависит от марки и типа замка.
Автомобильный радиоприемник не включается, что делать?
Если автомобильный радиоприемник не включен, на него не будет подаваться питание. Убедитесь, что красный провод подключен к контактному источнику питания, а желтый провод — к источнику питания постоянной мощности.
Инструкция Mercury Mountaineer (2002) доступно в русский?
К сожалению, у нас нет руководства для Mercury Mountaineer (2002), доступного в русский. Это руководство доступно в английский.
Не нашли свой вопрос? Задайте свой вопрос здесь
-
Contents
-
Table of Contents
-
Troubleshooting
-
Bookmarks
Quick Links
www.carburetor-manual.com
Would you like some Free Manuals?
http://carburetor-manual.com/free-shop-manual-club-t-13.html
Also visit
for more Free Manuals
Also Visit my website for 7 FREE Download Manuals starting
with this one.
«The ABC’s of Carburetion»
Click Here Now
file:///C|/Documents%20and%20Settings/Tim/Desktop/carburetor-manual-welcome/index.htm[4/25/2009 11:42:20 AM]
Summary of Contents for Mercury Mountaineer 2002
На этой странице вы можете совершенно бесплатно скачать Инструкция по эксплуатации Mercury Mountaineer 2005.
У документа PDF Инструкция по эксплуатации 264 страниц, а его размер составляет 2.25 Mb.
Читать онлайн Автомобили Mercury Mountaineer 2005 Инструкция по эксплуатации

Скачать файл PDF «Mercury Mountaineer 2005 Инструкция по эксплуатации» (2.25 Mb)
Популярность:
30867 просмотры
Подсчет страниц:
264 страницы
Тип файла:
Размер файла:
2.25 Mb
Прочие инструкции Mercury Mountaineer 2005
Прочие инструкции Mercury Автомобили


Прочие инструкции Mercury


Руководство на английском языке по техническому обслуживанию и ремонту Ford Crown Victoria и Mercury Grand Marquis 1989-1994 годов выпуска.
- Автор: —
- Издательство: Chilton
- Год издания: 2004
- Страниц: —
- Формат: PDF
- Размер: 59,7 Mb
Руководство на английском языке по техническому обслуживанию и ремонту Ford Explorer, Mazda Navajo и Mercury Mountaineer 1991-2001 годов выпуска.
- Автор: —
- Издательство: Haynes Publishing
- Год издания: —
- Страниц: 347
- Формат: PDF
- Размер: 511,3 Mb
Руководство на английском языке по техническому обслуживанию и ремонту Ford Mustang 1979-1992 и Mercury Capri 1979-1986 годов выпуска.
- Автор: —
- Издательство: Haynes Publishing
- Год издания: 1992
- Страниц: 355
- Формат: PDF
- Размер: 59,6 Mb
Руководство на английском языке по техническому обслуживанию и ремонту Ford Freestar, Mercury Monterey 2004-2007 и Ford Windstar 1995-2003 годов выпуска.
- Автор: —
- Издательство: Haynes Publishing
- Год издания: 2009
- Страниц: 308
- Формат: PDF
- Размер: 206,7 Mb
Руководство на английском языке по техническому обслуживанию и ремонту Ford Escort и Mercury Tracer 1991-1996 годов выпуска.
- Автор: Alan Ahlstrand, J.H. Haynes
- Издательство: Haynes Publishing
- Год издания: 1996
- Страниц: —
- Формат: PDF
- Размер: 263,6 Mb
Руководство по техническому обслуживанию и ремонту Ford Explorer, Ford Ranger и Mercury Mountaineer 1991-1999 годов выпуска.
- Автор: —
- Издательство: Легион-Автодата
- Год издания: —
- Страниц: 416
- Формат: —
- Размер: —
Руководство по эксплуатации и ремонту Ford Explorer и Mercury Mountaineer с 2001 года выпуска с бензиновыми двигателями объемом 4.0/4.6 л.
- Автор: —
- Издательство: Монолит
- Год издания: —
- Страниц: 352
- Формат: —
- Размер: —
Руководство по эксплуатации и ремонту автомобилей Ford Explorer и Mercury Mountaineer 2006-2010 годов выпуска с бензиновыми двигателями объемом 4.0/4.6 л.
- Автор: —
- Издательство: Монолит
- Год издания: —
- Страниц: 412
- Формат: —
- Размер: —
Руководство по техническому обслуживанию и ремонту Ford Taurus и Mercury Sable 1986-1995 годов выпуска.
- Автор: —
- Издательство: ТЕХИНФОРМ
- Год издания: —
- Страниц: 255
- Формат: PDF
- Размер: 53,9 Mb

Руководство на испанском языке по техническому обслуживанию и ремонту Ford Explorer и Mercury Mountaineer 1995-2001 годов выпуска.
- Автор: —
- Издательство: —
- Год издания: —
- Страниц: 3613
- Формат: PDF
- Размер: 44,9 Mb
