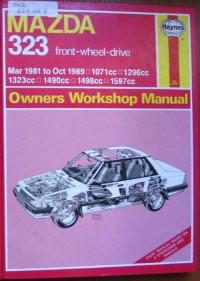
Руководство на английском языке по техническому обслуживанию и ремонту автомобиля Mazda 323 1981-1989 годов выпуска.
- Автор: Mark Coombs
- Издательство: Haynes Publishing
- Год издания: —
- Страниц: 340
- Формат: PDF
- Размер: 97,8 Mb
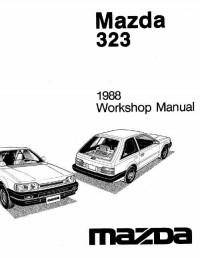
Руководства на английском языке по техническому обслуживанию и ремонту автомобиля Mazda 323 1988 года выпуска.
- Автор: —
- Издательство: Mazda Motor Corporation
- Год издания: 1987
- Страниц: 880/1129
- Формат: PDF
- Размер: 89,1 Mb
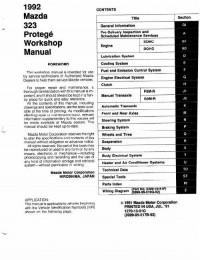
Руководство на английском языке по техническому обслуживанию и ремонту автомобилей Mazda 323 и Mazda Protege 1992 года выпуска.
- Автор: —
- Издательство: Mazda Motor Corporation
- Год издания: 1991
- Страниц: 1164
- Формат: PDF
- Размер: 62,0 Mb
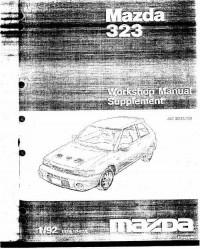
Дополнение к руководству на английском языке по техническому обслуживанию и ремонту автомобиля Mazda 323.
- Автор: —
- Издательство: Mazda Motor Corporation
- Год издания: 1992
- Страниц: 279
- Формат: PDF
- Размер: 17,1 Mb
Дополнение к руководству на английском языке по техническому обслуживанию и ремонту автомобиля Mazda 323 4WD 1990 года выпуска.
- Автор: —
- Издательство: Mazda Motor Corporation
- Год издания: 1989
- Страниц: 728/677
- Формат: PDF
- Размер: 93,7 Mb
Руководство по техническому обслуживанию и ремонту автомобиля Mazda 323F в кузове BA
- Автор: —
- Издательство: Алфамер Паблишинг
- Год издания: —
- Страниц: 232
- Формат: PDF
- Размер: 148,2 Mb
Руководство по ремонту автомобиля Mazda 323 1985-1989 годов выпуска.
- Автор: —
- Издательство: —
- Год издания: —
- Страниц: —
- Формат: PDF
- Размер: 108,6 Mb
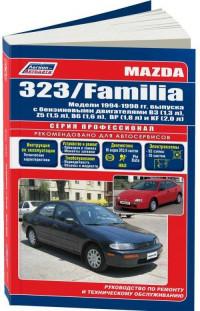
Руководство по эксплуатации, техническому обслуживанию и ремонту автомобилей Mazda 323 и Mazda Familia 1994-1998 годов выпуска с бензиновыми двигателями.
- Автор: —
- Издательство: Легион-Автодата
- Год издания: —
- Страниц: 474
- Формат: —
- Размер: —
Руководство по техническому обслуживанию и ремонту автомобилей Mazda 323/Protege/MX-3/MX-6/626/Miata с 1990 года выпуска.
- Автор: —
- Издательство: ПОНЧиК
- Год издания: 2002
- Страниц: 394
- Формат: PDF
- Размер: 19,8 Mb
Руководство по эксплуатации и ремонту автомобиля Mazda 323 1989-1998 годов выпуска с бензиновыми и дизельными двигателями.
- Автор: —
- Издательство: Петит
- Год издания: 2006
- Страниц: 241
- Формат: PDF
- Размер: 301,8 Mb

Руководство по техническому обслуживанию и ремонту автомобиля Mazda 323 1989-1994 годов выпуска с бензиновыми двигателями
- Автор: —
- Издательство: АСТ
- Год издания: 2003
- Страниц: 270
- Формат: PDF
- Размер: 35,5 Mb

Мультимедийное руководство по техническому обслуживанию и ремонту автомобиля Mazda 323 с 1985 года выпуска.
- Автор: —
- Издательство: —
- Год издания: —
- Страниц: —
- Формат: NRG
- Размер: 132,8 Mb

Руководство по техническому обслуживанию и ремонту автомобилей Mazda 323, Mazda Familia и Mazda Protege 1998-2004 годов выпуска с бензиновыми двигателями.
- Автор: —
- Издательство: Легион-Автодата
- Год издания: —
- Страниц: 522
- Формат: —
- Размер: —

- Manuals
- Brands
- Mazda Manuals
- Automobile
- 323F
- Owner’s manual
-
Contents
-
Table of Contents
-
Bookmarks
Quick Links
•
Form No.8134EI — 9SH
1995 Mazda Motor Corporation
8134
Printed
Japan 96-06
@
In
Related Manuals for Mazda 323F
Summary of Contents for Mazda 323F
-
Page 1
• Form No.8134EI — 9SH 1995 Mazda Motor Corporation 8134 Printed Japan 96-06… -
Page 2
IIIROSHIMA. JAPAN Important Notes About This Manual Keep this manual in the glove box as a handy reference for (he safe and enjoyable use of your Mazda. Should resell the ve hicle, leave this lIlanuul with it for (he ncxt owncr. -
Page 3: How To Use This Manual
Each begins with a brief list of contents, so manual to beSt explain how to enjoy your you can usually tell at a glance if that sec Mazda. By rcading your manual, you can tion has the information you want. find out aboullhc features. about important ,1′,CAUTION safety in[onnation.
-
Page 4
to Use Manual This Gr ap hic sy m bo ls: Some of the followin!,! �Y!llboI5 are used to identify COlllro b and displ ays on your vehid e. � � ¢¢ �D :00: ::::- TII�'» Sl(;»�l.’ LIGIIl’!; �»‘RKI»(‘; IIOfn� �… -
Page 5
Table of Contents 1..I Knowing Your Mazda I)rotecting Your Mazda Driving Your Mazda Appearance Care Maintenance Customer Information Indcx… -
Page 6: Your Vehicle At A Glance
Your Vehicle at a Glance Ma:;da i5 Your a complexl’ehicle. but the desig/l IhroughoUI considers your sa!ef.y ond com/o» jJurwnounl. This requires nIany cOl1lrols,/ocks. graphic symbols. mechanisms. and comjorl ap· poin/mell/! Ihll/ need be underSIQO(/!or prop_ operatioll. Sec/ion illlIslraln Ihis information /0 Jamil fl(‘Cl/r iari:e )’014 Wilh «,hal to be known /0 help…
-
Page 7: Interior Overview
Your Vehicle at Glance Interior Overview Lefl-hand drh’C’ model 2-34) mirror (pilgc (p.�g c4-:\ 5 ) ; r rl m irr or 4-31) Seat bell (page (page 2-19) mastn cO!ltrol Power w i ndow (rage 2·8) Olo\c (page 4-33) HQr[l (pagl·…
-
Page 8
Your Vehicle at a Glance Righ t-hu lld driv e mod el Vanit), (page 4′:�5) Scat beh (p<lgc2-19) ‘box (page 4-33) Power 2-8) (page… -
Page 9: Dashboard Overview
Your Vehicle al a Glance Dashboard Overview Ldl-hand drive model Side Ic»cr!shift Ic»er $clN:tor 4·5 ) (pa gc 4.6 . Illumination rontr(ll (pagc2·12) . release lever (page 2·) ·SOmt’l1w)<I ..
-
Page 10
V»hicle at a Glance Your drhc Righi-hand model ClimalC coolrol Side «» IlIt l milialion n:lcase (page 2-12) 4-32) (pa,e lever (page 4·6. 4-5) 4-(5) Parting brake (]lo1ge re1ea.<;c le\ er (.,.. � 2-.11) ‘Some models. -
Page 11
Your Vehicle at a Glance Doors Front LeO-hand dri\'( ‘ model (Drh(‘r’s sidt’) Front Right.hand dri�c model (Driver’s side) Door lock. OU1S,(k minor (page 2-.�3) OU1side nHJTOr (pag� 2-_U) handle Door Door lock. Door handle ro»-er «‘mdow�» I\ches Pov.er «, i ndow swi1ches 2-8) (page (p age 2·8 ) -
Page 12
Your Vehicle at a Glance LeO·hand IIri�c modd (Passcngcr»s �idc) Right.hand drhc model W3�cngcr»s Front fr on t sidc) Outs;!!..’ (page m,rror 2· ..) Door halldle Doollod Po»er wmdow s» PO»CI WlI)dow SWitch Door handle itch (po»» 2·11) 2·8) (pagc… -
Page 13
Y our Vehicle at a Glance Luggage Comp�rlmenl Rear Door lock handle Child safl.’ly lock (page 2-1) Door handle 2-1I) Power «,indo\>’ SWiICh� (pagl.’ �Sornl’ IlIlxkb. 1 �8… -
Page 14
Your Vehicle at a Glance S.door model… -
Page 15: Knowing Your Mazda
Knowing Your Mazda Security f(lk�s many forms ami is high!\’ neus .wry Qwner (!lid occupants. Sec/ion 1 de scribe:; the S<I/e ,,-ay use )'()ur Ma�a: Ire)’s. locks, windoll’s, ;lIIe’-;o( ligh/ing, sealS. antI bellS. Utli Keys 7 hIS section is lef)’ ill/porrom. II could someday…
-
Page 16
Knowing Your Mazda K eys 1)pell numl><:r Type Type plate code A cooe number is stamped on the plate at tached to the key sct: detach this plate and store it in a safe place-not in the vehic1c lISC if you need to make a replacement key. -
Page 17
Knowing Your ;\lazda D oor Locks Front • Outside Door Loek .. Locking without key To lock a rear door. pu�h the inside lock bullon and close the door ..Locking, unlocking. with kc) To lock a front door without a key, push the door lock and hold the door handle up •… -
Page 18
Kno\\ing Your Mazda NOTE remove the ignition key. close Always all windows, and lock all doors when dcd. nus your v c unatle � s and di’\courages IIHCVCS. • • To open. Door Lock Inside pull thc handle. • door. -
Page 19
Knowing Your �Ia’l.da Lt:, WARNING Unlockl! d doors ill a 1II(}�iIlK vehicle e(ll l be dangerous_ Passengers call/all Ollt a door is acddl’1I1t1lly opened (II u i Cflll more em· i Jy be thrown Ollt ill (III accident. So keep all doon-/ocked w>’illU/ drh’ing. -
Page 20
Knowing Your Mazda NOTE • e keyless entry system will oper ate up to about meters from the re L»CiveT. but this range may vary be cause of local conditions. • You have �ecol1ds to open door after unlocking It with the remote unlock device. -
Page 21
If you have a problem with the keyless entry system, consult <In Authorized Maz da Dealer. If your transmitter is lost or stolen. visit an Authorilcd Mazda Dealer as soon as pos sible for a replacemcnt and to make the old transmiller inoperative. •… -
Page 22
Knowing Your Mazda • One-Touch Power Window (I)ri\'(‘r’s window) \Vhcn the �witch is prc�setl firmly, the win dow will move to its fully open position, It will dose when the switJ.:h i» pullcd finnly. To stup the wllldow punway. pull u p o n switch if it’s opening;… -
Page 24
Knowing Your Mazda Trunk LidIHatch � WARNING An open trunk lid/hatch in a moving vehicle will cause exhaust gas to be drawn illto tile cabill. This gas con- tainsCO (carboll monoxide), which is colorless, odorless, and highly poison- ous; it can cause lI,lConsciOIl.»lIess and death, So keep tile trunk lid/hatch closed when dn’ I’ ing. -
Page 25
Knowing Your Mazda • Trunk Security (4 Door model) In some situations you may want (oprcvcnt the trunk from being opened with the re mote tnmk release lever. Give your key only to someone you trust. • To secure the trunk lid,… -
Page 26
Knowing Your Mazda Hood Release SllPI)/ ) rl cmch Snfcly l. Pull the release handle to unlock the 2. PullupthcsafclycatcIJulldlifuhehood. 3. Usc the suppon rod to hold the hood open. hood. Before closing the hood. secure the rod in it� clip,… -
Page 27
Mazda Knowing Your Fuel-Filler Lid To d ose he hood: • he under Check out t HI rillcrcapsare m place an d I t ccrtam al II lo os e Ite m s • C lo se th e hood so that it locks secure y . -
Page 28
Knowing Your Mazdn Fuel·Filler Cap WARNING Fuel Tqnk Prenun!: b i�l� Presmre sometimes builds up in the /uel tank. 1/,II;s /tappem and tile fuel cap is remo»ed qu;ckly,jllel can spray out. Fllel call bllm skill antI eyes cause ill1ft!n when ingested. To pre «oil any u/ this/rom happen;nK, slow… -
Page 29
..’&’CAUTlON dc�ig natcd Mazd a Alwa ys use only fucl cap or an appro ved equiv alent. availab le al Authonzed Mazda Deal CliP ers. The wrong can rc’iUll in a seri ous malfunction of the fuel system and the emissio n control «ysicm. -
Page 30
Knowing Your Mazda Lt. WARNING Adju�! a head restrain! so!ha!!he top cars, lels the top of the user’s never the neck. user’s Sift i «g i1/ a reclined position in a mov Lt. WARNING ing whicle can he dangerous hecause YOII dotl’t get tile full protection from seat bells. -
Page 31
Knowing Your Mazda Rear Scat Lh WARNING Stacking IlIggage or otfler cargo high. I:tIfi er tharllhe seat bach be danger QIIS. Dllri/lg a S/Idden stop or wllisiQfI, flwl it call become projectile IIIay hit and injurI; posstllgers. Don �·tack t/ltlll tliing.\’ higher… -
Page 32
Mazda Knowing Your WARNING NOTE mOlY need 10 unlock the seal back Folded Seat Backs,’ before you can fold it forward (page 2-19). Silting or lying it! Ille trunk/luggage compartment or on folded seat backs is a dangerous way to ride. During a smi·… -
Page 33
Scat Belt System WARNING Scat belts help decrease the possibility or severity of injury during accidents and sud den stops. Mazda recommends that the Seat Befts: driver and passengers wear sea! belts at <)11 Passengers not wearing seat befts dur… -
Page 34
T ..isted seat belts can calise injury. In If the system docs not operate correct! a collision, the full width of the belt consult lin Authorizcd Mazda Dealer. ;sn’l QI’ailable to absorb the impact. This puts more force on tlte iH:mcs be’ lIeath the belt, «,hh:h could break them… -
Page 35
Knowing Your Ma7..da WARNING the Seal Bell: Foillfr� to position ‘he shoulder por tim/ oj the seal helt properly r(‘(luces ((II W fll/f oJ prolel:litm ill all acci a/inJu< dell’ (I//(/ increases ‘he chalice ry. Make sure IIII’ shoulder portion of the seal belt is po�·iJjo»ed across JOllr short/der lIear Jour «uk, not on yOllr •… -
Page 36
Knowing Your i\’1azda T o unfasten: buckle release. s the .,. Shoulder belt adjuster WARNING Thi,> adJu�ts shoulder belt angle for Iliorc fit, Simply comf(lrtablc pll�h the but e desired IWIIMer /’ortiml of ton, move It position, eaf /lelt: i<; then release 11. -
Page 37
Knowing Your M1I7.da WARNING ullra�ten: & Depres� the button on the buckle. the Seal Bell: NOTE Failure to POSiriOIl tile sllOlIlder por· retract, li o n of the �’eal belt properly relJIIt:es belt mspect If a docs not fully the (lmOllllt of protection in an (Icci· twists. -
Page 38
Kno»ing Your «la’lela Shoncn ..,. L:.lp belt To lengthen the belt. hold the tongue WARNING a right angle to the webbing and pull: I To fasten: shonen, pull the loose end of the we bing. Pull tongue 10 Ihe dc�ircd lcngth. To unfasten: The lap portiotl of the seat belt ,.,.ortl in,en it mtH the bud-Ie untIl you hear a… -
Page 39
• ‘Vornell Pregnant Pregnant women should wear scat belt as semblies as recommended by their doctors. The lap belt should be worn SNUGLY AND AS LOW AS POSSIBLE. • » Restraint Systems for Infants and » Lh WARNING Children Scaling units for infants and small children Belt: musl fit the vehicle properly. -
Page 40
Knowing Your Mazda Supplemental Restraint System'» ,:’t, WARNING ,:’t, WARNING In a front-cnd accident, the supplemental restraint system with air bags is designed to provide protection for the driver and front Child Restraint Pm’itjonjn � : Air Ba � Activation,’… -
Page 41
L’h WARNING Innalor alld air bags Child restrai nts lucd in the f rQllt seat and whi ch face tile rear are unsa /c. Till! restrai nt can be hit by a deploy ing air bag, mOI’cd out of positio n, and resull in Jour child being seriousl y fHOC injured. -
Page 42
AUlhorized Only an Mazda Dealer system. can replace 2-28… -
Page 43
A WARNING A WARNING Air Bag Insp ection af ter a rollision: I f YOllr Mazda was ill a c:olli�’ion not Attaching all object to an air bag sto[ strong (‘rwugll io inflate the air bags, agf area or pladng olle infront o f it is Modifyin g the cQmponents or wiring dangerous. -
Page 44
A system malfunction this l � flashes ht con :111. if it d come If one of these con�uh an Authorized Mazda Dealer as soon as possible. The system in an acrident. may not work ·SOI1l» l1I()<tcl�_ 2-30… -
Page 45: Steering Wheel
But if any of the follow ing occurs, take your vehicle to an Autho Do n’t try to selj-sflrvice Ihe l·ystem. rized Mazda Dealer as soon as possible. Tamp ering wilh il could cause it to ac- ril’ale, a»d this could result ;/I injury.
-
Page 46
Knoning Your Mauln Lt-, WARNING Ad justing the lilt wheel while rile .’e hic/e is mOl’ilfg can be (langerlJu�, l’UII MOiling it anti down IIcry casily 111 m ctlll,\’e Ihe driller to abruptly to Ille call lefl or right, Tllis featl IfJs�’ IIf aedt/fml,… -
Page 47
Mir ror s • Outs ide Mirrors Check the mirrors’ angles before driving. WARNING & What you see in the convex mirror( l’) will be closer Ihall it appears. I f you don’t remember this when changing laflcs, you (‘Quld hit a «chicle . Be $/Ire .. -
Page 48: Interior Lights
Your Mazda Interior Lights Type Lt,CAUTION The sunshade doesn·t tilt. To avoid damaging the sunshade, don ‘\ push up on it. Type • Sunshade (with glass sunroon DOOR The: sunshade can be opened and clmcd by hand when thc sunroof closed.
-
Page 50: Trunk Light
Kno\\ing Your Mazda Luggage Compartment Trunk Light Door model) Door model) • when Luggage Compartment Cover The trunk light is on the l open it\ closed. when U’>C reath th e luggage compartment. straps to lift up the compartmcnt toyer.
-
Page 51
Roof Carrier Conm.’Ctors* (Ire • Luggab’e Compartment Li�ht TIle built-in conncclor� for mounting specifically f roof carrier designed or your details about Light this carrier and on when open Mazda Light hatch is how (oaunch it. Authorized Dealer. -
Page 52: Protecting Your Mazda
Protecting Your Mazda monev. sort’ il’IOfl l�Ople hi» With an alllO done 111m • can be in se�eral \HlJsJrom mobile. mIle s on Ihe il5ftrSI o f uperatiOll. /’robably t COSf.f/ficiCIIC’)’ /isl o f is usmg the right killd o f /llet and «01 usm.�…
-
Page 53: Fuel Requirements
Protecting Your Mazda Fuel Requirements Brunei. Hong Kong, SingallOre, SOIlI h Africa L!:,.CAUTlON Thailand, Malta, Malaysia, Zealand , Turkey, and Maeao liter-engine 1 . 8 NEVER USE LEADED FUEL. U<>c premium gasoline with octane rat- Use only regu lar unleaded gasoline wilh an ing of at least 95 (Research Octane Num I [ is harmful to the catalytic converter.
-
Page 54
Protecting ‘ our :\1azda tr ol Sy st em £ lJl is s io n C on ),t ic Co nv er te rs (o r Ca t ai itCAUTION ert e (th e cat aly tic 1:-. cIln lr’J l s this syst em) th.lt enab les you r vc·… -
Page 55: Before Driving
Jour around your vehicle. • • Mazda, immediately CUllsuit an Au Ir you plan back up. make sure t»orized Mazda Dealer. ing will be in your way. If you must dril’e e�’en though you NOTE slllellfume�’, keep…
-
Page 57
Spccinl Driving Conditions • Hazardous Dri\ ing • Don’t rest your foot on the brake pedal lIow you operate your Mazda dctenmnes while driving. how far it will tHlVel on a tank of fuel. Use these suggestions help save money on When driving on icc or in waler, sno •… -
Page 58
• Rocking the WARNING WARNING Vehicle If you IllU�t mck the vehicle to free it from snow, sand, or mud, depress the accelerator DowIIS fti ftillg Spinninx tlw wlwe/s at high �peeds ;IIto first gear w;,h a .. lightly and «… -
Page 59
Protecting Your Mazda • • Winter Driving t usc the parking brake if it might re s … SIIO\\ t freeze, Instead, shift 10 park with an au- • Carry emergem.:y gear, including tire tomatic trallsaxlc and to first or reverse snow tires on four wheels. -
Page 60
..,. Tire chains L1:,CAUTION \»OTI� on s oul loc al (1 1 C l:k bef ore us before using Chains scratch chip alumi • ing sllld ded ti chains. Install num w tire chains on steel wheels only. Installing the chains •… -
Page 61: Vehicle Information Labels
Proteclillt,: Your Mazda Vehicle Information Labels • Driving in flooded Areas Model plate Vehicle emission control information label'» Avoid driving in nooded arcas if he watcr is highcr than the bottom of the wheel rims. Drive through water slowly and allow for exIra �toppingdisl(lncc bccau�…
-
Page 62
I’rotcering Y our \1a7(la 2.0-lilcr cngirn.’ 3-11… -
Page 63: Driving Your Mazda
Driving Your Mazda Ignition S»it�h Pl»lIions 4- 2 Sranmg the- Engine 4- 3 Manual Transa.'(1! Operation 4- 5 4· , Automatic Trans:l’I:lc O / H’ I/inq your j,t-hide ‘NJuirl!$ a good und!!r you mus, .l «OI\ Brake S),M<!JIl �-1 3 an …
-
Page 64
Your Mazda Ignition Switch Positions • it, WARNING ACC(J) (Accessory) The stccring wheel unlocb and someclcc tricalllccessorics will operatc. Removing the key from the iglliri(J/I switch lock.l· the .\·teeritlX. I J remOl’ed • steerillK cOlltrol while drivitl/.:, loss o j… -
Page 65: Starting The Engine
Driv ing You r Maz da Starting the Engine W AR N IN G NOTE I. Occupams»hould fasten theIr scat belts. [n e�trcmel)’ cold weather. below Make sure the parking brake is on. n:l°c (O°F), or after the vchicle ha� CO/ IIl�…
-
Page 66
YOllr Mazda NOTE NOTE (3) Iftheengincf ailstostan.crank it with out using the accelerator-for up to Whether cold or waml, the engine (except I.S·liter seconds. should be staned without usc of the ac You may hear noise (from Ihe valve 11Ip·… -
Page 67
nsaxl c l\Ian alUl Tra NOTE the vehicle is stopped be • Make forc shif t ing \0 • If shifting in reversc is diffi release shift inl0 Ihe dutch pedal. and L!:»CAUTION • Transaxlc Shift Pattern clutch pedal ex t:onVCll… -
Page 68
Mazda Drivini:: Your Autonmtic Transaxle • Automatic Transaxle Controls Len-hand drin� motlel Selector ICl’cr Lock-rdcasc T o prevent uM�fe button mode. hing this button acti\·�tes the hold Pushing this again de:\Ctivatcs this mode. Hold indit-utor This Shirt pultcrn indicator indil-alor cOllies on «hen the hold mode is selected. -
Page 69
Drh’ing Your Mazda matic Tran s axlc A UIO Aul Om il lie TranS3 Jt:lc Contro • model drhc Righ t-han d lever Selector Lock-rel(‘tlse bullon prevent unsafe Shifting hullon Pushing thIs button activates the hold mode. » f.!>. Pushing this again deactivates Ihis mode. -
Page 70
Mazda Driving Your • L1:,.CAUTION ‘i’ransaxie Ranges The selector lever must be at P or N to oper In the position, the vehicle moves • Shifring Into Por R while the vehicle ate the staner. backward. It must be stopped before I ‘j i�… -
Page 71
Oriving Your M!JI.da • rivi ..S (Second) Tips … Passing position I S n driving helpful slow-moving traffic and when climbing a t:i.J.u:.. .£;. . hill. For extra power when pa��ing I llo n»e rol / l ‘ Ws llif tfr om No rP l another ,.·/te ll ilie etlg mc IS rlln ·… -
Page 72
Your Mazda • Hold Mode … Descending SIL’CP gra When dcSt ‘ending a steep grade, shift The hold mc:xlc SlOpS the aulOmatie speed 10 S depending on load weight and grade change operation and has three IXlsitions: and first (l),… -
Page 73
Driving Your :\1azda L (Low) mode is on: .. \\ hen the hold The transaxle is held in first. Don’l rive D (Drh e) mph) in this p siti faster than 56 km (35 r.l.n It llU lo ma ti th ird . -
Page 74
P. oul of unless the brake pedal is de Continuing to drive your Mazda in this pressed. • conduion could cause damage to your If the brake is pumped with the tran<;axlc. -
Page 75: Brake System
Driving Your Mazda Brake System • Brake Foot Your Mazda power-a. ., sisted brakes that nomlul usc. can stop by Should power assist fail. you upplylllg greater forte thun nonnal to brake pedal. BUI distance �lOp will be greater Ihan usual.
-
Page 76
Whcn you noi<;c, consul! an Au wet the brakes may a f ect tltei r perfor. mance. It � thoriLcd Mazda Dealer soon as pos ible could resllit ill f ailure to �-[ow the usual rate and ill pu ng to down Olle side whell the brake.\»… -
Page 77
Lt,CAUTION (CD) g wIth t ivi n e on will parking b CilU’iC lin cxcc!o,sive wear brake BRAKE ings pads. • Brake System Warning Ught e brake warning light stays on after the y released. prcrklllg br<lkc the brakc • �y�… -
Page 78
Driving Your Mazda NOTE Lt. WARNING • the antilock warn ing l �t<lys on dlL’l, while drivin ADS coo- 111′- (rol unit has dc(c(«tc !}y�IClll mal- AlJS catlllot cOlllpen.wtle jor lUlll function. If Ihi� occ urs, your brakes s a f t rCI.:klen Jril’iIlK. -
Page 80
Driving Maula YOUl· Instrumcnt Ciustci’ Tum �ign�1 mdlcalor sigfJ.lI indicator ..»..:’! Lo w fue l \la mi ng ligh t Sp eo oo mC ler 1II,JI �mot Wa rnin g ant i «IC ier liSh ls rc ..l Tr ip bu uo «… -
Page 82
Driving Your Mazda Dashboard Illumination* » I.S·liter engine All other cngine-trnn5tlxlc combinations 1.6·liter engine Tran�xte) 1 . .!I·liter enginl’ (Automutic When t • THchometer parki g lights h»,dl;;ghlS LhCAUTION rotate the thumb-wheel llle tachometer shows engine speed s of the dashboard lights. -
Page 83
Driving Your Mazda Ligh t sIBcc PS • to p thdt it closer to the Brak{‘ System Warning lIlay go ‘n»JC(t ion • \\ar nlll » L» Light longcflo In either case, it will take gh ls by tu rn in g nn Ih e stop the vehicle . -
Page 84
Authorized the Ignition is at ON (II), a beep will wuml for about 6 seconds and the scat bell warn Mazda Dealer as soon as 1)U�ible. mg I1ght will rcmain on ul1Iil the belt i» buckled. If the sy!,tclII docs not operatc correctl}. -
Page 85
OCCUTS even after 011. Ihe AUS warning cOllies light get H lOW 10 nearest scrvj(:c Of 10 This i� dllC to wCHl banery. nol a 5131i0I1 an Authorized Mazda Dealer. functlon. Recharge the ballel). ·SVIIlC fIlmlcb. 4-23… -
Page 86
Supplemental Restraint This also signals need for servicing. Con em Warning Light· sult an Authorized Mazda Dealer at your first opportunity. lfthe supplemental restraint system is the warning light comes on when the igni These beeps will sound each time the igni… -
Page 88
Ori\ ing Your Mazda Lights-oil reminder Ihgh Ix»ams If you Stop the engine and leave the lights on, a beep will sound when any door is opened. NOTE To prevent dIscharging the batlery, don’t lcave the lights on while the en… -
Page 89
Driving Your Mal.da • • rog Lights>lO .,. Lane-change signals and Lane-Change Signals ‘Turn Move thc Icver slightly toward the When vislbtlity is poor because thick direc Tu rn s tion of tllC fog. lights until indicator turn the fog left hold it will return to… -
Page 90
‘\1a’lda Your \\’indshicld » Vipers and \\’asher [‘!TrillS • Windshield Wipers ..,. Variablc-speed intcrmittent nipcrs· wipers ..,. One-touch The ;gnmon switch must be on. Sct the lever at lind dl(X):-.e the interval For a single wiping eyrie, push forward and release timing by rotating the ring, Turn the wipers on by pulling the lever down. -
Page 92: Rear Window Defroster
Driving Your Mazda Rear Window Wiper and Rear Window Defroster Washer* ..• Rear Window Washer Washer Iper T o spray washer fluid. tum knob to � poSitIon, wiper comes on auto 0′» mallcally, After the knob i1> released the wiper wipes limes, and SlopS.
-
Page 93
Dri\<ing �1azda YOIIT Clock 9:00 9:01 1):21) 9:30-9:59 10:00 1I0UR (11), n 10 change RULI- (hour) bu hours. Press MIN (M): Press button change min (minute) utes. Setting Ihe lime ignition switch nlll�t be in the ACql) or ON(II) position. RESET: RESET blltton to… -
Page 94
DrivillJ,\ Your Mazda Ashtray Lighter 6CAUTION • Don’t hold the ight r in because it will overheat. • Don’, the lighter sockct forplug in accessories such shavers and coffee pots. They may damage It Use only a cau;,c elcctrical failure. -
Page 95: Glove Box
Your Dri\’ing Mazda Glove Box &CA UTI ON tra sh . th e a� h[ ra y fo r U’ <! I}t’lfl ‘1 fire. \ laO Ollgh t To open the glove box_ pulI the latch to YOll. ward T hc door has a lock, in�co the key…
-
Page 96: Storage Compartments
Your Mazdn Center Comole Storage Compartments lever and • • Driver’s Side Passenger»s Side- Pull the lock lift the the center co»»ole. To open the storage compartment. pull the To opcn the storage compartlllcnl. pu»h the lever. r elease rcle<l»c lever.
-
Page 97
Your Mazda Driving V anity Mirror Sunviwr s To use the vanily mirror. lowcrthc sunvisor on the pa!.scngcr·:, side. 4·35… -
Page 98
Driving Your Mazda Climate Control Features swi(«h� Air»»,,,,,,,,, Tcmpermurc Icvcr switch ‘Some models. 4-36… -
Page 99
Conlrob Cold 1101 • • • Fan Swi Air Intake Temperature Control Selector �c1cclor speeds, ‘l1lis lever control� lempcralure Ihe air This cOnlrol» the <;Ollrce of .ur . Thl� �wlH:h allows variable fan system by contlil �c1c�lor coming Ihrough Ihe sliding the Under nOnllal i(lIl:o., keep Ihe… -
Page 100
Your Mazda This position can be used on dusy roads or ill :.imihlr conditions. It al\Ohclps toprovidcquickerhcating and cooling of the interior ..Outside air position Tfthe indicator light is on, push the switch for outside air�thc light will go off. -
Page 101
Your Dri’ ing Milah. » … 11 … Fluor-dcfro IiTlg position … Floor position \(, nt -fl oo r I)o sit io ll delivered to the noor; a Most ofthc air deli\’ered to thc floor and The air i� direc tcd towa rd to the race (�) alld Mo»! of the air is Ihe wi 1111�hicld;… -
Page 102
Driving Your Mazda • Operating Tips Systcm* • vehicle has parked in been sunlight during hOI weather. run conditioner at its coolest setti ng i windows open. ·rhis willIe! warm cape. Toclean misted windows on ,»i,wda • the humidity decrease inside the the air conditioner. -
Page 103: System Operation
‘\lll’lda Ikj\,jng Your System Operation …; O TE fil le d er is TIle opt lOll il ‘ » no t o � [*I,;I»I») @ \\11 re fr ige ra nt th at c l:lycr. J.IIIIJge L -IW- — IIIJ — rc fr ig cr …
-
Page 104
Driving Your Mazda NOTE Tf the windshield fogs up easily, set the function selector to Ihe�posilion. • If cooler air i� desired at face level, set the Cooling* function selector allhe position and ad just the lemperalllre lever to maintain max… -
Page 106
Driving Your Mazda 5. If dehumidified healing is desired. tum on Ihe air conditioner. NOTE • For ma»irnum defrosting, sci the temperature lever to the extreme right position and the fan switch to the position 4. floor. • If warn… -
Page 107
Driving Your Mazda Close • • Outside Vents De hu m id ify in g NOTE (l\ ith air co nd itio nin g) · The vents may be opened or closed by ro Clear all snow and icc from… -
Page 108: Radio Reception
Your Ma7.da Radio Reception • • Signals from an transmitter are AM (Amplitude Modulation) I’M (Frequency Modulation) 10 beams oflighl because they do Characteristics Characteristics ;!(ound corners. but they do reflect. An FM broadcast range is u�ually about AM signals. FM signals cannot ..
-
Page 110
Your Mazda Sialion I • Operating Tips nt Ihe battery from being charged. do not leave the audio systen,, ‘ for a period long while the engine is runnlll g . Lt,CAUTION damaging prevent the antennil. I»C T Station the radio off… -
Page 111
Driving Your Mllzd .. er * TAPE play Rr»jnu Fast forv.ard TAPE Manualls.., � hilling ClIanncl �IS Bass/Balance Dolh)’ memory AUla TJeblC!F» Automatic program control 4-49 ·Some models… -
Page 112
Driving Your Mazda • Antenna NOTE I ‘t. Rear power antenna* elevation is fully au Pressing the SW VOL button tomatic. With the ignition switch in ON(U) audio unit is off will tum on vious function. either radio or or ACql) position. the antenna will ele… -
Page 113
Drh’ing Your Mazda … BaS!. • .\d ju Sli ng Ih e \o iu m e … Treble control control lldju �t the qualities. To adju’>t the \owcrtonlll push the vol· T o ad ust the highcr tonal quah’1cs, push… -
Page 114
Driving Your Mazda A fter ad justmem. push Ihe knob back Left Fronl to prevent inadvertant adjustment. Rigt\! Rear Balance control !<‘ader control To adjust the sound distribution between To adjust the sound distribution between the left and right speakers. push the bas»… -
Page 116
Mazda Channel l’reSCI� Lowe’ f»»l»el1(;y HIgher freqllll’ocy «f’ «f’ «f’ �1anual luning Scan luning Channel preset tuning To tune a station manually, press and rc Press to automatically scan the fre The six channel presets can be SCAN P��;; , �… -
Page 117
Od\ing !\’Ial.da Your _ •• Frcqu’:II’:Y ‘ I I » ‘··’; n» ___ • t :! t:i.: : :i I· AUT»‘» rrc�ct Jlumocr Il� nd , .. ,! Chan,w:1 CH .. memory «» Auto tuning hel d In me mo ry. Repe at Af1er scanning completed, the strongest The \Ial ion i\ now… -
Page 118
Driving Your Mazda Slopping tapt’ Play ing tapt’ Tf»1 [-«I • Cassette Tape Pla}er Operation … Stopping/Playing tape When the upper triangle i� lil, the top half oflhe tape is being played. When the lower To operate the cassene tape player, turn the one is lit, the bottom half is being played. -
Page 119
Mazda Drhing Your ron�ard Fast NOTI� During fast· fo rewind. when the tapc rcao.:hcs thcem.1 it will automat SlOp St3rt ically SlOp and start playing the re verse direction. • Start Stop • fast-forwardlRewind Ejectin g tape met.lpc can be ejected while the audio unit To fast·… -
Page 120
Your )- lazda NOTE @Q;)C)C)OC) APe may not opcrutc properly when the following types of tapes arc used. • tape with low recording level • wilh long silent in\ef- music va]» • music lape ofa li\’c recording with -» inter ..als between … -
Page 121
Driving Your Mazda • Store ca.<.scttc.;away from extreme heat, magnctic fields, direct sunlight. PrOlect tapes from dIn and store thcm in prolecli\oe ea�cs ..Cleaning the tape pla�er The tapc head, capstans, and pmch rollers 11’11:. will gather oxide residue from tapes. -
Page 122
}uu «,ill ulsofind oul what do if you ( ‘( m / ronl a problem i» Ihe elec/rical system, and there’s W(lY s()me guid<mce on the correc/ loll’ your Mazda. 5- 2 Hazard Warning Flasher 5- 2 Overheating 5- 4 Emergency Staning 5·… -
Page 123: Hazard Warning Flasher
of Emcrgency Case Overheating Hazard Warning Flasher mdicate!; NOTE If the tcrnp,:mlure gauge , •• » «‘. hcaling. if you expcriem.:c power • 111e hC3T s dOll» work when a loud knocking or pinging the hazard warning lights are on. the enginc probably too hot.
-
Page 124
The esc api ng stea m the engine �’calding coolant and �·teom may shoot an Authorized Mazda Ollt Ilnder pressure and call.\·e seri(JU�’ Dealer. JOII. injury. Don’t remove dOur coolinJ: you find no problems. if the engine 1/ steam is coming from the engine system t’Op when the engine and radia… -
Page 125
Case of Emergency Emergency Starting • &, WARNING Jump-SIMling dangcrou� J ump-slanmg is done incor So follow p ocedurc� carefully. If HydrllN'» Nas is produced during nor you feci unsure about J ump·�tartmg. \»,e mal battery operation. A battery-re strong y recommend that )’ou have a corn ell/l la/cd ex plosion… -
Page 126
Lt. WARNING onkr i n nunl l ‘ r i c al �’·�r�e onkT. Jurn pe rcabks Connectinx the end o f the second @ (-) cable to the neg(l(ive (-) termillal o f i�’ the discl/arged battery llangerouJ. «00»»» spark could caw;c the gas around lhe bancr y battery toi!xp/Ql/e and injure someoltC. -
Page 127
In CCI)’C of Emergency � Fu�t.’s s,,»‘»»,» � • Push-Starting You can’t Slarl a vehicle wilh automalic lrlllha\!c by pushing it. Normat HIO\lon » Muin �L ruse L’hCAUTION You shouldn ‘( push-�1:Irl ll \-chicJc lhat U IOW!l Im� manual transaxle, It can damage the emiSSion control sy:,tem •… -
Page 128
Always replace with and make sure it fits tightly. Ifit doc same rating. Otherwise you may dam have an Authorized Mazda Dealer llge Ihe clet·tric system. install spare fuses. If you have no borrow same rating cin:uit not vehicle operation. -
Page 129
Emcrgcnc}’ Case or Whcn replacing the 80A· fusc: I . Make sure the ignition is off. 2. Rcmove the negative battery tcnninnl. Rcmove nuts Lift the fuse block and remove bolts or the Replace the fuse with a new one same rating. -
Page 131
In Case of Emergency �’USE I’HOTECTEI) DESCRII» T ION COLOR HATING CUl’ll’ONENT » FOG’ Yellow Fog light· ST SIGN’ Starter 5-10 ‘Some models. -
Page 132
Case or Emergency … fuse pant’l (driver’s side) FUSE �:/’IiT 1J�.:sCKII··n()N COLOR l’KOTECTEIJ COMPO!’. RATISG Blue Imcrior lights. Luggage companmcnt light Sunroof SlROOF METER Blue Bad, u p Gaug light P,W1ND PO»»cr window� Green §� �IO @@@@@ �a R,WlP Rl’d u u u U DEFOG Yellow… -
Page 133
In Case of Emergency � KA’JII\G UESCRIP’IION COLOR I’KOTECTEU COI\.Il’OI\t:�T 1>A STOI’ Blue Brakeftaillighl CIGAR Hlu», CigaH.’1Icllghll’r D,L(X’K !<lA G.rn Pow»,r door locl SPARE SPARE Blu� HEATER Cltrn.1lc cOlllrol Sj’,l,·m 5-12… -
Page 134
Case orEmergcllcy Towing Whc1:1 dollies We recommend that lowing be done only Autho zed Mazda [)cateror a com &’CAUTION &’CAUTION I1Icrcial!OW-lrnd service. Don»( low th vehicle backward with Don’, lOW with �ling.lypc equipment. c necessary Proper lifting and lOwing ar driving wheels on the ground. -
Page 135
Emcrgcnc».’ In CllSC lowing Doo r hook,; Front model) If speed mu»t exceed 56 krn/h (35 mph) or If all fOUf wheels arc on the ground. the ve h icle may a towing distance of80 km (50 miles), use towed only fonvard. Don’t one of these methods: exceed 56 km/h (35 mph) and a distancc of 80 km (50 miles): you could damage the… -
Page 136
In Case of Emergency � Rear (S Doo r Front (4 Rear Door model) Towing hook model) Towing hooks Tov.-ina;: hook Door model) 5-15… -
Page 137: Flat Tire
In Case Emergcncy Flat Tire • Tire, Jack, .Jack Handlc, and Tool StorHge door model door mOOrl Span: lire Jack hamlk Too bag 5-16…
-
Page 138
Case of Emergency • Tift’ Changing a Flat If }OU have a natlirc, drive slowly to a level «»» spot thOl1 is well otT the roOld and o f the way of t raffic Ihe tire. Slopping in t rOllTic or on the shoulder of a busy road is dangerous. -
Page 139
In Case or Emergency Block the l diagonally opposite the flat lire. When blocking front wheel. place the block in from orlhe tire. When blocking a rear wheel, place the block behind the tire. I. Park on a level surface and finnly set the 6. -
Page 140
Using a jack tllal isn’l designed for your Mazda could be danger(}II�·. The I’ehicle could 1. · /ip offlhejack and seri oltsly injure someone. Use only the jack provided wilh YOllr Mazda. 5-19… -
Page 141: Appearance Care
Appearance Care OUI, This st’Clion fl!aru�s Inside alld care, your /l f a�/Q … hu» besl /0 keep il clean and (wHlrg good. Ilml Be 0″‘0″» (lllIJr.oroncl! iJ no/ the only rea· son for cleanliness. Road grime lends {Hltl} at Ihe melof. so kN’ping your I’ehicl/! c/Nm ill/he way SectIOn flresaibes \fill help p rellenlll�…
-
Page 142
Appearance Care How to Minimize Environmental Paint Damage paintwork • • on your Mazda reprcsentS Etching Caused hy Acid Rain tlr Damage Cnllsed by llird Dropping, tllC latest technical developrnent� in COIll Industrial Fallout Insects, or Tree poSItIon mcthod.� of application. -
Page 143
Appearan ce Care • • ..» Prcwiltion Waler Marks Paint Chipping ..» is necessary to have your Mazda W(l>;hcd … Occurrence waxed 10 p >; it� finish ac Ihc in�tructions in this section. This when grU\’el thrown occur� Rain. fog. dew,… -
Page 144: Exterior Care
�ure Ihe Chipped pl.lint can lead to ruSt fonn drai holes in the lower edge … of the doors • ing on your Mazda. Before thi� hap and rocker panels are dean. �ns, repilir the damage by using Mazda touch-up paint «ccording to…
-
Page 145
Appearance Carr’ … Waxing After washing the vehicle, dry it wilh a Ll’-,.CAUTION clean chamOIs prevent water spots from Always wash and dry the vehicle before fonning. • Wiping off dust or dirt with a dry waxing it. cloth will scralch the fin ish. The vehicle needs to be \»axed when water Ll’-,.CAUTION •… -
Page 146
Mazda toueh·up paim be 1I’)C after the vehicle has been put 1I1 t O w i l l 2. Usc wax which contains no abra�ives. -
Page 147
We recommend cold \\ealher or coastal :lreas. • eon<;uit cotlting th:l! yOll with Mazda Dealer. l’over bright-metal parIs wilh a of wax prc�ervalive heavier than usu would al. It also help coat them Wllh noncorrosive p jdly or �Ollle… -
Page 148
Appearance Care Interior Cal’c • • Aluminum Wheel Maintenance Dashboard I’recautions WARNING Your aluminum wheels arc coated with Prevent caustic solutions such as perfume Wet Brakes: clear protective nish. osmeti oils from contacting the Wet brakes Ina)’ not work, or they may dashboard. -
Page 149
Appearance Care • Cleaning the Interior and t<1oors To keep the fabric looking clean and fresh. • Cleaning the Upholstery and Interior Trim ta�e care of it. Otherwise its color will be Keeping the intcriorclean-especiallythe af f e cted. floor is important to help prevent rust. -
Page 150
Appeurance Care • • C g the LnplShoulder Belt Cleaning the Windo,», Interiors Webbing If the windows become eovered with an Clean the webbing with a mild soap solu oily. greasy. waxy film. clean them with tion recommended uphuh.tery or car· glass cleaner. -
Page 151
Maintenance 8�ca�fl’ \’Olir Ma:.tla is a (011:1′ pita oj illlri· e/lle nmcilmer),. il needs r(‘gular (‘ure in the form u/mailr/t’nance a»d Sl’n kim;. �»am’ OInt· «,’I’ll» to rin much (I/Ihis 1I ‘ 0 rl.: So SUlion hm been 1″t’IXlfl’d a Guide lor Ih(‘ opera/ur IIho «‘alllr IQ self:unice filCh lIIi nor jt)bs as rtplaCIIIS bulbs and «‘i,N’r blades. -
Page 152: Scheduled Maintenance
(Lnspecl, and if nece-«>sary replace the these syslelllS be done by an Authom:ed Mazda Dealer. Factory-trained Mazda technicians and air filter) ge nuine Mazda pans are best for ve parts hicle. Withoul this expertise and the c�pe Ihal have been designed and made tinily for your Mazda.
-
Page 153
Maintenance spo.’ � ViSlial examination al.d1 o r fUllctll)nal meIlSUI’CII1�IH of ,ysh;m’\ 1)I»‘I,I\;on or pcrf o nn,,,,c c Adju�!: EumiMtioll resulting in adjuSln�m rcplaCtnlClll Rcplni’� ChilllgC I.lI’ Numlwr of mulllhs (miles), «,hichel’er com�s lirst l\1onths 1000 (4S) (miles) (0.6) (24) (311) (36) (12) -
Page 154
Maintcnance Inspe(,’1; Visual exammalLon and/or fun(,’tlQllalmcasull’I11 . ;nt of ‘S OPl’ll11lQll ..,.- p or ch811gr act’ I\’omber of momhs or km miles fin!! , ‘» hichner eomts » 1000 (miles) (12) (l8) (2 4) (0.6) (36) (42) (48) (.l<)) ldk srred Idle ml�tul’l’ Air cleaner c1emcm·J Fuel filter… -
Page 155
Maintenance Inspect; Visual examlnauon and/or functiOflaI measurement of sym’Il1’5 opcrahon or pcrforma� Replace or change Number of monlhs or km whichncr (miles), first l\1 oll lh� » 1000 (0.6) (12) (Z4) (42 ) (36) (IS) Brake and clutch pedal Brake lines. �s aoo COmlo:’:CllonS Clutch nuid Brake flUld*5… -
Page 158
Maintenance WARNING WARNING Electric CooJi»g Fan.’ Working under the hood with ‘he en Because your engine cooling fall is gine running is dongerow’. It buomes df1l:trically controllf1d, it will if the rll lI even more danxerolts wilen wear igllitioll switch is This could cause all. -
Page 159
Maintenance • Engine Compartment O\’crvic\� (,lIgine) (1.5, l.n, 1.8-lilt»r Sp�rt rlugs Au!OnL�!ic lransaxlc nUIIJ k,,,1 dirsticL for aUlOmalK lran.uk) lonly loKrr,,,;, Hrnkc’C1″lch n,»d Ail’ filler Coohn , �y.lcm… -
Page 160
Maintenance (2,O-lilcr engine) Automalic lransaxk nuid·!cvel dirsliCk (only for lranS<lxlc) Cooling nuid n’SCrvoir WirKlstlieh:J bl ock FUS C nuid reservoir Engine oil dip!llid Spark plugs 7-10… -
Page 161
Maintenance , R»» [0′ SAE • ;�F) Engine Telll p er:lture ..Recommended oil Service SD. SE. SF, engine oil. Engine Engine oil viscosity, or thickness. has an L:t,CAUTION effect on fuel economy and cold�weathcr operation (starting and oil 110w), Low-vis cosity engine oils can pr vide improved Using oils of viscosity besides those… -
Page 162
Maintenance L!»,CAUTION Overfilling with engine oil will damage your engine. �OTE The distance between Land F on t h e dip,tick represents e t 2.0-lilcr ell giue: 0.8 liter (0.H5 USqt 0.70 impqt), inspecti g engine oil level 5. Pull it out again ilnd examine the level. 2.0-li I er e e: 1.0 liter (1.1 eSC/I, It’s OK betw… -
Page 163
Engine Coolant cool. lfthecoo1:mt reservoir is empty, consult an WARNING Authorized Mazda Dealer. Part of tile engine compartment be comes very hot if tile engine has been rflnning. To avoid burning yourself, don’t inspect tile coolant system or at… -
Page 164
!evel to FULL off quickly. Rinse Do not overfill. If new coolant is requi frequently, con sult an Authorilcd Mazda Dealer. • Inspecting BrakeIClutch I-luid Level The bmkes and clulch draw f l uid rrom the same reservoir. level Ihe reservoir Inspect the fluid regu… -
Page 165
9-2) fluids (see chart, page will damage If brake fluid gets in your eyes, YOII an Authorized Mazda Dealer. the systems. Mixing different fluids could be seriously injllred, If it spills will also damage (hem. start. a hot engine, afire could… -
Page 166
Maintenance !fnew fluid is required frequently. consult WARNING an Authorized Mazda Dealer. LhCAUTION Low brakelclulchf l u id dangerous. Low levell’ could signal brake lining wear a leak. YOllr To avoid damage to the power steering brakes could fail and calise an acci… -
Page 167
Maintenancc • Inspccting Automatic Transax1c el surface and set the park ll’-, I. P WARNING fluid Lewl ing brake fimlly. Sudden Vehicle MOI’emeflt: The automatic tr.. In �:Hde nuidlcvcl should Idle the engine about minutes. Pmh be insl)Cctcd regularly. Measure it as de down on the brake pedal: move the se·… -
Page 168
Maintenance NOTE • cold scale only as refer ence. • temperature is lower 200C (68°F), stal1 engine and in spect t he flUid level after the engine reaches operating temperature. • the vehicle has been driven for an extended period at high s or in •… -
Page 169
Maintenance • Body Lubrication WARNING All moving points ofthc body, such as door lYa�her Fluid: and hood hingcs and locks, should be lubri Radiator antifreeze i�’ not washer cated each timc the engine oil is changcd fluid. If sprayed on the windshield it Usc a nonfreezing lubricant on locks dur… -
Page 170
Maintenance NOTE vehicle is operated in very dusty or sandy areas. replace thc filter morc oftcn than recommended imervals. Ll’-,CAUTION Don’t drive without air filter. This • could result in excessive engine wear . Replacing the Air Filter Lift off the air filter cover and remove the filter. -
Page 171
Maintenance • Maintaining Wiper Blades • ing Windshield Wiper ‘&’CAUTION Blades ‘&’CAUTION To prevent damage to the wiper blades, When the wipers no longer clean well, the don’t usc gasoline, kerosene. paint blades are probably WOOl or cracked. Re· thinner. other solvents on or ncar e thelll. -
Page 172
Maintcnance Tabs Raise the wiper tum the blade Hold the pull until etal retllmers from the rubber Remove the assembly to expo the plastic locking the tabs are rec of the metal suppor1. blade nlbber and install thcm ill new li p blades. -
Page 173
\1aintcnnnce • Replacing Rear Window Wiper Blade When t he wiper no longer dean well. the blade is probably worn or cracked. Replace » . &CAUTION To pre\’ent damage to the wiper and other component:-, dOli’, move (he Carefully i s ert the new blade rubber. -
Page 174
Maintenance • Battery support WARNING Batteries are dangerous. To avoid in jury, pay careflll attention to the ad vice below. Keep alljlames, sparh, ami lit mwk ing materiah away from the battery, the reverse order 3. Install a new blade in Hold rhe end of the rubber and pull until Baltery cells contain hydro;:en, a the tabs… -
Page 175
cloth ‘While the way to a dOl’tor. • the \’chicle not be u’lCd for at lc<l�t will a month, disconnect the bat t cables If electrQlyte gets on your skill, thor and charge the ba every six wcck�. ollglll y wash the cot/fueled arca. Ilyo l/ f eel poi»… -
Page 176
Maintenance cold weather. If it’s low, recharge the bat- … Battery recharging lery. ballery quickly discharges be • If cause, for example. the lights were left long with the engine otf. slow charge it as required by ballery size and charger capacity . -
Page 177
Main tenance • lin’S WARNING For reasons ofpropcr pcrfonnance. 5.1fct). and bener fucl economy, always maintain lire Using any other tire she or type Ihan recommended innation pressures and load specified/or your M a�a (page stay within the recommended limits what 9-5) may seriously af f ect… -
Page 178
MaintenallCc NOTE L!:» WARNING • Waml tires nom1a!ly exceed recom Tire mended prc.l>sLlres. Don’t relca’>C air from wanll tires to adjust O�·erillfl(lf;OIl or II.lIden» l Iflatitm call <? rmnl reduce tire life. affect hUlldlillg. alld leoti milt/en lire fui/ure alld IOSl’ of •… -
Page 179
Maintenance After rotation, bring all tire press Trea<J wear indicator WARNING specification (page 9-5) and inspect the lug nuts for tightness. on worn-out hawrd Driving lires is OilS and red flces braking eflectfl’e ness, LtCAUTION steedng accllracy, ami traction. Worn Ollt or damaged ares cOllld cause you Rotate radial tires that have an asym… -
Page 180
• • Snow-chain clearance Headlight Bulb Re WARNING • calibration Your Mazda’s hCHdlighlS have replaceable halogen bulbs. One can be replaced with Wheel • Headlight aim out disturbing the rest of the headlight. Using a wrong-sized wheel can affect the braking and handling of your ve… -
Page 181
Maintenance LQ1�beam J WARNING A halogen bulb contains pressurized gas.lfbroken. it will explode and send bits of glassfl y ing. If the glass portion «,,,mo, ‘pn». is toucked with bare hand�’. natural body oil couid cause the bulb to over heat and burst when lit. -
Page 182
Mointeuonce Right-hand driH’ model 7·32… -
Page 183
Maintenance • Bulb Replacement (Front) 4 Door model 7-33 ·Some models. -
Page 184
Maintenance • Bulb Replacement (Front) Door model 7·34 ·Some models… -
Page 185
Maintenance • Bulb Replacement (Rear) 4 Door model 7·35 ·Some models. -
Page 186
Maintenance • Bulb Replacement (Rear) Door model 7-36… -
Page 187
Maintenance � Bulb Replacement Interior 7-37… -
Page 188: Customer Information
Customer Information What you should knoll’ aboul regislering Jour \»ehicle in a/ore/gfl counln’ond add-on electri· )’ 0 /1’/1 cui t’quipmtm. Ihis is lir(‘ i’/forma/iOlr find in Seerion 8. Rcgi�ter;ng A Foreign Your Vehicle in Country 8· Add·On Elcctriclll and Electronic &juiprncm…
-
Page 189
Registering Your Vehicle in A Add·On Electrical and Foreign Country Elcctronic Equipmcnt Governmem regulations in your country The electrical system of your Mazda has Mazda assumes res(Xlllsibility been carefully designed and tested to per could require that automobiles meet spe… -
Page 190: Specifications
Specifications Lubricant Qu�lity Dunensions Engine Electrical S)slcm Capacities ’11 rcs 9- .5 Light Bulbs Fu ses 9 -1…
-
Page 191
Specifications Lubricant Quality Dimensions Unit 111m (mch) Lubricant Classification 4 Door model Door lIIodel Engine oil* API Service SO, SE, SF or SO Overall length 4,490 (176.8) 4.240 (166.9) API Service OL-4 or GL-5 Manual trans3xlc oil Overall width (66.7) 1,695 (66.7) 1.695 (SAE 75W-90) -
Page 192: Electrical System
Sj>ccificatiofls Engine I.S-liter engine 1.8-litcr (‘ngine 2.0-lit(‘r engine 1.6-liler engine Type In-line 4cyl In line 4cyl In-line 4cyl V-shaped 6cyl DOlle 16V DOHC 16V DOHC 16V DOI — I C Bure x Strokc 75.3mm X3.6mm 83mm !!5mm 78mm 69.6mm 78mm 83.6mm (2.96 3.29 in)
-
Page 193
Specifications Capacities Unil Liter USql Imp qt Item 3.2,3.5· 2.8.3.1· 1.5. 1.6-liter engines 3.4,3.7· Engine 1.8-liter engine 3.6,3.8· 3.8,4.0· 3.2,3.3· 3.7.4.0· 3.3,3.5· 2.0-liter engine 3.9,4.2· 1.5. 1.6, 1.8-litcr engines Coolant 2.0-literengine 1.5. 1.6. 2.68 2.83 2.36 1.8-liter engillC»s 2.0- 2.85 2.38 Transaxle 1.5. -
Page 194
Specifications Tires ‘I)-pc I.S-Iiter enKine 1.5 or 1.6-liter t!nlline 15SR13 78 S ISS I 8 0R13 lS5 I 6 5R1486S 175170RB 82H 175nURt382S Front Item Rear Front Rear ‘» 210′» 210· 210* (0 3 persons (2.1,30) (2.1,30) (2.1.30) Inllation pressure (2.1.30) 240·… -
Page 195
Specifications Type 2.0·liter engine 195160RIS 88 V 205lSORI6 H6W 205l50RI687V 205l50R t6 87W Front Rear Item Rear 220 *1 210* 1 21 0″,2 persons (2.2,32) (2. 1 ,30) (2.2. 32) (2.1,30) lnllati(ltl prc�surc 27 0*2 2 40*1 270 .1 24 0*2 kPa (kglcm . -
Page 196: Light Bulbs
Specifications Light Bulbs Refer page Fuses 5·9 Wattll.ge l bulb » High beam ( H I ) Headlights (UI) » Low beam Frollt lum-signal li@.hlS Front parking lights » Fog lights· Side tum-�ignal 1ighls 1Um.sign�l lights Rear 2 1 15 Brnkc-rr ail lights Back-up light�…
Mazda 323 Птичка

Cobaine
Был 1 день назад
Олег Cobain, 41 год
Я езжу на Mazda 323 Птичка
Новополоцк, Беларусь
Всем доброго времени суток

Хочу поделиться со своими читателями книжками, мануалами и тд. что у меня есть.
Может кому-нибудь будет полезно.
ТЫЦ
Всем удачи на дорогах.
23 октября 2017
Метки: другое
72
8
Ранее [50] Традиционный пост: Переобулся на зиму)
Далее [52] Вовремя переобулся или пришла зима
Разместить рекламу
Реклама
Машины в продаже
Комментарии
8
Войдите или зарегистрируйтесь, чтобы писать комментарии, задавать вопросы и участвовать в обсуждении.
Войти
Зарегистрироваться

Sergey1016
Я езжу на Mazda 323 VI
Плохо что на нерусском
1
4 месяца

arshanskiyav
Я езжу на Lada Ларгус
Спасибо.
Забрал )
2

5 лет

Ioan81
Я езжу на Mazda 323 VI
спасибо большое, очень пригодятся.
5 лет
Cobaine
Автор
Я езжу на Mazda 323 VI
Пожалуйста, да это нужно)
5 лет

Dmitra83
Я езжу на BMW 5 series (E39)
Спасибо, теперь будет книжечка в телефоне всегда с собой)
5 лет
Cobaine
Автор
Я езжу на Mazda 323 VI
Пожалуйста)
5 лет

BobR129
Я езжу на Lada Vesta
спасибо тебе, добрый человек, многим пригодится, и мне тоже
5 лет
Cobaine
Автор
Я езжу на Mazda 323 VI
пожалуйста!))
5 лет
- Руководства по ремонту
- Руководство по ремонту Мазда 323 1985-1993 г.в.
Руководство по ремонту Mazda 323 / Мазда 323
Общая информация об автомобиле.
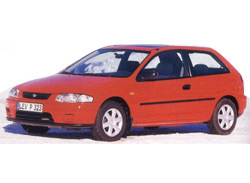
Автомобили данных моделей выпускаются в вариантах седан, хэтчбек и компакт с бензиновыми и дизельными двигателями.
Mazda 323 оснащается четырехцилиндровым рядным двигателем с водяным охлаждением, расположенным поперек направления движения.
Для приготовления рабочей смеси в зависимости от модели служат или карбюратор, или электронная система впрыска топлива, которая, как правило, не требует технического обслуживания.
Привод передних колес осуществляется через ручную КПП или 3 или 4-ступенчатую автоматическую трансмиссию.
Mazda 323 имеется и в полноприводном варианте. Для привода задних колес необходимы дополнительные элементы. Привод передних и задних колес соединяется карданным валом. Карданный вал приводит в движение дифференциал задних колес, от которого к задним колесам отходят два приводных вала.
Рулевой механизм расположен слева от двигателя и соединен с рулевыми рычагами посредством тяг. Некоторые модели оснащены гидроусилителем руля.
Тормозная система состоит из главного торомозного цилиндра, тормозного усилителя, дисковых тормозов передних колес и барабанных тормозов задних колес. У некоторых моделей дисковые тормоза установлены также и на задних колесах.
В зависимости от модели Mazda 323 с 10/89 г. вып. может быть оснащена антиблокировочной системой (ABS).
↓ Комментарии ↓
1. Автомобилимарки Mazda-323
1.0 Автомобили марки Mazda-323
1.3 Идентификационные номера автомобиля
1.4 Приобретение запасных частей
1.5 Технология обслуживания, инструмент и оборудование рабочего места
1.6 Запуск двигателя от вспомогательного источника
1.7 Поддомкрачивание и буксировка
1.8 Автомобильные химикалии, масла и смазки
1.9 Диагностика неисправностей
1.10 Текущее обслуживание
1.11. Работы по техническому обслуживанию
1.12 Коробка передач/привод колес
1.13 Тормоза/шины/колеса
1.14 Рулевое управление/привод передних колес
1.15 Электрооборудование автомобиля
1.16 Кузов/внутреннее оснащение
2. Бензиновые двигатели
2.0 Бензиновые двигатели
2.3 Снятие и установка двигателя
2.4 Снятие и установка зубчатого ремня двигателей ВЗ, В5, B6 (SOHC), ВР (SOHC)
2.5 Снятие и установка зубчатого ремня (DOHC)
2.6 Снятие и установка головки цилиндров/замена прокладки головки цилиндров
2.7 Механизм цепного привода
2.8 Снятие и установка распредвала/регулировка фаз газораспределения
2.9 Снятие и установка распределительного вала
2.10 Распредвал/привод распределительного механизма
2.11 Распределительный вал/привод распределительного механизма
2.12 Снятие и установка распределительных валов
2.13 Снятие и установка клапанов
2.14 Замена маслоотражательных колпачков
2.15 Проверка направляющих клапанов
2.16 Обработка фасок седел клапанов в головке цилиндров/обработка клапанов
2.17 Притирка клапанов
2.18 Проверка/регулировка зазора клапанов
2.19 Проверка компрессии
2.20 Снятие и установка/натяжение клинового ремня
3. Система смазки двигателя
3.0 Система смазки двигателя
3.1 Масляный контур
3.2 Проверка давления масла
3.3 Проверка датчика давления масла
3.4 Снятие и установка поддона картера
4. Система охлаждения двигателя
4.0 Система охлаждения двигателя
4.2 Антифризный концентрат
4.3 Замена охлаждающей жидкости
4.4 Проверка герметичности системы охлаждения
4.5 Снятие и установка/проверка термостата
4.6 Снятие и установка водяного насоса
4.7 Снятие и установка радиатора
4.8 Снятие и установка мотора вентилятора
4.9 Проверка термовыключателя
5. Система зажигания
5.0 Система зажигания
5.1 Меры безопасности при работе с электронной системой зажигания
5.2 Проверка катушки зажигания
5.3 Проверка кабеля зажигания
5.4 Проверка/регулировка момента зажигания
5.5 Снятие и установка распределителя зажигания
5.6 Свечи зажигания
5.7 Свечи для MAZDA 323
6. Система питания, карбюратор, система впрыска топлива
6.0 Система питания, карбюратор, система впрыска топлива
6.1 Правила чистоты при работе с системой питания
6.2 Снятие и установка/проверка датчика в топливном баке
6.3 Снятие и установка топливного бака
6.4 Снятие и установка топливного насоса
6.5 Снятие и установка/проверка топливного насоса
6.6 Снятие и установка воздушного фильтра
6.7. Карбюратор
6.8. Система впрыска топлива
7. Дизельный двигатель
7.0 Дизельный двигатель
7.1 Принцип работы дизельного двигателя
7.2 Снятие и установка зубчатого ремня/регулировка привода распределительного механизма
7.3 Система преднакала дизельного двигателя
7.4 Проверка системы преднакала
7.5 Удаление воздуха из системы питания
7.6 Проверка/замена электромагнитного клапана прекращения подачи топлива
7.7 Регулировка привода газа
7.8 Проверка/регулировка числа оборотов холостого хода
7.9 Снятие и установка форсунок
7.10 Снятие и установка вакуумного насоса
8. Система выпуска отработавших газов
8.0 Система выпуска отработавших газов
8.1 Принцип работы каталитического преобразователя (катализатора)
8.2 Правила эксплуатации автомобилей с катализатором
8.3 Снятие и установка системы выпуска отработавших газов
8.4 Проверка/снятие и установка лямбда-зонда
9. Сцепление
9.0 Сцепление
9.1 Снятие и установка/проверка сцепления
9.2 Снятие и установка/проверка выжимного подшипника сцепления
9.3 Регулировка педали/троса сцепления
9.4 Проверка/регулировка педали сцепления
9.5 Удаление воздуха из привода сцепления
10. Ручная коробка передач
10.0 Ручная коробка передач
10.1 Снятие и установка коробки передач
10.2 Механизм переключения передач
10.3 Полный привод
11. Автоматическая коробка передач
11.0 Автоматическая коробка передач
11.1 Буксировка автомобилей с автоматической коробкой передач
12. Подвеска и система рулевого управления
12.0 Подвеска и система рулевого управления
12.2 Снятие и установка амортизационной стойки
12.3 Разборка амортизационной стойки/снятие и установка амортизатора/винтовой пружины
12.4 Проверка амортизатора
12.5 Снятие и установка поперечного рычага/замена резиновой опоры
12.6 Проверка/замена опоры поперечного рычага/поворотного кулака
12.7 Снятие и установка приводного вала
12.8 Снятие и установка промежуточного вала
12.9 Проверка/разборка приводного вала/замена манжет
12.10 Подшипник передней ступицы
12.11 Задняя подвеска
12.12 Снятие и установка задней амортизационной стойки
12.13 Разборка задней амортизационной стойки/снятие и установка амортизатора/винтовой пружины
12.14 Поперечные рычаги/продольный рычаг/стабилизатор
12.15 Проверка подшипника ступицы
12.16 Снятие и установка подшипника ступицы
12.17 Регулировка люфта подшипника ступицы
12.18 Снятие и установка ступицы
12.19 Рулевое управление
12.20 Снятие и установка рулевого колеса
12.21 Снятие и установка наконечника рулевой тяги
12.22 Снятие и установка резиновой манжеты рулевого привода
12.23 Насос сервоуправления
12.24 Углы установки колес
12.25 Значения для проверки MAZDA 323
13. Тормозная система
13.0 Тормозная система
13.1 Технические данные тормозной системы
13.2 Передний тормоз
13.3 Снятие и установка передних тормозных колодок
13.4 Проверка толщины/бокового биения тормозного диска
13.5 Снятие и установка колодок заднего дискового тормоза
13.6 Снятие и установка суппорта тормоза
13.7 Снятие и установка тормозного диска
13.8 Снятие и установка задних тормозных колодок/тормозного барабана
13.9 Снятие и установка колесного тормозного цилиндра
13.10 Ремонт колесного тормозного цилиндра
13.11 Тормозная жидкость
13.12 Прокачка тормозной системы
13.13 Замена тормозных трубопроводов и шлангов
13.14 Проверка тормозного усилителя
13.15 Снятие и установка выключателя стоп-сигналов
13.16 Ручной тормоз
13.17 Регулировка ручного тормоза
13.18 Антиблокировочная система (ABS)
14. Колеса и шины, кузов, окраска автомобиля, уход за автомобилем
14.0 Колеса и шины, кузов, окраска автомобиля, уход за автомобилем
14.2 Обозначения дисков
14.3 Обозначения шин
14.4 Замена колес
14.5 Правила ухода за шинами
14.6 Балансировка колес
14.7 Цепи противоскольжения
14.8 Запасное колесо
14.9 Износ шин
14.10 Кузов
14.11 Снятие и установка переднего бампера
14.12 Снятие и установка заднего бампера
14.13 Снятие и установка решетки радиатора
14.14 Снятие и установка боковых молдингов
14.15 Снятие и установка переднего крыла
14.16 Снятие и установка/регулировка капота
14.17 Снятие и установка/регулировка дверцы задка
14.18 Снятие и установка/регулировка двери
14.19 Обивка двери/стеклоподъемник/стекло двери
14.20 Снятие и установка обивки двери
14.21 Снятие и установка стекла/стеклоподъемника передней двери
14.22 Замок/ручка/цилиндр замка двери
14.23 Замок дверцы задка/внутренний привод
14.24 Наружное зеркало
14.25 Снятие и установка стекла зеркала
14.26 Панель приборов/средняя консоль
14.27 Передние сиденья
14.28 Снятие и установка заднего сиденья
14.29 Заднее сиденье
14.30 Окраска автомобиля
14.31 Устранение повреждений от камней
14.32 Рихтовка кузова/Ремонт ржавых отверстий
14.33 Подготовка к покраске
14.34 Окраска
14.35 Мойка автомобиля
14.36 Уход за лаковым покрытием
14.37 Защита днища и консервация полостей
14.38 Уход за обивкой
15. Система электрооборудования
15.0 Система электрооборудования
15.2 Проверка выключателя на пропускание тока
15.3 Проверка реле
15.4 Проверка мотора стеклоочистителя
15.5 Проверка указателей поворота
15.6 Проверка стоп-сигналов
15.7 Проверка обогревателя заднего стекла
15.8 Разъединение и соединение кабельных штекеров
15.9 Расположение предохранителей
15.10 Замена предохранителей
15.11 Снятие и установка батареи
15.12 Проверка батареи
15.13 Батарея разряжается сама по себе
15.14 Зарядка батареи
15.15 Хранение батареи
15.16 Генератор
15.17 Меры безопасности для генератора переменного тока
15.18 Проверка напряжения генератора
15.19 Снятие и установка генератора
15.20 Компоненты генератора
15.21 Разборка генератора/замена угольных щеток
15.22 Снятие и установка стартера
15.23 Проверка/замена тягового реле стартера
16. Отопитель, система освещения, приборы
16.0 Отопитель, система освещения, приборы
16.2 Мотор вентилятора
16.3 Снятие и установка вентилятора отопителя
16.4 Блок управления отопителем
16.5 Регулировка приводов отопителя
16.6 Проверка мотора вентилятора/предрезисторов
16.7 Проверка выключателя отопителя
16.8 Система освещения
16.9 Таблица ламп
16.10 Замена ламп внешнего освещения
16.11 Фара
16.12 Снятие и установка фары
16.13 Регулировка фар
16.14 Снятие и установка задних фонарей
16.15 Приборы
16.16 Приборный щиток
16.17 Снятие и установка приборного щитка
16.18 Приборы
16.19 Снятие и установка радиоприемника
16.20 Снятие и установка громкоговорителей
16.21 Снятие и установка штыревой антенны
16.22 Замена щеток стеклоочистителей
16.23 Снятие и установка/регулировка сопел стеклоомывателя
16.24 Снятие и установка рычагов переднего стеклоочистителя
16.25 Передний стеклоочиститель
16.26 Снятие и установка мотора переднего стеклоочистителя
16.27 Задний стеклоочиститель
16.28 Снятие и установка мотора заднего стеклоочистителя
16.29 Снятие и установка рычага заднего стеклоочистителя
17. Органы управления и приемы эксплуатации
17.0 Органы управления и приемы эксплуатации
17.2 Обкатка
17.3 Ключи
17.4 Замки дверей
17.5 Единое (центральное) запорное устройство (если имеется)
17.6 Защита от шалостей детей (если имеется, только на задних дверях)
17.7 Электрический стеклоподъемник (если имеется)
17.8 Задние поворотные стекла (на 3-дверных моделях)
17.9 Сиденья
17.10 Регулировка высоты рулевого колеса (если имеется)
17.11 Ремни безопасности (если имеется)
17.12 Дверца задка/крышка багажника
17.13 Заправка топливом
17.14 Зеркала
17.15 Багажные ремни
17.16 Крышка багажника (если имеется)
17.17 Запасное колесо
17.18 Приборная панель
17.19 Рулевое колесо и переключение передач
17.20 Запуск двигателя
17.21 Управление РКПП и раздаточной коробкой
17.22 Эксплуатация автомобиля с автоматической коробкой передач
17.23 Рекомендации для экономичной эксплуатации
17.24 Темпостат (выключатель режима поддержания постоянной скорости)
17.25 Освещение и световая сигнализация
17.26 Стеклоочиститель и стеклоомыватель
17.27 Приборная доска
17.28 Прочие приборы и оснащение
17.29 Отопитель и вентиляция
17.30 Кондиционер (если имеется)
17.31 Фонари салона, багажника и лампа для чтения (если имеется)
17.32 Сдвижной люк (если имеется)
17.33 Запуск толканием или буксировкой
17.34 Двигательный отсек
18. Электрические схемы
18.0 Электрические схемы
18.2 Расположение штекеров центральной электрики
18.3 Построение электрических схем
18.4 Расположение реле
18.5. 1987 г. вып.
18.6. Модель 1991 г. вып.
- Кузов
- Общая информация
- Силовой агрегат
- Трансмиссия
- Шасси
- Электрооборудование
Данное руководство содержит информационные материалы по ремонту и обслуживанию автомобиля Mazda 323 Familia 6 BG (1989-1994). Вы найдете инструкции по снятию и установке различных узлов и агрегатов Mazda 323 Familia 6, схемы электрооборудования, справочные данные и реккомендации по уходу.