- Manuals
- Brands
- Dover Manuals
- Label Maker
- markerm-imaje 2200
- Instruction manual
-
Contents
-
Table of Contents
-
Troubleshooting
-
Bookmarks
Quick Links
Instruction manual
2200
Printer overview —
Interface overview
Starting/shutting down the printer
Selecting and printing a job
Replacing consumables —
Adjustments
Maintenance
?
Troubleshooting
Technical Specifications —
Information
Summary of Contents for Dover markerm-imaje 2200
-
Page 1
Instruction manual 2200 Printer overview — Interface overview Starting/shutting down the printer Selecting and printing a job Replacing consumables — Adjustments Maintenance Troubleshooting Technical Specifications — Information… -
Page 2
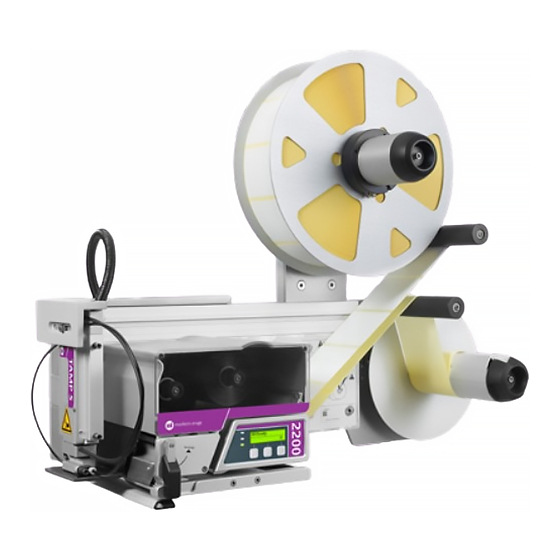
System 2200 overview Status beacon Standalone terminal (optional) Print module Adjustable stand Label module Electrical power supply connection Printer positioning screw Interface with LCD screen Power switch 10 CPU 11 Manufacturer’s plate Instruction manual… -
Page 3
System 2200 overview 1 Ribbon supply spindle 8 Print head 2 Ribbon rewind spindle 9 Blow bar Status screen, LEDs and 3 Label roll guide control buttons 4 Label supply spindle 11 Label path 5 Label compensator arm 12 Print head lever Backing paper compensator 13 Ink ribbon compartment 7 Backing paper rewind spindle… -
Page 4
Connections Terminal strip Inlet Air Plant Applicator Pneumatic module 110-240 VAC P13 P21 50-60 Hz connector with ground connection. Power switch P15 Beacon Electrical power supply P16 LVDS Relay outputs P17 Pre Trig photocell LHM (communication) P18 Input Main Trig photocell P10 Opto input P19 Input Return Sensor photocell P11 Port Série 1 (RJ45) -
Page 5: User Interface
User Interface Print control button Starting up Simple User Interface (SUI) mode Status screen Beacons (same meanings as the LEDs, No. 6) LEDs: Green: System is OK Orange and green: System is OK, warnings present Orange: Printer paused Blue: System error or cover open Blue, orange and green: Test pattern mode Instruction manual…
-
Page 6
User Interface Pressing the button shifts the printer to Simple User Interface (SUI) mode. The operation of SUI mode is detailed in the diagram below: Labels <label 1> Loads the selected <label 2> … labels … <label n> USB memory Insert USB flash drive Load labels Add labels… -
Page 7
Standalone terminal (optional) Status led Connection OK, error, print engine/not at production page (blue) Connection OK, warning, print engine (orange) Online (green) No connection with print module (Allowed time elapsed). Resumes printing or confirms the warnings and faults. Message field. Exits current menu level and goes back one level. -
Page 8
Standalone terminal (optional) Production settings Counter System settings management Reset Applicator settings counters Set start Printer settings value Production Control panel parameters Edit the Port settings configuration requests Terminal – Printer connection Data input device Settings Time/Date Set display language Set display contrast Password management… -
Page 9
CoLOS Create Pro (optional) CoLOS® Create Professional is a particularly functional graphic design software that allows you to easily create and manage complex labels and codes. CoLOS® Create Professional allows you to: • define the location and format of information to be printed, including default or fixed information, using image templates, •… -
Page 10
CoLOS Create Pro (optional) Supported fields and styles: — barcodes (1D & 2D) — Dates (BBE) and Shift Codes — line fields — Merged text — box fields — Calculated text — logo fields — Math text — fixed text — Printer setting text — user entry text — Variable text (information… -
Page 11: Daily Startup And Shutdown
Daily startup and shutdown ■ Starting up ≈ 10 seconds Ready for label data ■ Shutting down ≈ 3 seconds Instruction manual…
-
Page 12
Selecting a job — Using the standalone terminal Either option depending on your configuration. ENTER For more information, refer to the terminal user manual. Instruction manual… -
Page 13: Printing A Job
Printing a job Pause printing — On printer Stop printing — On standalone terminal Instruction manual…
-
Page 14: Loading Labels
Loading labels ■ Outside wound roll 1.5 m (5 ft) Instruction manual…
-
Page 15: Loading The Ribbon
Loading the ribbon Instruction manual…
-
Page 16
Adjustments ■ Test pattern The test pattern displays the printer configuration and must resemble the example. Feed a continuous roll of paper in the printer before running a test pattern. 1 — Turn off the printer for approx. 15 seconds. 2 — Turn the printer back on while pressing the Print key. -
Page 17
Positioning of labels Taut Stretched Instruction manual… -
Page 18
Adjusting the outfeed ■ Adjusting ■ Adjusting the outfeed the air flow plate d = 0.4 mm ( ) and //. Instruction manual… -
Page 19
Adjusting a creased ribbon Instruction manual… -
Page 20
Adjusting the printing ■ Adjusting the pressure ■ Adjusting the position ZZZYYYXXX 2 mm Instruction manual… -
Page 21: Cleaning The Print Head
Cleaning the print head THIS SIDE DOWN 13mm Printhead Cleaning Film DATAMAX® Instruction manual…
-
Page 22: Replacing The Printhead
Replacing the print head Instruction manual…
-
Page 23
Changing the print roll Make sure that the roll properly locks in place clic when reassembling. Instruction manual… -
Page 24
Changing the supply roll Make sure that the roll clic properly locks in place when reassembling. Instruction manual… -
Page 25: Troubleshooting
Troubleshooting Alarm condition. Alarm acknowledgment (if error/warning corrected) Information message Meaning The system is ready and the trigger is enabled (on- 01 — Ready line). Send through a label to be printed to make the 02 — Available system ready (online). Press the Start button to make the system enter 03 — Paused Ready mode.
-
Page 26
Troubleshooting Error message What to do 40 — Application time too Raise the application time in the Setup menu. It short should be longer than the print time. 42 — Readback error The barcode reader needs to be adjusted or the print quality needs to be improved. -
Page 27: Technical Specifications
Technical specifications ■ Standard specifications Print methods Thermal transfer or direct thermal transfer Clock Real-time Counters 10 individual programmable counters Graphic display Printer status in different languages ■ Print resolutions 200 dpi (8 dots per mm) or 300 dpi (12 dots per mm) ■…
-
Page 28
Technical specifications ■ Programming language Communication printable ASCII characters File management macros and graphics Field rotation 0°, 90°, 180°, 270° ■ Operating characteristics — Environment Operating temperature +5°C to + 45°C range Humidity 20% to 85% non-condensing (using Markem-Imaje brand media) — Power requirements 100–240 V AC;… -
Page 29
Technical specifications ■ Communication interface High-speed RS232 300–115,200 bps 10/100 Fast Ethernet, the following protocols are supported: TELNET, FTP, HTTP, LPD (Line Printer Daemon) and RAW RAW TCP printing used for transparent communication between a client and a print device. The TCP port is 9100 by default. RAW TCP is the default print protocol for most print devices. -
Page 30
Technical specifications ■ Fonts, graphics and symbologies — Fonts Standard fonts 10 smooth scalable fonts (Univers Medium, Bold, Condensed, Condensed Bold, CG Times, Italic, Bold, Bold Italic, Letter Gothic, Bold, Coronet, etc.) TrueType download Field rotation 0°, 90°, 180°, 270° — Graphic features Supports the most BMP, WMF, PCX, PNG, ICO, GIF, TIFF, JPEG… -
Page 31
Technical specifications ■ Mount NOTE: Does not apply to the pallet applicator. The multi-position mount allows the printer applicator to be mounted on a non-Markem-Image stand. M8 (4x) Markem-Imaje assumes no liability if a non-Markem-Imaje stand is used. Instruction manual… -
Page 32
Technical specifications ■ Dimensions (adjustable stand and H-base) Given the many assembly possibilities, please contact Markem- Imaje to obtain additional dimension drawings. Instruction manual… -
Page 33
Information S/N: Serial number Media For printing and coding equipment. Photos and illustrations are not contractually binding. This document was originally written in French. The French text of this document shall alone be authentic and shall prevail in the event of a dispute. -
Page 34
2200 Applicators ● Pallet ● Blow ● Tamp S — Tamp L ● Tamp Blow S — Tamp Blow L ● Wipe — Enhanced Wipe ● Corner Wrap ● Flex SE Markem-Imaje Industries 9, rue Gaspard Monge 26500 BOURG-LES-VALENCE France tel 33 (0)4 75 75 55 00 A43126-FB 03/2019 www.markem-imaje.com…
- Manuals
- Brands
- Dover Manuals
- Label Maker
- markerm-imaje 2200
- Instruction manual
-
Contents
-
Table of Contents
-
Troubleshooting
-
Bookmarks
Quick Links
Instruction manual
2200
Printer overview —
Interface overview
Starting/shutting down the printer
Selecting and printing a job
Replacing consumables —
Adjustments
Maintenance
?
Troubleshooting
Technical Specifications —
Information
Summary of Contents for Dover markerm-imaje 2200
-
Page 1
Instruction manual 2200 Printer overview — Interface overview Starting/shutting down the printer Selecting and printing a job Replacing consumables — Adjustments Maintenance Troubleshooting Technical Specifications — Information… -
Page 2
System 2200 overview Status beacon Standalone terminal (optional) Print module Adjustable stand Label module Electrical power supply connection Printer positioning screw Interface with LCD screen Power switch 10 CPU 11 Manufacturer’s plate Instruction manual… -
Page 3
System 2200 overview 1 Ribbon supply spindle 8 Print head 2 Ribbon rewind spindle 9 Blow bar Status screen, LEDs and 3 Label roll guide control buttons 4 Label supply spindle 11 Label path 5 Label compensator arm 12 Print head lever Backing paper compensator 13 Ink ribbon compartment 7 Backing paper rewind spindle… -
Page 4
Connections Terminal strip Inlet Air Plant Applicator Pneumatic module 110-240 VAC P13 P21 50-60 Hz connector with ground connection. Power switch P15 Beacon Electrical power supply P16 LVDS Relay outputs P17 Pre Trig photocell LHM (communication) P18 Input Main Trig photocell P10 Opto input P19 Input Return Sensor photocell P11 Port Série 1 (RJ45) -
Page 5: User Interface
User Interface Print control button Starting up Simple User Interface (SUI) mode Status screen Beacons (same meanings as the LEDs, No. 6) LEDs: Green: System is OK Orange and green: System is OK, warnings present Orange: Printer paused Blue: System error or cover open Blue, orange and green: Test pattern mode Instruction manual…
-
Page 6
User Interface Pressing the button shifts the printer to Simple User Interface (SUI) mode. The operation of SUI mode is detailed in the diagram below: Labels <label 1> Loads the selected <label 2> … labels … <label n> USB memory Insert USB flash drive Load labels Add labels… -
Page 7
Standalone terminal (optional) Status led Connection OK, error, print engine/not at production page (blue) Connection OK, warning, print engine (orange) Online (green) No connection with print module (Allowed time elapsed). Resumes printing or confirms the warnings and faults. Message field. Exits current menu level and goes back one level. -
Page 8
Standalone terminal (optional) Production settings Counter System settings management Reset Applicator settings counters Set start Printer settings value Production Control panel parameters Edit the Port settings configuration requests Terminal – Printer connection Data input device Settings Time/Date Set display language Set display contrast Password management… -
Page 9
CoLOS Create Pro (optional) CoLOS® Create Professional is a particularly functional graphic design software that allows you to easily create and manage complex labels and codes. CoLOS® Create Professional allows you to: • define the location and format of information to be printed, including default or fixed information, using image templates, •… -
Page 10
CoLOS Create Pro (optional) Supported fields and styles: — barcodes (1D & 2D) — Dates (BBE) and Shift Codes — line fields — Merged text — box fields — Calculated text — logo fields — Math text — fixed text — Printer setting text — user entry text — Variable text (information… -
Page 11: Daily Startup And Shutdown
Daily startup and shutdown ■ Starting up ≈ 10 seconds Ready for label data ■ Shutting down ≈ 3 seconds Instruction manual…
-
Page 12
Selecting a job — Using the standalone terminal Either option depending on your configuration. ENTER For more information, refer to the terminal user manual. Instruction manual… -
Page 13: Printing A Job
Printing a job Pause printing — On printer Stop printing — On standalone terminal Instruction manual…
-
Page 14: Loading Labels
Loading labels ■ Outside wound roll 1.5 m (5 ft) Instruction manual…
-
Page 15: Loading The Ribbon
Loading the ribbon Instruction manual…
-
Page 16
Adjustments ■ Test pattern The test pattern displays the printer configuration and must resemble the example. Feed a continuous roll of paper in the printer before running a test pattern. 1 — Turn off the printer for approx. 15 seconds. 2 — Turn the printer back on while pressing the Print key. -
Page 17
Positioning of labels Taut Stretched Instruction manual… -
Page 18
Adjusting the outfeed ■ Adjusting ■ Adjusting the outfeed the air flow plate d = 0.4 mm ( ) and //. Instruction manual… -
Page 19
Adjusting a creased ribbon Instruction manual… -
Page 20
Adjusting the printing ■ Adjusting the pressure ■ Adjusting the position ZZZYYYXXX 2 mm Instruction manual… -
Page 21: Cleaning The Print Head
Cleaning the print head THIS SIDE DOWN 13mm Printhead Cleaning Film DATAMAX® Instruction manual…
-
Page 22: Replacing The Printhead
Replacing the print head Instruction manual…
-
Page 23
Changing the print roll Make sure that the roll properly locks in place clic when reassembling. Instruction manual… -
Page 24
Changing the supply roll Make sure that the roll clic properly locks in place when reassembling. Instruction manual… -
Page 25: Troubleshooting
Troubleshooting Alarm condition. Alarm acknowledgment (if error/warning corrected) Information message Meaning The system is ready and the trigger is enabled (on- 01 — Ready line). Send through a label to be printed to make the 02 — Available system ready (online). Press the Start button to make the system enter 03 — Paused Ready mode.
-
Page 26
Troubleshooting Error message What to do 40 — Application time too Raise the application time in the Setup menu. It short should be longer than the print time. 42 — Readback error The barcode reader needs to be adjusted or the print quality needs to be improved. -
Page 27: Technical Specifications
Technical specifications ■ Standard specifications Print methods Thermal transfer or direct thermal transfer Clock Real-time Counters 10 individual programmable counters Graphic display Printer status in different languages ■ Print resolutions 200 dpi (8 dots per mm) or 300 dpi (12 dots per mm) ■…
-
Page 28
Technical specifications ■ Programming language Communication printable ASCII characters File management macros and graphics Field rotation 0°, 90°, 180°, 270° ■ Operating characteristics — Environment Operating temperature +5°C to + 45°C range Humidity 20% to 85% non-condensing (using Markem-Imaje brand media) — Power requirements 100–240 V AC;… -
Page 29
Technical specifications ■ Communication interface High-speed RS232 300–115,200 bps 10/100 Fast Ethernet, the following protocols are supported: TELNET, FTP, HTTP, LPD (Line Printer Daemon) and RAW RAW TCP printing used for transparent communication between a client and a print device. The TCP port is 9100 by default. RAW TCP is the default print protocol for most print devices. -
Page 30
Technical specifications ■ Fonts, graphics and symbologies — Fonts Standard fonts 10 smooth scalable fonts (Univers Medium, Bold, Condensed, Condensed Bold, CG Times, Italic, Bold, Bold Italic, Letter Gothic, Bold, Coronet, etc.) TrueType download Field rotation 0°, 90°, 180°, 270° — Graphic features Supports the most BMP, WMF, PCX, PNG, ICO, GIF, TIFF, JPEG… -
Page 31
Technical specifications ■ Mount NOTE: Does not apply to the pallet applicator. The multi-position mount allows the printer applicator to be mounted on a non-Markem-Image stand. M8 (4x) Markem-Imaje assumes no liability if a non-Markem-Imaje stand is used. Instruction manual… -
Page 32
Technical specifications ■ Dimensions (adjustable stand and H-base) Given the many assembly possibilities, please contact Markem- Imaje to obtain additional dimension drawings. Instruction manual… -
Page 33
Information S/N: Serial number Media For printing and coding equipment. Photos and illustrations are not contractually binding. This document was originally written in French. The French text of this document shall alone be authentic and shall prevail in the event of a dispute. -
Page 34
2200 Applicators ● Pallet ● Blow ● Tamp S — Tamp L ● Tamp Blow S — Tamp Blow L ● Wipe — Enhanced Wipe ● Corner Wrap ● Flex SE Markem-Imaje Industries 9, rue Gaspard Monge 26500 BOURG-LES-VALENCE France tel 33 (0)4 75 75 55 00 A43126-FB 03/2019 www.markem-imaje.com…
User Interface
Pressing the
(SUI) mode. The operation of SUI mode is detailed in the
diagram below:
Labels
USB memory
Layouts
confirms a selection or displays
the following submenu
displays the following option in
the current submenu
displays the previous submenu
Instruction manual
button shifts the printer to Simple User Interface
<label 1>
<label 2> …
… <label n>
Insert USB flash drive
A USB flash drive
must be inserted at
this point in order for
the following menu to
appear.
Load labels
Load fonts
Load images
System information
Loads the selected
labels
Add labels
Overwrite labels
Add fonts
Overwrite fonts
Add images
Overwrite images
Software version
IP Address
Host name
6
перейти к содержанию
Руководства пользователя, инструкции и руководства для продуктов markem-imaje.
Найти
markem-imaje X30 SmartDate Термотрансферный принтер Держите эту информацию под рукой, чтобы вы могли вернуться к ней позже. Важное примечание Найдите всю документацию по вашему продукту на нашем webсайте, отсканировав QR-код на обложке или посетив сайт www.markem-imaje.com. Безопасность Перед использованием этого принтера прочитайте и полностью соблюдайте…
Подробнее «Руководство по эксплуатации термотрансферного принтера markem-imaje X30 SmartDate»
9750 9750 Найдите всю документацию по вашему продукту на нашем webсайте, отсканировав QR-код или посетив сайт www.markem-imaje.com Безопасность и важная информация Это руководство состоит из текстовой части и иллюстрированной части. Вы найдете иллюстрированный раздел в конце текстовой части. Держите эту информацию под рукой, чтобы вы могли…
Подробнее «Инструкция по эксплуатации струйного принтера markem-imaje 9750»
Характеристики принтера:
◈ Способы печати: термопечать или термотрансферная печать
◈ Встроенные часы реального времени
◈ 10 независимых программируемых счетчиков
◈ Печатающие головки:
— 2220: ширина области печати 56 мм, разрешающая способность печати 200 точек/дюйм (8 точек на мм)
— 2230: ширина области печати 54 мм, разрешающая способность печати 300 точек/дюйм (12 точек на мм)
— 2420: ширина области печати 104 мм, разрешающая способность печати 200 точек/дюйм (8 точек на мм)
— 2430: ширина области печати 108 мм, разрешающая способность печати 300 точек/дюйм (12 точек на мм)
— 2620: ширина области печати 168 мм, разрешающая способность печати 200 точек/дюйм (8 точек на мм)
— 2630: ширина области печати 162 мм, разрешающая способность печати 300 точек/дюйм (12 точек на мм)
◈ Максимальная скорость печати: 300 мм/с
◈ Шрифты: предусмотрены 16 сглаженных масштабируемых гарнитур
◈ Возможность загрузки шрифта True Type
◈ Возможность работы со шрифтами Unicode
◈ Поддержка большей части графических форматов: BMP, WMF, PCX, PNG, ICO, GIF, TIFF, JPEG
◈ Поддержка основных линейных и двумерных штрих-кодов
Преимущества
Печать и нанесение этикеток со скоростью 125 коробок в минуту, вне зависимости от сложности и характера наносимых данных.
Гарантия на оборудование: 18 мес.
Возможность продления гарантии до 5 лет.
Упрощенная схема смены расходных материалов позволяет операторам поменять этикетки и ленты менее, чем за 40 секунд.
Длина рулона этикеток и риббона 560 м при рыночном стандарте 450 м позволяет сократить простой конвейера на 25%.
Коды соответствуют классу А и В стандарта ANSI (Американского национального института стандартов) даже при самой высокой скорости печати и нанесения этикеток.
Программное обеспечение CoLOS обеспечивает достоверность печатаемой информации, централизованное управление данными и удобство подключения к базе данных предприятия.
На 95% состоит из перерабатываемых материалов.
Страна производитель: США
Гарантийный срок: 18 месяцев
Способ печати: Термопечать или термотрансферная печать
Ширина области печати: От 56 мм до 162 мм
Разрешающая способность печати: От 200 точек на дюйм до 300 точек на дюйм
Максимальная скорость печати: 300 мм/с
Шрифты: Предусмотрены 16 сглаженных масштабируемых гарнитур
Графические форматы: BMP, WMF, PCX, PNG, ICO, GIF, TIFF, JPEG
Штрих-коды: Поддержка основных линейных и двухмерных
Электропитание: 110/240 В переменного тока; 50/60 Гц
Сжатый воздух: 6 бар, сухой и чистый
Промышленный терминал: С клавиатурой QWERTY и подсветкой экрана
Этикет: Высеченные самоклеющиеся этикетки (рулон)
Намотка этикеток: Наружу
Ширина этикета: 178 мм
Максимальный диаметр рулона этикеток: 350 мм
Диаметр внутренней сердцевины: 76 мм
Лента для термотрансферной печати: Намотана контактной стороной внутрь
Длина риббона: 560 м
Внутренний диаметр бобины риббона: 25 мм
Характеристики принтера:
◈ Способы печати: термопечать или термотрансферная печать
◈ Встроенные часы реального времени
◈ 10 независимых программируемых счетчиков
◈ Печатающие головки:
— 2220: ширина области печати 56 мм, разрешающая способность печати 200 точек/дюйм (8 точек на мм)
— 2230: ширина области печати 54 мм, разрешающая способность печати 300 точек/дюйм (12 точек на мм)
— 2420: ширина области печати 104 мм, разрешающая способность печати 200 точек/дюйм (8 точек на мм)
— 2430: ширина области печати 108 мм, разрешающая способность печати 300 точек/дюйм (12 точек на мм)
— 2620: ширина области печати 168 мм, разрешающая способность печати 200 точек/дюйм (8 точек на мм)
— 2630: ширина области печати 162 мм, разрешающая способность печати 300 точек/дюйм (12 точек на мм)
◈ Максимальная скорость печати: 300 мм/с
◈ Шрифты: предусмотрены 16 сглаженных масштабируемых гарнитур
◈ Возможность загрузки шрифта True Type
◈ Возможность работы со шрифтами Unicode
◈ Поддержка большей части графических форматов: BMP, WMF, PCX, PNG, ICO, GIF, TIFF, JPEG
◈ Поддержка основных линейных и двумерных штрих-кодов
Преимущества
Печать и нанесение этикеток со скоростью 125 коробок в минуту, вне зависимости от сложности и характера наносимых данных.
Гарантия на оборудование: 18 мес.
Возможность продления гарантии до 5 лет.
Упрощенная схема смены расходных материалов позволяет операторам поменять этикетки и ленты менее, чем за 40 секунд.
Длина рулона этикеток и риббона 560 м при рыночном стандарте 450 м позволяет сократить простой конвейера на 25%.
Коды соответствуют классу А и В стандарта ANSI (Американского национального института стандартов) даже при самой высокой скорости печати и нанесения этикеток.
Программное обеспечение CoLOS обеспечивает достоверность печатаемой информации, централизованное управление данными и удобство подключения к базе данных предприятия.
На 95% состоит из перерабатываемых материалов.
Системы для печати и нанесения этикеток Markem-Imaje 2200
• Исключительная надежность
• Высокое качество печати
• Удобство использования для оператора
• Низкие эксплуатационные расходы
• Максимальная эксплуатационная гибкость
• Качество, проверенное временем
Основные технические характеристики
Возможности печати:
• Методы печати: термотрансферная печать или прямая термопечать
• Печатный механизм:
— 2420: ширина печати 105 мм (4”), разрешение печати 200 точек/дюйм
— 2430: ширина печати 105 мм (4”), разрешение печати 300 точек/дюйм
— 2620: ширина печати 178 мм (6”), разрешение печати 200 точек/дюйм
— 2630: ширина печати 178 мм (6”), разрешение печати 300 точек/дюйм
Скорость печати:
— 2420, 2620: до 300 мм в секунду
— 2430, 2630: до 200 мм в секунду
Шрифты – графические символы
• Шрифты: 10 TrueType шрифтов
• Характеристики графических символов: поддерживает наиболее распространенные форматы; BMP, WMF, PCX, PNG, ICO, GIF, TIFF, JPEG
Штрих коды:
— Линейные штриховые коды: 2/5 Interleaved, Code 39, USS Codabar, UPC-A, UPC-E, EAN 8, EAN 13, EAN 128,EAN/UPC extension code,Code128, ITF 14, RSS-14, RSS-14 Truncated, RSS Limited, RSS Expanded, Code 2 of 5
— двумерные штриховые коды: PDF 417, LEB, KIX, RM4SCC, QR Code M1, M2, Maxicode M2, M3, M4, M5, Datamatrix
Спецификации носителей
• Типы носителей: самоклеящиеся этикетки
• Максимальная ширина барабана для этикеток: 350 мм
• Внутренний диаметр барабана: 76 мм
Аппликаторы
• 3 типа аппликаторов (tamp, blow, wipe) для нанесения этикеток на переднюю, боковую, угловую часть коробки или на 2 смежные части коробки или паллет.
Эксплуатационные характеристики
• Графический дисплей
• Клавиатура, старт, пауза, печать
• Встроенный датчик времени
• 10 индивидуальных программируемых счетчиков
• Интерфейс связи:
— Высокая скорость RS-232, 300 – 115 200 бит/сек
— Ethernet 10/100 (LPD, R Telnet, FTP, веб сервер)
— Входные/выходные сигналы
— WLAN 802.11b (дополнительно)
• Диапазон рабочих температур: от +5°C до +40°C
• Влажность: от 20 до 85% , без конденсата
• Потребляемая мощность: 110/240 В переменного тока; 50/60 Гц
• Подача воздуха: 6 бар, сухой и чистый
• Габариты печатной секции: высота: 800 мм — ширина: 640 мм — глубина: 400 мм — вес: 36 кг
Дополнительные возможности и аксессуары
• Расширенный объем памяти при помощи компактной флэш карты
• Масштабируемые и международные шрифты
• Трехцветная сигнализация о состоянии системы
• Устройство для считывания штрихового кода
• Промышленная стойка
Table of Contents for Dover markerm-imaje 2200:
-
Instruction manual 16 Adjustments ■ Test pattern The test pattern displays the printer conguration and must resemble the example. Feed a continuous roll of paper in the printer before running a test pattern. 1 — Turn off the printer for approx. 15 seconds. 2 — Turn the printer back on while pressing the Print key. 3 — Hold the key depressed until the grey test target is printed. To return to normal operation, turn the printer off then back on. ■ Automatic adjustment of the Media Position Sensor (MPS) 4 — Press and hold the key
-
Instruction manual 22 Replacing the print head 1 2 3 4 5
-
Markem-Imaje Industries 9, rue Gaspard Monge 26500 BOURG-LES-VALENCE France tel 33 (0)4 75 75 55 00 www.markem-imaje.com — User Documentation — A43126-FB 03/2019 en 2200 Applicators ● Pallet ● Blow ● Tamp S — Tamp L ● Tamp Blow S — Tamp Blow L ● Wipe — Enhanced Wipe ● Corner Wrap ● Flex SE
-
31 Instruction manual Technical specications M8 (4x) Markem-Imaje assumes no liability if a non-Markem-Imaje stand is used. ■ Mount NOTE: Does not apply to the pallet applicator. The multi-position mount allows the printer applicator to be mounted on a non-Markem-Image stand.
-
29 Instruction manual Technical specications ■ Communication interface High-speed RS232 300–115,200 bps 10/100 Fast Ethernet, the following protocols are supported: TELNET, FTP, HTTP, LPD (Line Printer Daemon) and RAW TCP RAW TCP printing used for transparent communication between a client and a print device. The TCP port is 9100 by default. RAW TCP is the default print protocol for most print devices. Web server I/O signals: 2 x In via opto, 5 x Out via relay (24 VDC)
-
13 Instruction manual Printing a job Pause printing — On printer Stop printing — On standalone terminal
-
Instruction manual 14 Loading labels 1 3 8 2 4 5 10 11 ! 9 12 7 ! 6 1.5 m (5 ft) ■ Outside wound roll
-
Instruction manual 6 User Interface conrms a selection or displays the following submenu displays the following option in the current submenu displays the previous submenu Labels <label 1> Load labels <label 2> … Load fonts Add labels Overwrite labels Add fonts Overwrite fonts Add images Overwrite images Software version IP Address USB memory … <label n> Insert USB ash drive Host name Load images System information Layouts Loads the s
-
Instruction manual 24 Changing the supply roll clic 1 2 3 ! Make sure that the roll properly locks in place when reassembling.
-
17 Instruction manual Positioning of labels ! 1 3 ! Stretched 2 Taut
-
9 Instruction manual CoLOS Create Pro (optional) CoLOS® Create Professional is a particularly functional graphic design software that allows you to easily create and manage complex labels and codes. CoLOS® Create Professional allows you to: • dene the location and format of information to be printed, including default or xed information, using image templates, • preview images before loading them, • upload one or more images to all compatible devices, including CimComms, SmartLase, Small Character Ink Jet and NextGen models,
-
11 Instruction manual Daily startup and shutdown ≈ 10 seconds ≈ 3 seconds ■ Starting up Ready for label data ■ Shutting down
-
Instruction manual 2 System 2200 overview 5 6 9 7 8 3 2 4 1 11 10 1 Status beacon 2 Standalone terminal (optional) 3 Print module 4 Adjustable stand 5 Label module 6 Electrical power supply connection 7 Printer positioning screw 8 Interface with LCD screen 9 Power switch 10 CPU 11 Manufacturer’s plate
Questions, Opinions and Exploitation Impressions:
You can ask a question, express your opinion or share our experience of Dover markerm-imaje 2200 device using right now.