-
Privacy Notice
-
Legal Terms And Conditions
-
Legal Terms And Conditions
-
Your Privacy Choices
-
Prop 65 Info
We use cookies to improve your experience on this site and show you personalized advertising. To find out more, read our
cookie policy.
©2022 American Honda Motor Co., Inc.

Подвесные лодочные моторы
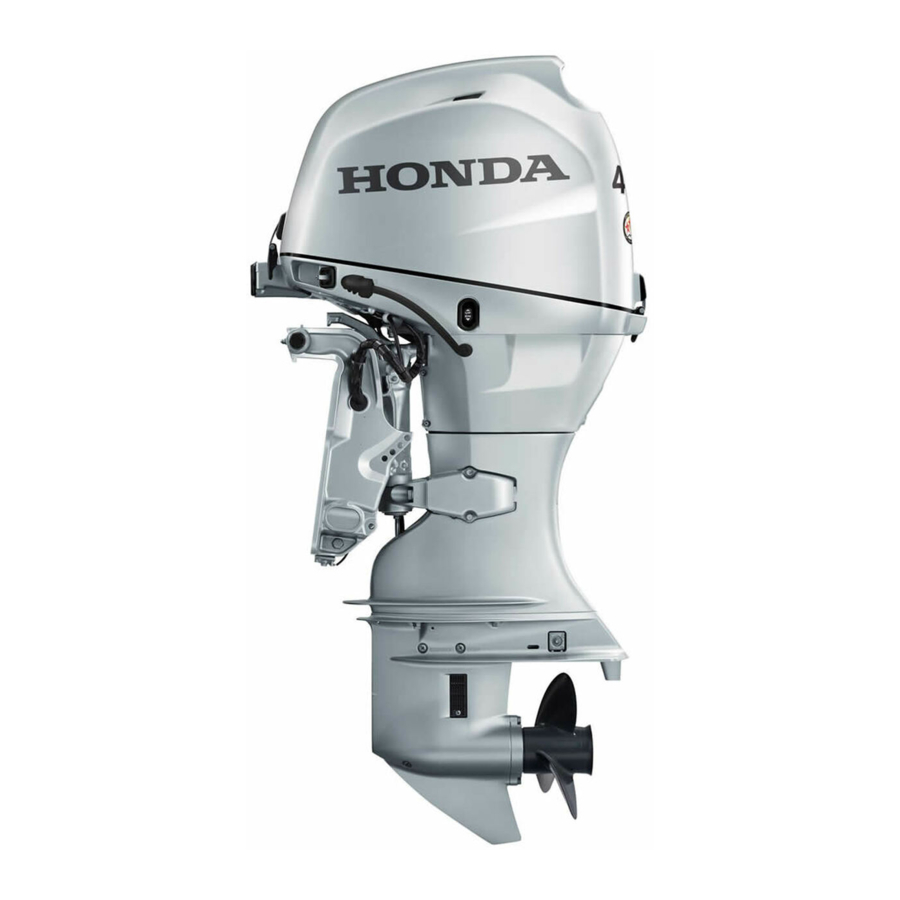
BF40D/BF50D
Руководство по эксплуатации
-
Contents
-
Table of Contents
-
Troubleshooting
-
Bookmarks
Quick Links
Related Manuals for Honda Outboard Motor BF50
Summary of Contents for Honda Outboard Motor BF50
-
Page 3
Thank you for purchasing This manual covers operation Motor. information information available at the time of approval for printing. Honda Motor Co., Ltd. reserves the right to make changes at any time without notice and without incurring No part of this publication This manual should be considered and should remain with the Outboard… -
Page 4: Table Of Contents
CONTENTS 1. SAFETY INSTRUCTIONS LABELS … 2. WARNING 3. COMPONENT IDENTIFICATION 4. INSTALLATION 5. PRE-OPERATION THE ENGINE … 6. STARTING 7. OPERATION THE ENGINE … 8. STOPPING High altitude operation.. 9. MAINTENANCE 10. TRANSPORTING/STORAGE 11. TROUBLESHOOTING 12. SPECIFICATIONS DIAGRAM 13. WIRING PARTS …
-
Page 5
THIS OWNER’S MANUAL power is properly mounted. to operate the outboard if any passenger while the boat is near any person poisonous carbon monoxide. garage or confined flammable and is explosive area with the engine or sparks where… -
Page 6
2. WARNING LABELS When storing, turn handle up and place .motor iC position or 0. [ WARNING START ENGINE WlTH TRANSMISSION IN NEUTRAL. MD0 NOT OPEATE WITH ENGINE COVER REMOVED. CHECK OIL LEVEL BEFORE STARTING. PULL STARTER LIGHTLY UNTIL SOME RESISTANCE IS FELT.THEN PULL OWNER’S BEFORE… -
Page 7
IF SWALLOWED, DO NOT INDUCE VOMITTING. CALL PHYSICIAN IMMEDIATELY. AVOID REPEATED OR PROLONGED CONTACT WITH SKIN OR BREATHING OF VAPOR. -DO NOT USE OR STORE NEAR HEAT, SPARKS, OR OPEN FLAME. REMOVE FROM BOAT FOR FILLING. HONDA MOTOR (88i PUMP OCTANE). -
Page 8
3. COMPONENT IDENTlFlCATlON SHIFT,LEVER CHOKE KNOB ENGINE COVER THROlTLE FRICTION FUEL LINE CONNECTOR, (MALE) ADJUSTING ANTI-CAVITATION PLATE ’ pRopELLER*yiWA~~~ INTAKE FUEL,GAUGE FUEL F . KIT FUEL TANK PRIMER BULB LINE FUEL LINE CONNECTOR (FEMALE) -
Page 9
ENGINE STOP BUTTON SPARK PLUG OIL FILLER CAP THROTTLE GRIP-4 STARTER GRIP ENGINE COVER OIL PRESSURE INDICATOR LAMP STERN BRACKET FLUSH BOLT GEAR OIL LEVEL BOLT EXHAUST GEAR OIL DRAIN BOLT ’… -
Page 10: Installation
CAUTION: 0 While operating the boat, check tightness screws occasionally. 0 Tie a rope through stern bracket other of the boat. This will prevent tal loss of the motor. to choose 5ss+f+ recommen- injury height Incorrect per- be installed plate…
-
Page 11
4. Motor Angle (In cruising) Adjust the motor so the axis of the propeller is parallel surface. INCORRECT CAUSES BOAT TO “SQUAT- INCORRECT CAUSES BOAT TO “PLOW’ 5. Motor Angle Adjustment If the propeller axis with the water surface, changing… -
Page 12
5. PRE-OPERATION 1. Check the engine oil level. CAUTION: Engine oil is a major factor affecting Non-detergent and low quality Running the engine with insufficient Honda 4-stroke equivalent high detergent, quality motor oil certified exceed U.S. automobile turer’s requirements Classification SE or SF. -
Page 13
2. Check the fuel level Check the fuel gauge and refill the tank if the fuel level is low. NOTE: Open the vent knob before removing vent knob is firmly closed, the cap will be difficult Use any regular grade automotive with a pump octane… -
Page 14
3. Check the following 0 Check the propeller, are secure and undamaged. 0 Check the stern bracket 0 Check steering handle 0 Make sure you have the tool kit and spare parts with items. the shear pin, and the cotter to be sure the motor operation. -
Page 15: Starting The Engine
CAUTION: Damage to the water system may occur if the motor water. 1. Connect the fuel line to the tank and outboard the connectors are securely latched. NOTE: Position the fuel tank so the tank fuel line connector meter (3.3 ft) below the motor fuel line connector. Do not place the fuel tank more than 2 meters (6.6 ft) away from the motor..
-
Page 16
Starting 1. Put the shift lever in NEUTRAL. NEUTRAL 2. In temperatures below 20°C (68OF), use the choke knob. KE KNOB… -
Page 17
3. Pull the starter rope slowly until a resistance is felt, then pull briskly. NOTE: Do not allow the starter grip to snap back. Return it slowly hand. STARTER GRIP 4. The oil pressure indicator lamp should be on while the engine is running above idle speed. -
Page 18
5. After starting, be! sure water CAUTION: CAUTION: If water If water engine. engine. Check Check to see if the water to see if the water operate operate the engine the engine until the problem until the problem 6. If the choke was used, push it in gradually is flowing does not flow… -
Page 19
Emergency Starting If the recoil starter is not working the spare starter rope in the tool kit. 1. Remove the engine 2. Wind the spare rope’clockwise CAUTION: Keep clear of moving 3. Reinstall the engine CAUTION: Do not operate parts could cause injury properly, cover. -
Page 20: Operation
7. OPERATION 1. Gear Shifting has 3 gears: FORWARD, The engine indicator at the base of the gear shift lever aligns with the letter F, N, or R on the engine case to show Turn the throttle grip to SHIFT to decrease engine speed before moving the gear shift lever.
-
Page 21
2. Steering To turn to the right, swing the steering handle to the left. To turn to the left, swing the handle to the right. For smooth steering, adjust the steering friction bolt so that a slight drag is felt when turning. -
Page 22
NOTE: passengers and equipment be distributed to balance the boat evenly from side to side and parallel to the water from front to back. grip increase speed. open at a steady friction… -
Page 23
TILT position, to either the 30’. 45’ to the normal RUN position, tilt the engine the motor in the tilted to the boat or the motor. water. or 70’ tilt oosition. mdv’e the tilt lever slightly, then lower TILT LEVER position;… -
Page 24
Don’t allow the motor to strike against the pier or other boats. CAUTION: To avoid damaging the motor, never use it as a handle for lif- ting or moving the boat. -
Page 25
5. Battey Charging and Lighting The DC receptacle ing and lighting. The circuit by removing the engine An electrical plug for the DC receptacle your charging or lighting Batteries cigarettes away. To prevent battery, connect the charging outboard motor, and disconnect motor. -
Page 26: Stopping The Engine
8. STOPPING THE ENGINE 1 .Turn the throttle grip to slow and move the shift lever to NEUTRAL. 2. Push the stop button High altitude operation At high altitude, the standard ly rich. Performance will decrease, High altitude performance main fuel jet in the carburetor always operate…
-
Page 27: Maintenance
Periodic maintenance the best operating condition. Shut off the engine engine must be run, make sure the area is well ventilated. tains poisonous carbon CAUTION: If the engine must above the anti-cavitation receive sufficient cooling To maintain cooling fresh water after each use in salt water.
-
Page 28
Tool Kit and Spare Parts The following tools and spare parts are supplied with the outboard maintenance, adjustment, The tool kit and oil bottle Spare shear pins and cotter pins are located on the stern bracket. Tool Kit FLAT SCREW DRIVER 10 x 12 mm WRENCH PHILLIPS SCREWDRIVER PLUG… -
Page 29
Engine Oil Change Drain the oil while the engine draining. 1. Remove the engine cover. the oil. Reinstall the drain bolt. 2. Fill the crankcase with the recommended oil level with the dipstick Fill to the upper level mark. 3. Reinstall the filler cap/dipstick Oil capacity: 0.55 P (0.58… -
Page 30
Gear Oil Check/Change Oil level check Check the oil level when engine is in the vertical bolt and see if oil flows hole until the oil starts water in the oil, the water will flow out first when the drain bolt is removed, or the oil will be a milky color. -
Page 31
Spark Plug Service Recommended spark plug: BPR5ES (NGK); WlGEPR-U, 1. Remove the engine 2. Remove the spark plug cap. 3. Use the wrench supplied 4.Visually inspect the spark plug. Discard chipped. 5. Measure the plug gap with should be 0.7-0.8 necessary by bending 6. -
Page 32
Cleaning and Flushing After each use in salt water outboard motor. (With Hose Coupler-Optional 1. Wash the outside of the outboard 2. Remove the flush bolt. 3. Flush the cooling system, a. Attach a hose from a fresh water b. Remove the propeller. -
Page 33
Lubrication Wipe the outside of the engine ticorrosion grease to the following NOTE: Apply anti-corrosion penetrate. THROTTLE CABLE AN0 PIVOT SHIFT SHAFT AND PIVOT HANDLE PIVOT CLAMP SCREWS with a cloth dipped in oil. Apply parts: oil to pivot TILT LEVER/REVERSE LOCK LEVER surfaces where… -
Page 34
Shear Pin Change A shear pin is used to protect the propeller when the propeller strikes an obstruction. 1. Remove the cotter pin, the propeller 2. Remove the broken shear pin and replace it with a new one. 3. Install the propeller, 4. -
Page 35
Servicing a Submerged Motor A submerged motor must be serviced immediately the water in order to minimize If there is a Honda immediately to the dealer. follows: 1. Remove the engine cover, and rinse the motor with fresh water to remove salt water, sand, mud, etc. -
Page 36
Fuel strainer replacement The fuel strainer is located between or sediment accumulated starting. To prevent engine malfuction, ((SERVICE PERIOD)) Gasoline is flammable smoke or allow flames fuel. Always work in a well-ventilated Be sure that any fuel drained from the outboard container. -
Page 37
4. Remove the clamps used to close the fuel tubes. Connect the fuel tank line to the motor. Turn the fuel tank vent knob to the ON position, pump the primer bulb, and check for leaks. sediment Contact an authorized Honda dealer if you find excessive water or accumulated… -
Page 38: Transporting/Storage
10. TRANSPORTING/STORAGE 1. Disconnect the fuel line and install the cap on the engine fuel inlet. Firmly close the fuel cap vent knob. FUEL INLET r——TdA FUEL LINE CONNECTOR ‘I f\— 2. Loosen the carburetor drain screw, and drain the gasoline into a suitable container.
-
Page 39
3. To carry, hold the motor handle and engine cover lock lever as shown engine cover. 4. Transport and store the motor here, with the steering handle raised. Vertical transport or storage: Attach the stern bracket to a stand. Horizontal transport (steering handle side of the motor). -
Page 40
‘11. TROUBLESHOOTING Engine Will Not Start: 1. Is the shift lever in neutral? 2. Is there fuel in the fuel tank? 3. Is the fuel cap knob turned to ON? 4. Is the fuel system primed by squeezing the primer bulb? 5. -
Page 41: Specifications
output Full throttle range Engine type Displacement Valve tappet clearance Spark plug gap Starter system Ignition system Lubrication system Specified Oil capacity Cooling system Exhaust system Spark plug Fuel Tank capacity Steering equipment Tilt angle Angle of rotation Overall length x height x width Height from stern bracket to anticavitation plate…
-
Page 42: Wiring Diagram
13. WIRING DIAGRAM…
-
Page 43: Optional Parts
14. OPTIONAL PARTS GEAR OIL LARGE ANODE FOR SALT WATER USE REMOTE CONTROL BRACKET CHARGING AND LIGHTING COIL KIT POWER PROPELLER FOR HEAVY LOAD HOSE COUPLEk FOR FLUSHING ENGINE COVER Number of blades-diameter x pitch 3-200 x 170 mm (7-25/32 x 6-11/16…
-
Page 44
15. WARRANTY Owner Satisfaction Your satisfaction and goodwill Honda warranty details are explained Normally, any problems dealer’s service department. been handled to your action: Discuss your problem complaints can be quickly already been reviewed the dealership or the General If your problem still has not been resolved Power Equipment… -
Page 45
Current customer service contact information: Your owner’s manual was written to cover most of the questions you might ask about your Honda. Any questions not answered in the owner’s manual can be answered by your Honda dealer. If your dealer doesn’t have an immediate answer, they should be able to get it for you. -
Page 46
MEMO… -
Page 47
MEMO…
Download
Table of Contents
Add to my manuals
Share
URL of this page:
HTML Link:
Bookmark this page
Manual will be automatically added to «My Manuals»
Print this page
- Manuals
- Brands
- Honda Manuals
- Outboard Motor
- BF50 Series
- Manual
Hide thumbs
1
2
3
4
5
6
7
8
9
10
11
12
13
14
15
16
17
18
19
20
21
22
23
24
25
26
27
28
29
30
31
32
33
34
35
36
37
38
39
40
41
42
43
44
45
46
47
48
49
50
51
52
53
54
55
56
57
58
59
60
61
62
63
64
65
66
67
68
69
70
71
72
73
74
75
76
77
78
79
80
81
82
83
84
85
86
87
88
89
90
91
92
Table Of Contents
93
-
page
of
93/
93 -
Contents
-
Table of Contents
-
Troubleshooting
-
Bookmarks
Table of Contents
-
Contents
-
Specifications
-
Dimensions/Weight
-
Dimensional Drawings
-
Propeller Shaft
-
Service Information
-
General Safety
-
Service Rules
-
Serial Number Location
-
Maintenance Standards
-
Torque Values
-
Special Tools
-
Wiring Diagram
-
Tube Routing
-
Troubleshooting
-
Hard Starting
-
Cylinder Copmression
-
Poor Performance
-
Ignition System
-
Spark Test
-
Miscellaneous
-
Maintenance Schedule
-
Recommended Service Materials
-
Lubrication Chart
-
Maintenance
-
Engine Oil
-
Gear Oil
-
Spark Plug
-
Standard Spark Plug
-
Spark Plug Gap
-
Valve Clearance
-
Fuel Line Filter
-
Fuel Tank Filter
-
Carburetor
-
Idle Speed
-
Throttle Cable
-
Pilot Screw
-
Throttle Opener System
-
Shift Rod
-
Reverse Lock
-
Disassembly and Service
-
Disassembly Chart
-
Engine Cover
-
Engine Cover/Recoil Starter
-
Recoil Starter
-
Starter Reel
-
Carburetor/Fuel Pump
-
Fuel Pump
-
Inspection
-
Thermostat
-
Carburetor Float Level
-
Fuel Pump Delivery
-
Fuel Pump Delivery Pressure
-
Flywheel/Electrical Equipment
-
DC Charging and Lighting Circuit
-
Ignition Coil
-
Primary Coil
-
Secondary Coil
-
Engine Switch
-
Oil Indicator Lamp
-
Fuse/Fuse Holder
-
D.C. Receptacle
-
Silicone Rectifier
-
Charging and Lighting Coils
-
Engine Removal
-
Cylinder Head/Valve
-
Valve Spring Free Length
-
Valve Seat Width
-
Cylinder Head
-
Valve Stem O.D.
-
Valve Guide I.D.
-
Valve Guide-To-Stem Clearance
-
Valve Guide Replacement
-
Valve Seat Reconditioning
-
Oil Pan
-
Oil Pump
-
Pump Body ID
-
Inner Rotor-To-Outer Rotor Clearance
-
Outer Rotor-To-Body Clearance
-
Outer Rotor Height
-
Pump Body Depth
-
Rotor-To-Body Side Clearance
-
Crankshaft/Piston
-
Piston Ring
-
Breather Chamber
-
Timing Gear
-
Crankshaft Bearing
-
Oil Seal
-
Crankshaft Bearing Free Play
-
Cylinder I.D.
-
Piston-To-Cylinder Clearance
-
Piston Ring Side Clearance
-
Piston Ring End Gap
-
Piston Pin O.D.
-
Piston Pin Hole I.D.
-
Connecting Rod Small End I.D.
-
Connecting Rod Big End I.D.
-
Crankpin O.D.
-
Connecting Rod Big End Oil Clearance
-
Connecting Rod Big End Axial Clearance
-
Camshaft Journal O.D.
-
Cam Height
-
Camshaft Bearing I.D.
-
Crankshaft Oil Pan Bearing O.D.
-
Oil Pan Main Bearing I.D.
-
Crankshaft-To-Main Bearing Clearance
-
Throttle Cable/Handle
-
Engine Housing
-
Handle/Shift Shaft
-
Extension Case/Swivel Case/Stern Bracket
-
Swivel Case/Stern Bracket
-
Gear Case Removal
-
Propeller Shaft/Gear Case
-
Impeller Pump
-
Pinion Shaft/Forward Bevel Gears
-
Shim Selectoin
-
Pinion Shaft O.D.
-
Gear Case Bushing I.D.
-
Pinion Shaft-To-Bushing Clearance
-
Propeller Shaft O.D.
-
Fuel Tank
-
Optional Parts
-
Remote Control Bracket Kit
-
Kit Parts
-
Installation Procedure
-
DC Charging and Lighting Kit
-
Operation
-
Lubrication System
-
Oil Circulation
-
Cooling System
-
Water Circulation
-
Water Pump
-
Power Train
-
Forward
-
Neutral
-
Reverse
-
Fuel System
-
Fuel Flow
-
Neutral Start System
-
Half Throttle System
-
Change Locations
Advertisement
Quick Links
x
Download this manual
10
Wiring Diagram
Table of Contents
Previous Page
Next Page
- 1
- 2
- 3
- 4
- 5
Advertisement
Table of Contents
Related Manuals for Honda BF50 Series
-

Outboard Motor Honda Outboard Motor BF5A Owner’s Manual
Honda outboard motor owners manual (95 pages)
-
Outboard Motor Honda BF5A Owner’s Manual
Honda automobiles outboard motor user manual (99 pages)
-
Outboard Motor Honda Outboard Motor BF5A Owner’s Manual
Honda power equipment outboard motor owner’s manual (49 pages)
-
Outboard Motor Honda BF5A Owner’s Manual
(81 pages)
-
Outboard Motor Honda BF5A Owner’s Manual
(84 pages)
-
Outboard Motor Honda BF5A Owner’s Manual
(49 pages)
-
Outboard Motor Honda BF5A Owner’s Manual
(90 pages)
-
Outboard Motor Honda BF5A Owner’s Manual
(48 pages)


-
Outboard Motor Honda BF5A Owner’s Manual
Honda marine (103 pages)
-
Outboard Motor Honda BF5A Owners Manualyamna
(88 pages)
-
Outboard Motor Honda BF5A Owner’s Manual
(84 pages)
-
Outboard Motor Honda BF5A Owner’s Manual
(90 pages)
-
Outboard Motor Honda Outboard Motor BF50 Owner’s Manual
Honda power equipment outboard motor owner’s manual (50 pages)
-
Outboard Motor Honda bf50d Owner’s Manual
(147 pages)
-
Outboard Motor Honda BF45A Owner’s Manual
Honda power equipment outboard motor owner’s manual (133 pages)
-
Outboard Motor Honda BF75-100 Owner’s Manual
Honda outboard motor owner’s manual (50 pages)


Summary of Contents for Honda BF50 Series
-
Page 92
Specifications 3 — 4 Service Information 5 — 17 Maintenance 18 — 24 Disassembly and Service 25 — 69 Optional Parts 70 — 74 Operation 75 — 81 Shop Manual News BF5A Supplement 83 — 91…
This manual is also suitable for:
Bf5a seriesBf50sBf50lBf5a sBf5a l
Table of Contents
Рундук водномоторника файл:
Отсюда можно не только брать полезное, но и желательно что-либо ложить для других.
Взял — положи от себя. Спасибо всем, кто помогает развивать ресурс!
Проблемы со скачиванием/закачиванием — тебе сюда: Помощь
|
Данное «Руководство» содержит процедуры обслуживания и ремонта подвесных лодочных моторов Honda BF40D•BF50D. Дата выпуска: Март, 2008 © Honda Motor Co., Ltd. специально для рукастых водкомоторников. |
О файле: Honda 100
Данное «Руководство» содержит процедуры обслуживания и ремонта подвесных лодочных моторов Honda BF40D•BF50D. Дата выпуска: Март, 2008 © Honda Motor Co., Ltd. специально для рукастых водкомоторников.
Размер: 30.88 МБ Файл:DOS | Windows | Android | iOS | PDF
|
Поддержи проект!
Поблагодарить или поддержать:
Посмотри еще здесь:
Добавить комментарий
————-