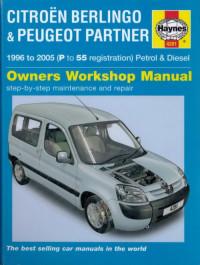
Руководство на английском языке по техническому обслуживанию и ремонту автомобилей Citroen Berlingo и Peugeot Partner 1996-2005 годов выпуска с бензиновыми и дизельными двигателями.
- Автор: ohn S. Mead
- Издательство: Haynes Publishing
- Год издания: 2006
- Страниц: 370
- Формат: PDF
- Размер: 88,8 Mb
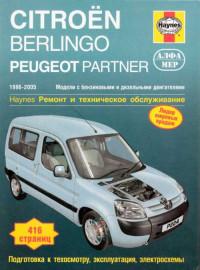
Руководство по ремонту и техническому обслуживанию автомобилей Citroen Berlingo и Peugeot Partner 1996-2005 годов выпуска с бензиновыми и дизельными двигателями.
- Автор: Джон С. Мид
- Издательство: Алфамер Паблишинг
- Год издания: —
- Страниц: 416
- Формат: —
- Размер: —
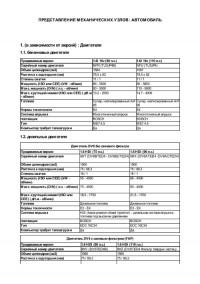
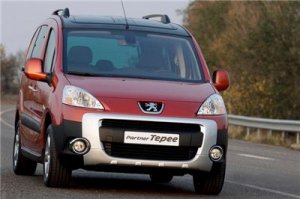
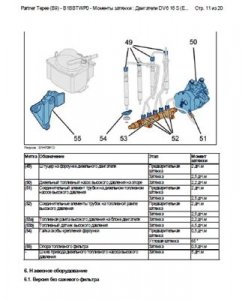
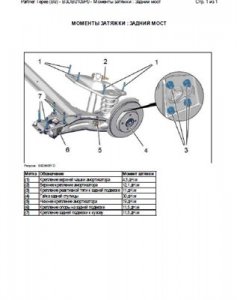
Руководство по ремонту автомобиля Peugeot Partner Tepee.
- Автор: —
- Издательство: —
- Год издания: —
- Страниц: —
- Формат: PDF
- Размер: 51,6 Mb

Руководство по ремонту и эксплуатации автомобилей Citroen Berlingo и Peugeot Partner с 1996 года выпуска с бензиновыми и дизельными двигателями.
- Автор: —
- Издательство: Монолит
- Год издания: —
- Страниц: 400
- Формат: —
- Размер: —
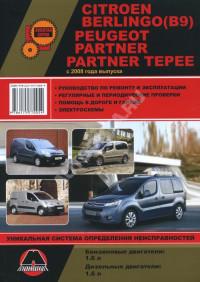
Руководство по эксплуатации и ремонту автомобилей Peugeot Partner/Partner Tepee и Citroen Berlingo B9 с 2008 года выпуска с бензиновыми и дизельными двигателями объемом 1,6 л.
- Автор: —
- Издательство: Монолит
- Год издания: —
- Страниц: 428
- Формат: —
- Размер: —
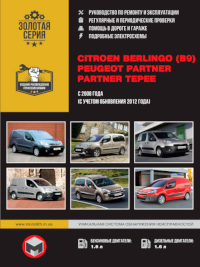
Руководство по эксплуатации и ремонту автомобилей Peugeot Partner/Partner Tepee и Citroen Berlingo B9 с 2008 года выпуска с бензиновыми и дизельными двигателями объемом 1,6 л.
- Автор: —
- Издательство: Монолит
- Год издания: —
- Страниц: 438
- Формат: —
- Размер: —
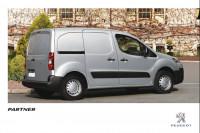
Сборник инструкций по эксплуатации автомобиля Peugeot Partner 2012-2014 годов выпуска.
- Автор: —
- Издательство: Peugeot
- Год издания: 2011/2013/2014
- Страниц: 208/236/244
- Формат: PDF
- Размер: 24,5 Mb
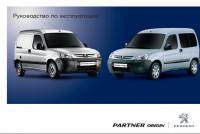
Инструкция по эксплуатации автомобиля Peugeot Partner Origin 2011 года выпуска.
- Автор: —
- Издательство: Peugeot
- Год издания: 2010
- Страниц: 136
- Формат: PDF
- Размер: 6,2 Mb
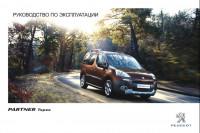
Сборник инструкций по эксплуатации автомобиля Peugeot Partner Tepee 2010-2014 годов выпуска.
- Автор: —
- Издательство: Peugeot
- Год издания: 2010-2014
- Страниц: —
- Формат: PDF
- Размер: 38,2 Mb
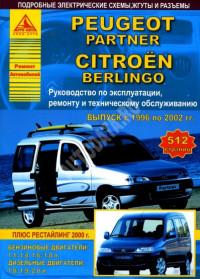
Руководство по ремонту и эксплуатации автомобилей Citroen Berlingo и Peugeot Partner 1996-2002 годов выпуска с бензиновыми и дизельными двигателями.
- Автор: —
- Издательство: Арго-Авто
- Год издания: —
- Страниц: 512
- Формат: —
- Размер: —

Руководство по ремонту и эксплуатации автомобилей Citroen Berlingo и Peugeot Partner с 2002 года выпуска с бензиновыми и дизельными двигателями.
- Автор: —
- Издательство: Арго-Авто
- Год издания: —
- Страниц: 504
- Формат: —
- Размер: —
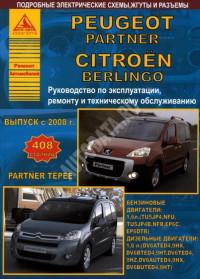
Руководство по ремонту и эксплуатации автомобилей Citroen Berlingo и Peugeot Partner/Partner Tepee с 2008 года выпуска с бензиновыми и дизельными двигателями.
- Автор: —
- Издательство: Арго-Авто
- Год издания: —
- Страниц: 408
- Формат: —
- Размер: —
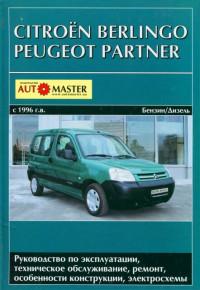
Руководство по эксплуатации, техническому обслуживанию и ремонту автомобилей Citroen Berlingo и Peugeot Partner с 1996 года выпуска с бензиновыми и дизельными двигателями.
- Автор: —
- Издательство: Автомастер
- Год издания: —
- Страниц: 376
- Формат: —
- Размер: —
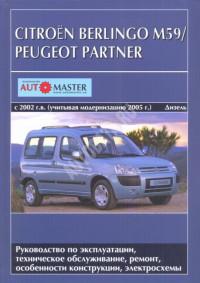
Руководство по эксплуатации, техническому обслуживанию и ремонту автомобилей Citroen Berlingo и Peugeot Partner с 2002 года выпуска с дизельными двигателями.
- Автор: —
- Издательство: Автомастер
- Год издания: —
- Страниц: 420
- Формат: —
- Размер: —
Руководство на французском языке по эксплуатации, техническому обслуживанию и ремонту автомобилей Citroen Berlingo и Peugeot Partner с 2002 года выпуска.
- Автор: —
- Издательство: —
- Год издания: —
- Страниц: 203
- Формат: PDF
- Размер: 31,9 Mb
Инструкция по ремонту грузовиков Peugeot Partner 1
В данном руководстве рассмотрены автомобили Citroen Berlingo с кузовами «минивэн» (Multispace), «фургон» и Peugeot Partner первого поколения с кузовами «комби» и «фургон», включая специальные варианты/варианты ограниченной серии. Здесь содержится описание следующих моделей двигателей:
Бензиновые двигатели: 1.4 л (1360 см3) и 1.6 л (1587 см3).
Дизельные двигатели: 1.8 л (1769 см3), 1.9 л (1868 см3 и 1905 см3) и 2.0 л (1997 см3), включая варианты с турбонаддувом.
Не рассмотрены модели с бензиновым двигателем 1.8 л (1761 см3).
Ссылка на этот раздел в разных форматах
TEXTHTMLBB Code
- Manuals
- Brands
- PEUGEOT Manuals
- Automobile
- PARTNER Tepee
- Handbook
-
Contents
-
Table of Contents
-
Bookmarks
Related Manuals for PEUGEOT PARTNER Tepee
Summary of Contents for PEUGEOT PARTNER Tepee
-
Page 1
HANDBOOK PARTNER Tepee… -
Page 2
«Personal space». latest information available, easily identified by the bookmark, associated with this symbol: If the «Personal space» function is not available on the PEUGEOT Select: The Vehicle documentation link in the home page public website for your country, you can find your handbook at the… -
Page 3
PEUGEOT thanks you for your confi dence and wishes alerts you to the safety of individuals and equipment you very happy motoring. on board. -
Page 4: Table Of Contents
Contents 1. FAMILIARISATION 2. READY TO SET OFF 3. EASE OF USE and 4. SAFETY 4-16 17-48 COMFORT 49-102 103-127 Hazard warning lamps Exterior Lighting control Parking brake Instruments and controls Alarm wipers Parking sensors Sitting comfortably Doors Cruise control Anti-lock braking Visibility Tailgate…
-
Page 5
Being towed and their associated page numbers on the schematic outlines of the vehicle PEUGEOT Connect is the (visual index). name given to all of the 8. TECHNICAL 6. CHECKS new equipment of the radio/… -
Page 6
Exterior… -
Page 7
Exterior Key — Remote control Tailgate and rear screen Fuel fi ller fl ap Sliding side door Parking sensors Spare wheel and temporary puncture repair kit 144, Side-hinged rear doors Grip control Changing bulbs Rear roof fl ap Opening the bonnet : chapter identifi… -
Page 8: Instruments And Controls
Interior INSTRUMENTS AND CONTROLS 1. Lighting and direction indicator stalk. 2. Instrument panel with screen. 3. Wipers, screenwash, trip computer control stalk. 4. Ignition. 5. Audio system controls. 6. Driver’s airbag, horn. 7. Steering wheel height and reach adjustment. 8. Cruise control, speed limiter controls.
-
Page 9
Interior INSTRUMENTS AND CONTROLS 1. Lighting and direction indicator control stalk. 2. Instrument panel with screen. 3. Wiper, screenwash, trip computer control stalk. 4. Ignition switch. 5. Audio system controls. 6. Driver’s airbag, horn. 7. Steering wheel height and reach adjustment. -
Page 10: Sitting Comfortably
Interior SITTING COMFORTABLY Steering wheel Storage compartments Adjust the steering wheel for height The tools are stored under the left-hand and reach. seat. Driver’s seat 1. Forwards-backwards 2. Backrest angle. adjustment. Seat belts Mirrors Height adjustment. Manual adjustments. 3. Seat cushion 4.
-
Page 11: Visibility
Interior VISIBILITY Lighting stalk Wiper stalk Changing bulbs In bad weather or in winter, ensure that Lighting off. fast. the lamps are not covered with mud or normal. snow. intermittent. Sidelamps. park. single wipe. Main beam headlamps (blue). AUTO, press the stalk down. Reactivate if the ignition has Dipped beam headlamps (green).
-
Page 12: Driving Safely
DRIVING SAFELY Hill start assist From the time you release the brake pedal, the vehicle is held for approximately PEUGEOT Connect Sound (RD5) 2 seconds without need to use the parking Cruise control brake, to allow you to move off.
-
Page 13: Passenger Compartment Space
Interior PASSENGER COMPARTMENT SPACE USB player Zenith roof, Scented air freshener The multifunction roof console extends the overhead 9.42, storage compartment. 9.70 The fragrance is diffused in the passenger compartment from the vents of the roof console. Armrest If the vehicle is fi tted with the additional console and an armrest, remove the console or the armrest to fold the passenger seat to the table position.
-
Page 14: Rear Fi Ttings
Interior REAR FITTINGS Rear seats, 5 seat version Load space cover, 5 seat version Maximum loads Overhead storage compartment: 5 kg. Zenith roof: central storage compartments: 6 kg, box: 10 kg, roof bars placed longitudinally or transversely: 35 kg. Transverse roof bars: 75 kg. Rear seats, 7 seat version Load space cover, 7 seat version…
-
Page 15: Child Safety
Interior CHILD SAFETY Side door child lock Child surveillance mirror Child seats Safety anti-pinch Airbag deactivation 1 1 1…
-
Page 16: Ventilation
Interior VENTILATION Recommended settings for Manual Air Conditioning For optimum use of the system, we recommend: If I Temperature Air fl ow require… distribution recirculation Heating Heating Cooling Demisting Defrosting With Digital Air Conditioning, operation in AUTO mode is recommended at all times.
-
Page 17: Eco-Driving
ECO-DRIVING Eco-driving is a range of everyday practices that allow the motorist to optimise their fuel consumption and CO emissions. Optimise the use of your Drive smoothly gearbox With a manual gearbox, move Maintain a safe distance between Switch off the air conditioning, unless off gently and change up without vehicles, use engine braking rather it has automatic regulation, as…
-
Page 18
Limit the causes of excess Observe the recommendations consumption on maintenance Spread loads throughout the Check the tyre pressures regularly, When refuelling, do not continue after vehicle; place the heaviest items in when cold, referring to the label in the the third cut-off of the nozzle to avoid the bottom of the boot, as close as door aperture, driver’s side. -
Page 19: Key
Access ACCESS REMOTE CONTROL Central unlocking Deadlocking Press this button to unlock all This locks and unlocks the doors on A second press on the closed of your vehicle’s doors. the vehicle, opens and closes the padlock on the remote control within fuel fi…
-
Page 20: Changing Battery
Insert the key in the ignition switch with Battery ref.: CR1620 / 3 volts. the buttons (padlocks) of the remote Deposit them at a PEUGEOT The «battery fl at» information is given control facing you. dealership, or at an authorised by an audible signal, accompanied by collection point.
-
Page 21: Alarm
If you lose your keys exterior protection: it sounds if a front/rear door or the bonnet is Visit a PEUGEOT dealer with the opened. vehicle’s V5 registration document and your identifi cation document. interior protection: it sounds if…
-
Page 22: Doors
Within the next fi ve minutes, set Contact a PEUGEOT dealer to have the alarm by locking or deadlocking the system checked. using the remote control (the red LED fl…
-
Page 23: From The Inside
Access SLIDING SIDE DOORS From the outside From the inside Good practice Pull the handle towards you then Unlock the side door using this handle Take care not to block the guide space towards the rear and open the side and open it, guiding the rearward on the fl…
-
Page 24: Tailgate
Access TAILGATE Operation in the event of a battery failure From outside From inside Locking/unlocking is by means of the Emergency control Front and side passenger doors remote control. In the event of a central unlocking In the event of a battery or central To open, press the control below the operating fault, this permits unlocking locking fault, use the lock to lock the…
-
Page 25
Access HINGED REAR DOORS Tailgate screen The hinged rear doors are Pull the lever to open the right-hand The opening rear screen allows you to asymmetrical (2/3 — 1/3), with the door. access the rear of the vehicle directly, smaller door on the right. To close, start with the right-hand door without having to open the tailgate. -
Page 26
Access When parked with the rear doors open to 90°, the doors mask the rear lamps. To signal your position to other road users driving in the same direction who may not have seen your vehicle, use a warning triangle or other device required by the legislation in your country. -
Page 27: Rear Roof Fl Ap
Access REAR ROOF FLAP This rear roof fl ap is only compatible lower the black paddle to secure The side supports can be used as with side-hinged rear doors. the rear roof fl ap. hooking points. Securing the rear roof fl ap places it on To open the rear roof fl…
-
Page 28: Central Locking
Access Anti-intrusion security Locking while driving When the vehicle moves off, as soon as you reach approximately 6 mph (10 km/h), the system locks the doors. The characteristic central locking noise is heard. The LED in the switch on the dashboard central switch panel comes on.
-
Page 29: Instrument Panel
Instruments and controls INSTRUMENTS AND CONTROLS INSTRUMENT PANEL Dials 1. Distance recorder in kilometres / miles. 2. Screen. 3. Fuel level, coolant temperature. 4. Rev counter. Displays 5. Trip distance recorder / service Speed limiter / cruise control. indicator zero reset. Kilometres / Miles travelled.
-
Page 30: Adjusting The Time
Instruments and controls Instrument panel without screen ADJUSTING THE TIME Centre console without screen Centre console with screen To adjust the time of the clock, The display — time sequence turn to the right to increase the use the left-hand button on hours (hold the button to the right is linked according to model the instrument panel then…
-
Page 31: Warning Lamps
«Coolant so, park and switch off the ignition. Have it STOP lamp and temperature», «Electronic checked by a PEUGEOT dealer or a qualifi ed accompanied brake force distribution», workshop. by a message «Power steering» and in the screen.
-
Page 32
Chapter 6, «Levels» section. Contact a fl ashing. a drop in the coolant level. PEUGEOT dealer or a qualifi ed workshop. on temporarily. minor faults or warnings. Consult the alert log in the display or screen. If your vehicle is equipped with a trip computer Service or a screen: refer to the «Audio equipment -… -
Page 33
EOBD There is a risk of damage to the catalytic emission fl ashing or a failure of the system. converter. Have it checked by a PEUGEOT or a control remaining on. qualifi ed workshop. system a fault in the charging Check the battery terminals, …… -
Page 34
The vehicle retains conventional braking. a fault with the anti- remaining on. Have it checked by a PEUGEOT dealer or a lock braking system. qualifi ed workshop. The system optimises traction and improves the triggering of the ASR fl… -
Page 35
Warning lamp indicates Solution — action a fault with the particle Particle Have the fi lter checked by a PEUGEOT dealer emission fi lter (Diesel emission or a qualifi ed workshop. Chapter 6, «Levels» additive level, risk of fi lter section. -
Page 36
Wait until the warning lamp goes off before heating pre-heating. operating the starter. Have the fi lter bled by a PEUGEOT dealer or on and Presence of a qualifi ed workshop without delay. Chapter 6, accompanied by water in the water in the Diesel fi… -
Page 37: Fuel Gauge
The gauge is positioned on: zone, have the system checked by move close to the red graduations. 1: the fuel tank is full, a PEUGEOT dealer or a qualifi ed approximately 60 litres. workshop. 0: the reserve is now being used, the warning lamp comes on Refer to the «Levels»…
-
Page 38: Tyre Under-Infl Ation Detection
Driving with under-infl ated tyres There is a risk of damage to the increases fuel consumption. catalytic converter. Have it checked by a PEUGEOT dealer or a qualifi ed The tyre under-infl ation detection workshop. system is an aid to driving which…
-
Page 39
(according to equipment), Go to a PEUGEOT dealer or a qualifi ed workshop to have the system if you have a compressor, the one checked or, following the repair of a… -
Page 40: Service Indicator
Instruments and controls SERVICE INDICATOR More than 1 000 miles/km before the A few seconds after the ignition is next service is due switched on, the oil level is displayed, This programmes service intervals then the total distance recorder Example: 4 800 miles/km remain according to the use of the vehicle.
-
Page 41: Lighting Dimmer
Instruments and controls Zero re-set Oil level correct Dipstick A = maximum, never exceed Your PEUGEOT dealer or a qualifi ed this level as a surplus of oil workshop carries out this operation may damage the engine. after each service.
-
Page 42: Gearbox
Gearbox and steering wheel GEAR SHIFT INDICATOR System which reduces fuel consumption by recommending the most appropriate gear. With an electronic gearbox, the system is only active in manual mode. 5-speed gearbox — reverse Operation GEARBOX Depending on the driving situation and your vehicle’s equipment, the system To change gear easily, always press Engaging 5…
-
Page 43: 6-Speed Electronic Gearbox
Gearbox and steering wheel 6-SPEED ELECTRONIC GEARBOX The information appears in the instrument panel in the form of an arrow. The system adapts its gear change recommendation according to the driving conditions (slope, load, …) and the demands of the driver (power, acceleration, braking, …).
-
Page 44
Gearbox and steering wheel Moving off To start the engine, the gear selector must be in position N . Press fi rmly on the brake pedal. Operate the starter. When the engine is running, place the gear selector on R , A or M as desired. -
Page 45: Steering Wheel Adjustment
Gearbox and steering wheel Changing gear Acceleration For optimum acceleration (e.g. to Pull on the » + » control overtake another vehicle), simply paddle to change up. press the pedal beyond the point of Pull on the » — » control resistance at the end of its travel, by paddle to change pressing down fi…
-
Page 46: Stop & Start
Stop & Start Stop & Start If your vehicle is fi tted with the system, Special cases: STOP mode a time counter calculates the sum of unavailable The Stop & Start system puts the the periods in STOP mode during a STOP mode is not invoked when: engine temporarily on standby — STOP journey.
-
Page 47
Stop & Start Going into engine START mode Special cases: START invoked Deactivation automatically START is invoked automatically when: The «ECO» warning lamp At any time, press the «ECO goes off and the engine starts: OFF» switch to deactivate the you open the driver’s door, system. -
Page 48
Fitting a battery not listed by PEUGEOT introduces the risk of malfunction of the system. The Stop & Start system makes use of advanced technology. All work on this type of battery must be done only by a PEUGEOT dealer or a qualifi ed workshop. -
Page 49: Starting And Stopping
Starting and stopping Good practice when starting Door or bonnet open warning lamp If this comes on, a door or the bonnet is not closed correctly, check! Diesel pre-heating warning lamp If the temperature is high enough, the warning lamp comes on for less than one second, you can start without waiting.
-
Page 50: Hill Start Assist
It is not an automatic vehicle parking function or an automatic accompanied by an audible parking brake. signal and confi rmed by a message in the screen. Contact a PEUGEOT dealer or a qualifi ed workshop to have the system checked.
-
Page 51: Lighting Control
Steering mounted controls Lighting off Automatic illumination of headlamps Sidelamps Dipped beam (green) Main beam (blue) Dipped beam/main beam change DIRECTION INDICATORS LIGHTING CONTROL Pull the stalk fully towards you. Direction indicators Front and rear lighting Selection is by turning ring A . Left : downwards passing the point of resistance.
-
Page 52
Steering mounted controls If the user does not operate any Do not forget to switch them off Automatic illumination of headlamps equipment for 30 minutes, the when they are no longer needed. The sidelamps Economy mode engages to avoid Operation of the automatic illumination discharging the battery (see «Battery»… -
Page 53: Cornering Lighting
, the lighting comes on accompanied by the service warning lamp, an audible signal and a message in the screen. Contact a PEUGEOT dealer or a qualifi ed workshop. Cornering lighting Guide-me-home lighting With dipped or main beam headlamps,…
-
Page 54: Wipers
Normal wipe (moderate rain). reactivated: intermittent mode. Intermittent wipe. move the stalk to any position, Contact a PEUGEOT dealer or a Off. then move it back to the required qualifi ed workshop to have the system Single wipe position.
-
Page 55: Windscreen Wipers
Steering mounted controls Wash-wipe and headlamp wash Pull the stalk towards you, the wash- wipe is accompanied by a timed sweep of the wipers. The headlamp wash is linked with the wash-wipe, it is triggered if the dipped headlamps are on. To top up the levels, refer to the «Levels»…
-
Page 56: Cruise Control
Steering mounted controls This cruise control shows the function selection status in the instrument panel and displays the programmed speed: Function selected, display of the «Cruise Control» symbol. Function deactivated, OFF . Function activated. CRUISE CONTROL «CRUISE» «This is the speed at which the driver In order for it to be programmed or Vehicle speed above wishes to drive».
-
Page 57
Steering mounted controls Selecting the function Place the switch in the CRUISE position. The cruise control is Temporarily exceeding the Reactivation selected but is not yet active and speed no speed has been programmed. Following deactivation of the cruise control, press this button. It is possible to accelerate and drive momentarily at a speed greater than Your vehicle will return to the last… -
Page 58
1 mph (km/h). Operating fault A maintained press decreases the The programmed speed is cleared then speed in steps of 5 mph (km/h). replaced by three dashes. Contact a PEUGEOT dealer or a qualifi ed workshop to have the system checked. -
Page 59: Speed Limiter
Steering mounted controls This speed limiter shows the function selection status in the instrument panel and displays the programmed speed: Function selected, displaying of the «Speed Limiter» symbol. Function deactivated, last programmed speed — OFF . Function activated. SPEED LIMITER «LIMIT» Vehicle speed above «This is the selected speed which the However, pressing the pedal beyond…
-
Page 60
Steering mounted controls Selecting the function Place the switch in the LIMIT position. The limiter is selected but is not yet active. The screen indicates the last programmed speed. Programming a speed Activation/Deactivation (off) A speed can be programmed without Pressing this button once activates activating the limiter but with the the limiter, pressing the button again… -
Page 61
Pressing the accelerator pedal in order Switching the function off to exceed the programmed speed Contact a PEUGEOT dealer or a will have no effect unless you press qualifi ed workshop to have the system Place the switch in position 0 or the pedal fi… -
Page 62: Air Distribution
Ventilation Heating control panel Air conditioning control panel VENTILATION Manual settings: Air flow Temperature the footwells, The speed of the blown air at Control positioned: the vents varies from 1 to the fastest 4. Position 0 switches it off. in the blue zone, provides Adjust this control in order the windscreen and the ambient air,…
-
Page 63
Ventilation Intake of exterior air Air conditioning A/C The air conditioning can only operate The LED in the button is off. This is the preferred with the engine running. operating position. Recirculation of interior air Pressing the button starts the air conditioning system, The LED in the button is on. -
Page 64: Digital
Ventilation When the engine is cold, to prevent an excessive diffusion of cold air, the air diffuser will reach its optimum level gradually. For your comfort, the settings are stored when the ignition is switched off and are reinstated the next time the vehicle is started.
-
Page 65
Ventilation Manual operation Air fl ow Intake of exterior air / Recirculation of interior air Press the small fan button to You can, according to your reduce the fl ow or the large Press this button to requirements, make a different selection fan button to increase the recirculate the interior air. -
Page 66: Demisting And Defrosting
Ventilation DEMISTING AND DEFROSTING Manual mode Demisting the rear screen and/ or mirrors Pressing this button, with the engine running, activates Turn the control to this air Press the air conditioning the rapid demisting — distribution setting. button. defrosting of the rear screen and/or electric mirrors.
-
Page 67: Air Conditioning
Automatic mode: visibility (activated carbon) If the system does not produce cold air, programme do not use it and contact a PEUGEOT The comfort programme (AUTO) may This fi lter traps certain dust and limits dealer or a qualifi ed workshop.
-
Page 68: Front Seats
Seats 1 — Forwards/backwards adjustment 3 — Driver’s seat height adjustment Lift the bar and slide the seat forwards To raise the seat, pull the control or backwards. upwards then take your weight off the seat cushion. To lower the seat, pull the control upwards then push on the seat cushion.
-
Page 69
Seats Adjustable armrest To access the vertical position, raise the armrest until it locks. Lower the armrest to return it to a position for use. To remove the armrest, press the release button from the vertical position and move aside the armrest. To put the armrest back in place, clip it Head restraint height adjustment in the vertical position. -
Page 70: Rear Bench Seat
Seats Head restraint High position: lift and raise the head restraint. Low position: press on the head restraint to lower it. To remove the head restraint, after raising it press the tab and lift the head restraint. To install the head restraint, engage the rods of the head restraint in the holes keeping it in line with the seat back.
-
Page 71
Seats Fully folded position Putting back in place Raise the grey control bar, located at the rear of the seat cushion. Example of operations for the Tilt the entire seat rearwards until it 1/3 section. They are identical for the locks. -
Page 72
Seats Refitting the bench seat Offer up the bench seat (1/3 section and/or 2/3 section) vertically. Place the hooks between the two bars. Fold the bench seat rearwards. To return the bench seat (1/3 section and/or 2/3 section) to the «passenger transportation» position, refer to the «fully folded position»… -
Page 73: Rear Seats (5 Seat Version)
Seats Head restraint High position: lift and raise the head restraint. Low position: press on the head restraint to lower it. To remove the head restraint, after raising it press the tab and lift the head restraint. To install the head restraint, engage the rods of the head restraint in the holes keeping it in line with the seat back.
-
Page 74
Seats Returning the seat back to the sitting position Release the seat back by pulling the control, then return it to its original position. When returning the seat back to the sitting position, ensure that it is locked securely. Adjusting the angle of the seat back Returning the seat to its original position Operate the control and adjust the… -
Page 75
Seats Good practice Following the various operations: do not remove a head restraint without storing it and fi x it to a support, ensure that the passengers can always access the seat belts and fasten them easily, passengers must never take their seat without adjusting and fastening their seat belt. -
Page 76: Rear Seats (7 Seat Version)
Seats Head restraint This is of the «comma» shape type. High position: press the tab, lift and raise the head restraint. Low position: push the tab and press the top of the head restraint to lower it. To remove the head restraint: place it in the high position, lift it, then remove it.
-
Page 77
Seats Types of Row 2 seat Left-hand outer seat Centre seat Right-hand outer seat Types of Row 3 seat Left-hand outer seat Right-hand outer seat… -
Page 78
Seats Returning the seat back to the sitting position Release the seat back by pulling the control, then return it to its original position. Ensure that the entire seat is anchored securely. Row 2 seat adjustments Returning the seat to its original position Fold back the entire seat. -
Page 79
Seats Row 3 seat adjustments Placing the seat back in the table Placing the seat in the fully folded Returning the seat to its original position position position Lower the head restraint fully. Place the seat in the table position. Push the red control. -
Page 80
Seats Entering, exiting from row 3 Before folding it back, ensure that Pull the red strap to place the seat the feet of the passenger in row 3 in the fully folded position. are not obstructing the row 2 seat Tilt the entire seat forwards. -
Page 81
Seats Handling the Row 2 seat Removing the seat Repositioning the seat Ensure that no object or foot of a passenger seated in the rear If necessary, move the front seats The label on the seat indicates the is obstructing the anchoring forward. -
Page 82
Seats Good practice Do not place hard or heavy objects on the seat backs forming a table, they could become dangerous projectiles in the event or sharp braking or impact. Following the various operations: do not remove a head restraint without storing it, fi… -
Page 83: Modularity
Seats MODULARITY AND DIFFERENT SEAT CONFIGURATIONS 5 seat layouts…
-
Page 84
Seats 7 seat layouts The various operations must be carried out while stationary. -
Page 85: Front Fi Ttings
Practical information FRONT FITTINGS Upper storage compartment 1. Lower glove box 3. Side storage compartment This is located on the dashboard, This may or may not be fi tted with a lid. behind the steering wheel. A recess makes lifting of the lid easier when opening.
-
Page 86
Practical information Sun visor To prevent dazzle from ahead, fold the sun visor down. A pocket is provided in the driver’s sun visor for storing toll cards, tickets, … Overhead storage unit This is located above the sun visors and can accommodate various objects Central storage console (a jumper, fi… -
Page 87
Practical information Drawers under seats Storage compartment under seats Your vehicle may be fi tted with a drawer, under each front seat. Storage compartments are available, with or without lid, in the fl oor under the front seats. To gain access to them, move the seat forward. -
Page 88
Practical information SEATING AREA FITTINGS Aircraft style tables Side blinds To put the table in place, pull it Side blinds may be available on the upwards and fold it down. sliding side doors. Floor boxes As a safety precaution, above a high Pull the side blind by the tab to pressure, the table is designed to install it. -
Page 89: Zenith Roof
Practical information Storage compartments Courtesy lamp Storage compartments are provided The operation of the courtesy lamp is on each side of the roof. The maximum identical to that of the front courtesy lamp. weight is 6 Kg. Refer to the «Comfort and Safety» The translucent base assists with section of chapter 3, «Courtesy fi…
-
Page 90
Practical information From inside From outside Rear box Vents From the boot, place your thumb on This roof box can be accessed from A 3-position control allows you to the recess then pull the handle to the rear seats and the boot. adjust the air fl… -
Page 91
Practical information SCENTED AIR FRESHENER Removing the scented air freshener The scented air freshener diffuses a fragrance in the passenger Press the button down while turning compartment from the roof console it a quarter of a turn to the left to vents. -
Page 92
PEUGEOT dealers. Turn it a quarter of a turn to lock it with fragrances other than those on the button and remove the case. recommended by the PEUGEOT Insert the scented air freshener in network. Inserting the scented air its location. -
Page 93
Practical information ZENITH ROOF BARS The maximum authorised weight on each bar is 35 kg. These two longitudinal Zenith roof bars can be removed. Recommendations for loading on In all cases, the load must rest on the roof: the non-slip bands provided for this purpose and must not touch the roof or Open the protective covers. -
Page 94: Roof Bars
Practical information ROOF BARS If you install transverse bars on these bars, refer to the weight values indicated by the manufacturer but do not exceed 75 Kg.
-
Page 95: Courtesy Lamps
Practical information Front courtesy lamp Rear courtesy lamp Front individual reading lamps COURTESY LAMPS Automatic switching on/off These are switched on and off by Front seats: comes on when means of a manual switch, with The front courtesy lamp comes on one of the front doors is the ignition on.
-
Page 96: Load Space Cover
Practical information LOAD SPACE COVER (5 SEAT VERSION) Removing Storing (according to version) Fold the load space cover. A location is provided in the back of the This rigid shelf conceals the objects rear seats to accommodate the load Detach it from the notches A and B stored in the boot.
-
Page 97
Practical information 12 Volt socket (120 W Max) Stowing rings Protective net It is advisable to limit the use of this Use these rings to secure loads on the Open the cover located in the hook socket to avoid discharging the battery. fl… -
Page 98: (7 Seat Version)
Practical information REAR FITTINGS (7 SEAT VERSION) Cup holder 12 volt socket (120 W max) Stowing rings Any liquid carried in a cup (mug or It is advisable to limit the use of this Use the stowing rings on the fl oor to other) on board which could spill, socket to avoid discharging the battery.
-
Page 99
Practical information Seat belts Storage flaps Ensure that the centre seat belt has Raise the corresponding fl ap. Next to the boot sill, the recess is reeled in correctly to its strengthener intended to receive the roller tube on the roof. containing the load space cover. -
Page 100
Practical information LOAD SPACE SCREEN, LOAD SPACE COVER The load space screen is a load space cover of the blind type with roller. Take care not to place heavy objects on the load space cover when unrolled. To install it Place the row 3 seats in the fully folded position. -
Page 101
Practical information The roller is fi tted with three fl aps permitting concealment of the boot, whether the row 2 seats are in the normal position or the comfort position. Each fl ap has two clips which are hooked on the base of each head restraint. -
Page 102: Mirrors
Mirrors and windows MIRRORS Manual door mirrors Electric door mirrors Heated mirrors Move the lever in all four directions to Move the control to the right or to The electric mirrors can be heated. adjust. the left to select the corresponding mirror.
-
Page 103
Mirrors and windows Manual rear view mirror SURVEILLANCE MIRROR REAR WINDOWS The rear view mirror has two positions: This mirror, placed on top of the To partially open the rear windows, tilt central mirror, enables the driver or the lever and push it fully to lock the day (normal), front passenger to observe all the rear windows in the open position. -
Page 104: Electric Windows
Mirrors and windows Lower the window fully, then raise it, it will rise in steps of a few centimetres each time the control is pressed. Repeat the operation until the window is fully closed. Continue to press the control for at least one second after the window closed position has been reached.
-
Page 105: Hazard Warning Lamps
Driving safely DRIVING SAFELY PARKING BRAKE Applying Pull on the parking brake lever, only HAZARD WARNING LAMPS with the vehicle stationary . Pull the parking brake lever up to Press this button, the direction In the exceptional case of use of the immobilise your vehicle.
-
Page 106: Parking Sensors
Parking sensors REAR PARKING SENSORS Engage reverse gear The audible and/or visual rear parking An audible signal confi rms the sensor system consists of four activation of the system by engaging proximity sensors, installed in the reverse gear. rear bumper. The sensors detect any The proximity information is indicated obstacle which enters the fi…
-
Page 107
LED in the button comes on, accompanied by an audible signal and a message in the screen. Contact a PEUGEOT dealer or a qualifi ed workshop. Good practice In bad weather or in winter, ensure that the sensors are not covered with mud, ice or snow. -
Page 108: Anti-Lock Braking System (Abs)
Stop as soon as it is safe to do so. slippery surface, you will then be able In both cases, contact a PEUGEOT to continue to manoeuvre the vehicle dealer or a qualifi ed workshop.
-
Page 109: Asr And Dsc
After an impact, have these systems (50 km/h), wheels, in order to put the vehicle back checked by a PEUGEOT dealer or a on course. qualifi ed workshop. manually by pressing the…
-
Page 110: Grip Control
Driving safely «GRIP CONTROL» On snow, mud and sand, traction Correct use control is obtained by a compromise Your vehicle is designed principally to between safety, grip and traction, drive on tarmac roads but it allows you which is associated with the Michelin ®…
-
Page 111
Driving safely This DSC mode is calibrated This snow mode allows the This sand mode allows a for a low level of skidding, vehicle to adapts its strategy little wheelspin on the two based on different conditions to the conditions of grip driving wheels at the same of grip encountered on the encountered for each of the… -
Page 112: Seat Belts
Seat belts Good practice The driver must ensure that passengers use the seat belts correctly and that they are all strapped in securely before moving off. Wherever you are seated in the vehicle, always fasten your seat belt, even for short journeys. The seat belts are fi…
-
Page 113: Front Seat Belts
4. The airbag warning lamp comes on if the pretensioners are deployed. Contact a PEUGEOT dealer or a In accordance with current safety qualifi ed workshop. regulations, your PEUGEOT dealer In order to be effective, a seat belt…
-
Page 114
Seat belts In row 3 The row 3 seat belts which are not in Rear seat belts use can be stored to clear the load (7 seat version) The two seats are fi tted with three- space and make use of the load space point inertia reel seat belts. -
Page 115: Airbags
Airbags AIRBAGS in the event of a minor or rear In the event of a serious collision, the The airbags have been designed to electronic detectors record and analyse impact and in certain roll-over maximise the safety of the occupants conditions, the airbags will not be the front and side impacts suffered in in the event of a serious collision;…
-
Page 116
If a second impact occurs (during the infl ation of the lateral airbags. Contact occupants and the airbags (a child, same or a subsequent accident), the a PEUGEOT dealer or a qualifi ed pet, object…). This could hinder the airbag will not operate. workshop. -
Page 117: Curtain Airbags
PEUGEOT dealer or a qualifi ed workshop to have the system checked. The airbags may no longer be deployed in the event of a serious impact.
-
Page 118: Passenger’s Airbag
Deployment a rear-facing child seat, contact a then remove the key, keeping the They are deployed simultaneously, PEUGEOT dealer or a qualifi ed switch in the new position. unless the passenger’s front airbag workshop. has been deactivated, in the event of…
-
Page 119: Child Seats
Child safety GENERAL POINTS RELATING TO CHILD SEATS Although one of PEUGEOT’s main criteria when designing your vehicle, the safety of your children also depends on you. For maximum safety, please follow these precautions: all children under the age of 12 or less than one metre fi…
-
Page 120
Refer to chapter 4, «Airbags» section. The child seats function and the passenger’s airbag deativation function are common to the entire PEUGEOT range. If the passenger’s airbag is not deactivated, the installation of a «rearward facing» child seat in the front Passenger airbag OFF is strictly prohibited. -
Page 121
Child safety НИКОГА НЕ инсталирайте детско столче на седалка с АКТИВИРАНА предна ВЪЗДУШНА ВЪЗГЛАВНИЦА. Това можеда причини СМЪРТ или СЕРИОЗНО НАРАНЯВАНЕ на детето. NIKDY neumisťujte dětské zádržné zařízení orientované směrem dozadu na sedadlo chráněné AKTIVOVANÝM čelním AIRBAGEM. Hrozí nebezpečí SMRTI DÍTĚTE nebo VÁŽNÉHO ZRANĚNÍ. Brug aldrig en bagudvendt barnestol på… -
Page 122
Child safety NIEKADA neįrenkite vaiko prilaikymo priemonės su atgal atgręžtu vaiku ant sėdynės, kuri saugoma VEIKIANČIOS priekinės ORO PAGALVĖS. Išsiskleidus oro pagalvei vaikas gali būti MIRTINAI arba SUNKIAI TRAUMUOTAS. NAV PIEĻAUJAMS uzstādīt uz aizmuguri vērstu bērnu sēdeklīti priekšējā pasažiera vietā, kurā ir AKTIVIZĒTS priekšējais DROŠĪBAS GAISA SPILVENS. -
Page 123: Recommended Seats
Child safety CHILD SEATS RECOMMENDED BY PEUGEOT PEUGEOT offers a complete range of recommended child seats which are secured using a three point seat belt : Group 0+: from birth to 13 kg «ROMER Baby-Safe Plus» Installed in the rearward facing position Groups 2 and 3: from 15 to 36 kg «KLIPPAN Optima»…
-
Page 124: Installing
Child safety INSTALLING CHILD SEATS ATTACHED USING THE SEAT BELT In accordance with European regulations, this table indicates the options for installing child seats secured using a seat belt and universally approved in accordance with the weight of the child and the seat in the vehicle. Weight of the child and indicative age Under 13 kg From 9 to 18 kg…
-
Page 125
Child safety «ISOFIX» MOUNTINGS Your vehicle has been approved in two front rings A and B , located a rear ring C , located on the back accordance with the new ISOFIX between the vehicle seat back and of the vehicle’s seat back, for regulation. -
Page 126
Child safety ISOFIX CHILD SEAT APPROVED FOR YOUR VEHICLE This child seat can also be used on ISOFIX RÖMER Duo Plus (size category B1 ) seats which are not fi tted with ISOFIX mountings. In this case, it must be attached to the Group 1: from 9 to 18 kg vehicle seat using the three point seat belt. -
Page 127: Isofi X Seats
Child safety LOCATIONS FOR THE INSTALLATION OF ISOFIX CHILD SEATS In accordance with European regulations, this table indicates the options for the installation of ISOFIX child seats on the vehicle seats fi tted with ISOFIX mountings. In the case of the universal and semi-universal ISOFIX child seats, the child seat’s ISOFIX size category, determined by a letter from A to G , is indicated on the child seat next to the ISOFIX logo.
-
Page 128: Child Lock
PEUGEOT recommends the use of a thrown around the vehicle in the event booster seat which has a back, fi tted Always remove the ignition key when of sharp braking.
-
Page 129
Child safety… -
Page 130: Accessories
Towing a trailer TOWING A TRAILER, CARAVAN, BOAT, ETC… Distribution of loads As the fan is electrically controlled, its cooling capacity is not dependent on Distribute the load in the trailer so For more information about the engine speed. that the heaviest objects are as weights, refer to the administrative close as possible to the axle and You should therefore use a high gear…
-
Page 131
In this case, the air conditioning is your vehicle, and that you entrust the Side wind automatically cut off to save engine fi tting of this equipment to a PEUGEOT power. dealer. Sensitivity to side wind is increased. Drive smoothly and at a moderate If this equipment is not fi… -
Page 132: Other Accessories
(frequency band, maximum output maintenance: standard equipment must be taken into power, aerial position, specifi c account. Please ask a PEUGEOT dealer conditions of installation) of the for more information before fi tting such transmitters which can be fi tted, in Anti-theft alarm, window etching, fi…
-
Page 133
This enables «Fleet» managers to optimise the monitoring and management of their professional vehicles. Depending on country, contact a PEUGEOT dealer for more information. -
Page 134
Partners in performance and protection of the environment Innovation at the service of performance The TOTAL Research and Development teams develop lubricants for PEUGEOT which satisfy the requirements of the latest technical innovations incorporated in PEUGEOT vehicles. This ensures that you obtain the best performance and the maximum engine life. -
Page 135: Opening The Bonnet
Opening the bonnet OPENING THE BONNET On the inside On the outside Bonnet stay Pull the lever below the dashboard Raise the bonnet slightly by reaching Secure the stay in its location, towards you. The bonnet is released. in a fl at hand, palm down, to make identifi…
-
Page 136: Petrol Engine
Under the bonnet PETROL ENGINE Take care when working under the bonnet. 1. Screenwash reservoir. 2. Fusebox. 3. Engine coolant header tank. 4. Brake and clutch fl uid reservoir. 5. Air fi lter. 6. Engine oil dipstick. 7. Engine oil fi ller cap. 8.
-
Page 137: Diesel Engine
Under the bonnet DIESEL ENGINE Take care when working under the bonnet. 1. Screenwash reservoir. 4. Brake and clutch fl uid reservoir. 7. Engine oil fi ller cap. 2. Fusebox. 5. Air fi lter. 8. Power steering fl uid reservoir. 3.
-
Page 138: Levels
These regular maintenance operations will keep your vehicle in good working order. Ask for advice from a PEUGEOT dealer or refer to the servicing and warranty booklet in the handbook pack. If you have to remove / refi t the engine style cover, handle it with care to avoid damaging the fi…
-
Page 139: Cooling System
PEUGEOT dealer or a products of the PEUGEOT range. qualifi ed workshop. Slacken the cap by 1/4 of a turn to…
-
Page 140: Checks
Checks CHECKS Battery At the start of winter, have your battery checked by a PEUGEOT dealer or a qualifi ed workshop. Carbon filter and passenger compartment filter Brake pads An access fl ap allows replacement of Depending on the environment (dusty Brake pad wear depends on the style the fi…
-
Page 141
HDi engines use advanced technology. All work requires special training, which is assured by a PEUGEOT dealer. Only use products recommended Depending on country of sale. by PEUGEOT or products of equivalent quality and specifi… -
Page 142: Fuel
Fuel Filling Quality of the fuel used for petrol engines The fuel tank must be fi lled with the engine off . The petrol engines are perfectly Open the fuel fi ller fl ap. compatible with E10 or E24 type Insert the key, then turn it a quarter petrol biofuels (containing 10 % or turn.
-
Page 143: Fuel Cut-Off
Refer to the «Under the bonnet» re-establish the fuel supply: special servicing conditions. Contact section of chapter 6. a PEUGEOT dealer or a qualifi ed switch off the ignition workshop. (STOP position), The use of any other type of (bio)
-
Page 144: Battery
Operate the starter, let the engine run, remain after doing this, please contact The Stop & Start battery does not have a PEUGEOT dealer or a qualifi ed Wait for the engine to return to idle, to be disconnected for charging. workshop.
-
Page 145
Battery ECONOMY MODE After the engine has stopped, with the key in the ignition position, certain functions (windscreen wiper, electric windows, courtesy lamps, audio equipment, etc.) can only be used for a cumulative duration of thirty minutes, to prevent discharging of the battery. Once the thirty minutes are over, the active functions are put on standby and the battery warning lamp fl… -
Page 146: Puncture Repair Kit
After use, do not discard the bottle compressor pipe before connecting into the environment, take it to a it to the bottle. PEUGEOT dealer or to an specialised 5. Connect the power lead to one of waste disposal site. the vehicle’s 12V sockets.
-
Page 147: Changing A Wheel
On certain types of ground and/ or if considerable loads are being 1. Wheelbrace. transported, call a PEUGEOT dealer or 2. Jack. a qualifi ed workshop. 3. Towing eye. 4. Chock. The jack and the tool kit are specifi c to your vehicle.
-
Page 148
Changing a wheel 3. SPARE WHEEL Open the rear doors to gain access Unscrew the bolt using the Detach the carrier from the hook to the spare wheel. wheelbrace until the carrier is and place the spare wheel near the lowered fully. -
Page 149
Changing a wheel 4. OPERATING PROCEDURE Remove the wheel trim. Place the jack in contact with the Do not extend the jack until you have locating point provided, the one started unscrewing the bolts on the Loosen the wheel bolts and start which is closest to the wheel to wheel to be changed and have placed unscrewing them. -
Page 150
Changing a wheel 5. FITTING THE SPARE WHEEL Position the wheel on the hub and Lower the vehicle completely by Secure the carrier on the hook then start tightening the bolts by hand. folding the jack, then remove the raise the carrier using the bolt and jack. -
Page 151: Removable Snow Screen
Put it in place by pressing at each cooling fan. the original wheel repaired and refi tted clip B located in the four corners. by a PEUGEOT dealer or a qualifi ed workshop as soon as possible. REMOVAL Do not forget to remove the…
-
Page 152: Snow Chains
215/55 R16 215/50 R17 For more information on snow chains, contact a PEUGEOT dealer or a qualifi ed workshop. Avoid driving on roads that have been cleared of snow, to avoid damaging your vehicle’s tyres and the road surface.
-
Page 153: Changing A Bulb
It is normal for condensation to form Type D inside the headlamps. Regular use of Light emitting diode the vehicle eliminates this misting. (LED): for replacement of the daytime running lamps, contact a PEUGEOT dealer or a qualifi ed workshop.
-
Page 154
Changing a bulb FRONT LAMPS 1. Dipped / Main beam headlamps 2. Sidelamps 3. Direction indicators Type C , H4 — 55W Type A , W5W — 5W Type B , PY21W — 21W (amber) — Remove the centre cover by — Remove the cover by pulling the — Remove the cover by pulling the pulling the fl… -
Page 155
Contact a PEUGEOT dealer to Pull the bulb out and change it. bumper, using a Torx 30 screwdriver. ©… -
Page 156
Changing a bulb REAR LAMPS For more information concerning the Identify the faulty bulb then open Move aside the 4 tabs then extract bulbs, refer to the «Types of bulb». the rear doors to 180°. the bulb holder. 1. Brake lamps / sidelamps Refer to the «Access»… -
Page 157
Changing a bulb NUMBER PLATE LAMPS THIRD BRAKE LAMP Type A , W5W — 5W Type A , W16W — 16W With tailgate With hinged doors Unscrew the two nuts. Disengage the plastic lens using a Unclip the interior trim. Push the pins. -
Page 158: A Fuse
For any other work, visit a PEUGEOT dealer or a qualifi ed workshop. Motor trade technicians: for complete information on the fuses Removing and fitting a fuse and relays, refer to the «Repair…
-
Page 159
Changing a fuse DASHBOARD FUSES Fuses Amperes Allocation Tilt the cover to gain access to the fuses. Rear wiper Spare Airbag Air conditioning, diagnostic socket, mirror control, headlamp beam Electric windows Locks Rear courtesy lamp, front map reading lamp, roof console Audio equipment, screen, tyre under-infl… -
Page 160
Changing a fuse PASSENGER COMPARTMENT FUSES Fuses Amperes Allocation Spare Heated seats Spare Folding mirrors relay Refrigeration equipment socket relay… -
Page 161
Changing a fuse FUSES UNDER THE BONNET Fuses Amperes Allocation After opening the bonnet, unclip and tilt the corresponding box to gain access Engine management to the fuses. Horn Front and rear wash-wipe pump Headlamp wash pump Engine components Steering wheel angle sensor, DSC Brake switch, clutch switch Starter Headlamp beam motor, parc management… -
Page 162: A Wiper Blade
Changing a wiper blade CHANGING A WIPER BLADE Placing the windscreen wiper Changing a front wiper blade Changing the rear wiper blade blades in the special position Lift the wiper arm. Lift the wiper arm, then unclip the blade and remove it. Unclip the blade and remove it.
-
Page 163: Being Towed
Having your vehicle towed BEING TOWED From the front When towing with the engine switched off, there is no braking or The towing eye is stored in the tool kit, Unclip the cover by pressing the steering assistance. located under the left-hand seat. bottom part.
-
Page 164: Dimensions
Dimensions…
-
Page 165
Dimensions DIMENSIONS (MM) Overall length 4380 Overall height 1801-1862 Wheelbase 2728 Front overhang Rear overhang without mirrors 1810 Width over panels: with mirrors 2112 Width of front tracks 1505-1507 Width of rear tracks 1554-1556 Row 2 Length of the loading surface to Row 2, seat fully folded 1343 the seat… -
Page 166
Dimensions REAR DOORS (mm) Max threshold with 205/65 R15 tyre and tailgate trim Hinged doors Tailgate Small Large Useable opening height (under panel) 1118 Width 1582… -
Page 167
Dimensions SLIDING SIDE DOORS (mm) Useable height 1009 Useablewidth Height under raised tailgate 1892… -
Page 168: Weights
+ driver (75 kg) + fuel tank and its gross train weight, consult a fi lled to 90%. PEUGEOT dealer. The GTW and towed load values indicated are valid up to a maximum altitude of 1000 metres; the towed load…
-
Page 169: Identifi Cation Markings
Identification markings IDENTIFICATION MARKINGS A. Manufacturer’s plate. B. Serial number. C. Tyres and paint colour code. This is engraved on the front right The label C , on the front door gives: wheelarch. the wheel and tyre sizes, the brands of tyres recommended by the manufacturer, the tyre pressures (the tyre pressures must be checked when…
-
Page 171
EMERGENCY OR ASSISTANCE CALL… -
Page 172: Emergency Or Assistance Call
OPERATION OF THE SYSTEM LED goes off. Cancellation is confi rmed by a voice message . To cancel a call, tell the PEUGEOT CONNECT SOS call centre that the call was a mistake. When the ignition is switched on, the green LED comes on for 3 seconds indicating that the system is operating correctly.
-
Page 173
PEUGEOT Connect N onnect N onnect avigation (RT6) SATELLITE NAVIGATION SYSTEM MULTIMEDIA BLUETOOTH TELEPHONE AUDIO SYSTEM CONTENTS 01 First steps — Control panel 02 General operation 03 Steering mounted controls The system is protected in such a way that it will only operate in your vehicle. -
Page 174
01 FIRST STEPS Selection and confi rmation OK dial: Long press: open the » Audio settings » menu: music ambience, bass, treble, loudness, left/right Selection of an item on the screen or in balance, front/rear fader, automatic volume adjustment. a list or a menu, then confi rmation with a short press. -
Page 175
FIRST STEPS Select: Open the the previous/next line in a list or menu. » Confi guration » menu. Open the the previous / next media folder. » Telephone » menu Long press: access step by step selection of the previous/next radio frequency. to the GPS coverage and display the list of the previous / next MP3 folder. -
Page 176: General Operation
GENERAL OPERATION Press the MODE button several times in succession for access to the following displays: » MAP IN WINDOW » » RADIO » (If navigation guidance in progress) » TELEPHONE » » FULL SCREEN MAP » (If conversation in progress) Changing the audio source: SETUP : PARAMETERS RADIO : RADIO broadcasts.
-
Page 177
GENERAL OPERATION DISPLAY ACCORDING TO CONTEXT Select destination DTMF ring tones A press on the dial gives access to short-cut menus according to the Enter an address Hang up display in the screen. Directory RADIO: MUSIC MEDIA PLAYERS, CD or USB (according to GPS coordinates Activate / Deactivate TA media):… -
Page 178: Steering Mounted Controls
03 STEERING MOUNTED CONTROLS RADIO: change to the next radio station in the list. Long press: automatic search for a higher frequency. RADIO: select the previous/next preset station. CD: select the next track. Select the next entry in the address book. CD: continuous press: fast forward play.
-
Page 179: Audio Settings
04 AUDIO SETTINGS They are accessible by the MUSIC The distribution (or spatialisation using the Arkamys system) of sound system) of sound © © © button in the control panel or by a long is an audio process that allows the audio quality to be adapted to the press on RADIO according to the source number of listeners in the vehicle.
-
Page 180: Navigation — Guidance
NAVIGATION — GUIDANCE Access to the «NAVIGATION» menu Contact a PEUGEOT » » » » » » » » » » » » » » » » » » » » » » » Navigation — guidance Navigation — guidance…
-
Page 181
NAVIGATION — GUIDANCE SELECTING A DESTINATION Selection the town from the list offered, then confi rm. A pre-set list (by entering the fi rst few letters) of the towns in the country selected can be accessed directly by selecting and confi rming » List » on the screen. List «… -
Page 182
NAVIGATION — GUIDANCE SELECTING A DESTINATION TO ONE OF THE RECENT DESTINATIONS TOWARDS A CONTACT IN THE CONTACTS DIRECTORY Press NAV to display the Navigation towards a contact imported from your telephone is only » Navigation — guidance » menu. possible if the address is compatible with the system. -
Page 183
NAVIGATION — GUIDANCE TOWARDS GPS COORDINATES TOWARDS A POINT ON THE MAP With the map displayed, press OK to Press NAV to display the display the contextual menu. Select » Navigation — guidance » menu. » Move the map » and confi rm. Select «… -
Page 184
NAVIGATION — GUIDANCE The points of interest (POI) indicate all of the service locations in the vicinity TOWARDS POINTS OF INTEREST (POI) (hotels, various businesses, airports…). Press NAV to display the Select » Search by Name » to search for POIs by name and not by «… -
Page 185
Restaurant Swimming pool Tourist information, Tourist attraction Cafeteria Winter sports resort Risk area * Bed and breakfast Entertainment, show Airport Cinema * According to availability in the The detailed procedure for updating POIs can be found at «http://peugeot.navigation.com». country. 9.15… -
Page 186
Press NAV to display the » Navigation — guidance » menu. The detailed procedure for updating risk area POIs can be found at www.peugeot.com. Select » Guidance options » and confi rm, then select » Set parameters for risk areas » and confi rm. -
Page 187
05 NAVIGATION — GUIDANCE ADDING A STAGE ORGANISING STAGES Press NAV to display the To organise stages, carry out » Navigation — guidance » menu. operations 1 to 2 again, then select » Order/delete journey legs » and confi rm. Select «… -
Page 188: Route Options
05 NAVIGATION — GUIDANCE ROUTE OPTIONS CALCULATION CRITERIA Select » Defi ne calculation criteria » and confi rm. This function allows modifi cation of: the guidance criteria: (» Fastest Press NAV to display the route «, » Shortest route «, «…
-
Page 189
05 NAVIGATION — GUIDANCE MAP MANAGEMENT SELECTING THE POINTS OF INTEREST DISPLAYED ON THE MAP Select from the various categories the Press NAV to display the ones that you want to display on the » Navigation — guidance » menu. screen. -
Page 190
05 NAVIGATION — GUIDANCE MAP ORIENTATION Select: » Vehicle direction » to have the map follow the direction of travel, Press NAV to display the » North direction » to keep the map » Navigation — guidance » menu. always North up, «… -
Page 191
05 NAVIGATION — GUIDANCE ADJUSTING THE GUIDANCE SPEECH SYNTHESIS The volume setting of guidance messages is also accessible via the ADJUSTING THE VOLUME/DEACTIVATION » SETUP » / » Voice synthesis » menu. The volume of messages can be adjusted during the transmission Select the volume graph and confi… -
Page 192
05 NAVIGATION — GUIDANCE MALE VOICE / FEMALE VOICE Press SETUP to display the confi guration menu. Select » Voice synthesis » and confi rm. Select » Select male voice » or » Select female voice » then confi rm » Yes «… -
Page 193: Traffic Information
06 TRAFFIC INFORMATION Access to the «TRAFFIC INFORMATION» menu » » » » » » » » » » » » » » » » » » Traffi c information Traffi c information Traffi c information Traffi c information Traffi c information Traffi…
-
Page 194
06 TRAFFIC INFORMATION CONFIGURE THE FILTERING AND DISPLAY OF TMC MESSAGES TMC (Traffi c Message Channel) messages contain information on traffi c and weather conditions, received in real time and transmitted to the driver in the form of audible announcements and symbols on the navigation map. The navigation system can then suggest an alternative route to avoid a traffi… -
Page 195
06 TRAFFIC INFORMATION PRINCIPAL TMC SYMBOLS RECEIVING TA MESSAGES The TA (Traffi c Announcement) function gives priority to TA alert Black and blue triangle: general information, for example: messages. To operate, this function needs good reception of a radio station transmitting this type of message. When a traffi c report is transmitted, the current audio source (Radio, CD, USB, …) is Weather reports Traffi… -
Page 196
9.26… -
Page 197: Using The Telephone
07 USING THE TELEPHONE Access to the «TELEPHONE» menu In the top bar of the permanent » » » » » » » » » » » » » » » » » » Telephone Telephone Telephone Telephone Telephone Telephone Telephone Telephone Telephone…
-
Page 198
Bluetooth mobile telephone to the hands-free system of the audio unit must be FIRST CONNECTION carried out with the vehicle stationary . Visit www.peugeot.co.uk for more information (compatibility, additional help, …). Select » Peripherals search » and confi rm. -
Page 199
USING THE TELEPHONE The services available depend on the network, the SIM card and the compatibility of the Bluetooth telephone used. Check the telephone manual and with your network provider for details of the services available to you. Then accept automatic connection on the telephone to allow the The «… -
Page 200
07 USING THE TELEPHONE DIRECTORY / SYNCHRONIZING CONTACTS Select » Import all the entries » to import all the contacts in the telephone and Press PHONE then select » Contacts save them in the system. management » and confi rm. Once imported, a contact remains visible whatever telephone is connected. -
Page 201: Managing Contacts
USING THE TELEPHONE MANAGING CONTACTS Select » Import » to copy one contact to Press PHONE then select » Directory of the system. contacts » and confi rm. Select » Delete » to delete a contact saved Select the desired contact and confi rm. in the system.
-
Page 202: Making A Call
07 USING THE TELEPHONE Use of the telephone is not recommended while driving. We MAKING A CALL recommended that you park safely or make use of the steering mounted controls. CALLING A NEW NUMBER CALLING A CONTACT Press TEL or twice on PHONE . Press PHONE twice.
-
Page 203: Ending A Call
07 USING THE TELEPHONE ENDING A CALL CALLING A RECENTLY ENTERED NUMBER Press PHONE then select » OK » to end the call. Press TEL , select » Call list » and confi rm, Or make a long press on TEL at the steering mounted controls.
-
Page 204: Receiving A Call
07 USING THE TELEPHONE RECEIVING A CALL An incoming call is announced by a ring and a superimposed display on the screen. «Yes » to accept the call is selected by default. Press » OK » to accept the call. Select «…
-
Page 205: Options During A Call
07 USING THE TELEPHONE OPTIONS DURING A CALL * Select » DTMF ring tones » to use the numerical keypad, so as to navigate through the menu of an interactive vocal During a call, press the MODE button server. several times to select display of the telephone screen, then press «…
-
Page 206: Managing Paired Telephones Changing The Ring Tone
USING THE TELEPHONE MANAGING PAIRED TELEPHONES CHANGING THE RING TONE Press PHONE twice. Press PHONE twice. Select » Phone functions » and confi rm. Select » Bluetooth functions «. Select » Ring options » and confi rm. Select » List of the paired peripherals » and confi…
-
Page 207
9.37… -
Page 208: Radio
08 RADIO Access to the «RADIO» menu » » » » » » » » » » » » » » » » » » » FM / AM band FM / AM band FM / AM band FM / AM band FM / AM band FM / AM band FM / AM band…
-
Page 209: Selecting A Station
08 RADIO CHANGING WAVEBAND SELECTING A STATION The external environment (hill, building, tunnel, underground car park…) may interfere with the reception, including in RDS station tracking mode. This phenomenon is a normal result of the way in which radio waves are transmitted and does not in any way indicate a fault with the audio system. The quality of reception is represented by the number of active waves in this symbol.
-
Page 210
RADIO PRESETTING A STATION ACTIVATE / DEACTIVATE RDS RDS, if activated, allows you to continue listening to the same station by automatic retuning to alternative frequencies. However, in certain conditions, coverage of an RDS station may not be assured throughout the entire country as radio stations do not cover 100 % of the territory. -
Page 211
9.41… -
Page 212: Music Media Players
09 MUSIC MEDIA PLAYERS Access to the «MUSIC MEDIA PLAYER» menu » » » » » » » » » » » » » » » » » » » MEDIA MEDIA MEDIA MEDIA MEDIA MEDIA MEDIA MEDIA MEDIA MEDIA MEDIA MEDIA MEDIA…
-
Page 213
09 MUSIC MEDIA PLAYERS CD, MP3 CD / USB PLAYER INFORMATION AND ADVICE The audio equipment will only play audio fi les with «.wma, .aac, .fl ac, The system supports USB mass storage or iPod .ogg and .mp3» fi le extensions and with a bit rate of between 32 Kbps devices via the USB port (suitable cable not supplied). -
Page 214
09 MUSIC MEDIA PLAYERS SOURCES SELECTION OF SOURCE The SOURCE button on the steering mounted controls allows a direct change to the next media source. Insert the CD in the player, insert the USB memory stick in the USB player or connect the «… -
Page 215
MUSIC MEDIA PLAYERS SELECTING A TRACK MUSIC: List of USB or CD tracks or Previous track. folders Next track. Up or down in the list. Previous folder. Confi rm, next menu level. Next folder. Fast forward. Long press Fast backward. Long press Up one menu level. -
Page 216: Audio Streaming
Apple player. player. ® ® ® It is recommended that you activate » Repeat » on the Bluetooth The list of devices compatible with software versions is available from peripheral. PEUGEOT dealers. 9.46…
-
Page 217
09 MUSIC MEDIA PLAYERS USING THE AUXILIARY INPUT (AUX) JACK AUDIO/USB CABLE NOT SUPPLIED Select » Activate / Deactivate AUX input » and confi rm. Connect the portable device (MP3, WMA player…) to the JACK First adjust the volume of your portable auxiliary audio socket or USB port using a suitable cable. -
Page 218: Configuration
10 CONFIGURATION DISPLAY CONFIGURATION Select » Choose colour » and confi rm to Choose colour » and confi rm to Choose colour select the screen colour harmony and the map presentation mode: day mode, Press SETUP to display the » Confi guration » menu. night mode, automatic day/night mode, according to whether the…
-
Page 219: Setting The Date And Time
10 CONFIGURATION SETTING THE DATE AND TIME Select » Synchronize the minutes with GPS » so that setting the Press SETUP to display the minutes is done automatically by satellite reception. » Confi guration » menu. Select the setting to adjust. Confi…
-
Page 220
9.50… -
Page 221: Trip Computer
If, whilst driving, dashes are displayed continuously in place of the remaining. digits, contact a PEUGEOT dealer. The «1» (trip 1) tab with: Current fuel consumption: only calculated and displayed above The average speed, the average 20 mph (30 km/h).
-
Page 222: Screen Menu Map
12 SCREEN MENU MAP Map management MAIN FUNCTION Previous destinations Map orientation Order/delete journey legs OPTION A Vehicle direction Divert route option A1 Chosen destination North direction option A2 Guidance options Perspective view OPTION B… Defi ne calculation criteria Map details «Navigation — guidance»…
-
Page 223: Phone Functions
12 SCREEN MENU MAP Call Phone functions «TRAFFIC» MENU Open Ring options Geographic filter Import Delete calls log Retain all the messages Delete Bluetooth functions Retain the messages Cancel List of the paired peripherals Around the vehicle Contacts management Connect On the route New contact Disconnect…
-
Page 224
12 SCREEN MENU MAP «RADIO» MENU «MUSIC» MENU Bass Treble Change Waveband Change Media Loudness AM / FM Activated / Deactivated Guidance options BT Streaming Distribution USB/iPod Driver All passengers Audio settings Read mode Le-Ri balance Equalizer Normal Fr-Re balance None Random Auto. -
Page 225
12 SCREEN MENU MAP «SETUP» MENU Select language Define vehicle parameters * Français Parking assistance Display configuration English Operation of wipers Choose colour Italiano Engage rear wiper in REVERSE Harmony Portuguese Lighting confi guration Cartography Español Duration of guide-me home lighting Day mode Deutsch Directional headlamps… -
Page 226: Frequently Asked Questions
The POIs have not been selected. Select the POIs in the list of POIs. The POIs have not been downloaded. Download the POIs from the website: «http://peugeot.navigation.com». The risk areas audible The audible warning is not active. Activate audible warnings in the Guidance options warning does not work.
-
Page 227
FREQUENTLY ASKED QUESTIONS QUESTION ANSWER SOLUTION Certain traffi c jams On starting, it is several minutes before the system begins to receive the Wait until the traffi c information is being received along the route are not traffi c information. correctly (display of the traffi… -
Page 228
FREQUENTLY ASKED QUESTIONS QUESTION ANSWER SOLUTION Some contacts are The options for synchronizing contacts are synchronizing the contacts Select «Display SIM card contacts» or «Display duplicated in the list. on the SIM card, the contacts on the telephone, or both. When both telephone contacts». -
Page 229
The aerial is absent or has been damaged (for example when going Have the aerial checked by a PEUGEOT dealer. through a car wash or into an underground car park). I cannot fi nd some radio The station is not received or its name has changed in the list. -
Page 230
FREQUENTLY ASKED QUESTIONS QUESTION ANSWER SOLUTION In changing the setting The selection of an equalizer setting imposes the balance settings. Modify the balance or equalizer settings to obtain of treble and bass the the desired musical ambience. Modifying one without the other is not possible. equalizer setting is deselected. -
Page 231
FREQUENTLY ASKED QUESTIONS QUESTION ANSWER SOLUTION With the engine off, the When the engine is switched off, the system’s operating time depends on Start the vehicle’s engine to increase the battery system switches off after the battery charge. charge. a few minutes of use. The switch-off is normal: the system switches to economy mode and switches off to prevent discharging of the vehicle’s battery. -
Page 232
9.62… -
Page 233: Peugeot Connect Sound
PEUGEOT Connect Sound AUDIO SYSTEM / BLUETOOTH CONTENTS 9.64 01 First steps Your PEUGEOT Connect Sound is coded in such a way that it will only operate in your vehicle. 9.65 02 Steering mounted controls 9.66 03 Main menu 9.67 04 Audio 9.70…
-
Page 234: First Steps
01 FIRST STEPS Display the list of Audio settings: front/ Select source: local stations. rear fader, left/right radio, audio CD / MP3 CD, USB, Select wavebands balance, bass/treble, Long press: CD Jack connection, Streaming, FM1, FM2, FMast loudness, audio tracks or MP3 folders Abandon the current AUX.
-
Page 235: Steering Mounted Controls
02 STEERING MOUNTED CONTROLS Radio: automatic search for a higher frequency. Radio: select the previous/next pre-set CD / MP3 / USB: selection of the next station. track. USB: select genre / artist / folder from the CD / USB: continuous press: fast classifi…
-
Page 236: Main Menu
03 MAIN MENU TELEPHONE : Bluetooth hands-free, AUDIO FUNCTIONS : pairing, management radio, CD, USB, options. of a call. > MONOCHROME SCREEN C TRIP COMPUTER : entering PERSONALISATION- of distances, alerts, status of CONFIGURATION : functions. vehicle parameters, display, languages. >…
-
Page 237: Audio
The external environment (hills, buildings, tunnels, basement car parks, …) 04 AUDIO may block reception, including in RDS mode. This is a normal effect of the way in which radio waves are transmitted and does not indicate any failure of the audio system. RADIO SELECTING A STATION Press the SOURCE button several…
-
Page 238: Playing A Cd
04 AUDIO RECEIVING TA MESSAGES PLAYING A CD The TA (Traffi c Announcement) function gives priority to TA alert Insert circular compact discs only. messages. To operate, this function needs good reception of a Some anti-pirating systems, on original discs or CDs copied using a radio station transmitting this type of message.
-
Page 239
AUDIO MP3 CD MP3 CD PLAYING AN MP3 COMPILATION INFORMATION AND ADVICE Insert an MP3 compilation in the player. The MP3 format, an abbreviation of MPEG 1.2 & 2.5 Audio Layer 3, The audio equipment searches for all of the music tracks, which is an audio compression standard which permits the recording of may take anything between a few seconds and several tens of several tens of music fi… -
Page 240
— digital player or a USB on, the USB source is detected as soon as it memory stick — to your Peugeot Connect Sound is connected. Play begins automatically after a (RD5) and heard via the vehicle’s speakers. -
Page 241
USB PLAYER USING THE PEUGEOT CONNECT USB Press one of these buttons to gain Press and hold LIST to display the access to the previous / next track on different classifi cations. the classifi cation list currently being Select by Folder / Artist / Genre / Playlist, played. -
Page 242
USB PLAYER USING THE AUXILIARY INPUT (AUX) ADJUSTING THE VOLUME OF THE AUXILIARY SOURCE JACK socket or USB port (according to vehicle) The auxiliary input, JACK or USB, allows the connection of a portable device (MP3 player…). First adjust the volume of your portable device. Do not connect a device to both the JACK socket and the USB port at the same time. -
Page 243: Bluetooth
* If your telephone is fully compatible. and the ignition on. Select the telephone to be connected from the list. Only one Go to www.peugeot.co.uk for more information (compatibility, telephone can be connected at a time. more help, …). Activate the telephone’s Bluetooth function A virtual keypad is displayed in the screen: and ensure that it is «visible to all»…
-
Page 244
BLUETOOTH RECEIVING A CALL MAKING A CALL An incoming call is announced by a ring and a superimposed From the Bluetooth telephone function Audio menu, select Manage display in the vehicle’s screen. the telephone call then Call, Call list or Directory. Select the YES tab on the display Press this button for more than two seconds for access to your directory, then navigate with the… -
Page 245: Bluetooth Audio Streaming
BLUETOOTH BLUETOOTH AUDIO STREAMING * Wireless transmission of the telephone’s music fi les via the audio Activate the streaming source by equipment. The telephone must be able to manage the appropriate pressing the SOURCE button ** . Bluetooth profi les (Profi les A2DP / AVRCP). The tracks to be played can be controlled as usual via the buttons on the audio system control panel and…
-
Page 246: Configuration
07 CONFIGURATION SETTING THE DATE AND TIME SCREEN C Press the MENU button. Press to confi rm the selection. Using the arrows, select PERSONALISATION CONFIGURATION. Using the arrows, select ADJUST DATE AND TIME. Press to confi rm the selection. Press to confi rm the selection. Adjust the settings one by one Using the arrows, select DISPLAY confi…
-
Page 247: Trip Computer
After fi lling with at least 10 litres of fuel, the range is recalculated and is displayed when it exceeds 60 miles (100 km). If, whilst driving, dashes are displayed continuously in place of the digits, contact a PEUGEOT dealer. Current fuel consumption: only calculated and displayed above 20 mph (30 km/h).
-
Page 248: Screen Menu Map P
09 SCREEN MENU MAP MONOCHROME A RADIO-CD OPTIONS RDS SEARCH DIAGNOSTICS REG MODE CONSULT MAIN FUNCTION CD REPEAT ABANDON OPTION A RANDOM PLAY OPTION A1 OPTION A2 VEHICLE CONFIG * OPTION B… REV WIPE ACT GUIDE LAMPS * The parameters vary according to vehicle. 9.78…
-
Page 249
SCREEN MENU MAP DISPLAY ADJUST LANGUAGE UNITS TEMPERATURE: °CELSIUS / °FAHRENHEIT YEAR FRANCAIS FUEL CONSUMPTION: MONTH ITALIANO KM/L — L/100 — MPG DATE NEDERLANDS HOUR PORTUGUES MINUTES PORTUGUES-BRASIL 12 H/24 H MODE DEUTSCH ENGLISH ESPANOL 9.79… -
Page 250
09 SCREEN MENU MAP MONOCHROME C Press the OK dial for access to short-cut menus according to the display on the screen: RADIO CD / MP3 CD activate / deactivate Intro activate / deactivate track repeat (of the activate / deactivate RDS current folder / artist / genre / playlist) activate / deactivate track repeat (the activate / deactivate REG mode… -
Page 251: Audio Functions
09 SCREEN MENU MAP MONOCHROME C TRIP COMPUTER AUDIO FUNCTIONS Pressing the MENU button displays: ENTER DISTANCE TO DESTINATION FM BAND PREFERENCES Distance: x miles alternative frequencies (RDS) ALERT LOG activate / deactivate Diagnostic s regional mode (REG) STATUS OF THE FUNCTIONS * activate / deactivate Functions activated or deactivated radio-text information (RDTXT)
-
Page 252
09 SCREEN MENU MAP PERSONALISATION-CONFIGURATION BLUETOOTH TELEPHONE DEFINE THE VEHICLE PARAMETERS * BLUETOOTH CONFIGURATION DISPLAY CONFIGURATION Connect/Disconnect a device video brightness adjustment Telephone function normal video Audio Streaming function inverse video Consult the paired device brightness (- +) adjustment Delete a paired device date and time adjustment Perform a Bluetooth search day/month/year adjustment… -
Page 253: Frequently Asked Questions
FREQUENTLY ASKED QUESTIONS QUESTION ANSWER SOLUTION There is a difference in For optimum sound quality, the audio settings (Volume, Bass, Treble, Check that the audio settings (Volume, Bass, sound quality between Ambience, Loudness) can be adapted to the different sound sources, Treble, Ambience, Loudness) are adapted to the different audio which may result in audible differences when changing source (radio,…
-
Page 254
(no sound, 87.5 Mhz is displayed…). The aerial is absent or has been damaged (for example when going Have the aerial checked by a PEUGEOT dealer. through a car wash or into an underground car park). Sound cut-outs of 1 to… -
Page 255
Exterior EXTERIOR Dimensions 162-165 Remote control 17-18 Changing the battery, reinitialisation Starting Accessories 130-131 Hill start assist Central locking / unlocking 17, 26 Zenith roof 87-88 Roof bars 91, 92 Rear lamps, direction indicators 49-50, 154-155 3rd brake lamp Wiper blades Changing rear Door mirrors bulbs… -
Page 256
Instruments and controls INSTRUMENTS AND CONTROLS Instrument panels, screens, dials 27-28 Warning lamps, indicator lamps 29-34 Indicators, fuel gauge 35, 38-39 Setting the time in the instrument panel Lighting dimmer Gear shift indicator 40-41 Wiper controls 52-53 Automatic rain sensitive wipers Lighting controls 49-51 Screenwash / headlamp… -
Page 257
Instruments and controls INSTRUMENTS AND CONTROLS Instrument panels, displays, screens, dials 27-28 Warning and indicator lamps 29-34 Indicators, gauge 35, 38-39 Wiper control stalk 52-53 Setting the time at Automatic wipers the instrument panel Sreenwash / headlamp Lighting dimmer wash 53, 137 Gear shift indicator 40-41… -
Page 258
Child surveillance mirror Screens, display 27, Section 9 Setting the time in the screen Section 9 In-car technology Section 9 — PEUGEOT Connect Navigation (RT6) «Grip control» 108-109 — PEUGEOT Connect Sound Deactivating the passenger’s airbag Emergency or roadside assistance call… -
Page 259
Setting the time in the screen Section 9 Emergency or Technology on-board Section 9 assistance call Section 9 — PEUGEOT Connect Navigation (RT6) — PEUGEOT Connect Sound (RD5) «Grip control» 108-109 Electronic gearbox 41-43 Front fi titngs 83-85 Heating, ventilation… -
Page 260
Interior INTERIOR Rear view mirror Toll cards, car park tickets Front seats, adjustments, Front courtesy lamp head restraint 66-67 Changing courtesy lamp bulbs Front, lateral, Seat belts 97, 110-112 curtain airbags 113-116 Passenger’s airbag deactivation Battery, charging, starting Opening the bonnet Child seats 117-122, 126 Rear bench seat… -
Page 261
Interior INTERIOR Accessories Rear view mirror Toll payment, parking Front interior lamp Front seats, adjustment, Changing interior lamp bulbs head restraints 66-67 Seat belts 97, 110-112 Airbags, front, lateral, curtain 113-116 Deactivating the passenger’s airbag Opening the bonnet Battery, charging, starting Child seats 117-122, 126 ISOFIX mountings… -
Page 262: Maintenance
Technical data — Maintenance TECHNICAL DATA — MAINTENANCE Levels 136-137 Warning lamps 29-34 — Diesel additive, — engine oil dipstick, — power steering fl uid, — brake fl uid, — coolant. Identifi cation markings, serial Bleeding water, Diesel fi lter number, paint code, tyres Snow chains Engine fuses…
-
Page 267
This handbook describes all of the Automobiles PEUGEOT declares, equipment available in the whole by application of the provisions range. of the European regulation (Directive 2000/53) relating to End Your vehicle will be fi tted with some of Life Vehicles, that it achieves the… -
Page 268
Anglais AN. 14PAR.0040 www.peugeot.com…
Комментариев об этом автофайле пока нет, оставьте первый.
Материал предоставляется исключительно в целях ознакомпления и стимулирования приобретения оригинального продукта.
Администрация Автофайлов отказывается от какой-либо ответственности за содержание и последующее использование скачанных файлов.
Для авторов и правообладателей. Если Вы не согласны с размещением своего материала на страницах ресурса, просто сообщите нам об этом посредством обратной связи, чтобы удалить его.
Информация об автофайле
Описание автофайла
- 0
| Дата: | 20 января 2012 |
| В разделе: | Руководства ремонт |
| Загрузил: | crab_ |
| Скачиваний: | 4 116 |
| Теги: | |
| Рейтинг: |
|
Инструкции по ремонту Peugeot Partner Tepee с 2008 г. дизель 1,6 HDi. Руководство по эксплуатации.
Электрические схемы (приведены для модели с кондиционером, ECP, ABS, дополнительным обогревом, ).
Год выпуска: c 2008 г.
Издательство: Пежо
Формат: PDF , программа для открытия PDF
Внимание! У Вас нет прав для просмотра скрытого текста.
Качество: Изначально компьютерное (eBook)
Язык авто-книги : Русский
размер : 54 мб.
Внимание! У Вас нет прав для просмотра скрытого текста.
Внимание! У Вас нет прав для просмотра скрытого текста.
.
.
Скачать Peugeot Partner Tepee с 2008 г. дизель 1,6 HDi 90 лс. Инструкции по ремонту.: с облака / торрента
Скачать из облачного хранилища
Обсуждение:
Требуется руководство для вашей Peugeot Partner (2020)? Ниже вы можете просмотреть и загрузить бесплатно руководство в формате PDF. Кроме того, приведены часто задаваемые вопросы, рейтинг изделия и отзывы пользователей, что позволит оптимально использовать ваше изделие. Если это не то руководство, которое вы искали, – свяжитесь с нами.
Ваше устройство неисправно, и в руководстве отсутствует решение? Перейдите в Repair Café для получения бесплатных ремонтных услуг.
Руководство

Рейтинг
Сообщите нам, что вы думаете о Peugeot Partner (2020), оставив оценку продукта. Хотите поделиться вашими впечатлениями от данного изделия или задать вопрос? Вы можете оставить комментарий в нижней части страницы.
Довольны ли вы данным изделием Peugeot?
Да Нет
Будьте первым, кто оценит это изделие
0 голоса
Часто задаваемые вопросы
Наша служба поддержки выполняет поиск полезной информации по изделиям и отвечает на часто задаваемые вопросы. Если вы заметили неточность в наших часто задаваемых вопросах, сообщите нам об этом с помощью нашей контактной формы.
В моей машине есть цепь ГРМ. С каким интервалом ее нужно менять? Проверенный
При нормальной эксплуатации цепь ГРМ должна прослужить весь срок службы автомобиля и не нуждается в замене.
Это было полезно (2409)
Почему я не могу открыть одну или несколько дверей изнутри? Проверенный
Вероятно, в машине активирован детский замок. Обычно его можно разблокировать с помощью механизма в двери.
Это было полезно (761)
Как часто следует менять масло? Проверенный
Практически для каждого автомобиля есть свои точные рекомендации, однако в целом масло разумно менять каждые 10 000–15 000 км пробега или один раз в год. Загрязненное масло может со временем серьезно повредить двигатель.
Это было полезно (643)
Когда следует отключать подушку безопасности сбоку от пассажирского сиденья? Проверенный
При движении с ребенком в автокресле на пассажирском сиденье необходимо выключить подушку безопасности с этой стороны. Это также рекомендуется для детей до 12 лет, которые размещаются на пассажирском сиденье. Это необходимо для предотвращения травм в случае аварии.
Это было полезно (582)
Ключи от машины больше не будут открывать машину на расстоянии, почему? Проверенный
Автомобильные ключи, которые можно разблокировать на расстоянии, обычно работают от аккумулятора. Когда он закончится, ключ перестанет работать. Замените аккумулятор и попробуйте еще раз.
Это было полезно (576)
Приведет ли более низкое давление в шинах к большему сцеплению с дорожным покрытием при езде по снегу? Проверенный
Нет, несмотря на то что при снижении давления пятно контакта шин с дорогой увеличивается, автомобиль становится менее устойчивым. Садитесь за руль, только если в шинах правильное давление!
Это было полезно (330)
Я залил в машину не то топливо, что мне делать? Проверенный
Не садитесь за руль! Неважно, заливаете ли вы дизельное топливо в автомобиль с бензиновым двигателем или бензин в автомобиль с дизельным двигателем. В обоих случаях это может привести к повреждению машины и / или других частей автомобиля. Обратитесь в службу технической поддержки на дорогах.
Это было полезно (219)
Где я могу найти VIN-номер моей машины? Проверенный
Это может варьироваться в зависимости от марки и модели, но на многих автомобилях номер VIN можно найти на дверном косяке, под капотом или на металлическом полу переднего сиденья.
Это было полезно (184)
Как часто нужно менять щетки дворников? Проверенный
Желательно заменять щетки стеклоочистителя не реже одного раза в год. Признаками необходимости замены лезвий являются полосы, дымка, шум или отслоение резины.
Это было полезно (160)
Сколько миль в одном километре? Проверенный
1 километр равен 0,621 мили. 10 километров равны 6,21 мили. 1 миля равна 1,609 километра. 10 миль равны 16,09 километра.
Это было полезно (137)
Какой номер VIN? Проверенный
VIN означает идентификационный номер автомобиля и является уникальным номером, который есть у каждого автомобиля. Это делает автомобиль не идентифицируемым, например, после аварии или в случае отзыва. Это также позволяет идентифицировать автомобиль в случае отсутствия номерных знаков.
Это было полезно (135)
Могу ли я использовать дворники, когда на лобовом стекле обледенел? Проверенный
Нет, это не рекомендуется. Лед острый и может повредить резину на щетках стеклоочистителя.
Это было полезно (132)
Какие модели Peugeot подходят для езды на E10? Проверенный
Peugeot заявляет, что все модели с бензиновым двигателем, построенным в 2000 году или позже, могут ездить на E10.
Это было полезно (35)


