- Manuals
- Brands
- CF MOTO Manuals
- Motorcycle
- 150NK
- Owner’s manual
-
Contents
-
Table of Contents
-
Bookmarks
Quick Links
150
NK
CF150-3A
OWNER’S MANUAL
Related Manuals for CF MOTO 150NK
Summary of Contents for CF MOTO 150NK
-
Page 1
CF150-3A OWNER’S MANUAL… -
Page 2
Foreword This manual mainly introduce how to use and maintenance CF150-3A motorcycle. Please read the manual carefully before your fist ride. Proper riding and maintenance can effectively ensure traffic safety, reduce the trouble of motorcycle, keep the best performance and extend the service life of the vehicle. CFMOTO service station will provide the best after-sale service for you. -
Page 3
NOTE Ensure to follow your local traffic regulations and laws when riding. Always operate the motorcycle as per the instructions in this owner’s manual. This manual should be considered as a permanent part of the motorcycle and should remain with the — motorcycle when resold. -
Page 4: Table Of Contents
CONTENT 1.CF150-3A motorcycle overview………………5 2.User instruction………………….7 3.Transportation, storage and unpacking ……………..8 4.Safe riding 4.1 Rules for safe riding ……………………..9 4.2 Protective riding gear ……………………10 4.3 Modification ……………………….. 11 4.4 Loading ……………………….12 4.5 Accessories ………………………..12 5. . owner’s instruction 5.1 Parts position ………………………13 5.2 Dashboard and ignition switch ………………….16 5.3 Handlebar switch RH ……………………19 5.4 Handlebar switch LH ……………………20…
-
Page 5
6. . Operation guide 6.1 Brake-in period ……………………..26 6.2 Inspection before riding ……………………27 6.3 Starting the motorcycle ……………………28 6.4 Riding the motorcycle ……………………29 7. . Maintenance and service 7.1 Periodic maintenance chart………………….32 7.2 Engine oil inspection and change………………..42 7.3 Spark plug selection and replacement………………..43 7.4 Air filter cleaning and installation…………………44 7.5 Throttle grip inspection and adjustment ………………45 7.6 Clutch adjustment ……………………..46… -
Page 6: Cf150-3A Motorcycle Overview
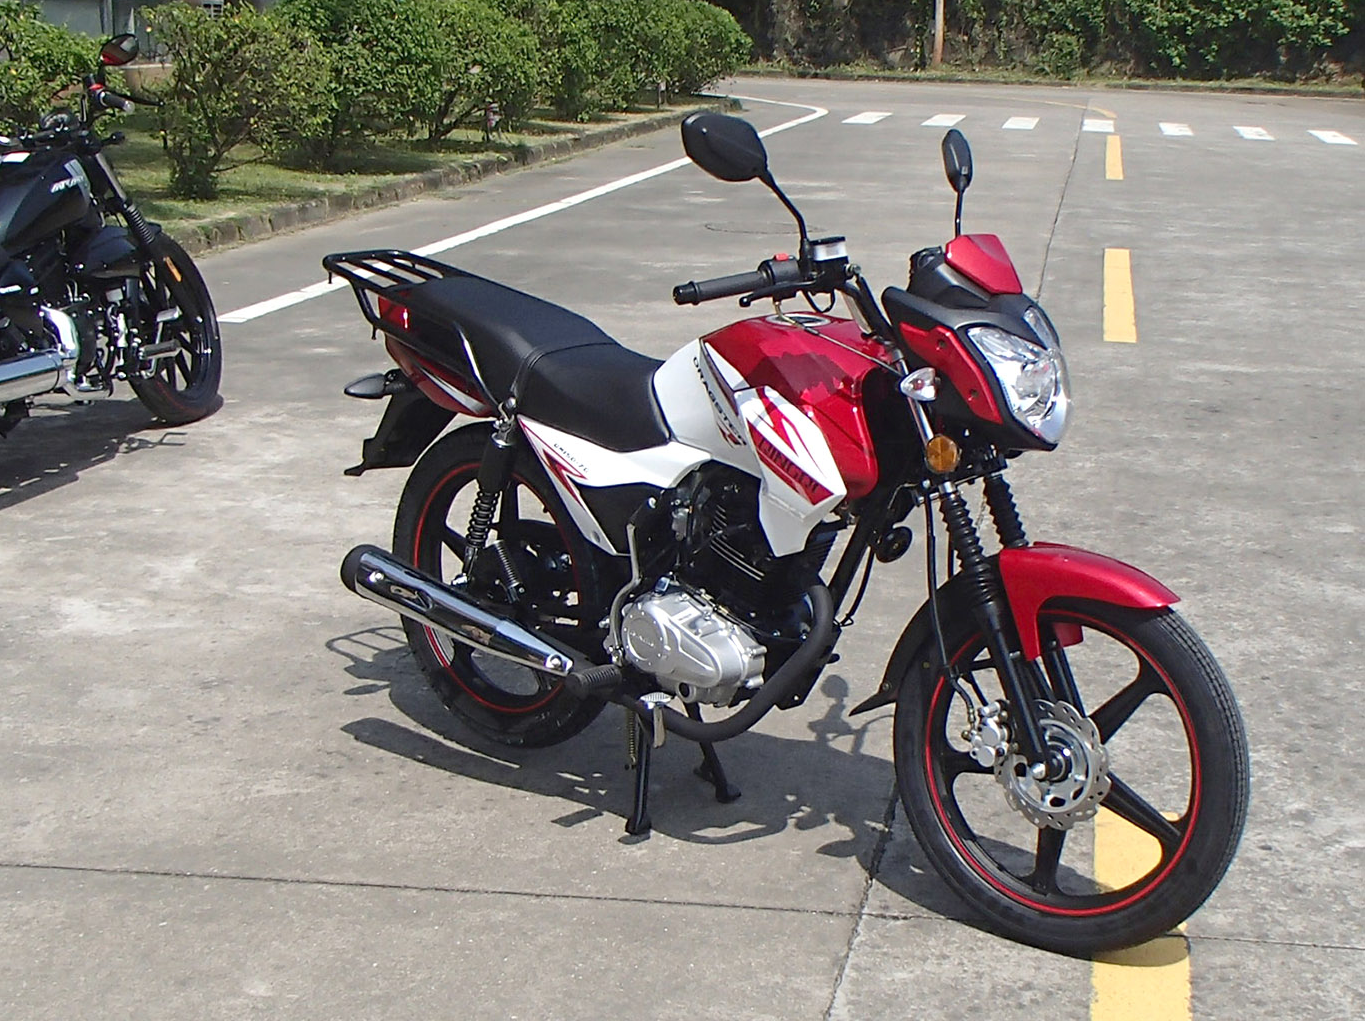
1. CF150-3A motorcycle overview CF150-3A is a motorcycle of unique style with compact structure for comfortable and stable riding. This model is equipped with the latest CFMOTO liquid-cooled engine and electronic fuel injection system. Therefore, it’s more environment- friendly, low fuel consumption and low exhaust emission. It meets the CNS IV emission standard.
-
Page 7
1.2.4. Top liquid-cooled technology. CFMOTO, a company which is specialized in production of liquid-cooled engine, is the top-level manufacturer in China. Compared to same displacement of air-cooled engine, engine cooling effect is better, oil temperature can be adjusted more freely, more powerful and lower fuel consumption, longer engine service life. -
Page 8: User Instruction
2 User Instruction 2.1. Loading specification: CF150-3A two — wheel motorcycle is permitted to carry two people (including one driver and one passenger). Maximum Load Capacity: Max 150kg. 2.2. Fuel Fuel type: 93# gasoline. Since gasoline is extremely flammable, if the fuel tank, fuel filter, fuel line, throttle body and other parts of the vehicle cause fuel leakage due to damage and aging, the users should not use the vehicle before repair and troubleshooting.
-
Page 9: Transportation, Storage And Unpacking
3 Transportation, Storage and Unpacking (1). The motorcycle (with package) should be fixed firmly on the transport vehicle and without scratches and damaging during transport. (2). The motorcycle (with package) should be stored in a clean, ventilated, dry, sun and rain-proof warehouse , while it shouldn’t be stored with flammable materials, chemical corrosive substances and other harmful items .
-
Page 10: Safe Riding
4 Safe Riding The motorcycle is two- wheel motor-driven vehicle, which can bring convenience and rapidness to the driver. To ensure the best performance of the motorcycle, maintain and service the vehicle properly. The vehicle must be in safe and normal conditions. The driver should be healthy when riding the motorcycle to ensure that the motorcycle can be controlled in the best state.
-
Page 11: Protective Riding Gear
5. Use care when driving in corners, crossroads, the entrance and exit of parking lot, highway or other roads with obstacles in front. 6. Keep hands on the handlebar and both feet on the left and right front foot rests when riding. The passenger should hold the hand grip or wrap driver’s waist and keep both feet on the left and right rear foot rests.
-
Page 12: Modification
4.3 Modification NOTE: 1、Modification or retrofit of your motorcycle could not ensure your safety or it’s even illegal. Users must comply with the vehicle’s regulations issued by traffic management department. 2. To ensure that the emission of the vehicle meets National Phase 3 Standards, the user should not retrofit or disassemble the following parts without authorization.
-
Page 13: Loading
4.4 Loading NOTE: The distribution of goods weight is specified. Improper loading may affect the vehicle performance and cause riding instability. When loading the goods: 1. The center (center of gravity) of the goods should be low and near to the center of the vehicle. 2.
-
Page 14: Owner’s Instruction
5. Owner’s instruction 5.1 Parts position 1.(Pic 1): · ①Headlight ②F ront turn signal light LH ③V ehicle stamp plate ④Rearview mirror LH ⑤A ir filter under the seat ⑥E ngine serial number (on the right) ⑦S hift lever ⑧L eft front foot rest ⑨Side stand left ⑩Rear foot rest ⑪…
-
Page 15
2.(Pic 2): · ①T aillight / brake light ②Rear turn signal light, RH ③Rear brake caliper ⑭ ⑮ ④Muffler ⑯ ⑤Rear foot rest RH ⑥Rear shock absorber ⑦F ront foot rest LH ① ⑧Rear brake pedal ⑨T hrottle body ② ⑩F uel tank cap ⑪… -
Page 16
3、Front vehicle body(Pic 3): · ① Clutch lever ② Handlebar switch comp LH ③ Dashboard ④ I gnition switch lock comp. ⑤ Handlebar switch comp RH ⑥ F ront brake lever ① ② ③ ④ ⑤ ⑥ ⑦ ⑦ T hrottle grip Pic 3 Front vehicle body 4. -
Page 17: Dashboard And Ignition Switch
5.2 Dashboard and ignition switch [Dashboard] Parts below attached on dashboard Thermo indicator ① ABS indicator Gear indicator ② High beam indicator Speedometer ③ Fuel gauge Turning indicator RH ④ Neutral indicator Odometer ⑤ Turning indicator LH Overriding indicator ⑥ EFI trouble indicator Engine speed meter Thermo gauge indicator…
-
Page 18
LED shifting function table Function Display Result Odometer Short press Shift to fuel level Fuel level Short press Shift to clock time Rider Information Clock Short press Shift to battery voltage Center shifting Battery voltage Short press Shift to coolant temperature Coolant temperature Short press Shift to Odometer… -
Page 19
[Ignition switch] Ignition switch is located in front of the fuel tank(See Page 15 Pic 3),Turn on the Ignition switch before start the motorcycle. Positions and functions of the key are shown in table 2: Table 2 Key position Key state Function Entire circuit is open and engine can’t be started. -
Page 20: Handlebar Switch Rh
5.3 Handlebar switch RH(Pic 6) ① · ① Engine stop switch ② Headlight and position light switch ③ Start button ② ③ Pic 6 Handlebar switch RH [Engine stop switch] Engine stop switch has to positions: ” and » » . “…
-
Page 21: Handlebar Switch Lh
5.4 Handle bar switch LH(Pic 7) ③ ④ ⑤ · ①Horn button ②S teering signal switch ③B eam switch ④Overtake indicating switch ⑤Mode switch ② [Overtake indicating switch] Pic 7 Handle bar switch LH With the ignition switch on, press the overtake light switch and the overtake light (high beam) is on. To turn off the overtake light, release the overtake light switch and it returns to original position.
-
Page 22: Fuel And Fuel Tank Cover
If needs right turn, set the switch to » «Position;The steering signal lights RH. and the RH indicator When position back to middle. The steering signal lights and indicators are off Warning: If you are on turning or lane changing. Turn the signal light on and make sure the vehicle totally turned or lane changed, Then turn off the switch [Mode switch] When the switch on E(Eco-mode)Position.
-
Page 23: Lubricant
WARNING: To avoid the vehicle running out of fuel resulting in a sudden stop and to protect the fuel pump,refuel in time when the fuel gauge is close to the pointer E. 5.6 Lubricant Oil is a key factor which affects the service life and operation status. Always select proper engine oil for your vehicle.
-
Page 24: Tire
5.7 Tire(Pic 10) Proper tire pressure assures stability, comfort and durability. Tire pressure should be inspected when tire is cold. Tire size and tire pressure refer to table 4: Table 4 Single ride Double ride Cold tire Pressure p s i k P a p s i k g f / c m…
-
Page 25: Passenger Armrest And Footrest Kit
5.8 Passenger Armrest And Footrest Kit Passenger armrest is the holding part mounted on motorcylce for passenger to hold during driving, including strap and handle. Footrest is the pedal part mounted on motorcycle for driver and passenger to treadle. -24-…
-
Page 26: Tool Kit
5.9 Tool Kit The tool kit 1 is located under the seat. With these tools, you can maintain, disassemble and assemble some vehicle parts. -25-…
-
Page 27: Operation Guide
6 Operation Guide 6.1 Brake in Period Break-in period is defined as a treatment which is carried out in the first distance of operation for new vehicle, so as to ensure the working surface between two parts to be in the optimized mating status. Mileage in Break-in period for the new vehicle: 1000km NOTE:…
-
Page 28: Inspection Before Riding
NOTE 1.always chec the engine oil after the engine is warmed up. 2.contact cfmoto ser ice station immediately for inspection or repair if the engine is damagad in brea in period. .ride the motorcycle to the ser ice station for maintenance after the brea in period is completed.
-
Page 29: Starting The Motorcycle
6.3 Starting the motorcycle(See pic 11) ①Clutch lever ②Engine stop switch ③Throttle ④Ignition switch ⑤Side stand switch ⑥Side stand Pic 11 Start preparation [Starting pre-pare] 1. Turn on ④ ignition switch. Turn the ignition switch to » » Position. Switch ② ignition switch to position»…
-
Page 30: Riding The Motorcycle
NOTE 1. Allow the engine to warm up for 2-5 minutes before riding the motorcycle. » Start button. release the button immediately for 3 to 5 seconds 2. When press the » Before next attempt or the battery life period affect 3.
-
Page 31
3. When the motorcycle is running stably, lower the engine speed and then disengage the clutch. Using left foot, hook the shift arm → → ← → ← → ← → ← → ← → ← up to shift the transmission to the second gear ②, then gradually ←… -
Page 32
1.Use the front and rear brake simultaneously to decelerate. (Apply both the front and rear brakes slowly. Do not apply the front and rear brakes separately.) 2. In emergency and hazardous situations, turn off the kill switch and apply both the front and rear brakes to stop the vehicle. -
Page 33: Maintenance And Service
7 Maintenance and Service 7.1 Periodic maintenance chart The motorcycle should be maintained according to the time and mileage prescribed in Maintenance Schedule. Clean the vehicle before maintenance. Cautions ► = Severe Use Item. Reduce interval by 50% on vehicles subjected to severe use. ■…
-
Page 34
Break-in Maintenance Schedule Break-in Maintenance Interval (Service whichever interval comes first) Item Hour Calendar Remarks Engine Engine oil and oil filte 1000 Replace ■ Oil strainer 1000 Clean ■ Idle 1000 Coolant 1000 ■ Inspect Throttle system 1000 Valve clearance 1000 Electrical system Functions of electrical parts… -
Page 35
Break-in Maintenance Interval (Service whichever interval comes first) Item Hour Calendar Remarks Brake system Brake discs 1000 Brake pads 1000 Inspect Brake fluid leve 1000 Inspect for damage Brake hoses 1000 and sealing Brake lever 1000 Inspect for free play ■… -
Page 36
Break-in Maintenance Interval (Service whichever interval comes first) Item Hour Calendar Remarks Cooling system Coolant level 1000 Coolant 1000 Inspect ■ Radiator fan function 1000 ■ Steering system Steering bearings 1000 Inspect ■ Other parts Diagnosis connector 1000 Read with PDA ■… -
Page 37
Periodic Maintenance Schedule Periodic Maintenance Interval (Service whichever interval comes first) Item Hour Calendar Remarks Engine Engine oil and oil filte 5000 Replace Oil strainer 5000 Clean Clutch 5000 ■ Inspect Idle 10000 Coolant 35000 Replace ■ Throttle system 5000 Inspect 5000 Inspect and clean… -
Page 38
Break-in Maintenance Interval (Service whichever interval comes first) Item Hour Calendar Remarks Electrical system Functions of electrical parts 10000 ■ Battery 5000 Inspect Fuses or circuit breakers 5000 Inspect for damage, Wires 10000 ■ bending and routing Wheels 7500 Tire condition 15000 7500 Inspect… -
Page 39
Periodic Maintenance Interval (Service whichever interval comes first) Item Hour Calendar Remarks Brake system 7500 Front and rear brake system 15000 7500 Brake discs 15000 Inspect 7500 ► Brake pads 15000 7500 Brake fluid leve 15000 7500 Inspect for damage Brake hoses and sealing 15000… -
Page 40
Periodic Maintenance Interval (Service whichever interval comes first) Item Hour Calendar Remarks Suspension system 7500 Suspension system Inspect ■ 15000 7500 I n s p e c t f o r l e a k i n g (maintain the parts Rear shock absorber and front forks ■… -
Page 41
Periodic Maintenance Interval (Service whichever interval comes first) Item Hour Calendar Remarks Frame system Frame 30000 Inspect Steering system 7500 Steering bearings Inspect ■ 15000 Chain 7500 Chain, rear sprocket and engine ► Inspect sprocket 15000 ► = Severe Use Item. Reduce interval by 50% on vehicles subjected to severe use. ■… -
Page 42
Periodic Maintenance Interval (Service whichever interval comes first) Item Hour Calendar Remarks Other parts 7500 Diagnosis connector Read with PDA ■ 15000 7500 Lubricate; inspect for Mobile parts ■ flexibilit 15000 7500 Bolts and nuts Inspect for fastness ■ 15000 7500 Inspect for damage, Cables and wires… -
Page 43: Engine Oil Inspection And Change
7.2 Engine oil inspection and change The function of engine oil: reducing friction, sealing, cooling parts, cleaning parts, rust-proof and other effects. Engine oil with poor quality, excessive service life, or insufficient amount, will accelerate the wear of engine parts and reduce the service life of engine. What’s worse, it could cause the engine temperature to be excessively high, clutch wear or burning out, power decrease, abnormal sound, high oil consumption and so on.
-
Page 44: Spark Plug Selection And Replacement
4. When changing oil, place a container under the engine, remove the drain plug and unscrew the three nuts to take out the oil filter cover, springs filter. 5. Clean the oil drain plug and oil filter cover after draining the oil. Replace the oil filter and inspect the oil seal.
-
Page 45: Air Filter Cleaning And Installation
7.4 Air filter cleaning and installation Air filter element Pic 17 Air filter position 1.The air filter should be periodically maintained(Page 29 table 5).If the motorcycle works in high temperature or dusty environment, the air filter cleaning or replacement interval should be shortened. 2.
-
Page 46: Throttle Grip Inspection And Adjustment
7.5 Throttle grip inspection and adjustment ③Lower adjusting nut ④Locking nut [Throttle cable inspection] 1. Turn the handlebar from left maximum to right maximum to check if it’s normal and if the stopper is reliable. 2. Open and close the throttle grip through the entire travel to check if it’s free of binding.
-
Page 47: Clutch Adjustment
7.6 Clutch adjustment The clutch of this vehicle is manually operated. Clutch lever ⑤: ⑤Clutch lever free play is: 1 0mm ~ 2 0mm. The function of clutch is to transmit the power of the engine to the gearbox and to cut off the engine power transmission when necessary.
-
Page 48: Driving Chain Inspection Adjustment And Lubricate
7.7 Drive chain inspection, adjustment and Lubrication [Driving chain inspection and lubrication] Driving chain is comprised of a number of moving parts. The service life of chain depends on good lubrication and proper adjustment. If the chain maintenance and service is neglected, it could lead to premature wear of the chain and chain sprockets.
-
Page 49: Abs Braking
[Drive chain adjustment and replacement] Adjustment: 1. Park the motorcycle using the main stand (optional). Shift to neutral and shut off the engine (ignition key removed). 2. Loose rear wheel axle nut adjust ⑤ adjusting to adjust the chain tension to specification 10mm~20mm. Both chain adjusters should point to the same adjustment scale ⑥.
-
Page 50
Brake pad frictional layer 1m m Braking fluid Follow the maintenance form to check the front and rear braking fluid level in reservoir and replace the braking fluid. If braking fluid polluted or water into it. Braking fluid needs replaced. Use DOT4 braking fluid only. -
Page 51
Braking fluid level check Inspect the front and rear braking fluid level to make sure it is between upper and lower line. When the brake fluid level goes down, it causes the negative pressure inside Reservoir lower line the fluid reservoir, which may lead to reservoir sag. -
Page 52
Replace braking fluid Please invite authorized dealer to replace front and rear braking system. Brake disc and pad will be worn in long working period. It needs inspected or replaced in maintenance period. DANGER If breaking lever or pedal feels soft in handling. The braking hoses may have air-resistor or braking fluid is not enough. -
Page 53: Maintenance Of Battery
7.9 Maintenance of battery Note: The user should ensure that the battery is fully charged. Otherwise the battery could be damaged. If the vehicle is not used frequently, check the battery voltage with a voltmeter every week. If the battery voltage is lower than 12.8 V, charge the battery with a suitable charger (consult CFMOTO service station).If the vehicle is not used for more than two weeks, charge the battery with a suitable charger.
-
Page 54
WARNING: Never remove the battery seal strip, otherwise the battery will be damaged. Do not install unspecified battery on this vehicle, otherwise electrical system could be adversely affected. 1. Battery electrolyte could generate flammable gases under certain conditions. Always keep the battery away from sparks, flames and cigarettes. -
Page 55
[Battery inspection and maintenance] When the motorcycle is not used for a long period, the battery should be removed from the motorcycle to be charged and stored. It should be charged periodically. To remove the battery, disconnect the negative cable ━ first. Clean the battery positive ╋… -
Page 56: Efi System And Evap
7.10 EFI system and EVAP To fully meet the country’s National I V emission standards,CF150-3A equipped with EFI system and EVAP which banner in national and same with europe. [EFI system & EVAP] 1、EFI system & EVAP includes the following components(Pic 25): ·…
-
Page 57
2. ECU fault code table and fault types CF150-3A use EFI engine . The trouble indicator is down to Left side of the dashboard. The flashing shows the ECU got trouble code. Use PDA can read the trouble code. If the fuel injection indicator light blinks, have the motorcycle checked by CFMOTO WARNING:… -
Page 58: Engine Cooling System Operation And Maintenance Instruction
7.11 Engine cooling system operation and maintenance instruction [Cooling system] Radiator is located in front of engine. Clean the dust and dirt on the radiator fins regularly according to the road conditions. Coolant type Use only high-quality ethylene glycol based antifreeze with corrosion inhibitors, which is specifically designed for aluminum engines.
-
Page 59: Vehicle Cleaning And Storage
Note : If coolant change is required or the cooling system leaks, go to CFMOTO service station for service. 7.12 Vehicle cleaning and storage [Vehicle cleaning] Motorcycle should be cleaned periodically to check damage, wear or leakage of the vehicle in time. When cleaning, rinse with clean water.
-
Page 60: Vehicle Service Life And Disposal
[When the vehicle is used again after storage] 1. Remove the motorcycle cover and clean motorcycle. 2. Inspect the battery voltage, if the voltage is below 12.8V, fully charge the battery and install the battery. 3. Clean up the anti-rust agent inside the tank and add fresh fuel. 4.
-
Page 61: Adjustment Data Of Motorcycle
7.14 Adjustment data of Motorcycle Front brake free play: 10mm~20mm Rear brake free play: 10mm~20mm Chain tension:10mm~20mm Intake and exhaust valve clearance:0.10mm~0.15mm Torque of handlebar clamp bolts :10N·m~14N·m Torque of front axle nut:50N·m~80N·m Torque of rear axle nut:50N·m~80 N·m Torque of front shock absorber and upper plate bolt:10N·m~14N·m Torque or front shock absorber and steering column bolt:20N·m~25 N·m Torque of engine mounting nut :M8:20N·m~30 N·m,M10:34N·m~40 N·m…
-
Page 62: Main Technical Specifications Of Cf150-3A
7.15 Main technical specifications of CF150-3A Model Data CF150- ZHE JIANG CFMOTO POWRE CO.LTD Make Model CF150-3A Standard Q/CFD 013 Brand CFMOTO Type General motorcycle Specifi- LCEPDKLA××××××××× cations Allowed load of people 2 people (one driver and one passenger) Steering type Steering handle Transmission Six-speed…
-
Page 63
Model data CF 150- Vertical, single-cylinder, four-stroke, liquid-cooled Engine type Engine model 157MJ-3 Compression ratio 10.5:1 150mL Displacement Engine Maximum net power 8.8kW 8500 r/min Maximum torque 10.7N·m7000 r/min Bore × stroke 57×58.6 Idle speed 1400r/min±140 r/min Engine oil grades SAE15W-40/SG Replace:1.2L Total dry:1.4L Oil Capacity… -
Page 64: Cf150-3A Wiring Diagram
7.16 CF150-3A wiring diagram -63-…
-
Page 65: General Troubles And Causes
7.17 General troubles and causes Trouble Components Possible cause Solution No fuel in tank Refill the fuel Fuel syetem Clean or replace Pump blockage or damage: poor fuel quality Inspect or replace Spark plug failure: excessive carbon deposits, too long time use Inspect or replace Spark plug cap failure: Poor contact or burning Cannot…
-
Page 66
Trouble Components Possible cause Solution Cylinder head or valve leaking Cylinder head Inspect or replace Insufficient Electrical system failure Electric system Inspect or repair power Air filter jammed Air filter Clean or adjust Poor connections Cable Adjust Headlights Switch faulty or damaged Left and right switches Adjust or replace and tail… -
Page 67
6KJV-380101-6200-12 EU208 ZHEJIANG CFMOTO POWER CO., LTD. No.116,Wuzhou Road,Yuhang Economic Development Zone, Hangzhou 311100,Zhejiang Province Tel: 0571-89197903 Fax: 0571-89265696 E-mail: cfmoto@cfmoto.com www.cfmoto.cn…
This manual is also suitable for:
Cf150-3a
Последние сообщения на форуме
![]()
Изучение системы зажиганияот BoxerПомозговал еще раз, кажется, картинка складывается.
Попробую опис … Читать далее4 года назад
![]()
АИ-92 или АИ-95?от Boxer
Цитата: Doc от 15.11.2019, 16:37
А кто-нибудь знает, что это за … Читать далее4 года назад
![]()
Покрышкиот DocВообщем поделюсь своим опытом, нет, не установки, а поиска бескаме … Читать далее4 года назад
![]()
Прокладка штока обогатителя своим …от DocВсем доброго времени суток. На сайте, уже есть советы как убрать с … Читать далее4 года назад
![]()
Какое масло льем?от DocТут дело не только в гофре на вилках. Как вы уже выше писали, влаг … Читать далее4 года назад
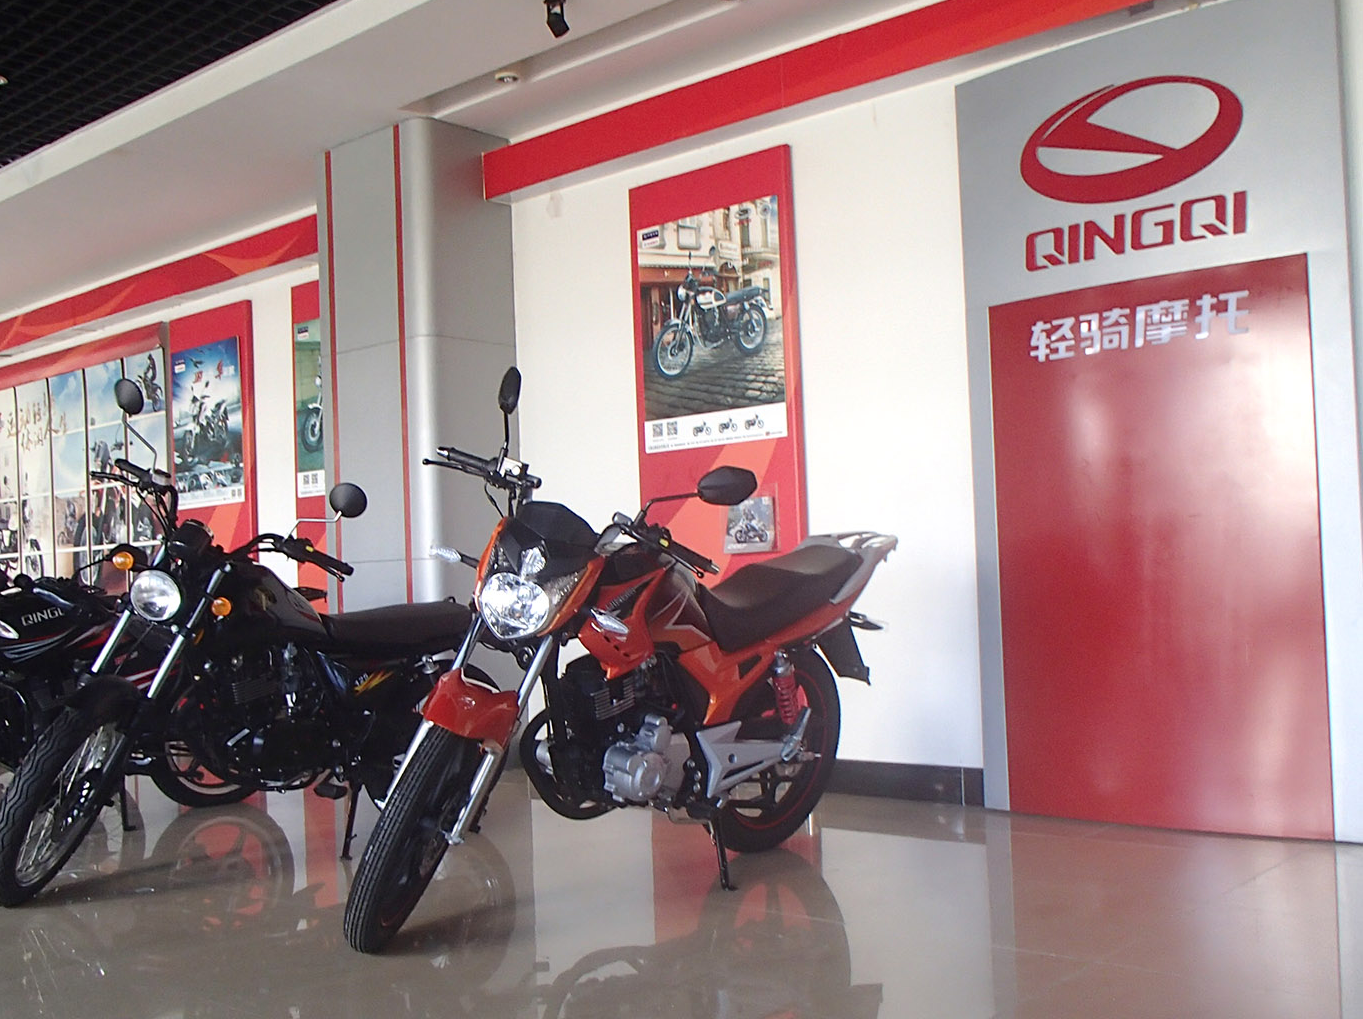
ОБСЛУЖИВАНИЕ И ЭКСПЛУАТАЦИЯ МОТОЦИКЛОВ SKYBIKE BURN-150 (QM150-10E), STRANGER-150 (QM150-7G), COBRA-150 (QM150-7G), VEPR-150 (QM150-7G(Y)).
Производитель: JINAN QINGQI MOTORCYCLE CO., LTD
ПРИМЕНИМО В ПОЛНОЙ МЕРЕ ДЛЯ МОТОЦИКЛОВ SKYMOTO FLAME-150 (QM150-9D), RANGER-II-150 (QM150-7G), VEPR-150 (QM150-7G(Y)).
Производитель: JINAN QINGQI MOTORCYCLE CO., LTD
(ПЕРЕВОД РУКОВОДСТВА ПОЛЬЗОВАТЕЛЯ «OWNER”S MANUAL»)
ОБЩИЕ СВЕДЕНИЯ И РЕКОМЕНДАЦИИ.
В мотоциклах SKYMOTO FLAME-150 (QM150-9D), RANGER-II-150 (QM150-7G), VEPR-150 (QM150-7G(Y)).
и SKYBIKE BURN-150 (QM150-10E), STRANGER-150 (QM150-7G), COBRA-150 (QM150-7G), VEPR-150 (QM150-7G(Y))
установлен двигатель 162FMJ.
Это одноцилиндровый 4-тактный двигатель воздушного охлаждения типа CG с нижним распредвалом, диаметр поршня 62 мм. Используйте моторное масло для 4-хтактных двигателей SAE10W40 API SF. Подлежит смене каждые 3000 км. Если этого масла нет, купите моторное масло аналогичного типа. Спепень вязкости выбираите согласно таблице, которая указана ниже.
Объем заливаемого масла при замене – 0,8 л. Перед каждой поездкой убедитесь в наличии необходимого уровня масла в картере! При необходимости, долейте.
Для заправки мотоциклов используйте бензин с октановым числом 95 с малым содержанием свинца, это увеличит срок службы свечи зажигания, а также срок службы двигателя. Если во время работы двигатель издает нехарактерные звуки (хлопки) — возможно причина в плохом качестве топлива. В этом случае поменяйте место заправки. Дополнительный топливный фильтр для тонкой очистки топлива способствует меньшему загрязнению карбюратора, уменьшает вероятность попадания воды и инородных частиц в топливную систему.
Давление в холодных шинах 2,5-18, 2,75-18, 3,00-18, 3,50-18 — передняя шина 1,75 кг./см2 ,
Давление в холодных шинах 2,75-18, 3,00-18, 3,5-18, 110/90-18 — задняя шина 2,25 кг./см2
Рекомендуется, чтобы шина была заменена, когда глубина протектора шины составляет 1,6мм или меньше.
ЭКСПЛУАТАЦИЯ И ОБСЛУЖИВАНИЕ
В графике технического обслуживания мотоциклов SKYMOTO FLAME-150, RANGER-II-150, VEPR-150 и SKYBIKE BURN-150, STRANGER-150, COBRA-150, VEPR-150 указаны интервалы между обслуживанием в километрах и месяцах. Если Ваш мотоцикл используется в тяжелых условиях, при сильных нагрузках, при полном использовании ручки газа или эксплуатируется в пыльной местности, некоторые пункты регламента обслуживания необходимо проводить чаще.
ГРАФИК ТЕКУЩЕГО ОБСЛУЖИВАНИЯ
Аккумуляторная батарея — осмотр каждые 2000 км.
Гайки в крышке цилиндра и глушителе — обтяжка каждые 5000 км.
Головка цилиндра, цилиндр и глушитель — чистка каждые 5000 км.
Карбюратор— осмотр и регулировка каждые 5000 км.
* Воздушный фильтр — чистка каждые 500 км.
* — Если мотоцикл эксплуатируется в местах с повышенной запыленностью воздуха (на грунтовых дорогах), чистку воздушного фильтра необходимо проводить каждые 200 км.
Свеча зажигания — замена каждые 6000 км.
Зазор клапанов — регулировка каждые 3000 км.
Шланги подачи топлива — осмотр каждые 5000 км., замена каждые 2 года.
Моторное масло — замена каждые 3000 км.
Тормоза— осмотр и регулировка каждые 5000 км
Руль — осмотр и регулировка каждые 5000 км
Передняя вилка — осмотр и регулировка каждые 5000 км
Задний амортизатор — осмотр и регулировка каждые 5000 км
Покрышки — осмотр каждые 5000 км
Топливный фильтр — замена каждые 5000 км.
Крепежные гайки и болты— осмотр и обтяжка каждые 5000 км
Тросики газа, тормоза — осмотр и смазка каждые 5000 км
АККУМУЛЯТОРНАЯ БАТАРЕЯ
Аккумуляторную батарею мотоцикла , работающую на жидком электролите, необходимо периодически проверять и обслуживать. При проверке уровень жидкости в аккумуляторе должен сохраняться в середине между верхним и нижним пределом. Если показатели ниже минимального уровня, необходимо добавить дистиллированную воду до максимального уровня. Гелиевые батареи не требуют дополнительного обслуживания. Необходимо следить за чистотой клемм проводов питания мотоцикла и подклеммников аккумулятора для достижения наилучшего контакта этой группы.
СВЕЧА ЗАЖИГАНИЯ
На мотоциклы SKYMOTO FLAME-150, RANGER-II-150, VEPR-150 и SKYBIKE BURN-150, STRANGER-150, COBRA-150, VEPR-150 рекомендуется устанавливать свечу зажигания DR8EA. Для чистки свечи используйте металлическую щетку, чтобы удалить нагар каждые 3 000 км. Зазор в свече зажигания должен быть 0.6~0.7 мм. Рекомендуется менять свечу зажигания каждые 6 000 км. Если свеча зажигания черная, используется слишком обогащенная рабочая смесь или свеча «холодная». Нормальная свеча зажигания должна быть рыжевато-коричневого цвета. Не зажимайте сильно свечи зажигания, это может повредить головку цилиндра.
РЕГУЛИРОВКА ЗАЗОРОВ КЛАПАНОВ
Клапанный зазор может измениться в период эксплуатации, что приведет к некорректной работе двигателя, а также негативно повлияет на технические характеристики двигателя.. Поэтому, важно регулярно выполнять регулировку зазора клапана в пределах 0,03 — 0,05 мм. Желательно, чтобы эту работу выполнял квалифицированный механик или дилер.
ВОЗДУШНЫЙ ФИЛЬТР
Фильтрующий элемент воздушного фильтра на мотоциклах состоит из пенополиуретана. Если фильтрующий элемент забит пылью, сопротивление впуска увеличится, в результате чего это отразится на мощности и увеличит расход горючего. Проверяйте и чистите фильтрующий элемент воздушного фильтра согласно следующей процедуре:
1) Выкрутить два винта.
2) Переместить два зажима установки.
3) Снять крышку воздушного фильтра.
4) Снять фильтрующий элемент.
МОЙКА ФИЛЬТРУЮЩЕГО ЭЛЕМЕНТА ВОЗДУШНОГО ФИЛЬТРА МОТОЦИКЛА.
1) Наполнить поддон мойки раствором воды и стирального порошка. Погрузить фильтрующий элемент в раствор и вымыть его.
2) Выжать фильтрующий элемент, сжимая его между пальцами обеих рук.
Не крутите, не скручивайте фильтрующий элемент — это образует трещины.
3) Погрузить фильтрующие элементы в раствор моторного масла, потом отжать масло с фильтрующего элемента, чтобы смешать этим немного влагу с маслом.
4) Установить очищенный фильтрующий элемент воздушного фильтра на мотоцикл в обратном порядке. Убедитесь, что фильтрующий элемент расположен плотно и должным образом.
В течение операции по очистке, тщательно исследуйте фильтрующий элемент воздушного фильтра на любые разрывы в материале. Порванный фильтрующий элемент должен быть заменен новым. При использовании мотоцикла в пыльных условиях, фильтрующий элемент необходимо чистить чаще. Работа двигателя без фильтрующего элемента увеличит его износ. Всегда проверяйте, чтобы фильтрующий элемент находился в превосходном эксплуатационном состоянии. Срок работы двигателя зависит в значительной степени от этого единственного компонента. При нарушении герметичности короба воздушного фильтра мотоцикла необходимо устранить поломку или заменить короб фильтра на новый.
ШЛАНГ ПОДАЧИ ТОПЛИВА
Шланги подачи топлива рекомендуется менять каждые два года.
КАРБЮРАТОР
Четкая работа карбюратора мотоцикла — одно из основных требований, которое необходимо для вашего двигателя. Есть два способа регулировки работы карбюратора, которые вы можете осторожно применять — обороты холостого хода двигателя и зазор воздушной заслонки. Периодически регулируйте обороты холостого хода двигателя и зазор воздушной заслонки.
РЕГУЛИРОВКА ОБОРОТОВ ХОЛОСТОГО ХОДА ДВИГАТЕЛЯ
1) Запустить двигатель и дать ему нагреться.
2) После того, как двигатель нагреется, провернуть стопорный болт заслонки так, чтобы двигатель мог достигнуть 1400-1600 оборотов в минуту. Обороты холостого хода двигателя должны быть отрегулированы после того, как двигатель нагрелся.
РЕГУЛИРОВКА ТРОСИКА ГАЗА
1) Ослабьте контргайку.
2) Отрегулируйте натяжку троса, вращая регулятор, чтоб получить прогиб 5-10 мм.
3) После наладки провисания, зажмите контргайку.
ПРОВЕРКА И РЕГУЛИРОВКА ТОРМОЗОВ
РЕГУЛИРОВКА ПЕРЕДНЕГО БАРАБАННОГО ТОРМОЗА
На мотоциклах, где установлен передний барабанный тормоз. Зазор между ручкой переднего тормоза и ручкой руля должен быть 10-20мм. Проворачивайте регулировочную гайку переднего тормоза по часовой стрелке или против, до тех пор, пока Вы не достигнете рекомендованного зазора.
ПРОВЕРКА И РЕГУЛИРОВКА ПЕРЕДНЕГО ДИСКОВОГО ТОРМОЗА
Для моделей мотоциклов, где установлен передний дисковый тормоз.
1. Проверьте, нет ли утечки тормозной жидкости.
Выжмите ручку переднего тормоза и удерживайте ее нажатой в течение минуты. Убедитесь в том, что тормозная жидкость нигде не протекает.
2. Проверка состояния передних тормозных колодок
Выжать тормоз, проверить индикатор износа. Если индикатор почти достиг тормозного диска, поменяйте тормозные колодки переднего дискового тормоза.
3. Проверка уровня тормозной жидкости
В случае нехватки тормозной жидкости, воздух может попасть в тормозную систему, что приведет к неисправности тормозов. Проверьте уровень тормозной жидкости перед управлением и долейте, если это необходимо
1. Чтобы проверить уровень тормозной жидкости, поверните руль, чтобы сделать доступным резервуар тормозной жидкости.
2. Всегда используйте рекомендованную тормозную жидкость. Иначе, резиновые уплотнения будут повреждены, после чего может появиться утечка и неисправность тормоза.
3. Всегда используйте одну и ту же тормозную жидкость. Смесь различных типов тормозной жидкости может произвести к химической реакции и неисправности тормоза!!!
4. Никогда не допускайте попадания тормозной жидкости на тормозной диск.
5. Тормозная жидкость разъедает окрашенные поверхности и пластмассовые детали. Вытрите все чистой тряпкой в случае любого попадания на детали.
Рекомендуемый тип тормозной жидкости: DOT 4.
РЕГУЛИРОВКА ЗАДНЕГО БАРАБАННОГО ТОРМОЗА
на мотоциклах с задним барабанным тормозом необходимо свободный ход педали тормоза выдерживать в пределах 20-30мм.
Проверка зазора и регулировка:
1) Поворачивайте регулировочную гайку заднего тормоза по- или против часовой стрелки, до тех пор, пока Вы не получите рекомендованный зазор. Поворот регулировочной гайки по часовой стрелке уменьшит зазор.
2) После регулировки зазора, проверьте, нет ли трения при вращении колеса.
ПРИВОДНАЯ ЦЕПЬ МОТОЦИКЛА.
На мотоциклы SKYMOTO FLAME-150, RANGER-II-150, VEPR-150 и SKYBIKE BURN-150, STRANGER-150, COBRA-150, VEPR-150 установлена приводная цепь с шагом 428.
После каждых 1 000 км. пробега регулируйте натяжение приводной цепи так, чтобы провисание цепи было не более 10-15мм.
- Установите мотоцикл на центральную опору.
- Выньте шплинт и выкрутите гайку заднего вала колеса.
- Вывинтите стопорную гайку.
- Цепь можно отрегулировать, поворачивая регулировочный болт по часовой стрелке или против часовой стрелки.
При замене приводной цепи, проверьте обе звездочки. Если это необходимо, замените их.
ПРЕДОСТЕРЕЖЕНИЕ
Открывающийся конец соединительного звена цепи должен быть установлен против направления движения.
Пыль и грязь на приводной цепи увеличат износ цепи и звездочек. Поэтому, чистите приводную цепь и звездочки с чистящим средством, затем смажьте цепь специальным смазочным веществом или моторным маслом через каждые 1000 km.
ПРЕДОХРАНИТЕЛЬ
Предохранитель на мотоцикле расположен возле аккумуляторной батареи. Если есть какая-то неисправность в электрической системе, сначала проверьте плавкий предохранитель. В случае, если предохранитель оплавился, замените на новый 15A предохранитель.
ПОДГОТОВКА МОТОЦИКЛА К ХРАНЕНИЮ
Если мотоцикл не планируется использовать в течение длительного периода времени (зимнее хранение или по любой другой причине), двигатель нуждается в специальном обслуживании.
1. Поставить мотоцикл на главную опору.
2. Выкрутить свечу, затем с карбюратора снять воздушный фильтр, ручку газа провернуть до остановки, затем нужно одновременно впрыскивать консервант в карбюратор и прокручивать двигатель до появления паров из свечного отверстия. Свечу вкрутить в цилиндр, воздушный фильтр закрепить на карбюратор.
3. Заправить топливный бак доверху топливом, смешанным со стабилизатором горючего. Дренировать карбюратор или завести двигатель на несколько минут, пока стабилизированное горючее не попадет в карбюратор.
4. Снять аккумуляторную батарею с мотоцикла. Очистить внешнюю сторону батареи моющим средством и удалить коррозию от соединений кабеля, проводов и зажимов. Хранить батарею необходимо в комнате с температурой выше нуля. Во время хранения периодически заряжайте батарею (один раз в месяц).
5. Спустить шины до нормального давления.
6. Все пластмассовые и резиновые части рекомендуем покрыть консервирующим средством. Покрыть не окрашенные поверхности жидкостью для профилактики ржавчины. Покрыть окрашенные поверхности автомобильным воском.
ПОРЯДОК РАБОТЫ ПО ПОДГОТОВКЕ МОТОЦИКЛА К ЭКСПЛУАТАЦИИ
— Вытереть или помыть мотоцикл.
— Выкрутить свечу зажигания, провернуть двигатель несколько раз, нажимая рычаг ножного стартера, и вкрутить свечу зажигания назад.
— Поставить аккумуляторную батарею.
— Подкачать давление в шинах .
— Проверить мотоцикл перед поездкой.
РЕКОМЕНДАЦИИ ПО ОБКАТКЕ НОВОГО МОТОЦИКЛА
исключительно для мотоциклов SKYBIKE BURN-150, COBRA-150, STRANGER-150, VEPR-150.
Первые 500 — 1000 км — самый важный период для мотоцикла.
Соблюдение рекомендаций в период обкатки мотоцикла может гарантировать максимальный срок службы и отличные технические характеристики Вашего нового мотоцикла. Комплектующие изготовлены из высококачественных материалов, но некоторые детали мотоцикла, должны приработаться друг к другу. Это происходит в период обкатки. Поэтому, во время обкатки советуем избегать работы двигателя долгое время, придерживаться исключительно малых нагрузок в течение первых 1000 км пробега, и стараться предотвратить перегрев двигателя.
Максимальная нагрузка на двигатель в период обкатки
Пределы максимальной скорости для нового мотоцикла в течение периода обкатки показаны ниже.
Первые 800 км. — менее чем 4000 оборотов в минуту
До 1600 км. — менее чем 5500 оборотов в минуту
После 1600 км. — менее чем 7500 оборотов в минуту
Изменяйте частоту вращения двигателя
Частота вращения двигателя должна быть разная, так же как и скорость движения. Необходимо позволять деталям, которые работают под нагрузкой остыть — это помогает процессу обкатки деталей. Изменение нагрузки на двигатель в течение обкатки гарантирует хороший результат обкатки, тем не менее, не подвергайте двигатель перегрузкам.
Избегайте езды на постоянной низкой скорости в период обкатки
В период обкатки двигателя не рекомендуется ездить на постоянно низкой скорости. Позвольте двигателю свободно ускоряться в пределах рекомендованных максимальных ограничений (90 км/час), не выжимайте полностью ручку газа на первые 1600 км.
Позвольте моторному маслу подготовить двигатель перед поездкой.
После запуска двигателя, необходимо дать двигателю поработать на холостом ходу несколько минут, довести рабочую температуру масла до необходимой нормы, что повышает его проникающие способности — это позволит смазочным материалам достигнуть всех тяжело нагруженных узлов двигателя.
В течение обкатки все узлы двигателя и детали притрутся, лишние частицы металлической стружки осядут в картере двигателя и масляном фильтре. Поэтому так необходимо заменить отработанное масло и фильтр после пробега первых 500 км.
Обслуживание в первые 500-1000 км — самое важное обслуживание Вашего мотоцикла!!!
При ремонте мотоциклов SKYMOTO FLAME-150, RANGER-II-150, VEPR-150 и SKYBIKE BURN-150, STRANGER-150, COBRA-150, VEPR-150, рекомендуем применять только оригинальные запчасти компании QINGQI. Это поможет продлить срок службы Вашего мотоцикла.