Информация, представленная на Сайте, носит информационный характер и ни при каких условиях не является публичной
офертой, определяемой положениями статьи 437 Гражданского кодекса Российской Федерации. Все содержащиеся на
Сайте сведения носят исключительно информационный характер и не являются исчерпывающими. Все условия
приобретения мототехники, цены, спецпредложения и комлектации мототехники указаны с целью ознакомления.
Комплектации и цены действительны на момент публикации и могут быть изменены без предварительного оповещения.
Представленная на Сайте мототехника может быть укомплектована дополнительным оборудованием, не входящим в
стандартную версию, но доступным за дополнительную плату. Сведения о продукции, касающиеся объёмов поставки,
внешнего вида, характеристик, габаритов и веса, эксплуатационных затрат и т.д. не являются обязательными,
рассматриваются как приблизительные и указаны с условием того, что могут возникнуть ошибки при печати, настройке
и/или наборе текста. Такая информация может быть изменена без предварительного уведомления. Чтобы получить
полную информацию о продукции, услугах, дополнительном оборудовании и спецпредложениях, интересных для Вас,
обращайтесь к менеджерам Дилерского центра
- Manuals
- Brands
- KTM Manuals
- Motorcycle
- 300 EXC AUS
Manuals and User Guides for KTM 300 EXC AUS. We have 3 KTM 300 EXC AUS manuals available for free PDF download: Repair Manual, Owner’s Manual
KTM 300 EXC AUS Repair Manual (289 pages)
Brand: KTM
|
Category: Motorcycle
|
Size: 12.59 MB
Table of Contents
-
Table of Contents
4
-
Table of Contents 2
4
-
1 Means of Representation
8
-
Symbols Used
8
-
Formats Used
8
-
-
2 Safety Advice
9
-
Repair Manual
9
-
Degrees of Risk and Symbols
9
-
Work Rules
9
-
-
3 Important Information
10
-
Guarantee, Warranty
10
-
Operating and Auxiliary Substances
10
-
Spare Parts, Accessories
10
-
Figures
10
-
-
4 Serial Numbers
11
-
Chassis Number
11
-
Type Label
11
-
Engine Number
11
-
Fork Part Number
11
-
Shock Absorber Part Number
11
-
-
5 Motorcycle
12
-
Raising the Motorcycle with the Lift Stand
12
-
Removing the Motorcycle from the Lift Stand
12
-
Starting
12
-
Starting the Motorcycle for Checking
13
-
-
6 Fork, Triple Clamp
14
-
Exc Eu/Aus, XC-W
14
-
Adjusting the Compression Damping of the Fork
14
-
Adjusting the Rebound Damping of the Fork
14
-
Adjusting the Spring Preload of the Fork
14
-
Bleeding the Fork Legs
15
-
Cleaning the Dust Boots of the Fork Legs
15
-
Loosening the Fork Protection
16
-
Positioning the Fork Protection
16
-
Removing the Fork Legs
16
-
Installing the Fork Legs
16
-
Removing the Fork Protector
17
-
Installing the Fork Protector
17
-
Performing a Fork Service
18
-
Disassembling the Fork Legs
18
-
Cartridge Disassembly
21
-
Disassembling the Compression Damping Fitting
23
-
Checking the Fork Legs
23
-
Assembling the Compression Damping Fitting
24
-
Assembling the Cartridge
25
-
Assembling the Fork Legs
26
-
Greasing the Steering Head Bearing
31
-
Removing the Lower Triple Clamp
31
-
Installing the Lower Triple Clamp
32
-
Checking the Play of the Steering Head Bearing
33
-
Adjusting the Play of the Steering Head Bearing
34
-
250/300 Six Days
34
-
Adjusting the Compression Damping of the Fork
34
-
Adjusting the Rebound Damping of the Fork
35
-
Bleeding the Fork Legs
35
-
Cleaning the Dust Boots of the Fork Legs
35
-
Loosening the Fork Protection
36
-
Positioning the Fork Protection
36
-
Removing the Fork Legs
36
-
Installing the Fork Legs
37
-
Removing the Fork Protector
37
-
Installing the Fork Protector
38
-
Performing a Fork Service
38
-
Disassembling the Fork Legs
38
-
Removing the Spring
40
-
Disassembling the Cartridge
41
-
Disassembling the Piston Rod
42
-
Disassembling the Hydrostop Unit
43
-
Disassembling the Seal Ring Retainer
44
-
Checking the Fork Legs
44
-
Assembling the Seal Ring Retainer
45
-
Assembling the Hydrostop Unit
46
-
Assembling the Piston Rod
46
-
Assembling the Cartridge
48
-
Assembling the Fork Legs
49
-
Greasing the Steering Head Bearing
52
-
Removing the Lower Triple Clamp
53
-
Installing the Lower Triple Clamp
53
-
Checking the Play of the Steering Head Bearing
55
-
Adjusting the Play of the Steering Head Bearing
55
-
-
7 Handlebar, Controls
56
-
Handlebar Position
56
-
Adjusting the Handlebar Position
56
-
Adjusting the Basic Position of the Clutch Lever
56
-
Checking the Routing of the Throttle Cable
57
-
Checking the Play in the Throttle Cable
57
-
Adjusting the Play in the Throttle Cable
58
-
-
8 Frame
59
-
Removing the Engine Guard (250/300 SIX DAYS)
59
-
Installing the Engine Guard (250/300 SIX DAYS)
59
-
-
9 Shock Absorber, Swingarm
60
-
Adjusting the High-Speed Compression Damping of the Shock Absorber
60
-
Adjusting the Low-Speed Compression Damping of the Shock Absorber
60
-
Adjusting the Rebound Damping of the Shock Absorber
61
-
Measuring the Sag of the Unloaded Rear Wheel
61
-
Checking the Static Sag of the Shock Absorber
61
-
Checking the Riding Sag of the Shock Absorber
62
-
Adjusting the Spring Preload of the Shock Absorber
62
-
Adjusting the Riding Sag
63
-
Removing the Shock Absorber
63
-
Installing the Shock Absorber
63
-
Servicing the Shock Absorber
64
-
Removing the Spring
64
-
Disassembling the Damper
65
-
Disassembling the Piston Rod
66
-
Disassembling the Seal Ring Retainer
67
-
Replacing the Pilot Bushing
68
-
Checking the Damper
69
-
Disassembling the Rebound Adjuster
69
-
Removing the Heim Joint
70
-
Installing the Heim Joint
71
-
Assembling the Rebound Adjuster
72
-
Assembling the Seal Ring Retainer
72
-
Assembling the Piston Rod
73
-
Assembling the Damper
74
-
Bleeding and Filling the Damper
77
-
Filling the Damper with Nitrogen
79
-
Installing the Spring
80
-
Changing the Heim Joint
81
-
-
10 Exhaust
83
-
Removing the Main Silencer
83
-
Installing the Main Silencer
83
-
Changing the Glass Fiber Yarn Filling of the Main Silencer
83
-
-
11 Air Filter
85
-
Removing the Air Filter Box Lid
85
-
Installing the Air Filter Box Lid
85
-
Removing the Air Filter
85
-
Installing the Air Filter
85
-
Cleaning the Air Filter and Air Filter Box
86
-
Sealing the Air Filter Box
86
-
-
12 Fuel Tank, Seat, Trim
87
-
Opening the Filler Cap
87
-
Closing the Filler Cap
87
-
Removing the Seat
87
-
Mounting the Seat
88
-
Removing the Fuel Tank
88
-
Installing the Fuel Tank
89
-
Fuel Tap
90
-
-
13 Mask, Fender
91
-
Removing the Front Fender
91
-
Installing the Front Fender
91
-
Removing the Headlight Mask with the Headlight
91
-
Refitting the Headlight Mask with the Headlight
92
-
-
14 Wheels
93
-
Checking the Tire Air Pressure
93
-
Checking the Tire Condition
93
-
Checking the Brake Discs
94
-
Checking the Spoke Tension
94
-
Front Wheel
95
-
Removing the Front Wheel
95
-
Installing the Front Wheel
95
-
Removing the Brake Disc of the Front Brake
96
-
Installing the Brake Disc of the Front Brake
96
-
Rear Wheel
96
-
Removing the Rear Wheel
96
-
Installing the Rear Wheel
97
-
Removing the Brake Disc of the Rear Brake
98
-
Installing the Brake Disc of the Rear Brake
98
-
Checking the Chain for Dirt
98
-
Cleaning the Chain
99
-
Checking the Chain Tension
99
-
Checking the Chain, Rear Sprocket, Engine Sprocket and Chain Guide
100
-
Adjusting the Chain Tension
101
-
-
15 Wiring Harness, Battery
103
-
Plug-In Connection, Ignition Timing Map
103
-
Removing the Main Fuse
103
-
Installing the Main Fuse
103
-
Recharging the Battery
103
-
Disconnecting the Negative Cable of the Battery
104
-
Connecting the Negative Cable of the Battery
105
-
Removing the Battery
105
-
Installing the Battery
106
-
Checking the Charging Voltage
106
-
Checking the Closed Current
106
-
Checking the Starter Relay
107
-
-
16 Brake System
108
-
Checking the Front Brake Linings
108
-
Changing the Front Brake Linings
108
-
Checking the Free Travel of the Hand Brake Lever
110
-
Adjusting Free Travel of Hand Brake Lever (All 250/300 EXC Models)
110
-
Adjusting the Basic Position of the Hand Brake Lever (All 250/300 XC-W)
110
-
Checking the Front Brake Fluid Level
111
-
Adding Front Brake Fluid
111
-
Changing the Front Brake Fluid
112
-
Checking the Rear Brake Linings
113
-
Changing the Brake Linings of the Rear Brake
114
-
Checking the Free Travel of Foot Brake Lever
115
-
Adjusting the Basic Position of the Foot Brake Lever
115
-
Checking the Rear Brake Fluid Level
116
-
Adding Brake Fluid for the Rear Brake
116
-
Changing the Rear Brake Fluid
117
-
-
17 Lighting System, Instruments
119
-
Checking the Headlight Setting
119
-
Adjusting the Headlight Range
119
-
Exc Eu/Aus, XC-W
119
-
Speedometer Overview
119
-
Activation and Test
120
-
Setting Kilometers or Miles
120
-
Adjusting the Speedometer Functions
120
-
Setting the Clock
121
-
Activating the Additional Functions
121
-
Setting the Wheel Circumference
122
-
Querying Lap Time
122
-
250/300 Six Days
123
-
Speedometer Overview
123
-
Activation and Test
123
-
Setting Kilometers or Miles
123
-
Setting the Speedometer Functions
124
-
Setting the Clock
124
-
Setting the Wheel Circumference
125
-
Viewing the Lap Time
125
-
-
18 Engine
126
-
Removing the Engine
126
-
Installing the Engine
130
-
Engine Disassembly
135
-
Clamping the Engine into the Engine Work Stand
135
-
Draining the Gear Oil
135
-
Removing the Clutch Push Rod
135
-
Removing the Shift Lever
135
-
Removing the Engine Sprocket
135
-
Removing the Spacer
136
-
Removing the Starter Motor
136
-
Removing the Kick Starter
137
-
Removing the Cylinder Head
138
-
Removing the Cylinder
138
-
Removing the Piston
139
-
Removing the Water Pump Cover
140
-
Removing the Clutch Cover
140
-
Removing the Clutch Discs
140
-
Removing the Clutch Basket
141
-
Removing the Kick Starter Shaft
142
-
Removing the Intermediate Kick Starter Gear
142
-
Removing the Shift Shaft
143
-
Removing the Shift Drum Locating Unit
143
-
Removing the Locking Lever
143
-
Removing the Rotor
143
-
Removing the Reed Valve Housing
144
-
Removing the Left Engine Case Section
144
-
Removing the Shift Rails
144
-
Removing the Shift Drum
145
-
Removing the Shift Forks
145
-
Removing the Transmission Shafts
145
-
Removing the Crankshaft
145
-
Work on Individual Parts
146
-
Work on the Right Section of the Engine Case
146
-
Work on the Left Section of the Engine Case
147
-
Removing the Crankshaft Bearing Inner Race
147
-
Installing the Crankshaft Bearing Inner Race
148
-
Changing the Connecting Rod, Conrod Bearing, and Crank Pin
148
-
Checking the Crankshaft Run-Out at the Bearing Pin
149
-
Checking/Measuring the Cylinder
149
-
Removing the Exhaust Control
150
-
Checking the Exhaust Control
152
-
Installing the Exhaust Control
152
-
Cylinder — Nikasil ® Coating
154
-
Checking/Measuring the Piston
155
-
Checking the Piston Ring End Gap
156
-
Piston/Cylinder — Measuring the Mounting Clearance
156
-
Checking the Reed Valve Housing, Reed Valve, and Intake Flange
157
-
Work on the Clutch Cover
157
-
Checking the Clutch
161
-
Preassembling the Shift Shaft
162
-
Checking the Shift Mechanism
163
-
Disassembling the Main Shaft
164
-
Disassembling the Countershaft
165
-
Checking the Transmission
165
-
Assembling the Main Shaft
166
-
Assembling the Countershaft
167
-
Checking the Kick Starter
169
-
Preassembling the Kick Starter Shaft
169
-
Checking the Electric Starter Drive
171
-
Engine Assembly
172
-
Installing the Crankshaft
172
-
Installing the Transmission Shafts
172
-
Installing the Shift Forks
173
-
Installing the Shift Drum
173
-
Installing the Shift Rails
173
-
Installing the Left Engine Case Section
173
-
Installing the Reed Valve Housing
174
-
Installing the Rotor
174
-
Installing the Locking Lever
175
-
Installing the Shift Drum Locating Unit
175
-
Installing the Shift Shaft
175
-
Installing the Intermediate Kick Starter Gear
175
-
Installing the Kick Starter Shaft
175
-
Installing the Clutch Basket
176
-
Installing the Clutch Discs
177
-
Installing the Clutch Cover
178
-
Installing the Water Pump Cover
179
-
Installing the Piston
179
-
Installing the Cylinder
180
-
Checking the X-Distance
181
-
Adjusting the X-Distance
182
-
Adjusting the Z-Distance
182
-
Installing the Cylinder Head
184
-
Installing the Kick Starter
184
-
Installing the Starter Motor
184
-
Installing the Spacer
186
-
Installing the Engine Sprocket
186
-
Installing the Shift Lever
186
-
Installing the Clutch Push Rod
187
-
Installing the Gear Oil Drain Plug
187
-
Removing the Engine from the Work Stand
187
-
-
-
19 Carburetor
188
-
Choke
188
-
Carburetor — Adjusting the Idle Speed
188
-
Emptying the Carburetor Float Chamber
189
-
Removing the Carburetor
189
-
Installing the Carburetor
190
-
Checking/Adjusting the Carburetor Components
191
-
Disassembling the Carburetor
192
-
Checking the Choke Slide
193
-
Checking the Jet Needle
193
-
Checking the Throttle Slide
193
-
Checking the Float Needle Valve
194
-
Assembling the Carburetor
194
-
Checking/Adjusting the Float Level
195
-
-
20 Clutch
196
-
Checking/Correcting the Fluid Level of the Hydraulic Clutch
196
-
Changing the Hydraulic Clutch Fluid
196
-
-
21 Water Pump, Cooling System
197
-
Cooling System
197
-
Checking the Antifreeze and Coolant Level
197
-
Checking the Coolant Level
197
-
Draining the Coolant
198
-
Refilling with Coolant
198
-
-
22 Exhaust Control
200
-
Engine Characteristic — Setting the Auxiliary Spring
200
-
-
23 Lubrication System
201
-
Changing the Gear Oil
201
-
Draining the Gear Oil
201
-
Refilling with Gear Oil
202
-
Checking the Gear Oil Level
202
-
Adding Gear Oil
202
-
-
24 Ignition System
204
-
Checking the Ignition System
204
-
Ignition Coil — Checking the Primary Winding
204
-
Ignition Coil — Checking the Secondary Winding
205
-
Checking the Spark Plug Connector
205
-
Alternator — Checking the Charging Coil of the Ignition
206
-
Alternator — Checking the Battery Winding
206
-
Alternator — Checking the Light Winding
207
-
Checking the Ignition Pulse Generator
207
-
Removing the Stator and Crankshaft Position Sensor
208
-
Installing the Stator and Crankshaft Position Sensor
208
-
-
25 Electric Starter
209
-
Checking the Starter Motor
209
-
-
26 Technical Data
210
-
Engine
210
-
All 250 Models
210
-
All 300 Models
210
-
Engine Tolerance, Wear Limits
211
-
Engine Tightening Torques
212
-
Capacities
212
-
Gear Oil
212
-
Coolant
212
-
Fuel
213
-
Chassis
213
-
Electrical System
214
-
Tires
214
-
Fork
214
-
Exc Eu/Aus, XC-W
214
-
250/300 Six Days
215
-
Shock Absorber
215
-
Chassis Tightening Torques
216
-
Carburetor
217
-
Exc Eu, 250 Exc Six Days Eu
217
-
Exc aus
217
-
XC-W Usa
217
-
Exc Eu, 300 Exc Six Days Eu
217
-
Exc aus
218
-
XC-W Usa, 300 XC-W Six Days Usa
218
-
Carburetor Tuning
219
-
Carburetor Tuning (All 250 Models)
219
-
Carburetor Tuning (All 300 Models)
220
-
General Carburetor Tuning
221
-
-
27 Cleaning, Care
222
-
Cleaning the Motorcycle
222
-
Checks and Maintenance Steps for Winter Operation
223
-
-
28 Storage
224
-
Preparing for Use after Storage
224
-
-
29 Service Schedule
225
-
Service Work (as Additional Order)
226
-
Advertisement

KTM 300 EXC AUS Owner’s Manual (150 pages)
2014
Brand: KTM
|
Category: Motorcycle
|
Size: 3.99 MB
Table of Contents
-
Table of Contents
4
-
1 Means of Representation
7
-
Symbols Used
7
-
Formats Used
7
-
-
2 Safety Advice
8
-
Use Definition — Intended Use
8
-
Degrees of Risk and Symbols
8
-
Tampering Warning
8
-
Safe Operation
9
-
Protective Clothing
9
-
Work Rules
9
-
Environment
9
-
Owner’s Manual
9
-
-
3 Important Notes
10
-
Guarantee, Warranty
10
-
Operating and Auxiliary Substances
10
-
Spare Parts, Accessories
10
-
Service
10
-
Figures
10
-
Customer Service
10
-
-
4 View of Vehicle
11
-
View of Vehicle, Front Left (Example)
11
-
View of Vehicle, Rear Right (Example)
12
-
-
5 Serial Numbers
13
-
Chassis Number
13
-
Type Label
13
-
Key Number (All EXC Models)
13
-
Engine Number
13
-
Fork Part Number
13
-
Shock Absorber Part Number
14
-
-
6 Controls
15
-
Clutch Lever
15
-
Hand Brake Lever
15
-
Throttle Grip
15
-
Kill Switch (All EXC Models)
15
-
Kill Switch (All XC-W Models)
16
-
Horn Button (All EXC Models)
16
-
Light Switch (All EXC Models)
16
-
Light Switch (All XC-W Models)
16
-
Turn Signal Switch (All EXC Models)
16
-
Emergency off Switch (EXC AUS)
17
-
Electric Starter Button (200/250/300 EXC EU, 250/300 SIX DAYS, XC-W)
17
-
Electric Starter Button (EXC AUS)
17
-
Overview of Indicator Lamps (EXC EU/AUS)
17
-
Overview of Indicator Lamps (SIX DAYS EU)
17
-
Overview of Indicator Lamps (300 XC-W SIX DAYS USA)
18
-
Opening the Filler Cap
18
-
Closing the Filler Cap
18
-
Fuel Tap
19
-
Choke
19
-
Shift Lever
19
-
Kick Starter
20
-
Foot Brake Lever
20
-
Side Stand
20
-
Steering Lock (All EXC Models)
20
-
Locking the Steering (All EXC Models)
21
-
Unlocking the Steering (All EXC Models)
21
-
-
7 Speedometer
22
-
Exc, XC-W
22
-
Speedometer Overview
22
-
Activation and Test
22
-
Setting Kilometers or Miles
22
-
Adjusting the Speedometer Functions
23
-
Setting the Clock
23
-
Querying Lap Time
23
-
Display Mode SPEED (Speed)
24
-
Display Mode SPEED/H (Service Hours)
24
-
Setup Menu
24
-
Unit of Measurement Menu
25
-
Display Mode SPEED/CLK (Time)
25
-
Setting the Clock
25
-
Display Mode SPEED/LAP (Lap Time)
26
-
Viewing the Lap Time
26
-
Display Mode SPEED/ODO (Odometer)
26
-
Display Mode SPEED/TR1 (Trip Master 1)
26
-
Display Mode SPEED/TR2 (Trip Master 2)
27
-
Setting TR2 (Trip Master 2)
27
-
Display Mode SPEED/A1 (Average Speed 1)
27
-
Display Mode SPEED/A2 (Average Speed 2)
28
-
Display Mode SPEED/S1 (Stop Watch 1)
28
-
Display Mode SPEED/S2 (Stop Watch 2)
28
-
Table of Functions
28
-
Table of Conditions and Menu Activation
29
-
Six Days
29
-
Speedometer Overview
29
-
Activation and Test
30
-
Setting Kilometers or Miles
30
-
Setting the Speedometer Functions
30
-
Setting the Clock
31
-
Viewing the Lap Time
31
-
Display Mode SPEED (Speed)
32
-
Display Mode SPEED/H (Service Hours)
32
-
Setup Menu
32
-
Setting the Unit of Measurement
33
-
Display Mode SPEED/CLK (Time)
33
-
Setting the Clock
33
-
Display Mode SPEED/LAP (Lap Time)
34
-
Viewing the Lap Time
34
-
Display Mode SPEED/ODO (Odometer)
34
-
Display Mode SPEED/TR1 (Trip Master 1)
34
-
Display Mode SPEED/TR2 (Trip Master 2)
35
-
Setting TR2 (Trip Master 2)
35
-
Display Mode SPEED/A1 (Average Speed 1)
35
-
Display Mode SPEED/A2 (Average Speed 2)
36
-
Display Mode SPEED/S1 (Stop Watch 1)
36
-
Display Mode SPEED/S2 (Stop Watch 2)
36
-
Table of Functions
37
-
Table of Conditions and Menu Activation
38
-
-
8 Preparing for Use
39
-
Advice on First Use
39
-
Running in the Engine
40
-
Preparing the Vehicle for Difficult Riding Conditions
40
-
Preparations for Riding on Dry Sand
41
-
Preparations for Riding on Wet Sand
41
-
Preparations for Riding on Wet and Muddy Surfaces
42
-
Preparations for Riding at High Temperatures and Low Speeds
42
-
Preparing for Riding at Low Temperatures or in Snow
43
-
-
9 Riding Instructions
44
-
Checks and Maintenance Work When Preparing for Use
44
-
Starting
44
-
Start off
45
-
Shifting, Riding
45
-
Braking
45
-
Stopping, Parking
46
-
Transport
46
-
Refueling
47
-
-
10 Service Schedule
48
-
Service Work (as Additional Order)
49
-
-
11 Tuning the Chassis
50
-
Checking the Basic Chassis Setting with the Rider’s Weight
50
-
Compression Damping of Shock Absorber
50
-
Adjusting the Low-Speed Compression Damping of the Shock Absorber
50
-
Adjusting the High-Speed Compression Damping of the Shock Absorber
51
-
Adjusting the Rebound Damping of the Shock Absorber
51
-
Measuring the Sag of the Unloaded Rear Wheel
52
-
Checking the Static Sag of the Shock Absorber
52
-
Checking the Riding Sag of the Shock Absorber
53
-
Adjusting the Spring Preload of the Shock Absorber
53
-
Adjusting the Riding Sag
54
-
Checking the Basic Setting of the Fork
54
-
Adjusting the Compression Damping of the Fork
55
-
Adjusting the Rebound Damping of the Fork
56
-
Adjusting the Spring Preload of the Fork (EXC, XC-W)
57
-
Handlebar Position
57
-
Adjusting the Handlebar Position
58
-
-
12 Service Work on the Chassis
59
-
Raising the Motorcycle with the Lift Stand
59
-
Removing the Motorcycle from the Lift Stand
59
-
Bleeding the Fork Legs
59
-
Cleaning the Dust Boots of the Fork Legs
60
-
Loosening the Fork Protection
60
-
Positioning the Fork Protection
61
-
Removing the Fork Legs
61
-
Installing the Fork Legs
61
-
Removing the Fork Protector
62
-
Installing the Fork Protector
63
-
Removing the Lower Triple Clamp (EXC, XC-W)
63
-
Removing the Lower Triple Clamp (SIX DAYS)
64
-
Installing the Lower Triple Clamp (EXC, XC-W)
64
-
Installing the Lower Triple Clamp
66
-
Six Days)
66
-
Checking the Play of the Steering Head Bearing
68
-
Adjusting the Play of the Steering Head Bearing
68
-
Greasing the Steering Head Bearing
69
-
Removing the Front Fender
69
-
Installing the Front Fender
69
-
Removing the Shock Absorber
70
-
Installing the Shock Absorber
70
-
Removing the Seat
71
-
Mounting the Seat
71
-
Removing the Air Filter Box Lid
72
-
Installing the Air Filter Box Lid
72
-
Removing the Air Filter
72
-
Installing the Air Filter
72
-
Cleaning the Air Filter and Air Filter Box
73
-
Sealing the Air Filter Box
73
-
Removing the Main Silencer
74
-
Installing the Main Silencer
74
-
Changing the Glass Fiber Yarn Filling of the Main Silencer
74
-
Removing the Fuel Tank
75
-
Installing the Fuel Tank
76
-
Checking the Chain for Dirt
77
-
Cleaning the Chain
77
-
Checking the Chain Tension
77
-
Adjusting the Chain Tension
78
-
Checking the Chain, Rear Sprocket, Engine Sprocket and Chain Guide
79
-
Checking the Frame
80
-
Checking the Swingarm
81
-
Checking the Routing of the Throttle Cable
81
-
Checking the Rubber Grip
82
-
Additionally Securing the Rubber Grip
82
-
Adjusting the Basic Position of the Clutch Lever
82
-
Checking/Correcting the Fluid Level of the Hydraulic Clutch
83
-
Changing the Hydraulic Clutch Fluid
83
-
Removing the Engine Guard (SIX DAYS)
84
-
Installing the Engine Guard (SIX DAYS)
85
-
-
13 Brake System
86
-
Checking the Free Travel of the Hand Brake Lever
86
-
Adjusting Free Travel of Hand Brake Lever (All EXC Models)
86
-
Adjusting the Basic Position of the Hand Brake Lever (All XC-W Models)
86
-
Checking the Brake Discs
87
-
Checking the Front Brake Fluid Level
87
-
Adding Front Brake Fluid
87
-
Checking the Front Brake Linings
88
-
Changing the Front Brake Linings
89
-
Checking the Free Travel of Foot Brake Lever
90
-
Adjusting the Basic Position of the Foot Brake Lever
90
-
Checking the Rear Brake Fluid Level
91
-
Adding Brake Fluid for the Rear Brake
91
-
Checking the Rear Brake Linings
92
-
Changing the Brake Linings of the Rear Brake
92
-
-
14 Wheels, Tires
95
-
Removing the Front Wheel
95
-
Installing the Front Wheel
95
-
Removing the Rear Wheel
96
-
Installing the Rear Wheel
96
-
Checking the Tire Condition
97
-
Checking the Tire Air Pressure
98
-
Checking the Spoke Tension
98
-
-
15 Electrical System
100
-
Removing the Battery (All 200/250/300 Models)
100
-
Installing the Battery (All 200/250/300 Models)
100
-
Recharging the Battery (All 200/250/300 Models)
101
-
Changing the Main Fuse (All 200/250/300 Models)
102
-
Removing the Headlight Mask with the Headlight
103
-
Refitting the Headlight Mask with the Headlight
103
-
Changing the Headlight Bulb
103
-
Changing the Turn Signal Bulb (All EXC Models)
104
-
Checking the Headlight Setting
105
-
Adjusting the Headlight Range
105
-
Changing the Speedometer Battery
105
-
-
16 Cooling System
107
-
Checking the Antifreeze and Coolant Level
107
-
Checking the Coolant Level
108
-
Draining the Coolant
108
-
Refilling with Coolant
109
-
-
17 Tuning the Engine
111
-
Checking the Play in the Throttle Cable
111
-
Adjusting the Play in the Throttle Cable
111
-
Carburetor — Idle
111
-
Carburetor — Adjusting the Idle Speed
112
-
Emptying the Carburetor Float Chamber
113
-
Checking the Basic Position of the Shift Lever
114
-
Adjusting the Basic Position of the Shift Lever
114
-
Engine Characteristic — Auxiliary Spring (All 250/300 Models)
114
-
Engine Characteristic — Setting the Auxiliary Spring X (All 250/300 Models)
114
-
-
18 Service Work on the Engine
116
-
Checking the Gear Oil Level
116
-
Changing the Gear Oil
116
-
Draining the Gear Oil
117
-
Refilling with Gear Oil
117
-
Adding Gear Oil
118
-
-
19 Cleaning, Care
120
-
Cleaning the Motorcycle
120
-
Checks and Maintenance Steps for Winter Operation
121
-
-
20 Storage
122
-
Preparing for Use after Storage
122
-
-
21 Troubleshooting
123
-
22 Technical Data
125
-
Engine
125
-
All 125 Models
125
-
All 200 Models
125
-
All 250 Models
126
-
All 300 Models
126
-
Engine Tightening Torques
127
-
All 125/200 Models
127
-
All 250/300 Models
128
-
Capacities
129
-
Gear Oil
129
-
Coolant
129
-
Fuel
129
-
Chassis
129
-
Electrical System
130
-
Tires
131
-
Fork
131
-
EXC EU, All 200 Models
131
-
250/300 Exc Eu/Aus, XC-W Usa
131
-
Exc Six Days Eu
132
-
250/300 Six Days
132
-
Shock Absorber
133
-
All 125/200 Models
133
-
All 250/300 Models
133
-
Chassis Tightening Torques
134
-
Carburetor
135
-
22.10.1 All 125 Models
135
-
22.10.2 200 Exc Eu
135
-
22.10.3 200 Exc aus
135
-
22.10.4 200 XC-W Usa
135
-
22.10.5 250 Exc Eu, 250 Exc Six Days Eu
136
-
22.10.6 250/300 Exc aus
136
-
22.10.7 250 XC-W Usa
136
-
22.10.8 300 Exc Eu, 300 Exc Six Days Eu
137
-
22.10.9 300 XC-W Usa, 300 XC-W Six Days Usa
137
-
Carburetor Tuning (All 125 Models)
137
-
Carburetor Tuning (All 200 Models)
138
-
Carburetor Tuning (All 250 Models)
139
-
Carburetor Tuning (All 300 Models)
140
-
General Carburetor Tuning
141
-

KTM 300 EXC AUS Owner’s Manual (136 pages)
2012 Motorcycle
Brand: KTM
|
Category: Motorcycle
|
Size: 4.26 MB
Table of Contents
-
Table of Contents
4
-
Means of Representation
7
-
Important Information
8
-
View of Vehicle
10
-
View of Vehicle, Front Left (Example)
10
-
View of Vehicle, Rear Right (Example)
11
-
-
Serial Numbers
12
-
Chassis Number
12
-
Type Label
12
-
Key Number (All EXC Models)
12
-
Engine Number
13
-
Fork Part Number
13
-
Shock Absorber Part Number
13
-
-
Controls
14
-
Clutch Lever
14
-
Hand Brake Lever
14
-
Throttle Grip
14
-
Kill Switch (All EXC Models)
14
-
Short Circuit Button (XC-W)
15
-
Light Switch (All EXC Models)
15
-
Turn Signal Switch (All EXC Models)
15
-
Horn Button (All EXC Models)
15
-
Emergency off Switch (200 EXC AUS)
15
-
Emergency off Switch (250/300 EXC AUS)
16
-
Electric Starter Button (250/300 EXC EU, EXC SIX DAYS, 250/300 XC-W)
16
-
Electric Starter Button (250/300 EXC AUS)
16
-
Light Switch (XC-W)
16
-
Overview of Indicator Lamps (All EXC Models)
16
-
Speedometer
17
-
Speedometer Activation and Test
17
-
Tripmaster Switch
17
-
Setting Kilometers or Miles
17
-
Setting the Clock
18
-
Adjusting the Speedometer Functions
18
-
Querying Lap Time
19
-
Display Mode SPEED (Speed)
19
-
Display Mode SPEED/H (Operating Hours)
19
-
Display Mode SPEED/CLK (Clock)
20
-
Display Mode SPEED/LAP (Lap Time)
20
-
Display Mode SPEED/ODO (Odometer)
20
-
Display Mode SPEED/TR1 (Trip Master 1)
20
-
Display Mode SPEED/TR2 (Trip Master 2)
21
-
Display Mode SPEED/A1 (Average Speed 1)
21
-
Display Mode SPEED/A2 (Average Speed 2)
21
-
Display Mode SPEED/S1 (Stop Watch 1)
22
-
Display Mode SPEED/S2 (Stop Watch 2)
22
-
Fuel Tap
23
-
Opening the Filler Cap
23
-
Closing the Filler Cap
24
-
Shift Lever
24
-
Kickstarter
24
-
Foot Brake Lever
25
-
Side Stand
25
-
Steering Lock (All EXC Models)
25
-
Locking the Steering (All EXC Models)
25
-
Unlocking the Steering (All EXC Models)
26
-
-
Preparing for Use
27
-
Advice on First Use
27
-
Running in the Engine
28
-
Preparing the Vehicle for Difficult Operating Conditions
28
-
Preparations for Riding on Dry Sand
29
-
Preparations for Riding on Wet Sand
29
-
Preparations for Riding on Wet and Muddy Surfaces
30
-
Preparations for Riding at High Temperatures and Low Speeds
30
-
Preparing for Rides at Low Temperatures or in Snow
31
-
-
Riding Instructions
32
-
Checks and Maintenance Work When Preparing for Use
32
-
Starting
32
-
Start off
33
-
Shifting, Riding
33
-
Braking
33
-
Stopping, Parking
34
-
Refueling
34
-
-
Service Schedule
36
-
Maintenance Work (as an Additional Order)
37
-
-
Tuning the Chassis
38
-
Checking the Basic Chassis Setting with the Rider’s Weight
38
-
Compression Damping of Shock Absorber
38
-
Adjusting the High-Speed Compression Damping of the Shock Absorber
38
-
Adjusting the Low-Speed Compression Damping of the Shock Absorber
39
-
Adjusting the Rebound Damping of the Shock Absorber
39
-
Measuring the Sag of the Unloaded Rear Wheel
40
-
Checking the Static Sag of the Shock Absorber
40
-
Checking the Riding Sag of the Shock Absorber
41
-
Adjusting the Spring Preload of the Shock Absorber
41
-
Adjusting the Riding Sag
42
-
Checking the Basic Setting of the Fork
42
-
Adjusting the Compression Damping of the Fork
43
-
Adjusting the Rebound Damping of the Fork
43
-
Adjusting the Spring Preload of the Fork
44
-
Handlebar Position
44
-
Adjusting the Handlebar Position
44
-
-
Service Work on the Chassis
46
-
Raising the Motorcycle with the Lift Stand
46
-
Removing the Motorcycle from the Lift Stand
46
-
Bleeding the Fork Legs
46
-
Cleaning the Dust Boots of the Fork Legs
47
-
Loosening the Fork Protection
47
-
Positioning the Fork Protection
48
-
Removing the Fork Legs
48
-
Installing the Fork Legs
48
-
Removing the Fork Protector
49
-
Installing the Fork Protector
50
-
Removing the Lower Triple Clamp (EXC EU/AUS, XC-W)
50
-
Removing the Lower Triple Clamp X (EXC SIX DAYS)
50
-
Installing the Lower Triple Clamp (EXC EU/AUS, XC-W)
51
-
Installing the Lower Triple Clamp (EXC SIX DAYS)
52
-
Checking the Play of the Steering Head Bearing
54
-
Adjusting the Play of the Steering Head Bearing
54
-
Greasing the Steering Head Bearing
55
-
Removing the Start Number Plate (XC-W)
55
-
Installing the Start Number Plate (XC-W)
55
-
Removing the Front Fender
56
-
Installing the Front Fender
56
-
Removing the Shock Absorber
56
-
Installing the Shock Absorber
56
-
Removing the Seat
57
-
Mounting the Seat
57
-
Removing the Air Filter Box Lid
58
-
Installing the Air Filter Box Lid
58
-
Removing the Air Filter
58
-
Installing the Air Filter
58
-
Cleaning the Air Filter and Air Filter Box
59
-
Removing the Main Silencer
59
-
Installing the Main Silencer
60
-
Changing the Glass Fiber Yarn Filling of the Main Silencer
60
-
Removing the Fuel Tank
60
-
Installing the Fuel Tank
61
-
Checking the Chain for Dirt
62
-
Cleaning the Chain
62
-
Checking the Chain Tension
63
-
Checking the Chain, Rear Sprocket, Engine Sprocket and Chain Guide
63
-
Adjusting the Chain Tension
65
-
Adjusting the Chain Guide
66
-
Checking the Frame
67
-
Checking the Swingarm
67
-
Checking the Throttle Cable Routing
67
-
Checking the Rubber Grip
68
-
Additionally Securing the Rubber Grip
68
-
Adjusting the Basic Position of the Clutch Lever
68
-
Checking the Fluid Level of the Hydraulic Clutch
69
-
Changing the Hydraulic Clutch Fluid
69
-
-
Brakes
71
-
Checking Free Travel of Hand Brake Lever
71
-
Adjusting the Basic Position of the Hand Brake Lever (XC-W)
71
-
Adjusting Free Travel of Hand Brake Lever (All EXC Models)
71
-
Checking the Brake Discs
72
-
Checking the Front Brake Fluid Level
72
-
Adding Front Brake Fluid
72
-
Checking the Front Brake Linings
73
-
Changing the Front Brake Linings
74
-
Checking the Free Travel of Foot Brake Lever
75
-
Adjusting the Basic Position of the Foot Brake Lever
75
-
Checking the Rear Brake Fluid Level
76
-
Adding Brake Fluid for the Rear Brake
76
-
Checking the Rear Brake Linings
77
-
Removing the Rear Brake Linings
77
-
Installing the Rear Brake Linings
78
-
Changing the Rear Brake Linings
78
-
-
Wheels, Tires
80
-
Removing the Front Wheel
80
-
Installing the Front Wheel
80
-
Removing the Rear Wheel
81
-
Installing the Rear Wheel
81
-
Checking the Tire Condition
82
-
Checking the Tire Air Pressure
83
-
Checking the Spoke Tension
83
-
-
Electrical System
85
-
Removing the Battery (All 250/300 Models)
85
-
Installing the Battery (All 250/300 Models)
85
-
Recharging the Battery (All 250/300 Models)
85
-
Changing the Main Fuse (All 250/300 Models)
86
-
Removing the Headlight Mask with the Headlight (All EXC Models)
87
-
Refitting the Headlight Mask with the Headlight (All EXC Models)
88
-
Changing the Headlight Bulb (All EXC Models)
88
-
Checking the Headlight Setting (All EXC Models)
89
-
Adjusting the Headlight Range (All EXC Models)
89
-
Changing the Speedometer Battery
89
-
-
Cooling System
91
-
Checking the Antifreeze and Coolant Level
91
-
Checking the Coolant Level
92
-
Draining the Coolant
92
-
Refilling with Coolant
93
-
-
Tuning the Engine
95
-
Checking the Play in the Throttle Cable
95
-
Adjusting the Play in the Throttle Cable
95
-
Carburetor
95
-
Carburetor — Adjusting the Idle Speed
96
-
Emptying the Carburetor Float Chamber
97
-
Checking the Basic Position of the Shift Lever
98
-
Adjusting the Basic Position of the Shift Lever
98
-
Engine Characteristic — Auxiliary Spring (All 250/300 Models)
98
-
Engine Characteristic — Adjusting the Auxiliary Spring (All 250/300 Models)
98
-
-
Service Work on the Engine
100
-
Checking the Gear Oil Level
100
-
Changing the Gear Oil
100
-
Draining the Gear Oil
101
-
Refilling with Gear Oil
101
-
Adding Gear Oil
102
-
-
Cleaning, Care
103
-
Cleaning the Motorcycle
103
-
Checks and Maintenance Steps for Winter Operation
104
-
-
Storage
105
-
Preparing for Use after Storage
105
-
-
Troubleshooting
106
-
Technical Data — Engine
108
-
125 Exc Eu, 125 Exc Six Days Eu
108
-
All 200 Models
108
-
All 250 Models
109
-
All 300 Models
109
-
Capacity — Transmission Oil
110
-
Capacity — Coolant
110
-
-
Technical Data — Engine Tightening Torques
111
-
All 125/200 Models
111
-
All 250/300 Models
112
-
-
Technical Data — Carburetor
113
-
125 Exc Eu, 125 Exc Six Days Eu
113
-
200 Exc Eu
113
-
200 Exc aus
113
-
200 XC-W Usa
113
-
250 Exc Eu, 250 Exc Six Days Eu
114
-
250 Exc aus
114
-
250 XC-W Usa
114
-
300 Exc Eu, 300 Exc Six Days Eu
114
-
300 Exc aus
115
-
300 XC-W Usa
115
-
Carburetor Configuration (125 EXC EU, 125 EXC SIX DAYS EU)
115
-
Carburetor Configuration (All 200 Models)
117
-
Carburetor Configuration (All 250 Models)
118
-
Carburetor Configuration (All 300 Models)
119
-
General Carburetor Configuration
120
-
Advertisement
Advertisement
Related Products
-
KTM 300 EXC AUS 2010
-
KTM 300 EXC AUS 2012
-
KTM 300 EXC AUS 2013
-
KTM 300 EXC AU 2017
-
KTM 300 EXC AUS 2014
-
KTM 300 EXC AU 2016
-
KTM 300 EXC AUS 2011
-
KTM 300 EXC SIX DAYS EU 2010
-
KTM 300 EXC EU 2011
-
KTM 300 EXC Six Days EU 2017
KTM Categories
Motorcycle
Motorcycle Accessories
Offroad Vehicle
Engine
Bicycle Accessories
More KTM Manuals
Посмотреть инструкция для KTM 300 EXC (2017) бесплатно. Руководство относится к категории мотоциклы, 14 человек(а) дали ему среднюю оценку 8.9. Руководство доступно на следующих языках: английский. У вас есть вопрос о KTM 300 EXC (2017) или вам нужна помощь? Задайте свой вопрос здесь
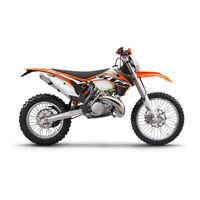
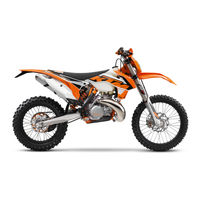
KTM 300 EXC (2017) – это мотоцикл, который способен передвигаться по различным типам поверхностей. Он оснащен двигателем воздушного охлаждения объемом 293.2 куб.см и мощностью 54 л.с. Передние и задние тормоза выполнены в диск-гидравлической конструкции, что гарантирует высокую эффективность при торможении. При этом, вес мотоцикла всего 104.5 кг.
Система питания KTM 300 EXC работает на бензине. Ее емкость — 9 л. Будучи исключительно рассчитанной на профессионалов в мире мотокросса, модель имеет эргономичный дизайн, обеспечивающий удобство в управлении при прохождении сложных и весьма требовательных петель.
Конструкция включает в себя состоящую из прочного материала раму, на которой установлены переднее и заднее колесо. Дорожный просвет равен 370 мм, а система подвески обеспечивает удобное передвижение на мотоцикле на различных типах дорог.
В целом, KTM 300 EXC это мощный мотоцикл, который обеспечивает быструю и комфортную езду на больших скоростях в неровной местности.
Главная
| KTM | |
| 300 EXC (2017) | |
| мотоцикл | |
| английский | |
| Руководство пользователя (PDF) |
Не можете найти ответ на свой вопрос в руководстве? Вы можете найти ответ на свой вопрос ниже, в разделе часто задаваемых вопросов о KTM 300 EXC (2017).
Как перевести мили в километры?
1 миля равна 1,609344 километрам, а 1 километр — 0,62137119 милям.
В чем разница между топливом E10 и E5?
В топливе E10 содержится до десяти процентов этанола, в то время как в E5 содержится менее пяти процентов. Соответственно, топливо E10 менее вредит окружающей среде.
Какова рекомендуемая частота замены масляного фильтра в двигателе KTM?
В большинстве двигателей масляный фильтр необходимо менять через каждые 6000 километров (около 4000 миль).
Как часто следует менять масло в двигателе KTM?
В большинстве двигателей масло необходимо менять через каждые 6000 километров (около 4000 миль).
Как удалить ржавчину с устройства KTM мотоцикл?
1. Замочите поржавевшую деталь в уксусе, пока ржавчина не размокнет полностью. 2. Обрабатывайте ржавчину уксусом в течение 24 часов. 3. Удалите ржавчину с помощью металлической щетки или алюминиевой фольги.
Инструкция KTM 300 EXC (2017) доступно в русский?
К сожалению, у нас нет руководства для KTM 300 EXC (2017), доступного в русский. Это руководство доступно в английский.
Не нашли свой вопрос? Задайте свой вопрос здесь
- Manuals
- Brands
- KTM Manuals
- Motorcycle
- 300 EXC
Manuals and User Guides for KTM 300 EXC. We have 15 KTM 300 EXC manuals available for free PDF download: Repair Manual, Owner’s Manual, Owner’s Handbook Manual, Manual
KTM 300 EXC Repair Manual (289 pages)
Brand: KTM
|
Category: Motorcycle
|
Size: 12.59 MB
Table of Contents
-
Table of Contents
4
-
Table of Contents 2
4
-
1 Means of Representation
8
-
Symbols Used
8
-
Formats Used
8
-
-
2 Safety Advice
9
-
Repair Manual
9
-
Degrees of Risk and Symbols
9
-
Work Rules
9
-
-
3 Important Information
10
-
Guarantee, Warranty
10
-
Operating and Auxiliary Substances
10
-
Spare Parts, Accessories
10
-
Figures
10
-
-
4 Serial Numbers
11
-
Chassis Number
11
-
Type Label
11
-
Engine Number
11
-
Fork Part Number
11
-
Shock Absorber Part Number
11
-
-
5 Motorcycle
12
-
Raising the Motorcycle with the Lift Stand
12
-
Removing the Motorcycle from the Lift Stand
12
-
Starting
12
-
Starting the Motorcycle for Checking
13
-
-
6 Fork, Triple Clamp
14
-
Exc Eu/Aus, XC-W
14
-
Adjusting the Compression Damping of the Fork
14
-
Adjusting the Rebound Damping of the Fork
14
-
Adjusting the Spring Preload of the Fork
14
-
Bleeding the Fork Legs
15
-
Cleaning the Dust Boots of the Fork Legs
15
-
Loosening the Fork Protection
16
-
Positioning the Fork Protection
16
-
Removing the Fork Legs
16
-
Installing the Fork Legs
16
-
Removing the Fork Protector
17
-
Installing the Fork Protector
17
-
Performing a Fork Service
18
-
Disassembling the Fork Legs
18
-
Cartridge Disassembly
21
-
Disassembling the Compression Damping Fitting
23
-
Checking the Fork Legs
23
-
Assembling the Compression Damping Fitting
24
-
Assembling the Cartridge
25
-
Assembling the Fork Legs
26
-
Greasing the Steering Head Bearing
31
-
Removing the Lower Triple Clamp
31
-
Installing the Lower Triple Clamp
32
-
Checking the Play of the Steering Head Bearing
33
-
Adjusting the Play of the Steering Head Bearing
34
-
250/300 Six Days
34
-
Adjusting the Compression Damping of the Fork
34
-
Adjusting the Rebound Damping of the Fork
35
-
Bleeding the Fork Legs
35
-
Cleaning the Dust Boots of the Fork Legs
35
-
Loosening the Fork Protection
36
-
Positioning the Fork Protection
36
-
Removing the Fork Legs
36
-
Installing the Fork Legs
37
-
Removing the Fork Protector
37
-
Installing the Fork Protector
38
-
Performing a Fork Service
38
-
Disassembling the Fork Legs
38
-
Removing the Spring
40
-
Disassembling the Cartridge
41
-
Disassembling the Piston Rod
42
-
Disassembling the Hydrostop Unit
43
-
Disassembling the Seal Ring Retainer
44
-
Checking the Fork Legs
44
-
Assembling the Seal Ring Retainer
45
-
Assembling the Hydrostop Unit
46
-
Assembling the Piston Rod
46
-
Assembling the Cartridge
48
-
Assembling the Fork Legs
49
-
Greasing the Steering Head Bearing
52
-
Removing the Lower Triple Clamp
53
-
Installing the Lower Triple Clamp
53
-
Checking the Play of the Steering Head Bearing
55
-
Adjusting the Play of the Steering Head Bearing
55
-
-
7 Handlebar, Controls
56
-
Handlebar Position
56
-
Adjusting the Handlebar Position
56
-
Adjusting the Basic Position of the Clutch Lever
56
-
Checking the Routing of the Throttle Cable
57
-
Checking the Play in the Throttle Cable
57
-
Adjusting the Play in the Throttle Cable
58
-
-
8 Frame
59
-
Removing the Engine Guard (250/300 SIX DAYS)
59
-
Installing the Engine Guard (250/300 SIX DAYS)
59
-
-
9 Shock Absorber, Swingarm
60
-
Adjusting the High-Speed Compression Damping of the Shock Absorber
60
-
Adjusting the Low-Speed Compression Damping of the Shock Absorber
60
-
Adjusting the Rebound Damping of the Shock Absorber
61
-
Measuring the Sag of the Unloaded Rear Wheel
61
-
Checking the Static Sag of the Shock Absorber
61
-
Checking the Riding Sag of the Shock Absorber
62
-
Adjusting the Spring Preload of the Shock Absorber
62
-
Adjusting the Riding Sag
63
-
Removing the Shock Absorber
63
-
Installing the Shock Absorber
63
-
Servicing the Shock Absorber
64
-
Removing the Spring
64
-
Disassembling the Damper
65
-
Disassembling the Piston Rod
66
-
Disassembling the Seal Ring Retainer
67
-
Replacing the Pilot Bushing
68
-
Checking the Damper
69
-
Disassembling the Rebound Adjuster
69
-
Removing the Heim Joint
70
-
Installing the Heim Joint
71
-
Assembling the Rebound Adjuster
72
-
Assembling the Seal Ring Retainer
72
-
Assembling the Piston Rod
73
-
Assembling the Damper
74
-
Bleeding and Filling the Damper
77
-
Filling the Damper with Nitrogen
79
-
Installing the Spring
80
-
Changing the Heim Joint
81
-
-
10 Exhaust
83
-
Removing the Main Silencer
83
-
Installing the Main Silencer
83
-
Changing the Glass Fiber Yarn Filling of the Main Silencer
83
-
-
11 Air Filter
85
-
Removing the Air Filter Box Lid
85
-
Installing the Air Filter Box Lid
85
-
Removing the Air Filter
85
-
Installing the Air Filter
85
-
Cleaning the Air Filter and Air Filter Box
86
-
Sealing the Air Filter Box
86
-
Advertisement
KTM 300 EXC Owner’s Manual (150 pages)
2014
Brand: KTM
|
Category: Motorcycle
|
Size: 3.99 MB
Table of Contents
-
Table of Contents
4
-
1 Means of Representation
7
-
Symbols Used
7
-
Formats Used
7
-
-
2 Safety Advice
8
-
Use Definition — Intended Use
8
-
Degrees of Risk and Symbols
8
-
Tampering Warning
8
-
Safe Operation
9
-
Protective Clothing
9
-
Work Rules
9
-
Environment
9
-
Owner’s Manual
9
-
-
3 Important Notes
10
-
Guarantee, Warranty
10
-
Operating and Auxiliary Substances
10
-
Spare Parts, Accessories
10
-
Service
10
-
Figures
10
-
Customer Service
10
-
-
4 View of Vehicle
11
-
View of Vehicle, Front Left (Example)
11
-
View of Vehicle, Rear Right (Example)
12
-
-
5 Serial Numbers
13
-
Chassis Number
13
-
Type Label
13
-
Key Number (All EXC Models)
13
-
Engine Number
13
-
Fork Part Number
13
-
Shock Absorber Part Number
14
-
-
6 Controls
15
-
Clutch Lever
15
-
Hand Brake Lever
15
-
Throttle Grip
15
-
Kill Switch (All EXC Models)
15
-
Kill Switch (All XC-W Models)
16
-
Horn Button (All EXC Models)
16
-
Light Switch (All EXC Models)
16
-
Light Switch (All XC-W Models)
16
-
Turn Signal Switch (All EXC Models)
16
-
Emergency off Switch (EXC AUS)
17
-
Electric Starter Button (200/250/300 EXC EU, 250/300 SIX DAYS, XC-W)
17
-
Electric Starter Button (EXC AUS)
17
-
Overview of Indicator Lamps (EXC EU/AUS)
17
-
Overview of Indicator Lamps (SIX DAYS EU)
17
-
Overview of Indicator Lamps (300 XC-W SIX DAYS USA)
18
-
Opening the Filler Cap
18
-
Closing the Filler Cap
18
-
Fuel Tap
19
-
Choke
19
-
Shift Lever
19
-
Kick Starter
20
-
Foot Brake Lever
20
-
Side Stand
20
-
Steering Lock (All EXC Models)
20
-
Locking the Steering (All EXC Models)
21
-
Unlocking the Steering (All EXC Models)
21
-
-
7 Speedometer
22
-
Exc, XC-W
22
-
Speedometer Overview
22
-
Activation and Test
22
-
Setting Kilometers or Miles
22
-
Adjusting the Speedometer Functions
23
-
Setting the Clock
23
-
Querying Lap Time
23
-
Display Mode SPEED (Speed)
24
-
Display Mode SPEED/H (Service Hours)
24
-
Setup Menu
24
-
Unit of Measurement Menu
25
-
Display Mode SPEED/CLK (Time)
25
-
Setting the Clock
25
-
Display Mode SPEED/LAP (Lap Time)
26
-
Viewing the Lap Time
26
-
Display Mode SPEED/ODO (Odometer)
26
-
Display Mode SPEED/TR1 (Trip Master 1)
26
-
Display Mode SPEED/TR2 (Trip Master 2)
27
-
Setting TR2 (Trip Master 2)
27
-
Display Mode SPEED/A1 (Average Speed 1)
27
-
Display Mode SPEED/A2 (Average Speed 2)
28
-
Display Mode SPEED/S1 (Stop Watch 1)
28
-
Display Mode SPEED/S2 (Stop Watch 2)
28
-
Table of Functions
28
-
Table of Conditions and Menu Activation
29
-
Six Days
29
-
Speedometer Overview
29
-
Activation and Test
30
-
Setting Kilometers or Miles
30
-
Setting the Speedometer Functions
30
-
Setting the Clock
31
-
Viewing the Lap Time
31
-
Display Mode SPEED (Speed)
32
-
Display Mode SPEED/H (Service Hours)
32
-
Setup Menu
32
-
Setting the Unit of Measurement
33
-
Display Mode SPEED/CLK (Time)
33
-
Setting the Clock
33
-
Display Mode SPEED/LAP (Lap Time)
34
-
Viewing the Lap Time
34
-
Display Mode SPEED/ODO (Odometer)
34
-
Display Mode SPEED/TR1 (Trip Master 1)
34
-
Display Mode SPEED/TR2 (Trip Master 2)
35
-
Setting TR2 (Trip Master 2)
35
-
Display Mode SPEED/A1 (Average Speed 1)
35
-
Display Mode SPEED/A2 (Average Speed 2)
36
-
Display Mode SPEED/S1 (Stop Watch 1)
36
-
Display Mode SPEED/S2 (Stop Watch 2)
36
-
Table of Functions
37
-
Table of Conditions and Menu Activation
38
-
KTM 300 EXC Owner’s Manual (154 pages)
Brand: KTM
|
Category: Motorcycle
|
Size: 7.42 MB
Table of Contents
-
Table of Contents
4
-
1 Means of Representation
7
-
Symbols Used
7
-
Formats Used
7
-
-
2 Safety Advice
8
-
Use Definition — Intended Use
8
-
Degrees of Risk and Symbols
8
-
Tampering Warning
8
-
Safe Operation
9
-
Protective Clothing
9
-
Work Rules
9
-
Environment
9
-
Owner’s Manual
9
-
-
3 Important Notes
10
-
Guarantee, Warranty
10
-
Operating and Auxiliary Substances
10
-
Spare Parts, Accessories
10
-
Service
10
-
Figures
10
-
Customer Service
10
-
-
4 View of Vehicle
11
-
View of Vehicle, Front Left (Example)
11
-
View of Vehicle, Rear Right (Example)
12
-
-
5 Serial Numbers
13
-
Chassis Number
13
-
Type Label
13
-
Key Number (All EXC Models)
13
-
Engine Number
13
-
Fork Part Number
13
-
Shock Absorber Part Number
14
-
-
6 Controls
15
-
Clutch Lever
15
-
Hand Brake Lever
15
-
Throttle Grip
15
-
Kill Switch (All EXC Models)
15
-
Kill Switch (All XC-W Models)
16
-
Horn Button (All EXC Models)
16
-
Light Switch (All EXC Models)
16
-
Light Switch (All XC-W Models)
16
-
Turn Signal Switch (All EXC Models)
16
-
Emergency off Switch (EXC AU)
17
-
Electric Starter Button (All 200/250/300 EU/US Models, 300 EXC BR)
17
-
Electric Starter Button (EXC AU)
17
-
Overview of Indicator Lamps (All EXC Models)
17
-
Overview of Indicator Lamps (All XC-W Models)
17
-
Opening the Filler Cap
18
-
Closing the Filler Cap
18
-
Fuel Tap
19
-
Choke
19
-
Shift Lever
19
-
Kick Starter
20
-
Foot Brake Lever
20
-
Side Stand
20
-
Steering Lock (All EXC Models)
20
-
Locking the Steering (All EXC Models)
21
-
Unlocking the Steering (All EXC Models)
21
-
-
7 Speedometer
22
-
Speedometer Overview
22
-
Activation and Test
22
-
Setting Kilometers or Miles
22
-
Setting the Speedometer Functions
23
-
Setting the Clock
23
-
Viewing the Lap Time
23
-
Display Mode SPEED (Speed)
24
-
Display Mode SPEED/H (Service Hours)
24
-
Setup Menu
25
-
Setting the Unit of Measurement
25
-
Display Mode SPEED/CLK (Time)
26
-
Setting the Clock
26
-
Display Mode SPEED/LAP (Lap Time)
26
-
Viewing the Lap Time
27
-
Display Mode SPEED/ODO (Odometer)
27
-
Display Mode SPEED/TR1 (Trip Master 1)
27
-
Display Mode SPEED/TR2 (Trip Master 2)
28
-
Setting TR2 (Trip Master 2)
28
-
Display Mode SPEED/A1 (Average Speed 1)
28
-
Display Mode SPEED/A2 (Average Speed 2)
29
-
Display Mode SPEED/S1 (Stop Watch 1)
29
-
Display Mode SPEED/S2 (Stop Watch 2)
29
-
Table of Functions
30
-
Table of Conditions and Menu Activation
31
-
-
8 Preparing for Use
32
-
Advice on First Use
32
-
Running in the Engine
33
-
Preparing the Vehicle for Difficult Riding Conditions
33
-
Preparations for Riding on Dry Sand
34
-
Preparations for Riding on Wet Sand
34
-
Preparations for Riding on Wet and Muddy Surfaces
35
-
Preparations for Riding at High Temperatures and Low Speeds
35
-
Preparing for Riding at Low Temperatures or in Snow
36
-
-
9 Riding Instructions
37
-
Checks and Maintenance Work When Preparing for Use
37
-
Starting
37
-
Start off
38
-
Shifting, Riding
38
-
Braking
38
-
Stopping, Parking
39
-
Transport
39
-
Refueling
40
-
Advertisement
KTM 300 EXC Owner’s Manual (145 pages)
Brand: KTM
|
Category: Motorcycle
|
Size: 7.05 MB
Table of Contents
-
Table of Contents
4
-
Table of Contents 2
4
-
1 Means of Representation
7
-
Symbols Used
7
-
Formats Used
7
-
-
2 Safety Advice
8
-
Use Definition — Intended Use
8
-
Degrees of Risk and Symbols
8
-
Tampering Warning
8
-
Safe Operation
9
-
Protective Clothing
9
-
Work Rules
9
-
Environment
9
-
Owner’s Manual
9
-
-
3 Important Notes
10
-
Guarantee, Warranty
10
-
Operating and Auxiliary Substances
10
-
Spare Parts, Accessories
10
-
Service
10
-
Figures
10
-
Customer Service
10
-
-
4 View of Vehicle
11
-
View of Vehicle, Front Left (Example)
11
-
View of Vehicle, Rear Right (Example)
12
-
-
5 Serial Numbers
13
-
Chassis Number
13
-
Type Label
13
-
Key Number (All EXC Models)
13
-
Engine Number
13
-
Fork Part Number
13
-
Shock Absorber Part Number
14
-
-
6 Controls
15
-
Clutch Lever
15
-
Hand Brake Lever
15
-
Throttle Grip
15
-
Kill Switch (EXC EU/AU, EXC Factory Edition, 300 EXC BR)
15
-
Kill Switch (Six Days EU)
16
-
Kill Switch (All XC-W Models)
16
-
Horn Button (EXC EU/AU, EXC Factory Edition, 300 EXC BR)
16
-
Horn Button (Six Days EU)
16
-
Light Switch (EXC EU/AU, EXC Factory Edition, 300 EXC BR)
16
-
Light Switch (Six Days EU)
17
-
Light Switch (All XC-W Models)
17
-
Turn Signal Switch (EXC EU/AU, EXC Factory Edition, 300 EXC BR)
17
-
Turn Signal Switch (Six Days EU)
17
-
Emergency off Switch (EXC AU)
17
-
Electric Starter Button (All 200/250/300 EU/US Models, 300 EXC BR)
18
-
Electric Starter Button (EXC AU)
18
-
Overview of Indicator Lamps (All EXC Models)
18
-
Overview of Indicator Lamps (All XC-W Models)
18
-
Opening the Filler Cap
18
-
Closing the Filler Cap
19
-
Fuel Tap
19
-
Choke
20
-
Shift Lever
20
-
Kick Starter
20
-
Foot Brake Lever
20
-
Side Stand
21
-
Steering Lock (All EXC Models)
21
-
Locking the Steering (All EXC Models)
21
-
Unlocking the Steering (All EXC Models)
22
-
-
7 Speedometer
23
-
Speedometer Overview
23
-
Activation and Test
23
-
Setting Kilometers or Miles
23
-
Setting the Speedometer Functions
24
-
Setting the Clock
24
-
Viewing the Lap Time
24
-
Display Mode SPEED (Speed)
25
-
Display Mode SPEED/H (Service Hours)
25
-
Setup Menu
25
-
Setting the Unit of Measurement
26
-
Display Mode SPEED/CLK (Time)
26
-
Setting the Clock
27
-
Display Mode SPEED/LAP (Lap Time)
27
-
Viewing the Lap Time
27
-
Display Mode SPEED/ODO (Odometer)
28
-
Display Mode SPEED/TR1 (Trip Master 1)
28
-
Display Mode SPEED/TR2 (Trip Master 2)
28
-
Setting TR2 (Trip Master 2)
28
-
Display Mode SPEED/A1 (Average Speed 1)
29
-
Display Mode SPEED/A2 (Average Speed 2)
29
-
Display Mode SPEED/S1 (Stop Watch 1)
30
-
Display Mode SPEED/S2 (Stop Watch 2)
30
-
Table of Functions
30
-
Table of Conditions and Menu Activation
31
-
-
8 Preparing for Use
32
-
Advice on First Use
32
-
Running in the Engine
33
-
Preparing the Vehicle for Difficult Riding Conditions
33
-
Preparations for Riding on Dry Sand
34
-
Preparations for Riding on Wet Sand
34
-
Preparations for Riding on Wet and Muddy Surfaces
35
-
Preparations for Riding at High Temperatures and Low Speeds
35
-
Preparing for Riding at Low Temperatures or in Snow
36
-
KTM 300 EXC Owner’s Manual (139 pages)
201 year
Brand: KTM
|
Category: Motorcycle
|
Size: 4.41 MB
Table of Contents
-
Table of Contents
4
-
1 Means of Representation
7
-
Symbols Used
7
-
Formats Used
7
-
-
2 Safety Advice
8
-
Use Definition — Intended Use
8
-
Degrees of Risk and Symbols
8
-
Tampering Warning
8
-
Safe Operation
9
-
Protective Clothing
9
-
Work Rules
9
-
Environment
9
-
Owner’s Manual
9
-
-
3 Important Notes
10
-
Guarantee, Warranty
10
-
Operating and Auxiliary Substances
10
-
Spare Parts, Accessories
10
-
Service
10
-
Figures
10
-
Customer Service
10
-
-
4 View of Vehicle
11
-
View of Vehicle, Front Left (Example)
11
-
View of Vehicle, Rear Right (Example)
12
-
-
5 Serial Numbers
13
-
Chassis Number
13
-
Type Label
13
-
Key Number (All EXC Models)
13
-
Engine Number
13
-
Fork Part Number
13
-
Shock Absorber Part Number
14
-
-
6 Controls
15
-
Clutch Lever
15
-
Hand Brake Lever
15
-
Throttle Grip
15
-
Kill Switch (All EXC Models)
15
-
Kill Switch (XC-W)
16
-
Horn Button (All EXC Models)
16
-
Light Switch (All EXC Models)
16
-
Light Switch (XC-W)
16
-
Turn Signal Switch (All EXC Models)
16
-
Emergency off Switch (EXC AUS)
17
-
Electric Starter Button (200/250/300 EXC EU, 250/300 EXC SIX DAYS EU, XC-W)
17
-
Electric Starter Button (EXC AUS)
17
-
Overview of Indicator Lamps (All EXC Models)
17
-
Speedometer
17
-
Overview
17
-
Activation and Test
18
-
Tripmaster Switch
18
-
Setting Kilometers or Miles
18
-
Adjusting the Speedometer Functions
18
-
Setting the Clock
19
-
Querying Lap Time
19
-
Display Mode SPEED (Speed)
20
-
Display Mode SPEED/H (Operating Hours)
20
-
Display Mode SPEED/CLK (Clock)
20
-
Display Mode SPEED/LAP (Lap Time)
21
-
Display Mode SPEED/ODO (Odometer)
21
-
Display Mode SPEED/TR1 (Trip Master 1)
21
-
Display Mode SPEED/TR2 (Trip Master 2)
21
-
Display Mode SPEED/A1 (Average Speed 1)
22
-
Display Mode SPEED/A2 (Average Speed 2)
22
-
Display Mode SPEED/S1 (Stop Watch 1)
22
-
Display Mode SPEED/S2 (Stop Watch 2)
23
-
6.14.19 Table of Functions
23
-
6.14.20 Table of Conditions and Menu Activation
23
-
Opening the Filler Cap
24
-
Closing the Filler Cap
24
-
Fuel Tap
25
-
Choke
25
-
Shift Lever
25
-
Kick Starter
26
-
Foot Brake Lever
26
-
Side Stand
26
-
Steering Lock (All EXC Models)
26
-
Locking the Steering (All EXC Models)
27
-
Unlocking the Steering (All EXC Models)
27
-

KTM 300 EXC Owner’s Manual (157 pages)
Brand: KTM
|
Category: Motorcycle
|
Size: 7.6 MB
Table of Contents
-
Table of Contents
4
-
Means of Representation
8
-
Symbols Used
8
-
Formats Used
8
-
Safety Advice 2
9
-
Use Definition — Intended Use
9
-
Misuse
9
-
Degrees of Risk and Symbols
9
-
Tampering Warning
10
-
Safe Operation
10
-
Protective Clothing
11
-
Work Rules
11
-
Environment
11
-
Owner’s Manual
11
-
Important Notes
12
-
Manufacturer Warranty, Implied Warranty
12
-
Fuel, Auxiliary Substances
12
-
Spare Parts, Accessories
12
-
Service
12
-
Figures
12
-
Customer Service
12
-
View of Vehicle 4
13
-
View of Vehicle, Front Left (Example)
13
-
View of Vehicle, Rear Right (Example)
14
-
Serial Numbers 5
15
-
Vehicle Identification Number
15
-
Type Label
15
-
Key Number
15
-
Engine Number
15
-
Fork Part Number
16
-
Shock Absorber Article Number
16
-
Controls 6
17
-
Clutch Lever
17
-
Hand Brake Lever
17
-
Throttle Grip
17
-
Switch-Off Button
17
-
Horn Button
18
-
Light Switch
18
-
Turn Signal Switch
18
-
Emergency off Switch
18
-
Start Button
19
-
Overview of Indicator Lamps
19
-
Opening the Fuel Tank Filler Cap
19
-
Closing the Fuel Tank Filler Cap
20
-
Fuel Tap
20
-
Choke
21
-
Shift Lever
21
-
Foot Brake Lever
21
-
Side Stand
22
-
Steering Lock
22
-
Locking the Steering
22
-
Unlocking the Steering
23
-
Combination Instrument
24
-
Combination Instrument Overview
24
-
Activation and Test
24
-
Setting the Kilometers or Miles
24
-
Adjusting Combination Instrument Function
25
-
Setting the Clock
26
-
Viewing the Lap Time
26
-
Display Mode SPEED (Speed)
27
-
Display Mode SPEED/H (Operating Hours)
27
-
Setup Menu
27
-
Adjusting the Unit of Measurement
28
-
Display Mode SPEED/CLK (Time)
29
-
Setting the Clock
29
-
Display Mode SPEED/LAP (Lap Time)
29
-
Viewing the Lap Time
30
-
Display Mode SPEED/ODO (Odometer)
30
-
Display Mode SPEED/TR1 (Trip Master 1)
31
-
Display Mode SPEED/TR2 (Trip Master 2)
31
-
Adjusting TR2 (Trip Master 2)
31
KTM 300 EXC Owner’s Manual (136 pages)
2012 Motorcycle
Brand: KTM
|
Category: Motorcycle
|
Size: 4.26 MB
Table of Contents
-
Table of Contents
4
-
Means of Representation
7
-
Important Information
8
-
View of Vehicle
10
-
View of Vehicle, Front Left (Example)
10
-
View of Vehicle, Rear Right (Example)
11
-
-
Serial Numbers
12
-
Chassis Number
12
-
Type Label
12
-
Key Number (All EXC Models)
12
-
Engine Number
13
-
Fork Part Number
13
-
Shock Absorber Part Number
13
-
-
Controls
14
-
Clutch Lever
14
-
Hand Brake Lever
14
-
Throttle Grip
14
-
Kill Switch (All EXC Models)
14
-
Short Circuit Button (XC-W)
15
-
Light Switch (All EXC Models)
15
-
Turn Signal Switch (All EXC Models)
15
-
Horn Button (All EXC Models)
15
-
Emergency off Switch (200 EXC AUS)
15
-
Emergency off Switch (250/300 EXC AUS)
16
-
Electric Starter Button (250/300 EXC EU, EXC SIX DAYS, 250/300 XC-W)
16
-
Electric Starter Button (250/300 EXC AUS)
16
-
Light Switch (XC-W)
16
-
Overview of Indicator Lamps (All EXC Models)
16
-
Speedometer
17
-
Speedometer Activation and Test
17
-
Tripmaster Switch
17
-
Setting Kilometers or Miles
17
-
Setting the Clock
18
-
Adjusting the Speedometer Functions
18
-
Querying Lap Time
19
-
Display Mode SPEED (Speed)
19
-
Display Mode SPEED/H (Operating Hours)
19
-
Display Mode SPEED/CLK (Clock)
20
-
Display Mode SPEED/LAP (Lap Time)
20
-
Display Mode SPEED/ODO (Odometer)
20
-
Display Mode SPEED/TR1 (Trip Master 1)
20
-
Display Mode SPEED/TR2 (Trip Master 2)
21
-
Display Mode SPEED/A1 (Average Speed 1)
21
-
Display Mode SPEED/A2 (Average Speed 2)
21
-
Display Mode SPEED/S1 (Stop Watch 1)
22
-
Display Mode SPEED/S2 (Stop Watch 2)
22
-
Fuel Tap
23
-
Opening the Filler Cap
23
-
Closing the Filler Cap
24
-
Shift Lever
24
-
Kickstarter
24
-
Foot Brake Lever
25
-
Side Stand
25
-
Steering Lock (All EXC Models)
25
-
Locking the Steering (All EXC Models)
25
-
Unlocking the Steering (All EXC Models)
26
-
-
Preparing for Use
27
-
Advice on First Use
27
-
Running in the Engine
28
-
Preparing the Vehicle for Difficult Operating Conditions
28
-
Preparations for Riding on Dry Sand
29
-
Preparations for Riding on Wet Sand
29
-
Preparations for Riding on Wet and Muddy Surfaces
30
-
Preparations for Riding at High Temperatures and Low Speeds
30
-
Preparing for Rides at Low Temperatures or in Snow
31
-
-
Riding Instructions
32
-
Checks and Maintenance Work When Preparing for Use
32
-
Starting
32
-
Start off
33
-
Shifting, Riding
33
-
Braking
33
-
Stopping, Parking
34
-
Refueling
34
-
-
Service Schedule
36
-
Maintenance Work (as an Additional Order)
37
-
KTM 300 EXC Repair Manual (154 pages)
KTM Automobile Parts User Manual
Brand: KTM
|
Category: Engine
|
Size: 5.51 MB
Table of Contents
-
Table of Contents
5
-
Updating Instructions
7
-
Explanation — Updating
9
-
General Information
14
-
Operating Ranges of the Carburetor
16
-
Basic Information on a Change of the Carburetor Setting
17
-
Basic Information on the Original Carburetor Setting
17
-
-
Carburetor Adjustment
17
-
Bleeding of the Hydraulic Clutch
18
-
Checking the Setting of the TVC System
18
-
Special Tools — Engine 250/300/380
19
-
-
Cleaning
20
-
Conservartion for Winter Operation
20
-
Storage
20
-
Removing and Refitting Engine
22
-
Dismounting the Engine
24
-
Filling in of Cooling Liquid
26
-
Filling in of Transmission Oil
26
-
Refitting the Engine
26
-
-
Disassembling the Engine
28
-
Dismounting of Cylinder Head, Cylinder and Piston
30
-
Dismounting of Sprocket and Shift Lever
30
-
Draining Gear Oil
30
-
Dismounting of Clutch Cover
31
-
Dismounting of Pressure Cap and Clutch Discs
32
-
Dismounting of the Primary Drive
32
-
Dismounting of Ignition Cover
33
-
Dismounting of Kickstarter
33
-
Dismounting of the Shift Lock
33
-
Dismounting of the Ignition (Kokusan)
34
-
Dismounting of the Ignition (SEM)
34
-
Dismounting of Gearshift Mechanism and Transmission
35
-
Dismounting of Intake Flange and Reed Valve Housing
35
-
Parting of Engine Housing Halves
35
-
Dismounting the Crankshaft
36
-
Servicing of Individual Components
37
-
Working on the Right-Hand Housing Half
39
-
Working on the Left-Hand Housing Half
40
-
-
Crankshaft
41
-
Crankshaft Webs – Measure Outer Dimension
41
-
Piston
41
-
Piston Ring End Gap
41
-
Checking Cylinder for Wear
42
-
Nikasil Coating of Cylinder
42
-
Recoated Cylinder
42
-
Cylinder Exhaust Control System
43
-
Cylinder Preassembly
43
-
Exhaust Control, Clutch Cover
45
-
Preassembly of Clutch Cover
45
-
Reed Valve Housing, Intake Flange
46
-
Clutch
47
-
Replace Outer Clutch Hub
48
-
Preassembly of Shift Shaft
49
-
Shift Mechanism
49
-
Check Stator and Pulse Generator (Kokusan)
50
-
Ignition (Kokusan)
50
-
Kokusan Ignition & Spark Plug
50
-
Check Stator (SEM)
51
-
Ignition (SEM)
51
-
SEM Ignition & Spark Plug
51
-
Assembly Mainshaft
52
-
Transmission
52
-
Assembly Countershaft
53
-
Assemble of Kickstarter Shaft
54
-
Assembling the Engine
55
-
Assembling the Engine Housing
58
-
Mounting Kickstarter
59
-
Mounting Shift Mechanism
59
-
Mount Primary Drive and Clutch
60
-
Mounting Clutch Discs and Pressure Cap
61
-
Adjusting Dimension „X“
62
-
Mounting Piston and Cylinder
62
-
Adjusting Control Flap (Dimension “Z“)
63
-
Mounting Cylinder Head
64
-
Mounting Reed Valve Housing and Intake Flange
64
-
Mounting Steering Covers
64
-
Mounting Engine Sprocket
65
-
Mounting the Ignition (Kokusan)
65
-
Adjusting Ignition Point (SEM)
66
-
Mounting Starting Lever and Shift Lever
66
-
Mounting the Ignition (SEM)
66
-
Electrical
67
-
Checking the Voltage Regulator (Kokusan)
69
-
Checking the Voltage Regulator (Tympanium)
69
-
Checking the Voltage Regulator-Rectifier (Shindengen)
69
-
CDI Unit
70
-
Checking the Capacitor
70
-
Ignition Coil (Kokusan)
70
-
Ignition Coil (SEM)
70
-
Checking the Voltage Regulator
71
-
Static Ignition Values 250-380 SX, EXC (Kokusan 2K-1, 2K-3, 2K-4)
72
-
Static Generator Values 250-380 EXC (Kokusan 2K-3) (Except 250 USA)
74
-
Static Ignition Values 250 MXC, EXC USA (Kokusan 2K-2)
76
-
Troubleshooting
79
-
-
Trouble Shooting
81
-
Technical Specifications
83
-
Technical Specifications — Engine 250/300/380 SX/MXC/EXC ‘99 (Only for USA)
85
-
Basic Carburetor Setting
86
-
Gasket Thicknesses
86
-
Tightening Torques
86
-
Tolerances and Fitting Clearances
86
-
Technical Specifications — Engine 250/300/380 SX/EXC/EGS ‘99 (All Models out of USA)
87
-
Standard Adjustment — Fork
89
-
Standard Adjustment — Shock Absorber
89
-
Technical Specifications Chassis 250/300/380 SX/MXC/EXC/EGS ‘99
89
-
Carburetor Setting KTM 250/300 MXC/EXC EU, USA‘99 KEIHIN PWK 38
90
-
Carburetor Setting KTM 250 SX Europe, USA ‘99 KEIHIN PWK 38
91
-
Carburetor Setting KTM 380 SX/MXC/EXC EU, USA ‘99 KEIHIN PWK 38
92
-
Technical Data — Engine 250/300/380 SX/MXC/EXC 2000 (Only USA)
93
-
Technical Data — Engine 250/300/380 SX/EXC 2000 (All Models out of USA)
95
-
Technical Specifications Chassis 250/300/380 SX, MXC, EXC 2000
97
-
Carburetor Setting G KTM 250 SX EUR/USA 2000 KEIHIN PWK 38AG PJ
98
-
Carburetor Setting KTM 250 MXC/EXC EUR/USA 2000 KEIHIN PWK 38 AG
99
-
Carburetor Setting KTM 300 MXC/EXC EUR/USA 2000 KEIHIN PWK 38 AG
100
-
Carburetor Setting KTM 380 SX/MXC/ EXC/EUR/USA 2000 KEIHIN PWK 38 AG
101
-
Technical Data — Engine 250/300/380 SX/MXC EXC 2001 (Only USA)
103
-
Technical Data — Engine 250/300/380 SX / EXC 2001 (All Models out of USA)
105
-
Technical Specifications Chassis 250/300/380 SX, MXC, EXC 2001
107
-
Carburetor Setting KTM 250 SX EUR/USA 2001 KEIHIN PWK 38AG PJ
108
-
Carburetor Setting KTM 250 MXC/EXC EUR/USA 2001 KEIHIN PWK 38 AG
109
-
Carburetor Setting KTM 300 MXC/EXC EUR/USA 2001 KEIHIN PWK 38 AG
110
-
Carburetor Setting KTM 380 SX / MXC / EXC EUR / USA 2001 KEIHIN PWK 38 AG
111
-
Technical Data — Engine 250/300/380 SX / MXC / EXC 2002 (Only USA)
112
-
Technical Data — Engine 250/300/380 SX / EXC 2002 (All Models out of USA)
114
-
Technical Specifications Chassis 250/300/380 SX, MXC, EXC 2002
116
-
Carburetor Setting KTM 250 SX EUR/USA 2002 KEIHIN PWK 38AG
117
-
Carburetor Setting KTM 250 MXC/EXC EUR/USA 2002 KEIHIN PWK 38 AG
118
-
Carburetor Setting KTM 300 MXC/EXC EUR/USA 2002 KEIHIN PWK 38 AG
119
-
Carburetor Setting KTM 380 SX / MXC / EXC EUR / USA 2002 KEIHIN PWK 38 AG
120
-
Technical Data — Engine 250/300 MXC/EXC 2003
121
-
Periodic Lubrication and Maintenance Schedule
131
-
Periodic Maintenance Schedule 2001/02
132
-
Important Chacks and Maintenance to be Carried by the Rider
133
-
Periodic Maintenance Schedule 2003
134
-
Recommended Inspection of the 250/300 EXC and MXC Engine Used for Enduro Competitions by Your KTM Workshop
136
-
Recommended Inspection of the 250/300 EXC and MXC Engine Used for Hobby Enduro by Your KTM Workshop
136
-
-

KTM 300 EXC Owner’s Manual (74 pages)
KTM Owner’s Manual Motorcycle 125 EXC, EXC SIX DAYS 200 XC, XC-W, EXC 250 XC, XC-W, EXC, EXC SIX DAYS 300 XC, XC-W, EXC-E, EXC-E SIX DAYS
Brand: KTM
|
Category: Motorcycle
|
Size: 9.08 MB
Table of Contents
-
Table of Contents
5
-
Serial Number Locations
6
-
Chassis Number
6
-
Engine Number, Engine Type
6
-
-
Operation Instruments
6
-
Clutch Lever
6
-
Hand Brake Lever
6
-
Electronic Speedometer
7
-
Indicator Lamps (EXC)
11
-
Short Circuit Button
11
-
Combination Switch (EXC)
12
-
Headlamp Switch (XC-W)
12
-
Flasher Switch
12
-
Starter Button
12
-
Emergency off Switch (Australia)
12
-
Filler Cap
13
-
Fuel Tap
13
-
Choke Knob
13
-
Shift Lever
14
-
Kickstarter
14
-
Foot Brake Pedal
14
-
Side Stand
14
-
Steering Lock
14
-
Compression Damping of Fork
15
-
Rebound Damping of Fork
15
-
Spring Preload of the Fork
15
-
Shock Absorber Compression Damping
16
-
Shock Absorber Rebound Damping
16
-
-
General Tips and Warnings for Starting the Motorcycle
17
-
Instructions for Your First Ride
17
-
Running in
17
-
-
Driving Instructions
18
-
What You Should Check before each Start
18
-
Starting When the Engine Is Cold
19
-
Starting When the Engine Is Warm
19
-
What to Do When the Engine Is „Flooded
19
-
Starting off
19
-
Shifting/Riding
20
-
Braking
20
-
Stopping and Parking
20
-
Refueling, Fuel
20
-
-
Periodic Maintenance Schedule
21
-
Maintenance Work on Chassis and Engine
25
-
Changing the Spring Preloading of the Shock Absorber
25
-
Pivot Bearing
25
-
Basic Suspension Setup for the Weight of the Driver
26
-
Checking the Shock Absorber and Spring
26
-
Determining the Static Sag of the Shock Absorber
26
-
Determining the Riding Sag of the Shock Absorber
26
-
Changing the Spring Preload on the Telescopic Fork
27
-
Checking the Basic Setup of the Telescopic Fork
27
-
Breather Plug Front Fork
27
-
Cleaning the Dust Sleeves of the Telescopic Fork
28
-
Checking and Adjusting the Steering Head Bearing
28
-
Changing the Fork Offset (Caster) XC/EXC Six Days
29
-
How to Change the Handlebar Position
30
-
Adapting Chain Guide to the Rear Sprocket
31
-
Check Chain Tension
32
-
Correct Chain Tension
32
-
Chain Maintenance
32
-
Chain Wear
32
-
General Information about KTM Disc Brakes
33
-
Changing Basic Position of the Hand Brake Lever
34
-
Checking the Brake Fluid Level — Front Brake
34
-
Refilling the Front Brake Fluid Reservoir
34
-
Checking the Front Brake Pads
34
-
Replacing the Front Brake Pads
35
-
Checking the Rear Brake Fluid Level
35
-
Refilling the Rear Brake Fluid Reservoir
35
-
Changing the Basic Position of the Foot Brake Pedal
36
-
Checking the Rear Brake Pads
36
-
Replacing the Rear Brake Pads
36
-
Dismounting and Mounting the Front Wheel
37
-
Dismounting and Mounting the Rear Wheel
38
-
Tires, Air Pressure
38
-
Checking Spoke Tension
39
-
Replacing the Battery of the Digital Speedometer
39
-
Replacing the Headlight Lamp/Parking Light Lamp
39
-
Battery
40
-
Charging the Battery
40
-
Fuse
41
-
Cooling System
41
-
Checking the Coolant Level
42
-
Refilling/Bleeding the Cooling System
42
-
Cleaning the Air Filter
42
-
Checking the Oil Level of the Hydraulic Clutch
43
-
Exhaust System
43
-
Changing the Original Position of the Clutch Lever
43
-
Bleeding the Hydraulic Clutch
44
-
Carburetor Adjustment
44
-
Draining the Float Chamber of the Carburetor
46
-
Checking the Float Level
46
-
Adjusting the Engine Characteristic Via the Ignition Curve
46
-
Adjusting the Engine Characteristic Via the Auxiliary Spring
47
-
Check Transmission Oil Level
48
-
Changing the Transmission Oil
48
-
KTM 300 EXC Owner’s Manual (71 pages)
2007
Brand: KTM
|
Category: Motorcycle
|
Size: 5.14 MB
Table of Contents
-
Table of Contents
5
-
Serial Number Locations
6
-
Chassis Number
6
-
Engine Number, Engine Type
6
-
-
Operation Instruments
6
-
Clutch Lever
6
-
Hand Brake Lever
6
-
Electronic Speedometer
7
-
Indicator Lamps (EXC)
11
-
Combination Switch (EXC)
12
-
Headlamp Switch (XC-W)
12
-
Flasher Switch
12
-
Emergency off Switch (Australia)
12
-
Filler Cap
13
-
Filler Cap (XC, XC-W)
13
-
Fuel Tap
13
-
Choke Knob
13
-
Shift Lever
13
-
Kickstarter
14
-
Foot Brake Pedal
14
-
Side Stand
14
-
Steering Lock
14
-
Compression Damping of Fork
15
-
Rebound Damping of Fork
15
-
Spring Preload of the Fork(XC/EXC Six Days)
15
-
Compression Damping of Shock Absorber (XC-W, EXC)
16
-
Shock Absorber Compression Damping (XC-W/EXC)
16
-
Shock Absorber Rebound Damping XC-W, EXC)
16
-
-
General Tips and Warnings for Starting the Motorcycle
17
-
Instructions for Your First Ride
17
-
Running in
17
-
-
Driving Instructions
18
-
What You Should Check before each Start
18
-
Starting When the Engine Is Cold
19
-
Starting When the Engine Is Warm
19
-
What to Do When the Engine Is „Flooded
19
-
Starting off
19
-
Shifting/Riding
20
-
Braking
20
-
Stopping and Parking
20
-
Refueling, Fuel
20
-
-
Periodic Maintenance Schedule
21
-
Maintenance Work on Chassis and Engine
25
-
Changing the Spring Preloading of the Shock Absorber
25
-
Pivot Bearing
25
-
Basic Suspension Setup for the Weight of the Driver
26
-
Checking the Shock Absorber and Spring
26
-
Determining the Static Sag of the Shock Absorber
26
-
Determining the Riding Sag of the Shock Absorber
26
-
Changing the Spring Preload on the Telescopic Fork
27
-
Checking the Basic Setup of the Telescopic Fork
27
-
Replacing Fork Springs
28
-
Breather Plug Front Fork
28
-
Cleaning the Dust Sleeves of the Telescopic Fork
28
-
Changing the Fork Offset (Caster) (XC)
29
-
Checking and Adjusting the Steering Head Bearing
30
-
How to Change the Handlebar Position
31
-
Check Chain Tension
31
-
Correct Chain Tension
32
-
Chain Maintenance
32
-
Chain Wear
32
-
General Information about KTM Disc Brakes
33
-
Adjusting the Free Travel at the Hand Brake Lever
34
-
Checking the Brake Fluid Level — Front Brake
34
-
Refilling the Front Brake Fluid Reservoir
34
-
Checking the Front Brake Pads
34
-
Replacing the Front Brake Pads
35
-
Changing the Basic Position of the Foot Brake Pedal
35
-
Checking the Rear Brake Fluid Level
35
-
Refilling the Rear Brake Fluid Reservoir
35
-
Checking the Rear Brake Pads
36
-
Replacing the Rear Brake Pads
36
-
Dismounting and Mounting the Front Wheel
36
-
Dismounting and Mounting the Rear Wheel
37
-
Tires, Air Pressure
38
-
Checking Spoke Tension
38
-
Replacing the Battery of the Digital Speedometer
39
-
Check/Set Distance of the Magnetic Sensor
39
-
Replacing the Headlight Lamp/Parking Light Lamp
39
-
Cooling System
40
-
Checking the Coolant Level
40
-
Refilling/Bleeding the Cooling System
41
-
Cleaning the Air Filter
41
-
Checking the Oil Level of the Hydraulic Clutch
42
-
Exhaust System
42
-
Changing the Original Position of the Clutch Lever
42
-
Bleeding the Hydraulic Clutch
43
-
Carburetor Adjustment
43
-
Draining the Float Chamber of the Carburetor
45
-
Checking the Float Level
45
-
Adjusting the Engine Characteristic Via the Ignition Curve
45
-
Adjusting the Engine Characteristic Via the Auxiliary Spring
46
-
Check Transmission Oil Level (125/200)
47
-
Changing the Transmission Oil (125/200)
47
-
Check Transmission Oil Level (250/300)
47
-
Changing the Transmission Oil (250/300)
47
-
KTM 300 EXC Owner’s Manual (67 pages)
Brand: KTM
|
Category: Motorcycle
|
Size: 5.12 MB
Table of Contents
-
Table of Contents
5
-
Serial Number Locations
6
-
Chassis Number
6
-
Engine Number, Engine Type
6
-
-
Operation Instruments
6
-
Clutch Lever
6
-
Hand Brake Lever
6
-
Electronic Speedometer
7
-
Indicator Lamps (EXC)
11
-
Short Circuit Button (SX)
12
-
Combination Switch (EXC)
12
-
Headlamp Switch (EXC USA)
12
-
Flasher Switch
12
-
Emergency off Switch (Australia)
12
-
Filler Cap
13
-
Fuel Tap
13
-
Choke Knob
13
-
Shift Lever
13
-
Kickstarter
14
-
Foot Brake Pedal
14
-
Side Stand
14
-
Steering Lock
14
-
Compression Damping of Fork
15
-
Rebound Damping of Fork
15
-
Damping Action During Compression of Shock Absorber (SX)
15
-
Compression Damping of Shock Absorber (MXC, EXC)
16
-
Rebound Damping of Shock Absorber (SX, MXC, EXC)
16
-
-
General Tips and Warnings for Starting the Motorcycle
17
-
Instructions for Your First Ride
17
-
Running in
17
-
-
Driving Instructions
18
-
What You Should Check before each Start
18
-
Starting When the Engine Is Cold
19
-
Starting When the Engine Is Warm
19
-
What to Do When the Engine Is „Flooded
19
-
Starting off
19
-
Shifting/Riding
19
-
Braking
20
-
Stopping and Parking
20
-
Refueling, Fuel
20
-
-
Periodic Maintenance Schedule
21
-
Maintenance Work on Chassis and Engine
24
-
Changing the Spring Preload of the Shock Absorber
24
-
Pivot Bearing
24
-
Basic Suspension Setup for the Weight of the Driver
25
-
Checking the Shock Absorber and Spring
25
-
Determining the Static Sag of the Shock Absorber
25
-
Determining the Riding Sag of the Shock Absorber
25
-
Checking the Basic Setup of the Telescopic Fork
26
-
Changing the Spring Preload on the Telescopic Fork
26
-
Replacing Fork Springs
27
-
Breather Plug Front Fork
27
-
Cleaning the Dust Sleeves of the Telescopic Fork
27
-
Changing the Fork Offset (SX)
28
-
Checking and Adjusting the Steering Head Bearing
29
-
How to Change the Handlebar Position
30
-
Check Chain Tension
30
-
Correct Chain Tension
31
-
Chain Maintenance
31
-
Chain Wear
31
-
General Information about KTM Disc Brakes
32
-
Adjusting the Free Travel at the Hand Brake Lever
33
-
Checking the Brake Fluid Level — Front Brake
33
-
Refilling the Front Brake Fluid Reservoir
33
-
Checking the Front Brake Pads
33
-
Replacing the Front Brake Pads
34
-
Changing the Basic Position of the Foot Brake Pedal
34
-
Checking the Rear Brake Fluid Level
34
-
Refilling the Rear Brake Fluid Reservoir
34
-
Checking the Rear Brake Pads
35
-
Replacing the Rear Brake Pads
35
-
Dismounting and Mounting the Front Wheel
35
-
Dismounting and Mounting the Rear Wheel
36
-
Tires, Air Pressure
37
-
Checking Spoke Tension
37
-
Replacing the Battery of the Digital Speedometer
37
-
Check/Set Distance of the Magnetic Sensor
38
-
Replacing the Headlight Lamp/Parking Light Lamp
38
-
Cooling System
39
-
Radiator Cover for the Cold Season
39
-
Checking the Coolant Level
39
-
Refilling/Bleeding the Cooling System
40
-
Cleaning the Air Filter
40
-
Changing the Original Position of the Clutch Lever
41
-
Checking the Oil Level of the Hydraulic Clutch
41
-
Bleeding of the Hydraulic Clutch
41
-
Exhaust System
41
-
Cleaning the Spark Arrestor (EXC USA)
42
-
Carburetor Adjustment
42
-
Draining the Float Chamber of the Carburetor
43
-
Checking the Float Level
43
-
Engine Characteristic 250/300 SX/MXC/EXC
44
-
Check Transmission Oil Level (125/200)
45
-
Changing the Transmission Oil (125/200)
45
-
Check Transmission Oil Level (250/300)
45
-
Changing the Transmission Oil (250/300)
45
-
KTM 300 EXC Owner’s Handbook Manual (45 pages)
Brand: KTM
|
Category: Motorcycle
|
Size: 3.46 MB
Table of Contents
-
Chassis Number
3
-
Engine Number
3
-
Table of Contents
5
-
Serial Number Locations
6
-
Chassis Number
6
-
Engine Number, Engine Type (125/200)
6
-
Engine Number, Engine Type (250/300/380)
6
-
-
Operation Instruments
6
-
Clutch Lever
6
-
Hand Brake Lever
6
-
Digital Speedometer, Indicator Lamp (EXC)
7
-
Digital Speedometer
7
-
Odometer (EXC USA)
7
-
Speedometer, Indicator Lamps (EXC — Australia)
7
-
Short Circuit Button (SX)
7
-
Combination Switch (EXC)
8
-
Headlamp Switch (EXC USA)
8
-
Flasher Switch
8
-
Emergency off Switch (Australia)
8
-
Filler Cap
8
-
Refueling, Fuel
9
-
Fuel Tap
9
-
Choke Knob
9
-
Shift Lever
10
-
Kickstarter
10
-
Foot Brake Pedal
10
-
Compression Damping of Fork
10
-
Rebound Damping of Fork
10
-
Compression Damping of Shock Absorber
11
-
Rebound Damping of Shock Absorber
11
-
Steering Lock
11
-
Side Stand
11
-
-
Driving Instructions
12
-
Starting off
13
-
Periodic Maintenance Schedule
14
-
-
Maintenance Work on Chassis and Engine
16
-
Changing the Original Position of the Clutch Lever
16
-
Checking and Adjusting the Steering Head Bearing
16
-
Breather Plug Front Fork
17
-
Cleaning the Dust Sleeves of the Telescopic Fork
17
-
How to Change the Handlebar Position
17
-
Changing the Spring Preloading of the Shock Absorber
18
-
Pivot Bearing
18
-
Check Chain Tension
18
-
Correct Chain Tension
19
-
Chain Maintenance
19
-
Chain Wear
19
-
General Informations about KTM Disc Brakes
20
-
Adjusting of Free Travel at the Hand Brake Lever
20
-
WIRING DIAGRAMME, CARBURETOR SETTING . . .Appendix
21
-
Checking of Brake Fluid Level — Front Brake
21
-
Refilling the Front Brake Fluid Reservoir
21
-
Checking the Front Brake Pads
21
-
Replacing the Front Brake Pads
21
-
Changing the Basic Position of the Foot Brake Pedal
22
-
Checking Rear Brake Fluid Level
22
-
Refilling the Rear Brake Fluid Reservoir
22
-
Checking the Rear Brake Pads
23
-
Replacing the Rear Brake Pads
23
-
Dismounting and Mounting the Front Wheel
23
-
Dismounting and Mounting the Rear Wheel
24
-
Tires-Air Pressure
25
-
Checking Spoke Tension
25
-
Replacing the Battery of the Digital Speedometer
25
-
Adjustin Digital Speedometer
27
-
Check/Set Distance of Magnetic Sensor
27
-
Replacing Headlight Lamp (H4)
28
-
Cooling System
28
-
Radiator Cover for the Cold Season
29
-
Checking the Coolant Level
29
-
Refilling/Bleeding the Cooling System
29
-
Cleaning the Air Filter
30
-
Exhaust System
30
-
Cleaning the Spark Arrestor (EXC USA)
30
-
Draining of Float Chamber of the Carburetor
30
-
Carburetor Adjustment
31
-
Checking the Float Level
32
-
Checking the Oil Level of the Hydraulic Clutch
32
-
Bleeding of the Hydraulic Clutch
32
-
Check Transmission Oil Level (125/200)
33
-
Changing the Transmission Oil (125/200)
33
-
Check Transmission Oil Level (250/300/380)
33
-
Changing the Transmission Oil (250/300/380)
33
-

KTM 300 EXC Owner’s Manual (39 pages)
Brand: KTM
|
Category: Motorcycle
|
Size: 4.82 MB
Table of Contents
-
Table of Contents
5
-
Serial Number Locations
6
-
Frame Number
6
-
Engine Number, Engine Type (125/200)
6
-
Engine Number, Engine Type (250/300/380)
6
-
Operation Instruments
6
-
Clutch Control Lever (125/200)
6
-
Clutch Control Lever (250/300/380)
6
-
Hand Brake Lever
7
-
Speedometer, Indicator Lamps (EXC)
7
-
Odometer (EXC USA)
7
-
Speedometer, Indicator Lamps (EGS)
7
-
Ignition Lock
7
-
Short Circuit Button (SX)
8
-
Combination Switch (EXC)
8
-
Headlamp Switch (EXC USA)
8
-
Flasher Switch
8
-
Emergency off Switch (Australia)
8
-
Filler Cap
9
-
Refueling, Fuel
9
-
Fuel Tap
9
-
Choke Knob
10
-
Shift Lever
10
-
Kickstarter
10
-
Foot Brake Pedal
10
-
Compression Damping of Fork
10
-
Rebound Damping of Fork
11
-
Compression Damping of Shock Absorber
11
-
Rebound Damping of Shock Absorber
11
-
Steering Lock
11
-
Side Stand
11
-
Driving Instructions
12
-
Starting When the Engine Is Cold
13
-
Starting When the Engine Is Warm
13
-
Starting off
13
-
Stopping and Parking
13
-
Periodic Lubrication and Maintenance Schedule
14
-
Maintenance Work on Chassis and Engine
15
-
Changing the Original Position of the Clutch Lever (125/200)
15
-
Checking and Adjusting the Steering Head Bearing
15
-
Check Chain Tension
16
-
Correct Chain Tension
16
-
Chain Maintenance
16
-
Chain Wear
17
-
General Informations about KTM Disc Brakes
17
-
Adjusting of Free Travel at the Hand Brake Lever
17
-
Checking of Brake Fluid Level — Front Brake
18
-
Refilling the Front Brake Fluid Reservoir
18
-
Checking the Front Brake Pads
18
-
Replacing the Front Brake Pads
18
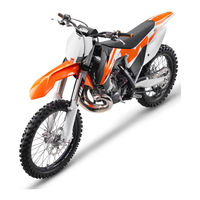
KTM 300 EXC Owner’s Handbook Manual (37 pages)
1999
Brand: KTM
|
Category: Motorcycle
|
Size: 5.75 MB
Table of Contents
-
Table of Contents
5
-
Serial Number Locations
6
-
Chassis Number
6
-
Engine Number, Engine Type (125/200)
6
-
Engine Number, Engine Type (250/300/380)
6
-
Operation Instruments
6
-
Clutch Lever
6
-
Hand Brake Lever
6
-
Speedometer, Indicator Lamp (EXC)
7
-
Odometer (EXC USA)
7
-
Speedometer, Indicator Lamps (EGS)
7
-
Ignition Lock
7
-
Short Circuit Button (SX)
8
-
Combination Switch (EXC)
8
-
Headlamp Switch (EXC USA)
8
-
Flasher Switch
8
-
Emergency off Switch (Australia)
8
-
Filler Cap
9
-
Refueling, Fuel
9
-
Fuel Tap
9
-
Choke Knob
10
-
Shift Lever
10
-
Kickstarter
10
-
Foot Brake Pedal
10
-
Compression Damping of Fork
10
-
Rebound Damping of Fork
11
-
Compression Damping of Shock Absorber
11
-
Rebound Damping of Shock Absorber
11
-
Steering Lock
11
-
Center Stand
11
-
Driving Instructions
12
-
Starting off
13
-
Periodic Lubrication and Maintenance Schedule
14
-
Maintenance Work on Chassis and Engine
15
-
Changing the Original Position of the Clutch Lever
15
-
Checking and Adjusting the Steering Head Bearing
15
-
Pivot Bearing
16
-
Check Chain Tension
16
-
Correct Chain Tension
16
-
Chain Maintenance
16
-
Chain Wear
17
-
General Informations about KTM Disc Brakes
17
-
Adjusting of Free Travel at the Hand Brake Lever
17
-
Checking of Brake Fluid Level — Front Brake
18
-
Refilling the Front Brake Fluid Reservoir
18
-
Checking the Front Brake Pads
18
-
Replacing the Front Brake Pads
18
-
Changing the Basic Position of the Brake Pedal
19
-
Checking Rear Brake Fluid Level
19
-
Refilling the Rear Brake Fluid Reservoir
19
KTM 300 EXC Manual (12 pages)
motor type 546
Brand: KTM
|
Category: Engine
|
Size: 10.69 MB
Table of Contents
-
Technical Data
1
-
Gear Ratios
2
-
Basic Carburetor Setting
2
-
Tolerances and Fitting Clearances
2
-
Gasket Thicknesses
2
-
Crank Case
3
-
Clutch Cover
4
-
Crankshaft, Piston
4
-
Cylinder
5
-
Twin Valve Control
5
-
Carburettor
6
-
Clutch
7
-
Kickstarter
7
-
Ignition System
8
-
Transmission
9
-
Shifting Mechanism
10
-
Cooling System
10
-
Special Tools
11
Advertisement
Related Products
-
KTM 300 EXC AUS
-
KTM 300 EXC EU 2010
-
KTM 300 EXC SIX DAYS EU 2010
-
KTM 300 EXC AUS 2010
-
KTM 300 EXC Six days eu
-
KTM 300 EXC Factory Edition
-
KTM 300 EXC SIX DAYS
-
KTM 300 EXC 2004
-
KTM 300 EXC-E SIX DAYS 2008
-
KTM 300 EXC 2006
KTM Categories
Motorcycle
Motorcycle Accessories
Offroad Vehicle
Engine
Bicycle Accessories
More KTM Manuals
owner’s Manuals
PowerWear & PowerParts Manuals
Here is your personal document
If you prefer a printed document to thumb through, or you would like to search for an older document, these are available in the Print on Demand portal.
In the portal, you can find owner’s and repair manuals for a wide variety of models.
You can choose between PDF downloads and printed copies.
To the Print on Demand portal