- Manuals
- Brands
- Toyota Manuals
- Automobile
- Celica 1999
- Operating manual
-
Contents
-
Table of Contents
-
Bookmarks
Quick Links
Part 1
OPERATION OF
INSTRUMENTS AND
CONTROLS—
Chapter 1- 1
Overview of instruments
and controls
«
Instrument panel overview
«
Instrument cluster overview
«
Indicator
symbols
on
instrument panel
the
99MY CELICA U
1
Related Manuals for Toyota Celica 1999
Summary of Contents for Toyota Celica 1999
-
Page 1: Chapter 1- 1 Overview Of Instruments And Controls
99MY CELICA U Part 1 OPERATION OF INSTRUMENTS AND CONTROLS— Chapter 1- 1 Overview of instruments and controls » Instrument panel overview » Instrument cluster overview » Indicator symbols instrument panel…
-
Page 2: Instrument Panel Overview
99MY CELICA U Instrument panel overview 1. Side vents 2. Side defroster outlets 3. Instrument cluster 4. Personal lights 5. Electric moon roof switches and interior lights 6. Glove box 7. Power door lock switches 8. Power window switches 9. Ashtray 10.
-
Page 3
99MY CELICA U 1. Headlight and turn signal switch 2. Wiper and washer switches 3. Emergency flasher switch 4. Clock 5. Center vents 6. Car audio 7. Auxiliary box 8. Air conditioning controls 9. Rear window defogger switch 10. Liftback— Power rear view mirror control switch (without power windows) Convertible—… -
Page 4: Instrument Cluster Overview
99MY CELICA U Instrument cluster overview 1. Service reminder indicators and 4. Engine coolant temperature gauge 7. Trip meter reset knob indicator lights 5. Fuel gauge 8. Speedometer 2. Tachometer 6. Trip meter 3. Odometer…
-
Page 5: Indicator Symbols On The Instrument Panel
99MY CELICA U Indicator symbols on the instrument panel Open door warning light (type A) Brake system warning light SRS airbag warning light (type B) Seat belt reminder light Turn signal indicator lights Discharge warning light Headlight high beam indicator light Low oil pressure warning light Overdrive- off indicator light Malfunction indicator lamp…
-
Page 6
99MY CELICA U… -
Page 7: Operation Of Instruments And Controls
Fuel tank cap need additional keys, duplicates can be To protect things locked in the glove box, » Electric moon roof made by a Toyota dealer using the key trunk or luggage compartment when you number. » Convertible top have your vehicle parked, leave the sub We recommend you to write down the key key with the attendant.
-
Page 8: Side Doors
99MY CELICA U Side doors Driver’s side LOCKING AND UNLOCKING WITH KEY LOCKING UNLOCKING WITH INSIDE LOCK KNOB Insert the key into the keyhole and turn Move the lock knob. To lock: Turn the key forward. To lock: Push the knob forward. To unlock: Turn the key backward.
-
Page 9: Side Windows
99MY CELICA U Power windows— —Power window precautions —Side windows LOCKING UNLOCKING WITH CAUTION POWER DOOR LOCK SWITCH Push the switch. To avoid serious personal injury, you To lock: Push the switch on the front side. must do the following. To unlock: Push the switch on the rear «…
-
Page 10
99MY CELICA U OPERATING PASSENGER’S WINDOW switch on the passenger’s door. The driver’s door also has a switch that controls the passenger’s window. The window moves as long as you hold the switch. To open: Pull down the switch. To close: Push up the switch. If you push in the window lock button on the driver’s door, the passenger’s window cannot be operated. -
Page 11
99MY CELICA U —Quarter windows Trunk lid (convertible)/ (convertible) Back door (liftback)— CAUTION » Keep the trunk lid or back door closed while driving. This not only keeps luggage from being thrown out but also prevents ex- haust gases from entering the ve- hicle. -
Page 12: Luggage Security System
99MY CELICA U —Lock release lever —Luggage security system To open the trunk lid or back door from This system deactivates the lock re- 2. After closing the trunk lid or back the driver’s seat, pull up on the lock lease lever so that things locked in the door, insert the master key and turn release lever.
-
Page 13
99MY CELICA U Hood To open the hood: 2. In front of the vehicle, pull up the 3. Hold the hood open by inserting the auxiliary catch lever and lift support rod into the slot. 1. Pull the hood lock release lever. The hood. -
Page 14: Fuel Tank Cap
The indicator lamp goes off after driving neck if the cap is suddenly re- several times. If the indicator lamp does moved. not go off, contact your Toyota dealer as soon as possible.
-
Page 15: Electric Moon Roof
99MY CELICA U Electric moon roof You may stop the moon roof at any de- To operate the moon roof, use the switches beside the interior light. sired position. The roof will move while the switch is being pushed and stop when The moon roof works when the ignition released.
-
Page 16
99MY CELICA U Convertible top— —Convertible top precautions » z Do not raise or lower the convert- Never leave small children alone in CAUTION ible top when the temperature is the vehicle, especially with the igni- » below 5 C (41 F), or damage to the tion key still inserted. -
Page 17: Lowering The Convertible Top
99MY CELICA U —Lowering the convertible top LOWERING THE CONVERTIBLE TOP 2. Push and hold the convertible top INSTALLING THE TOP BOOT control switch on the ”OPEN” side The ignition switch must be in the ”ON” The top boot is used to cover and conceal until the convertible top is complete- position to operate the convertible top.
-
Page 18
99MY CELICA U —Raising the convertible top 4. Secure the top boot snaps to the 5. Attach the fastener tape on the top REMOVING THE TOP BOOT ones on the quarter trim. boot to that on the rear seatback. 1. Push the top boot backward to sepa- rate its fastener tape from the tape behind the rear seatback. -
Page 19: Raising The Convertible Top
99MY CELICA U 2. Release the top boot snaps from the 3. Pull out the outer edge of the top RAISING THE CONVERTIBLE TOP quarter trim. boot from under the body moldings. The ignition switch must be in the ”ON” Put the removed top boot in the plastic position to operate the convertible top.
-
Page 20
99MY CELICA U 5. Push the latch handles fully forward till they are hooked. Visually check that the latch handles are fully seated in the strikers. Also, pull on the convertible top side rails to make sure the top is securely hooked. 6. -
Page 21: Operation Of Instruments And Controls
99MY CELICA U Front seats— —Seat adjustment precautions Seats Part 1 While the vehicle is being driven, all ve- Adjust the driver’s seat so that the foot OPERATION OF pedals, steering wheel instrument hicle occupants should have the seatback panel controls are within easy reach of upright, sit well back in the seat and prop- INSTRUMENTS AND the driver.
-
Page 22
99MY CELICA U —Adjusting front seats 1. SEAT POSITION ADJUSTING LEVER » While adjusting the seat, do not put Pull the lever up. Then slide the seat your hands under the seat or near to the desired position with slight body the moving parts. -
Page 23
99MY CELICA U —Moving passenger’s seat for rear seat entry 3. DRIVER’S SEAT CUSHION ANGLE CAUTION ADJUSTING KNOB Turn the knob either way. » After putting back the seat, pushing the seat forward and rear- ward to make sure it is secured in place. -
Page 24: Head Restraints
99MY CELICA U Fold- down rear seat (liftback) Head restraints CAUTION When returning the seatback to the upright position: » Make sure the seat belts are not twisted or caught in the seatback and are arranged in their proper position and are ready to use. «…
-
Page 25
99MY CELICA U Seat belts— —Seat belt precautions Pregnant woman. Toyota recommends the Toyota strongly urges that the driver and CAUTION passengers in the vehicle be properly re- use of a seat belt. Ask your doctor for strained at all times with the seat belts specific recommendations. -
Page 26: Seat Belts
99MY CELICA U —Seat belts » Avoid reclining the seatbacks too much. The seat belts provide maxi- mum protection when the seatbacks are in the upright position. (Refer to the seat adjustment instructions.) » Be careful not to damage the belt webbing or hardware.
-
Page 27
» If the seat belt does not function normally, immediately contact your Toyota dealer. Do not use the seat until the seat belt is fixed. It cannot protect an adult occupant or your child from injury. -
Page 28: Seat Belt Extender
Please contact your local Toyota dealer so nally intended for. that the dealer can order the proper re- quired length for the extender. Bring the heaviest coat you expect to wear for prop- er measurement and selection of length.
-
Page 29: Srs Driver And Front Passenger Airbags
» If the seat belt does not function normally, immediately contact your Toyota dealer. Do not use the seat until the seat belt is fixed. It cannot To connect the extender to the seat The SRS (Supplemental Restraint Sys-…
-
Page 30
A driver or front passenger too close to the steering wheel or dashboard during airbag deployment killed seriously injured. Toyota strongly recommends that: » The driver sit as far back as pos- sible from the steering wheel while still maintaining control of the ve- hicle. «… -
Page 31
99MY CELICA U If the severity of the impact is below the above threshold level, the SRS airbags may not deploy. However, this threshold velocity will be Hitting a curb, edge Falling into or Collision from the rear considerably higher if the vehicle strikes of pavement or jumping over an object, such as a parked vehicle or… -
Page 32
99MY CELICA U In a severe frontal impact, sensors detect A crash severe enough to inflate the air- deceleration and the system triggers the bags may break the windshield as the airbag inflators. Then a chemical reaction vehicle buckles. In vehicles with a pas- in the inflators momentarily fills the air- senger airbag the windshield may also be bags with non- toxic gas to help restraint… -
Page 33
The front seat occupants can restraint system. Toyota strongly be killed or seriously injured by an recommends that all infants and inflating airbag if they do not wear children be placed in the rear seat the available seat belts. -
Page 34
99MY CELICA U instructions concerning installation of a child restraint sys- tem, see ”Child restraint” in this chapter. Move seat fully back » » A forward- facing child restraint sys- Do not sit on the edge of the seat tem should be allowed to put on or lean over the dashboard when the front seat only when it is un- the vehicle is in use. -
Page 35
99MY CELICA U » Do not modify or remove any wir- ing. Do not modify, remove, strike or open any components such as the steering wheel pad, steering wheel, column cover, front passen- ger airbag cover, front passenger airbag or airbag sensor assembly. Doing any of these may cause sud- den SRS airbag inflation or disable the system, which could result in… -
Page 36
Modification of the suspension sys- z Modification of the front end struc- This SRS airbag system has a service In the following cases, contact your Toyota ture reminder indicator to inform the driver of dealer as soon as possible: z Attachment of a grille guard (bull operating problems. -
Page 37: Child Restraint- -Child Restraint Precautions
99MY CELICA U Child restraint— —Child restraint precautions Toyota strongly urges the use of child » Toyota strongly urges use of A forward- facing child restraint sys- restraint systems children small proper child restraint system that tem should be allowed to put on enough to use it.
-
Page 38: Child Restraint System
99MY CELICA U —Child restraint system A child restraint system for a small » CAUTION After installing the child restraint child or baby must itself be properly system, make sure it is secured in restrained on the seat with the lap por- «…
-
Page 39: Types Of Child Restraint System
If your child restraint system does not provide any of the necessary parts, you (B) Convertible seat can purchase the following items from (C) Booster seat your Toyota dealer. Install the child restraint system following » CRS installation kit the instructions provided by its manufac- (Part No.
-
Page 40
99MY CELICA U —Installation with 3- point type seat belt (C) Booster seat (A) INFANT SEAT INSTALLATION CAUTION An infant seat is used in rear- facing position only. » Never put a rear- facing child re- straint system on the front seat be- cause the force of the rapid infla- tion of the passenger airbag can cause death or serious injury to the… -
Page 41
Contact your Toyota dealer immediately. Do not 1. Run the lap and shoulder belt through » Do not put a rear- facing child re- use the seat until the seat belt is or around the infant seat following the straint system on the rear seat if it fixed. -
Page 42
99MY CELICA U 2. Fully extend the shoulder belt to put it 3. While pressing the infant seat firmly CAUTION in the lock mode. When the belt is against the seat cushion and seatback, then retracted even slightly, it cannot let the shoulder belt retract as far as Push and pull the child restraint sys- be extended. -
Page 43
99MY CELICA U 4. To remove the infant seat, press the (B) CONVERTIBLE SEAT INSTALLATION CAUTION buckle- release button and allow the A convertible seat is used in forward- belt to retract completely. The belt facing and rear- facing depending on «… -
Page 44
99MY CELICA U Move seat fully back 1. Run the lap and shoulder belt through » » A forward- facing child restraint sys- Do not put a rear- facing child re- or around the convertible seat following tem should be allowed to put on straint system on the rear seat if it instructions provided… -
Page 45
Contact your Toyota dealer immediately. Do not 2. Fully extend the shoulder belt to put it 3. While pressing convertible seat use the seat until the seat belt is in the lock mode. When the belt is firmly against the seat cushion and fixed. -
Page 46
99MY CELICA U 4. To remove the convertible seat, press (C) BOOSTER SEAT INSTALLATION CAUTION the buckle- release button and allow the A booster seat is used in forward- fac- belt to retract completely. The belt will ing position only. Push and pull the child restraint sys- move freely again and be ready to tem in different directions to be sure… -
Page 47
99MY CELICA U CAUTION » Always make sure the shoulder belt is positioned across the center of child’s shoulder. The belt should be kept away from child’s neck, but not falling off child’s shoulder. Fail- ure to do so could reduce the amount of protection in an accident and increase the chance of injury. -
Page 48
Contact your Toyota dealer immediately. Do not use the seat until the seat belt is fixed. Left seat 2. To remove the child restraint system, press the buckle- release button and al- low the belt to retract. -
Page 49
99MY CELICA U If your child restraint system requires Bolt the use of a top strap, latch the hook 240 mm Anchor bracket 114 mm onto the anchor bracket and tighten the (9.4 in.) (4.5 in.) top strap. Anchor bracket See the following instructions to install the anchor bracket. -
Page 50: Tilt Steering Wheel
99MY CELICA U Tilt steering wheel If you remove the anchor brackets when CAUTION the child restraint system is necessary no longer, replace the bolts in the holes to » Do not adjust the steering wheel prevent entry of exhaust emissions, water while the vehicle is moving.
-
Page 51: Outside Rear View Mirrors
99MY CELICA U Outside rear view mirrors— —Power rear view mirror control To adjust a mirror, use the switches. 1. Master switch—To select the mirror to be adjusted Place the switch at ”L” (left) or ”R” (right). 2. Control switch—To move the mirror Push the switch in the desired direc- tion.
-
Page 52: Anti- Glare Inside Rear View Mirror
99MY CELICA U Anti- glare inside rear view mirror —Folding rear view mirrors CAUTION Do not adjust the mirror while the vehicle is moving. It may cause the driver to mishandle the vehicle and an accident may occur resulting in personal injuries.
-
Page 53: Operation Of Instruments And Controls
99MY CELICA U Headlights and turn signals Part 1 OPERATION OF NOTICE To prevent the battery being dis- INSTRUMENTS AND charged, do not leave the lights on for a long period when engine is not CONTROLS— running. Chapter 1- 4 Daytime running light system (Canada only) Lights, Wipers and…
-
Page 54: Emergency Flashers
99MY CELICA U Emergency flashers High- low beams—For high beams, turn TURN SIGNALS To turn on the emergency flashers, the headlights on and push the lever away push the switch. To signal a turn, push the headlight/ from you (position 1). Pull the lever to- turn signal lever up or down to position All the turn signal lights will flash.
-
Page 55: Instrument Panel Light Control
99MY CELICA U Instrument panel light control Front fog lights NOTICE To prevent the battery from being dis- charged, do not leave the switch on longer than necessary when the en- gine is not running. To adjust the brightness of the instru- To turn on the front fog lights, twist ment panel lights, turn the knob.
-
Page 56: Personal Lights
99MY CELICA U Interior lights (without moon roof) Interior light (with moon roof) Personal lights To turn on the interior light, push the The interior lights operate separately To operate the personal light, move the switch. To turn the light off, slightly with each outer switch.
-
Page 57: Ignition Switch Light
99MY CELICA U Luggage compartment light (liftback) Ignition switch light Windshield wipers and washer For easy access to the ignition switch, To turn the luggage compartment light To turn on the windshield wipers, move the ignition switch light comes on when on, open the back door and push the the lever to the desired setting.
-
Page 58: Rear Window Wiper And Washer
99MY CELICA U Rear window wiper and washer To squirt washer fluid, pull the lever NOTICE toward you. If the windshield wipers are off, they will Do not operate the rear wiper if the operate a couple of times after the washer rear window is dry.
-
Page 59: Rear Window Defogger
99MY CELICA U Rear window defogger Make sure you turn the defogger off when the window is clear. Leaving the defogger on for a long time could cause the battery to discharge, especially during stop- and- go driving. The defogger is not designed for drying rain water or for melting snow.
-
Page 60
99MY CELICA U… -
Page 61: Chapter 1- 5 Gauges, Meters And Service Reminder Indicators
Gauges, Meters and The indicator lamp goes off after driving several times. If the indicator lamp does Service reminder not go off, contact your Toyota dealer as indicators soon as possible. » Fuel gauge The gauge works when the ignition switch is on and indicates the approxi- «…
-
Page 62
99MY CELICA U Engine coolant temperature gauge Tachometer » Towing a trailer. NOTICE z Do not remove the thermostat in the engine cooling system as this may cause the engine to overheat. The thermostat is designed to con- trol the flow of coolant to keep the temperature of the engine within the specified operating range. -
Page 63: Odometer And Trip Meter
(type A) If parking brake is off, (type B) stop and check. (type A) Take vehicle Fasten seat belt. Toyota dealer. (type B) (Indicator and buzzer) These meters show the running dis- Close both side tance doors and back Stop and check.
-
Page 64
(b) Seat Belt Reminder Light and Buzz- and stop the engine immediately. Call a There may be a problem somewhere in Toyota dealer or qualified repair shop for the brake system. Check the fluid level of assistance. Once the ignition key is turned to ”ON” or the see- through reservoir. -
Page 65
(h) Open Door Warning Light position. case c, have your vehicle checked/re- This light remains on until both side doors paired by your Toyota dealer as soon as and back door are completely closed. possible. (i) SRS Airbag Warning Light… -
Page 66
If any service reminder indicator or warn- ing buzzer does not function as described above, either the bulb is burned out or the circuit in need of repair. Have it checked by your Toyota dealer as soon as possible. -
Page 67: Chapter 1- 6 Ignition Switch, Transmission And Parking Brake
99MY CELICA U Ignition switch with steering lock Part 1 You must push in the key to turn the key OPERATION OF from ”ACC” to the ”LOCK” position. On vehicles with an automatic transmission, INSTRUMENTS AND the selector lever must be in the ”P” posi- tion before pushing the key.
-
Page 68: Automatic Transmission
99MY CELICA U Automatic transmission Lock release button Overdrive switch To prevent misshifting For selecting either a three- speed or four- speed transmission Parking, engine OFF position starting and key (Shifting into overdrive removal position not possible) Reverse position Neutral position Normal driving position Position for engine ON position…
-
Page 69
99MY CELICA U Your automatic transmission has a shift 3. Release the parking brake and brake CAUTION pedal. Depress the accelerator pedal lock system to minimize the possibility of slowly for smooth starting. incorrect operation. This means you can Be careful downshifting on a slippery only shift out of ”P”… -
Page 70
99MY CELICA U (d) Backing up (f) Good driving practice NOTICE » 1. Bring the vehicle to a complete stop. If the transmission is repeatedly up- z Be careful not to overrev the en- shifted and downshifted between third 2. With the brake pedal held down with gine. -
Page 71: Manual Transmission
99MY CELICA U Manual transmission (g) Rocking your vehicle in stuck z If your vehicle remains stuck after rocking the vehicle several times, CAUTION consider other ways such as tow- ing. your vehicle becomes stuck snow, mud, sand, etc., then you may (h) If you cannot shift the selector le- attempt to rock the vehicle free by ver out of ”P”…
-
Page 72: Parking Brake
99MY CELICA U Parking brake For the best compromise between fuel NOTICE economy and vehicle performance, you should upshift or downshift at the following Do not downshift if you are going speeds: faster than the maximum allowable speed for the next lower gear. gear km/h (mph) 1 to 2 or 2 to 1…
-
Page 73: Cruise Control
99MY CELICA U Cruise control The cruise control allows you to cruise When parking, firmly apply the parking brake to avoid inadvertent creeping. the vehicle at a desired speed over 40 km/h (25 mph) even with your foot off To set: Pull up the lever. For better hold- the accelerator pedal.
-
Page 74
Toyota deal- the set speed. When you release it, the er at the earliest opportunity. vehicle will return to the speed set prior RESETTING AT A FASTER SPEED to the acceleration. -
Page 75
If this is the case, contact your Toyota will not be applied because the cruise dealer and have your vehicle inspected. control is not cancelled. To decrease the… -
Page 76
99MY CELICA U… -
Page 77: Air Conditioning System
99MY CELICA U Car audio system— —Reference Part 1 OPERATION OF INSTRUMENTS AND CONTROLS— Chapter 1- 7 Car audio system and Air conditioning system Car audio system Type 1: AM F M ETR radio/cassette player/ Reference Type 3: AM F M ETR radio/cassette player/compact compact disc auto changer controller disc player/compact disc auto changer controller Using your audio system:some…
-
Page 78
This section describes some of the basic TONE AND BALANCE YOUR RADIO ANTENNA features on Toyota audio systems. Some For details about your system’s tone and To lower a manual antenna, carefully push information may not pertain to your sys- balance controls, see the description of it down. -
Page 79
99MY CELICA U YOUR CASSETTE PLAYER 8 cm (3 in.) compact disc singles When you insert a cassette, the exposed Your compact disc player does not need tape should be to the right. an adaptor to play compact disc singles. Compact disc singles are about 8 cm (3 NOTICE in.) -
Page 80
99MY CELICA U —Using your audio system: controls and features «Type 1 Details of specific buttons, controls, and features are described in the alphabetical listing that follows. -
Page 81
99MY CELICA U 1 2 3 4 5 6 (Preset buttons) (Reverse/Fast forward buttons) These buttons are used to preset and Push ”AM” to switch the AM band. ”AM” Cassette Player tune in radio stations. will appear on the display. Push the fast forward button to fast for- To preset a station to a button: Tune in If the audio system is off, you can turn… -
Page 82
If the malfunction is not rectified, take CONTROL / MODE” repeatedly until ”BAL” er and automatic changer. your vehicle to your Toyota dealer. appears on the display. Then turn the If the player malfunctions, your audio sys- knob to adjust the left/right balance. -
Page 83
99MY CELICA U Dolbyr B NR RAND (Random) Push ”FM” to switch the FM band. ”FM1” There are two random features—you can If you are listening to a tape that was or ”FM2” will appear on the display. This either listen to the tracks on all the com- recorded with Dolbyr B Noise Reduction, system allows you to set twelve FM sta- pact discs in the magazine in random or-… -
Page 84
99MY CELICA U RPT (Repeat) SCAN Compact disc player There are two repeat features—you can Radio There are two scan features—you can ei- either replay a disc track or a whole com- ther scan the tracks on a specific disc or You can either scan all the frequencies on pact disc. -
Page 85
Your radio automatically changes to stereo Tuning reception when a stereo broadcast is re- Your Toyota has an electronic tuning radio ceived. ”ST” appears on the display. If the (ETR). Push and release the ” ” (up) or signal becomes weak, the radio reduces ”… -
Page 86
99MY CELICA U «Type 2 Details of specific buttons, controls, and features are described in the alphabetical listing that follows. -
Page 87
99MY CELICA U 1 2 3 4 5 6 (Preset buttons) AUDIO CONTROL / MODE (Reverse/Fast forward buttons) These buttons are used to preset and Manual tone adjustment function— If you want to fast forward or reverse tune in radio stations. through a compact disc track, push and This knob is used to adjust the tone To preset a station to a button: Tune in… -
Page 88
If the malfunction is not rectified, take CONTROL / MODE” repeatedly until ”BAL” disc player and automatic changer. your vehicle to your Toyota dealer. appears on the display. Then turn the If the player malfunctions, your audio sys- knob to adjust the left/right balance. -
Page 89
99MY CELICA U RAND (Random) RPT (Repeat) SCAN There are two random features—you can There are two repeat features—you can Radio either listen to the tracks on all the com- either replay a disc track or a whole com- You can either scan all the frequencies on pact discs in the magazine in random or- pact disc. -
Page 90
Your Toyota has an electronic tuning radio scan the first tracks of all the discs in the ceived. ”ST” appears on the display. If the (ETR). -
Page 91
99MY CELICA U «Type 3 Details of specific buttons, controls, and features are described in the alphabetical listing that follows. -
Page 92
99MY CELICA U 1 2 3 4 5 6 (Preset buttons) AM F M (Reverse/Fast forward buttons) These buttons are used to preset and Push ”AM·FM” to switch between the AM Cassette Player tune in radio stations. and FM bands.”AM”, ”FM1” or ”FM2” will Push the fast forward button to fast for- appear on the display. -
Page 93
If the malfunction is not rectified, take CONTROL / MODE” repeatedly until ”FAd” disc player and automatic changer. your vehicle to your Toyota dealer. appears on the display. Then turn the If the player malfunctions, your audio sys- knob to adjust the front/rear balance. -
Page 94
99MY CELICA U Dolbyr B NR PROG (Program) Random playing for the tracks on a disc: Quickly push and release ”RAND”. ”RAND” Push ”PROG” to select the other side of If you are listening to a tape that was will appear on the display. The disc you a cassette tape. -
Page 95
99MY CELICA U Compact Disc Player SCAN Compact disc player There are two repeat features—you can Radio There are two scan features—you can ei- either replay a disc track or a whole com- ther scan the tracks on a specific disc or You can either scan all the frequencies on pact disc. -
Page 96
99MY CELICA U SEEK (Seeking) When counting the number of tracks you SKIP want to rewind, remember to count the Radio The skip feature allows you to fast for- current track as well. For example, if you ward past long stretches of blank tape. In the seek mode, the radio finds and want to rewind to a song that is two be- This is especially useful at the end of… -
Page 97: Car Audio System Operating Hints
AM signals. And of course, radio signals Your Toyota has an electronic tuning radio other large objects. Increasing the bass have a limited range, and the farther you (ETR).
-
Page 98
99MY CELICA U Use high- quality cassettes. Fading—AM broadcasts are reflected by Low- quality cassette tapes can cause the upper atmosphere—especially at night. many problems, including poor sound, These reflected signals can interfere with inconsistent playing speed, those received directly from the radio sta- constant auto- reversing. -
Page 99
99MY CELICA U If moisture gets into your compact disc CAUTION player, you may not hear any sound even though your compact disc player Compact disc players use invisible la- appears to be working. Remove the ser beam which could cause hazard- disc from the player and wait until it radiation exposure directed… -
Page 100
99MY CELICA U Air conditioning system— —Controls 1. Air Flow Selector 2. Air Intake Selector 3. ”A/C” Button (on some models) 4. Fan Speed Selector 5. Temperature Selector… -
Page 101
99MY CELICA U For details about air flow selector settings, Fan speed selector see the illustration after ”A/C” button. Turn the knob to adjust the fan speed—to the right to increase, to the left to de- Vehicles with ”A/C” button— crease. -
Page 102
If this happens, take your ve- hicle to a Toyota dealer for service. Air intake selector Press the button to select the air source. An indicator light will illuminate to show which air intake mode is being selected. -
Page 103: Air Flow Selector Settings
99MY CELICA U —Air flow selector settings —Operating tips To cool off your Toyota after it has been parked in the hot sun, drive with the windows open for a few minutes. This vents the hot air, allowing the air conditioning to cool the interior more quickly.
-
Page 104
99MY CELICA U Heating Air conditioning Defogging and defrosting For best results, set controls to: For best results, set controls to: The inside of the windshield For best results, set controls to: Fan speed—Any setting except ”OFF” Fan speed—Any setting except ”OFF” Temperature—Towards WARM Temperature—Towards COLD Fan speed—Any setting except ”OFF”… -
Page 105: Instrument Panel Vents
99MY CELICA U —Instrument panel vents The outside of the windshield For best results, set controls to: Fan speed—Any setting except ”OFF” Temperature—Towards WARM (red zone) Air intake—FRESH (outside air) Air flow—WINDSHIELD Vehicles with ”A/C” button— Pressing the windshield button turns on the defroster- linked air conditioning.
-
Page 106
99MY CELICA U… -
Page 107: Chapter 1- 8 Other Equipment
99MY CELICA U Clock Part 1 If the electrical power source has been OPERATION OF disconnected from the clock, the time dis- play will automatically be set to 1:00 (one INSTRUMENTS AND o’clock). CONTROLS— When instrument panel lights turned on, the brightness of the time indi- cation will be reduced.
-
Page 108: Cigarette Lighter And Ashtray
To lock: Insert the master key and turn it Do not hold the cigarette lighter pressed clockwise. CAUTION Use a Toyota genuine cigarette lighter or equivalent for replacement. To reduce the chance of injury in case of an accident or a sudden stop,…
-
Page 109: Auxiliary Box
99MY CELICA U Auxiliary box Cup holder CAUTION » Do not place anything else other than cups or drink- cans on the cup holder, as such item may be thrown about in the compartment and pos- sibly injure people in the vehicle during sudden braking or an acci- dent.
-
Page 110: Luggage Cover
99MY CELICA U Luggage cover Floor mat When you open the back door, the lug- Use a floor mat of the correct size. CAUTION gage cover tilt ups for easy access to If the floor carpet and floor mat have a the luggage compartment.
-
Page 111: Information Before Driving Your Toyota
1600 km (1000 miles) can add To help prevent gas station mix- ups, your to the future economy and long life of YOUR TOYOTA Toyota has a new smaller fuel tank open- your vehicle: ing. The special nozzle on pumps with «…
-
Page 112
Toyota recommends the use of gasolines steady speed on level roads, consult your that meet the AAMA specification, if avail- If you use gasohol in your Toyota, be Toyota dealer. sure that it is unleaded, has an octane able, for improved driveability and emis- rating no lower than 87 and does not sion control system. -
Page 113: Operation In Foreign Countries
99MY CELICA U Operation in foreign countries Three- way catalytic converters If you plan to drive your Toyota in NOTICE another country… z Do use gasohol other than First, comply with the vehicle registration stated above. It will cause fuel sys- laws.
-
Page 114: Engine Exhaust Cautions
Avoid inhaling the engine exhaust. flowing into the three- way catalytic sible. Remember, your Toyota dealer It contains carbon monoxide, which converter may cause it to overheat knows your vehicle and its three- is a colorless and odorless gas.
-
Page 115: Facts About Engine Oil Consumption
99MY CELICA U Facts about engine oil consumption FUNCTIONS OF ENGINE OIL The amount of engine oil consumed de- » Keep the trunk lid or back door pends on the viscosity of the oil, the Engine oil has the primary functions of closed while driving.
-
Page 116
Toyota recommends that the oil stopping distance will be longer. Also, the ANTI- LOCK BRAKE SYSTEM level be checked every time you refuel brake system warning light may come on. -
Page 117
99MY CELICA U Always maintain a safe distance from the Effective way to press the ”ABS” brake vehicle in front of you. Compared with pedal: When the anti- lock brake system vehicles not fitted with an anti- lock brake function is in action, you may feel the system, your vehicle may require a longer brake pedal pulsating and hear a noise. -
Page 118: Brake Pad Wear Limit Indicators
Toyota road surfaces. Have your vehicle checked dealer as soon as possible. Expensive ro- by your Toyota dealer as soon as pos- tor damage can result if the pads are not sible. replaced when necessary.
-
Page 119: Luggage Stowage Precautions
This is the primary identification number seatbacks. Keep luggage or package of the vehicle. In an accident they for your Toyota. It is used in registering low, as close to the floor as pos- may injure the vehicle occupants. the ownership of your vehicle.
-
Page 120: Engine Number
99MY CELICA U Theft prevention labels (except for Canada) —Engine number Your new vehicle carries theft preven- tion labels which are approximately 56 mm (2.20 in.) by 16 mm (0.63 in.). The purpose of these labels is to reduce the incidence of vehicle thefts by facilitat- ing the tracing and recovery of parts from stolen vehicles.
-
Page 121: Suspension And Chassis
99MY CELICA U Suspension and chassis Types of tires Determine what kind of tires your ve- CAUTION CAUTION hicle is originally equipped with. 1. Summer tires » Do not modify the suspension/chassis Do not mix summer and all season Summer tires are high- speed capability with lift kits, spacers, springs, etc.
-
Page 122
99MY CELICA U… -
Page 123: Starting And Driving
99MY CELICA U How to start the engine— (a) Before cranking Before starting the engine Part 3 1. Check the area around the vehicle be- 1. Apply the parking brake firmly. STARTING AND DRIV- fore entering it. 2. Turn off unnecessary lights and acces- 2.
-
Page 124: Tips For Driving In Various Conditions
If they still do not See ”If your vehicle will not start” in Part work safely, pull to the side of the road and call a Toyota dealer for assistance.
-
Page 125: Winter Driving Tips
When it is extremely cold, we recommend wet, your vehicle will require a lon- Remember, if you ride the brakes to use 60% solution for your Toyota, to ger stopping distance, and it may excessively, they may overheat and pull to one side when the brakes provide protection down to about -50 C not work properly.
-
Page 126: Trailer Towing
Your safety and satisfaction depend harder starting. If you are not sure about not use the parking brake, or snow or on the proper use of correct equipment which oil to use, call your Toyota deal- water accumulated in and around the cautious driving habits.
-
Page 127
99MY CELICA U CAUTION Total trailer weight Tongue load » total trailer weight (trailer weight plus its cargo load) must not exceed 907 kg (2000 lb.). Ex- ceeding this weight is dangerous. Tongue load 100 = 9 to 11% Total trailer weight «… -
Page 128
99MY CELICA U » » Toyota recommends removing the trail- A safety chain must always be used » The trailer cargo load should be er hitch whenever you are not towing between the towing vehicle and the distributed so that the tongue load a trailer to reduce the possibility of trailer. -
Page 129: Trailer Towing Tips
(This pro- » loaded so that it can not shift. cedure is generally opposite to that Toyota recommends that you do not » tow a trailer with a new vehicle or a when backing without a trailer). Also,…
-
Page 130
99MY CELICA U » » » Because stopping distance may be in- Crosswinds and rough roads will ad- Because of the added load of the trail- creased, vehicle- to- vehicle distance versely affect handling of your vehicle er, your vehicle’s engine may overheat should be increased when towing a and trailer, causing sway. -
Page 131: How To Save Fuel And Make Your Vehicle Last Longer, Too
99MY CELICA U How to save fuel and make your vehicle last longer, too When restarting out after parking on a Getting more kilometers/mileage from a CAUTION liter/gallon of fuel is easy—just take it slope: easy. It will help make your vehicle last 1.
-
Page 132
99MY CELICA U » » Avoid continuous speeding up and Keep the bottom of your vehicle free slowing down. Stop- and- go driving from mud, etc. This not only lessens wastes fuel. weight but also helps prevent corro- » sion. Avoid unnecessary stopping… -
Page 133: In Case Of An Emergency
If the light is O.K., but the engine still will » convertible does not start, it needs adjustment or repair. Call a Toyota dealer or qualified repair notraise or lower shop. » If you lose your keys NOTICE Do not pull- or push- start the vehicle.
-
Page 134: Jump-Starting Procedure
If the engine still will not start, it needs » Batteries contain sulfuric acid correct. adjustment or repair. Call a Toyota dealer which is poisonous and corrosive. or qualified repair shop for assistance. Wear protective safety glasses when JUMP STARTING PROCEDURE jump starting, and avoid spilling NOTICE 1.
-
Page 135
99MY CELICA U 3. If the engine in the vehicle with the Jumper cable Discharged battery booster battery is not running, start it and let it run for a few minutes. During jump starting, run the engine at about 2000 rpm with the accelerator pedal lightly depressed. -
Page 136: If Your Engine Stalls While Driving
99MY CELICA U If your engine stalls while driving 5. Start your engine in the normal way. If your engine stalls while driving… After starting, run it at about 2000 rpm 1. Reduce your speed gradually, keeping for several minutes with the accelerator a straight line.
-
Page 137: If Your Vehicle Overheats
You should have it checked as soon as possible at your Toyota dealer. CAUTION 1. Pull safely off the road, stop the ve- hicle and…
-
Page 138: If You Have A Flat Tire
99MY CELICA U If you have a flat tire— 1. Reduce your speed gradually, keeping » NOTICE Stop the vehicle on a level firm a straight line. Move cautiously off the ground, firmly set the parking brake road to a safe place well away from Do not continue driving with a de- and put the transmission in ”P”…
-
Page 139
» The compact spare tire was de- The compact spare tire is identified by the signed especially for your Toyota. distinctive wheel design and color and Do not use it on any other vehicle. special wording ”TEMPORARY USE ONLY”… -
Page 140: Required Tools And Spare Tire
99MY CELICA U —Required tools and spare tire 1. Get the required tools and spare tire. 1 Jack handle 2 Jack 3 Tool bag (Canada) 4 Spare tire 5 Wheel nut wrench (U.S.A.) To prepare yourself for an emergency, you should familiarize yourself with the use of the jack, each of the tools and their stor- age locations.
-
Page 141
99MY CELICA U —Removing wheel ornament (steel wheels only) —Blocking the wheel To remove the spare tire: 2. Block the wheel diagonally opposite 3. Remove the wheel ornament. the flat tire to keep the vehicle from 1. Loosen the nut and remove it. Pry off the wheel ornament, using the rolling when it is jacked up. -
Page 142: Loosening Wheel Nuts
99MY CELICA U —Loosening wheel nuts —Positioning the jack —Raising your vehicle 4. Loosen all the wheel nuts. 5. Position the jack at the correct jack 6. After making sure that no one is in point as shown. the vehicle, raise it high enough so Always loosen the wheel nuts before rais- that the spare tire can be installed.
-
Page 143: Changing Wheels
99MY CELICA U —Changing wheels —Reinstalling wheel nuts 7. Remove the wheel nuts and change Before putting on wheels, remove any cor- 8. Reinstall all the wheel nuts finger tires. rosion on the mounting surfaces with a tight. wire brush or such. Installation of wheels Lift the flat tire straight off and put it Reinstall the wheel nuts (tapered end in- without good metal- to- metal contact at the…
-
Page 144
99MY CELICA U —Reinstalling wheel ornament (steel wheels only) —Lowering your vehicle CAUTION When lowering the vehicle, make sure all portions of your body and all oth- er persons around will not be injured the vehicle is lowered to the ground. -
Page 145: If Your Vehicle Needs To Be
11. Check the air pressure of the re- If towing is necessary, we recommend (a) Towing with wheel lift type truck— you to have it done by your Toyota placed tire. dealer or a commercial tow truck ser- Adjust the air pressure to the specification —From front…
-
Page 146
99MY CELICA U » (a) Towing with wheel lift type truck Automatic transmission: (c) Towing with sling From front—Release the parking brake. Use a towing dolly under the front type truck wheels. NOTICE NOTICE When lifting wheels, take care to en- sure adequate ground clearance for Never tow a vehicle with an auto- towing at the opposite end of the… -
Page 147: Emergency Towing
The hook or eyelet and towing cable or chain may break If towing is necessary, we recommend and cause serious injury or damage. you to have it done by your Toyota dealer or a commercial tow truck ser- vice. NOTICE…
-
Page 148: If You Cannot Shift Automatic Transmission Selector Lever
Be sure to have the system checked by ”MANUAL” side. your Toyota dealer as soon as possible. 2. Lower the sun visors. Check that all the side windows and quarter win- dows are lowered. If the battery is discharged and the win- dows cannot be lowered, open both side doors.
-
Page 149
99MY CELICA U 3. From the rear seat, place one hand 4. Move to the front seat, grasp the 5. While holding the convertible top on top of the rear seatback. With the handle which is under the convert- against the windshield frame, push other hand, grasp the convertible top ible top and pull the top fully for- the latch handles fully forward till… -
Page 150
99MY CELICA U 6. Return the manual control switch to LOWERING CONVERTIBLE 2. Lower all the side windows, quarter the opposite side of the ”MANUAL” MANUALLY windows, and sun visors. Then pull position, attach the cover, and close the latch handles fully backward. 1. -
Page 151: If You Lose Your Keys
99MY CELICA U If you lose your keys Many Toyota dealers can make a new key if you can give them the key num- ber. See the suggestion given in ”Keys” in Chapter 1- 2. If your keys are locked in the vehicle and…
-
Page 152
99MY CELICA U… -
Page 153: Corrosion Prevention And Appearance Care
APPEARANCE CARE construction. Now, it is up to you. Proper » High temperatures will cause corrosion care of your Toyota can help ensure long- to those components of the vehicle » term corrosion prevention. Protecting your Toyota…
-
Page 154: Washing And Waxing Your Toyota
We recommend See ”Washing and waxing your Toyota” for » that the fittings and the area where the When driving in the areas where there more tips.
-
Page 155
99MY CELICA U Convertible models—For washing instruc- Aluminum wheels: Use only a mild soap tions for the convertible top, see ”Convert- or neutral detergent. ible top”. Plastic bumpers: Wash carefully. Do not 1. Rinse off loose dirt with a hose. Re- scrub with abrasive cleaners. -
Page 156
Convertible top Waxing your Toyota Wash using mild soap suds, lukewarm wa- ter and a sponge. Polishing and waxing is recommended to maintain the original beauty of your NOTICE Toyota’s finish. -
Page 157: Cleaning The Interior
99MY CELICA U Cleaning the interior NOTICE NOTICE CAUTION z Do not use dye or bleach on the Do not use solvent, thinner, gasoline Do not wash the vehicle floor with or window cleaner on the interior. belts—it may weaken them. water, or allow water to get onto the z Do not use the belts until they be- floor when cleaning the vehicle interi-…
-
Page 158
Toyota, your local oring, staining or peeling of the z Never use organic substances such Toyota dealer will be pleased to answer surface. as benzine, alcohol or gasoline or them. z If you use cleaners or polishing… -
Page 159: Vehicle Maintenance And Care
Toyota dealer will be dating this warranty. See ”Owner’s War- pleased to do them at a nominal cost.
-
Page 160: General Maintenance
They learn to work on ment” for the details. vehicle to your Toyota dealer or a quali- Toyotas before they work on your vehicle, fied service shop immediately. It is recom- rather than while they are working on it.
-
Page 161: Inside The Vehicle
99MY CELICA U Tire surface and wheel nuts INSIDE THE VEHICLE Seat belts Check the tires carefully for cuts, damage Check that the seat belt system such as Items listed below should be checked or excessive wear. See Chapter 7- 2 for buckles, retractors and anchors operate regularly, e.g.
-
Page 162: In The Engine Compartment
99MY CELICA U Automatic transmission ”Park” mecha- IN THE ENGINE COMPARTMENT Power steering fluid level nism Check the level through the reservoir. The Items listed below should be checked Check the lock release button of the se- level should be in the ”HOT” or ”COLD” from time to time, e.g.
-
Page 163: Does Your Vehicle Need Repairing
Be on the alert for changes in perfor- If you notice any of these clues, take your mance, sounds, and visual tip- offs that vehicle to your Toyota dealer as soon as indicate service is needed. Some impor- possible. It probably needs adjustment or tant clues are as follows: repair.
-
Page 164
99MY CELICA U… -
Page 165: Do-It-Yourself Maintenance
99MY CELICA U Part 7 DO- IT- YOURSELF MAINTENANCE— Chapter 7- 1 Introduction » Engine compartment overview » Fuse locations » Do- it- yourself serviceprecautions » Parts and tools…
-
Page 166: Engine Compartment Overview
99MY CELICA U Engine compartment overview 1. Power steering fluid reservoir 2. Engine oil filler cap 3. Brake fluid reservoir 4. Fuse blocks 5. Battery 6. Engine coolant reservoir 7. Electric cooling fans 8. Engine oil level dipstick 9. Windshield and rear window washer fluid tank…
-
Page 167: Fuse Locations
99MY CELICA U Fuse locations Spare fuses Canada only…
-
Page 168: Do- It- Yourself Service Precautions
Read separate work under your vehicle compartment—the engine, radiator, Toyota Warranty statement for details and where you may be exposed to flying exhaust manifold, power steering suggestions. or falling material, fluid spray, etc. fluid reservoir spark…
-
Page 169: Parts And Tools
Do not drive with the air cleaner NOTICE need on performing do- it- yourself mainte- filter removed, or excessive engine nance. Remember all Toyota parts are de- z Remember that battery and ignition wear could result. Also backfiring signed in metric sizes, so your tools must…
-
Page 170
99MY CELICA U Tools: Adding washer fluid » Rag or paper towel Parts: » » Funnel (only for adding fluid) Water » Checking power steering fluid Washer fluid containing antifreeze (for winter use) Parts (if level is low): » Tools: Automatic transmission fluid… -
Page 171: Chapter 7- 2 Engine And Chassis
99MY CELICA U Checking the engine oil level Part 7 DO- IT- YOURSELF CAUTION Low level Full level MAINTENANCE— Be careful not to touch the hot ex- haust manifold. Chapter 7- 2 If the oil level is below or only slightly Engine and Chassis above the low level, add engine oil of the same type as already in the engine.
-
Page 172: Engine Oil Selection
99MY CELICA U ENGINE OIL SELECTION Oil identification marks Use API grade SJ, ”Energy- Conserving” Either or both API registered marks are or ILSAC multigrade engine oil. added to some oil containers to help you select the oil you should use. Recommended viscosity (SAE): The API Service Symbol is located any- where on the outside of the container.
-
Page 173: Checking The Engine Coolant Level
Follow the manufac- turer’s directions for how much to mix If you can find no leak, have your Toyota with plain water (preferably demineralized dealer test the cap pressure and check water or distilled water). The total capacity for leaks in the cooling system.
-
Page 174: Checking Brake Fluid
99MY CELICA U Checking power steering fluid Checking brake fluid If the level is low, add SAE J1703 or FMVSS No.116 DOT 3 brake fluid to the brake reservoir. Remove and replace the reservoir cover Close Open by hand. Fill the brake fluid to the dotted line.
-
Page 175: Checking Tire Pressure
If a tire frequently needs refilling, have it The reservoir tank may be hot so be size and the vehicle capacity weight are checked by your Toyota dealer. careful not to burn yourself. given in Part 8. They are also on the tire The following instructions for checking pressure label as shown.
-
Page 176: Checking And Replacing Tires
REPLACING YOUR TIRES The tires on your Toyota have built- in » Be sure to reinstall the tire inflation tread wear indicators to help you know When replacing a tire, use only the valve caps.
-
Page 177: Rotating Tires
When rotating tires, check for uneven mended size. wear and damage. Abnormal wear is usu- ally caused by incorrect tire pressure, im- Toyota recommends all four tires, or at proper wheel alignment, out- of- balance least both of the front or rear tires be Without a compact spare tire wheels, or severe braking.
-
Page 178
If you need snow tires, select the same TIRE CHAIN SELECTION lower. size, construction and load capacity as Use the tire chains of correct size and » the original tires on your Toyota. Drive carefully avoiding bumps, type. holes, and sharp turns, which may Do not use tires other than those men- Use SAE Class ”S”… -
Page 179: Replacing Wheels
When replacing wheels, care should be » taken to ensure that the wheels are re- Use only the Toyota wheel nuts and placed by ones with the same load ca- wrench designed for your aluminum pacity, diameter, rim width, and offset.
-
Page 180
99MY CELICA U… -
Page 181: Chapter 7- 3 Electrical Components
99MY CELICA U Checking battery condition— —Precautions Part 7 DO- IT- YOURSELF » CAUTION If electrolyte gets on your skin, thoroughly wash the contact area. If MAINTENANCE— you feel pain or burning, get medi- BATTERY PRECAUTIONS cal attention immediately. The battery produces flammable and «…
-
Page 182
Have DARK WHITE battery checked c. Tighten hold- down clamp only by your Toyota enough to keep the battery firmly in place. dealer. Overtightening may damage the battery case. CLEAR or Have battery LIGHT checked by your YELLOW… -
Page 183: Battery Recharging Precautions
99MY CELICA U Battery recharging precautions Checking and replacing fuses During recharging, the battery is pro- ducing hydrogen gas. Type A Therefore, before recharging: 1. If recharging with the battery installed on the vehicle, be sure to disconnect the ground cable. 2.
-
Page 184: Adding Washer Fluid
It is a good idea to purchase a set of spare fuses and keep them in your ve- hicle for emergencies. If the new fuse immediately blows out, there is a problem with the electrical sys- tem. Have your Toyota dealer correct it as soon as possible.
-
Page 185
If a gauge reading is not within the ac- 2. Horizontal movement ceptable range, have the aiming adjusted To obtain correct gauge readings, do by your Toyota dealer. these before you check the headlight aims. » Make sure the body around the head- light is not deformed. -
Page 186: Replacing Light Bulbs
99MY CELICA U Replacing light bulbs— The following illustrations show how to Bulb Bulb Light bulbs Type Light bulbs Type gain access to the bulbs. When replacing a bulb, make sure the ignition switch and Headlights Interior light light switch are off. Use bulbs with the —…
-
Page 187
3. Install a new bulb and the connector ing the lock release. into the mounting hole. If the connector is tight, wiggle it. Aiming is not necessary after replacing the bulb. When aiming adjustment is nec- essary, contact your Toyota dealer. -
Page 188
99MY CELICA U —Front fog lights 1. Loosen the retainer screw and take 2. Turn the cover counterclockwise and 3. Disconnect the cords. out the beam unit. remove it. -
Page 189
99MY CELICA U —Parking and front turn signal lights Use a Phillips- head screwdriver. 4. Release the bulb retaining spring 5. Connect the cords, install the cover and remove the bulb. Install a new and turn it clockwise so that two bulb and the bulb retaining spring. -
Page 190: Front Side Marker Lights
99MY CELICA U —Front side marker lights Use a Phillips- head screwdriver.
-
Page 191
99MY CELICA U —Rear side marker, rear turn signal, stop tail, back- up lights (convertible) a: Rear turn signal light b: Rear side marker, stop and tail light c: Stop and tail light d: Back- up light… -
Page 192
99MY CELICA U —Rear side marker, rear turn signal, stop tail, back- up lights (liftback) a: Rear side marker light b: Rear turn signal light c: Stop and tail light d: Back- up light… -
Page 193
99MY CELICA U —High mounted stoplight (liftback) —License plate lights Use a Phillips- head screw driver. -
Page 194
99MY CELICA U… -
Page 195: Specifications
99MY CELICA U Part 8 SPECIFICATIONS » Dimensions and weight » Engine » Fuel » Service specifications » Tires » Fuses…
-
Page 196: Dimensions And Weight
99MY CELICA U Dimensions and weight Liftback Convertible Overall length mm (in.) 4425 (174.2) 4495 (177.0) Overall width mm (in.) 1750 (68.9) 1750 (68.9) Overall height mm (in.) 1305 (51.4) 1325 (52.2) Wheelbase mm (in.) 2540 (100.0) 2540 (100.0) Front tread mm (in.) 1515 (59.6)
-
Page 197: Service Specifications
99MY CELICA U Engine Fuel Service specifications Model: Fuel type: ENGINE 5S- FE Unleaded gasoline, Octane Rating 87 Valve clearance (engine cold), mm (in.): Type: Intake 0.19—0.29 (0.007—0.011) (Research Octane Number 4 cylinder in line, 4 cycle, gasoline Exhaust 0.28—0.38 (0.011—0.015) higher Bore and stroke, mm (in.): Spark plug type:…
-
Page 198
SAE J1703 or FMVSS No.116 DOT 3 7.1 (7.5, 6.2) MANUAL TRANSAXLE Coolant type: Oil capacity, L (qt., Imp. qt.): ”Toyota Long Life Coolant” or equivalent 2.2 (2.3, 1.9) Oil type: With ethylene- glycol type coolant for a Gear oil API GL- 4 or GL- 5… -
Page 199
99MY CELICA U Tires Fuses Tire size: BRAKES Minimum pedal clearance when depressed Spare tire with the pressure of 490 N (50 kgf, 110 U.S.A. lbf) with the engine running, mm (in.): T125/70D16 80 (3.1) Canada Pedal freeplay, mm (in.): 205/55R15 87V 1—6 (0.04—0.24) P205/55R15 87V… -
Page 200
99MY CELICA U Engine compartment—Canada only Instrument panel Fuses (type A) 9. SPARE: Spare fuse 1. AM2 30 A: Starting system 10. SPARE: Spare fuse 2. HAZARD 10 A: Emergency flashers 11. SPARE: Spare fuse 3. HORN 7.5 A: Horns 12. -
Page 201
99MY CELICA U 23. STOP 15 A: Stop lights, high mounted 33. ST 7.5 A: Starting system, multiport stoplight, multiport fuel injection sys- fuel injection system/sequential multi- tem/sequential multiport fuel injection port fuel injection system system, cruise control system cancel 34. -
Page 202
99MY CELICA U… -
Page 203: Reporting Safety Defects For U.s. Owners And Uniform Tire Quality Grading
However, NHTSA cannot become involved in individual prob- lems between you, your dealer, or Toyota Motor Sales, U.S.A., Inc.
-
Page 204: Uniform Tire Quality Grading
A tire marked C may have tire failure. quality grading. poor traction performance. Your Toyota dealer will help answer any Warning: The traction grade assigned to questions you may have as you read this this tire is based on braking (straight information.
-
Page 205
99MY CELICA U Part 10 INDEX…
Я постараюсь здесь выложить список инструкций, что у меня есть. Я буду пополнять по мере возможности.
В списке сначала идёт оригинальное название, потом описание.
Если у вас есть чем пополнить, или какие-нибудь интересные ссылки, то пишите в личку.
Просьба не флудить!
Toyota Celica Gen4 ST16#
computer%20control%20system.pdf — COMPUTER CONTROL SYSTEM — ECU (На английском)
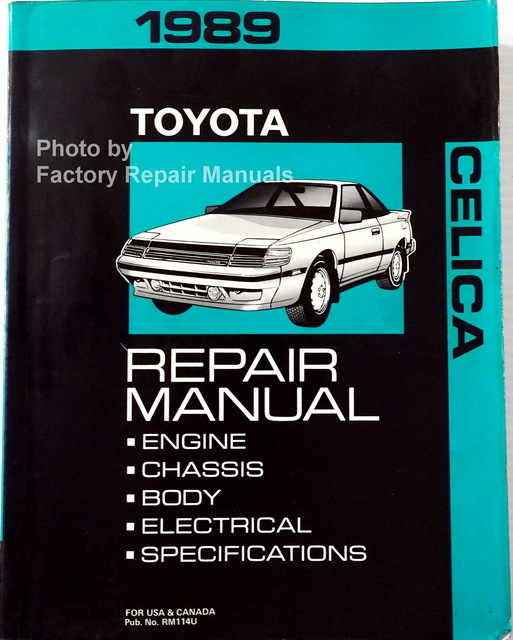
Toyota — ST165 — Repair Manual (RM).pdf — Toyota ST165 Repair Manual (RM071U) (На английском)
Toyota 4A-GE Motor Manual.pdf — 4A-F, 4A-GE Engine Repair Manual (RM063) (На английском)
Toyota Celica Gen5 ST18#
celica92wiring.pdf — Схемы и вся проводка (На английском)
Schaltplan_3S-GTE_3S-GE_5S-FE_ST185RC.pdf — Электрические схемы AT180-ST18_ (EWD142F)(1991)(На Немецком!)
l_wiirng_diagrams.pdf — Схемы компьютеров для многих автомобилей Toyota (На английском)
Название и коды датчиков на 185 кузов
1991_toyota_Vacuum_diagrams.pdf — Celica-MR2 1991Год (На английском)
1992_toyota_Vacuum_diagrams.pdf — Celica-MR2 1992Год (На английском)
1993_toyota_Vacuum_diagrams.pdf — Celica-MR2 1993Год (На английском)
En_Francais.rar — Toyota ST182,184,185 (3S-FE, 3S-GE, 3S-GTE, 5S-FE) Repair Manual (На Французском!)
motor.rar — Toyota ST182,184,185 (3S-FE, 3S-GE, 3S-GTE, 5S-FE) Repair Manual (На Немецком!)
internet_TOYOTAmotorhandbuch_3S-GTE_3S-GE_5S-FE.pdf — 3S-GE, 3S-GTE, 5S-FE Repair Manual (На Немецком!)
Toyota — ST185 — 1993 — Repair Manual (RM305U1).pdf — Toyota ST185 1993 RM (RM305U1) (На английском)
Toyota — ST185 — 1990 — Repair Manual (RM176U).pdf — Toyota ST185 1990 Repair Manual (RM149U) (На английском)
Toyota — 3S-GTE — 1991 — Repair Manual (RM266E).pdf — Toyota ST185 1991 Repair Manual (RM266E) (На английском)
Toyota — ST185 — 1993 — Service Manual.pdf — Инструкция для технического обслуживания и диагностики автомобиля (1,6-1,8-2,0-2,2) (На английском)
Haynes ST185 Info.pdf — Toyota ST185 Основные характеристики машины (На английском)
Проверка Лямбда зонда (На английском)
_________________________________________________________________________________
Toyota Celica Repair Manual 1992 — Самое полное описание по ремонту машины которое я встречал. (На английском)
Содержит подробную инструкцию по двигателям 3S-GTE — 5S-FE — 4A-FE
AIR CONDITIONING SYSTEM.pdf
AUTOMATIC TRANSAXLE.pdf
Body Electrical System.pdf
BODY.pdf
BRAKE SYSTEM.pdf
CHARGING SYSTEM.pdf
CLUTCH.pdf
COOLING SYSTEM.pdf
EFI SYSTEM.pdf
EMISSION CONTROL SYSTEM.pdf
ENGINE MECHANICAL.pdf
EXHAUST SYSTEM.pdf
IGNITION SYSTEM.pdf
Introduction_Gen5_Testing_specifications.pdf
LUBRICATION SYSTEM.pdf
MAINTENANCE.pdf
MANUAL TRANSAXLE.pdf
PROPELLER SHAFT.pdf
SERVICE SPECIFICATIONS (2).pdf
SERVICE SPECIFICATIONS.pdf
SRS AIRBAG.pdf
SST AND SSM.pdf
STANDARD BOLT TORQUE SPECIFICATIONS.pdf
STARTING SYSTEM.pdf
STEERING.pdf
SUSPENSION AND AXLE.pdf
TURBOCHARGER.pdf
_________________________________________________________________________________
Toyota Celica Gen6 ST20#
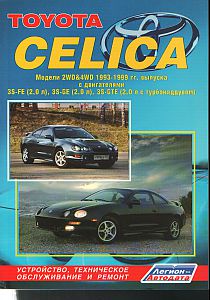
celica_old.pdf — Устройство, техническое обслуживание и ремонт. Для моделей с двигателем 3S-FE, 3S-GE, 3S-GTE (На русском)
Toyota Celica 2WD&4WD 1993-1999.pdf — Схемы и проводка (На русском)
Toyota 4AGE Engine Manual — 4A-GE Engine — Repair Manual (На английском)
ST205_RM398E.doc — 3S-GTE Gen3 Engine — Repair Manual(DOC) (На английском)
Toyota — ST205 — Engine Repair Manual Suppliment (RM398E).pdf — 3S-GTE Gen3 Engine — Repair Manual(PDF) (На английском)
3s-ge 1993G.pdf — 3S-GE Gen3 Engine — Repair Manual (На английском)
Toyota — ST205 — Repair Manual — Chassis and Body (RM399E).pdf — Toyota ST205 Repair Manual – Ходовая, кузов, электрика (На английском)
Toyota Celica Gen7 ZZT-23#
celica23.pdf — Модели выпуска с 1999 года 1ZZ-FE 2ZZ-GE — (Устройство, техническое обслуживание и ремонт) (На русском)
volume1.pdf — Celica ZZT230-231 Repair Manual — Volume1 (Обслуживание, подготовка, спецификации, диагностика)(RM744U1) (На английском)
volume2.pdf — Celica ZZT230-231 Repair Manual – Volume2 (Двигатель, шасси, кузов, электрика)(RM744U2) (На английском)
2ZZ-GE_repair_manual.pdf — 2ZZ engine — Repair Manual (COROLLA) (На английском)
Celica Service Manual.rar — Полная инструкция для модели ZZT230, 231 с двигателями 1ZZ-FE, 2ZZ-GE, сделана для просмотра в браузере.
BRM088E.pdf — Официальная инструкция по ремонту кузова
EWD399U.pdf — Электрические схемы для Toyota Celica 2000Год
EWD432U.pdf — Электрические схемы для Toyota Celica 2001Год
EWD473U.pdf — Электрические схемы для Toyota Celica 2002Год
EWD497U.pdf — Электрические схемы для Toyota Celica 2003Год
EWD538U.pdf — Электрические схемы для Toyota Celica 2004Год
EWD590U.pdf — Электрические схемы для Toyota Celica 2005Год
RM1131U.pdf — Подробная инструкция по ремонту Celica 2005 (REPAIR MANUAL)
Другие схожие модели (Supra — MR2)
toyota_starting_systems.pdf — Toyota Starting System[/url] (На английском)
Toyota MR2 MK1 1989 Repair Manual.pdf — Toyota MR2 1989 RM (На английском)
Toyota MR2 MK2 1991 Repair Manual.pdf — Toyota MR2 RM 1991(RM179U2) (На английском)
1988-894agerebuild.pdf — 1988 Toyota MR2 Описание двигателя 1.6L (На английском)
ECU
Распиновка ECU 3S-GE Gen2
Распиновка ECU 3S-GE
Распиновка ECU 3S-GE Gen??
Распиновка ECU 3S-GTE (ST16#-ST18#-ST20#)
Распиновка ECU 3S-GE Gen???
Распиновка ECU 3S-GE Gen2
Распиновка ECU 4A-GE (AFM)
Распиновка ECU 4A-GE (MAP)
Последний раз редактировалось MMX 28 июл 2012, 23:32, всего редактировалось 3 раза.
https://carbon-microsystem.com
Автор самого интересного бортовика 2011
Золотые руки клуба 2011
Модификатор года 2011
Автор самого интересного бортовика 2012
Талант клуба 2012
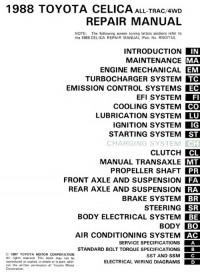
Сборник руководств на английском языке по техническому обслуживанию и ремонту автомобиля Toyota Celica серии ST165 1988 года выпуска.
- Автор: —
- Издательство: Toyota Motor Corporation
- Год издания: 1987
- Страниц: —
- Формат: PDF
- Размер: 72,3 Mb
Сборник руководств на английском языке по техническому обслуживанию и ремонту автомобиля Toyota Celica 200-й серии с 1993 года выпуска.
- Автор: —
- Издательство: Toyota Motor Corporation
- Год издания: —
- Страниц: —
- Формат: PDF
- Размер: 121,1 Mb
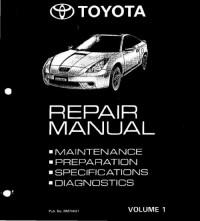
Сборник руководств на английском языке по техническому обслуживанию и ремонту автомобиля Toyota Celica 230-й серии с 1999 года выпуска.
- Автор: —
- Издательство: Toyota Motor Corporation
- Год издания: —
- Страниц: —
- Формат: PDF
- Размер: 146,0 Mb
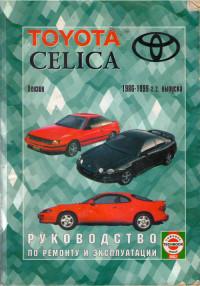
Руководство по эксплуатации и ремонту автомобиля Toyota Celica 1986-1999 годов выпуска с бензиновыми двигателями объемом.
- Автор: —
- Издательство: Петит
- Год издания: 2004
- Страниц: 272
- Формат: PDF
- Размер: 201,8 Mb
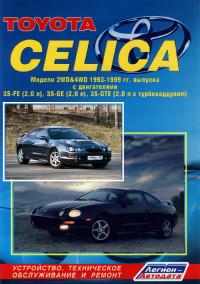
Руководство по техническому обслуживанию и ремонту автомобиля Toyota Celica 1993-1999 годов выпуска с бензиновыми двигателями объемом 2,0 л.
- Автор: —
- Издательство: Легион-Автодата
- Год издания: 2007
- Страниц: 396
- Формат: —
- Размер: —
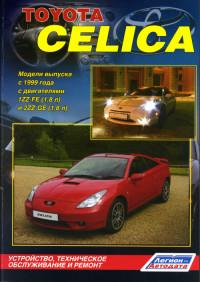
Руководство по техническому обслуживанию и ремонту автомобиля Toyota Celica с 1999 года выпуска с бензиновыми двигателями объемом 1,8 л.
- Автор: —
- Издательство: Легион-Автодата
- Год издания: 2008
- Страниц: 413
- Формат: —
- Размер: —
We have 58 Toyota
Celica manuals
covering a total of 34 years of production.
In the table below you can see 0
Celica Workshop Manuals,0
Celica Owners Manuals and 2 Miscellaneous
Toyota Celica downloads.
Our most popular manual is the
1994 Toyota Celica Service Repair Manual PDF
.
This (like all of our manuals) is available to download for free in PDF format.
How to download a Toyota Celica
Repair Manual (for any year)
These Celica manuals have been provided by our users,
so we can’t guarantee completeness. We’ve checked the years that the manuals cover
and we have Toyota Celica repair manuals
for the following years; 1971, 1971, 1971, 1971, 1971, 1971, 1971, 1972, 1984, 1986, 1986, 1986, 1986, 1986, 1988, 1988, 1990, 1993, 1994, 1994, 1994, 1994, 1995, 1996, 1997, 1998, 1999, 1999, 1999, 1999, 1999, 1999, 1999, 1999, 2000, 2000, 2000, 2001, 2002, 2003, 2004 and 2005.
Go through the 58 different PDF’s that are displayed below,
for example this one. You’ll then be shown the first 10 pages of this specific
document, you can then scroll down and click ‘show full PDF’. Then you can click
download you’ve got a totally free car manual, forever!
What topics does the Toyota Celica
Service/Repair Manual cover?
In total, that’s over 19203 pages of content dedicated to your
Toyota Celica. Here’s a non exhaustive list
of what’s covered;
- Toyota Celica service manual for roadside repairs
- Toyota Celica owners manual covering weekly checks
- Toyota Celica workshop manual covering Lubricants, fluids and tyre pressures
- Toyota Celica service PDF’s covering routine maintenance and servicing
- Detailed Toyota Celica Engine and Associated Service Systems (for Repairs and Overhaul) (PDF)
- Toyota Celica Transmission data Service Manual PDF
- Toyota Celica Brakes and suspension PDF
- Toyota Celica Wiring Diagrams
Looking for a Free Toyota Celica Haynes /
Toyota Celica Chilton Manuals?
We get a lot of people coming to the site looking to get themselves a free
Toyota Celica Haynes
manual. There are two things you need to know; firstly it’s illegal, and secondly —
there are much better ways of servicing and understanding your
Toyota Celica engine than
the Haynes manual. That’s essentially what we’re here for — to give you an
alternative to the Haynes and Chilton, online and totally for free.
Центр тех. помощи
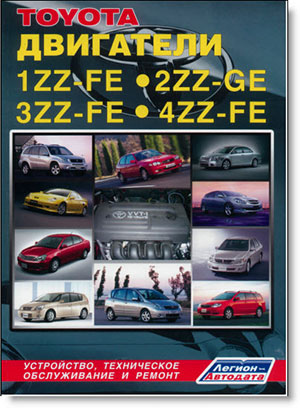
| Toyota. Двигатели 1ZZ-FE, 2ZZ-GE, 3ZZ-FE, 4ZZ-FE. Устройство, техническое обслуживание и ремонт. | ||||
|
В руководстве дается пошаговое описание процедур по эксплуатации, ремонту и техническому обслуживанию бензиновых двигателей 1ZZ-FE (1,8 л), 2ZZ-GE (1,8 л), 3ZZ-FE (1,6 л) и 4ZZ-FE (1,4 л) с распределенным впрыском топлива, устанавливающиеся на автомобили Toyota с 1998 г. по настоящее время. Издание содержит подробные сведения по ремонту и регулировке механизмов двигателя, элементов системы впрыска топлива, системы изменения фаз газораспределения (VVT-i), системы изменения фаз газораспределения и высоты подъема клапанов (VVTL-i), зажигания, систем запуска и зарядки, инструкции по использованию системы самодиагностики, а также возможные неисправности и методы их устранения, сопрягаемые размеры основных деталей и пределы их допустимого износа. Приведены электросхемы систем управления двигателем, зарядки и запуска для различных моделей. |
|
|||
|
Читать/Скачать
|
||||
| Мультимедийное руководство по ремонту и обслуживанию автомобиля Toyota Celica | ||||
|
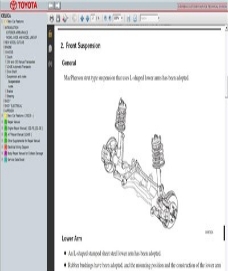
Мультимедийное руководство Toyota Celica ZZT230, 231 серии с двигателями 1ZZ и 2ZZ. Подробно описаны все узлы автомобиля, способы их демонтажа и монтажа, инструменты. полные эл.схемы, иллюстрации. |
 |
|||
|
Читать/Скачать
|
||||
| Мануал по ремонту Celica T23 на Русском. | ||||
| В руководстве дается пошаговое описание процедур по эксплуатации, техническому обслуживанию и ремонту леворульных и праворульных переднеприводных автомобилей Toyota Celica выпуска с 1999 г., оборудованных бензиновыми двигателями 1ZZ-FE (1,8 л.) и 2ZZ-GE (1,8 л.). Издание содержит подробные сведения по проверке элементов системы управления бензиновыми двигателями, системы изменения фаз газораспределения (VVTL), смазки, охлаждения, запуска и зарядки. Приведены инструкции по использованию системы самодиагностики двигателя, АКПП, ABS, SRS и рекомендации по регулировке и ремонту двигателей, механических и автоматических коробок передач, элементов тормозной системы (включая ABS), системы пассивной безопасности (SRS), рулевого управления и подвески. Представлены подробные электросхемы и описания проверок элементов электрооборудования. Приведены возможные неисправности и методы их устранения, сопрягаемые размеры основных деталей и пределы их допустимого износа, рекомендуемые смазочные материалы и рабочие жидкости. Книга предназначена для автовладельцев, персонала СТО и ремонтных мастерских. |
 |
|||
|
Читать/Скачать |
||||
| Мануал по ремонту Celica T20 | ||||
|
В руководстве дается пошаговое описание процедур по эксплуатации, |
|
|||
|
Читать/Скачать
|
||||
| Оригинальный мануал по ремонту Celica T23 ENG. | ||||
| В руководстве дается описание процедур по эксплуатации, техническому обслуживанию и ремонту автомобилей Toyota Celica Т23 выпуска с 1999 г., оборудованных двигателями 1ZZ-FE и 2ZZ-GE. Издание содержит подробные сведения по проверке элементов системы управления двигателями, системе VVTL, смазки, охлаждения, запуска и зарядки. Приведены инструкции по использованию системы самодиагностики двигателя, АКПП, ABS, SRS и рекомендации по регулировке и ремонту двигателей, механических и автоматических коробок передач, элементов тормозной системы (включая ABS), системы пассивной безопасности (SRS), рулевого управления и подвески. Книга предназначена для автовладельцев, персонала СТО и ремонтных мастерских. |
 |
|||
|
Читать/Скачать |
||||
| Toyota Celica 4WD ST205. Repair Manual supplement for chassis & body | ||||
| Руководство по ремонту кузова и шасси Toyota Celica 4WD серии ST205. Информацияпредставленная в данном издании действительна на момент публикации. Вместе с тем технические характеристики и процедуры могут быть изменены без предварительного уведомления. |  |
|||
|
Читать/Скачать |
||||
|
Руководство по ремонту и эксплуатации Toyota Celica Supra MK2-8 |
||||
| Рассмотрены все модели 2-го поколения Celica / Supra MK2 и все двигатели, ставившиеся на этот автомобиль: DOHC 2.8L 5M-GE (для США), 5M-E (для Швеции, Швейцарии и Австралии), турбированные SOHC M-TE и 2-литровый twinturbo 1G-GTE (для Японии). Также в Японии машина комплектовалась двигателем 1G-GEU и продавалась под названием Celica XX. | 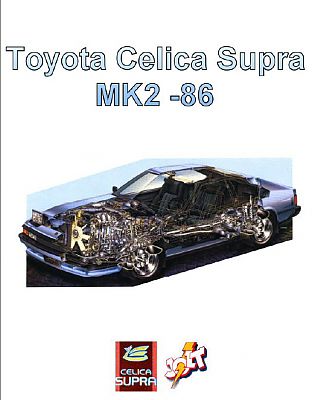 |
|||
|
Читать/Скачать |
||||
|
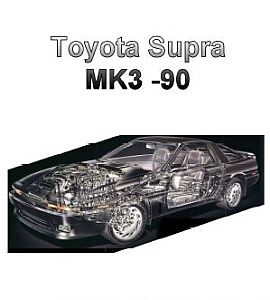
Руководство по ремонту и эксплуатации Toyota Celica Supra MK3-90 |
||||
|
||||
| Toyota 3S-GE engine Repair Manual | ||||
|
Руководство по ремонту двигателей Toyota 3S-GE для автомобилей Toyota Celica ST202 (сентябрь 1993 — декабрь 1997) и Toyota MR2 SW20 (ноябрь 1993 — декабрь 1997). Информация предоставленная в данном издании действительна на момент публикации. Вместе с тем технические характеристики и процедуры могут быть изменены без предварительного уведомления. |
 |
|||
|
Читать/Скачать |
||||
| Toyota 3S-GTE engine Repair Manual supplement | ||||
| Руководство по ремонту двигателей Toyota 3S-GTE. Информация, предоставленная в данном издании действительна на момент публикации. Вместе с тем технические характеристики и процедуры могут быть изменены без предварительного уведомления. |  |
|||
|
Читать/Скачать |
|
Toyota 3S-FE Engine Repair Manual |
|
|
Двигателья Toyota 3S-FE Инструкция по ремонту двигателя для автомобилей выпущенных с Oct. 1997 по Dec. 2002. The Toyota 3S-FE is a 16-valve 2.0L twin camshaft, single cam gear engine built by Toyota from 1986 to 2000. European version produces 128 PS (94 kW)(126 hp) at 5,600 rpm and 179 Nm (132 ft-lbs) at 4,400 rpm. It is commonly used in the
|
 |
|
Читать/Скачать |


