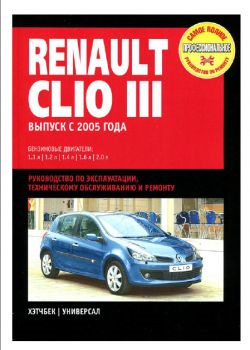
Насобирал по интернетам, может кому из клиоводов будет полезно…
Renault Clio III с 2005 Руководство по тех обслуживанию и ремонту — drive.google.com/open?id=…YeyFFT_ZUjZ3ppEJ7KzVoucP5
Clio 3 Руководство по эксплуатации — drive.google.com/open?id=…bPGgjOMxF89q-bV4d0UDm0GZk
CLIO 3 Двигатель и его системы — drive.google.com/open?id=…CgSGuFTHUpJ2hkCqEsURaCsed
CLIO 3 Кузовные работы — drive.google.com/open?id=…pq47-hcB4iyrhGk0KPz3hc0xG
CLIO 3 Механизмы и пренадлежности— drive.google.com/open?id=…sw_PwIyX-HejdwPvMr2RZS2is
CLIO 3 Общие сведения 2 -drive.google.com/open?id=…GZL5AIhvXNGWnVHB4KsMMmxPZ
CLIO 3 Общие сведения — drive.google.com/open?id=…DT4fo-YBvycihzF5h6Svyqom9
CLIO 3 Отделка салона и сидений — drive.google.com/open?id=…YoTdlNh9GZI_GvdNfcT1xchzy
CLIO 3 Трансмиссия — drive.google.com/open?id=…M4V59qgybEVdEFlBQxlXmy_Bb
CLIO 3 Уплотнение и шумоизоляция — drive.google.com/open?id=…3gjxugwkVFptyCrPY_SSjutuS
CLIO 3 Шасси — drive.google.com/open?id=…7bM8QqN7xZ4xJuz94TC3fmh1Y
CLIO 3 Электрооборудование — drive.google.com/open?id=…URN8vn_Yxk_70ASp2fYxsORH-
- Manuals
- Brands
- Renault Manuals
- Automobile
- clio 2001
- Owner’s manual
-
Contents
-
Table of Contents
-
Troubleshooting
-
Bookmarks
Related Manuals for Renault clio 2001
Summary of Contents for Renault clio 2001
-
Page 2
RENAULT recommends… -
Page 3
Brief overview • Tyre pressures ………………….0.04 • Adjusting the seats and driving position ……….1.10 1.12 • Child restraints ………………1.22 1.26 • Warning lights ……………….. 1.30 1.45 • Horn and headlamp flash …………….. 1.46 1.50 • De-icing/Demisting ………………..1.52 •… -
Page 4: Table Of Contents
Sections Getting to know your car …………..Driving ………………….. Your comfort ………………..Maintenance ………………..Practical advice ………………. Technical specifications ……………. Alphabetical index ………………0.03…
-
Page 5
TYRE PRESSURES WHEN COLD (in bar) Versions 1.2 16V 1.4 16V 1.5 dCi Type LB0F LB11 LB0B LB0P — LB2A LB07 (see vehicle identification plate) LB03 — LB17 LB13 — LB2B Normal use • Front • Rear Full load (1) •… -
Page 6
Tyre pressures when cold (in bar) (continued) Tyre safety and use of chains Refer to the information on tyres in section 5 for advice on tyre maintenance and, depending on the version, the use of chains. (1) Special note concerning vehicles used at full load (maximum permissible all-up weight) and towing a trailer Under these circumstances, the maximum speed must be restricted to 60 mph (100 km/h) and the tyre pressure increased by 0.2 bar. -
Page 7
0.06… -
Page 8
Section 1: Getting to know your car Keys …………………………… 1.02 — 1.03 Doors …………………………1.04 1.06 Engine immobiliser system ……………………..1.07 Head restraint — Seats …………………….. 1.08 1.10 Seat belts/Methods of restraint in addition to the front seat belts ……….1.11 1.21 Child safety ………………………. -
Page 9
KEYS / RADIO FREQUENCY REMOTE CONTROL Remote control operating range» This varies according environment: therefore take care when handling the remote control that you do not inadvertently lock or unlock the doors. Locking/unlocking the doors Press remote control approximately one second to lock or unlock the doors. -
Page 10
• If a remote control unit is electronic circuit in the key cover replaced, it will be necessary to when replacing the battery. take the car to your Renault dealer as the car and the unit are needed together for initialisation. The batteries can be obtained •… -
Page 11: Opening The Doors
OPENING THE DOORS Opening the doors from the Opening the doors from inside Childproof locks outside the car These make it impossible for the rear doors to be opened from the Front: Use the key to unlock one of Move handle 4. inside.
-
Page 12: Driving
LOCKING THE DOORS Manual locking Electric central locking Front: From outside the car, use the This enables the four doors key, which will lock all four days and the luggage compartment (depending on the version), or from locked unlocked inside, push down door…
-
Page 13
(padlock side) for about the doors are properly closed. If 5 seconds, until you hear the beep. they are properly closed correctly, consult your Renault Dealer. To deactivate it Also make sure that locking has not With the ignition on, press the been inadvertently deactivated. -
Page 14: Engine Immobiliser System
If you do not have access to car’s coded ignition key. this, it is essential to call a Renault Dealer because only dealers in the • Light indicating that the engine Renault network are qualified to immobiliser is operational.
-
Page 15: Front Head Restraint
FRONT HEAD RESTRAINT head restraint important for safety. Ensure that it is in place and in the correct position. distance between your head and the head restraint should be as small as possible. The top of your head should be in line with the top of the head restraint.
-
Page 16: Head Restraint — Seats
REAR HEAD RESTRAINT Adjustment of the rear centre Storage position To adjust the height head restraint Simply slide it up. When completely lowered, the head restraint is in the storage • To adjust the height: To remove position: it must not be used when a Simply slide it up.
-
Page 17: Front Seats
FRONT SEATS To move forwards or backwards To tilt the seatback Lift lever 2 to unlock the seat. Turn the wheel 3 and tilt the Release the lever in the required seatback to the desired position. position and ensure the seat is locked in place.
-
Page 18: Seat Belts/Methods Of Restraint In Addition To The Front Seat Belts
SEAT BELTS Always wear your seat belt when •Adjust the position of your head travelling in your car. You must also restraint. comply with the local legislation in For maximum safety your head the particular country you are in. should be as close as possible to the head restraint.
-
Page 19
— Then allow the belt to rewind automatically. — Unwind it again. — If the problem persists, consult your Renault Dealer. Unlocking Press button 3 on catch 5. The belt will rewind itself. Guide the buckle to help the operation. -
Page 20
(computer, wiring, etc.). These systems are provided to act • Only qualified Renault Network independently or together when the personnel may work on the car is subjected to a frontal impact. pretensioner system to prevent… -
Page 21
10 years. This work steering wheel must always be undertaken by a dashboard, and a label on the base Renault Dealer. of the windscreen or on the sun The seat belt pretensioners and visor. the air bag operate together. If… -
Page 22
30 milliseconds, cushioning the there is a fault in the system. impact of the driver’s head against Consult your Renault Dealer as soon the steering wheel and the front as possible. Your protection will be passenger’s… -
Page 23
• As a safety precaution, have the air bag system checked if your car has been involved in an accident, is stolen or broken into. • When selling or lending the car, inform the user of these points and hand over this handbook with the car. • When scrapping your car, contact your Renault Dealer for disposal of the gas generator(s). 1.16… -
Page 24
• Do not affix any objects (badge, logo, clock, telephone bracket, etc.) to the steering wheel boss. • The steering wheel must not be removed (except by qualified Renault network personnel). • Do not sit too close to the steering wheel. If you sit with your arms slightly bent (see “Adjusting your driving position”… -
Page 25
Consult your Renault Dealer to find out if these covers may be purchased from Renault outlets. The use of any covers other than those designed for your car (and… -
Page 26: Rear Seat Belts
REAR SEAT BELTS Rear side seat belts 1 Manually adjusted lap belt The belts are locked, unlocked and The belts are locked and unlocked adjusted in the same way as the in the same way as the inertia-reel front belts. type belts.
-
Page 27
REAR SEAT BELTS (continued) Rear centre belt Special point concerning cars with a split rear seat Unwind the belt slowly from If you have to fold down the part of position 1. the rear seat behind the front Fasten the black buckle 2 into the left-hand seat: black housing 3. -
Page 28
• No modification may be made to the component parts of the restraint system (belts and seats and their mountings) fitted originally. Consult your Renault Dealer for special applications (e.g. fitting child seats). • Do not use any devices which give any play in the belts (clothes pegs, clips, for example). -
Page 29: Child Safety
CHILD SAFETY In all countries there are regulations Child restraints for which approval governing the use of restraint was obtained after January 1992 systems for children and babies. offer a much higher level of safety than those approved before that In Europe, children under 12 years date.
-
Page 30
(figure 2) or seats with harnesses. To avoid any risk to your safety, we recommend that you use RENAULT approved accessories because they are suitable for your car and are the only accessories for which RENAULT will provide a warranty. 1.23… -
Page 31
CHILD SAFETY (continued) Category 3 For children aged over seven, a booster seat with belt guides is recommended to ensure that the car’s three-point seat belt will be worn flat over the child’s thighs. booster seat with height-adjustable seatback and a belt guide are recommended as this will allow the belt to be worn as close to the base of the neck as… -
Page 32
CHILD SAFETY (continued) DANGER It is forbidden to install a rear-facing baby/child seat on the front passenger seat if the car is equipped with a passenger air bag. The child may suffer very serious injuries if the air bag inflates. You are reminded about these instructions by label 5 (on the dashboard), label 6 (on the front passenger window ) and label 7 (on the sun visor). -
Page 33
CHILD SAFETY (continued) CHILD SAFETY • No modifications may be made to the originally fitted parts of the restraint system (belts and seats and their mountings). • Follow carefully the fitting instructions provided by the manufacturer of the restraint system. •… -
Page 34: Clock
CLOCK Setting the clock Setting the clock With the ignition on, deselect the With the ignition on, select display radio function. 6 showing total mileage and clock. Press button 2 (DSP) and button 4 There are two methods for setting (SEL) simultaneously until you hear the time: a beep.
-
Page 35: Rear View Mirrors
REAR VIEW MIRRORS External rear view mirrors with Electrically operated external The driver’s side external manual adjustment rear view mirrors rear view mirror may have Move lever 1 to adjust the mirror. With the ignition on, turn knob 2: two clearly differentiated — Position C to adjust the left-hand zones.
-
Page 36
REAR-VIEW MIRRORS/STEERING WHEEL Interior rear-view mirror Adjusting the steering wheel This is adjustable. Lower the small On certain cars, the position of the lever 1 located behind the rear-view steering wheel is adjustable. mirror when driving at night to Raise lever 2 and place the steering avoid being dazzled… -
Page 37
DRIVER’S LAYOUT, LEFT-HAND DRIVE 28 27 15 14 21 20 19 18 17 16 1.30… -
Page 38
DRIVER’S LAYOUT, LEFT-HAND DRIVE (continued) The presence of the equipment described below depends on the car version, equipment option and country. 1 Demister outlet for left-hand 9 Stowage compartment 18 Hazard warning lights switch side window 19 Handbrake 10 Passenger air bag location 2 Left-hand side vent 20 Ashtray 21 Gear lever… -
Page 39
INSTRUMENT PANEL If these warning lights light up, you must stop as soon as traffic conditions allow. 1.32… -
Page 40
Headlight main beam and check the coolant level indicator light (having let the engine cool Not used down). Call for the assistance of a Renault Dealer if necessary. Headlight dipped beam indicator light Rear screen demisting indicator light Engine immobiliser… -
Page 41
INSTRUMENT PANEL (continued) If these warning lights light up, you must stop as soon as traffic conditions allow. 1.34… -
Page 42
• Preheating warning light (on driving, it indicates a fault in continue driving. Call for the diesel version) the anti-lock braking system. assistance of a Renault Dealer. When the ignition key is in Braking will then occur… -
Page 43
INSTRUMENT PANEL (continued) If these warning lights light up, you must stop as soon as traffic conditions allow. 1.36… -
Page 44
If this is It should go out when normal, call for the assistance Select display normal the engine starts. If it lights up of a Renault Dealer. mileometer or trip meter. while driving, indicates that the circuit is overcharging discharged. -
Page 45
INSTRUMENT PANEL The presence and operation of the warning and indicator lights described below depend on the car’s equipment and the country. If these lights light up, you must stop as soon as traffic conditions allow. 1.38… -
Page 46
If it does not illuminate when the ignition is turned on or if it flashes, there is a fault in the system. Consult your Renault 4 Coolant temperature indicator Dealer as soon as possible. In normal use, the needle should be below zone 4a. -
Page 47
INSTRUMENT PANEL The presence and operation of the warning and indicator lights described below depend on the car’s equipment and the country. If these lights light up, you must stop as soon as traffic conditions allow. 1.40… -
Page 48
Renault Dealer in the near The squares in the display future: flashes • Trip mileage zeroing button indicate level. -
Page 49
INSTRUMENT PANEL The presence and operation of the warning and indicator lights described below depend on the car’s equipment and the country. If these lights light up, you must stop as soon as traffic conditions allow. 1.42… -
Page 50
If this is normal, call for the incident. Consult your circuit overcharging assistance of a Renault Dealer. Renault Dealer as soon as discharged. Stop and have the possible. circuit checked. 1.43… -
Page 51
INSTRUMENT PANEL The presence and operation of the warning and indicator lights described below depend on the car’s equipment and the country. If these warning lights illuminate, you must stop as soon as traffic conditions allow. 1.44… -
Page 52
• If it flashes, reduce the continue driving. Call for the Consult your Renault Dealer as engine speed until the light assistance of a Renault Dealer. soon as possible. stops flashing. Consult your Renault Dealer as soon as possible. -
Page 53: External Lighting And Signals
EXTERNAL LIGHTING AND SIGNALS Main beam headlights With stalk 1 in the dipped beam position, pull stalk towards you. An indicator light on the instrument panel lights up when the main beam headlights are on. To return to the dipped headlight position, pull the stalk towards you again.
-
Page 54
EXTERNAL LIGHTING AND SIGNALS (continued) When the external car lights are extinguished, the rear fog light is extinguished or the equipment returns to the front fog lights position (if these are fitted). Front fog lights Rear fog lights Turn the central ring of Turn the central ring of stalk 4 until the symbol appears stalk 4 until the symbol appears… -
Page 55
ELECTRICAL ADJUSTMENT OF THE HEADLIGHTS Versions with single lenses Adjustment positions of button A Position 0: basic setting, luggage compartment empty and driver only or driver + one front passenger. Button A allows the height of the beams to be adjusted according to Position 2: car with 5 persons on the load. -
Page 56
ELECTRICAL ADJUSTMENT OF THE HEADLIGHTS Versions with double lenses Adjustment positions of button A Position 0 or 1: basic setting, luggage compartment empty with driver alone or with a front passenger. Position 2 or 3: car with 5 persons on board, luggage compartment empty. -
Page 57
HORN AND HAZARD LIGHTS Horn Hazard warning lights Direction indicators Press the end of the stalk 1. Press switch 2. Move the stalk 1 in the plane of the steering wheel in the direction in This switch illuminates all four which you are going to turn the direction indicators simultaneously. -
Page 58
WINDSCREEN WIPER/WASHER Windscreen wiper Windscreen In frosty weather, make sure that the washer wiper blades are not stuck by ice With the ignition on, (risk of motor overheating). move stalk 1 in the plane of the With the ignition switched on, pull steering wheel: the stalk 1 towards you. -
Page 59: De-Icing/Demisting
DE-ICING/DEMISTING Heated rear screen Demisting the windscreen With the engine running, Move control 2: set it to press button 1. (indicator light illuminates instrument position: panel.) For greater efficiency, close the This function demists the rear dashboard air vents. screen and the electric rear view All the air is directed to the mirrors (if these are fitted to the car).
-
Page 60: Fuel Tank
If this happens, the SERV warning light instrument panel will flash, and you should consult your Renault Useful capacity of fuel tank: Dealer immediately. The fuel filler This is of a special type. If cap and neck must be clean and Approx.
-
Page 61
(at the pump). checked by qualified Renault — Insert the nozzle as far as it will go network personnel. so as to open the valve. -
Page 62
Section 2: Driving (Advice on use relating to fuel economy and the environment) Running in / Ignition switch ……………………… 2.02 Starting the engine / Stopping the engine ………………… 2.03 Special features of petrol versions ……………………2.04 Special features of diesel versions ……………………2.05 Advice on anti-pollution and how to economise on fuel ………….. -
Page 63: Running In / Ignition Switch
RUNNING IN IGNITION SWITCH Petrol version Position M: “Ignition on” For the first 625 miles (1000 km) do Ignition is on. not exceed 70 mph (130 km/h) You are ready to start. in the highest gear or 3000 to 3500 rpm. Position D: “Start”…
-
Page 64: Starting The Engine / Stopping The Engine
STARTING/STOPPING THE ENGINE Starting the engine Diesel injection Special feature vehicles equipped with engine Cold or warm engine Hot engine immobiliser system Turn the ignition key to the Turn the ignition key directly to the very cold conditions ignition on position, M, and hold Start position.
-
Page 65: Special Features Of Petrol Versions
If the fault cannot be identified, do cause thermal damage to the car. not persist in attempting to start the engine and call a Renault Dealer. Do not park the car or run the engine in locations where combustible substances or…
-
Page 66: Special Features Of Diesel Versions
However, if after a few seconds and fuel heater several attempts the engine fails to This equipment enables diesel fuel start, contact a Renault Dealer. to be used without an additive down to –18°C or, if the vehicle is used regularly for short journeys (cold engine), down to –5°C.
-
Page 67
• Idling speed: this does not require adjustment. Your Renault Dealer has all the equipment necessary for ensuring • Air and fuel filters: a clogged that your car is maintained to its filter element reduces output and original standard. -
Page 68
ADVICE ON ANTI-POLLUTION AND HOW TO ECONOMISE ON FUEL, DRIVING (continued) • Study the road ahead so that you are able to brake as little as possible, it can be sufficient just to lift off the accelerator. • Avoid fierce acceleration. •… -
Page 69
ADVICE ON ANTI-POLLUTION AND HOW TO ECONOMISE ON FUEL, DRIVING (continued) • Air conditioning increases fuel consumption, especially in town driving. Switch off the system when it is not needed. • Never fill the fuel tank right to the brim as this is wasteful. •… -
Page 70: Environment
ENVIRONMENT Your vehicle has been designed addition, your meets with the aim of caring for the requirements European environment. legislation relating to environmental protection. • The majority of versions are equipped with a depollution Make your contribution towards system including catalytic protection of the environment too! converter, a lambda sensor and…
-
Page 71: Gear Lever
GEAR LEVER HANDBRAKE POWER STEERING To release: Never leave the steering wheel on full lock when the car is parked if Pull the lever up slightly, press you have power-assisted steering button 2, then lower the lever to the fitted, as this may damage the floor.
-
Page 72: Anti-Lock Braking System (Abs)
Contact at the same time. Also, this system that you must adapt your driving your Renault Dealer as a matter or allows you to optimise stopping style to suit the road conditions. urgency.
-
Page 73
2.12… -
Page 74: Your Comfort
Section 3: Your comfort Air vents …………………………3.02 — 3.03 Heating — Ventilation — Air conditioning ……………….. 3.04 3.09 Interior lighting …………………………3.10 Electric windows ………………………… 3.11 Sun visor …………………………..3.12 Glove box — Storage compartments …………………. 3.13 — 3.14 Ashtrays — cigarette lighters ……………………..
-
Page 75: Air Vents
AIR VENTS (air outlets) 1 — Left-hand front window demister 5 — Heating/ventilation control unit 6 — Right-hand side air vent 2 — Left-hand air vent 7 — Right-hand front window demister 3 — Windscreen demisting vents 8 — Footwell heater outlets for front 4 — Centre air vents and rear passengers 3.02…
-
Page 76
AIR VENTS (continued) Side air vents Centre air vents Air flow Air flow Move tumblewheel 2 (beyond the Move tumblewheel 4 (beyond the point where resistance is felt). point where resistance is felt). : maximum flow : maximum flow : closed : closed Direction Direction… -
Page 77
HEATING — VENTILATION Controls Adjusting the air temperature Distribution passenger compartment A Air temperature adjustment. Turn button A. Move control B. Turning the knob to the right B Distribution of air. increases the temperature. • Position C Air flow regulation. All the air flow is directed to the dashboard vents. -
Page 78
HEATING — VENTILATION (continued) Adjusting the amount of supplied passenger compartment • Normal use (ventilation) Move control C from 0 to 4. Passenger compartment ventilation is by “blown air”. The blower determines how much air enters but car speed has some effect on this. •… -
Page 79: Heating — Ventilation — Air Conditioning
HEATING — VENTILATION — AIR CONDITIONING Controls Adjusting the air temperature Distribution passenger compartment A Air temperature adjustment. Move control A. Move control B. B Distribution of air. To the right: maximum possible temperature • Position C Air flow regulation. To the left: minimum possible All the air flow is directed to the D Using the air conditioning.
-
Page 80
HEATING — VENTILATION — AIR CONDITIONING (continued) Adjusting the amount of blown into • Position • Position passenger compartment Ventilation The air flow is distributed between Close the dashboard vents for more Move control C from 0 to 4. dashboard vents effective demisting. -
Page 81
If there is an operating fault, consult control D to start the air conditioning may mist the windows slightly or your Renault Dealer. and move control C from 0 to 4. cause odours due to the air not being renewed. -
Page 82
HEATING — VENTILATION — AIR CONDITIONING (continued) Air conditioning controls Note: the air conditioning may be used in all conditions but does not Control D operates or stops Using the air conditioning system: operate when external the air conditioning system. •… -
Page 83: Interior Lighting
INTERIOR LIGHTS Automatic operation interior lights (for certain cars) • if the doors are unlocked using the plip remote control, the interior lighting is switched on for approximately 15 seconds. • if the doors are locked using the plip remote control, the interior lighting is immediately switched off.
-
Page 84: Electric Windows
ELECTRIC WINDOWS Front passenger’s side electric window With the ignition on, press switch 2 to open the window or raise switch 2 to close it. Front driver’s side electric Manual window controls window Operate handle 3. With the ignition on, press switch 1 to open the window or raise switch 1 to close it.
-
Page 85: Sun Visor
SUN VISOR Front sun visor Lower the sun visor 1. When the sun visor is fitted with a vanity mirror 2, this will be on the passenger side. 3.12…
-
Page 86: Storage Compartments
STORAGE COMPARTMENTS Passenger side glove box Centre console storage Driver’s side storage pockets 3 compartment 2 To open, lift control 1. Two cup holders are provided on the inside of the flap. 3.13…
-
Page 87
STORAGE COMPARTMENTS (continued) Front door storage pockets 1 Storage at the far end of the Luggage compartment storage luggage compartment 2 A storage space 3 is provided for various accessories (petrol can, toolkit …). 3.14… -
Page 88: Ashtrays — Cigarette Lighters
ASHTRAYS — CIGARETTE LIGHTERS Ashtray Cigarette lighter To open, lift cover 1. With the ignition on, press in the cigarette lighter 2. To empty, pull ashtray towards you and it will be released from its It will spring back with a click when housing.
-
Page 89
REAR SEAT (operation) To fold down the seatback Removing the seat cushion The seat and the seatback may be folded away to allow bulky objects Remove the rear head restraint (if Raise the seat cushion so that you to be carried. fitted). -
Page 90: Luggage Compartment
LUGGAGE COMPARTMENT versions with electric central door locking The tailgate is locked and unlocked at the same time as the doors. The tailgate may, however, be locked unlocked without affecting the doors by using the door key in the lock 1. To close Slam the tailgate and turn the ignition key to the right.
-
Page 91: Transporting Items In The Luggage Compartment
TRANSPORTING ITEMS IN THE LUGGAGE COMPARTMENT Always arrange the items to be carried so that their longest side is against the seatback of the rear bench seat (which will be the case with normal loads) or the folded bench seat (which will be the case with the bulkiest loads).
-
Page 92: Maintenance
Section 4: Maintenance Bonnet …………………………..4.02 Engine oil level ………………………. 4.03 4.05 Levels: Brake fluid ……………………….4.06 Coolant …………………………4.07 Power steering pump …………………….. 4.08 Screen washer reservoir ……………………4.09 Air filter — Battery ……………………….. 4.10 Bodywork maintenance ……………………. 4.11 — 4.12 Interior trim maintenance ……………………..
-
Page 93: Bonnet
(except own weight. Take care when working for qualified staff from the under the bonnet as the Renault network). Check that the bonnet is correctly engine cooling fan may locked. start up at any moment.
-
Page 94: Engine Oil Level
Message 2 every 625 miles (1000 km), consult Level It is vital to top up with oil as soon display your Renault Dealer. as possible. function Oil change frequency: check the oil level from time to time and certainly before any long journey,…
-
Page 95
ENGINE OIL LEVEL (continued) 1.4 l 1.4 l 16V Topping up/filling • Reading the oil level using the — Unscrew the filler cap 1. dipstick — Top level. (For The car must be parked on level — Take out the dipstick. information, capacity ground and the engine should be… -
Page 96
1.2 l 16V 1.5 l dCi Engine oil change Frequency of changing: Refer to the Consult your Renault Dealer at Servicing booklet for your vehicle. once if you notice an abnormal or Change the oil more often if the repeated drop in any of the fluid vehicle is used in harsh conditions. -
Page 97
MINIMUM warning mark. Take care when working under the bonnet as the engine cooling fan may Consult your Renault Dealer at start up at any moment. once if you notice an abnormal or repeated drop in the level. 4.06… -
Page 98: Coolant
Top up this when cold level before it reaches the MINI mark. No operations may be carried cooling circuit when the engine is hot. Consult your Renault Dealer at Risk of burns. once if you notice an abnormal or repeated drop in the level. 4.07…
-
Page 99
— visible between the Min and Max marks on the reservoir 1. For topping up or refilling with oil, use products approved by Renault’s Technical Department. Take care when working under the bonnet as the… -
Page 100: Screen Washer Reservoir
Take care when working under the bonnet as the engine cooling fan may Consult your Renault Dealer at start up at any moment. once if you notice an abnormal or repeated drop in the level.
-
Page 101
The battery does not need to be engine cooling fan may serviced: never open cover 2. start up at any moment. Consult your Renault Dealer at once if you notice an abnormal or repeated drop in any of the fluid levels. -
Page 102: Bodywork Maintenance
— Atmospheric pollution (built-up • Allow rust to form following Renault’s Technical Department. and industrial areas). minor impacts. If adequate precautions are not — Saline atmosphere (near the sea, •…
-
Page 103
Consult must be reapplied by spraying on and may even cause the paint to anti-corrosion booklet. products approved by Renault’s peel off): Technical Department. • Respect local regulations about must washed washing vehicles (e.g. do not… -
Page 104: Interior Trim Maintenance
Renault’s Technical Department passenger compartment: unless • washing up liquid (with one part (or Renault accessory outlets) or carefully used, such equipment of washing up liquid to 200 parts warm soapy water using a sponge could interfere with correct of water).
-
Page 105
4.14… -
Page 106: Practical Advice
Section 5: Practical advice Emergency spare wheel ………………………. 5.02 Toolkit (Jack — Wheelbrace — Tyre levers, etc.) ………………..5.03 Hubcaps …………………………..5.04 Changing a wheel ……………………….. 5.05 Tyres (tyre safety, wheels, winter use) ………………..5.06 5.08 Wiper blades …………………………5.09 Changing the bulbs: ……………………..
-
Page 107: Spare Wheel
SPARE WHEEL Spare wheel 2 This is located in the luggage • Release the retaining strap 3. compartment. To gain access to the • Take out the spare wheel 2. spare wheel: • Open the tailgate. • Lift up the luggage compartment carpet 1.
-
Page 108: Toolkit (Jack — Wheelbrace — Tyre Levers, Etc.)
TOOLKIT The toolkit is located inside the rear left wing. It contains: — the wheelbrace 1 — the jack 2 — the towing ring 3 The jack is designed for wheel changing purposes only. It must not be used under any circumstances to assist repair underneath the car.
-
Page 109: Hubcaps
HUBCAPS Hubcap with concealed wheel Central hubcap Aluminium wheel 4 bolts (example: hubcap 3) There is no need to remove this (example: hubcap 1) Remove using the hubcap spanner hubcap: the bolts are visible. A (stored in the toolkit). Remove it using a wheel hubcap spanner A (stored in the tool kit) or the end of the wheelbrace by inserting the hook into one of the…
-
Page 110: Changing A Wheel
CHANGING A WHEEL Park the car on flat, firm ground (if necessary, insert a solid support under the baseplate of the jack), and turn on the hazard warning lights. Apply the handbrake and put the car in gear (first or reverse, or position automatic transmission).
-
Page 111: Tyres (Tyre Safety, Wheels, Winter Use)
Maintaining the tyres affect safety. The tyres must be in good condition and the tread must have sufficient depth; tyres approved by Renault’s Technical Department have tread wear indicators 1 which are raised When they need to be pads moulded into the tread at replaced, only tyres of several points.
-
Page 112: Tyre Pressures
TYRES (continued) Tyre pressures Pressures should be checked when Fitting new tyres the tyres are cold; ignore higher Tyre pressures must be adhered to. pressures which may be reached in (Remember to check the spare hot weather or following a journey wheel at the same time.) Pressures For safety reasons, this at higher speeds.
-
Page 113
In all cases, we would recommend replace the punctured wheel and to that you consult your Renault fit the emergency spare wheel in Dealer who will be able to advise place of the rear wheel. -
Page 114: Wiper Blades
WINDSCREEN WIPER BLADES Refitting a wiper blade To refit the wiper blade, proceed in reverse order of removal. Make sure the blade is correctly locked in position. Replacing windscreen wiper blades 1 • Lift the wiper arm 3. • Move the blade into a horizontal position.
-
Page 115
SINGLE LENS FRONT LIGHTS: replacement of the bulbs Cleaning headlights As the headlights are made of plastic “glass”, use a soft cloth or cotton wool to clean them. If this does not clean them properly, use a soft cloth or cotton wool slightly moistened with soapy water and then wipe clean with a soft damp cloth. -
Page 116
FRONT DUAL HEADLIGHT: changing bulbs Cleaning headlights As the headlights are made of plastic “glass”, use a soft cloth or cotton wool to clean them. If this does not clean them properly, use a soft cloth or cotton wool slightly moistened with soapy water and then wipe clean with a soft damp cloth. -
Page 117: Front Fog Lights
Renault Dealer. Adjusting beam height • Remove the mounting screws 1. Please consult your Renault Dealer • Take out the lamp unit towards to adjust these lights. the front. • Disconnect the wires.
-
Page 118
REAR LIGHTS: replacing bulbs Remove the screw 1 and pull off the Unclip the bulb holder by moving 3 Tail light and stop light rear light cluster from the outside. the tab 2. Pear-shaped bulb, bayonet type with 2 filaments, P 21/5 W. 4 Reversing light (right-hand side) Pear-shaped bulb, bayonet type with 2 filaments P 21 W. -
Page 119
REAR LIGHTS: replacing bulbs (continued) Third brake light 1 Remove the cover by pressing Turn the bulb holder 2 a quarter of a simultaneously on the locking tabs turn, release it and take out the bulb. on both sides (arrows). Bulb type: P 21 W. -
Page 120
REAR LIGHTS: replacing bulbs (continued) Number plate light 1 Release it using a tool such as a flat To access the bulb 2, you must screwdriver. unclip the bulb holder lens. Bulb type: PH 5 W. 5.15… -
Page 121
SIDE-MOUNTED REPEATERS: changing the bulbs Unclip side-mounted repeater 1 Turn the bulb holder 2 a quarter of a (using a tool such as a flat turn and take out the bulb. screwdriver). Bulb type: W 5 W. 5.16… -
Page 122: Interior Lights
INTERIOR LIGHTS: changing the bulbs Interior light A Unclip cover 1 (using a tool such as a flat screwdriver) Release the bulb. Bulb type: W 5 W. 5.17…
-
Page 123
INTERIOR LIGHTS: replacing the bulb Luggage compartment light 1 Unclip the light 1 by pressing the Press tab 2 to release the lens and tabs on each side (using a tool such gain access to the bulb 3. as a flat screwdriver). Bulb type: double-ended tubular Disconnect the light. -
Page 124: Battery
In this case, it is advisable to have normally. your vehicle fitted with a battery which has an increased nominal To avoid all risk of sparks: The battery must be kept clean and capacity. Consult your Renault dry. — Ensure that the consumers are Dealer. disconnected before…
-
Page 125
Start the engine as you would Obtain suitable jump leads (with a normally. As soon as it starts, large cross section) from a Renault disconnect cables A and B in Dealer or, if you already have jump reverse order (4-3-2-1). -
Page 126
If a fuse is fitted where the rating is too high, it may cause the obtain a box of spare bulbs and electrical circuit to overheat (risk of fire) in the event of an item of fuses from your Renault Dealer. equipment using an excessive amount of current. 5.21… -
Page 127: Fuses
FUSES (continued) Allocation of fuses (depending on the car equipment level) Symbol Allocation Symbol Allocation Symbol Allocation Air bag/ Right-hand main beam Left-hand side light Delay timing unit headlight Right-hand side light Stop lights Left-hand main beam headlight Heated rear screen Engine immobiliser Dual headlight (dipped and main beam)
-
Page 128: System For Cutting Off The Fuel Supply In The Event Of A Severe Impact
Renault network personnel who must ensure that: • the car can be driven; • there is no smell of fuel; • and that the fuel system is not leaking.
-
Page 129: Towing (Breakdown — Trailer)
You must observe the towing Screw in towing ring 2 as far as it regulations which apply in the will go. country in which you are driving: do not exceed the towing weight for your car. Consult your Renault Dealer. 5.24…
-
Page 130
TOWING: breakdown TOWING: trailer • Renault recommends the use of a rigid towing bar. If a rope or cable is used (where the law allows this), the car being towed must be able to brake. • A car must not be towed if it is not fit to be driven. -
Page 131
Consult your Renault Dealer to find out the correct part numbers. • No work may be carried out on the electrical or radio circuits, except by Renault network engineers: an incorrectly connected system may result in damage being caused to the electrical system and/or the components connected to it. -
Page 132
RENAULT will provide a Also, for your own safety, we warranty. would advise you always to take account of traffic conditions and… -
Page 133
FAULTS Your car should not be affected by faults likely to keep it off the road for long if you have followed the Renault Servicing Programme regularly. The following troubleshooting tips will enable you to get going again quickly, even if only temporarily. For reasons of safety you should always consult a Renault Dealer as soon as you can. -
Page 134
Starting procedure incorrect. See “Starting engine” section. Poor fuel supply or ignition fault. If the car will not start, do not keep trying to start it. Consult a Renault Dealer. System for cutting off fuel supply Consult Renault Dealer. (See… -
Page 135
Oil level too low. Top up the oil. — at idling speed Oil pressure too low. Consult the nearest Renault Dealer. — is slow to go out or remains Loss of oil pressure. Stop: contact a Renault Dealer. illuminated on acceleration. -
Page 136
Reminder: only products approved by Renault’s Technical Department may be used for this purpose. -
Page 137
— Feed wire disconnected or connector Reconnect wire. out of position. — Faulty earth connection. Find earth wire and remake a good clean wire-to-earth connection. On both sides: — Fuse blown. Replace fuse. — Flasher unit defective. Replace: consult a Renault Dealer. 5.32… -
Page 138: Troubleshooting
TROUBLESHOOTING (continued) Electrical equipment CAUSES REMEDIAL ACTION • Headlights One headlight only: — Bulb blown. Replace bulb. not flashing. — Wire disconnected or connector out Check reconnect wire of position. connector. — Faulty earth connection. See above. Both headlights: — If circuit is protected by fuse Check fuse and change if necessary.
-
Page 139
5.34… -
Page 140: Technical Specifications
Section 6: Technical specifications Vehicle identification plates ……………………. 6.02 — 6.04 Engine specifications ……………………….6.05 Weights …………………………..6.06 Towing weights …………………………6.07 Dimensions ………………………….. 6.08 Replacement parts ……………………….6.09 6.01…
-
Page 141: Vehicle Identification Plates
VEHICLE IDENTIFICATION PLATES The information on the vehicle A — Vehicle identification plate identification plate A (right-hand 1 Vehicle type and chassis number 6 Technical specifications side) must be quoted when writing (The number also appears on the vehicle to us or ordering parts. dashboard, at the bottom of the 7 Vehicle paint reference windscreen).
-
Page 142
VEHICLE IDENTIFICATION PLATES (continued) The information on the vehicle B — Engine plate or engine label identification plate and the engine (Location varies depending plate B must be quoted when engine) writing or ordering parts. 1 Engine type 2 Engine suffix 3 Engine number 6.03… -
Page 143
VEHICLE IDENTIFICATION PLATES (continued) The information on the vehicle B — Engine plate or engine label identification plate and the engine (Location varies depending plate B must be quoted when engine) writing or ordering parts. 1 Engine type 2 Engine suffix 3 Engine number 6.04… -
Page 144: Engine Specifications
The type should be marked on a label stuck inside the engine compartment. – If it is not then contact your Renault Dealer. Fitting spark plugs which are not to specification may damage the engine. * If not available, unleaded fuel with an octane rating of 91 can be used.
-
Page 145: Weights
WEIGHTS (in kg) — basic car without options subject to change over the year: Consult your Renault Dealer. Versions 1.2 l 1.2 l 16V 1.4 l 1.4 l 16V 1.5 l dCi Vehicle type LB0F LB11 LB0B LB0P — LB2A…
-
Page 146
— It is important to comply with the towing weights governed by local legislation in each country and, in particular, those laid down in the Road Traffic Regulations. Consult your Renault Dealer about any attachments. Under no circumstances may the total train weight (= maximum permissible all-up weight and weight towed) be exceeded. -
Page 147: Dimensions
DIMENSIONS (in metres) 0,714 2,472 0,964 1,406 4,150 1,940 Turning circle • Between walls: 10.70 or 11.15 • between kerbs: 10.30 or 10.75 1,417 1,385 6.08…
-
Page 148: Replacement Parts And Repairs
If you always fit Renault genuine parts to your car, you will ensure that it performs well. Repairs carried out within the Renault network using original parts are guaranteed for one year.
-
Page 149
6.10… -
Page 150: Alphabetical Index
ALPHABETICAL INDEX A ABS …………….2.11 D Dashboard …………1.30 — 1.31 Accessories …………… 5.27 Dimensions …………… 6.08 Accessories — installation ……..5.27 Dipstick …………4.03 4.05 Additional driving lights ……..5.12 Direction indicators ….1.50 — 5.10 — 5.11 — 5.13 Adjusting the driving position ….
-
Page 151
ALPHABETICAL INDEX G Gear lever …………..2.10 L Lights: Adjustment ……..1.48 — 1.49 Dipped beam headlights ..1.46 — 5.10 — 5.11 Fog lights ………. 1.47 — 5.12 Hazard warning ……….. 1.50 H Handbrake …………..2.10 Indicators ….1.50 — 5.10 — 5.11 — 5.13 Hazard warning lights ………. -
Page 152
ALPHABETICAL INDEX S Seat belts …………. 1.11 1.21 V Vehicle identification plate ……6.02 — 6.04 Side repeaters …………5.16 Ventilation and heating ……3.02 3.09 Spare wheel ………….. 5.02 Speakers (location) ……….5.26 Starting the engine ……….2.03 Storage compartments/pockets ….3.13 — 3.14 W Warning lights ………. -
Page 155
C R É A T E U R D ‘ A U T O M O B I L E S The driver’s handbook – 82 00 197 291 – NU 665-3 – June 2001 – ÉDITION ANGLAISE…
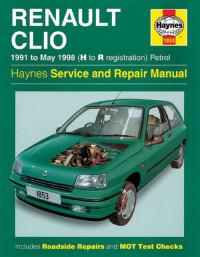
Руководство на английском языке по техническому обслуживанию и ремонту автомобиля Renault Clio 1991-1998 годов выпуска с бензиновыми двигателями.
- Автор: —
- Издательство: Haynes Publishing
- Год издания: 1999
- Страниц: 390
- Формат: PDF
- Размер: 188,0 Mb
Руководство на французском языке по техническому обслуживанию и ремонту автомобиля Renault Clio с 1993 года выпуска.
- Автор: —
- Издательство: —
- Год издания: —
- Страниц: —
- Формат: PDF
- Размер: 32,0 Mb
Сборник руководств по техническому обслуживанию и ремонту автомобиля Renault Clio с 1998 года выпуска.
- Автор: —
- Издательство: Renault
- Год издания: 1997-2002
- Страниц: —
- Формат: PDF
- Размер: 12,1 Mb
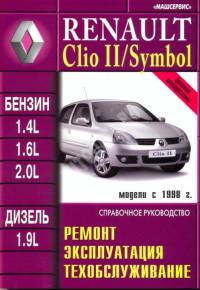
Руководство по эксплуатации, техническому обслуживанию и ремонту автомобилей Renault Clio и Renault Symbol с 1998 года выпуска с бензиновыми и дизельными двигателями.
- Автор: —
- Издательство: Машсервис
- Год издания: —
- Страниц: 278
- Формат: —
- Размер: —
Руководство на испанском языке по техническому обслуживанию и ремонту автомобиля Renault Clio с 2005 года выпуска.
- Автор: —
- Издательство: Renault
- Год издания: 2005
- Страниц: —
- Формат: PDF
- Размер: 65,0 Mb
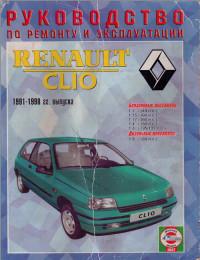
Руководство по эксплуатации и ремонту автомобиля Renault Clio 1991-1998 годов выпуска с бензиновыми и дизельными двигателями.
- Автор: —
- Издательство: Петит
- Год издания: 2005
- Страниц: 328
- Формат: PDF
- Размер: 493,0 Mb
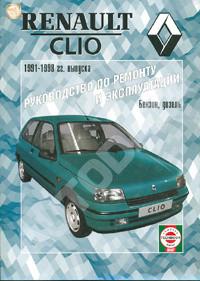
Руководство по эксплуатации и ремонту автомобиля Renault Clio 1991-1998 годов выпуска с бензиновыми и дизельными двигателями.
- Автор: —
- Издательство: Чижовка
- Год издания: —
- Страниц: 328
- Формат: —
- Размер: —
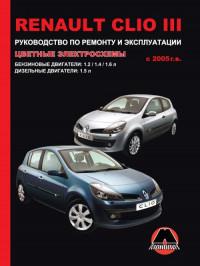
Руководство по эксплуатации и ремонту автомобиля Renault Clio с 2005 года выпуска с бензиновыми и дизельными двигателями.
- Автор: —
- Издательство: Монолит
- Год издания: —
- Страниц: 356
- Формат: —
- Размер: —
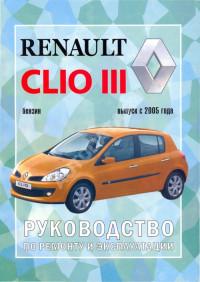
Руководство по эксплуатации и ремонту автомобиля Renault Clio с 2005 года выпуска с бензиновыми двигателями.
- Автор: —
- Издательство: Чижовка
- Год издания: —
- Страниц: 368
- Формат: —
- Размер: —
Сборник руководств по эксплуатации и техническому обслуживанию автомобиля Renault Clio третьего поколения.
- Автор: —
- Издательство: Renault
- Год издания: 2008/2010/2011
- Страниц: 261/30/73
- Формат: PDF
- Размер: 39,4 Mb
Сборник руководств по эксплуатации и техническому обслуживанию автомобиля Renault Clio RS/GT с 2012 года выпуска.
- Автор: —
- Издательство: Renault
- Год издания: 2013
- Страниц: 28
- Формат: PDF
- Размер: 833 Kb
Руководство по эксплуатации и техническому обслуживанию автомобиля Renault Clio второго поколения.
- Автор: —
- Издательство: Renault
- Год издания: 2002
- Страниц: 205
- Формат: PDF
- Размер: 235,4 Mb

Сборник мультимедийных схем на нескольких языках (в том числе русском) электрооборудования автомобилей Renault Clio и Renault Clio Symbol 2000-2007 годов выпуска.
- Автор: —
- Издательство: Renault
- Год издания: —
- Страниц: —
- Формат: ISO
- Размер: 917,4 Mb

Сборник мультимедийных схем на нескольких языках (в том числе русском) электрооборудования автомобиля Renault Clio 2005-2009 годов выпуска.
- Автор: —
- Издательство: Renault
- Год издания: —
- Страниц: —
- Формат: ISO
- Размер: 875,0 Mb
Renault Clio с 1991-1998 руководство по ремонту и обслуживанию
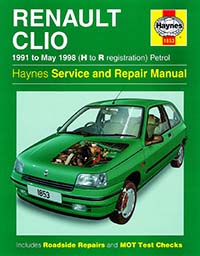
Renault Clio petrol engine models, including 16-valve (except Williams models) and special/limited editions
1108 се ohv, 1149 сс, 1171 сс,1390 сс, 1783 сс & 1794 сс SOHC and 1764 сс DOHC petrol engines.
Книги |
Просмотров: 7484 |
Загрузок: 1684 |
Добавил: Admin |
Дата: 13.05.2014
| Комментарии (0)
Посмотреть инструкция для Renault Clio (2017) бесплатно. Руководство относится к категории автомобили, 42 человек(а) дали ему среднюю оценку 8.5. Руководство доступно на следующих языках: английский. У вас есть вопрос о Renault Clio (2017) или вам нужна помощь? Задайте свой вопрос здесь
Renault Clio характеризуется сильным и экономичным двигателем, который стремительно реагирует на нажатие педали газа. Модель оснащена достаточным количеством систем безопасности, продуманной эргономикой салона и современными технологиями. Автомобиль комфортно справляется с городскими дорогами и при этом имеет достойную проходимость.
Конструкция автомобиля Renault Clio, изготовленная из высококачественных материалов, обеспечивает качественную и надежную эксплуатацию на протяжении долгого времени. Внешний вид машины выглядит стильным и современным, что привлекает внимание окружающих.
У Renault Clio есть достаточно места для водителя и пассажиров. Сиденья комфортные и удобные, обеспечивая наилучший уровень комфорта при длительных поездках. Автомобиль имеет большой багажник, что позволяет удобно разместить багаж и провизию во время длительных поездок.
Renault Clio обладает продуманными техническими характеристиками и имеет низкий уровень выбросов вредных веществ в окружающую среду. Благодаря этому, машина является экологически чистой и современной.
Главная
Не можете найти ответ на свой вопрос в руководстве? Вы можете найти ответ на свой вопрос ниже, в разделе часто задаваемых вопросов о Renault Clio (2017).
Как перевести мили в километры?
1 миля равна 1,609344 километрам, а 1 километр — 0,62137119 милям.
Где я могу узнать идентификационный номер транспортного средства Renault?
Место размещения идентификационного номера транспортного средства зависит от марки и типа транспортного средства. Номер может быть выбит на раме транспортного средства или указан на номерном знаке. Чтобы узнать место расположения идентификационного номера транспортного средства лучше всего ознакомиться с руководством по эксплуатации Renault Clio (2017).
Что такое идентификационный номер транспортного средства (VIN)?
Идентификационный номер транспортного средства — уникальный для каждого транспортного средства идентификационный номер. Аббревиатура VIN расшифровывается как «Vehicle Identification Number» (Идентификационный номер транспортного средства).
Когда транспортному средству Renault требуется техническое обслуживание?
Регулярное техническое обслуживание необходимо всем транспортным средствам. С информацией о том, как часто необходимо проходить техническое обслуживание и чему именно стоит уделять особое внимание можно ознакомиться в инструкции по техническому обслуживанию. Как правило, транспортное средство требует технического обслуживания каждые 2 года или 30 000 километров пробега.
Когда следует заменять тормозную жидкость на Renault?
Тормозную жидкость рекомендуется менять каждые два года.
В чем разница между топливом E10 и E5?
В топливе E10 содержится до десяти процентов этанола, в то время как в E5 содержится менее пяти процентов. Соответственно, топливо E10 менее вредит окружающей среде.
Одна или несколько дверей не открываются изнутри. Что мне делать?
Скорее всего, замок оснащен защитой от детей и поэтому не может быть открыт изнутри. Процедура открытия замка с защитой от детей зависит от марки и типа замка.
Автомобильный радиоприемник не включается, что делать?
Если автомобильный радиоприемник не включен, на него не будет подаваться питание. Убедитесь, что красный провод подключен к контактному источнику питания, а желтый провод — к источнику питания постоянной мощности.
Инструкция Renault Clio (2017) доступно в русский?
К сожалению, у нас нет руководства для Renault Clio (2017), доступного в русский. Это руководство доступно в английский.
Не нашли свой вопрос? Задайте свой вопрос здесь

