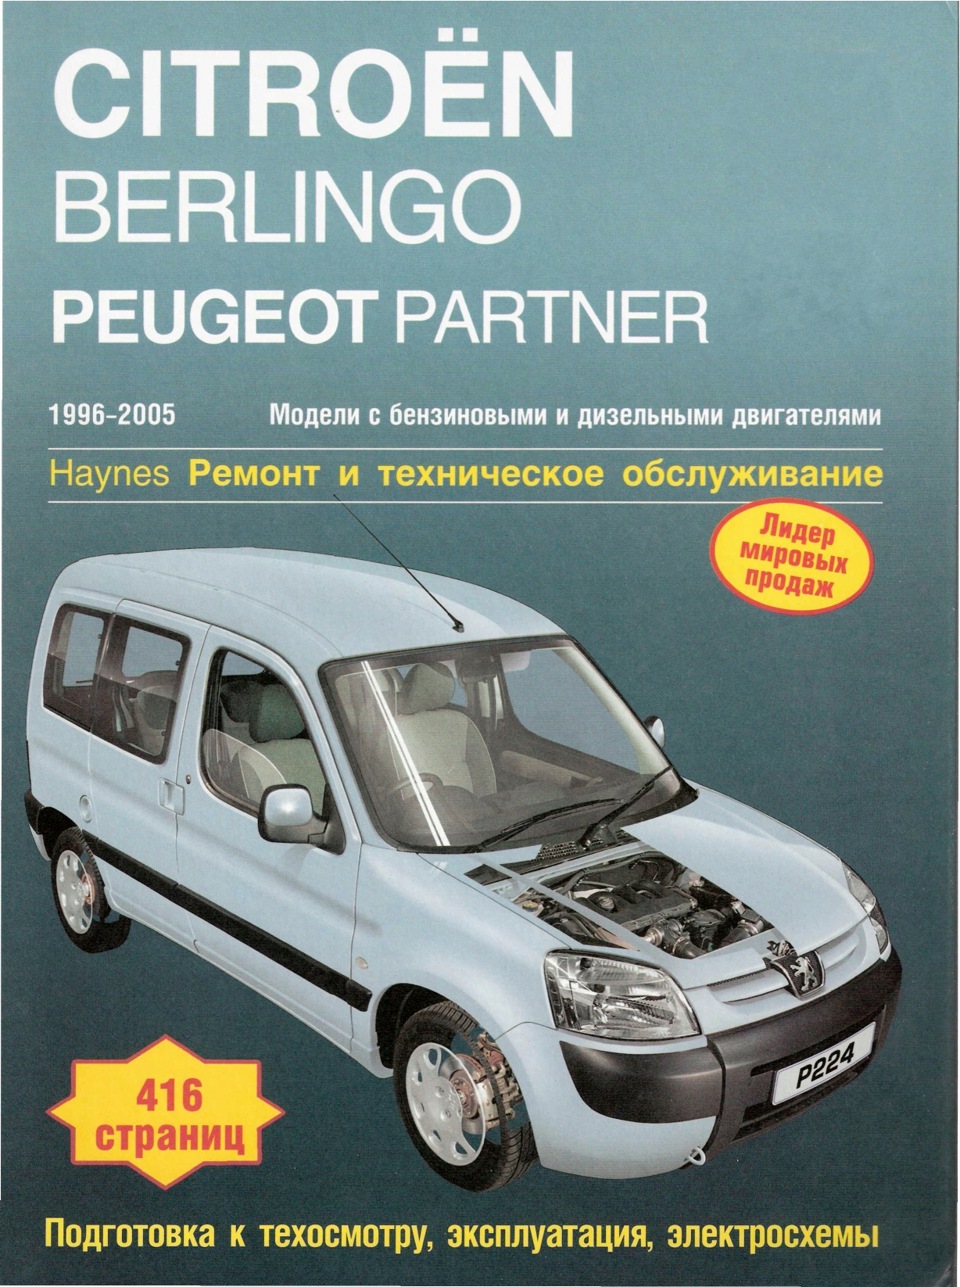
Руководство по ремонту и эксплуатации в PDF.
Кому надо берем здесь
yadi.sk/d/9nYugb2YDYcWr
Размер: 191.5 Мб
Книжку закинул по новой 30.11.2013
Цена вопроса: 0 ₽
Машины в продаже
Комментарии
19
Войдите или зарегистрируйтесь, чтобы писать комментарии, задавать вопросы и участвовать в обсуждении.


Я езжу на Renault Duster (1G)


Поищу еще может найду. Спасибо вам.
Приличная книжка. Есть такая. Кто знает как её сделать в PDF и выложить ?

f-bit.ru/236349
Размер: 191.5 Мб
Книжку закинул по новой 24.09.2013
Она здесь в PDF
Nik359 спасибо конечно. Видимо не правильно написал. Как собственно любую книгу в PDF сделать самому .
прим; там нет книги подобной для 207 пежо ?

Не для 207 не видел, мне кажется эта книжку просто сканили и сохраняли.

Реально толковая книжка, спасибо!

Не за что, я в свое время просто так скачал, потом думаю ведь кто то ищет и найти не может.


спасибо! Искал ее в интернете, но не находил нормальные ссылки=))))

спасибо за ссылку, книжка толковая, иногда пользуюсь перед ремонтом

Не за что, а что книжка дельная? Я просто сам вроде бы в Пыжике не копаюсь.
Так как я студент. позволить себе сервис немогу.(
Поэтому приходится…)
Все комментарии
- Manuals
- Brands
- PEUGEOT Manuals
- Automobile
- Partner Origin
- Handbook
-
Contents
-
Table of Contents
-
Bookmarks
Quick Links
Related Manuals for PEUGEOT Partner Origin
Summary of Contents for PEUGEOT Partner Origin
-
Page 1
Handbook… -
Page 2
You can fi nd your user guide on the PEUGEOT website, under Referring to the user guide on-line also gives you access the heading «Personal space». to the latest information available, easily identifi ed by the bookmarks, associated with this pictogram: Please note the following point: The fi… -
Page 3
Ludospace (4/5 seat versions) document, depending on its trim lev- el, version and the specifi cation for the country in which it was sold. PEUGEOT thanks you for your trust and wishes you many pleasant jour- neys. Warning: this symbol marks warnings… -
Page 4: Table Of Contents
CONTENTS 4 — 18 FAMILIARISATION 34 — 45 SEATS Front seats Rear bench seat (4/5 seat versions) Child seats Eco-driving Locations for child seats attached with the seat belt ISOFIX mountings ISOFIX child seat Seat belts 19 — 27 INSTRUMENTS, CONTROLS AND DISPLAYS 46 — 53 ACCESS AND STARTING Instrument panel…
-
Page 5
CONTENTS — 58 — 63 COMFORT AND SAFETY 98 — 109 TECHNICAL DATA Dimensions Front fi ttings Engines Courtesy lamps Light van weights and loads 105 Headlamp adjustment Ludospace weights Steering wheel adjustment and loads Lashing rings Identifi cation features Rear fi… -
Page 6: Familiarisation
FAMILIARISATION…
-
Page 7
FAMILIARISATION — INSTRUMENTS AND CONTROLS 1. Speaker (tweeter). 11. Driver’s airbag. 22. Parking brake. Horn. 2. Windscreen demisting vents. 23. Cigarette lighter. 12. Wiper/screenwash controls. 3. Controls: 24. Portable ashtray. 13. Audio system steering mounted — Electric windows. controls. 25. Gear lever. — Rear door windows demisting. -
Page 8
FAMILIARISATION Remote control STARTING STOP position (S): Locking The ignition is off. Press button A to lock the vehicle. To release the steering, turn the This is confi rmed by fi xed lighting of steering wheel slightly while turning the direction indicators for approxi- the key, without forcing it. -
Page 9
FAMILIARISATION — Vehicles fi tted with a rear foglamp (ring B) Turn the ring forwards. Vehicles fi tted with front foglamps and a rear foglamp (ring B) WIPERS STEERING MOUNTED CONTROLS Front Front foglamps (1st turn of the ring LIGHTING Rapid wipe (heavy rain). -
Page 10
FAMILIARISATION FRONT SEATS 1. Head restraint height adjust- ment. Never travel with the head restraints removed. 2. Armrest. 3. Seat back angle adjustment. 4. Forwards-backwards adjustment. -
Page 11
FAMILIARISATION — AIRBAGS Deactivation check Front airbags With the ignition switched on (2 nd notch), illumination of These are fi tted in the centre of the steering this warning lamp indicates wheel for the driver and in the dashboard that the passenger’s airbag for the front passenger. -
Page 12
FAMILIARISATION 10 — DOOR MIRRORS STEERING WHEEL HEIGHT ADJUSTMENT 1. Driver’s electric window. Move the manual control 3 in all four directions to adjust. When stationary, push the control 2. Passenger’s electric window. A forwards to release the steering wheel adjustment mechanism. Adjust the height of the steering wheel. -
Page 13
FAMILIARISATION — SPEED LIMITER * CRUISE CONTROL * If the vehicle is fi tted with a speed limiter and cruise control, these functions can- This limiter indicates the status of The cruise control has a display on not both be activated at the selection of the function on the in- the instrument panel to indicate the same time. -
Page 14
FAMILIARISATION 12 — HEATING N° Symbol Function Air fl ow adjustment. Air fl ow adjustment and air intake control. Temperature adjustment. Air distribution adjustment. AIR CONDITIONING N° Symbol Function Air conditioning control. Air fl ow adjustment and air intake control. Temperature adjustment. -
Page 15
FAMILIARISATION — RECOMMENDED INTERIOR SETTINGS Heating or Manual air conditioning I require… Air recirculation/ Air distribution Air fl ow Temperature Manual AC Intake of exterior air COLD DEMISTING DE-ICING… -
Page 16
FAMILIARISATION 14 — FRONT FITTINGS 1. Storage compartments in the doors. A. Bottle holder. B. Cup holder. C. Storage compartment. 2. Overhead storage. 3. Map reading lamp. 4. Courtesy lamp. 5. Sun visors. 6. Glove box. 7. Cigarette lighter. 8. Removable ashtray. 58-59… -
Page 17: Seats
FAMILIARISATION — REAR FITTINGS 1. Load space cover. 2. High load retaining net. 3. Stowing rings. 4. Side door storage compartment. 5. Trays between the front and rear seats. 6. Seat back storage pockets. Stowing rings For greater safety, always en- sure that the loads transported are secured fi…
-
Page 18
FAMILIARISATION 16 — REFUELLING Inside the vehicle: Pull the lever on the left-hand side, under the dash- board. This operation must be carried out Low fuel level with the engine switched off . warning lamp Insert the key then turn it to the left. -
Page 19: Eco-Driving
FAMILIARISATION — ECO-DRIVING Eco-driving is a range of everyday practices that allow the motorist to optimise their fuel consumption and CO emissions. Optimise the use of your Control the use of your gearbox electrical equipment With a manual gearbox, move off Before moving off, if the passenger Avoid running the engine before moving gently, change up without waiting…
-
Page 20
FAMILIARISATION 18 — Limit the causes of excess Observe the recommendations consumption on maintenance Spread loads throughout the vehicle; Check the tyre pressures regularly, When refuelling, do not continue after place the heaviest items in the bot- when cold, referring to the label in the the 3 rd cut-off of the nozzle to avoid tom of the boot, as close as possible door aperture, driver’s side. -
Page 22: Instruments, Controls And Displays
INSTRUMENTS, CONTROLS and DISPLAYS 20 — INSTRUMENT PANEL: PETROL — DIESEL 1. Seat belt not fastened warning 9. Total distance recorder, service 17. Water in Diesel fi lter warning lamp indicator and engine oil level lamp indicator 2. Passenger’s airbag deactivated 18.
-
Page 23
Do not ignore this warn- Parking brake, low low oil pressure indicated by the ing: consult a PEUGEOT dealer message «Oil pressure insuffi — brake fluid level and as soon as possible. cient» in the screen. -
Page 24
There is a risk of damage to the in- the following: jection system. malfunction charging Contact a PEUGEOT dealer as soon circuit, as possible. loose battery or starter terminals, a cut or loose alternator belt, an alternator failure. -
Page 25
Consult a PEUGEOT dealer. the screen. If the passenger’s airbag is deacti- vated, the warning lamp comes on when the ignition is switched on and it remains on. Always consult a PEUGEOT dealer if the warning lamp fl ashes. * According to country. -
Page 26: Service Indicator
INSTRUMENTS, CONTROLS and DISPLAYS 24 — INSTRUMENT PANEL 5 seconds after ignition The service is overdue. switched on, the total distance re- DISPLAY Each time the ignition is switched on corder resumes normal operation and for 5 seconds, the symbol and and the screen shows the total or trip After switching on the ignition, three the excess distance fl…
-
Page 27
Flashing of the six squares and the the vehicle is on level ground and Your PEUGEOT dealer carries out the engine has been off for more display of «max» indicate that the oil this operation after each service. -
Page 28: Lighting Rheostat
INSTRUMENTS, CONTROLS and DISPLAYS 26 — Total distance recorder LIGHTING RHEOSTAT CLOCK Briefl y pressing button 1 alternates With the lights on, press the button Button 1 : hour adjustment between the total and trip distance to vary the intensity of the lighting of Button 2 : minute adjustment displays.
-
Page 29: Display A
INSTRUMENTS, CONTROLS and DISPLAYS — DISPLAY A Adjusting the parameters display A Press and hold button A for two seconds to access the settings; the data fl ashes, indicating it is ready to be modifi ed. Then, each press of button A scrolls through the various data in the fol- lowing order: language of information displayed,…
-
Page 30: Comfort
COMFORT 28 -…
-
Page 31: Ventilation
With the engine running, pressing to your requirements and the climatic cold air, do not use it and contact a the control de-ices the rear windows conditions. PEUGEOT dealer. and mirrors. Gradually adjust the temperature It switches off automatically after setting for your comfort.
-
Page 32: Heating
COMFORT 30 — HEATING 1. Air fl ow adjustment Turn the control from position 1 to position 4 to obtain an air fl ow suffi cient to ensure your comfort. 2. Air fl ow adjustment and air intake control Turn the control from position 1 to position 4 to obtain an air fl…
-
Page 33
COMFORT — 3. Temperature adjustment Windscreen, side windows and footwells. To be adjusted to your requirements. From blue (exterior temperature) to red (hot). Footwells. These settings are recommended for cold climates. 4. Air distribution adjustment Windscreen and side windows Centre and side vents. (de-icing/demisting). -
Page 34: Air Conditioning
COMFORT 32 — AIR CONDITIONING 1. Air conditioning control The air conditioning does not op- 2. Air fl ow adjustment and air erate while the air fl ow adjustment intake control The air conditioning is designed to control is in the minimum position. operate in all seasons.
-
Page 35
COMFORT — Intake of exterior air. 4. Air distribution adjustment Windscreen and side windows Windscreen, side windows (de-icing/demisting). and footwells. This is the normal operating position. To quickly de-ice or demist the wind- Footwells. screen and side windows: Recirculation of interior air. turn the temperature and air fl… -
Page 36
SEATS 34 -… -
Page 37: Front Seats
SEATS — FRONT SEATS 1. Head restraint height 3. Seat back angle adjustment 6. Access to rear seats adjustment (version with one sliding side door only) To raise or lower the restraint, slide it. A. Turn the knob. Lift the control to fold the seat back and move the seat forwards.
-
Page 38: Rear Bench Seat (4/5 Seat Versions)
SEATS 36 — REAR BENCH SEAT (4/5 SEAT VERSIONS) Head restraint When repositioning: To fold the rear bench seat: tilt the folded seat rearwards, lower the head restraint, lift the seat back, This is of the «comma-shape» type. press control 1 to unlock the seat check that the seat is locked correctly.
-
Page 39
SEATS — GENERAL POINTS ON SEAT CHILD SEAT AT THE FRONT BELTS Although one of PEUGEOT’s main «Rearwards-facing» «Forwards-facing» criteria when designing your vehicle, When a «rearwards-facing» child seat When a «forwards-facing» child seat the safety of your children also de-… -
Page 40
SEATS 38 — Passenger airbag OFF Refer to the advice given on the label present on both sides of the passen- ger’s sun visor. To assure the safety of your child, you must deactivate the passenger’s front airbag when you install a child seat in the rearwards facing position on the front passenger’s seat. -
Page 41: Child Seats
SEATS — CHILD SEATS RECOMMENDED BY PEUGEOT PEUGEOT offers a complete range of recommended child seats which are secured using a three point seat belt : Group 0+: from birth to 13 kg Groups 1, 2 and 3: from 9 to 36 kg «KIDDY Comfort Pro»…
-
Page 42: Locations For Child Seats Attached With The Seat Belt
SEATS 40 — LOCATIONS FOR CHILD SEATS ATTACHED WITH THE SEAT BELT In accordance with European regulations, this table indicates the options for the installation of child seats secured using the seat belt and universally approved (a), in accordance with the weight of the child and the seat in the vehicle: Weight of the child and indicative age Below 13 kg From 9 to 18 kg…
-
Page 43: «Isofix» Mountings
SEATS — «ISOFIX» MOUNTINGS Your vehicle has been approved in ac- These are two rings located between cordance with the ISOFIX regulation . the vehicle’s seat back and the seat cushion. The seats, represented below, are fi t- ted with regulation ISOFIX mountings: This ISOFIX mounting system pro- vides reliable, safe and fast fi…
-
Page 44: Isofix Child Seat
SEATS 42 — ISOFIX CHILD SEAT RECOMMENDED BY PEUGEOT AND APPROVED FOR YOUR VEHICLE » ISOFIX KIDDY » Group 0+: from birth to 13 kg Group 1: from 9 to 18 kg Installed in the rear facing position, on the outer rear seat only.
-
Page 45
Ensure that the lap part of the seat sharp braking. belt passes correctly over the child’s thighs. PEUGEOT recommends the use of a booster seat which has a back, fi tted with a seat belt guide at shoulder level. -
Page 46: Seat Belts
SEATS 44 — Locking the seat belts Rear seat belts (4 seat version) Pull the strap, then insert the end into the buckle. The rear seats are fi tted with two Check that the seat belt is fastened three-point inertia reel seat belts. correctly by pulling the strap.
-
Page 47
The seat belts are fi tted with an inertia before independently must be carried out by a PEUGEOT reel permitting automatic adjustment airbags. Triggering of the pre-tensioners dealer who guarantees that the work of the length of the strap to your size. -
Page 48: Access And Starting
ACCESS and STARTING 46 — KEYS Remote control The keys allow you to switch on the Locking ignition and operate the passenger Press button A to lock the vehicle. airbag disarming switch as well as to independently operate the locks on This is confi…
-
Page 49
Make a careful note of the If the keys are lost number of each key. This IMMOBILISER Visit a PEUGEOT dealer with the vehi- number is coded on the label cle’s V5 registration certifi cate and your attached to the key. -
Page 50: Alarm
Contact a PEUGEOT dealer to have by locking using the remote control the system checked. To stop it, switch on the ignition.
-
Page 51: Front And Side Doors
ACCESS and STARTING — FRONT DOORS AND Opening the doors from inside SLIDING SIDE DOORS Opening the doors from outside Front doors Side doors The driver’s door opening control Sliding side doors permits complete unlocking of the vehicle. Front doors The side door opening/closing control only controls the door Locking Unlocking from the…
-
Page 52
ACCESS and STARTING 50 — Automatic central locking Your vehicle can lock automatically while driving (speed greater than 6mph (10 km/h)). You can activate or deactivate this function. Activation Press and hold control D . Activation of the function is accom- panied by an audible signal and a message on the display. -
Page 53: Rear Doors
ACCESS and STARTING — Side door child lock LOCKING/UNLOCKING THE TAILGATE To open the tailgate, operate the This prevents opening of the side handle 1 and lift it. door from the inside. You can unlock the tailgate by inserting Turn the control a quarter turn using the key in the lock 2 .
-
Page 54
ACCESS and STARTING 52 — Opening the doors from inside Opening the rear doors to 180° The rear door opening controls only To open the rear doors to 180°, To open the other door, push lever B . unlock these doors. release the check strap E towards you when the door is partially open. -
Page 55: Opening The Bonnet
ACCESS and STARTING — To close You have enough fuel remaining to drive for approximately 30 miles Lower the bonnet and release it at (50 km). the end of its travel. The engine must be switched off Check that the bonnet has latched when fi…
-
Page 56: Visibility
VISIBILITY 54 — Front fog lamps and rear fog «Follow-me-home» lighting lamp In poor light, or at night, if you leave your vehicle, the side lights and Rotate the ring forwards to switch on dipped headlamps may remain on for and backwards to switch off.
-
Page 57: Windscreen Wiper Stalk
Note: if a bicycle carrier is used, con- In the I ntermittent position, the wiping tact a PEUGEOT dealer to have this speed is proportional to the speed of function disarmed. the vehicle.
-
Page 58: Electric Windows
VISIBILITY 56 — Always remove the ignition key when leaving the vehicle, even for a short time. If an obstacle is encountered while the electric windows are in use, you must reverse the movement of the window. To do this, press the switch concerned.
-
Page 59: Exterior Mirrors
VISIBILITY — THE EXTERIOR MIRRORS Passenger side exterior THE MANUAL INTERIOR mirror electric control MIRROR From the driver’s seat, move the con- Manual mirrors The interior mirror has two positions: trol 1 in all four directions to adjust. day (normal), Move the lever in all four directions to adjust.
-
Page 60: Comfort And Safety
COMFORT AND SAFETY 58 -…
-
Page 61: Front Fi Ttings
COMFORT AND SAFETY — FRONT FITTINGS Permanently on when the key is in the accessories po- sition or the ignition is on. 1. Storage in the doors A. Bottle holder. B. Can holder. 5. Sun visors C. Storage compartment. 6. Glove box 2.
-
Page 62: Headlamp Adjustment
COMFORT AND SAFETY 60 — HEADLAMP STEERING WHEEL HORN ADUSTMENT ADJUSTMENT Press one of the spokes or Depending on the load in your vehi- When stationary, lower the handle the centre of the steering cle, it is recommended that the head- to release the steering wheel adjust- wheel.
-
Page 63: Lashing Rings
fl oor to secure your loads. You can use suitable load retainers (half-height partitions, grille, etc.) supplied by the PEUGEOT network. It is recommended that the load is immobilised by secur- ing it fi rmly using the lashing…
-
Page 64
COMFORT AND SAFETY 62 -… -
Page 65: Rear Fi Ttings
COMFORT AND SAFETY — REAR FITTINGS 1. Load-space cover 2. High load retaining net 3. Stowing rings To install it: The high load retaining net can be fi t- ted behind the front or rear seats. position the front ends of the load space cover on its support and Open the covers A of the correspond- 4.
-
Page 66: Driving
(while the vehicle is moving), indicates that the Stop immediately. handbrake is still applied or has not In both cases, consult a PEUGEOT been released fully. dealer.
-
Page 67: Speed Limiter
DRIVING — The status of the function is displayed on the instrument panel in accor- dance with the following sequences: Function selected, displaying of the «Speed Programming a speed Limiter» symbol. A speed can be programmed without activating the limiter but with the Function deactivated, engine running.
-
Page 68
fl ash for a few seconds. due to the profi le of the road or on Contact a PEUGEOT dealer to have a steep descent, the system checked. in the event of sharp acceleration. -
Page 69: Cruise Control
DRIVING — The status of the function is displayed on the instrument panel in accor- dance with the following sequences: Function selected, displaying of the «Cruise Control» symbol. First activation/ Function deactivated, programming a speed OFF (example at 66 mph Reach the chosen speed by (107 km/h)).
-
Page 70
The programmed speed is cleared and Changing the programmed the dashes fl ash for a few seconds. reference speed Contact a PEUGEOT dealer to have When the speed is displayed: the system checked. press SET + button to increase it. -
Page 71
DRIVING — The airbags have been designed to Immediately after the impact, the maximise the safety of the occupants airbags defl ate rapidly so that they do not hinder the visibility of the in the event of serious collisions. They work in conjunction with the force-lim- occupants nor their exit if necessary iting seat belts. -
Page 72: Airbags
If this warning light comes on, arming. accompanied by an audible In the «OFF» position, the passenger signal, contact a PEUGEOT airbag will not be triggered in the event dealer to have the system of an impact. checked. The airbags may…
-
Page 73
(child, animal, object, …). Lateral airbags * This could hamper the operation ● Only put approved covers on the of the airbags or injure the occu- front seats. Consult a PEUGEOT pants. dealer. ● All work on the airbag systems ●… -
Page 74: Practical Information
PRACTICAL INFORMATION 72 — 1.4 LITRE PETROL ENGINE 1. Power steering reservoir. 4. Brake fl uid reservoir. 7. Dipstick. 2. Windscreen and headlamp wash 5. Battery. 8. Engine oil reservoir. reservoir. 6. Air fi lter. 3. Coolant reservoir.
-
Page 75
PRACTICAL INFORMATION — 1.6 LITRE PETROL ENGINE 1. Power steering reservoir. 4. Brake fl uid reservoir. 7. Dipstick. 2. Windscreen and headlamp wash 5. Battery. 8. Engine oil reservoir. reservoir. 6. Air fi lter. 3. Coolant reservoir. -
Page 76
PRACTICAL INFORMATION 74 — 1.9 LITRE DIESEL ENGINE 1. Power steering reservoir. 4. Brake fl uid reservoir. 7. Dipstick. 2. Windscreen and headlamp wash 5. Battery. 8. Engine oil reservoir. reservoir. 6. Air fi lter. 3. Coolant reservoir. -
Page 77
PRACTICAL INFORMATION — 1.6 LITRE TURBO DIESEL HDI ENGINE 1. Power steering reservoir. 4. Brake fl uid reservoir. 7. Dipstick. 2. Windscreen/headlamp wash 5. Battery. 8. Engine oil reservoir. rese rvoir. 6. Air fi lter. 9. Priming pump. 3. Coolant reservoir. -
Page 78
Reduced exhaust emissions TOTAL lubricants are formulated to optimise the effi ciency of engines and the protection of the emissions post-treatment systems. It is crucial to observe the servicing recommenda- tions made by PEUGEOT to ensure correct operation. RECOMMENDS… -
Page 79
For vehicles equipped with a par- in the PEUGEOT dealer network ticle fi lter, the engine fan may ope- (France) or to an authorised waste rate after the ignition has been Viscosity selection disposal site. -
Page 80: Checks
If you should run out of fuel, it is ne- cessary to re-prime the circuit: At the start of winter, have your battery checked by a PEUGEOT dealer. fi ll the fuel tank with at least fi ve litres of diesel,…
-
Page 81: Changing A Wheel
PRACTICAL INFORMATION — CHANGING A WHEEL Removing a wheel Parking the vehicle If possible, park the vehicle on Chock the rear of the wheel level, stable and non-slippery Access to the spare wheel and diagonally opposite the wheel to ground. the jack be changed, using the chock 2 .
-
Page 82
Stow the wheelbrace 1 and the jack. on using the palm of the hand. and the pressure of the spare tyre checked as soon as possible by a PEUGEOT dealer. Have the punctured tyre repaired and replace it on the vehicle as soon as possible. -
Page 83
Note: make a careful note of the code number engraved on the top of the anti-theft socket. This will enable you to obtain a duplicate anti-theft socket from your PEUGEOT dealer. SPECIAL FEATURES OF ALLOY WHEELS Fitting the spare wheel If your vehicle is equipped with a steel spare wheel, when fi… -
Page 84: Changing A Bulb
PRACTICAL INFORMATION 82 — CHANGING A BULB Remove the grille Partially remove the wheelarch liner Front lamps To replace a dipped/main beam head- lamp or sidelamp bulb: Remove the screw ( 1 ). Remove the screws ( 1 ), Unclip the lug ( A ) of carrier ( 2 ) on Remove the screw ( 2 ), each side.
-
Page 85
PRACTICAL INFORMATION — Partially remove the bumper Remove the headlamp Remove the screws ( 1 ), Pull lightly on the side of the bum- Remove the screws ( 1 ), per ( 3 ), Unclip the index pin on the head- Push in the direction of the ar- lamp ( A ), row ( B ), on the latch ( A ), via the… -
Page 86
PRACTICAL INFORMATION 84 — Dipped/Main beam headlamps Turn and remove the protector ( 6 ), Disconnect the connector ( C ), (H4-60/55W) Unclip the spring ( D ), After following the procedure for removal Remove and replace the bulb ( 3 ). of the headlamp:… -
Page 87
Sidelamps (W 5 W) Direction indicator side Front and rear lamp repeaters (WY 5 W amber) protection grille After following the procedure for re- moval of the headlamp: Push the lens to the front or rear This grille reduces the force of any Turn and remove the protector ( 6 ). -
Page 88
PRACTICAL INFORMATION 86 — Rear lamps Open the rear door. Number plate lamps (W 5 W) Unscrew the nut A . 1. Foglamp (P 21 W). Insert a thin screwdriver into one of the external holes of the lens. Push the lamp unit gently towards 2. -
Page 89
PRACTICAL INFORMATION — Third brake lamp (tailgate) Third brake lamp (left rear (W 5 W) door) (W5W) With the tailgate open, unscrew Remove the housing cover by Squeeze the two tabs B to remove the bulb holder. the two nuts. pressing the tab A (round sec- tion) at the end of the lamp. -
Page 90: Changing A Fuse
PRACTICAL INFORMATION 88 — CHANGING A FUSE Removing and fi tting a fuse Always replace a failed fuse with a fuse of the same rating (two fuse types ac- Before changing a fuse, the cause The fuseboxes are located under the cording to manufacturer — see images).
-
Page 91
PRACTICAL INFORMATION — Fuse N° Rating Functions Rear wiper. Multifunction screen — Instrument panel — Audio system — Steering mounted controls. Not used. Diagnostic socket. Not used. Heated seats. Rear window and door mirrors demisting. Rear wiper (tailgate). Front electric windows. Engine fusebox — Steering mounted controls. -
Page 92
PEUGEOT declines any responsibility for expenses incurred through the repair of your vehicle or for any malfunctions resulting from the installation of auxiliary accessories, not supplied and not recommended by PEUGEOT and not installed in accordance with its instructions, in particular for any equipment the power consumption of which exceeds 10 milliamps. -
Page 93
PRACTICAL INFORMATION — Engine compartment fusebox Fuse N° Rating Functions To gain access to the box in the engine compartment (next to the battery), un- Pre-heater unit (Diesel) — Brake and clutch clip the cover. switches — Reversing lamps. After carrying out work, close the cover carefully to ensure its sealing. -
Page 94: Battery
If Wait for the engine to return to idle, slight diffi culties are experienced af- then disconnect the cables. ter this, please contact a PEUGEOT dealer. A fl at battery prevents the engine from starting.
-
Page 95: Fitting Audio Equipment, Speakers
35 mm diameter tweeters in the tweeter fascia, B6: (-) Front left speaker and 165 mm diameter speakers in the tweeter front doors. B7: (+) — B8: (-) — Contact a PEUGEOT dealer before fi tting audio equipment or speakers in your vehicle.
-
Page 96: Snow Screen
PRACTICAL INFORMATION 94 — SNOW SCREEN * The snow screen is installed on the lower part of the front bumper to pre- vent the accumulation of snow at the radiator cooling fan. Remove the snow screen: when the exterior temperature is higher than 10 °C, when towing, for speeds higher than 75 mph…
-
Page 97
PRACTICAL INFORMATION — Never use the radiator cross- member. When towing another vehicle, it must freewheel. Place the gearbox in «neutral». Failure to observe this instruction may result in damage to certain brak- ing components and the absence of braking assistance when the engine is started again. -
Page 98: Towing A Trailer
Braking: Towing increases the braking your vehicle and that the fi tting of the exceeding it. distance. towbar is entrusted to a PEUGEOT dealer. If the towbar is not fi tted by a Lights: Check the electrical signalling Cooling: Towing a trailer on a slope PEUGEOT dealer, it is imperative on the trailer.
-
Page 99: Accessories
fi tting of equipment of these fami- Towbar, towbar harness: trailer towbar The fi tting of electrical equip- lies of products mean that the spe- which must be fi tted by the PEUGEOT ment or accessories which cial features of the equipment and network.
-
Page 100: Technical Data
TECHNICAL DATA 98 — EXTERIOR DIMENSIONS (IN MM)
-
Page 101
TECHNICAL DATA — Light van Ludospace 4 137 4 437 1 796 to 1 819 1 810 2 693 1 440 1 440 or 1 452 1 960 1 420 1 420 or 1 436 1 724… -
Page 102
100 — TECHNICAL DATA LIGHT VAN INTERIOR DIMENSIONS (IN MM) AND VOLUMES (IN M 1 155 1 320 1 190 1 190 1 340 1 640 3.25… -
Page 103
TECHNICAL DATA — LUDOSPACE INTERIOR DIMENSIONS (IN MM) LUDOSPACE VOLUMES (IN M 4/5 SEAT VERSIONS — normal 1.25 1.75 2 bench seat in — fully folded 3.25 position… -
Page 104: Engines
102 — TECHNICAL DATA PETROL ENGINES AND GEARBOXES ENGINES 1.4 litre 1.6 litre Cubic capacity (cc) 1 360 1 587 Bore x stroke (mm) 75 x 77 78.5 x 82 EU standard maximum power (kW) Maximum power at engine speed (rpm) 5 500 5 800 EU standard maximum torque (Nm)
-
Page 105
TECHNICAL DATA — DIESEL ENGINES AND GEARBOXES ENGINES 1.6 litre Turbo HDi 75 1.6 litre Turbo HDi 90 1.9 litre Cubic capacity (cc) 1 560 1 560 1 867 Bore x stroke (mm) 75 x 88.3 75 x 88.3 82.2 x 88 EU standard maximum power (kW) Maximum power at engine speed (rpm) 4 000… -
Page 106
The B30 biofuel can be used in certain Diesel engines; however, this use is subject to strict application of the special servicing conditions. Contact a PEUGEOT dealer or a qualifi ed workshop. The use of any other type of (bio)fuel (vegetable or animal oils, pure or diluted, domestic fuel…) is strictly prohibited (risk of… -
Page 107
TECHNICAL DATA — PETROL WEIGHTS AND TOWED LOADS (IN KG) FOR LIGHT VANS Engine 1.4 litre Gearbox Manual Length Version (kg) ● Kerb weight (in running order) 1 055 ● Gross vehicle weight (GVW) 1 855 ● Gross train weight (GTW) 2 755 ●… -
Page 108
106 — TECHNICAL DATA DIESEL WEIGHTS AND LOADS (IN KG) FOR LIGHT VANS Engines 1.6 litre Turbo HDi 75 1.6 litre Turbo HDi 90 1.9 litre Gearboxes Manual Manual Manual Length Version (kg) 1 000 1 000 1 000 ● Kerb weight (in running order) 1 112 1 143… -
Page 109
WEIGHTS AND TOWING LOADS (IN KG) FOR PETROL LUDOSPACE 4/5 SEAT VERSIONS Engines 1.4 litre 1.6 litre Gearboxes Manual Manual Length Version (kg) 1 000 ● Kerb weight (in running order) 1 197 1 207 ● Gross vehicle weight (GVW) 1 780 2 170 ●… -
Page 110
108 — TECHNICAL DATA WEIGHTS AND TOWING LOADS (IN KG) FOR DIESEL LUDOSPACE 4/5 SEAT VERSIONS Engines 1.6 litre Turbo HDi 75 1.6 litre Turbo HDi 90 1.9 litre Gearboxes Manual Manual Manual Length Version (kg) 1 000 1 000 1 000 ●… -
Page 111: Identifi Cation Features
TECHNICAL DATA — IDENTIFICATION FEATURES A. Manufacturer’s label (under the B. Serial number on the body- C. Tyres and paint colour reference. bonnet, on the front right wing). work (under the bonnet, on the The label C on the driver’s door pillar, right-hand crossmember).
-
Page 112: Audio Equipment
110 — AUDIO EQUIPMENT RD3 AUDIO SYSTEM Stalk movement Function 1 — Press (behind) Increase volume 2 — Press (behind) Decrease volume 1 + 2 — Simultaneous press Sound cut-off (mute); restoring of the sound by pressing any button 3 — Press Automatic search of higher frequencies (radio) — Selection of the next track (CD) 4 — Press Automatic search of lower frequencies (radio) — Selection of the previous track (CD)
-
Page 113
AUDIO EQUIPMENT — Button Function Radio On/Off. Decrease volume. Increase volume. RDS function On/Off. Press for more than 2 seconds: regional following mode On/Off. Traffi c information priority on/off. Press for more than 2 seconds: PTY function On/Off. Selection of bass, treble, loudness, sound distribution and automatic volume correction. Increase the setting of the functions associated with button H . -
Page 114
112 — AUDIO EQUIPMENT GENERAL FUNCTIONS AUDIO SETTINGS Adjusting the bass On/Off Press button H several When «BASS» is dis- times succession played, press button I With the ignition key to access the bass or J to vary the setting. in the accessories or (BASS) , treble (TREB) , «BASS -9″… -
Page 115
AUDIO EQUIPMENT — Adjusting the front/rear sound RADIO SOURCE Selecting radio mode distribution (Fader) When «FAD» is displayed, press but- Radio reception Press button R . ton I or J . Your car radio is subject to phenom- Button I increases the volume in the ena which do not affect domestic ra- front. -
Page 116
114 — AUDIO EQUIPMENT Automatic station search Manual station search Automatic presetting of FM stations (autostore) Press the «MAN» button. Briefl y press button L or N to in- Press and hold button crease or decrease the frequency R for more than two displayed. -
Page 117
AUDIO EQUIPMENT — Traffi c information programme Regional mode (REG) Using the RDS (Radio Data Press the «TA» button When they are part System) function on FM to switch the function of a network, certain Radio Data System allows you to on or off. -
Page 118
116 — AUDIO EQUIPMENT PTY function To search for a PTY programme: EON system This allows you to listen to stations broad- This connects stations which are part casting a specifi c type of programme of the same network. It enables the (news, culture, sport, rock, etc.). -
Page 119
AUDIO EQUIPMENT — COMPACT DISC SOURCE Selecting a track Shuffl e When the CD player is selected, keep button Q pressed for two seconds. The tracks will be played in random Selecting CD mode sequence. Pressing the button again for two seconds returns you to nor- After insertion of a mal play. -
Page 120
118 — VISUAL INDEX EXTERIOR Key, starting, battery ..6, 46-47 Central locking ….46, 49-50 Accessories …….. 97 Door mirrors …….. 57 Rear lamps ……… 86 3rd brake lamp……87 Snow screen ……. 94 Spare wheel, jack, changing, fi tting ….79-81 Front lamps……54, 82-85 Infl… -
Page 121
INTERIOR Front seats……34-35 Stowing rings ……15, 61 Rear seats (4/5 seat versions) ….36 Rear fi ttings …..15, 62-63 Courtesy lamp, — stowing rings, interior lighting …..58-59 — storage boxes, — hooks, — retaining net, — storage pocket, — storage compartments. Child seats ……37-43 Airbags ……..69-71 Child lock (door) …… -
Page 122
120 — VISUAL INDEX INSTRUMENTS AND CONTROLS Overhead storage, sun visor, courtesy lamp ….14, 58-59 Rear view mirror ……57 Instrument panel, dials, speedometer ……20 Warning lamps, Electric windows ……56 indicator lamps ….21-23 Hazard warning Indicators, displays, screen …23-27 lamps …….. -
Page 123
VISUAL INDEX — STEERING MOUNTED CONTROLS Alarm ………. 48 Door mirrors …….. 57 Lighting ……..54 — dipped beam headlamps, — main beam headlamps, — foglamps. Front-rear wipers ……55 Screenwash ……7, 55 Speed limiter/ cruise control …….65-68 Audio system controls ..110-111 Passenger’s electric mirror …….. -
Page 124
122 — VISUAL INDEX TECHNICAL DATA — MAINTENANCE Dimensions ……98-101 Engine technical data ..102-103 Levels ……72-75, 77 Weights, loads ….105-108 — dipstick, Identifi cation markings ….109 — power steering fl uid, — brake fl uid, Air/oil fi lters, — coolant. checks ……72-75, 78 Petrol supply cut-off, Diesel fuel priming …. -
Page 127
You have available the «Electric mode Automobiles PEUGEOT. supplement» which is provided with Your vehicle will be fi tted with some of this Partner Origin document. this equipment described in this doc- Refer to this supplement before us- ument, depending on its trim level, ing the vehicle and most particularly version and the specifi… -
Page 128
Anglais AN. 12M59.0030 www.peugeot.com…
Руководство на английском языке по техническому обслуживанию и ремонту автомобилей Citroen Berlingo и Peugeot Partner 1996-2005 годов выпуска с бензиновыми и дизельными двигателями.
- Автор: ohn S. Mead
- Издательство: Haynes Publishing
- Год издания: 2006
- Страниц: 370
- Формат: PDF
- Размер: 88,8 Mb
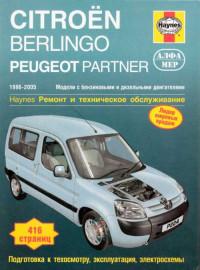
Руководство по ремонту и техническому обслуживанию автомобилей Citroen Berlingo и Peugeot Partner 1996-2005 годов выпуска с бензиновыми и дизельными двигателями.
- Автор: Джон С. Мид
- Издательство: Алфамер Паблишинг
- Год издания: —
- Страниц: 416
- Формат: —
- Размер: —
Руководство по ремонту автомобиля Peugeot Partner Tepee.
- Автор: —
- Издательство: —
- Год издания: —
- Страниц: —
- Формат: PDF
- Размер: 51,6 Mb

Руководство по ремонту и эксплуатации автомобилей Citroen Berlingo и Peugeot Partner с 1996 года выпуска с бензиновыми и дизельными двигателями.
- Автор: —
- Издательство: Монолит
- Год издания: —
- Страниц: 400
- Формат: —
- Размер: —
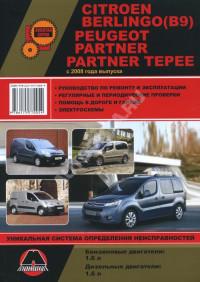
Руководство по эксплуатации и ремонту автомобилей Peugeot Partner/Partner Tepee и Citroen Berlingo B9 с 2008 года выпуска с бензиновыми и дизельными двигателями объемом 1,6 л.
- Автор: —
- Издательство: Монолит
- Год издания: —
- Страниц: 428
- Формат: —
- Размер: —
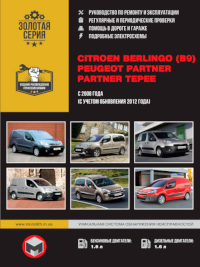
Руководство по эксплуатации и ремонту автомобилей Peugeot Partner/Partner Tepee и Citroen Berlingo B9 с 2008 года выпуска с бензиновыми и дизельными двигателями объемом 1,6 л.
- Автор: —
- Издательство: Монолит
- Год издания: —
- Страниц: 438
- Формат: —
- Размер: —
Сборник инструкций по эксплуатации автомобиля Peugeot Partner 2012-2014 годов выпуска.
- Автор: —
- Издательство: Peugeot
- Год издания: 2011/2013/2014
- Страниц: 208/236/244
- Формат: PDF
- Размер: 24,5 Mb
Инструкция по эксплуатации автомобиля Peugeot Partner Origin 2011 года выпуска.
- Автор: —
- Издательство: Peugeot
- Год издания: 2010
- Страниц: 136
- Формат: PDF
- Размер: 6,2 Mb
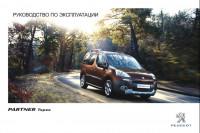
Сборник инструкций по эксплуатации автомобиля Peugeot Partner Tepee 2010-2014 годов выпуска.
- Автор: —
- Издательство: Peugeot
- Год издания: 2010-2014
- Страниц: —
- Формат: PDF
- Размер: 38,2 Mb
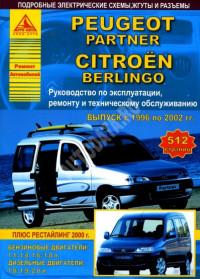
Руководство по ремонту и эксплуатации автомобилей Citroen Berlingo и Peugeot Partner 1996-2002 годов выпуска с бензиновыми и дизельными двигателями.
- Автор: —
- Издательство: Арго-Авто
- Год издания: —
- Страниц: 512
- Формат: —
- Размер: —
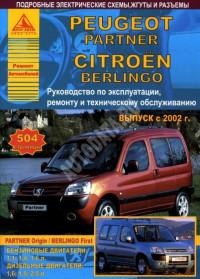
Руководство по ремонту и эксплуатации автомобилей Citroen Berlingo и Peugeot Partner с 2002 года выпуска с бензиновыми и дизельными двигателями.
- Автор: —
- Издательство: Арго-Авто
- Год издания: —
- Страниц: 504
- Формат: —
- Размер: —
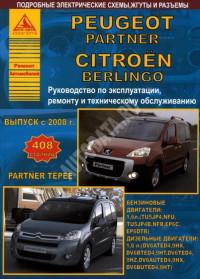
Руководство по ремонту и эксплуатации автомобилей Citroen Berlingo и Peugeot Partner/Partner Tepee с 2008 года выпуска с бензиновыми и дизельными двигателями.
- Автор: —
- Издательство: Арго-Авто
- Год издания: —
- Страниц: 408
- Формат: —
- Размер: —
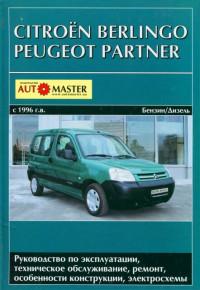
Руководство по эксплуатации, техническому обслуживанию и ремонту автомобилей Citroen Berlingo и Peugeot Partner с 1996 года выпуска с бензиновыми и дизельными двигателями.
- Автор: —
- Издательство: Автомастер
- Год издания: —
- Страниц: 376
- Формат: —
- Размер: —
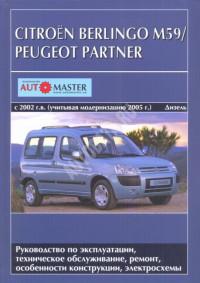
Руководство по эксплуатации, техническому обслуживанию и ремонту автомобилей Citroen Berlingo и Peugeot Partner с 2002 года выпуска с дизельными двигателями.
- Автор: —
- Издательство: Автомастер
- Год издания: —
- Страниц: 420
- Формат: —
- Размер: —
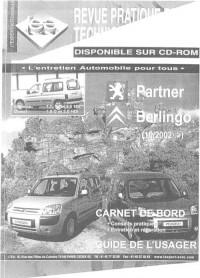
Руководство на французском языке по эксплуатации, техническому обслуживанию и ремонту автомобилей Citroen Berlingo и Peugeot Partner с 2002 года выпуска.
- Автор: —
- Издательство: —
- Год издания: —
- Страниц: 203
- Формат: PDF
- Размер: 31,9 Mb
Инструкция по ремонту грузовиков Peugeot Partner 1
В данном руководстве рассмотрены автомобили Citroen Berlingo с кузовами «минивэн» (Multispace), «фургон» и Peugeot Partner первого поколения с кузовами «комби» и «фургон», включая специальные варианты/варианты ограниченной серии. Здесь содержится описание следующих моделей двигателей:
Бензиновые двигатели: 1.4 л (1360 см3) и 1.6 л (1587 см3).
Дизельные двигатели: 1.8 л (1769 см3), 1.9 л (1868 см3 и 1905 см3) и 2.0 л (1997 см3), включая варианты с турбонаддувом.
Не рассмотрены модели с бензиновым двигателем 1.8 л (1761 см3).
Ссылка на этот раздел в разных форматах
TEXTHTMLBB Code
Требуется руководство для вашей Peugeot Partner (2020)? Ниже вы можете просмотреть и загрузить бесплатно руководство в формате PDF. Кроме того, приведены часто задаваемые вопросы, рейтинг изделия и отзывы пользователей, что позволит оптимально использовать ваше изделие. Если это не то руководство, которое вы искали, – свяжитесь с нами.
Ваше устройство неисправно, и в руководстве отсутствует решение? Перейдите в Repair Café для получения бесплатных ремонтных услуг.
Руководство

Рейтинг
Сообщите нам, что вы думаете о Peugeot Partner (2020), оставив оценку продукта. Хотите поделиться вашими впечатлениями от данного изделия или задать вопрос? Вы можете оставить комментарий в нижней части страницы.
Довольны ли вы данным изделием Peugeot?
Да Нет
Будьте первым, кто оценит это изделие
0 голоса
Часто задаваемые вопросы
Наша служба поддержки выполняет поиск полезной информации по изделиям и отвечает на часто задаваемые вопросы. Если вы заметили неточность в наших часто задаваемых вопросах, сообщите нам об этом с помощью нашей контактной формы.
В моей машине есть цепь ГРМ. С каким интервалом ее нужно менять? Проверенный
При нормальной эксплуатации цепь ГРМ должна прослужить весь срок службы автомобиля и не нуждается в замене.
Это было полезно (2409)
Почему я не могу открыть одну или несколько дверей изнутри? Проверенный
Вероятно, в машине активирован детский замок. Обычно его можно разблокировать с помощью механизма в двери.
Это было полезно (761)
Как часто следует менять масло? Проверенный
Практически для каждого автомобиля есть свои точные рекомендации, однако в целом масло разумно менять каждые 10 000–15 000 км пробега или один раз в год. Загрязненное масло может со временем серьезно повредить двигатель.
Это было полезно (643)
Когда следует отключать подушку безопасности сбоку от пассажирского сиденья? Проверенный
При движении с ребенком в автокресле на пассажирском сиденье необходимо выключить подушку безопасности с этой стороны. Это также рекомендуется для детей до 12 лет, которые размещаются на пассажирском сиденье. Это необходимо для предотвращения травм в случае аварии.
Это было полезно (582)
Ключи от машины больше не будут открывать машину на расстоянии, почему? Проверенный
Автомобильные ключи, которые можно разблокировать на расстоянии, обычно работают от аккумулятора. Когда он закончится, ключ перестанет работать. Замените аккумулятор и попробуйте еще раз.
Это было полезно (574)
Приведет ли более низкое давление в шинах к большему сцеплению с дорожным покрытием при езде по снегу? Проверенный
Нет, несмотря на то что при снижении давления пятно контакта шин с дорогой увеличивается, автомобиль становится менее устойчивым. Садитесь за руль, только если в шинах правильное давление!
Это было полезно (330)
Я залил в машину не то топливо, что мне делать? Проверенный
Не садитесь за руль! Неважно, заливаете ли вы дизельное топливо в автомобиль с бензиновым двигателем или бензин в автомобиль с дизельным двигателем. В обоих случаях это может привести к повреждению машины и / или других частей автомобиля. Обратитесь в службу технической поддержки на дорогах.
Это было полезно (219)
Где я могу найти VIN-номер моей машины? Проверенный
Это может варьироваться в зависимости от марки и модели, но на многих автомобилях номер VIN можно найти на дверном косяке, под капотом или на металлическом полу переднего сиденья.
Это было полезно (184)
Как часто нужно менять щетки дворников? Проверенный
Желательно заменять щетки стеклоочистителя не реже одного раза в год. Признаками необходимости замены лезвий являются полосы, дымка, шум или отслоение резины.
Это было полезно (160)
Сколько миль в одном километре? Проверенный
1 километр равен 0,621 мили. 10 километров равны 6,21 мили. 1 миля равна 1,609 километра. 10 миль равны 16,09 километра.
Это было полезно (137)
Какой номер VIN? Проверенный
VIN означает идентификационный номер автомобиля и является уникальным номером, который есть у каждого автомобиля. Это делает автомобиль не идентифицируемым, например, после аварии или в случае отзыва. Это также позволяет идентифицировать автомобиль в случае отсутствия номерных знаков.
Это было полезно (135)
Могу ли я использовать дворники, когда на лобовом стекле обледенел? Проверенный
Нет, это не рекомендуется. Лед острый и может повредить резину на щетках стеклоочистителя.
Это было полезно (132)
Какие модели Peugeot подходят для езды на E10? Проверенный
Peugeot заявляет, что все модели с бензиновым двигателем, построенным в 2000 году или позже, могут ездить на E10.
Это было полезно (35)


