Перейти к контенту
Lenovo TAB 2 A10-70 — интересный четырехъядерный планшет для меломанов, ставший заменой популярному в свое время предшественнику — Lenovo TAB A10-70. Аппарат имеет мощную аккумуляторную батарею, качественный экран с Full HD разрешением и опционально поддерживает сети четвертого поколения LTE. Всем новичкам и тем, кто хочет больше узнать обо всех тонкостях работы с устройством, рекомендуется изучить инструкцию и руководство пользователя к планшету.
Стоит отметить, что данное устройство бывает двух модификаций, однако кроме модуля связи, они ничем не отличаются:
- Lenovo TAB 2 A10-70L — поддержка беспроводных сетей Wi-Fi и LTE
- Lenovo TAB 2 A10-70F — поддержка беспроводных сетей Wi-Fi
Содержание инструкции:
- Технические характеристики
- Общий вид
- Подготовка Lenovo TAB 2 A10-70
- Начало использования Lenovo TAB 2 A10-70


Скачать инструкцию для Леново Таб 2 А10-70: ссылка
Максимально подробно о тонкостях работы с планшетом и операционной системе Android можно узнать из руководства пользователя: скачать
( 7 оценок, среднее 2.71 из 5 )
![]()
Lenovo TAB 2 A10-70
Руководство пользователя версии 1.0
Перед использованием ознакомьтесь с правилами техники безопасности и важными примечаниями
в прилагаемом руководстве.

Глава 01
Обзор Lenovo TAB 2 A10-70
|
1-1 |
Внешний вид |
|
1-2 |
Кнопки |
|
1-3 |
Включение и выключение экрана |
|
1-4 |
Блокировка и разблокировка экрана |
|
1-5 |
Советы по навигации |
|
1-6 |
Главный экран |
|
1-7 |
Строка состояния |
|
1-8 |
Последние приложения |
|
1-9 |
Управление приложениями |
|
1-10 |
Ввод текста |
Рекомендации
|
Модель и версия |
|
|
Модель |
Версия |
|
Lenovo TAB 2 A10-70F |
WLAN |
|
Lenovo TAB 2 A10-70L |
WLAN+LTE (только данные) |
 Вся информация, помеченная звездочкой (*) в данном руководстве,
относится только к моделям WLAN + LTE (Lenovo TAB 2 A10-70L).
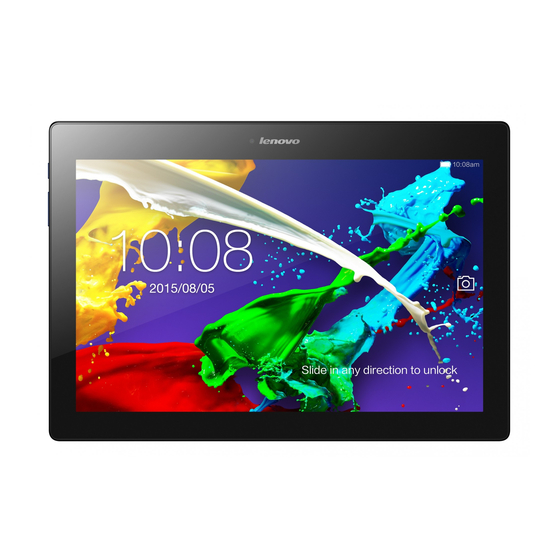
1-1 Внешний вид
Изображения представлены только в справочных целях и могут отличаться от вашего устройства.

1-2 Кнопки
Кнопка включения/отключения питания
Чтобы включить планшет, нажмите и удерживайте эту кнопку в течение 3 секунд, а затем отпустите ее.
Если планшет включен, эта кнопка служит для отключения экрана. Если экран отключен, нажмите эту кнопку, чтобы включить его.
Чтобы выключить планшет, нажмите и удерживайте эту кнопку в течение 1 секунды, а затем выберите ОК во всплывающем окне Выключить, чтобы завершить работу планшета.
ПРИМЕЧАНИЕ. При подключении к компьютеру с помощью USB-кабеля убедитесь, что заряда батареи достаточно для нормальной работы. В противном случае зарядите устройство с помощью адаптера питания перед подключением через USB.
Регуляторы громкости
Нажимайте кнопку увеличения или уменьшения громкости для настройки уровня громкости звука.

1-3 Включение и выключение экрана
Включение экрана
Когда экран отключен, чтобы активировать его, нажмите кнопку включения/выключения на планшете. Свечение экрана планшета свидетельствует о его включении.
Выключение экрана
Если вам временно не нужен планшет, нажмите кнопку включения/ выключения, чтобы отключить экран. Планшет перейдет в режим ожидания для экономии энергии.
1-4 Блокировка и разблокировка экрана
Блокировка экрана Автоматическая блокировка
Можно установить время ожидания, нажав  Настройки > Экран > Спящий режим. Если в течение указанного времени никаких операций выполняться не будет, экран автоматически отключится, а планшет будет автоматически заблокирован.
Ручная блокировка
Если вам временно не нужен планшет, нажмите и удерживайте кнопку включения/выключения в течение 1 секунды, чтобы отключить экран. Планшет будет заблокирован и перейдет в режим ожидания.
Разблокировка экрана
В режиме ожидания нажмите кнопку включения/выключения на планшете, чтобы включить экран. Затем, нажав и удерживая значок блокировки, перетащите ползунок на значок разблокировки, как показано на рисунке ниже.

Установка графического ключа блокировки экрана
Можно установить графический ключ блокировки экрана, выбрав
Настройки > Безопасность > Блокировка экрана > Графический ключ. После включения этой функции для разблокировки экрана планшета потребуется нарисовать заданный графический ключ.
1-5 Советы по навигации
|
Назад |
: возврат к предыдущему экрану. |
||
|
Главный экран |
: возврат к главному экрану. |
||
|
Последние приложения |
: отображение последних |
используемых приложений.
 Меню «Дополнительно»
  : отображение таких ярлыков, как «Добавить», «Обои», «Управление экраном», «Настройки рабочего стола» и «Настройки».

1 — назад
2 — главный экран
3 — последние 4 — меню приложения «Дополнительно»
1-6 Главный экран
На этом рабочем столе можно быстро просматривать и открывать часто используемые приложения.
Можно менять обои главного экрана и добавлять на него виджеты.
Чтобы добавить ярлык на главный экран, нажмите и удерживайте значок приложения в на другом экране, пока он не будет добавлен на главный экран.
Чтобы сменить обои, нажмите  > Обои, чтобы выбрать обои в папке
Локальные обои.
Чтобы удалить какой-либо элемент с главного экрана, нажмите и удерживайте выбранный элемент в течение 2 секунд, пока не появится
 . После этого нажмите
  , чтобы удалить элемент.

Переключение главных экранов
В планшете предусмотрено несколько рабочих столов.
Переключайтесь между экранами, прокручивая экран пальцем. Значки можно перемещать с одной панели на другую.
1-7 Строка состояния
Любые системные сообщения будут отображаться в строке состояния.
В строке состояния отображаются сведения о подключениях и уровне сигнала WLAN, заряде батареи и состоянии зарядки, а также другие уведомления.
Сдвиньте вниз строку состояния, чтобы отобразить панель уведомлений, в которой расположен ярлык настроек, переключатель режима полета, ярлык настройки WLAN, местоположение, *переключатель передачи данных, *использование данных, ярлык настройки Bluetooth, переключатель автоповорота экрана, панель настройки яркости и т. д.

1-8 Последние приложения
Планшет запоминает приложения, которые были использованы ранее.
Нажмите  , чтобы отобразить список последних использованных приложений. Нажмите приложение из списка, чтобы открыть его. Нажмите приложение вверху или внизу, чтобы закрыть его.
1-9 Управление приложениями
Проведите пальцем по главному экрану, чтобы открыть список приложений.

Коснитесь  Настройки > Приложения > Управление приложениями для управления всеми приложениями.
Удаление
1.Коснитесь приложения, которое вы хотите удалить, на вкладке
Сторонние.
2.Коснитесь Удалить в верхней части экрана.
3.Коснитесь OK.
Коснитесь  Настройки > Приложения > Работающие службы для управления всеми приложениями.
Остановка работающего приложения
1. Выберите вкладку Работающие.

2.Коснитесь работающего приложения, которое требуется остановить.
3.Коснитесь Остановить.
4.Коснитесь OK.
1-10 Ввод текста
Можно легко вводить текст с помощью виртуальной клавиатуры непосредственно на сенсорном экране, например, при добавлении контактных данных в приложении «Контакты» или вводе и изменении SMS-сообщений. Можно вводить цифры и латинские буквы непосредственно на сенсорном экране.
Виртуальная клавиатура
Коснитесь Готово, чтобы скрыть виртуальную клавиатуру. Коснитесь поля ввода текста для отображения виртуальной клавиатуры.
Изменение метода ввода
 Коснитесь значка
  или
или  для переключения между буквами и цифрами.
 Коснитесь
  , чтобы ввести прописную букву. Или нажмите и
удерживайте значок  , пока он не сменится на
  , чтобы вводить только прописные буквы. Нажмите его еще раз, чтобы вернуться к строчным символам.
|
В режиме ввода чисел коснитесь значка |
для ввода |
дополнительных и специальных символов. Коснитесь  для возврата в режим ввода чисел.
Параметры ввода
Коснитесь  Настройки > Язык и ввод, чтобы открыть меню
КЛАВИАТУРА И СПОСОБЫ ВВОДА. В этом меню можно выбрать Клавиатура Google или Голосовой ввод Google.
![]()
|
Начало: руководство Lenovo TAB 2 |
Глава 02: подключение к Интернету |
|
|
A10-70 |
||

Глава 02
Подключение к Интернету
2-1 Браузер
2-1 Браузер
Для доступа в Интернет с помощью веб-браузера требуется подключение к сети. При возникновении проблем с доступом к сети обратитесь к сетевому оператору или поставщику услуг.
С помощью веб-браузера в планшете можно получать доступ в Интернет через сеть WLAN или LTE (сеть LTE не поддерживается на устройстве версии WLAN) для рабочего или личного использования.
Чтобы открыть браузер, коснитесь  Chrome на главном экране.
Браузер поддерживает указанные ниже функции.
Ввод веб-адресов
Коснитесь адресной строки и введите веб-адрес с помощью виртуальной клавиатуры.
Нажмите кнопку ПЕРЕЙТИ на виртуальной клавиатуре, чтобы открыть веб-страницу.
Выход из браузера
Нажмите  в нижней строке, чтобы выйти из браузера и вернуться на главный экран.

Закладки:
отображение списка всех веб-страниц, добавленных в
Закладки. Чтобы добавить закладку, нажмите  , после чего текущая веб-страница будет добавлена в Закладки. Чтобы изменить закладку, нажмите и удерживайте ее, чтобы открыть всплывающее окно. В этом окне можно открыть, изменить или удалить выбранный веб-сайт.
История:
отображение списка всех веб-страниц, которые недавно открывались.
Просмотр сайтов на разных вкладках
Для большего удобства можно открыть несколько веб-страниц в
одном окне. Коснитесь  и нажмите Новая вкладка, чтобы открыть новую вкладку. Для перехода на другую страницу,
просто нажмите соответствующую ей вкладку. Коснитесь  на вкладке, чтобы закрыть ее.
Дополнительные функции
Обновить: коснитесь  , чтобы вручную обновить вебстраницу.
Назад/Вперед: коснитесь  или
или  , чтобы вернуться на предыдущую страницу или перейти к следующей странице.
Выбрать текст: выбор текста на текущей странице для копирования, обмена или поиска.
Изменить закладки: коснитесь  и нажмите Закладки для управления своими закладками.
Дополнительные функции: коснитесь  , чтобы открыть список параметров. Этот список включает следующие параметры: «Новая вкладка», «Новая вкладка (инкогнито)», «Закладки», «Последние вкладки», «История», «Печать» и другие.

|
Глава 01: обзор Lenovo TAB 2 A10- |
Глава 03: приложения |
|
|
70 |
||
 Loading…
- Manuals
- Brands
- Lenovo Manuals
- Tablet
- TAB 2 A10-70
- User manual
-
Contents
-
Table of Contents
-
Troubleshooting
-
Bookmarks
Quick Links
Lenovo TAB 2 A10-70
User Guide
V1.0
Please read the
safety precautions and important notes
in the supplied manual before use.
Related Manuals for Lenovo TAB 2 A10-70
Summary of Contents for Lenovo TAB 2 A10-70
-
Page 1
Lenovo TAB 2 A10-70 User Guide V1.0 Please read the safety precautions and important notes in the supplied manual before use. -
Page 2
Chapter 01 Lenovo TAB 2 A10-70 Overview Appearance Buttons Activating/Deactivating the display Screen lock/unlock Navigation tips Home screen Status bar Recent apps Application management 1-10 Entering text Tips Model & Version Model Version Lenovo TAB 2 A10-70F WLAN Lenovo TAB 2 A10-70L… -
Page 3: On/Off Button
1-2 Buttons On/Off button To turn on your tablet, press and hold this button for about 3 seconds, then release it. If your tablet is turned on, press this button to deactivate the display. If the display is deactivated, press this button to activate the display. To turn off your tablet, press and hold this button for about 1 second, then select OK in the Power off pop-up window to shut down your tablet.
-
Page 4: Activating/Deactivating Display
Activating the display With the display deactivated, press the On/Off button on the tablet to activate the display. The tablet’s display will then illuminate, indicating that it has been activated. Deactivating the display If you do not need to use your tablet temporarily, you can press the On/Off button to deactivate the display.
-
Page 5: Navigation Tips
Screen lock pattern setting Settings > Security > You can set the screen lock pattern by tapping Screen lock > Pattern. After this function has been enabled, you will be required to trace a personalised unlock pattern to unlock the screen before you can use your tablet.
-
Page 6: Home Screen
1 — Back 2 — Home 3 — Recent apps 4 — Advanced menu 1-6 Home screen This desktop enables you to quickly view and open all your applications. In the Home screen, you can add widgets and change your wallpaper. To add a shortcut to the Home screen, tap and hold the icon of the other screen until it is added to the Home screen.
-
Page 7: Status Bar
Switching Home screens Your tablet has multiple desktops. Move through screens by sliding your finger across the display. Icons can be moved from one panel to another. 1-7 Status bar System messages, if any, will be displayed in the status bar. Information about WLAN connections and reception, power levels, charging status and other notifications are displayed in the status bar.
-
Page 8: Application Management
1-8 Recent apps Your tablet remembers apps you have used recently. to display a list of your recently used apps. Tap an app from the list to open it. Tap the app up or down to end it. 1-9 Application management Slide your finger on the Home screen to open the applications list.
-
Page 9: Entering Text
Settings > Apps > Manage apps to manage all your apps. Uninstall 1.Tap the app you want to uninstall under the Downloaded tab. 2.Tap Uninstall at the top. 3.Tap OK. Settings > Apps > Running services to manage all your apps. Stop a running app 1.Tap Running tab.
-
Page 10: Input Options
Input options Settings > Language & input to open the KEYBOARD & INPUT METHODS menu. You can select Google Keyboard or Google voice typing in this menu. Cover: Lenovo TAB 2 A10-70 user Chapter 02: Connecting to the guide Internet…
-
Page 11: Connecting To The Internet
Chapter 02 Connecting to the Internet Browser 2-1 Browser Network support is required to access the Internet with the web browser. If you have problems accessing your network, please consult your network operator or service provider directly. The web browser in your tablet can access the Internet via a WLAN or LTE network (LTE network does not apply to WLAN version) for business and/or personal use.
-
Page 12: Additional Functions
Edit bookmarks: Tap and click Bookmarks to manage your bookmarks. More options: Tap to display an option list. These options include New tab, New incognito tab, Bookmarks, Recent tabs, History, Print etc. Chapter 01: Lenovo TAB 2 A10-70 Chapter 03: Applications Overview…
-
Page 13: Calendar
Chapter 03 Applications Calendar Camera Clock Email Slide your finger to the left on the Home screen to open the applications list. 3-1 Calendar Tap Calendar in the applications list to open the calendar. New Calendar event in the Calendar view to create a new event. You can also create a new event by tapping and holding a time in the Week or Day view.
-
Page 14: Camera
in the Calendar view to access the calendar for the current day. 3-2 Camera Tap Camera in the applications list to open the camera interface. In this interface, you can perform the following operations: Switch Cameras Your tablet provides you with front/back camera. In the photo/video interface, tap to switch between the front and back cameras.
-
Page 15
Viewing Photos A thumbnail image of the latest taken photo will be displayed on the upper-right corner of the photo interface. Tap the image to open the photo-viewing interface. You can set and play photo slideshows. Or tap left on the photo interface to open the photo viewing interface. -
Page 16
A thumbnail image of the last photo taken will be displayed on the upper-right corner of the panorama interface. Tap the image to open the photo-viewing interface. Or tap left in the panorama interface to open the photo viewing interface. Photo saving location Any panoramas you have taken will be saved in the Gallery Gallery in the home screen to open a list of all… -
Page 17: Chapter 04: Settings
Chapter 04: Settings Internet…
-
Page 18: Wireless & Networks
Chapter 04 Settings WIRELESS & NETWORKS DEVICE PERSONAL ACCOUNTS SYSTEM Settings in the applications list to open the Settings interface. 4-1 WIRELESS & NETWORKS This setting module includes: *SIM management, WLAN, Ethernet configuration, Bluetooth, Data usage, and More… (Airplane mode, *Default SMS app, Tethering &…
-
Page 19: Ethernet Configuration
The network status icon, indicates that the network requires no password, and can be connected to directly. However, indicates that the network has been encrypted, and can be connected to only after the required password is entered. You can select any network you want from the list. After selecting the network, enter the password and tap Connect to connect directly.
-
Page 20
Your tablet supports Bluetooth V4.0. To ensure effective operation of your tablet and another Bluetooth-enabled devices, please use only Lenovo-approved accessories compatible with your tablet. Also, check with the manufacturer of the other device to determine whether the device is compatible with your tablet. -
Page 21
*Mobile networks: This setting module includes Data connection, Data roaming, Preferred networks, Preferred networks type, Access Point Names and Network operators. *How to enable the LTE function: This section explains how to view or edit the Access Point Names (APN) for cellular data services on your tablet. -
Page 22: Audio Profile
Tap Settings > DEVICE > Audio profiles to enter the profile settings interface. The PREDEFINED PROFILES include General, Silent, Meeting and Outdoor. Tap the setting button, it includes GENERAL (*Vibrate, Lenovo Tone and Volumes), NOTIFICATIONS (Default notification sound), SYSTEM(Touch sounds, Screen lock sound and Vibrate on touch settings).
-
Page 23
Wallpaper: You can select any pictures from Gallery, Live Wallpapers, Photos and Video Wallpaper as your wallpaper. Lockscreen Wallpaper: You can select any pictures from the Gallery, and Static Wallpapers as your lock-screen wallpaper. Brightness: You can manually adjust the brightness. Sleep: This option allows you to select how long your tablet’s screen will remain activated without any operation before it is automatically locked to save power. -
Page 24
Apps Tap Settings > DEVICE > Apps, to easily manage and delete selected applications. You can also filter any running applications or applications provided by third- party software developers in the applications list. Manage apps: You can manage and remove installed apps. Running services: You can view and control currently running services. -
Page 25
Tap Settings > PERSONAL >Security to access security settings, which include: SCREEN SECURITY, ENCRYPTION, *SIM CARD LOCK, PASSWORDS, DEVICE ADMINISTRATION and CREDENTIAL STORAGE. SCREEN SECURITY: You can set the screen lock method and owner information to be displayed on the lock screen. Screen lock: You can unlock the display in one of six ways: Slide, Face Unlock, Voice Unlock, Pattern, PIN and Password. -
Page 26
After you have set and activated the pattern unlock function, the unlock keypad will be displayed whenever the display is to be unlocked. Use your finger to trace your pre-set pattern on the keypad. After the pre-set pattern has been correctly entered, the screen will be unlocked. -
Page 27
PASSWORDS: Under this option, you can decide whether or not your chosen password will be visible when you input it. If the tick box is selected, then the password will be visible. If it is not selected, then your password will only be displayed as ····… -
Page 28: Add Account
4-4 ACCOUNTS Add account You can choose to add a company, e-mail or Lenovo account. 4-5 SYSTEM Date & time These settings allow you to set a number of time-related options, such as system time.
-
Page 29: Chapter 05: Appendix
Accessibility SERVICES: This option allows you to turn on/off Talkback. SYSTEM: This option allows you to set a Magnification gestures and a large text. Also you can set the Text-to-speech output, Touch & hold delay, whether to speak passwords and to toggle Auto-rotate screen ON/OFF. About tablet Under this option, you can view System Update, Status, Legal information, Model number, Android version, *Baseband version, Kernel version,…
-
Page 30
If the glass chips or cracks, do not touch the broken glass or attempt to remove it from the device. Stop using the device immediately and contact Lenovo technical support for repair, replacement, or disposal information. -
Page 31
Attempting to open or modify your device will void the warranty. Built-in rechargeable battery notice DANGER: Do not attempt to replace the internal rechargeable lithium ion battery. Contact Lenovo Support for factory replacement. Plastic bag notice DANGER: Plastic bags can be dangerous. Keep plastic bags away from babies and children to avoid danger of suffocation. -
Page 32
Warning: Lenovo is not responsible for the performance or safety of products not manufactured or approved by Lenovo. Use only approved Lenovo ac adapters and batteries. Prevent hearing damage Your device has a headphone connector. Always use the headphone connector for headphones (also called a headset) or earphones. -
Page 33
or dispose of your device in any manner contrary to local laws and regulations. Some internal parts contain substances that can explode, leak, or have an adverse environmental affect if disposed of incorrectly. See “Recycling and environmental information” for additional information. Keep your device and accessories away from small children Your device contains small parts that can be a choking hazard to small children. -
Page 34
Consult an authorized dealer or service representative for help. Lenovo is not responsible for any radio or television interference caused by unauthorized changes or modifications to this equipment. Unauthorized changes or modifications could void the user’s authority to operate the equipment. -
Page 35
This product is in conformity with the protection requirements of EU Council Directive 2004/108/EC on the approximation of the laws of the Member States relating to electromagnetic compatibility. Lenovo cannot accept responsibility for any failure to satisfy the protection requirements resulting from a nonrecommended modification of the product, including the installation of option cards from other manufacturers. -
Page 36
Lenovo encourages owners of information technology (IT) equipment to responsibly recycle their equipment when it is no longer needed. Lenovo offers a variety of programs and services to assist equipment owners in recycling their IT products. For information on recycling Lenovo products, go to: http://www.lenovo.com/recycling. -
Page 37
Caso você possua um produto Lenovo em situação de descarte, ligue para o nosso SAC ou encaminhe um e-mail para: reciclar@lenovo.com, informando o modelo, número de série e cidade, a fim de enviarmos as instruções para o correto descarte do seu produto Lenovo. Recycling information for Japan Recycling and disposal information for Japan is available at: http://www.lenovo.com/recycling/japan. -
Page 38
Lenovo is proud to offer our customers products with the ENERGY STAR qualified designation. Lenovo TAB 2 A10-70F has been designed and tested to conform to the ENERGY STAR program requirements for computers. By using ENERGY STAR qualified products and taking advantage of the powermanagement features of your computer, you can help reduce the consumption of electricity. -
Page 39: Troubleshooting
Please adjust the volume using the volume keys. Cannot access the internet via wireless network Restart the wireless router or go to Settings and restart WLAN. Cannot wakeup the tablet from sleep mode Please long-press the power key to restart. Chapter 05 Appendix www.lenovo.com…
-
Инструкции по эксплуатации
1

Lenovo TAB2 A10-70L 16Gb инструкция по эксплуатации
(45 страниц)
- Языки:Русский
-
Тип:
PDF -
Размер:
1.07 MB -
Описание:
Планшетный компьютер
Просмотр
На NoDevice можно скачать инструкцию по эксплуатации для Lenovo TAB2 A10-70L 16Gb. Руководство пользователя необходимо для ознакомления с правилами установки и эксплуатации Lenovo TAB2 A10-70L 16Gb. Инструкции по использованию помогут правильно настроить Lenovo TAB2 A10-70L 16Gb, исправить ошибки и выявить неполадки.