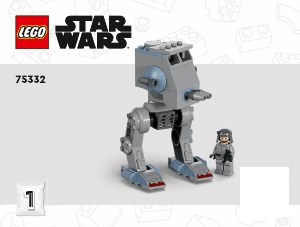
Need building instructions for your Lego set 75332 Star Wars AT-ST? Below you can view and download the PDF building instructions for free. There are also frequently asked questions, a product rating and feedback from users to enable you to optimally use your product. If this is not the manual you want, please contact us.
Is your product defective and the manual offers no solution? Go to a Repair Café for free repair services.
Manual

Rating
Let us know what you think about the Lego set 75332 Star Wars AT-ST by leaving a product rating. Want to share your experiences with this product or ask a question? Please leave a comment at the bottom of the page.
Are you satisfied with this Lego product?
Yes No
Be the first to rate this product
0 votes
Frequently Asked Questions
Our support team searches for useful product information and answers to frequently asked questions. If you find an inaccuracy in our frequently asked questions, please let us know by using our contact form.
There is a Lego brick missing from my set, where can I order a spare one? Verified
Lego has a service where you can order separate bricks or contact them when a brick is missing from your set. Have a look at their website for more information.
This was helpful (4266)
How can I prevent my Lego toys from discolouring? Verified
The two biggest contributers to the discolouring of the plastic of Lego toys are long term exposure to sunlight and cigarette smoke. Try to minimise these when storing your Playmobil.
This was helpful (1433)
What is the best way to clean my Lego bricks? Verified
Lego advises to clean the bricks by hand with some water (no warmer than 40°C) and a mild detergent. Never place the bricks in a washing machine or dishwasher. Let the bricks air-dry afterwards. Electric parts can only be cleaned with dry cloth.
This was helpful (1315)
After I build a new Lego set I always have a few small pieces left. Did I forget to use them? Verified
No, many new Lego sets provide spares for the smaller pieces.
This was helpful (1071)
What is the best way to apply stickers on Lego? Verified
To be able to reposition stickers it’s a good idea to apply some glass cleaner on the location you want to put the sticker. When the sticker is in right spot, let it dry and it will stick.
This was helpful (952)
Where can I find a part list of my Lego set? Verified
Many modern Lego instructions include a part list at the end of the booklet. In the case of multiple booklets the list might be found in the middle of the PDF.
This was helpful (934)
Can Lego and Duplo bricks be used in combination with each other? Verified
Yes, Lego and Duplo bricks are compatible. Lego bricks fit on the Duplo bricks with the hollow studs. Duplo bricks fit best on larger Lego bricks and could come loose form smaller Lego bricks.
This was helpful (829)
From what age is Lego suited to play with? Verified
Most Lego sets are suited to play with from age 4 and up, because of the small parts they include. The special Duplo theme is suited for children aged 1,5 and up. The recommended age is always mentioned on the box.
This was helpful (817)
Introduction: LEGO STAR WARS: AT-ST
Hi everybody! I am Density and I am 14 years old. I am a big fan of star wars and Lego so I decided to show you how to make the AT-ST. The All Terrain Scout Transport (AT-ST) is a reconnaissance (military observation of a region to locate an enemy) or defensive vehicle that is lightweight and built for speed. I hope the instructions are clear and easy to understand. You do not have to make it exactly as I did and you can change the colour of the parts. Read through the instructables before you start so you can understand the instructions and it will be clearer to build. Please enjoy it and have fun.
Step 1: PARTS
These are the parts you will need:
— X6 1X2 W. FORK/VERTICAL/END PLATES
— X4 1X2 W. STUB VERTICAL/END PLATES
— X2 1X2 W. STUB/ALONG/UPPER P PLATES
— X2 1X2 W. STUB, VERTICAL PLATES
— X2 1X2 W. FORK/VERTICAL,END BRICKS
— X2 1X4 BRICKS
— X2 1X2 BRICKS
— X2 1X2 TECHNIC BRICKS
— X2 2X2/45 DEGREES ROOF TILES
— X2 1X1X2/3 ROOF TILES
— X2 4X4 PLATES
— X2 1X1/2 M CONNECTING BUSHES
— X2 2X4 PLATES
— X2 1X2 PLATES
— X1 2X3 W. ANGLE LEFT+RIGHT PLATES
— X1 1X4 FLAT TILES
— X4 1X2 FLAT TILES
— X2 PRABOLAS
— X4 MINI ANTENNAS
Step 2: PART 1
Place the 1X2 W. STUB VERTICAL/END PLATE on top of the 1X2 W. FORK/VERTICAL/END PLATE. Then do it again so you have 2.
Step 3:
Place a 1X2 W. FORK/VERTICAL/END PLATE on top of the 1X2 W. STUB VERTICAL/END PLATE. Do this again so you have 2.
Step 4:
Connect the 1X2 W. STUB VERTICAL/END PLATES from the first step to the 1X2 W. FORK/VERTICAL/END PLATES from the second step.
Step 5:
Add a upside down1X2 W. FORK/VERTICAL/END PLATE to both of the remaining 1X2 W. STUB VERTICAL/END PLATES.
Step 6:
Add the 1X2 W. STUB VERTICAL/END PLATES to the remaining 1X2 W. FORK/VERTICAL/END PLATES.
Put the 2X3 W. ANGLE LEFT+RIGHT PLATES on top of the 1X2 W. STUB VERTICAL/END PLATES (image 2).
Turn the legs over and put the 1X2 PLATES on the 2X3 W. ANGLE LEFT RIGHT PLATES (image 3).
It would look like image 4
Step 7:
While the legs are turned over, place a 2X4 PLATE on the 1X2 W. FORK/VERTICAL/END PLATESthat are facing up (image 1).
Add the 1X2 W. STUB/ALONG/UPPER P PLATES on the 2X4 PLATE (image 2).
Place the second 2X4 PLATE over the 1X2 W. STUB/ALONG/UPPER P PLATES and the 1X2 W. FORK/VERTICAL/END PLATES (image 3).
Step 8: PART 2
Turn a 4X4 PLATE upside down.
Add the 1X2 W. FORK/VERTICAL/END BRICKS to the 4X4 PLATE (image 2).
Step 9:
Add the 1X2 TECHNIC BRICKS on the 4X4 PLATE.
Step 10:
Put the 2X2/45 DEGREES ROOF TILES on the 4X4 PLATE.
Step 11:
Place the 1X4 BRICKS over the 2X2/45 DEGREES ROOF TILES and the 1X2 W. FORK/VERTICAL/END BRICKS.
Step 12:
Add the 1X2 BRICKS between the 1X4 BRICKS.
Step 13:
Put the other 4X4 PLATE over the 2X1 BRICKS and the 1X4 BRICKS.
Step 14:
Add the 1X1/2 M CONNECTING BUSHES in the 1X2 TECHNIC BLOCK.
Step 15:
Put the PROBOLAS on the 1X1/2 M CONNECTING BUSHES.
Add the MINI ANTENNAS on the PROBOLAS.
Step 16:
Add the 1X4 FLAT TILE on the top row 4X4 PLATE (image 2).
Step 17:
Put the 1X1X2/3 ROOF TILES below the 1X4 FLAT TILE.
Step 18:
Put the 1X2 FLAT TILES on the 4X4 PLATE.
Step 19:
Add the other MINI ANTENNAS to the 4X4 PLATE.
Step 20: COMBINATION
Connect the 1X2 W. FORK/VERTICAL/END BRICKS to the 1X2 W. STUB/ALONG/UPPER P PLATES. It would look like image 2.
Step 21:
Adjust the cockpit and legs until it can balance.
Step 22: FINISHED AT-ST
This is the finished AT-ST. Thank you for taking time out to check out my AT-ST. I hope it was easy to understand and that it was fun. Use your imagination to make it look authentic and unique. Please comment on what you think and how I can improve it. Also, please check out my Lego USB at:
https://www.instructables.com/id/LEGO-USB-2/
and my Lego cars at:
https://www.instructables.com/id/LEGO-CAR-CREATIONS-2/
https://www.instructables.com/id/LEGO-CAR-CREATIONS/
Thank you very much and enjoy!
Перед вами файл pdf, где представлена инструкция (руководство) на русском для LEGO Star Wars 75153 Разведывательный транспортный шагоход (AT-ST). Вы можете скачать ее либо изучить в онлайн режиме.
Подробные сведения об инструкции:
Устройство из раздела: конструктор LEGO
Бренд-производитель: LEGO
Наименование модели: LEGO Star Wars 75153 Разведывательный транспортный шагоход (AT-ST)
Язык: Руководство на русском языке
Файл: pdf
Размер файла: 12,85 MB
")
Скачать инструкцию к HARPER HDT2-1110
ЗАГРУЗИТЬ
Просмотр инструкции онлайн
Номер конструктора: 75153
Кол-во деталей: 449
Кол-во минифигурок: 3
Модельный ряд: 2016 год
Цена: 3999 руб.
Стоимость 1 детали: 9 руб.
Серия: Звездные войны

Где купить: поиск лучшей цены в интернет-магазинах
Инструкция по сборке 75153
Скачать (1 часть)
Нажмите на ссылку для просмотра информации. Если вы хотите скачать инструкцию 75153 на компьютер нажмите правой клавишей на ссылке и выберите «сохранить ссылку как» — если браузер Хром, или «сохранить объект как» для пользователей мозиллы.
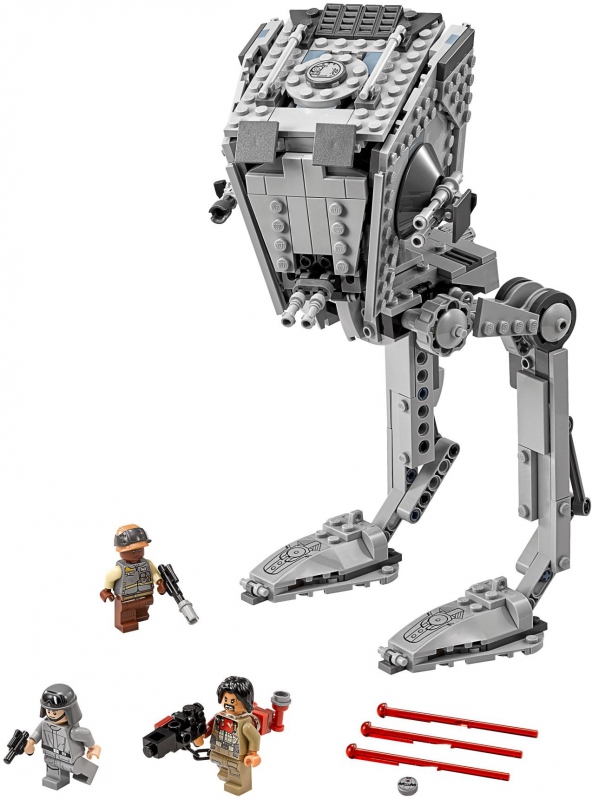
Этот набор является новинкой сентября 2016 года. В его составе 449 элементов, из которых можно соорудить шагоход и три минифигурки с оружием: наемный убийца Бейз Мальбус, водитель машины и солдат армии Альянса Повстанцев. Модель шагохода выполнена в сером цвете. Она может выполнять множество боевых задач: разведка, патрулирование, охрана военных пунктов и другие. Экипаж расположен в башне с отличным обзором. на вооружении у боевой машины две пружинные пушки, бластер и гранатометы.
Сборка и игра с этим набором принесет вам много удовольствия и увлекательных сражений.