Нашел хороший мануал на русском на наши машинки, там есть 2,0, 2,4 и 2,7 дрыгатели.
Если кому надо, качайте на здоровье)
Формат пдф, картинки черно-белые!
Ссылочка с моего «Яндекс-диска»: yadi.sk/d/rRzA4GJOJD7BX
Машины в продаже
Комментарии
34
Войдите или зарегистрируйтесь, чтобы писать комментарии, задавать вопросы и участвовать в обсуждении.
Все комментарии
Руководство на английском языке по техническому обслуживанию и ремонту Chrysler Sebring/Stratus и Dodge Stratus 2005 года выпуска.
- Автор: —
- Издательство: DaimlerChrysler Corporation
- Год издания: 2004
- Страниц: —
- Формат: PDF
- Размер: 137,7 Mb
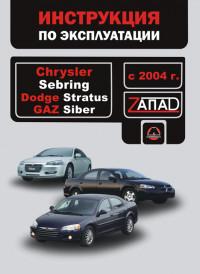
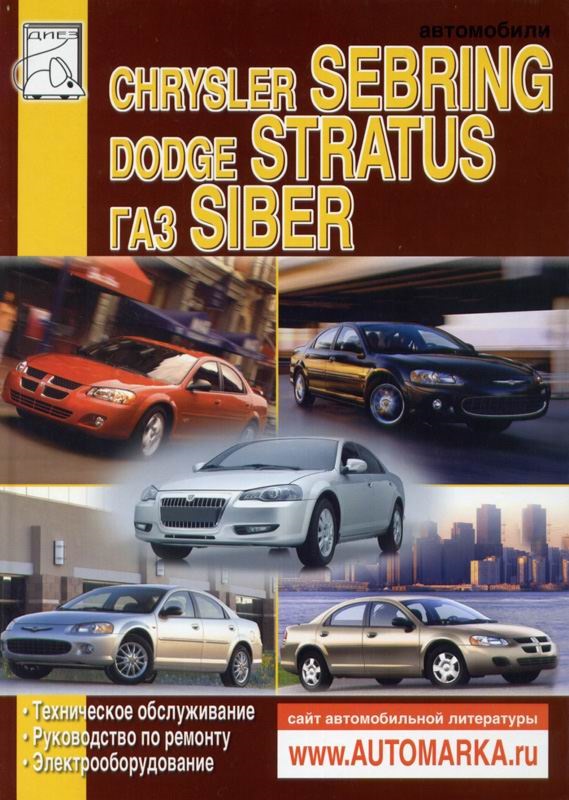
Руководство по эксплуатации Chrysler Sebring, Dodge Stratus и ГАЗ Siber.
- Автор: —
- Издательство: Монолит
- Год издания: —
- Страниц: 234
- Формат: —
- Размер: —
Руководство по техническому обслуживанию и ремонту Chrysler Sebring 2000-2006, Dodge Stratus и ГАЗ Siber с 2008 года выпуска.
- Автор: —
- Издательство: Диез
- Год издания: 2007
- Страниц: 448
- Формат: —
- Размер: —

- Manuals
- Brands
- Chrysler Manuals
- Automobile
- Sebring
Manuals and User Guides for Chrysler Sebring. We have 5 Chrysler Sebring manuals available for free PDF download: Owner’s Manual, User Manual, Quick Reference Manual

Chrysler Sebring Owner’s Manual (474 pages)
2009
Brand: Chrysler
|
Category: Automobile
|
Size: 7.68 MB
Table of Contents
-
Introduction 1
5
-
Introduction
3
-
Table of Contents
5
-
-
Introduction
6
-
How to Use this Manual
6
-
Warnings and Cautions
8
-
Vehicle Identification Number
8
-
Vehicle Modifications/Alterations
9
-
-
Things to Know before Starting Your Vehicle
11
-
A Word about Your Keys
14
-
Ignition Key Removal
15
-
Key-In-Ignition Reminder
17
-
Locking the Doors with the Key
17
-
-
Things to Know before Starting Your Vehicle 9
14
-
Sentry Key
17
-
Replacement Keys
19
-
Sentry Key Programming
19
-
General Information
20
-
-
Vehicle Security Alarm System — if Equipped
21
-
Rearming the System
21
-
To Arm the System
21
-
To Disarm the System
22
-
-
Illuminated Entry System — if Equipped
23
-
Remote Keyless Entry (RKE) — if Equipped
23
-
To Unlock the Doors
24
-
To Lock the Doors
26
-
To Unlatch the Trunk
27
-
Using the Express down Windows Feature — if Equipped
28
-
Using the Panic Alarm
28
-
Programming Additional RKE Transmitters
28
-
Battery Replacement
29
-
General Information
30
-
-
Remote Start System — if Equipped
31
-
How to Use Remote Start
32
-
-
Door Locks
34
-
Manual Door Locks
34
-
Power Door Locks
35
-
Child Protection Door Lock System (Rear Doors)
37
-
-
Power Windows
38
-
Power Window Switches
38
-
Auto Window down — if Equipped
39
-
Auto Window up — if Equipped
40
-
Window Lockout Switch
40
-
Wind Buffeting
41
-
-
Trunk Lock and Release
41
-
Trunk Safety Warning
42
-
Trunk Internal Emergency Release
43
-
-
Occupant Restraints
44
-
Lap/Shoulder Belts
46
-
Lap/Shoulder Belt Untwisting Procedure
51
-
Adjustable Upper Shoulder Belt Anchorage
51
-
-
Enhanced Seat Belt Reminder System (Beltalert )
52
-
Rear Seat Belts
52
-
Seat Belt Pretensioners
52
-
Beltalert Programming
53
-
Automatic Locking Mode
54
-
Seat Belt Extender
54
-
Seat Belts and Pregnant Women
54
-
Supplemental Restraint System (SRS) — Airbags
55
-
SRS Components
56
-
Front Seat Airbag Features
57
-
Airbag Deployment Sensors and Controls
63
-
Event Data Recorder (EDR)
69
-
Child Restraints
71
-
Transporting Pets
82
-
-
Engine Break-In Recommendations
82
-
Safety Tips
83
-
Exhaust Gas
83
-
Safety Checks You Should Make Inside the Vehicle
83
-
Periodic Safety Checks You Should Make Outside the Vehicle
84
-
-
-
Understanding the Features of Your Vehicle
85
-
Mirrors
89
-
Inside Day/Night Mirror
89
-
Automatic Dimming Mirror
90
-
If Equipped
90
-
Power Mirrors
91
-
Adjusting Sideview Mirrors
92
-
Illuminated Vanity Mirrors — if Equipped
92
-
-
Hands-Free Communication (Uconnect ) — if Equipped
93
-
Operation
95
-
Phone Call Features
103
-
Uconnect System Features
106
-
Advanced Phone Connectivity
111
-
Things You Should Know about Your Uconnect System
112
-
General Information
121
-
-
Voice Recognition System (VR) — if Equipped
121
-
Voice Recognition System (VR) Operation
121
-
Commands
123
-
Voice Training
126
-
-
Seats
127
-
Manual Front Seat Adjustment
127
-
Reclining Bucket Seats
129
-
Lumbar Support — if Equipped
130
-
Power Seats — if Equipped
130
-
Adjustable Head Restraints
131
-
Heated Seats — if Equipped
132
-
Fold Flat Passenger Seat Back
133
-
Folding Rear Seat
134
-
Folding Rear Seat Center Armrest
135
-
-
To Open and Close the Hood
135
-
Lights
137
-
Map/Reading/Interior Lights
137
-
Headlights, Parking Lights and Instrument Panel Lights
138
-
Automatic Headlight System
139
-
If Equipped
139
-
Headlight Time Delay
139
-
Flash-To-Pass
140
-
Daytime Running Lights (DRL) — if Equipped
140
-
Lights on Reminder
140
-
Fog Lights — if Equipped
140
-
Turn Signals
141
-
High Beam/Low Beam Select Switch
142
-
-
Windshield Wipers and Washers
143
-
Intermittent Wiper System
144
-
Mist Feature
145
-
Headlights with Wipers Feature (Available with Auto Headlights Only)
145
-
Windshield Washers
146
-
-
Tilt/Telescoping Steering Column
146
-
Electronic Speed Control — if Equipped
147
-
To Activate
148
-
To Set at a Desired Speed
148
-
To Deactivate
148
-
To Resume Speed
149
-
To Vary the Speed Setting
149
-
To Accelerate for Passing
150
-
-
Garage Door Opener — if Equipped
150
-
Programming Homelink
151
-
Gate Operator/Canadian Programming
155
-
Security
155
-
Troubleshooting Tips
156
-
General Information
156
-
-
Power Sunroof — if Equipped
157
-
Sunroof Operation
158
-
Auto Sunroof Express with Anti-Pinch Protection — if Equipped
158
-
Sunshade Operation
159
-
Wind Buffeting
159
-
-
Understanding the Features of Your Vehicle 157
159
-
Sunroof Maintenance
159
-
Ignition off Operation
159
-
-
Electrical Power Outlets
160
-
Cigar Lighter and Ash Receiver — if Equipped
162
-
Cupholders
163
-
Heated/Cooled Cupholder
163
-
If Equipped
163
-
Rear Bottle Holders
164
-
-
Storage
165
-
Driver’s Side Sunglass Holder — if Equipped
165
-
Cargo Area
166
-
-
Console Features
167
-
Dual Storage Bins
168
-
Video Console — if Equipped
170
-
-
Rear Window Features
171
-
Rear Window Defroster — if Equipped
171
-
-
-
Understanding Your Instrument Panel
173
-
Instrument Panel Features
176
-
Instrument Cluster — Base
177
-
Instrument Cluster — Premium
178
-
Instrument Cluster Descriptions
179
-
Electronic Vehicle Information Center (EVIC) — if Equipped
191
-
EVIC Displays
193
-
Oil Change Required
193
-
Trip Functions
194
-
Compass Display
196
-
Personal Settings (Customer-Programmable Features)
198
-
-
Sales Code REQ — AM/FM Stereo Radio and 6-Disc CD/DVD Changer (MP3/WMA AUX Jack)
201
-
Operating Instructions — Radio Mode
201
-
Operation Instructions — (Disc Mode for CD and MP3/WMA Audio Play, DVD-Video)
210
-
Notes on Playing MP3/WMA Files
212
-
List Button (Disc Mode for MP3/WMA Play)
214
-
Info Button (Disc Mode for MP3/WMA Play)
215
-
-
Setting the Analog Clock
201
-
AM/FM/CD/DVD Multimedia System Radio (RER/REN) — if Equipped
217
-
Operating Instructions — Voice Recognition System (VR) — if Equipped
217
-
Operating Instructions — Hands-Free Communication (Uconnect ) — if Equipped
217
-
Clock Setting Procedure
218
-
-
Sales Code RES — AM/FM Stereo Radio with CD Player (MP3 AUX Jack)
220
-
Operating Instructions — Radio Mode
220
-
Operation Instructions — CD Mode for CD and MP3 Audio Play
223
-
Notes on Playing MP3 Files
225
-
Operation Instructions — Auxiliary Mode
228
-
-
Sales Code RES/RSC — AM/FM Stereo Radio with CD Player (MP3 AUX Jack) and Sirius Radio
229
-
Operating Instructions — Radio Mode
229
-
Operation Instructions — CD Mode for CD and MP3 Audio Play
235
-
Notes on Playing MP3 Files
237
-
List Button (CD Mode for MP3 Play)
239
-
Info Button (CD Mode for MP3 Play)
240
-
-
Satellite Radio — if Equipped (REN/REQ/RER/RES/REU Radios Only)
241
-
System Activation
241
-
Electronic Serial Number/Sirius Identification Number (ESN/SID)
241
-
Selecting Satellite Mode
242
-
Satellite Antenna
242
-
Reception Quality
243
-
Operating Instructions — Satellite Mode
243
-
Operating Instructions — Hands-Free Phone (if Equipped)
246
-
Operating Instructions — Video Entertainment System (VES)™ (if Equipped)
246
-
-
Video Entertainment System (VES)™ — if Equipped
246
-
Remote Sound System Controls — if Equipped
248
-
Right-Hand Switch Functions
249
-
Left-Hand Switch Functions for Radio Operation
249
-
Left-Hand Switch Functions for Media (I.e., CD) Operation
249
-
-
CD/DVD Maintenance
250
-
Radio Operation and Cellular Phones
250
-
Climate Controls
251
-
Manual Heating Ventilation and Air Conditioning (HVAC)
251
-
Automatic Temperature Control (ATC) — if Equipped
255
-
Operating Tips
261
-
-
-
Starting and Operating
265
-
Starting Procedures
269
-
Normal Starting
269
-
Tip Start Feature
270
-
Extremely Cold Weather (below 20°F or 29°C)
270
-
If Engine Fails to Start
270
-
After Starting
271
-
-
Engine Block Heater — if Equipped
271
-
Automatic Transaxle
272
-
Brake/Transaxle Interlock System
273
-
Automatic Transaxle Ignition Interlock System
274
-
Speed/6 Speed Automatic Transaxle
274
-
-
Autostick — if Equipped
278
-
Operation
278
-
General Information
279
-
-
Driving on Slippery Surfaces
280
-
Acceleration
280
-
Traction
280
-
-
Driving through Water
281
-
Flowing/Rising Water
281
-
Shallow Standing Water
281
-
-
Power Steering
283
-
Power Steering Fluid Check
284
-
-
Parking Brake
284
-
Brake System
287
-
Anti-Lock Brake System — if Equipped
288
-
-
Anti-Lock Brake System (ABS)
290
-
Electronic Brake Control System
293
-
Anti-Lock Brake System (ABS)
293
-
Traction Control System (TCS)
293
-
Brake Assist System (BAS)
294
-
Electronic Stability Program (ESP)
295
-
-
Tire Safety Information
298
-
Tire Markings
298
-
Tire Identification Number (TIN)
302
-
Tire Loading and Tire Pressure
303
-
-
Tires — General Information
307
-
Tire Pressure
307
-
Tire Inflation Pressures
308
-
Radial-Ply Tires
310
-
Compact Spare Tire — if Equipped
311
-
Limited Use Spare — if Equipped
312
-
Tire Spinning
313
-
Tread Wear Indicators
313
-
Life of Tire
314
-
Replacement Tires
314
-
-
Snow Tires
316
-
Tire Chains
316
-
Tire Rotation Recommendations
317
-
Tire Pressure Monitor System (TPMS)
318
-
Base System
320
-
Premium System — if Equipped
322
-
General Information
326
-
-
Fuel Requirements
327
-
2.4L and 2.7L Engine
327
-
3.5L Engine
327
-
Reformulated Gasoline
328
-
Gasoline/Oxygenate Blends
328
-
E-85 Usage in Non-Flex Fuel Vehicles
329
-
MMT in Gasoline
329
-
Materials Added to Fuel
330
-
Fuel System Cautions
330
-
Carbon Monoxide Warnings
331
-
-
Flexible Fuel- 2.7L Only (Except California Emission States)
332
-
E-85 General Information
332
-
Ethanol Fuel (E-85)
333
-
Fuel Requirements
333
-
Selection of Engine Oil for Flexible Fuel Vehicles (E-85) and Gasoline Vehicles
334
-
Starting
334
-
Cruising Range
335
-
Replacement Parts
335
-
Maintenance
335
-
-
Adding Fuel
335
-
Fuel Filler Cap (Gas Cap)
335
-
Loose Filler Cap Message
338
-
-
Vehicle Loading
338
-
Vehicle Certification Label
338
-
Gross Vehicle Weight Rating (GVWR)
339
-
Gross Axle Weight Rating (GAWR)
339
-
Overloading
339
-
Loading
340
-
-
Trailer Towing
340
-
Common Towing Definitions
340
-
Trailer Hitch Classification
342
-
Trailer Towing Weights (Maximum Trailer Weight Ratings)
343
-
Trailer and Tongue Weight
344
-
Towing Requirements
345
-
Towing Tips
348
-
-
Recreational Towing (Behind Motorhome, Etc.)
350
-
Towing this Vehicle Behind Another Vehicle (Flat Towing with All Four Wheels on the Ground)
350
-
-
Advertisement
Chrysler Sebring Owner’s Manual (444 pages)
2010
Brand: Chrysler
|
Category: Automobile
|
Size: 8.22 MB
Table of Contents
-
Introduction 1
4
-
Introduction
2
-
Table of Contents
4
-
-
Introduction
5
-
How to Use this Manual
5
-
Vehicle Identification Number
7
-
Warnings and Cautions
7
-
Vehicle Modifications/Alterations
8
-
-
Things to Know before Starting Your Vehicle
10
-
A Word about Your Keys
13
-
Ignition Key Removal
13
-
Key-In-Ignition Reminder
15
-
Locking the Doors with the Key
15
-
-
Things to Know before Starting Your Vehicle 9
13
-
Sentry Key
16
-
Replacement Keys
17
-
Customer Key Programming
17
-
General Information
18
-
Vehicle Security Alarm — if Equipped
19
-
Rearming the System
19
-
To Arm the System
19
-
To Disarm the System
20
-
-
Illuminated Entry — if Equipped
21
-
Remote Keyless Entry (RKE) — if Equipped
21
-
To Unlock the Doors
22
-
To Lock the Doors
24
-
To Unlatch the Trunk
25
-
Remote Open Window Feature
25
-
If Equipped
25
-
Using the Panic Alarm
25
-
Programming Additional Transmitters
26
-
Transmitter Battery Replacement
26
-
General Information
27
-
-
Remote Start System — if Equipped
27
-
How to Use Remote Start
28
-
-
Door Locks
30
-
Manual Door Locks
30
-
Power Door Locks
31
-
Child Protection Door Lock System (Rear Doors)
33
-
-
Power Windows
34
-
Power Window Switches
34
-
Auto Window down — if Equipped
35
-
Auto Window up — if Equipped
36
-
Window Lockout Switch
37
-
Wind Buffeting
37
-
-
Trunk Lock and Release
37
-
Trunk Safety Warning
38
-
Trunk Internal Emergency Release
39
-
-
Occupant Restraints
39
-
Lap/Shoulder Belts
41
-
Lap/Shoulder Belt Untwisting Procedure
45
-
Adjustable Upper Shoulder Belt Anchorage
46
-
-
Automatic Locking Retractors (ALR) Mode — if Equipped
47
-
Rear Seat Belts
47
-
Seat Belt Pretensioners — if Equipped
48
-
Supplemental Active Head Restraints (AHR)
48
-
Beltalert Programming
52
-
Enhanced Seat Belt Use Reminder System (Beltalert )
52
-
Seat Belt Extender
53
-
Seat Belts and Pregnant Women
53
-
Supplemental Restraint System (SRS) — Airbags
54
-
Airbag System Components
55
-
Advanced Front Airbag Features
56
-
Airbag Deployment Sensors and Controls
61
-
Event Data Recorder (EDR)
68
-
Child Restraints
70
-
Transporting Pets
80
-
-
Engine Break-In Recommendations
80
-
Safety Tips
81
-
Transporting Passengers
81
-
Exhaust Gas
82
-
Safety Checks You Should Make Inside the Vehicle
83
-
Periodic Safety Checks You Should Make Outside the Vehicle
85
-
-
-
Understanding the Features of Your Vehicle
86
-
Mirrors
90
-
Inside Day/Night Mirror
90
-
Automatic Dimming Mirror — if Equipped
91
-
Power Mirrors
91
-
Adjusting Sideview Mirrors
92
-
Illuminated Vanity Mirrors — if Equipped
93
-
-
Seats
94
-
Manual Front Seat Adjustment
95
-
Driver Seat Manual Height Adjuster — if Equipped
95
-
Reclining Bucket Seats
96
-
Lumbar Support — if Equipped
97
-
Power Seats — if Equipped
98
-
Adjusting Active Head Restraints
99
-
Heated Seats — if Equipped
102
-
Folding Rear Seat
103
-
Folding Rear Seat Center Armrest
104
-
-
Uconnect™ Phone — if Equipped
94
-
Voice Command — if Equipped
94
-
To Open and Close the Hood
105
-
Lights
106
-
Multifunction Lever
106
-
Headlights and Parking Lights
107
-
Automatic Headlights — if Equipped
108
-
Headlight Time Delay
108
-
Turn Signals
109
-
Lane Change Assist
109
-
High/Low Beam Switch
109
-
Flash-To-Pass
109
-
Fog Lights — if Equipped
110
-
Daytime Running Lights — if Equipped
110
-
Lights on Reminder
111
-
Instrument Panel Dimmer
111
-
Map/Reading/Interior Lights
112
-
-
Windshield Wipers and Washers
113
-
Intermittent Wiper System
114
-
Windshield Washers
115
-
Mist Feature
115
-
Headlights with Wipers Feature (Available with Automatic Headlights Only)
116
-
-
Tilt/Telescoping Steering Column
117
-
Electronic Speed Control
118
-
To Activate
118
-
To Set a Desired Speed
119
-
To Deactivate
119
-
To Resume Speed
119
-
To Vary the Speed Setting
119
-
To Accelerate for Passing
120
-
-
Garage Door Opener — if Equipped
121
-
Programming Homelink
122
-
Gate Operator/Canadian Programming
125
-
Security
126
-
Troubleshooting Tips
126
-
General Information
127
-
-
Power Sunroof — if Equipped
127
-
Sunroof Operation
128
-
Auto Sunroof Express with Anti-Pinch Protection — if Equipped
129
-
Sunshade Operation
129
-
Wind Buffeting
129
-
Sunroof Maintenance
129
-
Ignition off Operation
130
-
-
Electrical Power Outlets
130
-
Cigar Lighter and Ash Receiver — if Equipped
132
-
Cupholders
133
-
Front Seat Cupholders
133
-
-
Storage
134
-
Driver’s Side Sunglass Holder — if Equipped
134
-
Cargo Area
135
-
-
Console Features
136
-
Dual Storage Bins
136
-
Video Console — if Equipped
138
-
-
Rear Window Features
139
-
Rear Window Defroster
139
-
-
-
Understanding Your Instrument Panel
140
-
Instrument Panel Features
144
-
Instrument Cluster
145
-
Instrument Cluster Descriptions
146
-
Electronic Vehicle Information Center (EVIC) — if Equipped
159
-
-
Electronic Vehicle Information Center (EVIC) Displays
161
-
Oil Change Required — if Equipped
162
-
Trip Functions
163
-
Compass Display
164
-
Personal Settings (Customer-Programmable Features)
167
-
-
Media Center 230 (REQ) — AM/FM Stereo Radio and 6-Disc CD/DVD Changer (MP3/WMA AUX Jack)
170
-
Operating Instructions — Radio Mode
171
-
Operation Instructions — (Disc Mode for CD and MP3/WMA Audio Play, DVD-Video)
179
-
Notes on Playing MP3/WMA Files
181
-
List Button (Disc Mode for MP3/WMA Play)
183
-
Info Button (Disc Mode for MP3/WMA Play)
184
-
-
Setting the Analog Clock
170
-
Media Center 730N/430 (Rer/Ren/Rbz) — Am/Fm Stereo Radio and CD/DVD/Hdd/Nav — if Equipped
186
-
Operating Instructions — Voice Command System — if Equipped
186
-
Operating Instructions — Uconnect™ Phone — if Equipped
186
-
Clock Setting Procedure — RBZ Radio
187
-
Clock Setting Procedure — RER/REN Radio
188
-
-
Media Center 130 (RES) — AM/FM Stereo Radio with CD Player (MP3 AUX Jack)
190
-
Operating Instructions — Radio Mode
191
-
Operation Instructions — CD Mode for CD and MP3 Audio Play
194
-
Notes on Playing MP3 Files
196
-
Operation Instructions — Auxiliary Mode
198
-
-
Media Center 130 (RES/RSC) — AM/FM Stereo Radio with CD Player (MP3 AUX Jack) and Sirius Radio
199
-
Operating Instructions — Radio Mode
199
-
Operation Instructions — CD Mode for CD and MP3 Audio Play
205
-
Notes on Playing MP3 Files
207
-
List Button (CD Mode for MP3 Play)
210
-
Info Button (CD Mode for MP3 Play)
210
-
Operating Instructions — Uconnect™ Phone (if Equipped)
211
-
-
Uconnect™ Multimedia (Satellite Radio) — if Equipped (REN/REQ/RER/RBZ/RES Radios Only)
211
-
System Activation
212
-
Electronic Serial Number/Sirius Identification Number (ESN/SID)
212
-
Selecting Uconnect™ Multimedia (Satellite) Mode
212
-
Satellite Antenna
213
-
Reception Quality
213
-
Operating Instructions — Uconnect™ Multimedia (Satellite) Mode
213
-
Operating Instructions — Uconnect™ Phone (if Equipped)
215
-
-
Video Entertainment System (VES)™ — if Equipped
215
-
Remote Sound System Controls — if Equipped
217
-
Right-Hand Switch Functions
218
-
Left-Hand Switch Functions for Radio Operation
218
-
Left-Hand Switch Functions for Media (I.e., CD) Operation
219
-
-
CD/DVD Disc Maintenance
219
-
Understanding Your Instrument Panel
219
-
Climate Controls
220
-
Manual Heating and Air Conditioning
220
-
-
Radio Operation and Cellular Phones
220
-
If Equipped
224
-
Operating Tips
230
-
-
Starting and Operating
234
-
Starting Procedures
239
-
Automatic Transmission
239
-
Normal Starting
239
-
Extreme Cold Weather (below 20°F or 29°C)
240
-
If Engine Fails to Start
240
-
After Starting
241
-
-
Automatic Transmission
242
-
Key Ignition Park Interlock
244
-
Brake/Transmission Interlock System
244
-
Automatic Transmission Ignition Interlock System
245
-
Four-Speed/Six-Speed Automatic Transmission
245
-
Gear Ranges
245
-
-
Engine Block Heater — if Equipped
242
-
Autostick — if Equipped
249
-
Operation
249
-
General Information
250
-
-
Driving on Slippery Surfaces
251
-
Acceleration
251
-
Traction
251
-
-
Driving through Water
252
-
Flowing/Rising Water
252
-
Shallow Standing Water
252
-
-
Power Steering
254
-
Power Steering Fluid Check
254
-
-
Parking Brake
255
-
Anti-Lock Brake System (ABS)
257
-
Electronic Brake Control System
260
-
Anti-Lock Brake System (ABS)
260
-
Traction Control System (TCS)
260
-
Brake Assist System (BAS)
261
-
Hill Start Assist (HSA) — if Equipped
262
-
Electronic Stability Control (ESC)
264
-
-
Tire Safety Information
267
-
Tire Markings
267
-
Tire Identification Number (TIN)
271
-
Tire Terminology and Definitions
272
-
Tire Loading and Tire Pressure
273
-
-
Tires — General Information
277
-
Tire Pressure
277
-
Tire Inflation Pressures
278
-
Radial-Ply Tires
280
-
Compact Spare Tire
280
-
Tire Spinning
281
-
Tread Wear Indicators
282
-
Life of Tire
283
-
Replacement Tires
283
-
-
Tire Chains
284
-
Snow Tires
285
-
Tire Rotation Recommendations
285
-
Tire Pressure Monitor System (TPMS)
286
-
Base System
289
-
Premium System — if Equipped
291
-
General Information
294
-
-
Fuel Requirements
295
-
2.4L and 2.7L Engine
295
-
3.5L Engine
295
-
Reformulated Gasoline
296
-
Gasoline/Oxygenate Blends
296
-
E-85 Usage in Non-Flex Fuel Vehicles
297
-
MMT in Gasoline
298
-
Materials Added to Fuel
298
-
Fuel System Cautions
298
-
Carbon Monoxide Warnings
299
-
-
Flexible Fuel (2.7L Only) — if Equipped
300
-
E85 General Information
300
-
Ethanol Fuel (E85)
302
-
Fuel Requirements
302
-
Selection of Engine Oil for Flexible Fuel Vehicles (E85) and Gasoline Vehicles
303
-
Cruising Range
303
-
Replacement Parts
304
-
Maintenance
304
-
-
Adding Fuel
304
-
Fuel Filler Cap (Gas Cap)
304
-
Loose Filler Cap Message
306
-
-
Vehicle Loading
306
-
Vehicle Certification Label
306
-
Gross Vehicle Weight Rating (GVWR)
307
-
Gross Axle Weight Rating (GAWR)
307
-
Overloading
307
-
Loading
308
-
-
Trailer Towing
308
-
Common Towing Definitions
309
-
Trailer Hitch Classification
311
-
Trailer Towing Weights (Maximum Trailer Weight Ratings)
312
-
-
Trailer and Tongue Weight
313
-
Towing Requirements
314
-
Towing Tips
318
-
(Behind Motorhome, Etc.)
319
-
Towing this Vehicle Behind Another Vehicle (Flat Towing with All Four Wheels on the Ground)
319
-

Chrysler Sebring User Manual (436 pages)
Brand: Chrysler
|
Category: Automobile
|
Size: 6.65 MB
Table of Contents
-
Introduction 1
3
-
Introduction
1
-
Table of Contents
3
-
-
Introduction
4
-
How to Use this Manual
4
-
Warnings and Cautions
6
-
Vehicle Identification Number
6
-
Vehicle Modifications/Alterations
7
-
-
Things to Know before Starting Your Vehicle
9
-
A Word about Your Keys
12
-
Ignition Key Removal
12
-
Key-In-Ignition Reminder
14
-
Locking the Doors with the Key
14
-
-
Sentry Key
15
-
Replacement Keys
16
-
Customer Key Programming
16
-
General Information
17
-
-
Vehicle Security Alarm — if Equipped
18
-
Rearming the System
18
-
To Arm the System
18
-
To Disarm the System
19
-
-
Illuminated Entry System — if Equipped
20
-
Remote Keyless Entry (RKE) — if Equipped
20
-
To Unlock the Doors
21
-
To Lock the Doors
23
-
To Unlatch the Trunk
24
-
Using the Remote Open Window Feature — if Equipped
24
-
Using the Panic Alarm
24
-
Programming Additional Transmitters
25
-
Transmitter Battery Replacement
25
-
General Information
26
-
-
Remote Start System — if Equipped
26
-
How to Use Remote Start
27
-
-
Door Locks
29
-
Manual Door Locks
29
-
Power Door Locks
30
-
Child Protection Door Lock System (Rear Doors)
32
-
-
Power Windows
33
-
Power Window Switches
33
-
Auto Window down — if Equipped
34
-
Auto Window up — if Equipped
35
-
Window Lockout Switch
36
-
Wind Buffeting
36
-
-
Trunk Lock and Release
37
-
Trunk Safety Warning
37
-
Trunk Internal Emergency Release
38
-
-
Occupant Restraints
39
-
Lap/Shoulder Belts
40
-
Lap/Shoulder Belt Untwisting Procedure
46
-
Adjustable Upper Shoulder Belt Anchorage
46
-
-
Automatic Locking Retractors (ALR) Mode — if Equipped
47
-
Rear Seat Belts
47
-
Seat Belt Pretensioners — if Equipped
48
-
Supplemental Rear Impact Active Head Restraints (AHR)
48
-
Enhanced Seat Belt Use Reminder System (Beltalert )
52
-
Beltalert Programming
53
-
Seat Belt Extender
54
-
Seat Belts and Pregnant Women
54
-
Supplemental Restraint System (SRS) — Airbags
54
-
Airbag System Components
55
-
Advanced Front Airbag Features
56
-
Airbag Deployment Sensors and Controls
61
-
Event Data Recorder (EDR)
68
-
Child Restraints
70
-
Transporting Pets
81
-
-
Engine Break-In Recommendations
81
-
Safety Tips
82
-
Transporting Passengers
82
-
Exhaust Gas
82
-
Safety Checks You Should Make Inside the Vehicle
83
-
Periodic Safety Checks You Should Make Outside the Vehicle
84
-
-
-
Understanding the Features of Your Vehicle
85
-
Mirrors
89
-
Inside Day/Night Mirror
89
-
Automatic Dimming Mirror — if Equipped
90
-
Power Mirrors
90
-
Adjusting Sideview Mirrors
92
-
Illuminated Vanity Mirrors — if Equipped
93
-
-
Uconnect™ Phone — if Equipped
93
-
Voice Recognition (VR) System — if Equipped
93
-
Manual Front Seat Adjustment
94
-
Seats
94
-
Driver Seat Manual Height Adjuster — if Equipped
95
-
Reclining Bucket Seats
96
-
Lumbar Support — if Equipped
97
-
Power Seats — if Equipped
97
-
Adjusting Active Head Restraints
98
-
Heated Seats — if Equipped
101
-
Fold-Flat Passenger Seatback
102
-
Folding Rear Seat
103
-
Folding Rear Seat Center Armrest
104
-
-
To Open and Close the Hood
104
-
Lights
106
-
Multifunction Lever
106
-
Headlights and Parking Lights
107
-
Automatic Headlights — if Equipped
107
-
Headlight Time Delay
108
-
Turn Signals
108
-
Lane Change Assist
109
-
High/Low Beam Switch
109
-
Flash-To-Pass
109
-
Fog Lights — if Equipped
109
-
Daytime Running Lights — if Equipped
110
-
Lights on Reminder
110
-
Instrument Panel Dimmer
110
-
Map/Reading/Interior Lights
111
-
-
Windshield Wipers and Washers
112
-
Intermittent Wiper System
113
-
Mist Feature
114
-
Headlights with Wipers Feature (Available with Automatic Headlights Only)
115
-
Windshield Washers
115
-
-
Tilt/Telescoping Steering Column
116
-
Electronic Speed Control — if Equipped
117
-
To Activate
117
-
To Set a Desired Speed
118
-
To Deactivate
118
-
To Resume Speed
118
-
To Vary the Speed Setting
119
-
To Accelerate for Passing
120
-
-
Garage Door Opener — if Equipped
120
-
Programming Homelink
121
-
Gate Operator/Canadian Programming
124
-
Security
125
-
Troubleshooting Tips
125
-
General Information
126
-
-
Power Sunroof — if Equipped
126
-
Sunroof Operation
127
-
Auto Sunroof Express with Anti-Pinch Protection — if Equipped
128
-
Sunshade Operation
128
-
Wind Buffeting
128
-
Sunroof Maintenance
128
-
Ignition off Operation
129
-
-
Electrical Power Outlets
129
-
Cigar Lighter and Ash Receiver — if Equipped
131
-
Cupholders
132
-
Heated/Cooled Cupholder — if Equipped
132
-
Rear Bottle Holders
133
-
-
Storage
134
-
Driver’s Side Sunglass Holder — if Equipped
134
-
Cargo Area
134
-
-
Console Features
136
-
Dual Storage Bins
136
-
Video Console — if Equipped
138
-
-
Rear Window Features
139
-
Rear Window Defroster
139
-
-
-
Understanding Your Instrument Panel
141
-
Instrument Panel Features
144
-
Instrument Cluster
145
-
Instrument Cluster Descriptions
146
-
Electronic Vehicle Information Center (EVIC) — if Equipped
159
-
Electronic Vehicle Information Center (EVIC) Displays
161
-
Oil Change Required
162
-
Trip Functions
162
-
Compass Display
164
-
Personal Settings (Customer-Programmable Features)
167
-
-
Setting the Analog Clock
169
-
Sales Code REQ — AM/FM Stereo Radio and 6-Disc CD/DVD Changer (MP3/WMA AUX Jack)
170
-
Operating Instructions — Radio Mode
170
-
Operation Instructions — (Disc Mode for CD and MP3/WMA Audio Play, DVD-Video)
178
-
Notes on Playing MP3/WMA Files
180
-
List Button (Disc Mode for MP3/WMA Play)
183
-
Info Button (Disc Mode for MP3/WMA Play)
183
-
-
Sales Code (RER/REN) — AM/FM/CD/DVD Radio — if Equipped
186
-
Operating Instructions — Voice Recognition
186
-
System (VR) — if Equipped
186
-
Operating Instructions — Uconnect™ Phone — if Equipped
186
-
Clock Setting Procedure
186
-
-
Sales Code RES — AM/FM Stereo Radio with CD Player (MP3 AUX Jack)
188
-
Operating Instructions — Radio Mode
188
-
Operation Instructions — CD Mode for CD and MP3 Audio Play
191
-
Notes on Playing MP3 Files
193
-
Operation Instructions — Auxiliary Mode
196
-
-
Sales Code RES/RSC — AM/FM Stereo Radio with CD Player (MP3 AUX Jack) and Sirius Radio
197
-
Operating Instructions — Radio Mode
197
-
Operation Instructions — CD Mode for CD and MP3 Audio Play
203
-
Notes on Playing MP3 Files
205
-
List Button (CD Mode for MP3 Play)
207
-
Info Button (CD Mode for MP3 Play)
208
-
-
Uconnect™ Studios (Satellite Radio) — if Equipped (REN/REQ/RER/RES Radios Only)
209
-
System Activation
209
-
Electronic Serial Number/Sirius Identification Number (ESN/SID)
209
-
Selecting Uconnect™ Studios (Satellite) Mode
210
-
Satellite Antenna
210
-
Reception Quality
210
-
Operating Instructions — Uconnect™ Studios (Satellite) Mode
211
-
Operating Instructions — Uconnect™ Phone (if Equipped)
213
-
-
Video Entertainment System (VES)™ — if Equipped
213
-
Remote Sound System Controls — if Equipped
215
-
Right-Hand Switch Functions
216
-
Left-Hand Switch Functions for Radio Operation
216
-
Left-Hand Switch Functions for Media (I.e., CD) Operation
216
-
-
CD/DVD Maintenance
217
-
Climate Controls
217
-
Manual Heating and Air Conditioning
218
-
Automatic Temperature Control (ATC) — if Equipped
222
-
Operating Tips
228
-
-
Radio Operation and Cellular Phones
217
-
-
Starting and Operating
231
-
Starting Procedures
235
-
Automatic Transaxle
235
-
Normal Starting
235
-
Extreme Cold Weather (below 20°F or 29°C)
236
-
If Engine Fails to Start
236
-
After Starting
238
-
-
Engine Block Heater — if Equipped
238
-
Automatic Transaxle
239
-
Key Ignition Park Interlock
240
-
Brake/Transaxle Interlock System
240
-
Automatic Transaxle Ignition Interlock System
241
-
Four-Speed/Six-Speed Automatic Transaxle
242
-
Gear Ranges
242
-
-
Autostick — if Equipped
246
-
Operation
246
-
General Information
246
-
-
Driving on Slippery Surfaces
247
-
Acceleration
247
-
Traction
248
-
-
Driving through Water
248
-
Flowing/Rising Water
248
-
Shallow Standing Water
249
-
-
Power Steering
250
-
Power Steering Fluid Check
251
-
-
Parking Brake
252
-
Anti-Lock Brake System (ABS)
254
-
Electronic Brake Control System
256
-
Anti-Lock Brake System (ABS)
257
-
Traction Control System (TCS)
257
-
Brake Assist System (BAS)
257
-
Hill Start Assist (HSA) — if Equipped
258
-
Electronic Stability Control (ESC)
260
-
-
Tire Safety Information
264
-
Tire Markings
264
-
Tire Identification Number (TIN)
267
-
Tire Loading and Tire Pressure
268
-
-
Tires — General Information
272
-
Tire Pressure
272
-
Tire Inflation Pressures
273
-
Radial-Ply Tires
275
-
Compact Spare Tire
275
-
Tire Spinning
276
-
Tread Wear Indicators
277
-
Life of Tire
278
-
Replacement Tires
278
-
-
Tire Chains
279
-
Snow Tires
280
-
Tire Rotation Recommendations
280
-
Tire Pressure Monitor System (TPMS)
281
-
Base System
284
-
Premium System — if Equipped
286
-
General Information
289
-
-
Fuel Requirements
290
-
2.4L and 2.7L Engine
290
-
3.5L Engine
290
-
Reformulated Gasoline
291
-
Gasoline/Oxygenate Blends
291
-
E-85 Usage in Non-Flex Fuel Vehicles
292
-
MMT in Gasoline
292
-
Materials Added to Fuel
293
-
Fuel System Cautions
293
-
Carbon Monoxide Warnings
294
-
-
Flexible Fuel (2.7L Only) — if Equipped
295
-
E-85 General Information
295
-
Ethanol Fuel (E-85)
297
-
Fuel Requirements
297
-
Selection of Engine Oil for Flexible Fuel Vehicles (E-85) and Gasoline Vehicles
298
-
Starting
298
-
Cruising Range
298
-
Replacement Parts
299
-
Maintenance
299
-
-
Adding Fuel
299
-
Fuel Filler Cap (Gas Cap)
299
-
Loose Filler Cap Message
301
-
-
Vehicle Loading
302
-
Vehicle Certification Label
302
-
Gross Vehicle Weight Rating (GVWR)
302
-
Gross Axle Weight Rating (GAWR)
302
-
Overloading
303
-
Loading
303
-
-
Trailer Towing
304
-
Common Towing Definitions
304
-
Trailer Hitch Classification
306
-
Trailer Towing Weights (Maximum Trailer Weight Ratings)
307
-
Trailer and Tongue Weight
308
-
Towing Requirements
309
-
Towing Tips
313
-
-
Recreational Towing (Behind Motorhome, Etc.)
314
-
Towing this Vehicle Behind Another Vehicle (Flat Towing with All Four Wheels on the Ground)
314
-
-
Advertisement

Chrysler Sebring User Manual (76 pages)
2010
Brand: Chrysler
|
Category: Automobile
|
Size: 10.01 MB
Table of Contents
-
Table of Contents
3
-
Introduction/Welcome
4
-
Welcome from Chrysler Group Llc
4
-
-
Controls at a Glance
6
-
Driver Cockpit
6
-
Instrument Cluster
8
-
-
Getting Started
10
-
Key Fob
10
-
Theft Alarm
11
-
Seat Belt
11
-
Child Restraints
11
-
Front Seats
14
-
Rear Seats
16
-
Fold-Flat Front Passenger Seat
16
-
Folding Rear Seatback
16
-
-
Heated Seats
17
-
Tilt / Telescoping Steering Column
17
-
Programmable Features
18
-
-
Operating Your Vehicle
20
-
Turn Signal/Lights Lever
20
-
Wiper/Washer Lever
21
-
Speed Control Lever
22
-
Manual Climate Controls
23
-
Automatic Temperature Controls (Atc)
23
-
Power Sunroof
24
-
Wind Buffeting
25
-
-
Electronics
26
-
Non-Touch-Screen Radios
26
-
Touch-Screen Radios
29
-
Remote Audio Controls
34
-
Electronic Vehicle Information Center (Evic)
34
-
Universal Garage Door Opener
35
-
Power Outlet
36
-
Uconnect™ Phone
36
-
Voice Command
38
-
-
Utility
40
-
Trailer Towing Weights (Maximum Trailer Weight Ratings)
40
-
Recreational Towing (Behind Motorhome, Etc.)
41
-
Brake/Transaxle Interlock Manual Override
41
-
-
What to Do in Emergencies
42
-
24-Hour Towing Assistance — U.s. Only
42
-
Instrument Cluster Warning Lights
42
-
If Your Engine Overheats
45
-
Jacking and Tire Changing
46
-
Jump-Starting
50
-
Towing a Disabled Vehicle
53
-
Freeing a Stuck Vehicle
54
-
Event Data Recorder (Edr)
54
-
-
Maintaining Your Vehicle
56
-
Opening the Hood
56
-
Engine Compartment
57
-
Fluids and Capacities
60
-
Maintenance Chart
62
-
Maintenance Record
63
-
Fuses
64
-
Tire Pressures
66
-
Wheel and Wheel Trim Care
66
-
Exterior Bulbs
67
-

Chrysler Sebring Quick Reference Manual (13 pages)
2009
Brand: Chrysler
|
Category: Automobile
|
Size: 1.19 MB
Table of Contents
-
Turn Signal/Lights Lever
4
-
Instrument Panel Dimmer
4
-
Fog Lights
4
-
Fuel Cap
6
-
Tire Pressure Monitoring System (TPMS)
6
-
Oil Change Indicator
6
-
Manual Climate Controls
7
-
Electronic Vehicle Information Center (EVIC) Controls
7
-
Air Recirculation
7
-
Air Conditioning (A/C)
8
-
Automatic Temperature Control
8
-
Locking and Unlocking the Doors
9
-
Remote Start
9
-
Express down Window Feature
9
-
Panic Alarm
9
-
Wiper/Washer Lever
10
-
Height Adjustment
10
-
Clock Setting
11
-
Wind Buffeting
11
Advertisement
Related Products
-
Chrysler Sebring Sedan
-
Chrysler Sebring Convertible 2010
-
Chrysler Sebring Convertible
-
Chrysler Sebring Coupe
-
Chrysler Sebring Convertible 2006
-
Chrysler Sebring 2008
-
Chrysler Sebring 2009
-
Chrysler Sebring 2004
-
Chrysler Sebring Convertible 2004
-
Chrysler Sebring Sedan 2007
Chrysler Categories
Automobile
Car Video System
Car Receiver
Engine
Car Navigation system
More Chrysler Manuals
Волга Сибирь (ГАЗ Сайбер, Крайслер Себринг, Додж Стратус, платформа JR41) с бензиновыми двигателями: D4ER/ECC 2.0 л (1996 см³) 141-152 л.с./104-112 кВт, EDZ 2.4 л (2429 см³) 143-152 л.с./105-112 кВт и EEE/EER 2.8 л (2736 см³) 181-203 л.с./133-149 кВт; Руководство по эксплуатации, техническому обслуживанию и ремонту, электросхемы, контрольные размеры кузова, устройство, диагностика, особенности конструкции, технические характеристики. Иллюстрированное практическое пособие легковой автомобиль среднего «Д» класса Volga (GAZ) Siber/ Chrysler Sebring и Dodge Stratus (2000-2006) с цельнометаллическими несущими кузовами четырёхдверный седан переднеприводные модели первого поколения выпуска с 2008 по 2010 год
ЕСЛИ ВЫ ВИДИТЕ ОШИБКУ 406 Not Acceptable и не видите документ, то скорей всего у Вас IP РФ и его надо сменить, на любой другой страны, с помощью VPN ( Scribd и SlideShare блокируют посетителей с Российским IP).
Видео Волга Сибирь замена ремня ГРМ и ремней привода агрегатов, переднего бампера (Volga Siber 08-10)
ГАЗ Сайбер, Крайслер Себринг, Додж Стратус общая информация (Volga (GAZ) Siber/ Chrysler Sebring и Dodge Stratus 2000-2010)
РЕМЕНЬ ПРИВОДА ГРМ И ЗВЕЗДОЧКИ (Двигатель D4ER/ECC 2.0 л)
Снятие
ВНИМАНИЕ! Перед снятием ремня привода ГРМ совместите установочные метки распределительного и коленчатого валов путем вращения двигателя с коленчатым валом.
• Вращайте коленчатый вал, пока установочные метки не совместятся на распределительных валах и на коленчатом валу;
• ослабьте контргайку натяжного устройства для ремня привода ГРМ;
• вставьте 6-миллиметровый шестигранный ключ в шестиугольное отверстие, расположенное на накладке натяжного ролика ремня. Вращайте накладку ПО ЧАСОВОЙ СТРЕЛКЕ, пока ремень привода ГРМ не будет ослаблен до степени, позволяющей его снять;
• снимите ремень привода ГРМ.
ВНИМАНИЕ! Не вращайте распределительный (-ые) вал (ы) после того, как ремень привода ГРМ был снят, так как это может привести к повреждению клапанных компонентов.
УСТАНОВКА РЕМНЯ ПРИВОДА ГРМ
• Установите звездочку коленчатого вала в положение верхней мертвой точки цилиндра путем совмещения звездочки со стрелкой на корпусе масляного насоса, а затем возвратите на 3 зубца назад до положения верхней мертвой точки;
• совместите метки звездочек распределительного вала вместе путем совмещения зубцов на звездочках;
• поверните коленчатый вал на 1/2 зубца против часовой стрелки от верхней мертвой точки;
• установите ремень привода ГРМ. Начиная с коленчатого вала, установите ремень на звездочку водяной помпы, натяжной ролик, звездочки распределительного вала, и, в конце, натяните оборотную сторону ремня привода ГРМ на ролик натяжного устройства;
• приведите звездочку коленчатого вала в положение верхней мертвой точки цилиндра и натяните ремень;
• вставьте 6-миллиметровый шестигранный ключ в шестиугольное отверстие, расположенное на накладке натяжного ролика ремня. Поверните накладку ПРОТИВ ЧАСОВОЙ СТРЕЛКИ. Ролик натяжного устройства будет крутиться против движения ремня, а установочный желобок
начнет движение по часовой стрелке. Наблюдая за движением установочного желобка, продолжайте вращать накладку против часовой стрелки, пока установочный желобок не совместится с хвостовиком пружины. Используя шестигранный ключ для предотвращения движения накладки, затяните контргайку натяжного устройства моментом 30 Нм. После затяжки контргайки установочный желобок и хвостовик пружины должны оставаться совмещенными;
• уберите шестигранный и тарированный ключи;
ВНИМАНИЕ! Установка коленчатого вала в положение верхней мертвой точки цилиндра производится только при вращении ПО ЧАСОВОЙ СТРЕЛКЕ. Если верхняя мертвая точка пропущена, проверните коленчатый вал еще на два оборота до достижения положения верхней мертвой точки. НЕ Вращайте коленчатый вал против часовой стрелки, так как это сделает невозможной проверку правильности установки натяжного устройства.
• вручную проверните коленчатый вал ПО ЧАСОВОЙ СТРЕЛКЕ на два полных оборота для посадки ремня, пока коленчатый вал не встанет в положение верхней мертвой точки. Проверьте правильность синхронизации установочных меток коленчатого и распределительного валов;
• проверьте, находится ли хвостовик пружины в пределах допуска. Если хвостовик пружины находится в пределах допуска, процесс установки завершен, и проведения дальнейших операций не требуется. Если хвостовик пружины находится вне пределов допуска, то повторите действия;
• установите переднюю крышку ремня привода ГРМ.
| № | Спецификация / Specs | Данные |
| Габариты (мм/mm) и масса (кг/kg) / Dimensions and Weight | ||
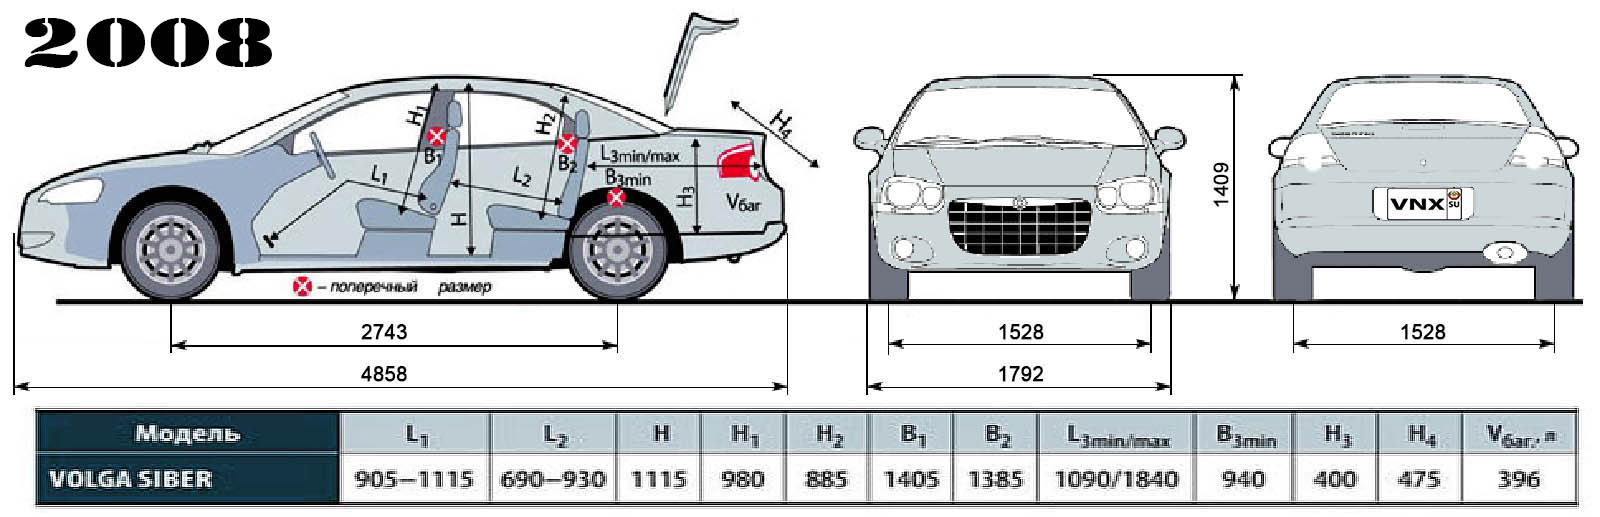
| 1 | Длина / Length | 4858 |
| 2 | Ширина (без/с зеркалами) / Width | 1792 |
| 3 | Высота (загружен/пустой) / Height | 1409 |
| 4 | Колёсная база / Wheelbase | 2743 |
| 5 | Дорожный просвет (клиренс) / Ground clearance | 140 |
| 6 | Снаряжённая масса / Total (curb) weight | 1555 |
| Полная масса / Gross (max.) weight | 1950 | |
|
Двигатель / Engine |
||
| 7 | Тип / Engine Type, Code | Бензиновый, жидкостного охлаждения, четырехтактный, CHRYSLER EDZ |
| 8 | Количество цилиндров / Cylinder arrangement: Total number of cylinders, of valves | 4-цилиндровый, рядный, 16V, DOHC с верхним расположением двух распределительных валов |
| 9 | Диаметр цилиндра / Bore | 87.5 мм |
| 10 | Ход поршня / Stroke | 101.0 мм |
| 11 | Объём / Engine displacement | 2429 см³ |
| 12 | Система питания / Fuel supply, Aspiration | Распределенный впрыск топлива MPFI |
| Атмосферный | ||
| 13 | Степень сжатия / Compression ratio | 9.4:1 |
| 14 | Максимальная мощность / Max. output power kW (HP) at rpm | 105 кВт (143 л.с.) при 5200 об/мин |
| 15 | Максимальный крутящий момент / Max. torque N·m at rpm | 210 Нм при 4200 об/мин |
|
Трансмиссия / Transmission |
||
| 16 | Сцепление / Clutch type | Гидротрансформатор с блокировкой/ Torque Converter |
| 17 | КПП / Transmission type | 41TE АКПП 4 Автоматическая, четырёхступенчатая, гидромеханическая, адаптивная с режимом AutoStick (возможность ручного переключения передач) |
О Книге
- Название: Chrysler Sebring, Dodge Stratus, ГАЗ Siber Техническое обслуживание и руководство по ремонту
- Бензиновые двигатели: D4ER/ECC 2.0 л (1996 см³) 141-152 л.с./104-112 кВт, EDZ 2.4 л (2429 см³) 143-152 л.с./105-112 кВт и EEE/EER 2.7 л (2736 см³) 181-203 л.с./133-149 кВт
- Выпуск с 2000 года
- Серия: «Ремонт Автомобилей»
- Год издания: 2007
- Автор: Коллектив авторов
- Издательство: «Ассоциация независимых издателей»
- Формат: PDF
- Страниц в книге: 447
- Размер: 172.36 МБ
- Язык: Русский
- Количество электросхем: 1
Manufactured and sold between 1995 and 2010 by the Chrysler division of Chrysler Corporation, the Chrysler Sebring was a line of mid-size cars including three generations of convertibles, two generations of sedans, and two generations of coupes. The coupe version, was however, mechanically unrelated to the other Sebring models. In 20 11, it received a majorupdated and renamed as Chrysler 200.
How do I bleed the brakes on my Chrysler Sebring?
To bleed the brakes on your Chrysler Sebring, first locate the brake bleeder valve on each brake caliper. Then, use a wrench to open the valve and have a helper press the brake pedal until fluid comes out. Finally, close the valve and repeat the process on each brake caliper.
How do I change a tire on my Chrysler Sebring?
To change a tire on your Chrysler Sebring, first locate the spare tire and the tools needed to change the tire. Then, use the lug wrench to loosen the lug nuts, jack up the car, and remove the lug nuts and tire. Finally, install the spare tire and tighten the lug nuts.
How do I change the oil in my Chrysler Sebring?
To change the oil in your Chrysler Sebring, first locate the oil pan underneath the vehicle. Then, use a wrench to remove the oil drain plug and drain the old oil. Finally, replace the oil filter and refill the engine with new oil.
How do I check the transmission fluid in my Chrysler Sebring?
To check the transmission fluid in your Chrysler Sebring, first make sure the engine is running and the vehicle is in park or neutral. Then, locate the transmission dipstick under the hood and remove it. Finally, check the fluid level and color, and add more fluid if needed.
How do I replace the air filter on my Chrysler Sebring?
To replace the air filter on your Chrysler Sebring, first locate the air filter housing under the hood. Then, use a screwdriver to remove the cover and remove the old air filter. Finally, insert the new air filter and replace the cover.
How do I replace the alternator on my Chrysler Sebring?
To replace the alternator on your Chrysler Sebring, first locate the alternator under the hood. Then, use a wrench to remove the mounting bolts and disconnect the electrical connections. Finally, remove the old alternator and replace it with a new one.
How do I replace the battery on my Chrysler Sebring?
To replace the battery on your Chrysler Sebring, first locate the battery under the hood. Then, use a wrench to remove the negative and positive battery cables. Finally, remove the old battery and replace it with a new one, and reconnect the battery cables.
How do I replace the brake pads on my Chrysler Sebring?
When replacing the brake pads on your Chrysler Sebring, first remove the wheel and locate the brake caliper. Then, use a wrench to remove the caliper bolts and remove the caliper. Finally, remove the old brake pads and replace them with new ones.
How do I replace the radiator on my Chrysler Sebring?
To replace the radiator on your Chrysler Sebring, first drain the coolant from the radiator and disconnect the hoses and electrical connections. Then, use a wrench to remove the mounting bolts and remove the old radiator. Finally, install the new radiator and reconnect the hoses and electrical connections.
How do I replace the serpentine belt on my Chrysler Sebring?
To replace the serpentine belt on your Chrysler Sebring, first locate the belt routing diagram under the hood. Then, use a wrench to release the tension on the belt tensioner and remove the old belt. Finally, install the new belt and release the tensioner.
How do I replace the spark plugs on my Chrysler Sebring?
To replace the spark plugs on your Chrysler Sebring, first locate the spark plugs underneath the hood. Then, use a spark plug socket and ratchet to remove the old spark plugs and install the new ones. Finally, connect the spark plug wires to the new spark plugs.
What type of oil should I use in my Chrysler Sebring?
It is recommended to use 5W-20 or 5W-30 motor oil for your Chrysler Sebring. Make sure to check your owner’s manual to confirm the recommended oil viscosity and amount.
Why is my check engine light on in my Chrysler Sebring?
The check engine light in your Chrysler Sebring can turn on due to a variety of reasons, such as a faulty oxygen sensor, loose gas cap, or a malfunctioning catalytic converter. It is recommended to have your vehicle checked by a professional mechanic to diagnose the issue.
Why is my Chrysler Sebring making a strange noise?
Your Chrysler Sebring can make strange noises due to a variety of reasons, such as a worn-out belt, a damaged exhaust system, or a failing suspension component. It is recommended to have your vehicle checked by a professional mechanic to diagnose the issue.
Why is my Chrysler Sebring overheating?
Your Chrysler Sebring can overheat due to a variety of reasons, such as a malfunctioning thermostat, a leak in the cooling system, or a faulty water pump. It is recommended to have your vehicle checked by a professional mechanic to diagnose the issue.