Содержание
- Включение варочной панели
- Включение конфорок
- Изменение степени нагрева
В этой статье мы попунктно расскажем, как включить индукционную плиту Korting, чтобы вы легко справились с этой операцией самостоятельно.
Включение варочной панели
- Нажмите и удерживайте 1 секунду сенсор ВКЛ./ ВЫКЛ.
- Раздастся короткий звуковой сигнал, и рядом с дисплеями конфорок загорятся точки-индикаторы. E F E A
- Если не производить дальнейших установок, варочная панель автоматически выключится через 10 секунд. Раздастся короткий звуковой сигнал.
- После первого подключения прибора к электросети и при подключении после сбоя электропитания варочная панель заблокирована.

Включение конфорок
После включения варочной панели в течение 10 секунд включите необходимую конфорку сенсором Е.
Сенсорами C и D выбранной конфорки установите степень нагрева.
Если первым нажать сенсор C, сразу установится мощность 9.
Если первым нажать сенсор D, установится мощность 1.
Если на конфорке не установлена посуда, на дисплее будут попеременно мигать выбранная степень нагрева и символ.
Изменение степени нагрева
Выберите конфорку и соответствующими сенсорами C и D поменяйте мощность нагрева. Если сенсор C или D удерживать, значение будет меняться быстрее.
Режим максимальной мощности нагрева POWER BOOST
- Выберите конфорку и нажмите сенсор С. Раздастся короткий звуковой сигнал, на дисплее загорится значение 9.
- Нажмите сенсор D, на дисплее загорится символ Р. Конфорка будет работать с максимальной мощностью в течение 10 минут, затем раздастся звуковой сигнал, и конфорка переключится на мощность 9.
Подробнее о том, как включить индукционную плиту Кортинг вы можете найти в специальном разделе на сайте онлайн-магазина Techno Pride.

Авторизованный сервисный центр по ремонту бытовой техники.
+7(812) 368-22-05
+7(911) 260-67-77
+7(981) 805-01-90
E-mail: order@tvs-service.ru
Главная \ Гарантийный ремонт бытовой техники Korting \ Инструкции по эксплуатации Варочные панели Korting

Варочные панели Индукционные
Индукционная варочная панель HI 3200B — Инструкция
Индукционная варочная панель HI 32003B — Инструкция
Индукционная варочная панель HI 32003BW — Инструкция
Индукционная варочная панель HI 32021B — Инструкция
Индукционная варочная панель HI 42031B — Инструкция
Индукционная варочная панель HI 42031BW — Инструкция
Индукционная варочная панель HI 64013B — Инструкция
Индукционная варочная панель HI 64013BW — Инструкция
Индукционная варочная панель HI 64021B — Инструкция
Индукционная варочная панель HI 64021BW — Инструкция
Индукционная варочная панель HI 64021X — Инструкция
Индукционная варочная панель HI 6400B — Инструкция
Индукционная варочная панель HI 64502B — Инструкция
Индукционная варочная панель HI 6405B — Инструкция
Индукционная варочная панель HI 6402B_BX_X — Инструкция
Индукционная варочная панель HI 6400BCH — Инструкция
Индукционная варочная панель HI 64042B — Инструкция
Индукционная варочная панель HI 64042BW — Инструкция
Индукционная варочная панель HI 6450BCH — Инструкция
Индукционная варочная панель HI 6450BGR — Инструкция
Индукционная варочная панель HI 64540B — Инструкция
Индукционная варочная панель HI 64560BB — Инструкция
Индукционная варочная панель HI 64560BCG — Инструкция
Индукционная варочная панель HI 64560BCH — Инструкция
Индукционная варочная панель HI 64560BGR — Инструкция
Индукционная варочная панель HIB 6409B Инструкция
Индукционная варочная панель HIB 6409BS Инструкция
Индукционная варочная панель HIB 64750B Smart Инструкция
Индукционная варочная панель HIB 64760BB Smart Инструкция
Индукционная варочная панель HIB 64870BS Smart Инструкция
Индукционная варочная панель HIB 64940B Maxi Инструкция
Индукционная варочная панель HIB 68700 B Quadro Инструкция
Индукционная варочная панель HIB 95750 B Smart Инструкция
Индукционная варочная панель HIB 95750 BW Smart Инструкция
Индукционная варочная панель HIB 95760 BB Smart Инструкция
Варочные панели Электрические
Электрическая варочная панель HK 32001B — Инструкция
Электрическая варочная панель HK 32033B — Инструкция
Электрическая варочная панель HK 32033BW — Инструкция
Электрическая варочная панель HK 42031B — Инструкция
Электрическая варочная панель HK 42031BW — Инструкция
Электрическая варочная панель HK 60001B — Инструкция
Электрическая варочная панель HK 60001BW — Инструкция
Электрическая варочная панель HK 60003B — Инструкция
Электрическая варочная панель HK 60003BW — Инструкция
Электрическая варочная панель HK 62001B — Инструкция
Электрическая варочная панель HK 62001BW — Инструкция
Электрическая варочная панель HK 6205RN — Инструкция
Электрическая варочная панель HK 62031B — Инструкция
Электрическая варочная панель HK 62051B — Инструкция
Электрическая варочная панель HK 62051BW — Инструкция
Электрическая варочная панель HK 62051X — Инструкция
Электрическая варочная панель HK 62550B — Инструкция
Электрическая варочная панель HK 6351B3 — Инструкция
Отправить заявку на ремонтНазад к списку инструкций
-
Contents
-
Table of Contents
-
Troubleshooting
-
Bookmarks
Quick Links
Instructions for use, installation
MT
IE
GB
and connection
Glass-ceramic induction built-in coking hob
Related Manuals for KORTING KIT-614-ESC
Summary of Contents for KORTING KIT-614-ESC
-
Page 1
Instructions for use, installation and connection Glass-ceramic induction built-in coking hob… -
Page 2: Table Of Contents
Glass-ceramic built-in cooking hob Dear customer! Glass-ceramic hob is intended for use in households. Our products are packed in environment-friendly materials which can be recycled, disposed of, or destroyed without imposing any burden on the environment. Instructions for use Instructions for use are intended for the user. They describe the appliance and its operation.
-
Page 3: Important Warnings
Important warnings • Installation of the appliance into a kitchen worktop and its connection to the power mains and the gas supply may only be performed by an adequately qualifi ed technician. • Do not leave small children unattended when the appliance is in operation. Risk of burning and scalding! •…
-
Page 4: Appliance Description
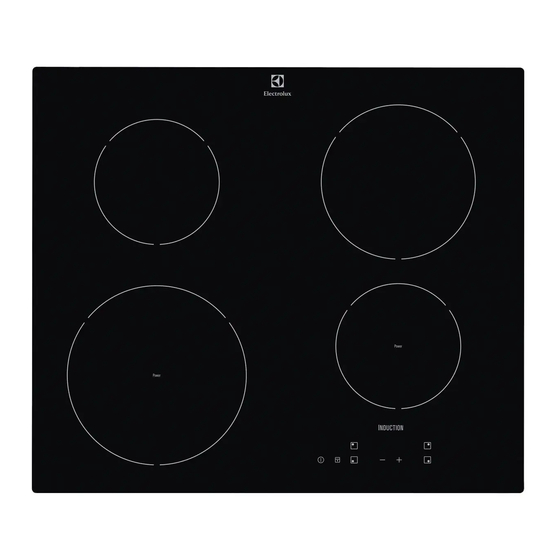
Appliance description Control panel 1. Start / stop buttons 4. Timer LED 2. Power / timer setting button 5. Timer display 3. Timer button 6. Lock button Description 1. Cooking zone Φ160mm; 2,0kW 2. Cooking zone Φ180mm; 2,3kW 3. Cooking zone Φ210mm; 2,3kW…
-
Page 5
Safety instructions What you should pay attention to Induction cooking is extremely safe. Various surveillance systems have been incorporated in the hob such as a residual heat indicator and a cooking time limiter. There are nevertheless a number of precautions you should take. Connection and repair •… -
Page 6
• The ceramic top is extremely strong, but not unbreakable. A spice jar or pointed utensil falling on it, for example, could cause it to break. • Stop using the hob if a break or crack appears. Switch the appliance off immediately, unplug it to avoid electric shocks, and call the service department. -
Page 7
Protection against spills The hob may shut down (with the adjacent symbol in the display) and a beep (depending on the model) may sound in any of these 3 situations: • Overfl ow that spills onto the buttons. • Damp cloth placed over the buttons. •… -
Page 8: Use
Getting used to it… Using the touch controls The touch controls may take some getting used to if you are used to other (rotary) controls. Place the tip of your fi nger fl at on the control to achieve the best results. You do not have to apply any pressure.
-
Page 9
Induction cooking Induction cooking hob heats the food using a magnetic fi eld. When a pan with ferromagnetic metal bottom is placed on the hob, the magnetic fi eld generates eddy currents that heat up the pan. Coil (1) in the induction hob (2) generates magnetic fi… -
Page 10
You can check for yourself whether your pans are suitable using a magnet. A pan is suitable if the base of the pan is attracted by the magnet. Suitable Unsuitable Special stainlesssteel pans Earthenware Class Induction Stainless steel Hard-wearing enamelled pans Porcelain Enamelled cast-iron pans Copper… -
Page 11: Operation
Operation Settings Switching on the hob and setting the power Press the start/stop button for the cooking zone you want to use. A fl ashing 0 display and a beep indicates that he cooking zone is on. A fi xed dot appears in the selected display. You can now choose the desired power level.
-
Page 12
To stop the timer: — Select your timer — Press twice on Using the lock function Your cooking hob has a child safety function which locks controls which are not in use (for cleaning, for example) or during cooking (to keep your settings). For safety reasons, only the button is always active and allows he heating zone to be switched off even if locked. -
Page 13: Cooking
Cooking Healthy cooking Burning point of different types of oil To ensure your food is fried as healthily as possible, Gorenje recommends choosing the type of oil according to the frying temperature. Each oil has a different burning point at which toxic gasses are released.
-
Page 14: Maintenance
• Use setting 6 and 5 to: — complete the cooking of large quantities; — defrost hard vegetables; — fry thin slices of breaded meat. • Use settings 1-4 to: — simmer bouillon; — stew meats; — simmer vegetables; — melting chocolate; — melting cheese.
-
Page 15: Troubleshooting
Troubleshooting The service department telephone number can be General found on the guarantee card provided. If you notice a crack in the glass top (however small), switch the hob off immediately, unplug the hob, turn off the (automatic) fuse switch(es) in the meter cupboard or, in the event of a permanent connection, set the switch in the power supply lead to zero.) Contact the service department.
-
Page 16: Installation Instructions
SYMPTOM POSSIBLE CAUSE SOLUTION A fuse blows as soon as the The hob has been wrongly Check the electrical hob is switched on. connected. connections. The hob simply switches off. You accidentally touched the Switch the hob back on. On/Off button or touched two buttons at the same time.
-
Page 17
Clearance Suffi cient all-round clearance is essential to the safe use of the hob. Check that there is enough clearance. cooker hood cabinet side wall *SIVK 6 F … 610 mm Installation dimensions The dimensions and recesses are shown in the illustrations beneath. -
Page 18
• Cooking hobs can be installed into worktops that are 30 to 50 mm thick. • If the board is thicker than 40 mm, its inner edge should be trimmed, or ground. Thus, suffi cient air circulation will be provided. Ventilation The electronics in the appliance need cooling. -
Page 19
B Lower kitchen cabinet with an oven • Installing the oven under an induction hob is possible with oven types EVP4.., EVP2.., which are fi tted with a cooling fan. Before installing the oven, the rear wall of the kitchen cabinet should be removed. -
Page 20
Electrical connection These hobs must be connected to the mains using a socket in compliance with publication IEC 60083 or an all-pole circuit- breaker device in compliance with the installation rules in force. Your appliance should be positioned so that the mains switch is accessible. -
Page 21
• Hook-up of 400V 3~ — 16A Before connecting the appliance, check the rating of fuses in your home. If the power mains in your home allow such option, we recommend a 2-phase connection to decrease the electric load. Building in Check that the cabinet and the cut-out meet the dimension and ventilation requirement Threat the sawn ends of wooden or synthetic worktops with… -
Page 22
Turn the hob over and lay it in the recess. Connect the appliance to the mains. A short bleep will be heard and all the displays will light up briefl y. The appliance is ready for use. Check that it works properly. If the appliance has been wrongly connected either a bleep will sound or nothing will appear in the displays, depending on the error. -
Page 24
SIVK6F en (12-11)