1503.qxd
20.10.03
15:12
Page 1
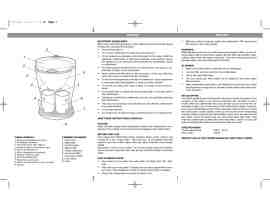
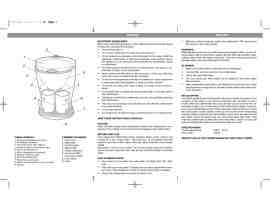
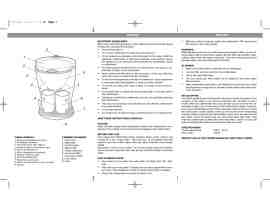
СХЕМА ПРИБОРА:
1. Крышка резервуара для воды
2. Резервуар для воды
3. Переключатель «Вкл./Выкл.»
(индикатор работы загорается при
включении кофеварки)
4. Место размещения фильтра
5. Подача готового кофе
6. Постоянный фильтр
7. Подставка для чашек
8. Место для хранения сетевого шнура
9. Чашки
IMPORTANT SAFEGUARDS
When using electrical appliances, basic safety precautions should always
be followed, including the following.
•
Read all instructions.
•
Do not use coffeemaker for other than intended use.
•
Do not operate any appliance with a damaged cord or plug or after the
appliance malfunctions or has been damaged in any manner. Return
the appliance to an authorised service facility for examination, repair,
or adjustment.
•
To protect against electrical shock, do not immerse cord, plug, or cof
feemaker in water or any other liquid.
•
Avoid contact with the plate or the hot surface of the cup, Take also
care riot to come in contact with the hot steam.
•
Do not leave the appliance switched on unattended. Close supervision
is necessary when any appliance is used by or near children.
•
Do not let cord hang over edge of table or counter or touch hot sur
faces.
•
Do not spill water or coffee over the warming plate or any other part of
the coffeemaker.
•
Unplug from outlet when coffeemaker is not in use and before cleaning
the coffeemaker.
•
The use of an accessory not evaluated for use with this coffeemaker
may cause hazards.
•
Do not use outdoors.
•
Do not place on or near a hot gas or electric burner or in a heated oven.
SAVE THESE INSTRUCTIONS CAREFULLY
VOLTAGE
Make sure the voltage on the specification plate of the coffeemaker corre
sponds to the voltage in your house before plugging in the coffeemaker.
BEFORE FIRST USE
First unplug the coffeemaker before cleaning. Wash carafe, basket, and
ASSEMBLY DIAGRAM:
serving lid in hot, soapy water. Rinse and dry. To thoroughly clean the
1. Tank cover
2. Water tank
inside of your new coffee maker, brew tap water, if desired some vinegar
added.
3. On/Off switch
See section «How to brew coffee». Do not add coffee grounds to basket.
4. Filter holder
Throw the water away and clean with second and third carafe of clean tap
5. Coffee dispenser
water.
6. Permanent filter
7. Cup support base
HOW TO BREW COFFEE
8. Cord space
9. Cups
•
Use carafe to pour water into water tank; not higher than the «Max»
sign.
•
Place the cup on the plate. If desired you can place paper filter in bas
ket. Add 1 level tablespoon of drip or regular grind coffee to basket.
•
Plug in the coffeemaker and switch control to ON.
ENGLISH
ENGLISH
•
When the coffee is brewed, switch the coffeemaker «Off» and remove
the plug from the mains supply.
REMARKS:
Wait with taking away the cup until brewing has stopped. When you use fil
tered water, scale is formed less quickly, and the taste will be better espe
cially in areas where the water is very hard. If you find coffee grains in your
brewed coffee, use a less finely grind of coffee.
GLEANING
•
Make sure coffeemaker is switched off and unplugged.
•
Turn the filter and remove it from the coffeemaker.
•
Throw the paper filter away.
•
The cup, serving lid, filter holder can be washed in hot sudsy water.
Rinse and dry.
•
Wipe coffeemaker base with a soft slightly damp cloth and dry. Never
use abrasive scouring pads or cleaners as they will scratch and/or dis
color the finish.
DECALCIFYING
You should decalcify your coffeemaker every two months to prevent it from
clogging. If the water in your area is especially hard, decalcify it once a
month. When the coffeemaker has to be cleaned you can (a) hear the cof
feemaker makes a lot of noise and (b) the coffeemaker needs more time.
Use a good decalcifying product that is specially made for this use. Follow
the instructions exactly. Switch control to ON and let all the decalcifying
solution (without using the permanent filter) to drip from the reservoir into
the carafe. Throw the liquid away and clean the carafe with water. Then
rinse the coffeemaker by filling the water tank with a carafe of clean cold
water and letting the machine operate twice with only water.
SPECIFICATIONS
Power requirement
230 V ~ 50 Hz
Max. power
450 W
SERVICE LIFE OF THE COFFEE MAKER NOT LESS THAN 3 YEARS
Перейти к контенту
Русские электронные инструкции по эксплуатации
Постоянно обновляемый большой каталог документации по эксплуатации и использованию современных устройств и оборудования на русском языке. Бесплатное скачивание файлов.
Поиск:
Главная
♥ В закладки
Просмотр инструкции в pdf
Инструкция по эксплуатации кофеварки Vitek VT-1503 BK.
Скачать инструкцию к кофеварке Vitek VT-1503 BK (641,78 КБ)
Инструкции кофеварок VITEK
« Инструкция к кофеварке Tefal CM261838
» Инструкция к кофеварке Ufesa CE7240
Вам также может быть интересно
Инструкция к метеостанции VITEK VT-6408
Инструкция к кофемолке VITEK VT-1543
Инструкция к фену VITEK VT-2270 Blue
Инструкция к микроволновой печи Vitek VT-1697 BK
Инструкция к тостеру Vitek VT-7161
Инструкция к тостеру Vitek VT-1586 BK
Инструкция к кухонной машине VITEK 1445-VT-01
Инструкция к обогревателю VITEK VT-1707 W
Добавить комментарий
Имя *
Email *
Сайт
Комментарий


Сохранить моё имя, email и адрес сайта в этом браузере для последующих моих комментариев.
- Добавить инструкцию
- Заказать инструкцию
- Политика конфиденциальности
ENGLISH ENGLISH
IMPORTANT SAFEGUARDS
• When the coffee is brewed, switch the coffeemaker «Off» and remove
When using electrical appliances, basic safety precautions should always
the plug from the mains supply.
be followed, including the following.
• Read all instructions.
REMARKS:
• Do not use coffeemaker for other than intended use.
Wait with taking away the cup until brewing has stopped. When you use fil
tered water, scale is formed less quickly, and the taste will be better espe
• Do not operate any appliance with a damaged cord or plug or after the
cially in areas where the water is very hard. If you find coffee grains in your
appliance malfunctions or has been damaged in any manner. Return
brewed coffee, use a less finely grind of coffee.
the appliance to an authorised service facility for examination, repair,
or adjustment.
GLEANING
• To protect against electrical shock, do not immerse cord, plug, or cof
• Make sure coffeemaker is switched off and unplugged.
feemaker in water or any other liquid.
• Turn the filter and remove it from the coffeemaker.
• Avoid contact with the plate or the hot surface of the cup, Take also
• Throw the paper filter away.
care riot to come in contact with the hot steam.
• The cup, serving lid, filter holder can be washed in hot sudsy water.
• Do not leave the appliance switched on unattended. Close supervision
Rinse and dry.
is necessary when any appliance is used by or near children.
• Wipe coffeemaker base with a soft slightly damp cloth and dry. Never
• Do not let cord hang over edge of table or counter or touch hot sur
use abrasive scouring pads or cleaners as they will scratch and/or dis
faces.
color the finish.
• Do not spill water or coffee over the warming plate or any other part of
the coffeemaker.
DECALCIFYING
• Unplug from outlet when coffeemaker is not in use and before cleaning
You should decalcify your coffeemaker every two months to prevent it from
the coffeemaker.
clogging. If the water in your area is especially hard, decalcify it once a
• The use of an accessory not evaluated for use with this coffeemaker
month. When the coffeemaker has to be cleaned you can (a) hear the cof
may cause hazards.
feemaker makes a lot of noise and (b) the coffeemaker needs more time.
• Do not use outdoors.
Use a good decalcifying product that is specially made for this use. Follow
the instructions exactly. Switch control to ON and let all the decalcifying
• Do not place on or near a hot gas or electric burner or in a heated oven.
solution (without using the permanent filter) to drip from the reservoir into
the carafe. Throw the liquid away and clean the carafe with water. Then
SAVE THESE INSTRUCTIONS CAREFULLY
rinse the coffeemaker by filling the water tank with a carafe of clean cold
water and letting the machine operate twice with only water.
VOLTAGE
Make sure the voltage on the specification plate of the coffeemaker corre
SPECIFICATIONS
sponds to the voltage in your house before plugging in the coffeemaker.
Power requirement 230 V ~ 50 Hz
Max. power 450 W
BEFORE FIRST USE
СХЕМА ПРИБОРА:
ASSEMBLY DIAGRAM:
First unplug the coffeemaker before cleaning. Wash carafe, basket, and
SERVICE LIFE OF THE COFFEE MAKER NOT LESS THAN 3 YEARS
1. Крышка резервуара для воды
1. Tank cover
serving lid in hot, soapy water. Rinse and dry. To thoroughly clean the
2. Резервуар для воды
2. Water tank
inside of your new coffee maker, brew tap water, if desired some vinegar
3. Переключатель “Вкл./Выкл.”
3. On/Off switch
added.
(индикатор работы загорается при
4. Filter holder
See section «How to brew coffee». Do not add coffee grounds to basket.
включении кофеварки)
5. Coffee dispenser
Throw the water away and clean with second and third carafe of clean tap
4. Место размещения фильтра
6. Permanent filter
water.
5. Подача готового кофе
7. Cup support base
6. Постоянный фильтр
8. Cord space
HOW TO BREW COFFEE
7. Подставка для чашек
9. Cups
• Use carafe to pour water into water tank; not higher than the «Max»
8. Место для хранения сетевого шнура
9. Чашки
sign.
• Place the cup on the plate. If desired you can place paper filter in bas
ket. Add 1 level tablespoon of drip or regular grind coffee to basket.
• Plug in the coffeemaker and switch control to ON.
Страницы и текст этой инструкции


Как использовать наш сайт инструкций OnlineManuals.ru
Наша цель состоит в том, чтобы предоставить вам быстрый доступ к содержанию инструкции для кофеварки Vitek VT-1503.
С помощью онлайн просмотра, Вы можете быстро просмотреть содержимое инструкции и найти решение проблемы с кофеварки Vitek VT-1503.
Для Вашего удобства
Если листать руководство пользователя кофеварки Vitek VT-1503 прямо на сайте, не очень удобно для Вас, есть два возможных решения:
• Просмотр в полноэкранном режиме — легко просмотреть руководство пользователя (без загрузки его на свой компьютер), Вы можете использовать режим полноэкранного просмотра.
Для просмотра инструкции пользователя кофеварки Vitek VT-1503 на полном экране, используйте кнопку «Открыть в Pdf-viewer».
• Загрузка на компьютер — Вы можете также скачать Руководство пользователя кофеварки Vitek VT-1503 на свой компьютер и сохранить его в файлах.
Многие люди предпочитают читать документы не на экране, а в печатной версии.
Возможность печати руководства пользователя также была предусмотрена на нашем сайте,
и вы можете использовать ее, нажав на иконку «печать» в Pdf-viewer.
Нет необходимости печатать все руководство кофеварки Vitek VT-1503, можно выбрать только нужные страницы инструкции.
Кофеварка Vitek VT-1503
Технические характеристики
Использование типов кофе
| Использов. молотого кофе | Да |
Электропитание
| Потребляемая мощность | 450 Вт |
Резервуар для воды
| Приготовл. больших чашек | 2 порц. |
Резервуар для кофе
Функции
| Регулировка крепости кофе | Нет |
Индикация
Комплектация
| Синтетический фильтр | в комплекте |
| Мерная ложечка | Да |
Корпус
Сетевой шнур
| Длина сетевого шнура | 0.7 м |
Цвет, размеры и вес
| Цвет | черный/серебристый |
| Габаритные размеры (В*Ш*Г) | 24*16*15 cм |
| Вес | 0.6 кг |
Основные характеристики
| Краткое описание | исп. молот. кофе;450Вт;х2 |
| Гарантия | 1 год |
| Страна | КНР |
| 2 фарфоровые термостойкие чашки в комплекте | |
| Высота | 24 см |
| Ширина | 16 см |
| Глубина | 15 см |
Служебная информация
| Базовый цвет | другие цвета |
Видео
Embedded video


