Выезд мастера по Москве и ближайшим городам Подмосковья
Все инструкции для кофемашин Bosch вы можете скачать бесплатно в формате (.pdf). Если вы пытались устранить неисправность по книжке и ничего не получилось, то позвоните в нашу мастерскую. Все цены и другую информацию по ремонту кофемашин Bosch вы найдете на нашем сайте.
Если у кофемашины Bosch произошел сбой в работе, то на дисплее загорится код ошибки или предупреждение о мелкой неисправности. Это позволяет ориентировочно понять причину неполадки.
| Error 1 | Вышел из строя термодатчик (NTC-датчик) на пароблоке, необходимо обратиться в сервисный центр. |
| Error 2 | NTC-датчик находится за пределами диапазона измерений температуры. Кофемашина охладилась до температуры ниже +5°С или NTC-датчик вышел из строя. |
| Error 5 | Вышел из строя термодатчик (NTC-датчик) на термоблоке. |
| Error 8 | Ошибка редуктора (привода) кофемашины, не удалось инициализировать заварочный блок (ЦЗУ), поршень ЦЗУ не может быть перемещен в верхнее положение. |
| Brewing unit missing | Центральное заварное устройство кофемашины отсутствует или заблокировано. |
| Fill up pipe-system | Воздушная пробка в системе. |
| Empty trays | Заполнен поддон отработанного кофе (жмыха). |
| Add beans | Закончилось кофе. Засыпьте кофейные зерна в контейнер для зерен кофемашины. |


Все инструкции для кофемашин Bosch закачаны на Google Диск. Скачать можно абсолютно бесплатно, без каких либо регистраций и SMS. Инструкции по эксплуатации с пометкой (ALL) — являются мультиязычными, (ENG) — на английском языке, (RUS) — на русском языке. Для удобства вы можете просматривать руководство по эксплуатации кофемашины, прямо в окне браузера. А также нажав в новом открывшемся окне сверху на соответствующий значок «скачать».
Прежде чем скачать инструкцию посмотрите этот ролик, который научит вас как выполнять все необходимые чистки кофемашин Bosch практически любой модели TES.
Bosch CTL 636E (Встраиваемая, новая модель) (RUS)
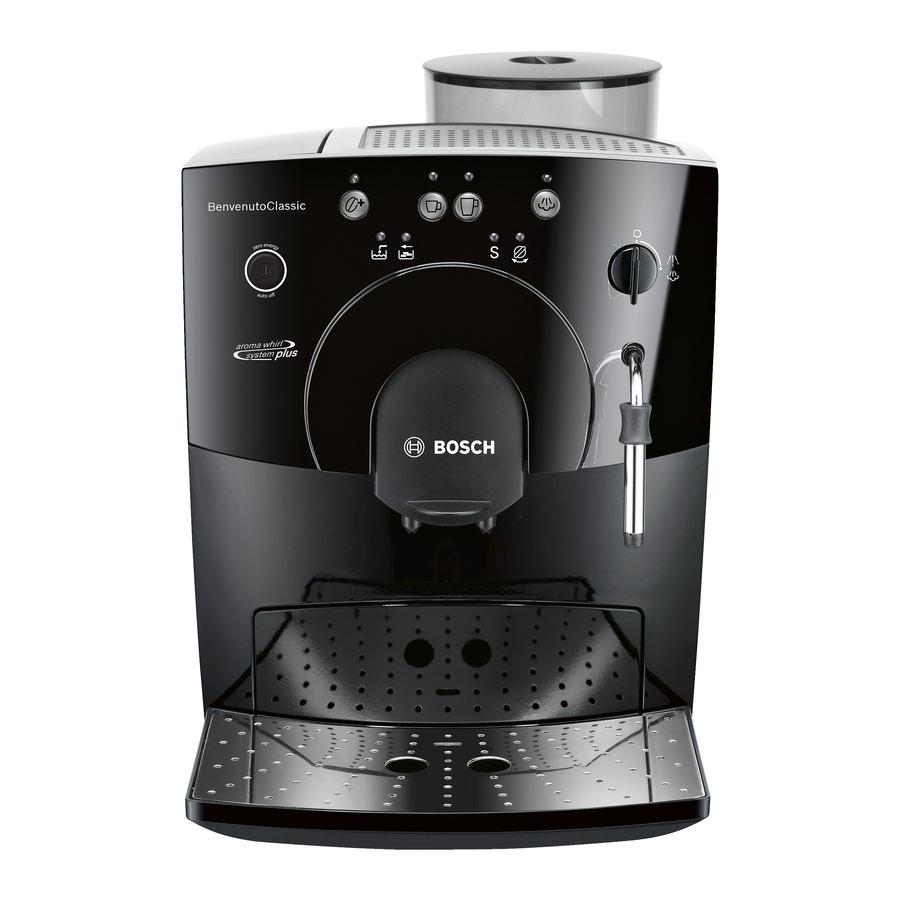
Bosch TCA 5201 / 52.. (Benvenuto Classic) (RUS)
Bosch TCA 5309 / 53.. (Benvenuto Classic) (ALL)
Bosch TCA 5401 / 54.. (Benvenuto Classic) (RUS)
Bosch TCA 5601 / 56.. (Benvenuto Venezia Collection) (ALL)
Bosch TCA 5802 / 58.. (Benvenuto Classic) (ALL)
Bosch TCA 6001 (Benvenuto B20) (RUS)
Bosch TCA 6301 / 63.. (Benvenuto B30) (RUS)
Bosch TCA 6401 / 64.. (Benvenuto B40) (ALL)
Bosch TCA 6701 / 67.. (Benvenuto B60 / B65) (ALL)
Bosch TCA 6801 / 68.. (Benvenuto B70 / B75) (ALL)
Bosch TCC 78K750 / Bosch TCC 78K751 (Встраиваемая)
Bosch TES 50129RW / 501.. (VeroCafe) (ALL)
Bosch TES 50221RW / 502.. (VeroCafe) (ALL)
Bosch TES 50321RW / 503.. (VeroCafe) (ALL)
Bosch TES 55236RW / 552.. (VeroCappuccino 200) (ALL)
Bosch TES 556M1RU / 556.. / 559.. (VeroCappuccino 600 / 900) (ALL)
Bosch TES 71221RW / 712.. / 715.. (VeroBar AromaPro 100 / 300) (ALL)
Bosch TES 80329RW / 803.. / 805.. / 807.. (VeroSelection 300 / 500) (ALL)
Bosch TIS 30129RW / 30321RW (VeroCup 100 / 300) (ALL)
Мы ремонтируем кофемашины всех брендов
Практически все пользователи кофемашин начинают искать инструкцию, когда что-то пошло не так. Появились посторонние звуки, перестала молоть кофемолка или чего хуже вообще не включается. В некоторых случаях стоит сразу позвонить сервисным инженерам, коими мы являемся. Профессиональный ремонт кофемашин Bosch в Москве это вид деятельности, которым мы занимаемся не один год. Обратившись в нашу компанию, вы получите не только бесплатную консультацию, но и квалифицированный ремонт.
Bosch TCA5309 Series Benvenuto Classic Manual
Safety instructions
Please read these instructions carefully and keep for future reference!
This fully automatic espresso machine is designed for preparation of small amounts of coffee for domestic use or for use in non-commercial, householdlike environments, such as staff kitchens in shops, offices, agricultural and other small businesses or for use by guests at bed-and-breakfast establishments, small hotels and similar residential facilities.
Risk of electric shock!
Connect and operate the appliance only in accordance with the specifications on the rating label.
Do not use if either the power cord or the appliance is damaged.
Use indoors at room temperature only.
This appliance is not intended for use by persons (including children) with reduced physical, sensory or mental capabilities, or lack of experience and knowledge, unless they have been given supervision or instruction concerning use of the appliance by a person responsible for their safety.
Keep children away from the appliance. Children should be supervised to ensure that they do not play with the appliance. In the event of malfunction, unplug the appliance immediately.
To avoid potential hazards, repairs such as replacing a damaged cord should only be performed by our service personnel.
Never immerse the appliance or power cord in water.
Do not reach into the grinding unit.
Use the appliance only in frost free rooms.
Risk of scalding!
The nozzle for hot water and steam 8 gets very hot. Hold the nozzle 8 by the plastic part only, not by the metal parts. When steam or hot water is released, the nozzle 8 may initially sputter.
Overview


- Power switch (on/off) auto off
- Coffee strength button

- Coffee dispensing button
- Coffee dispensing button
- Steam generation button
- Hot water / steam dial
- LED display
- Add water
- Empty tray
- Run service programme S
- Turn dial
- Add water
- Nozzle (for hot water / steam)
- Plastic mounting
- Sleeve
- Nozzle tip
- Height- adjustable coffee outlet
- Lid for water tank
- Removable water tank
- Bean container with aroma cover
- Cleaning tablet duct
- Cup shelf (warming function)
- Sliding switch for adjusting grind
- Grate
- Coffee grounds tray
- Residual water tray
- Float
- Cord storage compartment
- Doors to brewing unit
- Brewing unit
- Button (red)
- Handle


Before using for the first time
General
Fill the water tank with fresh, uncarbonated water only, and if possible, use only beans for fully automatic coffee and espresso machines. Do not use coffee beans that have been glazed, caramelized or treated with other additives containing sugar, since they will block the grinding unit. This appliance can be adjusted for use with different water hardness values (see «Set ting the water hardness»).
Switching on the appliance
- Place the appliance on a flat, water resistant surface.
- Pull enough of the power cord out of the storage compartment and plug it into the electrical socket.
- Remove and rinse the water tank 11 and fill it with fresh cold water. Do not fill above the «max» mark.
- Replace the water tank 11 and push it firmly down into place.
- Fill the bean container with coffee beans.
- Make sure that the hot water / steam dial 6 is at «O«.
- Press the power switch 1 auto off to switch on the appliance.
Filling the system
When switched on for the first time, the water pipes in the appliance must be filled.
The appliance is ready for use as soon as both LEDs light up.
Controls
Power switch auto off
The auto off power switch can be used to turn the power supply on or off. After switching on the power supply, the appliance heats up, rinses and is then ready for use. The dispensing buttons 3  and 4
and 4  both light up. The appliance does not rinse if it is still warm when switched on.
If the appliance is not manually switched off, it will switch off automatically after approx. 10 minutes after the last dispens ing operation and then rinse. The pre set switch off time can be changed (see section «Automatic Switch Off auto off»). The appliance will not rinse if:
- there was no coffee drawn after switching on the machine.
- steam was drawn shortly before switching off the machine.
- only hot water or steam were drawn.
Coffee strength button
By pressing the button  , the coffee strength can be set:LED does not light = Normal settingLED lights = Strong settingLED flashing = Bean container empty
Dispensing button Small coffee
With this button, a small cup (approx. 40ml) of coffee can be dispensed.
- Press the button 3 . The LED will start to flash. The coffee is ground, brewed and poured into the cup. Both LEDs light up as soon as the process is finished.

The beverage size can be changed (see section «Changing volume dispensed»).
Dispensing button Large coffee
With this button, a large cup F Large coffee (approx. 125ml) of coffee can be dispensed.
- Press the button 4 . The LED will start to flash. The coffee is ground, brewed and poured into the cup. Both LEDs light up as soon as the process is finished.
 .
. The beverage size can be changed (see section «Changing volume dispensed»)
Steam generation button
The steam button  generates steam for foaming or warming.
Steam dispensing dial
Hot water or steam can be dispensed by turning the dial to  or
or  . To dispense steam, the steam generation button
  must be pressed first (see «Steam for foam ing milk»).
LED display
The various LEDs indicate the following:
 on on |
The water tank is empty and needs to be filled |
 on on |
Trays full: Empty and replace them |
 flashing flashing |
Trays missing: Reinsert them |
| S on | Run the service programme (see «Service programme») |
| S flashing | Service programme in operation |
 on on |
Turn dial to  |
 flashing flashing |
Turn dial to «O« |
Settings and displays
Setting the water hardness
It is important that the water hardness be set correctly, so that the appliance indicates accurately when the descaling programme should be run. The factory setting is a water hardness of 4.
You can check the water hardness by asking your local water supplier.
| Degree | Water hardness | |
| German (°dH) | French (°fH) | |
| 1 | 1 7 | 1 13 |
| 2 | 8 15 | 14 27 |
| 3 | 16 23 | 28 42 |
| 4 | 24 30 | 43 54 |
The appliance must be ready for use.
If a water filter (optional extra Order No. 461732) is used, the water hardness should be set to 1.
Note: If no button is pressed within 90 s econds, the appliance switches to stand by mode without saving the new settings. In this case, the previous water hardness setting is retained.
The appliance must be rinsed when a filter is first used and after changing the filter.
- Fill the tank with water up to the «0,5 l» mark.
- Place a suitable container (approx. «0,5 l») under the nozzle 8.
- Set the dial 6 to .
- When water stops coming out of the nozzle 8, set the dial back to «O«.
- Fill the water tank and the water pipes
(see «Switching on the appliance / Filling the system»).
 .
.Adjusting the grinding unit
Sliding switch 15 adjusts the degree of grinding, from coarse to fine.
Adjust the grinding unit only while it is running! Otherwise the appliance may be damaged.
Tip: For dark roast coffee beans, choose a coarser grind; for light roast beans, select a finer grind.
Automatic switch-off auto off
The pre set automatic switch off time of approx. 10 minutes can be changed.
- To do this, press and hold the dispensing button 3 and the button 5 at the same time for at least 5 seconds. The LEDs that light up, 7a, b, c and d ( , , S, ), represent the switch off time set.
By pressing the button 5 the switch-off time can be selected: the switch LED 7a ( ) lights up
= Appliance switches off after approx. 10 minutes.
LED 7a and 7b ( , )
= Appliance switches off after approx. 30 minutes.
LED 7a, 7b and 7c ( , , S ) light up
= Appliance switches off after approx. 1 hour.
LED 7a, 7b, 7c and 7d (, , S, )
= Appliance switches off after approx. 4 hours.
Pressing button 2saves the s election.

 at the
  ,
,  ,
, 
 the switch-


Setting the temperature
This fully automatic coffee machine allows the user to change the temperature of the coffee.
- To do this, press and hold the dispensing buttons 3 and 4 at the same time for at least 5 seconds. The LEDs that light up, 7a, b and c ( , , S ), represent the temperature set. By pressing the button 5 , the temperature can now be selected:
LED 7a ( ) lights up
= Low temperature
LED 7a and 7b (, ) light up
= Medium temperature.
LED 7a, 7b and 7c ( , , S ) light up
= High temperature.


 ,
,  ,
,
 ) lights up
 ) light up
 ,
,  , S ) light up
Pressing button 2  saves the selection.
Float
The float 19 in the water tray 18 showswhen the tray needs emptying.
- If the float 19 is clearly visible, empty the water tray 18.
Using coffee beans
This fully automatic espresso / coffee machine grinds beans freshly for each brew. If possible, use only beans for fully automatic coffee and espresso machines.
Deep freeze or store in a cool place in sealed, airtight containers. Coffee beans can be ground while frozen.
Fill the water tank with fresh water every day. The tank must always contain sufficient water for operating the appliance. Do not allow it to become empty.
Tip: Pre warm cups, especially small, thick espresso cups, by placing on the cup shelf 14 or rinsing with hot water.
The appliance must be ready for use.
It is possible to dispense the same amount of coffee a second time.
Note: The second cup is brewed using the previously ground coffee.
Changing volume dispensed
The pre set quantities for dispensing button 3  (approx. 40ml) and dispensing button 4
  (approx. 125 ml) can be changed.
Reset: The appliance must be ready for use.
The standard factory settings have now been reactivated.
Preparing hot water
The appliance must be ready for use.
This function allows water to be heated for a cup of tea, for example.
The nozzle gets very hot. Do not touch the metal parts.
- Place an appropriate cup under the nozzle 8.
- Push the sleeve on the nozzle 8 all the way down.
- Turn the dial 6 to .
Risk of scalding
When the dial is set to  , the nozzle may sputter a little. Do not touch the nozzle 8 or point it at anyone.
- End the process by turning the dial 6 back to «O«.
Steam for foaming milk
The appliance must be ready for use. You can foam the milk first and add the coffee on top, or foam the milk separately and pour it into the coffee.
The nozzle gets very hot. Do not touch the metal parts.
- Push the sleeve on the nozzle 8 all the way down.
- Fill the cup approximately 1/3 full of milk.
- Press the steam button . The LED will start to flash.

The appliance will heat up for approx. 20 seconds.
- Immerse the nozzle 8 deep into the milk, but do not let it touch the bottom of the cup.
- As soon as the LED J lights up, turn the rotary button 6 to .
Risk of scalding
When the dial 6 is set to , the nozzle 8 may sputter. Escaping steam is very hot and may cause liquids to sputter. Do not touch the nozzle 8 or point it at anyone.
Note: When the nozzle 8 has cooled down, clean immediately. Dried residue is difficult to remove.
Tip: If possible, use cold low fat (1,5% fat) milk.
Steam for heating drinks
The nozzle gets very hot. Do not touch the metal parts.
The appliance must be ready for use.
- Push the sleeve on the nozzle 8 all the way up.
- Press the steam button . The LED will start to flash.

The appliance will now heat up for approx. 20 seconds.
Risk of scalding
When the dial 6 is set to , the nozzle 8 may sputter a little. Escaping steam is very hot and may cause liquid to sputter. Do not touch the nozzle 8 or point it at anyone.
- End the process by turning the dial 6 back to «O».
To generate more steam, press the steam butto
 again and repeat the whole process.
Note: When the nozzle 8 has cooled down, clean immediately. Dried residue is difficult to remove.
Maintenance and daily cleaning
Risk of electric shock!
Unplug the appliance before cleaning it.
Never immerse the appliance in water.
Do not use a steam cleaner.
- Wipe the outside of the appliance with a damp cloth. Do not use scouring agents.
- Always remove any limescale, coffee, milk or descaling fluid residue immedi ately. Such residue can cause corrosion.
- Wash all removable parts by hand only.
- Rinse out the water tank 11 with water only.
- Remove, empty and clean the trays for coffee grounds 17 and residual water 18.
- Wipe out the inside of the appliance (tray holders).
- Open the door to the brewing unit 21 and remove any coffee residues. Close the door.
Note: If the appliance is cold when switched on, or if it is switched off after dispensing coffee, it rinses automatically; in other words the system cleans itself.
Nozzle for hot water / steam
- Unscrew the nozzle 8 from the steam pipe.
- Dismantle all parts.
- Clean with a caustic cleaning solution and a soft brush. Clean the tip of the nozzle 8c with a blunt needle.
- Thoroughly rinse and dry all parts.
Brewing unit
The brewing unit can be removed for cleaning.
- Switch off the appliance using the power switch 1 auto off.
- Open the door 21 to the brewing unit 22.
- Hold the red button 22a down and push the handle 22b up until you hear it engage.
- Grasp the brewing unit 22 by the handle, remove carefully, and rinse under running water. Do not use cleaning agents. Do not place in the dishwasher.
- Vacuum the inside of the appliance, or clean it with a damp cloth.
- Reinsert the brewing unit 22 all the way into the appliance.
- Hold the red button 22a down and push the handle 22b down as far as it goes, until you hear it engage. The brewing unit is now secure.
- Close the door of the brewing unit.
Service programme
Combined cleaning and descaling process
If the S LED lights up while the appliance is on, the service programme must be run immediately to clean and descale the appli ance. If the service programme is not run as instructed, the appliance may be damaged.
Specially developed descaling (Order No. 310967) and cleaning agents (Order No. 310575) can be obtained from our customer service department.
Each time you run the service programme, follow the instructions for using the cleaning and descaling agents.
Never interrupt the service programme!
Do not drink the liquids!
Never use vinegar or vinegar based products!
Never put descaling tablets or other des caling materials into the duct for cleaning tablets! The S LED flashes while the service pro gramme is running (approx. 40 minutes).
If there is a filter in the water tank, it must be removed before the service programme is run.
Starting the service programme
The appliance must be ready for use.
The S LED starts to flash and the appliance rinses the coffee dispenser through twice.
- Empty and reinsert the grounds tray 17.
The LEDs for button  and
and  «Add water» light up.
- Place one cleaning tablet in the duct 13.
- Fill the water tank with lukewarm water, add descaling agent and dissolve com pletely (total liquid 0,5 litres)
or
pour prepared descaling mixture into the water tank (total liquid 0,5 litres). - Press the steam button process begins. Duration approx. 10 min . The descaling utes. The descaling solution flows into the water tray 18.

The  LED lights up.
- Place a suitable container (approx. 0,5 litres) under the nozzle 8.
- Set the dial 6 to . The descaling process begins. Duration approx. 5 min utes. The descaling solution flows into the container.
The  LED lights up
- Empty and reinsert the grounds tray 17.
The steam button LED  lights up.
- Empty and clean the water tank 11, fill with fresh water up to the «max» mark and reinsert.
- Place a suitable container (approx.0,5 litres) under the nozzle 8.
- Press the steam button . The cleaning process begins. Water flows into the container.

The  LED flashes.
- Turn the dial 6 to «O». The cleaning process begins. Duration approx. 10 minutes. Liquid flows into the coffee grounds tray 17 inside the appliance, then out through the coffee outlet.
The  LED lights up.
- Empty, clean and reinsert the trays 17 and 18.
The appliance starts to heat up and is ready for use once the LEDs for dispensing buttons 3  and 4
and 4  light up.
If the service programme is interrupted, e.g. due to a power cut, it is vital that the appliance be rinsed before it is used again.
The appliance must be ready for use.
The  and steam button
  LEDs flash.
- Rinse the water tank 11 thoroughly and fill with fresh water.
- Press the steam button is rinsed and liquid flows into the tray.

The  LED lights up.
- Hold a cup under the nozzle 8 and turn the dial 6 to . Water runs into the cup.
The  LED flashes.
- Turn the dial 6 back to «O».
The appliance rinses and is ready for use again.
Anti-freeze
In order to avoid damage through cold during transportation and storage, the appli ance must be emptied completely first.
The appliance must be ready for use.
Disposal
This appliance is labelled in accordance with the European Directive 2002/96/EG relating to waste electrical and electronic equipment – WEEE. The directive provides the framework for the EU wide take back and disposal of end of life appliances.
Please ask your specialist retailer about current disposal facilities.
Guarantee
The guarantee conditions for this appliance are as defined by our representative in the country in which it is sold. Details regarding these conditions can be obtained from the dealer from whom the appliance was pur chased. The bill of sale or receipt must be produced when making any claim under the terms of this guarantee.
Right of modification reserved.
Troubleshooting
| Problem | Possible cause | Solution |
| No hot water or steam discharge. | Nozzle 8 is blocked. | Clean nozzle 8. |
| Foam insufficient or too runny. | Sleeve b on nozzle 8 not in correct position. | Push down sleeve b on nozzle 8. |
| Milk not suitable for foaming. | Use cold low fat (1,5% fat) milk. | |
| Coffee dispensing slows to a trickle. | Coffee is ground too fine. | Adjust the grinding unit to a coarser setting. |
| Coffee not dispensed. | Water tank not filled or not correctly positioned. | Fill water tank and make sure it is in the right posi tion. If necessary, fill water pipes (see «Switching on the appliance»). |
| Coffee has no «crema» (creamy foam). | Unsuitable type of coffee. Beans no longer fresh. | Change type of coffee used. Use fresh beans. |
| Degree of grinding inappro priate for beans. | Optimize degree of grinding. | |
| Grinding unit does not grind the beans. | Beans are not falling into the grinding unit (beans too oily). | Gently tap the bean container. |
| Grinding unit makes a loud noise. | Foreign objects in the grind ing unit (e.g. grit, which can be found even in superior types of coffee). | Call the hotline. |
LED S and button  flash alternately. flash alternately. |
The brewing unit 22 is missing, or is not properly inserted or secured. | Insert and secure the brewing unit 22. |
| If you are unable to solve the problem, please call the hotline. You will find the telephone numbers at the back of these instructions. |

Documents / Resources
Download manual
Here you can download full pdf version of manual, it may contain additional safety instructions, warranty information, FCC rules, etc.
Download Bosch TCA5309 Series Benvenuto Classic Manual
128 pages
TES50328RW Operating Instructions Manual
156 pages
Tassimo TAS 20 Series Instruction Manual

104 pages
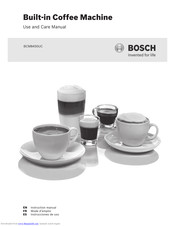
Built-In Coffee Machine User Manual

200 pages
TASSIMO style TAS110 Series User Manual
62 pages
TAS4011GB Instruction Manual
45 pages
TAS6515UC — Tassimo Single-Serve Coffee Brewer User Manual
78 pages
TAS5542GB Instruction Manual

91 pages
TCA6001UC — Benvenuto B20 Gourmet Coffee Machine Use And Care Manual
102 pages
tca60f9 Repair Instruction

88 pages
VeroCafe Latte TES50356DE Operating Instructions Manual

16 pages
TAS 20XX Tassimo Instruction Manual

148 pages
VeroBar Manual

90 pages
Tassimo TAS 65xx User Manual
164 pages
TIS3.1 Series Instruction Manual

14 pages
BCM8450UC Installation Instructions Manual
116 pages
BCM8450UC Use And Care Manual
24 pages
TAS-4511UC User Manual
62 pages
Tassimo TAS 1000UC User Manual
138 pages
TES50321RW Instruction Manual
70 pages
Tassimo TAS65xxUC Instruction Manual
T
TAS 12 Series

Instruction Manual • Instruction Manual • Instruction Manual
TAS 140xGB/CH
Instruction Manual
TAS 32seriesUC
Instruction Manual
TAS 32xx
Instruction Manual
TAS 40xx
User Manual • Instruction Manual
TAS 45 series
Instruction Manual
TAS 4503CH
Instruction Manual
TAS 4503GB
Instruction Manual
TAS 65xxGB/CH
Instruction Manual
TAS 85xxGB/CH
Instruction Manual
TAS1002
Instruction Manual
TAS1003
Instruction Manual • Instruction Manual
TAS1007
Instruction Manual • Instruction Manual
TAS100xGB/CH
Instruction Manual
TAS1401
Instruction Manual
TAS1407
Instruction Manual
TAS2001UC
Instruction Manual
TAS2001UC8
Instruction Manual • Instruction Manual
TAS2002GB
Quick Start Manual • Instruction Manual • Instructions For Use Manual
TAS2002UC
Instruction Manual
TAS2002UC8
Instruction Manual
TAS3102
First Time Use • Instruction Manual
TAS4011
Instruction Manual
TAS4011/15
Instruction Manual
TAS4011CH/05
Instruction Manual
TAS4011GB
Instruction Manual • Descaling Manual
TAS4012GB
Instruction Manual • Descaling Manual
TAS4013GB
User Manual
TAS4302GB
Instructions For Use Manual
TAS4304GB
Instructions For Use Manual
TAS4511UC — Tassimo Single-Serve Coffee Brewer
User Manual • User Manual
TAS4513UC — Tassimo Suprema Coffee Machine
User Manual
TAS4515UC
Instruction Manual • Short Instructions
TAS4515UC8
Instruction Manual • Short Instructions
TAS4516UC
Instruction Manual • Short Instructions
TAS4516UC8
Instruction Manual • Short Instructions • Instruction Manual
TAS45xxUC
Instruction Manual
TAS46xxUC
Instruction Manual
TAS5542GB Short
Cleaning Manual • Instruction Manual
TAS5542UC
Instruction Manual
TAS55xxUC
Instruction Manual
TAS65**UC
User Manual
TAS6502
Instruction Manual
TAS6507
Instruction Manual
TAS6507GB
Instruction Manual
TAS6515GB
Descaling Manual
TAS6515UC — Tassimo Single-Serve Coffee Brewer
User Manual
TAS6515UC8
Quick Start Instructions
Tassimmo Caddy TAS 75 Series
Instruction Manual
Tassimo
Instructions For Use Manual
Tassimo 40 series
Instruction Manual
Tassimo 42 series
Operating Instructions Manual • Operating Instructions Manual • Operating Instructions Manual • Instruction Manual • Original Instructions Manual • Original Instructions Manual • Original Instructions Manual • Original Instructions Manual • Original Instructions Manual
Tassimo 5542
Instruction Manual
TASSIMO AMIA 20 series
Instruction Manual
Tassimo Caddy TAS 70 Series
Instruction Manual
TASSIMO CADDY TAS 70xx
Instruction Manual
TASSIMO CADDY TAS 75xx
Instruction Manual
Tassimo Charmy TAS 55 CH Series
Manual
Tassimo Charmy TAS 55 GB Series
Manual
Tassimo Fidelia TAS 40 CH Series
Instruction Manual
Tassimo Fidelia TAS 40 GB Series
Instruction Manual
Tassimo Fidelia TAS 42 CH Series
Instruction Manual
Tassimo Fidelia TAS 42 GB Series
Instruction Manual
Tassimo Fidelia TAS4011CH
Instruction Manual
TASSIMO FIDELIA+ 65 series
Instruction Manual
TASSIMO FIDELIA+ 85 series
Instruction Manual
TASSIMO finesse TAS16B Series
User Manual • User Manual
Tassimo happy
Quick Start Manual • Instruction Manual
Tassimo Happy TAS100 CH Series
Instruction Manual
Tassimo Happy TAS100 GB Series
Instruction Manual
Tassimo Happy TAS100 Series
Instruction Manual • Instruction Manual • Instruction Manual • Instruction Manual
Tassimo HAPPY TAS1001
Instruction Manual
Tassimo HAPPY TAS1002N
Instruction Manual
Tassimo Happy TAS1006
Instruction Manual • Instruction Manual
TASSIMO happy TAS1009
Instruction Manual
Tassimo JOY TAS 45 UC Series
Instruction Manual • Instruction Manual
Tassimo JOY TAS45 Series
Quick Start Manual • Instruction Manual • Instruction Manual
Tassimo JOY TAS45 UC Series
Quick Start Manual
TASSIMO JOYTAS 45xx
Instruction Manual
Tassimo my way 2
Manual • Instruction Manual
TASSIMO MY WAY 2 TAS65 GB Series
Instruction Manual
TASSIMO my way 2 TAS65 Series
Instruction Manual • Instruction Manual
Tassimo My way TAS60 GB Series
Instruction Manual
Tassimo My Way TAS60 Series
Quick Start Manual • Instruction Manual
Tassimo My way TAS6004GB
Instruction Manual
Tassimo Professional TAS6512CUL
User Manual
Tassimo S12 Series
Manual
Tassimo Series TAS60GB
Instruction Manual
TASSIMO style TAS110 Series
User Manual • User Manual • User Manual • User Manual • User Manual
Tassimo Style TAS1102
User Manual • User Manual
Tassimo Style TAS1103
User Manual
Tassimo Style TAS1104
User Manual • User Manual
Tassimo Style TAS1106
User Manual
TASSIMO style TAS110CH
User Manual
TASSIMO style TAS110GB
User Manual
Tassimo Suny
First Time Use • Quick Start Manual • Quick Start Manual
Tassimo Suny TAS 31 Series
Instruction Manual • Instruction Manual • Instruction Manual
Tassimo Suny TAS 37 Series
Instruction Manual • Instruction Manual • Instruction Manual
TASSIMO suny TAS3 Series
User Manual
TASSIMO suny TAS3104
User Manual
Tassimo Suny TAS3202
Instruction Manual
Tassimo Suny TAS3203
Instruction Manual
Tassimo Suny TAS3204GB
Instruction Manual • Instruction Manual
Tassimo Suny TAS3204GB/04
Instruction Manual • Instruction Manual
TASSIMO suny TAS3205
Instruction Manual
TASSIMO suny TAS3208
Instruction Manual
Tassimo TAS 1000UC
User Manual • User Manual • User Manual • User Manual
Tassimo TAS 12xxUC
Instruction Manual
Tassimo TAS 20 Series
Quick Start Manual • Instruction Manual • Instruction Manual
Tassimo TAS 20**UC
Instruction Manual • Manual
Tassimo TAS 2005 EE
User Manual
Tassimo TAS 20XXKR
Instruction Manual
Tassimo TAS 40 Series
Tassimo TAS 42 Series
Descaling Manual • User Manual • Instruction Manual • Quick Start Manual • Instruction Manual • User Manual Manual
Tassimo TAS 40XXCH
Instruction Manual
Tassimo TAS 40XXGB
Instruction Manual
TASSIMO TAS 40XXGB/CH
Instruction Manual
Tassimo TAS 42 Series
Quick Start Manual • Instruction Manual • User Manual Manual
Tassimo TAS 42XXCH
Instruction Manual
Tassimo TAS 42XXGB
Instruction Manual
TASSIMO TAS 42XXGB/CH
Instruction Manual
Tassimo TAS 43 Series
Instruction Manual • Instruction Manual
Tassimo TAS 451xUC
User Manual • User Manual • User Manual • User Manual
TASSIMO TAS 47**UC
Instruction Manual
TASSIMO TAS 47xxUC
Instruction Manual
TASSIMO TAS 55 KR Series
Instruction Manual
Tassimo TAS 55 series
Instruction Manual • Instruction Manual • Instruction Manual
Tassimo Tas 55XX
Instruction Manual • Instruction Manual
Tassimo TAS 55xxCH
Instruction Manual
Tassimo TAS 55xxGB
Instruction Manual
Tassimo TAS 55xxUC
Instruction Manual • Instruction Manual • Instruction Manual
Tassimo TAS 65 Series
Descaling Manual • User Manual • User Manual • Quick Start Manual • User Manual Manual
TASSIMO TAS 6515EE Series
User Manual Manual
Tassimo TAS 65xx
User Manual • User Manual • Instruction Manual • Instruction Manual • Instruction Manual
Tassimo TAS 85 Series
Descaling Manual • User Manual • User Manual • Quick Start Manual • User Manual Manual
Tassimo TAS 85xx
User Manual • User Manual • Instruction Manual • Instruction Manual • Instruction Manual
Tassimo TAS Amia 20xx
Instruction Manual • Instruction Manual • Instruction Manual
Tassimo TAS1002C
Instruction Manual
TASSIMO TAS100x
Instruction Manual • User Manual
Tassimo TAS1107
User Manual
Tassimo TAS110x
Manual
Tassimo Tas12xxuC
Instruction Manual
Tassimo TAS2002GB
Instructions For Use Manual
TASSIMO TAS4302
Instruction Manual
TASSIMO TAS4304
Instruction Manual
Tassimo TAS46 UC Series
Instruction Manual
Tassimo TAS5542GB
Cleaning Manual
TASSIMO TAS60 Series
Instruction Manual • Instruction Manual
Tassimo TAS65xxUC
Instruction Manual
TASSIMO VIVY
Instruction Manual • Instruction Manual
Tassimo Vivy 2
Instruction Manual • Quick Start Manual • Instruction Manual
Tassimo Vivy 2 TAS 140 CN Series
Instruction Manual • Instruction Manual
TASSIMO vivy 2 TAS 140 Series
Instruction Manual • Instruction Manual • Instruction Manual
TASSIMO VIVY TAS 12xx
Instruction Manual
Tassimo Vivy TAS12A2
Instruction Manual
TC 63 SERIES
Operating Instructions Manual
TCA 4101
Operating Instructions Manual
TCA 4101 UC
Manual • Use And Care Manual
TCA 52 SERIES
Operating Instructions Manual • Operating Instructions Manual • Operating Instructions Manual
TCA 53 Series
Operating Instructions Manual • Instruction Manual • User Manual
TCA 54 SERIES
Operating Instructions Manual • Operating Instructions Manual
TCA 56 series
Operating Instructions Manual
TCA 58 series
Operator’s Manual • Operating Instructions Manual • Operating Instructions Manual
TCA 5802
Operating Instructions Manual
TCA 6001
User Manual
TCA 6001 UC
Use And Care Manual • Use And Care Manual
TCA 6301 UC
Use And Care Manual • User And Care Manual • Use And Care Manual
TCA 71
Operating Instructions Manual
TCA5309
User Manual
TCA6001
Operating Instructions Manual
TCA6001UC — Benvenuto B20 Gourmet Coffee Machine
Use And Care Manual • Use And Care Manual
tca60f9
Repair Instruction
TCA64 SERIES
Operating Instructions Manual • Instructions For Use Manual
TCA640 Series
Repair Instruction
TCA68 SERIES
Operating Instructions Manual • Instructions For Use Manual
TCA680 Series
Repair Instruction
TCA6801
Short Instructions
TCA7121RW
Manual
TCA7159
Operating Instructions Manual
TCC78K750
Instruction Manual • Instruction Manual
TCC78K751
Quick User Manual • Operating Instructions Manual • Operating Instructions Manual • Installation Instructions Manual • Instruction Manual • Operating Instructions Manual
TCC78K751C
Operating Instructions Manual
TES 501 Series
Operating Instructions Manual • Operating Instructions Manual • Operating Instructions Manual • Instruction Manual • Instruction Manual • Instruction Manual • Operating Instructions Manual
TES 503F Series
Instruction Manual • Instruction Manual
TES 506
Operating Instructions Manual • Operating Instructions Manual
TES 506 Series
Operating Instructions Manual • Instruction Manual • Instruction Manual
TES 515
Quick Reference Manual
TES 515 SERIES
Instruction Manual • Instruction Manual • Instruction Manual
TES 556
Instruction Manual • Instruction Manual • Quick Reference Manual
TES 559
Instruction Manual • Instruction Manual • Quick Reference Manual
TES 6 F Series
Instruction Manual
TES 603F Series
Instruction Manual
TES 65539RU
Instruction Manual
TES 65733RU
Instruction Manual
TES 70129 RW VeroBar
Operating Instructions Manual
TES 70321 RW
User Manual • Operating Instructions Manual
TES 711 Series
Operating Instructions Manual • Operating Instructions Manual • Operating Instructions Manual
TES 713 Series
Operating Instructions Manual • Operating Instructions Manual • Operating Instructions Manual
TES 716 Series
Operating Instructions Manual
TES50129RW
Operating Instructions Manual
TES50159
Operating Instructions Manual
tes50159de
Instruction Manual
TES50159DE/07
Instruction Manual
TES50159DE/08
Instruction Manual
TES502 series
Operating Instructions Manual • Instruction Manual • Instruction Manual • Operating Instructions Manual • Instruction Manual
TES50321RW
Instruction Manual
TES50328RW
Operating Instructions Manual
TES50358DE
Operating Instructions Manual
TES503F1DE
Operating Instructions Manual
TES503M1DE
Instruction Manual • Operating Instructions Manual
TES506 series
Instruction Manual
TES55236
Instruction Manual
TES703
Manual
TES71129RW
Operating Instructions Manual
TES71321RW
Operating Instructions Manual
TES80359DE
Instruction Manual
TES80751DE
Instruction Manual
TES?552 series
Instruction Manual • Instruction Manual
TES?603 Series
Instruction Manual
TES?605 Series
Instruction Manual
TES?607 Series
Instruction Manual
TES?712 Series
Instruction Manual • Quick Reference Manual
TES?715 Series?
Instruction Manual • Quick Reference Manual
TES?803 SERIES
Instruction Manual • Instruction Manual • Instruction Manual • Instruction Manual
TES?805 Series
Instruction Manual • Instruction Manual • Instruction Manual • Instruction Manual
TES?807 SERIES
Instruction Manual • Instruction Manual • Instruction Manual • Instruction Manual
TIS3 3 Series
Instruction Manual
TIS3.1 Series
Instruction Manual • Instruction Manual
TIS30351DE
Instruction Manual
TIS65 Series
Instruction Manual • Short Instructions
TIS65429RW
Instruction Manual
TIS65621RW
Instruction Manual
TK76K573/06
Installation Instructions Manual
TK76K573/07
Installation Instructions Manual
TK76K573/08
Installation Instructions Manual
TK76K573/09
Installation Instructions Manual
TKA 280. UC
Use And Care Manual
TKA 283. UC
Use And Care Manual
TKA 2830
Use And Care Manual
TKA 2830 UC — Coffeemaker
Use And Care Manual
TKA 55 series
Instructions For Use Manual
TKA 80
Operating Instructions Manual • Instruction Manual • Instruction Manual • Instruction Manual • User Manual
TKA 8011
Operating Instructions Manual
TKA 8013
Operating Instructions Manual
TKA 863
Operating Instructions Manual • Quick Start Manual • Operating Instructions Manual
TKA 863.
Operating Instructions Manual • Operating Instructions Manual • Operating Instructions Manual • Instruction Manual • Operating Instructions Manual
TKA 865
Operating Instructions Manual • Quick Start Manual • Operating Instructions Manual
TKA 865.
Operating Instructions Manual • Operating Instructions Manual • Operating Instructions Manual • Instruction Manual • Operating Instructions Manual
TKA 9110UC
Use And Care Manual • Use And Care Manual
TKA280
Use And Care Manual
TKA3A SERIES
Operating Instructions Manual • Instruction Manual • Operating Instructions Manual • User Manual
TKA3A031
Operating Instructions Manual • User Manual
TKA3A034
Operating Instructions Manual • User Manual
TKA60
Operating Instructions Manual • Operating Instructions Manual
TKA63 SERIES
Operating Instructions Manual
TKA65 Series
Operating Instructions Manual
TKA66
Operating Instructions Manual • Operating Instructions Manual
TKA67
Operating Instructions Manual
TKA6A043
Instruction Manual • Instruction Manual
TKA6A643
Instruction Manual
TKA80-GB Series
Instruction Manual
TKA863 series
Instruction Manual • Instruction Manual
TKA8631/01
Instruction Manual
TKA8633/01
Instruction Manual
TKA865 series
Instruction Manual • Instruction Manual
TKA8653/01
Instruction Manual
TKA8SL1 Solitaire
Operating Instructions Manual
TKA?6 series
Instruction Manual
TKM3003
Instruction Manual
TKM3004
Instruction Manual
TKN68E75UC — Benvenuto Coffee System
Installation Instructions Manual • User Manual • Short Instructions • Use And Care Manual • Installation Instructions Manual
TWK3A Series
Operating Instructions Manual • Operating Instructions Manual • Operating Instructions Manual • Instruction Manual • User Manual