ENGLISHDEUTSCH
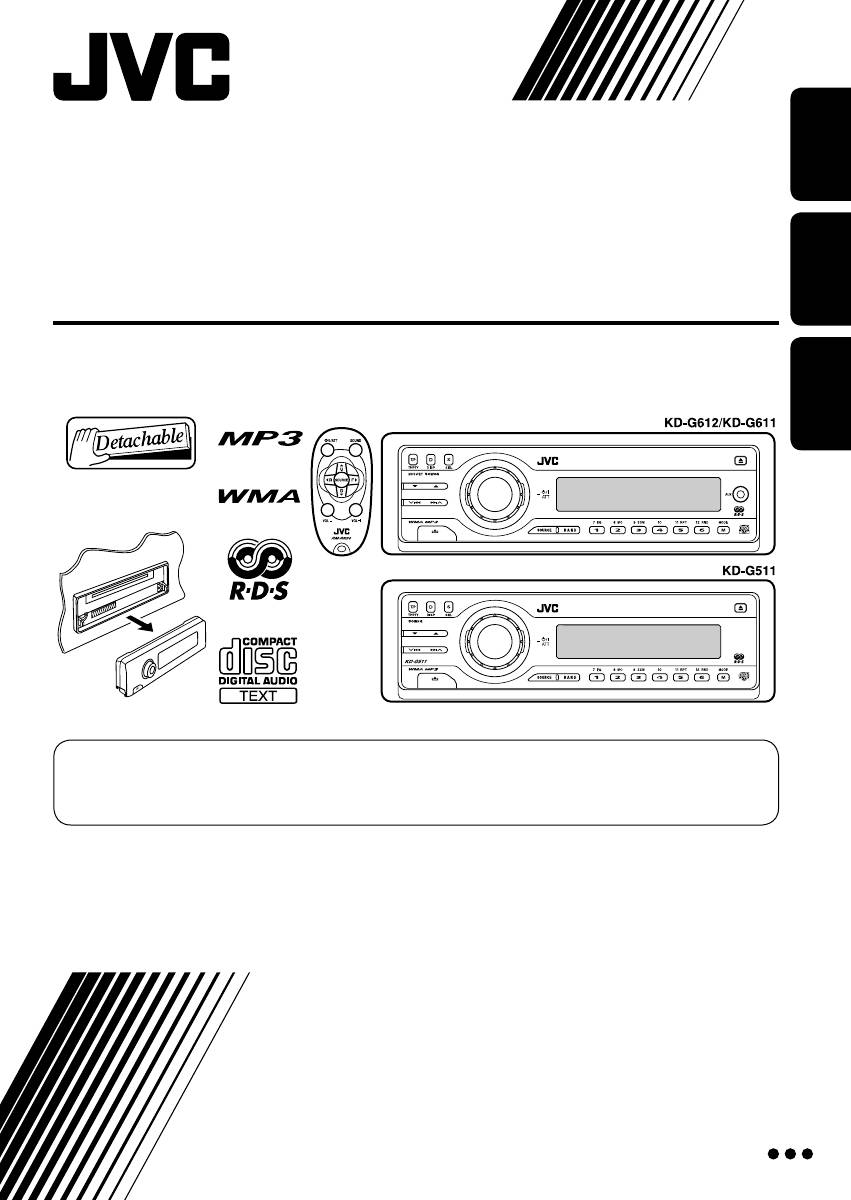
CD RECEIVER
CD-RECEIVER
РЕСИВЕР С ПРОИГРЫВАТЕЛЕМ КОМПАКТ-ДИСКОВ
KD-G612/KD-G611/KD-G511
РУCCKИЙ
For canceling the display demonstration, see page 8.
Zum Abbrechen der Displaydemonstration siehe Seite 8.
Информацию об отмене демонстрации функций дисплея см. на стр. 8.
For installation and connections, refer to the separate manual.
Für den Einbau und die Anschlüsse siehe das eigenständige Handbuch.
Указания по установке и выполнению соединений приводятся в отдельной инструкции.
INSTRUCTIONS
BEDIENUNGSANLEITUNG
ИНСТРУКЦИИ ПО ЭКСПЛУАТАЦИИ
GET0266-006A
[EY]
Cover_KD—G612[EY]006A_f.indd 2Cover_KD-G612[EY]006A_f.indd 2 11/12/04 8:59:17 PM11/12/04 8:59:17 PM
Thank you for purchasing a JVC product.
Please read all instructions carefully before operation, to ensure your complete understanding and to
obtain the best possible performance from the unit.
ENGLISH
IMPORTANT FOR LASER PRODUCTS
1. CLASS 1 LASER PRODUCT
2. CAUTION: Do not open the top cover. There are no user serviceable parts inside the unit; leave
all servicing to qualified service personnel.
3. CAUTION: Visible and invisible laser radiation when open and interlock failed or defeated.
Avoid direct exposure to beam.
4. REPRODUCTION OF LABEL: CAUTION LABEL, PLACED OUTSIDE THE UNIT.
Warning:
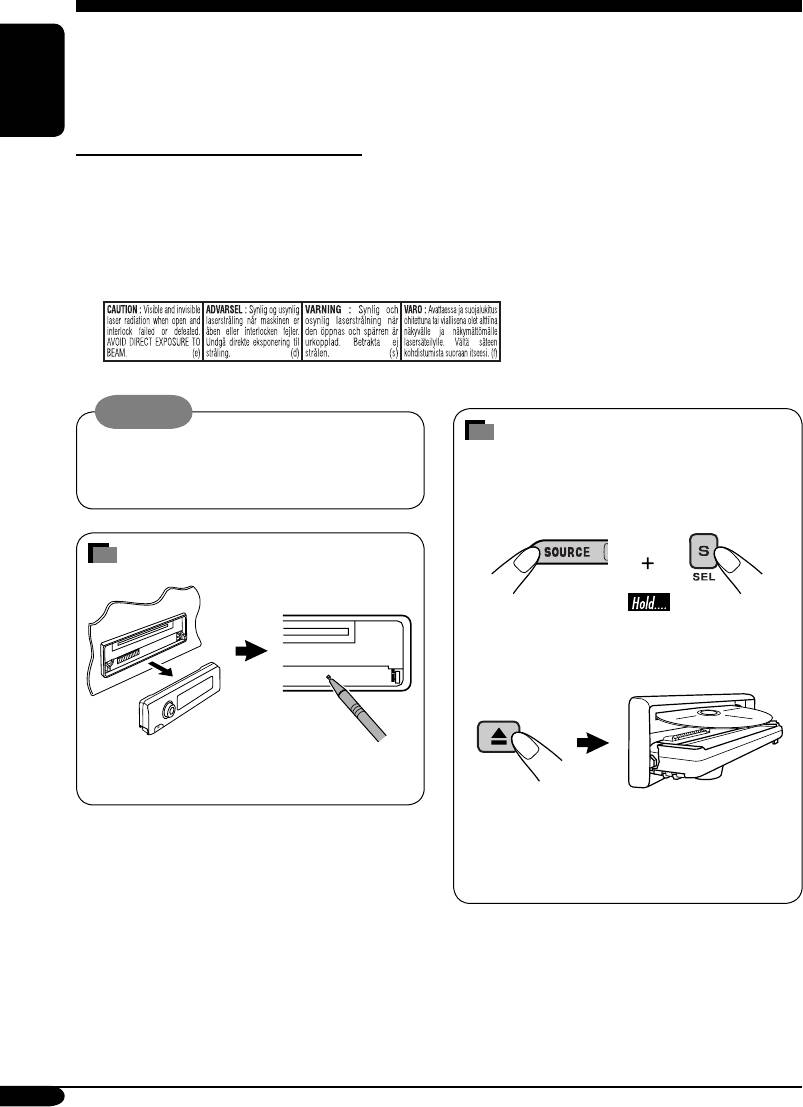
How to forcibly eject a disc
If you need to operate the receiver while
driving, be sure to look ahead carefully or
If a disc cannot be recognized by the
you may be involved in a traffic accident.
receiver or cannot be ejected, ejects the disc
as follows.
How to reset your unit
“PLEASE” and “EJECT” appear alternately
on the display.
This will reset the microcomputer. Your
preset adjustments will also be erased.
• If this does not work, try to reset your
receiver.
• Be careful not to drop the disc when it
ejects.
For security reasons, a numbered ID card is provided with this receiver, and the same ID number is
imprinted on the receiver’s chassis. Keep the card in a safe place, as it will help the authorities to
identify your receiver if stolen.
2
EN02—05_G612[EX_EU]f.indd 2EN02-05_G612[EX_EU]f.indd 2 11/26/04 9:19:35 AM11/26/04 9:19:35 AM

Contents
How to reset your unit ……………………… 2
Sound adjustments ……………. 20
How to forcibly eject a disc ………………. 2
Selecting preset sound modes
How to read this manual …………………… 4
(C-EQ: custom equalizer) ……………… 20
How to use the M MODE button ……….. 4
Adjusting the sound …………………………. 21
ENGLISH
Control panel
General settings — PSM ……… 22
—
KD-G612/KD-G611/KD-G511
…. 5
Basic procedure ………………………………. 22
Parts identification …………………………… 5
Other main functions …………. 25
Remote controller —
RM-RK50
… 6
Assigning titles to the sources …………… 25
Main elements and features ………………. 6
Detaching the control panel ………………. 26
Getting started ………………….. 7
External component operations
… 27
Basic operations ……………………………. 7
Playing an external component ………… 27
Canceling the display demonstrations … 8
DAB tuner operations
……………. 28
Setting the clock ……………………………… 8
Listening to the DAB tuner ………………. 28
Radio operations ………………. 9
Storing DAB services in memory ………. 29
Listening to the radio ……………………… 9
Tuning in to a preset DAB service …….. 29
Storing stations in memory ……………….. 10
Tracing the same programme
Listening to a preset station ………………. 10
—Alternative Reception ……………….. 29
FM RDS operations …………….. 11
Maintenance …………………….. 30
Searching for your favorite FM RDS
More about this receiver …….. 31
programme
………………………………… 11
Storing your favorite programmes ……… 12
Troubleshooting ………………… 34
Using the standby receptions …………….. 12
Specifications ……………………. 37
Tracking the same programme
—Network-Tracking Reception …….. 13
Disc operations …………………. 14
Playing a disc in the receiver …………… 14
Playing discs in the CD changer ……….. 15
Other main functions ……………………….. 17
Changing the display information ……… 18
Selecting the playback modes ……………. 19
The receiver is equipped with the steering
wheel remote control function.
• See the Installation/Connection Manual
(separate volume) for connection.
*For safety….
*Temperature inside the car….
• Do not raise the volume level too much, as
If you have parked the car for a long time in
this will block outside sounds, making driving
hot or cold weather, wait until the temperature
dangerous.
in the car becomes normal before operating the
• Stop the car before performing any
unit.
complicated operations.
3
EN02—05_G612[EX_EU]2.indd 3EN02-05_G612[EX_EU]2.indd 3 11/1/04 6:24:37 PM11/1/04 6:24:37 PM
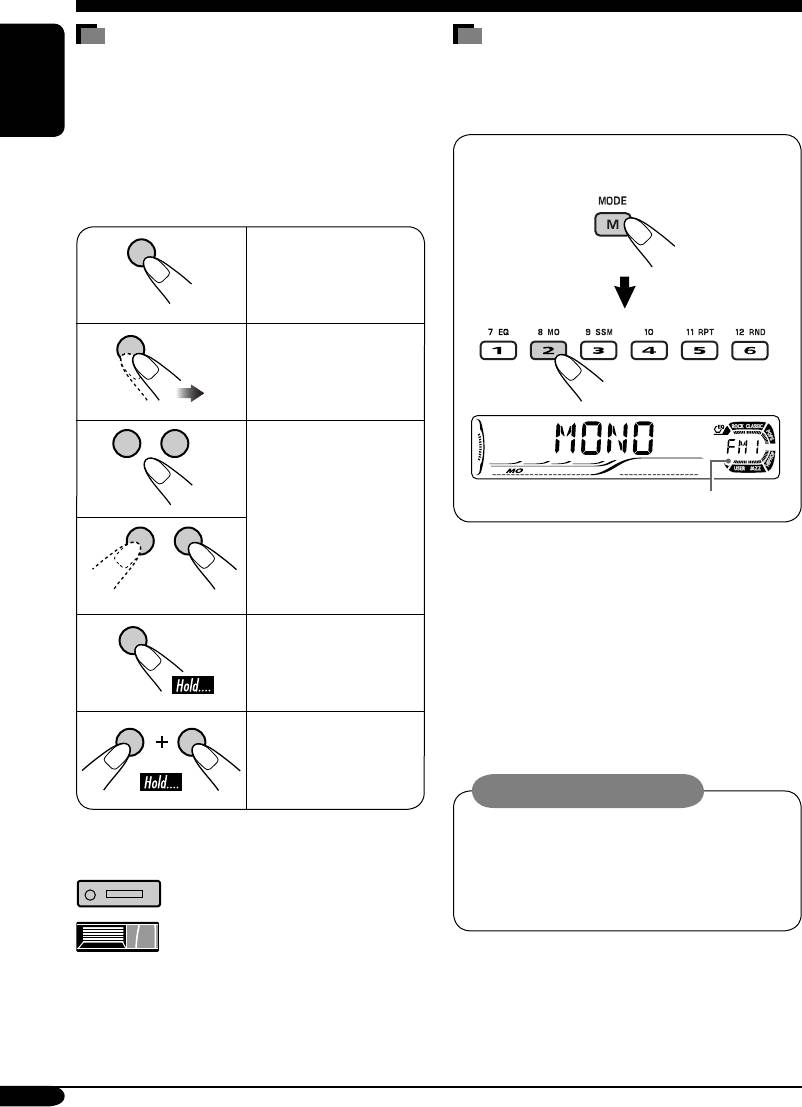
How to read this manual
How to use the M MODE button
The following methods are used to made the
If you press M MODE, the receiver goes into
explanations simple and easy-to-understand:
functions mode, then the number buttons and
• Some related tips and notes are explained in
5/∞ buttons work as different function buttons.
ENGLISH
“More about this receiver” (see pages
31 – 33).
Ex.: When number button 2 works as
• Button operations are mainly explained with
MO (monaural) button.
the illustrations as follows:
Press briefly.
Press repeatedly.
Time countdown indicator
Press either one.
To use these buttons for original functions
again after pressing M MODE, wait for
5 seconds without pressing any of these buttons
until the functions mode is cleared.
• Pressing M MODE again also clears the
Press and hold until
functions mode.
your desired response
begins.
Press and hold both
buttons at the same
time.
Caution on volume setting:
Discs produce very little noise compared
with other sources. Lower the volume
The following marks are used to indicate…
before playing a disc to avoid damaging
the speakers by the sudden increase of the
: Built-in CD player operations.
output level.
: External CD changer operations.
4
EN02—05_G612[EX_EU]1.indd 4EN02-05_G612[EX_EU]1.indd 4 10/26/04 8:56:16 PM10/26/04 8:56:16 PM

Control panel — KD-G612/KD-G611/KD-G511
Parts identification
Display window
ENGLISH
1 5 (up) / ∞ (down) buttons
Display window
2 T/P TP/PTY (traffic programme/programme
a Disc information indicators—TAG (ID3
type) button
Tag),
(folder), (track/file)
3 D DISP (display) button
s Main display
4 S SEL (select) button
d Source display / Volume level indicator
5 • Control dial
f EQ (equalizer) indicator
•
(standby/on attenuator) button
g Sound mode (C-EQ: custom equalizer)
6 Display window
indicators—ROCK, CLASSIC, POPS,
7 Remote sensor
HIP HOP, JAZZ, USER
• DO NOT expose the remote sensor to
•
also works as the time countdown
strong light (direct sunlight or artificial
indicator and level meter during play (see
lighting).
page 23).
8 0 (eject) button
h Disc type indicators—WMA, MP3
9
4/¢ buttons
j Tuner reception indicators—ST (stereo),
p
(control panel release) button
MO (monaural)
q SOURCE button
k RDS indicators—TP, PTY, AF, REG
w BAND button
l Playback source indicators—
e Number buttons
CH: Lights up only when CD-CH is selected
r EQ (equalizer) button
as the playback source.
t MO (monaural) button
DISC: Lights up for the built-in CD player.
y SSM (Strong-station Sequential Memory)
/ Playback mode / item indicators—
button
RND (random),
(disc), (folder),
u RPT (repeat) button
RPT (repeat)
i RND (random) button
z LOUD (loudness) indicator
o M MODE button
x Tr (track) indicator
;
AUX (auxiliary) input jack
• Only for KD-G612/KD-G611.
• NOT compatible with digital signals.
5
EN02—05_G612[EX_EU]f.indd 5EN02-05_G612[EX_EU]f.indd 5 11/24/04 10:00:39 PM11/24/04 10:00:39 PM

Remote controller — RM-RK50
•
RM-RK50 is supplied for KD-G612/KD-G611.
• KD-G511 can be remotely controlled as
Main elements and features
instructed here (with an optionally purchased
remote controller—recommended to use
ENGLISH
RM-RK50).
Installing the lithium coin battery
(CR2025)
1 (standby/on/attenuator) button
• When operating, aim the remote controller
• Turns on and off the power and also
directly at the remote sensor on the
attenuates the sound.
receiver. Make sure there is no obstacle in
2 5 U (up) / D (down) ∞ buttons
between.
• 5 U: Changes the FM/AM/DAB bands.
• D ∞: Changes the preset stations (or
Warning:
services).
• Store the battery in a place where children
• Changes the folder of the MP3/WMA
cannot reach to avoid risk of accident.
discs.
• To prevent the battery from over-heating,
• While playing an MP3 disc on an
cracking, or starting a fire:
MP3-compatible CD changer:
– Do not recharge, short, disassemble, or
– Changes the disc if pressed briefly.
heat the battery or dispose of it in a fire.
– Changes the folder if pressed and held.
– Do not leave the battery with other
3 VOL – / VOL + buttons
metallic materials.
• Adjusts the volume level.
– Do not poke the battery with tweezers or
4 SOUND button
similar tools.
• Selects the sound mode (C-EQ: custom
– Wrap the battery with tape and insulate
equalizer).
when throwing away or saving it.
5 SOURCE button
• Selects the source.
6 2 R (reverse) / F (forward) 3 buttons
Caution:
• Searches for stations (or services) if
pressed briefly.
• Searches for ensembles if pressed and
held.
• Fast-forwards or reverses the track if
pressed and held.
• Changes the tracks of the disc.
6
EN06—11_G612[EX_EU]2.indd 6EN06-11_G612[EX_EU]2.indd 6 11/1/04 5:54:13 PM11/1/04 5:54:13 PM
Страницы и текст этой инструкции
 Инструкция автомагнитолы JVC KD-G611
 Информация отображена на картинке
 Информация отображена на картинке
 Информация отображена на картинке
 Информация отображена на картинке
Как использовать наш сайт инструкций OnlineManuals.ru
Наша цель состоит в том, чтобы предоставить вам быстрый доступ к содержанию инструкции для автомагнитолы JVC KD-G611.
С помощью онлайн просмотра, Вы можете быстро просмотреть содержимое инструкции и найти решение проблемы с автомагнитолы JVC KD-G611.
Для Вашего удобства
Если листать руководство пользователя автомагнитолы JVC KD-G611 прямо на сайте, не очень удобно для Вас, есть два возможных решения:
• Просмотр в полноэкранном режиме — легко просмотреть руководство пользователя (без загрузки его на свой компьютер), Вы можете использовать режим полноэкранного просмотра.
Для просмотра инструкции пользователя автомагнитолы JVC KD-G611 на полном экране, используйте кнопку «Открыть в Pdf-viewer».
• Загрузка на компьютер — Вы можете также скачать Инструкция автомагнитолы JVC KD-G611 на свой компьютер и сохранить его в файлах.
Многие люди предпочитают читать документы не на экране, а в печатной версии.
Возможность печати руководства пользователя также была предусмотрена на нашем сайте,
и вы можете использовать ее, нажав на иконку «печать» в Pdf-viewer.
Нет необходимости печатать все руководство автомагнитолы JVC KD-G611, можно выбрать только нужные страницы инструкции.
- Manuals
- Brands
- JVC Manuals
- Car Receiver
- KD-G611
Manuals and User Guides for JVC KD-G611. We have 6 JVC KD-G611 manuals available for free PDF download: Instructions For Use Manual, Instruction Manual, Instructions Manual, Service Manual, Schematic Diagrams, Installation & Connection Manual
Инструкцию для JVC KD-G611 на русском языке, в формате pdf можно скачать с нашего сайта. Наш каталог предоставляем Вам инструкцию производителя фирмы JVC, которая была взята из открытых источников. Ознакомившись с руководством по эксплуатации от JVC, Вы на все 100% и правильно сможете воспользоваться всеми функциями устройства.
Для сохранения инструкции «Автомобильная магнитола с DVD + монитор JVC KD-G611» на русском языке на вашем компьютере либо телефоне, нажмите кнопку «Скачать инструкцию». Если активна кнопка «Инструкция онлайн», то Вы можете просмотреть документ (manual), в своём браузере онлайн.
Если у Вас нет возможности скачать инструкцию по эксплуатации либо просмотреть её, Вы можете поделиться ссылкой на эту страницу в социальных сетях и при удобном моменте скачать инструкцию. Либо добавьте эту страницу в закладки Вашего браузера, нажав кнопку «Добавить страницу в закладки браузера».

20
Р
УCCKИЙ
Настройки звучания
Выбор запрограммированных режимов звучания
(C-EQ: настраиваемый эквалайзер)
Можно выбрать режим звучания,
соответствующий музыкальному жанру.
~
Ÿ
Пример: Если выбран “ROCK”
Шаблон индикации для каждого режима
звучания:
Индикатор
Для:
Запрограммиров-
анные настройки
BAS*
1
TRE*
2
LOUD*
3
USER
(Бемольный
звук)
00
00
OFF
ROCK
Музыка в
стиле рок
или диско
+03
+01
ON
CLASSIC
Классическая
музыка
+01
–02
OFF
POPS
Легкая
музыка
+04
+01
OFF
HIP HOP
Музыка в
стиле фанк
или рэп
+02
00
ON
JAZZ
Джазовая
музыка
+02
+03
OFF
*
1
BAS: Низкие частоты
*
2
TRE: Верхние частоты
*
3
LOUD: Громкость
RU18-23_G612[EY]f.indd 20
RU18-23_G612[EY]f.indd 20
11/24/04 11:27:38 PM
11/24/04 11:27:38 PM