(скачивание инструкции бесплатно)
Формат файла: PDF
Доступность: Бесплатно как и все руководства на сайте. Без регистрации и SMS.
Дополнительно: Чтение инструкции онлайн

ИНСТРУКЦИЯ
ПО ЭКСПЛУАТАЦИИ
Страница:
(1 из 95)
навигация

1

2

3

4

5

6

7

8

9

10

11

12

13

14

15

16

17

18

19

20

21

22

23

24

25

26

27

28

29

30

31

32

33

34

35

36

37

38

39

40

41

42

43

44

45

46

47

48

49

50

51

52

53

54

55

56

57

58

59

60

61

62

63

64

65

66

67

68

69

70

71

72

73

74

75

76

77

78

79

80

81

82

83

84

85

86

87

88

89

90

91

92

93

94

95
Оглавление инструкции
- Страница 1 из 96
ИНСТРУКЦИЯ ПО ЭКСПЛУАТАЦИИ - Страница 2 из 96
ВАЖНЫЕ ИНСТРУКЦИИ ПО БЕЗОПАСНОСТИ Машина не предназначена для использования детьми и психически нездоровыми людьми, людьми с ограниченными возможностями без достаточного опыта и надлежащего присмотра. Не позволяйте детям играть с ней. Эта машина сконструирована и разработана только для бытового - Страница 3 из 96
СОДЕРЖАНИЕ ПОДГОТОВКА К РАБОТЕ Наименование частей Стандартные аксессуары Дополнительный столик Хранение аксессуаров Подключение питания Контроль скорости шитья Регулятор контроля скорости Ножная педаль Рабочие кнопки машины Кнопка Старт/Стоп Кнопка реверса Кнопка автоматической закрепки Кнопка - Страница 4 из 96
ПОДГОТОВКА К РАБОТЕ 4 Наименование частей 5 1 3 2 6 3 7 4 2 5 1 6 12 11 10 9 7 8 8 9 10 15 11 12 16 13 44 14 14 15 17 16 46 13 17 18 19 18 19 20 20 22 21 21 22 24 25 23 23 24 25 27 43 26 28 26 27 28 29 34 29 33 30 30 31 32 31 32 33 45 34 35 35 36 37 38 36 39 40 42 41 42 43 44 37 41 40 45 46 38 39 2 - Страница 5 из 96
1 2 3 Стандартные аксессуары 4 1 5 6 7 8 2 3 4 9 10 11 5 12 6 7 8 9 13 16 15 14 10 11 12 13 14 18 17 19 20 15 16 17 18 21 22 23 24 2 19 20 21 22 23 25 26 27 24 25 28 26 29 27 30 28 31 29 30 31 32 33 32 3 33 34 35 34 35 36 37 36 37 3 Лапка А для зигзага (установлена на машине) Лапка С для обработки - Страница 6 из 96
Дополнительный столик Дополнительный столик обеспечивает дополнительное рабочее пространство и дает возможность работать со свободным рукавом. 1 Съемный рукав Как снять: Потяните его влево. Как установить: Установите съемный столик на полозья и подтолкните его вправо. 1 Работа со свободным рукавом: - Страница 7 из 96
Подключение питания Сначала отключите питание. Затем вставьте штекер педали в разъем машины, а вилку питания — в розетку на стене. Включите питание. 1 Выключатель питания 2 Вилка подключения машины 3 Разъем машины 1 3 ПРИМЕЧАНИЕ: Используйте только тот шнур, который прилагается к машине. После - Страница 8 из 96
Контроль скорости шитья Регулятор контроля скорости По желанию можно ограничить максимальную скорость работы машины при помощи регулятора контроля скорости. Для увеличения скорости работы передвиньте рычаг вправо. Чтобы уменьшить скорость, передвиньте его влево. Ножная педаль Скорость шитья - Страница 9 из 96
Рабочие кнопки машины 1 Кнопка Старт/Стоп Нажимайте на эту кнопку при запуске и остановке машины. Первые несколько стежков машина прошивает медленно, затем начинает работать на скорости, ограниченной регулятором контроля скорости. Пока нажата эта кнопка, машина работает медленно. Во время работы - Страница 10 из 96
4 Кнопка подъема/опускания иглы Нажимайте на эту кнопку, чтобы поднять или опустить иглу. При остановке машины игла либо поднимется, либо опустится в зависимости от положения, заданного этой кнопкой. LED signal При выборе нижнего положения иглы загорится соответствующий светодиодный символ. 5 - Страница 11 из 96
Подъем и опускание прижимной лапки Рычаг подъема лапки поднимает и опускает прижимную лапку. 1 Рычаг подъема прижимной лапки 1 Можно поднять прижимную лапку выше ее обычного положения. Эта возможность позволяет установить устройство верхнего транспортера, а также работать с толстыми материалами. 2 - Страница 12 из 96
Функциональные кнопки 15 16 14 12 11 9 13 10 6 4 8 5 7 1 2 1 Кнопка режимов (См. стр. 23) Нажмите на эту кнопку, чтобы открыть окно выбранной группы. 3 8 Кнопка Старт (См. стр. 25) Нажмите эту кнопку, чтобы открыть окно установок для введения своих данных. 9 Кнопка двойной иглы (См. стр. 72) 2 - Страница 13 из 96
Замена прижимной лапки ВНИМАНИЕ: Перед заменой лапки отключите питание машины. Чтобы отстегнуть лапку: Поднимите иглу в наивысшее положение и поднимите рычаг прижимной лапки. Нажмите на красную кнопку позади держателя лапки. Прижимная лапка отскочит. 1 Красная кнопка 2 Прижимная лапка 2 3 1 - Страница 14 из 96
Установка устройства верхнего транспортера z 1 ВНИМАНИЕ: Перед заменой лапки отключите питание машины. Устанавливайте лапку верхнего транспортера для работы с устройством верхнего транспортера. Как установить лапку верхнего транспортера 2 x 1 Снимите иглу и ослабьте винт при помощи отвертки. 1 Винт - Страница 15 из 96
Отключение устройства верхнего транспортера z 1 Поднимите рычаг прижимной лапки в наивысшее положение. 1 Наивысшее положение 2 Потяните вниз устройство верхнего транспортера и отсоедините его от лапки. Отведите устройство верхнего транспортера назад. 2 Устройство верхнего транспортера 3 Отведите - Страница 16 из 96
Установка катушки ниток Поднимите катушечный стержень. Установите катушку с ниткой на катушечный стержень. Разматывайте нитку в направлении, показанном на рисунке. Сверху наденьте большой держатель и плотно зафиксируйте его на катушке. 1 Большой держатель катушки 1 ПРИМЕЧАНИЕ: Используйте малый - Страница 17 из 96
Намотка шпульки z 1 Вытяните нить с катушки. Удерживая нить двумя руками, пропустите ее в прорезь направителя. 1 Прорезь направителя 2 Вытяните нить влево и вперед, вокруг нитенаправителя. Проведите нить назад и вправо, снизу под нитенаправительной пластиной. Удерживая нить двумя руками, отведите - Страница 18 из 96
Установка шпульки z 1 Поместите шпульку в шпуледержатель, отматывая нить против часовой стрелки. x 2 Пропустите нить в паз в передней части шпуледержателя. 1 Паз в передней части шпуледержателя 3 Оттяните нить влево и пропустите ее между пружинами натяжения. 2 Пружины натяжения 4 Продолжайте - Страница 19 из 96
x Заправка нити в машину z Поднимите прижимную лапку. Дважды нажмите на клавишу подъема/опускания иглы и поднимите иглу вверх. Отключите питание машины. v Проведите нить по всем отметкам от 1 до 7 . b n c m zx 1 Удерживая нить двумя руками, пропустите ее в прорезь направителя. 1 Прорезь направителя - Страница 20 из 96
Автоматический нитевдеватель ПРИМЕЧАНИЕ: Нитевдевателем можно пользоваться при работе с иглами от №11 до №16 или с иглами №11 с голубым наконечником (для тонких тканей). Рекомендуем использовать нитки от №50 до №90. z 1 Опустите прижимную лапку. Поднимите иглу в наивысшее положение. Отключите - Страница 21 из 96
Вытягивание нижней нити z 1 Поднимите рычаг прижимной лапки. Придерживайте конец нити пальцем. 1 Игольная нить 2 Дважды нажмите на кнопку подъема/опускания иглы для подхвата нижней нити. 2 Кнопка подъема/опускания иглы 3 Потяните вверх за игольную нить и вытяните петлю нижней нити. 3 Петля нижней - Страница 22 из 96
Смена игл 1 ВНИМАНИЕ: Никогда не забывайте отключать питание машины и вытаскивать вилку из розетки перед заменой игл. Нажмите на кнопку подъема/опускания иглы и поднимите иглу вверх. Опустите прижимную лапку. Отключите питание. Ослабьте винт игольного стержня, повернув его против часовой стрелки. - Страница 23 из 96
Сбалансированное натяжение нити Автоматическое натяжение 1 Для обычной работы устанавливайте регулятор натяжения на AUTO, который удовлетворяет различным условиям шитья. Рекомендуемые установки натяжения для выбранной строчки указываются на экране. 1 Регулятор натяжения нити 2 Рекомендуемые - Страница 24 из 96
Регулировка давления лапки 5 6 Давление лапки на ткань можно изменить при помощи регулятора давления, расположенного под верхней крышкой. 4 7 3 2 Регулятор имеет 7 положений от 1 до 7. При обычном шитье устанавливайте «7» у установочной отметки. 1 Регулятор давления лапки 2 Установочная отметка 1 2 - Страница 25 из 96
Выбор строчек Строчки машины разделены на 11 групп. Чтобы выбрать желаемую строчку, посмотрите в схему на верхней крышке для определения группы и номера строчки. 2 При включении питания на ЖК дисплее будет определяться прямая строчка D1. Нажмите кнопку режима, откроется окно выбора группы. 1 Кнопка - Страница 26 из 96
Кнопка помощи При нажатии на эту кнопку на дисплее появятся альтернативные варианты применения и информация к выбранным строчкам: 2 1 Кнопка помощи При выборе одной из приведенных вверху строчек ниже появится значок «?». 2 Значок «?» 1 Пример: если выбрана строчка D1 Каждый раз при нажатии на - Страница 27 из 96
Установки пользователя Можно создать установки машины в соответствии со своими желаниями. Нажмите на кнопку установок, на экране откроется окно установок машины. 1 Кнопка установок 2 Окно установок машины 1 Чтобы закрыть окно установок, нажмите на отметку с крестиком. 3 Отметка с крестиком 3 2 - Страница 28 из 96
Время демонстрации дополнительного окна Дополнительное окно появляется при выборе определенных строчек, например, петель. Можно изменить длительность демонстрации дополнительного окна. Поверните джойстик и выберите х0.5 (1 секунда), х1.0 (2 секунды) или х1.5 (3 секунды). Первоначальная установка — - Страница 29 из 96
Калибровка сенсорного экрана Если панель с кнопками кажется неверно настроенной, откалибруйте положения кнопок. 1 Стилусом нажмите на центр кнопки изменения ширины стежка. 2 Стилусом нажмите на центр кнопки изменения длины стежка. c 3 Стилусом нажмите на центр кнопки редактирования. v 4 Стилусом - Страница 30 из 96
Выбор языка Вы можете выбрать один из следующих языков для установки в меню машины. 1 Английский 2 Испанский 3 Финский 4 Французский 5 Немецкий 6 Итальянский 7 Датский 8 Португальский 9 Русский 10 Шведский 11 Польский Поверните джойстик для выбора желаемого языка. Нажмите кнопку подтверждения для - Страница 31 из 96
ОСНОВНЫЕ ШВЕЙНЫЕ ТЕХНИКИ Прямой стежок Установки машины: Строчка: Натяжение нити: Прижимная лапка: Давление лапки: D1 AUTO А для зигзага или лапка верхнего транспортера AD 7 Начало шитья Поднимите прижимную лапку и расположите ткань рядом с направительными линиями на игольной пластине. Опустите - Страница 32 из 96
Завершение швов 2 Для закрепления концов швов нажимайте кнопку обратного хода и прошивайте несколько стежков реверса. Машина будет шить в обратном направлении до тех пор, пока вы будете удерживать кнопку реверса. При шитье стежка Lock-a-Matic (строчка D2/D2S) или закрепочного стежка (строчка - Страница 33 из 96
Сборка широкого рабочего стола 3 2 4 1 5 Отклейте защитную пленку с резиновых прокладок и установите их снизу на ножки. 1 Резиновые прокладки 2 Ножка 3 Винт Прикрутите к верхней части стола 6 ножек винтами. 4 Верхняя часть стола Установите собранный стол на машину как показано на рисунке. - Страница 34 из 96
Изменение положения иглы Положение прокола иглы на ткани можно изменить при помощи кнопки изменения ширины стежка. ПРИМЕЧАНИЕ: Значения в скобках указывают на первоначальные установки. 3.5 0.0 7.0 Нажмите на кнопку «+» и переместите игольный стержень вправо. Нажмите на кнопку «-» и переместите - Страница 35 из 96
Ввод значений длины и ширины стежка Заданные значения длины и ширины стежка оптимальны для выбранной строчки. Однако, можно изменить заданные значения у следующих строчек для достижения наилучшего результата (см. стр. 26). Пример:Как изменить выставленные значения длины стежка Выбрать строчку, у - Страница 36 из 96
Автоматический конвертер игольной пластины Установки для прямого стежка При выборе строчек D1S, D2S или D3S автоматический конвертер закроет игольную пластину для создания прямого стежка. ПРИМЕЧАНИЕ: Для достижения наилучших результатов используйте устройство и лапку верхнего транспортера. Лапку - Страница 37 из 96
Как открыть автоматический конвертер пластины Автоматический конвертер пластины будет открыт, если выбраны другие строчки, а не строчки D1S, D2S или D3S. Окно конвектора будет открыто, если выбраны строчки не D1S, D2S или D3S, а автоматический конвертер игольной пластины будет закрыт. 1 z Если - Страница 38 из 96
Разнообразие прямых стежков Прямой стежок с левым позиционированием иглы Установки машины Строчка: Натяжение нити: Прижимная лапка: Давление лапки: D4 (рабочая) AUTO лапка А для зигзага, лапка-верхний транспортер АD 7 Применяйте этот стежок для формирования шва по краю ткани. Стежок Lock-a-Matic - Страница 39 из 96
Тройной стежок стреч Установки машины Строчка: Натяжение нити: Прижимная лапка: Давление лапки: 5 (рабочая) AUTO лапка А для зигзага 7 Этот крепкий эластичный стежок рекомендуется для придания ткани эластичности и крепости при необходимости. Используйте его для усиления области проймы и шаговых - Страница 40 из 96
SРабота с устройством двойной подачи ткани Установки машины Строчка: Натяжение нити: Прижимная лапка: Давление лапки: D1S AUTO лапка-верхний транспортер АD 7 ПРИМЕЧАНИЕ: Строчки D1, D2, D3, D4 и D1S, D2S, D3S создаются с устройством верхнего транспортера. Устройство верхнего транспортера особенно - Страница 41 из 96
Наметка Установки машины Строчка: Натяжение нити: Прижимная лапка: Давление лапки: Транспортер ткани: 8 (рабочие) 1–3 лапка QB-H для свободного квилтинга 7 опущен При выборе стежков наметки на ЖК дисплее появится совет опустить транспортер ткани. См. стр. 22 как опустить транспортер ткани. Как - Страница 42 из 96
Зигзаг Установки машины: Строчка: Натяжение нити: Прижимная лапка: Давление лапки: 9 или 10 (рабочие) AUTO лапка А для зигзага 7 Стежок зигзаг используется для различных целей, включая оверлочивание. Его можно использовать, в основном, на всех тканях с волнистыми краями. Плотный зигзаг можно - Страница 43 из 96
Разнообразие оверлочных стежков Оверлочный стежок с зигзагом Установки машины: Строчка: Натяжение нити: Прижимная лапка: Давление лапки: 9 или 10 (рабочая) AUTO лапка С для обработки края 7 Расположите ткань рядом с направителем на лапке и начинайте шить. 1 Край ткани 2 Направитель ВНИМАНИЕ: 2 При - Страница 44 из 96
Множественный зигзаг (Стежок трико) Установки машины: Строчка: Натяжение нити: Прижимная лапка: Давление лапки: 13 (рабочая) AUTO лапка А для зигзага 7 Этот стежок рекомендуется для шитья синтетического трикотажа и стреч велюра, т.к. гарантирует большую эластичность и крепкий шов. Шейте вдоль края - Страница 45 из 96
Пришивание молнии Установки машины: Строчка: Натяжение нити: Прижимная лапка: Давление лапки: (A) D1 (рабочая) AUTO лапка Е для пришивания молнии 7 Как пристегнуть лапку для молнии Е Сопоставьте перекладину на лапке Е с выемкой на держателе лапки. 1 Выемка 2 Перекладина (B) (А): Чтобы пришить левую - Страница 46 из 96
Пришивание 4 1 Заложите назад оставшиеся припуски на швы. Поверните над правым припуском и сформируйте складку в 0.2-0.3 см. Расположите зубцы молнии рядом с этой складкой и приколите булавкой. Верните длину стежка и натяжение нити к первоначальным значениям. 1 Складка в 0.2-0.3 см 2 Зубцы молнии 3 - Страница 47 из 96
4 Закройте молнию и расправьте ткань лицевой стороной вверх. Приметайте раскрытую ткань к ленте молнии. 1 Наметка 2 Лента молнии 5 Переставьте лапку Е для молнии на левую сторону. Прошейте обратными стежками поперек раскрытия в конце молнии на 0.7-1 см и поверните ткань на 90 градусов. 3 0,7-1см 6 - Страница 48 из 96
Роликовый шов Установки машины: Строчка: Натяжение нити: Прижимная лапка: Давление лапки: D1 (рабочая) AUTO лапка D для роликового шва 7 Как шить: 2 Сделайте двойную складку на ткани 6см в длину и 0,3см в ширину. 1 6см 2 0,3см 1 Расположите ткань, совместив края с направителем на лапке. Опустите - Страница 49 из 96
Потайной шов Установки машины: Строчка: Натяжение нити: Прижимная лапка: Давление лапки: 16 или 17 (рабочая) AUTO лапка G для потайной строчки 7 Выберите строчку 16 для волнистых тканей или 17 для эластичных тканей. Как сложить ткань 3 1 Сложите ткань и сделайте складку как показано на рисунке. 1 - Страница 50 из 96
Смена положения иглы Нажмите на кнопку изменения ширины стежка. ЖК дисплей покажет левое положение иглы от направителя в мм. Нажмите на «-», чтобы переместить иглу влево. Нажмите на «+», чтобы переместить иглу вправо. 1 Позиция иглы в левом положении 2 Позиция иглы в правом положении 3 Направитель - Страница 51 из 96
Шов-ракушка Установки машины: Строчка: Натяжение нити: Прижимная лапка: Давление лапки: 18 (рабочая) 6-8 лапка F для атласных строчек 7 Используйте легкие ткани (трико, например). Сделайте складку как показано на рисунке и строчите по кромке. Положите сложенный край ткани так, чтобы при обработке - Страница 52 из 96
Петли Разновидности петель 23 Квадратная (Сенсорная) петля Эта квадратная петля широко используется на средних и тяжелых тканях. Размер петли автоматически определяется по размеру пуговицы, размещенной в лапке. 24 Квадратная (Автоматическая) петля Это также квадратная петля, похожая на сенсорную - Страница 53 из 96
Квадратная (Сенсорная) петля Установки машины: Строчка: Натяжение нити: Прижимная лапка: Давление лапки: 23 (Петли) AUTO лапка R для автоматической петли 7 Сенсорная петля Строчки 23 и с 25 по 33 — сенсорные петли. Размер петли автоматически определяется по размеру пуговицы, размещенной в лапке R. - Страница 54 из 96
3 c Потяните вниз за рычаг петли до конца. 1 Рычаг петли 1 ПРИМЕЧАНИЕ: Если Вы не оттянули рычаг петли вниз до конца, при начале шитья на ЖК дисплее появится предупреждающая надпись, машина прошьет несколько стежков и остановится. Оттяните рычаг петли вниз до конца и снова начните шить. v 4 2 3 4 - Страница 55 из 96
5 Начинайте шить. Машина сначала прошьет левую сторону. 6 Затем прямыми стежками дойдет до конца петли. Затем прошьет дальнюю закрепку и правую сторону. 7 В конце машина создаст переднюю закрепку и автоматически остановится. Для шитья другой петли нажмите кнопку обрезки нитей и поднимите прижимную - Страница 56 из 96
Зажгутованная петля Установки машины: Строчка: Натяжение нити: Прижимная лапка: Давление лапки: 23 (Петли) AUTO лапка R для автоматической петли 7 Поднимите прижимную лапку R для петли, набросьте шнур на выступ позади лапки. 1 Выступ Вытяните концы шнура на себя под лапкой. Набросьте шнур на вилку - Страница 57 из 96
Изменение ширины петли Ширину петли можно изменять, нажимая на кнопку регулировки ширины стежка. Нажмите на «+» на кнопке регулировки ширины стежка для увеличения ширины петли. Нажмите на «-» на кнопке регулировки ширины стежка для уменьшения ширины петли. 1 Кнопка изменения ширины стежка 2 Петля - Страница 58 из 96
Автоматическая петля Установки машины: Строчка: Натяжение нити: Прижимная лапка: Давление лапки: 24 (Петли) AUTO лапка R для автоматической петли 7 При выборе автоматической петли на ЖК дисплее появится совет открыть держатель пуговицы. 1 z Оттяните до конца держатель пуговицы. Подложите под лапку - Страница 59 из 96
Закругленная петля и петли на тонких тканях Установки машины: Строчка: Натяжение нити: Прижимная лапка: Давление лапки: 25, 26 (Петли) AUTO лапка R для автоматической петли 7 Процедура выполнения такая же, как и квадратной (сенсорной) петли (см. стр. 51-53). ПРИМЕЧАНИЕ: Ширину петли можно изменять - Страница 60 из 96
Трикотажная петля Установки машины: Строчка: Натяжение нити: Прижимная лапка: Давление лапки: 30 или 32 (Петли) AUTO лапка R для автоматической петли 7 Процедура выполнения такая же, как и квадратной (сенсорной) петли (см. стр. 51-53). Машина создаст петлю в том порядке, как показано на рисунке. - Страница 61 из 96
Пришивание пуговиц Установки машины: Строчка: Натяжение нити: Прижимная лапка: Давление лапки: Транспортер ткани: 34 (Петли) AUTO лапка Т для пришивания пуговиц 7 отключен (см. стр. 22) ВНИМАНИЕ: Отключите питание перед сменой прижимной лапки. Установка лапки Т для пришивания пуговиц Установите - Страница 62 из 96
Штопка Установки машины: Строчка: Натяжение нити: Прижимная лапка: Давление лапки: 35 (Петли) AUTO лапка R для автоматической петли 7 При выборе строчки для штопки на ЖК дисплее появится подсказка, — открыть держатель пуговицы. Отодвиньте до конца держатель пуговицы. Подложите уголок ткани под - Страница 63 из 96
Короткая штопка 1 Чтобы сделать штопку менее 2см, сначала прошейте нужную длину, затем остановите машину и нажмите на кнопку реверса. Теперь нужная длина определена. Снова запустите машину, продолжайте шить, пока машина не остановится автоматически. 1 Нужная длина 2 Кнопка реверса 2 Чтобы сделать - Страница 64 из 96
Закрепка Установки машины: Строчка: Натяжение нити: Прижимная лапка: Давление лапки: 36 (Петли) AUTO лапка F для атласных стежков 7 Закрепка используется для усиления области карманов, шаговых швов, шлевок и т. д., где необходима дополнительная прочность. Как шить Опустите иглу в точку начала - Страница 65 из 96
Выполнение глазков Установки машины: Строчка: Натяжение нити: Прижимная лапка: Давление лапки: 38 (Петли) AUTO лапка F для атласных стежков 7 Глазки используются как отверстия на ремнях и т.д. Как шить Нажмите на педаль и начните шить, пока машина не остановится автоматически. Прорежьте глазок при - Страница 66 из 96
ПЭЧВОРК И КВИЛТИНГ Сшивание кусочков ткани Установки машины: Строчка: Натяжение нити: Прижимная лапка: Давление лапки: 93 (Квилт) AUTO лапка О для шва 0,6см 7 Положите кусочки ткани для пэчворка лицевой стороной друг к другу. Прошейте, направляя край вдоль направителя на лапке, которая будет точно - Страница 67 из 96
Квилтинг Установки машины: Строчка: Натяжение нити: Прижимная лапка: Давление лапки: 1 2 D1 (рабочие) AUTO лапка А для зигзага или лапка двойной подачи АD 7 Установка направителя для квилтинга Вставьте направитель для квилтинга в отверстие держателя и отрегулируйте его длину в соответствии с - Страница 68 из 96
Свободный квилтинг Установки машины: Строчка: Натяжение нити: Прижимная лапка: Давление лапки: Транспортер ткани: Установка лапки для свободного квилтинга Установите лапку для свободного квилтинга и убедитесь, что игла проходит по центру отверстия в лапке (см. стр. 39). Отрегулируйте высоту лапки - Страница 69 из 96
ДЕКОРАТИВНЫЕ СТРОЧКИ Аппликация Установки машины: Строчка: Натяжение нити: Прижимная лапка: Давление лапки: (A) (B) 41-50 (Аппликация) AUTO лапка F для атласных строчек или открытая лапка F-2 для атласных строчек 4 Положите аппликацию на ткань и приметайте ее или воспользуйтесь плавким - Страница 70 из 96
Мережка Установки машины: Строчка: Натяжение нити: Прижимная лапка: Давление лапки: 66, 67, 75 (Фамильные строчки) AUTO лапка А для зигзага 5 Воспользуйтесь этой сточкой для сшивания двух кусков тканей и создания декоративного эффекта. Заложите складки по 1,5см с каждого края и прогладьте. - Страница 71 из 96
Пришивание шнура (тройной шнур) Установки машины: Строчка: Натяжение нити: Прижимная лапка: Давление лапки: 132 (Атласные) AUTO лапка Н для пришивания шнура 7 Вставьте три струны шнура под пружину лапки и отведите их назад под лапкой. 1 Пружина Держите три шнура параллельно для ровного шитья и - Страница 72 из 96
Атласные строчки Установки машины: Строчка: Натяжение нити: Прижимная лапка: Давление лапки: 131-150 (Атласные) AUTO лапка F для атласных строчек 7 Строчки этой группы можно вытянуть до 5 раз от их оригинальной длины, при этом плотность стежков остается неизменной. Пример: Строчка 134 1 Выберите - Страница 73 из 96
Строчки с зеркальным отображением Для создания строчек с зеркальным отображением нажмите кнопку закрепки после введения в память желаемой строчки. z 1 2 c Нажмите кнопку зеркального отображения. 3 x Выберите желаемую строчку. Зеркальное отображение строчки будет создаваться друг за другом. Работа с - Страница 74 из 96
Строчка с двойной иглой ВНИМАНИЕ: v x Перед сменой иглы и заправкой нитки в машину отключите питание машины. Если Вы шьете строчки двойной иглой, нажмите кнопку двойной иглы . z ПРИМЕЧАНИЯ: Для шитья двойной иглой используйте лапку А для зигзага или лапку F для атласных строчек. Используйте нитки - Страница 75 из 96
Установки машины: Строчка: Натяжение нити: Прижимная лапка: Давление лапки: 2 См. ниже AUTO лапка А для зигзага или лапка F для атласных строчек 7 Выбор строчек Выберите строчку, подходящую для работы с двойной иглой. Нажмите на кнопку двойной иглы . На дисплее появится символ двойной иглы и - Страница 76 из 96
ПРОГРАММИРОВАНИЕ КОМБИНАЦИЙ СТРОЧЕК Комбинация строчек Пример: программирование строчек 134 и 138 ПРИМЕЧАНИЕ: Строчки из разных групп, буквы и цифры также можно программировать. z 1 Выберите строчку 134 (Атласные). x 2 Нажмите на кнопку памяти. c 3 Выберите строчку 138 (Атласные). v 4 Нажмите на - Страница 77 из 96
Комбинация строчек с зеркальным отображением Пример: строчка 137 (Атласные) и ее зеркальное отображение z 1 Выбрать строчку 137 (Атласные). x 2 Нажать кнопку памяти. c 3 Снова выбрать строчку 137 (Атласные). v 4 Нажать кнопку зеркального отображения, чтобы перевернуть строчку. b 5 Нажать кнопку - Страница 78 из 96
Программирование автоматической обрезки нитки 1 Чтобы по завершении выполнения комбинации строчек нитки обрезались автоматически, нажмите на кнопку автоматической обрезки нити после программирования комбинации строчек. Значок обрезки нитки появится на ЖК дисплее, а на кнопке обрезки нити загорится - Страница 79 из 96
Выполнение комбинации строчек с начала 3 1 2 Если Вы хотите остановить выполнение комбинации строчек и прошить все снова, нажмите на кнопку памяти и начните все сначала. 1 Запрограммированная комбинация строчек 2 Остановка шитья 3 Нажмите на кнопку памяти 4 Машина выполняет комбинацию строчек с - Страница 80 из 96
Строчки с мостиками Строчки с 151 по 158 – строчки с мостиками, которые используются в качестве прямых стежков после выбранной строчки. Пример: Комбинация строчек 77 (Фамильные) и строчки 155 (с мостиками). z 1 Выбрать строчку 77 (Фамильные). x 2 Нажать кнопку памяти. c 3 Выбрать строчку 155 (с - Страница 81 из 96
Программирование французских узлов Пример: комбинация французских узлов и стежков с мостиками. z 1 Выберите строчку 159 (декоративные). x 2 Нажмите кнопку памяти. 3 Выберите строчку 152 (с мостиком). 4 Нажмите кнопку памяти. 5 К французскому узлу добавится два прямых стежка с центральным положением - Страница 82 из 96
МОНОГРАММЫ Выбор стиля 1 Нажать на кнопку монограмм для выбора стиля букв. Откроется окно выбора монограмм. Каждый раз при нажатии на кнопку монограмм, можно выбрать один из трех стилей ниже. 1 Печатные 2 Прописные 3 Бродвей 2 3 Выбор букв 1 Поверните джойстик по часовой или против часовой стрелки - Страница 83 из 96
Программирование монограмм Пример: Запрограммировать “R&B” 1 Нажмите кнопку монограмм. 2 Выберите букву “R” (верхний регистр). c 3 Нажмите кнопку памяти. v 4 Выберите символ “&”(верхний регистр). b 5 Нажмите кнопку памяти. n 6 Выберите букву “В” (верхний регистр). m 7 Нажмите кнопку памяти. , 8 - Страница 84 из 96
РЕДАКТИРОВАНИЕ КОМБИНАЦИИ СТРОЧЕК Просмотр длинной комбинации Одновременно на ЖК дисплее показывается только 5 строчек или 9 букв. Если текст не показывается полностью, нажмите кнопку редактирования и просмотрите остаток текста. Нажмите на правую сторону кнопки и переместите курсор вправо. Нажмите - Страница 85 из 96
Вставка строчки Пример: Вставить пробел Нажмите кнопку редактирования и передвиньте курсор под строчку, где необходимо вставить пробел. Выберите пробел . Нажмите на кнопку памяти, и пробел появится перед строчкой 133. Дублирование строчки Нажмите кнопку редактирования и передвиньте курсор под - Страница 86 из 96
Универсальное изменение стежка Ширину и длину стежков запрограммированных строчек можно одновременно изменить у всех строчек сразу. Пример 1: Изменение ширины стежка запрограммированной строчки 175 и ее зеркального отображения. Передвиньте курсор вправо к последней запрограммированной строчке. - Страница 87 из 96
Программирование атласных строчек и строчек стреч Ширину атласных строчек и строчек стреч в комбинации можно изменить унифицировано. Нажмите кнопку изменения ширины стежка. Значение ширины стежка будет применено ко всем запрограммированным строчкам. ПРИМЕЧАНИЕ: При комбинировании атласных и - Страница 88 из 96
СОХРАНЕНИЕ И ВЫЗОВ КОМБИНАЦИЙ СТРОЧЕК До 20 комбинаций строчек может храниться в памяти машины даже при отключении питания. Сохраненную комбинацию строчек можно вызвать из памяти при помощи кнопки вызова. Сохранение комбинации строчек z 1 Запрограммируйте комбинацию строчек. Нажмите кнопку вызова. - Страница 89 из 96
Вызов сохраненной комбинации строчек 1 Нажмите кнопку вызова для выбора адреса памяти, где хранится комбинация строчек. Нажмите кнопку подтверждения или значок кнопки подтверждения на экране для вызова сохраненной комбинации строчек. 1 Значок кнопки подтверждения Удаление сохраненной комбинации - Страница 90 из 96
УХОД ЗА МАШИНОЙ Корректировка несбалансированных строчек Результаты шитья строчек могут зависеть от многих условий, таких как скорость шитья, тип ткани, количество слоев и т.д. Всегда проводите тест на соответственном кусочке ткани. Если строчки стреч или петля стреч выполняются неправильно, - Страница 91 из 96
3 1 z Чистка шпульного отсека, тканенаправителей и нитеобрезателя 2 ОСТОРОЖНО: 2 Перед чисткой машины отключите питание и вытащите вилку из розетки. ВНИМАНИЕ: x Перед тем, как снять игольную пластину, не забудьте открыть автоматический игольный конвертер. ПРИМЕЧАНИЕ: Не разбирайте машину иначе, чем - Страница 92 из 96
Проблемы и предупреждающие сигналы Если появится звуковой сигнал, а на ЖК дисплее предупреждающая надпись, следуйте инструкциям ниже: Сообщение Проблема/причина Попробуйте сделать это Во время шитья отсоединилась педаль. Подсоедините педаль и снова включите машину. Нажата кнопка старт/стоп, кода - Страница 93 из 96
Сообщение Проблема/причина Попробуйте сделать это Нажата кнопка вытягивания образца, когда выбранная строчка не подходит для этого. Только атласные стежки можно вытягивать в размере. Нажата кнопка памяти при выборе строчки, которую нельзя ввести в память. Выбирайте другие строчки. Машина начала - Страница 94 из 96
Устранение неисправностей Неисправность Рвется верхняя нить Вероятная причина Верхняя нить неверно заправлена. Верхняя нить слишком сильно натянута. Погнута или затуплена игла. Неправильно установлена игла. Верхняя и нижняя нити неправильно расположены под прижимной лапкой при начале шитья. 6. Нити - Страница 95 из 96
858-800-001 Отпечатано на Тайване - Страница 96 из 96

-
Contents
-
Table of Contents
-
Troubleshooting
-
Bookmarks
Quick Links
Instruction Book
D3S
D1S
D2S
tic P P l l at ate e C C o o n n v v e e r r t t er er
APC
APC
A A u u t t om
oma a tic
Memory Craft 7700 QCP
Related Manuals for Janome Horizon Memory craft 7700 QCP
Summary of Contents for Janome Horizon Memory craft 7700 QCP
-
Page 1
Instruction Book tic P P l l at ate e C C o o n n v v e e r r t t er er A A u u t t om oma a tic Memory Craft 7700 QCP… -
Page 2: Important Safety Instructions
IMPORTANT SAFETY INSTRUCTIONS This appliance is not intended for use by persons (including children) with reduced physical, sensory or mental capabilities, or lack of experience and knowledge, unless they have been given supervision or instruction concerning use of the appliance by a person responsible for their safety. Children should be supervised to ensure that they do not play with this sewing machine.
-
Page 3: Table Of Contents
TABLE OF CONTENTS GETTING READY TO SEW Shell Tuck …………….49 Names of Parts …………….. 2 Buttonholes …………….50 Standard Accessories …………… 3 Square (Sensor) buttonhole ……….51 Extension Table …………….. 4 Corded buttonhole …………..54 Accessories Storage …………..4 Adjusting the buttonhole width ……….
-
Page 4: Getting Ready To Sew Names Of Parts
GETTING READY TO SEW Names of Parts Take-up lever Foot pressure dial Reference chart Top cover Foot storage compartment Bobbin thread cutter Bobbin winder stopper Bobbin winder spindle Hole for extra spool pin Spool holder Spool pin Thread tension dial Thread cutter Face plate Speed control slider…
-
Page 5: Standard Accessories
Standard Accessories Zigzag foot A (set on the machine) Overcasting foot C Rolled hem foot D Zipper foot E Satin stitch foot F Blind hemming foot G Cording foot H Overedge foot M Automatic buttonhole foot R Screwdriver Screwdriver key Set of needles Lint brush Seam ripper (Buttonhole opener)
-
Page 6: Extension Table
Extension Table The extension table provides an extended sewing area and can be removed for free arm sewing. 1 Extension table To detach: Draw the table out to the left. To attach: Slide the table on the base and push the table to the right.
-
Page 7: Connecting The Power Supply
Connecting the Power Supply First make sure the power switch is off. Insert the machine plug of the power supply cord into the machine socket. Insert the power supply plug into the wall outlet, and turn the power switch on. 1 Power switch 2 Machine plug 3 Machine socket…
-
Page 8: Controlling Sewing Speed
Controlling Sewing Speed Speed control slider You can limit the maximum sewing speed with the speed control slider according to your sewing needs. To increase the sewing speed, move the slider to the right. To decrease the sewing speed, move the slider to the left. Foot control Pressing on the foot control can vary sewing speed.
-
Page 9: Machine Operating Buttons
Machine Operating Buttons Start/stop button Press this button to start or stop the machine. The machine starts running slowly for the first few stitches, it then runs at the speed set by the speed control slider. The machine runs slowly as long as this button is pressed.
-
Page 10: Needle Up/Down Position Button
Needle up/down position button Press this button to bring the needle bar up or down. The machine will stop with the needle up or down LED signal depending on the position set by this button. The LED signal is turned on when the down position is selected.
-
Page 11: Raising And Lowering The Presser Foot
Raising and Lowering the Presser Foot The presser foot lifter raises and lowers the presser foot. 1 Presser foot lifter You can raise the presser foot higher than the normal up position. This allows for setting the dual feed device, attaching presser foot, and also helps you to place thick layers of fabrics under the foot.
-
Page 12: Function Keys
Function Keys 1 Mode key (refer to page 23) 8 Set key (refer to page 25) Press this key to open the group selection window. Press this key to open the machine setting window for customizing the machine settings. 2 Monogram key (refer to page 80) Press this key to select one of 3 letter styles available.
-
Page 13: Changing The Presser Foot
Changing the Presser Foot WARNING: Turn the power switch off before changing the presser foot. Removing the presser foot Raise the needle to its highest position and raise the presser foot lifter. Press the red button on the back of the foot holder. The presser foot will drop off.
-
Page 14: Setting For Dual Feed Sewing
Setting for Dual Feed Sewing WARNING: Turn the power switch off before changing the presser foot. Attach the dual feed foot when sewing with the dual feed device. Attaching the dual feed foot z Remove the needle and loosen the thumbscrew with the screwdriver.
-
Page 15: Disengaging The Dual Feed Device
Disengaging the dual feed device z Raise the presser foot lifter to the extra lifted position. 1 Extra lifted position x Pull down the dual feed device to disengage it from the dual feed foot. Swing the dual feed device to the rear. 2 Dual feed device c Swing up the dual feed device until it catches the pins.
-
Page 16: Setting The Spool Of Thread
Lift out the bobbin from the bobbin holder. 3 Bobbin NOTE: Use the Janome plastic bobbins for horizontal hook (marked with “J”). Using other bobbins, such as pre-wound paper bobbins, may cause stitching problems and/ or damage to the bobbin holder.
-
Page 17: Winding The Bobbin
Winding the Bobbin z Pull the thread from the spool. Hold the thread with both hands and pass the thread into the guide slot. 1 Guide slot x Draw the thread to the left and forward around the thread guide. Draw the thread to the rear and to the right around under the guide plate.
-
Page 18: Inserting The Bobbin
Inserting the Bobbin z Place the bobbin in the bobbin holder with the thread running off counterclockwise. x Guide the thread into the front notch on the bobbin holder. 1 Front notch c Draw the thread to the left, sliding it between the tension spring blades.
-
Page 19: Threading The Machine
Threading the Machine Raise the presser foot. Press the needle up/down position button twice to raise the needle. Turn the power switch off. Pass the thread in order from z to m. z Hold the thread with both hands and pass the thread into the guide slot.
-
Page 20: Built-In Needle Threader
Built-in needle threader NOTE: The needle threader can be used with a #11 to #16 needle, or a #11 Blue needle. Thread size 50 to 90 is recommended. z Lower the presser foot. Raise the needle to its highest position. Turn the power switch off. Pull down the needle threader knob as far as it will go.
-
Page 21: Drawing Up The Bobbin Thread
Drawing Up the Bobbin Thread z Raise the presser foot lifter. Hold the needle thread with your finger. 1 Needle thread x Press the needle up/down position button twice to draw up the bobbin thread. 2 Needle up/down position button c Pull the needle thread to bring up the loop of bobbin thread.
-
Page 22: Changing Needles
Changing Needles CAUTION: Always make sure to turn the power switch off and disconnect the machine from the power supply before changing the needle. Raise the needle by pressing the needle up/down position button and lower the presser foot. Turn the power switch off. Loosen the needle clamp screw and remove the needle from the clamp.
-
Page 23: Balancing Thread Tension
Balancing Thread Tension Auto-thread tension For general sewing, set the thread tension dial at AUTO, which covers a wide range of sewing conditions. Recommended tension setting for the selected pattern is indicated on the LCD screen. 1 Thread tension dial 2 Recommended tension setting Balanced thread tension For straight stitch sewing, both needle and bobbin…
-
Page 24: Adjusting The Foot Pressure
Adjusting the Foot Pressure The foot pressure can be adjusted with the foot pressure dial located under the top cover. The dial has 7 setting positions from 1 to 7. For ordinary sewing, set “7” at the setting mark. 1 Foot pressure dial 2 Setting mark Reduce the pressure when sewing fine synthetics and stretch fabrics.
-
Page 25: Selecting Patterns
Selecting the Patterns The stitch patterns are classified into 11 groups. To select the desired stitch pattern, refer to the reference chart inside the top cover to identify the stitch group and pattern number. When turning the power switch on, the LCD screen will show the straight stitch D1 selected.
-
Page 26: Help Key
Help key Pressing this key will show alternative applications and useful information for the following stitch patterns: 1 Help key When one of the above patterns is selected, the “?” mark is displayed. 2 “?” mark Example: Stitch pattern D1 is selected. When you press the help key, the following will be dis- played on the LCD screen.
-
Page 27: Customizing Machine Settings
Customizing Machine Settings You can customize the machine settings to your preference. Press the set key and the LCD screen will show the machine setting window. 1 Set key 2 Machine setting window To close the machine setting window, press the cross mark.
-
Page 28: Sub Window Display Time
Sub window display time A sub window will appear when selecting certain patterns such as buttonholes. The duration of the sub window display can be altered. Turn the jog dial to select x0.5 (1 second), x1.0 (2 seconds) or x1.5 (3 seconds). The preset time is x1.0 (2 seconds).
-
Page 29: Touch Panel Calibration
Touch panel calibration If the touch panel keys seem out of alignment, calibrate the key position as follows. z Press the center of the stitch width adjusting key with the touch panel stylus. x Press the center of the stitch length adjusting key with the touch panel stylus.
-
Page 30: Language Selection
Language selection You can choose one of the following languages for screen display. 1 English 2 Spanish 3 Finnish 4 French 5 German 6 Italian 7 Dutch 8 Portuguese 9 Russian 10 Swedish 11 Polish Turn the jog dial to select the desired language. Press the confirm button to register the new setting.
-
Page 31: Utility Stitches Straight Stitch
UTILITY STITCHES Straight Stitch Machine settings Pattern: D1 (Utility) Thread tension: AUTO Presser foot: Zigzag foot A or Dual feed foot AD Foot pressure: Starting to sew Raise the presser foot and position the fabric next to a seam guide on the needle plate. Lower the needle at the point where you wish to start.
-
Page 32: Securing Seams
Securing seam For fastening the ends of seams, press the reverse button and sew several reverse stitches. The machine sews in reverse as long as you press and hold in the reverse button. Press the reverse button once when sewing the Lock-a- Matic stitch (pattern D2/D2S) or locking stitch (pattern D3/D3S) so the machine will lock the stitch off and stop automatically.
-
Page 33: Assembling The Extra Wide Table
Assembling the Extra Wide Table Peel off the backing paper from the rubber soles and attach to the bottom of the legs. 1 Rubber sole 2 Leg 3 Setscrew Attach the 6 legs to the table top with the setscrews. 4 Table top Place the assembled table to the machine as shown.
-
Page 34: Adjusting The Needle Drop Position
Adjusting the needle drop position The needle drop position of the straight stitches can be altered by pressing the stitch width adjusting key. NOTE: The value in brackets indicates the preset setting. Press the “+” sign on the key to move the needle bar to the right.
-
Page 35: Customizing Preset Values Of Stitch Length And Width
Customizing the preset values of the stitch length and width The preset values of the stitch length and width are optimized for each pattern. However, you can change the preset values to suit your sewing preferences, if the favorite stitch adjustment option is turned on (refer to page 26).
-
Page 36: Automatic Plate Converter
Automatic plate converter Setting for straight stitch When stitch pattern D1S, D2S or D3S is selected, the automatic plate converter will close to set up the needle plate hole for straight stitch. NOTE: Use the dual feed device and dual feed foot when sewing fine fabrics and stretch fabrics for the best sewing results.
-
Page 37: Opening The Automatic Plate Converter
Opening the automatic plate converter The automatic plate converter should be open if any pattern other than D1S, D2S or D3S is selected. The APC setting window will open if a stitch pattern other than D1S, D2S or D3S is selected while the automatic plate converter is closed.
-
Page 38: Variety Of Straight Stitches
Variety of straight stitches Straight stitch with left needle position Machine settings Pattern: D4 (Utility) Thread tension: AUTO Presser foot: Zigzag foot A, Dual feed foot AD Foot pressure: Use this stitch to seam the edge of fabrics. Lock-a-Matic stitch Machine settings Pattern: D2 (Utility)
-
Page 39
Triple stretch stitch Machine settings Pattern: 5 (Utility) Thread tension: AUTO Presser foot: Zigzag foot A Foot pressure: This strong, durable stitch is recommended for areas where both elasticity and strength are needed to ensure comfort and durability. Use it to reinforce areas such as crotch and armhole seams. -
Page 40: Sewing With The Dual Feed Device
Sewing with the Dual Feed Device Machine settings Pattern: Thread tension: AUTO Presser foot: Dual feed foot AD Foot pressure: NOTE: Patterns number D1, D2, D3, D4 and D1S, D2S, D3S can be sewn with the dual feed device. The dual feed device is extremely effective for sewing with hard to feed material such as vinyl or leather.
-
Page 41: Basting
Basting Machine settings Pattern: 8 (Utility) Thread tension: Presser foot: Convertible free motion quilting foot QB-H Foot pressure: Feed dog: Lowered When selecting the basting stitch, the LCD screen will advise you to lower the feed dog. Refer to page 22 for how to lower the feed dog. Attaching the convertible free motion quilting foot Loosen the thumbscrew and remove the foot holder.
-
Page 42: Zigzag Stitch
Zigzag Stitch Machine Setting Pattern: 9 or 10 (Utility) Thread tension: AUTO Presser foot: Zigzag foot A Foot pressure: Zigzag stitch is used for various sewing needs including overcasting. It can be used on most woven fabrics. A dense zigzag stitch can also be used for applique. Adjusting the stitch width Press the “+”…
-
Page 43: Overcasting Stitches
Overcasting Stitches Overcasting with zigzag stitch Machine settings Pattern: 9 or 10 (Utility) Thread tension: AUTO Presser foot: Overcasting foot C Foot pressure: Place the fabric edge next to the guide of the foot and then sew. 1 Edge of fabric 2 Guide CAUTION: When you use the overcasting foot C, you must set the…
-
Page 44
Knit stitch Machine settings Pattern: 13 (Utility) Thread tension: AUTO Presser foot: Zigzag foot A Foot pressure: This stitch is recommended for sewing such fabrics as synthetic knits and stretch velour as it provides the greatest amount of elasticity and strength. Sew along the fabric edge leaving an adequate seam allowance. -
Page 45: Zipper Sewing
Zipper Sewing Machine settings Pattern: D1 (Utility) Thread tension: AUTO Presser foot: Zipper foot E Foot pressure: Attaching the zipper foot E Fit the pin on zipper foot E to the groove on the foot holder. 1 Groove 2 Pin (A): To sew the left side of the zipper, attach zipper foot with the pin on the right-hand side.
-
Page 46
Sewing z Fold back the left seam allowance. Turn the right seam allowance under to form a 0.2 to 0.3 cm (1/8“) margin. Place the zipper teeth next to the fold and pin in place. Set the stitch length and thread tension back to the original setting. -
Page 47
v Close the zipper and spread the fabric open flat with the right side facing up. Baste the opened fabric and zipper tape together. 1 Basting 2 Zipper tape b Re-attach the zipper foot E with the left pin. Backstitch across the end of the opening 0.7-1 cm (3/8“) and turn the fabric 90 degrees. -
Page 48: Rolled Hem
Rolled Hem Machine settings Pattern: D1 (Utility) Thread tension: AUTO Presser foot: Rolled hem foot D Foot pressure: Sewing Fold the edge of the fabric twice, 6 cm (2 — 3/8”) in length and 0.3 cm (1/8”) in width. 1 6 cm (2 — 3/8”) 2 0.3 cm (1/8”) Place the fabric aligning the edge of the hem with the guide on the foot.
-
Page 49: Blind Hemming
Blind Hemming Machine settings Pattern: 16 or 17 (Utility) Thread tension: AUTO Presser foot: Blind hemming foot G Foot pressure: Select pattern 16 for woven fabrics or pattern 17 for elastic fabrics. Folding the fabric Fold the fabric to make a hem as shown. 1 Heavy fabric 2 Fine to medium fabric 3 0.4 -0.7 cm (3/16”-1/4”)
-
Page 50
Changing the needle drop position Press the stitch width adjusting key. The LCD screen shows the distance between the left needle position and the guide in millimeters. Press the “–“ sign to move the needle to the right. Press the “+” sign to move the needle to the left. 1 Left needle drop position 2 Right needle drop position 3 Guide on foot… -
Page 51: Shell Tuck
Shell Tuck Machine settings Pattern: 18 (Utility) Thread tension: Presser foot: Satin stitch foot F Foot pressure: Use a light weight fabric (tricot, for example). Fold the fabric as shown and stitch on the fold. Allow the needle to just clear the folded edge to create a shelled edge.
-
Page 52: Buttonholes
Buttonholes Variety of buttonholes 23 Square (Sensor) buttonhole This square buttonhole is widely used on medium to heavy weight fabrics. The buttonhole size is automatically determined by placing a button in the foot. 24 Square (Memory) buttonhole This is also a square buttonhole similar to the sensor buttonhole, but you can manually set and memorize the buttonhole size to sew buttonholes of the same size.
-
Page 53: Square (Sensor) Buttonhole
Square (Sensor) buttonholes Machine settings Pattern: 23 (Buttonhole) Thread tension: AUTO Presser foot: Automatic buttonhole foot R Foot pressure: Sensor buttonhole Patterns number 23 and 25 to 33 are sensor buttonholes. The size of a buttonhole is automatically set by placing a button in the rear of automatic buttonhole foot R.
-
Page 54
c Pull the buttonhole lever down as far as it will go. 1 Buttonhole lever NOTE: If you start sewing without pulling down the buttonhole lever, the LCD screen will show a warning and the machine will stop after a few stitches. Pull the buttonhole lever down and start sewing. -
Page 55
b Start the machine to sew the buttonhole. The machine will sew the left row first. n Then it goes to the end point with straight stitches. The machine will sew the back bartack and the right row. m Finally, the machine will sew the front bartack and stop automatically. -
Page 56: Corded Buttonhole
Corded buttonhole Machine settings Pattern 23 (Buttonhole) Thread tension: AUTO Presser foot: Automatic buttonhole foot R Foot pressure: With the automatic buttonhole foot R raised, hook the filler cord on the spur at the back of the buttonhole foot 1 Spur Bring the ends of the cord toward you under the buttonhole foot clearing the front end.
-
Page 57: Adjusting The Buttonhole Width
Adjusting the buttonhole width The buttonhole width can be adjusted by pressing the stitch width adjusting key. Press the “+“ sign on the stitch width adjusting key to increase the buttonhole width. Press the “–“ sign on the stitch width adjusting key to decrease the buttonhole width.
-
Page 58: Memory Buttonhole
Memory buttonhole Machine settings Pattern: 24 (Buttonhole) Thread tension: AUTO Presser foot: Automatic buttonhole foot R Foot pressure: When selecting the memory buttonhole, the LCD screen will advise you to pull the button holder open. z Pull the button holder of the buttonhole foot all the way out.
-
Page 59: Round End And Fine Fabric Buttonholes
Round end and fine fabric buttonholes Machine settings Pattern: 25 or 26 (Buttonhole) Thread tension: AUTO Presser foot: Automatic buttonhole foot R Foot pressure: The sewing procedure is the same as the square (sensor) buttonhole (refer to pages 51-53). The machine will sew a buttonhole in the order shown. NOTE: The buttonhole width can be adjusted from 2.5 to 5.5.
-
Page 60: Stretch Buttonholes
Stretch buttonholes Machine settings Pattern: 30 or 32 (Buttonhole) Thread tension: AUTO Presser foot: Automatic buttonhole foot R Foot pressure: The sewing procedure is the same as the square (sen- sor) buttonhole (refer to pages 51-53). The machine will sew a buttonhole in the order shown. NOTE: The buttonhole width can be adjusted from 2.5 to 7.0.
-
Page 61: Button Sewing
Button Sewing Machine settings Pattern: 34 (Buttonhole) Thread tension: AUTO Presser foot: Button sewing foot T Foot pressure: Feed dog: Lowered (refer to page 22.) WARNING: Turn the power switch off before changing the presser foot. Attaching the button sewing foot T Insert the rear pin on the foot into the rear groove of the foot holder.
-
Page 62: Darning
Darning Machine settings Pattern: 35 (Buttonhole) Thread tension: AUTO Presser foot: Automatic buttonhole foot R Foot pressure: When selecting the darning stitch, the LCD screen will advise you to pull the button holder open. Pull the button holder to the rear. Insert the corner of the fabric under the foot.
-
Page 63
Sewing a shorter darning To sew a darning shorter than 2 cm (3/4”), first stop the machine after sewing the required length, then press the reverse button. The required length has been determined. Start the machine again and continue sewing until the machine stops automatically. -
Page 64: Tacking
Tacking Machine settings Pattern: 36 (Buttonhole) Thread tension: AUTO Presser foot: Satin stitch foot F Foot pressure: Tacking is used to reinforce pockets, crotch seams and belt carriers where extra strength is needed. Sewing Lower the needle at the starting point. Lower the foot and sew until the machine stops automatically.
-
Page 65: Eyelet
Eyelet Machine settings Pattern: 38-40 (Buttonhole) Thread tension: AUTO Presser foot: Satin stitch foot F Foot pressure: The eyelet is used for belt holes etc. Sewing Sew until the machine stops automatically. Open the eyelet with an eyelet puncher or pointed scissors.
-
Page 66: Patchwork And Quilting Patchwork Piecing
PATCHWORK AND QUILTING Patchwork Piecing Machine settings Pattern: 93 (Quilt) Thread tension: Auto Presser foot: 1/4” seam foot O Foot pressure: Place the patchwork pieces right sides together. Sew while guiding the edge of the fabric along the guide on the foot to keep a precise 1/4”…
-
Page 67: Quilting
Quilting Machine settings Pattern: D1 (Utility) Thread tension: AUTO Presser foot: Zigzag foot A or dual feed foot AD Foot pressure: Attaching the quilting bar Insert the quilting guide bar into the opening and slide the quilting guide bar to the position according to the desired space between seams.
-
Page 68: Free-Motion Quilting
Free Motion Quilting Machine settings Pattern: Thread tension: AUTO Presser foot: Convertible free motion quilting foot QB-H Foot pressure: Feed dog: Lowered (See page 22) Attaching the convertible free motion quilting foot Attach the convertible free motion quilting foot and make sure that the needle enters the center of the hole in the foot (refer to page 39).
-
Page 69: Decorative Stitches Applique
DECORATIVE STITCHES Applique Machine settings Pattern: 41-50 (Applique) Thread tension: AUTO Presser foot: Satin stitch foot F or open toe satin stitch foot F2 Foot pressure: Place an applique on the fabric and baste it in place or use a fusible web to secure the applique in place. Guide the applique fabric, so that the needle falls off the edge of the applique when the needle swings to the right.
-
Page 70: Fagoting
Fagoting Machine settings Pattern: 66, 67, 75 (Heirloom) Thread tension: AUTO Presser foot: Zigzag foot A Foot pressure: Use this stitch to join two pieces of fabric to create an open work appearance and add design interest. Fold under each fabric edge 1.5 cm (5/8˝) and press. Pin the two edges to paper or tear away backing 0.3 cm (1/8˝) apart.
-
Page 71: Cording (3-Strand Cording)
Cording (3-strand cording) Machine settings Pattern: 132 (Satin) Thread tension: AUTO Presser foot: Cording foot H Foot pressure: Insert 3 strands of cording under the spring of the foot and draw them under the foot to the rear. 1 Spring Hold the three strands parallel for even sewing and be sure to sew over the strands Stitch slowly and smoothly, guiding the fabric as you sew.
-
Page 72: Satin Stitches
Satin Stitches Machine settings Pattern: 131-150 (Satin) Thread tension: AUTO Presser foot: Satin stitch foot F Foot pressure: The stitches in this group can be elongated up to 5 times their original length while the stitch density remains the same. Example: Pattern number 134 Select pattern number 134.
-
Page 73: Sewing A Mirror Images Of A Pattern
Sewing a Mirror Image of a Pattern To sew a mirror image of a stitch pattern, press the locking stitch key after memorizing the desired pattern. z Select the desired pattern. x Press the mirror image key. c The mirror image of the pattern will be sewn continuously.
-
Page 74: Twin Needle Sewing
Twin Needle Sewing CAUTION: Turn off the machine before changing the needle and threading the machine. When sewing with the twin needle, press the twin needle NOTES: Use the zigzag foot A or satin stitch foot F. Use #60 or finer threads. Test the stitches before you begin to sew.
-
Page 75
Machine Setting Pattern: See below Thread tension: AUTO Presser foot: Zigzag foot A or satin stitch foot F Foot pressure: Selecting the patterns Select the desired pattern suitable for twin needle sewing. Press the twin needle key The LCD screen shows a twin needle icon and the maximum permissible stitch width is restricted to 3.0 mm. -
Page 76: Programming A Pattern Combination Pattern Combination
PROGRAMMING A PATTERN COMBINATION Pattern Combination Example: Programming patterns 134 and 138. NOTE: Patterns in the different groups, letters and numbers can also be programmed. z Select pattern 134 (Satin). x Press the memory key. c Select pattern 138 (Satin). v Press the memory key or confirm button.
-
Page 77: Pattern Combination With A Mirror Image
Pattern Combination with a Mirror Image Example: Pattern 137 (Satin) and its mirror image z Select pattern 137 (Satin). x Press the memory key. c Select pattern 137 (Satin) again. v Press the mirror image key to turn over the pattern. b Press the memory key.
-
Page 78: Programming Automatic Thread Cutting
Programming Automatic Thread Cutting To cut the threads automatically after sewing the pattern combination, press the automatic thread cutter key after programming the pattern combination. The cutter sign will be indicated on the LCD screen and the LED signal on the thread cutter button will turn on. 1 Cutter sign 2 LED signal The machine will sew the pattern combination and cut the…
-
Page 79: Sewing The Pattern Combination From The Beginning
Sewing the Pattern Combination from the Beginning If you have to stop sewing in the middle of a pattern combination and wish to sew it over again, press the memory key to sew the pattern combination from the beginning. 1 Programmed pattern combination 2 Sewing stopped.
-
Page 80: Bridge Stitches
Bridge Stitches Stitch patterns number 151 to 158 are bridge stitches, which are used to insert straight stitches after a stitch pattern. Example: Combination of pattern 77 (Heirloom) and pattern 155 (Bridge) z Select pattern 77 (Heirloom). x Press the memory key. c Select pattern 155 (Bridge).
-
Page 81: Programming French Knots
Programming French Knots Example: Combination of French knot and bridge stitches z Select pattern 159 (Decorative). x Press the memory key. c Select pattern 152 (Bridge). v Press the memory key. b Two counts of straight stitch with center needle position will be added to the French knot.
-
Page 82: Monogramming
MONOGRAMMING Selecting a Letter Style Press the monogram key to select the letter style. The monogram selection window will open. The following 3 styles are available. 1 Block 2 Script 3 Broadway Selecting a Character Turn the jog dial clockwise or counterclockwise to select the desired character and press the confirm button.
-
Page 83: Programming A Monogram
Programming a Monogram Example: To program “R&B” z Press the monogram key. x Select letter “R” (Block style). c Press the memory key. v Select letter “&” (Block style). b Press the memory key. n Select letter “B” (Block style). m Press the memory key.
-
Page 84: Editing A Pttern Combination
EDITING A PATTERN COMBINATION Viewing a Long Combination The LCD screen only shows 5 patterns or 9 characters at a time. If the entire combination is not displayed, press the edit key to view the rest of the combination. Press the right arrow on the edit key to shift the cursor to the right.
-
Page 85: Inserting A Pattern
Inserting a Pattern Example: Inserting a space. Press the edit key to shift the cursor under the pattern immediately after where you wish to insert a space. Select a space Press the memory key and a space will be inserted before pattern 133.
-
Page 86: Uniform Stitch Adjustment
Uniform Stitch Adjustment The stitch width and length of the programmed patterns can be uniformly adjusted. Example 1: Adjusting the stitch width of the programmed pattern 175 and its mirror image Shift the cursor to the right of the last programmed pattern.
-
Page 87: Programming Satin Stitches And Stretch Stitches
Programming Satin Stitches and Stretch Stitches The stitch width of satin stitch and stretch stitch combinations can be uniformly adjusted. Press the stitch width adjustment key. The stitch width will be applied to all programmed patterns. NOTE: However uniform adjustment of the stitch length is not available.
-
Page 88: Storing And Recalling A Pattern Combination
STORING AND RECALLING A PATTERN COMBINATION Up to 20 pattern combinations can be stored in the memory for future use even after turning the power off. The stored pattern combination can be recalled by pressing the memory recall key. Storing a Pattern Combination z Program a pattern combination.
-
Page 89: Recalling A Stored Combination
Recalling a Stored Combination Press the memory recall key to select the memory ad- dress where the desired pattern combination is stored. Press the confirm button or confirm button icon on the LCD screen to recall the stored combination. 1 Confirm button icon Deleting a Stored Combination Press the memory recall key to select the memory address storing the pattern combination you wish to…
-
Page 90: Care And Maintenance
CARE AND MAINTENANCE Correcting Distorted Stitch Patterns The sewing results of the stitch patterns may vary depending upon sewing conditions, such as sewing speed, type of the fabric, number of layers etc. Always test sew on a scrap piece of the fabric that you wish to use.
-
Page 91: Cleaning The Hook Race, Feed Dog And Thread Cutter Mechanism
Cleaning the Hook Race, Feed Dog and Thread Cutter Mechanism WARNING: Turn the power switch off and unplug the machine before cleaning. CAUTION: Make sure to open the automatic needle converter before removing the needle plate. NOTE: Do not dismantle the machine in any way other than what is explained on this page.
-
Page 92: Problems And Warning Signals
Problems and Warning Signals If a buzzer sounds and the LCD screen shows a warning sign, follow the guidance below. Warning Sign Cause Try this The foot control is disconnected while sewing. Connect the foot control and start the machine again.
-
Page 93
Warning Sign Try this Cause Elongation is applicable only to The elongation key is pressed when a pattern satin stitches. that cannot be elongated has been selected. The memory key is pressed when a pattern that Select a pattern that can be cannot be memorized has been selected. -
Page 94: Troubleshooting
Troubleshooting Condition Cause Reference The needle thread 1. The needle thread is not threaded properly. Page 17 breaks 2. The needle thread tension is too tight. Page 21 3. The needle is bent or blunt. Page 20 4. The needle is incorrectly inserted. Page 20 5.
-
Page 96
858-800-001 (EN) Printed in Taiwan…
-
Инструкции по эксплуатации
1

Janome Memory Craft 7700QCP инструкция по эксплуатации
(96 страниц)
- Языки:Английский
-
Тип:
PDF -
Размер:
5.13 MB
Просмотр
На NoDevice можно скачать инструкцию по эксплуатации для Janome Memory Craft 7700QCP. Руководство пользователя необходимо для ознакомления с правилами установки и эксплуатации Janome Memory Craft 7700QCP. Инструкции по использованию помогут правильно настроить Janome Memory Craft 7700QCP, исправить ошибки и выявить неполадки.
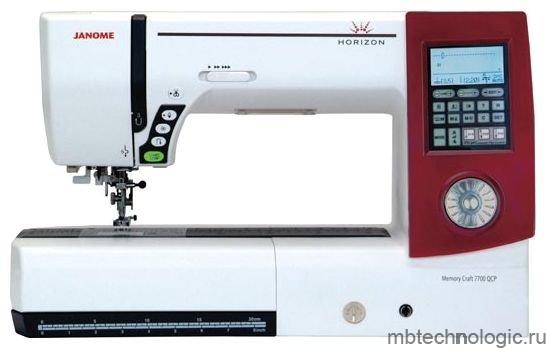
- Оперативный ремонт швейных машинок Janome Memory Craft 7700 QCP Horizon с гарантией на 12 месяцев;
- 13 сервис центров в Москве и Санкт-Петербурге рядом с метро;
- Используем для ремонта только оригинальные запчасти Janome Memory Craft 7700 QCP Horizon;
Записаться на ремонт
- Прайс на ремонт швейных машинок
- Характеристики Janome Memory Craft 7700 QCP Horizon
| Наименование услуги | Время ремонта, мин | Цена, руб * |
|---|---|---|
| Диагностика | от 30 мин | 0 р. |
| Замена блока переключателя | от 1 часа | от 1500 р. |
| Замена блока шага строчки | от 1 часа | от 1500 р. |
| Замена верхнего вала | от 1 часа | от 1500 р. |
| Замена игольной пластины | от 1 часа | от 1500 р. |
| Замена крепежа иглы | от 1 часа | от 1500 р. |
| Замена нижнего вала | от 1 часа | от 1500 р. |
| Замена нитеводителя | от 1 часа | от 1500 р. |
| Замена пружины толкателя | от 1 часа | от 1500 р. |
| Замена ремня электродвигателя | от 1 часа | от 1500 р. |
| Замена узла копира | от 1 часа | от 1500 р. |
| Замена узла намотки | от 1 часа | от 1500 р. |
| Замена цепного ремня | от 1 часа | от 1500 р. |
| Заточка ножей | от 1 часа | от 1500 р. |
| Ремонт двигателя | от 1 часа | от 1500 р. |
| Ремонт игловодителя | от 1 часа | от 1500 р. |
| Ремонт игольной пластины | от 1 часа | от 1500 р. |
| Ремонт кнопки включения | от 1 часа | от 1500 р. |
| Ремонт копира | от 1 часа | от 1500 р. |
| Ремонт натяжителя нити | от 1 часа | от 1500 р. |
| Ремонт педали | от 1 часа | от 1500 р. |
| Ремонт петлеобразующего механизма | от 1 часа | от 1500 р. |
| Ремонт фрикционного механизма | от 1 часа | от 1500 р. |
| Ремонт челночного механизма | от 1 часа | от 1500 р. |
| Ремонт электросхемы | от 1 часа | от 1500 р. |
| Чистка | от 30 мин | от 1500 р. |
* цена указана за работу мастера
| Тип управления | электронное |
| Тип челнока | ротационный горизонтальный |
| Регулировка давления лапки на ткань | есть |
| Регулировка скорости шитья | плавная |
| Максимальная скорость шитья | 1000 ст/мин |
| Верхний транспортер ткани | есть |
| Отключение механизма подачи ткани | есть |
| Кнопка реверса | есть |
| Коленный рычаг подъема лапки | есть |
| Система измерения размера пуговиц | есть |
| Линейка на корпусе | есть |
| Освещение | есть |
| Количество швейных операций | 250 |
| Выполнение петли | автомат, число видов петель: 10 |
| Строчки | обметочная, потайная, эластичная, эластичная потайная |
| Швейный советник | есть |
| Работа с тонкими тканями | да |
| Число вышивальных алфавитов | 3 |
| Максимальная длина стежка | 5 мм |
| Максимальная ширина стежка | 7 мм |
| Макси-узоры | да |
| Лапки | для квилтинга, для вшивания молнии, для пришивания пуговиц |
| Вышивальный блок | нет |
| Дисплей | есть, черно-белый |
| Длина платформы | 28 см |
| Рукавная платформа | есть |
| Длина рукавной платформы | 15 см |
| Стол для расширения рабочей поверхности | есть |
| Нитевдеватель | есть |
| Отсек для аксессуаров | есть |
| Чехол | мягкий |
| Переключатель положения иглы (верх/низ) | есть |
| Шитье без педали | есть |
| Вес | 12 кг |
| Дополнительная информация | встроенная память 20 банков; зеркальное отображение строчки; джойстик |
Вопросы и ответы
-
Сколько времени занимает ремонт швейных машинок?
Ремонт займет от 30 минут. Точное время установит мастер после бесплатной диагностики.
-
Как узнать точную стоимость?
Оставьте заявку через форму обратной связи или позвоните нам. Мастер назовет вам примерную стоимость ремонта. Чтобы узнать точную стоимость, приходите в сервисный центр Mbtechnologic. Специалисты проведут бесплатную диагностику и назовут точную стоимость устранения неисправности.
-
Как вызвать курьера?
Стоимость вызова курьера зависит от габаритов устройства и начинается от 0 руб. Чтобы вызвать курьера для доставки устройства в сервисный центр и узнать точную стоимость, заполните форму или свяжитесь с нами по телефону. Курьер перезвонит вам и уточнит удобное время, чтобы забрать устройство.
-
Можно ли оформить доставку после ремонта?
Да. Стоимость доставки от 200 руб. Точную стоимость вы можете узнать позвонив в сервисный центр.
Запишитесь на ремонт
прямо сейчас
и получите скидку до 30%
Или оставьте заявку по телефону единого сервисного центра mbtechnologic

Ремонт других швейных машинок:
Онлайн заявка
Оставьте нам заявку и мы перезвоним вам в течение 15 минут и сделаем скидку до 30%
Способы оплаты

Наличные
Через терминалы или салоны связи

Безналичный расчет
Безналичный расчет

Банковские карты
Visa, MasterCard, Maestro

Яндекс.Деньги
Со счета или с привязанной карты

Сбербанк Онлайн
Оплата по sms или Сбербанк онлайн

Qiwi
С кошелька или карты
Гарантии
Заказывая ремонт швейных машинок в сервисном центре MBTechnologic, вы получаете до 1 года гарантии. Если неисправность повторится в течение гарантийного срока, мы проведем повторный ремонт на гарантийной основе.
Задайте вопрос специалисту
Получите консультацию специалистов по вопросам ремонта и обслуживания техники mbtechnologic.