-
Contents
-
Table of Contents
-
Troubleshooting
-
Bookmarks
Quick Links
ZTE CORPORATION
ZTE Plaza, Keji Road South,
Hi-Tech Industrial Park, Nanshan District, Shenzhen,
P. R. China
518057
Tel: (86) 755 26771900
Fax: (86) 755 26770801
URL: http://ensupport.zte.com.cn
E-mail: support@zte.com.cn
ZXV10 B700
IP Set-Top Box
User Manual
Version 2A
Related Manuals for Zte ZXV10 B700
Summary of Contents for Zte ZXV10 B700
-
Page 1
ZXV10 B700 IP Set-Top Box User Manual Version 2A ZTE CORPORATION ZTE Plaza, Keji Road South, Hi-Tech Industrial Park, Nanshan District, Shenzhen, P. R. China 518057 Tel: (86) 755 26771900 Fax: (86) 755 26770801 URL: http://ensupport.zte.com.cn E-mail: support@zte.com.cn… -
Page 2
ZTE CORPORATION or its licensors may have current or pending intellectual property rights or applications covering the subject matter of this document. Except as expressly provided in any written license between ZTE CORPORATION and its licensee, the user of this document shall not acquire any license to the subject matter herein. -
Page 3: Table Of Contents
Contents 1 Safety Instruction……………… 2 2 Packing List ………………3 3 Panels ………………..4 Front Panel ………………..4 Rear Panel ………………..5 4 Connecting Up ………………6 Connecting Network ………………6 Video and Audio Connections …………….. 6 Power ON ………………..8 Upgrading Automatically …………….
-
Page 4: Safety Instruction
1 1 1 Safety Instruction Special Note If there is a plastic covering wrapping the device, remove the covering before using the device � for normal ventilation. Please use the power adapter provided along with the device. � Make sure the position of the power switch on the rear panel of the device before usage. �…
-
Page 5: Packing List
2 2 2 Packing List Item Remarks Set-top box Remote control AAA battery AV cable Straight-through network cable YPbPr component cable Power adapter User manual Qualification certificate/WA RRANTY Packing list Note: This packing list is for reference only. The items actually delivered depend on the companion packing list of the set-top box.
-
Page 6: Panels
3 3 3 Panels Front Panel Figure 1 Front Panel Description Standby button Running status indicator � Red: Standby state � Green: running normally � Yellow: Fault � OFF: Not powered ON Connection status indicator � Green: Normal network connection �…
-
Page 7: Rear Panel
Rear Panel Figure 2 Rear Panel Description Ethernet interface, used to connect to the external network USB ports HDMI output interface Component video output interfaces Composite video output interface Audio output interfaces (left channel and right channel) Digital audio output interface Power socket: Make sure to use the delivered +12V power adapter.
-
Page 8: Connecting Up
Note: The wireless network card is designated to W200C USB wireless network card provided by ZTE. It is recommended to use ZXV10 W300 residential gateway device of ZTE to get the best performance. Video and Audio Connections Connecting Standard Definition Interface 1.
-
Page 9
Figure 3 Standard Definition Interface Connecting High Definition Interface ZXV10 B700 provides two high definition output interface types. Select one of the following methods to connect with video/audio devices (such as TV, stereo). 1. Connect the R and L interfaces on STB to the corresponding interfaces on TV with AV cables (red and white). -
Page 10: Power On
5. Press TV/AV button to switch the system mode of TV until the EPG page is shown on TV. Upgrading Automatically The ZXV10 B700 can automatically connect to the server on each power-on. The ZXV10 B700 can automatically check whether an upgrade is necessary. The upgrade will start automatically if neces-…
-
Page 11: Remote Control
5 5 5 Remote Control STB Remote Control Figure 6 shows the STB remote control. Figure 6 STB Remote Control…
-
Page 12: Tv Learning Buttons
Note: The remote control is powered by two AAA batteries. Insert two AAA batteries into the remote control according to the polarity instruction displayed on it. During the operation, point the front part of the remote control to the infrared receiving area on the STB. TV Learning Buttons The remote control has four buttons (Power, TV/AV, VOL +, VOL-) having TV learning functions.
-
Page 13: Operation Guide
6 6 6 Operation Guide Standby/Working Status Switch the STB between the standby and working status. Switch the TV between the standby and working status. Switch the system mode of the TV. EPG Operations Press this button on the remote control to enter the EPG home page. Press direction buttons (up, down, left, and right) on the remote control to select an EPG item (such as button, text box, column).
-
Page 14: Common Operations During Watching Programs
Enter TVOD program. Enter VOD program. Enter information surfing program. Enter application program. Common Operations During Watching Programs Use the following buttons to control the volume. Switch between different audio channels (left channel, right channel, stereo). Turn on/off the volume of the STB. Increase/decrease the output volume of the STB.
-
Page 15: Watching Tstv Program
Press this button to operate fast forward when playing VOD or TSTV program. Press this button to operate fast backward when playing VOD or TSTV program. While watching the program organized in chapters, press this button to go to the next chapter.
-
Page 16: Troubleshooting
7 7 7 Troubleshooting Problem Possible Cause Solution The indicator is off after The power adapter has not been Connect the power adapter switching on the STB. connected. correctly. The power adapter is damaged. Consult your service provider and replace a new one. The power outlet has no power.
-
Page 17
Problem Possible Cause Solution The remote control fails. There is no battery in the remote Install the batteries correctly. control, or the batteries are installed with wrong polarities. The batteries run out of power. Replace the batteries. TV cannot receive instructions Use the remote control at a from the remote control. -
Page 18: Technical Specification
8 8 8 Technical Specification Compliant Q/SZX 186 — 2005 Standard Power Adapter Input: 100 — 240V 50/60Hz Output: +12.0VDC Environment Working environment temperature: 0℃ — +40℃ Requirement Working environment humidity: 10% — 90% Protocol TCP/IP, HTML 4.0, HTTP 1.1/JavaScript 1.5 Video Supports PAL, NTSC Receiving bit rate range: 200K — 10M…
-
Page 19: Text Input
9 9 9 Text Input Input via remote control Operations To input numerals, letters and symbols via the remote control, perform the following steps: 1. Select the text box. 2. Press TXT to switch to the interested input mode. The current input mode is shown on the TV screen.
-
Page 20: Input Via Soft Keyboard
2. Press 9 and then press OK to display the input interface. 3. Press 8 to input the upper-case letter Z. 8 is the number corresponding to letter Z. Symbol Input There are three methods for symbol input. To input the symbol “.”, the user has the following three options: Method 1 1.
-
Page 21
Letter/Numeral/Symbol Input 1. Press LOC/KB on the remote control to activate the soft keyboard. 2. Switch to the another interface of soft keyboard if the required character is not in current interface. 3. Use direction buttons on the remote control to select the required character. 4. -
Page 22: Wireless Network Card Usage Guidelines
Restrictions The wireless network card is designated to the W200C USB wireless network card provided by � ZTE. It is recommended to use the ZXV10 W300 residential gateway device of ZTE to get the best � performance. Installation Prerequisites It is recommended to conform to the following prerequisites for good performance of the device: There is no obstacle between AP and wireless network card of STB.
-
Page 23: Checking Signals
6. Select Search in the Services Settings page to find nearby AP. After that, select an AP. 7. Set the following parameters: authentication mode, encryption mode, encryption key, encryption key ID. After settings, select Next. Note: Different AP needs to set different parameters. Set the parameters according to the on-site de- mands of AP.
-
Page 24: Troubleshooting
Signal Intensity Signal Status 55 — 79 Good 80 — 100 Very good Note: When the signal intensity is lower than 50, the connection will not be smooth. Troubleshooting 1. Symptom: The alert information on the loading failure of wireless network card pops up. Possible cause: The wireless network card is not inserted, or it is not well connected.
Настройка iptv Zala, первая страница. Категория: Настройка iptv Zala Читать полностью.. Категория: Настройка iptv Zala Читать полностью.. Интерактивное телевидение IPTV С тех пор как человечество впервые осознало преимущества цифровой пакетной передачи данных, IP- протокол Internet Protocol вышел за родные стены интернета и методично встраивается во все технологии общения и распространения информации. Приставка «IP» появилась у радиовещания, телефонии, а теперь — у телевидения. IP- телевидением принято называть цифровую технологию многопрограммного интерактивного телевизионного вещания в IP- сети с помощью пакетной передачи видео- данных по IP- протоколу. Несмотря на то, что и IPTV, и интернет- телевидение обеспечивают доставку видео на основе IP, между ними существует ряд отличий. Так, интернет- телевидение распространяется по сети интернет, вследствие чего обеспечивается свободный доступ к контенту, тогда как услуга IPTV доставляется по закрытым сетям, в которых доступ к контенту разрешен только подписчикам услуги. Ключевым отличием является то, что интернет- ТВ предоставляет доступ к контенту из любой точки, где есть подключение к интернету, а IPTV распространяется в рамках ограниченной оператором среды и содержит в себе набор уникальных функций и высококачественный контент. Категория: Настройка iptv Zala Читать полностью.. Категория: Настройка iptv Zala Читать полностью.. Если Ваш Set- to- Box запросил пароль, значит либо Вы сами не дали приставке корректно обновить програмное обеспечение, либо произашел сбой при обновлении, в таком случае поступаем так.. Новости Не Официально Слухи Информация Инструкции Программы Трансляция видео с PC на приставку Zala Возврат настроек приставки IPTV на заводские ВСЛЕПУЮ На примере ZXV10 B700 V2A Если вдруг накосячили с кто пробовал добавить свой список каналов на stb. Пульт для ID TV приставки. Должностная инструкция инженер механик по транспорту. Поиск настроек модема по сайту как подключить iptv stb-приставка zxv 10.. Поиск · Новая тема. Перед покупкой STB DIB-120 рекомендуем проконсультироваться с вашим поставщиком услуг IP TV. Вот так выглядит IPTV STB — приставка от Белтелеком ZXV10 B600 V4C. Пульт для ID TV приставки.
Содержание
- Stb zxv10 b700 без кабеля 3rca
- Комплект оборудования для услуг ByFly, ZALA, телефон
- Пример 1
- Пример 2
- Пример 3
- Пример 4
- Пример 5
- Пример 6
- Итого
- Обзор приставки для Smart ZALA
Обсуждение ZTE B700V7 (МГТС) [Другая ОС]
TV Box
Обсуждение»
- Для сравнения устройства с конкурентами и по вопросам выбора устройств обращайтесь в раздел:Выбор и сравнение
- Перед размещением фотографии ознакомьтесь с темойРабота с изображениями на форуме
- Сообщения, не относящиеся к теме обсуждения (оффтоп), удаляются без предупреждения.
 ZTE_MTS_MGTSX_инструкция_20170824.pdf ( 541.05 КБ )
Rukovodstvo_polzovatelya_k_TV_pristavke_ZTEB700V7.pdf ( 416.41 КБ )
Входное напряжение: DC IN 12 В (адаптер электропитания)
Энергопотребление: В теме нет куратора. По вопросам наполнения шапки обращайтесь к модераторам раздела через кнопку  под сообщениями, на которые необходимо добавить ссылки.
Сообщение отредактировал BannedMi — 21.11.18, 16:22
Привет всем. Дошли ручёнки до этой железке. Нашел ПО позволяющие изменять адрес портала, всё меняется, загружается, но видео не показывает. Не начинается воспроизведение.
В софте можно постучаться до бокса по SSH, снять логи, да и вообще педалей там мама не горюй.
Есть идеи куда копать?
 aslambek134, ничего по идее не нужно делать. В три клика подключается. Антивирус выруби. Запускай от админа.
Добавлено 09.01.2019, 00:27:
123qwealex, тут браузер по сути
Лежит дома такая приставка. Получилось подключиться через STB Tools, указал портал Xsmart, все завелось, круто. Вопрос, можно ли, имея доступ к терминалу по SSH, залить туда легковесную линуксовую ось? На подобии как OpenElec там или что-то такое 🙂 Может если открыть приставку и глянуть на чипсет и по нему можно будет найти что-нибудь?
Сообщение отредактировал PhoenixRaziel — 09.01.19, 18:29
aslambek134, ничего по идее не нужно делать. В три клика подключается. Антивирус выруби. Запускай от админа.
Добавлено 09.01.2019, 00:27:
123qwealex, тут браузер по сути
Источник
Комплект оборудования для услуг ByFly, ZALA, телефон
В данной статье я хочу рассказать о комплекте оборудования, которое может выдаваться в сервисных центрах РУП «Белтелекома». У некоторых людей могут возникать проблемы с комплектностью оборудования при расторжении договора, при сдаче старого модема (когда установили, например, новый модем с использованием технологии xPON) и т. д.
При заключении договора в сервисном центре РУП «Белтелеком» вам выдается оборудование, при этом ваш договор будет содержать «Акт приема-передачи имущества». С помощью этого акта вы можете ориентироваться какое оборудование и комплектующие вам выдали. Далее будут приведены примеры.
Пример 1
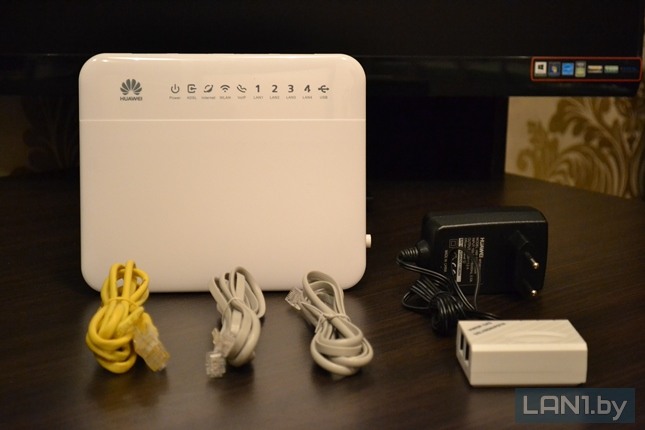
Например, из рисунка 1, видно, что вы получили приставку STB ZXV10 B700. Далее в примечании видим (выделено красным), что дополнительно вы получили блок питания, пульт ДУ, кабель 3RCA, кабель RGB или кабель HDMI, кабель RJ45. В таком же комплекте вы должны будете сдать оборудование, например, при расторжении договора. В данном примере используется акт, который выдаётся при заключении договора на услугу Интерактивная ZALA, кроме этого акта, может выдаваться ещё второй акт, касательно модема. Напомню, что для работы Интерактивной ZALA нужен модем и приставка. На рисунке 2 представлено более наглядно, что представляет собой этот комплект оборудования.
 Рисунок 2 — Комплект оборудования (приставка B700 c комплектующими)
| Номер | Описание |
|---|---|
| 1 | Приставка STB ZXV10 B700 |
| 2 | Пульт дистанционного управления |
| 3 | Кабель 3RCA («Разъёмы-тюльпаны» красный, желтый, белый) |
| 4 | Кабель HDMI |
| 5 | Блок питания |
| 6 | Кабель сетевой RJ45 |
Пример 2
На рисунке 3, видно, что вы получили терминал ONT F660 (модем). Далее в примечании видим (выделено красным), что дополнительно вы получили блок питания, кабель линейный RJ11, кабель сетевой RJ45, кабель оптоволоконный. На рисунке 4 представлено более наглядно, что представляет собой этот комплект оборудования.
 Рисунок 4 — Комплект оборудования (терминал ONT F660 с комплектующими)
| Номер | Описание |
|---|---|
| 1 | Терминал ONT F660 (модем) |
| 2 | Кабель оптоволоконный |
| 3 | Блок питания |
| 4 | Кабель линейный RJ11 (телефонный) |
| 5 | Кабель сетевой RJ45 |
Пример 3
На рисунке 5, видно, что вы получили терминал ONT Echolife HG8245H (модем). Далее в примечании видим (выделено красным), что дополнительно вы получили блок питания, кабель сетевой RJ45, кабель оптоволоконный, кассету. На рисунке 6 представлено более наглядно, что представляет собой этот комплект оборудования.
 Рисунок 6 — Комплект оборудования (терминал ONT Echolife HG8245H с комплектующими)
| Номер | Описание |
|---|---|
| 1 | Терминал ONT Echolife HG8245H (модем) |
| 2 | Кабель оптоволоконный |
| 3 | Кабель сетевой RJ45 |
| 4 | Блок питания |
| 5 | Кассета |
Пример 4
На рисунке 7, видно, что вы получили STB ZXV10 B600. Далее в примечании видим (выделено красным), что дополнительно вы получили блок питания, пульт ДУ, кабель 3RCA, кабель RJ45.
Пример 5
На рисунке 8, видно, что вы получили приставку Витязь DTR-824HD и карту условного доступа. Далее в примечании видим (выделено красным), что дополнительно вы получили блок питания, пульт ДУ, кабель RCA, переходник RCA-Scart, элемент питания 2 шт (батарейки), руководство по эксплуатации. Батарейки можно не возвращать. Такой комплект оборудования выдается для услуги эфирная ZALA.
Пример 6
На рисунке 9, видно, что вы получили модем H208N. Далее в примечании видим (выделено красным), что дополнительно вы получили блок питания, сплиттер, кабель линейный RJ11 (может быть 2), кабель сетевой RJ45. На рисунке 10 представлено более наглядно, что представляет собой этот комплект оборудования (чтобы не было непонимания, прошу обратиться ваше внимание на то что, здесь в акте представлен модем H208N, но на рисунке ниже модем Huawei HG552f-11!). Такое оборудование обычно выдаётся при заключении договора на Интернет ByFly.
 Рисунок 10 — Комплект оборудования (модем c комплектующими)
| Номер | Описание |
|---|---|
| 1 | Модем Huawei HG552f-11 |
| 2 | Кабель сетевой RJ45 |
| 3 | Кабель линейный RJ11 (телефонный) в количестве 2-ух штук |
| 4 | Блок питания |
| 5 | Сплиттер |
Итого
Какое оборудование вам выдадут в сервисном центре РУП «Белтелеком» зависит от многих факторов:
- От технологии, через которую вам будет представляться услуга, это может быть ADSL, VDSL, IMS или xPON;
- Услуга, которую вы подключаете, это может быть ByFly, Интерактивная ZALA, Эфирная ZALA, SMART ZALA, Умный дом и т. д.;
- От оборудования, которое уже установлено у вас дома.
Если у вас есть вопросы, то задавайте их ниже в комментариях.
Источник
Обзор приставки для Smart ZALA
В компании «Белтелеком» появилась возможность взять в пользование приставку для телевидения Smart ZALA. Подробнее в статье.
Приставка выдается в картонной коробке с логотипом бренда «ЯСНА». В комплекте идет сама приставка, инструкция по ее использованию, пульт ДУ, две мизинчиковые батарейки к нему, блок питания 12В, кабель сетевой RJ-45, кабель HDMI и кабель 3RCA-Mini Jack.
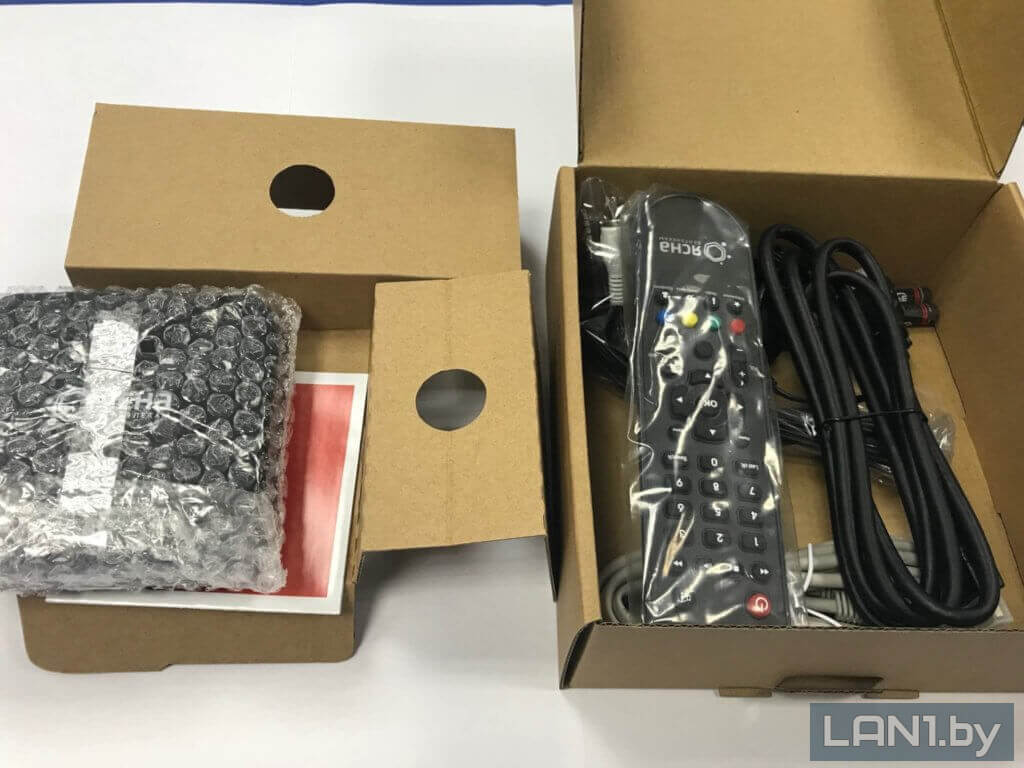 Рисунок 2 — Комплектация
  Рисунок 3 — Комплектация
Приставка маленького размера черного цвета. Важным ее достоинством является наличие Wi-Fi-модуля, посредством которого ее можно подключать к модему (любому) по беспроводной сети.
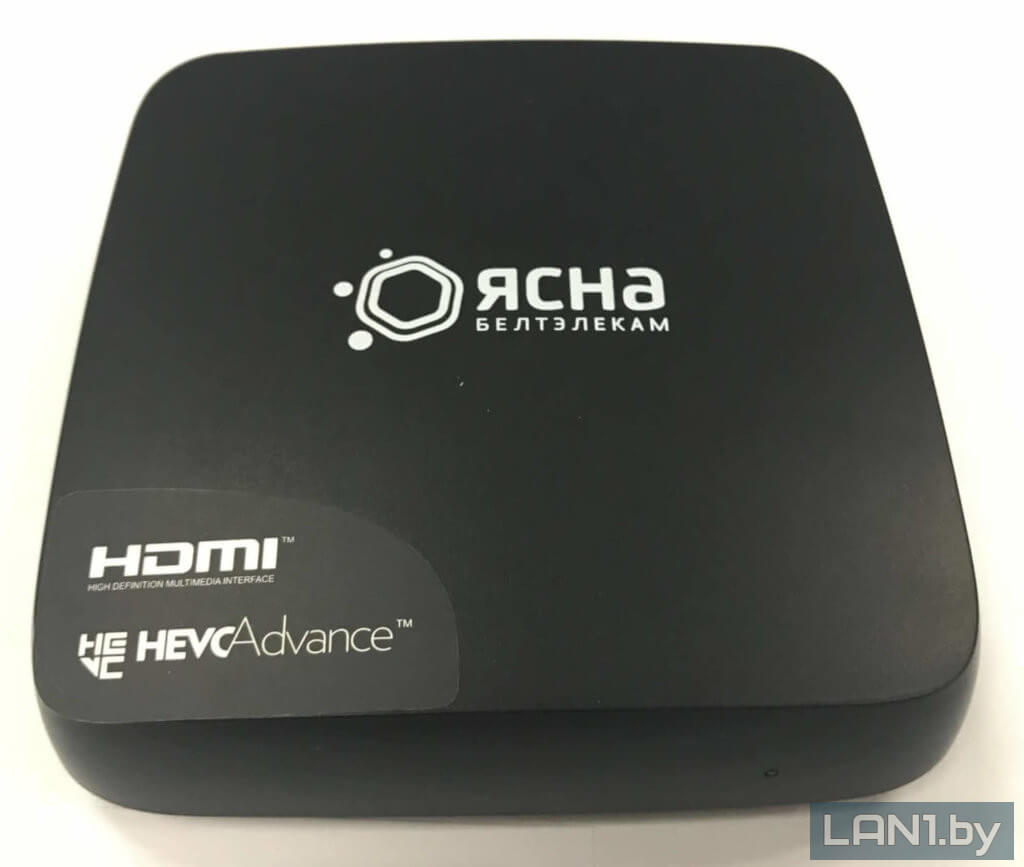 Рисунок 4 — Приставка. Вид сверху
  Рисунок 5 — Приставка. Вид снизу
На задней панели расположены разъёмы для подключения блока питания, кабеля AV/HDMI, при необходимости, сетевого кабеля и разъём USB.
 Рисунок 6 — Приставка. Вид сзади
 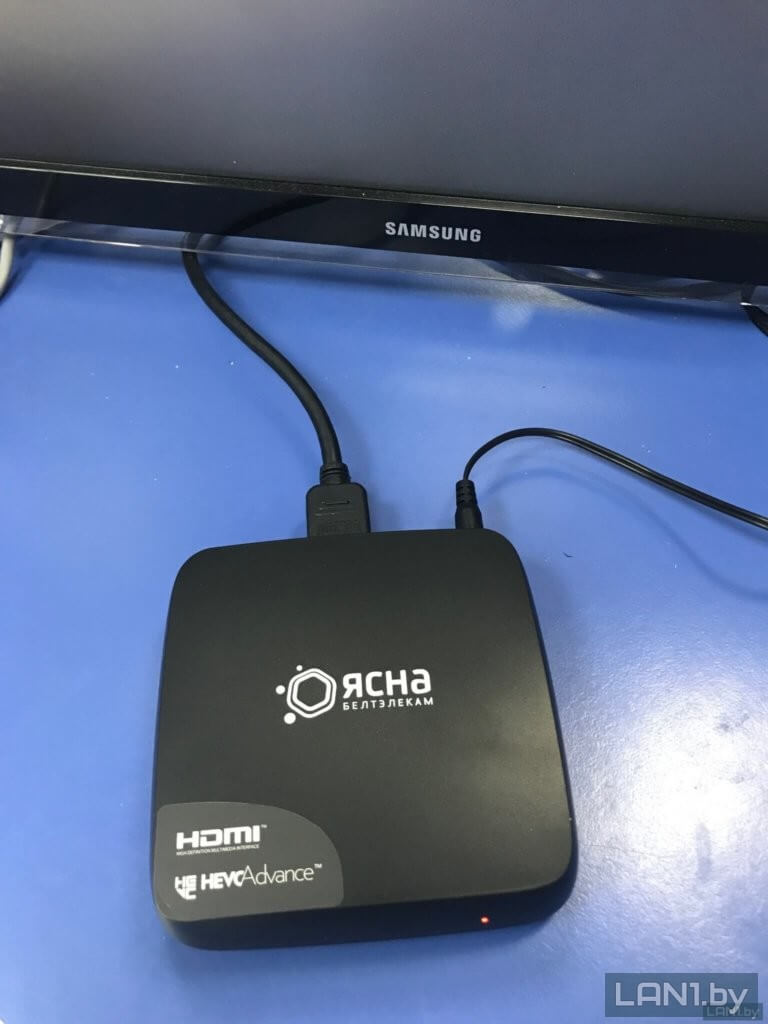 Рисунок 7 — Подключение приставки
После подключения приставки к телевизору, переходим в режим HDMI и видим, что нам сразу же предлагается выбрать язык. Выбираем его и жмём на пульте «OK».
 Рисунок 8 — Настройка приставки
  Рисунок 9 — Настройка приставки
Так как мы хотим подключить приставку без провода, то сразу видим, что приставка начинает искать беспроводную сеть.
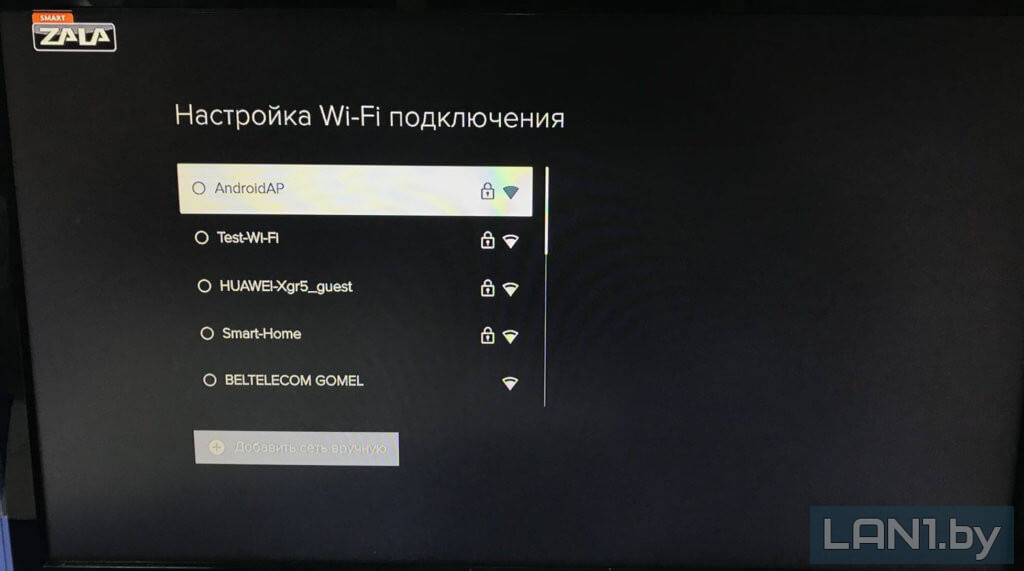 Рисунок 10 — Настройка приставки
В списке найденных беспроводных сетей выбираем нашу сеть, вводим пароль и жмём «OK».
 Рисунок 11 — Настройка приставки
 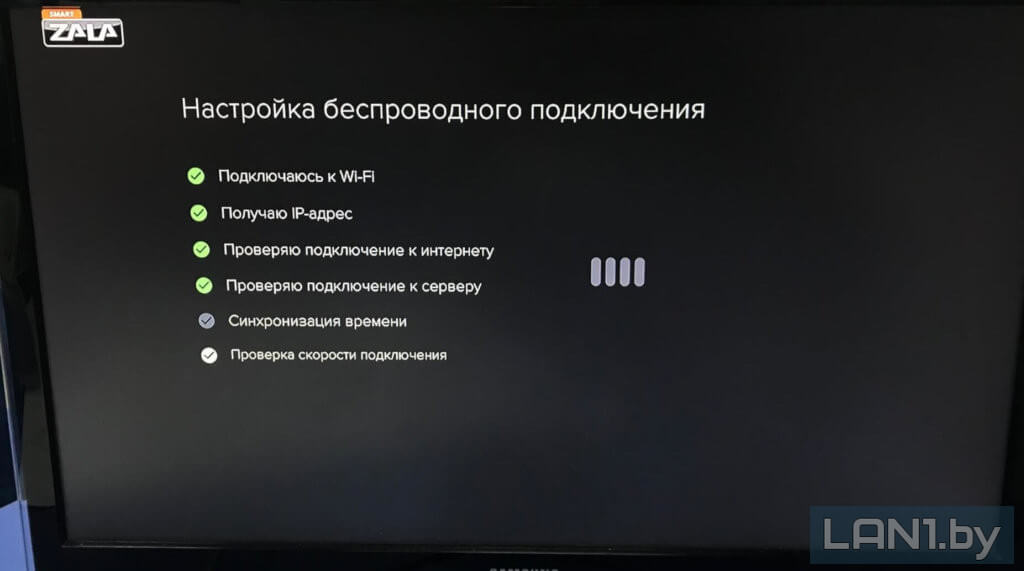 Рисунок 12 — Настройка приставки
После подключения к сети на экране отображается скорость соединения и качество беспроводного сигнала.
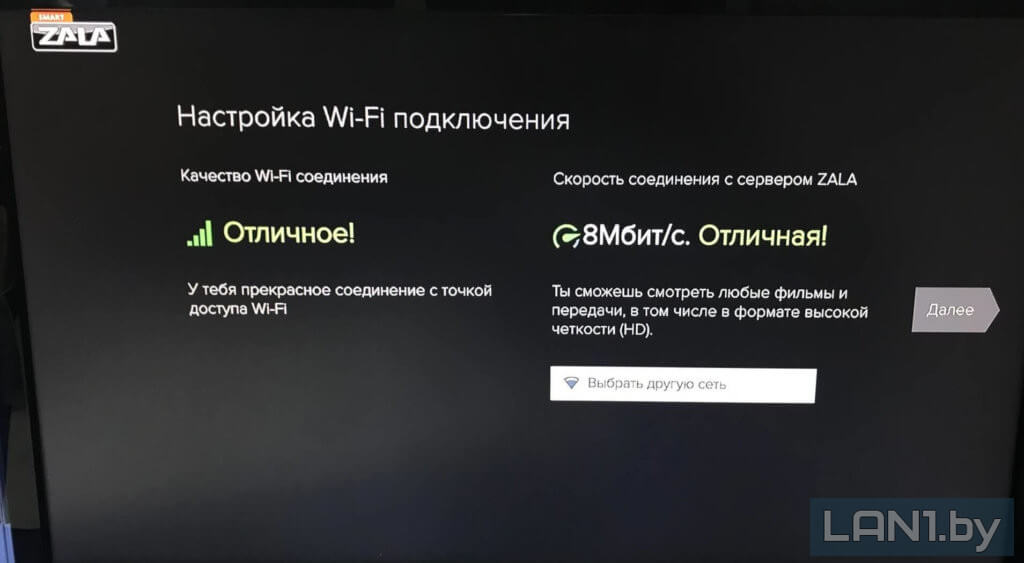 Рисунок 13 — Настройка приставки
После того как мы подключились к интернету и нажали «Далее», приставка начала искать обновление и нашла.
 Рисунок 14 — Обновление приставки
 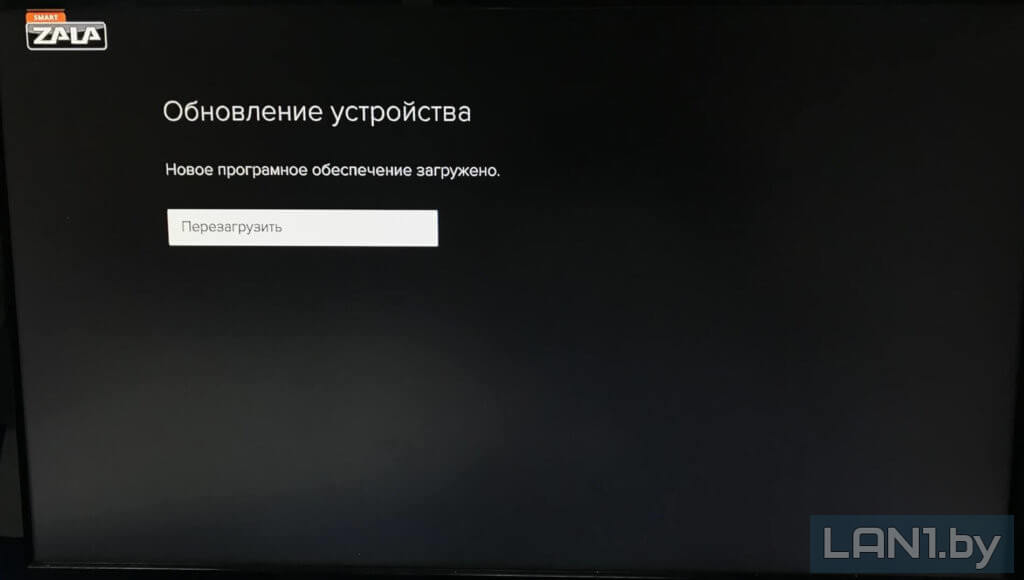 Рисунок 15 — Обновление приставки
Нажимаем кнопку «Перезагрузить» и ждём.
 Рисунок 16 — Включение приставки
После перезагрузки появляется логотип «ЯCНА» и начинается загрузка Smart ZALA.
 Рисунок 17 — Включение приставки
После обновления и перезагрузки приставка снова просит выполнить первоначальные шаги в выборе языка и подключения к беспроводной сети, как показано на рисунках выше. После этих манипуляций устройство запрашивает логин и пароль из договора, который абонент заключает в сервисном центре на пакет «ЯСНА 50 Smart».
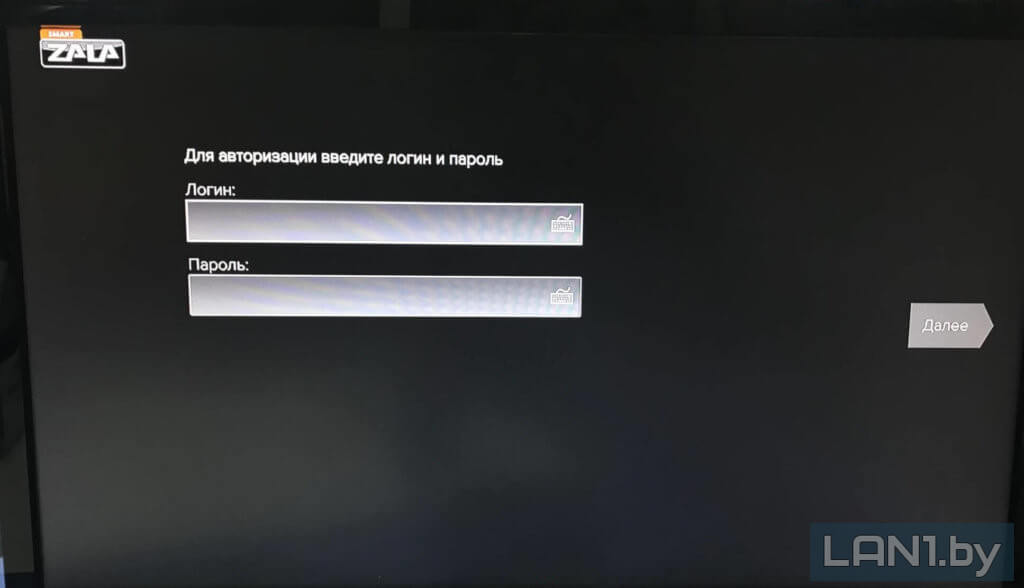 Рисунок 18 — Авторизация
Вводим свои данные и нажимаем «Далее». Теперь необходимо создать профиль. Достаточно написать любое имя, выбрать пол и аватар, если необходимо, задать возрастные ограничения.
 Рисунок 19 — Создание профиля
  Рисунок 20 — Создание профиля
  Рисунок 21 — Создание профиля
 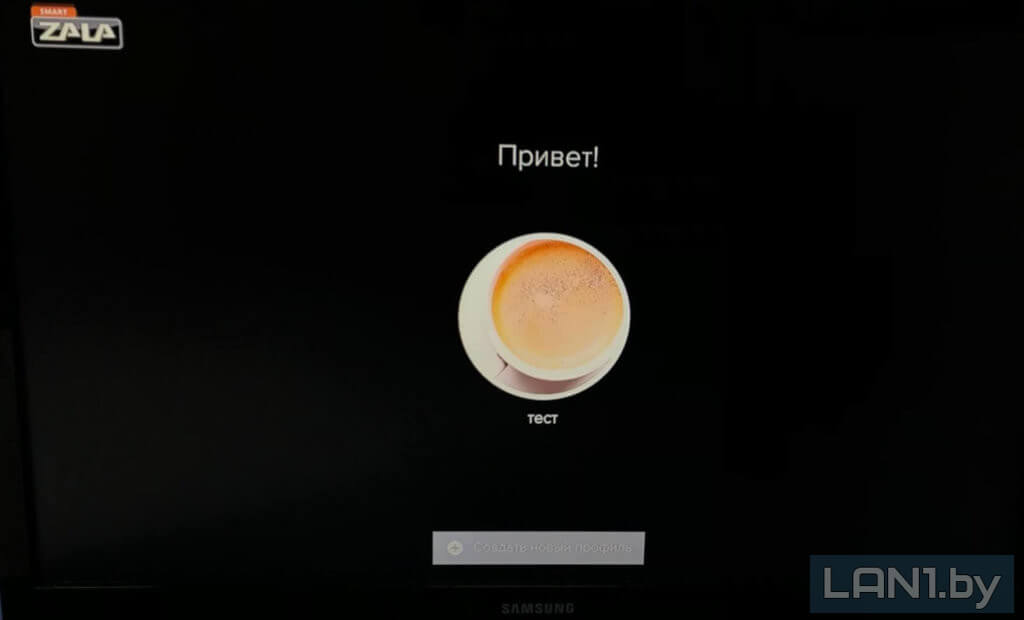 Рисунок 22 — Создание профиля
После создания профиля появляется меню приложения, в котором мы можем перейти к просмотру каналов, зайти в настройки или использовать YouTube.
 Рисунок 24 — Список каналов
  Рисунок 25 — Программа передач
  Рисунок 26 — Меню настроек
Источник
Specifications:
|
Accompanying Data:
Zte ZXV10 B700 Set-top boxes PDF Operation & User’s Manual (Updated: Wednesday 25th of January 2023 06:55:29 AM)
Rating: 4.5 (rated by 59 users)
Compatible devices: ATV1960, Media Link HD, ZXV10 B760H, DIB-360, TS6512HD, MMC-B19, SH960S-AT, ZXV10 B860H.
Recommended Documentation:
Zte ZXV10 B700: Text of Operation & User’s Manual
(Ocr-Read Version Summary of Contents, UPD: 25 January 2023)
-
13, 6 6 6 OperationGuide Standby/WorkingStatus SwitchtheSTBbetweenthestandbyandworkingstatus. SwitchtheTVbetweenthestandbyandworkingstatus. SwitchthesystemmodeoftheTV. EPGOperations PressthisbuttonontheremotecontroltoentertheEPGhomepage. Pressdirectionbuttons(up,down,left,andright)ontheremotecontrolto selectanEPGitem(suchasbutton,textbox,column).PressOKonthe remotecontroltoconfirmtheselection. W…
-
2, L E G A L I N F O R M A T I O N Copyright©2008ZTECORPORATION. Thecontentsofthisdocumentareprotectedbycopyrightlawsandinternationaltreaties. Anyreproductionordistributionofthisdocumentoranyportionofthisdocument,inany formbyanymeans,withoutthepriorwrittenconsentofZTECORPORATIONisprohibited. Additionally,thecontentsofthisdocumentareprotectedbycontractualcondentialityobl…
-
19, 9 9 9 TextInput Inputviaremotecontrol Operations Toinputnumerals,lettersandsymbolsviatheremotecontrol,performthefollowingsteps: 1.Selectthetextbox. 2.PressTXTtoswitchtotheinterestedinputmode.ThecurrentinputmodeisshownontheTV screen. IconNameDescription _NumeralinputmodeNoiconisshown. EnglishinputmodeUsedtoinputletters,numerals andEnglishwords. SymbolinputmodeUsedtoinputsymbols. 3.W…
-
14, EnterTVODprogram. EnterVODprogram. Enterinformationsurfingprogram. Enterapplicationprogram. CommonOperationsDuringWatchingPrograms Usethefollowingbuttonstocontrolthevolume. Switchbetweendifferentaudiochannels(leftchannel,rightchannel,stereo). Turnon/offthevolumeoftheSTB. Increase/decreasetheoutputvolumeoftheSTB. Increase/decreasetheoutputvolumeoftheTV. Usethe…
-
3, Contents 1SafetyInstruction……………………………………………………………………….2 2PackingList………………………………………………………………………………3 3Panels………………………………………………………………………………………4 FrontPanel………………………………………………………….…
-
24, SignalIntensitySignalStatus 55-79Good 80-100Verygood Note: Whenthesignalintensityislowerthan50,theconnectionwillnotbesmooth. Troubleshooting 1.Symptom:Thealertinformationontheloadingfailureofwirelessnetworkcardpopsup. Possiblecause:Thewirelessnetworkcardisnotinserted,oritisnotwellconnected. Solution:Checktheinterface.Pulloutthewirelessnetworkcardandre-insertit.SelectTry Againtoretry,orpressth…
-
8, 4 4 4 ConnectingUp ConnectingNetwork ThissectionintroducesthenetworkconnectionmethodsforSTB.Selectonemethodtoconnectac- cordingtotheon-sitecondition. Note: ThewirelessnetworkcardisdesignatedtoW200CUSBwirelessnetworkcardprovidedbyZTE.Itis recommendedtouseZXV10W300residentialgatewaydeviceofZTEtogetthebestperformance. VideoandAudioConnections ConnectingStandardDenitionInterface 1.ConnecttheRandLi…
-
10, ConnectingDigitalAudio Figure5DigitalAudioOutput PowerON 1.Makesurethatallcablesareconnectedcorrectly. 2.Makesurethatalldevicesarepoweredbymains. 3.TurnonthepowerswitchontheTV. 4.TurnonthepowerswitchontheZXV10B700. 5.PressTV/AVbuttontoswitchthesystemmodeofTVuntiltheEPGpageisshownonTV. UpgradingAutomatically TheZXV10B700canautomaticallyconnecttotheserveroneachpo…
-
15, PressthisbuttontooperatefastforwardwhenplayingVODorTSTVprogram. PressthisbuttontooperatefastbackwardwhenplayingVODorTSTVprogram. Whilewatchingtheprogramorganizedinchapters,pressthisbuttontogotothenext chapter. Whilewatchingtheprogramorganizedinchapters,pressthisbuttontobacktothe previouschapter. Pressthisbuttontopopuptheprogramprogressbar.Youcanusetheleftandright direct…
-
23, 6.SelectSearchintheServicesSettingspagetondnearbyAP .Afterthat,selectanAP . 7.Setthefollowingparameters:authenticationmode,encryptionmode,encryptionkey,encryption keyID.Aftersettings,selectNext. Note: DifferentAPneedstosetdifferentparameters.Settheparametersaccordingtotheon-sitede- mandsofAP . 8.Setnetworkparameters. Selectanaccessmodeaccordingtothenetworksituation. Acc…
-
17, ProblemPossibleCauseSolution Thereisnobatteryintheremote control,orthebatteriesare installedwithwrongpolarities. Installthebatteriescorrectly. Thebatteriesrunoutofpower.Replacethebatteries. Theremotecontrolfails. TVcannotreceiveinstructions fromtheremotecontrol. Usetheremotecontrolata placeclosertotheSTB,or removetheobstaclebetween theremotecontrolandtheSTB.…
-
12, Note: TheremotecontrolispoweredbytwoAAAbatteries.InserttwoAAAbatteriesintotheremotecontrol accordingtothepolarityinstructiondisplayedonit.Duringtheoperation,pointthefrontpartofthe remotecontroltotheinfraredreceivingareaontheSTB. TVLearningButtons Theremotecontrolhasfourbuttons(Power,TV/AV,VOL+,VOL-)havingTVlearningfunctions. ThesefourcorrespondingfunctionsonTVremotecontrolcanbeope…
-
22, 10 10 10 WirelessNetworkCardUsage Guidelines Notice Restrictions �ThewirelessnetworkcardisdesignatedtotheW200CUSBwirelessnetworkcardprovidedby ZTE. �ItisrecommendedtousetheZXV10W300residentialgatewaydeviceofZTEtogetthebest performance. InstallationPrerequisites Itisrecommendedtoconformtothefollowingprerequisitesforgoodperformanceofthedevice: �ThereisnoobstaclebetweenAPandwirelessnetwork…
Zte ZXV10 B700: Recommended Instructions
PRO 2.5 16GB, 4383, 77, Water Filter and Cartridge QL2-OW200L, AW 149


-
FAQ No HDMI input on your TV? The Manhattan T1 and T2-R are designed for HD, which requires HDMI. However, if you have an older TV that doesn’t have HDMI, these models can almost certainly be connected to your TV using the Analogue AV Kit (not included). Your TV simply needs either of these inputs: Manhattan Analogue AV Kit Only £4.99 (inc VAT) + delivery. To order, call 020 8450 …
T1 Freeview 5
-
ModemSET-TOP BOXCONNECTION GUIDEConnect LAN cable from Set-Top Boxto modem.Wait 5 seconds and check that the LINK light on the Set-Top Box is green.Select the correct HDMI TV source.Connect power adaptor to Set-Top Box and switch on the power socket.Connect the HDMI cable from the Set-Top Box to the TV.Upon successful set-up, the clock will be changed to the current time.Set-Top B …
SET-TOP BOX 2
-
InclusionsUSER MANUALXstream Box (A)HDMI Cable (B)Remote (C)Power Adaptor (D)Connect power adaptor to power switch(5), turn on TV & Xstream box.Connect your signal cable (coming from antenna) to SAT IN port(1) at rear of Xstream box.IConnect other end of HDMI cable to TV’s HDMI port (3). IIIVIIConnect HDMI cable (provided with box) to HDMI port (2) at rear of Xstream box.Connect other e …
Xstream 3
-
Vivid (VTB-103) USB 2.0 TV Box ProOperation ManualPlease browse our online catalogue to view our full product range.44-48 Maitland Road, Mayfield East, NSW, 2304 Australia, [email protected] +61 249689313 Fax +61 249689314www.converters.tv …
Vivid VTB-103 6
-
Motorola, Inc. 101 Tournament Drive, Horsham, Pennsylvania 19044 U.S.A.www.motorola.comMOTOROLA and the Stylized M Logo are registered in the US Patent and Trademark Office. Dolby and the double-D symbol are registered trademarks of Dolby Laboratories. HDMI, the HDMI Logo and High-Definition Multimedia Interface are trademarks or registered trademarks of HDMI …
RNG150N 2
-
Explorer® 1850Digital Home Communications TerminalUser’s GuidePOWERBYPASSSETTINGSEXITGUIDEINFOCHÐCH+VOLÐVOL+Lightning and PowerSurgesGround (earth) your cable systemto provide some protection againstvoltage surges and built-up staticcharges. Plug your equipment intoa surge protector in order to reducethe risk of damage from lightningstrikes and power surges. If youhave questions, call your c …
Explorer 1850 2
-
SAFETYCONCERNSThepurposeoftheSafetyConcernssectionistoensurethesafetyofusersandpreventpropertydamage.Pleasereadthisdocumentcarefullyforproperuse.ConventionsWarningProvidesinformationorinstructionsthatyoushouldfollowinordertoavoidpersonalinjuryorfatality.CautionProvidesinformationorinstructionsthatyoushouldfollowinordertoavoidaservicefailureordamagetoyourset-topbox.NoteIndi …
SMT-H3272 36
-
Set up your Chromecast with Google TV and Voice Remote Your Chromecast and the Google Home app will walk you through the steps to set up your Chromecast with Google TV and Voice remote. If you want to set up a different device, you can find the instructions in Set up smart devices in the Google Home app. What you need to get started A Chromecast with Google TV and Chromecast Voice rem …
Chromecast 3
-
EnglishManufactured under license from Dolby Laboratories.Dolby and the double-D symbol are trademarks of Dolby Laboratories.Manufactured under license under U.S. Patent #’s: 5,451,942; 5,956,674; 5,974,380; 5,978,762; 6,226,616; 6,487,535; 7,212,872; 7,333,929 & other U.S. and worldwide patents isasued & pending. DTS and the Symbol are registered trademarks, & DT …
TV-101 100
-
Installation & User Instructions – Please keep for future referenceImportant – Please read these instructions fully before installing or using152/6019 (D)BUSH — Set Top BoxThese instructions contain important information which will help you get the best from your appliance and ensure safe and correct installation, use and maintenance.If you need help or have dama …
CDVB52 17
Additional Information:
Popular Right Now:
Operating Impressions, Questions and Answers:
-
ZXV10 B700IP Set-Top BoxUser Manual
Version 2A
ZTE CORPORATIONZTE Plaza, Keji Road South,Hi-Tech Industrial
Park, Nanshan District, Shenzhen,P. R. China518057Tel: (86) 755
26771900Fax: (86) 755 26770801URL:
http://ensupport.zte.com.cnE-mail: [email protected] -
LEGAL INFORMATION
Copyright 2008 ZTE CORPORATION.
The contents of this document are protected by copyright laws
and international treaties.Any reproduction or distribution of this document or any portion
of this document, in anyform by any means, without the prior written consent of ZTE
CORPORATION is prohibited.Additionally, the contents of this document are protected by
contractual confidentiality obli-gations.
All company, brand and product names are trade or service marks,
or registered trade orservice marks, of ZTE CORPORATION or of their respective
owners.This document is provided as is, and all express, implied, or
statutory warranties, repre-sentations or conditions are disclaimed, including without
limitation any implied warranty ofmerchantability, fitness for a particular purpose, title or
non-infringement. ZTE CORPORA-TION and its licensors shall not be liable for damages resulting
from the use of or relianceon the information contained herein.
ZTE CORPORATION or its licensors may have current or pending
intellectual property rightsor applications covering the subject matter of this document.
Except as expressly providedin any written license between ZTE CORPORATION and its licensee,
the user of this documentshall not acquire any license to the subject matter herein.
ZTE CORPORATION reserves the right to upgrade or make technical
change to this productwithout further notice.
Users may visit ZTE technical support website
http://ensupport.zte.com.cn to inquire relatedinformation.
The ultimate right to interpret this product resides in ZTE
CORPORATION.Revision History
Revision No. Revision Date Revision Reason
R1.0 20090819 First Edition
Serial No. sjzl20094963
Publishing Date: 20100415
R1.1 20100415 Parameters Revised
-
Contents
1 Safety
Instruction……………………………………………………………………….
22 Packing List
………………………………………………………………………………
33 Panels
………………………………………………………………………………………
4Front Panel . . . . . . . . . . . . . . . . . . . . . . . . . .
. . . . . . . . . . . . . . . . . . . . . . . . . . . . . . . . . .
. . . . . . . . . . . . . . . . . . . . . . . . . . . . . . . . . .
4Rear Panel . . . . . . . . . . . . . . . . . . . . . . . . . . .
. . . . . . . . . . . . . . . . . . . . . . . . . . . . . . . . . .
. . . . . . . . . . . . . . . . . . . . . . . . . . . . . . . . . .
54 Connecting Up
…………………………………………………………………………..
6Connecting Network .. . . . . . . . . . . . . . . . . . . . . .
. . . . . . . . . . . . . . . . . . . . . . . . . . . . . . . . . .
. . . . . . . . . . . . . . . . . . . . . . . . . . . 6Video and Audio Connections .. . . . . . . . . . . . . . . . . .
. . . . . . . . . . . . . . . . . . . . . . . . . . . . . . . . . .
. . . . . . . . . . . . . . . . . . . . 6Power ON… . . . . . . . . . . . . . . . . . . . . . . . . . .
. . . . . . . . . . . . . . . . . . . . . . . . . . . . . . . . . .
. . . . . . . . . . . . . . . . . . . . . . . . . . . . . . . . .
8Upgrading Automatically . . . . . . . . . . . . . . . . . . . .
. . . . . . . . . . . . . . . . . . . . . . . . . . . . . . . . . .
. . . . . . . . . . . . . . . . . . . . . . . . . 85 Remote
Control………………………………………………………………………….
9STB Remote Control. . . . . . . . . . . . . . . . . . . . . . .
. . . . . . . . . . . . . . . . . . . . . . . . . . . . . . . . . .
. . . . . . . . . . . . . . . . . . . . . . . . . . . 9TV Learning Buttons .. . . . . . . . . . . . . . . . . . . . . .
. . . . . . . . . . . . . . . . . . . . . . . . . . . . . . . . . .
. . . . . . . . . . . . . . . . . . . . . . . . . . . 106 Operation
Guide…………………………………………………………………………
11Standby/Working Status.. . . . . . . . . . . . . . . . . . . . .
. . . . . . . . . . . . . . . . . . . . . . . . . . . . . . . . . .
. . . . . . . . . . . . . . . . . . . . . . . . 11EPG Operations.. . . . . . . . . . . . . . . . . . . . . . . . .
. . . . . . . . . . . . . . . . . . . . . . . . . . . . . . . . . .
. . . . . . . . . . . . . . . . . . . . . . . . . . . . . 11Common Operations During Watching Programs .. . . . . . . . . .
. . . . . . . . . . . . . . . . . . . . . . . . . . . . . . . . . .
. . . . . . 12Controlling Program Playing .. . . . . . . . . . . . . . . . . .
. . . . . . . . . . . . . . . . . . . . . . . . . . . . . . . . . .
. . . . . . . . . . . . . . . . . . . . . . 12Watching TSTV Program… . . . . . . . . . . . . . . . . . . . .
. . . . . . . . . . . . . . . . . . . . . . . . . . . . . . . . . .
. . . . . . . . . . . . . . . . . . . . . . 137
Troubleshooting…………………………………………………………………………
148 Technical Specification
……………………………………………………………….
169 Text Input
………………………………………………………………………………….
17Input via remote control . . . . . . . . . . . . . . . . . . . .
. . . . . . . . . . . . . . . . . . . . . . . . . . . . . . . . . .
. . . . . . . . . . . . . . . . . . . . . . . . . . 17Input via soft keyboard .. . . . . . . . . . . . . . . . . . . .
. . . . . . . . . . . . . . . . . . . . . . . . . . . . . . . . . .
. . . . . . . . . . . . . . . . . . . . . . . . . . 1810 Wireless Network Card Usage
Guidelines……………………………………. 20Notice.. . . . . . . . . . . . . . . . . . . . . . . . . . . . .
. . . . . . . . . . . . . . . . . . . . . . . . . . . . . . . . . .
. . . . . . . . . . . . . . . . . . . . . . . . . . . . . . . . . .
. . . 20Operation Steps .. . . . . . . . . . . . . . . . . . . . . . . .
. . . . . . . . . . . . . . . . . . . . . . . . . . . . . . . . . .
. . . . . . . . . . . . . . . . . . . . . . . . . . . . . . 20Checking Signals. . . . . . . . . . . . . . . . . . . . . . . .
. . . . . . . . . . . . . . . . . . . . . . . . . . . . . . . . . .
. . . . . . . . . . . . . . . . . . . . . . . . . . . . . . 21Troubleshooting .. . . . . . . . . . . . . . . . . . . . . . . .
. . . . . . . . . . . . . . . . . . . . . . . . . . . . . . . . . .
. . . . . . . . . . . . . . . . . . . . . . . . . . . . . . 221
-
111 Safety InstructionSpecial Note
If there is a plastic covering wrapping the device, remove the
covering before using the devicefor normal ventilation.
Please use the power adapter provided along with the device.
Make sure the position of the power switch on the rear panel of
the device before usage.Make sure that the batteries are installed correctly in the
remote control.Do not change the structure design and safety design of the
device.Precaution
Make sure that the electric voltage meets the device
requirements. Make sure that the elec-tric load of power outlet or power cable meets the requirements.
Check the cables periodically.Please replace the damaged cable immediately.
Make sure there is enough room for heat exhaustion from the
device.Place the device on a flat surface. Do not place any heavy
object on the device.Keep the device away from heat and water sources. Do not expose
the device to water, rain,and sunshine.
Power off and pull out the power plug if the device will not be
used for a long time.After power off, wait at least 15 seconds between power off and
next power-on.Service
Do not disassemble the device. Contact your service provider
when the following problems occur:The power cable or power socket is damaged.
If there is any liquid leaking into the device.
Fail to run normally even after following the instructions.
The device is damaged.
2
-
222 Packing ListNO. Item Remarks
1 Set-top box
One
2 Remote control
One
3 AAA battery
Two
4 AV cable
One
5 Straight-through network
cableOne
6 YPbPr component cable
7 Power adapter One
8 User manual One
9 Qualification certificate/WA
RRANTY
One
10 Packing list One
Note:
This packing list is for reference only. The items actually
delivered depend on the companion packinglist of the set-top box. Contact your dealer immediately if the
part is lost or damaged. For possiblechanging of the product, keep packaging box and available
components.3
-
333 Panels
Front Panel
Figure 1 Front Panel
NO. Description
1 Standby button
2 Running status indicator
Red: Standby state
Green: running normally
Yellow: Fault
OFF: Not powered ON
3 Connection status indicator
Green: Normal network connection
OFF: Disconnected or network failure
4 Infrared indicator (Green). It flashes when the STB receives
signals from the remote control5 MENU button. Its function is the same as that of remote
control6 Direction buttons. Their functions are the same as those of
remote control7 OK button. Its function is the same as that of remote
control4
-
Rear Panel
Figure 2 Rear Panel
NO. Description
1 Ethernet interface, used to connect to the external
network2 USB ports
3 HDMI output interface
4 Component video output interfaces
5 Composite video output interface
6 Audio output interfaces (left channel and right channel)
7 Digital audio output interface
8
Power socket: Make sure to use the delivered +12V power adapter.
Consult technicalpersonnel before using other types of power adapter
9 Power switch: Make sure the power switch is turned on after
the STB is powered on5
-
444 Connecting Up
Connecting Network
This section introduces the network connection methods for STB.
Select one method to connect ac-cording to the on-site condition.
Note:
The wireless network card is designated to W200C USB wireless
network card provided by ZTE. It isrecommended to use ZXV10 W300 residential gateway device of ZTE
to get the best performance.Video and Audio Connections
Connecting Standard Definition Interface1. Connect the R and L
interfaces on STB to the corresponding interfaces on TV with AV
cables(red and white).
2. Connect the CVBS interface on STB to video input interface on
TV with AV cable (yellow), asshown in Figure 3.
6
-
Figure 3 Standard Definition Interface
Connecting High Definition InterfaceZXV10 B700 provides two high
definition output interface types. Select one of the following
methodsto connect with video/audio devices (such as TV, stereo).
1. Connect the R and L interfaces on STB to the corresponding
interfaces on TV with AV cables (redand white). Connect the Y-Pb-Pr component video output
interfaces on STB to the correspondinginterfaces on TV with YPbPr component cable, as shown in Figure
4.2. Connect the HDMI interface on STB to the corresponding
interface on TV with HDMI cable, asshown in Figure 4.
Figure 4 High Definition Interface
Note:
HDMI output interface simultaneously generates uncompressed
high-definition video and multi-channel audio data. One HDMI data cable is capable of conveying
both video and audio data.7 -
Connecting Digital Audio
Figure 5 Digital Audio Output
Power ON
1. Make sure that all cables are connected correctly.
2. Make sure that all devices are powered by mains.
3. Turn on the power switch on the TV.
4. Turn on the power switch on the ZXV10 B700.
5. Press TV/AV button to switch the system mode of TV until the
EPG page is shown on TV.Upgrading Automatically
The ZXV10 B700 can automatically connect to the server on each
power-on. The ZXV10 B700 canautomatically check whether an upgrade is necessary. The upgrade
will start automatically if neces-sary. The upgrade takes three to five minutes. Do not perform
any operation during this period.8
-
555 Remote Control
STB Remote Control
Figure 6 shows the STB remote control.
Figure 6 STB Remote Control
9
-
Note:
The remote control is powered by two AAA batteries. Insert two
AAA batteries into the remote controlaccording to the polarity instruction displayed on it. During
the operation, point the front part of theremote control to the infrared receiving area on the STB.
TV Learning Buttons
The remote control has four buttons (Power, TV/AV, VOL +, VOL-)
having TV learning functions.These four corresponding functions on TV remote control can be
operated on the STB remote controlthrough learning. Users can perform some operations for both TV
and STB by only using the remotecontrol of STB.
Learning Receiver
Window
Operation Steps
1. Press SET for about 3 seconds until the learning status
indicator turnsinto solid green, which signals the starting of the learning
process.2. Point the remote control of the target learning TV to the
learning receiverwindow. Press the target learning button on the TV remote
control (e.g.,the Power button for TV), then the learning status indicator
changes fromsolid green to solid red.
3. Press the target button on the STB remote control (e.g.,
Power button),then the learning status indicator changes from solid red to
solid green,which signals that the learning process is successful.
4. Repeat step 2 and step 3 to learn other buttons.
5. After completing the learning process, do not perform any
operations untilthe learning status indicator is off, which signals that the
learning information is saved successfully.
Note:
If the remote control of STB fails to control TV after learning,
please learn again according to theabove steps.
10
-
666 Operation Guide
Standby/Working Status
Switch the STB between the standby and working status.
Switch the TV between the standby and working status.
Switch the system mode of the TV.
EPG Operations
Press this button on the remote control to enter the EPG home
page.Press direction buttons (up, down, left, and right) on the
remote control toselect an EPG item (such as button, text box, column). Press OK
on theremote control to confirm the selection.
When EPG contents are organized in multiple levels or pages, you
can perform page flipping operationvia the following buttons.
Go to the upper level if the current level is not the top-most
level.Go to the previous page if there are multiple pages in the same
level.Go to the next page if there are multiple pages in the same
level.Use the following buttons to switch program mode and open the
required page directly.Enter live TV program.
11
-
Enter TVOD program.
Enter VOD program.
Enter information surfing program.
Enter application program.
Common Operations During Watching Programs
Use the following buttons to control the volume.
Switch between different audio channels (left channel, right
channel, stereo).Turn on/off the volume of the STB.
Increase/decrease the output volume of the STB.
Increase/decrease the output volume of the TV.
Use the following buttons to switch channels when watching
programs.Display the channel number on the screen. Then you can enter the
channel numberto switch to that channel.
Switch the channel in order.
Controlling Program Playing
When a program is playing (such as live TV, VOD, TSTV), you can
use the following buttons to controlthe progress of the program.
Press this button to pause the program; or press it again to
resume the program.Press this button to open a dialog box. Stop playing the program
according to theprompt information in the dialog box.
12
-
Press this button to operate fast forward when playing VOD or
TSTV program.Press this button to operate fast backward when playing VOD or
TSTV program.While watching the program organized in chapters, press this
button to go to the nextchapter.
While watching the program organized in chapters, press this
button to back to theprevious chapter.
Press this button to pop up the program progress bar. You can
use the left and rightdirection buttons to adjust the progress of the program until
the interested startingpoint is reached. Then press OK on the remote control to play
the program from theinterested point.
Press this button to display the information of current channel
or program when theprogram is playing.
Watching TSTV Program
When watching the live program, you can utilize the time-shifted
function of the STB to watch theprogram content before the current time slot. Users can watch
some missed programs through time-shifted function.
Press to enter TSTV program. Then press to play TSTV
program.
Press to go back to the starting point of the TSTV program.
Enter TSTV program
Press to pop up the program progress bar. You can use the
leftdirection button to adjust the progress of the program until the
interestedstarting point is reached. Then press OK on the remote control
to play theTSTV program from the interested point
Exit TSTV program
Press to exit TSTV mode and go back to Live program mode.
13
-
777 TroubleshootingProblem Possible Cause Solution
The power adapter has not been
connected.
Connect the power adapter
correctly.
The power adapter is damaged. Consult your service provider
and replace a new one.
The indicator is off after
switching on the STB.
The power outlet has no power. Check and make sure the power
supply is available.
The network cable has not been
connected properly.
Connect the network cable
properly or replace it with a new
cable.
The service network fails. Wait or consult the service
provider.
Network connection fails.
The network configuration is not
correct.
Configure the network
parameters again.
The STB is in the standby status. Switch the STB to the
workingstatus.
The video cable has not been
connected properly.
Reconnect video cable.
No image on the TV screen.
The video input source of the TV
has been set wrongly.
Press the TV/AV button to
switch the system mode of the
TV until the EPG page is shown
on the TV.
The STB is in the standby status. Switch the STB to the
workingstatus.
The audio cable has not been
connected properly.
Reconnect audio cable.
No sound from the speaker.
The STB or TV is in the mute
status, or the volume has been
set to the minimum.
Press on the remote
control, or increase the volume
of the STB or TV.
14
-
Problem Possible Cause Solution
There is no battery in the remote
control, or the batteries are
installed with wrong polarities.
Install the batteries correctly.
The batteries run out of power. Replace the batteries.
The remote control fails.
TV cannot receive instructions
from the remote control.
Use the remote control at a
place closer to the STB, or
remove the obstacle between
the remote control and the STB.
The corresponding sound does
not match the image.
Some video programs are
broadcasted in multiple audio
tracks.
Press the L/R button on the
remote control to switch the
audio mode.
Other problems Restart the STB or call the
customer service hotline.
15
-
888 Technical SpecificationCompliant
Standard
Q/SZX 186 — 2005
Input: 100 — 240V 50/60HzPower Adapter
Output: +12.0VDC
Working environment temperature: 0 — +40Environment
RequirementWorking environment humidity: 10% — 90%
Protocol TCP/IP, HTML 4.0, HTTP 1.1/JavaScript 1.5
Supports PAL, NTSC
Receiving bit rate range: 200K — 10M
Video
Resolution: 720 576/PAL, 720 480/NTSC, 1280 720 /720p, 1920
1080/1080i, 1920 1080 /1080p
Supports ADSL, LAN and WLAN accessAccess Mode
Supports PPPoE, DHCP
Dimension 230 mm 150 mm 40 mm (Length Width Height )
Note:
The actual product may differ with the above technical
specifications due to product updates andrapid technology development.
16
-
999 Text Input
Input via remote control
OperationsTo input numerals, letters and symbols via the remote
control, perform the following steps:1. Select the text box.
2. Press TXT to switch to the interested input mode. The current
input mode is shown on the TVscreen.
Icon Name Description
_ Numeral input mode No icon is shown.
English input mode Used to input letters, numerals
and English words.
Symbol input mode Used to input symbols.
3. When the interested input mode is displayed on the screen,
you need to stop pressing TXT tokeep the current input mode.
4. Press numeral buttons on the remote control to input letters,
numerals, or symbols.During inputting, press the up/down buttons to turn page.
PressDel button to delete the characterbefore the cursor. Press Back to exit the input mode.
Numeral InputThere are two methods for numeral input. To input
the numeral 8, the user has the following twooptions:
Method 1 When none of the input mode is chosen, directly press 8
to input the numeral 8.Method 2 When the English input mode is chosen, press 8 and then
press up directionbutton to input the numeral 8.
Letter InputTo input the letter Z, perform the following
steps:1. Press TXT to switch to the English input mode.17
-
2. Press 9 and then press OK to display the input interface.
3. Press 8 to input the upper-case letter Z.
8 is the number corresponding to letter Z.
Symbol InputThere are three methods for symbol input. To input
the symbol ., the user has the following threeoptions:
Method 1 1. Press TXT to switch to the symbol input mode.
2. If the interested symbol is not in the current interface, use
up and down directionbuttons to turn the page until the interested one is found.
3. Press 2 to input the symbol .. 2 corresponds to symbol .. Or
use the directionbuttons to select . and then press OK.
Method 2 1. In English input mode, press 1 to switch to the text
input mode.2. Then follow the method 1 to input the symbol.
Method 3 1. In English input mode, press 0 to display the input
interface.2. Press 4 to input the symbol .. 4 corresponds to symbol .. Or
use the directionbuttons to select . and then press OK.
Input via soft keyboard
Activate/Close Soft Keyboard1. Select the text box.
2. Press LOC/KB on the remote control to activate the soft
keyboard. Then the soft keyboard ap-pears on the TV screen.
3. Press LOC/KB on the remote control to close the soft
keyboard. Then the soft keyboard disap-pears from the TV screen.
Switching Between InterfacesIf the capital letter or symbol you
want to input cannot be found in the lower-case interface, you
needto switch to the upper-case interface.
1. Use direction buttons on the remote control to select Caps on
the soft keyboard. Then press OKon the remote control to switch to the letter interface.
2. Use direction buttons on the remote control to select Shift
on the soft keyboard. Then press OKon the remote control to switch to the symbol interface.
18
-
Letter/Numeral/Symbol Input1. Press LOC/KB on the remote control
to activate the soft keyboard.2. Switch to the another interface of soft keyboard if the
required character is not in current interface.3. Use direction buttons on the remote control to select the
required character.4. Press OK to input the selected character.
19
-
101010 Wireless Network Card UsageGuidelines
Notice
Restrictions The wireless network card is designated to the
W200C USB wireless network card provided byZTE.
It is recommended to use the ZXV10 W300 residential gateway
device of ZTE to get the bestperformance.
Installation PrerequisitesIt is recommended to conform to the
following prerequisites for good performance of the device:There is no obstacle between AP and wireless network card of
STB.The signals of AP and STB wireless network card are in strong
status.The wireless network card is equipped with extension line, which
is convenient for position andangle adjustment.
Operation Steps
1. Make sure that the STB is powered off. Insert the wireless
network card into the USB interface.Note:
It is forbidden to insert/pull out the wireless network card
during usage.2. Switch on the STB, and then the prompt informationNow
connecting, please wait… is displayedon the TV screen. Input the password when the dialog box Input
Password pops up.3. Press SET on the remote control to enter the EPG page. Input
the password when the dialogbox Input Password pops up. And open the Configuration page of
STB.4. Select Basic Settings to open the Network Connection page.
Select WLAN mode.5. Select Next to open the Services Settings page.
Note:
Make sure that the wireless network card is well
connected.20 -
6. Select Search in the Services Settings page to find nearby
AP. After that, select an AP.7. Set the following parameters: authentication mode, encryption
mode, encryption key, encryptionkey ID. After settings, select Next.
Note:
Different AP needs to set different parameters. Set the
parameters according to the on-site de-mands of AP.
8. Set network parameters.
Select an access mode according to the network situation.
Access Mode Parameter Description
PPPoE User: ADSL username
Password: ADSL password
DHCP It is not necessary to set any parameters. The STB gets the
parameters (suchas IP address, gateway) automatically.
LAN IP Address: IP address of STB
Mask: Subnet mask of STB
Gateway: Gateway of STB
DNS Server: DNS address of STB
9. After settings, select OK to return to the Configuration page
and reset the STB.10. After resetting, the STB connects to EPG server if the
parameters are correctly set.Note:
Make sure that the AP runs normally before reset.
Checking Signals
After wireless configuration, you need to check wireless signals
according to the following procedure:1. Press SET to enter Configuration page.
2. Use direction buttons to select Network Information. Enter
the Network Information page.Observe the wireless signal status according to WLAN Status,
WLAN Intensity.Signal Intensity Signal Status
0 — 34 Poor
35 — 54 Medium
21
-
Signal Intensity Signal Status
55 — 79 Good
80 — 100 Very good
Note:
When the signal intensity is lower than 50, the connection will
not be smooth.Troubleshooting
1. Symptom: The alert information on the loading failure of
wireless network card pops up.Possible cause: The wireless network card is not inserted, or it
is not well connected.Solution: Check the interface. Pull out the wireless network
card and re-insert it. Select TryAgain to retry, or press the SET on remote control to modify the
settings.2. Symptom: The alert information of the connection failure of
wireless network pops up.Possible cause: The wireless network card fails to access
AP.Solution: Press the SET on remote control to modify the
settings. Make sure that the settings ofAP and WLAN of STB are well matched, and then reset the STB. If
the symptom still exists, youneed to call the customer hotline.
3. Symptom: The WLAN is associated, but there is still no
service.Possible cause: The settings of AP and STB are not matched.
Solution: Press the SET on remote control to modify the
settings. Make sure that the settings ofAP and WLAN of STB are well matched, and then reset the STB. If
the symptom still exists, youneed to call the customer hotline.
4. Symptom: The program connection is not smooth. The wireless
signal intensity is less than 50.Possible cause: The wireless network card or the associated AP
is not in proper position. Mean-while, other factors also influence the data transmission rate
and distance.Solution: Adjust the position of associated AP and wireless
network card to meet the followingrequirements:
The distance between AP and wireless network card should be
limited in the maximum dis-tance.
Outdoor environment: There is no obstacle between AP and
wireless network card.Indoor environment: In office or at home, if AP and wireless
network card also cannot getgood wireless connection, it is recommended to use cable
connection mode.22
1 Safety Instruction2 Packing List3 PanelsFront PanelRear
Panel4 Connecting UpConnecting NetworkVideo and Audio
ConnectionsPower ONUpgrading Automatically5 Remote ControlSTB Remote ControlTV Learning Buttons
6 Operation GuideStandby/Working StatusEPG OperationsCommon
Operations During Watching ProgramsControlling Program
PlayingWatching TSTV Program7 Troubleshooting8 Technical Specification9 Text InputInput via
remote controlInput via soft keyboard10 Wireless Network Card Usage GuidelinesNoticeOperation
StepsChecking SignalsTroubleshooting
(Ocr-Read Summary of Contents of some pages of the Zte ZXV10 B700 Document (Main Content), UPD: 27 July 2023)
-
23, 6.SelectSearchintheServicesSettingspagetondnearbyAP .Afterthat,selectanAP . 7.Setthefollowingparameters:authenticationmode,encryptionmode,encryptionkey,encryption keyID.Aftersettings,selectNext. Note: DifferentAPneedstosetdifferentparameters.Settheparametersaccordingtotheon-sitede- mandsofAP . 8.Setnetworkparameters. Selectanaccessmodeaccordingtothenetworksituation. AccessModeParameterDescription PPPoE�User:ADSLusername �P…
-
20, 2.Press9andthenpressOKtodisplaytheinputinterface. 3.Press8toinputtheupper-caseletterZ. 8isthenumbercorrespondingtoletterZ. SymbolInput Therearethreemethodsforsymbolinput.T oinputthesymbol“.”,theuserhasthefollowingthree options: Method11.PressTXTtoswitchtothesymbolinputmode. 2.Iftheinterestedsymbolisnotinthecurrentinterface,useupanddowndirection buttonstoturnthepageuntiltheinterestedoneisfound. 3.Press2toinputthesymbol“.”.2correspondstosymbol“.”.Orusethedirection buttonstoselect“.…
-
9, Figure3StandardDenitionInterface ConnectingHighDenitionInterface ZXV10B700providestwohighdenitionoutputinterfacetypes.Selectoneofthefollowingmethods toconnectwithvideo/audiodevices(suchasTV,stereo). 1.ConnecttheRandLinterfacesonSTBtothecorrespondinginterfacesonTVwithAVcables(red andwhite).ConnecttheY-Pb-PrcomponentvideooutputinterfacesonSTBtothecorresponding interfacesonTVwithYPbPrcomponentcable,asshowninFigure4. 2.ConnecttheHDMIinterfaceonS…
-
18, 8 8 8 TechnicalSpecication Compliant Standard Q/SZX186-2005 Input:100-240V50/60Hz PowerAdapter Output:+12.0VDC Workingenvironmenttemperature:0℃-+40℃ Environment Requirement Workingenvironmenthumidity:10%-90% ProtocolTCP/IP,HTML4.0,HTTP1.1/JavaScript1.5 SupportsPAL,NTSC Receivingbitraterange:200K-10M Video Resolution:720×576/PAL,720×480/NTSC,1280×720/720p,1920×1080 /1080i,1920×1080/1080p SupportsADSL,LANandWLANaccess AccessMode SupportsPPPoE,DHCP Dimension230mm×1…
-
17, Zte ZXV10 B700 ProblemPossibleCauseSolution Thereisnobatteryintheremote control,orthebatteriesare installedwithwrongpolarities. Installthebatteriescorrectly. Thebatteriesrunoutofpower.Replacethebatteries. Theremotecontrolfails. TVcannotreceiveinstructions fromtheremotecontrol. Usetheremotecontrolata placeclosertotheSTB,or removetheobstaclebetween theremotecontrolandtheSTB. Thecorrespondingsounddoes notmatchtheimage. Somevideoprogramsare broadc…
-
19, 9 9 9 TextInput Inputviaremotecontrol Operations Toinputnumerals,lettersandsymbolsviatheremotecontrol,performthefollowingsteps: 1.Selectthetextbox. 2.PressTXTtoswitchtotheinterestedinputmode.ThecurrentinputmodeisshownontheTV screen. IconNameDescription _NumeralinputmodeNoiconisshown. EnglishinputmodeUsedtoinputletters,numerals andEnglishwords. SymbolinputmodeUsedtoinputsymbols. 3.Whentheinterestedinputmodeisdisplayedonthescreen,youneedtostoppressingTXTto keepthecurrentinputmode. 4…
-
12, Note: TheremotecontrolispoweredbytwoAAAbatteries.InserttwoAAAbatteriesintotheremotecontrol accordingtothepolarityinstructiondisplayedonit.Duringtheoperation,pointthefrontpartofthe remotecontroltotheinfraredreceivingareaontheSTB. TVLearningButtons Theremotecontrolhasfourbuttons(Power,TV/AV,VOL+,VOL-)havingTVlearningfunctions. ThesefourcorrespondingfunctionsonTVremotecontrolcanbeoperatedontheSTBremotecontrol throughlearning.Users…
-
3, Contents 1SafetyInstruction……………………………………………………………………….2 2PackingList………………………………………………………………………………3 3Panels………………………………………………………………………………………4 FrontPanel………………………………………………………………………………….4 RearPanel…………………………………………………….…
-
22, 10 10 10 WirelessNetworkCardUsage Guidelines Notice Restrictions �ThewirelessnetworkcardisdesignatedtotheW200CUSBwirelessnetworkcardprovidedby ZTE. �ItisrecommendedtousetheZXV10W300residentialgatewaydeviceofZTEtogetthebest performance. InstallationPrerequisites Itisrecommendedtoconformtothefollowingprerequisitesforgoodperformanceofthedevice: �ThereisnoobstaclebetweenAPandwirelessnetworkcardofSTB.…
-
2, Zte ZXV10 B700 L E G A L I N F O R M A T I O N Copyright©2008ZTECORPORATION. Thecontentsofthisdocumentareprotectedbycopyrightlawsandinternationaltreaties. Anyreproductionordistributionofthisdocumentoranyportionofthisdocument,inany formbyanymeans,withoutthepriorwrittenconsentofZTECORPORATIONisprohibited. Additionally,thecontentsofthisdocumentareprotectedbycontractualcondentialityobli- gations. Allcompany,brandandproductnamesaretrad…
-
6, 3 3 3 Panels FrontPanel Figure1FrontPanel NO.Description 1Standbybutton 2Runningstatusindicator �Red:Standbystate �Green:runningnormally �Yellow:Fault �OFF:NotpoweredON 3Connectionstatusindicator �Green:Normalnetworkconnection �OFF:Disconnectedornetworkfailure 4Infraredindicator(Green).ItflasheswhentheSTBreceivessignalsfromtheremotecontrol 5MENUbutton.Itsfunctionisthesameasthatofremotecontrol 6Directionbuttons.The…
-
15, Zte ZXV10 B700 PressthisbuttontooperatefastforwardwhenplayingVODorTSTVprogram. PressthisbuttontooperatefastbackwardwhenplayingVODorTSTVprogram. Whilewatchingtheprogramorganizedinchapters,pressthisbuttontogotothenext chapter. Whilewatchingtheprogramorganizedinchapters,pressthisbuttontobacktothe previouschapter. Pressthisbuttontopopuptheprogramprogressbar.Youcanusetheleftandright directionbuttonstoadjusttheprogressoftheprogr…
-
24, SignalIntensitySignalStatus 55-79Good 80-100Verygood Note: Whenthesignalintensityislowerthan50,theconnectionwillnotbesmooth. Troubleshooting 1.Symptom:Thealertinformationontheloadingfailureofwirelessnetworkcardpopsup. Possiblecause:Thewirelessnetworkcardisnotinserted,oritisnotwellconnected. Solution:Checktheinterface.Pulloutthewirelessnetworkcardandre-insertit.SelectTry Againtoretry,orpresstheSETonremotecont…
-
8, 4 4 4 ConnectingUp ConnectingNetwork ThissectionintroducesthenetworkconnectionmethodsforSTB.Selectonemethodtoconnectac- cordingtotheon-sitecondition. Note: ThewirelessnetworkcardisdesignatedtoW200CUSBwirelessnetworkcardprovidedbyZTE.Itis recommendedtouseZXV10W300residentialgatewaydeviceofZTEtogetthebestperformance. VideoandAudioConnections ConnectingStandardDenitionInterface 1.ConnecttheRandLinterfacesonSTBtothecorrespondinginterfacesonTVwit…
-
13, 6 6 6 OperationGuide Standby/WorkingStatus SwitchtheSTBbetweenthestandbyandworkingstatus. SwitchtheTVbetweenthestandbyandworkingstatus. SwitchthesystemmodeoftheTV. EPGOperations PressthisbuttonontheremotecontroltoentertheEPGhomepage. Pressdirectionbuttons(up,down,left,andright)ontheremotecontrolto selectanEPGitem(suchasbutton,textbox,column).PressOKonthe remotecontroltoconfirmtheselection. WhenEPGcon…
-
5, Zte ZXV10 B700 2 2 2 PackingList NO.ItemRemarks 1Set-topbox One 2Remotecontrol One 3AAAbattery Two 4AVcable One 5Straight-throughnetwork cable One 6YPbPrcomponentcable 7PoweradapterOne 8UsermanualOne 9Qualificationcertificate/WA RRANTY One 10PackinglistOne Note: Thispackinglistisforreferenceonly.Theitemsactuallydelivereddependonthecompanionpacking listoftheset-topbox.Contactyourdealerimmediatelyifthepartislostordamaged.For…
-
1, ZXV10B700 IPSet-TopBox UserManual Version2A ZTECORPORATION ZTEPlaza,KejiRoadSouth, Hi-TechIndustrialPark,NanshanDistrict,Shenzhen, P.R.China 518057 Tel:(86)75526771900 Fax:(86)75526770801 URL:http://ensupport.zte.com.cn E-mail:[email protected]
…