HotWhHEELS Slot Car Track Set Инструкция по эксплуатации

СОДЕРЖАНИЕ
ИТОГО: 85 ШТ.

ВНЕШНИЙ ВИД

МОНТАЖ

Перед соединением дорожек отрегулируйте деформированные стыки. Не соединяйте гусеницы вместе, если стыки деформированы.

Удерживайте и соединяйте дорожки вместе, как показано.

Прикрепите ограждение к краю гусеницы, как показано.

Соберите опору гусеницы
ИГРАТЬ
Блок управления — установка аккумулятора (для версии B / O)

1. Открутите винт на крышке аккумуляторного отсека.
2. Откройте крышку аккумуляторного отсека.

3. Вставьте новые 6 батареек AA (1.5 В) в батарейный отсек блока управления, соблюдая полярность (+/–).
4. Закройте крышку аккумуляторного отсека.
5. Затяните винт на крышке аккумуляторного отсека.

Передатчик — установка батареи

- Откручиваем винт на крышке аккумуляторного отсека.
- Откройте крышку аккумуляторного отсека.
- Вставьте 2 новые батарейки AAA (1.5 В) в батарейный отсек каждого передатчика, соблюдая полярность (+/–).
- Закройте крышку аккумуляторного отсека.
- Затяните винт на крышке аккумуляторного отсека.
ОБСЛУЖИВАНИЕ

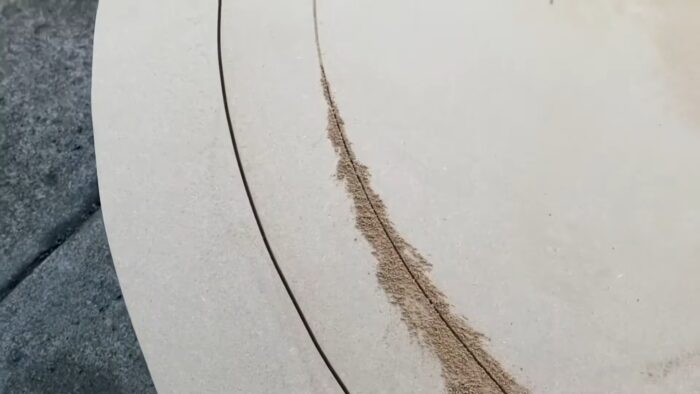
Направляющий штифт должен войти в прорезь, как показано. Убедитесь, что щетки автомобиля находятся в правильном положении. Установите машину на трассу и убедитесь, что она хорошо контактирует с гусеницей.
Упаковка и инструкция по эксплуатации содержат важную информацию. Сохраните их для использования в будущем. Мы оставляем за собой право улучшать / изменять спецификации и цвета без предварительного уведомления.
БЕЗОПАСНОСТЬ
- Рекомендуется использовать щелочные батареи (для версии B / O)
- Следует использовать только батареи того же или эквивалентного типа, как рекомендовано.
- Не используйте вместе щелочные, стандартные или аккумуляторные батареи.
- Не используйте одновременно старые и новые батареи или батареи разных типов.
- Неперезаряжаемые батареи нельзя заряжать.
- Аккумуляторы только для зарядки взрослых
- Аккумуляторные батареи необходимо вынуть из продукта перед их зарядкой.
- Обязательно вставляйте батарейки с соблюдением полярности и всегда следуйте инструкциям производителя батарей.
- Выньте все батареи, когда они не используются
- Разряженные батареи необходимо удалить из продукта.
- Клеммы питания не должны замыкаться накоротко.
- Правильно утилизируйте батареи. Не бросайте батареи в огонь, это может привести к их взрыву или утечке, что может привести к травмам или повреждению.
- Установка и снятие батареи должны выполняться только взрослыми.
Заявление о соответствии этикеткам FCC:
Это устройство соответствует части 15 правил FCC. Эксплуатация возможна при соблюдении следующих двух условий:
- Это устройство не должно вызывать вредных помех, и
- Это устройство должно принимать любые помехи, включая помехи, которые могут вызвать сбои в работе. Примечание. Данное оборудование было протестировано и признано соответствующим ограничениям для цифровых устройств класса B в соответствии с частью 15 правил FCC. Эти ограничения разработаны для обеспечения разумной защиты от вредных помех при установке в жилых помещениях. Это оборудование генерирует, использует и может излучать радиочастотную энергию и, если оно установлено и используется с нарушением инструкций, может создавать вредные помехи для радиосвязи. Однако нет гарантии, что помехи не возникнут при конкретной установке. Если это оборудование действительно создает вредные помехи для приема радио или телевидения, что можно определить путем включения и выключения оборудования, пользователю рекомендуется попытаться устранить помехи одним или несколькими из следующих способов:
— Изменить ориентацию или местоположение приемной антенны
— Увеличьте расстояние между оборудованием и приемником
— Подключить оборудование к розетке в цепи, отличной от той, к которой подключен приемник.
— Обратиться за помощью к дилеру или опытному специалисту по радио / телевидению.
Внимание! Изменения или модификации этого устройства, не одобренные в явной форме стороной, ответственной за соответствие, могут лишить пользователя права на эксплуатацию оборудования.
Заявление о соответствии RSS-210:
Это устройство содержит не требующие лицензии передатчик (и) / приемник (и), которые соответствуют не требующим лицензии RSS Канады в области инноваций, науки и экономического развития. Эксплуатация возможна при соблюдении следующих двух условий:
(1) Это устройство не должно вызывать помех.
(2) Это устройство должно принимать любые помехи, включая помехи, которые могут вызвать нежелательную работу устройства.
Декларация соответствия
Продукт соответствует требованиям Директивы ЕС 2014/53 / EU.
Инструкции для игрушек на батарейках со сменными батареями должны содержать следующее, если применимо:
Блок управления : Следует использовать 6 батареек AA. передатчик : Следует использовать батарейки AAA x 4 (по 2 на каждый передатчик).
Диапазон частот: 245008-22446705MMHHzz Максимальная передаваемая мощность радиочастоты: <0 дБмВт
![]() Примечания по охране окружающей среды:
Примечания по охране окружающей среды:
По окончании срока службы весь продукт также не относится к бытовым отходам. Вы можете вернуть его в пунктах сбора для утилизации электронных и электронных инструментов.tag или упаковка ясно показывает это. Материалы следует утилизировать согласно соответствующей маркировке. Переработка старых устройств или другое повторное использование содержащихся в них материалов представляет собой важный вклад в защиту окружающей среды. Пожалуйста, спросите в вашем местном сообществе о правильном пункте сбора.
![]() Утилизация батарей
Утилизация батарей
Батареи нельзя выбрасывать вместе с бытовыми отходами. Как потребитель, вы по закону обязаны вернуть батареи, содержащие вредные вещества, и все другие использованные батареи. Вы можете сдать свои старые батареи в общественных пунктах сбора в вашем районе или везде, где продаются батареи. Вы найдете эти химические сокращения вместе с перечеркнутым мусорным баком на батареях, содержащих вредные вещества: Pb = батарея содержит свинец Cd = батарея содержит кадмий Hg = батарея содержит ртуть
![]()
![]()
СБОРКА ИЗДЕЛИЯ ДОЛЖНА БЫТЬ СБОРКОЙ ТОЛЬКО ВЗРОСЛЫМ.
HOTWHEELS.com
Kidztech Toys Manufacturing Ltd., Гонконг.
СДЕЛАНО В КИТАЕ.
HOT WHEELS и связанные с ними товарные знаки и оформление принадлежат и используются по лицензии Mattel. © 2019 Mattel. Все права защищены.
ИНФОРМАЦИЯ ДЛЯ ПОТРЕБИТЕЛЯ
KIDZTECH TOYS MANUFACTURING LTD.
Зал 802, 8 / F, Inter-Continental Plaza,
94 Granville Road, TST East, Гонконг.
Тел: (852) 27218868
info@kidztech.net
http://www.kidztech.net
ПРОДУКТ: НАБОР ГУСЕНИЦ ДЛЯ АВТОМОБИЛЯ
ВОЗРАСТНЫЙ УРОВЕНЬ: Для детей старше 5 лет.
СОДЕРЖАНИЕ: Все содержимое перечислено здесь.
![]()

Документы / Ресурсы
Рекомендации

KIDZTECH HOLDINGS LIMITED — Еще один сайт на WordPress
If you have questions or difficulty operating your Race Set –
the cause is often a simple problem. And there’s often a simple fix. Usually a quick «pit stop» will get you
racing again. Please check below, and then turn to the Maintenance section of the Instruction Manual for
detailed information.
If your vehicle stops…
• You may need to clean the track. Please see Maintenance section: Track Cleaning.
• You may need to clean the vehicle. Please see Maintenance section: Vehicle Cleaning.
• Check power connections. Please see Power Connection section.
• Check your vehicle’s alignment. Please see Maintenance section: Alignment.
• Check your vehicle’s contacts. Please see Maintenance section: Contacts.
• Check to make sure track sections are properly connected. Please see Basic Track Assembly section.
• Check your vehicle’s heat shield. Please see Maintenance section: Heat Shield.
If your vehicle runs slowly or hesitates…
• You may need to clean the track. Please see Maintenance section: Track Cleaning.
• You may need to clean the vehicle. Please see Maintenance section: Vehicle Cleaning.
• Check your vehicle’s alignment. Please see Maintenance section: Alignment.
• Check your vehicle’s contacts. Please see Maintenance section: Contacts.
• Check to make sure track sections are properly connected. Please see Basic Track Assembly section.
• Check your vehicle’s batteries.Check battery connector and replace with fresh alkaline battery.
TROUBLESHOOTING GUIDE
IF YOU STILL HAVE PROBLEMS –
OR IF IF ANY PARTS ARE MISSING OR DAMAGED – DON’T
RETURN YOUR RACE SET TO THE STORE! CALL OUR RACING
SUPPORT TEAM TOLL-FREE AT 1-888-557-8926 FOR HELP .
If your vehicle spins out or flies off the track…
• You may need to clean the vehicle. Please see Maintenance section: Vehicle Cleaning.
• Check your vehicle’s alignment. Please see Maintenance section: Alignment.
• Check to make sure track sections are properly connected. Please see Basic Track Assembly section.
• Check your vehicle’s heat shield. Please see Maintenance section: Heat Shield.
• Check your vehicle for a missing guide pin. Please see Maintenance section: Chassis Parts.
If your vehicle runs in on one lane, but not the other…
• You may need to clean the track. Please see Maintenance section: Track Cleaning.
• You may need to clean the vehicle. Please see Maintenance section: Vehicle Cleaning.
• Check power connections. Please see Power Connection section.
• Check your vehicle’s alignment. Please see Maintenance section: Alignment.
• Check your vehicle’s contacts. Please see Maintenance section: Contacts.
• Check to make sure track sections are properly connected. Please see Basic Track Assembly section.
• Check your vehicle’s heat shield. Please see Maintenance section: Heat Shield.
If your vehicle runs backwards…
• Your vehicle’s rear axle assembly may be installed backwards. Please see Maintenance section:
Chassis Parts. Remove the rear axle assembly, reverse it and reinstall.

The track is obviously a vital component in slot car racing, and just like everything else in this hobby, a little thought and care can help you to get the best out of it.
So in this section we’ll look at cleaning and maintaining your track, designing layouts, and building your own. We’ll be dealing primarily with plastic sectional track here, but we’ll also look at routed tracks at some point.
Cleaning
A clean track is essential to the performance of your cars, as a dirty, or dusty track will reduce grip and traction. But before we start on cleaning the track, a quick vacuum round the whole track room is a good idea as your track is much less likely to get dusty if the room is clean. Sorry, I know it’s boring, but there you go.
Track Surface
Cleaning the actual track surface is really simple, just wipe it down with a slightly damp cloth, followed by a dry cloth if necessary. It’s just like wiping down your kitchen table. You don’t need any fancy cleaning solutions, just a quick wipe will do.
Steel Rails
Cleaning the power rails isn’t something you’ll need to do very often, but they will dull and tarnish over time. The solutions to this are many and varied, but the one thing you must never do is use abrasives.
Why not?
Abrasives will remove the coating on steel rails, leaving them susceptible to rust.
So what should I do?
Use a light foam pad, or a cloth doused on one corner with methylated spirits, or white vinegar, and scrub back and forth along the track. There are many other substances which you might see recommended, but some shouldn’t be left on the plastic parts of the track, and others might leave a residue if you don’t clean them off thoroughly.
Maintenance
Treatment
Once you’ve cleaned the rails, you should treat them by applying a small drop of Inox MX3, or a slightly larger drop of WD40, or rail conditioner to the braids of a car, and driving it for a few laps.
Tightening
Tightening the lugs to improve electrical continuity. Coming Soon.
Power Taps
No matter how carefully you treat plastic sectional track, you may find areas on your layout where the power dips. Sometimes that can be solved by tightening the lugs, or cleaning the rails, but if those don’t work, you may need power taps.
What are they?
Power taps are simply wires, which provide a back up electrical circuit to make sure you have consistent power all the way around your track. They attach to the underside of the power rails of your track at a number of locations, to ensure continuous, uninterrupted power.
In Practise
How?
The wires for a power tap can be attached to the underside of the track rails. For Scalextric track the lugs, or tabs which hold the metal rails to the plastic track can be pulled open, and the wires soldered onto them. For Carrera track you may find soldering difficult, but the openings underneath the track will allow bare ended wire to be pushed in so that the wires make contact with the underside of the metal rails.
Where?
Where is probably the most important question. The start of your power tap circuit should be on a track piece which is somewhere close to the power feed, so that it ensures it has all of the power that is going into the track. Then you’ll attach again to another track piece every 5-10 metres of track length, until you’re all the way round.
IMPORTANT!!!: You must make sure that your wires attach to the same power rail all the way around the track. On a two lane track you obviously have four power rails, so you’ll need four wires. You must make absolutely sure that the wire that attaches to the left hand rail on lane one, is attached to the same rail all the way round the circuit, and the same goes for each power rail.
This might sound complicated, but in practise it isn’t. You can simply follow each rail around the track to make sure, and colour coded wires can obviously help.
Design

The design of the track layout you race on can make a huge difference to the enjoyment of slot racing, and most people quickly outgrow the limits of the set they started out with. Most people end up buying more track to make more interesting layouts, and some go on to make their own routed wooden track.
Although there are many personal preferences involved in designing and building a track, there are also some tried and trusted basics which can help. So here we’ll look at how to design a great slot track. The factors you’ll need to consider, the elements you’ll need to put together, and the best software to use in planning your layout.
Basics
Space
Obviously the size of the room where the track is situated will be an important defining factor. All you can do is measure it out, and work with it.
Height
If you’re building a permanent layout, you’ll probably want to build your track on a table. There are two heights to bear in mind here. An average dining table is about 72cm high, and a a standard kitchen work surface is around 90cm high. Obviously the height of a kitchen work surface is ergonomically chosen to be a good height to work at, and it can also make it easier to reach deslotted cars. But the height of the dining table would probably be better for children, for sitting down, or if your track has significant track elevations. Most track builds will be somewhere within that range between the two.
Depth
Bear in mind that you must be able to reach all areas of the track to recover crashed cars, and clean the track, so don’t make the layout too deep.
Sight Lines
You can’t race properly if you can’t see the track. So try to make sure that each driver’s sight lines aren’t blocked by scenery items, other drivers, or possibly marshals.
Layout Elements
Straights
Most tracks benefit from having at least one long straight. There really should be one place on every track where you can get up to full speed. If you’re designing for a small space, try starting with the longest straight possible, and work from there.
Try to avoid short straights if you can. They can be a little pointless if they’re too short to accelerate. However there may be a case for having a short straight in the middle of an S bend, as it allows the car to straighten up and settle before you hit the next part of the corner.
Corners
Variety is the spice of life when it comes to corners, so most tracks benefit from a varied mixture of bends. But that shouldn’t just mean using different radii. It should also include using different angles of corner, ie whether it goes through 90°, 180° or 72.569°. It might include having different angles of camber or banking, and it should certainly include varying the radius of the corners, so that they tighten or open out as you go round them.
A corner that tightens towards the cente can often work wonders, as it helps beginners to avoid crashing, whilst still being challenging for experienced drivers.
Figure of Eight
A figure of eight track can equalise lap lengths, as well as evening out the number of left and right turns. But it only works if it’s a true figure of eight. A track where the second loop is inside the first will exaggerate the difference in lane lengths, and corner directions.
Bridges
Bridges are usually better situated over a straight, and away from any corners. The track under the bridge will be out of sight, and it will also be more awkward to recover crashed cars. So it should be as simple, and foolproof to drive as possible.
Squeezes
Sections of the track where the lanes are squeezed together are okay, but only in moderation. They can also be a pain as they prevent overtaking.
Crossovers
Analogue crossover pieces are another way of equalising lane length. But beware, they are also an almost guaranteed crash site, and as such they may well be better avoided.
Junctions
The junction pieces, where cars cross at 90° are a simple no for us. Not only are they a guaranteed crash site, but the crashes are extrememly damaging. So, unless you enjoy smashing up your cars, just avoid them.
Digital
Avoid
If you are planning a digital track, bear in mind that with more cars on track, there are many more chances to crash. Add in the lane changing, cars in the same lane as each other, and cars slowing to enter the pits, and you can probably see why many digital tracks look to reduce the risk of deslots caused by the design of the layout itself. You definitely won’t want any extra opportunities to crash, so avoid squeezes, crossovers and junctions. It probably also makes sense if you can cut back on the number of tricky, difficult corners.
Placement
The placement of your digital track pieces is important. It’s best to have a half or full straight between any corner exit and a lane change, or pit lane, for them to function reliably. Lane changers are probably best at the end of a straight, where the cars will be slowing down naturally, and pit lanes should ideally be long enough to fit all the cars you’ll run.
Recipe
Well that’s our simple recipe for keeping the trigger finger active, the laps interesting, and the mind working. But obviously there are no set rules for making a track, and all we can offer you is a rough consensus of opinion from those who’ve done it before.
Software
We used to be blessed with quite a number of track design applications, but unfortunately many of them have fallen by the wayside. Scalextric Track Designer, SlotMan, Tracker 2000 and Track Power are now difficult to get hold of, and have long since ceased development. So our choices nowadays are as follows…
Ultimate Racer
PC software, with a massive selection of track brands available, and some 3D capability.
Supported Tracks: Airfix, Artin 1/32, Artin 1/43, Aurora AFX + MM, Aurora AFX, Aurora Ajet 1:32, Carrera Exclusiv 1:24, Carerra Universal, Fleischmann, Jouef, Lifelike HO, Marchon, MaxTrax 4 Lane, MaxTrax 6 Lane, Ninco 1:32, Polistil, Revell/Riggen, Scalextric Sport Track, Scalextric / SCX + Digital, Scalextric Sport + Digital, Strombecker, SXR routed wood libraries, Tomy AFX, Tyco HO
System Requirements: Any PC using Windows 2k, XP, Vista, W7, W8 or W10
Ultimate Racer Website
RailModeller
MAC software, primarily for model railways, but with a resonable selection of slot track brands available.
Supported Tracks: Artin, Carrera Evolution/Digital 124/132, Carrera Go!!! 1:43,
Carrera Pro-X, Fleischmann RMC, Ninco, Scalextric Classic, Scalextric Sport
System Requirements:OS X 10.11 or later, 64-bit processor
RailModeller Website
Autorennbahnplaner
PC & MAC software for Carrera track only. Some 3D capability available as an add on.
Supported Tracks: Carrera Digital 124, Digital 132, Exclusiv, Evolution, Digital 143, GO!!!
System Requirements: Windows XP or higher (W10 Compatible), or MAC, Intel Pentium or faster, 64 MB RAM, 10 MB Disk Space
Autorennbahnplaner
SlotMan
As we mentioned before, SlotMan is getting increasingly difficult to get hold of, it’s outdated, and is no longer supported. But if you really don’t want to pay for your track design software, then fortunately we’ve managed to secure a copy for you.
Find out more
Check out the SlotRacer.Online «Track Plans» section.
Track Plans
There are also examples of tracks of various scales in the «Show us your Track» section of the Forum.
Show us your Track
You can also show off your plans, or get advice on your ideas in the «Planning» section of the Forum.
Planning
Tutorial on designing a track with Ultimate Racer.
http://www.uracerweb.org/english/help/layout-editor/tutorials/ninco-4lane-01.html
Chris Frost’s detailed look at building wooden tracks
http://www.slotcarracing.org.uk/trackbuild/
Building a wooden track by Ray «Old n Slo» Gardner
https://web.archive.org/web/20101201061920fw_/http://slotcar.com/articals/track_building_and_repairing.htm
Related Videos
Содержание
- Getting Started
- Choosing your System
- Analogue or Digital?
- Size and Scale
- Brands
- Best Brand?
- Find out more
- Гоночный трек JJ Slot Ралли от сети длина трека 900 см 1:64 — JJ32-2 ID: 179153
- Slot track racing 1 64 как собрать
- The Track
- Cleaning
- Maintenance
- Power Taps
- In Practise
- Design
- Basics
- Layout Elements
- Digital
- Recipe
- Software
- Find out more
Getting Started
Before you buy your first slot car set, there are a few things you might want to think about.
Of course, and understood. You probably wouldn’t be here if you hadn’t already had some experience of slot racing, at least enough to know you were interested in finding out more. But we have to start here, for the benefit of anybody who might not have got started yet.
So let’s take things right from the very beginning.
Choosing your System
Choosing the right system is an important decision. It’s not that you’ll be tied to your decision forever, but a little thought before buying can help to avoid expensive mistakes. Fortunately, whatever you choose it will be fun, and the decisions boil down to just a few main areas of choice, which we’ll discuss here.
The first is whether to choose a traditional analogue setup, or a modern digital system.
The second is which size or scale of track and cars you want to use.
The third, and final choice we’ll discuss here is which manufacturer, or brand to start with.
Analogue or Digital?
Analogue
Analogue slot racing is, to most of us, just slot racing.
To anybody over the age of thirty, it’s the type of slot racing set you probably played with as a child. That strange word that’s now been added, analogue (or analog), is a recent addition which is only necessary to distinguish it from digital slot racing. In truth it often goes unsaid, and you can usually assume that unless a car, power base, or controller are specifically labelled as digital, then they will be analogue.
The traditional analogue slot car set up comprises 2 or more separate lanes, and the same number of cars, controllers, and drivers. In other words each driver, has their own separately controlled lane to race on.
In general, analogue cars from any manufacturer can be used on any track system. So, for instance, a Scalextric car can be used on a Carrera, Ninco, or SCX track, and vice versa. In fact there are many manufacturers of slot cars, and most of them should work reasonably well on all of the main track systems.
Digital
Digital slot racing allows multiple cars on the same lane, and special track pieces allow cars to change from one lane to another. This makes the racing more strategic in nature as drivers can change lanes to overtake, or to block another driver.
Digital racing can also be more complex, as the systems allow pit stops, and can also simulate tyre wear, bad weather, and fuel usage.
In general, digital systems from different manufacturers are not compatible with each other, so your choice of which manufacturer to purchase from becomes an important one. However it is often possible to modify a car from one manufacturer to work on a different digital system, but it isn’t always simple.
Some digital systems can also work as a traditional analogue track.
Size and Scale
Slot cars are usually produced in one of four different scales, 1/24, 1/32, 1/43, & HO (1/64). Scale is the ratio of size in a model, with relation to the real thing it represents. So a 1:24 scale model car will be 24 times smaller, in it’s length, width and height than the actual car.

Track systems are also said to have a scale, though this is more a reflection of the size of the cars which are suitable for the track, rather than any attempt to model a real track. The scale of the track obviously has a bearing on how much track you can fit into the space you have.

Pros and Cons
1:24 scale is the largest size, and as such allows the greatest potential for realistic models, but needs a larger space for a track.
1:32 scale is the most popular scale and with several major manufacturers involved, is also the scale with the widest range of products available.
1:43 scale allows more compact track layouts, with reasonable model accuracy.
HO, or 1:64 scale is the smallest scale allowing much more track in a space, but makes realistic modelling more difficult.
There are several factors which you should consider when choosing a scale.
Available Track Space
The larger the scale you choose, the more space the track will take up. Carrera’s 1:24 scale track is the largest commercially available plastic track, and requires a large space to set up a layout of any complexity. So if your space is limited, think about the smaller scales.
Model Accuracy
The smaller the scale, the more difficult it becomes to make a realistic model. So HO scale models are not usually as accurate as the larger scales. If model realism is important to you, then you might prefer a larger scale.
Available Range
The more popular the scale, the more manufacturers are involved in production, and the wider the range of cars, track and accessories that are available. 1:32 scale currently has the widest range of products with Scalextric, Carrera, Policar, SCX, and many more companies involved.
Availability
The availability of a particular scale in your local hobby stores, or the use of a particular scale by other racers in your area might also be a factor worth considering.
Brands
There are lots of companies that make slot cars, but only a handful that produce a complete system, including the track. So unless you decide to rout your own track (we’ll deal with that later), the following are your choices.
Scalextric
Scalextric are probably the most famous and long running slot car brand in the world, and offer three different systems; «Sport», a 1/32 scale analogue system, «Digital», a 1/32 scale digital system which is compatible with «Sport» track, and «Micro» a 1/64 scale analogue system. Scalextric cars are usually well modelled, and detailed, and their track is quite compact.
Carrera
Carrera are also one of the major players in the slot car world, producing analogue and digital systems in 1/24, 1/32, and 1/43 scales. Carrera cars are well modelled, and solidy built, but probably not the quickest. Their 1/24 scale track (also used for 1/32 cars) is generally regarded as being of a higher quality, but it is also quite large.
Policar
Policar are a classic Italian brand, resurrected by Slot.it in the last few years, and currently concentrating on analogue cars and a brand new track system. Their cars are well modelled and have a unique gearing system. Policar track is a fairly recent introduction but is likely to be good quality. Size wise it’s halfway in between Scalextric and Carrera track, and has converters to connect to Ninco track.
Scaleauto
Best Brand?
We’d love to give you a simple, definitive answer to that question, but unfortunately it’s not possible. Everyone has their own favourite, and each system has it’s advantages.
The more established brands like Scalextric and Carrera are probably safer choices, and are widely available. Carrera 1/24 could work well in a large garage or basement, Scalextric 1/32 would probably be better in a smaller garage or an average room. Their smaller scales, 1/43 and 1/64, might be better in the smallest spaces, but choices in track and cars are more limited.
Policar and Scaleauto are exciting new entries into the plastic track market, and their tracks certainly look very professional. But we’ll have to wait and see how they progress.
SCX are another long standing brand, but their track system is similar in size to Scalextric, and their recent problems have perhaps put a question mark against their future.
If you are handy with woodworking tools, then routing your own track has many advantages. But that’s a subject in it’s own right, so we’ll deal with that at a later stage.
Find out more
The SlotRacer Online forum has sections discussing all the scales where you can find out more or ask questions.
1:24 — 1:32 — 1:43 — HO
There are also examples of tracks of various scales in the Show us your Track section.
Show us your Track
The News section of the forum is a good place to keep up with the latest slot car releases.
News
And we also have a Review section.
Reviews
Источник
Гоночный трек JJ Slot Ралли от сети длина трека 900 см 1:64 — JJ32-2 ID: 179153


Гоночный трек Ралли от сети длина трека 900 см 1:64 — JJ32-2 — это превосходный подарк для мальчишек — любителей высокоскоростных соревнований. Игра способствует в развитии внимательности, быстроты реакции и точности движений.
Очень простая сборка, каждый кусок трассы присоединяется простым щелчком.
В комплект входят 2 гоночные машинки с пультами ручного контроля скорости для одновременной игры двух детей. Гоночный трек с двумя машинками — возможность весело провести время, устроить заезд с другом или папой. Машинки движутся по треку тем быстрее, чем сильнее соперники нажимают ручки генераторов тока, игра сопровождается реалистичным звуком. Протяженность трассы 901 см. Набор изготовлен из прочного высококачественного материала.
Вы получите массу удовольствия, играя в эти гонки с друзьями!
- Кольцевой автодром
- Пульт ручного контроля скорости
- Функция включения/выключения звука
- Простота сборки
- Подходит для детей в возрасте от 3 лет и старше
- масштаб: 1:64
- общая длина трассы: 9.01 м
- требуемое пространство: 130 х 110 см
- автотрек
- 2 машинки
- 2 пульта управления
- сетевой адаптер
Источник
The Track
The track is obviously a vital component in slot car racing, and just like everything else in this hobby, a little thought and care can help you to get the best out of it.
So in this section we’ll look at cleaning and maintaining your track, designing layouts, and building your own. We’ll be dealing primarily with plastic sectional track here, but we’ll also look at routed tracks at some point.
Cleaning
A clean track is essential to the performance of your cars, as a dirty, or dusty track will reduce grip and traction. But before we start on cleaning the track, a quick vacuum round the whole track room is a good idea as your track is much less likely to get dusty if the room is clean. Sorry, I know it’s boring, but there you go.
Track Surface
Cleaning the actual track surface is really simple, just wipe it down with a slightly damp cloth, followed by a dry cloth if necessary. It’s just like wiping down your kitchen table. You don’t need any fancy cleaning solutions, just a quick wipe will do.
Steel Rails
Cleaning the power rails isn’t something you’ll need to do very often, but they will dull and tarnish over time. The solutions to this are many and varied, but the one thing you must never do is use abrasives.
Abrasives will remove the coating on steel rails, leaving them susceptible to rust.
Use a light foam pad, or a cloth doused on one corner with methylated spirits, or white vinegar, and scrub back and forth along the track. There are many other substances which you might see recommended, but some shouldn’t be left on the plastic parts of the track, and others might leave a residue if you don’t clean them off thoroughly.
Maintenance
Treatment
Once you’ve cleaned the rails, you should treat them by applying a small drop of Inox MX3, or a slightly larger drop of WD40, or rail conditioner to the braids of a car, and driving it for a few laps.
Tightening
Tightening the lugs to improve electrical continuity. Coming Soon.
Power Taps
No matter how carefully you treat plastic sectional track, you may find areas on your layout where the power dips. Sometimes that can be solved by tightening the lugs, or cleaning the rails, but if those don’t work, you may need power taps.
What are they?
Power taps are simply wires, which provide a back up electrical circuit to make sure you have consistent power all the way around your track. They attach to the underside of the power rails of your track at a number of locations, to ensure continuous, uninterrupted power.
In Practise
The wires for a power tap can be attached to the underside of the track rails. For Scalextric track the lugs, or tabs which hold the metal rails to the plastic track can be pulled open, and the wires soldered onto them. For Carrera track you may find soldering difficult, but the openings underneath the track will allow bare ended wire to be pushed in so that the wires make contact with the underside of the metal rails.
Where?
Where is probably the most important question. The start of your power tap circuit should be on a track piece which is somewhere close to the power feed, so that it ensures it has all of the power that is going into the track. Then you’ll attach again to another track piece every 5-10 metres of track length, until you’re all the way round.
IMPORTANT. You must make sure that your wires attach to the same power rail all the way around the track. On a two lane track you obviously have four power rails, so you’ll need four wires. You must make absolutely sure that the wire that attaches to the left hand rail on lane one, is attached to the same rail all the way round the circuit, and the same goes for each power rail.
This might sound complicated, but in practise it isn’t. You can simply follow each rail around the track to make sure, and colour coded wires can obviously help.
Design
The design of the track layout you race on can make a huge difference to the enjoyment of slot racing, and most people quickly outgrow the limits of the set they started out with. Most people end up buying more track to make more interesting layouts, and some go on to make their own routed wooden track.
Although there are many personal preferences involved in designing and building a track, there are also some tried and trusted basics which can help. So here we’ll look at how to design a great slot track. The factors you’ll need to consider, the elements you’ll need to put together, and the best software to use in planning your layout.
Basics
Space
Obviously the size of the room where the track is situated will be an important defining factor. All you can do is measure it out, and work with it.
Height
If you’re building a permanent layout, you’ll probably want to build your track on a table. There are two heights to bear in mind here. An average dining table is about 72cm high, and a a standard kitchen work surface is around 90cm high. Obviously the height of a kitchen work surface is ergonomically chosen to be a good height to work at, and it can also make it easier to reach deslotted cars. But the height of the dining table would probably be better for children, for sitting down, or if your track has significant track elevations. Most track builds will be somewhere within that range between the two.
Depth
Bear in mind that you must be able to reach all areas of the track to recover crashed cars, and clean the track, so don’t make the layout too deep.
Sight Lines
You can’t race properly if you can’t see the track. So try to make sure that each driver’s sight lines aren’t blocked by scenery items, other drivers, or possibly marshals.
Layout Elements
Straights
Most tracks benefit from having at least one long straight. There really should be one place on every track where you can get up to full speed. If you’re designing for a small space, try starting with the longest straight possible, and work from there.
Try to avoid short straights if you can. They can be a little pointless if they’re too short to accelerate. However there may be a case for having a short straight in the middle of an S bend, as it allows the car to straighten up and settle before you hit the next part of the corner.
Corners
Variety is the spice of life when it comes to corners, so most tracks benefit from a varied mixture of bends. But that shouldn’t just mean using different radii. It should also include using different angles of corner, ie whether it goes through 90°, 180° or 72.569°. It might include having different angles of camber or banking, and it should certainly include varying the radius of the corners, so that they tighten or open out as you go round them.
A corner that tightens towards the cente can often work wonders, as it helps beginners to avoid crashing, whilst still being challenging for experienced drivers.
Figure of Eight
A figure of eight track can equalise lap lengths, as well as evening out the number of left and right turns. But it only works if it’s a true figure of eight. A track where the second loop is inside the first will exaggerate the difference in lane lengths, and corner directions.
Bridges
Bridges are usually better situated over a straight, and away from any corners. The track under the bridge will be out of sight, and it will also be more awkward to recover crashed cars. So it should be as simple, and foolproof to drive as possible.
Squeezes
Sections of the track where the lanes are squeezed together are okay, but only in moderation. They can also be a pain as they prevent overtaking.
Crossovers
Analogue crossover pieces are another way of equalising lane length. But beware, they are also an almost guaranteed crash site, and as such they may well be better avoided.
Junctions
The junction pieces, where cars cross at 90° are a simple no for us. Not only are they a guaranteed crash site, but the crashes are extrememly damaging. So, unless you enjoy smashing up your cars, just avoid them.
Digital
Avoid
If you are planning a digital track, bear in mind that with more cars on track, there are many more chances to crash. Add in the lane changing, cars in the same lane as each other, and cars slowing to enter the pits, and you can probably see why many digital tracks look to reduce the risk of deslots caused by the design of the layout itself. You definitely won’t want any extra opportunities to crash, so avoid squeezes, crossovers and junctions. It probably also makes sense if you can cut back on the number of tricky, difficult corners.
Placement
The placement of your digital track pieces is important. It’s best to have a half or full straight between any corner exit and a lane change, or pit lane, for them to function reliably. Lane changers are probably best at the end of a straight, where the cars will be slowing down naturally, and pit lanes should ideally be long enough to fit all the cars you’ll run.
Recipe
Well that’s our simple recipe for keeping the trigger finger active, the laps interesting, and the mind working. But obviously there are no set rules for making a track, and all we can offer you is a rough consensus of opinion from those who’ve done it before.
Software
We used to be blessed with quite a number of track design applications, but unfortunately many of them have fallen by the wayside. Scalextric Track Designer, SlotMan, Tracker 2000 and Track Power are now difficult to get hold of, and have long since ceased development. So our choices nowadays are as follows.
Ultimate Racer
PC software, with a massive selection of track brands available, and some 3D capability.
Supported Tracks: Airfix, Artin 1/32, Artin 1/43, Aurora AFX + MM, Aurora AFX, Aurora Ajet 1:32, Carrera Exclusiv 1:24, Carerra Universal, Fleischmann, Jouef, Lifelike HO, Marchon, MaxTrax 4 Lane, MaxTrax 6 Lane, Ninco 1:32, Polistil, Revell/Riggen, Scalextric Sport Track, Scalextric / SCX + Digital, Scalextric Sport + Digital, Strombecker, SXR routed wood libraries, Tomy AFX, Tyco HO
System Requirements: Any PC using Windows 2k, XP, Vista, W7, W8 or W10
RailModeller
MAC software, primarily for model railways, but with a resonable selection of slot track brands available.
Supported Tracks: Artin, Carrera Evolution/Digital 124/132, Carrera Go. 1:43, Carrera Pro-X, Fleischmann RMC, Ninco, Scalextric Classic, Scalextric Sport
System Requirements:OS X 10.11 or later, 64-bit processor
Autorennbahnplaner
PC & MAC software for Carrera track only. Some 3D capability available as an add on.
Supported Tracks: Carrera Digital 124, Digital 132, Exclusiv, Evolution, Digital 143, GO.
System Requirements: Windows XP or higher (W10 Compatible), or MAC, Intel Pentium or faster, 64 MB RAM, 10 MB Disk Space
SlotMan
As we mentioned before, SlotMan is getting increasingly difficult to get hold of, it’s outdated, and is no longer supported. But if you really don’t want to pay for your track design software, then fortunately we’ve managed to secure a copy for you.
Supported Tracks: Carrera Evolution, Carrera GO. Carrera Profi, Scalextric, SCX
Find out more
Check out the SlotRacer.Online «Track Plans» section.
Track Plans
There are also examples of tracks of various scales in the «Show us your Track» section of the Forum.
Show us your Track
You can also show off your plans, or get advice on your ideas in the «Planning» section of the Forum.
Planning
Источник
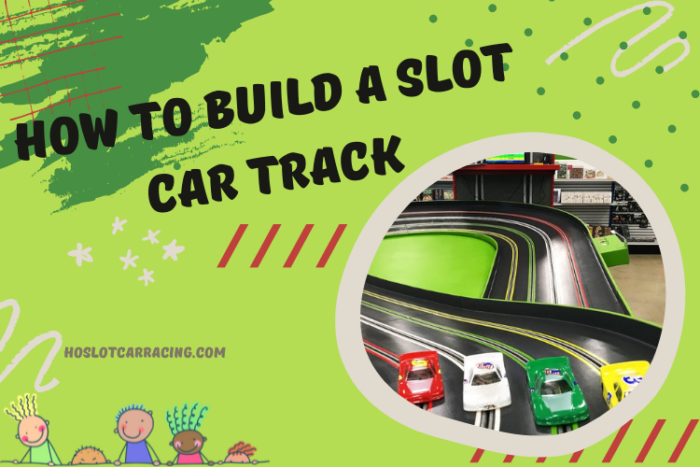
Nothing is more fun than recreating a racing track at home, especially if you love racing toy cars. It’s fun to use it together with your friends and family. As a DIY type of person, I got interested in how to build a slot car track from scratch.
Learn the complete slot car track building supplies and instructions below.
What You’ll Need
1. Medium Density Fiberboard (MDF)

MDF is a perfect surface for slot car tracks because it’s smooth and structured well. Keep in mind that MDF tends to be slightly heavy, so you’ll need a thinner sheet for this slot car track building project. The thickness can go around 12mm or more.
Make sure to choose the standard size, which is about 8×4 feet sheets. Avoid smaller sheets because creating the joints will be a pain.
You can also use chipboard as a cheaper alternative to MDF. This traditional material is sufficiently smooth to make a nice slot car track. When choosing the best chipboard for this project, look for something thicker.
2. Wooden Battens
The surface track tends to sag due to its weight, so you’ll need some wooden battens for ample support. Wooden battens are those strips of timber commonly used in building constructions. Choose 75mm depth to avoid warping issues.
Now, if you want to save money, you can use MDF strips. Certainly, there wouldn’t be any warping problems because you’ll be using the same MDF materials. However, screw fixings might be a little weak because the wood screws tend to delaminate if screws are placed around the edges.
3. Router
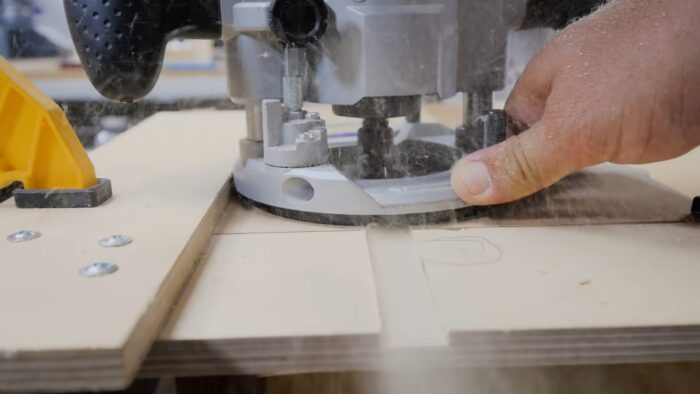
A router is essential in cutting the slot for your track surface. You can use high-power routers to make 1-2 cuts on the slot or numerically controlled cutters. I prefer the plunge router because they’re superb in making inlay grooves and allow precise adjustments.
Cheap routers can suffice, but you need to be extra careful with jigging as they’re not as well constructed as the more expensive ones. If you plan to hire a router, determine what kind of router can provide the right radius arm and shank size cutters you need.
4. Tools And Equipment
A regular or circular saw is necessary to cut the straights and curves for your slot car track. For MDF, make sure that the blade is carbide-tipped to cut through the high glue content of the fiberboard.
In building a slot car track, you’ll need wooden glue to join the track surface permanently. If you need a guide on which glue to choose check out our article on glue comparison.
If you plan to join the sections of a portable track, you’ll need several hardware items, like dowels and bolts. You’ll want to make a batten or an MDF strip beneath the joint to achieve a leveled surface. Also, prepare a hand drill to make holes for the hardware.
For a transportable track, you’ll need 2-3 bolts to make a tongue and groove joint.
Other tools you might need are lap counters and matte-finish paint. The lap counters are used for precise lap recording. You might also need some adhesive transfer tape or impact adhesive to lay the braids and lane stickers.
5. Options
- Track Support
Unless you want to set up your track on the ground, find something that can support the track at a desirable height. You can use anything available, like tables, empty drums, or cupboards in supporting a permanent track.
If you have Dexion at home, you can recycle that to make a frame. If not, weld your own steel frame using cheap steel. A wooden frame also suffices for track support.
For portability, you can put legs on the track. Just prepare two triangular pieces of ½-inch plywood, one 10-mm bolt, and three 6-mm bolts for every leg.
How to Build a Slot Car Track from Scratch Step-by-Step Instructions
Step 1: Cut The Straights And Curves
Cut the desired size of straights for your slot car track. To do this, simply clamp down a straightedge to lead your saw in cutting the straights.
For the curves, you need a more intrinsic job. Lay three jigs — one to plot the inner and outer curve edges with a marker, the second to route the exterior edge, and the third to lead the saw to cut the radial ends. The finished curve should look similar to a plastic track.
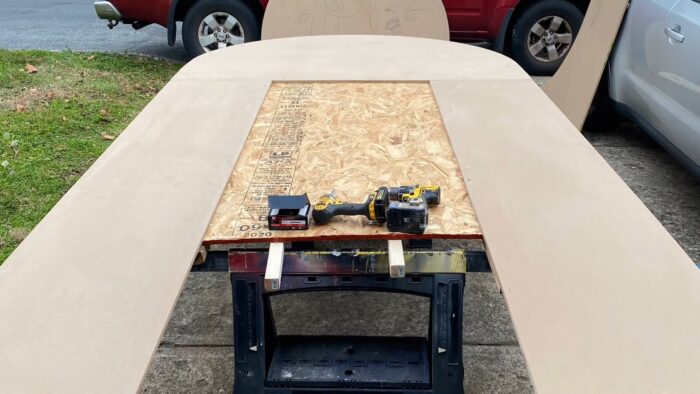
Step 2: Fix The Wooden Battens Underneath
You know that the MDF board alone can slump under its own weight without proper support. To avoid this problem, place wooden battens below. Fix a piece of timber lengthwise on every side and cross pieces in each 40-60 cm distance.
For the curve tracks, use straight patterns underneath. Use radial supports on the lower side of bends, similar to how you plot the cross pieces on the straight track.
Step 3: Decide The Track Support
If you plan to use the track on the floor, you can skip this step and proceed to step 4. If not, decide what track support you want.
For permanent tracks, you can use tables, oil drums, or workbenches. These things all work with a little bit of adjustment to get the right levels.
If you decide to make legs for your track, prepare some triangular pieces of plywood and bolts. Connect two triangular pieces of 12-mm plywood with a 10-mm bolt to make one leg. Bolt the top piece to the track using three 6-mm bolts.
Step 4: Join The Track Sections
The next step in building your own slot car track is to join several sheets of the board to make a smooth track surface. If the track is permanent in its place, use screws to join the sheets together, then fill the joint.
For a transportable track, construct a batten under the joint, then level the surfaces. Next, fasten the battens together with dowels and bolts.
Step 5: Cut The Slot
Before you cut the slot, decide between tape and braid because the latter requires a recess in the track surface. As a general rule, the slot width should be around 3 to 5 mm wide and 9mm deep.
For braid, you want to cut a recess on either side of the slot. The recess size depends on the braid’s size. Normally, the track braid is around 5.2-6m wide. It’s not necessary to recess the tapes.
Step 6: Position The Lap Counters
Place the lap counters in an area where there’s the least risk of counting errors, more particularly at a medium speed position on a flat level. These trackers tend to be reliable when the car is securely in its own slot.
Keep away from areas where the cars may be falling out or be up on two wheels. Also, avoid areas where the guide is likely to lift out of the slot.
Step 7: Paint, Lay The Braid & Stickers, And Wire
Now, paint the track surface with your favorite color. Use a brush, roller, or spray. I prefer a brush because it requires no masking.
Next, stick the conductor’s tape or braid on the track using an adhesive transfer tape or impact adhesive. Take the ends of the tape underneath the track. Finally, mark the lanes with stickers and wire the tracks.
Conclusion
Now that you know how to build a slot car track from scratch, you can have fun racing cars with friends. It’s a little complex looking at the steps above, but the result will be worth the effort. I suggest asking a professional when handling powerful router tools and wires.
Do you have something to share about constructing a slot car track from scratch? Let us know below. Please share the article with your friends if you like it.
Introduction: Building a Slot Car Track — Part One, a Good Foundation
Slot car racing has been in my blood for nearly sixty years. It’s great fun, inexpensive and safe. It also has the carbon footprint of a gnat. Any age can race, so it’s great for fathers and sons to do something together and learn a wide range of skills instead of sitting in front of a computer screen. In fact my father, me, my son, and grandson have all raced on my track! I’m the oldest in our club, at 65, and I’m fifty years older than the youngest member, who is 14. However most of our members are in their thirties and forties.
In the video you see my son driving his Jaguar XK120 around the complete circuit.
I have built several tracks over the years and this one was by far the most challenging. In fact it’s dual purpose — a two-lane 20m digital race track for up to six cars at a time, but cars can leave this section and tour the 30m single lane section which we use for rallies making 50m in all. You may not wish to be as adventurous as me but the techniques and methods I have used can be applied to any size track. Pick and choose as you like.
Step 1: The Design
First of all you need to determine where your track is going to go and the space available. I built mine in the old stables of our villa and had a huge space but you might be limited to a garage, spare room or loft.
I built the green section first from Scalextric Sport Digital track. Then I added the blue section and finally the red section. I simply got carried away!
Spend time on this step as it will save you time and frustration later. You’ll never get it exactly right as ideas will pop into your head and friends will suggest things that you hadn’t thought of, so be flexible. Sketch a pictorial view of the track first then work this into a plan. You can even draw on the baseboards to get a better idea of the design if you like.
One thing to remember is that, unless you go digital or have a single lane, you need a figure of eight so that the lane lengths are the same. You can bend and twist the circuit as much as you like but so long as you have that one bridge it will be OK.
Step 2: The Baseboards
It is very important to build on a good, strong, solid base. I used 12mm chipboard on a simple wooden frame, butt-jointed, screwed and glued. Each section is 1m x 2m and sits on a pair of wooden trestles. You never know when you might move house or get chucked out of that spare room so this size is ideal. It also fits into the back of a small van or estate car.
The sections are bolted together but you can used spring-loaded clamps for really quick assembly. This method also enables you to create different layouts or expand the track.
Step 3: The Elevations
This is the exciting part, actually putting the track pieces together and seeing how it looks. I had to lengthen the end of the main straight as the bridge obscured the corner. Not a good idea!
First you need to find some cardboard boxes and such-like to raise the track and achieve the height you need. Once that’s done you can measure from the baseboard to the underside of the track and sketch out the pieces of plywood ready for cutting. Even angles for banking can be built-in at this stage.
As you can see, I used 10mm plywood on edge to support the track, which also sits on 10mm ply. Buy big sheets of cheap marine plywood for this as it will all be covered up later and is just as strong.
I used a cheap bandsaw to cut the pieces and it’s worth investing in one as they’re so useful.
I hope you enjoyed this. Watch out for Part Two — The Scenery.
Instruction Manual for HotWhHEELS models including: Slot Car Track Set, ZERO GRAVITY
IM
SLOT CAR TRACK SET — INSTRUCTION MANUAL … The instructions for battery toys with replaceable batteries shall contain the substance of the following, …
User Manual
KIDZTECH TOYS MANUFACTURING LTD 8316120-24GTX 1/43 Hot Wheels Track Set — 2.4G Zero-Gravity Slot Track Set OTM-8316120-24GTX OTM831612024GTX 8316120 24gtx
- PDF Viewer
- Universal Document Viewer
- Google Docs View
- Google Drive View
- Download Document [pdf]
- Download Document [Optimized]
- Document:
- Text
- References
File Info : application/pdf, 2 Pages, 1.79MB
DocumentNot Your Device? Search For Manuals / Datasheets:
GetApplicationAttachment.html?id=4828773
NO. 83151 / 83161 CONTENTS TOTAL: 85 PIECES x 4 x 2 x 4 x 2 x 16 x 16 x 1 5+ SLOT CAR TRACK SET - INSTRUCTION MANUAL CHALLENGE LEVEL - 660CM / 21.6FT LAYOUT #83151 BATTERY REQUIREMENTS #83161 BATTERY REQUIREMENTS 6 X AA For Control Box (Not Included) 4 X AAA For Transmitter x2 (Not Included) OR Transformer For Control Box (Included only for #83161) INPUT: AC100-240Vac 50/60Hz 0.4A OUTPUT: DC9V 1.5A 4 X AAA For Transmitter x2 (Not Included) Recommend to play by adaptor Dx4 H Dx4 H L L K L Dx4 L Z F O H D x 4 Z F H LL L L L x 1 x 2 x 1 x 1 x 12 ASSEMBLY L L L ASSEMBLY x 1 x 2 x 2 Y x6 Z x2 Z x2 x 8 X Adjust the distorted joints before joining tracks. Do not join the tracks together if the joints are distorted. Hold and join tracks together as shown. Attach the guardrail to the side of the track as shown. Assemble the track support TO PLAY Control box - Battery installation (For B/O Version) 2. Open the battery cover. 1. Unscrew the screw on the battery cover. 5. Tighten the screw on the battery cover. ON OFF DC (USE AA BATTERIES) (USE Transformer) Speed Control MAINTENANCE 3. Insert new 6 x AA (1.5V) batteries into the battery compartment of the control box with the correct polarity (+/--). 4. Close the battery cover. Transmitter - Battery installation Transformer For Control Box (Included only for #83161) 1. Unscrew the screw on the battery cover. 2. Open the battery cover. 3. Insert new 2 x AAA (1.5V) batteries into the battery compartment of each transmitter with the correct polarity (+/--). 4. Close the battery cover. 5. Tighten the screw on the battery cover. Make sure that the wheel tyres are located as shown. BRUSHES Make sure that the brushes are adjusted to the correct position as indicated. Guide pin Guide pin must be in the slot as shown. Check the brushes of the car are in the correct position. Place the car on the track and make sure it has good contacts with the track. The packaging and instruction manual contain important information. Please keep them for future reference. We reserve the right to improve/amend specifications and colors without notice. SAFETY 1. Alkaline batteries are recommended to be used (For B/O Version) 2. Only batteries of the same or equivalent type as recommended are to be used 3. Do not mix alkaline, standard or rechargeable batteries 4. Do not mix old and new batteries or different type of batteries 5. Non-rechargeable batteries are not to be charged 6. Rechargeable batteries for adult charging only 7. Rechargeable batteries are to be removed from the product before they are charged 8. Be sure to insert batteries with correct polarities and always follow the battery manufacturer's instructions 9. Remove all batteries when not in use 10. Exhausted batteries are to be removed from the product 11. The supply terminals are not to be short-circuited 12. Dispose of batteries properly. Do not dispose the batteries in fire it may cause them to explode or leak causing injury or damage 13. Battery installation and removal must only be done by adult FCC label compliance statement: This device complies with part 15 of the FCC rules. Operation is subject to the following two conditions: 1. This device may not cause harmful interference, and 2. This device must accept any interference received, including interference that may cause undesired operation. Note: This equipment has been tested and found to comply with the limits for a Class B digital device, pursuant to Part 15 of the FCC Rules. These limits are designed to provide reasonable protection against harmful interference in a residential installation. This equipment generates, uses and can radiate radio frequency energy and, if not installed and used in accordance with the instructions, may cause harmful interference to radio communications. However, there is no guarantee that interference will not occur in a particular installation. If this equipment does cause harmful interference to radio or television reception, which can be determined by turning the equipment off and on, the user is encouraged to try to correct the interference by one or more of the following measures: - Reorient or relocate the receiving antenna - Increase the separation between the equipment and receiver - Connect the equipment into an outlet on a circuit different from that to which the receiver is connected - Consult the dealer or an experienced radio/TV technician for help Warning: Changes or modifications to this unit not expressly approved by the party responsible for compliance could void the user's authority to operate the equipment. RSS-210 Compliance Statement: This device contains licence-exempt transmitter(s)/receiver(s) that comply with Innovation, Science and Economic Development Canada's licence-exempt RSS(s). Operation is subject to the following two conditions: (1) This device may not cause interference. . (2) This device must accept any interference, including interference that may cause undesired operation of the device ion. Declaration of Conformity The product is in conformity with the requirement of EU Directive 2014/53/EU The instructions for battery toys with replaceable batteries shall contain the substance of the following, as applicable: Control box : AA batteries x 6 should be used. Transmitter : AAA batteries x 4 (2 for each Transmitter) should be used. Frequency band : 245008 -22446705MMHHzz Maximum radio frequency power transmitted : <0 dBm Environmental notes: The whole product also does not belong to household waste at the end of the product life. You can return it at collection points for the recycling of electronic and electronical instruments The symbol on the item, instruction manual, hangtag or packing is showing this clearly. Materials should be recycled according to their respective markings. Recycling of old devices or other re-use of materials contained therein represents an important contribution to environmental protection. Please ask at your local community for the correct collection point. Disposal of batteries Batteries should not be disposed of in the household waste. As the consumer you are legally obliged to return batteries containing harmful substances and all other used batteries. You can hand in your old batteries at public collection points in your area or wherever batteries are sold.You will find these chemical abbreviations along with a crossed-out refuse bin on batteries containing harmful substances: Pb=Battery contains lead Cd=Battery contains cadmium Hg=Battery contains mercury Conforms to the safety requirements of ASTM F963 PRODUCT MUST BE ASSEMBLED BY ADULT ONLY. Kidztech Toys Manufacturing Ltd., Hong Kong. MADE IN CHINA. HOT WHEELS and associated trademarks and trade dress are owned by, and used under license from Mattel. ©2019 Mattel. All Rights Reserved. KIDZTECH TOYS MANUFACTURING LTD. Room 802, 8/F, Inter-Continental Plaza, 94 Granville Road, TST East, Hong Kong. Tel: (852) 27218868 info@kidztech.net http://www.kidztech.net PRODUCT: SLOT CAR TRACK SET AGE GRADE: For ages over 5 years. CONTENTS: All contents listed here. NO. 83151 / 83161 KT-HW-10/06/19 EN-R01
References
 KIDZTECH HOLDINGS LIMITED – Just another WordPress site
Adobe PDF library 15.00 Adobe Illustrator CC 23.0 (Windows)
Similar to Hot Wheels Toy: Manuals for GL-40, BARIGATOR, ANIMAL COTTAGE
-
GL -40 dual filtration technologyde Gebrauchsanweisungen Instruction manualfr Notice d’utilisationit Istruzioni per l’usonl Gebruiksaanwijzingda Brugsanvisningno Bruksanvisningsv Bruksanvisningfi Käyttöohjees Instrucciones de usopt Instruções de utilizaçãoel Οδηγίε …
GL-40 145
-
21INSTRUCTIONSAnna and Elsa’s Royal ClosetSTORAGE2 3CHOKING HAZARD – Small parts.Not for children under 3 years.WARNING:Please remove everything from the package and compare to the contents shown here. If any items are missing, please contact your local Mattel office.Dolls not inc …
BDK36-0920 2
-
BedienungsanleitungOperation ManualDCC MMRailComH0 Digital Form-Hauptsignale, gekoppelt und ungekoppelt H0 Digital semaphore home signals, coupled and uncoupled 1. Wichtige Hinweise / Important information …………………………………………….. 2 2. Einleitung / Introduction . …
H0 series 20