перейти к содержанию
ЧЕТКОЕ ИЗОБРАЖЕНИЕ 207665 ПРОФЕССИОНАЛЬНАЯ ТОЧКА ДЛЯ НОЖЕЙ

ФУНКЦИИ И ОСОБЕННОСТИ
- Точилка для гладких и зубчатых ножей
- Заточите затупившиеся и поврежденные лезвия за секунды
- Легко затачивайте зубчатые ножи по всей кромке
- Заточенные японские (левые) полотна с одинарным скосом
- Профессиональный и портативный
КАК ИСПОЛЬЗОВАТЬ
- Протяните нож через точилку
- Убедитесь, что кончик ножа направлен вверх, чтобы сгладить и выровнять край, не удаляя металл.
- Слегка нажмите при заточке тонкого лезвия для нарезки
- Нажмите сильнее, чтобы получить прочное режущее лезвие
Профессиональная точилка для ножей подходит для этих ножей
- Японские ножи
- Поварские ножи
- Зубчатые ножи
- Обвалочные ножи
- Очищающие ножи
- подмаренник цепкий

Отполируйте, чтобы лезвия стали острыми как бритва.

Отточен для ежедневного ухода (металл не снимается).

Отточен для ежедневного ухода (металл не снимается).
ПРИМЕЧАНИЕ: Керамические лезвия не рекомендуется использовать с Professional Knife Sharpener.
ХАРАКТЕРИСТИКИ
- Материал: изготовлен из нержавеющей стали.
- Вес: 0.7 кг.
- В комплект входит: 1 точилка для ножей
ГАРАНТИЯ / ОБСЛУЖИВАНИЕ КЛИЕНТОВ
На товары под торговой маркой Sharper Image, приобретенные на SharperImage.com, распространяется ограниченная гарантия на замену сроком на 1 год. Если у вас есть какие-либо вопросы, не рассмотренные в этом руководстве, позвоните в наш отдел обслуживания клиентов по телефону 1 (877) 210-3449. Агенты по обслуживанию клиентов доступны с понедельника по пятницу с 9:00 до 6:00 по восточному времени.

Название и логотип SHARPER IMAGE® являются зарегистрированными товарными знаками.
© Более четкое изображение. Все права защищены.
Документы / Ресурсы
Рекомендации

The Sharper Image — Официальный сайт @ SharperImage.com
![]()
Download Article
![]()
Download Article
There is nothing more frustrating than trying to chop vegetables for your dinner, only to find that your knife is too dull and is smashing rather than slicing. You can easily remedy this problem by using a manual or electric knife sharpener, and it shouldn’t take you more than several minutes to restore your knife’s sharp edge. If you don’t have a manual or electric sharpener, you could explore using a whetstone, a honing rod, or even sending your knives off to a professional.
-

1
Test your knife by running it through a piece of paper. You may already know that your knife is dull, but if you aren’t sure, fold a piece of newspaper in half (or just use a single sheet of computer paper), hold it up in the air, and bring your knife down to cut through it. If your knife doesn’t slice through the paper, it’s time to sharpen it.[1]
- The knife should continuously cut through the paper without stopping if it is sharp and in good shape.
-
2
Use the “coarse” setting for very blunt knives that need to be reshaped. Most manual sharpeners have at least 2 settings: 1 labeled “coarse,” and 1 labeled “fine.” The coarse setting will actually remove steel from the blade to resharpen the edge, while the fine setting is used for everyday knife maintenance.[2]
- These settings are the same on electrical sharpeners, though an electric sharpener may have an additional slot between “coarse” and “fine.”
Advertisement
-
3
Pull the blade through from its base to its tip 3 to 6 times. Insert the blade into the manual sharpener at the base, which is where the blade meets the handle. Use gentle force, pushing the blade down as you pull it through the slot, toward your body. Repeat this action 3 to 6 times, 3 for a mildly-dull blade, or more for a severely-dull blade.[3]
- This action resets the blade, restoring it to its original sharpness.
- Use enough force when you pull the blade through that you hear an audible grinding sound. If you’re using an electric sharpener, you won’t need to press down—the whirring mechanisms will take care of everything for you.
-
4
Move the blade so you’re following its contour as you pull it through. Each time you bring the knife through the sharpener, you won’t just pull it straight through. Instead, follow the curve of the knife so that the handle comes up and is higher at the end than it was at the beginning. This way, the entirety of the blade will get sharpened.[4]
- If you’re pressing down, you’ll be able to tell by the sound and feel that you’re moving the blade the right way. If you no longer hear the grinding noise or feel the resistance of the blade, you probably aren’t following the contour closely enough.
-
5
Run the blade through the fine setting 1 to 2 times to finish the process. After you’ve finished pulling the blade through the “coarse” setting, you need to give it a few finishing touches to refine its edge. You don’t need to use as much force with the “fine” setting, and the grinding sound won’t be nearly as loud as it was in the “coarse” setting.[5]
- If your sharpener has more than one setting, pass the knife through each in-between setting 1 to 2 times, making sure that you end at the “fine” setting. These additional settings are just gradations of grinding and help fine-tune your knife even more.
-
6
Rinse the knife off and dry it with a lint-free towel. Use warm, soapy water to rinse away any lingering steel remnants before using your knife again.[6]
Feel free to use a sponge or dishtowel to give the knife a quick wipe down. Dry the knife off completely to prevent it from rusting, and return it to its knife block or similar storage space.[7]
- Avoid running your knives through the dishwasher. They can get banged up or damaged by other items.
-
7
Maintain the knife by running it through the “fine” setting daily. The general rule of thumb is to pull your knife through the fine setting once for every 2 hours of use. Depending on how often you cook, you may not need to do this every day, but keep it in mind as a helpful way to keep your knife sharp.[8]
- If you do a daily or semi-weekly pass through the manual sharpener, chances are you won’t need to do much more to keep your knives sharp.


Advertisement
-
1
Invest in an electric sharpener if you cook often with expensive knives. Electric sharpeners themselves are more expensive than manual sharpeners, running about $40 to $100, depending on the brand you get. They’re more intuitive, though, and are really easy to use as they will just pull the blade through for you. It takes less time and effort to sharpen your knives than the other manual methods require.[9]
- Make sure to do your research before ordering your electric sharpener. Some brands are meant for specific kinds of knives, and some include extra features, like a lifetime warranty.
-
2
Buy a pull-through or handheld sharpener for a nice at-home option. This is a really nice choice for your everyday home cook who doesn’t spend more than an hour or 2 in the kitchen every day. They’re smaller than the electric versions, making them easier to store, and they’re fantastic to use for daily touchups or for grinding a dull blade back to sharpness. They cost anywhere from $10 to $60, depending on the brand you choose.[10]
- There’s something to be said for the feeling of manually sharpening your own knife, too. Lots of cooks enjoy the physicality of taking care of their knives and you do get more control over your movements with a manual sharpener than you would with an electric sharpener.
-
3
Opt for a whetstone for a gentle, temperature-controlled sharpener. Whetstones are generally just a small block of material that you’ll run your knife down to sharpen its blade. Always soak it in water for at least 5 to 10 minutes before you use it. Hold the knife at a 22-degree angle and slide it forward down the whetstone, with the blade touching the stone.[11]
Repeat the movement 5 to 10 times to sharpen your knife.[12]
- The cold-water soak keeps your knife from overheating as it’s being sharpened. If a knife gets too hot, it’s chemistry can change and the blade can become brittle and warped.
- Do double-check the instructions before wetting your whetstone. While the majority of them do need to be soaked beforehand, there are a few brands and types of stones that aren’t meant to get wet.
-
4
Use a honing rod to quickly realign the edges of the blade. A honing rod is also often called a sharpening steel, and they often come along with a block-knife set. Honing doesn’t actually remove any steel from the knife and doesn’t technically sharpen it, but it does push out-of-line edges back into place, which in turn makes your cuts sharper and more precise.[13]
It doesn’t require much pressure, and it’s something you can use on a daily basis to keep your blades sharp.[14]
- Don’t use a honing rod in lieu of sharpening your knives with an alternative method from time to time. It can bend the edge over time, making it hazardous to use.
-
5
Take your knives to a professional if you can’t do it yourself at home. It costs about $1.50 to $2.25 per inch to have your knives sharpened by a professional.[15]
Some companies allow you to ship your knives to them if you don’t live nearby (you’ll need to pay the shipping costs, though).[16]
- Check out your warranty! Some knife brands offer free sharpening for life, so that might be something you could take advantage of, too.


Advertisement
Ask a Question
200 characters left
Include your email address to get a message when this question is answered.
Submit
Advertisement
Video
-
While knife sharpeners typically work best for kitchen knives, many can also be used for other blades, including pocket knives and field knives used by hunters and fishermen. For these blades, however, manual knife sharpeners are typically easier to carry and more effective than electric versions.
Advertisement
References
About This Article
Article SummaryX
Before you sharpen a knife with a manual sharpener, try holding up a folded sheet of paper and slicing down through it with the knife. If the knife can’t cut through the paper without stopping, insert it into the “coarse” slot on a manual sharpener. Pull the blade of the knife through the slot 3 to 6 times, following the contour of the blade and moving from base to tip. Next, pull the knife through the “fine” slot once or twice to refine the edge. When you’re done, rinse the knife and dry it with a clean towel before putting it away. For more tips, including how to sharpen knives with an electric sharpener or a whetstone, keep reading!
Did this summary help you?
Thanks to all authors for creating a page that has been read 219,335 times.
Reader Success Stories
-

«I just bought a manual knife sharpener from Amazon. It came in a typical box with color graphics and advertising…» more
Did this article help you?
Какие требования к оформлению заказа по оптовым ценам на вашем сайте?
Особых требований нет. Минимальная сумма заказа всего 10 000 рублей. Цены оптовые, с минимальной наценкой!
Мы работает с физическими лицами и организаторами совместных покупок. Для отправки заказа нужна только ваша Фамилия, Имя и Отчество, а также номер телефона и эл. почта для общения и ведения переписки. Эти данные вы вносите при регистрации на сайте или при оформлении заказа.
Как происходит работа с оптовым заказом?
Заказы оформляются через корзину на сайте! При оформлении заказа вы сможете указать нужную транспортную компанию и выбрать удобный Вам способ оплаты. Заказы по эл.почте, видеофайлы, смс, через мессенджеры и т.д. — не принимаются. Дозаказы к основному заказу присылайте по эл.почте.
После принятия заказа, мы вышлем вам на эл. почту реквизиты для предоплаты (50 — 60 % от стоимости заказа). После получения предоплаты мы начнём сборку заказа. В зависимости от объёма заказа и загруженности складов, сборка длится от одного до пяти рабочих дней. Вы можете сделать дозаказ по почте, указав в письме номер заказа, артикулы нужного товара и его количество. После сборки и проверки заказа на соответствие требованиям заказчика вам будет выслано письмо с «Итогом сборки» и реквизитами для оплаты полной суммы заказа. Накладную вы сможете скачать в своём Личном Кабинете. Если после сборки заказа предоплата превысила итоговую стоимость заказа, вы можете сделать дозаказ, оставить сумму для следующего заказа или выслать нам реквизиты для возврата переплаты на ваш счёт. После получения полной оплаты заказ передаётся в курьерскую службу для отправки выбранной вами транспортной компанией. После отправки заказа курьер привезёт накладную и мы вышлем вам письмо с указанием номера накладной, датой отправки и названием транспортной компании.
Внимание! Транспортные компании требуют паспортные данные для отправки оптового заказа. Высылайте номер и серию паспорта получателя дополнительным письмом на эл.почту info@elefante-shop.ru после оформления заказа.
Ответы на другие вопросы:

—————————————————————————-
Товары в розницу можно купить на нашем розничном сайте Elefante24.ru
![]()
—————————————————————————-
Небольшие оптовые заказы на сумму до 5000 рублей Вы можете оформить на сайте наших партнёров For-sp.ru
![]()
-
Contents
-
Table of Contents
-
Bookmarks
Quick Links
Electric Knife Sharpener
Commercial and Outdoor Model
Patented Worldwide
USER MANUAL
(SAVE THIS MANUAL FOR FUTURE USE)
Ê cs@mastergradeknifesharpener.com
www.mastergradeknifesharpener.com
Copyright © 2004 ~ 8 by Jack Chen
Related Manuals for Master Grade Electric Knife Sharpener
Summary of Contents for Master Grade Electric Knife Sharpener
-
Page 1
Electric Knife Sharpener Commercial and Outdoor Model Patented Worldwide USER MANUAL (SAVE THIS MANUAL FOR FUTURE USE) Ê cs@mastergradeknifesharpener.com www.mastergradeknifesharpener.com Copyright © 2004 ~ 8 by Jack Chen… -
Page 2: Table Of Contents
B. Why is MASTER GRADE different from other knife sharpeners? ……………………………………… 2 C. MASTER GRADE vs. a Professional sharpening service … 2 D. How to get the best results from your machine …………… 2 E. MASTER GRADE vs. the other knife sharpeners ……..3 F.
-
Page 3: Important Safeguards
A) IMPORTANT SAFEGUARDS When using electrical appliances, basic safety precautions should always be observed including the following: a) Read all instructions. b) To protect against risk of electrical shock do not immerse cord, plugs, or portable appliances in water or other liquids. c) Close supervision is necessary when any appliance is used near children.
-
Page 4: Other Knife Sharpeners
15° angle without leaving a burred. Professional chefs and meat cutters unanimously agree that the Master Grade Commercial Electric Knife Sharpener is both technologically and economically superior to others. C) Master Grade vs. a sharpening service: Cost /mo…
-
Page 5: Master Grade Vs. The Other Knife Sharpeners
E) Master Grade vs. other knife sharpeners Master Master Chef Edlund F. Dick Grade Grade Choice RS-150 Hone Commercial Premium 2000 Safe to use NO• NO• Pre sharpening Over heating Scratching knife blade Slight Excessive Excessive Excessive Excessive Burr Slight…
-
Page 6: Cautions
F) CAUTION: Ø ALWAYS WEAR SAFETY GOGGLES AND CUT RESISTANT GLOVES WHEN YOU OPERATE THIS MACHINE. Ø WHEN OPERATING THE MACHINE, HOLD IT WITH YOUR LEFT HAND AND HOLD THE KNIFE WITH YOUR RIGHT HAND G) What comes with this machine? For Outdoor Model For Commercial Model…
-
Page 7: What Types Of Knives Can Be Sharpened
J) How does the Master Grade work? The machine has two sharpening openings. The left opening is for the left side of the blade, and the right opening is for right side of the blade.
-
Page 8: How To Re-Profile A Knife’s Bevel
K) How to re-profile a knife’s bevel (Use CW-280 wide opening cover) 1) Remove the top cover by unscrewing the inset hand screw. 2) Remove the fine wheels (FS-304F) by unscrewing caps. 3) Insert the coarse sharpening wheels (FS-300C). 4) After screwing the wheel caps back on snugly, re-install the top.
-
Page 9
7) Insert the knife into the right opening, leaning your knife to the right. Tilt the knife against the sharpening wheel and draw the knife smoothly back towards you with equal and constant down pressure as in step 6. (fig 4)Continue alternating process until you see the slicer knife bevel 5˚…
-
Page 10: How To Sharpen A Cleaver Or Knife Blades
L) How to sharpen a cleaver or knife blade that is thicker than ³/ ” or 4 mm (If attempting to sharpen a blade that is thinner than ³/ ” or 4 mm please see page 11) 1) Remove the top cover by unscrewing the inset hand screw. (See fig 1 on page 6) 2) Insert the proper sharpening wheels (for regular knives use…
-
Page 12: How To Sharpen Cleaver & Knife Blades Thinner Than ³/ » Or 4 Mm
M) How to sharpen cleaver & knife blades thinner than ³/ ” or 4 mm. Note: The outdoor model doesn’t have a narrow opening cover, therefore, use the same procedures in L on page 8 1) Remove the top cover by unscrewing the inset hand screw. (see fig 1 on page 6) 2) Install the sharpening wheels (regular knives use FS-304F…
-
Page 13
(FEATHER TOUCH) until the burrs disappear. process of re-profiling the edge may take 10 or more passes depending on the condition and hardness of the knife blade. -
Page 14: How To Sharpen Serrated Knives
(CW-280) otherwise use the narrow opening cover (CN-280). 2) The MASTER GRADE can repair chips up to ⅛”. If chips are bigger than ⅛” do not attempt to repair. It may cause damage to the sharpening wheel and machine.
-
Page 15
alternating the process in each opening until the edge is straight. (See fig 16). -
Page 16: Special Instructions For Extremely Tempered Knives
Most extreme tempered knives use special materials like 440 steels, high speed steels … etc. You may find those materials use in German knives, Master Grade knives and Japanese Global Knives. Those knives the sharpened edges are not as easy to sharpen evenly as most other knives.
-
Page 18: Questions & Answers
) Questions & Answers 1) Q: Can Master Grade knife sharpener sharpen any knife? Yes, it can sharpen most knives. For serrated knives, see fig 14 on page 13. 2) Q: Can KE-280 sharpen scissors? Yes, but we do not recommend it for safety reasons.
-
Page 19
11) Q: Does it get the knife sharp enough to remove hair from your arm, like a razor? If you use a sharpening stone, you have to have a very good sharpening skill. From our experience about only 1 out of ten thousand people can do it. If you use our commercial model or outdoor model 95% people can do it. -
Page 20
15) Q: When I turn on the machine the motor is running but both side wheels are not turning at the same speed. In our experience, there are two possible causes: A knife blade was inserted forcefully (sudden entry) into the slot and pushed down too hard and cause the wheel to stop rotating while the motor continues to turn. -
Page 21: Technical Data
17) Q: What causes the sharpening wheels to rip? 1. Dirty knives that have food particles or liquid. Make sure they are clean and dry. 2. If your knife has a chip(s) (up to ⅛”) you need to use the coarse sharpening wheels to remove chips, and sharpen with light pressure then increase the pressure slightly.
-
Page 22: Outdoor Knife Sharpener
2) Outdoor Model AC 100V ~ 120V / 180 Watt USA model AC 220V ~ 240V / 180 Watt Europe model Safety Standard / Certification cUL, UL, NSF, CE, GS Sharpening Angle (Tan q) 15° Blade Angle / Blade Thickness 20° ~ 6° / Up to ½» tang Wheel Speed / Torque 2,500 RPM / 1,200 GCM Max blade contacts…
-
Page 23: Warranty
3) Under this limited warranty, MASTER GRADE reserves the right to either repair or replace the unit without charge. The customer is responsible for all freight and shipping insurance charges.
-
Page 24: Parts List
U) REPLACEMENT PARTS LIST 2. Base 4. Wide cover (CW-280) 6. Rotation Shaft (KP-280R)* 19. Electric cord (KP-280E) 25. Screw 26. Hand screw (KP-280H) (KP-168H) 51. Narrow cover (CN-280) 52. Switch (KP-280S) (KP-168S) 53. Wheel cover (KP-280C)* 54. Sharpening wheel (FS-300 Coarse)* (FS-302 Medium)* (FS-304 Fine)*…
-
Page 25: Recipe (Yan Can Cook)
Recipes by Master Chef Martin Yan TV host on PBS “Yan Can Cook” Show…
-
Page 26
Recipe #1 Assorted Fresh Fruit with Chicken… -
Page 27
Assorted Fresh Fruit with Chicken Makes 4 — 6 servings Ingredients 250 g boneless chicken slices ginger, crushed green onion, cut into 3 cm sections red chili, seeded and sliced apple, peeled, cored, and cubed mango, peeled, seeded, and cubed Asian pear, peeled, cored, and cubed cup diced pineapple Marinade… -
Page 28
Recipe #2 Assorted Vegetables in Pumpkin Bowl… -
Page 29
Assorted Vegetables in Pumpkin Bowl Makes 4 — 6 servings Ingredients small pumpkin, about 750 g slice ginger, minced cloves garlic, minced 70 g sliced celery 50 g pumpkin flesh cup straw mushrooms 30 g fresh or canned lotus seeds, drained 20 g fresh or 10 g dried lily buds, soaked and drained water chestnuts, sliced carrot, sliced… -
Page 30
Recipe #3 Fish in Eight Treasure Sauce… -
Page 31
Fish in Eight Treasure Sauce ( Makes 4 — 6 servings) Ingredients Marinade whole fish, about 500 g slices ginger, minced teaspoon salt teaspoon white pepper Eight Treasures cloves garlic, minced green onion, chopped red chilies, seeded and chopped tablespoons dried shrimp, soaked and chopped dried black mushrooms, soaked and chopped 40 g Sichuan preserved vegetables, chopped… -
Page 32
We create soft touch technology RAZOR SHARP IN JUST A FEW PASSES Ê cs@mastergradeknifesharpener.com www.mastergradeknifesharpener.com Copyright © 2004 ~ 8 by Jack Chen…
У нас в доме за остротой ножей следит муж. Он любит готовить правда делает это редко и когда берется за дело, просто не терпит, что нож тупой. Правда, как говорил мой дядя:
Это хозяева тупые, а ножи не точенные.
В общем, как ни крути, а ножи все равно точить надо. Вопрос встает чем. Об дно кружки (старинный проверенный способ) не серьезно. Покупать специальный точильный камень? Зачем? В наше время есть специальные точилки для ножей. Об одной из которых я хочу вам рассказать в этом отзыве. Точилка эта бюджетная. Заказывала я ее на wildberiies. Стоила она всего лишь 367 рублей. Муж попросил заказать. И выбрала я, честно признаться, одну из самых дешевых, если не сказать, что самую дешевую на момент покупки точилку.)))
Ну жалко мне денег на такую ерунду! Честное слово!)))
Общая информация о точилке:
Тип: ручная
Вес: 250 граммов
Артикул: 18768679
Количество лезвий: 3 шт.
Средняя стоимость: 350 рублей
Точилка пришла упакованная в коробку.
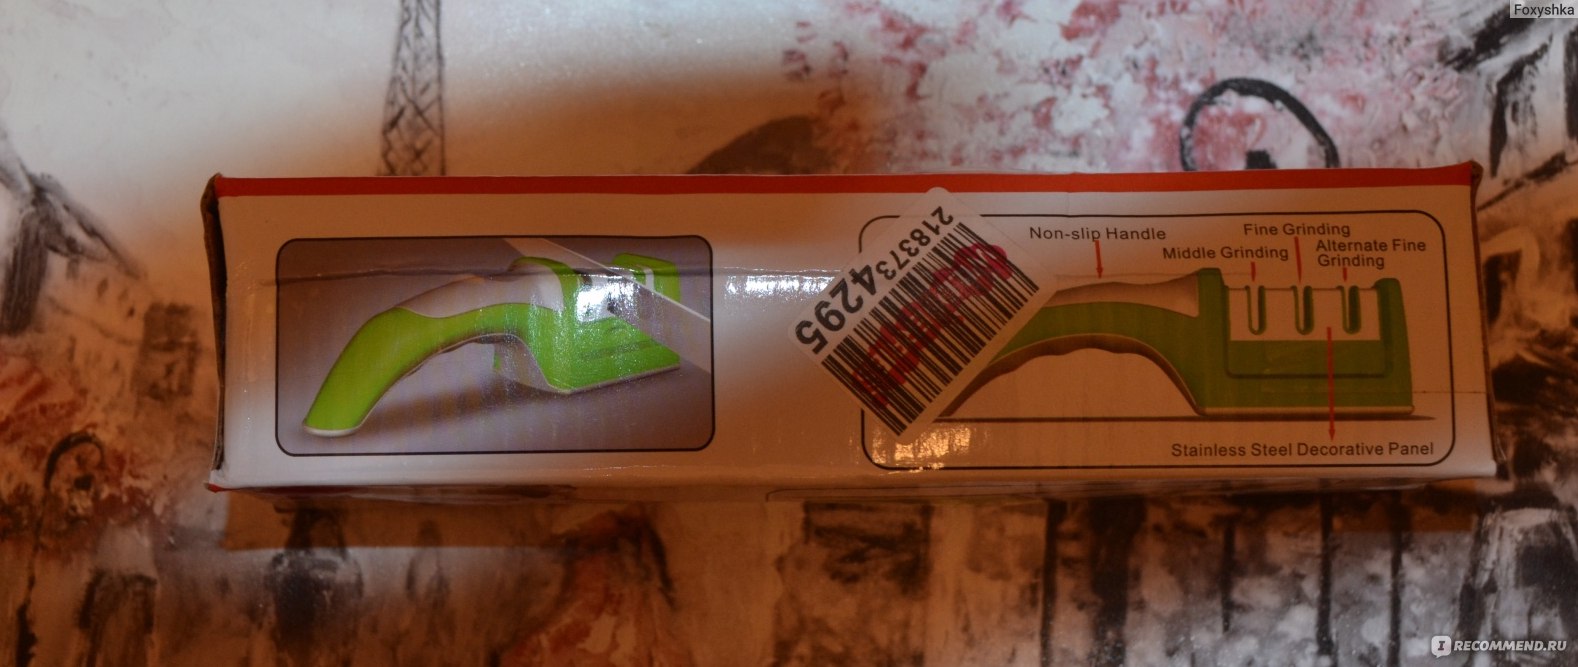
Мелочь, как говорится, а приятно. В коробке мы точилку не храним, это ни к чему. Но вот для транспортировки точилки, конечно же, коробка удобнее и надежнее.

На коробке много информации о точилке, но она вся на английском языке.
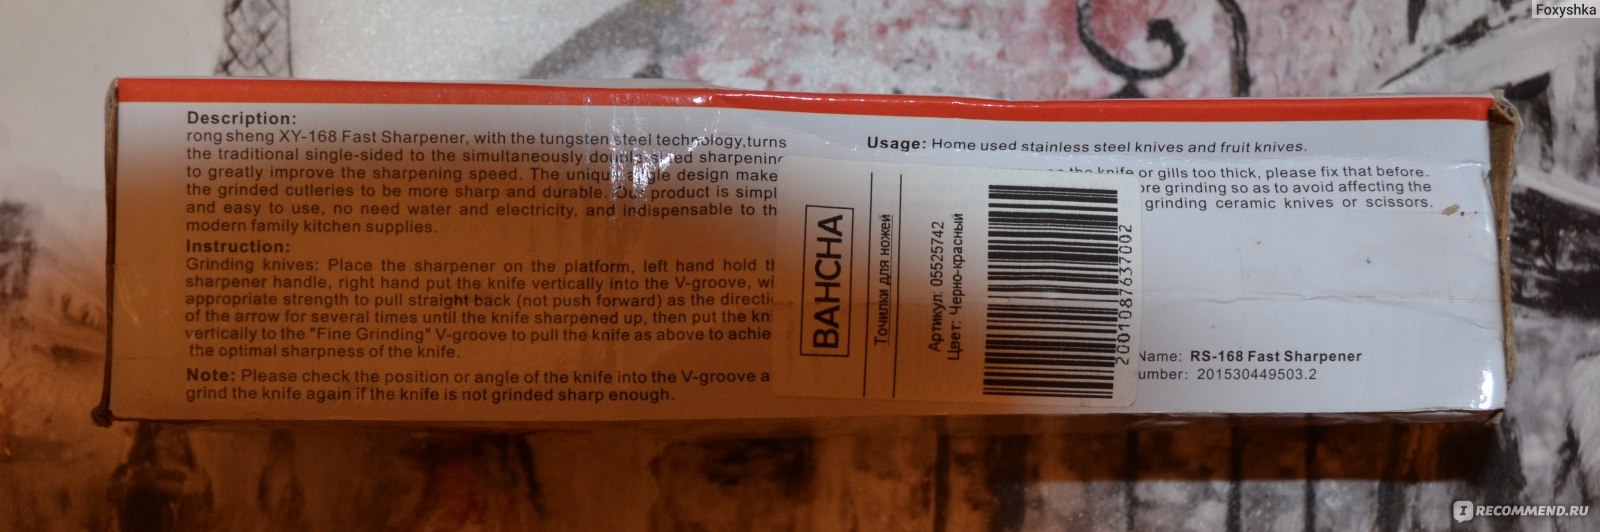
Поэтому выношу сюда в цитате информацию о точилке на русском языке:
Ручная тичилка для ножей 3 в 1 — Ваш новый помощник на кухне! Когда надо срочно поточить нож, а бежать в мастерскую нет времени, именно данная ножеточка и выручит Вас. Эта модель заточит любые ножи, даже самые тупые и поврежденные. Рукоятка выполнена из приятного на ощупь пластика, а основа является устойчивой и не скользящей и безопасной для ваших высококачественными ножами. Зона заточки отстегивается, точилку удобно мыть, даже в посудомоечной машине. Заточка ножей этой точилкой происходит в три этапа грубая и полирующая: 1. Абразивное покрытие выравнивает лезвие 2. Формирует идеальный V образный скос 3. Керамический элемент для полировки лезвия
Точилка внутри выглядит очень даже добротно. Даже и не скажешь, что она так дешево стоит.
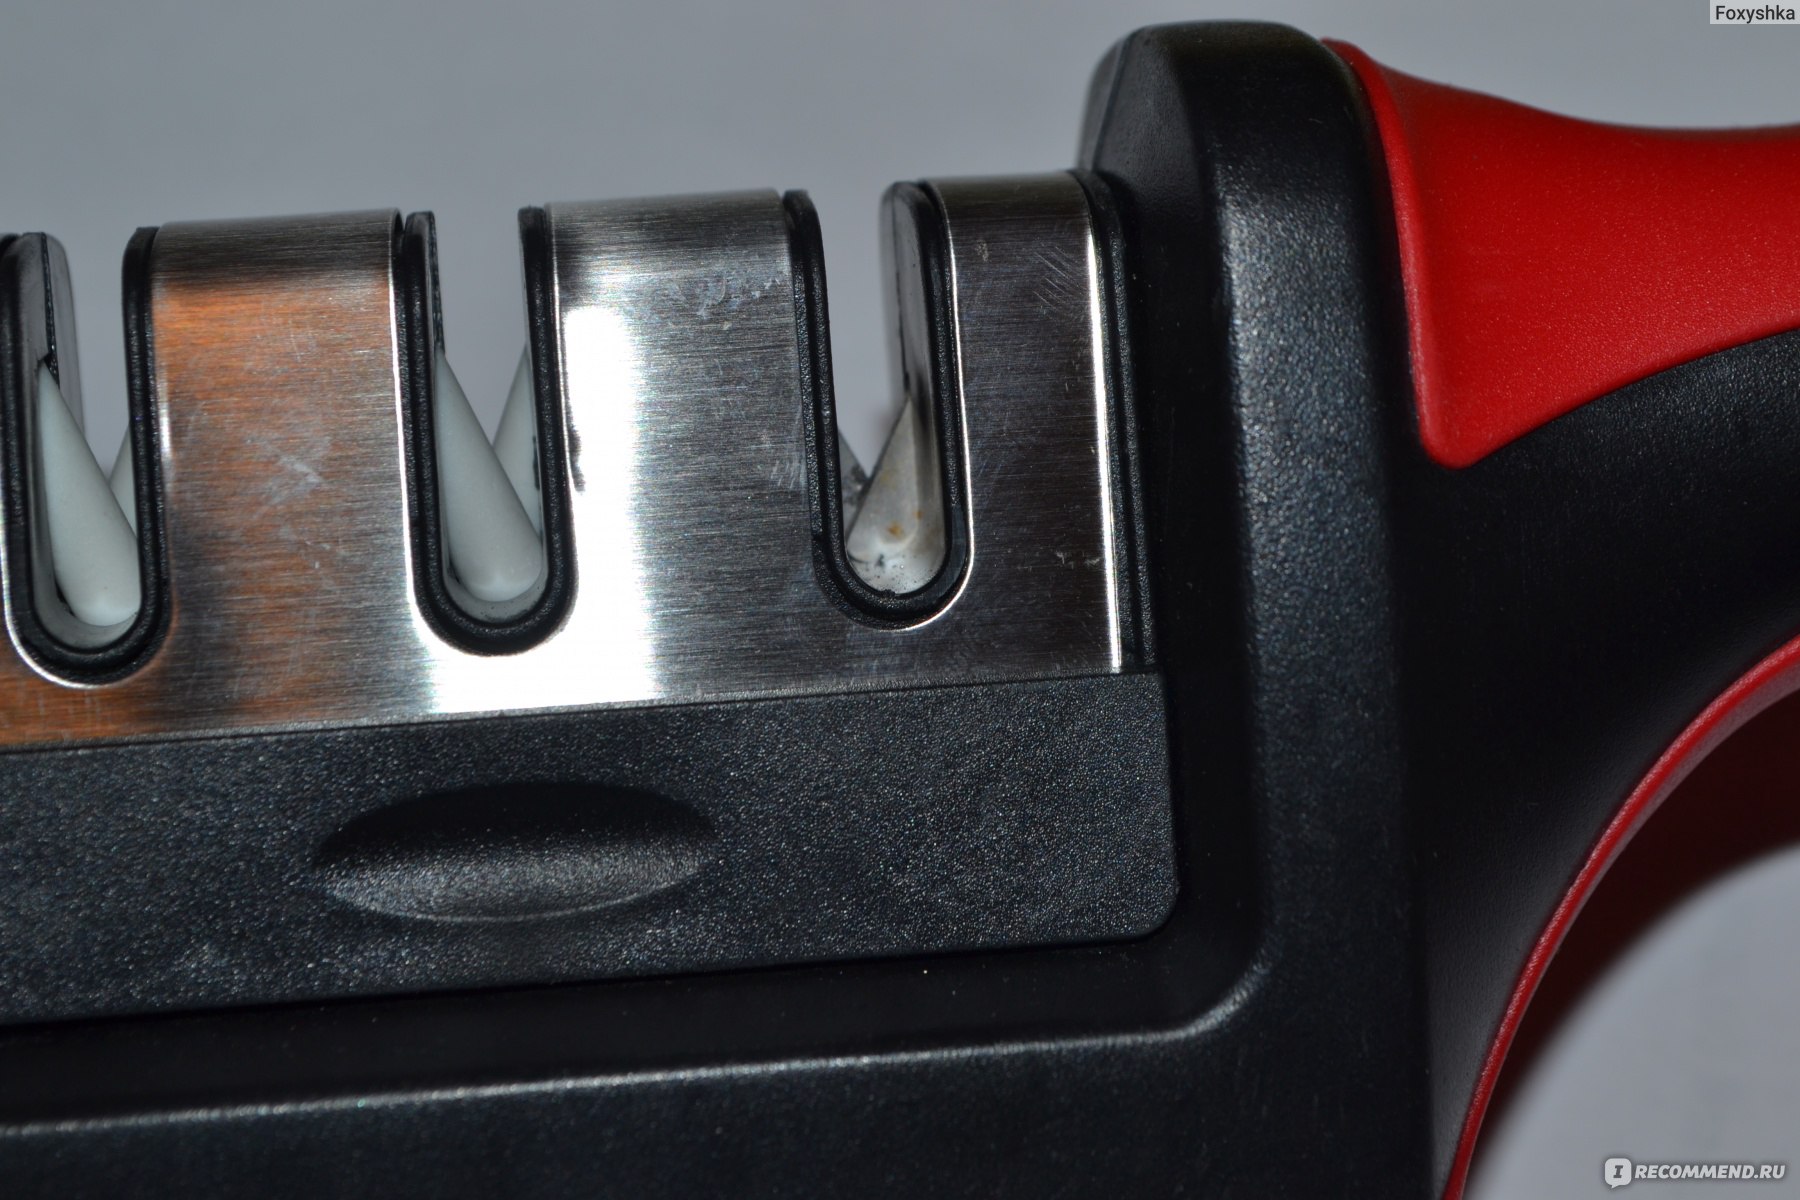
Точить ножи предлагается в три этапа. Собственно, муж так и сделал. И результат его более, чем устроил. Хотя сначала были большие сомнения, что точилка имеет три разные лезвия, предназначенные для различных видов заточки.
Для проведения экспериментальной заточки муж специально выбрал нож, имеющий зазубрину.
Точилка удобная. Ее легко держать в упор на столе. С заточкой ножей справится с помощью этой точилки не только мужчина, но и хрупкая женщина. Точилка, можно сказать, все делает сама. вам остается только проводить по лезвиям ножом.
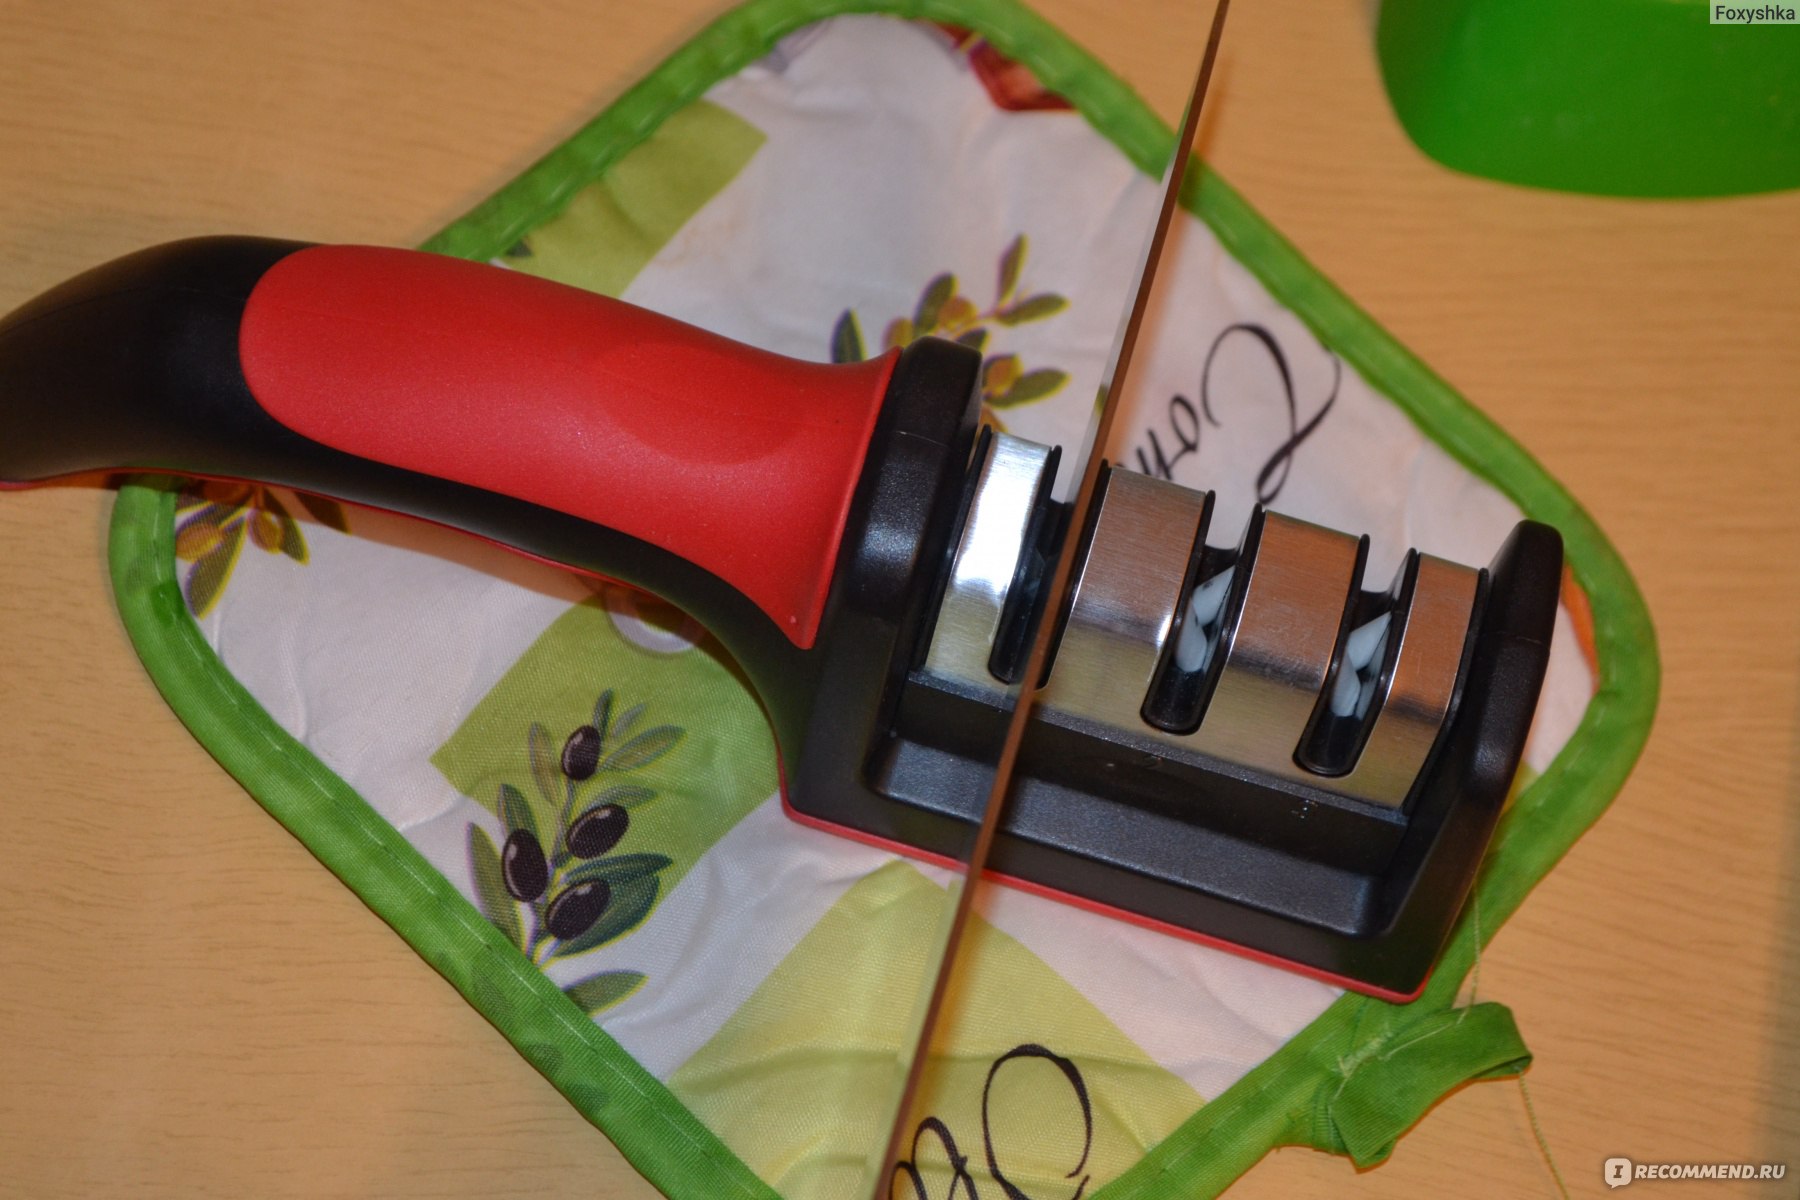
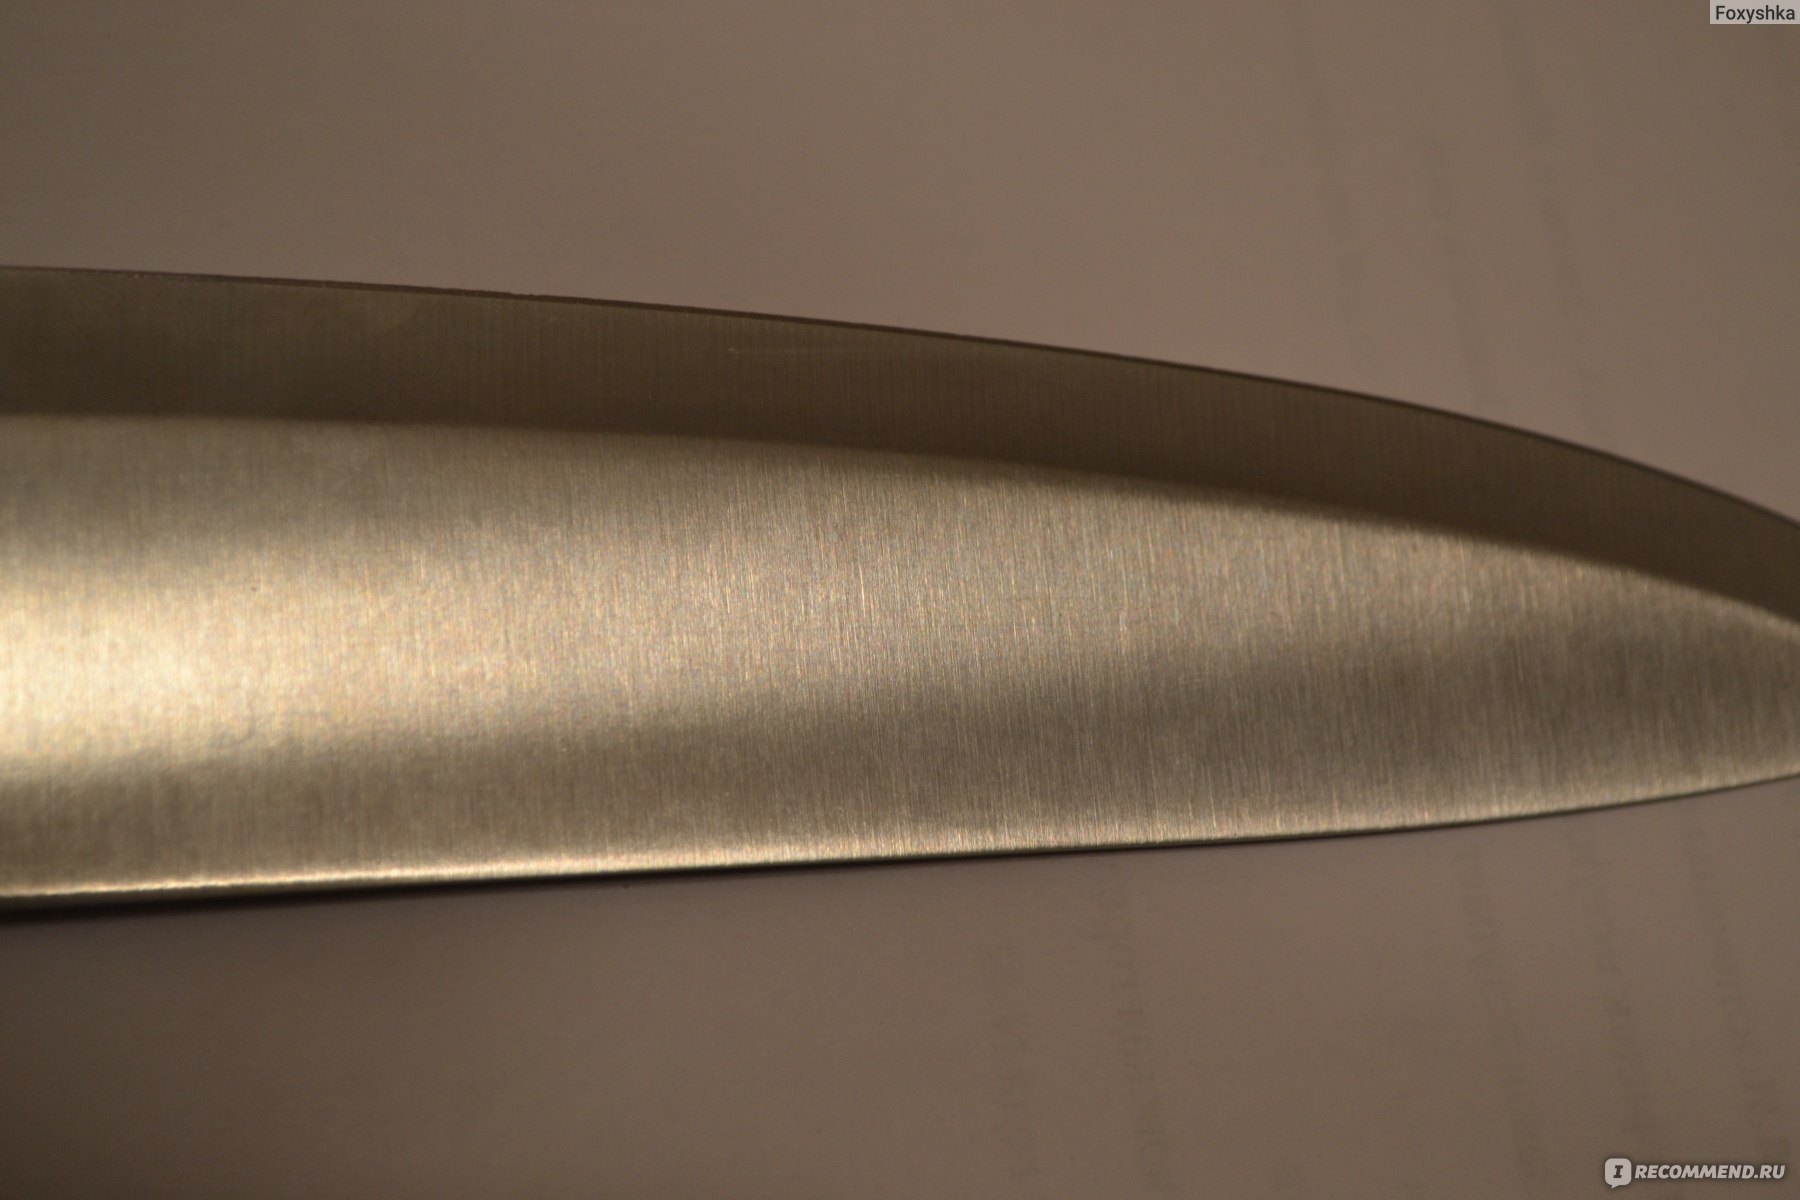
В итоге получился ровный нож, без зазубрин. Лезвия действительно выполняют разную функцию. Это только на первый взгляд они одинаковые.
В итоге имеем вот такой результат:

Нож стал на столько острый, что без труда разрезает тонкий лист бумаги на весу…

Что уж говорить, что все остальное нож тоже режет без труда.
В этот вечер в нашем доме все ножи стали резать очень хорошо.
А точилку эту я могу смело рекомендовать. Отличное качество по очень скромной цене.
перейти к содержанию
ЧЕТКОЕ ИЗОБРАЖЕНИЕ 207665 ПРОФЕССИОНАЛЬНАЯ ТОЧКА ДЛЯ НОЖЕЙ
ФУНКЦИИ И ОСОБЕННОСТИ
- Точилка для гладких и зубчатых ножей
- Заточите затупившиеся и поврежденные лезвия за секунды
- Легко затачивайте зубчатые ножи по всей кромке
- Заточенные японские (левые) полотна с одинарным скосом
- Профессиональный и портативный
КАК ИСПОЛЬЗОВАТЬ
- Протяните нож через точилку
- Убедитесь, что кончик ножа направлен вверх, чтобы сгладить и выровнять край, не удаляя металл.
- Слегка нажмите при заточке тонкого лезвия для нарезки
- Нажмите сильнее, чтобы получить прочное режущее лезвие
Профессиональная точилка для ножей подходит для этих ножей
- Японские ножи
- Поварские ножи
- Зубчатые ножи
- Обвалочные ножи
- Очищающие ножи
- подмаренник цепкий
Отполируйте, чтобы лезвия стали острыми как бритва.
Отточен для ежедневного ухода (металл не снимается).
Отточен для ежедневного ухода (металл не снимается).
ПРИМЕЧАНИЕ: Керамические лезвия не рекомендуется использовать с Professional Knife Sharpener.
ХАРАКТЕРИСТИКИ
- Материал: изготовлен из нержавеющей стали.
- Вес: 0.7 кг.
- В комплект входит: 1 точилка для ножей
ГАРАНТИЯ / ОБСЛУЖИВАНИЕ КЛИЕНТОВ
На товары под торговой маркой Sharper Image, приобретенные на SharperImage.com, распространяется ограниченная гарантия на замену сроком на 1 год. Если у вас есть какие-либо вопросы, не рассмотренные в этом руководстве, позвоните в наш отдел обслуживания клиентов по телефону 1 (877) 210-3449. Агенты по обслуживанию клиентов доступны с понедельника по пятницу с 9:00 до 6:00 по восточному времени.
Название и логотип SHARPER IMAGE® являются зарегистрированными товарными знаками.
© Более четкое изображение. Все права защищены.
Документы / Ресурсы
Рекомендации
The Sharper Image — Официальный сайт @ SharperImage.com
![]()
Download Article
![]()
Download Article
There is nothing more frustrating than trying to chop vegetables for your dinner, only to find that your knife is too dull and is smashing rather than slicing. You can easily remedy this problem by using a manual or electric knife sharpener, and it shouldn’t take you more than several minutes to restore your knife’s sharp edge. If you don’t have a manual or electric sharpener, you could explore using a whetstone, a honing rod, or even sending your knives off to a professional.
-
1
Test your knife by running it through a piece of paper. You may already know that your knife is dull, but if you aren’t sure, fold a piece of newspaper in half (or just use a single sheet of computer paper), hold it up in the air, and bring your knife down to cut through it. If your knife doesn’t slice through the paper, it’s time to sharpen it.[1]
- The knife should continuously cut through the paper without stopping if it is sharp and in good shape.
-
2
Use the “coarse” setting for very blunt knives that need to be reshaped. Most manual sharpeners have at least 2 settings: 1 labeled “coarse,” and 1 labeled “fine.” The coarse setting will actually remove steel from the blade to resharpen the edge, while the fine setting is used for everyday knife maintenance.[2]
- These settings are the same on electrical sharpeners, though an electric sharpener may have an additional slot between “coarse” and “fine.”
Advertisement
-
3
Pull the blade through from its base to its tip 3 to 6 times. Insert the blade into the manual sharpener at the base, which is where the blade meets the handle. Use gentle force, pushing the blade down as you pull it through the slot, toward your body. Repeat this action 3 to 6 times, 3 for a mildly-dull blade, or more for a severely-dull blade.[3]
- This action resets the blade, restoring it to its original sharpness.
- Use enough force when you pull the blade through that you hear an audible grinding sound. If you’re using an electric sharpener, you won’t need to press down—the whirring mechanisms will take care of everything for you.
-
4
Move the blade so you’re following its contour as you pull it through. Each time you bring the knife through the sharpener, you won’t just pull it straight through. Instead, follow the curve of the knife so that the handle comes up and is higher at the end than it was at the beginning. This way, the entirety of the blade will get sharpened.[4]
- If you’re pressing down, you’ll be able to tell by the sound and feel that you’re moving the blade the right way. If you no longer hear the grinding noise or feel the resistance of the blade, you probably aren’t following the contour closely enough.
-
5
Run the blade through the fine setting 1 to 2 times to finish the process. After you’ve finished pulling the blade through the “coarse” setting, you need to give it a few finishing touches to refine its edge. You don’t need to use as much force with the “fine” setting, and the grinding sound won’t be nearly as loud as it was in the “coarse” setting.[5]
- If your sharpener has more than one setting, pass the knife through each in-between setting 1 to 2 times, making sure that you end at the “fine” setting. These additional settings are just gradations of grinding and help fine-tune your knife even more.
-
6
Rinse the knife off and dry it with a lint-free towel. Use warm, soapy water to rinse away any lingering steel remnants before using your knife again.[6]
Feel free to use a sponge or dishtowel to give the knife a quick wipe down. Dry the knife off completely to prevent it from rusting, and return it to its knife block or similar storage space.[7]
- Avoid running your knives through the dishwasher. They can get banged up or damaged by other items.
-
7
Maintain the knife by running it through the “fine” setting daily. The general rule of thumb is to pull your knife through the fine setting once for every 2 hours of use. Depending on how often you cook, you may not need to do this every day, but keep it in mind as a helpful way to keep your knife sharp.[8]
- If you do a daily or semi-weekly pass through the manual sharpener, chances are you won’t need to do much more to keep your knives sharp.
Advertisement
-
1
Invest in an electric sharpener if you cook often with expensive knives. Electric sharpeners themselves are more expensive than manual sharpeners, running about $40 to $100, depending on the brand you get. They’re more intuitive, though, and are really easy to use as they will just pull the blade through for you. It takes less time and effort to sharpen your knives than the other manual methods require.[9]
- Make sure to do your research before ordering your electric sharpener. Some brands are meant for specific kinds of knives, and some include extra features, like a lifetime warranty.
-
2
Buy a pull-through or handheld sharpener for a nice at-home option. This is a really nice choice for your everyday home cook who doesn’t spend more than an hour or 2 in the kitchen every day. They’re smaller than the electric versions, making them easier to store, and they’re fantastic to use for daily touchups or for grinding a dull blade back to sharpness. They cost anywhere from $10 to $60, depending on the brand you choose.[10]
- There’s something to be said for the feeling of manually sharpening your own knife, too. Lots of cooks enjoy the physicality of taking care of their knives and you do get more control over your movements with a manual sharpener than you would with an electric sharpener.
-
3
Opt for a whetstone for a gentle, temperature-controlled sharpener. Whetstones are generally just a small block of material that you’ll run your knife down to sharpen its blade. Always soak it in water for at least 5 to 10 minutes before you use it. Hold the knife at a 22-degree angle and slide it forward down the whetstone, with the blade touching the stone.[11]
Repeat the movement 5 to 10 times to sharpen your knife.[12]
- The cold-water soak keeps your knife from overheating as it’s being sharpened. If a knife gets too hot, it’s chemistry can change and the blade can become brittle and warped.
- Do double-check the instructions before wetting your whetstone. While the majority of them do need to be soaked beforehand, there are a few brands and types of stones that aren’t meant to get wet.
-
4
Use a honing rod to quickly realign the edges of the blade. A honing rod is also often called a sharpening steel, and they often come along with a block-knife set. Honing doesn’t actually remove any steel from the knife and doesn’t technically sharpen it, but it does push out-of-line edges back into place, which in turn makes your cuts sharper and more precise.[13]
It doesn’t require much pressure, and it’s something you can use on a daily basis to keep your blades sharp.[14]
- Don’t use a honing rod in lieu of sharpening your knives with an alternative method from time to time. It can bend the edge over time, making it hazardous to use.
-
5
Take your knives to a professional if you can’t do it yourself at home. It costs about $1.50 to $2.25 per inch to have your knives sharpened by a professional.[15]
Some companies allow you to ship your knives to them if you don’t live nearby (you’ll need to pay the shipping costs, though).[16]
- Check out your warranty! Some knife brands offer free sharpening for life, so that might be something you could take advantage of, too.
Advertisement
Ask a Question
200 characters left
Include your email address to get a message when this question is answered.
Submit
Advertisement
Video
-
While knife sharpeners typically work best for kitchen knives, many can also be used for other blades, including pocket knives and field knives used by hunters and fishermen. For these blades, however, manual knife sharpeners are typically easier to carry and more effective than electric versions.
Advertisement
References
About This Article
Article SummaryX
Before you sharpen a knife with a manual sharpener, try holding up a folded sheet of paper and slicing down through it with the knife. If the knife can’t cut through the paper without stopping, insert it into the “coarse” slot on a manual sharpener. Pull the blade of the knife through the slot 3 to 6 times, following the contour of the blade and moving from base to tip. Next, pull the knife through the “fine” slot once or twice to refine the edge. When you’re done, rinse the knife and dry it with a clean towel before putting it away. For more tips, including how to sharpen knives with an electric sharpener or a whetstone, keep reading!
Did this summary help you?
Thanks to all authors for creating a page that has been read 260,561 times.
Reader Success Stories
-
«I just bought a manual knife sharpener from Amazon. It came in a typical box with color graphics and advertising…» more