
Ru
Подробное руководство пользователя
ЦИФРОВАЯ ФОТОКАМЕРА
Данная лицензия не предназначена для продажи этого Руководства и Вы не становитесь владельцем этого Руководства после приобретения любого продукта, загрузки и/или использования. Nikon сохраняет за собой право владения данным Руководством и, следовательно, всеми копиями и все соответствующие права, относящиеся к интеллектуальной собственности, и сохраняет за собой все права, которые явно не предоставлены Вам в рамках данного Соглашения. Данное Соглашение представляет собой полное и эксклюзивное соглашение, устное и письменное, между Вами и Nikon.
1. РУКОВОДСТВО
Руководство предназначено для клиентов, которые приобрели наши продукты. Мы можем не иметь возможности ответить на запрос физических лиц, которые не приобрели наши продукты. Пожалуйста, имейте в виду, что данное руководство и контактная информация, указанные здесь, могут быть изменены без уведомления.
Данное Руководство защищено Законом об авторском праве Японии и международными законами об авторском праве и международными договорами. Вам необходимо воспроизвести на каждой копии уведомление об авторском праве Nikon и любую другую информацию о праве собственности, которые присутствовали на оригинале.
2. ОГРАНИЧЕНИЯ
Кроме случаев, когда в данном Соглашении указано иное, нельзя делать или передавать копии данного Руководства другим или передавать в электронной форме Руководство с одного компьютера на другой по сети. НЕЛЬЗЯ ИЗМЕНЯТЬ ИЛИ УДАЛЯТЬ ЛЮБЫЕ УВЕДОМЛЕНИЯ ОБ АВТОРСКОМ ПРАВЕ, ТОРГОВОЙ МАРКЕ ИЛИ ДРУГИЕ ЗАЩИТНЫЕ УВЕДОМЛЕНИЯ, СОДЕРЖАЩИЕСЯ В ДАННОМ РУКОВОДСТВЕ. НЕЛЬЗЯ ПРИСВАИВАТЬ ИЛИ ИНЫМ ОБРАЗОМ ИЗБАВЛЯТЬСЯ, МОДИФИЦИРОВАТЬ, НАСТРАИВАТЬ, ПЕРЕВОДИТЬ, АРЕНДОВАТЬ, БРАТЬ В НАЕМ, ЗАНИМАТЬ, ПЕРЕПРОДАВАТЬ, РАСПРОСТРАНЯТЬ, ПЕРЕДАВАТЬ ПО СЕТИ ИЛИ СОЗДАВАТЬ ИЛИ ИМЕТЬ СОЗДАННЫЕ ПРОИЗВОДСТВЕННЫЕ РАБОТЫ, ОСНОВАННЫЕ НА ДАННОМ РУКОВОДСТВЕ ИЛИ ЛЮБОЙ ЧАСТИ ТАКОВОГО.
3. ОГРАНИЧЕННАЯ ГАРАНТИЯ И ОТКАЗ
В НАИБОЛЬШЕЙ СТЕПЕНИ, РАЗРЕШЕННОЙ В СИЛУ ДЕЙСТВУЮЩЕГО ЗАКОНОДАТЕЛЬСТВА, ДАННОЕ РУКОВОДСТВО ПРЕДОСТАВЛЕНО НА ОСНОВЕ ПРИНЦИПА «КАК ЕСТЬ», БЕЗ ГАРАНТИИ В ЛЮБОЙ ФОРМЕ, И КОМПАНИЯ NIKON, ЕЕ СОТРУДНИКИ, РАСПРОСТРАНИТЕЛИ, ДИЛЕРЫ И АГЕНТЫ ПРЯМО НЕ ПРИЗНАЮТ ЛЮБУЮ ГАРАНТИЮ В ЛЮБОЙ ФОРМЕ, ВЫРАЖЕННУЮ ИЛИ ПОДРАЗУМЕВАЕМУЮ, ВКЛЮЧАЯ, НО НЕ ОГРАНИЧИВАЯСЬ, ЛЮБОЙ ПОДРАЗУМЕВАЕМОЙ ГАРАНТИЕЙ ПРИГОДНОСТИ ДЛЯ ТОРГОВЛИ, ПРИГОДНОСТИ ДЛЯ ОПРЕДЕЛЕННОГО НАЗНАЧЕНИЯ ИЛИ ОТСУТСТВИЯ НАРУШЕНИЙ. В НАИБОЛЬШЕЙ СТЕПЕНИ, РАЗРЕШЕННОЙ В СИЛУ ДЕЙСТВУЮЩЕГО ЗАКОНОДАТЕЛЬСТВА, КОМПАНИЯ NIKON, ЕЕ СОТРУДНИКИ, РАСПРОСТРАНИТЕЛИ, ДИЛЕРЫ И АГЕНТЫ НЕ ГАРАНТИРУЮТ ИСПОЛНЕНИЕ ИЛИ РЕЗУЛЬТАТЫ, КОТОРЫЕ ВЫ МОЖЕТЕ ПОЛУЧИТЬ ИЗ ДАННОГО РУКОВОДСТВА, ИЛИ ЧТО ДАННОЕ РУКОВОДСТВО БУДЕТ СООТВЕТСТВОВАТЬ ВАШИМ ТРЕБОВАНИЯМ ИЛИ ЧТО РАБОТА РУКОВОДСТВА БУДЕТ БЕСПЕРЕБОЙНОЙ, БЕЗОШИБОЧНОЙ ИЛИ НЕ БУДЕТ СОДЕРЖАТЬ ВИРУСОВ. В НАИБОЛЬШЕЙ СТЕПЕНИ, РАЗРЕШЕННОЙ В СИЛУ ДЕЙСТВУЮЩЕГО ЗАКОНОДАТЕЛЬСТВА, НИ КОМПАНИЯ NIKON, НИ ЕЕ СОТРУДНИКИ, РАСПРОСТРАНИТЕЛИ, ДИЛЕРЫ И АГЕНТЫ НЕ ДОЛЖНЫ НЕСТИ ПЕРЕД ВАМИ ОТВЕТСТВЕННОСТЬ ЗА ЛЮБЫЕ КОСВЕННЫЕ, ПОСЛЕДУЮЩИЕ ИЛИ НЕПРЕДНАМЕРЕННЫЕ УБЫТКИ, ПОТЕРИ ИЛИ ИЗДЕРЖКИ ЛЮБОГО ТИПА, БУДЬ ТО ПОТЕРЯ ПРИБЫЛИ, ПЕРЕРЫВ В ДЕЯТЕЛЬНОСТИ ИЛИ ИНЫМ СПОСОБОМ ВОЗНИКАЮЩИЙ ИЛИ ЯВЛЯЮЩИЙСЯ СЛЕДСТВИЕМ ДАННОГО РУКОВОДСТВА, ВЫЗВАННЫЙ КАКИМ-ЛИБО СПОСОБОМ, ДАЖЕ ЕСЛИ КОМПАНИЯ NIKON, ЕЕ СОТРУДНИКИ, РАСПРОСТРАНИТЕЛИ, ДИЛЕРЫ ИЛИ АГЕНТЫ УВЕДОМЛЕНЫ О ВОЗМОЖНОСТИ ВОЗНИКНОВЕНИЯ ТАКИХ УБЫТКОВ, ПОТЕРЬ ИЛИ ИЗДЕРЖЕК. ЭТОТ ОТКАЗ СОСТАВЛЯЕТ СУЩЕСТВЕННУЮ ЧАСТЬ ДАННОГО СОГЛАШЕНИЯ, И НЕИСПОЛЬЗОВАНИЕ ДАННОГО РУКОВОДСТВА УПОЛНОМОЧЕНО, КРОМЕ СЛУЧАЕВ В РАМКАХ ДАННОГО ОТКАЗА.
4. ОБЩИЕ СВЕДЕНИЯ
Данное соглашение регулируется и должно истолковываться в соответствии с законами Японии независимо от его принципов коллизионного права. В случае возникновения спора в рамках или в связи с данным соглашением Вы, таким образом, даете согласие на персональную юрисдикцию Японии и отказываетесь от любого возражения, что такая дискуссия вызывает затруднение. Далее Вы соглашаетесь на получение судебных извещений в любом действии, возникающем из данного Соглашения по обычной почте или другими коммерчески оправданными способами доставки расписки в получении. Если любое положение данного Соглашения должно быть определено недействительным по какой-либо причине, то оставшиеся положения не должны быть признаны недействительными и должны остаться в силе без изменений. Данное Соглашение устанавливает в дальнейшем целое соглашение и понимание между Вами и компанией Nikon, и замещает собой и заменяет любые другие соглашения, относящиеся к сути дела данного Соглашения. Неуспех любой стороны в настаивании на строгом исполнении любого правила или положения данного соглашения, или выполнение любой опции, права или защиты прав, содержащихся в данном документе, не должны толковаться в качестве отказа от любого применения такого правила, положения, опции, права или защиты прав в будущем, и такое правило, положение, опция, право или защита прав должны продолжиться и сохранить полную юридическую силу и действие. Заголовки разделов данного Соглашения вставлены только для удобства и не должны составлять часть данного документа или влиять каким-либо образом на значение или толкование данного Соглашения. Кроме случаев, когда иначе явно указано в данном документе, положения раздела 3 и раздела 4 вместе с любыми положениями, которые с помощью своих прямо выраженных условий относятся к периодам после прекращения срока действия данного Соглашения, должны оставаться в силе после прекращения действия данного Соглашения по какой-либо причине.
Руководства для продуктов Nikon/ 2018/02/15/ Вер. 2.0.0
- Manuals
- Brands
- Nikon Manuals
- Digital Camera
- COOLPIX P510
- Reference manual
-
Contents
-
Table of Contents
-
Troubleshooting
-
Bookmarks
Quick Links
DIGITAL CAMERA
COOLP
,_
P510
Reference Manual
Related Manuals for Nikon COOLPIX P510
Summary of Contents for Nikon COOLPIX P510
-
Page 1
DIGITAL CAMERA COOLP P510 Reference Manual… -
Page 2: Table Of Contents
Reference Section The Reference Section provides detailed information and hints for using the camera. Shooting Taking Pictures with Manual Focus …………..Using Easy Panorama (Shooting and Playing back) …….._3 Using Panorama Assist ………………… Using 3D Photography ………………… P, S, A, M Modes ………………..Playback Playing and Deleting Images Captured Using Continuous Shooting…
-
Page 3
Available when the shooting mode is P, S, A, M, U, special effects mode or the Sports scene mode. Press the multi selector • focus mode). ®( • Use the multi seJector to choose (manua[ focus) and press the _) button. •… -
Page 4
Taking Pictures with Easy Panorama SCENE Rotate the mode dial to -_ MENU button _’ _ Panorama Select Easy panorama and press the _) button. Select shooting range from Normal (180 °) or «_ Wide (360°), press the _) button. •… -
Page 5: Using Easy Panorama (Shooting And Playing Back)
Using Easy Panorama (Shooting and Playing back) Press the shutter-release button all the way, and release it, • The D icons showing the panorama direction displayed. Move the camera straight and slowly in one of the four directions to start shooting. •…
-
Page 6
Using Easy Panorama (Shooting and Playing back) Viewing Easy Panorama (Scroll) Switch to playback mode (_34), display the picture recorded with easy panorama in full-frame playback mode and press tile _) button. Tile camera displays tile short side of tile picture filling tile entire… -
Page 7
Using a tripod makes the composition easier. When using a tripod to stabilize the camera, set Vibration reduction (_-580) to Off in the setup menu. SCENE Rotate the mode dial to -_ MENU button -_ _ Panorama Select Panorama assist press button. -
Page 8: Using Panorama Assist
Using Panorama Assist Press the _ button when shooting is completed. • The camera returns to step 2. Notes on Panorama Assist • Set the flash mode, self timer, focus mode and exposure compensation before releasing shutter for the first picture. The settings cannot be changed…
-
Page 9
The camera takes one picture for each eye to simulate a three-dimensional image on a 3D<:ompatible %/or monitor 3D photography SCENE Rotate the mode dial to -> MENU button Framethe subject. • The focus area that the camera focuses on can be moved to areas other than the center of the frame. -
Page 10: Using 3D Photography
Using 3D Photography Taking 3D Pictures • Moving subjects are not suited to 3D photography We recommend shooting still subjects • Pictures have a less pronounced 3D feel as the distance between the camera and background increased • Pictures may have a less pronounced 3D feel when the subject is dark or when the second picture…
-
Page 11
(Programmed auto), S (Shutter-priority auto) or (Aperture-priority auto) P, S _,_’ Rotate mode dial Rotate command dial or multi selector to set the exposure. • In mode, the flexible program (_Sg) can be set using the command dial. • In S mode, the shutter speed can be set in a range from a maximum speed of 1/4000 to 4 seconds using the command dial. -
Page 12
P,S, A, M Modes M (Manual) Mode Tile user controls both tile shutter speed and aperture value. • The shutter speed can be set in a range from a maximum speed of 1/4000 to 8 seconds. Rotate mode dial to M. Rotate command dial to set a… -
Page 13
P, S, A, M Modes Note on Shooting When zooming is per_rmed after the exposure is set, aperture value may be changed, Note on ISO Sensitivity When ISO sensitivity (_45) is set to Auto (default setting) or Fixed range auto, ISO sensitivity fixed at ISO 100. -
Page 14: Playback
The i mages shot inthe following continuous shooting mode are saved as agroup (called a»sequence») each time y ou shoot. • Continuous H, Continuous L, Pre-shooting cache, Continuous H: 120 fps or Continuous H: 60 fps in Continuous (_41) in tile shooting menu •…
-
Page 15
Playing and Deleting Images Captured Using Continuous Shooting Mode (Sequence) Changing Key Picture in Sequence A sequence’s key picture can be changed using Choose key picture (_’_63) in the playback menu. Playback Menu Options Available When Using Sequence When the MENU button is pressed during an image sequence playback, the following menu operations are available, Quick retouch… -
Page 16
Editing Features Images car] be easily edited with this camera using the functions below. Edited images are stored as separate files (_98). Editing function ..Application !’i!_!:_ Quick retouch (_17) Easily create a copy with enhanced contrast and richer colors. Create a copy of the current… -
Page 17
Editing Still Images Restrictions on Image Editing The _llowing restrictions apply when editing pictures that were created by editing, Editing functions used Editing functions to add Skin softening, Filter effects, Small picture, Black border or Crop Quick retouch can be used. D-Lighting Quick retouch… -
Page 18
Editing Still Images r__ Quick Retouch: Enhancing Contrast and Saturation picture Select (_34) _ MENU button ([]_]13) _ r._- Quick retouch Press the multi selector • or • to choose setting level, and press the _]_ button. • The origina[ version is displayed on the left and the edited version is displayed on the right. -
Page 19
Editing Still Images Skin Softening: Softening Skin Tones picture softening Select (_34) «) MENU button (_]I 3) -) _ Skin Press the multi selector • or • to choose setting level, press the _ button. • A confirmation screen is displayed, and the image is displayed zoomed in on the face edited by skin softening •… -
Page 20: Editing Still Images
Editing Still Images (] Filter Effects: Applying Digital Filter Effects picture Select (_34) -) MENU button ([_)13) -) _ Filter effects Option Description Selective color Keep only the selected image color and make other colors black-and-white. Produce stardike rays of [ight that radiate outward from bright Cross screen objects such as sunJight reflections and city lights.
-
Page 21
Editing Still Images Confirm result press the _ button. • A new, edited copy is created. • To cancel, press «. • Copies created by editing with filter effects can be recognized by the 0 icon displayed in playback mode. Small Picture: Reducing the Size of an Image picture… -
Page 22
Editing Still Images Black Border: Adding a Black Border to Pictures picture Select (_34) «) MENU button (_]I 3) -)’ [] Black border Press the multi selector • or • to choose desired frame thickness, press button. • Choose a frame thickness from Thin, Medium Broad line. -
Page 23
Editing Still Images Crop: Creating a Cropped Copy Create a copy containing only portion visible monitor when I_o°_ displayed with playback zoom (_35) enabled. Cropped copies are stored separate files. Enlarge the picture for cropping ([_[_]35), Refine copy composition, • Rotate tile zoom control toward… -
Page 24
Connect the camera to a television to play back pictures on the television. If your television is equipped with an HDMI connector, you can connect it to the camera with a commercially available HDMI cable to play back pictures. Turn off the camera. Connect the camera to the TV. -
Page 25
Connecting the Camera to a 11/(Viewing Images on a TV) Tune television to the video channel. • See the instruction manual provided with yourTV for details. Hold down the_ button to turn on the camera. • The camera enters playback mode, and the recorded pictures are displayed on the TV. -
Page 26
Users ofPictBridge-compatible (_:):-18) printers can connect the camera directly to the printer and print pictures without using acomputer. The s teps forprinting are as follows. using prir}t or clef option (Print order: _55) Print i dividual Pictures Print mu!tiple pictures (_28) (_27) S»… -
Page 27
Connecting the Camera to a Printer (Direct Print) Connecting the Camera to a Printer Turn off the camera. Turn on the printer. • Check the printer settings Connect the camera to the printer using the included USBcable • Be sure that the pJug is oriented correctJy When disconnecting the cable, do not pul] the plug atan angle. -
Page 28
Connecting the Camera to a Printer (Direct Print) Printing Individual Images After connecting the carnera to tile printer correctly (_26), print pictures by following the procedure below. Use the multi selector to choose the picture to be printed, and press the _ button. -
Page 29: Connecting The Camera Toaprinter (Direct Print)
Connecting the Camera toaPrinter (Direct Print) Choose the desired paper size and press the button. • To specifythe paper sizeusing tile printer settings, chooseDefault in the paper sizemenu. Choose Start print press the _ button. Printing starts. • The monitor display returns to that shown in step 1 when printing is complete.
-
Page 30
Connecting the Camera toaPrinter (Direct Print) 3 Choose the desired paper size a nd press the button. • To specify the paper size using the p rinter settings, choose Default inthe paper size menu. Choose Print selection, Print all images or DPOF printing and press the _ button. -
Page 31
Connecting the Camera to a Printer (Direct Print) Print all images All pictures stored in the internal memory or on the memory card are printed one per each. • When the menu shown on the right is displayed, choose Start print and press the _) button to start printing. -
Page 32
Extracting Only the Desired Portions of the Movie The desired portions of a recorded movie car] be saved as a separate file. Play back the movie to be edited and pause at the start point of the portion that is to be extracted ([_100), Use the multi… -
Page 33: Editing Movies
Editing Movies Notes on Editing Movies • Use a fully charged battery to prevent the camera from turning off during editing. When the battery level is _], movie editing is not possible. • Once a movie is created through editing, it cannot be used again for extracting a movie,…
-
Page 34
Image Quality Image Size To set the image quality and image size, see «Changing tile Image Quality and Image Size» (_77). Picture Control (COOLPIX Picture Control) P, S, A or M P, S, A or M Rotate -)’ Picture Control the mode dial to -) MENU button tab (_… -
Page 35: Shooting Menu (P, S, A Or M Mode)
Shooting Menu (P, S, A or M Mode) Customizing Existing COOLPIX Picture Controls: Quick Adjust and Manual Adjust COOLPIX Picture Control can be custorrfized using Quick adjust, which allows for balanced adjustment of sharpness, contrast, saturation and other image editing components, or manual adjust, which allows for detailed adjusting of the components individually.
-
Page 36
Shooting Menu (P, S, A or M Mode) Types of Quick Adjust and Manual Adjust Option Description Adjust the sharpness, contrast and saturation levels automatically. Five levels of adjustment are available from -2 to Quick adjust 1 Choose from options between -2 and +2 to reduce or emphasize the effect of the selected COOLPIX Picture Control. -
Page 37
Shooting Menu (P, S, A or M Mode) Option » Description Control the tint used in monochrome photographs from B&W (black-and-white, the default setting), Sepia, and Cyanotype Toning 3 (blue-tinted monochrome). Pressing the rotary multi selector • when Sepia or Cyanotype is selected enables you to choose from seven levels of gradation. -
Page 38
Shooting Menu (P, S, A or M Mode) Custom Picture Control (COOLPIX Custom Picture Control) P, S, A or M P, S, A Rotate the mode dial to «_ MENU button or M tab ([_]I 3) -) Custom Picture Control The picture editing options created by customizing COOLPIX Custom Picture Controls (:an be registered up to two options. -
Page 39
Shooting Menu (P, S, A or M Mode) White Balance (Adjusting Hue) P, S, A or M P, S, A or M Rotate the mode dial to «_ MENU button tab (_ -)’ White balance The color of light reflected from an object varies with the color of the light source. The human brain is able to adapt to changes in the color of the light source, with the result that white objects appear white whether seen in the shade, direct sunlight, or under incandescent lighting. -
Page 40
Shooting Menu (P, S, A or M Mode) Using Preset Manual Use when you want to make pictures taken under unusual lighting conditions (e.g., lamps with reddishqight) look as though they were shot in normal light. Use the procedure below to measure the white balance value under the lighting used during shooting. -
Page 41
Shooting Menu (P, S, A or M Mode) Metering P, S, A or M P, S, A or M Rotate the mode dial to «_ MENU button tab (_ -)’ Metering The process of measuring the brightness of the subject to determine the exposure is known… -
Page 42
Shooting Menu (P, S, A or M Mode) Continuous Shooting P, S, A or M P, S, A or M MENU Rotate the mode dial to «_ b utton tab (_ -)’ Continuous Change the settings for continuous shooting and BSS(Best Shot Selector). Option «… -
Page 43
Shooting Menu (P, S, A or M Mode) Option Description BSS is recommended for shooting under low lighting without the flash, with the camera zoomed in, or in other situations in which camera shake is Jikdy to blur pictures. BSS (Best Shot Selector Keep pressing the shutter-rdease button all the way, and up to ten pictures are shot and the camera automatically… -
Page 44
Shooting Menu (P, S, A or M Mode) Pre-shooting Cache When Pre-shooting cache is selected, shooting begins when the shutter release button is pressed halfway for O.S seconds or longer, and images captured before the shutter release button is pressed all the way are saved along with images captured after the shutter… -
Page 45
Shooting Menu (P, S, A or M Mode) Choose the interval between each shot press the _) button. • Tile maximum amount of frames that can be taken during interval timer shooting differs according to the selected interval. — 30 s: 600 images — 1 min: 300 images — 5 rain:60 images — 10 rain: 30 images… -
Page 46
Shooting Menu (P, S, A or M Mode) ISO Sensitivity P, S, A or M P, S, A or M Rotate the mode dial to «_ MENU button tab (_ -)’ ISO sensitivity The higher the ISO sensitivity, the less light needed for taking pictures. -
Page 47
Shooting Menu (P, S, A or M Mode) Exposure Bracketing P, S P, S or A Rotate -)’ Exposure bracketing the mode dial to «)’ MENU button -‘)’ tab (_]I The exposure (brightness) can be changed automatically during continuous shooting. This is effective for shooting when… -
Page 48
Shooting Menu (P, S, A or M Mode) AF Area Mode P, S, A or M P, S, A or M Rotate the mode dial to -_ MENU button tab (_ -) AF area mode You carl set how tile focus area is determined for autofocus. -
Page 49
Shooting Menu (P, S, A or JVl Mode) Option Description Choose manually the focus position from 99 areas in the screen.This option is suited to situations in which the intended subject is relatively still and not positioned at the center of the frame. Rotate the multi selector or press A V, _1 or •… -
Page 50
Shooting Menu (P, S, A or M Mode) Option Description When the camera detects tile main subject, it focuses on that subject. See «Using the Target Finding AF» [‘,] TargetfindingAF ([_)84) for more information. 4″ Notes on AF Area Mode •… -
Page 51
Shooting Menu (P, S, A or M Mode) Using Subject Tracking P, S, A or M P, S, A or M Rotate the mode dial to «_ MENU button tab (_ -) AF area mode Choose this mode to shoot moving subjects. Subject tracking begins once you select a subject to be focused on, and the focus area will move and follow the subject. -
Page 52
Shooting Menu (P, S, A or M Mode) Notes on Subject Tracking • The digital zoom is not available. • Set the zoom position, flash mode, focus mode, or menu settings before registering a subject, any of these are changed after a subject is registered, the subject will be canceled. -
Page 53
Shooting Menu (P, S, A or M Mode) Flash Exp. Comp. P, S, A P, S, A Rotate the mode dial to or M -‘)’ MENU button or M tab (_ -)’ Flash exp. comp. Flash exp. cornp, option is used to adjust the flash output. Use this option when tile… -
Page 54
Shooting Menu (P, S, A or M Mode) Active D-Lighting P, S, A or M P, S, A or M MENU Rotate the mode dial to «_ b utton tab (_ -)’ Active D-Lighting «Active F)-Lighting» preserves details in highlights and shadows, creating photographs with natural contrasc The image taken reproduces the contrast effect that is seen with the naked eye. -
Page 55
Shooting Menu (P, S, A or M Mode) Zoom Memory A or M P, S, A or M Rotate the mode dial to P, S, -_ MENU button tab (_ -) Zoom memory Description Option When the zoom control is operated, the camera changes in steps to the focal length (equivalent to 35mm [135] format of angle of view) of the zoom lens that is set in advance. -
Page 56
For m ore i nformation about image editing functions; (Quick retouch, D- Lighting, Skin softening, Filter effects, Small picture and Black border), see «Editing Still Images» (_15). Print Order (Creating a DPOF Print Order) (Playback Press the [] button mode) -) MENU b utton (_13) -) _1,Print order If you choose to use one of the following methods to print pictures that are stored on a memory card, the pictures to print and the number of copies (:an be set in… -
Page 57: The Playback Menu
The Playback Menu Choose whether or not to also print shooting date and shooting information. • Choose Date press the _) button to print shooting date on all pictures in the print order. • Choose Info and press the _) button to print shooting…
-
Page 58
The Playback Menu Slide Show Press the [] button (Playbackmode) -_ MENU b utton (_13) -) _ Slideshow View pictures stored in the internal memory or on a memory card in an automatic: slide show. Use the multi selector to choose Start, and press the _]_ button. -
Page 59
The Playback Menu Protect Press the [] button (Playbackmode) «) MENU b utton (_13) -) O-_Protect Protect selected pictures from accidental deletion. In the image selection screen, choose a picture and set or cancel protection. See «The Image Selection Screen» (_59) for more information. -
Page 60
The Playback Menu The Image Selection Screen Tile image selection screen is displayect in tile following menus. Only one image can be selected for some menu items, while for other menu items, multiple images can be selected. Func_[o_h/Zh_niyone_age_a_’ge_ Functions for which multiple images can be selected Selected… -
Page 61
The Playback Menu Rotate Image Press the [] button (Playbackmode) -) MENU b utton (_13) -) _L_ Rotate image Change the orientation of pictures played back in the camera’s monitor after shooting. Still pictures can be rotated 90° clockwise or counterclockwise. Pictures that were recorded in the «tall»… -
Page 62
The Playback Menu _1 Voice Memo _ Voice memo Press the [] button (Playback mode) _ Select a picture _ MENU button (_13) Use the camera’s microphone to record voice memos for pictures. • The recording screen is displayed for a picture without voice memo, while the voice memo playback screen is displayed for a picture with voice memo (a picture marked with _] in full-frame playback mode). -
Page 63
The Playback Menu r.-.’l copy (copy Between Internal Memory and Memory Card) MENU Press the [] button (Playback mode) b utton (_13) P.»_ Copy Copy pictures between the internal memory and a memory card. Use the multi selector to select an option from the copy screen, and press the @ button. -
Page 64
Playback Menu Message: «Memory contains no images.» If there are no pictures stored on the memory card when playback mode is selected, the message, the MENU Memory contains no images,, is displayed. Press the b utton and select Copy from the playback menu to copy the pictures… -
Page 65
Movie Options shooting screen options Display -) MENU button -) _ (Movie) tab ([]_)1 -) Movie You can choose the type of movie to shoot. Tile camera can record normal speed movies and HS (high speed) movies (_66), which can be played back in slow motion or fast motion. -
Page 66: The Movie Menu
The Movie Menu HS Movies See «Recording Movies in Slow Motion and Fast Motion (HS Movie)» (_66) more information. Option Description 1/4-speed slow motion movies with an aspect ratio of 4:3 are recorded. _’_i_ HS 120 fps (640×480) Max. movie length: 7 min 15 s (playback dme: 29 min) Movie bitrate: 2.8 Mbps Frame rate: 120 frames per second 1/2-speed slow motion movies with an aspect ratio of 16:9…
-
Page 67
The Movie Menu Recording Movies in Slow Motion and Fast Motion Movie) Displaytheshooting screen -_ MENU button _ _ /Movie/ tab1_13! -_ Movie options HS (high speed) movies carl be recorded. Movies recorded using HS movie can be played back in slow motion at 1/4 or 1/2 of normal playback speed, or played… -
Page 68
The Movie Menu Notes on HS Movie • The sound is not recorded. • Zoom position, focus, exposure and white balance are locked when the • (_11_movie record) button is pressed to start recording. HS Movie Recorded movies are played back at about 30 frames per second,… -
Page 69
The Movie Menu Autofocus Mode Display the shooting screen -) MENU button -‘) _ (Movie) tab (_13) -) Autofocus mode Choose how the camera focuses when recording normal speed movies (_64). Option Description AF-$ Single AF Lock on the focus when the • (_l_I movie-record) button is pressed (default… -
Page 70
GPS Settings Press the MENU button -‘) ,-_ (GPS setting) tab (_]I 3) -‘) GPS options Description i’i_ Option When set to On, signals are being received from the GPS satellite, and Record GPS data positioning starts ([_ 102). The default setting is Off. Signals from the GPSsatellite are used to set the date and time of the camera’s internal clock (only when Record GPS data in GPS Synchronize… -
Page 71: Gps Setting Menu
GPS Setting Menu Updating the A-GPS File Download tile latest A-GPSfile flora tile website below, and use it to update tile file. http://nikonimglib.com/ag ps2/index.html • The A-GPS file for COOLPIX PS10 is only available from the website above. • To update the A-GPSfile, set Record GPS data to Off. When On is selected, the A-GPS file cannot be updated.
-
Page 72
GPS Setting Menu Create Log (Record the log of moving information) (GPS setting) Press the MENU b utton «_ ,’_ tab (_]1 «_ Create When log recording starts, the measured tracking information is recorded until a preset time has elapsed at the interval set for Log interval, •… -
Page 73
GPS Setting Menu Select Save log, and press the _ button. • The log data is saved to a memory card. Notes on Log Recording • If the date and time are not set, the log cannot be recorded. • Use a fully charged battery to prevent the camera… -
Page 74
GPS Setting Menu View Log Press the MENUbutton _’g, (GPS setting) tab (_13) View Check or erase the log data stored in the memory card using Create leg (_71). Use the multi selector to select the log data to be displayed, and press the _}_ button. -
Page 75
Welcome Screen screen Press the MENU button _ V tab (_]_]1 _ Welcome Choose whether or not to display the welcome screen on the monitor when camera is turned Option Description None Display the shooting or playback screen without displaying the welcome screen. -
Page 76: The Setup Menu
The Setup Menu Time Zone and Date zone Press the MENU button -_ V tab (_]1 -_ Time and date Option Description Set the camera clock to tile current date and time. Use the mufti selector to set the date and time.
-
Page 77
The Setup Menu Setting the Travel Destination Time Zone Use the multi selector to choose Time zone, and press button. • The Time zone screen is displayed. Choose )_» Travel destination press button. • The date and time displayed on the monitor change according to the region currently selected. -
Page 78
The Setup Menu Time Zones The camera supports the time zones listed below. For time differences not listed below, set the camera clock using Time zone and date. UTC+? 7’_ ..Location ..UTC +_—‘_ _°_’_c_n Midway, Samoa Madrid, Paris, Berlin Hawaii, Tahiti Athens, Hdsinki, Ankara Moscow, Nairobi, Riyadh,… -
Page 79
The Setup Menu Monitor Settings Press the MENU button «) V tab (_]I 3) «) Monitor settings Option Description On (default setting): Picture is displayed on the monitor immediately Image review after shooting and the monitor display returns to shooting screen. Off: Picture is not displayed immediately after shooting. -
Page 80
The Setup Menu Print Date (Imprinting Date and Time on Pictures) Press the MENUbutton «) V tab ([_]I 3) «) Print date The shooting date and time (:an be imprinted on pictures at the time of shooting. This information can be printed even from printers that do not support printing of the date and time (_56). -
Page 81
The Setup Menu Vibration Reduction Press the MENU button -_ Iii tab (_]13) -_ Vibration reduction Option Description Compensate camera shake that commonly occurs when shooting at the telephoto zoom position or slow shutter speed. Camera shake is also compensated when recording movies as well as when shooting still images.The camera automatically detects the panning direction and only compensates… -
Page 82
The Setup Menu Motion Detection Press the MENU button -_ V tab ([_)13) -_ Motion detection Enable motion detection to reduce the effects of camera shake and subject movement when shooting still pictures. Option Description If the camera detects the movement of the subject or camera shake, the IgO sensitivity is raised and the shutter speed is increased to reduce their effects. -
Page 83
The Setup Menu AF Assist Press the MENU button -‘_ V tab (_13) -‘_ AF assist Enable or disable the AF-assist illuminator that assists the autofocus when lighting is dim. !,,w,, .._ …… DesCription AF-assist illuminator lights automatically if the lighting is dim. The illuminator has a range of about 4.0 m (13 ft) at the maximum wide-angle position and about 2.1 m (6 ft 10 in.) at the… -
Page 84
The Setup Menu Assign Side Zoom Control Assign zoom Press the MENU button «) V tab (_]I «) side control Choose the function to be performed during shooting when the side zoom control is used. Option Description Zoom (default setting) When shooting, use the side zoom control ([_]31) to adjust the zoom. -
Page 85
The Setup Menu Sound Settings Press the MENUbutton «) V tab (_]I 3) «) Sound settings Adjust the following sound settings. Option DesCription Set the following all sound settings to On (default setting) or Off. • Setting beep (beep sounds once when the settings are completed) Buttonsound •… -
Page 86
The Setup Menu Format Memory/Format Card Press the MENU button «) V tab ([_]I 3) «) Format memory/Format card Format the internal memory or a memory card. Formatting permanently deletes all data in the internal memory or memory card. The deJeted data (:annot be recovered. Be sure to transfer important pictures to a computer before formatting. -
Page 87
The Setup Menu TV Settings Press the MENU button -_ V tab (_]13) -_ TV settings Adjust the settings for c:onnecting to a TV. Option Description Select the analog video output system from NTSC or PAL in Video mode accordance with your TV. Select a picture resolution for HDMI output from Auto (default setting), 480p, 720p, or 1080L When Auto is set, the output HDMI… -
Page 88
The Setup Menu Fn Button Press the MENU button «_ V tab (_]1 «_ Fn button Assign the frequently used shooting menu to the (FUNC) button (_2). • This can be used when P, S, A, M or U is chosen for shooting mode. -
Page 89
• When the camera is connected to a computer, an application installed on the computer, such as Nikon Transfer 2, may start. If the camera was connected to the computer for the sole purpose charging the battery, exit the application. -
Page 90
The Setup Menu The Charge Lamp The following chart explains charge lamp status when the camera is connected to a computer, Option Description Flashes slowly (green) Battery charging. Battery not charging. If the charge ]amp changes from slow flashing (green) to off while the power-on lamp is lit, charging is complete. -
Page 91
The Setup Menu Toggle Av/Tv Selection Press the MENU button -) V tab (_]13) -) Toggle Av/Tv selection Switch the method for setting the flexible program, shutter speed or aperture value. • This feature can be used when shooting mode is setto P, S, A, M or U. -
Page 92
The Setup Menu Blink Warning warning Press the MENU b utton _ V tab ([_]1 _ Blink Choose whether or not blinking eyes are detected when using face detection (_85) in the following shooting modes. • In the following scene modes: Scene auto selector (_45), Portrait (_46) or Night portrait (when Tripod is selected) (_47) •… -
Page 93
The Setup Menu Filmstrip Press the MENU button -) V tab (_]13) -) Filmstrip Allows you to select whether or not filmstrips are displayed when rotate the multi selector quickly in full-frame playback mode (_34). Option Description Image thumbnail is displayed at the bottom of the monitor when /ou rotate the mufti selector… -
Page 94
The Setup Menu Eye-Fi Upload Eye-Fi upload Press the MENUbutton «_ V tab (_]1 «_ Option Description Enable Upload images created by the camera to a preselected destination. Disable (default setting) Images will not be uploaded. Notes on Eye-Fi Cards •… -
Page 95
The Setup Menu Reverse Indicators Press the MENU button _ V tab (_]I 3) _ Reverse indicators Change the +/- display direction of the exposure indicator displayed when shooting mode is M. The + side of the indicators is set to the left and — side is set to the right in the default setting. -
Page 96
The Setup Menu Landscape Menu Option Default value Landscape (_]43) _Single shot Backlighting Menu —‘_°’_ Option Default value HDR (_44) _Off Special Effects Menu Option Default value Special effects (_]55) _5oft Shooting Menu Option Default value Image quality (_77) Normal Image size (_78) _ 4608×3456 Picture Control (0_33) -
Page 97
The Setup Menu GPS Setting Menu Setup Menu Option ° Default value Welcome screen (_’eW4) None Image review (_’_78) Brightness (8″_78) View/hide framing grid (_78) View/hide histograms (_’_78) Print date (_’_79) Vibration reduction (_’_80) Motion detection (_81) Auto AF assist (O_82) Auto Digital zoom (_82) Assign side zoom control (_83) -
Page 98
The Setup Menu Others • Choosing Reset all also clears the current file number (_98) in the memory. After resetting, numbering continues from the lowest number available in the internal memory or the memory card. If Reset all is performed after all pictures are deleted from the internal memory or memory card (_36), the file numbers for the next pictures taken start from «0001/’… -
Page 99
• A folder for storing files is automatically created using the following naming convention: «Folder number € NIKON» (e.g., «100NIKON»). If there are 200 files in a folder, a new folder is created. (For example, the folder name following «100NIKON» becomes «101NIKON.») A new folder is also created when the file numbers in a folder reach 9999 or Reset file numbering (_90)is performed. -
Page 100: File And Folder Names
File and Folder Names • When image files or voice files are copied to or from the internal memory memory card (_62), tile file naming conventions are as follows: Selected images: Files copied using selected images are copied to tile current folder (or to tile…
-
Page 101
Rechargeable battery Rechargeable Liqon Battery EN-EL51 Charging AC adapter Charging AC Adapter EH-69P 1’2 Battery Charger MH-61 Battery charge r (Charging time when the battery is completely used up: Approx. two hours) ACAdapterEH62A connectasshow AC adapter Before closing the batter/-chamber/memory card slot cover, fully insert the power connector cord into the slot in the battery chamber. -
Page 102
The f ollowing table l ists t he error messages and other warnings displayed onthe monitor, as well as the solutions for d ealing with them. Display Cause/Solution «_ Clock not set. (flashes) Set date and time, Battery exhausted. Battery exhausted, Cha rge or replace the battery. -
Page 103
Error Messages Cause/Solution Displa7 Memory card has not been formatted for use in this camera. Card is not formatted. AII data stored on the memory card is deleted when formatted. Format card? If there is any data on the card that you want to keep, select No, and backup the data to a computer before formatting… -
Page 104
Error Messages Display Cause/Solution Failed to save the 3D pictures. Try shooting again, _’_8 Failed to save 3D Delete unnecessary pictures, image in some shooting conditions, such as when the subject moves or the subject is dark or low in contrast, the second shot may not be taken or the 3D picture may not be saved. -
Page 105
Lens error occurred. Lens error Turn the camera off and then on again. If the error persists, contact retailer or Nikon authorized service representative, Communications Error occurred during communication with printer, 6″B26… -
Page 106
Error Messages Display Cause/Solution Printer error: check Specified size of paper is not loaded. Load the specifier] size of paper, select Resume and press the paper @ button to resume printing, _ Printer error: paper Paper has jammed in the printer. Remove the jammed pa per, select Resume… -
Page 107
_I06… -
Page 108
_ Technical Notes and Index Caring for the Products ……….The Camera …………………._:-2 The Battery …………………._)_-3 Charging AC Adapter ………………_)_-4 The Memory Cards ……………….._)_-5 Caring for the Camera ……….Cleaning ……………………_)_-6 Storage ……………………_)_-6 Troubleshooting ………… -
Page 109: The Camera
The Camera To ensure continued enjoyment of this Nikon produc:t, observe tile following precautions when using or storing tile device. Be sure to read and follow tile warnings of»For Your Safety» (_vi to _viii) thoroughly before using tile products. Keep…
-
Page 110: The Battery
Caring for the Products Notes on the Monitor • Monitors and electronic viewfinders are constructed with extremely high precision; at least 99.99% of pixels are effective, with no more than 0.01% being missing or defective. Hence while these displays may contain pixels that are always lit (white, red, blue, or green) or always off (black), this is…
-
Page 111: Charging Ac Adapter
Caring for the Products • If the battery will not be used for some time, insert it in the camera and run it flat before removing it for storage The battery should be stored in a cool location with an ambient temperature of 15°C to 25°C (59°F to 77°F) Do not store the battery in hot or extremely cold locations •…
-
Page 112: The Memory Cards
Caring for the Products Memory Cards • Use only Secure Digital memory cards. See «Approved Memory (ards» (_23). • Be sure to observe the precautions in the memory card documentation when you use the memory card. • Do not affix labels or stickers to the memory card. •…
-
Page 113: Cleaning
Cleaning Avoid touching glass parts with your fingers. Remove dust or lint with a blower (typically a small device with a rubber bulb attached to one end that is pumped to produce a stream of air out the other end). To remove fingerprints, oily substances, or other stains that cannot be removed with a blower, carefully Lens! wipe the lens with a dry soft cloth or eyewear cleaning cloth, using a spiral…
-
Page 114
Ifthe camera fails t ofunction as expected, check the list o fcommon problems below b efore consulting your retailer orNikon-authorized service representative. Refer tothe page n umbers inthe right-most column for m ore i nformation. • See » Error Messages» (_101) for m ore i nformation. -
Page 115: Troubleshooting
Troubleshooting Problem Cause/Solution Camera is of_ Battery is exhausted. Standby mode for saving power: Press the power switch, shutter release button, button or • movie record) button, or rotate the mode dial, Monitor or Monitor and viewfinder cannot be used simultaneously, Press viewfinder is blank.
-
Page 116
Data recorded malfunction, is not affected. In the event of continued contact your retailer representative. Nikon-authorized service… -
Page 117
Troubleshooting Shooting Issues Problem _I Cause/Solution 90, 93, Cannot set to Disconnect the HDMI cable or USB cable, _23, shooting mode, _’526 When camera is in playback mode, press the [] button, shutter release button or • (_11_movie record) button. When menus are displayed, press the MENUbutton,… -
Page 118
Troubleshooting Problem _I Cause/Solution Flashis set to @ (off). Flashdoes not fire. A shooting mode where flash cannot fire is selected, Another function that is set now is restricting the flash. Off is selected for Digital zoom in the setup menu, When Scene auto… -
Page 119
Troubleshooting Problem _I _»_ Cause/Solution Flashis set to @ (off). Flashwindow is blocked, Subject is beyond flash range, Picturesare too Adjust exposure compensation. dark Raise the ISO sensitivity. 61, _45 (underexposed). Subject is backlit, Raisethe flash, and set the scene mode 44, 66 [] (Backlighting) with HDR to Off or set the flash mode to (fill flash). -
Page 120
Computer is not set to launch Nikon Transfer 2 automatically. For more information on Nikon Transfer 2, refer to help information contained in ViewNX The PictBridge… -
Page 121
Troubleshooting Problem Cause/Solution Pictures to be Memory card contains no pictures. Replace memory card. printed are not Remove memory card to print pictures from internal memory. displayed, Pictures taken by 3D photography cannot be printed. Paper size cannot be selected from the camera in the following situations,… -
Page 122
Nikon COOLPIX P510 Digital Camera Compact d_g_tal camera 16.1 million ;mag ]/Z3dn. type CMOS; approx. 16.79 million total pixels ;;ii 42x optical zoom, NIKKOR lens 4.3-180mm (angle of view equivalent to that of 24-1000 mm F0ca! ength lens in 35mm [135] format) f/-number f/36.g… -
Page 123
Specifications • 16 M 4608×3456 • 8 M 3264×2448 • 4M 2272×1704 • 2M 1600×1200 • VGA 640×480 • 16:9 12M 4608×2592 • 16:9 2M 1920×1080 • 3:2 4608×3072 • 1:1 3456×3456 • ISO 100, 200, 400, 800, 1600, 3200, Hi 1 (equivalent to 6400) •… -
Page 124: Specifications
Specifications Audio/video output; digital I/0(USB); HDMI Mini Connector (Type C) (HDMI output) Receiver frequency 1575.42 MHz (C/A c ode), geodetic system Arabic, Brazilian Portuguese, Chinese (Simplified Traditional), Czech, Danish, Dutch, English, Finnish, French, German, Greek, Hindi, Hungarian, Indonesian, Italian, Japanese, Korean, Norwegian, Polish, Portuguese, Romanian, Russian, Spanish, Swedish, Thai, Turkish, Ukrainian, Vietnamese •…
-
Page 125: Supported Standards
ForKorea:Approx. 55 x 59 × 66.5mm (2.2× 2.4× 2.7in.) Approx. 55 g (2.0 og {excluding plug adapte0 ForArgentina and Korea: A pprox. 80 g (2.9og Specifications • Nikon will not be held liable for any errors this manual may contain. • The appearance of this product…
-
Page 126
Svmbols ACadapter 21, _100 Active D-Lighting Aperture-priority auto mode _)10 AFarea mode 61, _47 AFassist 109, _) Apply selection button 5, 12 I_1 Auto mode AFmode Backlighting AF/access lamp «_ Delete button 4, 6, 36, Aperture value DISP (display)button 5, 6, 15 Aperture-priority auto mode 0_10… -
Page 127: Index
Index Flash Close-up _ Command dial 4, 5 Flash exp. comp. Flash mode Computer Fn button Continuous _’_41 Contrast _’_35 Focal length _54, _)715 COOLPIX Custom Picture Control Focus _47, _’_37 Focus area 32, _’_47 Focus mode COOLPI/Picture Control Folder name _’_98 Create log 105, Food _I 50…
-
Page 128
Index Picture Control Lens cap Li-ion rechargeable battery 18, _’_100 Playback 100, Lithium-ion type battery _’_100 Playback menu Playback mode Playback zoom Macro close-up Portrait _ Manual focus _’_2 Power Manual mode _’_11 Power switch/power-on lamp Memory capacity Pre-shootingcache _’_41 Memory card Pressing halfway… -
Page 129
Index View/hide histograms 108, Shooting Viewfinder Shooting menu ViewNX 2 91 Shutter sound 109, Voice memo Shutter speed Volume Shutter-priority auto mode Shutter-release button 4, 6, 32 Single 61, _41 Welcome screen 108, Single AF _51, White balance 61, _38 Skin softening Wide Slide show… -
Page 131
No reproduction in any form of this manual, in whole or in part (except for brief quotation in critical articles or reviews), may be made without written authorization from NIKON CORPORATION. NIKON CORPORATION FX2B02(11) 6MM 18711-02 © 2012 Nikon Corporation…
-
Инструкции по эксплуатации
18
Языки:

Nikon COOLPIX P510 инструкция по эксплуатации
(260 страниц)
- Языки:Русский
-
Тип:
PDF -
Размер:
17.82 MB
Просмотр

Nikon COOLPIX P510 инструкция по эксплуатации
(260 страниц)
- Языки:Английский
-
Тип:
PDF -
Размер:
16.11 MB
Просмотр

Nikon COOLPIX P510 инструкция по эксплуатации
(260 страниц)
- Языки:Тайский
-
Тип:
PDF -
Размер:
18.97 MB
Просмотр

Nikon COOLPIX P510 инструкция по эксплуатации
(260 страниц)
- Языки:Шведский
-
Тип:
PDF -
Размер:
17.58 MB
Просмотр

Nikon COOLPIX P510 инструкция по эксплуатации
(260 страниц)
- Языки:Словенский
-
Тип:
PDF -
Размер:
17.59 MB
Просмотр

Nikon COOLPIX P510 инструкция по эксплуатации
(260 страниц)
- Языки:Португальский
-
Тип:
PDF -
Размер:
16.89 MB -
Описание:
Brasil
Просмотр

Nikon COOLPIX P510 инструкция по эксплуатации
(260 страниц)
- Языки:Нидерландский
-
Тип:
PDF -
Размер:
17.27 MB
Просмотр

Nikon COOLPIX P510 инструкция по эксплуатации
(260 страниц)
- Языки:Корейский
-
Тип:
PDF -
Размер:
17.43 MB
Просмотр

Nikon COOLPIX P510 инструкция по эксплуатации
(260 страниц)
- Языки:Исландский
-
Тип:
PDF -
Размер:
17.49 MB
Просмотр

Nikon COOLPIX P510 инструкция по эксплуатации
(260 страниц)
- Языки:Венгерский
-
Тип:
PDF -
Размер:
17.83 MB
Просмотр

Nikon COOLPIX P510 инструкция по эксплуатации
(260 страниц)
- Языки:Французский
-
Тип:
PDF -
Размер:
17.71 MB
Просмотр

Nikon COOLPIX P510 инструкция по эксплуатации
(258 страниц)
- Языки:Китайский
-
Тип:
PDF -
Размер:
17.85 MB
Просмотр

Nikon COOLPIX P510 инструкция по эксплуатации
(260 страниц)
- Языки:Португальский
-
Тип:
PDF -
Размер:
17.83 MB
Просмотр

Nikon COOLPIX P510 инструкция по эксплуатации
(260 страниц)
- Языки:Японский
-
Тип:
PDF -
Размер:
23.6 MB
Просмотр

Nikon COOLPIX P510 инструкция по эксплуатации
(260 страниц)
- Языки:Итальянский
-
Тип:
PDF -
Размер:
17.36 MB
Просмотр

Nikon COOLPIX P510 инструкция по эксплуатации
(260 страниц)
- Языки:Немецкий
-
Тип:
PDF -
Размер:
17.39 MB
Просмотр

Nikon COOLPIX P510 инструкция по эксплуатации
(260 страниц)
- Языки:Чешский
-
Тип:
PDF -
Размер:
17.71 MB
Просмотр

Nikon COOLPIX P510 инструкция по эксплуатации
(260 страниц)
- Языки:Арабский
-
Тип:
PDF -
Размер:
18.31 MB
Просмотр
На NoDevice можно скачать инструкцию по эксплуатации для Nikon COOLPIX P510. Руководство пользователя необходимо для ознакомления с правилами установки и эксплуатации Nikon COOLPIX P510. Инструкции по использованию помогут правильно настроить Nikon COOLPIX P510, исправить ошибки и выявить неполадки.
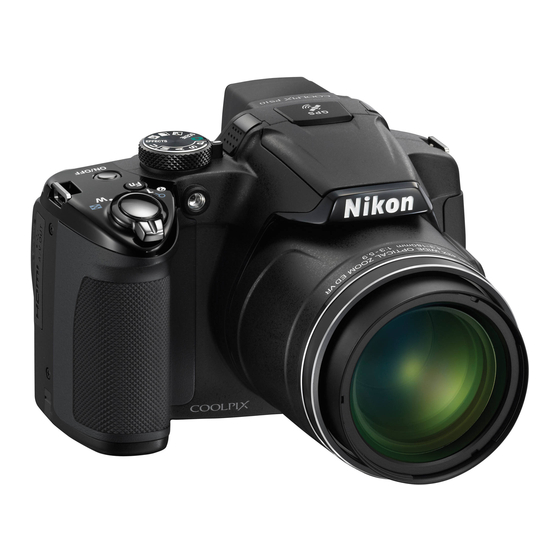
 Модель: Компактная фотокамера Nikon Coolpix P510
Год выпуска: 2012
Количество страниц: 260
Язык: русский
Формат: pdf
Размер: 16,9 Mb
Описание:
Расширьте возможности фотосъемки с помощью Nikon Coolpix P510 — переходной фотокамеры с впечатляющим 42-кратным зумом.
Благодаря объективу NIKKOR, который обеспечивает превосходное покрытие от широкоугольного (24-1000 мм) до сверхтелескопического, эта 16-мегапиксельная фотокамера позволяет приблизиться к центру событий.
КМОП-матрица с обратной подсветкой и расширенное подавление вибраций со смещением объектива позволяют получать снимки неизменно высокого качества в любых условиях освещения. Поворотный ЖК монитор обеспечивает великолепные снимки с высоким разрешением под любым углом.
Режим доступа к съемке видеороликов в формате Full HD одним касанием позволяет легко переключаться на видеосъемку. Функция встроенного GPS обеспечивает включение «геотегов» в данные изображений.
Содержание
- Введение.
- Прочитайте эту информацию в первую очередь.
- Проверка комплектности.
- Об этом руководстве.
- Информация и меры предосторожности.
- Меры предосторожности.
- ПРЕДУПРЕЖДЕНИЯ.
- Уведомления.
- Прочитайте эту информацию в первую очередь.
- Компоненты фотокамеры и основные возможности.
- Компоненты фотокамеры.
- Корпус фотокамеры.
- Элементы управления, используемые в режиме съемки.
- Элементы управления, используемые в режиме просмотра.
- Изменение угла монитора.
- Крепление ремня фотокамеры и установка крышки объектива.
- Монитор.
- Основные операции.
- Переключение из режима съемки в режим просмотра и обратно.
- Использование поворотного мультиселектора.
- Использование меню (кнопка MENU).
- Переключение информации на мониторе.
- Включение и выключение монитора.
- Использование видоискателя.
- Компоненты фотокамеры.
- Основные принципы съемки и просмотра.
- Этап подготовки 1. Установка батареи.
- Этап подготовки 2. Зарядка батареи.
- Этап подготовки 3. Установка карты памяти.
- Внутренняя память и карты памяти.
- Рекомендованные карты памяти.
- Шаг 1. Включение фотокамеры.
- Включение и выключение фотокамеры.
- Настройка отображения языка, даты и времени.
- Шаг 2. Выбор режима съемки.
- Доступные режимы съемки.
- Шаг 3. Компоновка кадра.
- Использование зума.
- Шаг 4. Фокусировка и съемка.
- Шаг 5. Просмотр снимков.
- Изменение метода отображения снимков.
- Шаг 6. Удаление ненужных снимков.
- Функции съемки.
- Режим A (Авто).
- Изменение настроек режима A (Авто).
- Сюжетный режим (съемка в соответствии с сюжетом).
- Изменение настроек сюжетного режима.
- Характеристики каждого сюжета.
- Использование функции смягчения тона кожи.
- Режим «Специальн. эффекты» (применение эффектов в процессе съемки).
- Характеристики каждого специального эффекта.
- Изменение настроек режима «Специальн. эффекты».
- Режимы P, S, A, M (настройка экспозиции для съемки).
- Изменение режимов P, S, A, M.
- Параметры, доступные в меню съемки.
- U (режимы пользовательских настроек User Settings).
- Сохранение настроек в режиме U.
- Функции, настраиваемые с помощью мультиселектора.
- Доступные функции.
- Использование вспышки (режимы вспышки).
- Использование автоспуска.
- Таймер улыбки (съемка улыбающихся лиц).
- Использование режима фокусировки.
- Регулировка яркости (поправка экспозиции).
- Список настроек по умолчанию.
- Изменение качества и размера изображения.
- Доступное качество изображения.
- Доступный размер изображения.
- Функции, которые нельзя использовать одновременно.
- Диапазон управления выдержкой (режимы P, S, A, M).
- Фокусировка на объекте.
- Использование функции «АФ с обнаруж. объекта».
- Использование функции распознавания лиц.
- Блокировка фокусировки.
- Режим A (Авто).
- Функции просмотра.
- Функции, доступные в режиме просмотра (меню просмотра).
- Подключение фотокамеры к телевизору, ПК или принтеру.
- Использование программы ViewNX 2.
- Установка программы ViewNX 2.
- Передача снимков на компьютер.
- Просмотр снимков.
- Запись и просмотр видеороликов.
- Запись видеороликов.
- Изменение настроек видеосъемки (меню видео).
- Просмотр видеороликов.
- Запись видеороликов.
- Использование GPS.
- Включение записи данных GPS.
- Изменение настроек GPS (меню параметров GPS).
- Общие настройки фотокамеры.
- Меню настройки.
- Раздел «Руководство».
- Фотосъемка с ручной фокусировкой.
- Использование режима «Простая панорама» (съемка и просмотр).
- Фотосъемка в режиме «Простая панорама».
- Просмотр простой панорамы (прокрутка).
- Использование режима «Съемка панорамы».
- Использование 3D-фотосъемки.
- Режимы P, S, A, M.
- P (Програм. авто. режим), S (Авто с приор. выдерж.) или A (Авто с приор. диафраг.).
- Режим M (Ручной).
- Просмотр и удаление снимков, сделанных в режиме непрерывной съемки (последовательности).
- Просмотр снимков в последовательности.
- Удаление снимков в последовательности.
- Редактирование снимков.
- Функции редактирования.
- Быстрая обработка: повышение контраста и насыщенности.
- D-Lighting: повышение яркости и контраста.
- Смягчение тона кожи: смягчение оттенков кожи.
- Эфф. фильтров: применение эффектов цифрового фильтра.
- Уменьшить снимок: уменьшение размера изображения.
- Черная рамка: добавление черной рамки вокруг изображения.
- Кадрирование: создание кадрированной копии.
- Подключение фотокамеры к телевизору (для просмотра снимков).
- Подключение фотокамеры к принтеру (прямая печать).
- Подключение фотокамеры к принтеру.
- Печать отдельных снимков.
- Печать нескольких снимков.
- Редактирование видеороликов.
- Сохранение фрагментов видеоролика.
- Сохранение кадра видеоролика в качестве снимка.
- Меню съемки (режим P, S, A, M).
- Качество и размер изображения.
- Picture Control (COOLPIX Picture Control).
- Польз. Picture Control (пользовательский COOLPIX Picture Control).
- Баланс белого (настройка оттенка).
- Замер экспозиции.
- Непрерывная съемка.
- Чувствительность.
- Брекет. экспозиции.
- Режим зоны АФ.
- Режим автофокуса.
- Попр. мощн. вспышки.
- Фильтр понижен. шума.
- Активный D-Lighting.
- Сохранение и сброс пользовательских настроек (user settings).
- Память зума.
- Начальное полож. зума.
- Меню просмотра.
- Задание печати (формирование задания печати DPOF).
- Показ слайдов.
- Защита.
- Экран выбора изображений.
- Повернуть снимок.
- Звуковая заметка.
- Копирование (копирование файлов из внутренней памяти на карту памяти и обратно).
- Свойства отображаемой последовательности.
- Выбрать основн. снимок.
- Меню видео.
- Параметры видео.
- Видеозапись в замедленном и ускоренном режиме (видео HS).
- Режим автофокуса.
- Меню настройки GPS.
- Настройки GPS.
- Функция (Create Log) «Создать журнал» (запись хронологических данных о перемещении).
- Просмотреть журнал.
- Меню настройки.
- Экран приветствия.
- Часовой пояс и дата.
- Настройки монитора.
- Печать даты (впечатывание даты и времени на снимках).
- Подавл. вибраций.
- Обнаруж. движения.
- АФ-помощь.
- Цифровой зум.
- Назначение функции боковому рычажку зуммирования.
- Настройка звука.
- Авто выкл.
- Форматирование памяти/карты памяти.
- Язык/Language.
- Настройки ТВ.
- Кнопка Fn.
- Зарядка от ПК.
- Перекл. управ. «Av/Tv».
- Сброс нум. файлов.
- Предуп. о закр. глаз.
- Полоса изображений.
- Загрузка Eye-Fi.
- Инвертировать индик-ры.
- Сброс всех знач.
- Версия прошивки.
- Имена файлов и папок.
- Дополнительные принадлежности.
- Сообщения об ошибках.
- Технические примечания и предметный указатель.
- Уход за изделиями.
- Фотокамера.
- Батарея.
- Сетевое зарядное устройство.
- Карты памяти.
- Уход за фотокамерой.
- Чистка.
- Хранение.
- Поиск и устранение неисправностей.
- Технические характеристики.
- Поддерживаемые стандарты.
- Алфавитный указатель.
- Уход за изделиями.
Скачать: disk.yandex.ru | mega.co.nz