-
Contents
-
Table of Contents
-
Troubleshooting
-
Bookmarks
Quick Links
SMVector — Frequency Inverter
Operating Instructions
Phone: 800.894.0412 — Fax: 888.723.4773 — Web: www.actechdrives.com — Email: info@actechdrives.com
Related Manuals for Lenze SMVector
Summary of Contents for Lenze SMVector
-
Page 1: Operating Instructions
SMVector — Frequency Inverter Operating Instructions Phone: 800.894.0412 — Fax: 888.723.4773 — Web: www.actechdrives.com — Email: info@actechdrives.com…
-
Page 2: Table Of Contents
Contents Safety Information ………………..3 Technical Data ………………….6 2.1 Standards and Application Conditions ………………6 2.2 SMV Type Number Designation ………………..7 2.3 Ratings ………………………8 Installation ………………….11 3.1 Dimensions and Mounting ………………..11 3.1.1 NEMA 1 (IP31) Models < 30HP (22kW) ……………11 3.1.2 NEMA 1 (IP31) Models > 30HP (22kW) ……………12 3.1.3 NEMA 4X (IP65) Models ………………13 3.1.4 NEMA 4X (IP65) Models with Disconnect Switch ……….14 3.2 Electrical Installation ………………….15 3.2.1 Power Connections ………………..15 3.2.1.1 Mains Connection to 120VAC Single-Phase Supply ……15 3.2.1.2…
-
Page 3: About These Instructions
Copyright © 2006 Lenze AC Tech Corporation All rights reserved. No part of this manual may be reproduced or transmitted in any form without written permission from Lenze AC Tech Corporation. The information and technical data in this manual are subject to change without notice. Lenze AC Tech Corporation makes no warranty of any kind with respect to this material, including, but not limited to, the implied warranties of its merchantability and fitness for a given purpose.
-
Page 4: Safety Information
Local codes and regulations take precedence over recommendations provided in this and other Lenze AC Tech documentation. The SMVector drive is considered a component for integration into a machine or process. It is neither a machine nor a device ready for use in accordance with European directives (reference machinery directive and electromagnetic compatibility directive).
-
Page 5
• Do not cycle input power to the controller more than once every two minutes. • For SMVector models that are equipped with a Disconnect Switch (11th character in model number is L or M), the Disconnect Switch is intended as a motor service disconnect and does not provide branch circuit protection to the inverter or motor. -
Page 6
Safety Information Harmonics Notification in accordance with EN 61000-3-2, EN 61000-3-12: Operation in public supply networks (Limitation of harmonic currents i.a.w. EN 61000-3-2, Electromagnetic Compatibility (EMC) Limits). Limits for harmonic current emissions (equipment input current up to 16A/phase). Directive Total Power Additional Measures Required for Compliance connected to Mains (public supply) -
Page 7: Technical Data
Technical Data Technical Data 2.1 Standards and Application Conditions Conformity Low Voltage (2006/95/EC) & EMC (2004/108/EC) Directives Approvals UL508C Underwriters Laboratories -Power Conversion Equipment Input voltage phase imbalance < 2% − For central grounded systems, operation is permitted without restrictions. Supported Power Systems − For corner grounded 400/500V systems, operation is possible but reinforced insulation to control circuits is compromised.
-
Page 8: Smv Type Number Designation
Technical Data 2.2 SMV Type Number Designation The table herein describes the Type numbering designation for the SMVector Inverter models. Electrical Products in the SMVector Series Power Rating in kW: 251 = 0.25kW (0.33HP) 113 = 11.0kW (15HP) 371 = 0.37kW (0.5HP) 153 = 15.0kW (20HP) 751 = 0.75kW (1HP)
-
Page 9: Ratings
Technical Data 2.3 Ratings 120V / 240VAC Models Mains = 120V Single Phase (1/N/PE) (90…132V), 240V Single Phase (2/PE) (170…264V); 48…62Hz Type Power Mains Current Output Current Heat Loss (Watts) 120V 240V Cont (I Max I N1/IP31 N4X/IP65 N4X/IP65 No filter W/ filter ESV251—1S— 0.33…
-
Page 10
Technical Data 240V Three Phase (3/PE) (170…264V); 48…62Hz Type Power Mains Current Output Current Heat Loss (Watts) 240V Cont (I Max I N1/IP31 N4X/IP65 N4X/IP65 No filter W/ filter ESV112—2T— ESV152—2T— ESV222—2T— 10.8 ESV402—2T— 18.6 16.5 ESV552—2T— ESV752—2T— ESV113—2T— ESV153—2T— NOTES: Output Current: The Output Current Maximum (%) is a percentage of the Output Current Continuous Amps (In) rating and is adjustable in parameter P171. -
Page 11
Technical Data 600VAC Models 600V Three Phase (3/PE) (425…660V); 48…62Hz Type Power Mains Current Output Current Heat Loss (Watts) Cont (I Max I N1/IP31 N4X/IP65 N4X/IP65 No filter W/ filter ESV751—6T— 0.75 ESV152—6T— ESV222—6T— ESV402—6T— ESV552—6T— 10.2 ESV752—6T— 12.4 ESV113—6T— 19.7 ESV153—6T— ESV183—6T—… -
Page 12: Installation
Installation Installation 3.1 Dimensions and Mounting WARNING! Drives must not be installed where subjected to adverse environmental conditions such as: combustible, oily, or hazardous vapors; corrosive chemicals; excessive dust, moisture or vibration; direct sunlight or extreme temperatures. 3.1.1 NEMA 1 (IP31) Models < 30HP (22kW) Mounting Screws 4 x #10 18 lb-in 4 x M5 20 Nm…
-
Page 13: Nema 1 (Ip31) Models > 30Hp (22Kw)
Installation 3.1.2 NEMA 1 (IP31) Models > 30HP (22kW) Type in (mm) in (mm) in (mm) in (mm) in (mm) in (mm) in (mm) in (mm) lb (kg) ESV303~~4~~B; 8.72 (221) 7.50 (190) 14.19 (360) 13.30 (338) 0.45 (11.4) 10.07 (256) 0.6 (15) 2.0 (50) 24 (10.9) ESV303~~6~~B ESV373~~4~~B;…
-
Page 14: Nema 4X (Ip65) Models
Installation 3.1.3 NEMA 4X (IP65) Models Mounting Screws 4 x #8-32 10 lb-in 4 x M4 1.2 Nm Type in (mm) in (mm) in (mm) in (mm) in (mm) in (mm) in (mm) in (mm) lb (kg) ESV371N01SX_; ESV751N01SX_; ESV371N02YX_; ESV751N02YX_; ESV371N04TX_; ESV751N04TX_; 6.28 (160) 5.90 (150) 8.00 (203)
-
Page 15: Nema 4X (Ip65) Models With Disconnect Switch
Installation 3.1.4 NEMA 4X (IP65) Models with Disconnect Switch Mounting Screws 4 x #8-32 10 lb-in 4 x M4 1.2 Nm Type (mm) (mm) (mm) (mm) (mm) (mm) (mm) (mm) (mm) (kg) ESV371N01SM_; ESV371N02YM_; ESV371N02SL_; ESV371N04TM_; ESV371N04TL_; ESV371N06TM_; 6.28 5.90 10.99 9.54 0.66 4.47 2.00 2.00 ESV751N01SM_;…
-
Page 16: Electrical Installation
Installation 3.2 Electrical Installation Installation After a Long Period of Storage STOP! Severe damage to the drive can result if it is operated after a long period of storage or inactivity without reforming the DC bus capacitors. If input power has not been applied to the drive for a period of time exceeding three years (due to storage, etc), the electrolytic DC bus capacitors within the drive can change internally, resulting in excessive leakage current.
-
Page 17: Mains Connection To 240Vac Single-Phase Supply
Installation 3.2.1.2 Mains Connection to 240VAC Single-Phase Supply PE L1 L2 N PE L1 L2 N ESV…N01S… ESV…N01S… PE L1 L2 L3 PE L1 L2 L3 ESV…N02Y… ESV…N02Y… (2/PE AC) (1/N/PE AC) PE L1 L2 PE L1 L2 ESV…N02S… ESV…N02S… (2/PE AC) (1/N/PE AC) 3.2.1.3 Mains Connection to Three-Phase Supply ESV…N02Y…
-
Page 18: Installation Recommendations For Emc Compliance
Installation 3.2.1.5 Installation Recommendations for EMC Compliance For compliance with EN 61800-3 or other EMC standards, motor cables, line cables and control or communications cables must be shielded with each shield/screen clamped to the drive chassis. This clamp is typically located at the conduit mounting plate. The EMC requirements apply to the final installation in its entirety, not to the individual components used.
-
Page 19: Dynamic Brake Connections
Installation 3.2.1.7 Dynamic Brake Connections For NEMA 1 and NEMA 4X Drives rated up to 30HP (22kW) the Dynamic Brake connections are made as illustrated herein. Refer to the SMV Dynamic Brake Instructions (DBV01) for complete information. NEMA 1 (IP31) up to 30HP (22kW) NEMA 4X (IP65) up to 30HP (22kW) The SMV 40…60Hp (30…45kW) models include a dynamic brake transistor as standard and only require the connection of an external resistor kit for dynamic braking operation.
-
Page 20: Fuses/Cable Cross-Sections
Installation 3.2.2 Fuses/Cable Cross-Sections NOTE: Observe local regulations. Local codes may supersede these recommendations Recommendations Input Power Wiring Fuse Type Miniature circuit (L1, L2, L3, PE) Fuse Breaker breaker (N. America) [mm²] [AWG] ESV251N01SXB M10 A C10 A 10 A 120V ESV371N01SXB, ESV371N01SX* M16 A C16 A…
-
Page 21: Control Terminals
Installation Notes for Fuse and Cable Table: (1) Installations with high fault current due to large supply mains may require a type D circuit breaker. (2) UL Class CC or T fast-acting current-limiting type fuses, 200,000 AIC, preferred. Bussman KTK-R, JJN or JJS or equivalent. (3) Thermomagnetic type breakers preferred.
-
Page 22
Installation Control Terminal Strip Descriptions Terminal Description Important Digital Input: Start/Stop input resistance = 4.3kW Analog Common Analog Input: 0…10 VDC input resistance: >50 kW Internal DC supply for speed pot +10 VDC, max. 10 mA Analog Input: 4…20 mA input resistance: 250W Digital Reference/Common +15 VDC / 0 VDC, depending on assertion level… -
Page 23: Commissioning
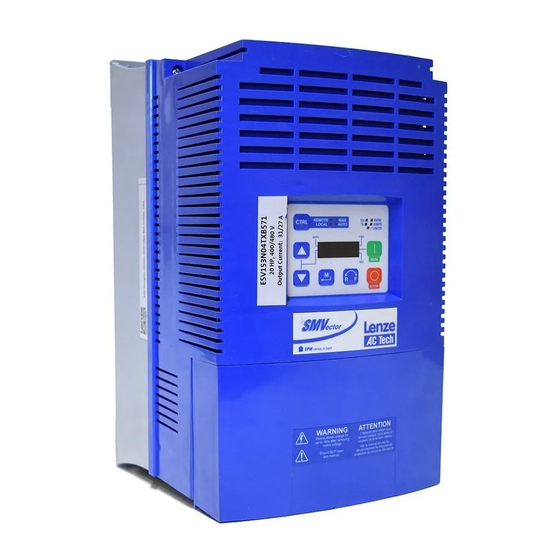
Commissioning Commissioning 4.1 Local Keypad & Display SMV Models: 0.33-10HP (0.25-7.5kW) SMV Models: 15HP (11kW) and greater AUTO REMOTE CTRL LOCAL AUTO AMPS /UNITS AUTO STOP STOP 4-Character Display 4-Character plus CTRL Display Display START BUTTON In Local Mode (P100 = 0, 4, 6), this button will start the drive. STOP BUTTON Stops the drive, regardless of which mode the drive is in.
-
Page 24
Commissioning Display INDICATING LEDs (on 4-character display) FWD LED: Indicate the present rotation direction is forward. Refer to ROTATION description above. REV LED: Indicate the present rotation direction is reverse. Refer to ROTATION description above. AUTO LED: Indicates that the drive has been put into Auto mode from one of the TB13 inputs (P121…P124 set AUTO to 1…7). -
Page 25: Drive Display And Modes Of Operation
Commissioning Display START CONTROL The REMOTE/LOCAL LEDs indicate the current start control source. If the start control source is a remote keypad or the network, then both LEDs will be OFF. REFERENCE CONTROL The AUTO/MANUAL LEDs indicate the current reference control source. IF P113 = 0 or 2, the AUTO/MANUAL LEDs will match the AUTO LED on the 4-character display.
-
Page 26: Parameter Setting
Commissioning 4.3 Parameter Setting Status/Fault messages Change Parameters StoP P194 = 0000 p100 60.0 PASS 20.0 p104 15 s 0225 12.0 p541 F.AF F.UF 60 s V0106 4.4 Electronic Programming Module (EPM) The EPM contains the drives operational memory. Parameter settings are stored in the EPM and setting changes are made to the “User settings”…
-
Page 27: Parameter Menu
Commissioning 4.5 Parameter Menu 4.5.1 Basic Setup Parameters Code Possible Settings IMPORTANT Name Default Selection Start Control Source 0 Local Keypad Use RUN button on front of drive to start P100 1 Terminal Strip Use start/stop circuit wired into the terminal strip. Refer to section 3.2.3 2 Remote Keypad Only Use RUN button on optional Remote Keypad to start 3 Network Only…
-
Page 28
Commissioning Code Possible Settings IMPORTANT Name Default Selection Minimum Frequency {Hz} P103 • P102, P103 are active for all speed P102 references Maximum Frequency 60.0 {Hz} p103 • When using an analog speed reference, also see P160, P161 NOTE • P103 cannot be set below Minimum Frequency (P102) • To set P103 above 120 Hz: — Scroll up to 120 Hz;… -
Page 29
Commissioning Code Possible Settings IMPORTANT Name Default Selection Start Method 0 Normal P110 1 Start on Power-up Drive will automatically start when power is applied. 2 Start with DC Brake When start command is applied, drive will apply DC braking according to P174, P175 prior to starting the motor 3 Auto Restart Drive will automatically restart after faults, or when… -
Page 30
Commissioning Code Possible Settings IMPORTANT Name Default Selection Auto/Manual Control 0 Terminal Strip Control The reference is dictated by the settings and state P113 of the TB-13x terminals. If no AUTO reference has been setup on the terminal strip then reference control is dictated by P101. -
Page 31: I/O Setup Parameters
Commissioning 4.5.2 I/O Setup Parameters Code Possible Settings IMPORTANT Name Default Selection Assertion Level 1 Low P120 and the Assertion Level switch must both p120 match the desired assertion level unless P100, P121…P124 are all set to 0. Otherwise an F.AL 2 High fault will occur.
-
Page 32
Commissioning Code Possible Settings IMPORTANT Name Default Selection NOTE • When input is activated, settings 1…7 override P101 • When TB-13A…TB-13D are configured for Auto References other than MOP, TB-13D overrides TB-13C, TB-13C overrides TB-13B and TB-13B overrides TB-13A. Any other Auto Reference will have priority over MOP. • Settings 10…14 are only valid in Terminal Strip mode (P100 = 1, 4, 5, 6) • If Start/Run/Jog Forward and Start/Run/Jog Reverse are both activated, drive will STOP • If Jog input is activated while drive is running, the drive will enter Jog mode;… -
Page 33
Commissioning Code Possible Settings IMPORTANT Name Default Selection Relay Output 0 None Disables the output p140 TB-16, 17 1 Run Energizes when the drive is running 2 Reverse Energizes when reverse rotation is active 3 Fault De-energizes when the drive trips, or power is removed 4 Inverse Fault Energizes when the drive trips… -
Page 34
Inverting P140 or P142 when the parameter is set to NONE (0) will result in the output being energized continuously. NOTE For SMVector drives rated at 0.33 to 10 HP (0.25 to 7.5 kW), P144 is only available with software versions 3.0 and higher (refer to P501). Loss of Load… -
Page 35: Advanced Setup Parameters
Commissioning 4.5.3 Advanced Setup Parameters Code Possible Settings IMPORTANT Name Default Selection Analog Inputs 0 TB5: (0-10 VDC); TB25: (4-20mA) p156 Configuration 1 TB5: (0 — 5 VDC); TB25: (4-20mA) 2 TB5: (2 — 10 VDC); TB25: (4-20mA) 4 TB5: (0-10 VDC); TB25: (0-20mA) 5 TB5: (0 — 5 VDC);…
-
Page 36
Commissioning Code Possible Settings IMPORTANT Name Default Selection TB-25 (4-20mA) {mA} 20.0 P164 Analog Input Monitoring Level Base Voltage 1000 Valid for V/Hz mode only. P165 Set voltage for bus compensation in V/Hz mode Carrier Frequency 0 4 kHz • As carrier frequency is increased, motor noise P166 Notes is decreased… -
Page 37
Commissioning Code Possible Settings IMPORTANT Name Default Selection DC Brake Time 999.9 p175 NOTE: CONFIRM MOTOR SUITABILITY FOR USE WITH DC BRAKING DC Brake voltage (P174) is applied for the time specified by P175 with the following exceptions: • If P111=1, 3 and P175=999.9 the brake voltage will be applied continuously until a run or fault condition occurs. -
Page 38
Commissioning Code Possible Settings IMPORTANT Name Default Selection Flux brake OFF. Motor Braking 0 Disabled p190 When drive is in deceleration and V > V (114% of 1 Braking with BUS threshold deceleration freeze the rated V ), the flux brake will be turned ON. As long as drive is in deceleration, the flux brake will be ON. -
Page 39: Pid Parameters
Commissioning Code Possible Settings IMPORTANT Name Default Selection NOTE 4 Program Selection p199 Resetting to 50 and 60 Hz default settings will set the Assertion Level (P120) to “2” (High). P120 may need to be reset for the digital input devices being used. An F.AL fault may occur if P120 and the Assertion switch are not set identically.
-
Page 40
Commissioning Code Possible Settings IMPORTANT Name Default Selection Proportional Gain 1000.0 Used to tune the PID loop: p207 • Increase P207 until system becomes unstable, Integral Gain 20.0 p208 then decrease P207 by 10-15% Derivative Gain 20.0 p209 • Next, increase P208 until feedback matches setpoint • If required, increase P209 to compensate for sudden changes in feedback… -
Page 41: Vector Parameters
Commissioning Code Possible Settings IMPORTANT Name Default Selection Auto Rinse in Sleep 0 Disabled Activated in sleep mode only. P250 Mode Sleep Recovery cancels Auto Rinse 1 Enabled Time Delay between 30.0 {min} 6553.5 Time delay reset by re/entering sleep mode P251 Auto Rinses Auto Rinse Speed…
-
Page 42
Commissioning Code Possible Settings IMPORTANT Name Default Selection Motor Rated {Hz} 1000 p304 Frequency Set to motor nameplate data Motor Rated Speed 1750 {RPM} 65000 P305 Motor Cosine Phi 0.80 0.40 0.99 P306 NOTE If motor cosine phi is not known, use one of the following formulas: cos phi = motor Watts / (motor efficiency X P302 X P303 X 1.732) cos phi = cos [ sin (magnetizing current / motor current) ]… -
Page 43: Network Parameters
Commissioning 4.5.6 Network Parameters Code Possible Settings IMPORTANT Name Default Selection Network Protocol 0 Not Active This parameter setting is based upon the network p400 or I/O module that is installed. 1 Remote Keypad 2 Modbus RTU 3 CANopen 4 DeviceNet 5 Ethernet 6 Profibus 7 Lecom-B…
-
Page 44: Diagnostic Parameters
Commissioning 4.5.7 Diagnostic Parameters Code Display Range (READ ONLY) IMPORTANT Name Fault History • Displays the last 8 faults p500 • Format: n.xxx where: n = 1..8, 1 is the newest fault; xxx = fault message (w/o the F.) • Refer to section 5.3 Software Version Format: x.yz P501…
-
Page 45: 4.5.7.1 Terminal & Protection Status Display
Commissioning Code Display Range (READ ONLY) IMPORTANT Name Sequencer: Currently p560 Active Segment Sequencer: Time {P708} 6553.5 Unit depends on P708 (0.1sec, sec or minutes) p561 since Start of Active {P708} 65535 Segment Sequencer: Time {P708} 6553.5 Unit depends on P708 (0.1sec, sec or minutes) p562 Remaining in Active {P708}…
-
Page 46: Onboard Communications Parameters 15-60Hp (11-45Kw)
Commissioning 4.5.8 Onboard Communications Parameters 15-60HP (11-45kW) The P6xx Onboard Communication parameters are applicable to the 15HP (11kW) and higher models only. Code Possible Settings IMPORTANT Name Default Selection Network Enable 0 Disabled This parameter enables the onboard network p600 communications. 1 Remote Keypad 2 Modbus 7 Lecom NOTE: Onboard Communications will be…
-
Page 47: Sequencer Parameters
Commissioning 4.5.9 Sequencer Parameters The P700 Sequencer parameters are listed herein. Refer to section 4.5.7 for P56x Sequencer Diagnostic Parameters. The sequencer function consists of 16 step segments, each individual step segment can have its own ramp time, time spent in individual segment and output frequency entered. The sequencer has 3 different modes to control how the drive moves through each individual step segment: Timer Transition, Step Sequence or Timer and Step Sequence.
-
Page 48
Commissioning Code Possible Settings IMPORTANT Name Default Selection Sequencer: Time 0 0.1 {sec} 6553.5 Setup units/scaling for all sequencer time P708 units/scaling related parameters {sec} 65535 {min} 65535 NOTE: P708 rescales the following sequencer related parameters: — Segment Times in current step: P712, P717, P722, P727, P732, P737, P742, P747, P752, P757, P762, P767, P772, P777, P782, P787, P792 — Sequence diagnostic/status: P561, P562 Segment #1… -
Page 49
Commissioning Code Possible Settings IMPORTANT Name Default Selection Segment #3 Segment #3 -500.0 {Hz} 500.0 If P112 = 1, negative sign forces reverse P720 Frequency Setpoint direction Segment #3 20.0 {sec} 3600.0 P721 Accel/Decel Time Segment #3 {P708} 6553.5 Scaling/units depend on P708 P722 Time in current step {P708}… -
Page 50
Commissioning Code Possible Settings IMPORTANT Name Default Selection Segment #6 Segment #6 -500.0 {Hz} 500.0 If P112 = 1, negative sign forces reverse P735 Frequency Setpoint direction Segment #6 20.0 {sec} 3600.0 P736 Accel/Decel Time Segment #6 {P708} 6553.5 Scaling/units depend on P708 P737 Time in current step {P708}… -
Page 51
Commissioning Code Possible Settings IMPORTANT Name Default Selection Segment #9 Segment #9 -500.0 {Hz} 500.0 If P112 = 1, negative sign forces reverse P750 Frequency Setpoint direction Segment #9 20.0 {sec} 3600.0 P751 Accel/Decel Time Segment #9 {P708} 6553.5 Scaling/units depend on P708 P752 Time in current step {P708}… -
Page 52
Commissioning Code Possible Settings IMPORTANT Name Default Selection Segment #12 Segment #12 -500.0 {Hz} 500.0 If P112 = 1, negative sign forces reverse P765 Frequency Setpoint direction Segment #12 20.0 {sec} 3600.0 P766 Accel/Decel Time Segment #12 {P708} 6553.5 Scaling/units depend on P708 P767 Time in current step {P708}… -
Page 53
Commissioning Code Possible Settings IMPORTANT Name Default Selection Segment #15 Segment #15 -500.0 {Hz} 500.0 If P112 = 1, negative sign forces reverse P780 Frequency Setpoint direction Segment #15 20.0 {sec} 3600.0 P781 Accel/Decel Time Segment #15 {P708} 6553.5 Scaling/units depend on P708 P782 Time in current step {P708}… -
Page 54
Commissioning Code Possible Settings IMPORTANT Name Default Selection End Segment: TB30 0.00 0.00 {VDC} 10.00 TB30 configuration parameter must be set to P794 Analog Output accept this value: P150 = 10 Value End Segment: 0 Keep Running Recovery: Toggling the START SEQUENCE will P795 Drive Action start the cycle from ‘end segment Stop’… -
Page 55: Sequencer Flow Diagram Left
Commissioning 4.5.9.1 Sequencer Flow Diagram Left Sequencer Flow Diagram “Start Segment” number selection Digital Input priority: TB-13A — Lowest TB-13B TB-13C Start TB-13D — Highest Drive Stop/Start Control Segment P121 P122 P123 P124 P701 Start from Local Keypad P700 P100 Sequencer Start from mode Terminal Strip disabled…
-
Page 56: Sequencer Flow Diagram Right
Commissioning 4.5.9.2 Sequencer Flow Diagram Right Action after Stop/Start (P100) transition/digital input (if setup for sequencer mode) transition or restart after trip. P706 Action Restart at beginning of sequence (pointed by TB13x) Restart at beginning of current segment Start at beginning of prior segment Start at beginning of next segment P710 P730…
-
Page 57: Sequencer Status
Commissioning 4.5.9.3 Sequencer Status P150 = 10 Segment 1 active Output Voltage Internal 0-10V reference P714 TB30 Segment 2 active Output Voltage P719 Segment 3 active Output Voltage P724 Segment 4 active Output Voltage P729 Segment 5 active Output Voltage P734 Segment 6 active Output Voltage P739…
-
Page 58: Troubleshooting And Diagnostics
Troubleshooting and Diagnostics Troubleshooting and Diagnostics 5.1 Status/Warning Messages Status / Warning Cause Remedy DC-injection brake active DC-injection brake activated Deactivate DC-injection brake • activation of digital input • deactivate digital input (P121…P124 = 18) • automatically (P110 = 2, 4…6) • automatically after P175 time has • automatically (P111 = 1, 3) expired Drive ID warning…
-
Page 59: Drive Configuration Messages
Troubleshooting and Diagnostics 5.2 Drive Configuration Messages When the Mode button is pressed and held, the drive’s display will provide a 4-digit code that indicates how the drive is configured. If the drive is in a Stop state when this is done, the display will also indicate which control source commanded the drive to Stop (the two displays will alternate every second).
-
Page 60
Troubleshooting and Diagnostics Fault Cause Remedy Dynamic Braking fault Dynamic braking resistors are overheating • Increase active decel time f.dbF (P105, P126, P127). • Check mains voltage and P107 External fault • P121…P124 = 21 and that digital input • Correct the external fault condition f.EF has been opened. -
Page 61
Troubleshooting and Diagnostics Fault Cause Remedy Output fault: Output short circuit Check motor/motor cable f.OF Transistor fault Acceleration time too short Increase P104, P125 Severe motor overload, due to: • Check machine / system • Mechanical problem • Verify drive/motor are proper size for • Drive/motor too small for application application Boost values too high… -
Page 62: Permissable Cable Lengths
Appendix Appendix A A.1 Permissable Cable Lengths The table herein lists the permissable cable lengths for use with an SMV inverter with an internal EMC filter. NOTE This table is intended as a reference guideline only; application results may vary. The values in this table are based on testing with commonly available low-capacitance shielded cable and commonly available AC induction motors.
Lenze руководства, инструкции, брошюры
Инструкции

LENZE 4800 4900 Инструкция
Размер файла: 1.72 мб
Руководство по эксплуатации LENZE 4800 4900
Скачать
Lenze 4800 4900 руководство
Размер файла: 426.50 кб
Руководство по монтажу LENZE 4800 4900
Скачать
lENZE 8200 smd ИНСТРУКЦИЯ
Размер файла: 571.64 кб
Руководство по эксплуатации LENZE 8200 smd
Скачать
LENZE smvector ИНСТРУКЦИЯ
Размер файла: 2.84 мб
Руководство пользователя Lenze smvector
Скачать
lenze 8200 vector инструкция
Размер файла: 2.41 мб
Руководство по эксплуатации Lenze 8200 vector
Скачать
Lenze 8400 инструкция
Размер файла: 4.01 мб
Руководство пользователя lenze 8400
Скачать
lenze 9300 vector инструкция
Размер файла: 657.32 кб
Руководство пользователя Lenze 9300 vector
Скачать
Lenze 9400 инструкция
Размер файла: 7.36 мб
Руководство пользователя lenze 9400 англ.
Скачать
lenze 8200 tmd инструкция
Размер файла: 539.01 кб
Руководство пользователя Lenze 8200 tmd
Скачать

Сейчас в базе инструкций для AC TECH SMVector насчитывается 2 бесплатных инструкций.

AC TECH SMVector (8 стр., ru)
Оглавление инструкции
- Страница 1 из 9
- Страница 2 из 9
SMVector Политика компании - Страница 3 из 9
- Страница 4 из 9
Пиковый ток = 14А % 50% Двигатель Полный ток = 6 А 0% 0 4000 8000 12000 Время [мс] Пусковой момент 180.0% % Номинальной мощности двигателя Номинальной мощности двигателя Крутящий момент двигателя Ток двигателя Частота вращения Крутящий момент двигателя двигателя Начальный крутящий момент 160.0% - Страница 5 из 9
- Страница 6 из 9
StandardI/O - Страница 7 из 9
120/240V — 1Ø Вход (3Ø Выход) Выходной ток Номер модели Мощность л.с. 1.7 2.4 4.2 кВт 0.33 0.5 1 IN [A] ESV251N01SX* ESV371N01SX* ESV751N01SX* Размеры NEMA 1 NEMA 4X NEMA 12 IP31 IP65 IP54 0.25 0.37 0.75 G1 G1 G1 R1 R1 Примечание: Выходное напряжение будет в 2 раза больше напряжения сети, если - Страница 8 из 9
- Страница 9 из 9

AC TECH SMVector (49 стр., ru)
Оглавление инструкции
- Страница 1 из 50
SMVector – частотный преобразователь Инструкция по эксплуатации - Страница 2 из 50
Содержание 1 Информация по технике безопасности……………………………………… 2 Технические характеристики……………………………………………… 6 2.1 2.2 2.3 6 7 8 3 Стандарты и условия эксплуатации…………………………………………………………… Типовые обозначения SMV………………………………………………………………. Номинальные характеристики ……………………………………………………………… 3 - Страница 3 из 50
Информация о данной инструкции В данном документе описан частотный регулятор-преобразователь серии SMV (привод) и представлены важные технические данные для установки и вводу этого преобразователя в эксплуатацию. Данная инструкция применима только для преобразователей частоты серии SMV с - Страница 4 из 50
Информация по технике безопасности 1 Информация по технике безопасности Общие сведения Некоторые части приводов Lenze/AC Tech могут находиться под напряжением, а некоторые поверхности могут быть горячими. Снятие крышки, использование не по назначению, неправильная установка или эксплуатация - Страница 5 из 50
Информация по технике безопасности Взрывозащитные устройства Взрывозащитные двигатели не предназначены для работы с преобразователями и теряют сертификацию при использовании регулирования скорости. Вследствие того, что при использовании преобразователей совместно с взрывозащищенными двигателями - Страница 6 из 50
Информация по технике безопасности Обозначения по технике безопасности согласно стандарту EN 61800-5-1: ОПАСНОСТЬ! Опасность поражения электрическим током Конденсаторы удерживают заряд в течение примерно 180 секунд после отключения питания. Перед тем, как прикоснуться к приводу, подождите, как - Страница 7 из 50
Технические характеристики 2 Технические характеристики 2.1. Стандарты и условия эксплуатации Соответствие Одобрения СЕ UL508C Директива по низковольтным устройствам (006/95/EC) и ЭMC ( 004/108/EC) Underwriters Laboratories — оборудование для преобразования энергии. Фазная асимметрия входного - Страница 8 из 50
Технические характеристики 2.2 Типовые обозначения SMV Данная таблица приводит типовые обозначения моделей SMV ESV 152 N0 2 T X B Электрические продукты серии SMV Номинальная мощность, кВт 251 = 0.25 кВт (0.33 л.с.) 402 = 4.0 кВт (5 л.с.) 371 = 0.37 кВт (0.5 л.с.) 552 = 5.5 кВт (7.5 л.с.) 751 = - Страница 9 из 50
Технические характеристики 2.3 Номинальные характеристики Модели 120 В / 240 В переменного тока Электропитание напряжение120 В, однофазное (1/N/PE) (90 … 132V) или 240 В, однофазное (2/PE) (170…264V) , 48Гц… 62Гц Тип Мощность (л.с./кВт) Входной ток Мощность потерь, Вт Выходной ток Iin(120V) I - Страница 10 из 50
Технические характеристики Электропитание напряжение 240 В, трехофазное (3/PE) (170…264V) , 48Гц… 62Гц Тип Мощность (л.с./кВт) Входной ток,A Выходной ток I in(240V) In, A CLimmax N1/IP31 Мощность потерь, Вт N4X/IP65 N4X/IP65 нет фильтра с фильтром ESV112…2T… 1.5 / 1.1 6.9 6 200% 64 ESV152…2T … 2 / - Страница 11 из 50
Технические характеристики Модели 600 В переменного тока Электропитание напряжение 600 В, трехфазное (3/PE) (425…660V) ; 48Гц… 62Гц Тип Мощность (л.с./кВт) Входной ток Выходной ток A In, A CLimmax N1/IP31 Мощность потерь, Вт N4X/IP65 N4X/IP65 нет фильтра с фильтром ESV751…6T … 1 / 0.75 2 1.7 200% - Страница 12 из 50
Установка 3 Установка 3.1 Размеры и установка ВНИМАНИЕ! Не устанавливайте приводы в неблагоприятных условиях окружающей среды, например: при наличии легковоспламеняющихся, масляных или опасных испарений или пыли, при избыточной влажности, избыточной вибрации или при высоких температурах. Для - Страница 13 из 50
Установка 3.1.2 Исполнение NEMA 4X (IP65) «_» — последний знак в обозначении: C = NEMA 4X/IP65; использование только внутри помещений; охлаждение конвекцией D = NEMA 4X/IP65; использование только внутри помещений; охлаждение вентилятором E = NEMA 4X/IP65; использование внутри и вне помещений; - Страница 14 из 50
3.1.3 Исполнение NEMA 4X(IP65) с встроенным выключателем «_» — последний знак в обозначении: C = NEMA 4X/IP65; использование только внутри помещений; охлаждение конвекцией E = NEMA 4X/IP65; использование внутри и вне помещений; охлаждение конвекцией «~» — последний знак в обозначении (AB1): D = - Страница 15 из 50
Установка 3.2 Электрическая установка 3.2.1 Подключение к сети ОПАСНОСТЬ! Опасность поражения электрическим током! Потенциалы цепи достигают 600В переменного тока относительно потенциала заземления. После отключения питания конденсаторы сохраняют свой заряд. Прежде чем приступить к обслуживанию - Страница 16 из 50
Установка 3.2.1.3 Схема соединения с трехфазным источником питания 3.2.1.4 Соединение с двигателем PES = защитный заземленный экран Если длина кабеля двигателя более 10 м, на выходе привода рекомендуется устанавливать дроссель. Между приводом и двигателем нельзя устанавливать коммутирующие элементы - Страница 17 из 50
Установка 3.2.1.6 Входная клеммная колодка NEMA 4X (IP 65) У моделей NEMA 4X со встроенными фильтрами ЭМС и / или с встроенным выключателем входная клеммная колодка расположена в правой части частотного преобразователя SMV в корпусе NEMA 4X (IP 65). Ниже приведены рисунки однофазной и трехфазной - Страница 18 из 50
(1) (2) В установках с высоким аварийным током из-за больших кабелей может потребоваться автомат защиты типа D. Предпочтительно использование быстродействующих предохранителей, ограничивающих ток, класс СС или Т согласно UL, 200 000 AIC. Bussman KTK-R, JJN, JJS или аналогичные. (3) Предпочтительно - Страница 19 из 50
Установка Управляющие выводы для преобразователей от 11 кВт и выше: ПРИМЕЧАНИЕ! Управляющие выводы и выводы обмена данными имеют усиленную изоляцию. Если привод соединен с системой питания напряжением 300 В между фазой и заземлением, то напряжение, подаваемое на выводы 16 и 17, должно быть меньше - Страница 20 из 50
Ввод в эксплуатацию 4 Ввод в эксплуатацию 4.1 Локальная клавиатура и дисплей Для моделей 0.25 — 7.5 кВт Для моделей 11 кВт и выше Дисплей 4 знака Дисплей 4 знака + CTRL-дисплей ЗЕЛЕНАЯ КНОПКА «ПУСК» Данная кнопка запускает привод в режиме управления от локальной клавиатуры КРАСНАЯ КНОПКА «СТОП»: - Страница 21 из 50
Ввод в эксплуатацию Светодиодный индикатор. 4 разряда. FWD: свечение индикатора свидетельствует о заданном направлении вращения ВПЕРЕД. См. описание ДВИЖЕНИЙ выше. REV: свечение индикатора свидетельствует о заданном направлении вращения НАЗАД. См. описание ДВИЖЕНИЙ выше. AUTO: Указывает, что привод - Страница 22 из 50
Ввод в эксплуатацию Дисплей Управление стартом Индикаторы REMOTE / LOCAL указывают, откуда осуществляется СТАРТ. Если для СТАРТА используется дистанционная клавиатура или сеть, индикаторы не горят. Источник заданного значения Индикаторы AUTO / MAN указывают, какой источник используется для - Страница 23 из 50
Ввод в эксплуатацию Ввод в эксплуатацию 4.3 Настройка параметров 4.4 Электронный программный модуль (ЕРМ) Модуль ЕРМ содержит в себе рабочую память приводов. В модуле EPM хранятся настройки параметров, и при любом изменении их значения сохраняются в модуле в «Области настройки пользователя». Также - Страница 24 из 50
Ввод в эксплуатацию 4.5 Меню параметров ВНИМАНИЕ! Заводские настройки соответствуют частоте сети 60 Гц. Рекомендуется при первом включении для настройки на сеть 50 Гц установить параметр Р199 = 4. Преобразователь при этом должен находится в режиме «StoP». 4.5.1 Установка основных параметров Код № - Страница 25 из 50
Ввод в эксплуатацию Код № Название P 102 Минимальная частота Р 103 Максимальная частота Возможные установки По умолчанию Выбор 0.0 0.0 7.5 • P102, P103 являются активными для всех уставок скорости • При использовании аналоговой уставки скорости 500 см. также P160, P161 {Гц} 60.0 Важно P103 {Гц} - Страница 26 из 50
Ввод в эксплуатацию Код № Название P 110 Способ пуска Возможные установки По умолчанию Выбор 0 0 Обычный 1 Пуск при подаче питания 2 Пуск с предварительным торможением постоянным током Важно Привод автоматически запускается при подаче электропитания. При подаче команды пуска привод применяет - Страница 27 из 50
Ввод в эксплуатацию Код № Название P 113 Управление Auto / Manual Возможные установки По умолчанию Выбор 0 0 Управление с клеммного терминала Важно Заданные значения определяются установками и состоянием клемм терминала ТВ-13х. Если были заданы не AUTO-уставки, то задание формируется значением - Страница 28 из 50
Ввод в эксплуатацию 4.5.2 Код № Название P 120 Уровень сигнала Установка параметров входов / выходов Возможные установки По умолчанию 2 1 Низкий Р120 и переключатель уровня сигнала ALsw должны оба иметь одинаковую настройку уровня сигнала, если Р100, Р121…Р123 все не установлены на 0. В противном - Страница 29 из 50
Ввод в эксплуатацию Код № Возможные установки По умолчанию Название ВНИМАНИЕ! Важно Выбор Фиксированная уставка скорости имеет приоритет над всеми командами ОСТАНОВА! Привод останавливается только при снятии сигнала активации фиксированной скорости или при срабатывании защит привода и индикации - Страница 30 из 50
Ввод в эксплуатацию Код № Название P 140 Релейный выход ТВ-16, 17 Возможные установки По умолчанию Выбор 0 не активен 0 Важно Выход отключен 1 Вращение Включается при работе привода 2 Реверс Включается при вращении в обратную сторону 3 Неисправность 4 Инверсия неисправности 5 Блокировка по - Страница 31 из 50
Ввод в эксплуатацию Код № Название Р 144 Инвертирование сигнала на дискретных выходах По умолчанию Возможные установки Выбор 0 Важно Р144 Инвертирт. Р142 0 нет нет 1 нет да 2 да нет 3 да Используется для инвертирования состояния контактов реле ТВ16,17 (см.Р140) или состояния дискретного выхода ТВ14 - Страница 32 из 50
Ввод в эксплуатацию 4.5.3 Установка дополнительных параметров Код Важно Возможные установки № Название По умолчанию Выбор Р 160 Скорость при минимальном сигнале 0.0 -999.0 {Гц} 1000 Р 161 Скорость при максимальном сигнале 60.0 -999.0 {Гц} 1000 Р 162 Фильтр аналогового входа 0.01 Р 163 Действие при - Страница 33 из 50
Ввод в эксплуатацию Код Возможные установки № Название По умолчанию Р 171 Предел по току 200 30 {%} Р 174 Напряжение торможения постоянным током 0.0 0.0 {%} Р 175 Время торможения постоянным током 0.0 0.0 Важно Выбор {c} CLimmax • При достижении предельного значения привод показывает CL, после чего - Страница 34 из 50
Ввод в эксплуатацию Код № Возможные установки Название По умолчанию Важно Выбор Р 181 Р 182 Пропуск частоты 1 0.0 Пропуск частоты 2 0.0 0.0 0.0 {Гц} {Гц} 500 • Привод не будет использовать указанный 500 диапазон; применяется для пропуска частот, которые Р 184 Пропуск диапазона частот 0.0 {Гц} 10.0 - Страница 35 из 50
Ввод в эксплуатацию 4.5.4 Параметры встроенного PID-регулятора № Р 200 Код Название PID-режим Возможные установки По умолчанию Выбор 0 0 Отключен Важно 1 Нормальное действие (отрицательная обратная связь) 2 Обратное действие (положительная обратная связь) Р 201 Р 202 Р203 Источник сигнала датчика - Страница 36 из 50
Ввод в эксплуатацию Код № Название Р 210 Интенсивность изменения PID уставки Р 214 Возможные установки По умолчанию 20.0 Важно Выбор 0.0 {с} 100.0 • Время изменения уставки от Р204 до Р205 или наоборот • Используется для более плавного перехода от одной PID уставки к другой, когда применяются - Страница 37 из 50
Ввод в эксплуатацию 4.5.5 Параметры векторного управления Код № P 300 Название Режим привода Возможные установки По умолчанию 0 (1) Важно Выбор 0 Линейная зависимость U/f (В/Гц) Для использования в обычных целях для одного или 1 Квадратичная зависимость U/f (В/Гц) 2 Повышенная точность при линейной - Страница 38 из 50
Ввод в эксплуатацию Код № Возможные установки Название P 331 Предустановленный P 332 Предустановленный P 333 Предустановленный P 340(1) Важно Выбор По умолчанию 100 400 TB-13A включен; Р121 = 3 и Р300 = 5 0 {%} 400 TB-13B включен; Р122 = 3 и Р300 = 5 0 {%} 400 TB-13C включен; Р123 = 3, а Р300 = 5 - Страница 39 из 50
Ввод в эксплуатацию 4.5.7 Параметры диагностики (только чтение) Код Дисплей (ТОЛЬКО ВЫВОД ПОКАЗАНИЙ) Важно № Название P 500 История неисправностей • Отображает последние 8 неисправностей • Формат: n . xxx Где: n = 1…8; 1 — самая последняя неисправность, ххх = сообщение о неисправности (без F). • - Страница 40 из 50
Ввод в эксплуатацию 4.5.7.1 Отображение состояния выводов и защиты Параметр Р530 позволяет отслеживать состояние управляющих выводов и общие параметры привода Освещенный сектор светодиодного дисплея показывает: • активация цепей защиты (СВЕТОДИОД 1) • логический переключатель уровня сигнала - Страница 41 из 50
Ввод в эксплуатацию Код № Название Р611 Скорость передачи информации в бодах Возможные установки 2 0 Важно Выбор По умолчанию 0 1 2 3 0 1 2 3 4 2400 бит / c 4800 бит / c 9600 бит / c 19200 бит / c 9600 бит / c 4800 бит / c 2400 бит / c 1200 бит / c 19200 бит / c Modbus Только Modbus Lecom Р612 - Страница 42 из 50
Устранение неисправностей и диагностика 5 Устранение неисправностей и диагностика 5.1 Сообщение о статусе / предупреждения Статус / предупреждение Причина Устранение неисправности Активировано торможение постоянным током Активировано торможение постоянным током • активация дискретного входа (Р121 - Страница 43 из 50
PID режим активирован Lenze AC Tech Привод переведен в PID режим. См. Параметр Р200. SV01 43 - Страница 44 из 50
Устранение неисправностей и диагностика Статус / предупреждение Причина Режим ожидания активирован См. Р240…Р242. Пуск не закончен На приводе возникла неисправность; будет автоматически выполнен повторный пуск (Р110 = 3…6) PID режим отключен Привод выведен из PID режима. См. Р200. С клавиатуры, - Страница 45 из 50
Устранение неисправностей и диагностика 5.3 Сообщения о неисправностях Приведенные ниже сообщения соответствуют тем, которые появляются при блокировке привода. При просмотре истории неисправностей (Р500) в сообщении о неисправности не отображается F_ Неисправность Причина Неисправность вследствие - Страница 46 из 50
Устранение неисправностей и диагностика Неисправность Причина Устранение неисправности(1) Для одной и той же функции настроено более одного цифрового входа Каждую настройку можно использовать только один раз (за исключением настроек 0 и 3) Для функции MOP настроен только один цифровой вход Один - Страница 47 из 50
Устранение неисправностей и диагностика Неисправность Устранение неисправности(1) Причина Перегрузка двигателя Избыточная нагрузка двигателя в течение длительного периода времени • Убедитесь, что Р108 имеет правильную настройку • Убедитесь, что правильно выбрана мощность привода и двигателя - Страница 48 из 50
Приложение Приложение А А.1 Рекомендуемая длина кабелей В таблице приведены рекомендуемые длины кабелей для приводов SMV с внутренним ЭМС – фильтром. __________________________________________________________________________________________ Примечание. Данные таблицы должны использоваться только - Страница 49 из 50
ЗАМЕЧАНИЯ Lenze AC Tech SV01 49 - Страница 50 из 50
Инструкция в формате — PDF
Количество страниц — 8 страниц
Размер — 6 МБ
Доступно — Бесплатное скачивание
Доступно — Онлайн чтение
Оглавление инструкции
- Страница 1 из 9
- Страница 2 из 9
SMVector Политика компании
- Страница 3 из 9
- Страница 4 из 9
Пиковый ток = 14А % 50% Двигатель Полный ток = 6 А 0% 0 4000 8000 12000 Время [мс] Пусковой момент 180.0% % Номинальной мощности двигателя Номинальной мощности двигателя Крутящий момент двигателя Ток двигателя Частота вращения Крутящий момент двигателя двигателя Начальный крутящий момент 160.0%
- Страница 5 из 9
- Страница 6 из 9
StandardI/O
- Страница 7 из 9
120/240V — 1Ø Вход (3Ø Выход) Выходной ток Номер модели Мощность IN [A] ESV251N01SX* ESV371N01SX* ESV751N01SX* 1.7 2.4 4.2 л.с. кВт 0.33 0.5 1 0.25 0.37 0.75 Размеры NEMA 1 NEMA 4X NEMA 12 IP31 IP65 IP54 G1 G1 G1 R1 R1 Примечание: Выходное напряжение будет в 2 раза больше напряжения сети, если
- Страница 8 из 9
- Страница 9 из 9