
- Информационный экран
- Световой индикатор (мигает при звонках и в беззвучном режиме)
- Софт-клавиши. Меняют свои значения для управления в пунктах меню. На главном экране являются «быстрыми» клавишами для часто используемых функций. Могут быть перепрограммированы через WEB-интерфейс телефона.
- Клавиши для перемещения по меню.
- Клавиша доступа к голосовой почте.
- Клавиша переключения между трубкой и гарнитурой.
- Отключение микрофона.
- Клавиша перевода звонков. (Call Transfer).
- Клавиша включения спикера (динамика)
- Клавиша повторного звонка на последние набранные номера.
- Клавиши регулировки громкости. Регулируют громкость звонка в спокойном состоянии и громкость звука при разговоре.
- Клавиши набора.
- Динамик громкой связи
- Фиксатор трубки при вертикальном расположении аппарата.
- Рычаг отбоя.
Функции телефона.
Исходящий звонок. Снимите трубку, наберите номер. Вызов начнется через 3 секунды. Либо нажмите {Вызов} (Рис. п.3) или # (клавиши набора) или ✔(Рис. п.4) Исходящий звонок через гарнитуру или по громкой связи осуществляется так же, только вначале нужно нажать соответствующую клавишу (Рис. п.6 или Рис. п.9). Входящие вызовы. В организации три входящие линии с номерами +7(495)626-23-52, +7(495)626-24-52 и +7(495)626-24-62. Будьте внимательны! Случайное нажатие на клавишу DND под дисплеем приводит к отключению звонков поступающего вызова. Проверьте: при нажатой клавише DND, в правом верхнем углу дисплея появляется квадрат с вписанными буквами DND. При звонке на номер +7(495)626-23-52 после информационного сообщения автосекретаря, звонок переключается на диспетчерскую службу, на номера 100, 101 или 102. При звонке на номер +7(495)626-24-52 после звукового приветствия можно набрать внутрений номер сотрудника (в цифровом формате набора) или 0 для соединения с помощью секретаря. При вызове на номер +7(495)626-24-62 соединение с сотрудником происходит с помощью секретаря. Для приема входящего звонка достаточно поднять трубку или нажать соответствующую клавишу: Гарнитура (Рис. п.6) или Громкая связь (Рис. п.9).
Повторный набор номера. Нажмите клавишу повторного набора номера (Рис. п.10) и при помощи клавиш перемещения по меню выберите нужный номер (Рис. п.4). После чего нажмите {Вызов} (Рис. п.3) Или дважды нажмите клавишу повторного набора для вызова последнего набранного номера.
Трансфер (Перевод вызова)
Слепой трансфер Во время разговора нажмите клавишу перевода звонка (Рис. п.8). Наберите номер, на который нужно перевести звонок. Еще раз нажмите клавишу перевода звонка и повесьте трубку.
Полуавтоматический трансфер. Во время разговора нажмите клавишу перевода звонка (Рис. п.8). Наберите номер, на который нужно перевести звонок, затем нажмите # для вызова абонента. Нажмите клавишу перевода звонка, когда услышите гудки дозвона.
Сопроводительный трансфер. Во время разговора нажмите клавишу перевода звонка (Рис. п.8). Наберите номер, на который нужно перевести звонок, затем нажмите # для вызова абонента. Дождитесь ответа и предупредите о переводе звонка, затем нажмите клавишу перевода.
Переадресация вызова
Для включения переадресации на заданный номер выполните следующие действия.
- Нажмите {Меню} (Рис. п.3) и выберете Функции\Переключить вызов.
- Клавишами навигации выберете тип переадресации:
Всегда: переадресация всех вызовов Когда занято: переадресация при занятом телефоне Нет ответа: переадресация если нет ответа в течении заданного времени
- Выбираем Открытие (при помощи клавиш Влево и Вправо (Рис. п.4)
- Нажимаем клавишу Вниз (Рис. п.4) и в поле Номер вводим абонента для переадресации
- Если выбрано условие переадресации Нет ответа то еще раз нажимаем Вниз и вводим время ожидания ответа.
- Нажимаем {Сохр} (Рис. п.3)
Условия переадресации можно комбинировать. Для отключения режима переадресации проделываем обратные действия.
Режим конференции
Во время активного разговора нажмите клавишу {Конф} (Рис. п.3). Затем наберите номер абонента которого хотите присоединить к разговору и нажмите {Вызов} (Рис. п.3). Дождитесь ответа и еще раз нажмите {Конф}. Проделайте это необходимое количество раз.
Для завершения конференц-звонка достаточно просто положить трубку.
Перехват вызова
Для перехвата вызова существует код АТС *04. Для осуществления перехвата необходимо снять трубку на своем телефоне, набрать код *04 и номер звонящаего аппарата, например *0412346
-
Contents
-
Table of Contents
-
Troubleshooting
-
Bookmarks
Quick Links
Related Manuals for Yealink T19P-E2
Summary of Contents for Yealink T19P-E2
-
Page 2
Copyright © 2019 YEALINK NETWORK TECHNOLOGY CO., LTD. Copyright © 2019 Yealink Network Technology CO., LTD. All rights reserved. No parts of this publication may be reproduced or transmitted in any form or by any means, electronic or mechanical, photocopying, recording, or otherwise, for any purpose, without the express written permission of Yealink Network Technology CO., LTD. -
Page 3
Do not dispose of WEEE as unsorted municipal waste and have to collect such WEEE separately. Customer Feedback We are striving to improve our documentation quality and we appreciate your feedback. Email your opinions and comments to DocsFeedback@yealink.com. -
Page 4
GPL. Please refer to the GPL for the exact terms and conditions of the license. The original GPL license, source code of components licensed under GPL and used in Yealink products can be downloaded online: http://www.yealink.com/onepage_83.html. -
Page 5: About This Guide
About This Guide About This Guide Thank you for choosing the Yealink SIP IP phones. The purpose of this guide introduces how to configure Yealink SIP IP phones via CommPortal phone configurator. The configuration process outlined in this guide applies to the following phone models:…
-
Page 6
Yealink IP Phones Configuring Guide… -
Page 7: Table Of Contents
Table of Contents Table of Contents About This Guide …………..v In This Guide ……………………… v Table of Contents …………..vii Configuration Methods …………. 1 Phone User Interface ………………….1 CommPortal Phone Configurator ………………. 1 Customizing Your Phone …………3 IPv4 and IPv6 Network Settings ………………..
-
Page 8
Yealink IP Phones Configuring Guide Configuring the Keypad Lock ……………….. 34 Unlocking the Phone ………………….34 Dial-now ……………………..35 Adding a Dial-now Rule………………… 35 Configuring the Delay Time for Dial-now Rules …………..36 Configuring Live Dialpad …………………. 37 Downloading Configuration Files to Phones ……39 Obtaining the Provisioning Server Address ……………. -
Page 9: Table Of Contents
Table of Contents Enhanced Monitor Extension ………………..55 Configuring an Enhanced Monitor Extension key …………. 55 LED Indicator ……………………56 Configuring Transfer Mode via Dsskey Feature …………..56 Intercom and Push-to-Talk ………………..57 Enabling Push to Talk Mode ………………..57 Configuring an Intercom/PTT Key ………………
-
Page 10
Rebooting Issues ……………………74 How to reboot the IP phone? ……………….. 74 Protocols and Ports Issues ………………..75 What communication protocols and ports do Yealink IP phones support? …… 75 Password Issues ……………………78 How to restore the administrator password? …………..78 Power and Startup Issues…………………. -
Page 11: Configuration Methods
Configuration Methods Configuration Methods There are two ways to configure Yealink SIP IP phones. Phone user interface: if you want to deploy a small number of phones, you can configure IP phones one by one via phone user interface.
-
Page 12
Yealink IP Phones Configuring Guide… -
Page 13: Customizing Your Phone
You can also configure IPv4 or IPv6 network settings manually. Choosing IP Addressing Mode Yealink IP Phones support IPv4 addressing mode, IPv6 addressing mode, as well as an IPv4&IPv6 dual-stack addressing mode. Choose one according to your environment. It is not applicable to W80B.
-
Page 14: Configuring A Static Ipv4 Address
Yealink IP Phones Configuring Guide Configuring a Static IPv4 Address To configure a static IPv4 address via CommPortal phone configurator: Click Network->IP Setting. Make sure that the IP addressing mode is configured as IPv4 or IPv4 & IPv6. Select Static IP Address from the drop-down menu of Internet Port Type for IPV4.
-
Page 15: Registering Accounts
Customizing Your Phone Enter the desired values in the Static IP Address, IPv6 Prefix, Gateway, Primary DNS and Secondary DNS fields respectively. Click Save changes to accept the change. Perform auto provisioning on the phone to download above configurations. For more information on how to perform auto provisioning, refer to Downloading Configuration Files on page 39.
-
Page 16: Sip Session Timer
Yealink IP Phones Configuring Guide Enter the desired values in the SIP Server Address field. Contact your system administrator for more information. You can repeat steps 2 to 7 to register more accounts. Click Save changes to accept the change.
-
Page 17: Configuring Sip Session Timer
Customizing Your Phone Example: The user registers a SIP account for the IP phone and then set the value of Timer T1, Timer T2 respectively (Timer T1: 0.5, Timer T2: 4). The SIP registration request message will be re-transmitted between the IP phone and SIP server. The re-transmitting and doubling of Timer T1 (0.5) will continue until the retransmitting time reaches the Timer T2 (4).
-
Page 18: Time & Date
Yealink IP Phones Configuring Guide Time & Date Yealink IP phones maintain a local clock. You can choose to get the time and date from SNTP (Simple Network Time Protocol) time server to have the most accurate time and set DST (Daylight Saving Time) to make better use of daylight and to conserve energy, or you can set the time and date manually.
-
Page 19
Customizing Your Phone Time Time Time Zone Name Time Zone Name Zone Zone Canada-Manitoba(Winnipeg) Iraq(Baghdad) Chile(Easter Islands) Russia(Moscow) Guadalajara St.Petersburg Monterrey Kuwait,Riyadh Mexico(Mexico City,Acapulco) Nairobi Saskatchewan Minsk United States-Central Time Volgograd (RTZ 2) Bogota,Lima +3:30 Iran(Teheran) Quito Armenia(Yerevan) Peru Azerbaijan(Baku) Indiana (East) Georgia(Tbilisi) Bahamas(Nassau) -
Page 20
Yealink IP Phones Configuring Guide Time Time Time Zone Name Time Zone Name Zone Zone Cayenne,Fortaleza Bangladesh(Dhaka) Montevideo +6:30 Myanmar(Naypyitaw) Salvador +6:30 Yangon (Rangoon) Brazil(DST) Russia(Krasnoyarsk) -2:30 Newfoundland and Labrador Thailand(Bangkok) Brazil(no DST) Vietnam(Hanoi) Mid-Atlantic Jakarta Portugal(Azores) China(Beijing) Cape Verde Islands… -
Page 21: Configuring Ntp Server
Customizing Your Phone Time Time Time Zone Name Time Zone Name Zone Zone West Central Africa Russia(Srednekolymsk Time) Poland(Warsaw) +11:30 Norfolk Island Spain(Madrid) New Zealand(Wellington,Auckland) Croatia(Zagreb) Fiji Islands Czech Republic(Prague) Russia(Kamchatka Time) Denmark(Kopenhagen) Anadyr France(Paris) Petropavlovsk-Kamchatsky (RTZ 11) Germany(Berlin) Marshall Islands Hungary(Budapest) +12:45 New Zealand(Chatham Islands)
-
Page 22: Configuring Daylight Saving Time
Yealink IP Phones Configuring Guide Enter the desired interval to update time and date from the NTP server in the NTP Query Interval field. Click Save changes to accept the change. Perform auto provisioning on the phone to download above configurations. For more…
-
Page 23
Customizing Your Phone Select Automatic from the drop-down menu of Daylight Savings. Click Save changes to accept the change. Perform auto provisioning on the phone to download above configurations. For more information on how to perform auto provisioning, refer to Downloading Configuration Files on page 39. -
Page 24
Yealink IP Phones Configuring Guide Enter the desired offset time in the Offset (minutes) field. Select DST By Week from the Fixed Type field. Enter the start time in the Start Date field. Enter the end time in the End Date field. -
Page 25
Customizing Your Phone Perform auto provisioning on the phone to download above configurations. For more information on how to perform auto provisioning, refer to Downloading Configuration Files on page 39. Disabling DST Settings To disable the DST settings automatically via CommPortal phone configurator: Click Preferences->Time&Date. -
Page 26
Yealink IP Phones Configuring Guide Select the desired value from the drop-down menu of Obtain Time Method. Click Save changes to accept the change. Perform auto provisioning on the phone to download above configurations. For more information on how to perform auto provisioning, refer to… -
Page 27: Directory
LDAP Directory on Yealink IP Phones Not all phones support Network Contacts and Network Call List. For more information, refer to Yealink SIP Phones Integrated with Metaswitch CommPortal Phone Applications User Guide You cannot configure Directory via CommPortal phone configurator for CP960 IP phones.
-
Page 28: Viewing The Directory On The Phone
Yealink IP Phones Configuring Guide If the priority is set to Disabled, the selected list is not displayed when user presses the Directory soft key. Click Save changes to accept the change. Perform auto provisioning on the phone to download above configurations. For more…
-
Page 29: Enabling Presenting The Caller Identity
Customizing Your Phone Enter the name in the Display Item Name N field. Click Save changes to accept the change. Perform auto provisioning on the phone to download above configurations. For more information on how to perform auto provisioning, refer to Downloading Configuration Files on page 39.
-
Page 30: Downloading The Business Group Contacts
Yealink IP Phones Configuring Guide Downloading the Business Group Contacts You can download the business group contacts for SIP-T19(P) E2, T27G and T29G IP phones only. If you enable this feature, the phone can download the business group contacts to the remote phone book 1.
-
Page 31: Searching For A Contact In The Remote Phone Book
Customizing Your Phone Searching for a Contact in the Remote Phone Book To search for a contact in the remote phone book: Do one of the following. Press Directory-> Remote Phone Book (If display priority of the Remote Phone Book is not set to Disabled). Press Menu->Directory->Remote Phone Book.
-
Page 32: Configuring Search Source List
For more information on the LDAP, refer to Not all phones support Network Contacts and Network Call List. For more information, refer to Yealink SIP Phones Integrated with Metaswitch CommPortal Phone Applications User Guide To configure the search priority of the directory via CommPortal phone configurator: Click Features->Search Source List In Dialing.
-
Page 33: Line Key Features
Customizing Your Phone Select desired key type from the Soft key action field. Assign a feature to the key. For more information, refer to Line Key Features on page 23. (Optional.) Enter a string that will appear on the LCD screen in the Label field. Click Save changes to accept the change.
-
Page 34
Yealink IP Phones Configuring Guide Soft key action (Line) Dependencies: Line (the account this feature will be applied to) Mode (Default/Lock) Label (key label displayed on the LCD screen) Usage: When receiving an incoming call, the Line key LED flashes green: Press the DSS key to accept the incoming call. -
Page 35
Customizing Your Phone Usage: Press the DSS key during an active call to set up a conference with the number specified Number in the field. Note Number If the field is left blank, the DSS key performs the same as the Conf soft key during a call. -
Page 36
Yealink IP Phones Configuring Guide feature to access the custom DND screen. For more information, refer to Do Not Disturb page 43. Soft key action (DND) Dependencies: Label (key label displayed on the LCD screen) Usage: When DND is in phone mode: Press the DSS key to activate DND. -
Page 37
Customizing Your Phone Line (the account this feature will be applied to) Park Orbit (the orbit where you retrieve the parked call) Label (key label displayed on the LCD screen) Usage: Press the DSS key to retrieve the parked call specified in the Park Orbit field. Enhanced Monitor Extension You can use this key feature to monitor a specific line for status changes on the phone. -
Page 38
Yealink IP Phones Configuring Guide Press the DSS key again to deactivate the group listening mode. Hold You can use this key feature to place an active call on hold or retrieve a held call. Soft key action (Hold) Dependencies:… -
Page 39
Customizing Your Phone Line (the account this feature will be applied to) Access code (the last caller ID erasure access code) Label (key label displayed on the LCD screen) Usage: Press the DSS key to delete the record of the last received call. LDAP You can use this key feature to quickly access an LDAP search screen. -
Page 40
Yealink IP Phones Configuring Guide Paging List You can use this key feature to view a list of multicast paging groups. For more information, refer to Multicast Paging on page 60. Soft key action (Paging List) Dependencies: Label (key label displayed on the LCD screen) Usage: Press the DSS key to view a list of multicast paging groups. -
Page 41
Customizing Your Phone available, regardless of whether the caller withheld their number. The service provider can then provide this information to law enforcement upon request. Soft key action (Trace Call) Dependencies: Line (the account this feature will be applied to) Access code (the trace call access code) Label (key label displayed on the LCD screen) Usage: Press the DSS key during or after the call to trace the call. -
Page 42
You can use this key to log out of existing accounts and then log into a new account. As a result, many users can share the phone resource at different times. For more information, refer to Yealink SIP Phones Integrated with Metaswitch CommPortal Phone Applications User Guide. Soft key action (Log Out) -
Page 43: Keypad Lock
Customizing Your Phone History You can use this key feature to quickly access network call lists. For more information, refer to Yealink SIP Phones Integrated with Metaswitch CommPortal Phone Applications User Guide Soft key action (History) Dependencies: Label (key label displayed on the LCD screen) Messages List You can use this key feature to quickly access the message lists.
-
Page 44: Configuring The Keypad Lock
Yealink IP Phones Configuring Guide You can set a waiting time to lock the phone automatically. If the waiting time is set to 0, the phone will not be automatically locked. You need to lock the phone manually. Note The Volume key, HEADSET key and Speakerphone key are always available when you lock the phone.
-
Page 45: Dial-Now
Customizing Your Phone Enter the PIN in the Unlock PIN field. Press the OK soft key to unlock the phone. Note You can also unlock the phone by entering the administrator password. When you enter the administrator password to unlock the phone, the phone will turn to the Change PIN interface. Dial-now You can configure one or more dial-now rules.
-
Page 46: Configuring The Delay Time For Dial-Now Rules
Yealink IP Phones Configuring Guide conference phones). If you select All Lines, the dial-now rule will apply to all accounts on the phone. If you select Current Lines, the dial-now rule will only apply to the current account. Click Save changes to accept the change.
-
Page 47: Configuring Live Dialpad
Customizing Your Phone Perform auto provisioning on the phone to download above configurations. For more information on how to perform auto provisioning, refer to Downloading Configuration Files on page 39. Configuring Live Dialpad Live dialpad allows IP phones to automatically dial out the entered phone number without pressing the send key after a designated period of time.
-
Page 48
Yealink IP Phones Configuring Guide… -
Page 49: Downloading Configuration Files To Phones
The following takes HTTP digest authentication method as an example to introduce phone deployment. Obtaining the Provisioning Server Address Yealink IP phones support many ways to obtain the provisioning server address, for example: Obtain the provisioning server address automatically by detecting DHCP options 66.
-
Page 50: Power On
Yealink IP Phones Configuring Guide Zero Touch The following sections introduce common methods to trigger the phone to perform auto provisioning. Power On Auto Provision Now Zero Touch Power On You can power on the phone to trigger it to perform auto provisioning.
-
Page 51: Zero Touch
Downloading Configuration Files to Phones To trigger auto provisioning via auto provision now: Press Menu->Settings->Advanced Settings->Auto Provision. Enter the provisioning server address in the Server URL field. Enter valid provisioning credential in the User Name and Password fields. Press the Save soft key. The LCD screen will be displayed as below: Press the Ok soft key.
-
Page 52
Enter valid provisioning credential, and then press the OK soft key. Press the OK soft key. The phone reboots and download configurations from the CommonPortal phone configurator. For more information on auto provisioning, refer to Yealink IP Phones Auto Provisioning Guide http://www.yealink.com/DocumentDownload.aspx?CateId=142&flag=142 available online:… -
Page 53: Basic Call Features
Basic Phone Features Basic Call Features The SIP IP phone is designed to be easily used like a regular phone on a public switched telephone network (PSTN). You can place calls, answer calls, transfer a call to someone else, or conduct a conference call.
-
Page 54: Activating Dnd In Phone Mode
Yealink IP Phones Configuring Guide Select the desired DND mode from the DND Mode field. Click Save changes to accept the change. Perform auto provisioning on the phone to download above configurations. For more information on how to perform auto provisioning, refer to Downloading Configuration Files on page 39.
-
Page 55: Transferring Calls
Basic Phone Features Metaswitch server will synchronously change the DND status for the user. Conversely, if you change a user’s DND status on the Metaswitch server, the Metaswitch server will notify the phone of the status change and the phone will change the DND status for the user. To configure DND key synchronization feature via CommPortal phone configurator: Click Feature->DND&Forward.
-
Page 56: Local Conference Call
Yealink IP Phones Configuring Guide To perform a semi-attended transfer: Press the Transfer soft key during a call. Do one of the following: Enter the number you want to transfer the call to. Press the Directory soft key to select the desired contact.
-
Page 57: Managing Conference Participants
Basic Phone Features Managing Conference Participants You can manage conference participants in the following ways: Mute a participant Hold a participant Remove a participant from the conference Note You cannot manage conference participants on W60B/W80B phones. Do the following during the conference call, do the following: Press the Manage soft key.
-
Page 58: Call Park And Call Retrieve
Yealink IP Phones Configuring Guide If you select Disabled, the conference ends. Click Save changes to accept the change. Perform auto provisioning on the phone to download above configurations. For more information on how to perform auto provisioning, refer to…
-
Page 59: Configuring An Enhanced Park Call Key
Basic Phone Features Enter the string that will appear on the LCD screen in the Label field. Click Save changes to accept the change. Perform auto provisioning on the phone to download above configurations. For more information on how to perform auto provisioning, refer to Downloading Configuration Files on page 39.
-
Page 60: Configuring A Retrieve Parked Call Key
Yealink IP Phones Configuring Guide Configuring a Retrieve Parked Call Key You can retrieve the parked call by pressing a retrieve parked call key or dialing the retrieve access code followed by the orbit number (for example: *302100). To configure a retrieve parked call key via the CommPortal phone configurator: Click Programmable Keys — Line Key->Key X.
-
Page 61: Retrieving A Call
Basic Phone Features Retrieving a Call To retrieve a call on the phone: Dial the call park retrieve code followed by the target orbit (for example: *302100) or press the retrieve parked call key to retrieve the parked call. Note If the parked call is not retrieved within a period of time assigned by the system, the phone performing call park will receive a call back.
-
Page 62: Picking Up A Call
Yealink IP Phones Configuring Guide Enter the string that will appear on the LCD screen in the Label field. Click Save changes to accept the change. Perform auto provisioning on the phone to download above configurations. For more information on how to perform auto provisioning, refer to…
-
Page 63: Picking Up A Call For A Group
Basic Phone Features Enter the group pickup code in the Access Code field. Enter the string that will appear on the LCD screen in the Label field. Click Save changes to accept the change. Perform auto provisioning on the phone to download above configurations. For more information on how to perform auto provisioning, refer to Downloading Configuration Files…
-
Page 64
Yealink IP Phones Configuring Guide… -
Page 65: Advanced Phone Features
Advanced Phone Features Advanced Phone Features This chapter provides operating instructions for the advanced features of the IP phone. Topics include: Enhanced Monitor Extension Intercom and Push-to-Talk Multicast Paging DTMF Call Jump Enhanced Monitor Extension You can use enhanced monitor extension feature to monitor a specific line for status changes on the phone.
-
Page 66: Led Indicator
Yealink IP Phones Configuring Guide Click Save changes to accept the change. Perform auto provisioning on the phone to download above configurations. For more information on how to perform auto provisioning, refer to Downloading Configuration Files on page 39. LED Indicator The following table shows the LED indicator associated with the line you are monitoring.
-
Page 67: Intercom And Push-To-Talk
Advanced Phone Features If you select New Call, press the enhanced monitor extension key to place a new call to the monitored number. Click Save changes to accept the change. Perform auto provisioning on the phone to download above configurations. For more information on how to perform auto provisioning, refer to Downloading Configuration Files on page 39.
-
Page 68: Configuring An Intercom/Ptt Key
Yealink IP Phones Configuring Guide Mark the desired radio box in the Push to Talk Mode Enable field. Click Save changes to accept the change. Perform auto provisioning on the phone to download above configurations. For more information on how to perform auto provisioning, refer to Downloading Configuration Files on page 39.
-
Page 69: Using Push-To-Talk
Advanced Phone Features Using Push-to-Talk To use push-to-talk on the phone: Long press the Intercom/PTT key for 1.5 seconds when the phone is idle. The called destination plays a warning tone and automatically answers the call in the speakerphone mode by default. Keep pressing the Intercom/PTT key during the push-to-talk call.
-
Page 70: Multicast Paging
Yealink IP Phones Configuring Guide Mark the desired radio box in the Intercom Tone field. Mark the desired radio box in the Intercom Barge field. Click Save changes to accept the change. Perform auto provisioning on the phone to download above configurations. For more…
-
Page 71: Configure A Paging List Key
Advanced Phone Features Enter the string that will appear on the LCD screen in the Label field. Click Save changes to accept the change. Perform auto provisioning on the phone to download above configurations. For more information on how to perform auto provisioning, refer to Downloading Configuration Files on page 39.
-
Page 72: Configuring A Codec For Multicast Paging
Yealink IP Phones Configuring Guide Enter the multicast IP address (for example: 224.5.6.20) in the Address field. The valid multicast IP addresses range from 224.0.0.0 to 239.255.255.255. Enter the multicast IP port number (for example: 10008) in the Port field.
-
Page 73: Configuring Multicast Listening Addresses
Advanced Phone Features Configuring Multicast Listening Addresses You can configure the phone to receive a Real-time Transport Protocol (RTP) stream from the pre-configured multicast address(es) without involving SIP signaling. You can specify up to 10 multicast addresses that the phone listens to on the network. To configure multicast listening addresses via web user interface: Click on Paging Groups->Listening Group N.
-
Page 74: Sending Rtp Stream Via A Multicast Paging Key
Yealink IP Phones Configuring Guide Paging Priority Enable The paging priority enable parameter decides how the phone handles incoming multicast paging calls when there is already a multicast paging call on the phone. If enabled, the phone will ignore incoming multicast paging calls with lower priorities, otherwise, the phone will answer incoming multicast paging calls automatically and place the previous multicast paging call on hold.
-
Page 75: Sending Rtp Stream Via A Paging List Key
Advanced Phone Features To end the multicast RTP session, press the multicast paging key again or press the EndCall soft key. Note Multicast RTP is one way only from the sender to the multicast address(es) (receiver). For outgoing RTP multicasts, all other existing calls on the phone will be placed on hold. Sending RTP Stream via a Paging List Key To send RTP stream via a paging key list when the receiver’s phone is idle: Press the paging list key when the phone is idle.
-
Page 76: Transmitting Dtmf Digit
Yealink IP Phones Configuring Guide Transmitting DTMF Digit Three methods of transmitting DTMF digits on SIP calls: RFC 2833 — DTMF digits are transmitted by RTP Events compliant with RFC 2833. You can configure the payload type and sending times of the end RTP Event packet. The RTP Event packet contains 4 bytes.
-
Page 77
Advanced Phone Features number by entering the designated hotkey. The main difference between call jump and call transfer is that when you transfer a call via call jump, the current call stays connected instead of being placed on hold. The following table lists the default call jump hotkeys configured by Metaswitch. Internet Telephony Service Provider can modify the hotkeys, depending on your actual needs. -
Page 78
Yealink IP Phones Configuring Guide work again. Note predefined The destination you want to jump your call to must be in CommPortal. For more information, contact your administrator. -
Page 79: Troubleshooting
Troubleshooting Troubleshooting This section describes solutions to common issues that may occur while using the IP phone. Upon encountering a scenario not listed in this section, contact your Yealink reseller for further support. IP Address Issues Why doesn’t the IP phone get an IP address?
-
Page 80: Display Issues
Yealink IP Phones Configuring Guide automatically. If your phone is unable to access the NTP server, configure the time and date manually. Display Issues Why is the LCD screen blank? Do one of the following: Ensure that the IP phone is properly plugged into a functional AC outlet.
-
Page 81: Why Do I Get Poor Sound Quality During A Call
Try to delete the registration information of the Bluetooth device on both IP phone and Bluetooth device, and then pair and connect it again. Contact Yealink field application engineer and your Bluetooth device manufacturer for more information. Why the Bluetooth headset affects IP phone’s voice quality?…
-
Page 82: Firmware And Upgrading Issues
Yealink IP Phones Configuring Guide Firmware and Upgrading Issues Why doesn’t the IP phone upgrade firmware successfully? Do one of the following: Ensure that the target firmware is not the same as the current firmware. Ensure that the target firmware is applicable to the IP phone model.
-
Page 83: Why Doesn’t The Ip Phone Update The Configuration
Troubleshooting Item Description 46: SIP-T29G 45: SIP-T27P 69: SIP-T27G 53: SIP-T19(P) E2 Firmware generation. Note: The larger it is, the newer the firmware generation is. A fixed number. Firmware version. Note: With the same firmware generation, the larger it is, the newer the firmware version is.
-
Page 84: Rebooting Issues
Yealink IP Phones Configuring Guide Click on Settings->Upgrade. Click Reset to factory in the Reset to factory field. The web user interface prompts the message “Do you want to reset to factory?”. Click OK to confirm the resetting. The IP phone will be reset to factory successfully after startup.
-
Page 85: Protocols And Ports Issues
Troubleshooting Protocols and Ports Issues What communication protocols and ports do Yealink IP phones support? Source Destination Destination Port Source IP Source Port Destination IP Protocol Description of destination port Device Device (Listening port) IP address of IP IP phone or voice…
-
Page 86
Yealink IP Phones Configuring Guide Source Destination Destination Port Source IP Source Port Destination IP Protocol Description of destination port Device Device (Listening port) DHCP protocol port, it is used to IP address of DHCP Server obtain IP address from DHCP DHCP server server. -
Page 87
Troubleshooting Source Destination Destination Port Source IP Source Port Destination IP Protocol Description of destination port Device Device (Listening port) of voice of IP by the phones destination device to send or gateway phone or destination receive the audio stream. IP phones voice device. -
Page 88: Password Issues
Yealink IP Phones Configuring Guide Password Issues How to restore the administrator password? Factory reset can restore the original password. All custom settings will be overwritten after reset. Power and Startup Issues What will happen if I connect both PoE cable and power adapter? Which has the higher priority? IP phones use the PoE preferentially.
-
Page 89: Regulatory Notices
Without prior written consent, no organization or individual is permitted to make any change to the structure or the safety design of the device. Yealink is under no circumstances liable to consequences or legal issues caused by such changes.
-
Page 90
Yealink IP Phones Configuring Guide Environmental Requirements Place the device at a well-ventilated place. Do not expose the device under direct sunlight. Keep the device dry and free of dust. Place the device on a stable and level platform. -
Page 91
Regulatory Notices Keep the power plug clean and dry. Using a dirty or wet power plug may lead to electric shock or other perils. -
Page 92
Yealink IP Phones Configuring Guide…
-
Page 2
Copyright © 2019 YEALINK NETWORK TECHNOLOGY CO., LTD. Copyright © 2019 Yealink Network Technology CO., LTD. All rights reserved. No parts of this publication may be reproduced or transmitted in any form or by any means, electronic or mechanical, photocopying, recording, or otherwise, for any purpose, without the express written permission of Yealink Network Technology CO., LTD. -
Page 3
Do not dispose of WEEE as unsorted municipal waste and have to collect such WEEE separately. Customer Feedback We are striving to improve our documentation quality and we appreciate your feedback. Email your opinions and comments to DocsFeedback@yealink.com. -
Page 4
GPL. Please refer to the GPL for the exact terms and conditions of the license. The original GPL license, source code of components licensed under GPL and used in Yealink products can be downloaded online: http://www.yealink.com/onepage_83.html. -
Page 5: About This Guide
About This Guide About This Guide Thank you for choosing the Yealink SIP IP phones. The purpose of this guide introduces how to configure Yealink SIP IP phones via CommPortal phone configurator. The configuration process outlined in this guide applies to the following phone models:…
-
Page 6
Yealink IP Phones Configuring Guide… -
Page 7: Table Of Contents
Table of Contents Table of Contents About This Guide …………..v In This Guide ……………………… v Table of Contents …………..vii Configuration Methods …………. 1 Phone User Interface ………………….1 CommPortal Phone Configurator ………………. 1 Customizing Your Phone …………3 IPv4 and IPv6 Network Settings ………………..
-
Page 8
Yealink IP Phones Configuring Guide Configuring the Keypad Lock ……………….. 34 Unlocking the Phone ………………….34 Dial-now ……………………..35 Adding a Dial-now Rule………………… 35 Configuring the Delay Time for Dial-now Rules …………..36 Configuring Live Dialpad …………………. 37 Downloading Configuration Files to Phones ……39 Obtaining the Provisioning Server Address ……………. -
Page 9: Table Of Contents
Table of Contents Enhanced Monitor Extension ………………..55 Configuring an Enhanced Monitor Extension key …………. 55 LED Indicator ……………………56 Configuring Transfer Mode via Dsskey Feature …………..56 Intercom and Push-to-Talk ………………..57 Enabling Push to Talk Mode ………………..57 Configuring an Intercom/PTT Key ………………
-
Page 10
Rebooting Issues ……………………74 How to reboot the IP phone? ……………….. 74 Protocols and Ports Issues ………………..75 What communication protocols and ports do Yealink IP phones support? …… 75 Password Issues ……………………78 How to restore the administrator password? …………..78 Power and Startup Issues…………………. -
Page 11: Configuration Methods
Configuration Methods Configuration Methods There are two ways to configure Yealink SIP IP phones. Phone user interface: if you want to deploy a small number of phones, you can configure IP phones one by one via phone user interface.
-
Page 12
Yealink IP Phones Configuring Guide… -
Page 13: Customizing Your Phone
You can also configure IPv4 or IPv6 network settings manually. Choosing IP Addressing Mode Yealink IP Phones support IPv4 addressing mode, IPv6 addressing mode, as well as an IPv4&IPv6 dual-stack addressing mode. Choose one according to your environment. It is not applicable to W80B.
-
Page 14: Configuring A Static Ipv4 Address
Yealink IP Phones Configuring Guide Configuring a Static IPv4 Address To configure a static IPv4 address via CommPortal phone configurator: Click Network->IP Setting. Make sure that the IP addressing mode is configured as IPv4 or IPv4 & IPv6. Select Static IP Address from the drop-down menu of Internet Port Type for IPV4.
-
Page 15: Registering Accounts
Customizing Your Phone Enter the desired values in the Static IP Address, IPv6 Prefix, Gateway, Primary DNS and Secondary DNS fields respectively. Click Save changes to accept the change. Perform auto provisioning on the phone to download above configurations. For more information on how to perform auto provisioning, refer to Downloading Configuration Files on page 39.
-
Page 16: Sip Session Timer
Yealink IP Phones Configuring Guide Enter the desired values in the SIP Server Address field. Contact your system administrator for more information. You can repeat steps 2 to 7 to register more accounts. Click Save changes to accept the change.
-
Page 17: Configuring Sip Session Timer
Customizing Your Phone Example: The user registers a SIP account for the IP phone and then set the value of Timer T1, Timer T2 respectively (Timer T1: 0.5, Timer T2: 4). The SIP registration request message will be re-transmitted between the IP phone and SIP server. The re-transmitting and doubling of Timer T1 (0.5) will continue until the retransmitting time reaches the Timer T2 (4).
-
Page 18: Time & Date
Yealink IP Phones Configuring Guide Time & Date Yealink IP phones maintain a local clock. You can choose to get the time and date from SNTP (Simple Network Time Protocol) time server to have the most accurate time and set DST (Daylight Saving Time) to make better use of daylight and to conserve energy, or you can set the time and date manually.
-
Page 19
Customizing Your Phone Time Time Time Zone Name Time Zone Name Zone Zone Canada-Manitoba(Winnipeg) Iraq(Baghdad) Chile(Easter Islands) Russia(Moscow) Guadalajara St.Petersburg Monterrey Kuwait,Riyadh Mexico(Mexico City,Acapulco) Nairobi Saskatchewan Minsk United States-Central Time Volgograd (RTZ 2) Bogota,Lima +3:30 Iran(Teheran) Quito Armenia(Yerevan) Peru Azerbaijan(Baku) Indiana (East) Georgia(Tbilisi) Bahamas(Nassau) -
Page 20
Yealink IP Phones Configuring Guide Time Time Time Zone Name Time Zone Name Zone Zone Cayenne,Fortaleza Bangladesh(Dhaka) Montevideo +6:30 Myanmar(Naypyitaw) Salvador +6:30 Yangon (Rangoon) Brazil(DST) Russia(Krasnoyarsk) -2:30 Newfoundland and Labrador Thailand(Bangkok) Brazil(no DST) Vietnam(Hanoi) Mid-Atlantic Jakarta Portugal(Azores) China(Beijing) Cape Verde Islands… -
Page 21: Configuring Ntp Server
Customizing Your Phone Time Time Time Zone Name Time Zone Name Zone Zone West Central Africa Russia(Srednekolymsk Time) Poland(Warsaw) +11:30 Norfolk Island Spain(Madrid) New Zealand(Wellington,Auckland) Croatia(Zagreb) Fiji Islands Czech Republic(Prague) Russia(Kamchatka Time) Denmark(Kopenhagen) Anadyr France(Paris) Petropavlovsk-Kamchatsky (RTZ 11) Germany(Berlin) Marshall Islands Hungary(Budapest) +12:45 New Zealand(Chatham Islands)
-
Page 22: Configuring Daylight Saving Time
Yealink IP Phones Configuring Guide Enter the desired interval to update time and date from the NTP server in the NTP Query Interval field. Click Save changes to accept the change. Perform auto provisioning on the phone to download above configurations. For more…
-
Page 23
Customizing Your Phone Select Automatic from the drop-down menu of Daylight Savings. Click Save changes to accept the change. Perform auto provisioning on the phone to download above configurations. For more information on how to perform auto provisioning, refer to Downloading Configuration Files on page 39. -
Page 24
Yealink IP Phones Configuring Guide Enter the desired offset time in the Offset (minutes) field. Select DST By Week from the Fixed Type field. Enter the start time in the Start Date field. Enter the end time in the End Date field. -
Page 25
Customizing Your Phone Perform auto provisioning on the phone to download above configurations. For more information on how to perform auto provisioning, refer to Downloading Configuration Files on page 39. Disabling DST Settings To disable the DST settings automatically via CommPortal phone configurator: Click Preferences->Time&Date. -
Page 26
Yealink IP Phones Configuring Guide Select the desired value from the drop-down menu of Obtain Time Method. Click Save changes to accept the change. Perform auto provisioning on the phone to download above configurations. For more information on how to perform auto provisioning, refer to… -
Page 27: Directory
LDAP Directory on Yealink IP Phones Not all phones support Network Contacts and Network Call List. For more information, refer to Yealink SIP Phones Integrated with Metaswitch CommPortal Phone Applications User Guide You cannot configure Directory via CommPortal phone configurator for CP960 IP phones.
-
Page 28: Viewing The Directory On The Phone
Yealink IP Phones Configuring Guide If the priority is set to Disabled, the selected list is not displayed when user presses the Directory soft key. Click Save changes to accept the change. Perform auto provisioning on the phone to download above configurations. For more…
-
Page 29: Enabling Presenting The Caller Identity
Customizing Your Phone Enter the name in the Display Item Name N field. Click Save changes to accept the change. Perform auto provisioning on the phone to download above configurations. For more information on how to perform auto provisioning, refer to Downloading Configuration Files on page 39.
-
Page 30: Downloading The Business Group Contacts
Yealink IP Phones Configuring Guide Downloading the Business Group Contacts You can download the business group contacts for SIP-T19(P) E2, T27G and T29G IP phones only. If you enable this feature, the phone can download the business group contacts to the remote phone book 1.
-
Page 31: Searching For A Contact In The Remote Phone Book
Customizing Your Phone Searching for a Contact in the Remote Phone Book To search for a contact in the remote phone book: Do one of the following. Press Directory-> Remote Phone Book (If display priority of the Remote Phone Book is not set to Disabled). Press Menu->Directory->Remote Phone Book.
-
Page 32: Configuring Search Source List
For more information on the LDAP, refer to Not all phones support Network Contacts and Network Call List. For more information, refer to Yealink SIP Phones Integrated with Metaswitch CommPortal Phone Applications User Guide To configure the search priority of the directory via CommPortal phone configurator: Click Features->Search Source List In Dialing.
-
Page 33: Line Key Features
Customizing Your Phone Select desired key type from the Soft key action field. Assign a feature to the key. For more information, refer to Line Key Features on page 23. (Optional.) Enter a string that will appear on the LCD screen in the Label field. Click Save changes to accept the change.
-
Page 34
Yealink IP Phones Configuring Guide Soft key action (Line) Dependencies: Line (the account this feature will be applied to) Mode (Default/Lock) Label (key label displayed on the LCD screen) Usage: When receiving an incoming call, the Line key LED flashes green: Press the DSS key to accept the incoming call. -
Page 35
Customizing Your Phone Usage: Press the DSS key during an active call to set up a conference with the number specified Number in the field. Note Number If the field is left blank, the DSS key performs the same as the Conf soft key during a call. -
Page 36
Yealink IP Phones Configuring Guide feature to access the custom DND screen. For more information, refer to Do Not Disturb page 43. Soft key action (DND) Dependencies: Label (key label displayed on the LCD screen) Usage: When DND is in phone mode: Press the DSS key to activate DND. -
Page 37
Customizing Your Phone Line (the account this feature will be applied to) Park Orbit (the orbit where you retrieve the parked call) Label (key label displayed on the LCD screen) Usage: Press the DSS key to retrieve the parked call specified in the Park Orbit field. Enhanced Monitor Extension You can use this key feature to monitor a specific line for status changes on the phone. -
Page 38
Yealink IP Phones Configuring Guide Press the DSS key again to deactivate the group listening mode. Hold You can use this key feature to place an active call on hold or retrieve a held call. Soft key action (Hold) Dependencies:… -
Page 39
Customizing Your Phone Line (the account this feature will be applied to) Access code (the last caller ID erasure access code) Label (key label displayed on the LCD screen) Usage: Press the DSS key to delete the record of the last received call. LDAP You can use this key feature to quickly access an LDAP search screen. -
Page 40
Yealink IP Phones Configuring Guide Paging List You can use this key feature to view a list of multicast paging groups. For more information, refer to Multicast Paging on page 60. Soft key action (Paging List) Dependencies: Label (key label displayed on the LCD screen) Usage: Press the DSS key to view a list of multicast paging groups. -
Page 41
Customizing Your Phone available, regardless of whether the caller withheld their number. The service provider can then provide this information to law enforcement upon request. Soft key action (Trace Call) Dependencies: Line (the account this feature will be applied to) Access code (the trace call access code) Label (key label displayed on the LCD screen) Usage: Press the DSS key during or after the call to trace the call. -
Page 42
You can use this key to log out of existing accounts and then log into a new account. As a result, many users can share the phone resource at different times. For more information, refer to Yealink SIP Phones Integrated with Metaswitch CommPortal Phone Applications User Guide. Soft key action (Log Out) -
Page 43: Keypad Lock
Customizing Your Phone History You can use this key feature to quickly access network call lists. For more information, refer to Yealink SIP Phones Integrated with Metaswitch CommPortal Phone Applications User Guide Soft key action (History) Dependencies: Label (key label displayed on the LCD screen) Messages List You can use this key feature to quickly access the message lists.
-
Page 44: Configuring The Keypad Lock
Yealink IP Phones Configuring Guide You can set a waiting time to lock the phone automatically. If the waiting time is set to 0, the phone will not be automatically locked. You need to lock the phone manually. Note The Volume key, HEADSET key and Speakerphone key are always available when you lock the phone.
-
Page 45: Dial-Now
Customizing Your Phone Enter the PIN in the Unlock PIN field. Press the OK soft key to unlock the phone. Note You can also unlock the phone by entering the administrator password. When you enter the administrator password to unlock the phone, the phone will turn to the Change PIN interface. Dial-now You can configure one or more dial-now rules.
-
Page 46: Configuring The Delay Time For Dial-Now Rules
Yealink IP Phones Configuring Guide conference phones). If you select All Lines, the dial-now rule will apply to all accounts on the phone. If you select Current Lines, the dial-now rule will only apply to the current account. Click Save changes to accept the change.
-
Page 47: Configuring Live Dialpad
Customizing Your Phone Perform auto provisioning on the phone to download above configurations. For more information on how to perform auto provisioning, refer to Downloading Configuration Files on page 39. Configuring Live Dialpad Live dialpad allows IP phones to automatically dial out the entered phone number without pressing the send key after a designated period of time.
-
Page 48
Yealink IP Phones Configuring Guide… -
Page 49: Downloading Configuration Files To Phones
The following takes HTTP digest authentication method as an example to introduce phone deployment. Obtaining the Provisioning Server Address Yealink IP phones support many ways to obtain the provisioning server address, for example: Obtain the provisioning server address automatically by detecting DHCP options 66.
-
Page 50: Power On
Yealink IP Phones Configuring Guide Zero Touch The following sections introduce common methods to trigger the phone to perform auto provisioning. Power On Auto Provision Now Zero Touch Power On You can power on the phone to trigger it to perform auto provisioning.
-
Page 51: Zero Touch
Downloading Configuration Files to Phones To trigger auto provisioning via auto provision now: Press Menu->Settings->Advanced Settings->Auto Provision. Enter the provisioning server address in the Server URL field. Enter valid provisioning credential in the User Name and Password fields. Press the Save soft key. The LCD screen will be displayed as below: Press the Ok soft key.
-
Page 52
Enter valid provisioning credential, and then press the OK soft key. Press the OK soft key. The phone reboots and download configurations from the CommonPortal phone configurator. For more information on auto provisioning, refer to Yealink IP Phones Auto Provisioning Guide http://www.yealink.com/DocumentDownload.aspx?CateId=142&flag=142 available online:… -
Page 53: Basic Call Features
Basic Phone Features Basic Call Features The SIP IP phone is designed to be easily used like a regular phone on a public switched telephone network (PSTN). You can place calls, answer calls, transfer a call to someone else, or conduct a conference call.
-
Page 54: Activating Dnd In Phone Mode
Yealink IP Phones Configuring Guide Select the desired DND mode from the DND Mode field. Click Save changes to accept the change. Perform auto provisioning on the phone to download above configurations. For more information on how to perform auto provisioning, refer to Downloading Configuration Files on page 39.
-
Page 55: Transferring Calls
Basic Phone Features Metaswitch server will synchronously change the DND status for the user. Conversely, if you change a user’s DND status on the Metaswitch server, the Metaswitch server will notify the phone of the status change and the phone will change the DND status for the user. To configure DND key synchronization feature via CommPortal phone configurator: Click Feature->DND&Forward.
-
Page 56: Local Conference Call
Yealink IP Phones Configuring Guide To perform a semi-attended transfer: Press the Transfer soft key during a call. Do one of the following: Enter the number you want to transfer the call to. Press the Directory soft key to select the desired contact.
-
Page 57: Managing Conference Participants
Basic Phone Features Managing Conference Participants You can manage conference participants in the following ways: Mute a participant Hold a participant Remove a participant from the conference Note You cannot manage conference participants on W60B/W80B phones. Do the following during the conference call, do the following: Press the Manage soft key.
-
Page 58: Call Park And Call Retrieve
Yealink IP Phones Configuring Guide If you select Disabled, the conference ends. Click Save changes to accept the change. Perform auto provisioning on the phone to download above configurations. For more information on how to perform auto provisioning, refer to…
-
Page 59: Configuring An Enhanced Park Call Key
Basic Phone Features Enter the string that will appear on the LCD screen in the Label field. Click Save changes to accept the change. Perform auto provisioning on the phone to download above configurations. For more information on how to perform auto provisioning, refer to Downloading Configuration Files on page 39.
-
Page 60: Configuring A Retrieve Parked Call Key
Yealink IP Phones Configuring Guide Configuring a Retrieve Parked Call Key You can retrieve the parked call by pressing a retrieve parked call key or dialing the retrieve access code followed by the orbit number (for example: *302100). To configure a retrieve parked call key via the CommPortal phone configurator: Click Programmable Keys — Line Key->Key X.
-
Page 61: Retrieving A Call
Basic Phone Features Retrieving a Call To retrieve a call on the phone: Dial the call park retrieve code followed by the target orbit (for example: *302100) or press the retrieve parked call key to retrieve the parked call. Note If the parked call is not retrieved within a period of time assigned by the system, the phone performing call park will receive a call back.
-
Page 62: Picking Up A Call
Yealink IP Phones Configuring Guide Enter the string that will appear on the LCD screen in the Label field. Click Save changes to accept the change. Perform auto provisioning on the phone to download above configurations. For more information on how to perform auto provisioning, refer to…
-
Page 63: Picking Up A Call For A Group
Basic Phone Features Enter the group pickup code in the Access Code field. Enter the string that will appear on the LCD screen in the Label field. Click Save changes to accept the change. Perform auto provisioning on the phone to download above configurations. For more information on how to perform auto provisioning, refer to Downloading Configuration Files…
-
Page 64
Yealink IP Phones Configuring Guide… -
Page 65: Advanced Phone Features
Advanced Phone Features Advanced Phone Features This chapter provides operating instructions for the advanced features of the IP phone. Topics include: Enhanced Monitor Extension Intercom and Push-to-Talk Multicast Paging DTMF Call Jump Enhanced Monitor Extension You can use enhanced monitor extension feature to monitor a specific line for status changes on the phone.
-
Page 66: Led Indicator
Yealink IP Phones Configuring Guide Click Save changes to accept the change. Perform auto provisioning on the phone to download above configurations. For more information on how to perform auto provisioning, refer to Downloading Configuration Files on page 39. LED Indicator The following table shows the LED indicator associated with the line you are monitoring.
-
Page 67: Intercom And Push-To-Talk
Advanced Phone Features If you select New Call, press the enhanced monitor extension key to place a new call to the monitored number. Click Save changes to accept the change. Perform auto provisioning on the phone to download above configurations. For more information on how to perform auto provisioning, refer to Downloading Configuration Files on page 39.
-
Page 68: Configuring An Intercom/Ptt Key
Yealink IP Phones Configuring Guide Mark the desired radio box in the Push to Talk Mode Enable field. Click Save changes to accept the change. Perform auto provisioning on the phone to download above configurations. For more information on how to perform auto provisioning, refer to Downloading Configuration Files on page 39.
-
Page 69: Using Push-To-Talk
Advanced Phone Features Using Push-to-Talk To use push-to-talk on the phone: Long press the Intercom/PTT key for 1.5 seconds when the phone is idle. The called destination plays a warning tone and automatically answers the call in the speakerphone mode by default. Keep pressing the Intercom/PTT key during the push-to-talk call.
-
Page 70: Multicast Paging
Yealink IP Phones Configuring Guide Mark the desired radio box in the Intercom Tone field. Mark the desired radio box in the Intercom Barge field. Click Save changes to accept the change. Perform auto provisioning on the phone to download above configurations. For more…
-
Page 71: Configure A Paging List Key
Advanced Phone Features Enter the string that will appear on the LCD screen in the Label field. Click Save changes to accept the change. Perform auto provisioning on the phone to download above configurations. For more information on how to perform auto provisioning, refer to Downloading Configuration Files on page 39.
-
Page 72: Configuring A Codec For Multicast Paging
Yealink IP Phones Configuring Guide Enter the multicast IP address (for example: 224.5.6.20) in the Address field. The valid multicast IP addresses range from 224.0.0.0 to 239.255.255.255. Enter the multicast IP port number (for example: 10008) in the Port field.
-
Page 73: Configuring Multicast Listening Addresses
Advanced Phone Features Configuring Multicast Listening Addresses You can configure the phone to receive a Real-time Transport Protocol (RTP) stream from the pre-configured multicast address(es) without involving SIP signaling. You can specify up to 10 multicast addresses that the phone listens to on the network. To configure multicast listening addresses via web user interface: Click on Paging Groups->Listening Group N.
-
Page 74: Sending Rtp Stream Via A Multicast Paging Key
Yealink IP Phones Configuring Guide Paging Priority Enable The paging priority enable parameter decides how the phone handles incoming multicast paging calls when there is already a multicast paging call on the phone. If enabled, the phone will ignore incoming multicast paging calls with lower priorities, otherwise, the phone will answer incoming multicast paging calls automatically and place the previous multicast paging call on hold.
-
Page 75: Sending Rtp Stream Via A Paging List Key
Advanced Phone Features To end the multicast RTP session, press the multicast paging key again or press the EndCall soft key. Note Multicast RTP is one way only from the sender to the multicast address(es) (receiver). For outgoing RTP multicasts, all other existing calls on the phone will be placed on hold. Sending RTP Stream via a Paging List Key To send RTP stream via a paging key list when the receiver’s phone is idle: Press the paging list key when the phone is idle.
-
Page 76: Transmitting Dtmf Digit
Yealink IP Phones Configuring Guide Transmitting DTMF Digit Three methods of transmitting DTMF digits on SIP calls: RFC 2833 — DTMF digits are transmitted by RTP Events compliant with RFC 2833. You can configure the payload type and sending times of the end RTP Event packet. The RTP Event packet contains 4 bytes.
-
Page 77
Advanced Phone Features number by entering the designated hotkey. The main difference between call jump and call transfer is that when you transfer a call via call jump, the current call stays connected instead of being placed on hold. The following table lists the default call jump hotkeys configured by Metaswitch. Internet Telephony Service Provider can modify the hotkeys, depending on your actual needs. -
Page 78
Yealink IP Phones Configuring Guide work again. Note predefined The destination you want to jump your call to must be in CommPortal. For more information, contact your administrator. -
Page 79: Troubleshooting
Troubleshooting Troubleshooting This section describes solutions to common issues that may occur while using the IP phone. Upon encountering a scenario not listed in this section, contact your Yealink reseller for further support. IP Address Issues Why doesn’t the IP phone get an IP address?
-
Page 80: Display Issues
Yealink IP Phones Configuring Guide automatically. If your phone is unable to access the NTP server, configure the time and date manually. Display Issues Why is the LCD screen blank? Do one of the following: Ensure that the IP phone is properly plugged into a functional AC outlet.
-
Page 81: Why Do I Get Poor Sound Quality During A Call
Try to delete the registration information of the Bluetooth device on both IP phone and Bluetooth device, and then pair and connect it again. Contact Yealink field application engineer and your Bluetooth device manufacturer for more information. Why the Bluetooth headset affects IP phone’s voice quality?…
-
Page 82: Firmware And Upgrading Issues
Yealink IP Phones Configuring Guide Firmware and Upgrading Issues Why doesn’t the IP phone upgrade firmware successfully? Do one of the following: Ensure that the target firmware is not the same as the current firmware. Ensure that the target firmware is applicable to the IP phone model.
-
Page 83: Why Doesn’t The Ip Phone Update The Configuration
Troubleshooting Item Description 46: SIP-T29G 45: SIP-T27P 69: SIP-T27G 53: SIP-T19(P) E2 Firmware generation. Note: The larger it is, the newer the firmware generation is. A fixed number. Firmware version. Note: With the same firmware generation, the larger it is, the newer the firmware version is.
-
Page 84: Rebooting Issues
Yealink IP Phones Configuring Guide Click on Settings->Upgrade. Click Reset to factory in the Reset to factory field. The web user interface prompts the message “Do you want to reset to factory?”. Click OK to confirm the resetting. The IP phone will be reset to factory successfully after startup.
-
Page 85: Protocols And Ports Issues
Troubleshooting Protocols and Ports Issues What communication protocols and ports do Yealink IP phones support? Source Destination Destination Port Source IP Source Port Destination IP Protocol Description of destination port Device Device (Listening port) IP address of IP IP phone or voice…
-
Page 86
Yealink IP Phones Configuring Guide Source Destination Destination Port Source IP Source Port Destination IP Protocol Description of destination port Device Device (Listening port) DHCP protocol port, it is used to IP address of DHCP Server obtain IP address from DHCP DHCP server server. -
Page 87
Troubleshooting Source Destination Destination Port Source IP Source Port Destination IP Protocol Description of destination port Device Device (Listening port) of voice of IP by the phones destination device to send or gateway phone or destination receive the audio stream. IP phones voice device. -
Page 88: Password Issues
Yealink IP Phones Configuring Guide Password Issues How to restore the administrator password? Factory reset can restore the original password. All custom settings will be overwritten after reset. Power and Startup Issues What will happen if I connect both PoE cable and power adapter? Which has the higher priority? IP phones use the PoE preferentially.
-
Page 89: Regulatory Notices
Without prior written consent, no organization or individual is permitted to make any change to the structure or the safety design of the device. Yealink is under no circumstances liable to consequences or legal issues caused by such changes.
-
Page 90
Yealink IP Phones Configuring Guide Environmental Requirements Place the device at a well-ventilated place. Do not expose the device under direct sunlight. Keep the device dry and free of dust. Place the device on a stable and level platform. -
Page 91
Regulatory Notices Keep the power plug clean and dry. Using a dirty or wet power plug may lead to electric shock or other perils. -
Page 92
Yealink IP Phones Configuring Guide…
IP-телефоны Yealink на рынке Казахстана появились в начале с 2013-го года.
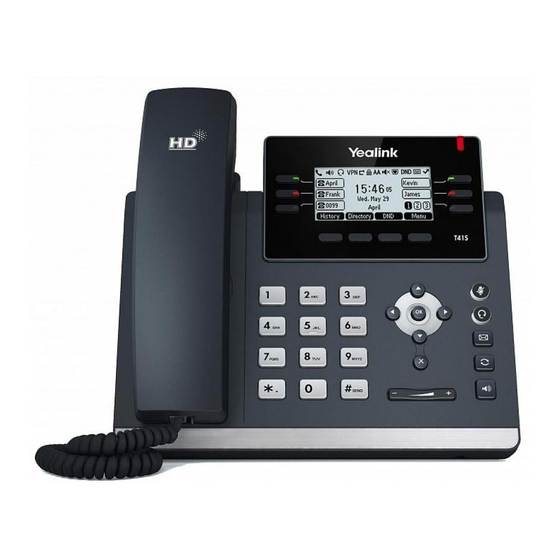
За долгий период присутствия на рынке, бренд Yealink зарекомендовал себя только с положительной стороны. Линейка телефонов Yealink по праву заслужила признание покупателей.
Младшие модели линейки — Yealink SIP-T19 E2, а также модель Yealink SIP-T19P E2 сняты с произвоства в 2020-м году. Кстати, индекс «P» в названии ip-телефонов Yealink обозначает, что модель снабжена возможностью подачи питания через Ethernet-кабель (технология PoE, для которой необходимы специальные PoE-коммутаторы). Других отличий нет.
Не смотря, что T19 уже не производится, за годы было их продано большое колчество в Казахстане и по сегодняшний день модель можно считать актуальной.
Как настроить IP-телефон Yealink SIP-T19 E2?
В большинстве случаев, IP-телефоны устанавливаются в офис с учетом, того, что они будет подключен к офисной IP-АТС.
Нужно отметить, что все телефоны Yealink для удобства и экономии эксплуатации комплектуются двумя LAN-портами: «Internet» и «PC». Такое сочетание позволяет подключать одно рабочее место «Компьютер-телефон» через одну розетку локальной сети. Телефон подключается в электрическую сеть и в локальную сеть в LAN-порт с надписью «Internet», а компьютер подключается к телефону в LAN-порт «PC».
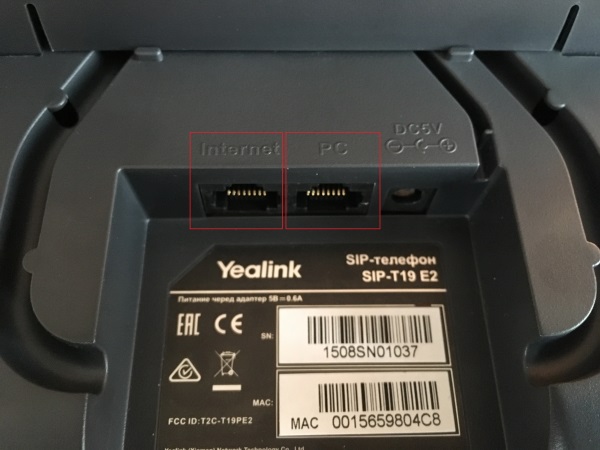
Телефон включен в электрическую сеть, подключен к локальной сети и к компьютеру.
Кстати,
К нам поступают звонки с вопросом «Что будет если подать высокое напряжение на телефон Yealink SIP-T19 E2?». Отвечаем: Производитель комплектует телефон блоком питания с выходом (питанием для телефона) 5В, 0.6А. Увеличение вольтажа, равно как и амперности, могут негативно отразиться на работе телефонного аппарата вплоть до полного выхода из строя. Поэтому, если у вас по каким-то причинам перегорел блок питания, обратитесь к официальному продавцу Yealink и купите оригинальный блок питания, не используйте аналоги с отличающимися параметрами тока.
Далее следует узнать IP-адрес, который был присвоен телефону по DHCP. Для этого на телефоне нужно нажать клавишу «OK»— галочка и на экране появится значение адреса.
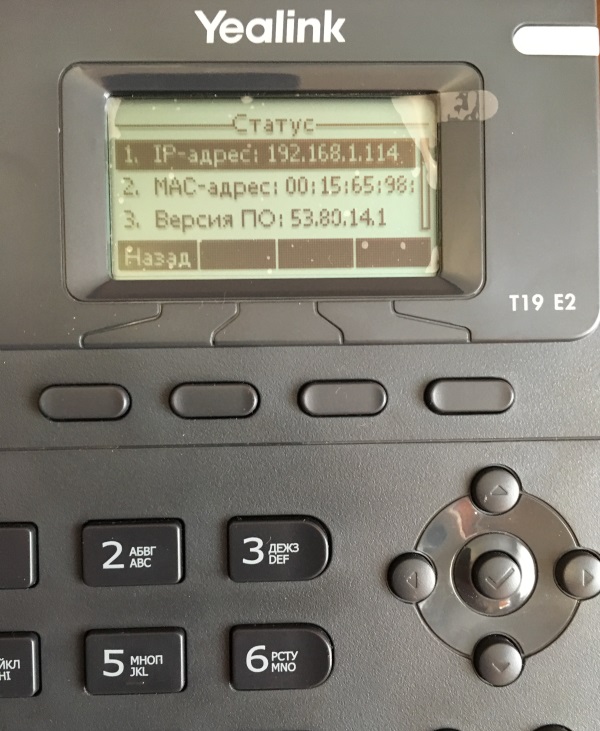
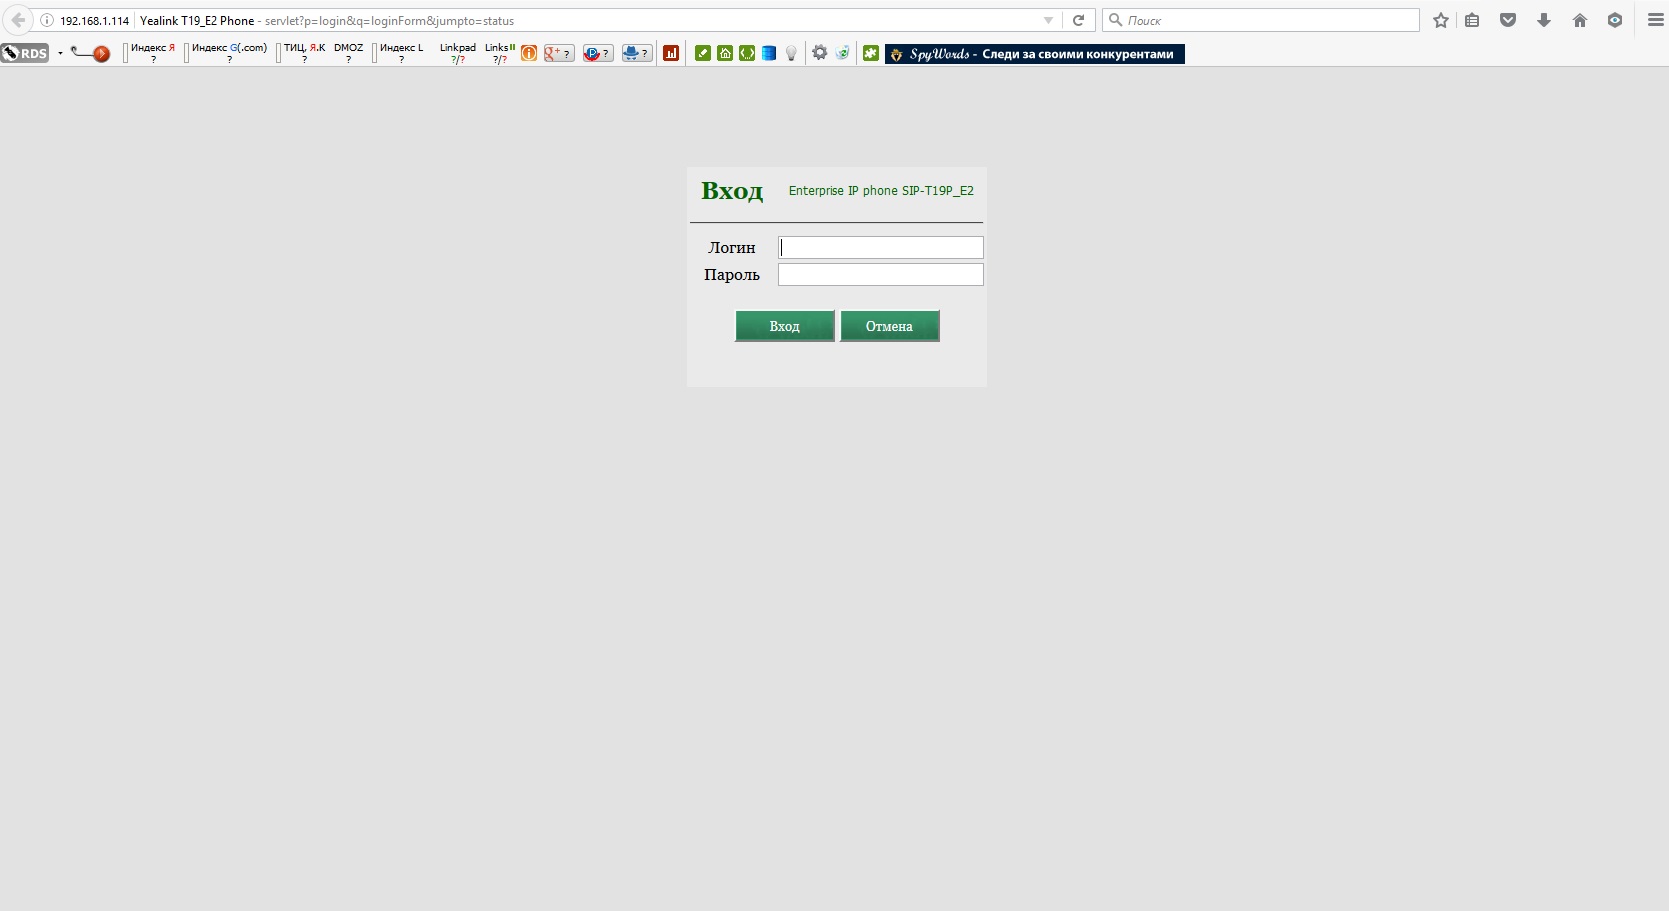
Следующим шагом необходимо открыть любой интернте-браузер и в командной строке ввести ip-адрес (в нашем случае — это http://192.168.1.114) и нажать Enter.
Если вы сделали всё правильно, то загрузиться веб-интерфейс телефона с предложением ввести логин и пароль (по умолчанию на телефонах Yealink T19 — admin, admin).
В открывшемся окне, необходимо выбрать вкладку «Аккаунт» и далее ввести в поля необходимые значения:
- в поле «Аккаунт» — название подключения;
- в поле «Лейбл»— любое слово, которое будет отображаться на мониторе телефона;
- в поле «Отображаемое имя»— любое слово, которое будет отображаться на мониторе телефона вызываемого абонента внутри сети АТС;
- в поле «Имя регистрации»— значение, выданное системным администратором;
- в поле «Пароль»— значение, выданное системным администратором;
- в поле «Адрес SIP-сервера»— локальный IP-адрес офисной IP-АТС и порт сервера (тоже выдается системным администратором).

Далее необходимо нажать «Сохранить» и дождаться обновления страницы. Если всё правильно было сделано, то статус регистрации поменяется на«Зарегистрировано».
В некоторых случаях необходимо подкорректировать настройки голосовых кодеков. Для этого нужно открыть вкладку «Кодеки» и выбрать используемые кодеки, как на рисунке ниже. После выбора кодеков также нажать «Сохранить».

Всё, после этого ваш телефон готов к продуктивной работе.
Возможные ошибки при настройке Yealink SIP T19 E2
В процессе настройки IP-телефона допущенные ошибки не позволят ему зарегисрировать учётную запись SIP-аккаунта и телефон не сможет совершать исходящие звонки и принимать
Наиболее частные ошибки в настройках телефона:
- Телефон «не видит» SIP-сервера. Эта ошибка может возникнуть при неправильном вводе адреса сервера регистрации, а также при отсутствии доступа к интернету у телефона. Внимательно проверяйте адрес, а также настройки сети;
- Неправильно введённые учётные данные. При вводе значий login/password внимательно вводите символы. Обращайте внимание на регистры букв.
Как обновить прошивку IP-телефона Yealink SIP-T19 E2
В некоторых случаях может потребоваться обновление программного обеспечения (прошивки) вашего телефонного аппарата. Обновление прошивки может быть связано со следующими случаями:
- Обновление в виду выхода новой прошивки. В обновлённых прошивках, как правило, присутствуют исправление ошибок, которые были замечены в старой версии ПО. В результате обновления телефон может работать стабильнее и быстрее. Также с обновлением могут быть «зактыры» уязвимости и backdoor’ы;
- Руссификация меню и интерфейса телефона. Некоторые телефонные аппараты могут попасть на местный рынок напрямую от производителя. Как правило, в таких телефонах русский язык отсутствует, а весь интерфейс отображается только на английском языке. Это может приносить некоторое неудобство в пользовании и в таком случае также целесообразно произвести обновление ПО Yealink SIP-T19 E2.
Процедура и этапы обноления внутреннего программного обеспечения Yealink SIP-T19 E2
Перед обновлением ПО вам необходимо скачать на свой компьютер его последнюю версию — Программное обеспечение для Yealink SIP-T19(P) E2 (53.84.14.1).
Далее по инструкции (см. выше) необходимо зайти в веб-интерфейс телефона.
У вас откроется интерфейс телефона, где вы можете приступить к обновлению ПО. Для этого необходимо в верхнем менб выбрать пункт «Settings» и в левом блоке меню выбрать пункт «Upgrade». Далее необходимо нажать на кнопку «Обзор» и выбрать файл прошивки, который вы скачали раннее. После нажмите на кнопку «Upgrade»

После нажатия «Upgrade» телефон начнет обновление программного обеспечения. Это займёт некоторое время.
ВАЖНО
В процессе обновления программного обеспечения категорически запрещается нажимать кнопки на телефоне, обновлять окно браузера или отключать телефонный аппарат от электрической сети. В случае какого-то сбоя, телефон может выйти из строя и для его реанимации потребуется обратиться в сервисный центр.
После перепрошивки, телефон обновится и в новой прошивке потребуется изменить настройки языка. Для этого нужно снова пройти в веб-интерфейс и выбрать в верхнем меню вкладку «Settings», далее в левом меню нажать на пункт «Settings». После этого изменить язык интерфейса на Русский.

После выбора русского языка обязательно необходимо подтвердить выбор нажав на кнопку «Confirm».
Всё! Ваш телефон обновлён и теперь весь интерфейс будет на русском языке. Приятного пользования.
Характеристики
-
Свойства IP-телефонов
-
100 Мбит/с, Fast Ethernet
-
Монохромный без подсветки
-
2 порта Ethernet, Поддержка PoE, Блок питания в комплекте, Крепление на стену
-
Программируемые BLF клавиши
-
Участников конференц-вызова
(чел.)
Описание
Данная модель телефона снята с производства. Аналог — Yealink SIP-T30P
Одна из главных задач современного руководителя — это совершенствование деятельности предприятия, которое направлено на развитие коммуникационных систем. В этом ему помогают различные методики и инструменты, в том числе и качественное оборудование. Яркий пример — это новая модель стационарного телефона Yealink SIP-T19P E2. Она служит отличным решением для обеспечения связи с клиентами и сотрудниками компании.
Аппарат разработан на основе модели предыдущего поколения SIP-T19P. Он обладает лучшими характеристиками, но при этом дополнен новыми достоинствами. В их числе — усовершенствованный процессор с более высокой мощностью для улучшенного качества связи. Ещё одна особенность — возможность питания устройства по системе PoE (Power over Ethernet).
Основные функции телефона:
- Локальная и удалённая телефонные книги с объёмом памяти до 1000 контактов. Адаптивный поиск по справочникам. Загрузка и выгрузка данных с локальной телефонной книги. Хранение истории звонков: входящих, исходящих, пропущенных, переадресованных.
- Приём и отклонение звонков от анонимных пользователей.
- Организация телефонной конференции, интерком-звонка (в том числе и группового).
- Автоматическая или ручная установка времени.
- Настройка горячей линии.
- Общение с помощью голосовой почты, отправка и получение сообщений SIP SMS.
- Экстренные вызовы и быстрый набор номера.
- Регулировка громкости и мелодии звонка.
- Подключение специальной гарнитуры.
- Режим DND (не беспокоить), отключение микрофона и удержание звонка.
Производитель Yealink гарантирует максимально качественную передачу звука благодаря внедрению в аппарат современных систем. К ним относятся:
- AEC — технология подавления эха;
- AGC — программная настройка уровня чувствительности микрофона;
- CNG — генератор комфортного шума;
- VAD — система распознавания голосовых волн;
- PLC — отметка ликвидации пакета с медиа-информацией.
Пользователь остаётся полностью защищённым от помех при обмене информацией с собеседником. Звук отличается чистотой и чёткостью.
Дизайн модели — тёмный корпус дополнен монохромным LCD-экраном без подсветки с разрешением 132 х 64. На главной панели находится клавиатура с русским и английским алфавитами, а также кнопки для запуска и отключения микрофона, совершения повторного вызова, активации громкой связи и голосовой почты. Также корпус снабжён пятью навигационными клавишами, которые можно запрограммировать в соответствии с индивидуальными нуждами.
Управление моделью Yealink SIP-T19P E2 производится на выбор через:
- Через web-интерфейс.
- Через экран телефона.
- Через систему Autoprovision.
Модель Yealink SIP-T19P E2 имеет доступную стоимость, что делает её популярной среди потребителей. Её приобретают для небольших офисов, мелких фирм, колл-центров, крупных компаний. Продукция Yealink — это реальный шанс сделать ведение бизнеса более эффективным, привлечь новых клиентов и усилить лояльность старых.
Технические характеристики телефона
Функции телефона
- 1 SIP-аккаунт
- Удержание, отключение микрофона, DND («Не беспокоить»)
- Быстрый набор, горячая линия
- Переадресация, режим ожидания, трансфер
- Групповое прослушивание, SIP SMS, экстренные вызовы
- 3-сторонняя конференция
- Выбор мелодии/загрузка/удаление
- Настройка времени: автоматически или вручную
- Правила набора
- XML-браузер, Action URL/URI
- Встроенные скриншоты
- RTCP-XR, VQ-RTCPXR
Экран и индикаторы
- Графический 2.3″ LCD-экран с разрешением 132х64
- LED-индикатор питания и MWI
- Поддержка нескольких языков
- Caller ID с именем и номером
- Энергосбережение
Функциональные кнопки
- Клавиатура с русскими и английскими буквами
- 5 навигационных клавиш с возможностью программирования
- Клавиши регулировки громкости
- 6 функциональных клавиш: трансфер, откл/вкл. микрофона, гарнитура, повторный набор номера, громкая связь, голосовая почта
Кодеки и настройки голоса
- Широкополосные кодеки: G.722; Opus
- Кодеки: G.711 (A/u), G.729AB, G.726, iLBC
- DTMF: In-band, Out-of-band (RFC2833), SIP INFO
- Full-duplex (полнодуплексная) громкая связь с AEC (подавление эха)
- VAD (обнаружение активности голоса), CNG (генератор комфортного шума), AEC (подавление эха), PLC (маркирование потери пакета с медиа-данными), AJB (адаптивный буфер для голосовых пакетов), AGC (автоматическая регулировка чувствительности микрофона)
Записные книги
- Локальная записная книга до 1000 контактов
- Черный список
- Удаленная записная книга XML, LDAP
- Интеллектуальный поиск
- Поиск по записным книгам, импорт/экспорт локальной записной книги
- История вызовов: набранные/принятые/пропущенные/переадресованные
Интеграция с IP-АТС
- Анонимный вызов, отклонение анонимных вызовов
- Hot-desking, экстренный вызов, интерком, paging, music on hold, напоминание
- MWI, напоминание, запись разговора
- Голосовая почта, парковка вызова, захват вызова
Управление
- Настройка телефона: веб-интерфейс/экран телефона/Autoprovision
- FTP/TFTP/HTTP/HTTPS/PnP Autoprovision
- Zero-sp-touch, TR069
- Блокировка клавиатуры
- Сброс к настройкам по умолчанию, перезагрузка
- Логи: PCAP Trace, system log
Сетевые характеристики и безопасность
- SIPv1 (RFC2543), SIPv2 (RFC3261)
- NAT, STUN
- Способы вызова: Proxy и peer-to-peer (по IP-адресу)
- Получение IP: Статический/DHCP
- HTTP/HTTPS-сервер
- Синхронизация времени и даты через SNTP
- UDP/TCP/DNS-SRV (RFC3263)
- QoS: 802.1p/Q tagging (VLAN), Layer 3 ToS DSCP
- Поддержка TLS
- Управление HTTPS-сертификатами
- AES шифрование конфигурационных файлов
- Поддержка стандартов шифрования и идентификации (MD5 и MD5-sess)
- SRTP (Внимание! В продуктах, предназначенных для стран-участников Таможенного союза, данный функционал отсутствует.)
- Поддержка IEEE802.1X
- Поддержка IPv6
- LLDP/CDP/DHCP VLAN
Физические характеристики
- Крепление к стене
- 2хRJ45 Ethernet-порта 10/100Мбит/с
- POE (IEEE 802.3af), class 2
- 1хRJ9 для подключения трубки
- 1хRJ9 для подключения гарнитуры
- Блок питания: Вход 100-240V AC, Выход 5V, 0.6А
- Потребление через блок питания: 0.9 — 1.3W
- Потребление через блок POE: 1.2 — 1.8W
- Размеры (Ш*Г*В*Т): 185мм*188мм*143мм*38мм
- Рабочая влажность: 10~95%
- Рабочая температура: -10~50˚C
Упаковка и габариты
| Размеры индивидуальной упаковки, мм | 215х200х121 |
| Вес индивидуальной упаковки, кг | 0.996 |
| Размеры коробки, мм | 630x436x210 |
| Количество штук в коробке | 10 |
| Вес брутто коробки, кг | 11.09 |
| Объём коробки, куб.м | 0.06 |