-
Contents
-
Table of Contents
-
Troubleshooting
-
Bookmarks
Quick Links
Using Avaya J139 IP Phone in an Open
SIP environment
Release 4.0.5
Issue 1
April 2020
Related Manuals for Avaya J139
Summary of Contents for Avaya J139
-
Page 1
Using Avaya J139 IP Phone in an Open SIP environment Release 4.0.5 Issue 1 April 2020… -
Page 2
RESERVES THE RIGHT TO TAKE LEGAL ACTION AGAINST YOU the express behalf of Avaya. End User agrees to indemnify and hold AND ANYONE ELSE USING OR SELLING THE SOFTWARE harmless Avaya, Avaya’s agents, servants and employees against all WITHOUT A LICENSE. -
Page 3
MAY BE OBTAINED FROM MPEG LA, L.L.C. SEE HTTP:// written consent of Avaya can be a criminal, as well as a civil offense WWW.MPEGLA.COM. under the applicable law. Compliance with Laws… -
Page 4
1. This device may not cause interference, and AC adapters shipped with the equipment or specified by Avaya to be used with the equipment. If you use any 2. This device must accept any interference, including other equipment, it may cause failures, malfunctioning, interference that may cause undesired operation of the or fire. -
Page 5
Device Usage Consent operation. By using the Avaya device you agree that Avaya, from time to time, Class B Part 15 Statement may collect network and device data from your device and may use This equipment has been tested and found to comply with the limits such data in order to validate your eligibility to use the device. -
Page 6: Table Of Contents
Making a call from the local Сontacts list …………32 Making a call from the corporate database Сontacts list ………………..32 Making an international call ……………………32 Emergency call April 2020 Using Avaya J139 IP Phone in an Open SIP environment Comments on this document? infodev@avaya.com…
-
Page 7
………………52 Autodialing a pre-assigned number ………………….52 BroadWorks Anywhere …………..53 Enabling and disabling BroadWorks Anywhere …………..53 Configuring BroadWorks Anywhere locations April 2020 Using Avaya J139 IP Phone in an Open SIP environment Comments on this document? infodev@avaya.com… -
Page 8
…………………….. 77 Call Waiting …………..77 Enabling and disabling the Call Waiting feature ……………………. 78 Distinctive Ringing ……………….. 78 Setting a distinctive ring tone April 2020 Using Avaya J139 IP Phone in an Open SIP environment Comments on this document? infodev@avaya.com… -
Page 9
Turning call history on and off …………..99 Redirecting calls when Do Not Disturb is active ………………………. 99 Audio …………….99 Turning automatic gain control on or off April 2020 Using Avaya J139 IP Phone in an Open SIP environment Comments on this document? infodev@avaya.com… -
Page 10
…………114 Finding documents on the Avaya Support website …………….. 114 Avaya Documentation Center navigation ………………..116 Viewing Avaya Mentor videos ……………………..116 Support April 2020 Using Avaya J139 IP Phone in an Open SIP environment Comments on this document? infodev@avaya.com… -
Page 11: Chapter 1: Introduction
Chapter 1: Introduction Purpose This document describes how to use Avaya J139 IP Phone features in an Open SIP environment. This document is intended for people who want to learn how to use Avaya J139 IP Phone features and capabilities. April 2020 Using Avaya J139 IP Phone in an Open SIP environment Comments on this document? infodev@avaya.com…
-
Page 12: Chapter 2: Avaya J139 Phones Overview
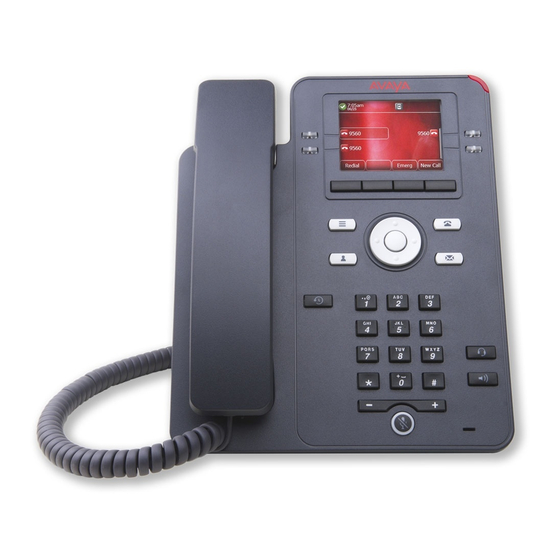
Chapter 2: Avaya J139 phones overview Phone overview Avaya J139 IP Phone is a phone for business communications. Avaya J139 IP Phone has a color display. Physical specifications • Four call appearances • 320 x 240 pixels graphical LCD • Four soft keys •…
-
Page 13: Physical Layout Of A J139 Ip Phone
Phone overview Physical layout of a J139 IP Phone April 2020 Using Avaya J139 IP Phone in an Open SIP environment Comments on this document? infodev@avaya.com…
-
Page 14
Used to mute and unmute the outgoing audio. Handset Used to receive and make calls Application keys provide direct access to the corresponding applications: April 2020 Using Avaya J139 IP Phone in an Open SIP environment Comments on this document? infodev@avaya.com… -
Page 15: Connection Jacks For J139 Ip Phone
Displays call history list. Connection jacks for J139 IP Phone The following image illustrates the connection jacks that are present on the back panel of Avaya J139 IP Phone. The image schematically describes which device to connect to which jack.
-
Page 16
To connect the Ethernet cable. PC port To connect the computer. Headset Jack To connect the headset. Handset Jack To connect the handset. April 2020 Using Avaya J139 IP Phone in an Open SIP environment Comments on this document? infodev@avaya.com… -
Page 17: Optional Components
You can use the following optional components with the phone: • PSAC12R–050 – 5V DC Power adapter • GSPPoE — Avaya 48V PoE power inserter Supported features The following table shows the features supported in Avaya J139 IP Phone: Features Supported Call Transfer…
-
Page 18
Avaya J139 phones overview Features Supported Presence Call Priority Redial from list Shared Control Speed Dial Team Button Whisper Page April 2020 Using Avaya J139 IP Phone in an Open SIP environment Comments on this document? infodev@avaya.com… -
Page 19: Chapter 3: Getting Started
• Config: To enter the file server address. • Never: To never prompt for the file server address. • Cancel: To cancel the prompt and display the Login screen. April 2020 Using Avaya J139 IP Phone in an Open SIP environment Comments on this document? infodev@avaya.com…
-
Page 20: Identifying The Device Type During Phone Boot-Up
Identifying the device type during phone boot-up About this task Avaya J100 Series IP Phones screen displays the device type during the phone boot-up. This feature is supported only in the phone software version 4.0.3 and later. Procedure 1. Set up the phone hardware.
-
Page 21: Logging Out Of Your Phone
To unlock the phone, press Unlock and enter the PIN or password. April 2020 Using Avaya J139 IP Phone in an Open SIP environment Comments on this document? infodev@avaya.com…
-
Page 22: Chapter 4: Navigation
The directional keys are context-sensitive. Up Arrow and Down Arrow Use these keys to scroll vertically in lists, menus, and pop- up windows. Table continues… April 2020 Using Avaya J139 IP Phone in an Open SIP environment Comments on this document? infodev@avaya.com…
-
Page 23: Text Input
• Displays the new character on the left side of the current character. • Deletes the character on the right side of the cursor when you press Backspac. April 2020 Using Avaya J139 IP Phone in an Open SIP environment Comments on this document? infodev@avaya.com…
-
Page 24: Line Keys
For example, when you press a line key in Contacts, the interface initiates a call to the contact because the first soft key represents the Call key. Main menu The following table lists the Main menu icons used in Avaya J139 IP Phone: Icons Name…
-
Page 25: General Phone Icons
General phone icons General phone icons The following table lists the icons used in Avaya J139 IP Phone: Icon Description Microphone is muted. Missed call on your phone. Incoming call; indicates you have answered this call. Outgoing call; indicates you have made this call.
-
Page 26: Viewing The Product Id
Viewing the Device type About this task View your device type when your system administrator asks you to provide your device type information. The device type can be either Avaya SIP or Open SIP. Procedure 1. Press Main menu. 2. Scroll to Network information, and press Select.
-
Page 27
1. Press Main menu. 2. Scroll to Network information, and press Select. 3. Scroll to System, and press Select. 4. Scroll to Server type. April 2020 Using Avaya J139 IP Phone in an Open SIP environment Comments on this document? infodev@avaya.com… -
Page 28: Chapter 5: Handling Incoming Calls
Press one of the following: • The Answer soft key • OK The phone puts the first call on hold and moves to the second call. April 2020 Using Avaya J139 IP Phone in an Open SIP environment Comments on this document? infodev@avaya.com…
-
Page 29: Ignoring A Call
The call is declined. Depending on your Call decline policy, the caller receives one of the following alert: • An audio message alert • A busy tone alert April 2020 Using Avaya J139 IP Phone in an Open SIP environment Comments on this document? infodev@avaya.com…
-
Page 30: Chapter 6: Handling Outgoing Calls
• Press Speaker. • Press Headset. 2. Dial the number. Redialing a number About this task You can redial the most recently dialed number. April 2020 Using Avaya J139 IP Phone in an Open SIP environment Comments on this document? infodev@avaya.com…
-
Page 31: Making A Call By Using Speed Dial
3. (Optional) Press the digits on the dial pad that correspond to the letters of the name of the person you want to call. For example, press 76484 to search for someone whose name is Smith. 4. Press Call. April 2020 Using Avaya J139 IP Phone in an Open SIP environment Comments on this document? infodev@avaya.com…
-
Page 32: Making A Call From The Corporate Database Сontacts List
• Phone screen • Lock screen If your system administrator configures emergency calling for your phone, the Phone screen displays the Emerg soft key. April 2020 Using Avaya J139 IP Phone in an Open SIP environment Comments on this document? infodev@avaya.com…
-
Page 33: Making An Emergency Call
• On the Phone screen, press the Emerg soft key, and again press Emerg when the phone prompts you for confirmation. • Dial the emergency number by using the dial pad. April 2020 Using Avaya J139 IP Phone in an Open SIP environment Comments on this document? infodev@avaya.com…
-
Page 34: Chapter 7: Call Related Features
1. To put an active call on hold, press the Hold soft key. 2. To resume the held call, press the Resume soft key, or press the line key of the held call. April 2020 Using Avaya J139 IP Phone in an Open SIP environment Comments on this document? infodev@avaya.com…
-
Page 35: Chapter 8: Contacts
• To enter a symbol, press More > Symbol. Use the navigation arrows to highlight the symbol that you want to enter, and press Insert. • To delete the last character, press the Backspac softkey. April 2020 Using Avaya J139 IP Phone in an Open SIP environment Comments on this document? infodev@avaya.com…
-
Page 36: Adding A Contact From The Recents List
5. Scroll to the field to edit. 6. Use the dial pad and soft keys to change the contact information. 7. Press Save. April 2020 Using Avaya J139 IP Phone in an Open SIP environment Comments on this document? infodev@avaya.com…
-
Page 37: Doing A Quick Search For A Contact
• To call a contact, press Call. • To edit a contact, press Edit. • To delete a contact, press Delete. • To view more options, press More. April 2020 Using Avaya J139 IP Phone in an Open SIP environment Comments on this document? infodev@avaya.com…
-
Page 38: Searching For A Contact
Ensure the Contacts list is not empty. Procedure 1. Press Contacts. 2. (Optional) To navigate through Main menu, do the following: a. Scroll to Applications, and press Select. April 2020 Using Avaya J139 IP Phone in an Open SIP environment Comments on this document? infodev@avaya.com…
-
Page 39: Deleting A Contact
3. Press More. 4. Press Groups. 5. Press NewGroup. 6. In the Enter group name field, type your group name. 7. Press Save. April 2020 Using Avaya J139 IP Phone in an Open SIP environment Comments on this document? infodev@avaya.com…
-
Page 40: Adding A Contact To The Local Group
The phone displays the list of contacts in the group. 6. Select a contact, and press Remove. The contact will be removed from your Contacts list. April 2020 Using Avaya J139 IP Phone in an Open SIP environment Comments on this document? infodev@avaya.com…
-
Page 41: Assigning A Ringtone To A Contact
You can combine any found LDAP contact with an existing local contact with the help of the Combine soft key. In 3PCC environment, this feature is not available for CCMS mode. April 2020 Using Avaya J139 IP Phone in an Open SIP environment Comments on this document? infodev@avaya.com…
-
Page 42: Setting Ldap Directory As The Contact Search Source
Procedure 1. Press Contacts. 2. (Optional) To navigate through Main Menulist, do one of the following: • Scroll to Applications, and press Select. April 2020 Using Avaya J139 IP Phone in an Open SIP environment Comments on this document? infodev@avaya.com…
-
Page 43
8. (Optional) Press Combine from the Details view to select an existing local contact and merge it with the selected LDAP contact. April 2020 Using Avaya J139 IP Phone in an Open SIP environment Comments on this document? infodev@avaya.com… -
Page 44: Chapter 9: Recents
• Call time-stamp • Call duration Avaya J100 Series IP Phones software version 4.0.3 and later always encrypts the content of the call log file. If you downgrade the software of your phone to a version earlier than 4.0.3, you will lose the call log details.
-
Page 45: Deleting A Call Record From Recents
• Delete: To delete the entry. The phone deletes the number from the call history list. • Cancel: To cancel and return to the previous menu. April 2020 Using Avaya J139 IP Phone in an Open SIP environment Comments on this document? infodev@avaya.com…
-
Page 46: Clearing The Recents List
4. Select one of the following when the phone prompts for confirmation: • Delete: To delete all entries. • Cancel: To cancel and return to the previous menu. April 2020 Using Avaya J139 IP Phone in an Open SIP environment Comments on this document? infodev@avaya.com…
-
Page 47: Chapter 10: Conference Calls
3. Press Held call soft key to see a list of held calls. 4. Select the call on hold that you want to add to the conference. 5. Press one of the following: • Join April 2020 Using Avaya J139 IP Phone in an Open SIP environment Comments on this document? infodev@avaya.com…
-
Page 48: Putting A Conference Call On Hold And Resuming A Call
1. Press Hold soft key during a conference call. 2. Do one of the following: • Press Resume. • Select the call appearance to resume the conference call. April 2020 Using Avaya J139 IP Phone in an Open SIP environment Comments on this document? infodev@avaya.com…
-
Page 49: Chapter 11: Advanced Features
Additionally, you can configure a ring reminder to get a short ring burst when the incoming call is sent to the voice mail. April 2020 Using Avaya J139 IP Phone in an Open SIP environment Comments on this document? infodev@avaya.com…
-
Page 50: Activating The Ring Reminder
4. For the Ring reminder setting, press Toggle to activate the ring reminder. 5. Press Save. DND icons The following table displays the DND icons for the Avaya J100 Series IP Phones. April 2020 Using Avaya J139 IP Phone in an Open SIP environment…
-
Page 51: Activating The Screen Saver
If you are using the soft client for the remote call initiation, ensure that you do not have any active Call Forward—Always and DND local features of the phone. However, you can use BroadWorksCall Forward and DND features. April 2020 Using Avaya J139 IP Phone in an Open SIP environment Comments on this document? infodev@avaya.com…
-
Page 52: Anonymous Call Block
• Make calls from phones using your BroadWorks business phone number as the Calling Line • Move calls across phones. • Specify phones on which you can attend calls. April 2020 Using Avaya J139 IP Phone in an Open SIP environment Comments on this document? infodev@avaya.com…
-
Page 53: Enabling And Disabling Broadworks Anywhere
1. Press the Main menu. 2. Scroll to Settings, and press Select. 3. Scroll to Features, and press Select. 4. Scroll to BroadWorks Anywhere. April 2020 Using Avaya J139 IP Phone in an Open SIP environment Comments on this document? infodev@avaya.com…
-
Page 54: Changing Location Details
• Use diversion inhibitor: Press Toggle to enable or disable this field. • Answer confirmation required: Press Toggle to enable or disable this field. 8. Press Save. April 2020 Using Avaya J139 IP Phone in an Open SIP environment Comments on this document? infodev@avaya.com…
-
Page 55: Deleting Locations
• Include group paging: To set the alerting of the location for the group paging calls. 7. Press Save. Alerting is set to the location. April 2020 Using Avaya J139 IP Phone in an Open SIP environment Comments on this document? infodev@avaya.com…
-
Page 56: Broadworks Mobility
Use this procedure to configure the mobile device you want to use in conjunction with your office phone. Before you begin Ensure your administrator has enabled the BroadWorks Mobility feature for your extension. April 2020 Using Avaya J139 IP Phone in an Open SIP environment Comments on this document? infodev@avaya.com…
-
Page 57
Include shared call appearance Specifies that all SCA devices are alerted. Ensure to set Device to ring to either Fixed or Both. Table continues… April 2020 Using Avaya J139 IP Phone in an Open SIP environment Comments on this document? infodev@avaya.com… -
Page 58: Editing Mobile Identity Alerting
• BroadWorks call control • Use diversion inhibitor • Answer confirmation required • Device to ring • Include shared call appearance • Include BroadWorks Anywhere April 2020 Using Avaya J139 IP Phone in an Open SIP environment Comments on this document? infodev@avaya.com…
-
Page 59
Include shared call appearance Specifies that all SCA devices are alerted. Ensure to set Device to ring to either Fixed or Both. Table continues… April 2020 Using Avaya J139 IP Phone in an Open SIP environment Comments on this document? infodev@avaya.com… -
Page 60: Broadworks Anywhere And Mobility Icons
Ensure to set Device to ring to either Fixed or Both. Mobile identities alerted Specifies the list of mobile identities that are alerted. BroadWorks Anywhere and Mobility icons The following table displays the BroadWorks Anywhere Mobility icons for the Avaya J139 IP Phone. State Phone icons BroadWorks Anywhere…
-
Page 61: Blf Icons And Visual Led Indication
First soft key is the key on the bottom left corner of the phone screen. BLF icons and visual LED indication The following table displays the BLF state icons and LED indicators for the Avaya J100 Series IP Phones. State…
-
Page 62: Customizing Blf Incoming Call Indication
• Both: To set the BLF pick up indication to both audible and visual. April 2020 Using Avaya J139 IP Phone in an Open SIP environment Comments on this document? infodev@avaya.com…
-
Page 63: Customizing Blf Parked Call Indication
Ensure your administrator enables customizing the ring tone. Ensure BLF incoming call indication or BLF parked call indication is set to Audible or Both. April 2020 Using Avaya J139 IP Phone in an Open SIP environment Comments on this document? infodev@avaya.com…
-
Page 64: Blf Call Operations
Barging in on an active call About this task Use this procedure to barge in on an active call if the monitored user is busy April 2020 Using Avaya J139 IP Phone in an Open SIP environment Comments on this document? infodev@avaya.com…
-
Page 65: Calendar
Calendar information is updated whenever you log in to your phone, change calendar settings, or access the Calendar. April 2020 Using Avaya J139 IP Phone in an Open SIP environment Comments on this document? infodev@avaya.com…
-
Page 66: Accessing Calendar
• Exchange domain: Enter the domain name, for example, avaya.com. 6. (Optional) To enable or disable Name/Password Prompt, do one of the following: • Toggle: To enable or disable the prompt. April 2020 Using Avaya J139 IP Phone in an Open SIP environment Comments on this document? infodev@avaya.com…
-
Page 67: Reviewing Your Calendar Event
• Day: To view calendar event of the selected day. Call Forwarding With the Call Forwarding feature, you can divert incoming calls to another number. April 2020 Using Avaya J139 IP Phone in an Open SIP environment Comments on this document? infodev@avaya.com…
-
Page 68: Call Forward Icons
In this case, your phone will redirect that incoming call to the assigned call forwarding number. Call Forward icons The following table displays the Call forward icons for the Avaya J100 Series IP Phones. State Phone and button module icons…
-
Page 69: Forwarding Call When Busy
• Select • OK • The corresponding line key 3. Scroll to the Call forward-NA feature, and press one of the following: • Config April 2020 Using Avaya J139 IP Phone in an Open SIP environment Comments on this document? infodev@avaya.com…
-
Page 70: Call Park
• Group Call Park: To park a call to the first available extension in the group. Call Park icons The following table lists the Call Park feature icons for Avaya J139 IP Phone: The following table lists the Call Park feature icons for J139 phones:…
-
Page 71: Call Park Notifications
4. Scroll to Alerting on calls, and press one of the following: • Select • OK 5. Scroll to Call park, and press one of the following: • Select • OK April 2020 Using Avaya J139 IP Phone in an Open SIP environment Comments on this document? infodev@avaya.com…
-
Page 72: Parking A Call
5. In the Park Call screen, enter the parking extension. Entering hash (#) or leaving the parking extension empty will self-park the call. 6. Press Park. April 2020 Using Avaya J139 IP Phone in an Open SIP environment Comments on this document? infodev@avaya.com…
-
Page 73: Parking A Call To A Call Park Group
1. Press Main menu. 2. Scroll to Features, and press Select. 3. Scroll to Call unpark, and press one of the following: • Unpark April 2020 Using Avaya J139 IP Phone in an Open SIP environment Comments on this document? infodev@avaya.com…
-
Page 74: Dynamic Park And Page
• Dial the extension number of the user or page target group that you want to page, and press Page. • Press Contacts. Select the required user, and press Page. April 2020 Using Avaya J139 IP Phone in an Open SIP environment Comments on this document? infodev@avaya.com…
-
Page 75: Retrieving The Parked Call
To retrieve this call from its current location using the Call Retrieve feature, place the current call on hold and then press Call Retrieve. April 2020 Using Avaya J139 IP Phone in an Open SIP environment Comments on this document? infodev@avaya.com…
-
Page 76: Using Call Retrieve
2. Do one of the following: • Dial the number to transfer the call. • Search for the number in Contacts or Recents. April 2020 Using Avaya J139 IP Phone in an Open SIP environment Comments on this document? infodev@avaya.com…
-
Page 77: Making A Blind Transfer
The phone displays incoming call screen, plays incoming call ringtone, and the beacon LED flashes. Enabling and disabling the Call Waiting feature Procedure 1. Press Main menu. April 2020 Using Avaya J139 IP Phone in an Open SIP environment Comments on this document? infodev@avaya.com…
-
Page 78: Distinctive Ringing
• Alternate number 1: To select the different ringtone for the first alternate number of a contact. The default ringtone is Short Short Long. April 2020 Using Avaya J139 IP Phone in an Open SIP environment Comments on this document? infodev@avaya.com…
-
Page 79: Enabling Auto Answer
Group Paging is a group feature that allows unidirectional paging for a group of users by dialing a group paging directory number (DN) or an extension. The feature can be configured by a group administrator or higher. April 2020 Using Avaya J139 IP Phone in an Open SIP environment Comments on this document? infodev@avaya.com…
-
Page 80: Long-Term Acoustic Exposure Protection
Advanced features Long-term acoustic exposure protection Avaya J100 Series IP Phones have the long-term acoustic exposure protection to prevent the users from getting acoustic shocks. This feature reduces the loud volume of the conversations on the phone call to permissible acoustic limits. The user can set the permissible acoustic limit to dynamic or predefined static values.
-
Page 81: Multicast Paging
• Lift the handset. • Press Speaker. • Press Headset. 2. (Optional) If you use the handset, press End Call to cancel dialing. April 2020 Using Avaya J139 IP Phone in an Open SIP environment Comments on this document? infodev@avaya.com…
-
Page 82: Pre-Configuration Of Keys
• Ensure that the system administrator configures the voicemail for your extension. • Obtain the user ID and password of your voicemail from your system administrator. April 2020 Using Avaya J139 IP Phone in an Open SIP environment Comments on this document? infodev@avaya.com…
-
Page 83: Shared Call Appearance
Incoming calls to any shared extension alert all phones configured with this extension. Note: SCA is available only in Avaya J139 IP Phone, Avaya J169/J179 IP Phone and Avaya J159 IP Phone. To activate the feature, contact your system administrator or go to the BroadSoft web interface yourself to activate the feature.
-
Page 84: Joining A Call In A Shared Line
In-use icon Before you begin Ensure that you are assigned a shared extension. Procedure 1. Scroll to the shared line. 2. Press Barge in. April 2020 Using Avaya J139 IP Phone in an Open SIP environment Comments on this document? infodev@avaya.com…
-
Page 85: Putting A Call On Private Hold And Resuming A Call
Ensure that you are assigned a shared extension. Procedure 1. Press Main menu. 2. Scroll to Settings, and press one of the following: • Select • OK April 2020 Using Avaya J139 IP Phone in an Open SIP environment Comments on this document? infodev@avaya.com…
-
Page 86: Customizing Sca Lines
The label and location of each of these lines can be individually modified using the customization feature. April 2020 Using Avaya J139 IP Phone in an Open SIP environment Comments on this document? infodev@avaya.com…
-
Page 87: Viewing Sca Configuration
Simultaneous ring can be turned off when you are at your desk on a call. April 2020 Using Avaya J139 IP Phone in an Open SIP environment Comments on this document? infodev@avaya.com…
-
Page 88: Accessing Simultaneous Ring Personal From The Phone Menu
Use this procedure to add a number or a SIP-URI address for a simultaneous ring. Important: You can add maximum 10 numbers or SIP-URI addresses. April 2020 Using Avaya J139 IP Phone in an Open SIP environment Comments on this document? infodev@avaya.com…
-
Page 89: Editing Simultaneous Ring Numbers
Use this procedure to delete a number or a SIP-URI address for simultaneous ringing. Procedure 1. On the phone, go to Main menu > Features > Simultaneous ringing > Config. April 2020 Using Avaya J139 IP Phone in an Open SIP environment Comments on this document? infodev@avaya.com…
-
Page 90: Sla Mon
4. In the confirmation window, press Delete. ™ SLA Mon ™ SLA Mon technology is a patented Avaya technology embedded in Avaya products to facilitate ™ advanced diagnostics. The phones support SLA Mon agent which works with Avaya Diagnostic Server (ADS).
-
Page 91
5. Press one of the following to set the duration in hours: • Right arrow key: To increase the value. • Left arrow key: To decrease the value. 6. Press Enter. April 2020 Using Avaya J139 IP Phone in an Open SIP environment Comments on this document? infodev@avaya.com… -
Page 92: Chapter 12: Customization
Use this procedure to display the duration of calls. Procedure 1. Press Main menu. 2. Scroll to Settings, and press Select. 3. Scroll to Phone, and press Select. April 2020 Using Avaya J139 IP Phone in an Open SIP environment Comments on this document? infodev@avaya.com…
-
Page 93: Setting Key Repeat Delay
5. Press Toggle to one of the following: • One number: To see the last dialed number. • List: To see a list of the last eight numbers. April 2020 Using Avaya J139 IP Phone in an Open SIP environment Comments on this document? infodev@avaya.com…
-
Page 94: Setting The Audio Button
6. Press Contacts. The phone displays the Contacts list. 7. Scroll to a suitable contact, and press Select. The phone updates the speed dial entries. April 2020 Using Avaya J139 IP Phone in an Open SIP environment Comments on this document? infodev@avaya.com…
-
Page 95: Setting Mute Alert
• If the speaker is on during an active call and there are new voice mail messages, the beacon LED turns off every 15 seconds. Note: If the call is on hold, the beacon LED stops flashing. April 2020 Using Avaya J139 IP Phone in an Open SIP environment Comments on this document? infodev@avaya.com…
-
Page 96: Customizing Phone Keys
Press Move. b. Use the Navigation keys to move the selected line. c. (Optional) If the new location is empty, press Select. April 2020 Using Avaya J139 IP Phone in an Open SIP environment Comments on this document? infodev@avaya.com…
-
Page 97: Restoring Customized Keys To Default
4. Scroll down to Presence integration, and press Select. 5. Scroll down to Away timer. 6. Press Toggle to turn on the timer. April 2020 Using Avaya J139 IP Phone in an Open SIP environment Comments on this document? infodev@avaya.com…
-
Page 98: Enabling Phone Auto-Lock
• Toggle: To toggle call history on or off. 6. Scroll to Log calls, and press Toggle to toggle call history to on and off. 7. Press Save. April 2020 Using Avaya J139 IP Phone in an Open SIP environment Comments on this document? infodev@avaya.com…
-
Page 99: Redirecting Calls When Do Not Disturb Is Active
5. Select the handset, headset, or speaker for which you want to turn automatic gain control on or off. 6. Press Toggle to turn automatic gain control on or off. 7. Press Save. April 2020 Using Avaya J139 IP Phone in an Open SIP environment Comments on this document? infodev@avaya.com…
-
Page 100: Selecting Audio Path
2. Scroll to Settings, and press Select. 3. Scroll to Audio, and press Select. 4. Use the Down Arrow key to go to the Error tones screen. April 2020 Using Avaya J139 IP Phone in an Open SIP environment Comments on this document? infodev@avaya.com…
-
Page 101: Enabling Wireless Headset Bidirectional Signaling
Note: The amplified audio level will return to normal when the call is ended. April 2020 Using Avaya J139 IP Phone in an Open SIP environment Comments on this document? infodev@avaya.com…
-
Page 102: Setting A Headset Profile
Plantronics: ™ • CS500 Series: CS510, CS520, CS530, CS540 (APV-63) ® • Savi 700 Series: W710, W720, W730, W740, W745 (APV-63) Table continues… April 2020 Using Avaya J139 IP Phone in an Open SIP environment Comments on this document? infodev@avaya.com…
-
Page 103: Setting Headset Mic Level
SC 630/660 (CAVA-31) ™ ™ • VXI: CC Pro 4010V DC, CC Pro 4021V DC (OmniCord-V) Profile 5 Jabra: GN2000 (GN1216) Table continues… April 2020 Using Avaya J139 IP Phone in an Open SIP environment Comments on this document? infodev@avaya.com…
-
Page 104: Setting A Personalized Ringtone
• Call Pickup 6. Press Select. 7. Scroll to the ringtone, and press Select. 8. (Optional) To play the ringtone, press Play. 9. Press Save. April 2020 Using Avaya J139 IP Phone in an Open SIP environment Comments on this document? infodev@avaya.com…
-
Page 105: Display
You can enter any value from 0 to 999. 6. To enable clock on the screen saver, scroll to Clock, and press Toggle. 7. Press Save. April 2020 Using Avaya J139 IP Phone in an Open SIP environment Comments on this document? infodev@avaya.com…
-
Page 106: Setting The Backlight Timer
3. Scroll to Display, and press Select. 4. Scroll to Language, and press Select. 5. Scroll to the language that you want to use, and press Select. April 2020 Using Avaya J139 IP Phone in an Open SIP environment Comments on this document? infodev@avaya.com…
-
Page 107: Adjusting Phone Screen Width
4. Use the Down Arrow key to go to the Date format screen. The phone displays one of the following: • Default • mm/dd April 2020 Using Avaya J139 IP Phone in an Open SIP environment Comments on this document? infodev@avaya.com…
-
Page 108: Setting The Time Format
3. Scroll to Display, and press Select. 4. Scroll to Time zone, and press Select. The phone displays the following: • My time • Time zone April 2020 Using Avaya J139 IP Phone in an Open SIP environment Comments on this document? infodev@avaya.com…
-
Page 109: Setting The Text Size
• Language • Time zone and time format • Date format Backup process is initiated only after retrieval of user-specific data is successful. April 2020 Using Avaya J139 IP Phone in an Open SIP environment Comments on this document? infodev@avaya.com…
-
Page 110
• When Manual Backup is successful: Backup successful • When Manual Restore is not successful: Retrieval failed • When Manual Restore is successful: Retrieval successful April 2020 Using Avaya J139 IP Phone in an Open SIP environment Comments on this document? infodev@avaya.com… -
Page 111: Chapter 13: Troubleshooting
When your phone is back on the original server, normal functionality is restored. Failover and failback are automatic; you have no control over failure mode. April 2020 Using Avaya J139 IP Phone in an Open SIP environment Comments on this document? infodev@avaya.com…
-
Page 112: Viewing The Product Id
1. Press Main menu. 2. Scroll to Network information, and press Select. 3. Scroll to System, and press Select. 4. Scroll to Product ID. April 2020 Using Avaya J139 IP Phone in an Open SIP environment Comments on this document? infodev@avaya.com…
-
Page 113: Viewing The Device Type
Viewing the Device type About this task View your device type when your system administrator asks you to provide your device type information. The device type can be either Avaya SIP or Open SIP. Procedure 1. Press Main menu. 2. Scroll to Network information, and press Select.
-
Page 114: Chapter 14: Resources
7. Click Enter. Avaya Documentation Center navigation Customer documentation for some programs is now available on the Avaya Documentation Center website at https://documentation.avaya.com. April 2020 Using Avaya J139 IP Phone in an Open SIP environment…
-
Page 115
Documentation Important: For documents that are not available at Avaya Documentation Center, click More Sites > Support on the top menu to open https://support.avaya.com. Using the Avaya Documentation Center, you can: • Search for content in one of the following ways: — Type a keyword in Search, and click Filters to search for content by product, release. -
Page 116: Viewing Avaya Mentor Videos
Avaya Mentor videos provide technical content on how to install, configure, and troubleshoot Avaya products. About this task Videos are available on the Avaya Support website, listed under the video document type, and on the Avaya-run channel on YouTube. • To find videos on the Avaya Support website, go to https://support.avaya.com/…
-
Page 117
…………….69 barging in on an active call ……….. call history customizing the ring tone ……….63 viewing …………….44 icons and visual LEDs ……….calling April 2020 Using Avaya J139 IP Phone in an Open SIP environment Comments on this document? infodev@avaya.com… -
Page 118
…………..file server address …………enabling screen saver clock ……..connection jacks …………..language …………..106 contacts setting screen saver time ……….105 April 2020 Using Avaya J139 IP Phone in an Open SIP environment Comments on this document? infodev@avaya.com… -
Page 119
………..99 contacts ……………. parking a call …………..overview …………… field description Line keys …………….24 BroadWorks Mobility ………….57 local contacts Mobile identity alerting ……….59 April 2020 Using Avaya J139 IP Phone in an Open SIP environment Comments on this document? infodev@avaya.com… -
Page 120
……….Ring Splash …………….. phone boot-up …………….. phone lock icons …………….auto-lock …………… screen saver …………..manual lock …………..screen saver details April 2020 Using Avaya J139 IP Phone in an Open SIP environment Comments on this document? infodev@avaya.com… -
Page 121
……………17 text input enter, edit …………..23 time zone display settings …………settings …………… unlockPIN password …………..unparking a call …………..73 user data April 2020 Using Avaya J139 IP Phone in an Open SIP environment Comments on this document? infodev@avaya.com…
-
Page 1
Using Avaya J139 IP Phone SIP Release 4.0 Issue 1 December 2018… -
Page 2
RESERVES THE RIGHT TO TAKE LEGAL ACTION AGAINST YOU the express behalf of Avaya. End User agrees to indemnify and hold AND ANYONE ELSE USING OR SELLING THE SOFTWARE harmless Avaya, Avaya’s agents, servants and employees against all WITHOUT A LICENSE. -
Page 3
MAY BE OBTAINED FROM MPEG LA, L.L.C. SEE HTTP:// written consent of Avaya can be a criminal, as well as a civil offense WWW.MPEGLA.COM. under the applicable law. Compliance with Laws… -
Page 4
• Please only use the connecting cables, power cord, and AC adapters shipped with the equipment or specified by RSS Standards Statement Avaya to be used with the equipment. If you use any This device complies with Industry Canada licence-exempt RSS other equipment, it may cause failures, malfunctioning, standard(s). -
Page 5
Device Usage Consent Class B Part 15 Statement By using the Avaya device you agree that Avaya, from time to This equipment has been tested and found to comply with the limits time,may collect network and device data from your device and may for a Class B digital device, pursuant to Part 15 of the FCC Rules. -
Page 6: Table Of Contents
Contents Chapter 1: Introduction………………….9 ……………………..9 Purpose Chapter 2: Avaya J139 phones overview…………….10 ……………………10 Phone overview ………………….. 11 Physical Layout ………………….13 Connection Jacks ………………….. 15 Optional components ………………….15 Supported features Chapter 3: Getting started…………………. 17 ………………..
-
Page 7
Enabling wireless headset bidirectional signaling …………….. 58 Configuring hearing aid compatibility ………………… 59 Setting headset profile ………………..59 Setting Headset mic level ………………60 Setting a personalized ring tone December 2018 Using Avaya J139 IP Phone SIP Comments on this document? infodev@avaya.com… -
Page 8
Chapter 8: Troubleshooting………………..66 ………………..66 Limited access during failover Chapter 9: Resources………………….68 ……………………68 Documentation …………. 70 Finding documents on the Avaya Support website …………….70 Avaya Documentation Portal navigation ………………..71 Viewing Avaya Mentor videos ……………………..72 Support… -
Page 9: Chapter 1: Introduction
Chapter 1: Introduction Purpose This document is intended for end users and describes how to use the features available on Avaya J139 IP Phone. This document also describes the end user procedures to set up various functionalities. December 2018 Using Avaya J139 IP Phone SIP…
-
Page 10: Chapter 2: Avaya J139 Phones Overview
Chapter 2: Avaya J139 phones overview Phone overview The Avaya J139 IP Phone is intended to be used for business communications. The phone supports four call appearances with four lines of call display. Avaya J139 IP Phone has a color display.
-
Page 11: Physical Layout
Phone overview Physical Layout December 2018 Using Avaya J139 IP Phone SIP Comments on this document? infodev@avaya.com…
-
Page 12
Used to mute and unmute the outgoing audio. Application keys provide direct access to the corresponding applications: Application keys Description Phone key Displays the Phone screen. Table continues… December 2018 Using Avaya J139 IP Phone SIP Comments on this document? infodev@avaya.com… -
Page 13: Connection Jacks
Displays the entries in your Contacts list. Recents Displays call history list. Connection Jacks The following image illustrates the connection jacks that are present on the back panel of Avaya J139 IP Phone. The image schematically describes which device to connect to which jack. December 2018 Using Avaya J139 IP Phone SIP Comments on this document? infodev@avaya.com…
-
Page 14
To connect the power supply. Network port To connect the Ethernet cable. PC port To connect the computer. Headset Jack To connect the headset. Handset Jack To connect the handset. December 2018 Using Avaya J139 IP Phone SIP Comments on this document? infodev@avaya.com… -
Page 15: Optional Components
You can use the following optional components with the phone: • 5V DC Power adapter • GSPPOE — Avaya 48V PoE power inserter Supported features The following table shows the features supported in Avaya J139 IP Phone: Features Supported Attended transfer…
-
Page 16
Avaya J139 phones overview Features Supported Presence Priority calls Redial from list Shared Control Speed dial Team Button Unattended transfer Whisper page December 2018 Using Avaya J139 IP Phone SIP Comments on this document? infodev@avaya.com… -
Page 17: Chapter 3: Getting Started
Qualified Domain Name (FQDN). Tip: To enter the dot symbol (.) in the field, press the alphanumeric softkey to toggle to the alphanumeric mode. 6. Press Save. The phone restarts. December 2018 Using Avaya J139 IP Phone SIP Comments on this document? infodev@avaya.com…
-
Page 18: Logging In To Your Phone
Use this procedure to lock your phone to prevent the use of the phone when you are away. Locking your phone does not log you out, so you can make emergency calls and receive calls. December 2018 Using Avaya J139 IP Phone SIP Comments on this document? infodev@avaya.com…
-
Page 19
Locking and unlocking the phone Procedure • To lock the phone, press Main Menu, and select Applications > Lock. • To unlock the phone, press Unlock and enter the login password. December 2018 Using Avaya J139 IP Phone SIP Comments on this document? infodev@avaya.com… -
Page 20: Chapter 4: Navigation
Chapter 4: Navigation Main Menu The following table lists the Main Menu icons used in Avaya J139 IP Phone: Icons Name Description Features To access administrator activated features. Applications • To access phone applications such as Contacts, Recents, and activate screen saver.
-
Page 21
™ Indicates that the SLA Mon agent has taken control of the phone. ™ Indicates that the call is being recorded for SLA Mon Table continues… December 2018 Using Avaya J139 IP Phone SIP Comments on this document? infodev@avaya.com… -
Page 22: Presence Icons
Icon Description Indicates that the end to end call is secured. Indicates that the ringtone is off. Presence icons The following table lists presence icons for Avaya J139 IP Phone with description: Icon Status Description Available User is available and can communicate.
-
Page 23
Priority. Flash Flash icon for a priority call with a higher precedence value than Immediate. Flash Override Flash override icon for a priority call with highest precedence. December 2018 Using Avaya J139 IP Phone SIP Comments on this document? infodev@avaya.com… -
Page 24: Chapter 5: Call Operations
2. Dial the number. The phone starts a call when the inter digit timer times out. Redialing a number Before you begin Ensure that the call history is not empty. December 2018 Using Avaya J139 IP Phone SIP Comments on this document? infodev@avaya.com…
-
Page 25: Making A Call Using Speed Dial
Use this procedure to make a call from the corporate database Сontacts list. This feature is only ® available in the Avaya Aura environment. Procedure 1. Press Contacts. 2. Press Search. December 2018 Using Avaya J139 IP Phone SIP Comments on this document? infodev@avaya.com…
-
Page 26: Making An International Call
In an IP Office environment, the Emerg softkey is not available. You must dial the emergency number by using the dial pad. December 2018 Using Avaya J139 IP Phone SIP Comments on this document? infodev@avaya.com…
-
Page 27: Handling Incoming Calls
• Press Headset. You cannot answer BLF, Call Park, and SCA calls using the Bluetooth headset. The headset does not play an alert tone for these calls. December 2018 Using Avaya J139 IP Phone SIP Comments on this document? infodev@avaya.com…
-
Page 28: Answering A Call When On Another Call
Headset button on the phone. Call related features Muting and unmuting a call Procedure 1. To mute an active call, press Mute. The Mute button is illuminated. December 2018 Using Avaya J139 IP Phone SIP Comments on this document? infodev@avaya.com…
-
Page 29: Placing A Call On Hold And Resuming The Call
• Enter the remaining letters or numbers. • To enter a symbol, press More > Symbol. Use the navigation arrows to highlight the symbol that you want to enter and press Insert. December 2018 Using Avaya J139 IP Phone SIP Comments on this document? infodev@avaya.com…
-
Page 30
7. Press Save. Viewing 3PCC local contact details About this task You can call, edit, or delete a contact from the Details window. Procedure 1. Press Contacts. December 2018 Using Avaya J139 IP Phone SIP Comments on this document? infodev@avaya.com… -
Page 31
Use this procedure to merge the phone number of the current contact with the existing local contact. Before you begin Ensure the Contacts list is not empty. Procedure 1. Press Contacts. December 2018 Using Avaya J139 IP Phone SIP Comments on this document? infodev@avaya.com… -
Page 32
Contacts, and press Select. 3. Press More. 4. Press Groups. 5. Press New Group. 6. In the Enter group name field, type your group name. 7. Press Save. December 2018 Using Avaya J139 IP Phone SIP Comments on this document? infodev@avaya.com… -
Page 33
5. Scroll to the group, and press Members. The phone displays the list of contacts in the group. 6. Select a contact, and press Remove. The contact will be removed from your Contacts list. December 2018 Using Avaya J139 IP Phone SIP Comments on this document? infodev@avaya.com… -
Page 34: Managing Conference Calls
• Dial the phone number by using the dial pad. • Call the person from the Contacts list or the Recents list. • Redial the last dialed number by using the Redial softkey. December 2018 Using Avaya J139 IP Phone SIP Comments on this document? infodev@avaya.com…
-
Page 35
1. From the Phone screen, select your active conference call. 2. Press Drop when the conference is up. The phone drops the last added person from the conference. Viewing the details for a conference December 2018 Using Avaya J139 IP Phone SIP Comments on this document? infodev@avaya.com… -
Page 36: Managing Call History
About this task You can view following details of each call: • Incoming call icon • Outgoing call icon • Missed call icon • Call type (incoming, outgoing, missed) December 2018 Using Avaya J139 IP Phone SIP Comments on this document? infodev@avaya.com…
-
Page 37
Clearing the Recents list Procedure 1. Press Recents. 2. (Optional) To navigate through Main menu, scroll to the following: a. Applications, and press Select. b. Recents, and press Select. December 2018 Using Avaya J139 IP Phone SIP Comments on this document? infodev@avaya.com… -
Page 38
4. Select one of the following when the phone prompts for confirmation: • Delete: To delete all entries. • Cancel: To cancel and return to the previous menu. December 2018 Using Avaya J139 IP Phone SIP Comments on this document? infodev@avaya.com… -
Page 39: Chapter 6: Advanced Features
™ SLA Mon ™ SLA Mon technology is a patented Avaya technology embedded in Avaya products to facilitate ™ advanced diagnostics. The phones support SLA Mon agent which works with Avaya Diagnostic December 2018 Using Avaya J139 IP Phone SIP…
-
Page 40: Retrieving A Voice Mail
You must use this feature only when your call is unattended by the receiver. Before you begin Ensure that the feature is activated by your administrator. December 2018 Using Avaya J139 IP Phone SIP Comments on this document? infodev@avaya.com…
-
Page 41: Call Parking
Use this procedure to unpark the call from another phone. Before you begin Ensure that you have parked a call on your extension. Procedure 1. Press Main Menu. December 2018 Using Avaya J139 IP Phone SIP Comments on this document? infodev@avaya.com…
-
Page 42: Call Forwarding
• Call Forward-No Answer 4. Press one of the following: • Select • OK 5. In the Destination field, enter the number where you want to forward the incoming calls. December 2018 Using Avaya J139 IP Phone SIP Comments on this document? infodev@avaya.com…
-
Page 43: Call Forwarding To Your Cell Phone Using Ec500
• OK Call forwarding to your cell phone using EC500 About this task Use this procedure to receive an incoming call of your Avaya phone on your personal phone, when you are away from your desk. Before you begin • Ensure that the feature is activated by your administrator.
-
Page 44: Activating Send All Calls
You can override the system (default) setting to display your extension on outgoing calls. Use the Calling Party Number Blocking feature to prevent your number from displaying. Procedure 1. From the Phone screen, access the Features screen. 2. Select CPN Block. December 2018 Using Avaya J139 IP Phone SIP Comments on this document? infodev@avaya.com…
-
Page 45: Displaying Your Extension On Outgoing Calls
Some countries, states, and localities have laws that determine if and under what circumstances you can use Malicious Call Trace . Before using the Malicious Call Trace feature, you must understand and comply with these laws. December 2018 Using Avaya J139 IP Phone SIP Comments on this document? infodev@avaya.com…
-
Page 46: Activating The Screen Saver
Transfer a call by connecting a call with the transfer recipient. Procedure 1. While on an active call, press Transfer. The phone displays the Enter transfer destination screen. December 2018 Using Avaya J139 IP Phone SIP Comments on this document? infodev@avaya.com…
-
Page 47
1. While on an active call, press Transfer. The phone displays the Enter transfer destination screen. 2. Do one of the following: • Dial the number to which you want to transfer the call. December 2018 Using Avaya J139 IP Phone SIP Comments on this document? infodev@avaya.com… -
Page 48: Precedence Call
Ensure that the Dial plan is configured on the Local Session Controller or Enterprise Session Controller with the Feature Access Code (FAC). Procedure 1. Lift the handset or press one of the following: • Speaker December 2018 Using Avaya J139 IP Phone SIP Comments on this document? infodev@avaya.com…
-
Page 49: Presence
2. (Optional) To navigate through Main menu, scroll to the following: a. Applications, and press Select. b. Contacts, and press Select. 3. Scroll to the required contact. The phone displays the corresponding presence icon of the contact. December 2018 Using Avaya J139 IP Phone SIP Comments on this document? infodev@avaya.com…
-
Page 50: Chapter 7: Customization
3. Scroll to Phone, and press Select. 4. Use the Down Arrow key to go to the Display call timers. 5. Press Change to activate or deactivate the call timers. December 2018 Using Avaya J139 IP Phone SIP Comments on this document? infodev@avaya.com…
-
Page 51: Setting Key Repeat Delay
5. Scroll to an unassigned dial entry that you want to use for assigning a contact. 6. Press Contacts. The phone displays the Contacts list. 7. Scroll to a suitable contact, and press Select. The phone updates the speed dial entries. December 2018 Using Avaya J139 IP Phone SIP Comments on this document? infodev@avaya.com…
-
Page 52: Setting Mute Alert
• If the speaker is on during an active call and there are new voice mail messages, the beacon LED turns off every 15 seconds. Note: • If the call is on hold, the beacon LED stops flashing. December 2018 Using Avaya J139 IP Phone SIP Comments on this document? infodev@avaya.com…
-
Page 53: Setting Call Pickup Indication
3. Scroll to Phone, and press Select. 4. Scroll to Call pickup indication. 5. Press Change to select one of the following: • Audible • Visual • Both • None 6. Press Save. December 2018 Using Avaya J139 IP Phone SIP Comments on this document? infodev@avaya.com…
-
Page 54: Applications
When your presence status is set to Do Not Disturb, use this procedure to enable the Send All Calls (SAC) feature to redirect calls. Before you begin Ensure that the Send All Calls feature is activated by your administrator. December 2018 Using Avaya J139 IP Phone SIP Comments on this document? infodev@avaya.com…
-
Page 55: Audio
About this task Use this procedure to select the main audio path for incoming and outgoing calls. Procedure 1. Press Main menu. 2. Scroll to Settings, and press Select. December 2018 Using Avaya J139 IP Phone SIP Comments on this document? infodev@avaya.com…
-
Page 56: Enabling And Disabling Bluetooth
• Ensure your Bluetooth headset is in pairing mode. Procedure 1. Press Main menu. 2. Scroll down to Bluetooth, and press Select. 3. Scroll to Devices, and press Select. December 2018 Using Avaya J139 IP Phone SIP Comments on this document? infodev@avaya.com…
-
Page 57: Turning Button Clicks On And Off
5. Press Change to turn error tones on or off. 6. Press Save. Enabling wireless headset bidirectional signaling Before you begin Check if the headset supports EHS signaling. December 2018 Using Avaya J139 IP Phone SIP Comments on this document? infodev@avaya.com…
-
Page 58: Configuring Hearing Aid Compatibility
Note: The amplified audio level will return to normal when the call is ended. • Hearing Aid: Optimizes the sound quality of hearing aids. 6. Press Save. December 2018 Using Avaya J139 IP Phone SIP Comments on this document? infodev@avaya.com…
-
Page 59: Setting Headset Profile
Use this procedure to adjust the best headset performance. Before you begin • Ensure that you are on a call and the caller’s audio level is at 50%. December 2018 Using Avaya J139 IP Phone SIP Comments on this document? infodev@avaya.com…
-
Page 60: Setting A Personalized Ring Tone
6. Press one of the following: • Select • OK 7. Scroll to the ringtone, and press Select. 8. (Optional) To play the ringtone, press Play. 9. Press Save. December 2018 Using Avaya J139 IP Phone SIP Comments on this document? infodev@avaya.com…
-
Page 61: Display
6. To enable clock on the screen saver, scroll to Clock, and press Change. 7. Press Save. Setting the backlight timer About this task Use this procedure to set the time that elapses before the backlight is turned off. December 2018 Using Avaya J139 IP Phone SIP Comments on this document? infodev@avaya.com…
-
Page 62: Adjusting The Brightness Of A Phone Screen
5. Scroll to the language that you want to use, and press Select. 6. Press one of the following when the phone prompts for confirmation: • Confirm December 2018 Using Avaya J139 IP Phone SIP Comments on this document? infodev@avaya.com…
-
Page 63: Adjusting Phone Screen Width
The phone displays one of the following: • Default • mm/dd • dd/mm • mm.dd • dd.mm • mm-dd • dd-mm • mmm dd 5. Press Change to select one of the options. December 2018 Using Avaya J139 IP Phone SIP Comments on this document? infodev@avaya.com…
-
Page 64: Setting The Time Format
6. Select Time zone to change the current time zone, and do one of the following: • Use the Left Arrow and Right Arrow key. • Press — or + softkey. 7. Press Save. December 2018 Using Avaya J139 IP Phone SIP Comments on this document? infodev@avaya.com…
-
Page 65: Setting The Text Size
2. Scroll to Network information, and press Select. 3. Scroll to Audio parameters, and press Select. 4. Press Record softkey. 5. To stop the recording, press Stop softkey. December 2018 Using Avaya J139 IP Phone SIP Comments on this document? infodev@avaya.com…
-
Page 66: Chapter 8: Troubleshooting
Incoming calls may not reach you; such calls may go to voice mail. • Emergency calls may or may not work, depending on the stage of failover and the functionality available on the alternate server. December 2018 Using Avaya J139 IP Phone SIP Comments on this document? infodev@avaya.com…
-
Page 67
• The Message Waiting Indicator is cleared, but voice mail may still be available if the voice mail server to which calls are being sent is not in failover. • Transitions back to the normal server will restore all original functionality. December 2018 Using Avaya J139 IP Phone SIP Comments on this document? infodev@avaya.com… -
Page 68: Chapter 9: Resources
Chapter 9: Resources Documentation See the following related documents at http://support.avaya.com. Title Use this document to: Audience Overview ® Avaya Aura Session Manager See characteristics and capabilities, For people who want Overview and Specification including feature descriptions, to gain a high-level…
-
Page 69
System Status Application. maintain System Status Application. ™ Using Avaya IP Office Platform See information about the maintenance For people who System Monitor tasks for SysMonitor. maintain SysMonitor. December 2018 Using Avaya J139 IP Phone SIP Comments on this document? infodev@avaya.com… -
Page 70: Finding Documents On The Avaya Support Website
Customer documentation for some programs is now available on the Avaya Documentation Portal at https://documentation.avaya.com/. Important: For documents that are not available on the Avaya Documentation Portal, click Support on the top menu to open https://support.avaya.com/. Using the Avaya Documentation Portal, you can: •…
-
Page 71: Viewing Avaya Mentor Videos
Avaya Mentor videos provide technical content on how to install, configure, and troubleshoot Avaya products. About this task Videos are available on the Avaya Support website, listed under the video document type, and on the Avaya-run channel on YouTube. Procedure •…
-
Page 72: Support
Note: Videos are not available for all products. Support Go to the Avaya Support website at https://support.avaya.com for the most up-to-date documentation, product notices, and knowledge articles. You can also search for release notes, downloads, and resolutions to issues. Use the online service request system to create a service request.
-
Page 73
…………….29 call forward busy …………42 adding a contact from the Recents list ……call forward no answer ……….42 adding contacts to a group ……….. call history December 2018 Using Avaya J139 IP Phone SIP Comments on this document? infodev@avaya.com… -
Page 74
……… putting a conference call on hold ……..35 editing contacts ……………. local contact details …………emergency calling icons dial pad …………….. December 2018 Using Avaya J139 IP Phone SIP Comments on this document? infodev@avaya.com… -
Page 75
…………..55 phone settings call pickup indication ……….call history …………..54 phone screen width ……….call timers …………..speed dial entries ……….dialing mode …………..time format …………..64 December 2018 Using Avaya J139 IP Phone SIP Comments on this document? infodev@avaya.com… -
Page 76
…………. settings …………….. tracing calls …………….45 unattended call transfer …………URI dialing, making a call ………… videos ……………… visual alerting ……………53 watch list …………….December 2018 Using Avaya J139 IP Phone SIP Comments on this document? infodev@avaya.com…
Характеристики
-
Свойства IP-телефонов
-
100 Мбит/с, Fast Ethernet, 1 Гбит/с, Gigabit Ethernet
-
2 порта Ethernet, Поддержка PoE
-
Программируемые BLF клавиши
Описание
Avaya J139 — это недорогой IP-телефон с широкими функциональными возможностями. Отличительной особенностью данного устройства является настройка посредством web-интерфейса и поддержка технологии PoE. Avaya J139 работает по протоколу SIP с поддержкой различных кодеков на выбор пользователя. Доступна интеграция с другими решениями компании Avaya.
IP-телефон Avaya J139 оснащен цветным LCD-дисплеем 2.8″, 320×240, четырьмя кнопками для программирования устройства. В наличии также кнопки с подсветкой для пропущенных вызовов, динамика и гарнитуры. Дополнительно доступны индикаторы оповещений о вызовах и сообщениях. В устройство интегрированы два порта Ethernet 10/100/1000 Мбит/с. Блок питания в комплект не входит.
Характеристики телефона Avaya J139
- 2,8 «цветной дисплей (320 х 240).
- 12 программируемых слотов для кнопок вызова и функциональных кнопок.
- Слоты для кнопок могут быть расположены либо на 3 страницах по 4 (режим с двумя столбцами), либо на 6 страницах по 2 (в режиме с одним столбцом). Дисплей с одной или двумя колонками.
- 4 двойных светодиодных (красная и зеленая) физических кнопки используются для индикации состояния программируемых слотов кнопок, которые в данный момент отображаются на дисплее.
- 4 дополнительные кнопки под дисплеем, используемые для контекстно-зависимых программируемых клавиш, как указано надписями на дисплее над ними.
- Подсветка кнопок для пропущенных вызовов, динамика, гарнитуры и отключения звука.
- Неосвещенные кнопки для доступа к сообщениям, контактам, журналу вызовов и меню конфигурации телефона.
- Сигнал вызова, индикатор ожидающего сообщения.
- Два порта Ethernet 10/100/1000 Мбит / с.
- Телефон оснащен двухпозиционной настольной подставкой.
- Телефоны серии J100 поддерживают следующие аудиокодеки: G.711, G.726a, G.729, G.729a, G.729ab, G.722. Телефон также поддерживает OPUS, но этот кодек не поддерживается в системах IP Office.
- Питание PoE.
NORTHLAND COMMUNICATIONS Настольный телефон Avaya IP Office J139

ТЕЛЕФОННЫЕ КЛАВИШИ И ФУНКЦИИ
- СООБЩЕНИЕ LAMP ИНДИКАТОР ЗВОНКА: ВКЛ: указывает на новые сообщения в вашем ящике голосовой почты, мигание указывает на поступивший вызов.
- ДИСПЛЕЙ: Отображает информацию о вызове, сведения о функциях системы и клавиши логических линий.
- ВЫЗОВ ИЛИ ФУНКЦИОНАЛЬНЫЕ КЛАВИШИ (12): Нажимайте клавиши со стрелками влево/вправо для просмотра дополнительных экранов.
Эти клавиши имеют четыре роли
- КЛАВИШИ ВЫЗОВА: Позволяет обрабатывать несколько вызовов. Используется для совершения или приема внутренних и внешних вызовов.
- ФУНКЦИОНАЛЬНЫЕ КЛЮЧИ: Доступ к функциям и меню осуществляется нажатием этих клавиш.
- ПОИСК ГРУППОВЫХ КЛЮЧЕЙ: Звонки и/или мигание для «групповых» вызовов, т.е.: Ведомственные или основные номера.
- КЛЮЧИ ПОЛЬЗОВАТЕЛЯ: Отображение внешнего вида добавочных номеров других пользователей и индикация состояния. Медленное мигание указывает на поступивший вызов. Быстрое мигание указывает на вызов. Непрерывный красный свет указывает на DND.
СОСТОЯНИЕ БЕЗОПАСНОСТИ: Когда ваш телефон находится в режиме ожидания, появляются следующие программные клавиши.
- ПОВТОРНЫЙ НАБОР: Отображает список исходящих номеров из журнала вызовов, что позволяет набирать номер из этого списка.
- ФУНКЦИИ: отображает прокручиваемый список доступных функций и пользовательских настроек.
СОСТОЯНИЕ ЗВОНКА: Когда ваш телефон звонит, появляются следующие программные клавиши.
- ОТВЕТ: Отвечает на входящие вызовы по громкой связи или переводит пейджинговый вызов в двусторонний разговор.
- К ВМ: Отправляет сигнал вызова на вашу голосовую почту.
- ИГНОРИРОВАТЬ: Отключение звонка для текущего звонка. Вызов будет продолжать мигать до тех пор, пока ответ не будет переведен на голосовую почту.
- УРОНИТЬ: Когда ваш телефон звонит, DROP отправит звонящего прямо на голосовую почту.
ВЫПОЛНЕНИЕ ВЫЗОВА С ДОТС.
- ПЕРЕЗВОНИ: Установите автоматический обратный вызов для набора пользователей, которому вы звонили. Когда они в следующий раз завершат вызов, телефонная система позвонит вам, а когда вы ответите, автоматически позвонит пользователю.
- DROP: Когда вы набираете номер, DROP отключит вас.
ПОДКЛЮЧЕН К ВЫЗОВУ: Когда вы подключены к вызову, появляются следующие программные клавиши.
- ДЕРЖАТЬ: Ставит вызов на монопольное удержание на вашем телефоне.
- КОНФЕРЕНЦИЯ: Ставит ваш текущий вызов на удержание и подает тональный сигнал, чтобы добавить другого участника к конференции.
- ПЕРЕДАЧА: Ставит ваш текущий вызов на удержание и подает тональный сигнал, чтобы вы могли перевести вызов на другой добавочный номер.
- УРОНИТЬ: Когда вы подключены к вызову, DROP отключит вас.
ПРИМЕЧАНИЕ: по мере завершения процесса ПЕРЕДАЧИ и КОНФЕРЕНЦИИ появляются дополнительные функциональные клавиши, а также когда вы находитесь в меню и списках на дисплее.
- 6 ТЕЛЕФОННАЯ КЛЮЧ: Используется для выхода из любого меню или возврата к экрану телефона.
- 8 ГЛАВНОЕ МЕНЮ: Доступ к списку параметров и настроек для настройки телефона.
- 9 КОНТАКТЫ: Доступ к личным и общим каталогам.
- 10 ПОСЛЕДНИХ (ЖУРНАЛ ЗВОНКОВ/ИСТОРИЯ): отображает список последних отвеченных, пропущенных и исходящих вызовов. Загорается при наличии новых пропущенных вызовов.
Если у вас есть новые пропущенные вызовы, количество пропущенных вызовов появится в верхней части экрана. - 11 СООБЩЕНИЕ: Доступ к системе голосовой почты, загорается, когда у вас есть новые сообщения.
- 12 ГАРНИТУРА: Переключение вызовов с трубки на гарнитуру. Клавиша подсвечивается, когда гарнитура активна.
- 13 ДОКЛАДЧИК: Используется для совершения или ответа на любой вызов, не снимая телефонной трубки. горит, когда динамик активен.
- 14 ОБЪЕМ: Управляет уровнем громкости звонка, динамика и входящего голоса через телефонную трубку/гарнитуру.
- 15 ОТКЛЮЧИТЬ: Включает или выключает микрофон, когда вы разговариваете по телефону. лamp горит во время использования, вызывающий абонент вас не слышит.
ОБРАБОТКА ЗВОНКОВ
ОТВЕТ И РАЗМЕЩЕНИЕ ЗВОНКОВ
ДЛЯ ОТВЕТА НА ВХОДЯЩИЙ ВЫЗОВ: Телефон звонит – индикатор медленно мигает. Поднимите трубку или нажмите кнопку SPEAKER или нажмите программную кнопку ANSWER.
ПРИМЕЧАНИЕ: Чтобы отключить звонящий вызов, нажмите функциональную клавишу IGNORE. Для отправки звонка на голосовую почту нажмите функциональную клавишу TOVM. ЧТОБЫ ОТВЕТИТЬ НА ВТОРОЙ ВЫЗОВ: Нажмите клавишу появления нового вызова, первый вызов автоматически удерживается. ЧТОБЫ СДЕЛАТЬ ЗВОНОК: Поднимите трубку или нажмите кнопку SPEAKER.
- Внутренние задачи: Введите номер РАСШИРЕНИЯ.
- Внешние факторы: Введите префикс набора номера (обычно 8 или 9), 1 код города и номер.
ОРАТОР: Нажмите, чтобы сделать или ответить на любой вызов, не поднимая трубку.
ДЛЯ ПЕРЕКЛЮЧЕНИЯ НА ДИНАМИК С ГАРНИТУРЫ/ТРУБКИ: Нажмите клавишу SPEAKER. Замените трубку в подставке. ДЛЯ ВОССТАНОВЛЕНИЯ КОНФИДЕНЦИАЛЬНОСТИ: Поднимите трубку или нажмите кнопку HEADSET. ЧТОБЫ ЗАВЕРШИТЬ ЗВОНОК ПО СПИКЕРФОНУ: Нажмите кнопку SPEAKER или программную кнопку DROP.
НЕМОЙ: Отключает микрофон (динамик, телефонную трубку и гарнитуру), чтобы вы могли говорить конфиденциально. Звонящий не может слышать офисный шум/разговор.
ДЛЯ ВОЗОБНОВЛЕНИЯ РАЗГОВОРА: Нажмите клавишу MUTE еще раз. HOLD: Ставит активный вызов на удержание. Это эксклюзивное удержание вашего телефона. Никто другой не может его восстановить.
ЧТОБЫ УДЕРЖАТЬ ВЫЗОВ: Нажмите функциональную клавишу HOLD. Индикатор лamp мигает быстро. ЧТОБЫ ВОЗВРАТИТЬСЯ К ВЫЗЫВАЮЩЕМУ: Нажмите мигающую клавишу вызова. АВТОМАТИЧЕСКОЕ УДЕРЖАНИЕ: Когда вы выбираете другую клавишу представления вызова или используете определенные функции, линия, по которой вы уже говорите, будет автоматически удерживаться без нажатия клавиши УДЕРЖАНИЕ.
ПЕРЕДАЧА: Позволяет вам соединить ваш звонок с кем-то еще (с вызовом на линии)
ПРИМЕЧАНИЕ: Если вы не знаете добавочный номер, после нажатия TRANSFER вы можете выполнить поиск в телефонной книге. ПЕРЕВОД НА ГОЛОСОВУЮ ПОЧТУ: перенаправляет вызывающего абонента непосредственно на голосовую почту, не звоня по телефону.
- Нажмите функциональную кнопку TRANSFER, вызов автоматически удерживается.
- Введите знак # и добавочный номер.
- Немедленно нажмите функциональную клавишу OMPLETE.
СПЕЦИАЛЬНАЯ КОНФЕРЕНЦИЯ: позволяет добавить несколько участников к вызову (с вызовом на линии)
Нажмите программную кнопку КОНФЕРЕНЦИЯ, первый вызов будет автоматически удержан, вы услышите гудок. Введите второй номер (внутренний или внешний).
ВАЖНО: Дождитесь ответа и объявите конференцию.
Нажмите функциональную клавишу ONFERENCE еще раз. Все стороны связаны.
- Чтобы добавить дополнительных участников, повторите описанную выше процедуру.
- Чтобы выйти из конференции, повесьте трубку.
- Чтобы исключить другого участника из конференции:
- Нажмите программную кнопку ДЕТАЛИ, на дисплее отобразится информация об участнике.
- Нажимайте клавиши со стрелками вверх/вниз для прокрутки списка участников.
- Нажмите программную кнопку DROP, чтобы удалить нужного участника.
- Чтобы отключить звук другого участника, нажмите программную кнопку MUTE.
- Чтобы отключить свой звук, нажмите фиксированную кнопку MUTE.
ЕСЛИ ВЫЗЫВАЕМАЯ СТОРОНА НЕ ОТВЕЧАЕТ/ЗАНЯТА: Чтобы вернуться к исходному вызову, нажмите программную кнопку ОТМЕНА или кнопку ВЫЗОВ на удерживаемой линии (быстрая зеленая вспышка).
ПРИМЕЧАНИЕ: Количество внешних абонентов, которых вы можете подключить к этому типу конференции, зависит от типа услуги, предоставляемой вашим поставщиком гудков. Обратитесь к системному администратору.
ДОПОЛНИТЕЛЬНЫЕ ВОЗМОЖНОСТИ
ПРИМЕЧАНИЕ: Вам может потребоваться прокрутить, нажимая клавиши со стрелками вправо и влево, чтобы увидеть дополнительные функции. ПАРКОВКА ВЫЗОВА: позволяет поставить вызов на удержание в системе и назначить его слоту парковки вызова. Вызов можно принять с любого телефона в системе, нажав соответствующую клавишу слота парковки вызова.
- ПАРКОВАТЬСЯ: Когда вызывающий абонент находится на линии, нажмите доступную клавишу CALL PARK, клавиша загорится зеленым цветом на вашем телефоне и красным на остальных. Сообщите человеку номер слота парковки вызова.
- ПОЛУЧИТЬ: Поднимите трубку или нажмите кнопку SPEAKER Нажмите соответствующую кнопку CALL PARK. Отображается идентификатор вызывающего абонента удерживаемого вызова. Pr Cess функциональная клавиша ONNECT. Вы подключены к вызову, начните говорить.
ЗАМЕТКИ: Если запаркованный вызов не будет получен в течение заданного количества секунд, вызов будет «обратно звонить» на телефон, с которого он был запаркован.
ПЕЙДЖИНГ: Доступ к телефону или потолочным динамикам для объявления.
ИСПОЛЬЗОВАТЬ: Поднимите трубку Pr PAess GE Key или *631 и дождитесь сигнала. Сделать объявление. Нажмите клавишу DROP, повесьте трубку.
ПРИМЕЧАНИЕ: Когда активны определенные функции, такие как «Не беспокоить» и «Переадресация вызова», слышен «заикающийся» сигнал набора номера, когда вы поднимаете трубку или нажимаете кнопку громкой связи. Это не влияет на исходящий вызов, это просто еще один признак того, что функция активирована. ПОВТОРНЫЙ НАБОР: отображение последних 10 набранных номеров или повторный набор последнего набранного номера.
ИСПОЛЬЗОВАТЬ: Нажмите функциональную клавишу ПОВТОРНЫЙ НАБОР. На дисплее отображаются последние 10 набранных номеров. Используйте клавиши со стрелками ВВЕРХ/ВНИЗ, чтобы выделить номер, который вы хотите набрать повторно. Pr Cess ALL Softkey.
ПОЛЬЗОВАТЕЛЬСКОЕ ПРОГРАММИРОВАНИЕ
ПЕРЕАДРЕСАЦИЯ: программирует ваш телефон так, чтобы он звонил на другой внутренний номер.
- ПРОГРАММИРОВАТЬ: Нажмите клавишу CALL FWD. Введите EXTENSION Номер телефона, на который вы хотите переадресовывать вызовы.
- ОТМЕНИТЬ: Нажмите клавишу CALL FWD, услышите тональный сигнал. CALL FWD Индикатор клавиши гаснет, D исчезает.
ПРИМЕЧАНИЕ: Пропущенный вызов вернется на вашу голосовую почту, поскольку изначально он предназначался вам. ПЕРЕБОР ГРУППЫ: позволяет вам перехватить другой звонок, который вы слышите в вашей группе. (Вы должны быть запрограммированы в группу системным администратором).
ИСПОЛЬЗОВАТЬ: Услышьте, как звонит другой телефон в вашей предварительно запрограммированной группе. Нажмите кнопку ВЗЯТЬ. Начинайте говорить, вызов подключен.
НАПРАВЛЕННЫЙ ПОДБОР: Позволяет вам подобрать «определенное» расширение, которое вы слышите.
ИСПОЛЬЗОВАТЬ: Услышьте звонок другого телефона, который не входит в вашу предварительно запрограммированную группу. Нажмите кнопку НАПРАВЛЕННЫЙ ПОДБОР. Введите номер РАСШИРЕНИЯ, которое вы хотите получить.
ПРИМЕЧАНИЕ: Не все функции могут быть запрограммированы на ключи в зависимости от особых потребностей вашей компании. Такие функции, как переадресация вызова и перехват вызова, также можно активировать, нажав программную кнопку FEATURES.
КОНТАКТЫ: Содержит четыре предварительно запрограммированных справочника и один персональный справочник на 100 номеров, который вы программируете.
ТИПЫ СПРАВОЧНИКОВ:
- ВСЕ: Все записи каталога (внешние, личные, пользователи и группы).
- ВНЕШНЕЕ: Записи, сохраненные системным администратором для использования всеми пользователями.
- ГРУППЫ: Имена и номера групп поиска в телефонной системе.
- ПОЛЬЗОВАТЕЛИ: Имена и номера всех пользователей телефонной системы.
- ЛИЧНОЕ: Записи, сохраненные вами, для использования с вашего телефона.
ПРОГРАММИРОВАТЬ: Оставьте трубку на месте Pr C ess OTACTS Ke Нажмите функциональную клавишу NEW Введите имя и номер (включая префикс набора (обычно 8 или 9), 1 и код города, если необходимо) Pr SAess VE Функциональная клавиша Информация автоматически сохраняется в вашем личном каталоге. Чтобы выйти без внесения изменений, нажмите программную кнопку ОТМЕНА.
ИСПОЛЬЗОВАТЬ: Нажмите клавишу КОНТАКТЫ Начните вводить имя на панели набора номера (вы можете искать по имени или фамилии). Поднимите трубку или нажмите программную кнопку CALL, кнопку SPEAKER, кнопку HEADSET или кнопку OK, чтобы позвонить.
ПРИМЕЧАНИЕ: При поиске имени в контактах нажимайте клавишу только один раз для каждой буквы. Бывшийample: при поиске Стивена — нажмите 783836 (не 7 четыре раза, чтобы указать S). ИСТОРИЯ/ ЖУРНАЛ ЗВОНКОВ: Доступ к списку ваших последних вызовов: последние 10 входящих, последние 10 пропущенных и последние 10 исходящих.
ИСПОЛЬЗОВАТЬ: Нажмите кнопку ЖУРНАЛ ВЫЗОВОВ. Если у вас есть новые пропущенные вызовы, кнопка ЖУРНАЛ ВЫЗОВОВ будет подсвечена, и ЖУРНАЛ откроется для пропущенных вызовов. Используйте клавиши со стрелками ВЛЕВО/ВПРАВО, чтобы просмотреть ПРОПУЩЕННЫЕ, ОТВЕЧЕННЫЕ, ИСХОДЯЩИЕ или ВСЕ
НАБРАТЬ: Нажмите программную кнопку CALL или OK, чтобы позвонить по номеру, отображаемому на дисплее.
СОХРАНИТЬ НОМЕР КАК КОНТАКТЫ
Нажмите кнопку ЖУРНАЛ ВЫЗОВОВ.
Используйте клавиши со стрелками ВЛЕВО/ВПРАВО для прокрутки ВСЕ/ПРОПУЩЕННЫЕ/ВХОДЯЩИЕ/ИСХОДЯЩИЕ. Используйте клавиши со стрелками ВВЕРХ/ВНИЗ для прокрутки записей.
Нажмите программную кнопку ДЕТАЛИ.
Нажмите программную кнопку MORE, затем нажмите программную кнопку +CONTACT. Используйте клавиши со стрелками ВВЕРХ/ВНИЗ для переключения и редактирования имени и номера, включая префикс набора (обычно 8 или 9), если это необходимо. Нажмите программную кнопку СОХРАНИТЬ, для отмены без сохранения нажмите программную кнопку ОТМЕНА.
ПРИМЕЧАНИЕ: ИНДИКАЦИЯ ПРОПУЩЕННЫХ ВЫЗОВОВ в верхней левой части дисплея показывает количество пропущенных вызовов, например: 4 [ X . Введите EXTENSION Номер телефона, который вы хотите переместить. PEnter ASSWORD Это либо внутренний номер, либо номер, назначенный системным администратором. Нажмите функциональную клавишу ГОТОВО.
ЗАМЕТКИ: Когда вы входите в систему на другом телефоне, вы выходите из своего телефона. Когда вы выходите из телефона, на котором вы вошли в систему, оба телефона должны вернуться к своему исходному расширению. При использовании Hot Desking в другом физическом здании при вызовах службы экстренной помощи будет отображаться адрес «домашнего» местоположения телефонов.
ПРИМЕЧАНИЕ: Пункты меню могут немного отличаться и могут быть ограничены статусом системного администратора.
ПРИЛОЖЕНИЯ: Этот пункт меню ограничен статусом системного администратора.
Настройки: Это главное меню, позволяющее конечным пользователям настраивать параметры и функции телефона.
- Телефон
- Визуальное оповещение определяет, будет ли индикатор мигать при новых входящих вызовах (по умолчанию включено).
- Аудио
- Автоматическая регулировка усиления вкл/выкл регулирует уровень выходного звука для достижения постоянного и лучшего качества звука. (по умолчанию включено)
- Audio Path изменяет путь по умолчанию для вызовов от динамика к гарнитуре. (по умолчанию динамик)
- Щелчки кнопок включают или выключают звуковой сигнал, издаваемый клавишами при нажатии. (по умолчанию включено)
- Error Tones включает или выключает звуковой сигнал, когда вы делаете ошибку. (по умолчанию включено)
- Функция Headset Signaling позволяет подавать звуковой сигнал на гарнитуру при поступлении вызова. (по умолчанию отключено)
- Телефон Проfile / Гарнитура Проfile изменяет уровни входящей громкости по умолчанию на трубку/гарнитуру в соответствии с потребностями пользователя и устраняет необходимость в отдельной трубке, совместимой со слуховым аппаратом. Варианты:
- Уровень микрофона гарнитуры регулирует усиление микрофона гарнитуры.
- Персонализированный звонок меняет мелодию звонка. Система поставляется с 14 основными рингтонами: 8 классических бизнес-рингтонов и 6 мелодичных мелодий.
- Дисплей настраивает параметры дисплея, включая:
- проверка данных
- Хранитель экрана
- Детали экранной заставки (время ожидания и часы)
- Таймер подсветки
- яркость
- контраст
- Язык
- Размер шрифта
- Сетевая информация предоставляет сетевую информацию системным администраторам для помощи в устранении неполадок.
- Администрирование предоставляет функциональные возможности системного администрирования.
- Информация содержит версию IP-телефона.
КОЛЬЦА И ИНДИКАТОРЫ
ВЫБЕРИТЕ ТИП ЗВОНКА Выберите одну из 8 различных мелодий звонка, чтобы отличить ваш телефон от звонка других.
Оставьте трубку на месте
Нажмите клавишу MAIN MENU. Прокрутите до пункта SETTINGS и нажмите SELECT.
Используйте клавиши со стрелками ВВЕРХ/ВНИЗ, чтобы найти персонализированный звонок. Нажмите клавишу ВЫБОР. На дисплее программной клавиши появится надпись Основной. Нажмите программную клавишу ВЫБОР. Используйте клавиши со стрелками ВВЕРХ/ВНИЗ. Pr PLess AY для прослушивания различных выборов Pr SAess VE программная клавиша для установки желаемого звонка Нажмите клавишу EXIT или PHONE для возврата на главный экран
Ваш телефон звонит по-разному для разных типов вызовов
- ВНЕШНЕЕ: Два повторяющихся коротких звонка (новый внешний вызов или переадресованный внешний вызов)
- ВНУТРЕННЯЯ: Одиночное кольцо Повторное
- ПЕРЕЗВОНИТЬ: Одиночный звонок, за которым следуют два коротких звонка Повторяется
- РЕГУЛИРОВКА ГРОМКОСТИ ЗВОНКА: Оставьте трубку на месте
Вы можете регулировать громкость, когда телефон звонит или находится в режиме ожидания. Нажмите кнопку PLUS/MINUS VOLUME CONTROL, чтобы отрегулировать громкость.
Документы / Ресурсы
Посмотреть инструкция для Avaya J139 бесплатно. Руководство относится к категории телефоны, 2 человек(а) дали ему среднюю оценку 7. Руководство доступно на следующих языках: английский. У вас есть вопрос о Avaya J139 или вам нужна помощь? Задайте свой вопрос здесь
Телефон Avaya J139 — это проводной телефон с монитором без сенсорного экрана и диагональю 2.8 дюйма. Разрешение дисплея составляет 320 x 240 пикселей. Устройство поддерживает функцию идентификации вызова и может хранить до 250 контактов в телефонной книге. Также присутствует громкая связь, которая позволяет проводить разговоры без использования наушников.
Avaya J139 имеет интерфейс Ethernet LAN и поддерживает Gigabit Ethernet, обеспечивая быструю и надежную передачу данных. Телефон не поддерживает Wi-Fi и Bluetooth. Скорость передачи данных через Ethernet LAN может составлять 10, 100 или 1000 мегабит в секунду в зависимости от условий сети.
Устройство выполнено из премиальных материалов и гарантирует долговечность и надежность в использовании. Avaya J139 специально разработан и приспособлен к определенным моделям автомобилей, что обеспечивает идеальное расположение телефона в каждом конкретном автомобиле.

Главная
| Avaya | |
| J139 | 700513916 | |
| телефон | |
| 0783555201961, 5706998818799 | |
| английский | |
| Руководство пользователя (PDF) |
Дизайн
| Цвет товара | Черный |
| Тип телефонной трубки | Проводная телефонная трубка |
| Тип продукта | IP телефон |
Экран
| Сенсорный экран | Нет |
| Диагональ экрана | 2.8 « |
| Разрешение экрана | 320 x 240 пикселей |
Характеристики телефона
| Количество линий | — линий |
| Идентификация абонента (Caller ID) | Да |
| Вместимость телефонной книги | 250 записей |
| Количество VoIP аккаунтов | — |
| Полнодуплексный режим | Да |
| Служба коротких сообщений (SMS) | Да |
| Записи в журнале звонков | 100 |
Аудио
| Громкоговоритель | Да |
| Тип сигнала вызова | Полифонический |
| Кодеки голоса | G.711, G.722, G.726, G.729ab, OPUS |
Сеть
| Подключение Ethernet | Да |
| Тип LAN Ethernet интерфейса | Гигабитный Ethernet |
| Wi-Fi | Нет |
| Bluetooth | Нет |
| Скорость передачи данных Ethernet LAN | 10,100,1000 Мбит/с |
Порты и интерфейсы
| Количество портов Ethernet LAN ( RJ-45) | 2 |
Камера
Энергопитание
| Питание по Ethernet (PoE) | Да |
Содержимое упаковки
| Количество ручек в комплекте | 1 шт |
| Базовая станция | Да |
Логистические данные
| Код гармонизированной системы описания (HS) | 85171800 |
показать больше
Не можете найти ответ на свой вопрос в руководстве? Вы можете найти ответ на свой вопрос ниже, в разделе часто задаваемых вопросов о Avaya J139.
Какой размер экрана Avaya J139?
Размер экрана Avaya J139 составляет 2.8 «.
Какое разрешение экрана дисплея Avaya J139?
Разрешение экрана Avaya J139 следующее 320 x 240 пикселей.
Инструкция Avaya J139 доступно в русский?
К сожалению, у нас нет руководства для Avaya J139, доступного в русский. Это руководство доступно в английский.
Не нашли свой вопрос? Задайте свой вопрос здесь