- Manuals
- Brands
- Avaya Manuals
- IP Phone
- 1408
- User manual
-
Contents
-
Table of Contents
-
Bookmarks
Quick Links
IP Office
1408, 1416 Phone User Guide
15-601040 Issue 05a — (25 October 2011)
Related Manuals for Avaya 1408
Summary of Contents for Avaya 1408
-
Page 1
IP Office 1408, 1416 Phone User Guide 15-601040 Issue 05a — (25 October 2011) -
Page 2
Avaya is not responsible for the contents or reliability of any linked Web sites consent of Avaya can be a criminal, as well as a civil, offense under the referenced within this site or documentation(s) provided by Avaya. Avaya is applicable law. -
Page 3: Table Of Contents
14.1.2 Logging In on a Not Logged In Phone …………….87 5.2.3 Unpark (Status Menu) …………….50 14.2 Logout …………..87 14.3 Lock …………..88 Transferring Calls 14.4 Auto Lock …………..89 1408, 1416 Phone User Guide Page 3 IP Office 15-601040 Issue 05a (25 October 2011)
-
Page 4
17.2.21 Send All Calls …………….121 21.2 Checking the Time Settings …………..157 17.2.22 Set Hunt Group Night Service …………….121 21.3 Setting the Date …………..157 1408, 1416 Phone User Guide Page 4 IP Office 15-601040 Issue 05a (25 October 2011) -
Page 5
…………..181 23.30 Small Community Network …………..181 23.31 System Administrator …………..181 23.32 System Phone User …………..181 23.33 Twinning …………..181 Index …………….183 1408, 1416 Phone User Guide Page 5 IP Office 15-601040 Issue 05a (25 October 2011) -
Page 7: Introduction
Chapter 1. Introduction 1408, 1416 Phone User Guide Page 7 IP Office 15-601040 Issue 05a (25 October 2011)
-
Page 9: Important Safety Information
· During a power surge, EFT or ESD, calls may be dropped. After a power surge, EFT or ESD, it is normal for the phone to restart. · Using a cell phone, mobile phone, GSM phone or two-way radio in close proximity to an Avaya telephone might cause interference.
-
Page 10: 08 Phones
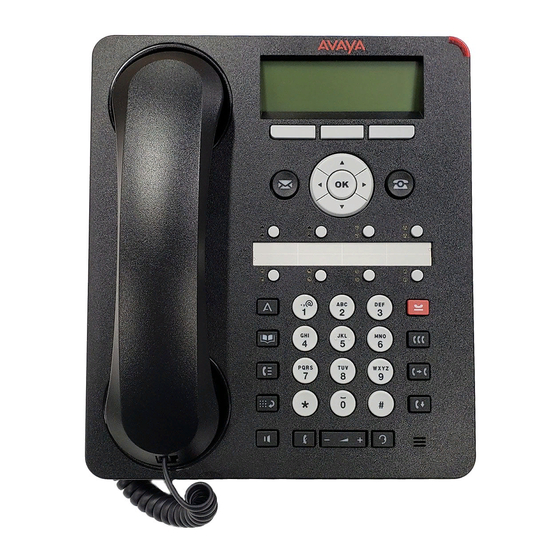
1.2 ’08 Phones The diagram below shows the main features of a 1408 phone. · This phone has 8 programmable buttons. · By default the first 3 buttons are used as appearance buttons for calls you make and receive. Your system administrator can configure additional appearance buttons.
-
Page 11: 16 Phones
· The phone includes a handsfree speaker and microphone for operation as a handsfree speakerphone. The speaker is located under the handset. The microphone is located at the bottom right of the keypad. · The phone includes a headset socket for connection of phone headsets. 1408, 1416 Phone User Guide Page 11 IP Office…
-
Page 12: Button Modules
Failure to connect and restart the equipment in the correct order may cause the phone to not function correctly. · The button module used for 1416 phones is not interchangeable with that used for 1616 phones and vice versa. 1408, 1416 Phone User Guide Page 12…
-
Page 13: Phone Keys
These button represent calls that you can make or receive. Feature Buttons — Those key not configured as appearance keys can be used for other functions. · 1408, 1416 Phone User Guide Page 13 IP Office 15-601040 Issue 05a (25 October 2011)
-
Page 14: The Phone Stand
This peg can be reversed to more securely anchor the handset when the stand places the phone in an upright position. On the 1416 and 1616 phones, the angle of the phone display can also be adjusted as shown below. 1408, 1416 Phone User Guide Page 14 IP Office…
-
Page 15: Labels
The action of each button is normally set by the system administrator. However you can also use the self-administer menu to select and assign actions to the buttons. 1408, 1416 Phone User Guide Page 15 IP Office 15-601040 Issue 05a (25 October 2011)
-
Page 16
You can also use the left arrow key to switch between the Appearance menu , Features menu and Button Features menu. 1408, 1416 Phone User Guide Page 16 IP Office 15-601040 Issue 05a (25 October 2011) -
Page 17: Other Menus
Visual Voice menu diagram shows a summary of the menu options. 1408, 1416 Phone User Guide Page 17 IP Office 15-601040 Issue 05a (25 October 2011)
-
Page 18: Phone Status Letters
· S = System Alarm If you are configured as a system administrator , an S in the phone’s display indicates a system alarm 1408, 1416 Phone User Guide Page 18 IP Office 15-601040 Issue 05a (25 October 2011)
-
Page 19: Appearance Buttons/Menu
Those buttons that have not been configured as appearance buttons can be used feature buttons 1408, 1416 Phone User Guide Page 19 IP Office 15-601040 Issue 05a (25 October 2011)
-
Page 20: Using The Appearance Menu
To access these, press the >> double-arrow soft key and select the required function. 1408, 1416 Phone User Guide Page 20 IP Office 15-601040 Issue 05a (25 October 2011)
-
Page 21: Call Apperance Buttons
Red off. Inaccessible The button pressed is not accessible. The call is still dialing, ringing or cannot be bridged into. Green broken flash. 1408, 1416 Phone User Guide Page 21 IP Office 15-601040 Issue 05a (25 October 2011)
-
Page 22
The call that you made or received on the call appearance has been put on hold by the other party. Holding You have put the call on hold. 1408, 1416 Phone User Guide Page 22 IP Office 15-601040 Issue 05a (25 October 2011) -
Page 23: Bridged Appearance Buttons
Green flash. Red off. Inaccessible The button pressed is not useable. The call is still dialing, ringing or cannot be bridged into. Green broken flash. 1408, 1416 Phone User Guide Page 23 IP Office 15-601040 Issue 05a (25 October 2011)
-
Page 24
If the other user puts their call on the matching call appearance on hold, your bridged appearance will indicate the held call. You can retrieve the held call by pressing the Pickup soft key or pressing the bridged appearance button. 1408, 1416 Phone User Guide Page 24 IP Office… -
Page 25: Call Coverage Buttons
The user has answered the call requiring coverage. Green on. Red off. On Hold Here The covered call has been put on hold by the call coverage button user. Green fast flash. 1408, 1416 Phone User Guide Page 25 IP Office 15-601040 Issue 05a (25 October 2011)
-
Page 26
If the call is from another internal user and they put the call on hold, the held state is indicated. You can retrieve the call from hold by pressing the call coverage button again. 1408, 1416 Phone User Guide Page 26 IP Office… -
Page 27: Line Appearance Buttons
Green flash. Red off. Inaccessible The button pressed is not accessible. The call is still dialing, ringing, routing or cannot be Green broken bridged into. flash. 1408, 1416 Phone User Guide Page 27 IP Office 15-601040 Issue 05a (25 October 2011)
-
Page 29: Making Calls
Chapter 2. Making Calls 1408, 1416 Phone User Guide Page 29 IP Office 15-601040 Issue 05a (25 October 2011)
-
Page 30: 2. Making Calls
If the call is external and no external line is currently available, the message WAITING FOR LINE is displayed. The display will indicate when the call is connected to the destination or to an outgoing line. 1408, 1416 Phone User Guide Page 30…
-
Page 31: En-Bloc Dialing
En-Bloc Dial. 5. Use the left and right arrow keys to change the setting or use the indicated soft key. 1408, 1416 Phone User Guide Page 31 IP Office 15-601040 Issue 05a (25 October 2011)
-
Page 32: Call Soft Key Options
Quiet the ringer for the current alerting call. The call will continue alerting until either answered or it goes to voicemail. · Pickup Answer the call that is held or alerting another user. · ToVM Send an alerting call to your voicemail. 1408, 1416 Phone User Guide Page 32 IP Office 15-601040 Issue 05a (25 October 2011)
-
Page 33: Calling A Person From The Contacts List
2. Press the Call soft key or OK to call the number displayed in the call record. 1408, 1416 Phone User Guide Page 33 IP Office 15-601040 Issue 05a (25 October 2011)
-
Page 34: Redialling A Previous Number
Feature Button self-administer function can be used to assign a feature button as a page button using the Group Paging action. 1408, 1416 Phone User Guide Page 34 IP Office 15-601040 Issue 05a (25 October 2011)
-
Page 35: Withholding Your Number
Withhold Number. 5. Use the left or right arrow keys to change the current setting or press the indicated soft key. 1408, 1416 Phone User Guide Page 35 IP Office 15-601040 Issue 05a (25 October 2011)
-
Page 36: Adjust The Call Volume
· If the call is connected on the phone’s headset, the HEADSET key is lit. Pressing the key again will end the call. · If the call is connected on the phone’s handset, replacing the handset will end the call. 1408, 1416 Phone User Guide Page 36 IP Office…
-
Page 37: Answering Calls
Chapter 3. Answering Calls 1408, 1416 Phone User Guide Page 37 IP Office 15-601040 Issue 05a (25 October 2011)
-
Page 38: 3. Answering Calls
1. This guide assumed that auto hold is enabled (the default). The system administrator can disable auto hold for the system, in which case calls are automatically disconnected rather than held. 1408, 1416 Phone User Guide Page 38 IP Office…
-
Page 39: Divert A Call To Voicemail
This function can be assigned to a feature button configured with the Internal Auto Answer action. The button lamp will indicate when internal auto answer is on. 1408, 1416 Phone User Guide Page 39 IP Office 15-601040 Issue 05a (25 October 2011)
-
Page 40: Call Pickup
Pickup a call ringing a user’s extension number (N). · Pickup a Group Members Call: *53*N# Pickup a call ringing the members of a group (N). This does not necessarily have to be a group call. 1408, 1416 Phone User Guide Page 40 IP Office…
-
Page 41: Redialling
Chapter 4. Redialling 1408, 1416 Phone User Guide Page 41 IP Office 15-601040 Issue 05a (25 October 2011)
-
Page 42: Redial A Call (One Mode)
10 most recent outgoing calls. 2. Press the Call soft key or OK to call the number displayed in the call record. 3. Continue in the same way as for a normal dialed call. 1408, 1416 Phone User Guide Page 42 IP Office…
-
Page 43: Selecting Your Redial Mode
6. Use either the Change soft key or the left or right arrow keys to change the mode. 7. When the required mode is displayed, press the Done soft key. 1408, 1416 Phone User Guide Page 43 IP Office 15-601040 Issue 05a (25 October 2011)
-
Page 44: View Call Details
Pause soft key to enter a comma (,) for a 1 second pause in the number dialing. 6. When the name and number are set as required, press the Save soft key. To return without saving the name and number, press the Cancel soft key. 1408, 1416 Phone User Guide Page 44 IP Office…
-
Page 45: Holding And Parking Calls
Chapter 5. Holding and Parking Calls 1408, 1416 Phone User Guide Page 45 IP Office 15-601040 Issue 05a (25 October 2011)
-
Page 46: 5. Holding And Parking Calls
… can be used with conference calls..can be used to start or add calls to a conference..the call is assigned a unique ID. 1408, 1416 Phone User Guide Page 46 IP Office 15-601040 Issue 05a (25 October 2011)
-
Page 47: Holding Calls
· You can press the >> double-arrow soft key. · Press the Pickup soft key to take the call off hold. 1408, 1416 Phone User Guide Page 47 IP Office 15-601040 Issue 05a (25 October 2011)
-
Page 48: Switching Between Calls
1. If you are the only internal user in the conference, depending on your telephone systems configuration, dropping yourself from the conference may end it. Consult your system administrator for details. 1408, 1416 Phone User Guide Page 48 IP Office…
-
Page 49: Parking Calls
Parks the held call using the park number dialed in place of N. · Unpark Call: *38*N# Unpark the call parked using the park number N. 1408, 1416 Phone User Guide Page 49 IP Office 15-601040 Issue 05a (25 October 2011)
-
Page 50: Park Using The Menu
4. Use the up and down arrow keys to scroll through the parked calls. 5. To unpark a particular call, press the CPkUp soft key. 1408, 1416 Phone User Guide Page 50 IP Office 15-601040 Issue 05a (25 October 2011)
-
Page 51: Transferring Calls
Chapter 6. Transferring Calls 1408, 1416 Phone User Guide Page 51 IP Office 15-601040 Issue 05a (25 October 2011)
-
Page 52: Transfer To Voicemail
1. If you are the only internal user in the conference, depending on your telephone systems configuration, dropping yourself from the conference may end it. Consult your system administrator for details. 1408, 1416 Phone User Guide Page 52 IP Office…
-
Page 53: Account Codes
Chapter 7. Account Codes 1408, 1416 Phone User Guide Page 53 IP Office 15-601040 Issue 05a (25 October 2011)
-
Page 54: Forced Account Code Entry
Access to the enter account code menu can be assigned to a feature button configured with the Account Code Entry action. The button can also be preset with a specific account code. 1408, 1416 Phone User Guide Page 54 IP Office 15-601040 Issue 05a (25 October 2011)
-
Page 55: Conference Calls
Chapter 8. Conference Calls 1408, 1416 Phone User Guide Page 55 IP Office 15-601040 Issue 05a (25 October 2011)
-
Page 56: Starting A Conference
5. If they do not want to join the call or do not answer, press DROP and then press the appearance key of the held call (fast green flash). 1408, 1416 Phone User Guide Page 56 IP Office 15-601040 Issue 05a (25 October 2011)
-
Page 57: Viewing Conference Details
1. If you are the only internal user in the conference, depending on your telephone systems configuration, dropping yourself from the conference may end it. Consult your system administrator for details. 1408, 1416 Phone User Guide Page 57 IP Office…
-
Page 58: Holding A Conference Call
1. If you are the only internal user in the conference, depending on your telephone systems configuration, dropping yourself from the conference may end it. Consult your system administrator for details. 1408, 1416 Phone User Guide Page 58 IP Office…
-
Page 59: Headset Operation
Chapter 9. Headset Operation 1408, 1416 Phone User Guide Page 59 IP Office 15-601040 Issue 05a (25 October 2011)
-
Page 60: Headset Volume
Change soft key to change the setting. 6. When completed, press the Done soft key. 7. Press the Exit soft key to exit the menus. 1408, 1416 Phone User Guide Page 60 IP Office 15-601040 Issue 05a (25 October 2011)
-
Page 61: Handsfree Speaker Operation
Chapter 10. Handsfree Speaker Operation 1408, 1416 Phone User Guide Page 61 IP Office 15-601040 Issue 05a (25 October 2011)
-
Page 62: Speaker Volume
Change soft key to change the setting. 6. When completed, press the Done soft key. 7. Press the Exit soft key to exit the menus. 1408, 1416 Phone User Guide Page 62 IP Office 15-601040 Issue 05a (25 October 2011)
-
Page 63: Contacts/Directory
Chapter 11. Contacts/Directory 1408, 1416 Phone User Guide Page 63 IP Office 15-601040 Issue 05a (25 October 2011)
-
Page 64: 11. Contacts/Directory
3. The system administrator can set other users as Ex Directory. Those users are then not included in the user directory. 1408, 1416 Phone User Guide Page 64 IP Office 15-601040 Issue 05a (25 October 2011)
-
Page 65: Viewing Contacts Details
It is also present for external directory entries if you have been setup as a system phone user by the system administrator. Edit · Edit the name and number. Delete · Delete the name and number. 1408, 1416 Phone User Guide Page 65 IP Office 15-601040 Issue 05a (25 October 2011)
-
Page 66: Make A Call From The Directory
· To view additional details about the currently displayed name, press the Details key. · When the required entry is displayed, press Select. 3. You will be returned to the menu in which you selected the Dir soft key. 1408, 1416 Phone User Guide Page 66 IP Office…
-
Page 67: Adding A New Contact
· External directory contacts imported by the system cannot be edited. · However, if a local entry is created with the same name or number as an imported entry, the imported entry is discarded in favor of the local one. 1408, 1416 Phone User Guide Page 67 IP Office…
-
Page 68: Add A Contact From The Call Log
Pause soft key to enter a comma (,) for a 1 second pause in the number dialing. 6. When the name and number are set as required, press the Save soft key. To return without saving the name and number, press the Cancel soft key. 1408, 1416 Phone User Guide Page 68 IP Office…
-
Page 69: Editing A Contact
· External directory contacts imported by the system cannot be edited. · However, if a local entry is created with the same name or number as an imported entry, the imported entry is discarded in favor of the local one. 1408, 1416 Phone User Guide Page 69 IP Office…
-
Page 70: Deleting A Contact
· External directory contacts imported by the system cannot be edited. · However, if a local entry is created with the same name or number as an imported entry, the imported entry is discarded in favor of the local one. 1408, 1416 Phone User Guide Page 70 IP Office…
-
Page 71: Call Log
Chapter 12. Call Log 1408, 1416 Phone User Guide Page 71 IP Office 15-601040 Issue 05a (25 October 2011)
-
Page 72: 12. Call Log
2. The call log on other types of phones is a local call log maintained by that phone. It will not move with you when you hot desk and it will be lost if the phone is restarted. 3. The redial function uses the outgoing call records stored in the call log. 1408, 1416 Phone User Guide Page 72 IP Office…
-
Page 73: Using The Call Log
2. Press the Call soft key or OK to call the number displayed in the call record. 1408, 1416 Phone User Guide Page 73 IP Office 15-601040 Issue 05a (25 October 2011)
-
Page 74: Viewing Call Details
Add the name and number to your personal directory. You can edit the details before they are added. · Back Go back to the normal call screen to select another call record. 1408, 1416 Phone User Guide Page 74 IP Office…
-
Page 75: Deleting A Record
2. Press the More soft key. 3. Press the Del All soft key to delete all your call log records. 1408, 1416 Phone User Guide Page 75 IP Office 15-601040 Issue 05a (25 October 2011)
-
Page 76: Adding A Record To Your Contacts
Pause soft key to enter a comma (,) for a 1 second pause in the number dialing. 6. When the name and number are set as required, press the Save soft key. To return without saving the name and number, press the Cancel soft key. 1408, 1416 Phone User Guide Page 76 IP Office…
-
Page 77: Voicemail
Chapter 13. Voicemail 1408, 1416 Phone User Guide Page 77 IP Office 15-601040 Issue 05a (25 October 2011)
-
Page 78: Message Waiting Indication
The system administrator can also configure it so that you receive new message waiting indication for a hunt group or hunt groups. 1408, 1416 Phone User Guide Page 78 IP Office…
-
Page 79: Checking Messages
(24 hours for embedded voicemail, 30 days for Voicemail Pro). For voicemail messages on a Voicemail Pro system, the system administrator can customize the delay and can also apply automatic deletion times to new and saved messages. 1408, 1416 Phone User Guide Page 79 IP Office…
-
Page 80: Sending A Message
Switch between the different sets of available soft key functions. · Others Add other extension numbers to which you want to send the message. · Record Record the message again. 1408, 1416 Phone User Guide Page 80 IP Office 15-601040 Issue 05a (25 October 2011)
-
Page 81: Mailbox Greeting
Intuity voicemail allows a number of greeting to be recorded and then used for different call types (internal, external, etc). These greetings are setup and recorded through the mailbox voice prompt interface or using the one-X Portal for IP Office application. 1408, 1416 Phone User Guide Page 81 IP Office…
-
Page 82: Email Mode
Send an email telling you there is a new message but do not attach a copy of the message. 6. When the required setting is displayed, press the Select soft key. To exit without changing the setting, press the Exit soft key. 1408, 1416 Phone User Guide Page 82 IP Office…
-
Page 83: Changing Your Voicemail Code
Voicemail. 4. Press the Select soft key. 5. Press the On or Off soft key to change the setting. 1408, 1416 Phone User Guide Page 83 IP Office 15-601040 Issue 05a (25 October 2011)
-
Page 84: Transfer To Voicemail
· Depending on how your system is configured, you may be required to enter your voicemail password and then press the Done soft key. 6. You will now see the visual voice menu 1408, 1416 Phone User Guide Page 84 IP Office 15-601040 Issue 05a (25 October 2011)
-
Page 85: Logging In/Out
Chapter 14. Logging In/Out 1408, 1416 Phone User Guide Page 85 IP Office 15-601040 Issue 05a (25 October 2011)
-
Page 86: Default Short Codes
Login to a phone using your extension number (N) and login code (P). · Log Out: *36 Log yourself out from the phone where you are currently logged in. 1408, 1416 Phone User Guide Page 86 IP Office 15-601040 Issue 05a (25 October 2011)
-
Page 87: Logging In
· If the phone does not have a default user, or the default user is currently logged on elsewhere, it displays NOT LOGGED IN. · If the phone has a default user and they are not current logged on elsewhere, they are automatically logged back in. 1408, 1416 Phone User Guide Page 87 IP Office 15-601040 Issue 05a (25 October 2011)
-
Page 88: Lock
4. Press the Select soft key or the OK button or the right arrow key. 5. The phone is now locked as indicated by the display. 1408, 1416 Phone User Guide Page 88 IP Office 15-601040 Issue 05a (25 October 2011)
-
Page 89: Auto Lock
1. Press the Unlock soft key. 2. Enter your login code. 3. Press the Done soft key. 1408, 1416 Phone User Guide Page 89 IP Office 15-601040 Issue 05a (25 October 2011)
-
Page 90: Changing Your Login Code
3. Press the Select soft key. 4. Press the Log Out soft key. 5. The phone now displays the menu for unregistered phone log in. 1408, 1416 Phone User Guide Page 90 IP Office 15-601040 Issue 05a (25 October 2011)
-
Page 91: Redirecting Calls
Chapter 15. Redirecting Calls 1408, 1416 Phone User Guide Page 91 IP Office 15-601040 Issue 05a (25 October 2011)
-
Page 92: Voicemail
Internal External Voicemail Follow Me Follow Me To Follow Me Here Forward Forward on Busy Forward on No Answer Forward Unconditional Do Not Disturb Twinning 1408, 1416 Phone User Guide Page 92 IP Office 15-601040 Issue 05a (25 October 2011)
-
Page 93: Follow Me
Access Control The system administrator is able to configure whether you can access the Forward and Follow Me menu and status options. 1408, 1416 Phone User Guide Page 93 IP Office 15-601040 Issue 05a (25 October 2011)
-
Page 94: Follow Me To (Features Menu)
· To change the destination of the setting, press the Edit soft key. Access Control The system administrator is able to configure whether you can access the Forward and Follow Me menu and status options. 1408, 1416 Phone User Guide Page 94 IP Office 15-601040 Issue 05a (25 October 2011)
-
Page 95: Follow Me Here (Features Menu)
· Press the Save soft key to set the follow me here. Access Control The system administrator is able to configure whether you can access the Forward and Follow Me menu and status options. 1408, 1416 Phone User Guide Page 95 IP Office 15-601040 Issue 05a (25 October 2011)
-
Page 96: Forwarding Calls
, the telephone system will attempt to redirect forwarded calls to voicemail if they are still unanswered after having rung for your no answer time (default 15 seconds). This is not always possible for calls that have been forwarded to an external number. 1408, 1416 Phone User Guide Page 96 IP Office…
-
Page 97
· Switch Forward on No Answer Off: *06 Access Control The system administrator is able to configure whether you can access the Forward and Follow Me menu and status options. 1408, 1416 Phone User Guide Page 97 IP Office 15-601040 Issue 05a (25 October 2011) -
Page 98: Forward Unconditional (Status Menu)
· Select edit to change the number to which calls are forwarded. Access Control The system administrator is able to configure whether you can access the Forward and Follow Me menu and status options. 1408, 1416 Phone User Guide Page 98 IP Office 15-601040 Issue 05a (25 October 2011)
-
Page 99: Forward Unconditional (Features Menu)
Only, External and Group, Non Group Calls and All Calls. Access Control The system administrator is able to configure whether you can access the Forward and Follow Me menu and status options. 1408, 1416 Phone User Guide Page 99 IP Office 15-601040 Issue 05a (25 October 2011)
-
Page 100: Forward On No Answer (Status Menu)
Selecting Change will set a forward on busy/no answer destination, it will not change the forward unconditional destination. Access Control The system administrator is able to configure whether you can access the Forward and Follow Me menu and status options. 1408, 1416 Phone User Guide Page 100 IP Office 15-601040 Issue 05a (25 October 2011)
-
Page 101: Forward On Busy (Status Menu)
Selecting Change will set a forward on busy/no answer destination, it will not change the forward unconditional destination. Access Control The system administrator is able to configure whether you can access the Forward and Follow Me menu and status options. 1408, 1416 Phone User Guide Page 101 IP Office 15-601040 Issue 05a (25 October 2011)
-
Page 102: Forward On Busy/No Answer (Features Menu)
Selecting Change will set a forward on busy/no answer destination, it will not change the forward unconditional destination. Access Control The system administrator is able to configure whether you can access the Forward and Follow Me menu and status options. 1408, 1416 Phone User Guide Page 102 IP Office 15-601040 Issue 05a (25 October 2011)
-
Page 103: Do Not Disturb
· Cancel All Forwarding: *00 Switch off any forwarding. Includes forward unconditional, forward on busy, forward on no answer, follow me and do not disturb. 1408, 1416 Phone User Guide Page 103 IP Office 15-601040 Issue 05a (25 October 2011)
-
Page 104: Dnd On/Off (Features Menu)
· Use the Add soft key to add a new number in the same way as if no numbers had been entered. · use the Delete soft key to delete the number shown. 1408, 1416 Phone User Guide Page 104…
-
Page 105: Twinning
7. When a number has been entered, you can access the Enable and Disable soft keys to turn use of mobile twinning on or off. The Clear soft key removes the existing twinning number in order to allow entry of a new number. 1408, 1416 Phone User Guide Page 105…
-
Page 107: Groups
Chapter 16. Groups 1408, 1416 Phone User Guide Page 107 IP Office 15-601040 Issue 05a (25 October 2011)
-
Page 108: Group Membership
The system administrator is able to configure if you can access the Membership, State and Fallback options of a group. If you are not configured for any groups then the Group menu is not shown. 1408, 1416 Phone User Guide Page 108…
-
Page 109: Group Membership On/Off (Features Menu)
The system administrator is able to configure if you can access the Membership, State and Fallback options of a group. If you are not configured for any groups then the Group menu is not shown. 1408, 1416 Phone User Guide Page 109…
-
Page 110: Group Service Status And Fallback
The system administrator is able to configure if you can access the Membership, State and Fallback options of a group. If you are not configured for any groups then the Group menu is not shown. 1408, 1416 Phone User Guide Page 110…
-
Page 111: Changing The Group Service Status (Features Menu)
The system administrator is able to configure if you can access the Membership, State and Fallback options of a group. If you are not configured for any groups then the Group menu is not shown. 1408, 1416 Phone User Guide Page 111…
-
Page 112: Changing The Group Service Status (Status Menu)
The system administrator is able to configure if you can access the Membership, State and Fallback options of a group. If you are not configured for any groups then the Group menu is not shown. 1408, 1416 Phone User Guide Page 112…
-
Page 113: Changing The Group Fallback
The system administrator is able to configure if you can access the Membership, State and Fallback options of a group. If you are not configured for any groups then the Group menu is not shown. 1408, 1416 Phone User Guide Page 113…
-
Page 115: Button Features
Chapter 17. Button Features 1408, 1416 Phone User Guide Page 115 IP Office 15-601040 Issue 05a (25 October 2011)
-
Page 116: Programming A Button
To do so press Replace. e. Press Back. 11.Repeat the process to program another button or press Back and then Exit to finish. 1408, 1416 Phone User Guide Page 116 IP Office 15-601040 Issue 05a (25 October 2011)
-
Page 117: Features
CPark · Some actions are not supported on all phones. However they may be set for users who hot desk between different types of phone. 1408, 1416 Phone User Guide Page 117 IP Office 15-601040 Issue 05a (25 October 2011)
-
Page 118: Abbreviated Dial
The button’s green lamp is lit when forwarding is enabled. The button can be pressed again to switch forward unconditional off. 1408, 1416 Phone User Guide Page 118 IP Office 15-601040 Issue 05a (25 October 2011)
-
Page 119: Call Park
DROP key on the phone. 17.2.14 Flash Hook A button configured for this action will send a hook flash signal to a currently connected analog line. 1408, 1416 Phone User Guide Page 119 IP Office 15-601040 Issue 05a (25 October 2011)
-
Page 120: Group
A button configured with this action can be used to turn your phone’s ringer on or off. Status 16XX/44XX/64XX — On Green on. — Off Off. 1408, 1416 Phone User Guide Page 120 IP Office 15-601040 Issue 05a (25 October 2011)
-
Page 121: Self-Administer
The button can be configured with a hunt group number or it can be left blank to toggle all groups of which you are a member. Status 16XX/44XX/64XX — On Green on. — Off Off. 1408, 1416 Phone User Guide Page 121 IP Office 15-601040 Issue 05a (25 October 2011)
-
Page 122: Time Of Day
Note that after the call, when the call appearance is next used, whether the timer is displayed or not to start with is controlled again by the Call Timer setting. 1408, 1416 Phone User Guide Page 122 IP Office 15-601040 Issue 05a (25 October 2011)
-
Page 123: User
· If the user enables DND through Mobile Call Control or one-X Mobile client, their status will show as DND. · Calls from the system direct to the user’s twinned destination number rather than redirected by twinning will not change the user’s status. 1408, 1416 Phone User Guide Page 123 IP Office…
-
Page 125: Phone Settings
Chapter 18. Phone Settings 1408, 1416 Phone User Guide Page 125 IP Office 15-601040 Issue 05a (25 October 2011)
-
Page 126: 18. Phone Settings
· Headset Volume Ring Sound · · Speaker Volume Ringer Volume · · Automatic Gain Control Internal Auto Answer · · Default Audio Path · 1408, 1416 Phone User Guide Page 126 IP Office 15-601040 Issue 05a (25 October 2011)
-
Page 127: Mobile Twinning
Withhold Number. 5. Use the left or right arrow keys to change the current setting or press the indicated soft key. 1408, 1416 Phone User Guide Page 127 IP Office 15-601040 Issue 05a (25 October 2011)
-
Page 128: Redial Mode
6. Use either the Change soft key or the left or right arrow keys to change the mode. 7. When the required mode is displayed, press the Done soft key. 1408, 1416 Phone User Guide Page 128 IP Office 15-601040 Issue 05a (25 October 2011)
-
Page 129: En-Bloc Dialing
Will only be applied to your A-menu options. 5. Press the Erase soft key. 6. When completed, press the Done soft key. 7. Press the Exit soft key to exit the menus. 1408, 1416 Phone User Guide Page 129 IP Office 15-601040 Issue 05a (25 October 2011)
-
Page 130: Auto Lock
Do not use the inactivity timer. · 1 / 5 / 30 / 60 Lock the phone after the indicated number of minutes. 6. Press the Done soft key. 1408, 1416 Phone User Guide Page 130 IP Office 15-601040 Issue 05a (25 October 2011)
-
Page 131: Ringer Controls
Disable Ringer. 5. Press the Change soft key to change the setting. Selecting On will turn the ringer off. 1408, 1416 Phone User Guide Page 131 IP Office 15-601040 Issue 05a (25 October 2011)
-
Page 132: Visual Alerting
5. Press the Change soft key to change the setting. · Ring Use normal ringing. · Abbr Use a single non-repeated ring (abbreviated ring). · Off No ring. 1408, 1416 Phone User Guide Page 132 IP Office 15-601040 Issue 05a (25 October 2011)
-
Page 133: Ring Sound
· To leave the menu without making any changes press the Cancel soft key. 4. When completed, press the Done soft key. 5. Press the Exit soft key to exit the menus. 1408, 1416 Phone User Guide Page 133 IP Office…
-
Page 134: Ringer Volume
This function can be assigned to a feature button configured with the Internal Auto Answer action. The button lamp will indicate when internal auto answer is on. 1408, 1416 Phone User Guide Page 134 IP Office 15-601040 Issue 05a (25 October 2011)
-
Page 135: Display Controls
6. When completed, press the Done soft key. 7. Press the Exit soft key to exit the menus. 1408, 1416 Phone User Guide Page 135 IP Office 15-601040 Issue 05a (25 October 2011)
-
Page 136: Call Timer Display
Show Last Call Duration. 4. Press Change to change the setting between On or Off. 5. Press the Save soft key. 1408, 1416 Phone User Guide Page 136 IP Office 15-601040 Issue 05a (25 October 2011)
-
Page 137: Display Language
7. To select the language currently displayed, press the Select soft key or OK. 8. When completed, press the Done soft key. 9. Press the Exit soft key to exit the menus. 1408, 1416 Phone User Guide Page 137 IP Office…
-
Page 138: Display Name
On/Off soft key to change the setting. 6. When completed, press the Done soft key. 7. Press the Exit soft key to exit the menus. 1408, 1416 Phone User Guide Page 138 IP Office 15-601040 Issue 05a (25 October 2011)
-
Page 139: Show Call Waiting
Do not use the inactivity timer. · 30 / 60 Apply the inactivity timer after the selected number of seconds. 6. Press the Done soft key. 1408, 1416 Phone User Guide Page 139 IP Office 15-601040 Issue 05a (25 October 2011)
-
Page 140: Volume And Sound
Automatic Gain Control · Switch automatic gain control on or off. Note The system administrator can set your phone to reset its volume after each call. 1408, 1416 Phone User Guide Page 140 IP Office 15-601040 Issue 05a (25 October 2011)
-
Page 141: Button Clicks
2. Use the + plus and – minus keys to adjust the volume. 3. The display will return to normal after a few seconds. 1408, 1416 Phone User Guide Page 141 IP Office 15-601040 Issue 05a (25 October 2011)
-
Page 142: Speaker Volume
Change soft key to change the setting. 6. When completed, press the Done soft key. 7. Press the Exit soft key to exit the menus. 1408, 1416 Phone User Guide Page 142 IP Office 15-601040 Issue 05a (25 October 2011)
-
Page 143
Phone Settings: Volume and Sound 1408, 1416 Phone User Guide Page 143 IP Office 15-601040 Issue 05a (25 October 2011) -
Page 145: Status Menu
Chapter 19. Status Menu 1408, 1416 Phone User Guide Page 145 IP Office 15-601040 Issue 05a (25 October 2011)
-
Page 146: Do Not Disturb
· To change the destination of the setting, press the Edit soft key. Access Control The system administrator is able to configure whether you can access the Forward and Follow Me menu and status options. 1408, 1416 Phone User Guide Page 146 IP Office 15-601040 Issue 05a (25 October 2011)
-
Page 147: Follow Me Here
Selecting Change will set a forward on busy/no answer destination, it will not change the forward unconditional destination. Access Control The system administrator is able to configure whether you can access the Forward and Follow Me menu and status options. 1408, 1416 Phone User Guide Page 147 IP Office 15-601040 Issue 05a (25 October 2011)
-
Page 148: Forward On No Answer
· Select edit to change the number to which calls are forwarded. Access Control The system administrator is able to configure whether you can access the Forward and Follow Me menu and status options. 1408, 1416 Phone User Guide Page 148 IP Office 15-601040 Issue 05a (25 October 2011)
-
Page 149: Forwarded Here
The system administrator is able to configure if you can access the Membership, State and Fallback options of a group. If you are not configured for any groups then the Group menu is not shown. 1408, 1416 Phone User Guide Page 149…
-
Page 150: Mobile Twinning
There is an error in the date or time being used by the system. Selecting Admin will take you to the system administration menu where you can change the date time 1408, 1416 Phone User Guide Page 150 IP Office 15-601040 Issue 05a (25 October 2011)
-
Page 151: Short Codes
Chapter 20. Short Codes 1408, 1416 Phone User Guide Page 151 IP Office 15-601040 Issue 05a (25 October 2011)
-
Page 152
· Cancel All Forwarding: *00 Switch off any forwarding. Includes forward unconditional, forward on busy, forward on no answer, follow me and do not disturb. 1408, 1416 Phone User Guide Page 152 IP Office 15-601040 Issue 05a (25 October 2011) -
Page 153: Hunt Group
Have voicemail ring your phone when you have any new messages. It will call when you use the phone. · Voicemail Ringback Off: *49 Switch off ringback. 1408, 1416 Phone User Guide Page 153 IP Office 15-601040 Issue 05a (25 October 2011)
-
Page 155: System Administration
Chapter 21. System Administration 1408, 1416 Phone User Guide Page 155 IP Office 15-601040 Issue 05a (25 October 2011)
-
Page 156: Checking The System And Software Version
8. Press the Select soft key or the OK button or the right arrow key. 9. You can now scroll through information about the system including its IP address and license key serial number. 1408, 1416 Phone User Guide Page 156 IP Office…
-
Page 157: Checking The Time Settings
10.When a complete valid date has been entered, the display will confirm that by showing the full date and the Done soft key option. 11.To set the date as the new date to be used by the telephone system press the Done soft key. 1408, 1416 Phone User Guide Page 157 IP Office…
-
Page 158: Setting The Time
· To change the offset from between positive or negative press the +/- soft key. 10.When a valid offset has been entered, the Done soft key is displayed. 11.To apply the offset to the current telephone system time press the Done soft key. 1408, 1416 Phone User Guide Page 158 IP Office…
-
Page 159: System Shutdown
Only proceed is you are sure. If you are not sure press the Back soft key. 11.If you press the Confirm soft key, the telephone system will switch itself to a shutdown state. This will disconnect all current calls and services. 1408, 1416 Phone User Guide Page 159 IP Office…
-
Page 160: Memory Card Management
· Copy This option is available on systems where both a System and Option memory card are active. It copies the contents of the System card to the Option card. 1408, 1416 Phone User Guide Page 160 IP Office 15-601040 Issue 05a (25 October 2011)
-
Page 161: System Alarms
There is an error in the date or time being used by the system. Selecting Admin will take you to the system administration menu where you can change the date time 1408, 1416 Phone User Guide Page 161 IP Office 15-601040 Issue 05a (25 October 2011)
-
Page 163: The Phone Menus
Chapter 22. The Phone Menus 1408, 1416 Phone User Guide Page 163 IP Office 15-601040 Issue 05a (25 October 2011)
-
Page 164
System Admin Menu · This menu is only available to a user who has been configured as a ‘system phone’ user by the system maintainer. 1408, 1416 Phone User Guide Page 164 IP Office 15-601040 Issue 05a (25 October 2011) -
Page 165: Features Menu
Access Control The system administrator controls whether you can access some of the menus. Others are only available if certain perquisites are met: 1408, 1416 Phone User Guide Page 165 IP Office 15-601040 Issue 05a (25 October 2011)
-
Page 166
· The Mobile Twinning options are only shown if you have been configured to use mobile twinning. · The System Admin option is only shown if you have been configured as a ‘System Phone’ user. 1408, 1416 Phone User Guide Page 166… -
Page 167: Self-Administer Menu
The Phone Menus: Features Menu 22.2 Self-Administer Menu This menu is accessed by pressing the Features soft key and selecting Phone User and then Self-Administer. 1408, 1416 Phone User Guide Page 167 IP Office 15-601040 Issue 05a (25 October 2011)
-
Page 168: Visual Voice Menu
The Email option is only available if configured by the system administrator. Hunt group mailbox access is only available if configured by the system administrator. 1408, 1416 Phone User Guide Page 168 IP Office…
-
Page 169: Status Menu
The Phone Menus: Visual Voice Menu 22.4 Status Menu This menu is accessed by pressing the Status soft key. 1408, 1416 Phone User Guide Page 169 IP Office 15-601040 Issue 05a (25 October 2011)
-
Page 170: Phone A-Menu
The following options are not used with IP Office and are not included in this documentation; Applications, Log- Answered, Log-Un-Answered, Log-Outgoing, Log-Bridged, Erase Contacts, Erase Call Log and Stay in Contacts 1408, 1416 Phone User Guide Page 170 IP Office…
-
Page 171: Call Log Menu
The Phone Menus: Phone A-Menu 22.6 Call Log Menu This menu is accessed by pressing the key. The diagram below summarizes the structure of the menu. 1408, 1416 Phone User Guide Page 171 IP Office 15-601040 Issue 05a (25 October 2011)
-
Page 172: Contacts Menu
22.7 Contacts Menu This menu is accessed by pressing the key. This menu is used to access your own personal contacts and the system directory of contacts. 1408, 1416 Phone User Guide Page 172 IP Office 15-601040 Issue 05a (25 October 2011)
-
Page 173: Redial Menu
This menu is only used when you set your redial mode to List. The numbers (up to 10) shown come from your outgoing call log. 1408, 1416 Phone User Guide Page 173 IP Office 15-601040 Issue 05a (25 October 2011)
-
Page 174: Phone Locked Menu
· None of the menus for your user settings can be accessed. · To unlock the phone requires your login code if you have configured a login code 1408, 1416 Phone User Guide Page 174 IP Office 15-601040 Issue 05a (25 October 2011)
-
Page 175: System Admin Menu
The Phone Menus: Phone Locked Menu 22.10 System Admin Menu This menu is only available to users who have been configured as a system phone user. 1408, 1416 Phone User Guide Page 175 IP Office 15-601040 Issue 05a (25 October 2011)
-
Page 176: Error Screens
If it is your phone you can unlock it using your login code. If it not you phone, you can still login 1408, 1416 Phone User Guide Page 176 IP Office…
-
Page 177: Glossary
Chapter 23. Glossary 1408, 1416 Phone User Guide Page 177 IP Office 15-601040 Issue 05a (25 October 2011)
-
Page 178: Abbreviated Ring
· You can still use the phone to make outgoing calls. When you go off-hook you will hear broken dial tone. · N = No Calls (Do Not Disturb) An N is shown on your phone’s display when you have do not disturb enabled. 1408, 1416 Phone User Guide Page 178 IP Office…
-
Page 179: Do Not Disturb Exceptions
, the telephone system will attempt to redirect forwarded calls to voicemail if they are still unanswered after having rung for your no answer time (default 15 seconds). This is not always possible for calls that have been forwarded to an external number. 1408, 1416 Phone User Guide Page 179 IP Office…
-
Page 180: Group
If you have been configured as a mobile twinning user, you can switch use of mobile twinning on or off through the phone’s menus and also change the number to which you are twinned. 1408, 1416 Phone User Guide Page 180…
-
Page 181: Park Call
Twinning is a process whereby your calls ring on two phones. Twinning is only available if configured by the system administrator. There are two methods of twinning supported, internal twinning mobile twinning 1408, 1416 Phone User Guide Page 181 IP Office 15-601040 Issue 05a (25 October 2011)
-
Page 183: Index
To voicemail 39, 84 Call from 33, 73 Diverting 18, 96, 179 Details 44, 74 Do Not Disturb 18, 103, 178 Menu 17, 72, 171 1408, 1416 Phone User Guide Page 183 IP Office 15-601040 Issue 05a (25 October 2011)
-
Page 184
Mobile Twinning Missed 17, 72 Number 105, 127 Service status 110, 111, 112, 149 Group Member 18 On/Off 105, 127 Groups 33, 65, 66 Status 1408, 1416 Phone User Guide Page 184 IP Office 15-601040 Issue 05a (25 October 2011) -
Page 185
Withhold Number 35, 127 Menu Send All Calls 98, 99, 148 Socket Headset 10, 11 Speaker Volume 62, 142 Stand 10, 11 Status Do Not Disturb 104, 146 1408, 1416 Phone User Guide Page 185 IP Office 15-601040 Issue 05a (25 October 2011) -
Page 187
1408, 1416 Phone User Guide Page 187 IP Office 15-601040 Issue 05a (25 October 2011) -
Page 188
Performance figures and data quoted in this document are typical, and must be specifically confirmed in writing by Avaya before they become applicable to any particular order or contract. The company reserves the right to make alterations or amendments to the detailed specifications at its discretion. The publication of information in this document does not imply freedom from patent or other protective rights of Avaya or others.
This manual is also suitable for:
1416
-
Page 1
Avaya 1408 and 1416 Telephones — connected to Integral 5 — User Guide 16-603588 Issue 1 May 2010… -
Page 2
Avaya does not guarantee that these links will work all the time and has no control over the availability of the linked pages. -
Page 3
Web site: http://www.avaya.com/support Contact Avaya Support Avaya provides a telephone number for you to use to report problems or to ask questions about your product. The support telephone number is 1-800-242-2121 in the United States. For additional support telephone numbers, see the Avaya Web site: http://www.avaya.com/… -
Page 4
1408/1416 at Integral 5 — User Guide May 2010… -
Page 5: Table Of Contents
Diverting calls to your telephone…28 Diverting calls for another telephone*…29 Signaling calls on two telephones (twinning)…30 Diverting bundles*…31 Chapter 5: Three-party conference call…33 Introduction to three-party conference calls…33 Making a conference call…33 1408/1416 at Integral 5 — User Guide Contents May 2010…
-
Page 6
Ending a call…55 Modifying the twinning/call diversion number…56 Deactivating call diversion / twinning…56 Calling code dialing destinations…56 Chapter 11: Using the Avaya Menu…59 Call charges…59 Introduction to call charges…59 Viewing the charge display…59 1408/1416 at Integral 5 — User Guide May 2010… -
Page 7
Introduction function keys…81 Assigning functions to keys…82 Assigning destinations to keys…82 Assigning lines to keys…83 Assigning partners to keys…84 Deleting key assignments…84 Conference bridge settings…85 Set up conference bridge *…85 Setup reservation permissions…85 1408/1416 at Integral 5 — User Guide May 2010… -
Page 8
Setting direct dial to rooms *…107 Setting guest-to-guest connection *…108 Determining the charge limit *…108 Waking guests *…109 Chapter 16: Menus…111 Menu overview…111 Appendix A: Remote features…115 Changing call diversion remotely *…115 Index…117 1408/1416 at Integral 5 — User Guide May 2010… -
Page 9: Chapter 1: Introduction
Chapter 1: Introduction Introduction to the 1400 Series Digital Deskphones The Avaya 1400 Series telephones are ISDN telephones for use with the Integral 5 call processing system.This user guide is written for the 1408 and 1416 Digital Deskphones.These deskphones put convenient features and capabilities at your fingertips, including a phone screen to view and manage your calls, a contacts list, a call log, a menu of options and settings to customize your phone, and access to your voice mail.
-
Page 10
1408/1416 at Integral 5 — User Guide Description This light flashes when you receive an incoming call. There are 3 (1408) or 4 (1416) lines in the phone display. The phone display presents calling or called party identification, user options, and other information relevant to using the phone. -
Page 11
Press the Phone book / Contacts button to view the entries in your phone book or contact list. Press the A button to access the Avaya menu. The Avaya menu provides options that allow you to customize phone settings, configure call logging and select the display language. -
Page 12: About Leds
Steady red Blinking red fast Blinking red slowly Related topics: Assigning partners to keys 1408/1416 at Integral 5 — User Guide Description Function is active, e. g. call diversion is set to on. Function is not active. Description Partner has set call diversion to.
-
Page 13: About This Manual
All the descriptions in this user guide assume a standard assignment of the function keys. If you re-assign the function keys, the procedures may change from those provided in this guide. 1408/1416 at Integral 5 — User Guide About this manual…
-
Page 14
Introduction 1408/1416 at Integral 5 — User Guide May 2010… -
Page 15: Chapter 2: Making Calls
2. Lift the handset. Related topics: Turning direct dialing on or off Calling an external call number 1. Enter the external line code, for example 0. Note: 1408/1416 at Integral 5 — User Guide on page 77 May 2010…
-
Page 16: Calling With A Destination Key
Calling a person from the call log 1. Press the Call Log button. 2. Select the desired call number. 3. Lift the handset. Related topics: Call log on page 41 1408/1416 at Integral 5 — User Guide on page 73 on page 81 May 2010…
-
Page 17: Calling A Person From The Phone Book Entry
Both functions are operated by means of the Speaker button. 1. Enter the desired call number. 2. Press the Speaker button. 1408/1416 at Integral 5 — User Guide Calling a person from the phone book entry on page 45 May 2010…
-
Page 18: Requesting Automatic Callback
Press the Delete softkey. Redialing You can redial one of the last numbers called. If you selected a special number to present to the call recipient, this will also be used for redial. 1408/1416 at Integral 5 — User Guide May 2010…
-
Page 19: Requesting Automatic Redialing
See your system administrator for more information. 1. Select Cut-In. 2. Press the OK button. 1408/1416 at Integral 5 — User Guide on page 74 Requesting automatic redialing May 2010…
-
Page 20: Presenting Yourself With Specified Call Numbers
1. Lift the handset. 2. Select Announce. When you want to make an «Announcement to all subscribers», you can also simply press the Announce function key and make your announcement. 1408/1416 at Integral 5 — User Guide May 2010…
-
Page 21: Making An Individual Announcement
2. Select Answer announcement. 3. Press the OK button. The caller who made the announcement is called. Calling anonymous Anonymous calling must be supported by your network provider. 1408/1416 at Integral 5 — User Guide Making an individual announcement May 2010…
-
Page 22
1. Enter the call number. 2. Select Anonymous call. 3. Press the OK button. Your number will not be transmitted to the called party for your next external call. 4. Lift the handset. 1408/1416 at Integral 5 — User Guide May 2010… -
Page 23: Chapter 3: Handling Calls
To answer a call, lift the handset or press the Speaker button to use the speakerphone. Answering a call ringing at another phone (pick-up) You hear another telephone ringing. 1. Press the Avaya Menu button. 2. Select Call Pickup. 1408/1416 at Integral 5 — User Guide on page 68 May 2010…
-
Page 24: Answering A Call For A Partner
The call is forwarded to the call forwarding stations. Related topics: Assigning call forwarding destinations * Putting a call on hold To place your current call on hold: 1408/1416 at Integral 5 — User Guide on page 95 May 2010…
-
Page 25: Muting A Call
Switching between two calls (brokering) You want to switch back to a first talking partner who has been put on hold. 1. Select Return to … . 2. Press the OK button. 1408/1416 at Integral 5 — User Guide Muting a call May 2010…
-
Page 26: Transferring A Call
2. Press the OK button. You are connected to the second call and the first call is put on hold. Note: To end the first call instead, press the Drop button first. 1408/1416 at Integral 5 — User Guide May 2010…
-
Page 27: Chapter 4: Call Diversion
You can also press an appropriate destination or partner key instead of entering the number. If dial-in authorized call numbers are registered for you for Managed Mobility Access (MMA) they are shown. You can select these destinations directly. 1408/1416 at Integral 5 — User Guide May 2010…
-
Page 28: Diverting Calls To Your Telephone
You can also press an appropriate destination or partner key instead of entering the number. 6. Select one of the following: • immediately • after time 1408/1416 at Integral 5 — User Guide on page 88 May 2010…
-
Page 29: Diverting Calls For Another Telephone
You must add an additional line code (usually “0”) in front of an external number. If dial-in authorized call numbers are registered for you for Managed Mobility Access (MMA) they are shown. You can select these destinations directly. 1408/1416 at Integral 5 — User Guide Diverting calls for another telephone* May 2010…
-
Page 30: Signaling Calls On Two Telephones (Twinning)
The status information twinning …- appears in the display. 8. To deactivate twinning: a. Select the appropriate status information. b. Press the OK button. c. Press the Delete softkey. 1408/1416 at Integral 5 — User Guide on page 53 May 2010…
-
Page 31: Diverting Bundles
6. Enter the external call number to which all calls via this bundle are to be diverted. 7. Press the OK button. 8. Press the OK button. The status information Bundle 1 … appears in the display. 1408/1416 at Integral 5 — User Guide Diverting bundles* May 2010…
-
Page 32
Call diversion 1408/1416 at Integral 5 — User Guide May 2010… -
Page 33: Chapter 5: Three-Party Conference Call
Then select the Conference with … menu item to connect all participants. Expanding conference with another participant Conferences can be expanded to up to 9 participants. Conferences with external participants are always limited to three participants. 1408/1416 at Integral 5 — User Guide May 2010…
-
Page 34: Connecting Conference Participants With Each Other
If you are on a three-party conference call and want to connect the other participants to each other, press the Transfer button or replace the handset. Ending the conference call Press the Drop button. 1408/1416 at Integral 5 — User Guide May 2010…
-
Page 35: Chapter 6: Conference Bridge
All conference subscribers hear a brief alert tone. You are now part of the conference. If you are alone in the conference bridge, you will hear on-hold music. 3. To leave the conference: Replace the handset. Note: 1408/1416 at Integral 5 — User Guide May 2010…
-
Page 36: Managing Conference Bridge Calls
All participants can talk to each other again. 10. To disconnect one conference participant specifically, first select the desired one. 11. Press the OK button. 12. Select Clear connection. 13. Press the OK button. 1408/1416 at Integral 5 — User Guide May 2010…
-
Page 37: Reserving Conference Bridge (One-Time Appointment)
The conference appointment is reserved. Next steps Now let all the conference subscribers know the date, the number of the conference bridge and your access PIN. 1408/1416 at Integral 5 — User Guide Reserving conference bridge (one-time appointment) May 2010…
-
Page 38: Reserving Conference Bridge (Recurring Appointment)
14. Press the OK button. The conference appointment is reserved. Next steps Now let all the conference subscribers know the date, the number of the conference bridge and your access PIN. 1408/1416 at Integral 5 — User Guide May 2010…
-
Page 39: Reserving A Conference Bridge For Others
4. Select the reservation to be deleted from the list. 5. If applicable, press the Delete softkey to delete the reservation. 6. To confirm, press the Delete softkey again. 1408/1416 at Integral 5 — User Guide Reserving a conference bridge for others May 2010…
-
Page 40
Conference bridge 1408/1416 at Integral 5 — User Guide May 2010… -
Page 41: Chapter 7: Managing The Call Log
Symbols in the call log Symbol Missed call Answered call Call answered by voicemail Message waiting in voice mailbox Diverted call, showing calling number and originally called number 1408/1416 at Integral 5 — User Guide on page 16 Meaning May 2010…
-
Page 42: Viewing The Call Log
You can select the following intervals: 10 minutes, 1 hour, 1 day, 1 week, 1 month or «off». Note: The new setting is only valid for new call log entries and has no effect on existing entries. 1408/1416 at Integral 5 — User Guide May 2010…
-
Page 43: Adding An Entry From The Call Log To The Phone Book
• Common for an entry in the common phone book 6. Enter a name if required. 7. Press the Save softkey. 8. Press the OK button. 1408/1416 at Integral 5 — User Guide Adding an entry from the call log to the phone book May 2010…
-
Page 44: Adding Additional Entries In The Call Log
9. Select Back. 10. Change Call display A→ B (on) to show the number that the caller dialed. 1408/1416 at Integral 5 — User Guide — (A) the call list of the called participant — (B) the call list of the participant the call was diverted to…
-
Page 45: Chapter 8: Managing The Phone Book
It may be necessary to enter an external line code and a dial pause before an external number. You can obtain more information from your telephone system administrator. 1408/1416 at Integral 5 — User Guide on page 17 May 2010…
-
Page 46: Editing An Entry In The Phone Book
Call numbers you have stored in the phone book without a name can be found there under the name » » (space). 3. Press the Edit softkey. 4. Edit the entry. 5. Press the OK button. 1408/1416 at Integral 5 — User Guide on page 56 May 2010…
-
Page 47: Deleting An Entry
Deleting an entry 1. Press the Phone book / Contacts button. 2. Select the entry you want to delete. 3. Press the Delete softkey. 4. Press the Delete softkey. 1408/1416 at Integral 5 — User Guide Deleting an entry May 2010…
-
Page 48
Managing the phone book 1408/1416 at Integral 5 — User Guide May 2010… -
Page 49: Chapter 9: Messages
2. Press the Delete softkey. Writing and sending own text messages 1. Press the Avaya Menu button 2. Select Message. 3. Enter the desired text. 4. Press the OK button. 5. Enter internal call number. 1408/1416 at Integral 5 — User Guide May 2010…
-
Page 50: Sending A Standard Text
3. Press the Message button. 4. Select the desired standard text. 5. Press the OK button. 6. Change or add to the message, e.g. to include a name or time. 7. Press the OK button. 1408/1416 at Integral 5 — User Guide May 2010…
-
Page 51
The text is saved and a status information appears in your display. Any internal caller who tries to call you will now get the message shown on his display. 1408/1416 at Integral 5 — User Guide Sending a text message for an internal caller… -
Page 52
Messages 1408/1416 at Integral 5 — User Guide May 2010… -
Page 53: Chapter 10: Mobile System Subscribers (Managed Mobility Access)
1. Dial the dial-in number for your system from a registered external telephone. 2. The Integral 5 picks up the call. Wait for a dial tone. You can now make calls as if you were an internal subscriber. 1408/1416 at Integral 5 — User Guide on page 29 on page 88…
-
Page 54: Dialing Into Your System Using Callback
The first five entries recorded in your personal phone book can easily be accessed as code dialing destinations by pressing #1…#5 (relates to entries 900 to 904). 1. Enter the call number. 2. Carry out the call. 1408/1416 at Integral 5 — User Guide May 2010…
-
Page 55: Referring Back
Ending a call Press * 8 keys. The current call is ended. You hear the dial tone and can now place a new call across the system. 1408/1416 at Integral 5 — User Guide Calling using your system May 2010…
-
Page 56: Modifying The Twinning/Call Diversion Number
You can note your code dialing destinations on a card which you can keep with you at all times. You have established a connection to your system from a registered telephone. You hear the dial tone. 1408/1416 at Integral 5 — User Guide May 2010…
-
Page 57
904 -> Code number 5. 2. Carry out the call. Related topics: Assigning function keys specifically (changing code dialing destinations) Creating a new entry in the phone book 1408/1416 at Integral 5 — User Guide Calling code dialing destinations on page 45 May 2010… -
Page 58
Mobile System Subscribers (Managed Mobility Access) 1408/1416 at Integral 5 — User Guide May 2010… -
Page 59: Chapter 11: Using The Avaya Menu
Viewing the charge display 1. Press the Avaya Menu button. 2. Select Charges. 3. Press the OK button. The charges for the last call are selected. 4. To view the total charges, select Total. 1408/1416 at Integral 5 — User Guide May 2010…
-
Page 60: Viewing Charges For Lines / Subscribers
Note: If you want to clear the totals for all calls, you must have this function enabled by your system administrator. 5. Press the OK button. 6. Press the Delete softkey. 1408/1416 at Integral 5 — User Guide May 2010…
-
Page 61: Locking The Telephone
If you make a mistake when entering your PIN: press the Back softkey and start again from the beginning. 5. Press the OK button. 6. Enter the new one. Locking the telephone Use this procedure to lock your telephone. 1408/1416 at Integral 5 — User Guide Locking the telephone May 2010…
-
Page 62: Unlocking The Telephone
When the time of the appointment arrives, a signal tone sounds and the message you have entered for the appointment appears in the display. You can selectively delete appointments you have entered. 1408/1416 at Integral 5 — User Guide May 2010…
-
Page 63: Entering An Appointment For Today
5. Enter the date and time in the form «day month hours minutes», e.g. 04081150 for 4 August at 11:50 hrs. 6. Select a standard text if required. To be able to select from standard texts, these must first have been entered into the system. 1408/1416 at Integral 5 — User Guide Managing appointments May 2010…
-
Page 64: Entering A Recurring Appointment
11. Press the OK button. Acknowledging an appointment Use this procedure to acknowledge an appointment. When the specified time is reached, a signal tone sounds and the entered appointment message appears on the display. 1408/1416 at Integral 5 — User Guide May 2010…
-
Page 65: Deleting An Appointment
4. Select Appointment for other. 5. Press the OK button. All existing appointments for this subscriber will be displayed. 6. Now enter the new appointment just as you would set your own appointments. 1408/1416 at Integral 5 — User Guide Managing appointments May 2010…
-
Page 66: At Integral 5 — User Guide May
Using the Avaya Menu 1408/1416 at Integral 5 — User Guide May 2010…
-
Page 67: Chapter 12: Customizing Your Telephone
7. Press the OK button. 8. Select one of the following: • Ringing tone • Monitor • Handset • Headset 9. Increase or reduce the volume by pressing the right or left navigation button. 1408/1416 at Integral 5 — User Guide May 2010…
-
Page 68: Setting The Ringing Tone Melody
«Service», «Head office» or «Workshop» can easily be recognized from the ring tones. You can apply these ring tones to your telephone. The setting only affects external calls and VIP calls. 1408/1416 at Integral 5 — User Guide May 2010…
-
Page 69: Setting The Contrast
Default setting and confirm with the OK button. 7. Press the OK button. 8. Increase or reduce the contrast with the right or left navigation button. 9. Press the Back softkey. 1408/1416 at Integral 5 — User Guide Setting parameters for your telephone May 2010…
-
Page 70: Setting The Language
7. Press the OK button. 8. Select Handsfree. 9. Change the setting with the right or left navigation button. • 1: Normal connection (medium volume) • 2: Quiet or long-distance connection 1408/1416 at Integral 5 — User Guide May 2010…
-
Page 71: Deactivating Ringing Tone Temporarily (Do Not Disturb)
The caller hears the busy tone or an announcement if you have switched on «Do not disturb». Related topics: Using call filter on page 91 Activating night service You can activate a desired night service at any time. 1408/1416 at Integral 5 — User Guide Deactivating ringing tone temporarily (Do not disturb) May 2010…
-
Page 72: Activating Automatic Handsfree After Dialing
4. Select Dial settings. 5. Press the OK button. 6. Select Autom. handsfree (off). 7. Press the Modify softkey. 8. Press the Back softkey. The new setting is saved. 1408/1416 at Integral 5 — User Guide on page 94 May 2010…
-
Page 73: Seizing Exchange Line Automatically
1. Press the Avaya Menu button. 2. Select Settings. 3. Press the OK button. 4. Select Dial settings. 5. Press the OK button. 1408/1416 at Integral 5 — User Guide Seizing exchange line automatically on page 15 May 2010…
-
Page 74: Setting The Number Of Redials
If the setting is 0, the Auto. redial menu item will not be shown while calling external numbers. 8. Press the Back softkey. The new setting is saved. Related topics: Requesting automatic redialing 1408/1416 at Integral 5 — User Guide on page 19 May 2010…
-
Page 75: Setting Redial Interval
1. Press the Avaya Menu button. 2. Select Settings. 3. Press the OK button. 4. Select Dial settings. 5. Press the OK button. 6. Select Remote no. disp. 1408/1416 at Integral 5 — User Guide Setting redial interval May 2010…
-
Page 76: Accepting Calls Automatically (Handsfree Answer Back)
The status information Handsfree answer back appears on the display. Next steps Note: If you want to switch “Handsfree answer back” off again, switch the function to Handsfree answer back (on) again. 1408/1416 at Integral 5 — User Guide May 2010…
-
Page 77: Turning Direct Dialing On Or Off
1. Press the Avaya Menu button. 2. Select Settings. 3. Press the OK button. 4. Select Dial settings. 5. Press the OK button. 1408/1416 at Integral 5 — User Guide on page 15 Turning direct dialing on or off May 2010…
-
Page 78: Assigning Code Numbers
• To change code, enter new code number, • To deactivate code, press OK button, • To delete code, select Delete and press OK button. 9. Press the Back softkey. The new setting is saved. 1408/1416 at Integral 5 — User Guide May 2010…
-
Page 79: Extending Call Display
3. Press the OK button. 4. Select Applications. 5. Press the OK button. 6. Select VIP call (on). 7. Press the Modify softkey. 8. Press the Back softkey. 1408/1416 at Integral 5 — User Guide Extending call display May 2010…
-
Page 80: Removing Telephone From Hunt Groups
1. Press the Avaya Menu button. 2. Select Settings. 3. Press the OK button. 4. Select Applications. 5. Press the OK button. 6. Select General call (on). 1408/1416 at Integral 5 — User Guide May 2010…
-
Page 81: Activating Remote Headset
A partner can be any internal subscriber to your telephone system. If you place a partner on the function key then the LED informs you as to the telephone status of the partner. 1408/1416 at Integral 5 — User Guide Activating remote headset…
-
Page 82: Assigning Functions To Keys
9. Press the OK button. 10. Press the OK button. Assigning destinations to keys 1. Press the Avaya Menu button. 2. Select Settings. 3. Press the OK button. 4. Select Function keys. 1408/1416 at Integral 5 — User Guide on page 16 May 2010…
-
Page 83: Assigning Lines To Keys
10. Select the line you want to assign to this key, e.g. Line 2. 11. Press the OK button. 12. Press the OK button. You can now seize Line 2 with this key. 1408/1416 at Integral 5 — User Guide Function, destination, line and partner keys May 2010…
-
Page 84: Assigning Partners To Keys
3. Press the OK button. 4. Select Function keys. 5. Press the OK button. The description and current assignment of all keys will be displayed. 6. Press the key whose assignment you want to delete. 1408/1416 at Integral 5 — User Guide May 2010…
-
Page 85: Conference Bridge Settings
9. Enter the number of the subscriber for whom you want to enable reservation permissions. You are shown the access PIN and whether the subscriber can reserve the conference bridge, e.g. PIN: 0000 Not active. 1408/1416 at Integral 5 — User Guide Conference bridge settings May 2010…
-
Page 86: Changing Access Pin
With a standard PIN, the conference bridge can be used at times at which it is not reserved. 1. Press the Avaya Menu button. 2. Select Settings. 3. Press the OK button. 1408/1416 at Integral 5 — User Guide May 2010…
-
Page 87: Changing Standard Pin
10. Select PIN: 0000 Not active 11. Press the OK button. 12. Enter the new standard 4-digit PIN. 13. Press the Back softkey. The default PIN has been changed and can be used. 1408/1416 at Integral 5 — User Guide Conference bridge settings May 2010…
-
Page 88: Managed Mobility Access Settings
8. Enter the call number of the internal subscriber for whom you want to register a new number. A list of all the external numbers already registered appears. 9. Press the New softkey. 1408/1416 at Integral 5 — User Guide on page 53 May 2010…
-
Page 89: Changing Dial-In Authorized Numbers
2. Select Settings. 3. Press the OK button. 4. Select Applications. 5. Press the OK button. 6. Select Mobility. 7. Press the OK button. 1408/1416 at Integral 5 — User Guide Managed Mobility Access settings on page 27 May 2010…
-
Page 90: Deleting Dial-In Authorized Numbers
9. Select the number you want to delete. 10. Press the Delete softkey. 11. Press one of the following softkeys: • Entry, to delete the shown entry. • All, to delete all entries in the list. 1408/1416 at Integral 5 — User Guide May 2010…
-
Page 91: Using Call Filter
The subscriber is added to the call filter list. 11. Press the Back softkey. Related topics: Diverting calls for your telephone Deactivating ringing tone temporarily (Do not disturb) 1408/1416 at Integral 5 — User Guide on page 27 on page 71 Using call filter May 2010…
-
Page 92: Deleting Entries From The Call Filter
8. Press the Delete softkey. 9. Press one of the following softkeys: • Entry, to delete the shown entry. • All, to delete all entries in the list. 10. Press the Back softkey. 1408/1416 at Integral 5 — User Guide May 2010…
-
Page 93: Chapter 13: Settings For Your Telephone System
Introduction You can perform many of the settings for your telephone system from your Avaya 1400 Series telephones. The settings apply to all the telephones in your system. • External callers can often reach your company using various different numbers. For each of these numbers you can define which phones should ring.
-
Page 94: Assigning Operators For Night Service
You can program times when the system automatically activates a night service (see Integral manual). 1. Press the Avaya Menu button. 2. Select Settings. 3. Press the OK button. 4. Select System functions. 1408/1416 at Integral 5 — User Guide May 2010…
-
Page 95: Assigning Call Forwarding Destinations
1. Press the Avaya Menu button. 2. Select Settings. 3. Press the OK button. 4. Select System functions. 1408/1416 at Integral 5 — User Guide on page 71 Assigning call forwarding destinations * May 2010…
-
Page 96: Setting Second Call Barring
5. Press the OK button. 6. Select Second call barring. 7. Press the OK button. A list of numbers for which second call barring is to be set up is displayed. 1408/1416 at Integral 5 — User Guide on page 24 May 2010…
-
Page 97: Setting Date And Time
You can determine a customer password so that you can e.g. manage your telephone system with the ICT tool. The password can consist of letters and digits. 1408/1416 at Integral 5 — User Guide Setting date and time May 2010…
-
Page 98: Showing Traffic Statistics
3. Press the OK button. Information about calls since data was last deleted will be shown. 4. To reset the counter, select Delete. The data will now be recorded again from the current date. 1408/1416 at Integral 5 — User Guide May 2010…
-
Page 99: Chapter 14: Auxiliary Devices
A DBM32 button module provides 32 buttons. You can connect one or two DBM32 to your Avaya 1416 telephone. No button module can be connected to the Avaya 1408 telephone. Your system administrator can assign the buttons according to your preferences. The following options are available to you: •…
-
Page 100: Using A Headset
Press the Headset button. You will be speaking to the other party via the headset. The button’s LED lights up. Ending a headset call and disconnecting: Press the Headset button and replace the handset if necessary. 1408/1416 at Integral 5 — User Guide Buttons with LEDs Strips for labeling Connection Partner receives an external call.
-
Page 101
Enter the call number and press the Headset button. Switching on monitoring: You can switch on monitoring on the telephone while you are on a call with the headset. Press the Speaker button. The button’s LED lights up. 1408/1416 at Integral 5 — User Guide May 2010… -
Page 102
Auxiliary devices 1408/1416 at Integral 5 — User Guide May 2010… -
Page 103: Chapter 15: Hotel Functions
Introduction You can use the hotel functions in small to medium-sized hotels and guest houses. Your system administrator can connect up to three DBM32 modules to the Avaya 1416 telephone for executing these functions. Available functions include checking guests in and out, viewing guest charges, disabling direct inward dial to rooms, waking up guests, etc.
-
Page 104: Layout Of The Hotel Functions On The Dbm32 Button Module
Disable guest-to- guest Charge limit Exit Other keys 1408/1416 at Integral 5 — User Guide Description For checking guests in and out. An external caller cannot directly dial the guest’s room, but must be connected via the switchboard. The switchboard can send a message to a room telephone.
-
Page 105: Checking In
You can query the charges and you can ask the guest to listen to the messages. 3. Press the Exit button. The DBM32 module returns to displaying the calling status of the room telephones. 1408/1416 at Integral 5 — User Guide Checking in * May 2010…
-
Page 106: Querying Call Charges
The guest is checked out or a message is displayed that there are still messages that have not been listened to. Listening to messages * A menu item shows how many messages on the guest’s voice mail box have not been listened 1408/1416 at Integral 5 — User Guide May 2010…
-
Page 107: Messaging To Guest: Message At Reception
If direct inward dial to a room is disabled, an external caller cannot reach this guest directly but must be connected via the switchboard. 1408/1416 at Integral 5 — User Guide Messaging to guest: message at reception * May 2010…
-
Page 108: Setting Guest-To-Guest Connection
1. Press the Charge limit button. The button LEDs of all rooms which an activated charge limit light up. 2. Press the button for the desired room. 1408/1416 at Integral 5 — User Guide May 2010…
-
Page 109: Waking Guests
8. Now enter the desired time for the wake-up call just as you would for your own appointments. 9. To delete one of the shown appointments: Just select it and press the Delete softkey. 1408/1416 at Integral 5 — User Guide Waking guests * May 2010…
-
Page 110
Hotel functions 1408/1416 at Integral 5 — User Guide May 2010… -
Page 111: Chapter 16: Menus
Chapter 16: Menus Menu overview The following contains an overview of the menu structure of the Avaya 1400 Series telephones connected to Integral 5. The first three menu levels are shown. The menu structure shown here may differ from the actual menu structure on your telephone. Deviations from the menu overview shown here may arise due to the features used and the accessories in use.
-
Page 112
Menus Menu item in basic menu Conference bridge Settings 1408/1416 at Integral 5 — User Guide One menu level lower Own conference Conference for others Display/Acoustics Acoustics/Contrast Partner beep Do not disturb MSN call type Language Function keys Dial settings Autom. -
Page 113
Night service, forwarding variants, gate stations, assignment control, call charge functions, paper format, call charge display, call charge threshold, call charge factor, second call barring. 1408/1416 at Integral 5 — User Guide One menu level lower One menu level lower… -
Page 114
Menus 1408/1416 at Integral 5 — User Guide May 2010… -
Page 115: Appendix A: Remote Features
8. Enter the system’s external line code and the new destination to which you want to divert the calls. As confirmation, an acknowledgement tone sounds after a short time. 9. To deactivate the call diversion, enter the code for Deactivate follow-me. 1408/1416 at Integral 5 — User Guide May 2010…
-
Page 116
Remote features 1408/1416 at Integral 5 — User Guide May 2010… -
Page 117: Index
… call forwarding destinations … call log … additional entries … entry in phone book … 1408/1416 at Integral 5 — User Guide Index symbols … call log entries automatically … call log lists … call numbers presenting different …
-
Page 118
… forwarding calls … function key LEDs … functions assigning keys … general call … guest-to-guest connectionl 1408/1416 at Integral 5 — User Guide hotel … handling calls … handsfree … handsfree answer back … handsfree operation setting … -
Page 119
… night service … activating … on hold putting … outgoing calls … overview … pager … 1408/1416 at Integral 5 — User Guide participant … partner assigning keys … partner key LEDs … partner keys … partners answering … -
Page 120
… symbols call log … telephone system settings … time … traffic statistics … 1408/1416 at Integral 5 — User Guide transferring call … on hold … twinning … unlocking telephone … VIP call … waking guests …
Краткое содержание страницы № 1
Avaya 1408 and 1416 Telephones —
connected to Integral 5 — User Guide
16-603588
Issue 1
May 2010
Краткое содержание страницы № 2
Notice means a Designated Processor that hosts a software application to be accessed by multiple users. “Software” means the computer programs While reasonable efforts have been made to ensure that the in object code, originally licensed by Avaya and ultimately utilized by information in this document is complete and accurate at the time of End User, whether as stand-alone products or pre-installed on printing, Avaya assumes no liability for any errors. Avaya reserves the Hardware. “Hardware” me
Краткое содержание страницы № 3
Downloading documents For the most current versions of documentation, see the Avaya Support Web site: http://www.avaya.com/support Contact Avaya Support Avaya provides a telephone number for you to use to report problems or to ask questions about your product. The support telephone number is 1-800-242-2121 in the United States. For additional support telephone numbers, see the Avaya Web site: http://www.avaya.com/ support 1408/1416 at Integral 5 — User Guide May 2010 3
Краткое содержание страницы № 4
4 1408/1416 at Integral 5 — User Guide May 2010
Краткое содержание страницы № 5
Contents Chapter 1: Introduction……………………………………………………………………………………………….9 Introduction to the 1400 Series Digital Deskphones……………………………………………………………………………..9 Overview of phone buttons and features…………………………………………………………………………………………….9 About LEDs……………………………………………………
Краткое содержание страницы № 6
Expanding conference with another participant………………………………………………………………………………….33 Connecting conference participants with each other…………………………………………………………………………..34 Ending the conference call………………………………………………………………………………………………………………34 Chapter 6: Conference bridge………………………………
Краткое содержание страницы № 7
Viewing charges for lines / subscribers……………………………………………………………………………………..60 Deleting call charges………………………………………………………………………………………………………………60 Locking the telephone…………………………………………………………………………………………………………………….61 Telephone lock…………………………………
Краткое содержание страницы № 8
Changing access PIN……………………………………………………………………………………………………………..86 Setup standard access *………………………………………………………………………………………………………….86 Changing standard PIN *…………………………………………………………………………………………………………87 Managed Mobility Access settings……………………….
Краткое содержание страницы № 9
Chapter 1: Introduction Introduction to the 1400 Series Digital Deskphones The Avaya 1400 Series telephones are ISDN telephones for use with the Integral 5 call processing system.This user guide is written for the 1408 and 1416 Digital Deskphones.These deskphones put convenient features and capabilities at your fingertips, including a phone screen to view and manage your calls, a contacts list, a call log, a menu of options and settings to customize your phone, and access to your voice mail. Not
Краткое содержание страницы № 10
Introduction Avaya 1416 Telephone No. Name Description 1 Call/Message This light flashes when you receive an incoming call. Waiting Indicator 2 Phone Display There are 3 (1408) or 4 (1416) lines in the phone display. The phone display presents calling or called party identification, user options, and other information relevant to using the phone. The top line shows the phone number and name you set and the date and time. The middle line (1408) or two lines (1416) display status information.
Краткое содержание страницы № 11
Overview of phone buttons and features No. Name Description are available in the menu. When a call number is programmed on the key press the key to dial the destination. (Partners are special destinations, see chapter Partners for more information) 7 Hold Press the Hold button (R button) to put the active call on hold. 8 Conference Press the Conference button to add another party to an existing call. 9 Transfer Press the Transfer button to transfer a call to another number. 10 Drop Press the Dro
Краткое содержание страницы № 12
Introduction About LEDs Each function, partner or destination key has two LEDs, one green and one red, to indicate the status of the function or partner. The status is identified by whether the LED is on, off, or blinking as described in the following tables. Note: If a key is assigned to a destination the LEDs are always off. Table 1: Function key LEDs LED Description Steady green Function is active, e. g. call diversion is set to on. Off Function is not active. Table 2: Partner key LEDs LED D
Краткое содержание страницы № 13
About this manual About this manual Descriptions of optional features are marked with an asterisk in the title. For more information about the optional features, see your system administrator. All the descriptions in this user guide assume a standard assignment of the function keys. If you re-assign the function keys, the procedures may change from those provided in this guide. 1408/1416 at Integral 5 — User Guide May 2010 13
Краткое содержание страницы № 14
Introduction 14 1408/1416 at Integral 5 — User Guide May 2010
Краткое содержание страницы № 15
Chapter 2: Making calls Introduction to making calls Use the procedures provided in this chapter to make calls from your telephone. Note that when you make a call, you can either dial the number and then lift the handset, or lift the handset and then dial the number. Both orders are correct. However, if you lift the handset first and then dial the number, you will not be able to correct a dialing error. Calling an internal call number 1. Enter the desired call number. If you have switched Direct
Краткое содержание страницы № 16
Making calls Instead of entering the external line code, you can also press a line key. If you have activated LN on dialing you only need to dial the external number. 2. Enter the desired call number. 3. Lift the handset. Related topics: Seizing exchange line automatically on page 73 Calling with a destination key 1. Press the destination key for the desired subscriber. 2. Lift the handset. Related topics: Introduction function keys on page 81 Calling a person from the call log 1. Press the Call
Краткое содержание страницы № 17
Calling a person from the phone book entry Calling a person from the phone book entry 1. Press the Phone book / Contacts button. 2. Select the entry you want to dial. Note: To reach the entry more quickly, you can also enter one or more of the first letters of the name. 3. Lift the handset. Related topics: Introduction to the phone book on page 45 Calling partners 1. Press the appropriate partner key. 2. Talk using the speakerphone, or lift the handset to talk using the handset. Calling using t
Краткое содержание страницы № 18
Making calls 3. To adjust the volume, press + or — on the Volume button. 4. Do one of the following: a. To continue the call using the handset, lift the handset. To activate the speaker additionally (Monitoring), press the Speaker button. To activate Handsfree press the Speaker button once more. b. To end the call, press the Speaker button. Requesting automatic callback If an internal call number you dialed is busy or unanswered, use this procedure if you want your telephone system to call you b
Краткое содержание страницы № 19
Requesting automatic redialing 1. Press the Redial button. 2. Select the desired call number. 3. Lift the handset. Requesting automatic redialing Note: You can specify the number of automatic redial attempts and the time between two attempts in the Dial settings. You can only use Automatic redial if you are calling on a digital exchange line. The external number dialed is busy. The Auto redial menu item is offered. 1. Select the Auto redial menu item. 2. Press the OK button. 3. Replace the hand
Краткое содержание страницы № 20
Making calls Each person on the call will hear a cut-in tone. You are now included in the call. 3. To disconnect from the call, press the Drop button, or replace the handset. Presenting yourself with specified call numbers * If your system is configured to do so, every time you make an external call you can select the number you want to present to the call recipient. This is called Calling Line Identification Presentation (CLIP). The number could represent your “service”, “head office” or “works
|
|
1408 [700504841] Цифровой телефон Avaya 1408 TELSET FOR CM/IPO ICON ONLY
Цена по запросу Услуги
Гарантийные обязательства Гарантия — 12 месяцев Доставка Осуществляем доставку заказанного Вами оборудования в любой регион и населенный пункт России. Доставку по РФ рекомендуем поручить транспортной компании (ТК) «Деловые линии». Доставка до дверей ТК, оформление груза на отправку — услуга бесплатная. |
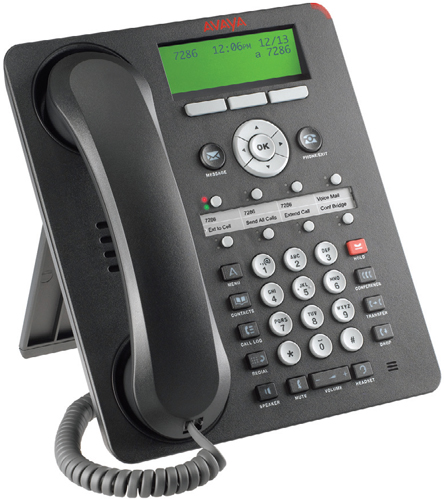
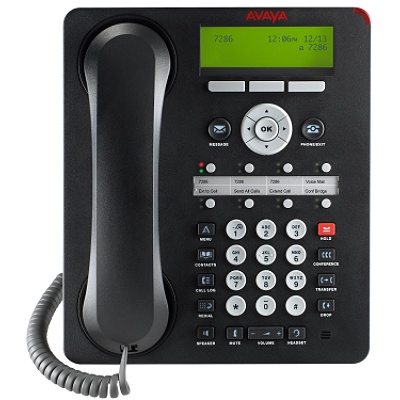
![]() Инструкция для Avaya IP Office | Инструкция для Avaya Aura
Инструкция для Avaya IP Office | Инструкция для Avaya Aura
ОписаниеХарактеристики
Общее описание
Цифровые настольные телефоны Avaya серии 1400, предназначенные для широкого круга деловых пользователей, сочетают привлекательный современный дизайн с передовыми аудио-технологиями и функциями, повышающими производительность труда. Эти телефоны объединяют в себе лучшее от прошлых моделей. Фиксированные клавиши — обычные для любых пользователей телефонов — обеспечивают легкий доступ к большинству общих функций, в то время как программируемые клавиши позволяют сделать индивидуальное контекстное управление и тем самым увеличить простоту и эффективность работы каждого сотрудника. К моделям 1408 и 1416 можно легко подключить гарнитуру. К модели 1416 можно подключить модуль расширения с 32 клавишами, который программируется и поддерживает широкий набор дополнительных функций.
Многофункциональные цифровые аппараты 1400 серии (1403, 1408, 1416) внешне и по основным функциям похожи на соответствующие IP-терминалы 1600 серии (1603, 1608, 1616). Все телефоны 1400 серии совместимы как с платформой Avaya Aura®, так и с платформой Avaya IP Office™. Исключение составляет только модель 1403, которая поддерживается только Avaya IP Office™.
Цифровой телефон Avaya 1408 [700504841] — телефон, разработанный для офисных работников, продавцов и других пользователей с относительно невысокими требованиями к телефонной связи. Отличается простым и понятным интерфейсом.
Телефон поддерживает все функции, характерные для модели 1403. Кроме того, он имеет несколько дополнительных функций: 3-строчный 24-значный дисплей с подсветкой, 8 программируемых клавиш, каждая из которых имеет два светодиодных указателя (красный и зеленый), информирующих пользователя о своем статусе.
Телефон устанавливается на подставке, которая может быть зафиксирована в двух позициях – нижней и верхней. В телефонном аппарате встроен громкоговоритель и микрофон, что позволяет разговаривать без поднятия трубки. В телефоне предусмотрен разъем для подключения гарнитуры.
Возможности и характеристики цифрового телефона Avaya 1408 [700504841]
- Цифровой телефон Avaya
- Артикул: 700504841
- Совместим с платформой Avaya Aura® и Avaya IP Office™
- Подключается к цифровому порту АТС (2-проводная выделенная линия)
- Используемый протокол подключения — DCP
- 3-строчный 24-значный монохромный подсвечивающийся LCD дисплей (181х40 пикселей)
- Двусторонний спикерфон (громкая связь)
- Кнопка регулировки громкости (отдельно для трубки, громкоговорителя, звонка)
- 8 программируемых кнопки с двойной светодиодной индикацией
- 3 контекстных клавиши, 19 функциональных
- Фиксированные кнопки: Menu, Redial, Transfer, Conference
- Индикация: ожидающее голосовое сообщение, визуальное оповещение о звонке
- Записная книжка на 100 имен/номеров
- Журнал регистрации вызовов содержит информацию о 100 последних звонках
- Возможность подключения проводных и беспроводных тел. гарнитур (RJ22)
- Кнопка вкл./выкл. тел. гарнитуры
- Тип монтажа: настольный (два положения)/настенный
- Габариты (Д х Ш х В),мм: 280x250x80
- Вес — 1,250 кг.
- Цвет — черный
- Гарантия — 12 месяцев
Функции цифрового телефона Avaya 1408 [700504841]
- Конференц связь
- Спикерфон (дуплекс)
- Определение звонка (caller ID)
- Голосовая почта
- Удержание вызова
- Переадресация вызова
- Контроль громкости звонка и звука
- Таймер звонка
- Вызов без снятия трубки
Где лучше купить цифровой телефон Avaya 1408 [700504841]?
 Компания «ОргТелеСервис» является авторизованным партнером по продажам телекоммуникационного оборудования AVAYA на территории России. Соответственно, у нас вы сможете купить цифровой телефон Avaya 1408 на наиболее выгодных и привлекательных условиях. В нашем каталоге представлено основное оборудование, выпускаемые компанией AVAYA: вы сможете подобрать решение, точно соответствующее вашим требованиям. Покупая цифровой телефон Avaya 1408 в компании «ОргТелеСервис», вы также получаете надёжные гарантии качества, доступную стоимость и комфортное обслуживание. Мы будем рады помочь Вам в выборе телекоммуникационного оборудования или решения AVAYA, а также ответим на любые возникшие вопросы: просто свяжитесь с нами, и мы предоставим вам всю необходимую информацию.
Интересующие Вас вопросы по подбору оборудования можно сформулировать в письменной форме и отправить по электронной почте info@orgteleservice.ru или задать по телефону: (495) 231-3939; (499) 956-0956.
![]() Наверх
Наверх
-
Page 1: Avaya 1408
A vaya 1408 and 1416 T elephones — connected to Integral 5 — User Guide 16-603588 Issue 1 May 2010[…]
-
Page 2: Avaya 1408
Notice While reasonable efforts have been made to ensure that the information in this document is complete and accurate at the time of printing, Avaya assumes no liability for any errors. A vaya reserves the right to make changes and corrections to the information in this document without the obligation to notify any person or organization of such […]
-
Page 3: Avaya 1408
Downloading documents For the most current versions of documentation, see the Avaya Support Web site: http://www .avaya.com/support Contact A vaya Support Avaya provides a telephone number for you to use to report problems or to ask questions about your product. The support telephone number is 1-800-242-2121 in the United States. For additional sup[…]
-
Page 4: Avaya 1408
4 1408/1416 at Integral 5 — User Guide May 2010[…]
-
Page 5: Avaya 1408
Contents Chapter 1: Introduction ……………………………………………………………………………………………….9 Introduction to the 1400 Series Digital Deskphones ……………………………………………………………………………..9 Overview of phone buttons and features …………………….[…]
-
Page 6: Avaya 1408
Expanding conference with another participant …………………………………………………………………………………. 33 Connecting conference participants with each other ………………………………………………………………………….. 34 Ending the conference call ………………………………..[…]
-
Page 7: Avaya 1408
Viewing charges for lines / subscribers …………………………………………………………………………………….. 60 Deleting call charges ……………………………………………………………………………………………………………… 60 Locking the telephone …………………………….[…]
-
Page 8: Avaya 1408
Changing access PIN …………………………………………………………………………………………………………….. 86 Setup standard access *………………………………………………………………………………………………………….86 Changing standard PIN * …………………………[…]
-
Page 9: Avaya 1408
Chapter 1: Introduction Introduction to the 1400 Series Digital Deskphones The Avaya 1400 Series telephones are ISDN telephones for use with the Integral 5 call processing system.This user guide is written for the 1408 and 1416 Digital Deskphones.These deskphones put convenient features and capabilities at your fingertips, including a phone screen […]
-
Page 10: Avaya 1408
A vaya 1416 T elephone No. Name Description 1 Call/Message W aiting Indicator This light flashes when you receive an incoming call. 2 Phone Display There are 3 (1408) or 4 (1416) lines in the phone display . The phone display presents calling or called party identification, user options, and other information relevant to using the phone. The top li[…]
-
Page 11: Avaya 1408
No. Name Description are available in the menu. When a call number is programmed on the key press the key to dial the destination. (Partners are special destinations, see chapter Partners for more information) 7 Hold Press the Hold button ( R button) to put the active call on hold. 8 Conference Press the Conference button to add another party to an[…]
-
Page 12: Avaya 1408
About LEDs Each function, partner or destination key has two LEDs, one green and one red, to indicate the status of the function or partner . The status is identified by whether the LED is on, off, or blinking as described in the following tables. Note: If a key is assigned to a destination the LEDs are always off. T able 1: Function key LEDs LED D[…]
-
Page 13: Avaya 1408
About this manual Descriptions of optional features are marked with an asterisk in the title. For more information about the optional features, see your system administrator . All the descriptions in this user guide assume a standard assignment of the function keys. If you re-assign the function keys, the procedures may change from those provided i[…]
-
Page 14: Avaya 1408
Introduction 14 1408/1416 at Integral 5 — User Guide May 2010[…]
-
Page 15: Avaya 1408
Chapter 2: Making calls Introduction to making calls Use the procedures provided in this chapter to make calls from your telephone. Note that when you make a call, you can either dial the number and then lift the handset, or lift the handset and then dial the number . Both orders are correct. However , if you lift the handset first and then dial th[…]
-
Page 16: Avaya 1408
Instead of entering the external line code, you can also press a line key . If you have activated LN on dialing you only need to dial the external number . 2. Enter the desired call number . 3. Lift the handset. Related topics: Seizing exchange line automatically on page 73 Calling with a destination key 1. Press the destination key for the desired[…]
-
Page 17: Avaya 1408
Calling a person from the phone book entry 1. Press the Phone book / Contacts button. 2. Select the entry you want to dial. Note: T o reach the entry more quickly , you can also enter one or more of the first letters of the name. 3. Lift the handset. Related topics: Introduction to the phone book on page 45 Calling partners 1. Press the appropriate[…]
-
Page 18: Avaya 1408
3. T o adjust the volume, press + or — on the V olume button. 4. Do one of the following: a. T o continue the call using the handset, lift the handset. T o activate the speaker additionally ( Monitoring ), press the Speaker button. T o activate Handsfree press the Speaker button once more. b. T o end the call, press the Speaker button. Requesting a[…]
-
Page 19: Avaya 1408
1. Press the Redial button. 2. Select the desired call number . 3. Lift the handset. Requesting automatic redialing Note: Y ou can specify the number of automatic redial attempts and the time between two attempts in the Dial settings . Y ou can only use Automatic redial if you are calling on a digital exchange line. The external number dialed is bu[…]
-
Page 20: Avaya 1408
Each person on the call will hear a cut-in tone. Y ou are now included in the call. 3. T o disconnect from the call, press the Drop button, or replace the handset. Presenting yourself with specified call numbers * If your system is configured to do so, every time you make an external call you can select the number you want to present to the call re[…]
-
Page 21: Avaya 1408
3. Press the OK button. 4. Select who you want to send the announcement to, e.g. Announcement to Group 1 . 5. Press the OK button. Y ou can now make your announcement. Making an individual announcement Use this procedure to make a announcement to a subscriber you are just calling and whose telephone is ringing. 1. Press the Announce function key . […]
-
Page 22: Avaya 1408
1. Enter the call number . 2. Select Anonymous call . 3. Press the OK button. Y our number will not be transmitted to the called party for your next external call. 4. Lift the handset. Making calls 22 1408/1416 at Integral 5 — User Guide May 2010[…]
-
Page 23: Avaya 1408
Chapter 3: Handling calls Introduction to handling calls When you receive an incoming call your telephone rings, the Call LED flashes and the call is indicated in the display . Y ou will be shown the number or name the caller dialled, e.g. when you receive a diverted call. Y ou can lift the handset or use the Speaker button and talk with the handse[…]
-
Page 24: Avaya 1408
A list of incoming calls will be shown. 3. Press the OK button. 4. Lift the handset. Answering a call for a partner When a partner’s telephone rings, the corresponding LED on your telephone flashes. Y ou can pick up that call and answer as deputy . 1. Press the Partner key and wait until the call reaches your own telephone. 2. Lift the handset[…]
-
Page 25: Avaya 1408
Press the Hold button, to take the call of hold, press Hold again. Muting a call 1. Press the Mute button during a call so that the other person cannot hear you. 2. Press the Mute button again to unmute the call. Referring back during a call (consultation call) During a call: 1. Press the Hold button. Y our first talking partner is waiting and cann[…]
-
Page 26: Avaya 1408
Y ou can now talk to the first talking partner . The second partner is put on hold. T ransferring a call 1. Press the Hold button. Y our first call is put on hold. 2. Dial the appropriate call number . Y ou do not need to wait until the call is accepted. 3. Press the T ransfer button or hang up. Answering an additional call (second call) The featur[…]
-
Page 27: Avaya 1408
Chapter 4: Call diversion Introduction call diversion Y ou can divert incoming calls to another extension. Y ou can set this up both for your own and other telephones. Y ou can also divert calls to your telephone. In all these variants, you can choose • whether this should always take place, • only if the telephone is busy • or only if the te[…]
-
Page 28: Avaya 1408
6. Select one of the following: • immediately • after time • on busy 7. Press the OK button. The status information Divert to … — appears in the display . Alternatively , a clock symbol is shown for call diversion after «after time» or a B for call diversion «on busy». 8. T o deactivate call diversion: a. Select the appr[…]
-
Page 29: Avaya 1408
• on busy 7. Press the OK button. The status information Divert from 1234- appears in the display . Alternatively , a clock symbol is shown for call diversion after «after time» or a B for call diversion «on busy». 8. T o deactivate call diversion: a. Select the appropriate status information. b. Press the OK button. c. Press […]
-
Page 30: Avaya 1408
8. Select one of the following: • immediately • after time • on busy 9. Press the OK button. Both subscribers involved will get the status information Divert from … — or Divert to … — . Alternatively , a clock symbol is shown for call diversion after «after time» or a B for call diversion «on busy». Related topics: Int[…]
-
Page 31: Avaya 1408
Diverting bundles* Call diversion can be set up to take place at the public exchange. Internal users can telephone without hindrance. The cost of the diverted call is allocated to the subscriber who activated the diversion. The caller only pays the costs up to the public exchange. The call units for the diversion are not logged in your telephone sy[…]
-
Page 32: Avaya 1408
Call diversion 32 1408/1416 at Integral 5 — User Guide May 2010[…]
-
Page 33: Avaya 1408
Chapter 5: Three-party conference call Introduction to three-party conference calls Y ou can use a three-party conference call to speak with two people at dif ferent locations on the same call. A conference between a call waiting (second call) and the first talking party is not possible. Making a conference call 1. While active on a call, press the[…]
-
Page 34: Avaya 1408
If you set up a Conference bridge in your system, up to 9 different subscribers can join the conference bridge. With a conference bridge set up additional conferences with more than three participants are no longer possible. 1. While you are in a three-party conference press the Conference button. 2. Enter the call number of the new participant. Wh[…]
-
Page 35: Avaya 1408
Chapter 6: Conference bridge Introduction conference bridge Y our system provides you with a virtual conference room (bridge). All conference participants which have dialed into the bridge are connected to one another . • Depending on the structure of your system, up to 9 internal and external subscribers can dial into the conference bridge. • […]
-
Page 36: Avaya 1408
If the conference bridge is reserved again immediately after your conference (15 minutes later), an alert tone sounds to warn you that the conference is approaching its end. 10 minutes before the beginning of the next conference, the connection is ended. Managing conference bridge calls The inviting participant has specific managing rights in a con[…]
-
Page 37: Avaya 1408
The selected participant is dropped from the conference. Reserving conference bridge (one-time appointment) Y ou must have permission to reserve a conference room. The default access PIN must be activated or amended. 1. Press the A vaya Menu button. 2. Select Conference bridge . 3. Press the OK button. 4. Select My conference . 5. Press the OK butt[…]
-
Page 38: Avaya 1408
Reserving conference bridge (recurring appointment) Y ou can reserve the conference bridge for recurring appointments. This could be, for example, a weekly group meeting on Friday at 9:00. 1. Press the A vaya Menu button. 2. Select Conference bridge . 3. Press the OK button. 4. Select My conference . 5. Press the OK button. 6. Press the New softkey[…]
-
Page 39: Avaya 1408
Reserving a conference bridge for others If you have permission, you can also reserve a conference bridge for others. Dialing into the conference bridge is then secured with the access PIN for the subscribers you have set up the conference for . 1. Press the A vaya Menu button. 2. Select Conference bridge . 3. Press the OK button. 4. Select Confere[…]
-
Page 40: Avaya 1408
Conference bridge 40 1408/1416 at Integral 5 — User Guide May 2010[…]
-
Page 41: Avaya 1408
Chapter 7: Managing the call log Call log If you do not answer an external call, the caller ’s number will be stored in the call log together with the time and date of the call. Y ou can also have other entries made in the call log, e.g. internal calls or conversations with external callers. The most recent entry is at the top of each list. Y ou […]
-
Page 42: Avaya 1408
V iewing the call log 1. Press the Call Log button. 2. Select the appropriate entry . 3. Press the OK button. The detailed display of the appropriate entry is shown. Removing entries from the call log If you call back an entry from the call log and a connection is established, the entry in the call log will be deleted automatically . Use the follow[…]
-
Page 43: Avaya 1408
1. Press the A vaya Menu button. 2. Select Settings . 3. Press the OK button. 4. Select Applications . 5. Press the OK button. 6. Select Call log . 7. Press the OK button. 8. Select deleted after … . The right window margin shows the time after which new call log entries will be automatically deleted. 9. Press the Modify softkey several times if […]
-
Page 44: Avaya 1408
Note: If you have entered a number without a name, you can edit the entry later and save it under a name. Adding additional entries in the call log Y ou can set additional entries to be made in the call log. 1. Press the A vaya Menu button. 2. Select Settings . 3. Press the OK button. 4. Select Applications . 5. Press the OK button. 6. Select Call […]
-
Page 45: Avaya 1408
Chapter 8: Managing the phone book Introduction to the phone book Y our telephone has a personal phone book. Y ou can store up to 100 individual numbers with names which will only be available on your telephone. Y ou can then dial phone book numbers quickly and easily . Y ou can modify the individual phone book entries yourself. Up to 800 numbers a[…]
-
Page 46: Avaya 1408
If you want to enter an internal number , you have to press Option > internal call number before making the entry . 5. Press the OK button. 6. Enter name. 7. Press the Save softkey . Result The entries in your personal phone book correspond to the code dial destinations starting from number 900. Code dialing destinations 900 to 904 can also easi[…]
-
Page 47: Avaya 1408
Deleting an entry 1. Press the Phone book / Contacts button. 2. Select the entry you want to delete. 3. Press the Delete softkey . 4. Press the Delete softkey . Deleting an entry 1408/1416 at Integral 5 — User Guide May 2010 47[…]
-
Page 48: Avaya 1408
Managing the phone book 48 1408/1416 at Integral 5 — User Guide May 2010[…]
-
Page 49: Avaya 1408
Chapter 9: Messages Introduction messages Y ou can send a text message to subscribers in your system, e.g. when the caller does not answer or the connection is busy . The messages can consist of standard texts prepared by your system administrator or your own text. T ext messages can only be received by phones with displays. A maximum of 10 message[…]
-
Page 50: Avaya 1408
The text message will be sent immediately . Sending a standard text T o be able to select from standard texts, these must first have been entered into the system. 1. Press the A vaya Menu button. 2. Select Message . 3. Press the Message button. 4. Select the desired standard text. 5. Press the OK button. 6. Change or add to the message, e.g. to inc[…]
-
Page 51: Avaya 1408
8. Select Message to caller . 9. Press the OK button. The text is saved and a status information appears in your display . Any internal caller who tries to call you will now get the message shown on his display . Sending a text message for an internal caller 1408/1416 at Integral 5 — User Guide May 2010 51[…]
-
Page 52: Avaya 1408
Messages 52 1408/1416 at Integral 5 — User Guide May 2010[…]
-
Page 53: Avaya 1408
Chapter 10: Mobile System Subscribers (Managed Mobility Access) Introduction MMA Y ou can dial into your system remotely and then make a call as if you were using your company telephone (MMA, Managed Mobility Access). The number of the telephone making the call must be registered and it must support DTMF dialling. If you use «Callback» yo[…]
-
Page 54: Avaya 1408
Dialing into your system using callback Note: This feature has to be set up by your system administrator . 1. Dial the dial-in number for your system from a registered external telephone with the callback setting activated. W ait for a ringback tone. After a short time, the Integral 5 disconnects. Y ou will hear the busy tone. 2. Replace the handse[…]
-
Page 55: Avaya 1408
Referring back Y ou are in a conversation. 1. Press * 7 keys. The first talking partner is waiting and cannot hear what you say . 2. Enter the number you want to consult. Carry out the refer-back call. 3. Press * 7 keys again. The refer-back call is ended and you are speaking again with your first talking partner . Starting a conference call Y ou a[…]
-
Page 56: Avaya 1408
Modifying the twinning/call diversion number Y ou have established a connection to your system from a registered telephone.The telephone from which you are calling must have caller display activated. Y ou hear the dial tone. 1. Press the # key . 2. Press the * key . T winning/Call diversion is now activated to the telephone you are currently callin[…]
-
Page 57: Avaya 1408
1. Press the # key followed by the code number of the code dialing destination you want to call, e.g. 2 for ”902”. The code dialing destinations correspond to the first entries in your personal phone book. Assigning code dialing destinations to the codes: Code dialing destination 900 -> Code number 1, Code dialing destination 901 -> Code […]
-
Page 58: Avaya 1408
Mobile System Subscribers (Managed Mobility Access) 58 1408/1416 at Integral 5 — User Guide May 2010[…]
-
Page 59: Avaya 1408
Chapter 1 1: Using the A vaya Menu Call charges Introduction to call charges During a call, you can view the current charges. Y ou can view the charges for your last call. All call charges incurred since the last reset are stored and totaled in your telephone system. Y ou can check the charges for each subscriber and each line separately . Furtherm[…]
-
Page 60: Avaya 1408
V iewing charges for lines / subscribers 1. Press the A vaya Menu button. 2. Select Charges . 3. Press the OK button. 4. Select one of the following: • T otal subs. , for showing the charges for a specific subscriber , • T otal line , for showing the charges for a specific line. 5. Enter the extension or line number , e.g. 01 for line 1. Instea[…]
-
Page 61: Avaya 1408
Locking the telephone T elephone lock Locking your telephone prevents unauthorized use during an absence. T o unlock your telephone, a Personal Identification Number (PIN) is required. The following functions are still available when the telephone is locked: • Answering calls, • Dialing internal call numbers, Changing the PIN Y ou need a PIN (P[…]
-
Page 62: Avaya 1408
1. Press the A vaya Menu button. 2. Press the Lock function key . 3. Press the OK button. The status information Phone locked is shown. Unlocking the telephone 1. Select Phone locked . 2. Press the OK button. 3. Enter the current PIN. Managing appointments Appointments (reminders) Y ou can set your telephone to remind you of important appointments.[…]
-
Page 63: Avaya 1408
Entering an appointment for today 1. Press the A vaya Menu button. 2. Select Appointments , and if necessary select Own appointm . All set appointments will be shown. 3. Select an appointment, which is marked empty , e.g. Appt. 1 . 4. Press the OK button. 5. Press the T oday softkey . 6. Enter the time in the form «hours minutes», e.g. 10[…]
-
Page 64: Avaya 1408
7. Enter or add any text. 8. Press the OK button. Result At the specified time, a signal tone sounds and the text you have entered is displayed. Entering a recurring appointment 1. Press the A vaya Menu button. 2. Select Appointments , and if necessary select Own appointm . All set appointments will be shown. 3. Select an appointment, which is mark[…]
-
Page 65: Avaya 1408
Press the OK button. The signal tone stops and the appointment reminder will be deleted in the display . Deleting an appointment 1. Press the A vaya Menu button. 2. Select Appointments , and if necessary select Own appointm . 3. Select the desired appointment. 4. Press the OK button. 5. Press the Delete menu item. Setting appointments for others 1.[…]
-
Page 66: Avaya 1408
Using the Avaya Menu 66 1408/1416 at Integral 5 — User Guide May 2010[…]
-
Page 67: Avaya 1408
Chapter 12: Customizing your telephone Setting parameters for your telephone Changing the acoustic signaling Use this procedure to change the volume of several tones. Note: Y ou can change the individual settings during a call by pressing + or — on the V olume button. Y ou can also change any setting by pressing the numeric key of the desired setti[…]
-
Page 68: Avaya 1408
The new setting sounds immediately to be checked. 10. Press the Back softkey . Setting the ringing tone melody Y ou can assign dif ferent melodies to each call type: • Internal call: Call from inside your telecommunications system • External call: Call from outside your telecommunications system • Message call: When a message is received • […]
-
Page 69: Avaya 1408
1. Press the A vaya Menu button. 2. Select Settings . 3. Press the OK button. 4. Select Display/Acoustics . 5. Press the OK button. 6. Select MSN call type (off) . 7. Press the Modify softkey . 8. If you wish to hear your personal ring tones again, change the setting back to (off) . 9. Press the Back softkey . Setting the contrast 1. Press the A va[…]
-
Page 70: Avaya 1408
Setting the language 1. Press the A vaya Menu button. 2. Select Settings . 3. Press the OK button. 4. Select Display/Acoustics . 5. Press the OK button. 6. Select Language . 7. Press the OK button. 8. Select the language you want to use for display texts. 9. Press the OK button. Y our telephone will reset itself. All display texts will now be in th[…]
-
Page 71: Avaya 1408
• 3: Loud connection purely digital or internal connection. This is normally the best setting if you are using your telephone’s build-in-loudspeaker . • 4: When you have connected an additional loudspeaker . 10. Press the Back softkey . Deactivating ringing tone temporarily (Do not disturb) If you do not wish to be disturbed, you can tempo[…]
-
Page 72: Avaya 1408
The system can activate night service automatically at times programmed by your system administrator . The calling stations for the night service can be set in the menu Settings > System functions . 1. Press the A vaya Menu button. 2. Select Night service . 3. Press the OK button. 4. Select Night service 1 (or 2, 3, autom. Night service) . 5. Pr[…]
-
Page 73: Avaya 1408
Seizing exchange line automatically Y ou can automatically seize an exchange line every time you dial with the handset on hook. Y ou then never have to dial the external line code. 1. Press the A vaya Menu button. 2. Select Settings . 3. Press the OK button. 4. Select Dial settings . 5. Press the OK button. 6. Select LN on dialing (off) . 7. Press […]
-
Page 74: Avaya 1408
6. Select Line / off-hook (off) . 7. Press the Modify softkey . 8. Press the Back softkey . The new setting is saved. Result If you have switched on «Line/off-hook», you must first press the Hold button to make an internal call. Setting the number of redials When you activate automatic redial: Use this procedure to set how often the diali[…]
-
Page 75: Avaya 1408
Setting redial interval When you activate automatic redial: Use this procedure to set the time that elapses between two automatic redials. Y ou can select times of 15, 30, 60, 90 or 120 seconds. 1. Press the A vaya Menu button. 2. Select Settings . 3. Press the OK button. 4. Select Dial settings . 5. Press the OK button. 6. Select Redial every … […]
-
Page 76: Avaya 1408
7. Press the Modify softkey several times until the desired setting is shown: • off , to switch the number display off completely , • own , to send your internal extension number (e.g. 7505-12) • Master , to send only your company telephone number (e.g. 7505-0). 8. Press the Back softkey . The new setting is saved. Result If enabled in your s[…]
-
Page 77: Avaya 1408
T urning direct dialing on or off By default, direct dialing is set to on. Then dialing begins immediately when the first digit or a destination is pressed. Y ou can turn this setting off. Then you can type in a whole call number first and then dial it as a block. Y ou can then check the call number again and correct it if necessary . 1. Press the […]
-
Page 78: Avaya 1408
6. Select Second call (on) . 7. Press the Modify softkey . 8. Press the Back softkey . The new setting is saved. Result If you are making a call and have switched off second call, a caller will receive the busy signal. Assigning code numbers * Every outgoing and incoming call can be assigned a code number . This enables the call to be assigned to a[…]
-
Page 79: Avaya 1408
Extending call display Y ou can set your telephone to always display not only the caller ’s number or name but the number which they dialed. This tells you whether the caller wants to speak to service or the workshop, for example. 1. Press the A vaya Menu button. 2. Select Settings . 3. Press the OK button. 4. Select Applications . 5. Press the O[…]
-
Page 80: Avaya 1408
The new setting is saved. Removing telephone from hunt groups If your telephone is assigned to one or more hunt groups: Use this procedure to temporarily remove your telephone from these hunt groups. 1. Press the A vaya Menu button. 2. Select Settings . 3. Press the OK button. 4. Select Applications . 5. Press the OK button. 6. Select Hunt group (o[…]
-
Page 81: Avaya 1408
7. Press the Modify softkey . 8. Press the Back softkey . The new setting is saved. Activating remote headset Use this procedure to activate the use of a cordless convenience headset. 1. Press the A vaya Menu button. 2. Select Settings . 3. Press the OK button. 4. Select Applications . 5. Press the OK button. 6. Select Remote headset (off) . 7. Pre[…]
-
Page 82: Avaya 1408
Note: All the procedures described in this user manual assume a standard assignment of the function keys. If you re-assign function keys, please bear in mind that this may change the operating procedures. Functions assigned to keys no longer appear in the menu. Related topics: Calling with a destination key on page 16 Assigning functions to keys Fu[…]
-
Page 83: Avaya 1408
5. Press the OK button. The description and current assignment of all keys will be displayed. 6. Select the key you want to change or assign. 7. Press the OK button. 8. Select Destination key . 9. Press the OK button. The call numbers or names stored in your individual phone book are displayed. 10. Select the destination you want to assign to this […]
-
Page 84: Avaya 1408
Assigning partners to keys 1. Press the A vaya Menu button. 2. Select Settings . 3. Press the OK button. 4. Select Function keys . 5. Press the OK button. The description and current assignment of all keys will be displayed. 6. Select the key you want to change or assign. 7. Press the OK button. 8. Select Partner . 9. Press the OK button. All inter[…]
-
Page 85: Avaya 1408
Y ou can now see the function or call number previously assigned to the key . 7. Select delete . 8. Press Delete softkey . The key is now free again. Conference bridge settings Set up conference bridge * The conference bridge can only be reserved by authorized subscribers. Each of these subscribers can change the access PIN themselves. A standard P[…]
-
Page 86: Avaya 1408
10. Select Activate . 1 1. Press the OK button. The subscriber can now reserve the conference bridge using the access PIN set. Changing access PIN Y ou can change your access PIN for the conference bridge at any time. The changed access PIN applies immediately , even for conferences which have already been reserved and which are still open. If you […]
-
Page 87: Avaya 1408
4. Select Applications . 5. Press the OK button. 6. Select Conference bridge . 7. Press the OK button. 8. Select Standard PIN . 9. Press the OK button. Y ou are shown that the standard PIN cannot be used, e.g. PIN: 0000 Not active . 10. Select Activate . 1 1. Press the OK button. 12. Press the Back softkey . Y ou can now access the conference room […]
-
Page 88: Avaya 1408
Managed Mobility Access settings Introduction MMA settings Up to 50 external numbers can be registered on your system to use Managed Mobility Access (MMA). Each external number is assigned to a fixed internal subscriber . Each internal subscriber can be assigned to more than one external number . The internal subscriber can be given the option of u[…]
-
Page 89: Avaya 1408
10. Select a number you want to register from the list or enter the external number (with dialing code), e.g. 0696 50512 . The number list contains all the external numbers on the call log of the internal subscriber . Note: This saves a lot of keying in numbers. For example, you could simply call your extension using the mobile whose number you wan[…]
-
Page 90: Avaya 1408
A list of all the external numbers registered appears. 8. Select the number whose settings you want to change. 9. Press the OK button. 10. Change the external number as usual. 1 1. If necessary , press the Options softkey and select and modify one or several of the following settings: • Callback (off) : T o allow callback option, change setting t[…]
-
Page 91: Avaya 1408
Using call filter Calls from subscribers in the call filter list are still signaled even when you have set up «Do not disturb». The call filter list contains up to 10 entries. Y ou can set up a special ringtone for calls from numbers on the call filter list (VIP ringtone). Caution: Y ou can also use the call filter to prevent call diversi[…]
-
Page 92: Avaya 1408
Deleting entries from the call filter 1. Press the A vaya Menu button. 2. Select Settings . 3. Press the OK button. 4. Select Applications . 5. Press the OK button. 6. Select Call filter . All call filter entries are shown. 7. Select the entry you want to delete. 8. Press the Delete softkey . 9. Press one of the following softkeys: • Entry , to d[…]
-
Page 93: Avaya 1408
Chapter 13: Settings for your telephone system Introduction Y ou can perform many of the settings for your telephone system from your Avaya 1400 Series telephones. The settings apply to all the telephones in your system. • External callers can often reach your company using various different numbers. For each of these numbers you can define which[…]
-
Page 94: Avaya 1408
3. Press the OK button. 4. Select System functions . 5. Press the OK button. 6. Select Day service . 7. Press the OK button. 8. Enter the two-digit number of the line for which you want to set up operators. Y ou can also simply press the corresponding line key instead of entering the line number . 9. Select the number for which you want to set up a[…]
-
Page 95: Avaya 1408
5. Press the OK button. 6. Select Night service . 7. Press the OK button. 8. Enter the two-digit number of the line for which you want to set up operators. Y ou can also simply press the corresponding line key instead of entering the line number . 9. Select the number for which you want to set up an operator . 10. Press the OK button. 1 1. Enter th[…]
-
Page 96: Avaya 1408
5. Press the OK button. 6. Select Call forwarding . 7. Press the OK button. 8. Enter the two-digit number of the line for which you want to set up operators. Y ou can also simply press the corresponding line key instead of entering the line number . 9. Select the number for which you want to set up an operator . 10. Press the OK button. 1 1. Enter […]
-
Page 97: Avaya 1408
8. Select the number for which you want to change second call barring. 9. Press the OK button. 10. If necessary select other numbers for which you want to change the setting. 1 1. If necessary press the OK button. 12. Press the Phone/Exit button. The new setting is saved. Result If you are in a call a further external caller would get a busy tone, […]
-
Page 98: Avaya 1408
1. Press the A vaya Menu button. 2. Select Settings . 3. Press the OK button. 4. Select System functions . 5. Press the OK button. 6. Select Customer pswd . 7. Press the OK button. 8. Enter the old password if one has already been assigned. 9. Enter the new customer password (new PIN) as four digits. 10. Press the Back softkey . The new setting is […]
-
Page 99: Avaya 1408
Chapter 14: Auxiliary devices Button module DBM32 A DBM32 button module provides 32 buttons. Y ou can connect one or two DBM32 to your Avaya 1416 telephone. No button module can be connected to the A vaya 1408 telephone. Y our system administrator can assign the buttons according to your preferences. The following options are available to you: • […]
-
Page 100: Avaya 1408
1 Buttons with LEDs 2 Strips for labeling Dialing with the DBM32 button module: Use the DBM32 buttons just like the destination or partner keys located directly on your telephone: Lift the handset and then press the button for the desired subscriber . T able 4: LED indications LED Connection Blinking red fast Partner receives an external call. Blin[…]
-
Page 101: Avaya 1408
Starting a call: Enter the call number and press the Headset button. Switching on monitoring: Y ou can switch on monitoring on the telephone while you are on a call with the headset. Press the Speaker button. The button’s LED lights up. Using a headset 1408/1416 at Integral 5 — User Guide May 2010 101[…]
-
Page 102: Avaya 1408
Auxiliary devices 102 1408/1416 at Integral 5 — User Guide May 2010[…]
-
Page 103: Avaya 1408
Chapter 15: Hotel functions Introduction Y ou can use the hotel functions in small to medium-sized hotels and guest houses. Y our system administrator can connect up to three DBM32 modules to the Avaya 1416 telephone for executing these functions. Available functions include checking guests in and out, viewing guest charges, disabling direct inward[…]
-
Page 104: Avaya 1408
Layout of the hotel functions on the DBM32 button module * No. Name Description 1 Check-in / Check- out For checking guests in and out. 2 DDD (Disable Direct Dial) An external caller cannot directly dial the guest’ s room, but must be connected via the switchboard. 3 Message The switchboard can send a message to a room telephone. 4 Disable guest-[…]
-
Page 105: Avaya 1408
Checking in * 1. Press the Check-in button. 2. Press the button for the desired room. 3. Select the desired language. Y ou can choose between several languages for the menu displays on the guest telephone. 4. Press the OK button. The guest is checked in. The button lights up. Result The menu displays on the guest telephone and the voice announcemen[…]
-
Page 106: Avaya 1408
Result All the guest’s messages, wake-up calls, call diversions and callbacks are deleted upon check- out. Direct dial from other rooms is disabled. On checking out, an automatic printout of the total is also possible. Consult your system administrator if necessary . Querying call charges * 1. Press the A vaya Menu button. 2. Select Charges . 3. […]
-
Page 107: Avaya 1408
1. Select this menu item, e.g. 101: New messages (2) . 2. Open the voice mail box by calling the voicemail server . 3. Enter the room number . 4. Press the OK button. The connection to the guest’s voice mail box is established. The voice mail box can be transferred to another telephone in the usual way (See transfering a call). There, the custome[…]
-
Page 108: Avaya 1408
1. Press the DDD (Disable Direct inward Dial) button. The button LEDs of all rooms which cannot be called directly light up. 2. Press the button for the desired room. The button LED lights up or goes out, depending of the new DDD status of the room. 3. Press the Exit button. The DBM32 module returns to displaying the calling status of the room tele[…]
-
Page 109: Avaya 1408
The button LED lights up or goes out, depending of the new charge limit status of the room. 3. Press the Exit button. The DBM32 module returns to displaying the calling status of the room telephones. W aking guests * With the wake-up call, you can send your own text or one prepared by your system administrator . Y ou can change that text or compose[…]
-
Page 110: Avaya 1408
Hotel functions 1 10 1408/1416 at Integral 5 — User Guide May 2010[…]
-
Page 111: Avaya 1408
Chapter 16: Menus Menu overview The following contains an overview of the menu structure of the Avaya 1400 Series telephones connected to Integral 5. The first three menu levels are shown. The menu structure shown here may differ from the actual menu structure on your telephone. Deviations from the menu overview shown here may arise due to the feat[…]
-
Page 112: Avaya 1408
Menu item in basic menu One menu level lower One menu level lower Conference bridge Own conference Conference for others Settings Display/Acoustics Acoustics/Contrast Partner beep Do not disturb MSN call type Language Function keys Dial settings Autom. Handsfree LN on dialling Line / off-hook Number of redials [0] Redial every [ s] Answ .Back Secon[…]
-
Page 113: Avaya 1408
Menu item in basic menu One menu level lower One menu level lower Day service Night service 1 (2, 3) Call forwarding Date/time Customer pswd … *) T raffic statistics *) Further menu options will be displayed if the Service department has enabled you to program the corresponding functions: subscriber names, substitute terms, classes of service, sy[…]
-
Page 114: Avaya 1408
Menus 1 14 1408/1416 at Integral 5 — User Guide May 2010[…]
-
Page 115: Avaya 1408
Appendix A: Remote features Changing call diversion remotely * Y ou can call your telephone system from outside to set up or change a call diversion for your telephone or for other telephones. This is possible from any telephone with DTMF suffix dialling. In many cases, you can use only certain pre-set telephones for this feature. Y our system admi[…]
-
Page 116: Avaya 1408
Remote features 1 16 1408/1416 at Integral 5 — User Guide May 2010[…]
-
Page 117: Avaya 1408
Index A acknowledging appointment ………………………………………………… 64 adjusting handsfree operation ……………………………………… 70 announcement replying ………………………………………………………. 21 anonymous calling ……………………………………………… 21 answered c[…]
-
Page 118: Avaya 1408
D date …………………………………………………………………. 97 day service ……………………………………………………….. 93 DBM32 ………………………………………………………. 99 , 104 hotel functions ……………………………………………. 104 deleting ………………..[…]
-
Page 119: Avaya 1408
lock ………………………………………………………………….. 61 locking ……………………………………………………………… 61 telephone ……………………………………………………. 61 M making a call ………………………………………………… 15 , 16 Managed Mobility Access[…]
-
Page 120: Avaya 1408
deactivating …………………………………………………. 77 second call barring …………………………………………….. 96 settings telephone system …………………………………………. 93 signaling calls on two telephones ………………………………………… 30 source discrimination code ……[…]

- 1
- 2
- 3
- 4
- 5
- 6
- 7
- 8
- 9
- 10
- 11
- 12
- 13
- 14
- 15
- 16
- 17
- 18
- 19
- 20
- 21
- 22
- 23
- 24
- 25
- 26
- 27
- 28
- 29
- 30
- 31
- 32
- 33
- 34
- 35
- 36
- 37
- 38
- 39
- 40
- 41
- 42
- 43
- 44
- 45
- 46
- 47
- 48
- 49
- 50
- 51
- 52
- 53
- 54
- 55
- 56
- 57
- 58
- 59
- 60
- 61
- 62
- 63
- 64
- 65
- 66
- 67
- 68
- 69
- 70
- 71
- 72
- 73
- 74
- 75
- 76
- 77
- 78
- 79
- 80
- 81
- 82
- 83
- 84
- 85
- 86
- 87
- 88
- 89
- 90
- 91
- 92
- 93
- 94
- 95
- 96
- 97
- 98
- 99
- 100
- 101
- 102
- 103
- 104
- 105
- 106
- 107
- 108
- 109
- 110
- 111
- 112
- 113
- 114
- 115
- 116
- 117
- 118
- 119
- 120
- 121
- 122
- 123
- 124
- 125
- 126
- 127
- 128
- 129
- 130
- 131
- 132
- 133
- 134
- 135
- 136
- 137
- 138
- 139
- 140
- 141
- 142
- 143
- 144
- 145
- 146
- 147
- 148
- 149
- 150
- 151
- 152
- 153
- 154
- 155
- 156
- 157
- 158
- 159
- 160
- 161
- 162
- 163
- 164
- 165
- 166
- 167
- 168
- 169
- 170
- 171
- 172
- 173
- 174
- 175
- 176
- 177
- 178
- 179
- 180
- 181
- 182
- 183
- 184
- 185
- 186
- 187
- 188
- 189
- 190
- 191
- 192
- 193
- 194
- 195
- 196
- 197
- 198
- 199
- 200
- 201
- 202
- 203
- 204
- 205
- 206
- 207
- 208
- 209
- 210
- 211
- 212
- 213
- 214
- 215
- 216
- 217
- 218
- 219
- 220
- 221
- 222
- 223
- 224
- 225
- 226
- 227
- 228
- 229
- 230
- 231
- 232
- 233
- 234
- 235
- 236
- 237
- 238
- 239
- 240
- 241
- 242
- 243
- 244
- 245
- 246
- 247
- 248
- 249
- 250
- 251
Скачать
Avaya 1408 and 1416 Telephones —
connected to Integral 5 — User Guide
16-603588
Issue 1
May 2010