Download
Table of Contents
Add to my manuals
Share
URL of this page:
HTML Link:
Bookmark this page
Manual will be automatically added to «My Manuals»
Print this page
- Manuals
- Brands
- Singer Manuals
- Sewing Machine
- 8280
- Instruction manual
Singer sewing machine instruction manual
Hide thumbs
Also See for 8280:
- Instruction manual (84 pages)
- Instruction manual (84 pages)
- Instruction manual (50 pages)
,
,
1
2
3
4
5
6
7
8
9
10
11
12
13
14
15
16
17
18
19
20
21
22
23
24
25
26
27
28
29
30
31
32
33
34
35
36
37
38
39
40
41
42
43
44
45
46
47
48
49
50
Table Of Contents
51
-
page
of
51/
51 -
Contents
-
Table of Contents
-
Troubleshooting
-
Bookmarks
Table of Contents
-
Safety Instructions
-
Contents
-
Parts List
-
Machine View
-
Accessories
-
Installing the Snap-In Sewing Table
-
Connecting Machine to Power Soure
-
Foot Control
-
Sewing Light
-
Changing the Bulb
-
Two-Step Presser Foot Filter
-
Adjusting Presser Foot Pressure
-
Attaching the Presser Foot Holder
-
Winding the Bobbin
-
Inserting Bobbin
-
Inserting and Changing Needles
-
Threading the Upper Thread
-
Thread Tension
-
Raising the Bobbin Thread
-
Reverse Sewing
-
Removing the Work
-
Cutting the Thread
-
Matching Needle/Fabric/Thread
-
How to Choose Your Pattern
-
Straight Stitch and Twin Needle
-
Zigzag Stitching
-
Function of Stitch Length Dial While Zigzag
-
Blind Hem/Lingerie Stitch
-
Sewing on Buttons
-
Sew 4-Step Buttonholes
-
Zippers and Piping
-
Multi-Stitch Zig-Zag
-
Bar Tack
-
Free Motion Darning, Stippling
-
Decorative Stitches
-
Shell Stitch
-
Crescent Stitch
-
Applique and Blindstitch Applique
-
Quilting Factions
-
Mending
-
Staystitching
-
Traditional Pintucks
-
Gathering
-
Couching
-
Maintenance
-
Remove the Needle Plate
-
Cleaning the Feed Dog
-
Cleaning and Lubricating the Hook
-
Troubleshooting
Advertisement
Quick Links
x
Download this manual
7
Parts List
16
Winding the Bobbin
17
Inserting Bobbin
21
Thread Tension
47
Troubleshooting
See also:
Instruction Manual
Table of Contents
Previous Page
Next Page
- 1
- 2
- 3
- 4
- 5
Advertisement
Table of Contents
Related Manuals for Singer 8280
-

Sewing Machine Singer 8280 Instruction Manual
(84 pages)
-
Sewing Machine Singer 8280 Instruction Manual
(84 pages)
-
Sewing Machine Singer 8280 Instruction Manual
(84 pages)
-
Sewing Machine Singer 8280 Instruction Manual
(50 pages)
-
Sewing Machine SINGER 8280 Instruction Manual
(50 pages)
-
Sewing Machine SINGER 10 STITCH SEWING MACHINE Instruction Manual
5, 6, 8, 10 stitch sewing machine (47 pages)
-
Sewing Machine Singer 8280 Instruction Manual
(41 pages)
-
Sewing Machine Singer 82387 Instruction Manual
Singer sewing machine user manual (29 pages)


-
Sewing Machine Singer 82-20 Parts List
Singer sewing machine parts list (32 pages)
-
Sewing Machine Singer 82-21 Parts Manual
Price list of parts (29 pages)
-
Sewing Machine SINGER 82-11 Instructions For Using And Adjusting
(6 pages)
-
Sewing Machine SINGER 821K70 Instructions For Using And Adjusting
High speed (10 pages)
-
Sewing Machine SINGER 81-1 Instructions For Using Manual
(9 pages)
-
Sewing Machine Singer 81-1 Parts List
Singer sewing machine parts list (33 pages)
-
Sewing Machine Singer 81-11 Parts List
The singer manufacturing co. sewing machines parts manual (31 pages)
-
Sewing Machine Singer 81-12 Parts List
Singer sewing machine list of parts (27 pages)
Summary of Contents for Singer 8280
-
Page 9
Satin stitch foot…
Table of Contents
Скачать
8280 Manual de Instrucciones
Manuel d’Instruction
Instruction Manual
Перейти к контенту
![]()
Русские электронные инструкции по эксплуатации
Постоянно обновляемый большой каталог документации по эксплуатации и использованию современных устройств и оборудования на русском языке. Бесплатное скачивание файлов.
Поиск:
Главная
♥ В закладки
Просмотр инструкции в pdf


Инструкция по эксплуатации швейной машины Singer 8280.
Скачать инструкцию к швейной машине Singer 8280 (747,66 КБ)

Инструкции по эксплуатации швейных машин Singer
« Инструкция к швейной машине Necchi 7580
» Инструкция к швейной машине Comfort 32
Вам также может быть интересно

Инструкция к швейной машине Singer 7640

Инструкция к швейной машине Singer 1409

Инструкция к швейной машине Singer M3305

Инструкция к швейной машине Singer Starlet 6660

Инструкция к швейной машине Singer Tradition 2255

Инструкция к швейной машине Singer 1507

Инструкция к швейной машине Singer M1605

Инструкция к швейной машине Singer Tradition 2259
Добавить комментарий
Имя *
Email *
Сайт
Комментарий


![]()


Сохранить моё имя, email и адрес сайта в этом браузере для последующих моих комментариев.
- Добавить инструкцию
- Заказать инструкцию
- Политика конфиденциальности
-
Страница 1
[…]
-
Страница 2
IMPORTANT SAFETY INSTRUCTIONS When using an electrical appliance, basic safety should always be followed, including the following: Read all instructions before using this sewing machine. To reduce the risk of electric shock: 1. An appliance should never be left unattended when plugged in. 2. Always unplug this appliance from the electric outlet imm[…]
-
Страница 3
Cuando se utiliza un dispositivo eléctrico, debe seguirse siempre precausiones de seguridad básica, incluyendo las siguientes: Leer todaas las instrucciones antes de utilizar está máquina de coser. Para reducir el riesgo de sacudidas eléctricas: 1. Un dispositivo eléctrico nunca debe dejarse desatendido cuando está conectado. 2. Desenchufar […]
-
Страница 4
Congratulations As the owner of a new Singer sewing machine, you are about to begin an exciting adventure in creativity. From the moment you first use your machine, you will know you are sewing on one of the easiest to use sewing machines ever made. May we recommend that, before you start to use your sewing machine, you discover the many advantages[…]
-
Страница 5
List of contents Principal parts How to choose your pattern of the Machine ………………………………………………………………………………………………………………………………………………………………………………………..2/3 the snap-in sewing table ……………………………….[…]
-
Страница 6
Indice Detalles de la máquina ………………………………………………………………………………………………………………………………………………………………………………………………….2/3 Accesorios …………………………………………………………………………[…]
-
Страница 7
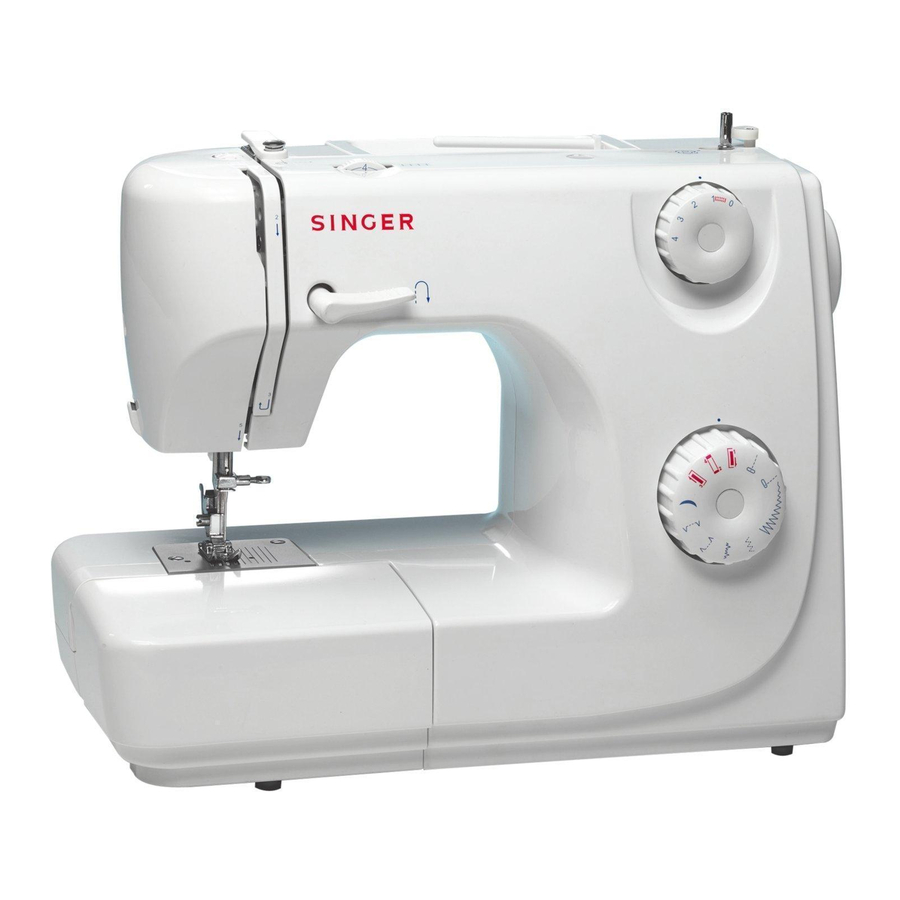
2 1. Thread tension dial 2. Presser foot pressure adjustment 3. Thread take-up lever 4. Thread cutter 5. Presser foot 6. Needle plate 7. Removable sewing table/ accessory storage 8. Reverse sewing lever 9. Bobbin stopper 10. Stitch length dial 11. Pattern selector dial Principal parts of the machine 1 2 3 4 5 6 7 8 9 10 11 Detalles de la máquina 1[…]
-
Страница 8
3 Principal parts of the machine 12. Horizontal spool pin 13. Bobbin winder 14. Handwheel 15. Power and light switch 16. Main plug socket 17. Bobbin thread guide 18. Upper thread guide 19. Face plate 20. Handle 21. Presser foot lever 22. Foot speed control 23. Power cord 23 22 15 16 17 18 19 21 20 12 14 13 12. 13. 14. 15. 16. 17. 18. 19. 20. 21. 22[…]
-
Страница 9
4 Accessories Standard accessories (1) Optional accessories (2) a. All purpose foot b. Zipper foot c. Buttonhole foot d. Button sewing foot e. L-screwdriver f. Seam ripper/ brush g. Oil bottle h. Pack of needles I. Bobbin (3x) j. Seam guide k. Darning plate l. Spool holder (These 6 accessories are not supplied with this machine; they are however av[…]
-
Страница 10
5 1 2 Installing the snap-in sewing table Keep the snap-in sewing table horizontal, and push it in the direction of the arrow. (1) The inside of the snap-in sewing table can be utilized as an accessory box. To open, lift up at the point of the arrow. (2) Instalación de la mesa de coser convertible Mantenga horizontal la mesa de coser convertible y[…]
-
Страница 11
Connect the machine to a power source as illustrated. (1) This appliance is equipped with a polarized plug which must be used with the appropriate polarized outlet. (2) Unplug power cord when machine is not in use. The foot control pedal regulates the sewing speed. (3) Consult a qualified electrician if in doubt as to connect machine to power sourc[…]
-
Страница 12
1 7 Conexión de la máquina a la fuente de alimentación eléctrica 2 A 3 Conecte la máquina a una fuente de alimentación según se ilustra. (1) Esta máquina está provista de un conector polarizado, que debe utilizarse con una toma de corriente polarizada adecuada. Desenchufe el cable de alimentación cuando la máquina no esté en uso. El ped[…]
-
Страница 13
8 C Disconnect the machine from the power supply by removing the plug from the main socket! Replace bulb with same type rated 10 watts (110-120V area) or 15 watts (220-240V area). — Remove the screw (A) as illustrated. (1) — Remove the face plate (B). — Unscrew the bulb and install a new one (C). (2) — Replace the face plate and tighten screw. Shou[…]
-
Страница 14
9 Two-step presser foot lifter When sewing several layers or thick fabrics, the presser foot can be raised for easy positioning of the work. (A) to a high rise position The presser foot pressure of the machine has been pre-set and requires no particular readjustment according to the type of fabric (light-or-heavy weight). However, if you need to ad[…]
-
Страница 15
a c d e f b 1 2 34 b a e g Attaching the presser foot holder Raise the presser bar (a). Attach the presser foot holder (b) as illustrated. (1) Lower the presser foot holder (b) until the cut-out (c) is directly above the pin (d). (2) Raise the lever (e). Lower the presser foot holder (b) and the presser foot (f) will engage automatically. Raise the[…]
-
Страница 16
1 2 3 4 5 67 8 9 11 Winding the bobbin — Place thread and spool holder big or small spool pin. (1/2) — Wind thread anticlockwise around bobbin winder tension discs (3). — Thread bobbin as illustrated and place on spindle (4). — Push bobbin to right (5). — Hold thread end (6). — Step on foot control pedal (7). — Cut thread (8). — Press bobbin to lef[…]
-
Страница 17
12 1 3 4 6 Inserting the bobbin When inserting or removing the bobbin, the needle must be fully raised. Attention: — Open the hinged cover (1) — Pull the bobbin case tab (a) and remove the bobbin case. (2) — Hold the bobbin case with one hand. Insert the bobbin so that the thread runs in a clockwise direction (arrow) (3). — Pull the thread through […]
-
Страница 18
13 AC B A B C D Inserting and changing needles Change the needle regularly, especially if it is showing signs of wear and causing problems. For best sewing results always use SINGER Brand Needles. Insert the needle A. Loosen the needle clamp screw and tighten again after inserting the new needle. (1) B. The flat side of the shaft should be towards […]
-
Страница 19
14 Threading the upper thread This is a simple operation but it is important to carry out correctly as by not doing so . — Start by raising the needle to its highest point (1), and also raise the presser foot to release the tension discs. For safety, it is strongly suggested you turn off the power before threading. — Lift up the spool pin. Place th[…]
-
Страница 20
Enhebrado del hilo superior 2 5 1 2 3 6 4 5 7 7 6 4 3 1 Se trate de una operación sencilla pero es importante realizarla correctamente pues de no hacerlo podría surgir varios problemas en la costura. — Comience elevando la aguja a su posición más alta (1) y también eleve el prensatelas para liberar los discos de tensión. Para seguridad, se re[…]
-
Страница 21
16 Thread tension 12 B A C D 4 Upper thread tension Lower thread tension Please note: Basic thread tension setting: «4» To increase the tension, turn the dial to the next number up. To reduce the tension, turn the dial to the next number down. A. Normal thread tension for straight stitch sewing. B. Thread tension too loose for straight st[…]
-
Страница 22
17 Tensión del hilo 12 B A C D 4 Tensión del hilo superior No olvide que: Adjuste de la tensión del hilo básica: «4» Para aumentar la tensión, girar el disco al siguiente número más alto. Para reducir la tensión, girar el disco al siguiente número más bajo. A. Tensión normal del hilo para cosido de puntos rectos. B. Tensión fl[…]
-
Страница 23
3 18 Raising the bobbin thread Hold the upper thread with the left hand. Turn the handwheel (1) towards you (counterclockwise) lowering, then raising needle. If it is difficult to raise the bobbin thread, check to make sure the thread is not trapped by the hinged cover or the Removable Sewing Table. Gently pull on the upper thread to bring the bobb[…]
-
Страница 24
19 3 Reverse sewing Removing the work Cutting the thread To secure the beginning and the end of a seam, press down the reverse sewing lever (A). Sew a few reverse stitches. Release the lever and the machine will sew forwards again. (1) Turn the handwheel counterclockwise to bring the thread take up lever to its highest position, raise the presser f[…]
-
Страница 25
Matching needle/ fabric/ thread 20 Note twin needle: 1. Twin needles, can be purchased for utility and decorative work. 2. When sewing with twin needles, sew only in center needle straight stitch or a narrow zig zag. 3. For best sewing results always use genuine SINGER needles. 4. Replace needle often (approximately every other garment ) and/ or at[…]
-
Страница 26
GUÍA DE SELECCIÓN DE AGUJA/ TEJIDO/ HILO TAMAÑO DE LA AGUJA TELA HILO 9-11 (70-80) 11-14 (80-90) Telas de poco peso — algodones delgados, Voile, sarga, seda, muselina, quiana, interlocks (puntadas entrelazadas), tejidos de algodón, tricots, jerseys, crepés, poliester tejido, telas para camisas y blusas. Telas de peso medio, raso, lona, tela de[…]
-
Страница 27
To select a stitch, simply turn the pattern selector dial. The pattern selector dial may be turned in either direction. The following page shows the recommended range of stitch lengths. Adjust the stitch length with the stitch length dial according to the fabric being used. To obtain any of the patterns shown on the stitch selection panel, select t[…]
-
Страница 28
23 Straight stitch and twin needle Turn the stitch selection dial so that the pointer is set to the straight stitch position. Generally speaking, the thicker the fabric, thread and needle, the longer the stitch should be. For a fine stitch set length at «1» or «2». For gathering set stitch length to «4». For twin needl[…]
-
Страница 29
24 Zigzag stitching 2 1 0 1 2 3 4 4 3 21 0.5 Turn the pattern selector dial so that the stitch display shows «zig-zag» » «. Turning the pattern selector dial will increase or decrease the zig zag width. (1) The density of zigzag stitches increase as the setting of stitch length dial approaches «0». Neat zigzag stitches[…]
-
Страница 30
25 Blind hem/ Lingerie stitch For hems, curtains, trousers, skirts, etc. Blind hem for stretch fabrics. Blind hem/ lingerie for firm fabrics. It takes practice to sew blind hems. Always make a sewing test first. Note: Turn up the hem to the desired width and press. Fold back (as shown in Fig. 1) against the right side of the fabric with the top edg[…]
-
Страница 31
26 3 Sewing on buttons 2 1 Cosido de botones Instalar la zurcida plancha. (1) Combie el prensatelas al especial para coser botones. Coloque la labor bajo el prensatelas. Coloque el botón en la posición deseada, baje el prensatelas, ajuste el ancho de la puntada a » » y cosa unas pocas puntadas de fijación. Ajuste el ancho de la puntada[…]
-
Страница 32
27 Sew 4-step buttonholes Prepare Note: Tips: 1. Take off the all purpose foot and attach the buttonhole foot. 2. Measure diameter and thickness of button and add 0.3 cm (1/8″) for bar tacks; mark buttonhole size on fabric. 3. Place fabric under the foot, so that marking on the buttonhole foot aligns with starting marking on fabric. Lower the […]
-
Страница 33
Cómo coser ojales en 4 pasos 4 2 3 1 0 1 2 3 4 4 1 2 3 5 Preparación Nota: 1. Quite el pie prensatelas multiuso y meta el pie prensatelas para hacer ojales. 2. Mida el diámetro y el espesor del botón y añada 0.3 cm (1/8″) para hilvanes; Señala el tamaño del ojal en la tela. 3. Coloque la tela debajo del pie prensatelas de modo que la se[…]
-
Страница 34
29 1 2 Zippers and piping 0 1 2 3 4 Set the machine as illustrated. Dial selector on » «. The zipper foot can be attached right or left, depending on which side of the foot you are going to sew. (1) To sew past the zipper pull, lower the needle into the fabric, raise the presser foot and push the zipper pull behind the presser foot. Lower[…]
-
Страница 35
30 1 2 Multi-stitch zig-zag 0 1 2 3 4 Sewing on lace and elastic, darning, mending, reinforcing edges. Set the stitch pattern dial to » «. Place patch in position. The stitch length can be shortened to produce very close stitches. (1) When mending tears, it is advisable to use a piece of backing fabric to reinforce. The stitch density can[…]
-
Страница 36
Free motion darning, stippling 0 1 2 3 4 Zurcido de brazo libre 31 1 2 3 a b c 5 4 * The darning foot is an optional accessory not included with your machine. (1) Install the darning plate (2) and For darning, first sew around the edge of the hole (to secure the threads). (5) Free motion darning is accomplished without the sewing machine internal f[…]
-
Страница 37
32 Decorative stitches Set the machine as illustrated. Turn the stitch length dial to suit the fabric and application. For a delicate edge finish along the edge of fabric. Shell stitch (A) For decorative edges. Suitable for edges on sheer, fine and stretch fabrics. The larger stitch should go just over the edge of the fabric to create the shell eff[…]
-
Страница 38
Applique and blindstitch applique 33 0 1 2 3 4 Puntada y aplicación invisible Position applique piece on background fabric. Align needle so that it pierces background fabric along the outside edge if the applique. Lower presser foot. If using a blindhem foot, align the lip of the blindhem foot guide so that it sits directly under the edge of the a[…]
-
Страница 39
0 1 2 3 4 Quilting functions Para acolchar * The Quilting foot is an optional accessory not included with your machine. Stippling is free motion quilting where you hoop the fabric and guide it by hand, allowing you to stitch in any direction. For template quilting transfer a design from a template (plastic stencil) to your fabric and then stitch fo[…]
-
Страница 40
Mending Remendar Machine Preparation: Sewing Instructions: — Pattern: Multi — stitch Zigzag — Stitch width: Largest 4.5mm — Stitch length: Fine (0.5 — 1.0) Position a piece of fabric directly beneath the tear in your fabric. Align the center of the foot with the center of the tear. Stitchacross, backstitching at the start and at the end of the seam[…]
-
Страница 41
Staystitching Pespunte fijo Machine Preparation: Sewing Instructions: — Pattern: Straight Stitch — Stitch length: 1.5mm (fine) Staystitching is used to reinforce curves such as armholes, seams in stretch fabrics and other areas to prevent stretching. Stay stitch along the edge of the area 1/4 of an inch from the edge of the seam. Preparación de la[…]
-
Страница 42
Traditional PinTucks Alforzas Tradicionales 0 1 2 3 4 Machine Preparation: Sewing Instructions: — Pattern: Straight — Stitch Length: 2 — 3 To mark pintucks in your fabric, either pull a thread to mark the fold or mark with chalk or marking pencil. Fold and press wrong sides together on pulled thread line or marked lines. Stitch 1/8 of an inch from […]
-
Страница 43
Gathering Fruncido 0 1 2 3 4 Machine Preparation: Sewing Instructions: — Pattern: Straight Stitch — Stitch Length: Longest Use this technique for gathering waistbands, sleeve caps etc. At 1/4 of an inch from the edge of the seam, begin by backstitching and then continue to sew the length required. When seam is complete, raise the needle to it'[…]
-
Страница 44
Couching Acumulado 0 1 2 3 4 Machine Preparation: Sewing Instructions: — Pattern: Zigzag — Stitch width: Variable (Set according to width of cord) — Stitch length: Variable Couching is simply the technique of zigzagging over a fine cord. Use as a decorative touch on jackets and other sewing projects. With a marking pencil, draw a design on your fab[…]
-
Страница 45
40 4 5 6 7 3 2 1 Maintenance Attention: Remove the needle plate: Cleaning the feed dog: Cleaning and lubricating the hook: Important: Disconnect the machine from the electricity supply by removing the plug from the mains socket. When cleaning the machine, it must always be disconnected from the electricity supply. Turn the handwheel until the needl[…]
-
Страница 46
4 5 6 7 3 2 1 Mantenimiento de la máquina 41 Atención: Quitar la placa de la aguja Limpieza del transportador Limpieza y aceitado de la lanzadera Importante: Antes de la limpieza desconectar la máquina quitando el enchufe de la red eléctrica. Girar el volante hasta que la aguja este en el punto más alto. Abrir la tapa con charnela y sacar el t[…]
-
Страница 47
Problem Cause Correction Upper thread breaks Lower thread breaks Skipped stitches Needle breaks Loose stitches Seams gather or pucker Uneven stitches, uneven feed The machine is noisy The machine jams 1. The machine is not threaded correctly 2. The thread tension is too tight 3. The thread is too thick for the needle 4. The needle is not inserted c[…]
-
Страница 48
Problema Causa Correció El hilo superior se rompe Falta de puntos La aguja se rompe Suelto los puntos La costura se encoge, la tela se frunce Puntadas desguales, arraste no uniforme La máquina hace ruido Máquina obstruida 1.La máquina está mal enhebrada. 2La tensión del hilo es demasiado fuerte 3.El hilo es demasiado grueso para la aguja 4.La[…]
-
Страница 49
[…]
-
Страница 50
021V880101( ) Feb/05 SINGER 8280(8280)[…]