- Manuals
- Brands
- Pfaff Manuals
- Sewing Machine
- Smarter
- Owner’s manual
-
Contents
-
Table of Contents
-
Troubleshooting
-
Bookmarks
Quick Links
Owner’s
Manual
160s
150s
140s
130s
SMARTER BY PFAFF
™
– inspired and developed by the premier PFAFF
sewing machine brand
®
Related Manuals for Pfaff Smarter
Summary of Contents for Pfaff Smarter
-
Page 1
Owner’s Manual 160s 150s 140s 130s SMARTER BY PFAFF ™ – inspired and developed by the premier PFAFF sewing machine brand ®… -
Page 2: Important Safety Instructions
This household sewing machine is designed to comply with IEC/ EN 60335-2-28 and UL1594. IMPORTANT SAFETY INSTRUCTIONS When using an electrical appliance, basic safety precautions should always be followed, including the following: Read all instructions before using this household sewing machine. Keep the instructions at a suitable place close to the machine.
-
Page 3
• Do not use bent needles. needle causing it to break. • Wear safety glasses. in the needle area, such as threading needle, changing needle, threading bobbin, or changing presser foot, etc. • Never drop or insert any object into any opening. •… -
Page 4
FOR EUROPE ONLY: This appliance can be used by children aged from 8 years and above and persons with reduced physical, sensory or mental capabilities or lack of experience and knowledge if they have been given supervision or instruction concerning use of the appliance in a safe way and understand the hazards involved. -
Page 5: Table Of Contents
TABLE OF CONTENTS INTRODUCTION ……… 6 ……….21 Machine Overview ……….6 ……….22 …………6 Adjustable Needle Position ……22 Top Parts …………7 ……….22 …………7 Accessories …………7 SEWING ……….23 Included Accessories not in Picture ..7 ….23 Presser Feet ………..8 ……23 ……9 ……….23 ….10 ……24 ……24…
-
Page 6: Introduction
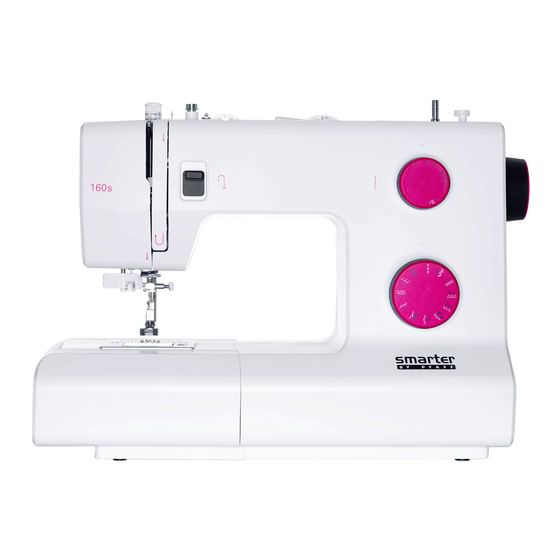
INTRODUCTION Machine Overview Front Side 1. Threading slots 12. Needle bar 2. Thread cutter 3. LED light 4. Reverse lever 14. Bobbin cover 5. Free arm 15. Lower thread guide 6. Accessory tray 16. Needle screw 17. Presser foot lift 18.
-
Page 7: Top Parts
Top Parts 21. Presser foot pressure dial 22. Thread guides 24. Hole for auxiliary spool pin 25. Bobbin winder spindle 26. Take-up lever 27. Thread tension discs 28. Bobbin winder tension disc 29. Thread tension dial Rear Side 31. Main switch, connectors for power cord and foot control 32.
-
Page 8: Presser Feet
Presser Feet Standard Presser Foot 0 This foot is used mainly for straight stitching and zigzag stitching with a stitch length longer than 1.0 mm. Clearview Foot 1 When sewing decorative stitches or short zigzag stitches and other utility stitches with less than 1.0mm stitch length, use this smoothly over the stitches.
-
Page 9
Stitch Overview – 150s/160s Stitch Name Description 1-step Buttonhole For all straight stitching and topstitching Triple zigzag stitch For stitching on elastic band, darning tears and patches Blindhem stitch For invisible hem attachment Elastic blindhem For invisible hem attachment and simultaneous stitch * serging, also for stretch fabrics Decor stitch… -
Page 10
Stitch Overview – 130s/140s Stitch Name Description 4-step Buttonhole For all straight stitching and topstitching Triple zigzag stitch* For stitching on elastic band, darning tears and patches Elastic blindhem For invisible hem attachment and simultaneous stitch * serging, also for stretch fabrics Blindhem stitch For invisible hem attachment Greek stitch… -
Page 11: Preparations
2. Remove all outer packing material and the plastic bag. Note: Your SMARTER BY PFAFF™ 130s/140s/ 150s/160s sewing machine is adjusted to provide the best stitch result at normal room temperature. Ex- treme hot and cold temperatures can affect the sewn result.
-
Page 12: Free Arm
Pack away after Sewing Note: After switching off, residual power may still remain in the machine. This may cause the light to stay on for a few seconds while the power is consumed. This is normal behavior for an energy 2.
-
Page 13: Spool Pins
Spool Pins Your machine has two spool pins, a main spool pin and an auxiliary spool pin. The spool pins are designed for all types of thread. The main spool pin is used in a Narrow thread spool the horizontal position for normal threads and the vertical position for large spools or specialty threads.
-
Page 14: Threading The Machine
Threading the Machine Make sure that the presser foot is raised and the needle is in its highest position. 5. Thread the needle.
-
Page 15: Needle Threader
Needle Threader The integrated needle threader allows you The needle must be in its highest position to use the built-in needle threader. Turn the handwheel until the notch on the wheel is lowering the presser foot. 1. Use the handle (B) to pull the needle threader all the way down.
-
Page 16: Threading For Twin Needle
Threading for Twin Needle Replace the sewing needle with a twin needle. Make sure that the presser foot is raised and the needle is in its highest position. 1. Place the thread spool on the spool pin and fit the appropriately sized spool cap.
-
Page 17: Bobbin Winding
Bobbin Winding spool cap tightly against the spool. front to the back. Pull the thread clockwise around the inside to the outside. 4. Place the bobbin on the bobbin spindle. 5. Push the bobbin spindle to the right to activate the bobbin winding. Press the foot control to wind the bobbin.
-
Page 18: Presser Foot Pressure
Presser Foot Pressure The presser foot pressure has been pre-set to not need to adjust the presser foot pressure. very light or heavy fabric, adjusting the pres- sure can improve the result. For very light fabrics, loosen the pressure by turning the dial counterclockwise.
-
Page 19: Needles
Needles The sewing machine needle plays an important role recommend needles of system 130/705H. The needle package included with your machine contains needles Universal Needle (A) Universal needles have a slightly rounded point and come in a variety of sizes. For general sewing in a vari- ety of fabric types and weights.
-
Page 20: Lowering Feed Dogs
Lowering Feed Dogs You can lower the feed dogs by moving the switch at the back of the free arm to the wish to raise the feed dogs. Note: The feed dogs will not raise immediately when the lever is switched. Turn the handwheel one full turn or start sewing to re-engage the feed dogs.
-
Page 21: Stitch Selection
Stitch Selection desired stitch. The selected stitch is the one The stitches printed in white on the stitch Use non-stretch stitches when sewing woven fabrics, leather or vinyl and stretch Note: Always raise the needle above the fabric and presser foot before you turn the stitch selc- tion dial.
-
Page 22: Adjustable Needle Position
Stitch Width sired stitch width. The higher the number, the wider the stitch width. The stitch width can be varied wheel correspond to the stitch width in Note: Before you turn the stitch width dial, raise the needle to its highest position, other- wise it may bend or break.
-
Page 23: Sewing
SEWING stitch scribed, a chart shows the recommended set- chart to the right. Start to Sew – Straight Stitch A. Recommended stitch B. Stitch length in mm Raise the presser foot and position the fab- C. Stitch width in mm ric under it, next to a seam allowance guide line on the needle plate.
-
Page 24: Reinforced Straight Stitch
Reinforced Straight Stitch stitch This stitch is stronger than regular straight stitch, due to the fact that it is a triple and elastic stitch. The reinforced straight stitch can be used for heavy stretch fabrics, for Set for reinforced straight stitch crotch seams which are subject to consider- able strain and for topstitching heavy fabrics.
-
Page 25
Overlock Stitch stitch The open overlock stitch sews the seam and overcast the edge all at one time, perfect for stretch fabrics. This stitch is more elas- tic than normal seams, very durable and Set for overlock stitch Tip: When sewing, guide the fabric edge along the metal pin of the foot. -
Page 26: Blindhem
Blindhem stitch The blindhem stitch is used to make invisible hems on skirts, trousers and home decorating. 1. Finish the edge of the hem. Set for blindhem stitch 2. Fold and press the hem allowance to the wrong side. 3. Fold the hem back on itself so approxi- extends beyond the fold.
-
Page 27: Darning With The
Sewing on Patches or Appliqués stitch To cover large holes it is necessary to sew a new piece of fabric onto the damaged area. Baste the new piece of fabric onto the dam- aged area on the right side of the fabric. Set for three-step zigzag stitch the three-step zigzag stitch.
-
Page 28
Sewing on Buttons stitch 1. Remove the presser foot and lower the Set for button sewing 2. Mark the fabric where the button is to be located. Place the fabric and button under the ankle with the holes in the button lined up with the swing of the needle. -
Page 29
Standard Buttonhole stitch (model 150s/160s) The fabric should be interfaced and/or stabi- lized where buttonholes are to be sewn. Set for buttonhole 1. Mark the start position and buttonhole Push the button holder open by pushing Push the button holder forward until button will determine the length of the buttonhole. -
Page 30
Standard Buttonhole stitch (model 130s/140s) The fabric should be interfaced and/or stabi- lized where buttonholes are to be sewn. Set for buttonhole Prepare the Buttonhole Measure diameter and thickness of the but- tain correct buttonhole length. Mark the start position and buttonhole length on the fabric Note: Before starting to sew any buttonhole, al- ways push the the buttonhole foot fully back. -
Page 31: Stretch Fabrics
Use seam ripper and cut the buttonhole open from both ends towards the middle. The density of the buttonhole is adjusted Note: Density varies according to the fabric. Al- Carefully cut your buttonhole ways test sew a buttonhole on the fabric you are open with a seam ripper.
-
Page 32: Sewing Zippers
Sewing Zippers stitch the right or the left of the needle, making it 1.5-3 easy to sew both sides of the zipper. To sew the left side of the zipper, attach the Set for zipper To sew the right side of zipper, attach the Center Zipper Right presser foot Left presser foot…
-
Page 33: Maintenance
MAINTENANCE Cleaning the Machine To keep your sewing machine operating well, Wipe the exterior surface of your machine with a soft cloth to remove any dust or lint built up. Cleaning the Bobbin Area Note: Raise the needle, lower the feed dogs and turn off the machine.
-
Page 34: Troubleshooting
TROUBLESHOOTING ® your machine. For further information please contact your local authorized PFAFF dealer. General Problems The Seam has Uneven Stitches Fabric does not move? Is the thread tension correct? Make sure that the feed dogs are not lowered. Check needle thread tension and the threading.
-
Page 35: Intellectual Property
Bobbin Thread Breaks Did you insert the bobbin properly? Check the bobbin thread. Is the stitch plate hole damaged? Change the stitch plate. Is the bobbin area clean? Clean lint from bobbin area. Is the bobbin wound correctly? Wind a new bobbin. design.
-
Page 36
4710092-26A English © 2014 KSIN Luxembourg II, S.ar.l. All rights reserved. Printed in Germany on environmentally-friendly paper…
Посмотреть инструкция для Pfaff Smarter by 160s бесплатно. Руководство относится к категории швейные машины, 9 человек(а) дали ему среднюю оценку 8.9. Руководство доступно на следующих языках: английский. У вас есть вопрос о Pfaff Smarter by 160s или вам нужна помощь? Задайте свой вопрос здесь
Швейная машина Pfaff Smarter by 160s — это удобное устройство для шитья дома. Она имеет портативный дизайн, что позволяет легко перемещать ее по дому. С помощью этой машины можно шить различные материалы — от легких тканей до более плотных.
Она оснащена множеством функций, которые сделают шитье более простым и быстрым. Система натяжения нити автоматически подстраивается для каждого типа шва. Машина также имеет 23 типа стежков, функцию частичной аппликации, регулировку скорости и множество других функций.
Для удобства используется панель управления и подсветка швов. Она также имеет специальную платформу для работы с рукавами и брючными швами.
Pfaff Smarter by 160s надежная и долговечная машина, выполненная из высококачественных материалов, обеспечивающих ее долговечность.
Она является идеальным выбором для начинающих швеи, которые ищут простую и удобную в использовании машину для шитья.
Главная
Не можете найти ответ на свой вопрос в руководстве? Вы можете найти ответ на свой вопрос ниже, в разделе часто задаваемых вопросов о Pfaff Smarter by 160s.
Какой размер иглы лучше всего использовать?
Наиболее подходящий размер иглы зависит от используемой толщины ткани. С плотной тканью следует использовать толстую иглу. Подходящие типы тканей указываются на упаковке с иглами.
Какой срок службы у швейной иглы?
Как правило, срок службы швейной иглы составляет от 7 до 9 часов.
Что может повредить иглу при шитье?
Причин повреждения иглы может быть несколько: — Использование неподходящей иглы для определенного типа ткани — Установка иглы слишком низко — Неправильное расположение ткани — Неправильно установленный шпульный колпачок
Инструкция Pfaff Smarter by 160s доступно в русский?
К сожалению, у нас нет руководства для Pfaff Smarter by 160s, доступного в русский. Это руководство доступно в английский.
Не нашли свой вопрос? Задайте свой вопрос здесь
-
О товаре
-
Характеристики
-
Отзывы
2 -
Выбрать магазин
7
Все характеристики товара
Швейные характеристики
|
Тип управления |
электромеханическое |
|
Челнок
|
горизонтальный (ротационный) |
|
Количество операций
|
23 |
|
Количество петель |
1 |
|
Максимальная длина стежка, мм |
4 |
|
Максимальная ширина строчки, мм |
6 |
|
Обметка петли |
автомат |
|
Виды петель |
прямоугольная (бельевая) |
|
Регулировка усилия давления лапки на ткань |
есть |
|
Нитевдеватель |
есть |
|
Шитье двойной иглой |
есть |
|
Комплектация |
Лапка универсальная. Лапка прозрачная. Лапка для потайной строчки. Лапка для молнии. Лапка для петли. Шпульки. Войлочная подкладка. Отвертка. Пластина для катушки(большая, маленькая). Вспариватель. Кисточка. Направитель. Катушкодержатель. Иглы. Педаль. Шнур. Жесткий чехол. Инструкция на русском языке. |
Дополнительно
|
Подсветка рабочей поверхности |
светодиодная |
|
Съемная рукавная платформа |
есть |
|
Вес, кг |
6,3 |
|
Мощность, Вт |
70 |
|
Материал корпуса |
пластик |
|
Материал каркаса |
металл |
|
Размер (длина х ширина х высота), см |
— |
|
Страна сборки |
Китай |
|
Состояние товара |
новый |
Смотреть руководство для Pfaff Smarter 160S ниже. Все руководства на ManualsCat.com могут просматриваться абсолютно бесплатно. Нажав кнопку «Выбор языка» вы можете изменить язык руководства, которое хотите просмотреть.

MANUALSCAT | RU
Вопросы и ответы
У вас есть вопрос о Pfaff Smarter 160S, но вы не можете найти ответ в пользовательском руководстве? Возможно, пользователи ManualsCat.com смогут помочь вам и ответят на ваш вопрос. Заполните форму ниже — и ваш вопрос будет отображаться под руководством для Pfaff Smarter 160S. Пожалуйста, убедитесь, что вы опишите свои трудности с Pfaff Smarter 160S как можно более детально. Чем более детальным является ваш вопрос, тем более высоки шансы, что другой пользователь быстро ответит на него. Вам будет автоматически отправлено электронное письмо, чтобы проинформировать вас, когда кто-то из пользователей ответит на ваш вопрос.
Задать вопрос о Pfaff Smarter 160S
- Бренд:
- Pfaff
- Продукт:
- швейные машины
- Модель/название:
- Smarter 160S
- Тип файла:
- Доступные языки:
- голландский
Сопутствующие товары Pfaff Smarter 160S
Не Крутится Шпулечное Колесо
Шпулечное Колесо Не Прокручивается И Верхняя Нитка Не Зацепляется Для Выхода На Верх
Пффаф Експресион 2026
Делает Несколько Стежков И Останвливается На Табло Светится Wd
Не Круьится Махоаое Колесо
Заклинило Машинку
Регулятор Ширины Стежка На Переключается На 0
Регулятор Ширины Стежка Не Переключается На 0. Что Делаю. Поднимаю Иглу, Выставляю Иглу По Центру Регулятором (Ри), И Проворачиваю Регулятор Ширины Стежка — Пытаюсь Провернуть На «0». Он Не Идет, Зато Почему-То Вместе С Ним Проворачивается Риглы И Ставит
Ткань Не Продвигается
Не Цепляет Нижнюю Нитку
Не Работает Функция Скрепка
Делает Попытку, Но Реверса Нет
Натяжение Нити
Не Регулируется Натяжение Нити.
Верхняя Нитка Запутывается На Шпульке, Или Рвет Нить.
Верхняя Нить, Наматывается На Шпульке И Или Же Комок Сходит На Строчку И Идёт Дальше С Таким Же Темпом, Или Обрывает Нить. Как Устранить Этот Дефект, 2 Дня Не Шила, Никто К Машинке Не Подходил Тем Более Не Трогали.
Пропускает Стежки
Не Фиксируется Игла В Иглодержателе
Болт Будто Прокручивается ,И Игла Не Фиксируется
Слетела Пружинка С Нитинамотки.
Как Поставить Ее На Место ?
Шум При Работе
Не Работает Маховик
Маховик Сломался
Двигатель Не Набирает Обороты
Стежок
Нижняя Часть Стежка Образует Петли
При Зигзаге Не Цепляет Правую Петлю На Флисе
На Ткани Зигзаг Нормальный А На Флисе Прпвая Петля Не Цепляется
Шкала Программ
Красный Флажок Сбился По Отнашению Окошек
Самопроизвольно Включение Заднего Хода
При Смене Операций Машинка Проживает Около 30 Стежков Взад А Потом Начинает Шить Нормально Вперед
Jaguar Escape-500
Возле Рычага Для Намотки Шпульки Открутилась Гайка
Педаль Не Работает
Как Синхронизировать Вращение Чеснока И Иглы
Не Совпадает Вращение Челнока И Иглы
Рычаг-Нитепритягиватель Ударяет По Корпусу Машины
Всё Началось С Того, Что Появился Жуткий Стук При Шитье. После Долгих Мучений Поняла, Что Это Рычаг-Нитепритягиватель Ударяет По Корпусу Машины. И Игла При Прямой Строчке Не По Центру Лапки.
Верхняя Нить Не Захватывает Нижнюю Нить
Неработает Зигзаг
Вибрация
Туго Вращается Маховое Колесом
Туго Вращается Маховик
Не Выметывает Петли
Перестала Выметывать Петли Автомат. Делает Вначале Прямую Строчку И Уходит За Границы Петли, Так И Не Начав Делать Зигзаг В Обратном Порядке
Давление Лапки На Ткань
При Шитье Неравномерное Распределение Ткани,Верхний Слой Вытягивается,Как Изменить Давление Лапки
Иглодержатель
Иглодержательный Столбик Не Пробивает Ткань,Живет Своей Жизнью. То Есть Никак Не Участвует В Процессе И Его Можно Свободно Двигать Вверх Вниз
Не Работает Реверс
При Переключении Реверса Никаких Изменений Не Происходит
Машина Шьёт Задним Ходом
Машинка Шьёт Задним Ходом, На Реверс Не Реагирует.
Не Шьет Зигзаг
Выскакивает Гнездо Для Шпуьки
На Позиции 85-86 Ни Делает Петлю
Горизонтальный Катушкодержатель
Сломан Катушкодержатель
Игла Попадает На Край Лапки
Игла В Brother Px-100 При Опускании Попадает,Задевает Край Лапки (По Центру). На Лапке Видны Следы (Заусеницы) От Попадания Иглы. Игла В Результате Или Ломается, Или Нет, В Зависимости От Толщины Ткани. Т.е. При Увеличении Толщины Игла Уже Постоянно Задев
Brother Star 120E
Начинает Шить Потом Пищит И Перистает Шить
Иголка Ломаеться Верхную Нитку Рветь
Лапка Стоит На Месте Не Шьет
Не Переключается На Педаль
Все Работает Но Без Педали. На Подключенную Педаль Никакой Реакции
Не Горит Лампа
Какую Нужно Покупать, Есть Ли Светодиодная
Не Переключает Строчку
Не Оверлаживает И Не Шьет Зигзагом
Меняю Лапку На Оверлог А Она Не Реагирует
Женоме608
Как Отрегулировать: Игла — Челнок В Горизонтальной Плоскости
Братьев Супер Ace M-965
На Дисплее Мигает Надпись Fubregler Ist Ausgeschaltet И Издают Звуковой Сигнал.машина Не Шьёт
Брайзер Супер Ace M-965
На Дисплее Мигает Надпись Fubregler Ist Ausgeschaltet И Издают Звуковой Сигнал.машина Не Шьёт
Машина Останавливается,Издаёт Звук Типа Повизгивает,Игла Недвигается Отключаю Машину ,Прокручиваю Маховое Колесо Снова Включаю И Такая Же История Дальше
Как Раскрыть Машины Чтоб Исправить Поломку
Нет Натяжения Нижней Нити
Только Верхняя Строчка ,Нижней Нет
Машина Шьёт Нормально Около Метра,А Потом Нитка Ср
На Утолшении Ткани Закусывает Иглу Что Делать
Неисправно Шьет
При Прошиве Простой Строчки Идут Пропуски Не Прошитые
Гнездо Челнока..погнута Напровляющая Нержавейка
Накатывает Нить… Гнет Иглу…
Как Смазать Швейную Машину Pfaff Select 1526
Тугое Натяжение Верхней Нити
Нить Очень Трудно Проходит(С Катушкой Норм Все),А В Игле Не Тянется- Рвет. Что Делать? В Середине Есть Тумблер От От 0 До 10 — Крутила- Не Помогает.
Не Загорается Буква А
Что Бы Вышить Буквы,Нажимаем Двойной Иглой А Буква Не Загорается Только При Первоначальном Включении А Затем Пропадает
Машинка Велтон Всв103
Наприбавляеться Стежок
Машинаfemili Platinum 4500
При Шитье Высвечивается Ошибкаfc