- Manuals
- Brands
- Philips Manuals
- Rice Cooker
- HD3037/03
- Service manual
-
Contents
-
Table of Contents
-
Troubleshooting
-
Bookmarks
Quick Links
Product information
Features
Published by Philips Consumer Lifestyle Printed in China Copy Right Reserved
1
HD3037/03
HD3037/03
Technical information
Rice Cooker
Subject to modification
Related Manuals for Philips HD3037/03
Summary of Contents for Philips HD3037/03
-
Page 1
Rice Cooker HD3037/03 HD3037/03 Technical information Product information Features Published by Philips Consumer Lifestyle Printed in China Copy Right Reserved Subject to modification… -
Page 2
HD3037Exploded View… -
Page 3
HD3037 Parts List 序 物料描述 物料编码 12NC English Description 号 deco ring for steam valve 装饰圈 996510050233 620202900098 蒸汽阀盖 996510050227 Cover for steam valve 620202110157 蒸汽阀座 996510050194 base for steam valve 620202110159 sealing ring for steam 蒸汽阀密封圈 996510064115 660400000041 valve 面盖 996510050196 top cover 620202050151 上盖发热传感组件 996510057874 top sensor 610201040038 Mound layer for spring of 996510057175 铰链弹簧压条 620203900054 gemel Panel for keeping warm 保温座板 996510057868 620203020061 … -
Page 4
Circuit Diagram: Temperature limiter wire Power board Control Heating board element Main Top sensor thermostat… -
Page 5
四、拆卸步骤: 2、separate steam valve cover from steam 1、remove steam valve valve base 3、remove four screw on the base 4、separate base from house 6、pull out top sensor 5、take out socket from base… -
Page 6
拆卸步骤: 7、remove screws on the cover of gemel. 8、remove cover of gemel 9、remove top cover assembly 10、separate top cover from inner cover with a spatula. 12、detach pressed layer of warm keeping board 11、remove top cover… -
Page 7
拆卸步骤: 14、separate from inner cover , sealing ring 13、remove screws on the warm keeping board and warm keeping board 15、pull out terminal of socket 16、pull out terminal of power board 17、fasten terminal of heating element with 18、remove screws used to fix main pliers and remove screws on heating element thermostat and detach main thermostat. with screwdriver… -
Page 8
拆卸步骤: 19、remove screws used to fix heating element 20、remove screws used to fix power board and take down heating element. bracket. 21、pull up flat cable of display board . 22、remove screws used to fix power board 24、detach screws used to fix control board 23、detach control board bracket… -
Page 9
拆卸步骤: 25、perk the salient point of outer pan 26、rotate outer pan and take it out 27、push the outer shell 28、detach outer shell 30、detach control panel 29、separate control panel from outer shell… -
Page 10
拆卸步骤: 31、take down button for opening cover… -
Page 11: Troubleshooting
Troubleshooting Fault Reason Solution 1.No power supply is outputted from the Check the power supply of the socket by socket having another appliance connected 2.Power cord being open circuit Check the power cord by replacing it with the a same one 3.The plug isn’t fully connected Insert the plug completely to ensure a fully connecting…
-
Page 12
Troubleshooting Fault Reason Solution Cook with right rice & water proportion 1.Inner pot is overloaded referring to the instruction manual 2.Difference in rice quality Change for another type of rice 4. Spilled rice or porridge 3.Rice isn’t well rinsed Rinse the rice 4.Top sensor malfunctions Repalce top sensor 5.Top sensor is losened…
Содержание обзора:
- Плюсы и минусы мультиварки
- Технические характеристики
- Описание автоматических программ
- Описание ручного режима
- Обзор мультиварки
- Видеорецепты
- Полезные материалы
- Комментарии и отзывы
Рейтинг:
![]()
![]()
3.9
Среднерыночная цена:
6300 руб.
Общие характеристики: мощность 980 Ватт, чаша на 5 литров с антипригарным покрытием, утолщённое дно чаши, 12 программ, 22 температурных режима, автоподогрев блюд, съёмный паровой клапан, корпус из нержавеющей стали, 3D-нагрев, отсрочка старта до 24 часов, ручка для переноски, ЖК-дисплей, светодиодная индикация, регулировка времени и температуры приготовления.
Отличительные особенности: ручной режим ПЕЧЬ (Мультиповар), утолщенное дно чаши.
- Утолщённое дно чаши с качественным антипригарным покрытием
- Мультиповар (режим «Печь»)
- 3D нагрев
- Встроенные часы
- Функция отсроченного старта
- Подсветка дисплея
- Высокая мощность
- Можно приобрести модель с меньшим объёмом чаши
- Поддержка памяти при перебоях в подаче электроэнергии
- Ручка для переноски
- Несъёмная внутрення крышка
- Нет предварительно отключения автоподогрева
- Неудачная инструкция
- Большой шаг регулировки температуры в Мультиповаре («Печь»)
- Завышенная цена
Технические характеристики
| Бренд | Philips |
|---|---|
| Модель | HD3037/03 |
| Тип мультиварки | мультиварка |
| Мощность, Вт | 980 |
| Тип нагрева |
|
| Объем чаши, л | 5,0 |
| Тип покрытия чаши | Антипригарное |
| Автоматические программы, кол-во | 12 |
| Ручная программа (мультиповар) | Есть |
| Отложенный старт | 24 |
| Размеры (ШxВxГ), см | 30.0×26.5ч39.5 |
| Вес, кг | 4,3 |
Описание автоматических программ (режимов)
| Программа | Описание |
| Рис |
Температура, °C: 130–140 Время приготовления автоматическое, зависит от объема и типа риса. Когда до окончания приготовления останется 10 минут, на дисплее начнет отображаться обратный отсчет времени. * |
| Гречка |
Температура, °C: 130-140 Время приготовления автоматическое, зависит от объема и типа гречки. * |
| Плов |
Температура, °C: 130-140 Время приготовления автоматическое, зависит от объема и типа риса. * |
| Каша |
Температура, °C: 90-100 Время, мин: 120 (1-4 часа)
По умолчанию — 60 минут. Можно выбрать время приготовления от 1 до 4 часов. |
| Варить |
Температура, °C: 90-100 Время, мин: 30 (5-30) По умолчанию — 30 минут. Можно выбрать время приготовления от 5 до 30 минут с шагом 1 минута. Время приготовления начинается с момента закипания воды, что сопровождается включением таймера обратного отсчета. Можно установить отсрочку до 24 часов. |
| Тушить |
Температура, °C: 80-95 Время, мин: 20 (20минут -10 часов) По умолчанию — 20 минут. Можно выбрать время приготовления от 20 минут до 10 часов. * |
| Жарить |
Температура, °C: 160-180 Время, мин: 42 (5-59) По умолчанию — 42 минуты. Можно выбрать время приготовления от 5 до 59 минут с шагом 1 минута. Отсрочка старта невозможна. В этом режиме крышка мультиварки должна быть открыта. |
| Йогурт |
Температура, °C: 37-43 Время, мин: 8 часов (6-12 часов) По умолчанию — 8 часов. Можно выбрать время от 6 до 8 часов с шагом 10 минут. Можно установить отсрочку до 24 часов. После приготовления мультиварка перейдет в режим ожидания, а не подогрева. |
| Подогреть |
Температура, °C: 85-95 Время, мин: 25 (8-25) По умолчанию — 25 минут. Можно выбрать время от 8 до 25 минут. * |
| Готовить на пару |
Температура, °C: 90-100 Время, мин: 30 (5-120)
По умолчанию — 30 минут. Можно выбрать время приготовления от 5 минут до 2 часов с шагом 1 минута. Время приготовления начинается с момента закипания воды, что сопровождается включением таймера обратного отсчета. |
| Подогрев |
Температура, °C: 70-80 Время, мин: 24 часа По завершении приготовления во всех режимах, кроме режима Йогурт, мультиварка переходит в подогрев на 24 часа. |
* Когда до окончания приготовления останется 10 минут, на дисплее начнет отображаться обратный отсчет времени.
Можно установить отсрочку cтарта до 24 часов.
Описание мультиварки
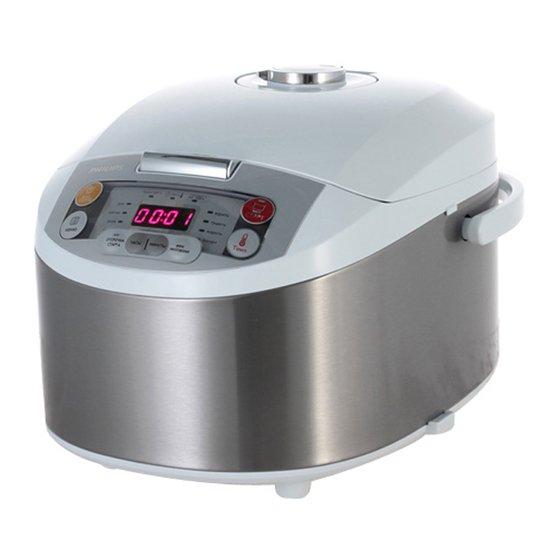
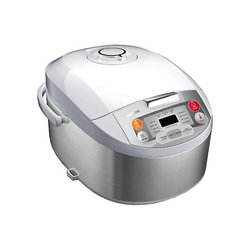
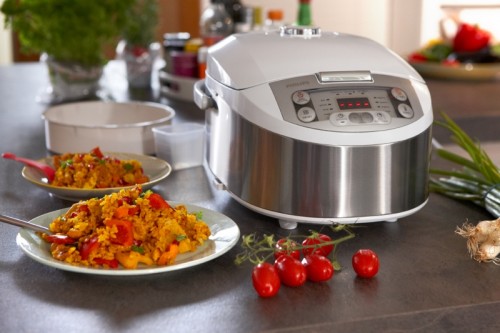
Мультиварка Philips HD3037/03 получилась удачной. Она порадует отличным функционалом, ручными регулировками, отсрочкой старта и великолепной чашей, к которой ничего не пригорает. Малые семьи и холостяки могут немного сэкономить и приобрести несколько другую модель – HD3036/03. Она отличается уменьшенным объёмом чаши и габаритами, больше никаких различий нет.
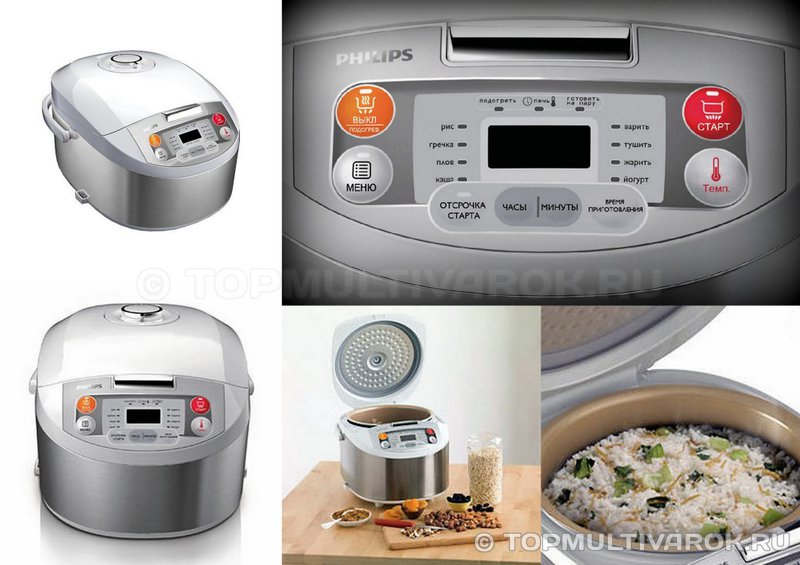
Компания Philips отлично поработала над дизайном, мультиварка получилась достаточно миниатюрной, её боковые панели изготовлены из нержавеющей стали. Панель управления удобная, на ней расположились кнопки с интуитивно понятным управлением, световые индикаторы режимов работы и небольшой дисплей, на котором отображается время, температура и прочие параметра. Расположение панели управление удачное, прибором можно управлять стоя, не сгибая спину в попытках заглянуть на панель. Также покупателей порадует наличие ручки для переноски, благодаря чему можно с лёгкостью переставлять аппарат с места на место, даже если он будет горячим. Крышка несъёмная, и это немного омрачает ситуацию. Из нареканий можно выделить отсутствие прорезиненных ножек, из-за чего мультиварка может скользить по поверхности стола.
Функционал аппарата довольно приличный, в нём реализовано 12 функций. Количество программ вполне достаточное, здесь нет ничего лишнего – варка, жарка, тушение, готовка на пару, приготовление риса, гречки, плова и каши. Пользователи жалуются на отсутствие специализированных программ по варке молочных каш, но для этих целей можно приспособить другие программы, так что ничего страшного в этом нет. Особенности программ следующие:
-
В программах ПЛОВ, ГРЕЧКА и РИС не регулируется время приготовления;
-
В программе ПЕЧЬ доступна регулировка температуры – 40, 60, 80, 100, 120, 150 и 180 градусов.
Время приготовления в остальных программах регулируется, а вот некоторым пользователям столь огромный шаг регулировки температуры может показаться неприемлемым. В качестве приятного дополнения пользователям предоставлена программа приготовления йогурта.
Из дополнительных функций можно выделить функции подогрева и автоподогрева, а также функцию отсрочки старта. Пользоваться её очень легко – достаточно установить время, через которое блюдо должно быть готовым. При этом данная опция неактивна в программах жарки и выпекания, что довольно странно.
Каких-либо сверхъестественных и мешающих нормальной эксплуатации недостатков мультиварка не имеет, отзывы о ней либо положительные, либо липовые – негативных практически нет, как и у других моделей.
Срок службы: 3 года
Гарантия: 2 года
Модельный год: 2012
Видео обзоры Philips HD3037/03:
Видео-рецепты для мультиварки Philips HD3037/03
Полезные материалы
05 сентября 2013 —
Мультиварка Philips HD3037 – это практичная и многофункциональная кухонная техника, которая отличается высоким качеством сборки, приятным интерфейсом и максимальной адаптивностью к пользовательским настройкам. Удобное и многофункциональное устройство имеет вместительную чашу, съемный паровой клапан, что существенно облегчает процесс очистки прибора как вручную, так и в посудомоечной машине. Обо всех особенностях мультиварки Philips HD3037 мы расскажем в данной статье.
Содержание статьи
- Общая характеристика мультиварки Philips HD3037
- Внешний вид и безопасность мультиварки Philips HD3037
- Преимущества мультиварки Philips HD3037
- Недостатки мультиварки Philips HD3037
- Описание автоматических программ мультиварки Philips HD3037
- Комплектация мультиварки Philips HD3037
- Мультиварка Philips HD3037. Видео
Общая характеристика мультиварки Philips HD3037
Мультиварка Philips HD3037 – достаточно функциональный прибор из среднего ценового сегмента, который позволяет пользователю готовить любимые блюда в различных вариациях: тушение, жарка, варка, готовка на пару и пр. Корпус кухонного прибора выполнен из прочного глянцевого пластика с сочетанием элементов, сделанных из нержавеющей стали. За счет такой особенности наружные стенки мультиварки не нагреваются в процессе приготовления и устройство можно легко переносить в нужное место.
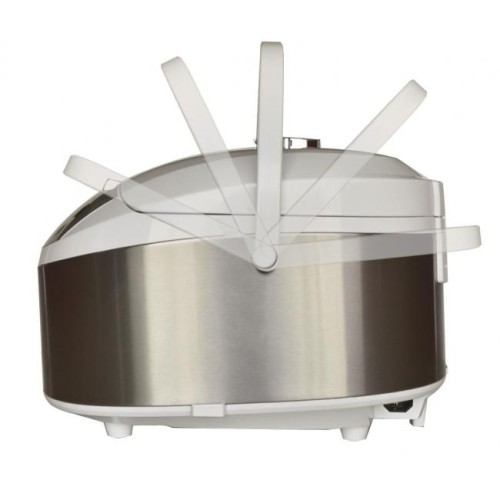
Также производитель предусмотрел в данной модели откидывающуюся ручку для переноски прибора. Поскольку внутренняя крышка устройства выполнена в несъемном варианте, есть портативный клапан для сброса пара. Такие внедрения позволили сделать мультиварку Philips HD3037 более практичной в эксплуатации, т.к. ее легко очищать от пищевых загрязнений.
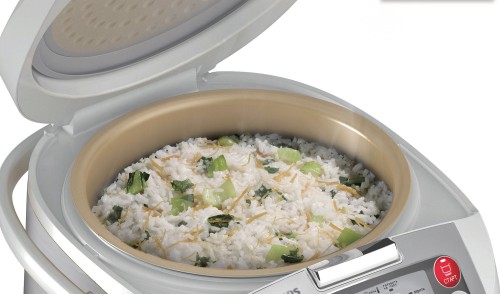
В представленной модели имеется возможность равномерного обогрева чаши. Опция 3D нагрева обеспечивается благодаря нескольким нагревательным элементам, которые расположены снизу и сбоку чаши. Данная особенность гарантирует максимально эффективное поддержание температуры в определенном режиме, а также быструю и равномерную обработку ингредиентов.
В мультиварке Philips HD3037 на выбор пользователя представлено 12 автоматизированных программ готовки пищи, среди которых есть такие, как: «Приготовление на пару», «Подогрев», «Рис», «Плов», «Гречка», «Варка», «Тушение», «Каша», «Жарка», «Йогурт» и «Печь». Помимо этого разработчики предусмотрели 22 вариации настройки температуры, которые позволяют выбрать оптимальные варианты для пользовательских рецептов. Ход процесса приготовления, выбранный режим и настройки времени выводятся на ЖК-дисплей.
Внешний вид и безопасность мультиварки Philips HD3037
Разработчики компании Philips отлично поработали над представленной моделью кухонного прибора, в результате чего устройство получилось достаточно миниатюрным, с обтекаемыми линиями, а боковые панели изготовлены из нержавеющей стали. Дизайн вполне универсален, за счет чего мультиварка легко впишется в любой интерьер кухонного помещения. А благодаря внешней эстетичности такой прибор не потребуется прятать в шкаф, освобождая под него специальную полку.
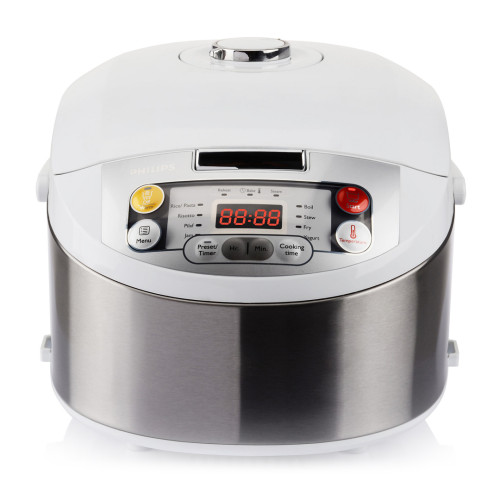
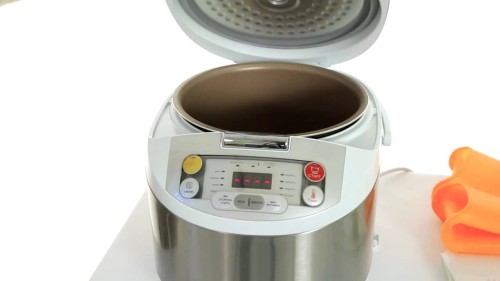
Панель управления мультиварки Philips HD3037 сделана с максимальной адаптивностью под пользователя. Все обозначения на русском языке, клавиши интуитивно понятны, а переходы между режимами и опциями – логичны. Световые индикаторы заданных пользователем программ достаточно яркие, мгновенно выводятся на дисплей, где кулинар сможет отслеживать все параметры конкретного режима.
Расположение панели управления в представленной модели весьма удачное, т.к. все опции можно настраивать стоя, не сгибая спину в попытках заглянуть на панель. Однако данный прибор не имеет прорезиненных ножек, что затрудняет его использование из-за скольжения мультиварки по поверхности стола.
В целях безопасности эксплуатации мультиварки Philips HD3037 разработчики предусмотрели 4-х кратный предупреждающий звуковой сигнал, который срабатывает при выкипании воды на программе «Готовка на пару». Также на корпусе нанесены наклейки с информацией об опасности ожога паром, о недопустимости погружения устройства в воду. А символьная индикация выводит на дисплей описание проблем и неисправностей.
Преимущества мультиварки Philips HD3037
Представленная модель кухонного прибора создана для максимального упрощения хлопот хозяек, поскольку имеет следующие преимущества:
- функция 3D нагрева;
- высокая мощность прибора, что позволяет готовить блюда намного быстрее, чем маломощные мультиварки;
- четкая подсветка дисплея;
- утолщенное дно чаши с антипригарным покрытием;
- наличие функции «Печь», которая заменяет опию «Мультиповар»;
- возможность приобрести модель с меньшим объемом чаши;
- есть функция отсроченного старта;
- наличие встроенных часов;
- есть ручка для переноски;
- энергонезависимая память сохраняет настройки режима при кратковременном сбое, отключении электроэнергии.
Недостатки мультиварки Philips HD3037
Несмотря на внушительный список достоинств, данная модель кухонной техники все же имеет некоторые недостатки. Среди них можно выделить следующее:
- несъемная внутренняя крышка устройства;
- большой шаг регулировки температуры в режиме «Печь»;
- некорректно составленная инструкция;
- завышенная стоимость;
- отсутствие возможности предварительного отключения опции «Автоподогрев».
Описание автоматических программ мультиварки Philips HD3037
- Программа мультиварки «Рис» предназначена для приготовления гарниров из любого типа круп, в частности из круглого, пропаренного и шлифованного риса. Запуск времени начинается в момент закипания воды и сброса пара. Устройство начинает автоматический отсчет времени – 10 минут. Приготовление осуществляется при температуре 130°C — 140°C.
- Режим устройства «Гречка» служит для готовки этого типа крупы, в результате чего получается рассыпчатая и полезная каша. Время приготовления, как и в предыдущем режиме, зависит от типа гречки и объема ингредиентов. Поэтому устройство начнет обратный отсчет времени, когда до конца программы останется 10 минут. Готовка происходит при температуре 130°C — 140°C.
- Программа готовки «Плов» рекомендуется для приготовления всех разновидностей данного блюда. Время готовки – автоматическое и зависит от типа крупы. Пользователь может задать диапазон от 30 минут до 2 часов. Аналогично предыдущему режиму ингредиенты обрабатываются при температуре 130°C — 140°C.
- Режим приготовления блюд «Каша» рассчитан на готовку гарниров из любых типов злаковых культур и круп. По умолчанию мультиварка выставлена на 60 минут и 90°C — 100°C. Однако допускается регулировка таймера в пределах от 60 минут до 4 часов.
- Программа кухонного прибора «Варка» рекомендуется для приготовления всех видов первых блюд, компотов, морсов и пр. Автоматический таймер запрограммирован на 30 минут, но пользователь сможет выставить свое время в диапазоне от 5 минут до 30 минут. Шаг составит 1 минуту. При этом обработка ингредиентов происходит на температурном режиме в 100°C. Допускается отсрочка таймера на 1 сутки.
- Опция мультиварки «Тушение» служит для деликатной обработки продуктов. На данном режиме можно томить овощи, мясные блюда, рыбу. Автоматически время таймера составляет 20 минут, а температура готовки – 80°C — 95°C. Допускается ручное регулирование настроек времени в пределах от 20 минут до 10 часов.
- Программа готовки пищи «Жарка» рекомендована для интенсивной обработки продуктов в течение 42 минут при температуре 160°C — 180°C. Пользователь сможет продлить/сократить таймер, выставив необходимо ему значение в пределах от 5 минут до 1 часа. На данной программе невозможно установить отсрочку старта. Также производитель рекомендует готовить ингредиенты при открытой крышке.
- Режим устройства «Йогурт» позволяет сделать натуральный продукт за 8 часов. Обработка ингредиентов происходит при температуре 37°C — 43°C. При этом владелец может продлить/сократить время приготовления в диапазоне от 6 до 10 часов. На данной программе допустимо установить отсрочку старта на 1 сутки. Стоит учесть, что после завершения режима готовки мультиварка переходит в режим ожидания, а не автоматического подогрева.
- Опция кухонного прибора «Подогрев» рекомендуется для разогрева остывших блюд. Автоматическое время таймера составляет 25 минут, однако его можно регулировать в пределах от 8 минут до 25 минут. Обработка продуктов происходит при температуре 85°C — 95°C.
- Режим мультиварки «Готовка на пару» позволяет делать полезные паровые блюда из овощей, мяса или рыбы. Термическая обработка происходит в температурном режиме 90°C — 100°C в течение 30 минут. По желанию можно изменить настройки таймера, выставив его в пределах 5-120 минут. Однако следует учесть, что устройство начнет отсчет времени с момента закипания воды. На данном режиме допускается установить отсрочку старта на 24 часа.
- Функция устройства «Автоподогрев» включается по умолчанию на всех режимах мультиварки, кроме программы «Йогурт» и поддерживает постоянную температуру внутри чаши на уровне 80°C.
- Пользовательский режим «Печь» имеет более гибкие настройки, чем все предыдущие программы. Активируя эту опцию, пользователь сможет самостоятельно выбирать не только время готовки блюда, варьируя его в пределах от 20 минут до 2 часов, но также и задавать нужную температуру. Допускается выбрать показатель в такой градации: 40°C — 60°C — 80°C — 100°C — 120°C — 150°C — 180°C.
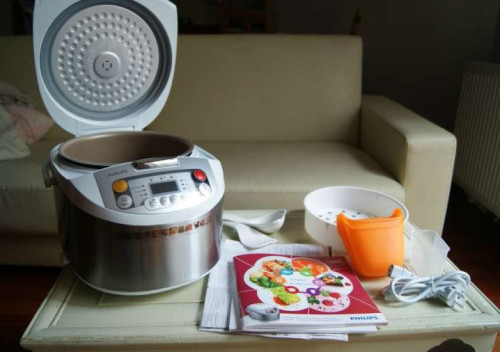
Комплектация мультиварки Philips HD3037
В стандартном комплекте поставки данной модели кухонной техники производитель предусмотрел такие предметы:
- силиконовые прихватки;
- контейнер для готовки ингредиентов на пару;
- ложки для риса и для супа;
- мерный стакан;
- книгу рецептов;
- инструкцию для пользователя.
Мультиварка Philips HD3037. Видео

English
1 Your multicooker
Congratulations on your purchase, and welcome to Philips!
To fully benefit from the support that Philips offers, register your
product at www.Philips.com/welcome.
2 What’s in the box (fig. 1)
Multicooker main unit
Steam basket
Rice scoop
Soup ladle
Measuring cup
Power cord
User manual
Safety leaflet
Warranty card
Recipe booklet
Silica gloves
3 Overview (fig. 2)
a
Lid
f
Power socket
b
Inner pot
g
Heating element
c
Lid release button
h
Water level indications
d
Control panel
i
Cooker handle
e
Main body
j
Detachable steam vent cap
Controls overview (fig. 3)
k
Cooking functions
p
Hour button
l
Display
q
Minute button
m
Off/Warm button
r
Cooking time button
n
Menu button
s
Temperature button
o
Preset button
t
Start button
Functions overview
Program
Temperature
regulation
Temperature
(Approximately)
Time regulation Default time
Rice
No
135°C
No
40 minutes
Risotto
No
135°C
No
40 minutes
Pilaf
No
135°C
No
40 minutes
Jam
No
90°C
1-4 hours
2 hours
Boil
No
95°C
5-30 minutes
30 minutes
Stew
No
90°C
20 minutes-10
hours
1 hour
Fry
No
150°C
5-59 minutes
42 minutes
Yogurt
No
40°C
6-12 hours
8 hours
Reheat
No
90°C
8-25 minutes
25 minutes
Bake
Yes
40, 60, 80, 100,
120, 150, 180°C
20 minutes -2
hours
45 minutes
Steam
No
95°C
5 minutes -2
hours
30 minutes
Warm
No
73°C
Turn on automaticlly after functions
finished (excluding Yogurt)
4 Using the multicooker
Before first use
1 Take out all the accessories from the inner pot. Remove the sheet
between the inner pot and the heating element.
2 Clean the parts of the multicooker thoroughly before using the
multicooker for the first time (see chapter ‘Cleaning’).
3 Add a half pot full of water in the inner pot, close the lid and plug in
the power supply. Select the boiling funtion; the Boil indicator lights up.
4 After water boils for 5 minutes, press the Off/Warm button.
5 Unplug the appliance, wait until the pot has cooled and pour out
the water.
Note
•
Make sure all parts are completely dry before you start using the
multicooker.
Preparations before cooking (fig. 4)
Before using the multicooker, you need to follow below preparations:
1 Measure the rice using the measuring cup provided.
2 Wash the rice thoroughly.
3 Put the pre-washed rice in the inner pot.
4 Add water to the level indicated on the scale inside the inner pot
that corresponds to the number of cups of rice used. Then smooth
the rice surface.
5 Press the lid release button to open the lid.
6 Wipe the outside of the inner pot dry, then put it in the
multicooker. Check if the inner pot is in proper contact with the
heating element.
7 Close the lid of the multicooker, and put the plug in the power socket.
Note
•
Make sure that the outside of the inner pot is dry and clean, and that
there is no foreign residue on the heating element or the magnetic switch.
•
Do not exceed the volume indicated nor exceed the maximum water
level indicated in the inner pot, as this may cause the multicooker to
overflow.
Tip
•
The level marked inside the inner pot is just an indication. You
can always adjust the water level for different types of rice and
your own preference. Do not exceed the maximum quantities
indicated on the inside of the inner pot.
•
Besides following the water level indications, you may also add
rice and water at 1:1-1.2 ratio for rice cooking.
•
For 4 cups of rice, the water level should reach the “4” mark in
the inner pot.
Cooking rice or pasta (fig. 5)
1 Follow the steps in “Preparations before cooking”.
2 Press the menu button (Menu) until the rice/pasta cooking
function (Rice/Pasta) is selected.
3 Press the start button (Start) to start cooking.
4 When the cooking is finished, you will hear a few beeps and the
selected cooking function light will be off.
5 The multicooker will be in keep-warm mode automatically.
»
The keep-warm indicator lights up.
Tip
•
You can press the cancel button (Off/Warm) to turn off the
keep-warm function.
•
To switch off, you need to unplug the appliance.
•
The default cooking time is 40 minutes, and is not adjustable.
•
Temperature for this program is approximately 135°C.
Cooking risotto (fig. 6)
1 Put food and ingredients in the inner pot.
2 Follow steps 6 and 7 in “Preparations before cooking”.
3 Press the menu button (Menu) until the risotto cooking function
(Risotto) is selected.
4 Press the start button (Start) to start cooking.
5 When the cooking is finished, you will hear a few beeps and the
selected cooking function light will be off.
6 The multicooker will be in keep-warm mode automatically.
»
The keep-warm indicator lights up.
Tip
•
You can press the cancel button (Off/Warm) to turn off the
keep-warm function.
•
To switch off, you need to unplug the appliance.
•
The default cooking time is 40 minutes, and is not adjustable.
•
Temperature for this program is approximately 135°C.
Cooking pilaf (fig. 6)
1 Whisk the food and ingredients for the pilaf well.
2 Follow steps 6 and 7 in “Preparations before cooking”.
3 Press the menu button (Menu) until the pilaf cooking function
(Pilaf) is selected.
4 Press the start button (Start) to start cooking.
5 When the cooking is finished, you will hear a few beeps and the
selected cooking function light will be off.
6 The multicooker will be in keep-warm mode automatically.
7 The keep-warm indicator lights up.
Tip
•
You can press the cancel button (Off/Warm) to turn off the
keep-warm function.
•
To switch off, you need to unplug the appliance.
•
The default cooking time is 40 minutes, and is not adjustable.
•
Temperature for this program is approximately 135°C.
Cooking jam (fig. 7)
1 Put food and ingredients in the inner pot.
2 Follow steps 6 and 7 in “Preparations before cooking”.
3 Press the menu button (Menu) until the jam cooking function
(Jam) is selected.
4 Press the cooking time button (Cooking time), and the hour unit
starts flashing on the display.
5 Press the hour button (Hr.) to set a desired hour unit.
6 After the hour unit is set, press the cooking time button (Cooking
time) again, and the minute unit starts flashing on the display.
7 Press the minute button (Min.) to set a desired minute unit.
Tip
•
You can press the cancel button (Off/Warm) to turn off the
keep-warm function.
•
To switch off, you need to unplug the appliance.
•
The default cooking time is 1 hour. You can select the cooking
time between 20 minutes to 10 hours.
•
Temperature for this program is approximately 90°C.
Frying (fig. 10)
1 Put food and ingredients into the inner pot.
2 Follow step 6 in “Preparations before cooking”.
3 Put the plug in the power socket.
4 Press the menu button (Menu) until the frying function (Fry) is
selected.
5 Press the cooking time button (Cooking time), and the minute
unit starts flashing on the display.
6 Press the minute button (Min.) to set a desired minute unit.
7 Press the start button (Start) to start cooking.
8 During cooking, stir the food constantly using a spatula.
9 When the cooking is finished, you will hear a few beeps and the
selected cooking function light will be off.
10 The multicooker will be in keep-warm mode automatically.
»
The keep-warm indicator lights up.
Note
•
This function must be operated with the lid opened.
•
This function may be not used for deep fry, and the amount of oil may not
exceed marking “2“.
Tip
•
To switch off, you need to unplug the appliance.
•
The default cooking time is 42 minutes. You can select the
cooking time between 5 to 59 minutes.
•
Temperature for this program is approximately 150°C.
Making yogurt (fig. 11)
Method 1:
1 Whisk the ingredients for the yogurt well and put them in a glass
container.
2 Put the glass container in the inner pot. Make sure that the
container is sealed.
3 Pour some water in the inner pot. Make sure that half of the
container is immersed in water.
4 Follow steps 6 and 7 in “Preparations before cooking”.
5 Press the menu button (Menu) until the yogurt making function
(Yogurt) is selected.
6 Press the cooking time button (Cooking time), and the hour unit
starts flashing on the display.
7 Press the hour button (Hr.) to set a desired hour unit.
8 After the hour unit is set, press the cooking time button (Cooking
time) again, and the minute unit starts flashing on the display.
9 Press the minute button (Min.) to set a desired minute unit.
10 Press the start button (Start) to start cooking.
11 When the cooking is finished, you will hear a few beeps and the
selected cooking function light will be off.
12 The multicooker will be in standby mode automatically.
8 Press the start button (Start) to start cooking.
9 When the cooking is finished, you will hear a few beeps and the
selected cooking function light will be off.
10 The multicooker will be in keep-warm mode automatically.
»
The keep-warm indicator lights up.
Tip
•
You can press the cancel button (Off/Warm) to turn off the
keep-warm function.
•
To switch off, you need to unplug the appliance.
•
The default cooking time is 2 hours. You can select the cooking
time from 1 to 4 hours.
•
Temperature for this program is approximately 90°C.
Boiling (fig.
1 Put the food and ingredients in the inner pot.
2 Follow steps 6 and 7 in “Preparations before cooking”.
3 Press the menu button (Menu) unitl the boiling function (Boil) is
selected.
4 Press the cooking time button (Cooking time), and the minute
unit starts flashing on the display.
5 Press the minute button (Min.) to set a desired minute unit.
6 Press the start button (Start) to start cooking.
7 When the cooking is finished, you will hear a few beeps and the
selected cooking function light will be off.
8 The multicooker will be in keep-warm mode automatically.
»
The keep-warm indicator lights up.
Note
•
The cooking time begins once the water is boiling, and the time is
displayed as a countdown.
Tip
•
You can press the cancel button (Off/Warm) to turn off the
keep-warm function.
•
To switch off, you need to unplug the appliance.
•
The default cooking time is 30 minutes. You can select the
cooking time between 5 to 30 minutes.
•
Temperature for this program is approximately 95°
C.
Stewing (fig. 9)
1 Put the food and ingredients in the inner pot.
2 Follow steps 6 and 7 in “Preparations before cooking”.
3 Press the menu button (Menu) until the stewing function (Stew)
is selected.
4 Press the cooking time button (Cooking time), and the hour unit
starts flashing on the display.
5 Press the hour button (Hr.) to set a desired hour unit.
6 After the hour unit is set, press the cooking time button (Cooking
time) again, and the minute unit starts flashing on the display.
7 Press the minute button (Min.) to set a desired minute unit.
8 Press the start button (Start) to start cooking.
9 When the cooking is finished, you will hear a few beeps and the
selected cooking function light will be off.
10 The multicooker will be in keep-warm mode automatically.
»
The keep-warm indicator lights up.
Method 2:
1 Pour 1 L of pasteurized milk into the pot (milk should be room
temperature) and add natural yogurt (180-200 g). Stir the milk
and yogurt.
2 Close the lid and select the yogurt-making function. Program starts
automatically.
3 If you want fruit yogurt, add fruits (eg. 200 g of cut strawberries)
30 minutes before the end of the program.
4 Unplug the appliance.
Tip
•
You can unplug the multicooker immediately after the cooking
is finished.
•
To switch off, you need to unplug the appliance.
•
The default cooking time is 8 hours. You can select the cooking
time between 6 to 12 hours.
•
Temperature for this program is approximately 40°C.
Reheating (fig. 12)
1 Loosen the cooled dish and evenly distribute it in the inner pot.
2 Pour some water onto the dish to prevent it from becoming too
dry. The quantity of the water depends on the amount of dish.
3 Follow steps 6 and 7 in “Preparations before cooking”.
4 Press the menu button (Menu) until the reheating function
(Reheat) is selected.
5 Press the cooking time button (Cooking time), and the minute unit
starts flashing on the display.
6 Press the minute button (Min.) to set a desired minute unit.
7 Press the start button (Start) to start cooking.
8 When the cooking process is finished, you will hear a few beeps
and the selected cooking function light will be off.
9 The multicooker will be in keep-warm mode automatically.
»
The keep-warm indicator lights up.
Tip
•
You can press the cancel button (Off/Warm) to turn off the
keep-warm function.
•
To switch off, you need to unplug the appliance.
•
The default cooking time is 25 minutes. You can select the
cooking time between 8 to 25 minutes..
•
Temperature for this program is approximately 90°C.
Baking (fig. 13)
1 Put the food and ingredients in the inner pot.
2 Follow step 6 in “Preparations before cooking”.
3 Put the plug in the power socket.
Note
•
When baking cake, keep the lid closed during cooking. Baking cake at
130°C and by 45 minutes usually delivers best cooking result.
•
When baking food other than cake, the lid must be opened during
cooking.
1 Press the menu button (Menu) until the baking function (Bake)
is selected.
2 Press the cooking time button (Cooking time), and the hour unit
starts flashing on the display.
3 Press the hour button (Hr.) to set a desired hour unit.
4 After the hour unit is set, press the cooking time button (Cooking
time) again, and the minute unit starts flashing on the display.
5 Press the minute button (Min.) to set a desired minute unit.
6 Press the temperature button (Temperature), and the default
cooking temperature starts flashing on the display.
7 Press the temperature button (Temperature) to set a desired
baking temperature.
8 Press the start button (Start) to start cooking.
9 When the baking is finished, you will hear a few beeps and the
selected function light will be off.
10 The multicooker will be in keep-warm mode automatically.
»
The keep-warm indicator lights up.
Tip
•
When removing the inner pot from the multicooker, use a
kitchen glove or a cloth, as the inner pot will be very hot.
•
To switch off, you need to unplug the appliance.
•
The default cooking time is 45 minutes. You can select the
cooking time between 20 minutes to 2 hours.
•
The default cooking temperature is 60°C. The available
temperature options are 40°C, 60°C, 80°C, 100°C, 120°C,
150°C, and 180°C.
Steaming (fig. 14)
1 Measure a few cups of water with the measuring cup.
2 Pour the water into the inner pot.
3 Put the steam basket into the inner pot.
4 Put the food into the steam basket.
5 Close the lid of the multicooker, and put the plug in the power
socket.
6 Press the menu button (Menu) until the steaming function
(Steaming) is selected.
7 Press the cooking time button (Cooking time), and the hour unit
starts flashing on the display.
8 Press the hour button (Hr.) to set a desired hour unit.
9 After the hour unit is set, press the cooking time button (Cooking
time) again, and the minute unit starts flashing on the display.
10 Press the minute button (Min.) to set a desired minute unit.
11 Press the start button (Start) to start cooking.
12 When the steaming is finished, you will hear a few beeps and the
selected cooking function light will be off.
13 The multicooker will be in keep-warm mode automatically.
»
The keep-warm indicator lights up.
14 Open the lid and carefully take out the steamed food from the
plate or the steam basket.
Note
•
The cooking time begins once the water is boiling, and the time is
displayed as a countdown.
•
When removing the steamed food from the steam basket, use a kitchen
glove or a cloth, as the plate and steam basket will be very hot.
•
When you cook rice and steam food at the same time, make sure you
measure out an amount of rice that leaves enough room for the steam tray.
•
Water level should be between 2 and 4 water level marked inside inner pot.
Fry
Specifications are subject to change without notice
© 2013 Koninklijke Philips N.V.
All rights reserved.
HD3037_UM_CEE_V2.0_130904
HD3037
Register your product and get support at
www.philips.com/welcome
Always there to help you
Question?
Contact
Philips
www.philips.com/welcome
Safety leaflet
www.philips.com/welcome
User manual
www.philips.com/welcome
Warranty
4
1
Rice/ Pasta
Reheat
Bake
Steam
Boil
Stew
Fry
Yogurt
Risotto
Pilaf
Jam
3
2
5
6
7
8
9
12
11
10
13
a
b
d
e
f
g
h
j
c
i
k
l
m
n
o
p
q
r
s
t
Rice/ Pasta
Jam
Boil
Stew
Yogurt
Bake
14
15
Steam
Rice/ Pasta
Pilaf
Jam
Boil
Stew
Yogurt
Reheat
Steam
EN
User manual
BG
Ръководство за потребителя
CS
Příručka pro uživatele
ET Kasutusjuhend
HR
Korisnički priručnik
HU Felhasználói kézikönyv
LT
Vartotojo vadovas
LV
Lietotāja rokasgrāmata
PL
Instrukcja obsługi
RO
Manual de utilizare
RU
Руководство пользователя
SK
Príručka užívateľa
SL
Uporabniški priročnik
Pilaf
Reheat
www.philips.com/welcome
Recipe