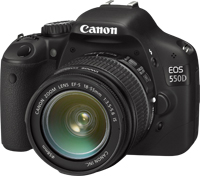
Canon EOS 550D оснащена 18-МП сенсором и процессором Digic IV. Эта камера предлагает расширенный до 12800 диапазон чувствительности ISO, доступный в специальном режиме, улучшенную технологию подавления шумов и встроенные функции по редактированию фотографий. Производитель оснастил EOS 550D рядом возможностей, ранее доступным лишь владельцам профессиональных моделей. Размер ЖК-дисплея составляет 3 дюйма, а его разрешение – 1040 тыс. пикселей. Камера оснащена разъемом HDMI для подключения к компьютерным мониторам и телевизорам высокой четкости.
Обзор на фотокамеру Canon EOS 550D
В феврале 2010 года, японская компания по производству фото и видеотехники «Canon» предоставила фотолюбителям новую зеркальную фотокамеру модели «Canon EOS 550D», имеющую разрешение в 18 Мегапикселей. Специальная матрица «APS-C CMOS» даёт ей возможность почувствовать себя корифеем фото-видео-съёмки даже непрофессионалу, благодаря процессору обработки изображения «DIGIC 4» и видеосъёмки в формате Full HD.
Фотокамера «Canon EOS 550D» поддерживает настройку чувствительности от 100 до 6400. Использование четырнадцати битной обработки изображения делает практически незаметными цветовые переходы, что является важным параметром во время просмотра и печати снимков.
Зачастую возникает необходимость запечатлеть некоторые моменты во время движения, либо фотографируемого объекта, либо самого фотографа. Здесь на помощь придёт режим мультисъёмки со скоростью 3,7 кадра в секунду. Далее, при просмотре снимков, можно выбрать наиболее понравившийся кадр.
«Canon EOS 550D» позволяет делать высококачественные снимки даже в условиях сложной освещённости. Такой момент достигнут, благодаря внедрению технологий, используемых в дорогих профессиональных аппаратах, в более дешёвые, предназначенные для широкого круга потребителей.
Как говорилось выше, модель камеры «Canon EOS 550D» позволяет производить видеосъёмку в формате Full HD. Многим любителям недостаточно одних только фотоснимков. Они видят себя в роли кинооператоров или репортёров.
Фотокамера «Canon EOS 550D» даёт такую возможность. Разрешение 1920х1080р HD позволяет устанавливать частоту кадров от 24 до 30 в секунду. А при включении режима в 720р 50-60 кадров в секунду. Также дополнительный разъём 3,5мм позволяет добавить стереомикрофон для звукового сопровождения видеосъёмки. Если нужно снять какое-нибудь удалённое событие, то здесь придёт на помощь «Movie Crop» — функция видео-кадрирования, увеличивающая изображение раз в семь. Также на фотокамере есть возможность просматривать фото и видеоизображения на телевизорах, поддерживающих HD, благодаря порту HDMI. При этом, просмотр ведётся с помощью обычного телевизионного пульта.
Перенести свои шедевры с камеры «Canon EOS 550D» можно беспроводным способом, при помощи функции «Eye-Fi connected». Фотокамера имеет пульт дистанционного управления. С его помощью фотограф дистанционно может управлять аппаратом с расстояния до пяти метров, если у него появилось желание самому поучаствовать в фотосессии.
В заключении можно добавить, что фотокамера «Canon EOS 550D» — это ещё один шаг компании «Canon» на пути к сочетанию высоких технологий, удобства и простоты управления этими самыми технологиями.
Матрица
- Общее число пикселей — 18.7 млн
- Число эффективных пикселей — 18 млн
- Тип матрицы — CMOS
- Физический размер матрицы — 22.3 х 14.9 мм
- Кроп-фактор — 1.6
- Максимальное разрешение фотоснимка — 5184×3456
- Соотношение сторон — 3:2
- Минимальная чувствительность (ISO) — 100
- Максимальная чувствительность (ISO) — 1600
- Функция очистки матрицы — есть
Объектив
- Объектив в комплекте — нет
- Байонет — Canon EF/EF-S
Затвор
- Минимальная выдержка — 1/4000 с
- Максимальная выдержка — 30 с
- Выдержка X-Sync — 1/200 c
- Время работы таймера, с — 10 с, 2 с
Режимы съемки
- Скорость съемки — 3.7 кадр./сек
- Максимальная серия снимков (JPEG) — 34
- Максимальная серия снимков (RAW) — 6
- Форматы файлов изображений — JPEG, RAW
Вспышка
- Расстояние действия встроенной вспышки — до 13 м
- Функции встроенной вспышки — подавление эффекта красных глаз
- Управление внешней вспышкой — E-TTL II
- Брекетинг вспышки — есть
Баланс белого
- Тип баланса белого — из списка, ручная установка, автоматический, брекетинг
Фокусировка
- Подсветка автофокуса — есть
Экспозиция
- Автоматическая обработка экспозиции — с приоритетом выдержки, с приоритетом диафрагмы
- Экспокоррекция — +/- 5 EV с шагом 1/3 ступени
- Замер экспозиции — мультизонный, точечный, общий (Evaluative), центровзвешенный
- Видоискатель и ЖК-экран
Видоискатель — зеркальный (TTL)
- Поле зрения видоискателя — 95%
- Диагональ ЖК экрана — 3″
- Число пикселей ЖК экрана — 1040000
Коммуникация и хранение данных
- Wi-Fi — нет
- GPS — нет
- Форматы поддерживаемых карт памяти — SDXC, SDHC, SD
Габариты, вес
- Ширина — 129 мм
- Высота — 98 мм
- Глубина — 62 мм
- Вес с элементами питания — 530 г
У вас уже есть продукция Canon? Зарегистрируйте свои продукты для доступа к программному обеспечению и обновлениям встроенного ПО, а также подпишитесь на рассылку, чтобы получать персонализированные советы и эксклюзивные предложения
Поддержка
Canon EOS 550D
Загружайте ПО, встроенное ПО и руководства, а также получите доступ к материалам поддержки для вашего продукта серии EOS.
Драйверы
Для выполнения подключения некоторых устройств к компьютеру может потребоваться драйвер. На этой вкладке вы найдете соответствующие драйверы для своего устройства или, в случае отсутствия драйверов, описание совместимости устройства с каждой операционной системой.
Полезная информация. Доступ к программному обеспечению, руководствам и другим материалам можно получить с помощью вкладок, расположенных выше.
Операционная система Обнаруженная операционная система
Программное обеспечение
Программное обеспечение загружать необязательно, но оно обеспечивает дополнительные функции и позволяет максимально эффективно пользоваться возможностями устройства. На этой вкладке можно просмотреть и загрузить доступное программное обеспечение для вашего устройства.
Операционная система Обнаруженная операционная система
Руководства пользователя
Руководства для вашего устройства или программного обеспечения перечислены ниже.
Приложения и функции
На этой вкладке можно посмотреть доступные приложения и функции, совместимые с вашим устройством.
Встроенное ПО
Встроенное ПО — это постоянное программное обеспечение, установленное на устройстве и обеспечивающее его корректную работу. Canon может периодически выпускать обновления для этого встроенного ПО, и если обновление доступно, его можно загрузить ниже.
FAQs
На этой вкладке вы найдете ответы на часто задаваемые вопросы и другую полезную информацию, которая поможет вам в решении вопросов и проблем.
Важная информация
На этой вкладке вы найдете подборку часто задаваемых вопросов, которые, на наш взгляд, будут вам интересны.
Коды ошибок
Код ошибки или сообщение об ошибке может появиться на устройстве по различным причинам. С помощью поля поиска можно найти полезную информацию о конкретном коде ошибки, где будут указаны причина ошибки и необходимые действия по ее устранению.
Технические характеристики
Ниже приведены все технические характеристики данного продукта.
Полезные ссылки
-
-
Ремонт
Поиск центров по ремонту оборудования, полезная информация по процессу ремонта
-
Переработка
Узнайте больше о программе утилизации картриджей Canon
-
Canon ID
Регистрация продукта и управление аккаунтом Canon ID
Canon EOS 550D оснащена 18-МП сенсором и процессором Digic IV. Эта камера предлагает расширенный до 12800 диапазон чувствительности ISO, доступный в специальном режиме, улучшенную технологию подавления шумов и встроенные функции по редактированию фотографий. Производитель оснастил EOS 550D рядом возможностей, ранее доступным лишь владельцам профессиональных моделей. Размер ЖК-дисплея составляет 3 дюйма, а его разрешение – 1040 тыс. пикселей. Камера оснащена разъемом HDMI для подключения к компьютерным мониторам и телевизорам высокой четкости.
Обзор на фотокамеру Canon EOS 550D
В феврале 2010 года, японская компания по производству фото и видеотехники «Canon» предоставила фотолюбителям новую зеркальную фотокамеру модели «Canon EOS 550D», имеющую разрешение в 18 Мегапикселей. Специальная матрица «APS-C CMOS» даёт ей возможность почувствовать себя корифеем фото-видео-съёмки даже непрофессионалу, благодаря процессору обработки изображения «DIGIC 4» и видеосъёмки в формате Full HD.
Фотокамера «Canon EOS 550D» поддерживает настройку чувствительности от 100 до 6400. Использование четырнадцати битной обработки изображения делает практически незаметными цветовые переходы, что является важным параметром во время просмотра и печати снимков.
Зачастую возникает необходимость запечатлеть некоторые моменты во время движения, либо фотографируемого объекта, либо самого фотографа. Здесь на помощь придёт режим мультисъёмки со скоростью 3,7 кадра в секунду. Далее, при просмотре снимков, можно выбрать наиболее понравившийся кадр.
«Canon EOS 550D» позволяет делать высококачественные снимки даже в условиях сложной освещённости. Такой момент достигнут, благодаря внедрению технологий, используемых в дорогих профессиональных аппаратах, в более дешёвые, предназначенные для широкого круга потребителей.
Как говорилось выше, модель камеры «Canon EOS 550D» позволяет производить видеосъёмку в формате Full HD. Многим любителям недостаточно одних только фотоснимков. Они видят себя в роли кинооператоров или репортёров.
Фотокамера «Canon EOS 550D» даёт такую возможность. Разрешение 1920х1080р HD позволяет устанавливать частоту кадров от 24 до 30 в секунду. А при включении режима в 720р 50-60 кадров в секунду. Также дополнительный разъём 3,5мм позволяет добавить стереомикрофон для звукового сопровождения видеосъёмки. Если нужно снять какое-нибудь удалённое событие, то здесь придёт на помощь «Movie Crop» — функция видео-кадрирования, увеличивающая изображение раз в семь. Также на фотокамере есть возможность просматривать фото и видеоизображения на телевизорах, поддерживающих HD, благодаря порту HDMI. При этом, просмотр ведётся с помощью обычного телевизионного пульта.
Перенести свои шедевры с камеры «Canon EOS 550D» можно беспроводным способом, при помощи функции «Eye-Fi connected». Фотокамера имеет пульт дистанционного управления. С его помощью фотограф дистанционно может управлять аппаратом с расстояния до пяти метров, если у него появилось желание самому поучаствовать в фотосессии.
В заключении можно добавить, что фотокамера «Canon EOS 550D» — это ещё один шаг компании «Canon» на пути к сочетанию высоких технологий, удобства и простоты управления этими самыми технологиями.
Матрица
- Общее число пикселей — 18.7 млн
- Число эффективных пикселей — 18 млн
- Тип матрицы — CMOS
- Физический размер матрицы — 22.3 х 14.9 мм
- Кроп-фактор — 1.6
- Максимальное разрешение фотоснимка — 5184×3456
- Соотношение сторон — 3:2
- Минимальная чувствительность (ISO) — 100
- Максимальная чувствительность (ISO) — 1600
- Функция очистки матрицы — есть
Объектив
- Объектив в комплекте — нет
- Байонет — Canon EF/EF-S
Затвор
- Минимальная выдержка — 1/4000 с
- Максимальная выдержка — 30 с
- Выдержка X-Sync — 1/200 c
- Время работы таймера, с — 10 с, 2 с
Режимы съемки
- Скорость съемки — 3.7 кадр./сек
- Максимальная серия снимков (JPEG) — 34
- Максимальная серия снимков (RAW) — 6
- Форматы файлов изображений — JPEG, RAW
Вспышка
- Расстояние действия встроенной вспышки — до 13 м
- Функции встроенной вспышки — подавление эффекта красных глаз
- Управление внешней вспышкой — E-TTL II
- Брекетинг вспышки — есть
Баланс белого
- Тип баланса белого — из списка, ручная установка, автоматический, брекетинг
Фокусировка
- Подсветка автофокуса — есть
Экспозиция
- Автоматическая обработка экспозиции — с приоритетом выдержки, с приоритетом диафрагмы
- Экспокоррекция — +/- 5 EV с шагом 1/3 ступени
- Замер экспозиции — мультизонный, точечный, общий (Evaluative), центровзвешенный
- Видоискатель и ЖК-экран
Видоискатель — зеркальный (TTL)
- Поле зрения видоискателя — 95%
- Диагональ ЖК экрана — 3″
- Число пикселей ЖК экрана — 1040000
Коммуникация и хранение данных
- Wi-Fi — нет
- GPS — нет
- Форматы поддерживаемых карт памяти — SDXC, SDHC, SD
Габариты, вес
- Ширина — 129 мм
- Высота — 98 мм
- Глубина — 62 мм
- Вес с элементами питания — 530 г
У вас уже есть продукция Canon? Зарегистрируйте свои продукты для доступа к программному обеспечению и обновлениям встроенного ПО, а также подпишитесь на рассылку, чтобы получать персонализированные советы и эксклюзивные предложения
Поддержка
Загружайте ПО, встроенное ПО и руководства, а также получите доступ к материалам поддержки для вашего продукта серии EOS.
Драйверы
Для выполнения подключения некоторых устройств к компьютеру может потребоваться драйвер. На этой вкладке вы найдете соответствующие драйверы для своего устройства или, в случае отсутствия драйверов, описание совместимости устройства с каждой операционной системой.
Полезная информация. Доступ к программному обеспечению, руководствам и другим материалам можно получить с помощью вкладок, расположенных выше.
Операционная система Обнаруженная операционная система
Программное обеспечение
Программное обеспечение загружать необязательно, но оно обеспечивает дополнительные функции и позволяет максимально эффективно пользоваться возможностями устройства. На этой вкладке можно просмотреть и загрузить доступное программное обеспечение для вашего устройства.
Операционная система Обнаруженная операционная система
Программное обеспечение
Программное обеспечение загружать необязательно, но оно обеспечивает дополнительные функции и позволяет максимально эффективно пользоваться возможностями устройства. На этой вкладке можно просмотреть и загрузить доступное программное обеспечение для вашего устройства.
Операционная система Обнаруженная операционная система
Руководства пользователя
Руководства для вашего устройства или программного обеспечения перечислены ниже.
Приложения и функции
На этой вкладке можно посмотреть доступные приложения и функции, совместимые с вашим устройством.
Встроенное ПО
Встроенное ПО — это постоянное программное обеспечение, установленное на устройстве и обеспечивающее его корректную работу. Canon может периодически выпускать обновления для этого встроенного ПО, и если обновление доступно, его можно загрузить ниже.
FAQs
На этой вкладке вы найдете ответы на часто задаваемые вопросы и другую полезную информацию, которая поможет вам в решении вопросов и проблем.
Важная информация
На этой вкладке вы найдете подборку часто задаваемых вопросов, которые, на наш взгляд, будут вам интересны.
Коды ошибок
Код ошибки или сообщение об ошибке может появиться на устройстве по различным причинам. С помощью поля поиска можно найти полезную информацию о конкретном коде ошибки, где будут указаны причина ошибки и необходимые действия по ее устранению.
Технические характеристики
Ниже приведены все технические характеристики данного продукта.
Полезные ссылки
-
Ремонт
Поиск центров по ремонту оборудования, полезная информация по процессу ремонта
-
Переработка
Узнайте больше о программе утилизации картриджей Canon
-
Canon ID
Регистрация продукта и управление аккаунтом Canon ID

Данная инструкция на русском языке предназначена для фотокамеры
Canon EOS 550D, описывает принцип работы и основные моменты эксплуатации устройства.
Производитель настойчиво рекомендует перед включением фотокамеры
внимательно изучить настоящую инструкцию.
Инструкция для фотокамеры
представлена в формате PDF. Все современные браузеры уже поддерживают данный формат и сложностей с открытием файла возникнуть не должно.
Но если открыть инструкцию все же не удается, то необходимо установить на компьютер программу для чтения PDF файлов, например, Acrobat Reader. Если у вас возникли сложности с открытием инструкции на смартфоне под управлением Android, нужно установить, например, Adobe Acrobat Reader.
Комментарии (0)
Комментарии про другие Фотокамеры
Другие Фотокамеры Canon
Canon EOS 550D оснащена 18-МП сенсором и процессором Digic IV. Эта камера предлагает расширенный до 12800 диапазон чувствительности ISO, доступный в специальном режиме, улучшенную технологию подавления шумов и встроенные функции по редактированию фотографий. Производитель оснастил EOS 550D рядом возможностей, ранее доступным лишь владельцам профессиональных моделей. Размер ЖК-дисплея составляет 3 дюйма, а его разрешение – 1040 тыс. пикселей. Камера оснащена разъемом HDMI для подключения к компьютерным мониторам и телевизорам высокой четкости.
Обзор на фотокамеру Canon EOS 550D
В феврале 2010 года, японская компания по производству фото и видеотехники «Canon» предоставила фотолюбителям новую зеркальную фотокамеру модели «Canon EOS 550D», имеющую разрешение в 18 Мегапикселей. Специальная матрица «APS-C CMOS» даёт ей возможность почувствовать себя корифеем фото-видео-съёмки даже непрофессионалу, благодаря процессору обработки изображения «DIGIC 4» и видеосъёмки в формате Full HD.
Фотокамера «Canon EOS 550D» поддерживает настройку чувствительности от 100 до 6400. Использование четырнадцати битной обработки изображения делает практически незаметными цветовые переходы, что является важным параметром во время просмотра и печати снимков.
Зачастую возникает необходимость запечатлеть некоторые моменты во время движения, либо фотографируемого объекта, либо самого фотографа. Здесь на помощь придёт режим мультисъёмки со скоростью 3,7 кадра в секунду. Далее, при просмотре снимков, можно выбрать наиболее понравившийся кадр.
«Canon EOS 550D» позволяет делать высококачественные снимки даже в условиях сложной освещённости. Такой момент достигнут, благодаря внедрению технологий, используемых в дорогих профессиональных аппаратах, в более дешёвые, предназначенные для широкого круга потребителей.
Как говорилось выше, модель камеры «Canon EOS 550D» позволяет производить видеосъёмку в формате Full HD. Многим любителям недостаточно одних только фотоснимков. Они видят себя в роли кинооператоров или репортёров.
Фотокамера «Canon EOS 550D» даёт такую возможность. Разрешение 1920х1080р HD позволяет устанавливать частоту кадров от 24 до 30 в секунду. А при включении режима в 720р 50-60 кадров в секунду. Также дополнительный разъём 3,5мм позволяет добавить стереомикрофон для звукового сопровождения видеосъёмки. Если нужно снять какое-нибудь удалённое событие, то здесь придёт на помощь «Movie Crop» — функция видео-кадрирования, увеличивающая изображение раз в семь. Также на фотокамере есть возможность просматривать фото и видеоизображения на телевизорах, поддерживающих HD, благодаря порту HDMI. При этом, просмотр ведётся с помощью обычного телевизионного пульта.
Перенести свои шедевры с камеры «Canon EOS 550D» можно беспроводным способом, при помощи функции «Eye-Fi connected». Фотокамера имеет пульт дистанционного управления. С его помощью фотограф дистанционно может управлять аппаратом с расстояния до пяти метров, если у него появилось желание самому поучаствовать в фотосессии.
В заключении можно добавить, что фотокамера «Canon EOS 550D» — это ещё один шаг компании «Canon» на пути к сочетанию высоких технологий, удобства и простоты управления этими самыми технологиями.
Матрица
- Общее число пикселей — 18.7 млн
- Число эффективных пикселей — 18 млн
- Тип матрицы — CMOS
- Физический размер матрицы — 22.3 х 14.9 мм
- Кроп-фактор — 1.6
- Максимальное разрешение фотоснимка — 5184×3456
- Соотношение сторон — 3:2
- Минимальная чувствительность (ISO) — 100
- Максимальная чувствительность (ISO) — 1600
- Функция очистки матрицы — есть
Объектив
- Объектив в комплекте — нет
- Байонет — Canon EF/EF-S
Затвор
- Минимальная выдержка — 1/4000 с
- Максимальная выдержка — 30 с
- Выдержка X-Sync — 1/200 c
- Время работы таймера, с — 10 с, 2 с
Режимы съемки
- Скорость съемки — 3.7 кадр./сек
- Максимальная серия снимков (JPEG) — 34
- Максимальная серия снимков (RAW) — 6
- Форматы файлов изображений — JPEG, RAW
Вспышка
- Расстояние действия встроенной вспышки — до 13 м
- Функции встроенной вспышки — подавление эффекта красных глаз
- Управление внешней вспышкой — E-TTL II
- Брекетинг вспышки — есть
Баланс белого
- Тип баланса белого — из списка, ручная установка, автоматический, брекетинг
Фокусировка
- Подсветка автофокуса — есть
Экспозиция
- Автоматическая обработка экспозиции — с приоритетом выдержки, с приоритетом диафрагмы
- Экспокоррекция — +/- 5 EV с шагом 1/3 ступени
- Замер экспозиции — мультизонный, точечный, общий (Evaluative), центровзвешенный
- Видоискатель и ЖК-экран
Видоискатель — зеркальный (TTL)
- Поле зрения видоискателя — 95%
- Диагональ ЖК экрана — 3″
- Число пикселей ЖК экрана — 1040000
Коммуникация и хранение данных
- Wi-Fi — нет
- GPS — нет
- Форматы поддерживаемых карт памяти — SDXC, SDHC, SD
Габариты, вес
- Ширина — 129 мм
- Высота — 98 мм
- Глубина — 62 мм
- Вес с элементами питания — 530 г
Данная инструкция на русском языке предназначена для фотокамеры
Canon EOS 550D, описывает принцип работы и основные моменты эксплуатации устройства.
Производитель настойчиво рекомендует перед включением фотокамеры
внимательно изучить настоящую инструкцию.
Инструкция для фотокамеры
представлена в формате PDF. Все современные браузеры уже поддерживают данный формат и сложностей с открытием файла возникнуть не должно.
Но если открыть инструкцию все же не удается, то необходимо установить на компьютер программу для чтения PDF файлов, например, Acrobat Reader. Если у вас возникли сложности с открытием инструкции на смартфоне под управлением Android, нужно установить, например, Adobe Acrobat Reader.
Комментарии (0)
Комментарии про другие Фотокамеры
Другие Фотокамеры Canon

Выберите категорию материалов поддержки
-
Поиск драйверов последней версии для вашего продукта
-
ПО для удобства использования наших продуктов
-
Полезные руководства для эффективного использования продукта
-
Обзор приложений для вашего продукта
-
Поиск встроенного ПО последней версии для вашего продукта
-
Нужна помощь? Посмотрите раздел часто задаваемых вопросов
-
Посмотрите последние новости о вашем продукте
-
Найдите решения в соответствии с отображаемым на продукте кодом ошибки
-
Технические характеристики
Ознакомьтесь с техническими характеристиками вашего продукта
Left Right
Полезные ссылки
Вам также может понадобиться…

Свяжитесь с нами
Свяжитесь со службой поддержки продукции для дома по телефону или электронной почте

Canon ID
Регистрация продукта и управление аккаунтом Canon ID

Ремонт
Поиск центров по ремонту оборудования, полезная информация по процессу ремонта
или


3
В первую очередь убедитесь, что в комплект поставки камеры
входят все перечисленные ниже компоненты. При отсутствии
каких-либо компонентов обращайтесь к своему дилеру.
* Зарядное устройство LC-E8 или LC-E8E входит в комплект поставки (LC-
E8E поставляется с кабелем питания).
При покупке комплекта Lens Kit проверьте наличие объектива.
В зависимости от типа комплекта Lens Kit в комплект поставки может
входить инструкция по эксплуатации объектива.
Не теряйте перечисленные выше компоненты.
Контрольный список комплекта поставки
Аккумулятор
LP-E8
(включая защитную
крышку)
Зарядное устройство
LC-E8/LC-E8E*
Интерфейсный кабель
Стереофонический
аудио/видеокабель
AVC-DC400ST
EOS DIGITAL
Solution Disk
(Программное
обеспечение)
Инструкция по
использованию
программного
обеспечения
Инструкция по
эксплуатации
фотоаппарата
(данный документ)
Широкий ремень
EW-100DB III
Камера
(с наглазником и крышкой
корпуса камеры)
H101_R.book Page 3 Friday, January 15, 2010 7:19 PM
Главная > Фотоаппараты > Руководство пользователя Canon 550D
Инструкция по эксплуатации Canon 550D в PDF (12.0 MB)
| устройство: | зеркальный фотоаппарат |
| производитель: | Canon |
| модель: | EOS 550D (DS126271) |
| дата обращения: | 15.06.2019 |
| страница добавлена: | 23.06.2019 |
| формат файла: | |
| размер файла: | 12.0 мегабайт |
| запросил пользователь: | unknown |
| с устройства: | ноутбук |
| информация о устройстве: | Кэнон 550Д – любительский зеркальный фотоаппарат 2010 года выпуска. 9-точечная автофокусировка, серийная фотосъемка 3,7 кадров в секунду. |
| дополнительная информация: | Инструкция Canon EOS 550D на русском языке, состоит из 256 страниц. В документе: знакомство с комплектацией, устройством и возможностями, основные фото и видео операции, просмотр и печать фотографий, справочная информация. |
| ССЫЛКА: |  |

- Manuals
- Brands
- Canon Manuals
- Digital Camera
- EOS 550D
- Instruction manual
-
Contents
-
Table of Contents
-
Bookmarks
Quick Links
Related Manuals for Canon EOS 550D
Summary of Contents for Canon EOS 550D
- Page 2
After shooting, playback and check whether the images have been properly recorded. If the camera or memory card is faulty and the images cannot be recorded or downloaded to a computer, Canon cannot be held liable for any loss or inconvenience caused. - Page 3
Item Check List Before starting, check that all the following items have been included with your camera. If anything is missing, contact your dealer. Buttery Pack Buttery Charger Camera LP°E8 LC°E8fLC-E8E* (with eyecup and body uap) (with protective cover) Wide Strup _nterface cubic Stereo AV Cubic EW°100DB tl_… - Page 4
Conventions Used in this Manual Icons in this Manual <_> Indicates the Main Dial. <AV> <_> Indicates the <_:_> cross keys. <_> Indicates the setting button. G4, 66, (_10, ©16 Indicates that the respective function remains active for4 sec., 6 sec., 10 sec., or 16 sec. respectively after you let go of the button. -
Page 5: Chapters
Chapters For first4ime DSLR users, Chapters 1 and 2 e×pJain the camera’s basic operations and shooting procedures. introduction Camera basics, Getting Started Basic Shooting and image PJayback Fully automatic shooting for different subjects. Creative Shooting Basic shooting features for specific types of subjects. Advanced Shooting ,Advanced shooting features,…
-
Page 6: Table Of Contents
Contents Item Check List ………………..Conventions Used in this Manual …………..Chapters ………………….Contents at a Gtance ………………Handling Precautions ………………Quick Start Guide ……………….. Nomenclature ………………..Charging the Battery ………………Installing and Removing the Battery …………..Turning on the Power ………………
- Page 7
Contents P:Program AE …………. lSO: Changing the I SO Speed ……….Using the B uilt-in Flash ………… AF: Changing the A F Mode ……….mSelecting the A F Point ……….. MF: Manual Focusing …………Continuous Shooting …………. ®Using the S elf-timer ………… - Page 8
Contents Shooting with the LCD Monitor …………… Shooting Function Settings …………….Using AF to Focus ………………Focusing Manually ………………Shooting Movies ………………Shooting Function Settings …………….Handy Features ………………… Silencing the Beeper ……………… Card Reminder ………………. Setting the Image Review Time ………….. - Page 9
Contents Slide Show (Auto Playback) ……….Viewing the I mages on TV ……….. B Protecting Images …………Erasing Images …………DISR Shooting Information Display ……….Preparing toPrint …………f_ Printing …………………. Trimming the Image ………………Digital Print Order Format (DPOF) …………Direct Printing with DPOF ……………. - Page 10
Contents at a Glance ® Shoot automatically _,_po45 — 57 (BasicZonemodes) _ Shoot continuously p,50, Continuous shooting) _ Take a picture of yourself in a group ,_ po71 (® Self-timer) ® Freeze the action ® BJur the action @ p.78 (Tv Shutter-priority AE) ®… - Page 11
® Make a Jarge-size print of the picture ,_ [3.72 (_L, _L, _) _ Take many pictures ,,7,po72 (iS, _ Change the point of focus ,,i_[3.68 (m AF point selection) _ Shoot a moving subject ,,,;_, [3.53, 67 (AJServo AF) _, View the images with the camera (_ Playback) [3,58… - Page 12
If you accidentally drop the camera into water, promptly consult your nearest Canon Service Center. Wipe off any water droplets with a dry cloth. If the camera has been exposed to salty air, wipe it with a well-wrung wet cloth. -
Page 13: Handling Precautions
Besides dust entering the camera from outside, in rare cases lubricant from the camera’s internal pants may adhere to the front of the sensor. In case visible spots still remain after the automatic sensor cleaning, having the sensor cleaned by a Canon Service Center is recommended.
-
Page 14: Quick Start Guide
Quick Start Guide Insert the battery. (p.26) To charge the battery, see page 24 Attach the lens. (p.33) Align the lens’ white or red index with the camera’s index in the matching color. Set the Jens focus mode switch to <AF>. (p,331 Open the slot cover insert a card.
- Page 15
Quick Start Guide Set the Mode DiaJ to <0> (FUJI Auto). (p.46) All the necessary camera settings will be set automatically. Focus the subject. (p.37) Look through the viewfinder and aim the viewfinder center over the subject. Press the shutter button halfway, and the camera will focus the subjec[. -
Page 16: Nomenclature
Nomenclature The names in bold indicate the parts mentioned up until the «Basic Shooting and Image Piayback» section, Mode D[a_ d_t4_:_f_ash/AF-assist beam (p,64t147) Power ew_teh (p,33) <iS0> ISO speed — } Lens mount i_dex {p,33) setting button (p,62) (p,206) p_ane mark (p,52) mour_t (p,23)
- Page 17
Nomenclature Eyecup (p,205) ……..Dioptde adjustment knob (p,36) <_> Live View shooting/ Vie,a_inde r eyepie_:e Movie shooting button (p,108t124) <,,X-t_-% > AE lock,’ FE lock button/ Index/Reduce button (p.97/98/156/158,183) se_ings d_sp_ay bu_on (p,44A10,126, AF point selectiont 143,173) Magnify button (p_68t158,183) button (p,40) - Page 18
Nomenclature Shooting Settings DispJay Exposure level indicator Aperture Exposure compensation amount (p,87) Main DiaJ pointer (p77) AEB range (p,89) speed (p,62) Shutter exposure compensation (p.88) Picture Style (p,75) — (p,194) Shooting mode — Auto Lighting Optimizer (p,103) Image_recording quality (p,72) Large/Fine ip.70,71 ) LargetNormal… - Page 19
Nomenclature V+ewfinder information Spot metering circle m point activation indicator <-> <BO> ISO speed <_B> White balance correction I> FOCBIS AEB in-progress eonf_rmat_on 1_9ht burst <_> Improper FE lock —< 8/W > Monochrome shooting warning ISO speed <_H> High+speed sync (FP flash) Highlight tone pnedty… - Page 20
Nomenclature Mode Dial The Mode Dial includes the Basic Zone modes, Creative Zone modes, and Movie shooting mode. Creative Zone These modes give you more control for shooting various subjects. : Program AE (p.60) : Shutter-priorityAE (p.78) : Aperture-priority AE (p.80) : Manual exposure (p.83) A-DEP: Automatic depth-of4ield AE (p.85) - Page 21
Nomenclature Lens Lens without a distance scale Focusing rinc Foetus mode sw{t_th (p,33) Hn9 (p,34) (p,231) (front of lens) (p,231) Filter thread Bmage Stabilizer sw_tch (p,35) Lens mount index (p,33) Contacts (p,f 3) Lens with a distance scale Focus mode sw_tch (p,33) Hood mount (p,231) - Page 22
Nomenclature Battery Charger LC-E8 Charger for Battery Pack LP-E8 (p,24), Power plug Battery pack Mot Charge lamp — FulFcharge lamp This power unit is intended to be correctly orientated in a vertical floor mount position. IMPORTANT SAFETY INSTRUCTIONS-SAVE THESE mNSTRUCT_ONS, DANGER-TO REDUCE THE RiSK OF F_RE OR ELECTRIC SHOCK,… - Page 23
Getting Started This chapter explains preparatory steps before you start shooting and basic camera operations. Attaching the Strap Pass the end of the strap through the camera’s strap mount eyelet ® from the bottom. Then pass it through the strap’s buckle as shown in the illustration. - Page 24
Charging the Battery Remove the protective cover. Attach the battery. ® As shown in the illustration, attach the battery securely. ® To detach the battery, follow the above procedure in reverse. LC °E8 Recharge the battery. For LC-E8 ® As shown by the arrow, flip out the battery charger’s prongs and insert the prongs into a power outlet. -
Page 25: Charging The Battery
Jife. Purchase a new battery. _¢ The Battery Pack LP-E8 is dedicated to Canon products only. Using it with art incompatible battery charger or pr0duct may result in malfunction or accidents for which Canon cannot be held }iable.
- Page 26
Installing and Removing the Battery Installing the Battery Load a fully charged Battery Pack LPoE8 into the camera, Open the battery compartment cover, ®_ Slide the lever as shown by the arrow’ and open the cover. insert the battery. ®_ Insert the end with the battery contacts, _ insert the battery until it locks in place. -
Page 27: Turning On The Power
Turning on the Power if the date/time setting screen appears when you turn on the power switch, see page 29 to set the date/time. <ON> : The camera turnson. <OFF> : The camera is turned offand does not operate. Set to this position when not using the camera.
- Page 28
Turning on the Power Checking the Battery LeveJ When the power switch is set to <ON>, the battery levelwill be indicated in one of four levels: Battery level is OK. Battery level is slightly down, but adequate power remains. Battery will be exhausted soon. C22_ Battery must be recharged. - Page 29
Setting the Date and Time When you turn on the power for the first time or if the date/time has been reset, the DatefTime setting screen will appear. Follow steps 3 and 4 to set the date/time. Note that the dateRime appended recorded images wHJbe based on this date/time setting°… - Page 30
Selecting Interface Language Display the menu. ® Press the <MENU> button to display the menu, Under the [_=] tab, select [Language_j_]. ® Press the <_ > key to select the [_:] tab, ® Press the <AV> key to select [Language_] (the third item from the top), then press <(_>, Set the desired… - Page 31
Installing Removing SD Card The captured images are recorded onto the card (sold separately), Make sure the card’s write protect switch is set upward to enable writing/erasingo mnstaHing the Card Open the cover. ® Slide the cover as shown by the arrow to open it. - Page 32
Installing and Removing the SD Card Removing the Card Open the cover. ® Set the power switch to <OFF >. ® Check that ‘Recording._» is not displayed on the LCD monitor. ® Make sure the access [amp is off, then open the cover. Access lamp Remove the card. - Page 33
Attaching and Detaching a Lens _::_ Attaching alerts Remove the caps. ® Remove the rear lens cap and the body cap by turning them as shown by the arrows. Attach the mens. ® Align the lens’ red or white index with the camera’s index matching the same color. - Page 34
Attaching and Detaching a Lens About Zooming To zoom, turn the zoom dng on the lens with your fingers. if you want to zoom, do it before focusing. Turning the zoom ring after achieving focus may throw off the focus sJightly. Detaching the Lens While… - Page 35
About Lens Image Stabilizer When you use the IS lens’ builtqn Image Stabilizer, camera shake corrected to obtain a less blurred shot. The procedure explained here is based on the EF-S18-55mm f/3.5-5.6 IS lens as an example. * IS stands for Image Stabilizer. Set the [,9 switch to <ON>. -
Page 36: Basic Operation
Basic Operation Adjusting th e V!ewfinder clarity Turn the dioptrie adjustment knob. _ Turn the knob left or dght until the nine AF points in the viewfinder look sharp. If the Camera!s dioptric adjustment Sti!! Cannot provide a Sharp viewfinder image, using Dioptrio Adjustment Lens E (10 typos, s0!d separately)
- Page 37
Basic Operation Shutter Button The shutter button has two steps. You can press the shutter button halfway. Then you can further press the shutter button completely. Pressing halfway This activates autofocusing and automatic exposure metering that sets the shutter speed and aperture. The exposure setting (shutter speed and aperture) is displayed in the viewfinder (54). - Page 38
Using the Quick Control Screen You can directly select and set the shooting functions displayed on the LCD monitor, This is called the Quick Control screen, Display the Quick Control screen. _ When the shooting settings are displayed, press the <[_[]> button, _+,The Quick Control screen will activate (610), Set the desired… -
Page 39: Using The Quick Control Screen
_] Usingthe QuickControlScreen Quick Control Screen Nomenclature Aperture (p.80) ……ISO speed (p,62) Shutter speed (p.78) .._ Highlight tone White balance (p.99),,,,,_ L,,,,,, Metering mode (p.86) ….AF mode (p.66) Asterisked functions Cannot be Set With the Quick Control Screen. Function se_jng D!Spmay ®…
- Page 40
Menu Operations You can set various functions with the menus such as the image-recording quality, date/time, etc. While looking at the LCD monitor, use the <MENU> button, < ,_’_ > cross keys, and < _]> button on the camera back. <MENU>… -
Page 41: Menu Operations
Menu Operations Menu Setting Procedure Display the menu. ® Press the <MENU> button to display the menu= Select a tab. ® Press the <_> key to select a tab. ® You can also turn the <_> dial to select a tab. Semeet the desired item.
- Page 42
Formatting the Card Jfthe card is new’ or was previousJy formatted by another camera or computer, format the card with the camera. When the card is formatted, aH images and data in the card wHJ be erased. Even protected images will be erased, so make sure there is nothing you need to keep. -
Page 43: Formatting The Card
Formatting the Card ExeCute [Format] in the following eases: ® The card is new. ® The card was formatted by a different camera or a computer. ® The card is full with images or data. ® A card-reJated error is dispJayed (p,224)o About Low-leveJ…
- Page 44
Switching the LCD Monitor Display The LCD monitor can display the shooting settings screen, menu screen, image, etc. Shooting Settings ® Displayed when the camera is turned on. ® When your eye nears the viewfinder eyepiece, the display-off sensor (p.17,146) turns offthe LCD monitor automatically. - Page 45
Basic Shooting image Playback This chapter explains how to use the Basic Zone modes on the Mode Dial for best results and how to playback images. With the Basic Zone modes, all you do is point and shoot and the camera sets ever_ automatically (p.210). - Page 46
Fully Automatic Shooting Set the Mode Dial to <_>, Aim any AF point over AF point subject. ® All the AF points will be used to focus, and generally the closest object will be focused, ® Aiming the center AF point over the subject wiii make focusing easier, Focus the subject,… -
Page 47: Fully Automatic Shooting
C3 Fully Automatic Shooting ® The focus confirmation light <@> bJinks and focus is not achieved, Aim the AF point over an area having good contrast, then press the shutter button halfway (p.202). if you are too close to the subject, move away and try again.
-
Page 48: Full Auto Techniques
Full Auto Techniques Recomposing the Shot Depending on the scene, position the subject toward the left or right to create a balanced background and good perspective. In the <[:3> (Full Auto) mode, while you press the shutter button halfway to focus a still subject, the focus will be locked. You can then recompose the shot and press the shutter button completely to take the picture.
- Page 49
Disabling Flash in places where flash photography is prohibited, use the <_> (Flash Off) mode= This mode is also effective for candlelight scenes when you want to capture the ambient light= ShoothgTip ®_ If the numeric display in the viewfinder bJinks, take care to prevent camera shake,… - Page 50
_t’_Shooting Portraits The <_’_> (Portrait) mode blurs the background to make the human subject stand out. it also makes flesh tones and the hair look softer than with the <(Z_> (Full Auto) mode. Shooting Tips ®_ The farther the distance between the subject and background,… - Page 51
Shooting Landscapes Use the <_,> (Landscape) mode for wide scenery, night scenes, or to have everything in focus from near to far. The greens and blues also become more vivid and sharper than with <0> (Full Auto). Shooting Tips _ With a zoom Jens, use the wide-angJe end. - Page 52
_ Shooting CIose-ups When you want to photograph flowers or small things up close, use the <_> (Close-up) mode. To make small things appear much larger, use a macro lens (sold separately). «_.’- Shooting Tips _ Use a simpJe background. A simple background makes the flower, etc., stand out better. - Page 53
Shooting Moving Subjects To photograph a moving subject, whether it is a child running or a moving vehicle, use the <_,_> (Sports) mode. Shooting Tips _ Use a telephoto Jens, Using a telephoto lens is recommended so you can shoot from afar. ®_ Use the center AF point to focus, Aim the center AF point over the subject, then press the shutter button halfway to auto focus. - Page 54
Shooting Portraits at Night To shoot someone at night and obtain a natural-looking exposure in the background, use the <_> (Night Portrait) mode. «_.’- Shooting Tips @ Use a wideoangle lens and a tripod. When using a zoom lens, use the wide-angle end to obtain a wide night view. - Page 55
Creative Auto Shooting Basic Zone modes except <_> (Creative Auto) take care of everything, whereas the <_> Creative Auto mode enables you to easily change the picture’s brightness, depth of field, color tone (Picture Style), etc. The default settings are the same as the <[3> (Full Auto) mode. -
Page 56: Shooting Portraits
Creative Auto Shooting Shutter speed and aperture Possible shots Batter check (1) FIash firing <_A> (Auto flash), <{> (Flash on), or <O> (Flash off) can be selected. If you set <O> (Flash off), see ‘Disabflng Flash» on page 49. (2) Blurring/sharpening the background If you move the index mark toward the left, the background will look…
- Page 57
_} Creative Auto Shooting (4) image effects Besides the standard image effect, you can set it for portraits, landscapes, or black-and-white photos. (p.75: Picture Style) <_> (Standard): Standard image effect applicable to most scenes. < _ > (Smooth skin tones): Effective for close-ups of women or children. -
Page 58: Image Playback
ffnage Playback The easiest way to playback images is explained below. For more details on the playback procedure, see page 155. Playback the image. _ When you press the <EEl> button, the last captured image will be displayed. Select the image. _, To view images starting with the last image, press the <4>…
- Page 59
Creative Shooting In the Basic Zone modes, to prevent spoiled shots, most functions are set automatically and cannot be changed. In the <P> (Program AE) mode, you can set various functions and be more creative. _ In the <P> (Program AE) mode, the camera sets the shutter speed and aperture automatically to obtain a standard exposure. - Page 60
P» Program To obtain a good exposure of the subject, the camera sets the exposure (shutter speed and aperture) automatically. TMs is called Program AE. <P>. Set the Mode Dial to Focus the subject. _ Look through the viewfinder and aim the selected AF point over the subject. - Page 61
P: Program AE «_.’- Sheeting Tips ® Change the ISO speed or use the built-in flash° To match the subject and ambient lighting level, you can change the ISO speed (p.62) or use the builtqn flash (p.64). in the <P> mode, the builtqn flash will not fire automatically. - Page 62
IS0: Changing the [SO Speed* Set the ISO speed (image sensor’s sensitivity to light) to suit the ambient light level. In the Basic Zone modes, the iSO speed is set automatically (p.63). Press the <IS0> button. (66) _y,, [ [SO speed] wi[[ appear. Set the [SO speed. - Page 63
IS0: Changing the ISO Speed* About ,,AUTO,, for Automatic ISO Speed If the ISO speed is set to «AUTO», the actual ISO speed to be set will be displayed when you press the shutter button halfway. As indicated below, the ISO speed will be set automatically suit the shooting mode. - Page 64
% Using the Built-in Flash in indoors, low light, or backlit conditions in daylight, just pop up the builtqn flash and press the shutter button to take flash pictures, in the <P> mode, the shutter speed (1/60 sec. o 1/200 sec.) will be set automatically to prevent camera shake. - Page 65
Using the B uilt-in Flash Cd-‘- shootingTips ® if the subject is far away, increase the ISO speed. By increasing the ISO speed, you can extend the flash range. ® in bright light, decrease the ISO speed. If the exposure setting in the viewfinder blinks, decrease the ISO speed. ®… - Page 66
AF: Changing the AF Mode You can select the AF mode suiting the shooting conditions or subject, in the Basic Zone modes, the optimum AF mode is set automatically. ¢_ On the lens, set the focus mode switch to <AF>. Press the <_ AF>… - Page 67
AF: Changing the AF Mode* viewfinder will blink, !f this occurs, a picture cannot be taken even if the shutter button is pressed completely, Recompose th e p!cture and try to focus again, Or see !!When Autofocus Fails» (p_202), ® If the [1_ Beep] menu is set to [Disabme], the beeper wiJ! not sound when focus is achieved AJ Servo… - Page 68
Selecting the AF Point* In the Basic Zone modes, all the AF points are active. Generally, the AF point covering the closest subject will be selected to focus. Therefore, the camera sometimes may not focus the subject you want. With the <P> (Program AE), <Tv>, <Av>, and <M>… - Page 69
Selecting the AF Point «_ «US Shooting Tips ® When shooting a portrait up close, use One-Shot AF and focus the eyes. If you focus the eyes first, you can then recompose and the face will remain sharp. ® if it is difficult to focus, select and use the center AF point. - Page 70
Continuous Shooting You can shoot up to about &7 shots per sec. This is effective for shooting a chiid running toward you or capturing the different faciai expressions. ,’_ Press the < _ _ _® > button. Select <Djjj>. ® Press the <_> key to select <Djj>… - Page 71
Using the Self-timer Press the <4 _ _®> button. $emeet the self-timer. ® Press the <_> key to select the desired self=timer, then press <_>= _®: lO=sec+ selfotimer The remote control can also be used. (p=204) _2: 2-see. serfotimer* (p+106) ®c: 10-sec. - Page 72
Setting image-recording QuaJity You can select the number of megapixels to record (approx. 17.9, 8.0, or 4.5 megapixels) and the image quality. Select [Quality]. ®_ Under the [£_’] tab, select [Quality], then press <_>. _y,, [ Quality] will appear. Select the image=recording quality. - Page 73
Setting the Image-recording Quality ® [ want to select the image-recording quality matching the paper size for printing. Refer to the diagram on the left when Paper size you want to crop the image, selecting a A4 (29.Tx21em/l, higher quality (more pixeis) such as A L, L!! 7×8.3in.)l J L, _, or _+J… - Page 74
Setting the Image-recording Quality About is the raw image data before it is made into d L or other images. Although _ images require software like Digital Photo Professional (provided) so they can be displayed on the computer, they also offer flexibility for image adjustments possible only with _]. - Page 75
SeJecting a Picture Style By selecting a Picture Style, you can obtain image effects matcMng your photograpMc expression or the subject. Press the < V _»_,_ > button. _y,, [ Picture StyJe] will appear. Select a Picture Style. ® Pressthe <_>… - Page 76
_,_ Selecting a Picture Style* Neutral This Picture Style is for users who prefer to process images with their computer. For natural colors and subdued images. FaithfuJ This Picture Style is for users who prefer to process images with their computer. When the subject is captured under a color temperature of 5200K, the color is adjusted colodmetdcally to match the subject’s color. - Page 77
Advanced Shooting This chapter buitds on the previous chapter introduces more ways to shoot creatively. _ The first half of this chapter explains how to use the <Tv> < Av > < M > < A-DEP> modes on the Mode Dial. Except for <A-D[P>, all the shooting modes can be used in combination with the functions introduced in Chapter 3. - Page 78
Action Shots You can either freeze the action or create motion blur with the <Tv> (Shutter-priority AE) mode on the Mode Dial. * <Tv> stands for Time value. Frozen action Blurred motion (Fast shutter speed: 1/2000 sec.) (Slow shutter speed: 1/30 sec.) <Tv>. - Page 79
Tv: Action Shots #_.’- Shooting Tips ®_To freeze the action or moving subject. Use a fast shutter speed such as 114000 sec. to 11500 sec. _ To blur a running child or animaJ giving the impression of fast movement. Use a medium shutter speed such as 1/250 sec. to 1130 sec. Follow the moving subject through the viewfinder and press the shutter button to take the picture. - Page 80
Changing the Depth of Field To obtain a blurry background or to make everything near and far look sharp, set the Mode Dial to <Av> (Aperture-priority AE) to adjust the depth of field (range of acceptable focus), * <Av > stands for Aperture value which is the size of the diaphragm hole inside the lens. - Page 81
Av : Changing the Depth of Field Cd-‘- shooting Tips _ When using an aperture with a high f-number, note that camera shake can occur in Jow light scenes. A higher aperture #number will make the shutter speed slower. Under low light, the shutter speed can be as long as 30 sec. In such cases, increase the ISO speed and hold the camera steady or use a tdpod. -
Page 82: Brightness
Av : Changing the Depth of Field Using the Built,in Flash To obtain a correct flash exposure, the flash output will be set automatically to match the set aperture (autoflash exposure). The shutter speed will be set automatically between 11200 sec. — 30 sec. to suit the scene’s brightness.
-
Page 83: Index
M’ Manual Exposure You can set both the shutter speed and aperture manually as desired. With flash, the flash exposure will be set automatically to match the aperture that was set. The flash sync speed can be set within 1/200 sec.
- Page 84
M: Manual Exposure Bulb Exposures In step 2 on the preceding page, turn the <_> dial to the left to set <BULB>. A bulb exposure keeps the shutter open for as long as you hold down the shutter button. It can be used to photograph fireworks, etc. - Page 85
A-DEP: Automatic Depth-of°Field Objects in the foreground and background will be in focus automatically, All the AF points will function to detect the subject, and the aperture required to attain the necessary depth of field will be set automatically, * <AoDEP> stands for Auto-Depth of field, This mode sets the depth of field automatically. - Page 86
E_] Changing Metering Mode* The metering mode measures the subject’s brightness to determine the correct exposure. Normally, evaluative metering is recommended. Select [Metering mode]. ® Under the [_:] tab, select [Metering mode], then press <_>. et the metering mode. ® Press the <_ >… - Page 87
Setting Exposure Compensation Av_ Setting Exposure Compensation Set exposure compensationif the exposure (withoutflash) does not come out as desired, This feature can be used in CreativeZone modes (except < M >). Although you can set the exposure compensationup to +5 stops in 1/3=stopincrements, the exposure compensationindicator inthe viewfindercan only display the setting up to +2 stop&… - Page 88
Setting Exposure Compensation* Flash E×posure Compensation* Set flash exposure compensation if the flash exposure of the subject does not come out as desired. You can set the flash exposure compensation up to _+2stops in ll3-stop increments. Display the Quick Control screen. - Page 89
Auto Exposure Bracketing* TMs feature takes exposure compensation a step further by varying the exposure automatically with three shots (-+2 stops in lt3-stop increments) as shown below. You can then choose the best exposure. This is called AEB (Auto Exposure Bracketing). Standard exposure Darker exposure Brighter exposure… - Page 90
Auto Exposure Bracketing* Canceling ® Follow steps 1 and 2 to turn off the AEB amount display= ® The AEB setting wiii be canceled automatically if the power switch is set to <OFF>, flash recycling is complete, etc= «_.’= Shooting Tips ®… - Page 91
This Instruction Manual booklet is current as of January 20!0. For information on I the camera’s compatibility with any accessories and lenses introduced after this [date, contact any Canon Serv ce Center. CT1-1036-001 © CANON 0NC, 2010 PRONTED ON JAPAN…
3
В первую очередь убедитесь, что в комплект поставки камеры
входят все перечисленные ниже компоненты. При отсутствии
каких-либо компонентов обращайтесь к своему дилеру.
* Зарядное устройство LC-E8 или LC-E8E входит в комплект поставки (LC-
E8E поставляется с кабелем питания).
При покупке комплекта Lens Kit проверьте наличие объектива.
В зависимости от типа комплекта Lens Kit в комплект поставки может
входить инструкция по эксплуатации объектива.
Не теряйте перечисленные выше компоненты.
Контрольный список комплекта поставки
Аккумулятор
LP-E8
(включая защитную
крышку)
Зарядное устройство
LC-E8/LC-E8E*
Интерфейсный кабель
Стереофонический
аудио/видеокабель
AVC-DC400ST
EOS DIGITAL
Solution Disk
(Программное
обеспечение)
Инструкция по
использованию
программного
обеспечения
Инструкция по
эксплуатации
фотоаппарата
(данный документ)
Широкий ремень
EW-100DB III
Камера
(с наглазником и крышкой
корпуса камеры)
H101_R.book Page 3 Friday, January 15, 2010 7:19 PM
- Manuals
- Brands
- Canon Manuals
- Digital Camera
- EOS 550D
Manuals and User Guides for Canon EOS 550D. We have 8 Canon EOS 550D manuals available for free PDF download: Instruction Manual, Quick Reference Manual

Canon EOS 550D Instruction Manual (260 pages)
Canon Digital Camera User Manual
Brand: Canon
|
Category: Digital Camera
|
Size: 5.7 MB
Table of Contents
-
Introduction
2
-
Item Check List
3
-
Conventions Used in this Manual
4
-
Chapters
5
-
Table of Contents
6
-
Contents at a Glance
10
-
Handling Precautions
12
-
Lcd Monitor
13
-
Quick Start Guide
14
-
Nomenclature
16
-
Viewfinder Information
19
-
Getting Started
23
-
Charging the Battery
24
-
Installing and Removing the Battery
26
-
Turning on the Power
27
-
Automatic Self-Cleaning Sensor
27
-
Checking the Battery Level
28
-
Battery Life
28
-
-
Setting the Date and Time
29
-
Selecting the Interface Language
30
-
Installing and Removing the SD Card
31
-
Removing the Card
32
-
Remove the Card
32
-
-
Attaching and Detaching a Lens
33
-
Detaching the Lens
34
-
About the Lens Image Stabilizer
35
-
Basic Operation
36
-
Shutter Button
37
-
Pressing Halfway
37
-
-
Q Using the Quick Control Screen
38
-
Menu Operations
40
-
Formatting the Card
42
-
Switching the LCD Monitor Display
44
-
Basic Shooting and Image Playback
45
-
Fully Automatic Shooting
46
-
Full Auto Techniques
48
-
Disabling Flash
49
-
Shooting Portraits
50
-
Shooting Landscapes
51
-
Shooting Close-Ups
52
-
Shooting Moving Subjects
53
-
Shooting Portraits at Night
54
-
C Creative Auto Shooting
55
-
Image Playback
58
-
-
Creative Shooting
59
-
D: Program AE
60
-
Shooting Tips
61
-
Z: Changing the ISO Speed
62
-
D Using the Built-In Flash
64
-
Using Red-Eye Reduction
65
-
E: Changing the AF Mode
66
-
Ai Servo Af for Moving Subjects
67
-
S Selecting the AF Point
68
-
MF: Manual Focusing
69
-
-
Continuous Shooting
70
-
Using the Self-Timer
71
-
Setting the Image-Recording Quality
72
-
A Selecting a Picture Style
75
-
-
Advanced Shooting
77
-
S: Action Shots
78
-
Using the Built-In Flash
79
-
F: Changing the Depth of Field
80
-
Depth of Field Preview
82
-
-
A: Manual Exposure
83
-
Bulb Exposures
84
-
8: Automatic Depth-Of-Field AE
85
-
Changing the Metering Mode
86
-
Oy Setting Exposure Compensation
87
-
Auto Exposure Bracketing
89
-
Canceling Aeb
90
-
A Customizing a Picture Style
91
-
A Registering a Picture Style
94
-
Setting the Color Space
96
-
A AE Lock
97
-
Ae Lock Effects
97
-
A FE Lock
98
-
Take the Picture
98
-
B: Setting the White Balance
99
-
White Balance Correction
101
-
White Balance Auto Bracketing
102
-
Auto Lighting Optimizer
103
-
Lens Peripheral Illumination Correction
104
-
Preventing Camera Shake
106
-
-
Shooting with the LCD Monitor (Live View Shooting)
107
-
A Shooting with the LCD Monitor
108
-
Shooting Function Settings
111
-
Menu Function Settings
112
-
Grid Display
112
-
-
Using AF to Focus
113
-
Focusing Manually
120
-
-
Shooting Movies
123
-
Shooting Movies
124
-
Manual Exposure Shooting
127
-
Shooting Still Photos
129
-
-
Shooting Function Settings
130
-
Sound Recording
134
-
-
Handy Features
137
-
Handy Features
138
-
Silencing the Beeper
138
-
Card Reminder
138
-
Setting the Image Review Time
138
-
Setting the Auto Power-Off Time
139
-
Adjusting the LCD Monitor Brightness
139
-
File Numbering Methods
140
-
Auto Rotation of Vertical Images
142
-
B Checking Camera Settings
143
-
Reverting the Camera to the Default Settings
144
-
Shooting Settings
145
-
Preventing the LCD Monitor from Turning off Automatically
146
-
Changing the Shooting Settings Screen Color
146
-
-
Setting the Flash
147
-
Flash Mode
148
-
Automatic Sensor Cleaning
150
-
Appending Dust Delete Data
151
-
Photograph a Solid-White Object
152
-
Manual Sensor Cleaning
153
-
Image Playback
155
-
HI Searching for Images Quickly
156
-
U/Y Magnified View
158
-
Rotating the Image
159
-
Enjoying Movies
160
-
Playing Movies
162
-
Editing the Movie’s First and Last Scenes
164
-
Slide Show (Auto Playback)
165
-
Start the Slide Show
166
-
Viewing the Images on TV
167
-
The Camera
169
-
K Protecting Images
170
-
L Erasing Images
171
-
B Shooting Information Display
173
-
-
Printing Images
175
-
Preparing to Print
176
-
Wprinting
178
-
Set the Printing Effects
180
-
Start Printing
181
-
Trimming the Image
183
-
Error Messages
184
-
-
W Digital Print Order Format (DPOF)
185
-
Print Ordering
187
-
Direct Printing with DPOF
188
-
-
Customizing the Camera
189
-
Setting Custom Functions
190
-
Custom Functions
191
-
Custom Function Settings
192
-
Registering My Menu
198
-
Setting Copyright Information
199
-
-
Reference
201
-
When Autofocus Fails
202
-
Using a Household Power Outlet
203
-
Remote Control Shooting
204
-
Using the Eyepiece Cover
205
-
External Speedlites
206
-
Using Non-Canon Flash Units
207
-
Using Eye-Fi Cards
208
-
Function Availability Table According to Shooting Modes
210
-
Menu Settings
212
-
System Map
216
-
Troubleshooting Guide
218
-
Error Codes
224
-
Specifications
225
-
Operation Environment
230
-
Index
237
-
End Pages: Quick Reference Guide and Software Start Guide
243
-
Quick Reference Guide
244
-
Q Quick Control Screen
245
-
Basic Zone Modes
249
-
A Live View Shooting
253
-
Software Start Guide
256
-
Picture Style Editor
256
-
Installing the Software
257
-
Software Instruction Manual
258
-
Your Computer
258
-
-
Advertisement
Canon EOS 550D Instruction Manual (132 pages)
Digital Photo Professional 3.9 for Macintosh Instruction Manual
Brand: Canon
|
Category: Software
|
Size: 14.72 MB
Table of Contents
-
1 Basic Operation
6
-
Canon Software License Agreement
2
-
Read Carefully before Using
2
-
System Requirements
4
-
Table of Contents
6
-
Basic Operation
7
-
Starting up DPP
7
-
Main Window Display
7
-
-
Downloading an Image to Your Computer
8
-
Downloading Images Using Your Card Reader
10
-
-
Viewing an Image
11
-
View Images as Thumbnails in the Main Window
11
-
Changing the Size of Thumbnail Images
11
-
-
Enlarge and View an Image in the Edit Window
12
-
Enlarging and Viewing a Specific Area
12
-
-
-
Adjusting an Image
13
-
About the Tool Palette
13
-
About Recipes
13
-
-
Saving an Image
14
-
Saving
14
-
-
Printing an Image
15
-
Printing
15
-
-
Quitting DPP
15
-
-
2 Advanced Operation
16
-
Advanced Operation
17
-
Efficiently Checking/Sorting Images
17
-
Attaching Check Marks
19
-
Setting Ratings
19
-
Sorting Images
19
-
Attaching Check Marks in the Main Window
20
-
Setting Ratings in the Main Window
20
-
Sorting Images in the Main Window
20
-
Arranging by Type
21
-
Arranging Images in the Main Window
21
-
Arranging Freely
22
-
Displaying a RAW Image and JPEG Image as a Single Image
23
-
Checking Image Information
24
-
Improving the Quality of an Image in the Main Window
24
-
-
Editing an Image
26
-
About the RAW Tool Palette
26
-
Editing with the Tool Palette in the Main Window
26
-
Adjusting Brightness
27
-
Changing a Picture Style
27
-
Adjusting Color Tone by Changing White Balance
28
-
Picture Style File
28
-
Adjusting Color Tone Using Click White Balance
29
-
Adjusting Contrast
30
-
Changing Color Tone and Color Saturation
30
-
Adjusting Monochrome
31
-
Adjusting Image Sharpness
32
-
Detailed Setting of Image Sharpness
33
-
Automatically Adjusting Brightness and Color
34
-
Contents at Curve Assist)
34
-
Glance
34
-
-
Contents at
35
-
Basic Operation
35
-
Editing Efficiently
35
-
Editing in the Edit Image Window
35
-
Gathering and Editing Images in the Collection Window
37
-
Position
37
-
-
-
Advanced Operation
37
-
Trimming and Adjusting the Angle of an Image
39
-
Applying Adjustment Contents to Other Images
42
-
Saving Editing Results
42
-
-
Image Editing
42
-
And Printing
42
-
Saving Editing Contents to a RAW Image
42
-
Saving as a JPEG or TIFF Image
43
-
-
Processing Large Numbers
43
-
Of Images
44
-
Printing an Image
44
-
Compatible with Easy-Photoprint EX
44
-
Printing Photographs with Canon Inkjet Printers
44
-
Operation 2
45
-
Large Numbers
46
-
Basic
47
-
Jpeg/Tiff
47
-
Printing Photographs with Canon Inkjet Printers Compatible with Easy-Photoprint
47
-
Advanced
48
-
Printing Photographs with a Printer Other than Canon Inkjet Printers
50
-
-
-
Re-Editing an Images
44
-
Organizing Images
50
-
Deleting an Unwanted Image
50
-
Creating a Folder for Saving Images
51
-
Moving Images
51
-
Moving Images in Folders
52
-
Organizing Bookmarks
52
-
Registering Frequent-Use Folders (Bookmark Registration)
52
-
-
-
Editing
44
-
Jpeg/Tiff
44
-
Image Editing
46
-
Operation
48
-
Advanced
48
-
-
3 Advanced Image Editing and Printing
53
-
Adjusting While Comparing with the Original Image
54
-
Changing How the Window Is Split
54
-
-
Adjusting by Comparing Multiple Images
55
-
Advanced
56
-
Operation
56
-
Advanced
57
-
Operation
57
-
Performing Advanced Editing
57
-
Adjusting White Balance with Color Temperature
57
-
Tuning White Balance with Color Wheel
57
-
-
And Printing
58
-
Adjusting Brightness of Shadows/Highlights
58
-
Of Images
59
-
Example of a Tone Curve Operation
60
-
Using a Picture Style File
60
-
-
Using the Auto Lighting Optimizer
62
-
Correcting Lens Aberration
64
-
Compatible Lenses
64
-
Making Corrections
66
-
About Shooting Distance Information Slider
67
-
Correcting Multiple Images at a Time
67
-
-
Setting Work Color Space
72
-
Transferring a Raw Image to Photoshop
72
-
Printing with Shooting Information
73
-
When Printing
73
-
Printing a Thumbnail List (Contact Sheet Printing)
74
-
When Printing
74
-
Printing Raw Images on a High-End Canon Printer
75
-
Printing with a High-End Canon Inkjet Printer
75
-
Printing with a Large-Format Canon Printer
76
-
When Printing
76
-
-
When Printing
75
-
Specifying Preferences
77
-
General Settings
77
-
View Settings
79
-
Tool Palette
80
-
Color Management
81
-
-
-
And Printing
59
-
-
4 Useful Functions for Processing Large Numbers of Raw Images
83
-
White Balance
83
-
Utilizing Adjustment Contents (Recipe)
84
-
Saving Recipes as a File
85
-
Loading and Pasting Recipes
85
-
Copying a Recipe and Applying to Another Image
85
-
-
Batch Apply White Balance to Images (Personal White Balance)
86
-
Registering Personal White Balance
86
-
Applying Personal White Balance
86
-
-
Batch Save as JPEG or TIFF Images (Batch Processing)
87
-
Batch Transfer Images to Image Editing Software
88
-
Batch Change the File Name of Images
89
-
Changing the File Name of Images in the Order in the Main Window
89
-
-
-
5 Editing Jpeg and Tiff Images
90
-
Editing JPEG and TIFF Images
91
-
About the RGB Tool Palette
91
-
Automatically Adjusting Brightness and Color (Tone Curve Assist)
92
-
Adjusting Brightness and Contrast
93
-
Adjusting Color Tone Using Click White Balance
94
-
Adjusting Hue, Saturation and Sharpness
95
-
Tone Curve Adjustment
96
-
Adjusting Dynamic Range
97
-
-
Reducing Noise
98
-
Trimming and Adjusting the Angle of an Image
99
-
Performing Automatic Dust Erasure Processing
102
-
Compatible Cameras
102
-
Automatic Dust Erasure Processing in the Main Window
103
-
-
Manually Erasing Dust (Repair Function)
104
-
Erasing Unwanted Parts of an Image (Copy Stamp Function)
106
-
-
Saving Editing Results
106
-
Saving Editing Content to an Image
106
-
Saving as a Separate Image
107
-
-
Applying Editing Contents to Another Image
107
-
Printing
107
-
Re-Editing an Image
107
-
-
Reference
108
-
Troubleshooting
109
-
Deleting the Software (Uninstalling)
110
-
List of Main Window (Folder Window) Functions
111
-
List of Main Window (Collection Window) Functions
112
-
Image Frame Information in the Main Window and Edit Image Window
113
-
List of Edit Window Functions
114
-
List of Tool Palette Functions
115
-
List of NR Preview Window Functions
117
-
List of Quick Check Window Functions
118
-
List of Edit Image Window Functions
119
-
List of Convert/Save One Image Window Functions
120
-
List of Trimming/Angle Adjustment Window Functions
121
-
List of Lens Aberration Correction Window Functions
122
-
List of Copy Stamp Window Functions
123
-
List of Convert/Save Multiple Images Window (Batch Processing) Functions
124
-
List of Rename Window Functions
125
-
Glossary
126
-
Saving an Image
126
-
Basic
127
-
Jpeg/Tiff
127
-
When Printing
127
-
-
Contents at
127
-
Index
128
-
Operation 2
129
-
-
-
Processing
130
-
Jpeg/Tiff
130
-
About this Instruction Manual
132
-
Trademark Acknowledgments
132
-
Jpeg/Tiff
132
-
Operation 2
132
-
-
-

Canon EOS 550D Instruction Manual (92 pages)
Brand: Canon
|
Category: Digital Camera
|
Size: 11.1 MB
Table of Contents
-
Introduction
2
-
Item Check List
3
-
Conventions Used in this Manual
4
-
Icons in this Manual
4
-
Basic Assumptions
4
-
-
Chapters
5
-
Table of Contents
6
-
Contents at a Glance
10
-
Handling Precautions
12
-
Camera Care
12
-
LCO Monitor
13
-
Cards
13
-
Lens
13
-
-
Handling Precautions
13
-
Quick Start Guide
14
-
Nomenclature
16
-
Shooting Settings Dispjay
18
-
Viewfinder Information
19
-
Mode Dial
20
-
Lens with a Distance Scale
21
-
Battery Charger LC-E8
22
-
Battery Charger LC-E8E
22
-
Getting Started
23
-
Attaching the Strap
23
-
-
Charging the Battery
24
-
Tips for Using the Battery and Charger
25
-
Installing and Removing the Battery
26
-
About Auto Power off
27
-
About the Automatic Self-Cleaning Sensor
27
-
Turning on the Power
27
-
Checking the Battery Level
28
-
Battery Life
28
-
-
Turning on the Power
28
-
Setting the Date and Time
29
-
Selecting the Interface Language
30
-
Installing and Removing the SD Card
31
-
Installing the Card
31
-
-
Installing and Removing the SD Card
32
-
Attaching and Detaching a Lens
33
-
About Zooming
34
-
Detaching the Lens
34
-
-
About the Lens Image Stabilizer
35
-
Holding the Camera
36
-
Adjusting the Viewfinder Clarity
36
-
-
Basic Operation
36
-
Shutter Button
37
-
Using the Quick Control Screen
38
-
Function Setting Display
39
-
Quick Control Screen Nomenclature
39
-
_] Usingthe Quickcontrolscreen
39
-
Creative Zone Modes
40
-
Menu Operations
40
-
Menu Screen
40
-
Menu Setting Procedure
41
-
Formatting the Card
42
-
-
-
Formatting the Card
43
-
Switching the LCD Monitor Display
44
-
Basic Shooting and Image Playback
45
-
Fully Automatic Shooting
46
-
Faq
47
-
Recomposing the Shot
48
-
Shooting a Moving Subject
48
-
Disabling Flash
49
-
Shooting Portraits
50
-
Shooting Landscapes
51
-
Shooting Close-Ups
52
-
Shooting Moving Subjects
53
-
Shooting Portraits at Night
54
-
Creative Auto Shooting
55
-
-
Shooting Portraits
56
-
} Creative Auto Shooting
57
-
Image Playback
58
-
Time
58
-
Creative Shooting
59
-
Program AE
60
-
Changing the ISO Speed
62
-
About «AUTO» for Automatic ISO Speed
63
-
Using the Built-In Flash
64
-
Using Red-Eye Reduction
65
-
Changing the AF Mode
66
-
One-Shot AF for Still Subjects
66
-
AI Focus AF for Automatic Switching of AF Mode
67
-
AI Servo AF for Moving Subjects
67
-
Selecting the AF Point
68
-
MF: Manual Focusing
69
-
Continuous Shooting
70
-
Using the Self-Timer
71
-
Setting the Image-Recording Quality
72
-
Picture Style Effects
75
-
Sejecting a Picture Style
75
-
Advanced Shooting
77
-
Tv: Action Shots
78
-
Av: Changing the Depth of Field
80
-
Brightness
82
-
Depthof Field Preview
82
-
Images
82
-
Settings
82
-
Using the Built in Flash
82
-
Index
83
-
M: Manual Exposure
83
-
Bulb Exposures
84
-
A-DEP: Automatic Depth-Of-Field AE
85
-
Changing the Metering Mode
86
-
Setting Exposure Compensation
87
-
Flash Exposure Compensation
88
-
Auto Exposure Bracketing
89
-
Canceling AEB
90
-
-
-
Full Auto Techniques
48
Advertisement
Canon EOS 550D Instruction Manual (102 pages)
Communication Software for the Camera
Brand: Canon
|
Category: Software
|
Size: 8.36 MB
Table of Contents
-
Read Carefully before Using
2
-
System Requirements
3
-
Contents at a Glance
4
-
Downloading Images to Your Computer
5
-
Connecting the Camera and Computer
6
-
Batch Downloading Images to Your Computer
7
-
Downloading Selected Images to Your Computer
8
-
Downloading Images with a Card Reader
11
-
Downloading Images Using Digital Photo Professional
11
-
Downloading Images Without Using Canon Software
11
-
Setting the Camera Owner’s Name, Copyright Notice and Date/Time
13
-
Available Settings by Camera Model
14
-
Setting up Camera Functions
15
-
Setting Picture Styles and Applying to the Camera
17
-
Selecting a Picture Style and Applying to the Camera
17
-
Changing Picture Style Settings and Applying to the Camera
18
-
Applying Picture Style Files to the Camera
19
-
Saving White Balance to Your Computer
20
-
Registering Personal White Balance in the Camera
21
-
Setting JPEG Quality and Applying to the Camera
22
-
Setting My Menu and Registering to the Camera
25
-
Remote Shooting by Controlling the Camera from Your Computer
27
-
Remote Live View Shooting
28
-
Remote Live View Window Functions
36
-
Focusing Manually
36
-
Focusing Using AF
37
-
Focusing Using Quick Mode
37
-
Focusing Using Live Mode
39
-
Focusing Using Face Detection Live Mode
40
-
Checking the Depth of Field and Exposure
41
-
White Balance with the Remote Live View Window
42
-
White Balance for Flash Photography
42
-
Overlaid Display Function
48
-
Displaying Grid Lines
52
-
Shooting by Operating the Camera
53
-
Shooting Movies
54
-
Timer-Controlled Shooting
65
-
Interval Timer Shooting
65
-
Bulb Exposures
66
-
Flash Shooting
67
-
Basic Settings
75
-
Destination Folder
75
-
Download Images
76
-
Remote Shooting
77
-
Linked Software
78
-
Time Settings
78
-
Troubleshooting
80
-
Function for Use with the Accessories
83
-
Uninstalling the Software
84
-
Fixing the Plug to the Camera
85
-
List of Main Window Functions
88
-
List of Viewer Window Functions
89
-
List of My Menu Settings Window Functions
91
-
List of Capture Window Functions
92
-
Exposure Level/Aeb Level
93
-
List of Flash Function Settings Window Functions
94
-
List of Zoom View Window Functions
98
-
List of Test Shooting Window Functions
99

CANON EOS 550D Instruction Manual (114 pages)
Brand: CANON
|
Category: Digital Camera
|
Size: 14.61 MB
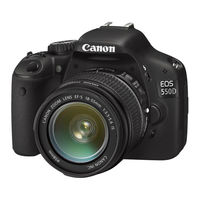
CANON EOS 550D Instruction Manual (112 pages)
Brand: CANON
|
Category: Digital Camera
|
Size: 14.12 MB
CANON EOS 550D Instruction Manual (73 pages)
Brand: CANON
|
Category: Digital Camera
|
Size: 8.58 MB
Table of Contents
-
Custom Functions
3
-
Function Settings
5
-
C,Fn IV: Operation/Others
8
-
Power Outlet
16
-
Using Eye-Fi Cards
21
-
Function Availability Table According to Shooting Modes
23
-
Movie Shooting
28
-
Mode Menu
28
-
Troubleshooting
31
-
Error Codes
37
-
Specifications
38
-
Reference Guide
57
-
Creative Zone Modes
57
-
Shutter Priority
63
-
Aperture Priority
63
-
Software Start Guide
69

Canon EOS 550D Quick Reference Manual (2 pages)
Canon EOS 550D: Quick Start
Brand: Canon
|
Category: Digital Camera
|
Size: 2.05 MB
Table of Contents
-
Quick Start Guide
1
-
Image Playback
1
-
Quick Reference Guide
1
-
Menu Operations
1
-
Menu Settings
1
-
Q Quick Control Screen
1
-
Shooting Operation
2
-
Custom Functions
2
-
Basic Zone Modes
2
-
A Live View Shooting
2
-
K Shooting Movies
2
Advertisement
Related Products
-
Canon EOS 550 D
-
Canon EOS 55
-
Canon EOS 50D
-
Canon EOS 5D Mark 3
-
Canon EOS 5D Marc 3
-
Canon EOS 5D Mark II
-
Canon EOS 5D MARK IV
-
Canon EOS 500D
-
Canon EOS 50 QD
-
Canon EOS 500N QD
Canon Categories
![]()
Printer
![]()
Digital Camera
![]()
All in One Printer
![]()
Camcorder
![]()
Scanner
More Canon Manuals
3
В первую очередь убедитесь, что в комплект поставки камеры
входят все перечисленные ниже компоненты. При отсутствии
каких-либо компонентов обращайтесь к своему дилеру.
* Зарядное устройство LC-E8 или LC-E8E входит в комплект поставки (LC-
E8E поставляется с кабелем питания).
При покупке комплекта Lens Kit проверьте наличие объектива.
В зависимости от типа комплекта Lens Kit в комплект поставки может
входить инструкция по эксплуатации объектива.
Не теряйте перечисленные выше компоненты.
Контрольный список комплекта поставки
Аккумулятор
LP-E8
(включая защитную
крышку)
Зарядное устройство
LC-E8/LC-E8E*
Интерфейсный кабель
Стереофонический
аудио/видеокабель
AVC-DC400ST
EOS DIGITAL
Solution Disk
(Программное
обеспечение)
Инструкция по
использованию
программного
обеспечения
Инструкция по
эксплуатации
фотоаппарата
(данный документ)
Широкий ремень
EW-100DB III
Камера
(с наглазником и крышкой
корпуса камеры)
H101_R.book Page 3 Friday, January 15, 2010 7:19 PM