Как использовать наш сайт инструкций OnlineManuals.ru
Наша цель состоит в том, чтобы предоставить вам быстрый доступ к содержанию инструкции для Руководство пользователя, руководство по эксплуатации МФУ (многофункционального устройства) HP Photosmart Wireless B110a(b)(c)(d)(e).
С помощью онлайн просмотра, Вы можете быстро просмотреть содержимое инструкции и найти решение проблемы с Руководство пользователя, руководство по эксплуатации МФУ (многофункционального устройства) HP Photosmart Wireless B110a(b)(c)(d)(e).
Для Вашего удобства
Если листать руководство пользователя Руководство пользователя, руководство по эксплуатации МФУ (многофункционального устройства) HP Photosmart Wireless B110a(b)(c)(d)(e) прямо на сайте, не очень удобно для Вас, есть два возможных решения:
• Просмотр в полноэкранном режиме — легко просмотреть руководство пользователя (без загрузки его на свой компьютер), Вы можете использовать режим полноэкранного просмотра.
Для просмотра инструкции пользователя Руководство пользователя, руководство по эксплуатации МФУ (многофункционального устройства) HP Photosmart Wireless B110a(b)(c)(d)(e) на полном экране, используйте кнопку «Открыть в Pdf-viewer».
• Загрузка на компьютер — Вы можете также скачать Руководство пользователя, руководство по эксплуатации МФУ (многофункционального устройства) HP Photosmart Wireless B110a(b)(c)(d)(e) на свой компьютер и сохранить его в файлах.
Многие люди предпочитают читать документы не на экране, а в печатной версии.
Возможность печати руководства пользователя также была предусмотрена на нашем сайте,
и вы можете использовать ее, нажав на иконку «печать» в Pdf-viewer.
Нет необходимости печатать все руководство Руководство пользователя, руководство по эксплуатации МФУ (многофункционального устройства) HP Photosmart Wireless B110a(b)(c)(d)(e), можно выбрать только нужные страницы инструкции.
- About
- Blog
- Projects
- Help
-
Donate
Donate icon
An illustration of a heart shape - Contact
- Jobs
- Volunteer
- People
Bookreader Item Preview
texts
HP Photosmart Wireless B110 series Manual
- Addeddate
- 2022-02-07 06:39:28
- Identifier
- manuallib-id-91685
- Identifier-ark
- ark:/13960/s206t4w13mj
- Ocr
- tesseract 5.0.0-1-g862e
- Ocr_autonomous
- true
- Ocr_detected_lang
- zh
- Ocr_detected_lang_conf
- 1.0000
- Ocr_detected_script
- HanS
HanT
Latin
Japanese
- Ocr_detected_script_conf
- 0.1368
0.1368
0.7120
0.0143
- Ocr_module_version
- 0.0.15
- Ocr_parameters
- -l deu+chi_sim+eng+lat+ltz+jpn+Latin+Japanese+HanS
- Page_number_confidence
- 92.73
comment
Reviews
There are no reviews yet. Be the first one to
write a review.
15
Views
DOWNLOAD OPTIONS
Uploaded by
chris85
on
SIMILAR ITEMS (based on metadata)
-
-
Инструкции по эксплуатации
-
Принтеры
-
HP
-
Photosmart Wireless e-All-in-One Printer — B110
-
Драйверы
4
-
Инструкции по эксплуатации
18
На NoDevice можно скачать инструкцию по эксплуатации для HP Photosmart Wireless e-All-in-One Printer — B110. Руководство пользователя необходимо для ознакомления с правилами установки и эксплуатации HP Photosmart Wireless e-All-in-One Printer — B110. Инструкции по использованию помогут правильно настроить HP Photosmart Wireless e-All-in-One Printer — B110, исправить ошибки и выявить неполадки.
![]()
HP Photosmart Wireless B110 series

Contents
|
1 |
HP Photosmart Wireless B110 series Help…………………………………………………………………. |
3 |
|
2 |
Get to know the HP Photosmart |
|
|
Printer parts……………………………………………………………………………………………………………….. |
5 |
|
|
Control panel features…………………………………………………………………………………………………. |
6 |
|
|
TouchSmart Web Manager…………………………………………………………………………………………. |
6 |
|
|
3 |
How do I?………………………………………………………………………………………………………………….. |
9 |
|
4 |
|
|
|
Tips for print success…………………………………………………………………………………………………. |
14 |
|
|
5 |
Copy and scan |
|
|
Scan to a computer…………………………………………………………………………………………………… |
15 |
|
|
Copy text or mixed documents……………………………………………………………………………………. |
16 |
|
|
Tips for copy and scan success………………………………………………………………………………….. |
19 |
|
|
6 |
Work with cartridges |
|
|
Check the estimated ink levels……………………………………………………………………………………. |
21 |
|
|
Clean printhead automatically…………………………………………………………………………………….. |
22 |
|
|
Replace the cartridges……………………………………………………………………………………………….. |
22 |
|
|
Order ink supplies……………………………………………………………………………………………………… |
24 |
|
|
Cartridge warranty information……………………………………………………………………………………. |
25 |
|
|
Tips for working with ink…………………………………………………………………………………………….. |
25 |
|
|
7 |
Connectivity |
|
|
Add the HP Photosmart to a network…………………………………………………………………………… |
27 |
|
|
Tips for setting up and using a networked printer…………………………………………………………… |
32 |
|
|
9 |
HP support |
|
|
HP support by phone…………………………………………………………………………………………………. |
37 |
|
|
Additional warranty options………………………………………………………………………………………… |
38 |
|
|
10 |
Technical information |
|
|
Notice………………………………………………………………………………………………………………………. |
39 |
|
|
Cartridge chip information………………………………………………………………………………………….. |
39 |
|
|
Specifications…………………………………………………………………………………………………………… |
40 |
|
|
Environmental product stewardship program………………………………………………………………… |
41 |
|
|
Regulatory notices…………………………………………………………………………………………………….. |
46 |
|
|
Regulatory wireless statements…………………………………………………………………………………… |
49 |
|
|
Index……………………………………………………………………………………………………………………………. |
53 |
Contents
1

Contents
2

1HP Photosmart Wireless B110 series Help
For information about the HP Photosmart, see:
•Get to know the HP Photosmart
•How do I?
•Copy and scan
•Work with cartridges
•Connectivity
•Technical information
•HP support by phone
Help
HP Photosmart Wireless B110 series
HP Photosmart Wireless B110 series Help |
3 |

Chapter 1
series B110 Wireless Photosmart HP
Help
4 HP Photosmart Wireless B110 series Help

2Get to know the HP Photosmart
•Printer parts
•Control panel features
•TouchSmart Web Manager
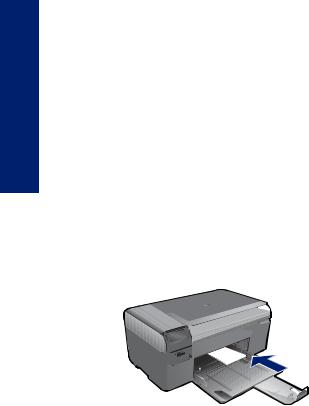
Printer parts
•Front and top views of the HP Photosmart
|
Photosmart |
||||
|
1 |
Color graphics display (also referred to as the display) |
|||
|
2 |
Control panel |
|||
|
3 |
Photo light |
|||
|
HP |
||||
|
4 |
Memory card slots for Memory Stick and Secure Digital cards |
|||
|
the |
||||
|
5 |
Wireless button |
|||
|
know |
||||
|
6 |
On button |
|||
|
7 |
Paper tray |
to |
||
|
8 |
Paper tray extender (also referred to as the tray extender) |
|||
|
Get |
||||
|
9 |
Glass |
|||
|
10 |
Lid-backing |
|||
|
11 |
Lid |
|||
|
12 |
Cartridge door |
|||
|
13 |
Cartridge access area |
|||
|
14 |
Model number location |
|||
|
15 |
Printhead assembly |
|||
•Rear view of the HP Photosmart
Get to know the HP Photosmart |
5 |

Chapter 2
|
16 |
Rear door |
||||||||||||||||||
|
17 |
Rear USB port |
||||||||||||||||||
|
18 |
Power connection (Use only with the power adapter supplied by HP.) |
||||||||||||||||||
Control panel features
Figure 2-1 Control panel features
|
2. |
2. |
||||||
|
to Get |
|||||||
|
1 |
Back: Returns to the previous screen. |
||||||
|
know |
|||||||
|
2 |
Cancel: Stops the current operation, restores default settings, and clears the current photo |
||||||
|
the |
selection. |
||||||
|
3 |
Directional keys: Allow you to navigate through photos and menu options. |
||||||
|
HP |
|||||||
|
4 |
Setup: Opens the Setup menu where you can change product settings and perform |
||||||
|
Photosmart |
|||||||
|
maintenance functions. |
|||||||
|
5 |
OK: Selects a menu setting, value, or photo. |
||||||
|
6 |
Copy: Opens the Copy menu where you can select a copy type or change the copy settings. |
||||||
|
7 |
Photo: Opens the Photo Menu. |
||||||
|
8 |
Scan: Opens the Scan menu where you can select a destination for your scan. |
||||||
|
9 |
Apps: TouchSmart Web provides a quick and easy way to access and print information from |
||||||
|
the Web, such as coupons, coloring pages, and puzzles. |
|||||||
TouchSmart Web Manager
The TouchSmart Web Manager can be used to add new Apps or to remove Apps.
6 Get to know the HP Photosmart

Manage Apps
1.Add new Apps.
a. Press the directional keys to scroll to the Web menu option. Press OK.
b. Press the directional keys to scroll to the More menu option. Press OK. Check desired Apps.Press OK. Follow prompts.
2.View the animation for this topic.
Get to know the HP Photosmart

Chapter 2
Photosmart HP the know to Get
8 Get to know the HP Photosmart
![]()
3 How do I?
This section contains links to commonly performed tasks, such as printing photos, scanning, and making copies.
|
TouchSmart Web Manager |
Scan to a computer |
|
Replace the cartridges |
Copy text or mixed documents |
|
Load media |
Clear the paper jam from the rear access door |
How do I?

Chapter 3
I? do How
10 How do I?

4 Print
Print documents
Print photos
Print envelopes
Related topics
Load media
Tips for print success
Print documents
Most print settings are automatically handled by the software application. You need to change the settings manually only when you change print quality, print on specific types of paper or transparency film, or use special features.
To print from a software application
1.Make sure you have paper loaded in the paper tray.
2.On the File menu in your software application, click Print.
3.Make sure the product is the selected printer.
4.If you need to change settings, click the button that opens the Properties dialog box. Depending on your software application, this button might be called Properties,
Options, Printer Setup, Printer, or Preferences.
 NOTE: When printing a photo, you must select options for the specific photo paper and photo enhancement.
5.Select the appropriate options for your print job by using the features available in the
Advanced, Printing Shortcuts, Features, and Color tabs.
 TIP: You can easily select the appropriate options for your print job by choosing one of the predefined print tasks on the Printing Shortcuts tab. Click a type of print task in the Printing Shortcuts list. The default settings for that type of print task are set and summarized on the Printing Shortcuts tab. If necessary, you can adjust the settings here and save your custom settings as a new printing shortcut. To save a custom printing shortcut, select the shortcut and click Save As. To delete a shortcut, select the shortcut and click Delete.
Print 11
Chapter 4
6.Click OK to close the Properties dialog box.
7.Click Print or OK to begin printing.
Related topics
Load media
Tips for print success
Print photos
Print photos saved on your computer
Print photos saved on your computer
To print a photo on photo paper
1.Remove all paper from the paper tray.
2.Place the photo paper print side down on the right side of the paper tray.
3.Slide the paper-width guide inward until it stops at the edge of the paper.
4.On the File menu in your software application, click Print.
5.Make sure the product is the selected printer.
6.Click the button that opens the Properties dialog box.
Depending on your software application, this button might be called Properties,
Options, Printer Setup, Printer, or Preferences.
7.Click the Features tab.
8.In the Basic Options area, from the Paper Type drop-down list, select More. Then, select the appropriate photo paper type.
9.In the Resizing Options area, from the Size drop-down list, select More. Then, select the appropriate paper size.
If the paper size and paper type are not compatible, the printer software displays an alert and allows you to select a different type or size.
10.(Optional) Select the Borderless printing check box if it is not already checked.
If the borderless paper size and paper type are not compatible, the product software displays an alert and allows you to select a different type or size.
12 Print

11.In the Basic Options area, select a high print quality, such as Best, from the Print Quality drop-down list.
 NOTE: To achieve the highest dpi resolution, you can use the Maximum dpi setting with supported types of photo paper. If Maximum dpi is not listed in the Print quality drop-down list, you can enable it from the Advanced tab.
12.In the HP Real Life Technologies area, click the Photo fix drop-down list and select from the following options:
•Off: applies no HP Real Life Technologies to the image.
•Basic: enhances low-resolution images; moderately adjusts image sharpness.
13.Click OK to return to the Properties dialog box.
14.Click OK, and then click Print or OK in the Print dialog box.
 NOTE: Do not leave unused photo paper in the paper tray. The paper might start to curl, which could reduce the quality of your printout. For best results, do not allow printed photos to stack up in the paper tray.
Related topics
Load media
Tips for print success
Print envelopes
With the HP Photosmart, you can print on a single envelope, a group of envelopes, or label sheets designed for inkjet printers.
To print a group of addresses on labels or envelopes
1.Print a test page on plain paper first.
2.Place the test page on top of the label sheet or envelope, and hold both up to the light. Check the spacing for each block of text. Make adjustments as needed.
3.Load the labels or envelopes into the paper tray.
 CAUTION: Do not use envelopes with clasps or windows. They can get stuck in the rollers and cause paper jams.
4.Slide the paper-width guide inward against the stack of labels or envelopes until the guide stops.
5.If you are printing on envelopes, do the following:
a. Display the print settings, and click the Features tab.
b. In the Resizing Options area, click the appropriate envelope size in the Size list.
6.Click OK, and then click Print or OK in the Print dialog box.
Related topics
Load media
Tips for print success

Chapter 4
Tips for print success
Use the following tips to print successfully.
Print tips
• Use genuine HP cartridges. Genuine HP cartridges are designed for and tested with HP printers to help you produce great results, time after time.
• Make sure the cartridges have sufficient ink. To check the estimated ink levels, follow the instruction in the Tools menu on the display. Alternatively, you can check the ink
|
|
levels in Printer Toolbox from the software. |
|
|
• Load a stack of paper, not just one page. Use clean and flat paper of the same size. |
||
|
Make sure only one type of paper is loaded at a time. |
||
|
• Adjust the paper-width guide in the input tray to fit snugly against all paper. Make sure |
||
|
the paper-width guide does not bend the paper in the input tray. |
||
|
• Set the print quality and paper size settings according to the type and size of paper |
||
|
loaded in the input tray. |
||
|
• Use print preview to check margins. Do not let the margin settings for the document |
||
|
exceed the printable area of the printer. |
||
|
• Learn how to share your photos online and order prints. Click here to go online for |
||
|
more information. |
||
|
• Learn about TouchSmart Web Manager for printing recipes, coupons, and other |
||
|
content from the web, simply and easily. Click here to go online for more information. |
||
|
• Learn how to print from anywhere by sending an email and attachments to your |
||
|
printer. Click here to go online for more information. |
14 Print

5Copy and scan
•Scan to a computer
•Copy text or mixed documents
•Tips for copy and scan success
Scan to a computer
To scan to a computer
1.Load original.
a. Lift lid on product.
Copy and scan
b. Load original print side down on right front corner of glass.
 Loading…
File Specifications:413/413586-photosmart_wireless_eallinone_printer__b110.pdf file (11 Sep 2023) |
Accompanying Data:
HP PHOTOSMART WIRELESS B110 All in One Printer PDF Reference Manual (Updated: Monday 11th of September 2023 05:46:29 AM)
Rating: 4.5 (rated by 34 users)
Compatible devices: LaserJet Enterprise M806dn, Officejet 7100, laserjet enterprise m527dn, LASERJET CC372A, LASERJET ENTERPRISE M712n, T1100 — DesignJet Color Inkjet Printer, Color Laserjet M4345xm, Color LaserJet 2700n.
Recommended Documentation:
Reference Manual (Text Version):
(Ocr-Read Summary of Contents of some pages of the HP PHOTOSMART WIRELESS B110 Document (Main Content), UPD: 11 September 2023)
-
1, © 2009 Hewlett-Packard Development Company, L.P. Printed in [English] *CN245-90067* *CN245-90067* CN245-90067 4 1 3 2 Important! Do not connect a USB cable unless prompted by the software! Unpack printer. Remove all tape, protective film, and packing material. Follow the Setup Wizard. Connect and power on. Connect the power cord and adapter. Press to turn on the HP Photosmart. Be sure to follow th…
-
2, 2 Setup troubleshooting If the HP Photosmart doesn’t turn on… 1. Turn off the printer, and then unplug the power cord. Plug the power cord back in, and then press the button to turn on the printer. 2. Take care not to press the button too quickly. Press it only once. It might take a few minutes for the printer to turn on, so if you press the button more than once, you might be turning off the printer. 3. If you have completed al…
-
3, 3 Get to know your HP Photosmart Back Returns you to the previous screen. Cancel Stops the current operation, restores previous settings, and clears the current photo selection. Directional keys Navigate through menu options and photos. Left key moves left or up. Right key moves right or down. Settings From the Home screen, opens the Setup menu. On other menus, selects options related to the displayed menu. OK Selects a menu setting, value, or photo. Copy From the Home screen, o…
-
4, 4 Features and tips Copy Print Scan • Make color or black and white copies. Use the Copy menu on the printer display to choose color, actual size of original or resize to fit, quality setting (including fast economy), paper size, and the number of copies. • Load single-sheet or thin originals, print side down, on the right front corner of the glass. • For thick originals, like a page in a book, remove the lid. Place the original, print side dow…
-
5, 5 What’s new? Web Services HP Apps ePrinterCenter HP ePrint Specs How to get started with HP ePrint To use HP ePrint, you need to have your printer connected to the Internet. • Press the Wireless button on the HP Photosmart front panel. • Select the Web Services menu from the printer display. From here, you can turn the service on or off, display the printer’s email address, and print an informati…
-
6, HP PHOTOSMART WIRELESS B110 6 Changing networked printer setup USB to Wireless Changing from USB to wireless network connection If you initially set up your printer using a USB connection to your computer, you can switch the connection to a wireless network connection by following these steps. 1. Click Start, click HP, click Photosmart B110 series, then click USB to Wireless. Keep your USB cable connected until prompted to disconnect it. 2. Follow the instructio…
-
7, 7 Fixing connectivity issues Check these settings to ensure that they are correct. • If you are using encryption on your network, you’ll need to enter a key. These are case- sensitive so be sure that it has been entered correctly. • If the network name (SSID) or the WEP/WPA key are not found automatically during installation, and you don’t already know them, you can download the Network Diagnostic Utility, which can help yo…
-
HP PHOTOSMART WIRELESS B110 User Manual
-
HP PHOTOSMART WIRELESS B110 User Guide
-
HP PHOTOSMART WIRELESS B110 PDF Manual
-
HP PHOTOSMART WIRELESS B110 Owner’s Manuals
Recommended: DP372, AE2160/05, T1-420, ESO Replacement Cartridge EV9607-20, ACTPRO 100
Links & Tools
Operating Impressions, Questions and Answers: