This is a community maintained wiki. If you spot a mistake, please help with fixing it.
Modding, or creating mods, is the act of modifying the behavior of the base game (often referred to as vanilla), either for personal use, or to release publicly for other players, for instance — via the Steam Workshop.
As for all Paradox games, Hearts of Iron IV is moddable to a great extent. Motivations of modders may vary widely: a better translation to their native language, more events or decisions, better maps, a major overhaul, etc.
By default, the user directory for Hearts of Iron IV is located in the following folders:
- Windows:
C:\Users\<Username>\Documents\Paradox Interactive\Hearts of Iron IV - Mac OS:
~/Documents/Paradox Interactive/Hearts of Iron IV - Linux:
~/.local/share/Paradox Interactive/Hearts of Iron IV
Mods are stored within the mod/ folder within the user directory. If the path to the user directory (Including the Windows username) includes any special characters (Such as umlauts, other diacritics, or Cyrillic), the game will not work properly. Local mods will fail to load, and the game will not be able to open the error log by itself. The user directory’s location can be changed in /Hearts of Iron IV/launcher-settings.json in the base game folder by changing the "gameDataPath" line and moving the files to that folder.
Alongside mods, the game will load any files stored in the user directory. The game’s internal map editor, the Nudger, stores its output within that folder.
The game will read any .mod file within the mod/ folder, and a local mod can be created via the launcher: «All installed mods» -> «Upload mod» -> «Create a mod». This is limited in the path and allowed mod structure options, so manually editing the output may be necessary.
Guidelines[edit | edit source]
- Never modify game files: use a mod even for small changes, and never modify directly game files in Steam Hearts of Iron 4 folder, as your changes may be undone without warning.
- Minimize overwrites of vanilla files by adding separate files and loading from folders whenever possible, to improve mod compatibility and maintenance. (Your files can have any name, all files in the folder will be loaded by the game. So choose a name, no one else will ever use, like the name of your mod. Ex: coolmod_countries)
- Use a proper merge tool (like WinMerge), to merge between folders, and update modified vanilla files to a new vanilla patch.
- Backup your work to avoid losing everything. Consider using a source control system like Git and a collaborative forge like GitHub or Gitlab to manage team collaboration, or just make a copy of the file somewhere else. Version keeping via Github or Gitlab can also be very useful for debugging due to limiting the selection of potential broken files.
- The Modding Git Guide is a community made guide for using Git, GitHub/GitLab, and related tools such as KDiff3. It can be a useful stop for questions beyond this wiki, and contains step by step guides for much of what is talked about here.
- Use UTF-8 encoding with the byte order mark for text files. This is commonly called «UTF-8», but can sometimes be specified as «UTF-8 without BOM».
- Use UTF-8 encoding with the byte order mark for localisation files (.yml). This is commonly called «UTF-8-BOM», but can be just «UTF-8», in which case omitting the byte order mark is a separate option. Some text editors, such as Atom, do not support the byte order mark in entirety and should be avoided for localisation.
- Use comments starting with # character, to remember reasons for writing tricky stuff. A single sharp sign will make the rest of the line completely ignored. There is no multi-line comment notation in the code.
- Debug effectively by enabling Debug mode. Do this by adding -debug to your launch options in Steam. The launch options are accessed in the menu opened by right-clicking the game and choosing ‘Properties..’.
Alternatively, in Windows it’s possible to create a shortcut to the hoi4.exe or dowser.exe file, and then to open the shortcut’s properties and append -debug (separated by a space) after the path’s end, such as «C:\Program Files (x86)\Steam\steamapps\common\Hearts of Iron IV\hoi4.exe» -debug.
Debug advantages[edit | edit source]
- Automatic loading — Edits to files done inside the mod folder will show up in-game without the need to use the ‘reload’ console command. This will also automatically add the errors in the files to the error log. This only applies to files that existed when the game was launched, with an exception: if a file’s direct path gets mentioned elsewhere within the mod, then it can still get loaded for that use in particular. Examples of that include orders of battle, as load_oob = «TAG_my_oob» functions as a direct link to /Hearts of Iron IV/history/units/TAG_my_oob.txt; or GFX, as sprites directly reference the position of the image. Although, notably, the loading of images in-game does not uncompress them properly, leading to visible distortion or black backgrounds which get fixed on a restart. Although edits to most files work, this doesn’t work with /Hearts of Iron IV/history/countries/, /Hearts of Iron IV/history/states/, and /Hearts of Iron IV/map/, although the nudge partially can be used for the latter two.
- No map definition crash — If the map is edited, there’s a possibility for errors to appear. Any map-related errors will crash the game when loading with a message saying ‘Some errors are present in the map defition[sic] and have been logged to error.log’. If debug mode is on, the game will continue to load properly. The map definition occurs when there is any error containing MAP_ERROR within the error log after loading into a country.
- Extended error log — Certain errors do not get logged in the log unless the debug mode is turned on. An example would be the map definition errors mentioned above, as the game crashes before getting a chance to log them. Enabling debug mode will ensure that all errors that can be logged in the error log will get logged.
- Ease of error log opening — As long as there are any errors in the log, the log will automatically open when loading the game or after selecting a country. The log will also be able to get accessed by clicking on the error dog in the bottom-right corner after loading into a country, which appears each time a new error appears in the log (since files get automatically loaded-in).
- Ease of nudge access — With debug mode turned on, an option to open the nudge will appear in the main menu. This can be useful to save time or to be able to open the nudge if the game crashes when you’re trying to load into a country (This can happen if the /Hearts of Iron IV/tutorial/tutorial.txt file references invalid states, if that file doesn’t contain at least one
tutorial = {}even if not containing anything, if supply nodes and railways aren’t set up properly, or for other reasons). - Graphical interface information in the main menu — As long as the debug mode is turned on, hitting the ` button (Typically in the top left corner of QWERTY keyboards, used to open the console by default) in the main menu will provide information about the graphical interface used, giving the names of elements, their positions, and the sprites used by them. This is equivalent to using the «gui» console command, but the debug mode makes it possible to do in the main menu.
- Expanded province info — With debug mode turned on, there will be additional information when hovering over the province, including its and the state it’s in’s IDs, tags of owner and controller, et cetera.
- Access to more console commands — Certain console commands are locked for developers only and debug mode allows the player to use them. However, note that not all console commands will become available.
- Ease of access to GUI files — When hovering over a GUI element, Ctrl+Alt+Right Click can be used to open a debug menu, which will allow going to the GUI file where the element is defined.
- Automatic saving on peace deals — The game automatically creates a savefile each time a peace conference occurs with debug.
Note that if you turn on the debug mode through the ‘debug’ console command, only the last 4 advantages will be available to use. If debug is turned on via launch options, be that -debug or -crash_data_log, all benefits will be granted.
Text editor[edit | edit source]
These are the most common text editors to use for modding the game:
- Visual Studio Code.
-
- Has a fan-made CWTools extension with Paradox syntax highlighting, validation and tooltips for triggers and effects. To install it, go to Extensions on the left panel of VS and search for CWTools. (Note: validation rules are incomplete and will show many false errors in gui and localization files).
- Recent versions with automatic highlighting of {} pairs in different colours and flagging opened/closing ones that are missing a partner red is worth it’s weight in gold.
- Notepad++. Choose Perl as your language, as it will provide good highlighting and allow to fold blocks of code and comments. To set it as default, go to Settings, Style Configurator, find Perl in the list on the left and add «gui txt» (without quotes) to the «User ext.» field at the bottom.
-
- Some options that are commonly turned on by default in other text editors are turned off in Notepad++, but can be changed in the topbar. This includes Word wrap, Document map, Indent guide, and Folder as workspace.
- Sublime Text. There is an extension for it released by the developers of Imperator which could be used with HOI4 but use at your own risk: Sublime Tools. It adds colored highlighting for effects and triggers. If you want to toggle comments in Sublime, you also need to add this file to the same «User» folder.
Reasons to use a non-default text editor include the following:
- Bracket and syntax highlighting. Bracket highlighting makes it easier to detect any missing or unnecessary files by allowing to select a bracket and see where it opens or closes, as to know what’s inside of that block. Syntax highlighting can make code more easily readable by highlighting more important parts, as well as excluyding brackets within comments from being considered such.
- Searching in multiple files in the same folder. In each provided tool, this is activated with the ^Ctrl + ⇧Shift + F hotkey and can have filename filters in order to limit the files that are searched (e.g.
*.txtwill only search text files, ignoring any other files, such as*.ddsones). - Each line is numbered on its side. Since error log typically points to the line where an error is present, this makes finding the line in question much faster compared to how the Microsoft Notepad only tells the number of the currently-selected line in the below.
- Greater capabilities to work with multiple files. Each of these editors may only have one instance of it open at a time with multiple files open at once (switching between them with ^Ctrl + ⇆Tab), in contrast to Microsoft Notepad that opens a separate instance for each opened file, which can quickly fill the Alt + ⇆Tab menu. Multiple instances of the text editor can still be opened, however. A text comparison tool also exists on each one of these: «ComparePlus» plugin in Notepad++, «Compare Side-By-Side» or «Diffy» package in Sublime Text, or a variety of Visual Studio Code extensions («Partial Diff» being the most popular one).
- Greater customisation capabilities: each of these text editors allows a wide variety of light or night themes that can be picked as fit, with downloadable themes existing as well. Since one would need to look at the text editor a lot while modding, selecting a theme that looks good to the eyes can make the experience much better.
Searching multiple files[edit | edit source]
One feature of non-default text editors is a highly-customisable search of all files within the same folder. This is highly useful for dealing with errors and finding locations of certain elements.
Windows File Explorer is a poor choice for doing this, as it only searches inside of .txt files while it may be desirable to search files of other extensions, e.g. .yml, .gfx, .gui, or .asset, and it is very noticeably slower than either text editor: a search taking ~10 seconds on a text editor may take up to 15 minutes to conclude in the Windows File Explorer.
This is how exactly the feature is enabled in the common text editors:
- Notepad++ – This is located in the «Search» topbar menu as «Find in Files…». By default, no folder is provided. «Follow current doc.» allows the text editor to automatically input the currently-opened document’s folder as the place for the search, or it can be entered manually. Alternatively, this menu can be opened from the right-click menu of a folder within the «Folder as Workspace» menu – accessed by a button in the topbar – which’ll automatically set the folder location to be that folder. The ^Ctrl+⇧Shift+F hotkey also opens the menu for this feature by default.
- Sublime Text – This is located in the «Find» topbar menu as «Find in Files…». In order to add a folder to search, the menu to the right of the «Where:» line can be opened, with either «Add Folder» (to select an individual folder) or «Add Open Folders» (To automatically select all folders opened via Sublime Text) buttons serving to do so. The ^Ctrl+⇧Shift+F hotkey also opens the menu for this feature by default.
- Visual Studio Code – Visual Studio Code only supports searching the currently opened folder. A folder is opened either through the «Open Folder…» button in the «File» topbar menu or the «Explorer» menu, accessed through the bar on the left. After this, the functionality can be accessed in the «Edit» menu as «Find in Files». In order to speed up the search, filename filters can be used. For example,
localisation/english/*.ymlwithin «files to include» will only search every *.yml file within the <currently opened folder>/localisation/english/ folder, where*stands for any amount (including 0) of any characters within the filename. Similar filters can be used in the previous two text editors, however without allowing folders to be filtered — only the filenames. The ^Ctrl+⇧Shift+F hotkey also opens the menu for this feature by default.
A filter on the file extension can be set to speed up the search. This depends on the text editor. Note that * is used to mark any amount of any characters, and this is universal.
- In Notepad++, this is done with the ‘filter’ menu. Filters are separated with spaces, and an exclamation point in the beginning marks it as an exclude filter. For example,
*.yml !*french.ymlwill result in searching every localisation file aside from the French ones. - In Sublime Text, this is in the ‘where’ menu. Filters are separated with commas, and a minus sign in the beginning marks it as an exclude filter. For example,
C:\Program Files (x86)\Steam\steamapps\common\Hearts of Iron IV\, *.txt, -GER*will search every text file in the base game (Assuming the default location within Windows on Steam) with the exception of those that begin with GER. - In Visual Studio Code, this is in the menu triggered with the ‘Toggle Search Details’ button, represented with an ellipsis. This menu has separate «Files to include» and «Files to exclude» menus, used accordingly. Additionally, this allows representing folder names within the menus, with the doubled
*(as in**) used to represent an arbitrary folder name. For example,*.gfxin the «Files to include» anddlc/**in «Files to exclude» will search every single file with the .gfx extension with the exception of those in the dlc folder.
There are the following uses for this:
- Finding out an internal ID by searching the localisation folder for the localised name. For example, searching for an event’s title can be used to determine the ID.
- Finding out where the database entry of a certain type is defined where it is not immediately intuitive. For example, by searching for an equipment ID within the folder that stores equipment (or even /Hearts of Iron IV/common/ in general) can be used to find the exact file, which isn’t immediately obvious for some equipment types.
-
- A subset of this includes finding sprites’ or interface elements’ locations: The
guiconsole command (or its main menu equivalent in debug mode) can be used in order to find the name of a certain SpriteType (prefixed with GFX_) or interface element. A search query with the given name within the /Hearts of Iron IV/interface/ folder will provide the file where the sprite is defined (as such, also giving thetexturefilethat says the path of the image in gfx) or the interface folder (which allows copying it to the mod and editing it).
- A subset of this includes finding sprites’ or interface elements’ locations: The
- Dealing with unintuitive errors where the location is not specified, such as
Invalid Decision Category, where this can be used to locate which file is throwing the error. - Finding out what can cause a certain occurance to happen, such what fires a certain event or what sets a certain cosmetic tag.
- Doing mass replacements in multiple files at the same time, usually used together with regular expression. This can be used to automate monotonous tasks, such as adding a log to every event, or most simply to change the owner in multiple states (such as by commenting out the previous owner and inserting another one).
Indenting[edit | edit source]
Another reason to use non-default text editors is greater indenting capabilities. Indenting refers to the usage of newlines and spaces at the beginning of the line, which does not leave an impact on how the code is interpreted, but makes it easier to see the relations between different parts of the code.
Typically, either a tab character (represented as \t) or 4 spaces are used as a single indenting level, placed from the beginning of the line to the beginning of code on the line. In order to increase the indenting level of code, the ⇆Tab button is used in text editors, which can be done on multiple lines at the same time by selecting them. Inversely, ⇧Shift+⇆Tab is used to decrease the indenting level of the line by one.
An additional option present in these editors is ‘Indent guide’, drawing a line on each indent level in order to make it easier to see the borders of each indent level, which can assist in code capability. While turned on by default in Sublime Text and Visual Studio Code, this must be turned on manually in Notepad++ within the topbar.
These are the typical conventions used for indenting:
- The first line of the file has zero indenting.
- An opening bracket and its corresponding closing bracket must be placed on lines with the same indenting level.
- If a line introduces an unclosed opening bracket, then everything until the proper closing bracket must be one indent level to the right compared to the line with the opening bracket.
- A line shouldn’t have more than one bracket of each kind.
- If a line includes a closing bracket without including an opening bracket, then it shouldn’t have anything other than the closing bracket and indentation before it.
This is an example of proper indenting:
TAG = {
    if = {
    |    limit = {      # The bar character "|" is used to visualise the indent guide, rather than being used in-code.
    |    |    has_stability > 0.5
    |    |    has_war_support > 0.5
    |    }
    |    country_event = { id = my_event.1 hours = 1 }
    }
}
Proper indenting has two primary benefits:
- It’s easy to where an argument is contained by moving one indenting level to the left and then following the indent guide’s line until it hits code.
- It’s easy to find what falls within a block by following the indent guide’s line from the line with the open bracket to the point where it hits the closing bracket.
Some common errors to check for in the indenting are the following:
- Unnecessarily removing an indentation level. This can usually be detected by detecting any interruptions in the indent guide–generated line from the line with the opening opening bracket drawn to the closing bracket:
ideas = {
    country = {
    |   my_idea_1 = {
    |   |   modifier = {
    |   |   |   political_power_gain = 0.1
    |   |   } # closes modifier = { ... }
    |   my_idea_2 = { # Interrupts the line from my_idea_1 to the closing bracket, so is erroneous
    |   }             # Doesn't work due to being located inside my_idea_1
    }
}
characters = {
    my_character = {
    |   name = character_name
    |
    portraits = {  # Erroneous
    |   civilian = {
    |   |   large = GFX_my_sprite
    |   }
    } # closes portraits = { ... }
    my_character_2 = { # Doesn't work due to being inside another character
    |   <...>
    }
}
- Putting a closing bracket on the same level as prior script:
if = {
    limit = {
        my_scripted_trigger = yes
    }
    } # Closes the if statement, and so should've been one more level to the left to match the if statement's indent level.
    my_scripted_effect = yes # Always executed due to being outside of the if statement.
}
country_event = {
    id = my_event.1
    option = {
        name = my_event.1.a
        } # Closes option = { ... }
    }     # Closes country_event = { ... }
    option = { # Does not work due to being defined outside of an event.
        <...>
- Not adding an indenting level after an unclosed opening bracket:
my_technology_1 = {
enable_building = {
    building = industrial_complex
    level = 20
} # Closes enable_building
my_technology_2 = { # Inside of my_technology_1 = { ... }, doesn't work.
    ...
}
- Placing neighbouring lines with a difference of at least 2 indent levels:
focus = {
    <...>
    completion_reward = {
        TAG = {
            country_event = my_event.1
    } # Closes TAG = { ... }
}     # Closes completion_reward = { ... }
focus = { # Does not work due to being contained within another focus = { ... }
    <...>
}
Following the indenting rules and checking for these indenting errors will ensure that there will be no bracket-related errors within the code.
Universal modding concepts[edit | edit source]
It’s heavily recommended to turn off Windows file explorer from hiding file extensions from the filename, if using Windows. File extensions are considered a part of the filename, and hiding them can cause files to not work due to wrong filenames (Such as accidentally saving localisation files as .txt files, saving an image in the wrong format and not realising it, et cetera).
Loading files[edit | edit source]
After creating a mod folder within the launcher, every single file within will get loaded at the same location as in base game. Taking a mod with the name of «yourmod» as an example, every single file within mod/yourmod/common/national_focus will get loaded alongside files in base game’s /Hearts of Iron IV/common/national_focus assuming the default path. However, inserting one more folder as in mod/yourmod/test/common/national_focus will result in the files in that folder not being loaded as national focus files, appearing to get ignored.
The root folder of the mod, considered the same as the /Hearts of Iron IV/ folder in base game, will be defined in the user directory’s /Hearts of Iron IV/mod/yourmod.mod file, opened with a text editor. This is set via path = "" in that file, by default being user directory’s /Hearts of Iron IV/mod/yourmod.
The game loads files in the order of base game, then DLCs (within the /Hearts of Iron IV/dlc/ folder), then user directory, and finally mods. The mods are usually loaded in the order set by the names of their mod files. Due to checksum constaints, the DLC folders usually only contain graphics and audio related to the DLC, while the code is always kept in the base game itself, locked behind a has_dlc check.
If there’s a file with the same name in the exact same folder between these (For example, both /Hearts of Iron IV/events/AcePilots.txt and mod/yourmod/events/AcePilots.txt), the game will only read the one that is later in the load order, ignoring all contents of the previously-defined one. In particular, a mod file will completely overwrite a base game file with the same name in the same folder.
The base game also utilises this to change the main menu background by changing the /Hearts of Iron IV/interface/frontendmainviewbg.gfx file within each DLC. This also means that the DLC folder doesn’t actually get read, but rather every DLC is loaded akin to a mod. This means that the modname/dlc/../ folder will have no effect in-game whatsoever, instead the DLC files have to be edited as they are truly loaded, such as modname/music/mtg_music.txt.
In particular, this means that every single base game file will get read within mods unless the mod contains a file with the same name in the same folder in which case only the mod file will be read, with none of the base game file’s content being read, or if replace_path is used to unload a folder in which case none of the folder’s contents will be read. This principle also applies to the DLCs and the user directory, which get loaded before the mods do and so can be treated as a part of the base game. Where a file comes from makes no difference in how it’s interpreted: the game doesn’t ditinguish between the base game files and the mod files.
Other than the overwriting of files with the same name, filenames don’t matter at all in how the file is read with few exceptions[a]. For vast majority of files, they’re either read only by the virtue of being within a specific folder (Such as national focuses), or by a direct link within a different file (Such as oob = "TAG_1936" within a country history file loading the /Hearts of Iron IV/history/units/TAG_1936.txt file for unit locations). This allows avoiding overwriting base game files in many cases, which eases making the mod’s contents be compatible to a major update.
Files are not immediately interpreted once they are loaded with the exception of localisation, instead the interpretation happens after the loading. For the vast majority of folders, such as /Hearts of Iron IV/interface/*.gfx files, the ASCII character IDs are used to sort them by filename. This is different from the alphabetic sorting used by the file explorer as uppercase letters are considered to come before lowercase letters and there are multiple characters inbetween (such as underscores) that lie inbetween. In order to place a file particularly high in the evaluation order, a prefix using late character IDs such as zz_ can be used and a reverse for the other way around, with the base game commonly using 00_ for this.
Changing the interpretation order has very limited use, but it is present. Some notable cases of this include:
- /Hearts of Iron IV/interface/*.gfx files that create sprites assigning information to images, such as attaching a singular name. If there are multiple definitions of the same sprite, only the later-evaluated sprite is used, with the earlier one being ignored. The base game notably uses this for DLCs: if a character only has a portrait within a DLC, then they will be set to use a sprite as the portrait. Within the base game, the sprite is set to lead to a generic portrait, as otherwise the character may appear broken, which is plausible in multiplayer. However, within the DLC files, the sprite that’s used for the portrait is defined once again in a separate file later in the evaluation order to ensure that the DLC-added portrait will be used for the DLC owners.
- /Hearts of Iron IV/common/country_tags/*.txt files: the order in which country tags are defined matters. While the base game places the evaluation order mostly in the order inside of the files here, it is still relevant. This decides on such things as the order in which /Hearts of Iron IV/history/countries/ files are evaluated, which may result in subjects having broken popularities otherwise, the order in which events/decisions/focuses/etc are evaluated (whether it’s the triggers for firing it or the AI selecting it), or the order when a scope selects several countries: both evaluated and in the tooltip.

The main menu showing a checksum of f680 on version 1.0.1
The checksum, the 4-character alphanumeric code that can be seen next to the version in the main menu, such as a2b4, decides multiplayer and achievement compatibility: servers can be joined only if the checksum is identical to the host’s, while achievements are only enabled if the checksum is identical to the base game’s, which can be seen in the launcher. The list of what changes it can be seen in the base game’s /Hearts of Iron IV/checksum_manifest.txt file, which includes entire common/, events/, and history/ folders, as well as most of the map/ folder, other than map/terrain/. Any change to the files in that folder will change the checksum, while any mod that doesn’t change them will not.
Folder structure[edit | edit source]
These folders are common to edit within mods:
- /Hearts of Iron IV/common/: This is the primary folder in which nearly every database entry is defined: countries, technologies, focuses, et cetera.
- /Hearts of Iron IV/events/: The folder which defines events.
- /Hearts of Iron IV/history/: This folder primary decides on starting historical information: which states are owned by which countries, the starting political and diplomatic situations, the army positions, starting buildings, and so on. Typically, if something happens before any country gets selected, it’s decided here. However, starting railways and supply nodes are instead defined in the /Hearts of Iron IV/map/ folder.
- /Hearts of Iron IV/map/: This folder is used to edit the appearance of the map, such as provinces, the shown terrain, the heightmap, and so on. This also includes the strategic regions and starting supply nodes and railways. However, the boundaries of states are instead defined in the /Hearts of Iron IV/history/states/ folder.
- /Hearts of Iron IV/localisation/: This folder is used to define how the text is shown, depending on the currently turned-on language.
- /Hearts of Iron IV/gfx/: This folder is used to store images. However, most of the time, these images aren’t automatically loaded but must be linked to in sprites. Commonly-edited exceptions include /Hearts of Iron IV/gfx/loadingscreens where every single file is always loaded, /Hearts of Iron IV/gfx/flags and subfolders where the country tries to load the flag upon ideology or cosmetic tag change, and /Hearts of Iron IV/gfx/interface/equipmentdesigner/graphic_db/*.txt files that assign sprites to the pools of images shown in the equipment designer. Everything else requires a sprite.
- /Hearts of Iron IV/interface/ (not to be confused with /Hearts of Iron IV/gfx/interface/): This folder is mostly filled with
*.gfxand*.guifiles, both of which can be opened in a text editor. The former define the graphical entries that are shown in-game: sprites that assign a name and properties (such as animation, the amount of frames, or loading type) to an image file, fonts, text colours, map arrows, et cetera. The latter define the graphical user interface itself: how the buttons and icons are laid out, which GFX is used where, where to write text, et cetera. This only decides on the appearance of the GUI, the attributes such as effects have to be defined elsewhere. - /Hearts of Iron IV/music/: This folder is used to define songs that play within the radio stations, and the possibilities in the weighted shuffle.
- /Hearts of Iron IV/sound/: This folder is used to define sounds that play elsewhere, usually tied to an element of the GUI. This also includes such entries as the division voicelines.
- /Hearts of Iron IV/portraits/: This folder is used to assign sprites as portraits for randomly-generated generic characters.
Code structure[edit | edit source]
The script language in which the code is built always has a common structure: <attribute> = <argument> (sometimes with inequality signs in case of triggers), such as add_political_power = 100, with few exceptions where the argument can be dropped. Each attribute and argument is a single word (A word character includes the [a-zA-Z0-9_.,\-] group), with whitespace characters serving as delimiters, however figure brackets can be used to group together arguments, which may include other attributes. Additionally, it is possible to use quotation marks to mark an argument as a string, which may include whitespace characters inside of itself until the closing quotation mark. If there aren’t any whitespace characters inside, omitting the quotation marks will not change the result (such as date > "1936.1.1" and date > 1936.1.1). Occassionally the attribute itself may be enclosed in quotation marks, such as "TAG" = { has_political_power > 100 }.
As an example of figure brackets, random_country = { add_stability = 0.1 } (as an effect) is an attribute of random_country with the argument of { add_stability = 0.1 }; that argument itself consists of an attribute of add_stability with an argument of 0.1. In particular, this will scope into a random existing country and add 10% ![]() Stability.
Stability.
If the attribute doesn’t support grouping together attributes, then using the opening bracket will be interpreted as the argument itself. For example, the game would interpret transfer_state = { 123 321 } as trying to transfer the state with the ID of {. Afterwards, the game encounters 123 which’d get interpreted as scoping into a state, which’d get interrupted prematurely by the closing bracket. As a result, there’s one more closing bracket which doesn’t have a proper opening bracket, which will likely lead to a scoping error, breaking the rest of the file.
Omitting the argument/equality sign is almost always erroneous. For example, this would be incorrect: GER = { leave_faction }. Instead, where there is no expected argument, yes is commonly used as GER = { leave_faction = yes }. There are few exceptions where an argument should be omitted, such as inside of the expanded form of add_ideas.
Comments are marked with the # character: everything after that character until the newline will be entirely ignored by the game. For example:
completion_reward = {
    add_political_power = 100 #TODO: Check if balanced
}
There exists no multi-lined comment block.
Aside from comments and strings (marked with the quotation marks, must be on one line total), indenting does not matter: most files can be done on one line in total without any change in how they get interpreted. However, doing indenting properly can make detecting bracket problems much easier without using a text editor’s bracket highlighting and overall makes it easier to see at a glance what each block includes within of itself and what it doesn’t.
This also means that an attribute’s argument should never be left empty, as it’ll interpret the next attribute as the argument instead. For example:
focus = {
    id = TAG_focusname
    icon =
    x = 2
}
In this case, the focus’ icon attribute is set with icon = x, and next the game has no idea how to interpret = 2. In practice, this’ll lead to the focus not being at the expected position.
There are these types of argument blocks are particularly common:
- Effects are used in circumstances such as focus completion rewards, event options, decision effects, on actions, country history files, and so on. They are used in order to enact a one-time change to the game’s state.
- Triggers are used in circumstances such as focus and decision availability checks, event triggers, or if statements. They return a strictly boolean value of either true or false, without actually changing anything in the game’s state.
- Scopes are a particular subset of triggers and effects that can be used to change for which country/state/character/division the effects are executed or triggers are checked for.
- Modifiers are used to apply a constant numeric change, such as the daily political power gain. Commonly, ideas such as spirits are used to apply it to countries.
Localisation[edit | edit source]
- Main article: Localisation
Names depending on language are defined within localisation. Taking only the English language into consideration, the /Hearts of Iron IV/localisation/english folder is used. A file within must end with _l_english.yml in the filename to work properly, including the extension that is hidden by default within the Windows File Explorer. The file must be encoded in the UTF-8 encoding with the byte-order mark included, usually called UTF-8-BOM. The exact details on conversion depend on the text editor. The first line in the file is l_english: to assign it to that database.
A localisation entry is structured as localisation_key:0 "Value of the key". In here, the first part before the colon is referred to as the localisation key, the ending part in quotes is referred to as the localisation key’s value, and the number in-between is the version number. The version number is purely a comment and isn’t read by the game, and it can be omitted entirely. Any localisation file can be used for any localisation, and it’s better to use new files rather than copying over base game files.
While it is possible to avoid using localisation in many cases, it is better to not do so for the following reasons:
- Non-ASCII characters, such as umlauts and other diacritics. Multiple files such as country leader traits or adjacency rules provide no support for the UTF-8-BOM encoding, which allows to use non-ASCII characters, and so using them in the name will be impossible.
- Dynamic localisation. In every single string outside of localisation, newlines and coloured text will not be interpreted. Additionally, in a large portion of files, such as scripted localisation, the
nameargument or any alternative is strictly expected to point towards a localisation key, just displaying the name of the key if not finding one. This results in dynamic localisation not working, such as not allowing to fetch the name of a country. - Multiple language support. Even if the mod is only intended to only be within English or a different language, it is better to allow the option to be open for potential sub-mods. While it is still possible to make translation sub-mods to mods that don’t use localisation, it becomes much harder to keep it up-to-date (As more than just localisation files can be changed in this case) and changes the checksum (Making it impossible to have a multiplayer session between those that have the translation sub-mod and those that don’t).
GFX[edit | edit source]
- Main article: Graphical asset modding
Most of the time, images are stored in the DDS format, typically ARGB8 (or A8R8G8B8. depending on the image editor) without mipmaps. The exact format doesn’t strictly matter, however: most image files can be saved in either DDS, TGA, PNG, or BMP; as long as information in the sprite is correct. Main exceptions to this include the flags representing countries that must be 32-bit TGA files without RLE encoding and bottom-left origin point, and files in the map folder.
A sprite is used to add extra information to an image file (such as a sprite’s name, loading type, the amount of frames, or animation), and are required for an image to be shown in the graphical user interface. Sprites are defined in the /Hearts of Iron IV/interface/*.gfx files opened with a text editor. Note that the folder is not related to /Hearts of Iron IV/gfx/interface/.
Sprites are defined within the spriteTypes = { ... } block and have different definitions, such as a simple spriteType, a corneredTileSpriteType that can be used with an arbitrary size, stretching to fit taking corners into consideration, a frameAnimatedSpriteType that allows creating an animation sequence rather than being limited to scripted ones that can be done in spriteTypes, and so on. A simplest possible sprite file consists of the following:
spriteTypes = {
    spriteType = {
        name = GFX_my_sprite_name
        texturefile = gfx/interface/folder/filename.dds # Must use / for folder separation
    }
    spriteType = {
        name = GFX_my_second_sprite
        texturefile = gfx/anotherfolder/filename.dds
    }
}
This assigns the /Hearts of Iron IV/gfx/interface/folder/filename.dds file to have the GFX_my_sprite_name sprite in-game. This sprite can then be used in the graphical user interface, such as a decision or a focus icon (Note that focus icons must also have a separate sprite for the shine animation).
The only images that do not have any definition within interface files are:
- Flags used for countries in /Hearts of Iron IV/gfx/flags/ and its subfolders.
- Loading screens within /Hearts of Iron IV/gfx/loadingscreens/. Note that, however, the main menu background usually stored in that folder is defined as a sprite.
- Character portraits. They may use a sprite as a definition, but they’re the only place in the game which doesn’t have it as a mandatory requirement, accepting direct links to the file as an alternative.
There are also potential errors that may occur related to sprites:
- A sprite is entirely transparent: This is an indication that the sprite exists, but the image within can’t be loaded. This occurs if the
texturefileis defined to a file that doesn’t exist (The folder path or the filename may not correspond with the file itself) or if the image itself is corrupted. This is usually accompanied with aTexture Handler encountered missing texture fileerror. - A sprite is replaced with the default image: This is an indication that there is something wrong with the sprite itself rather than the image: the game links to a non-existing sprite somewhere. This is typically a typo within the sprite’s name or a failure to follow a name format (Such as omitting _shine from the end of a national focus icon’s shine sprite). Ensure that the sprite exists and has the right name.
- The character uses a randomly-generated portrait: This is an indication of either of the previous two problems: a character with an invalid sprite or a missing file will have their portrait randomised.
Mod structure[edit | edit source]
- The .mod file extension doesn’t show up in the Windows File Explorer by default, which can make finding the files mentioned here more difficult. Ensure that file extensions are set to show up.
- Unless stated otherwise, this section assumes that the files are in the user directory, the location of which can be seen in the lead of the article.
There are two descriptor files with the .mod extension associated with each mod:
- The user-specific descriptor file, that assigns the information used for loading the mod. In particular, the path to the folder storing the mod must be defined only here, since it can differ depending on the user. They are stored within the user directory’s /Hearts of Iron IV/mod/ folder, where the filename decides the order in which they will be loaded (unless overwritten by dependencies). The filename can’t contain spaces. For example, /Hearts of Iron IV/mod/ugc_1234567890.mod or /Hearts of Iron IV/mod/modname.mod are user-specific descriptors.
- The mod-specific descriptor file, that assigns the information that the mod has that should be shared regardless of the user. This file must be called
descriptor.modand is located within the primary folder of the path, i.e. the folder specified in the path within the file above. For example, /Hearts of Iron IV/mod/my mod/descriptor.mod or ../steam/steamapps/workshop/content/394360/1234567890/descriptor.mod are mod-specific descriptors.
The two descriptors are intended to have mostly identical information, aside from the fact that only the user-specific file should have a path entry within its definition, since this isn’t shared across different users and can vary significantly. The launcher enforces this for arguments that can be defined in the launcher, however other arguments such as replace_path will not get automatically ported over.

The launcher’s «Create a mod» menu, accessed via «Upload mod» in the top right of the «All installed mods»
The launcher can be used to create a pair of descriptors: the menu accessed via «All installed mods» -> «Upload mod» -> «Create a mod» is used for this purpose. This doesn’t allow freedom in the location of the folder used as the mod folder and doesn’t provide all arguments possible to include within a mod descriptor, so manually editing the descriptors in the output may be necessary to add other mod attributes or change the folder location.
In addition, these files within the user directory are also used when loading mods:
- /Hearts of Iron IV/dlc_load.json provides a list of enabled mods (in the form of a list of shortened paths to the .mod files, as in
"mod/modname.mod") and disabled DLCs while opening the game. While this gets automatically changed by the launcher before the game’s launch, this allows toggling off and on different mods without using the launcher. If there are multipleenabled_modsdefinitions, the game will use the first-defined definition, allowing a set of playlists without using the launcher. - /Hearts of Iron IV/launcher-v2.sqlite or /Hearts of Iron IV/launcher-v2_openbeta.sqlite is a SQLite database that is used to generate the mod information and playsets within the launcher. Occassionally, the launcher may fail to update existing mods (e.g. an «invalid path» error may remain eternally even after the path is fixed or a new user-specific mod descriptor may fail to get detected), and a deletion of this file allows to re-generate the playsets. After the file is deleted, the game will pick up every user-specific mod descriptor and recreate the list of mods using each one. Mods hosted on Steam workshop and Paradox mods will be automatically added to the default playset; local mods will remain in the «All installed mods» list but not be assigned to any playset by default.
Descriptor contents[edit | edit source]
Most .mod files contain content similar to this, which is possible to set within the launcher:
name = "Average mod"
path = "mod/modname"
picture = "thumbnail.png"
version = "v1"
supported_version = "1.12.*"
tags={
	"Gameplay"
	"Historical"
}
remote_file_id="1678247250"
These are the following arguments:
nameis the name of the mod, as it appears in the launcher. This also gets used within thedependenciesattribute of mods. The name must be unique in comparison to other installed mods.pathis used to defined the location of the mod folder. For local mods, enteringpath = "mod/modname/as a shortened location will automatically prepend the user directory’s location after opening the launcher. Any folder can be used to store a mod, however only ASCII characters can be used within the path. If the path contains non-ASCII characters, such as diacritics or non-Latin scripts, the mod will fail to be loaded. The folder separator is strictly a forward slash «/». This should only be present in the user-specific file.pictureis the filename of the picture that’s assigned to the mod. This will appear in the launcher for mods of the Steam and Paradox nature, and also as the thumbnail in Steam Workshop and Paradox Mods. The image must be contained within the root directory of the mod (defined viapath) and must be less than 1MB in size. This must be defined after the name of the mod. Local mods will not have a picture in the launcher even with this defined.versionis a string that’s shown near the mod’s name in the launcher as the mod’s version. Any string is accepted and grants no change.supported_versionis used to determine for which version of the game the mod is meant for, granting the ‘out of date’ marker in the launcher otherwise. The last number of the version can be replaced with an asterisk, which will signify that the mod will work on any minor update within that major update.tagsis a list of tags that get used within the Steam Workshop and Paradox Mods.remote_file_idis used to attach a Steam Workshop or a Paradox Mods item to the mod, as to enable updating it within the launcher.
These arguments aren’t possible to set within the launcher and can only be added directly:
 user_dir = "NewSaveFolder"
 dependencies = { "Major Mod" "Major Mod 2" }
 replace_path = "history/states"
 replace_path = "map/strategicregions"
user_dirchanges the folder where the game stores saves. This prevents loading a save made in base game and mods with a differentuser_direntry and, vise-versa, prevents saves made in this mod to be loaded in the base game or mods with a differentuser_direntry.dependencieschanges the order in which mods will be loaded, in particular forcing this mod to be loaded after every mod listed in this attribute. This doesn’t make this mod require the listed mods to work. Changing the load order will ensure that any replace_path within the dependency mod will leave this mod’s files untouched and that this mod’s files will overwrite the dependency mod’s files in case of overlapping filenames. Necessary for sub-mods to work correctly.
replace_path[edit | edit source]
replace_path is used in order to unload every previously-loaded file during the main menu loading within the specified folder. This only applies to files directly within that folder, any sub-folders will left untouched.
This does not force the mod to replace the folder’s contents: anything higher in the load order than the mod will be loaded in the exact same way, anything lower than the mod will first get loaded before getting unloaded (e.g. the error where a file will get loaded twice if there’s one with a filename differing only by capitalisation will still be present even if one of the files is intended to be replaced with replace_path), anything loaded after the main menu will still get loaded from «replaced» folders. This doesn’t change the load order: if a file fails to overwrite another mod’s file, it will still not do so with this attribute used; instead, dependencies is used in the mod’s attributes to change the load order. In case the mod fails to overwrite base game’s files, this will never solve the problem: ensure that the folder you’re writing to is indeed the mod’s folder rather than, for example, the user directory or a backup of the mod; in case of flags, the game may occassionally fail to make the mod’s /Hearts of Iron IV/gfx/flags folder overwrite the base game which can be solved by creating another mod and moving the files there.
For example, replace_path = "history/states" will ensure that no state files from the base game or the user directory will be loaded when the game is launched with the mod. This can be used within major map overhauls to ensure that no base game contents will be read with unexpected results. Since the user directory is earlier in the load order than the mod files, this will also prevent the Nudge from having any impact on the states, however the files will still be outputted in the folder even if immediately unloaded upon saving.
Since this only unloads indexed files, a direct link to a file will not change regardless of the replace_path being present. For example, replace_path = "history/units" will not change anything, since the files in that folder aren’t checked during the main menu loading but rather get loaded with a direct link to the filename, such as oob = "TAG_1936" in the country history file. Similarly, a replace_path = "gfx/flags" will not change anything since the country-identifying flags are only loaded when the country changes the ruling ideology group.
This is particularly obvious with the loading screens: replace_path = "gfx/loadingscreens" will prevent any base game or DLC loading screen from appearing during the loading, however the main menu background will remain the same as if the replace_path wasn’t present. This is since the main menu background is defined as a sprite with a direct link to the image, by default in /Hearts of Iron IV/interface/frontendmainviewbg.gfx.
This option must be added to both .mod files: leaving it out from the mod-specific descriptor will cause the launcher to remove it from the user-specific one, while leaving it out from the user-specific descriptor will cause it to not take effect instead of being copied from the mod-specific descriptor as most other attributes do.
This commonly causes game crashes and unintuitive errors if used recklessly. In some folders, the game isn’t built for there being no database entries, such as national focuses, resulting in a crash; in others, such as Scripted triggers, there are several usages for entries besides the obvious, which can cause unintuitive errors such as the resistance system being triggered when unintended. Therefore, the replace_path attribute shouldn’t be used recklessly: there should always be at least one file with content within the replaced folder in the mod files, and the base game’s contents in the folder should be checked manually to see if anything useful is better left as remaining in the mod.
Game data[edit | edit source]
- Console commands, useful for debugging mods.
- Defines, which allow to influence some hardcoded vanilla behaviors
- Scopes, Triggers, and Effects used for scripting
- Modifiers, used to influence calculations made by the game
- Event modding, used to define popups with decisions
Names for in-game items (e.g. the name for research categories or rules like can_create_faction) can be found in the game’s localization folder, inside the localization files.
Tools & utilities[edit | edit source]
- Official Paradox Forum for mods
- Maya exporter — Clausewitz Maya Exporter to create your own 3D models.
- Steam Workshop — The place where you can share your creations with other players.
Common mistakes[edit | edit source]
- Multiple mods with the same name (Mod fails to load) – This commonly happens when subscribing to one’s own mod on Steam Workshop. If there are two mods with the same name that may be selected from the launcher, only the one that is loaded earlier will have its files detected; the other mod will appear as changing nothing in-game. This is corrected by changing the
nameattribute in the descriptors of either one of the mods.
- Generally, there is no reason to subscribe to your own mod in the Steam Workshop: it will almost never function any differently from the local mod and this may also occassionally break updating the mod due to duplicate
remote_file_idattributes in different mods.
- Wrong path (replace_paths apply, yet the mod doesn’t get loaded) – In this case, the needed file to adjust is /Hearts of Iron IV/mod/modname.mod, opened directly within a text editor. There are two primary variations on this issue:
-
- Incorrect path – This is commonly the cause if the game displays the filesize of the mod, but doesn’t load it. The mod doesn’t route to the file directly. This can sometimes be a cause of further subfoldering, such as if the mod is located in mod/my_mod/cool_mod, yet the user-specific .mod file contains
path = "mod/my_mod". In this case, the files still exist and get loaded. However, the game, for example, expects focus trees in the /Hearts of Iron IV/common/national_focus/ folder. mod/my_mod/cool_mod/common/national_focus/ gets taken to be /Hearts of Iron IV/cool_mod/common/national_focus/ instead, aspath = "mod/my_mod"doesn’t knock off the /cool_mod/ folder. This is corrected simply by adjusting the path to be to the correct folder. - Impossible path – The intended folder is correct, yet it’s stated in a way that the game can’t recognise.
- One of the ways of doing so is using backslashes for folder separations, such as
path = "mod\my_mod". This is incorrect, as a single backlash gets taken to be an escape character instead. Using forward slashes as inpath = "mod/my_mod"is correct. - Another way of doing so is using special characters in the name, such as
path = "C:/Users/Пример кириллицы/Documents/Paradox Interactive/Hearts of Iron IV/mod/my_mod". In this case, a special character is defined as one that takes more than 1 byte to write with UTF-8, not being present in ASCII’s printable characters. This is commonly non-English language folder names, such as diacritics or non-Latin alphabets. In this case, it can be rerouted to a folder that does not contain special characters in the name, such aspath = "D:/Hearts of Iron IV modding/my_mod". If the path to the user directory itself contains special characters, it’s better to re-route the entire directory to another folder. To do so, edit the base game’s /Hearts of Iron IV/launcher-settings.json file and change the folder specified undergameDataPath. After doing so, move the user directory’s contents to that folder as to not lose save games and other information. The mod’s path also needs to be adjusted properly. If the user directory is located at an impossible path, the game will also fail to open the error log with debug turned on with a «The system cannot find the path specified» error.
- Incorrect path – This is commonly the cause if the game displays the filesize of the mod, but doesn’t load it. The mod doesn’t route to the file directly. This can sometimes be a cause of further subfoldering, such as if the mod is located in mod/my_mod/cool_mod, yet the user-specific .mod file contains
- In case the launcher shows that the mod has an invalid path even after correcting the issue, make sure that the user-specific mod descriptor file directly within the user directory’s /Hearts of Iron IV/mod/ exists and try forcing an update of mod information by deleting the SQLite database that stores mod information, located at either /Hearts of Iron IV/launcher-v2.sqlite or /Hearts of Iron IV/launcher-v2_openbeta.sqlite.
- Incorrect dependency name (Mod fails to loaded when enabled with the main mod) – If a mod is intended to be a sub-mod to a larger mod or several, it is, in most cases, mandatory to include
dependencies = { "Main mod 1" "Main mod 2" }, which will place it higher in the load order. In this case, the name of the mod must be the exact same as in the .mod file of the mod, also showing up in the launcher. This can include special characters (e.g.name = "Main mod – Subtitle"in the main mod will requiredependencies = { "Main mod — Subtitle" }in the sub-mod with an en dash rather than a hyphen). For this reason, it’s preferable to copy over the name from the .mod file of the main mod rather than manually retyping it from the launcher: some special charactes may be difficult to notice or to distinguish from other characters. - Not copying over mod information entries (Entries such as replace_path fail to apply) – The game keeps the mod’s modname/descriptor.mod file as the information for the mod in general and /Hearts of Iron IV/mod/modname.mod as the information for the mod that gets read for the machine. While the launcher typically attempts to keep the machine-specific file up to date with the general mod information file, it sometimes fails to do so, such as for replace_paths where it succeeds at deleting unneeded entries but not at copying needed ones. In this case, both files must be edited manually for a replace_path to apply. This also may be needed for other entries in the file.
- Files with similar names (File gets loaded twice) – In this case, «similar» is defined as a pair of files within the same folder that have names made up of different characters, but would be considered as having the same name with case-insensitive checking, such as /Hearts of Iron IV/events/Generic.txt and /Hearts of Iron IV/events/GENERIC.txt. If the mod files contain a file that has a similar name to a base game file, the mod file will get loaded twice. Adjusting the filename to be the exact same as the base game file or entirely distinct will fix this issue. This applies even if the folder that the base game file is in is unloaded with replace_path.
Useful knowledge[edit | edit source]
Large English-speaking modding communities include the HOI4 Modding Coop and the HOI4 Modding Den, which can be joined on Discord. It’s useful to join one or multiple of them, as they contain links to modding resources and you can ask questions regarding modding in them.
settings.txt, located within the user directory also containing the mod folder, can be changed to change the game uses to open files from Microsoft Notepad, if the path to the editor is correct. Here are examples with 2 of frequently used text editors:
Notepad++:
editor="C:\\Program Files\\Notepad++\\notepad++.exe"
editor_postfix=" -n$"
Sublime Text:
editor="C:\\Program Files\\Sublime Text 3\\sublime_text.exe"
editor_postfix=":$:1"
See also[edit | edit source]
- Mods
- Getting started with modding forum: 995985
- How to create a new ship unit in Man the Guns forum: 1157324
- How to add a new unit — Checklist forum: 947435
Notes[edit | edit source]
^ a: These exceptions that may reasonably be changed within a mod are the following:
- /Hearts of Iron IV/gfx/flags/ and its subfolders, where the name must follow a strict formatting in order to be automatically loaded for a country.
- /Hearts of Iron IV/history/countries/, where the first 3 letters assign it to a country.
- .txt files directly inside of /Hearts of Iron IV/common/ (Most importantly achievements.txt, combat_tactics.txt, and graphicalculturetype.txt)
- /Hearts of Iron IV/common/countries/colors.txt and /Hearts of Iron IV/common/countries/cosmetic.txt must remain with the same name. The rest are directly linked to in /Hearts of Iron IV/common/country_tags/*.txt files.
- A variety of items within gfx such as /Hearts of Iron IV/gfx/maparrows/maparrow.txt or /Hearts of Iron IV/gfx/HOI4_icon.bmp. This does not include /Hearts of Iron IV/gfx/loadingscreens (every file within there is loaded regardless of filename) or most font/image files (as they’re loaded by a link within a different file).
- Files within the /Hearts of Iron IV/map/ and /Hearts of Iron IV/map/terrain/ folders, with the exception of /Hearts of Iron IV/map/strategicregions and those defined within /Hearts of Iron IV/default.map.
- /Hearts of Iron IV/tutorial/tutorial.txt
Hearts of Iron 4 – это стратегия, где игроки могут принять участие в событиях Второй Мировой войны. Игроки могут управлять государством и вести войну по своему усмотрению. Однако, игровой процесс становится еще более увлекательным благодаря модам. В этой статье мы расскажем, как создавать свои моды для Hearts of Iron 4.
Шаг 1: Установите необходимые инструменты
Перед тем как начать создание мода, вам необходимо установить необходимые инструменты. Для создания модов для Hearts of Iron 4 вам понадобится программа для работы с текстом и редактирование файлов, а также программы разработки (программирования) и файлы игры, которые будут служить основой для создания новых вариантов.
Шаг 2: Создайте новый мод
Чтобы создать новый мод для Hearts of Iron 4, нужно выполнить следующее:
- Откройте папку игры
- Перейдите в папку «mod»
- Создайте новую папку и назовите ее в соответствии с названием вашего мода, к примеру, «MyMod»
- В папке «MyMod» создайте файл с названием «MyMod.mod»
Вставьте следующий текст в файл MyMod.mod:
name="MyMod"
path="mod/MyMod"
tags={
	"New Gameplay"
}
picture="MyMod.jpg"
Поменяйте имена и значения в соответствии с вашими настройками.
Шаг 3: Создайте каталог структуры
Внутри папки MyMod создайте папку common. В папке common создайте директорию «countries» (для создания национальных флагов и гербов) и файл «define.lua», где будут указаны общие настройки мода.
Шаг 4: Настройки мода
Файл «define.lua» — это главный в файл в директории common. Он определяет глобальные и локальные настройки для вашего мода. Этот файл должен включать в себя определение мода и все его настройки внутри.
Нет необходимости писать какие-то специальные команды, просто вызовите ваш файл:
NDefines.NGame.START_DATE = "1936.1.1.12"
NDefines.NGame.END_DATE = "1950.1.1.1"
В этом примере мы изменяем даты начала и конца игры. Вы можете изменить это на свои настройки.
Шаг 5: Создание новых стран
Для создания новых стран в Hearts of Iron 4 нужно создать новый файл в папке countries. Это может быть любой текстовый файл с расширением .txt. Имя файла должно соответствовать существующему государству, например, «Russia.txt». Каждый файл должен содержать информацию о государстве. Это может быть имя и флаг страны, а также географические координаты и население.
Пример файла Russia.txt:
country = {
	name = "Russia"
	flag = "russia.tga"
	government = "communism"
	alignment = "communism"
	continental = no
	capital = 2962
	country_event = { 20100 0 } # Civil War
}
Шаг 6: Создание событий
Вы также можете создавать события в вашем моде в Hearts of Iron 4. События могут изменять исторические события, социальную стратификацию, границы государств и т.д. Для создания событий нужно создать файл в папке events.
Пример файла MyEvent.txt:
country_event = {
	id = MyEvent.1
	title = "The Great Event"
	desc = "Something happens..."
	picture = GFX_report_event_generic_the_peoples_army # optional texture
	fire_only_once = yes
	is_triggered_only = yes # it will only show up under certain conditions
	trigger = {
		is_year = 1937 # the condition for it to trigger
	}
	option = {
		name = "Option One"
		add_extraPoliticalPower = 100 # this means it'll give you political power when selected
	}
}
Шаг 7: Запуск игры с модом
После того, как вы создали мод в Hearts of Iron 4, вы можете его запустить вместе с игрой. Для этого запустите игру, выберите мод в меню игры и начните играть.
Создание модов Hearts of Iron 4 может занять много времени и требует определенных навыков. Однако, благодаря этому вы можете создать новые сценарии, настройки и опыт игры, что позволит вам наслаждаться этой замечательной игрой еще больше!
Starting to mod in HOI4 is a long journey. HOI4 and in fact most Paradox games are very easy to mod, and spending a small amount of time to learn the code is enough to start modding; however this isn’t the case for adding new graphics, provinces or juggling with interface files, which has no documentation at all. It can also be frustrating to learn coding in the first place. If you’re clueless on how to start up, stuck or just want some shortcuts, you’ve come to the right place.
This guide will focus on giving the player a basic grasp on editing localisation files, changing flags and leader portraits. Note that this guide makes the assumption that the reader never has done anything to do with modding, creating content based on coding or anything of that sort. It’s focused towards people who’ve spent their lives reading history books and staring at maps, so discretion is advised to people who are familiar with using coding.
Good places to start off[]
The first few steps are a popular topic and various tutorial videos have been made on it. If you don’t feel like learning modding from text, you can always receive visual guidance. These are some of the videos powerblo thinks are the most useful for starting off.
The playlist by MrKmproductions is by far the most informative and helpful series on Youtube, and help you get quite a far way.
The playlist made by Paradox themselves are the canon resource, and while they cover several complicated schemes(new resources, province editing etc.) it’s not organised or user friendly and I wouldn’t recommend it for the fresh green modder.
These series by The Iron Workshop give several tips on how to make several useful changes, and include a nice introduction on making new provinces.
Along with these videos, the wiki page below shows a good list of sites you can access to learn coding or refer to resources.
Making your First Mod[]
While unfortunately Paradox hasn’t given a lot of documentation about modding, they’ve given a lot of useful tools to help the modder get going. One of these is the ability to create an empty mod in mere seconds. When you launch HOI4, you’ll notice a «Mod Tools» button in the launcher.
Press it, and go to «Create a Mod». When you get in there, you can tamper with the title of your mod and add new tags. Unless you know what you’re doing, it’s advised to set your directory the same name as your mod(or an abbreviate of it) without spaces or slashes. The game version should also be set to the latest current version of the game.
Don’t worry too much if you feel you’ve made a mistake; all of these can be edited later. If you’ve finished with all the new bells and whistles, click create mod and you’re ready to go.
Your New Directory[]
Mods are located in the folder ~/.local/share/Paradox Interactive/Hearts of Iron IV/mod(Mac and Linux) or C;\Users\<username>\Documents\Paradox Interactive\Hearts of Iron IV\mod (Windows). Inside this folder there should be two nitbits;
- The mod folder, named what you decided your subdirectory was
- The .mod file, containing info on how the game should handle your mod folder
The EonAB .mod file looks like this:
name = "End of a New Beginning"

path = "mod/eonab"
tags = {
 "Gameplay"
}
supported_version = "1.4.2"
With both of these folders/files, you should be able to select your mod in the game launcher. Right now it shouldn’t do anything, but content is something you can stack along with time. But before we get working with brand new content, there’s a few precautions and tools you should
now of.
Guidelines[]
- Never use Notepad as your default text editor. For simplicity, use Notepad++, for convenient folder management use Sublime Text or Atom. All of them are free; it’s recommended to have at least two text editors (powerblo uses Atom to manage his projects and Notepad++ to edit individual files)
- ALWAYS create a workspace folder(where you do the editing) separate from your Paradox Interactive\Hearts of Iron\mod directory. Similarly, never edit vanilla files- those edits are permanent unless you reinstall the game.
- Try not to overwrite vanilla files unless their existence create errors or overwrite your content. It’s almost always advised to create separate files for localisation, events, focus trees, etc.
- Use repository managing programs like GitHub to keep track of what you’ve changed, and to revert any fatal errors you made. Don’t forget to upload every minor change to GitHub; if your game has errors it’s very easy to go sieve through previous versions if you know what changed through tie.
- Use proper folder merging tools instead of copy-paste like WinMerge.
- Don’t forget to use UTF-8 encoding for normal files and UTF-8 BOM files for localisation. Text editors like Atom automatically encode your files into these formats.
- Have a «project» folder that includes all your resources, your workspace, and plans for coordinated modding.
- Always have several backup folders if you don’t use GitHub. You won’t regret it when your new edits cause CTDs the second you start the game.
- Use AFP[1]s or Graphical Tools to reduce coding time and make coding easier, but always use them with caution. They often have several bugs and might delete everything you’ve done if you don’t backup.
- Proper indentations, comments using # and being smart with paragraphs make reading code much easier for other people. This won’t break your game when you don’t keep it, but it’s much more easier for you as well if you know exactly what’s going on with each line of code.
- Consult other modders or other mods to get help with things you can’t seem to code — reverse engineering is very useful in both learning and decreasing code time, but never plagiarise other’s work.
Localisation : Adding Loading Tips[]
Now that we’ve created the empty template for a mod, it’s time to create some dummy content. Localisation files are a good place to start, being easy to edit and create.
Localisation files give names to ingame variables, and add text for descriptions. This is where all the ingame text is rendered from, so editing these files would change the text that appears ingame. All localisation files are and should be located in <mod>/localisation. Another important point is that all localisation files have the .yml extension and are encoded in UFT-8 BOM format. If you don’t know what these are, don’t worry; you won’t have to worry about these as long as you’re smart with how you code.
The most straightforward piece of localisation the player first sees are the loading tips[2]; the lines of famous words written on the bottom of the screen while the game is loading. The best way to start off with localisation is to copy the file in the vanilla folder[3] and paste it into your mod, so you don’t have to go through the encoding. Create a new folder within your mod called localisation, and copy the loading_tips_l_english.yml file and paste it in there. When you open it, there will be a list of LOADING_TIP_<number>:0 «<loading tip>» , the code that assigns text to loading tips. Within a localisation file, the variable name goes behind the :0, and the text goes inside the double quotation marks. By changing the text inside the double quotes, you can change what the game displays for the loading text. Every single loading tip has an equal chance to appear while loading, so erasing every other one (leaving just one loading tip in) will make only one loading tip appear for the entire loading process.
Using special nitbits of code you can format your loading tips, and in fact any localisation file.
\n : The equivalent of typing Enter, adding this annotation jumps the text down one line. Useful for loading tips (you’ve gotta put the original quoter somewhere) or descriptions when you want them to look tidy. Note that you don’t need to put a space after the annotation, like «\nAnd Lewis is to blame.»
\» : Since the boundaries of the localisation is defined by quotes, to use quotes inside your text wall this annotation is used. This is optional, luckily HOI4 is smart enough to let you use normal quotes. However this is recommended for anyone making large scale projects, or just paranoid about how code looks.
UTF-8 and the HOI4 language[]
The traditional Paradox machine, the Clausewitz engine utilises a programming language unique to itself, different from the well known Lua or Java. You don’t have to read the stuff below to make portrait or flag mods, but it’s recommended to know what you’re coding in if you want to be good at it.
- HOI4 has their own ‘coding language’, making it much easier to code but much less versatile. It’s similar to the EU4 or CK2 language, but being a new iteration and a different game there will be several places the code doesn’t overlap.
- UTF-8 isn’t a language; it’s a format where the game can read code from .txt files. Don’t go looking for UTF-8 encoders and just see if your text editor can do it.
- Localisations need an extra step named UTF-8 BOM. Not keeping this is a common cause of missing localisation files.
- The HOI language, HOI-ese doesn’t utilise ;s or <>s, and links how your code is designed to how it functions. This is why using comments(#) is extremely important so you can keep track and have a clean, bugfree code.
- Indentations(tab and spaces) don’t really matter in HOI-ese in function.
- HOI-ese operates using .txt files for most code. .yml files are used in localisation, .gui for interface design and .gfx for designating graphic files.
- HOI-ese is mostly independent from directory for graphic files. This has not been confirmed for coding files, but generally it’s important to have thourough knowledge on the HOI4 directories.
- Make sure you don’t name any ingame files or variables the same.
We assume that you have basic knowledge of how code works, and have at least common sense on what parentheses or equal signs do. Then now that you’ve got that through, it’s time to start making edits to the actual game.
Changing Country Leaders[]
Perhaps the best of modding HOI4 would be adding new leaders to nations. It’s one of the more simpler, and straightforward changes to start off with.
Adding new country leaders, or replacing them requires you two edit two things;
- The «history» file of the nation you’re adding a leader for
- The portrait for your leader
The history file is the first step of adding a leader, faction, party or researched tech for any nation ingame. They’re located in [mod]/history/countries/[TAG].txt. Opening it for the first time is a complicated process; but since we’re simply adding new leaders it’s simple right now.
Let’s take the example of Germany; we’re not fond that Hitler is in power and want to place a yodeling person in his place.
In the GER.txt, searching «Hitler» returns this block:
create_country_leader = {
name = «Adolf Hitler»
desc = «POLITICS_ADOLF_HITLER_DESC»
portrait = «<directory>»
expire = «<date>»
trait = {
}
- ↑ Automatic File Processor — A set of .bat files that automate simple actions like creating nation history files or converting flag image files.
- ↑ They’re called loading tips because traditionally (in Paradox games like EU4) they contained tips on how to play the game.
- ↑ Wherever your HOI4 is installed — the localisations folder
![]()
Интерфейс. Как это работает ?
Для начала надо бы знать пару нюансов:
- Полностью изменить или удалить все элементы интерфейса простому разработчику модификаций не получится, так как скрипты интерфейса привязаны к файлам движка игры. Доступ непосредственно к движку Клаузвиц имеют лишь разработчики игры, ну или прошаренные хакеры. Благо, вы можете спрятать ненужные вам элементы, делая их не видимыми, или менять их позицию.
- Любой интерфейс подразумевает за собой использование графических редакторов, например, Paint.net, Photoshop и т. д.
Основные файлы и принципы
Основные группы файлов по интерфейсу находятся:
- …\Hearts of Iron IV\interface (инициализация переменных .gfx и скрипты графических элементов .gui). Этими файлами описываем наши элементы интерфейса, их позицию, функцию, привязываем к расширению экрана и т. д. Открываются с обычным Notepad, Notepad++ и подобными.
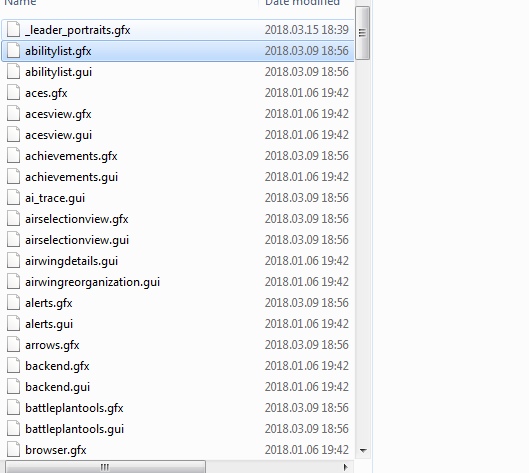
2. …\Hearts of Iron IV\gfx\interface (текстуры в .dds формате). Здесь находятся все текстурки интерфейса игры. Именно их и надо редактировать с графическими редакторами.
Теперь мы можем редактировать, к примеру, окно выбора стран country_selection_bg.dds
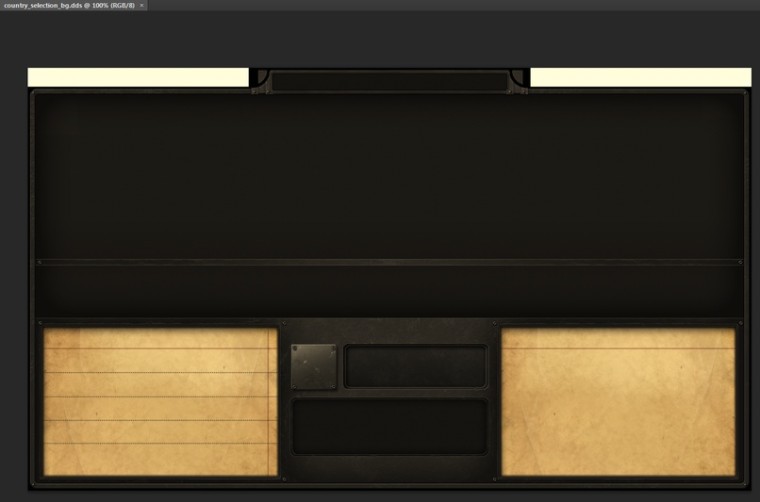
Открываем этот файл. Рисуем, копируем, что хотим. Можете соблюдать местоположение всех элементов, как значки, текст и т. п., но это будет вас ограничивать в фантазии. Правда, не придётся играться с .gfx и .gui.
В общем, если кнопки, картинки и текст остается в том же положении и не мешает вам, хватает попросту сохранить файл в ваш мод.
…\Hearts of Iron IV\mod\gfx\interface\country_selection_bg.dds
С таким настройками:
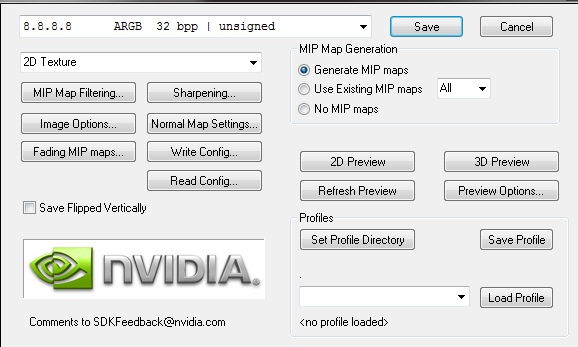
Также стоит соблюдать Alpha канал. Эта функция отображает только ту часть рисунка, которая вам необходима
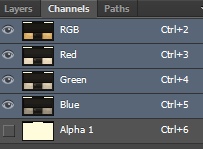
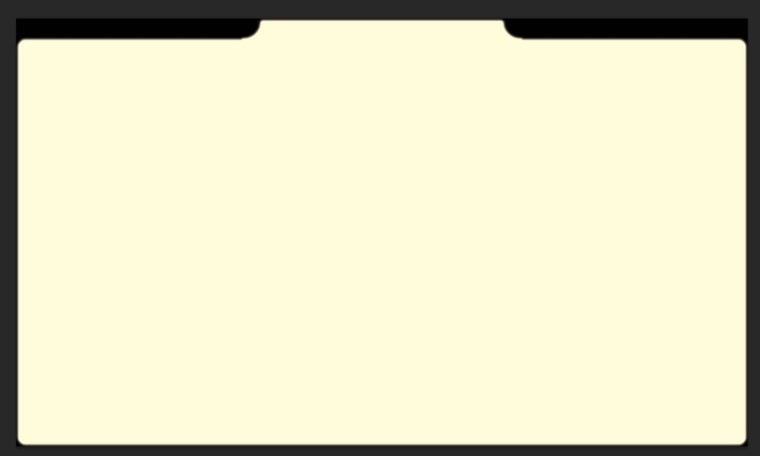
Что белое — то будет видно, что серое — то прозрачно, что черное — невидимое. Сохраняйте все файлы с альфа каналом (save as > .dds > Normal Map Setting).
Всё, у вас первая ваша текстура.
Оригинальный интерфейс
Вы неизбежно захотите своё с блэкджеком и куртизанками, поэтому учимся на примере того же country_selection_bg.dds менять позиции элементов. Для этого находим в каких файлах он прописан. Вы можете открыть все файлы с Notepad++ \Hearts of Iron IV\interface и пробить название текстурки в Find.


Как видим текстура выбора стран прописана в этих файлах.
![]()
Забираем их к себе в мод и открываем.
…\Hearts of Iron IV\mod\interface\
По сути, .gfx прописываются текстуры, которые используются в интерфейсе. Они обозначаются переменной, которую вы можете привязать к скрипту в файлах .gui.

Группа переменных спрайтов, имя переменной GFX_country_selection_bg, местонахождение самого графического файла gfx/interface/country_selection_bg.tga и эффект (допустим блеск, как у фокусов).
Когда вы хотите внедрить что-то новое, не поверху старых, совершенно новую картинку, она должна быть прописана здесь по такому же принципу.
Скрипты в файлах .gui уже интереснее.
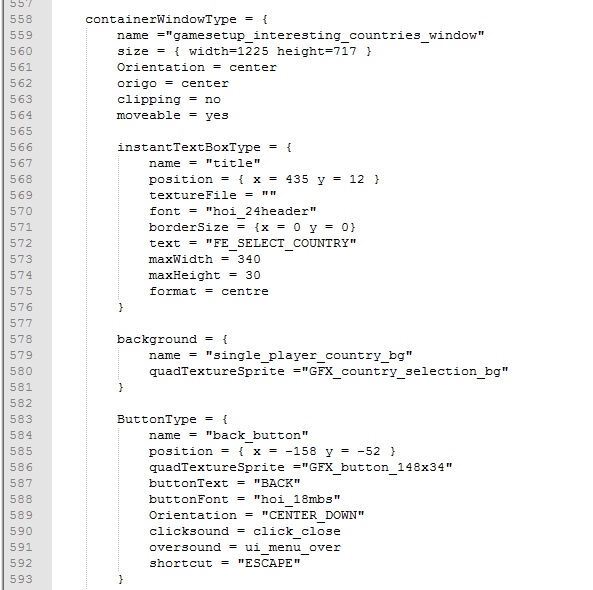
Контейнер containerWindowType — это вся группа интерфейса, в нашем случае, это окно выбора стран. Видно по названию, gamesetup_interesting_countries_window.
Изучим весь фрагмент:
Спойлер
containerWindowType = { //группа окна
name =»gamesetup_interesting_countries_window»//название
size = { width=1225 height=717 } //резолюция
Orientation = center //привязка к окну, будет в центре
origo = center //привязка к координатам
clipping = no //без вырезанных частей
moveable = yes //можно ли двигать окно? Да.
instantTextBoxType = { //кусок текста
name = «title» //название
position = { x = 435 y = 12 } //позиция текста
textureFile = «» //текстура, ее нет, так как это текст
font = «hoi_24header» //шрифт, на котором написан текст
borderSize = {x = 0 y = 0} //рамка, ее нет
text = «FE_SELECT_COUNTRY» //вызов переменной из локализации, видимый текст
maxWidth = 340 //максимальная длина текста
maxHeight = 30 //максимальная высота
format = centre //текст по центру
}
background = { //дополнительные текстуры на верху основной
name = «single_player_country_bg»
quadTextureSprite =»GFX_country_selection_bg»
}
ButtonType = { //категория кнопки
name = «back_button» //кнопка обратно
position = { x = -158 y = -52 } //ее позиция
quadTextureSprite =»GFX_button_148x34″ //ее текстурка
buttonText = «BACK» //ее текст
buttonFont = «hoi_18mbs» //ее шрифт
Orientation = «CENTER_DOWN» //ее привязка местоположения
clicksound = click_close //звук при нажатии
oversound = ui_menu_over //после нажатия
shortcut = «ESCAPE» //вызов скрипта при нажатии
}
…
Спойлер
containerWindowType = { //контейнер в контейнере (окно на окне)
name =»countries» //выбор стран
position = { x = 15 y = 45 }
size = { width = -15 height = 120}
gridboxType = { //сетка, функция для разного числа стран, допустим хотите поместить в мод 6 мажорных стран, а позже 8 и т. д.
name =»countries_grid»
position = { x = 0 y = 0 }
size = { width = 100% height = 100% }
slotsize = { width = 150 height = 0 } //размер сетки в 150 пикселей
add_horizontal = yes //добавлять новую страну горизонтально, ванильная настройка, можете менять
max_slots_vertical = 1 //одна полоса
format = «UPPER_LEFT» //привязка слева наверху
}
}
Думаю, по этим фрагментам постепенно начинаете понимать суть. Возможно, вам возник вопрос, что значит эта привязка и ориентация? Может интерфейс гей? (тонкая шутка) Это обозначает местоположение нулевой координаты.
Представьте, вы на тетраде по математике нарисовали оси X и Y, их начало нулевая координата. Наверх и вправо — положительные числа, вниз и влево — отрицательные. Каждое окно привязано к такой координате. Почему? Это сделано из-за разного расширения мониторов пользователей. Если у вас 4К монитор, вам, скорее всего, всё будет отображаться красиво, и все кнопки и текст будет на правильном месте, но на стареньком мониторе 640 на 800 будет выглядеть коряво. По этой причине многие элементы имеют свою относительную систему координат.
Привязка orientation:
- CENTER (0, 0 в центре экрана)
- CENTER_DOWN (в центре внизу)
- CENTER_UP (в центре наверху)
- UPPER_LEFT (наверху слева)
- LOWER_LEFT (внизу слева)
- UPPER_RIGHT (наверху справа)
- LOWER_RIGHT (внизу справа)
Проще говоря, если у вас size = { width=1225 height=717 } и кнопка Orientation CENTER_DOWN, то нулевое положение такой кнопки в центре внизу (общая координата X=613, Y=0, относительная координата без определения отображается как нулевая). Да, это может путать вас, но есть, как есть. Поиграетесь с этим положением и поймете, как это работает.
Некоторые элементы можно просто удалить. Например, какую-то картинку или текст в глубине двойного контейнера, или спрятать с функцией hide_position, или обозначить координату (X=10000, Y=10000) за расширением экрана (не рекомендую, но так делают).
Starting to mod in HOI4 is a long journey. HOI4 and in fact most Paradox games are very easy to mod, and spending a small amount of time to learn the code is enough to start modding; however this isn’t the case for adding new graphics, provinces or juggling with interface files, which has no documentation at all. It can also be frustrating to learn coding in the first place. If you’re clueless on how to start up, stuck or just want some shortcuts, you’ve come to the right place.
This guide will focus on giving the player a basic grasp on editing localization files, changing flags and leader portraits. Note that this guide makes the assumption that the reader never has done anything to do with modding, creating content based on coding or anything of that sort. It’s focused towards people who’ve spent their lives reading history books and staring at maps, so discretion is advised to people who are familiar with using coding.
Good places to start off[]
The first few steps are a popular topic and various tutorial videos have been made on it. If you don’t feel like learning modding from text, you can always receive visual guidance. These are some of the videos powerblo thinks are the most useful for starting off.
The playlist by MrKmproductions is by far the most informative and helpful series on YouTube, and help you get quite a far way.
The playlist made by Paradox themselves are the canon resource, and while they cover several complicated schemes(new resources, province editing etc.) it’s not organized or user friendly and is not recommend it for the fresh green modder.
These series by The Iron Workshop give several tips on how to make several useful changes, and include a nice introduction on making new provinces.
Along with these videos, the wiki page below shows a good list of sites you can access to learn coding or refer to resources.
Making your First Mod[]
While unfortunately Paradox hasn’t given a lot of documentation about modding, they’ve given a lot of useful tools to help the modder get going. One of these is the ability to create an empty mod in mere seconds. When you launch HOI4, you’ll notice a «Mod Tools» button in the launcher.
Press it, and go to «Create a Mod». When you get in there, you can tamper with the title of your mod and add new tags. Unless you know what you’re doing, it’s advised to set your directory the same name as your mod(or an abbreviate of it) without spaces or slashes. The game version should also be set to the latest current version of the game.
Don’t worry too much if you feel you’ve made a mistake; all of these can be edited later. If you’ve finished with all the new bells and whistles, click create mod and you’re ready to go.
Your New Directory[]
Mods are located in the folder ~/.local/share/Paradox Interactive/Hearts of Iron IV/mod(Mac and Linux [This is incorrect information. On mac, you can tap the directory in the launcher to go to the folder. Someone should find the directory, I cannot due to iCloud.]) or C;\Users\<username>\Documents\Paradox Interactive\Hearts of Iron IV\mod (Windows). Inside this folder there should be two nitbits;
- The mod folder, named what you decided your sub-directory was
- The .mod file, containing info on how the game should handle your mod folder
The EoaNB .mod file looks like this:
name = "End of a New Beginning"

path = "mod/eoanb"
tags = {
 "Gameplay"
}
supported_version = "1.4.2"
With both of these folders/files, you should be able to select your mod in the game launcher. Right now it shouldn’t do anything, but content is something you can stack along with time. But before we get working with brand new content, there’s a few precautions and tools you should know of.
Guidelines[]
- Never use Notepad as your default text editor. For simplicity, use Notepad++, for convenient folder management use Sublime Text or Atom. All of them are free; it’s recommended to have at least two text editors (powerblo uses Atom to manage his projects and Notepad++ to edit individual files)
- ALWAYS create a workspace folder(where you do the editing) separate from your Paradox Interactive\Hearts of Iron\mod directory. Similarly, never edit vanilla files- those edits are permanent unless you reinstall the game.
- Try not to overwrite vanilla files unless their existence create errors or overwrite your content. It’s almost always advised to create separate files for localization, events, focus trees, etc.
- Use repository managing programs like GitHub to keep track of what you’ve changed, and to revert any fatal errors you made. Don’t forget to upload every minor change to GitHub; if your game has errors it’s very easy to go sieve through previous versions if you know what changed through tie.
- Use proper folder merging tools instead of copy-paste like WinMerge.
- Don’t forget to use UTF-8 encoding for normal files and UTF-8 BOM files for localization. Text editors like Atom automatically encode your files into these formats.
- Have a «project» folder that includes all your resources, your workspace, and plans for coordinated modding.
- Always have several backup folders if you don’t use GitHub. You won’t regret it when your new edits cause CTDs the second you start the game.
- Use AFP[1]s or Graphical Tools to reduce coding time and make coding easier, but always use them with caution. They often have several bugs and might delete everything you’ve done if you don’t backup.
- Proper indentations, comments using # and being smart with paragraphs make reading code much easier for other people. This won’t break your game when you don’t keep it, but it’s much more easier for you as well if you know exactly what’s going on with each line of code.
- Consult other modders or other mods to get help with things you can’t seem to code — reverse engineering is very useful in both learning and decreasing code time, but never plagiarize other’s work.
Localisation : Adding Loading Tips[]
Now that we’ve created the empty template for a mod, it’s time to create some dummy content. Localization files are a good place to start, being easy to edit and create.
Localization files give names to in-game variables, and add text for descriptions. This is where all the in-game text is rendered from, so editing these files would change the text that appears in-game. All localization files are and should be located in <mod>/localization. Another important point is that all localization files have the .yml extension and are encoded in UFT-8 BOM format. If you don’t know what these are, don’t worry; you won’t have to worry about these as long as you’re smart with how you code.
The most straightforward piece of localization the player first sees are the loading tips[2]; the lines of famous words written on the bottom of the screen while the game is loading. The best way to start off with localization is to copy the file in the vanilla folder[3] and paste it into your mod, so you don’t have to go through the encoding. Create a new folder within your mod called localization, and copy the loading_tips_l_english.yml file and paste it in there. When you open it, there will be a list of LOADING_TIP_<number>:0 «<loading tip>» , the code that assigns text to loading tips. Within a localization file, the variable name goes behind the :0, and the text goes inside the double quotation marks. By changing the text inside the double quotes, you can change what the game displays for the loading text. Every single loading tip has an equal chance to appear while loading, so erasing every other one (leaving just one loading tip in) will make only one loading tip appear for the entire loading process.
Using special nitbits of code you can format your loading tips, and in fact any localization file.
\n : The equivalent of typing Enter, adding this annotation jumps the text down one line. Useful for loading tips (you’ve gotta put the original quoter somewhere) or descriptions when you want them to look tidy. Note that you don’t need to put a space after the annotation, like «\nAnd Lewis is to blame.»
\» : Since the boundaries of the localization is defined by quotes, to use quotes inside your text wall this annotation is used. This is optional, luckily HOI4 is smart enough to let you use normal quotes. However this is recommended for anyone making large scale projects, or just paranoid about how code looks.
UTF-8 and the HOI4 language[]
The traditional Paradox machine, the Clausewitz engine utilizes a programming language unique to itself, different from the well known Lua or Java. You don’t have to read the stuff below to make portrait or flag mods, but it’s recommended to know what you’re coding in if you want to be good at it.
- HOI4 has their own ‘coding language’, making it much easier to code but much less versatile. It’s similar to the EU4 or CK2 language, but being a new iteration and a different game there will be several places the code doesn’t overlap.
- UTF-8 isn’t a language; it’s a format where the game can read code from .txt files. Don’t go looking for UTF-8 encoders and just see if your text editor can do it.
- Localizations need an extra step named UTF-8 BOM. Not keeping this is a common cause of missing localization files.
- The HOI language, HOI-ese doesn’t utilize ;s or <>s, and links how your code is designed to how it functions. This is why using comments(#) is extremely important so you can keep track and have a clean, bug free code.
- Indentations(tab and spaces) don’t really matter in HOI-ese in function.
- HOI-ese operates using .txt files for most code. .yml files are used in localization, .gui for interface design and .gfx for designating graphic files.
- HOI-ese is mostly independent from directory for graphic files. This has not been confirmed for coding files, but generally it’s important to have thorough knowledge on the HOI4 directories.
- Make sure you don’t name any in-game files or variables the same.
We assume that you have basic knowledge of how code works, and have at least common sense on what parentheses or equal signs do. Then now that you’ve got that through, it’s time to start making edits to the actual game.
Changing Country Leaders[]
Perhaps the best of modding HOI4 would be adding new leaders to nations. It’s one of the more simpler, and straightforward changes to start off with.
Adding new country leaders, or replacing them requires you two edit two things;
- The «history» file of the nation you’re adding a leader for
- The portrait for your leader
The history file is the first step of adding a leader, faction, party or researched tech for any nation in-game. They’re located in [mod]/history/countries/[TAG].txt. Opening it for the first time is a complicated process; but since we’re simply adding new leaders it’s simple right now.
Let’s take the example of Germany; we’re not fond that Hitler is in power and want to place a yodelling person in his place.
In the GER.txt, searching «Hitler» returns this block:
create_country_leader = {
name = «Adolf Hitler»
desc = «POLITICS_ADOLF_HITLER_DESC»
portrait = «<directory>»
expire = «<date>»
trait = {
}
this kinda just stopped so yeah here is a random text also hope ye havin a good day.
- ↑ Automatic File Processor — A set of .bat files that automate simple actions like creating nation history files or converting flag image files.
- ↑ They’re called loading tips because traditionally (in Paradox games like EU4) they contained tips on how to play the game.
- ↑ Wherever your HOI4 is installed — the localisations folder