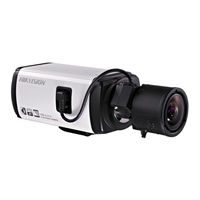
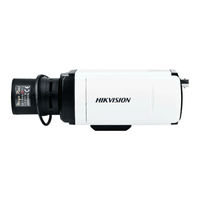
Камера
| Матрица | 1/3” progressive scan CMOS |
| Чувствительность | 0.07лк @( F1.2, AGC вкл.) 0 лк с ИК |
| Электронный затвор | 1/25с~ 1/100,000с |
| Объектив | 4мм @F1.2 (6мм, 12мм, опция) |
| Крепление объектива | M12 |
| Угол обзора | 73.1° |
| DNR | Есть (3D DNR) |
| WDR | Есть (DWDR) |
| Режим «День/ночь» | Механический ИК фильтр |
Стандарт сжатия
| Формат сжатия | H.264 / MJPEG |
| Скорость передачи | 32 Кб/с ~ 16 Мб/с |
Изображение
| Макс. разрешение | 2048 x 1536 |
| Кадров/с | 20к/с (2048 x 1536), 25к/с (1920 x 1080), 25к/с (1280 x 720) |
| Настройки изображения | Яркость/Насыщенность/Контраст настраиваются через пользовательское ПО или веб-интерфейс |
Сеть
| Сетевое хранение | NAS |
| Срабатывание тревоги | Детектор движения/ Замена видео/ Потеря видео/ Рассоединение сети/ Конфликт IP адресов / Контроль хранения данных |
| Протоколы | TCP/IP, HTTP, DHCP, DNS, DDNS, RTP, RTSP, PPPoE, SMTP, NTP, SNMP, HTTPS, FTP, 802.1x, Qos (SIP, SRTP, IPv6 опц.) |
| Совместимость | ONVIF, PSIA, CGI |
Интерфейсы
| Сетевой интерфейс | 1 RJ45 10 M / 100 M Ethernet порт |
Общие
| Рабочие условия | -40 °C ~ 60 °C |
| Питание | 12 В DC ± 10% , PoE (802.3af) |
| Потребляемая мощность | макс. 5Вт (7Вт с вкл. ICR) |
| Влагозащищенность | IP66 |
| Дальность действия ИК | До 30 м |
| Размеры | Ø 60.4 x 76.5 x 138.1 мм |
| Вес | 300 г |
Обновление прошивки. Версия: 5.0.0 Build: 130412
Паспорт устройства
Инструкция (на русском языке)
Фото устройства
Сертификат соответствия
- Manuals
- Brands
- HIKVISION Manuals
- Security Camera
- DS-2CD2032-I
Manuals and User Guides for HIKVISION DS-2CD2032-I. We have 6 HIKVISION DS-2CD2032-I manuals available for free PDF download: Installation Manual, Quick Operation Manual
HIKVISION DS-2CD2032-I Installation Manual (131 pages)
HIKVISION Network Camera Installation Manual
Brand: HIKVISION
|
Category: Security Camera
|
Size: 46.93 MB
Table of Contents
-
Network Camera
1
-
Safety Instruction
4
-
Table of Contents
6
-
Chapter 1 Introduction
8
-
Applications
8
-
Preparations
8
-
-
Chapter 2 Box Camera Installation
10
-
Type I Box Camera
10
-
Camera Description
10
-
Installation
12
-
-
Type II Box Camera
13
-
Camera Description
13
-
Installation
15
-
Wall Mounting
17
-
-
-
Chapter 3 Dome Camera Installation
20
-
Type I Dome Camera
20
-
Camera Description
20
-
Installation
21
-
-
Type II Dome Camera
27
-
Camera Description
27
-
Installation
28
-
-
Type III Dome Camera
31
-
Camera Description
31
-
Installation
32
-
-
Type IV Dome Camera
37
-
Camera Description
37
-
Installation
38
-
-
Type V Dome Camera
47
-
Camera Description
47
-
Installation
48
-
-
Type VI Dome Camera
50
-
Camera Description
50
-
Installation
52
-
Ceiling Mounting with Gang Box
56
-
Image and Focus Adjusting
59
-
-
-
Type VII Dome Camera
60
-
Camera Description
60
-
Installation
62
-
-
Type VIII Dome Camera
66
-
Camera Description of Type a Dome Camera
66
-
Installation of Type a Dome Camera
67
-
Camera Description of Type B Dome Camera
70
-
Installation of Type B Dome Camera
70
-
-
Type IX Dome Camera
73
-
Camera Description
73
-
Installation
74
-
-
-
Chapter 4 Bullet Camera Installation
84
-
Type I Bullet Camera
84
-
Camera Description
84
-
Installation
85
-
-
Type II Bullet Camera
86
-
Camera Description
86
-
Installation
87
-
-
Type III Bullet Camera
90
-
Camera Description
90
-
Installation
90
-
-
Type IV Bullet Camera
92
-
Camera Description
92
-
Installation
93
-
-
Type V Bullet Camera
94
-
Camera Description
94
-
Installation
95
-
-
Type VI Bullet Camera
101
-
Camera Description
101
-
Installation
102
-
-
Type VII Bullet Camera
105
-
Camera Description
105
-
Installation
107
-
-
-
Chapter 5 Turret Camera Installation
113
-
Camera Description
113
-
Installation
113
-
-
Chapter 6 Cube Camera Installation
118
-
Type I Cube Camera
118
-
Camera Description
118
-
Installation
119
-
-
Type II Cube Camera
120
-
Camera Description
120
-
Remote Control Overview
122
-
Installation
122
-
-
Type III Cube Camera
125
-
Camera Description
125
-
Notice
126
-
Installation
128
-
-
Advertisement
HIKVISION DS-2CD2032-I Installation Manual (95 pages)
Network camera
Brand: HIKVISION
|
Category: Security Camera
|
Size: 7.97 MB
Table of Contents
-
Network Camera
1
-
Safety Instruction
4
-
Table of Contents
6
-
Chapter 1 Introduction
8
-
Applications
8
-
Preparations
8
-
-
Chapter 2 Box Camera Installation
9
-
Appearance Description
9
-
Box Camera I
9
-
-
Installation
11
-
Lens Installation
11
-
Wiring
11
-
Mounting
12
-
-
-
Chapter 3 Dome Camera Installation
15
-
Dome Camerai
15
-
Appearance Description
15
-
Installation
16
-
-
Dome Camera II
21
-
Appearance Description
21
-
Installation
22
-
-
Dome Camera III
36
-
Overview
36
-
Installation
38
-
-
Dome Camera IV
41
-
Overview
42
-
Installation
42
-
-
Dome Camerav
45
-
Overview
45
-
Installation
46
-
-
Dome Camera VI
49
-
Overview
49
-
Installation
50
-
Ceiling Mounting with Gang Box
54
-
-
Image and Focus Adjusting
61
-
-
Chapter 4 Bullet Camera Installation
64
-
Bullet Camerai
64
-
Appearance Description
64
-
Installation
65
-
-
Bullet Camera II
67
-
Appearance Description
67
-
Installation
68
-
-
Bullet Camera III
70
-
Appearance Description
70
-
Installation
70
-
-
Bullet Camera IV
72
-
Appearance
72
-
Installation
72
-
-
Bullet Camerav
74
-
Appearance
74
-
Installation
75
-
Wall Mounting
77
-
-
-
Chapter 5 Cube Camera Installation
82
-
Cube Camerai
83
-
Appearance Description
83
-
Installation
84
-
-
Cube Camera II
86
-
Appearance Description
86
-
Installation
87
-
-
-
Chapter 6 Mini Dome Camera Installation
91
-
Appearance Description
91
-
Installation
92
-
HIKVISION DS-2CD2032-I Quick Operation Manual (37 pages)
Box Camera III;
Dome Camera III;
Dome Camera IV;
Dome Camera V;
Dome Camera VI;
Dome Camera VII;
Bullet Camera I;
Bullet Camera II;
Bullet Camera III;
Bullet Camera IV;
Cube Camera I;
Cube Camera II;
Mini Dome Camera
Brand: HIKVISION
|
Category: Security Camera
|
Size: 2.16 MB
Table of Contents
-
Table of Contents
4
-
Chapter 1 Appearance Description
5
-
Appearance Description of Box Camera
5
-
Box Camera I
5
-
Box Camera II
6
-
Box Camera III
9
-
-
Appearance Description of Dome Camera
11
-
Dome Camera I
11
-
Dome Camera II
13
-
Dome Camera III
14
-
Dome Camera IV
16
-
Dome Camera V
17
-
Dome Camera VI
18
-
-
Appearance Description of Bullet Camera
21
-
Bullet Camera I
21
-
Bullet Camera II
22
-
Bullet Camera III
23
-
Bullet Camera IV
24
-
-
Appearance Description of Cube Camera
25
-
Cube Camera I
25
-
Cube Camera II
27
-
-
Appearance Description of Mini Dome Camera
29
-
-
Chapter 2 Setting the Network Camera over the Lan
31
-
Chapter 3 Accessing Via Web Browsers
34
Advertisement

HIKVISION DS-2CD2032-I Quick Operation Manual (23 pages)
Network Bullet Camera
Brand: HIKVISION
|
Category: Security Camera
|
Size: 0.91 MB
Table of Contents
-
Table of Contents
8
-
Regulatory Information
3
-
Fcc Information
3
-
Safety Instruction
5
-
Appearance Description
9
-
Installation
10
-
Setting the Network Camera over the LAN
13
-
Modify Device Information
16
-
-
Accessing Via Web Browser
18
-
-
Table of Contents
23
HikVision DS-2CD2032-I Quick Operation Manual (22 pages)
Network Bullet Camera
Brand: HikVision
|
Category: Security Camera
|
Size: 0.49 MB
Table of Contents
-
Table of Contents
6
-
1 Introduction
7
-
Overview
7
-
The Wiring
8
-
-
2 Installation
9
-
3 Setting the Network Camera over the LAN
11
-
4 Accessing Via Web Browser
17
HIKVISION DS-2CD2032-I Installation Manual (15 pages)
Brand: HIKVISION
|
Category: Security Camera
|
Size: 1.79 MB
Table of Contents
-
Table of Contents
3
-
Chapter 1 Appearance Description
4
-
Appearance Description of Bullet Camera
4
-
20Xx Series Bullet Camera
4
-
22Xx Series Bullet Camera
5
-
26Xx Series Bullet Camera
6
-
-
Appearance Description of Dome Camera
7
-
21Xx Series Dome Camera
7
-
27Xx Series Dome Camera
8
-
-
Appearance Description of Turret Camera
9
-
-
Chapter 2 Setting the Network Camera over the LAN
10
-
Chapter 3 Accessing Via Web Browsers
12
Advertisement
Related Products
-
HIKVISION DS-2CD2012-I
-
HIKVISION DS-2CD2010-I
-
HIKVISION DS-2CD20x2-I
-
HIKVISION DS-2CD2027G1-L
-
HIKVISION DS-2CD2086G2-IU
-
HIKVISION DS-2CD2046G2-SL
-
HIKVISION DS-2CD2046G2-IU
-
HIKVISION DS-2CD2010F-I
-
HIKVISION DS-2CD2043G0-I
-
HIKVISION DS-2CD2065G1-I
HIKVISION Categories
![]()
Security Camera
DVR
Network Hardware
Intercom System
Security Sensors
More HIKVISION Manuals
-
Страница 1
Netw ork Camer a U ser Manual V5.0 UD .6L0201D1001A01 Hikvision Digital T echnolog y Co., L td. http ://www .hikvision.com[…]
-
Страница 2
User Manual of Network Camera 1 This manual is applied to the following camera models: T ype Model Bo x camera I DS -2CD883F-E(W), DS-2CD855(F)-E, DS-2CD854F(WD)-E(W), DS -2CD853F-E(W), DS-2CD864F(WD)-E(W), DS -2CD863PF(NF)-E(W), DS-2CD893PFWD(NFWD)-E(W), DS -2CD833F-E(W), DS -2CD893PF(NF)-E(W) Dome camer a I DS -2CD733F-E(I)(Z), DS-2 CD793PF(NF)-E[…]
-
Страница 3
User Manual of Network Camera © Hikvision Dig ital T echnology Co. , Ltd. All Rights R eserve d. 2 Thank you for purchasing our product. If t here are any questions, or requests, plea se do not hesitate to contact the dealer. This manual applies to Network Camer a. This manual may cont ain sever al technical incorre ct places or printing err or s,[…]
-
Страница 4
User Manual of Network Camera © Hikvision Dig ital T echnology Co. , Ltd. All Rights R eserve d. 3 R egulatory In format ion FCC Inf ormation FCC compliance: This equipment has been tes te d and fou nd to comply with the limits for a digi tal device, pur suant to p art 15 of the FCC Rules. These limits are de signed to provide r eas onable prot ec[…]
-
Страница 5
User Manual of Network Camera © Hikvision Dig ital T echnology Co. , Ltd. All Rights R eserve d. 4 Saf ety W arnings and Cautions Plea se pay a tten tion to the f ollowing warnings and cautions : Haz ardous V oltage ma y be presen t: Special measur es and precautio ns must be tak en when using this devic e. Some potentials (voltag es) on the devic[…]
-
Страница 6
User Manual of Network Camera © Hikvision Dig ital T echnology Co. , Ltd. All Rights R eserve d. 5 P ower Cord Requi rement s: The connec tor that plugs in to the wall o utlet must be a grounding-type male plug desig ned f or use in y our region. It mus t have cer tification marks showing certi fication by an ag ency in your r egion. The connector[…]
-
Страница 7
User Manual of Network Camera © Hikvision Dig ital T echnology Co. , Ltd. All Rights R eserve d. 6 determine d by turning the equipmen t on and of f , the user is requir ed to t ak e measur es t o eliminate the in terf erence or dis con tinue the use of this equipment. Lea d Content: Please recy cle this device in a responsible manner . Ref er to […]
-
Страница 8
User Manual of Network Camera © Hikvision Dig ital T echnology Co. , Ltd. All Rights R eserve d. 7 Saf ety Ins truction These instructions are intende d to ensure that the user can use the p r oduct corr ectly to av oid danger or pr operty loss. The prec aution measure is divided in to ‘W arnings’ and ‘Cautions’: W arnings : Serious injury[…]
-
Страница 9
User Manual of Network Camera © Hikvision Dig ital T echnology Co. , Ltd. All Rights R eserve d. 8 Cautions: Mak e sure the pow er supply volt age is corr ect bef ore using the camera. Do not drop the camera or subject it to phy sical s hock. Do not touch sensor module s with fin ger s. If cleaning is necessary , use a clean cloth with[…]
-
Страница 10
User Manual of Network Camera © Hikvision Dig ital T echnology Co. , Ltd. All Rights R eserve d. 9 Cont ent s CHAPTER 1 S YSTEM REQUIREMENT ……………………………………………………………………………….. 12 CHAPTER 2 NETWORK CONNECTION …………………………………………………………………………[…]
-
Страница 11
User Manual of Network Camera © Hikvision Dig ital T echnology Co. , Ltd. All Rights R eserve d. 10 6.4 C ONFIGUR ING V IDEO AND A UDIO S ETTINGS …………………………………………………………………………. 46 6.4.1 Configuring V id eo Settings …………………………………………………………………….[…]
-
Страница 12
User Manual of Network Camera © Hikvision Dig ital T echnology Co. , Ltd. All Rights R eserve d. 11 A PPENDIX 2 P OR T M APPING ……………………………………………………………………………………………………… 92[…]
-
Страница 13
User Manual of Network Camera © Hikvision Dig ital T echnology Co. , Ltd. All Rights R eserve d. 12 Chapter 1 Sy st e m Re quir emen t Oper ating S yst em: Microso ft W indows XP SP1 and abov e ver sion / V ista / W in7 / Server 2003 / Server 2008 32bits CPU : Intel P entium IV 3.0 GHz or higher RAM: 1G or higher Display: 1024× 768 resol ution or[…]
-
Страница 14
User Manual of Network Camera 13 Chapter 2 Network C onnection Before you s tart: If y ou wan t to set the netw ork c amera via a L AN (Local Are a Network), please re fer to Se ction 2.1 Setting the Network Camer a over the L AN . If you want to set the network camera via a W AN (W ide Area Network), please re fer to Se ction 2.2 Setting t[…]
-
Страница 15
User Manual of Network Camera © Hikvision Dig ital T echnology Co. , Ltd. All Rights R eserve d. 14 2.1.2 De tecting and Changing the IP A ddre ss You need the IP address to visit the network camera. Steps: 1. To get the IP address, you can cho ose either of th e following methods : Use SADP, a software too l which can automatically detect the[…]
-
Страница 16
User Manual of Network Camera © Hikvision Dig ital T echnology Co. , Ltd. All Rights R eserve d. 15 2.2 Setting the Net work Camer a ov er the W AN Purpose: This section explains how to connect the networ k camer a to t he W AN with a s tatic IP or a dynamic IP . 2.2.1 St atic IP Con nection Before you s tart: Please apply a s tatic IP from an I S[…]
-
Страница 17
User Manual of Network Camera © Hikvision Dig ital T echnology Co. , Ltd. All Rights R eserve d. 16 2.2.2 Dynamic IP Con nection Before you s tart: Please apply a dynamic IP from an ISP . W ith the dynamic IP addre ss, you can connect the network c amera to a modem or a r outer . Con necting the ne twork came ra via a router Steps: 1. Connect […]
-
Страница 18
User Manual of Network Camera © Hikvision Dig ital T echnology Co. , Ltd. All Rights R eserve d. 17 Figure 2-7 Normal Domai n Name Re solution Steps: 1. Apply a domain name fr om a domain name provider . 2. Configure the DDNS settings in the DDNS Set tings interf ace of the network camer a. R efer to Section 5.3.4 Configuring DDNS Settings f or de[…]
-
Страница 19
User Manual of Network Camera 18 Chapter 3 Acce ss t o the Ne twor k Camer a 3.1 Accessi ng by W eb Browser s Steps: 1. Open the web browser. 2. In the address field, input the IP addre ss of the network camera , e.g., 19 2.0.0.64 and press the Enter key to enter the login interface. 3. Input the user name and passwo rd and click . Note: The defaul[…]
-
Страница 20
User Manual of Network Camera © Hikvision Dig ital T echnology Co. , Ltd. All Rights R eserve d. 19 Figure 3-2 Downlo ad and Install Plug-in Figure 3-3 Ins tall Plug-in (1) Figure 3-4 Ins tall Plug-in (2)[…]
-
Страница 21
User Manual of Network Camera © Hikvision Dig ital T echnology Co. , Ltd. All Rights R eserve d. 20 Figure 3-5 Ins tall Plug-in (3) Note: You may h ave to close th e web browser to install the plug-in. Please reopen the web browser and log in again after installing the plug -in. 3.2 Accessi ng by Client Soft war e 3.2.1 Acce ssing by iVMS-4200 So […]
-
Страница 22
User Manual of Network Camera © Hikvision Dig ital T echnology Co. , Ltd. All Rights R eserve d. 21 Figure 3-6 iVMS-4 200 Live V iew Figure 3-7 iVMS -4200 Configura tion Pan el Note: F or detailed inf orma tion about iVMS-4200 client softw are, please ref er t o the user manual of the iVMS-4200 so ftware. 3.2.2 Acce ssing by iVMS-4500 So ftwar e T[…]
-
Страница 23
User Manual of Network Camera © Hikvision Dig ital T echnology Co. , Ltd. All Rights R eserve d. 22 4.1 Configuring Wi -F i Connection in Manage and Ad -hoc Mode s Before you s tart: A wireless network must be configur ed . W ireless Connection in Manage Mode Steps: 1. Enter the W i-F i configur ation in terf ace. Configur ation> Adv ance d Con[…]
-
Страница 24
User Manual of Network Camera © Hikvision Dig ital T echnology Co. , Ltd. All Rights R eserve d. 23 If you choose the Ad -hoc mode, you don ’ t nee d to c onnect the wirele ss camer a via a rout er . The scenario is the same as yo u connect the camer a and the PC direct ly with a network c able. Steps: 1. Cho ose Ad-hoc mode. Figure 4-3 Wi -F i […]
-
Страница 25
User Manual of Network Camera © Hikvision Dig ital T echnology Co. , Ltd. All Rights R eserve d. 24 Y ou can choose the Security Mode as not – encrypte d, WEP , WP A-per sonal, WP A-ent erprise, WP A2-per sonal, WP A2-enter prise. WEP mode: Au thentic ation — Select O pen or Shar ed Key Sys tem Authentic ation, dep ending on the method u se […]
-
Страница 26
User Manual of Network Camera © Hikvision Dig ital T echnology Co. , Ltd. All Rights R eserve d. 25 WP A- en terprise and WP A2-enter prise Mode: Choose the type of client/server authent ication being used by the acce ss point; EAP -TLS or EAP — PEAP . EAP -TLS Ident ity — En ter the user ID to pr esent t o the netw ork. Pr iva te k ey p a[…]
-
Страница 27
User Manual of Network Camera © Hikvision Dig ital T echnology Co. , Ltd. All Rights R eserve d. 26 4.2 Ea sy W i -F i Connection with WPS function Purpose : The setting o f the wirele ss network c onnection is never e a s y . T o a void the comple x setting o f the wireless connection you c an enable the WPS function. WPS ( Wi -F i Pro tecte d Se[…]
-
Страница 28
User Manual of Network Camera © Hikvision Dig ital T echnology Co. , Ltd. All Rights R eserve d. 27 If there is n ot a WPS button on the camera, y ou can also click the virtual button to enable the PBC function on the web in terface . Click butt on. When the PBC mode is both enabled in the ro uter and the camer a, the camera and the wireless netwo[…]
-
Страница 29
User Manual of Network Camera © Hikvision Dig ital T echnology Co. , Ltd. All Rights R eserve d. 28 Y ou can gener at e the PIN code on th e camer a side. And the expire d time for the PIN code is 120 secon ds. 1. Click 2. Enter the co de to the rou ter , in the e xample, e nter 4816 7581 to the r outer . 4.3 IP Property Set tings f or W ireless N[…]
-
Страница 30
User Manual of Network Camera 29 Chapter 5 Live V iew 5.1 Live V iew P ag e Purpose: The live video page allows you to view live video, capture images, realize PTZ control, set/call presets and configure video parameters. L og in the n etwork camera to enter the live view page, or you can click on the menu bar of the main page to enter the live vie[…]
-
Страница 31
User Manual of Network Camera © Hikvision Dig ital T echnology Co. , Ltd. All Rights R eserve d. 30 pan/tilt unit has been ins talled ). Live View Parameters: Configure the image size and stream type of the live video. 5.2 Starting Live V iew In the live view window as sh own in F igure 5-2, click on the t oolbar t o start the live view of the cam[…]
-
Страница 32
User Manual of Network Camera © Hikvision Dig ital T echnology Co. , Ltd. All Rights R eserve d. 31 click to recor d the live video . The saving paths of t he captur ed pictur es and clips can be set on the Configur ation > Local Configuration page. T o con figure remote schedule d recor ding, p lea se re fer to Section 6.2 . Note : The capture[…]
-
Страница 33
User Manual of Network Camera © Hikvision Dig ital T echnology Co. , Ltd. All Rights R eserve d. 32 Focus ne ar/far Iris open/ close Light on/ off W iper on/off One-t ouch focus Initializ e lens Adjus t speed of pan /ti lt movements 5.4.2 Sett ing / Calling a Pre set Setting a Preset: 1. In the PTZ control panel, select a preset number from th[…]
-
Страница 34
User Manual of Network Camera © Hikvision Dig ital T echnology Co. , Ltd. All Rights R eserve d. 33 Figure 5-4 Calling a Pr ese t 5.5 Configuring Live V iew P ar amet er s Purpose: Y ou can select the st ream type and a djust the image siz e on the live view page. Click , or tab under the menu bar of the live view interf ace to select the str […]
-
Страница 35
User Manual of Network Camera © Hikvision Dig ital T echnology Co. , Ltd. All Rights R eserve d. 34 Figure 6-1 Loc al Configura tion Inter face 2. Con figure the fol lowing setti ngs: Live V iew Par amete rs : Set the pro tocol type and liv e view performance. Prot ocol T ype: TCP , UDP , MUL TICAST and HTTP are selectable. TCP: Ensures co[…]
-
Страница 36
User Manual of Network Camera © Hikvision Dig ital T echnology Co. , Ltd. All Rights R eserve d. 35 pictures in playback mod e. Sav e clips to: Set the savi ng path of the clipped vi deo fil es in pla yback mode. Note : Y ou can click to change the direct ory for saving the clips and pictures. 3. Click to save the settings. 6.2 Configuring T i[…]
-
Страница 37
User Manual of Network Camera © Hikvision Dig ital T echnology Co. , Ltd. All Rights R eserve d. 36 Figure 6-3 T ime Sync by NTP Server Note : If the camera is connecte d to a p ublic network, you should use a NTP server that has a t ime s ynchro nization function, such as the server at the N a tional T ime Center (IP Addr ess: 210.72.145.44). If […]
-
Страница 38
User Manual of Network Camera © Hikvision Dig ital T echnology Co. , Ltd. All Rights R eserve d. 37 6.3 Configuring Network Set tings 6.3.1 Configuring T CP /IP Set tings Purpose: TCP /IP set tings must be pr operly configur ed bef or e you oper ate the camer a over network. The camera su pports both the IPv4 and IPv6. Both versions may be configu[…]
-
Страница 39
User Manual of Network Camera © Hikvision Dig ital T echnology Co. , Ltd. All Rights R eserve d. 38 3. Click t o save the above settings . Note : it will ask f or a re boot for the settings to tak e ef fect. 6.3.2 Configuring P ort Settings Purpose: Y ou can set the por t No. of the camera, e.g. HTTP port, RTSP port and HTTPS port. Steps: 1. Enter[…]
-
Страница 40
User Manual of Network Camera © Hikvision Dig ital T echnology Co. , Ltd. All Rights R eserve d. 39 Figure 6-8 PPP oE Se ttings 2. Check the En able PPPoE checkbox to enable this feature. 3. Enter User Name , Password , and Confirm password for PPPoE access. Note: The User Name and Password should be assigned by your ISP. 4. Clic k to save and exi[…]
-
Страница 41
User Manual of Network Camera © Hikvision Dig ital T echnology Co. , Ltd. All Rights R eserve d. 40 3. Select DDNS Type . Three DDNS types are selectable: HiDDNS, IPServer and DynDNS. DynDNS: Steps: (1) Enter Server Address of DynDNS (e.g. members.dyndns.org). (2) In the Domain text field, enter the domain name obtained from the DynDNS website[…]
-
Страница 42
User Manual of Network Camera © Hikvision Dig ital T echnology Co. , Ltd. All Rights R eserve d. 41 (2) Enter the Server A ddress www .hiddns.com. (3) Enter the Domain name o f the camer a. The domain is the same with the device alias in the HiDDNS server . (4) Click to sav e the new setti ngs. Note : It will ask f or a reboo t for the set tings t[…]
-
Страница 43
User Manual of Network Camera © Hikvision Dig ital T echnology Co. , Ltd. All Rights R eserve d. 42 Figure 6- 12 SNMP Set tings 2. Check the corresponding version checkbox ( , , ) to enable the feature. 3. Configure the SNMP settings. Note: The settings of the SNMP software should be the same as the settings you configure here. 4. Click t o save a[…]
-
Страница 44
User Manual of Network Camera © Hikvision Dig ital T echnology Co. , Ltd. All Rights R eserve d. 43 Configur ation > Adv anced Conf igurat ion > Network > 802. 1X Figure 6- 13 802.1X Se ttings 2. C heck the En able IEEE 80 2.1X checkbo x to enable the f ea ture. 3. Con figure the 802.1X settings, including EAPOL ver sion, u ser name and p[…]
-
Страница 45
User Manual of Network Camera © Hikvision Dig ital T echnology Co. , Ltd. All Rights R eserve d. 44 3. Clic k to sav e the settings. Note : it will ask f or a re boot for the settings to tak e ef fect. 6.3.8 Configuring FTP Set tings Purpose: Y ou can configur e the FTP ser ver relat ed inf ormation to enable the uploading of the captur ed picture[…]
-
Страница 46
User Manual of Network Camera © Hikvision Dig ital T echnology Co. , Ltd. All Rights R eserve d. 45 6.3.9 Configuring UPnP ™ Set tings U niver sal Plug and Play (UPnP ™ ) is a networking architecture th a t p r ovides compa tib ility among netw orking equipment, softwar e and other h ar dwar e devices. The UPnP p r otoc ol allows devices to co[…]
-
Страница 47
User Manual of Network Camera © Hikvision Dig ital T echnology Co. , Ltd. All Rights R eserve d. 46 3. Clic k to sa ve the set tings. 6.4 Configuring V ideo and Audio Set tings 6.4.1 Configuring V ideo S et tings Steps: 1. En ter the V ideo Settings interf ace: Configur ation >Basic Con figurat ion > V ideo / Audio > V ideo O r Configurat[…]
-
Страница 48
User Manual of Network Camera © Hikvision Dig ital T echnology Co. , Ltd. All Rights R eserve d. 47 Fram e Rate: Set the frame ra te to 1 / 16~25 fps. The f rame rat e is to describe the frequency at which the video stream is updat ed and it is measured by frames per second (fps). A higher frame rate is advantageous when there is movement in the v[…]
-
Страница 49
User Manual of Network Camera © Hikvision Dig ital T echnology Co. , Ltd. All Rights R eserve d. 48 Audio Encoding: G.711 ulaw , G.7 11alaw and G.72 6 are selectabl e. Audio Input: MicIn and Linein are selectable for the connecte d micro phone and pickup re spectively . 3. Clic k to save the se ttings. 6.4.3 Configuring R OI Encoding Note: O nly 4[…]
-
Страница 50
User Manual of Network Camera © Hikvision Dig ital T echnology Co. , Ltd. All Rights R eserve d. 49 1. En ter the Display Se ttings int erface: Configur ation > Basic Con figurat ion> Im age > Displa y Settings Or Configur at ion > Adva nced Configur ation> Imag e > Display Se ttings 2. Se t the image par ameter s of the camer a.[…]
-
Страница 51
User Manual of Network Camera © Hikvision Dig ital T echnology Co. , Ltd. All Rights R eserve d. 50 The mirror function enable s you to view another a spect of the image. Y ou c an flip the image horizon tally and vertically . It can be u se d to view the image in the wa y you see it directly using your eye s. WDR: W ide dynamic r ange can be used[…]
-
Страница 52
User Manual of Network Camera © Hikvision Dig ital T echnology Co. , Ltd. All Rights R eserve d. 51 Y ou can cus tomize the camer a name and time on the scree n. Steps: 1. Enter the OS D Settings in terface : Configur ation > Adv anced Conf igurat ion > Image > OSD Set tings Figure 6- 20 O SD Settings 2. Check the corre sponding checkbox […]
-
Страница 53
User Manual of Network Camera © Hikvision Dig ital T echnology Co. , Ltd. All Rights R eserve d. 52 6.5.3 Configuring T ext O verla y Set tings Purpose: Y ou can cus tomize the te xt overla y . Steps: 1. Enter the T ex t Overla y Setti ngs interf ace: Configur ation > A dvance d Configura tion > Image > T ext O verla y 2. Check the checkb[…]
-
Страница 54
User Manual of Network Camera © Hikvision Dig ital T echnology Co. , Ltd. All Rights R eserve d. 53 3. Clic k . Figure 6- 23 Priv acy Mask Set tings 4. C lick and drag the mouse in the live vi deo window to dr aw the mask area. Note: Y ou a re allowe d to dr aw up to 4 are as on the same imag e. 5. C lick to finish drawing or click to clear all of[…]
-
Страница 55
User Manual of Network Camera © Hikvision Dig ital T echnology Co. , Ltd. All Rights R eserve d. 54 2. Click button to add a picture fr om your PC. 3. Click button to uploa d it. 4. Check the checkbox t o enable the function. X Coordinate and Y Coordina te value s are for the loca tion of the pic ture on the image. And the Picture width and Heigh […]
-
Страница 56
User Manual of Network Camera © Hikvision Dig ital T echnology Co. , Ltd. All Rights R eserve d. 55 (2) Check the checkbo x of Enable Motion Det ection. Figure 6- 24 Enable Mo tion Detection (3) Click . Click and dr ag the mouse on the live video i mage to draw a motion detectio n area. Note: Y ou c an draw up to 8 motion det ection are as on the […]
-
Страница 57
User Manual of Network Camera © Hikvision Dig ital T echnology Co. , Ltd. All Rights R eserve d. 56 Figure 6- 25 Arming T ime (1) Click to edit the arming schedule. The F igure 5- 28 shows the editing int erface of the arming schedule. (2) Choose the da y you wan t to se t the arming schedule. (3) Click to set the time period f or the arming sche […]
-
Страница 58
User Manual of Network Camera © Hikvision Dig ital T echnology Co. , Ltd. All Rights R eserve d. 57 Y ou can specify the link age method when an even t occurs. The following cont ents ar e about how to c onfigure the dif fe rent types of lin k age method. Figure 6- 27 Link age Method Steps: (1) Check the checkbox t o select the linkage met hod. Au[…]
-
Страница 59
User Manual of Network Camera © Hikvision Dig ital T echnology Co. , Ltd. All Rights R eserve d. 58 Y ou can configure th e camer a to t rigger the alarm when t he lens is cov ere d and tak e alarm re sponse action . Steps: 1. En ter the T amper -pro of Setti ngs interf ace: Configur ation > A dvance d Configura tion > Ev ents > T amper-p[…]
-
Страница 60
User Manual of Network Camera © Hikvision Dig ital T echnology Co. , Ltd. All Rights R eserve d. 59 6.6.3 Configuring Ext ernal Al arm Input Steps: 1. En ter the Alarm Input Settings i nterf ace: Configur ation > A dvance d Configura tion> Ev ents > Alarm Input: 2. Choose the alarm input No. and the Alarm T ype. The alarm type ca n be NO […]
-
Страница 61
User Manual of Network Camera © Hikvision Dig ital T echnology Co. , Ltd. All Rights R eserve d. 60 Figure 6- 30 Link age Method 6.6.4 Configuring Alarm Out put Steps: 1. En ter the Alarm Ou tput Settings in terface: Configur ation>Adv anced Configur ation> E ven ts > Alarm O utput 2. Select one alarm output channel in the Alarm O utput d[…]
-
Страница 62
User Manual of Network Camera © Hikvision Dig ital T echnology Co. , Ltd. All Rights R eserve d. 61 Figure 6- 31 Alarm O utput Setti ngs 6.6.5 Hand ling Ex ception The ex ception type can b e HDD full, HDD error , network disconnect ed , IP addr ess conflict ed and illegal login to the c ameras. Steps: 1. En ter the Ex ception Settings in terf ace[…]
-
Страница 63
User Manual of Network Camera © Hikvision Dig ital T echnology Co. , Ltd. All Rights R eserve d. 62 6.6.6 Emai l Sending T riggere d by Alarm Purpose: The system can be configured t o send an Email notif ication to all d esignated receivers if a n alarm event is detected, e.g., motion d etection event, video l oss, tamper-proof, etc. Before you s […]
-
Страница 64
User Manual of Network Camera © Hikvision Dig ital T echnology Co. , Ltd. All Rights R eserve d. 63 And the SSL SMTP port is 465. Enable SSL: Check the checkbo x to enable SSL if it is require d by the SMTP server . A ttache d Image: Check the checkbox of A t tached Image if you wan t to send emails with a ttache d alarm images. Interv al: The int[…]
-
Страница 65
User Manual of Network Camera © Hikvision Dig ital T echnology Co. , Ltd. All Rights R eserve d. 64 details to con figure FTP par ameter s. 2) Check the En able T iming Snapsho t checkbox. U pload ev ent -triggere d snapshots t o FTP Steps: 1) Con figure the FTP settings and check checkbox in FTP Settings inte rface . Please ref er to Section […]
-
Страница 66
User Manual of Network Camera © Hikvision Dig ital T echnology Co. , Ltd. All Rights R eserve d. 65 Steps: 1. En ter the face detection se ttings int erface: Configur ation > Adv ance d Configura tion > E vent s > Face De tection 2. Check the Enable Face D etection to check box to enable the function . 3. ( Optional)Y ou can check th e En[…]
-
Страница 67
User Manual of Network Camera © Hikvision Dig ital T echnology Co. , Ltd. All Rights R eserve d. 66 Figure 6- 35 R emote Con trol Se ttings 2. Study the code of the remote c ontr ol or the wirele ss alarm. T o study a r emote control, select Remote Co ntrol fr om the Study dr op -down list , and click ; and then pre ss any o f the buttons o n the […]
-
Страница 68
User Manual of Network Camera © Hikvision Dig ital T echnology Co. , Ltd. All Rights R eserve d. 67 R emote Contr ol: Figure 6- 36 R emote Con trol Remo te Control Description: Sta tus Indicator Indicating the sta tus of the remo te; when you press the butt on on t he remo te, the indicator flicks in r ed. Arm Press the button to arm the camer a. […]
-
Страница 69
User Manual of Network Camera © Hikvision Dig ital T echnology Co. , Ltd. All Rights R eserve d. 68 T o s tudy the wirele ss alarms, e.g. the access control device, select W ireless Alarm f r om the Study drop-down list, a nd select the device serial nu mber (1-
 from the d r op-down list, and click ; and then send the signal f r om the wire[…]
 -
Страница 70
User Manual of Network Camera © Hikvision Dig ital T echnology Co. , Ltd. All Rights R eserve d. 69 Note: DS -2CD8464F -EI(Z)(W) camer a supports wireless audi ble and visual alarm as the wirel ess alarm output for the wireless alarm. Check the check box of W ireless audi ble and visual alarm to activ ate th e alarm output. Figure 6- 39 W ireless […]
-
Страница 71
User Manual of Network Camera © Hikvision Dig ital T echnology Co. , Ltd. All Rights R eserve d. 70 Manual Alarm/Emergen cy Alarm Certain series o f c amer a su pport manual alar m by th e remote con trol. It can be manually t rigger ed and link ed to t he audio warning if any emergency happens. Y ou can p r ess and hold th e man ual alarm butt on[…]
-
Страница 72
User Manual of Network Camera © Hikvision Dig ital T echnology Co. , Ltd. All Rights R eserve d. 71 Y ou can also press the Arm/Disarm butt o n on the remote contr ol to arm/disarm the camer a if the camer a has alr ea dy studied the r emote c ontr ol. The arming indicat or glow s red when the camera is armed and glows blue when it ’ s d[…]
-
Страница 73
User Manual of Network Camera 72 Chapter 7 Stor age Set tings Before you s tart: T o configure rec ord se ttings, plea se mak e sure th at you ha ve the netw ork st orag e device within the netw ork or the SD car d inserte d in your camer a. 7.1 Configuring N AS Settings Before you s tart: The network disk should be av ailab le within the network a[…]
-
Страница 74
User Manual of Network Camera © Hikvision Dig ital T echnology Co. , Ltd. All Rights R eserve d. 73 Figure 7-3 Initiali zing When the initializa tion complet ed, the sta tus of disk will become Normal. Figure 7-4 V iew D isk St atus Note s : U p to 8 NA S disks can be connected to the camer a. T o initializ e and use the SD card a fter ins[…]
-
Страница 75
User Manual of Network Camera © Hikvision Dig ital T echnology Co. , Ltd. All Rights R eserve d. 74 Figure 7-5 R ec ording Schedule In terface 2. Check the checkbox o f Enable Record Sche dule to enable sc hedule d reco rding. 3. Set the rec ord par ameter s of the c amera. Figure 7-6 R ec ord Par ameter s Pre-rec ord: The time you set to star[…]
-
Страница 76
User Manual of Network Camera © Hikvision Dig ital T echnology Co. , Ltd. All Rights R eserve d. 75 Figure 7-7 R ec ord Schedule 5. Choose the day to set th e record sc hedule. (1) Set all-day rec ord or segment recor d: If you w ant to c onfigur e the a ll -day rec ordi ng, please check the All Da y checkbox . If you want to recor d in di[…]
-
Страница 77
User Manual of Network Camera © Hikvision Dig ital T echnology Co. , Ltd. All Rights R eserve d. 76 Section 5.6.4 . Record T riggere d by Motion & Alarm If you select Motion & Alarm , t he video will be rec orded when the motion and alarm are trigger ed a t the same time. Besides configuring the rec ording sche dule, you ha ve to confi[…]
-
Страница 78
User Manual of Network Camera © Hikvision Dig ital T echnology Co. , Ltd. All Rights R eserve d. 77 Figure 7-8 E dit Rec ord Sched ule (3) Check the checkbox and click to copy set tings of this day to the whole week. Y o u can also check an y of the checkbo x es be for e the date and click . (4) Click to sa ve the set tings and exit the Edit Recor[…]
-
Страница 79
User Manual of Network Camera 78 Chapter 8 Pla yback Purpose: This section explains how to view the remo tely record ed video files store d in the network disk s or SD cards. Steps: 1. Click on the menu bar to enter playback in terface. Figure 8-1 Pla yback Inter face 2. Select the dat e and click . Figure 8-2 Se arch V ideo 3. Click to play the vi[…]
-
Страница 80
User Manual of Network Camera © Hikvision Dig ital T echnology Co. , Ltd. All Rights R eserve d. 79 proce ss. Figure 8-3 Pla yback T oolbar Table 8-1 Description of the bu ttons Button Operation Button Operation Play Capture a pictur e Pause / Start/Stop clipping vide o files Stop / Audio on and adjust volume/Mute Speed down Download video files S[…]
-
Страница 81
User Manual of Network Camera 80 Chapter 9 Log Sear ching Purpose: The o per ation, alarm, ex ception and inf ormation of the camer a can be store d in log files. Y ou can also e xport the log files on y our demand. Before you s tart: Please c onfigure netw ork stor age f or the camer a or insert a SD card in the camera. Steps: 1. Click on th e men[…]
-
Страница 82
User Manual of Network Camera 81 Chapter 10 Other s 10.1 Managing U ser Accoun ts Enter the U ser Management in terface: Configur ation >Basic Con figurat ion> Security > U ser O r Con figura tion > Adva nced Configur ation> Security > U ser The a dmin user has access to creat e, modify or delete other accounts. U p to 15 user acc[…]
-
Страница 83
User Manual of Network Camera © Hikvision Dig ital T echnology Co. , Ltd. All Rights R eserve d. 82 Figure 10-2 Add a U ser Modify a U ser Steps: 1. Left -click to select the user from the lis t and c lick . 2. Modify the U ser Name , Level or P assword . 3. In the Basic Permission field and Camer a Configura tion field, you can check or unc h[…]
-
Страница 84
User Manual of Network Camera © Hikvision Dig ital T echnology Co. , Ltd. All Rights R eserve d. 83 Delete a U ser Steps: 1. Left — cl ick the user name you w ant to delet e and click . 2. Click on the pop-up dialogue box to delet e the user . Figure 10-4 Delete a U ser Anonymous V isit 10.2 Configuring RT SP Authentica tion Purpose: Y ou […]
-
Страница 85
User Manual of Network Camera © Hikvision Dig ital T echnology Co. , Ltd. All Rights R eserve d. 84 Enabling this function allows visit for whom doesn ’ t hav e the user name and passw ord of the device. Steps: 1. Enter the Anon ymous V isit interf ace: Configur ation> Adv anced Configur at ion> Security > Anonymous V isit Figure 10-6 A[…]
-
Страница 86
User Manual of Network Camera © Hikvision Dig ital T echnology Co. , Ltd. All Rights R eserve d. 85 Figure 10-8 IP Addr ess F i lter I nterf a ce 2. Check the checkbox o f Enable IP Address F i lter . 3. Select the type of IP Addr ess F i lter in the drop -down list, Forbidden and Allowed are selecta ble. 4. Set the IP A ddress F ilter lis t. […]
-
Страница 87
User Manual of Network Camera © Hikvision Dig ital T echnology Co. , Ltd. All Rights R eserve d. 86 Figure 10- 10 Modify an IP (3) Click the bu tt on to finish modifying. Delete an IP A ddress Left -click an IP addr ess fr om filter list and click button. Delete all IP A ddress es Click button to dele te all the IP addr sses. 5. Click butt[…]
-
Страница 88
User Manual of Network Camera © Hikvision Dig ital T echnology Co. , Ltd. All Rights R eserve d. 87 10.6 Maint enance 10.6.1 R ebooting the Camer a Steps: 1. En ter the Mainte nance inter face: Configur ation > Basic Configur at ion > S yst em > Mainte nance Or Configura tion > Adv anced Configu ratio n> Sy st em > Maintenance: 2[…]
-
Страница 89
User Manual of Network Camera © Hikvision Dig ital T echnology Co. , Ltd. All Rights R eserve d. 88 start importi ng con figura tion file. Note : Y ou nee d to r eboot the camer a after importin g con figura tion fi le. 2. Clic k and set the saving pat h to save the configura tion file in loc al stor age . Figure 10- 14 Import/Export Configur atio[…]
-
Страница 90
User Manual of Network Camera © Hikvision Dig ital T echnology Co. , Ltd. All Rights R eserve d. 89 1. Enter R S-232 Port Setting int erface: Configur ation> Adv anced Configur at ion> Syst em > RS 232 Figure 10- 16 RS -232 Settings Note: If you wan t to connect the camer a by the RS- 232 port, the par ameter s of the RS -232 should be ex[…]
-
Страница 91
User Manual of Network Camera © Hikvision Dig ital T echnology Co. , Ltd. All Rights R eserve d. 90 Appendix Appendix 1 SADP So ftwar e Intr oduction Descripti on of S ADP V 2.0 SADP (Searc h Activ e Devices Pro tocol) is a kind of user-frie nd ly and in s tallation-fr ee online device sea rch tool. It sear ches the active online devices withi[…]
-
Страница 92
User Manual of Network Camera © Hikvision Dig ital T echnology Co. , Ltd. All Rights R eserve d. 91 Note: Y ou c an click or on e ach column heading to order t he informa tion; you c an c lick to expa nd the device table and hide the network par ameter panel on the right side, or click to show the network par amet er panel. Modify netwo rk par[…]
-
Страница 93
Appendix 2 P ort Mapping The following setti ng s are for TP -LINK router (TL-R410) . The settings vary d epending on diff eren t models of ro uters. Steps: 1. Select the W AN Connection T ype , as s hown below: F igure A.2.1 Select the W AN Connection T ype 2. Set the L AN par amet ers of the r outer as in the following figure, incl uding IP addre[…]
-
Страница 94
User Manual of Network Camera © Hikvision Dig ital T echnology Co. , Ltd. All Rights R eserve d. 93 ports of another camera as 81, 8001, 555, 8201 with IP 192.168.1.24. R ef er to the ste ps as below: Note : The 8200 port changes with the 80 00 port with a constan t value of 200. E.g. if the 8000 port is changed to 8005, then the 8200 po rt should[…]
-
Страница 95
First Choice for Security Professionals[…]
 from the d r op-down list, and click ; and then send the signal f r om the wire[…]
Я уже очень много лет занимаюсь системами видеонаблюдения.
Раньше как и все ставил аналоговые камеры, сейчас конечно перешел на цифру, обратно уже не хочется.
Пробовал разные камеры, но как то в чаще попадалась продукция ILDVR и Hikvision, в основном из-за удобного ПО.
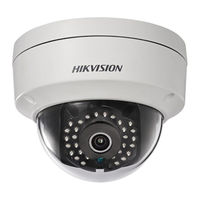
Вот о камерах второго производителя и пойдет речь, вернее об их одной, но очень удачной модели.
Кому интересно, заходите.
Оговорюсь сразу, скриншотов изображений улицы и т.п. нет, к моему большому сожалению.
Когда делал обзор, то как раз несколько дней была гадкая погода, а потом камеры уехали на свое штатное место. Поэтому я свой обзор написал скорее в стиле дополнения уже существующего обзора где есть скриншоты изображения с камеры и довольно неплохие.
Да и просто хотелось порекомендовать нормального продавца с хорошими ценами.
Заказывал я четыре камеры в три захода, первую на пробу, потом еще три. Пришли без проблем.
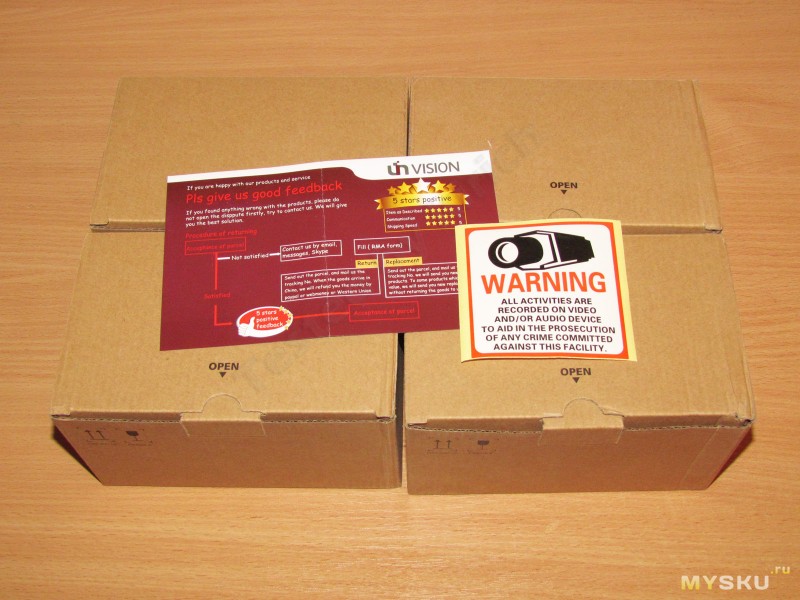
Упакованы довольно просто, но вполне надежно, повредить камеру в процессе доставки очень сложно.
Упаковка
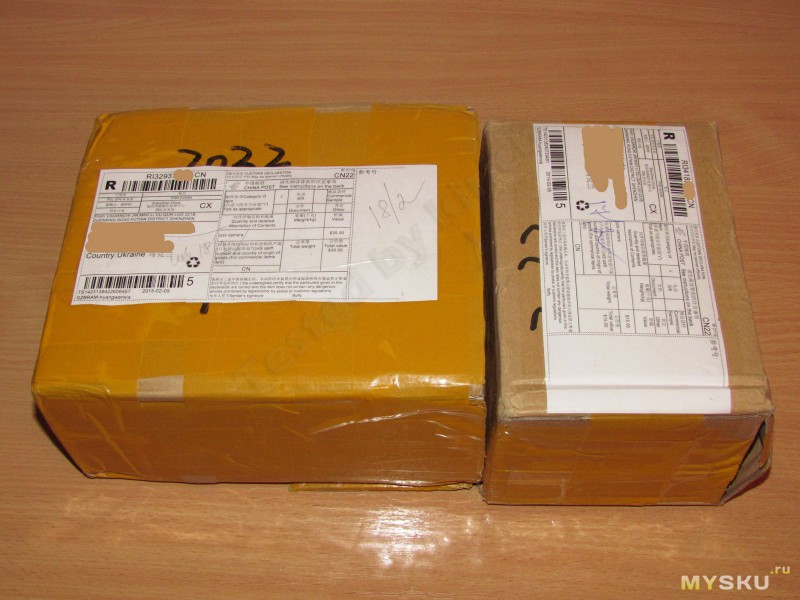
Вот так выглядит весь комплект.
Коробка камеры по размерам 1 в 1 с фирменной, в которых камеры продаются у нас, разница только в отсутствии полиграфии. Но я брал камеры не ради полиграфии, потому смысл ее для меня нулевой.
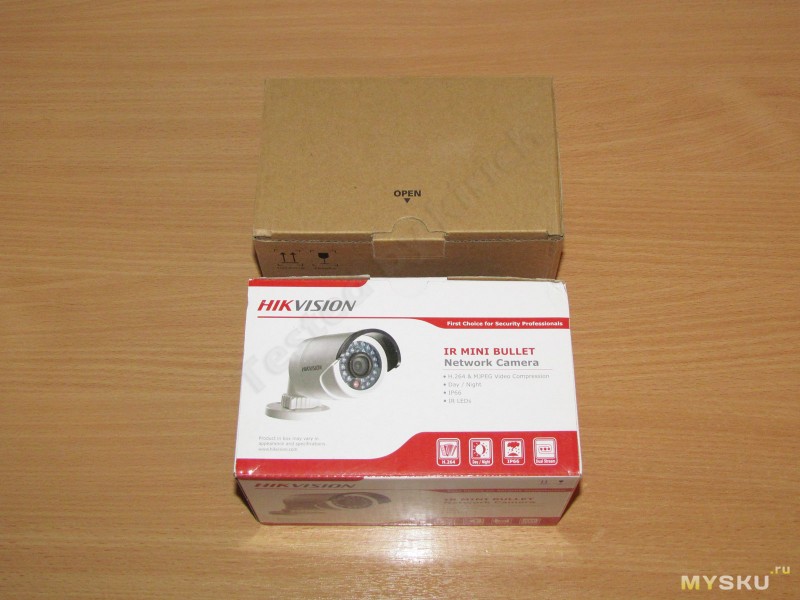
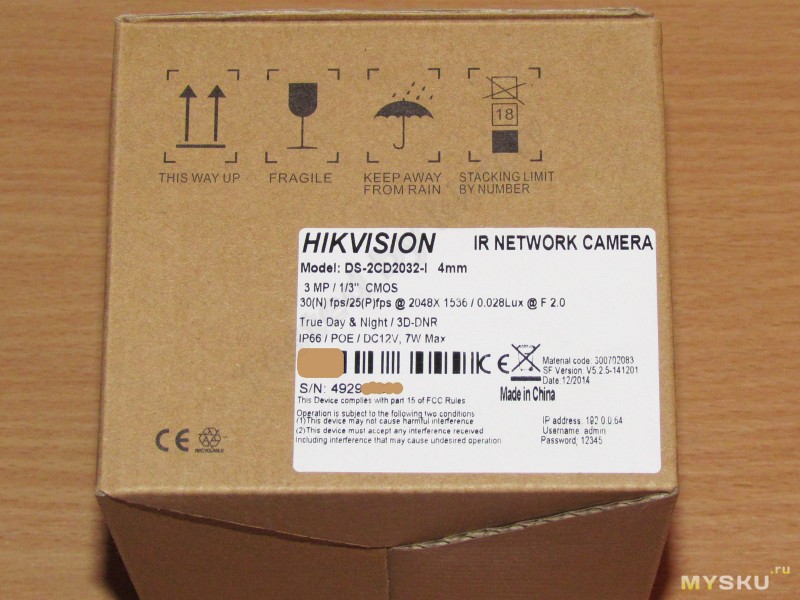
На одном из торцов упаковки размещена вся минимально необходимая информация о камере.
Матрица 3mp, 1/3″ CMOS (в реальности 3,2мр)
Максимальное разрешение 2048х1536
Максимальная частота кадров 30 (в режиме 1920х1080)
Чувствительность 0,028 Люкс
Так же присутствует айпи адрес по умолчанию, логин и пароль.
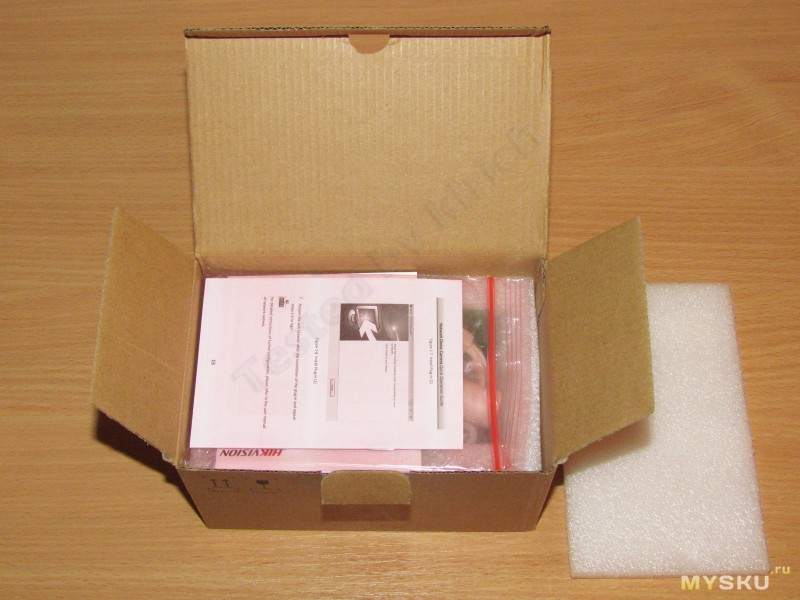
Внутри упаковка абсолютно не отличается от фирменной, тот же «домик» из вспененного полиэтилена, повредить камеру в такой упаковке очень сложно, особенно если учитывать прочность самой камеры.
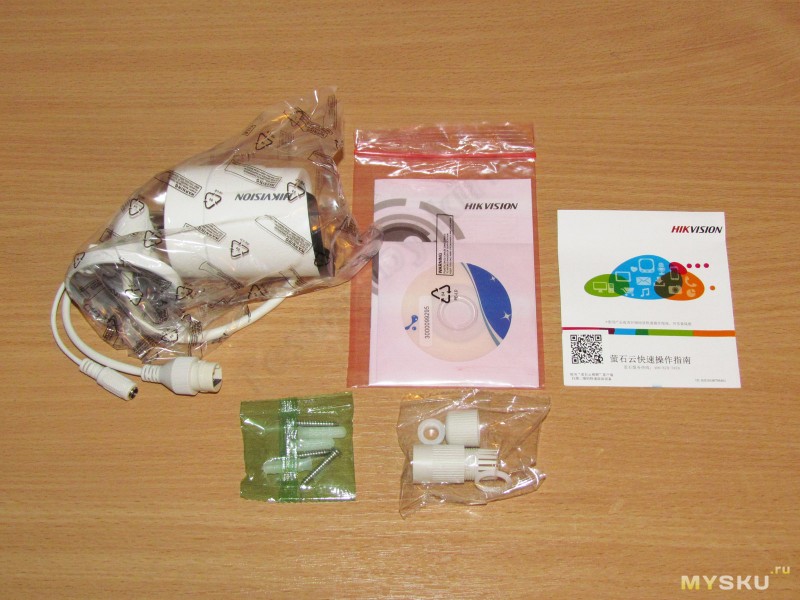
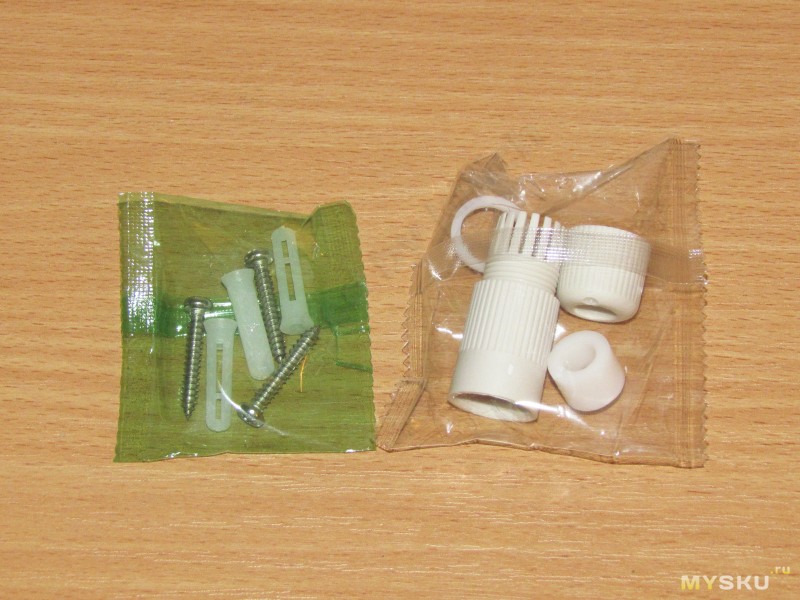
Комплект одной камеры.
Сама камера
Комплект шурупов и пробок к ним (откровенное г…., как и в фирменных)
Комплект гермосоединения
Инструкция
Компакт диск с ПО (по идее, ни разу не смотрел даже что на нем)
Краткая инструкция по установке.
На самой камере информации не так много, на коробке даже больше.
Указано фокусное расстояние объектива 4.0мм, максимальная мощность 7 Ватт по 12 Вольт (РоЕ свитч показывает около 5.5 Ватта).
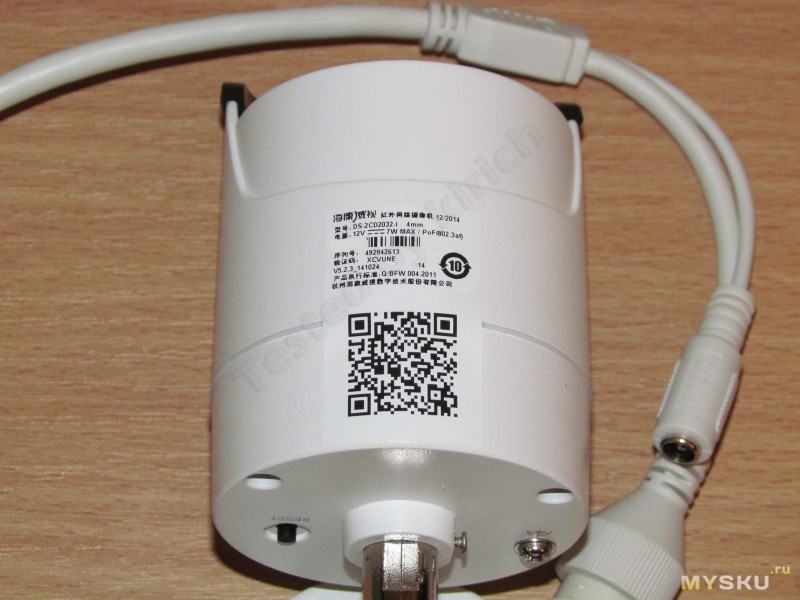
С тыльной стороны находится винт для подключения заземления к корпусу камеры и кнопка сброса.
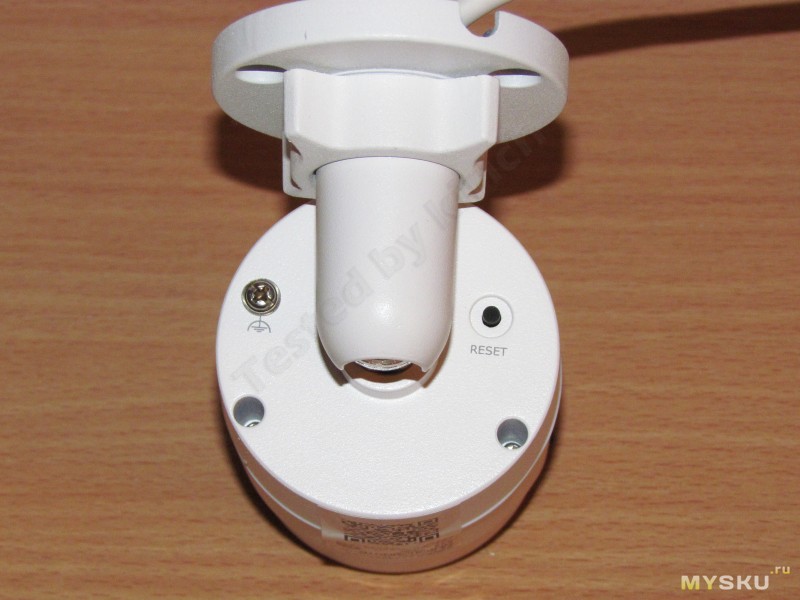
С фронтальной стороны камера ничем не отличается от остальных камер наблюдения. такой же объектив, такая подсветка с датчиком освещенности.

Камера имеет два разъема.
Разъем питания 12 вольт
Разъем для подключения кабеля локальной сети.
Из полюсов, разъем локальной сети можно подключить практически герметично, и если питать камеру от свитча, то больше ничего подключать не надо, из этого вытекает минус, разъем питания при этом желательно изолировать, либо изолентой\термоусадкой, либо размещать все соединения в герметичной коробке.

Крепеж и комплект для гермосоединения поближе.
Соединение довольно надежное, лучше конечно все соединения все равно делать в коробках, но даже в таком варианте соединение очень хорошее.
Полный комплект всех бумажек выглядит так.
Краткая инструкция по установке.
Наклейка для удобства сверления крепежных отверстий
Непонятная мне круглая пленка с надписью Хиквижн, к тем, что продаются у нас, в комплекте не идет.
Компакт диск и инструкция.
К купольным камерам еще идет шестигранный ключ.

Так же продавец положил бумажку с просьбой поставить ему 5 звезд и наклейку «ведется видеонаблюдение», вот только наклейку положил одну, зажал положить больше.

А вот и все четыре красавицы вместе 
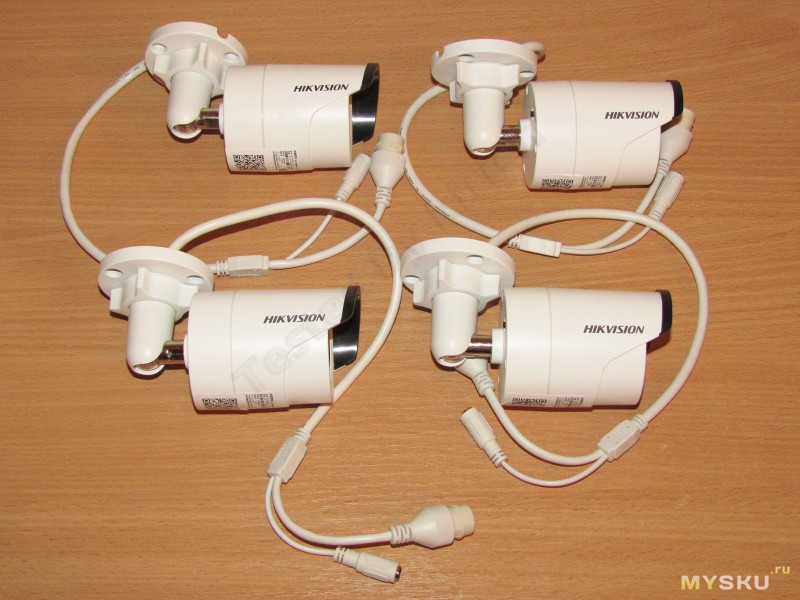
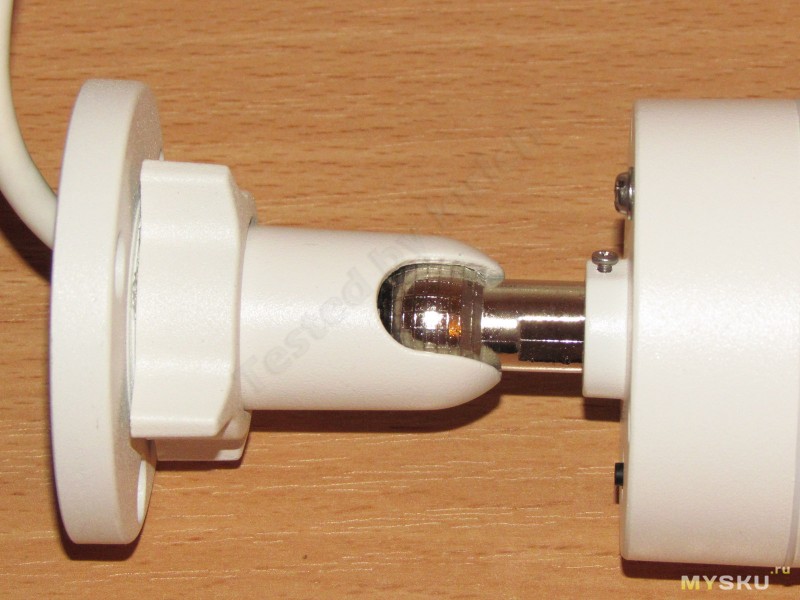
Кронштейн сделан средне (вообще, а не конкретно у этих камер).
Приходилось ставить разные камеры, и мне именно такой принцип крепления не очень нравится, так как иногда камера может «провиснуть». Здесь производитель сделал насечки, защищающие от этого. Но мне больше нравятся кронштейны, где крепеж имеет только две степени свободы и затягивается ключом или отверткой.
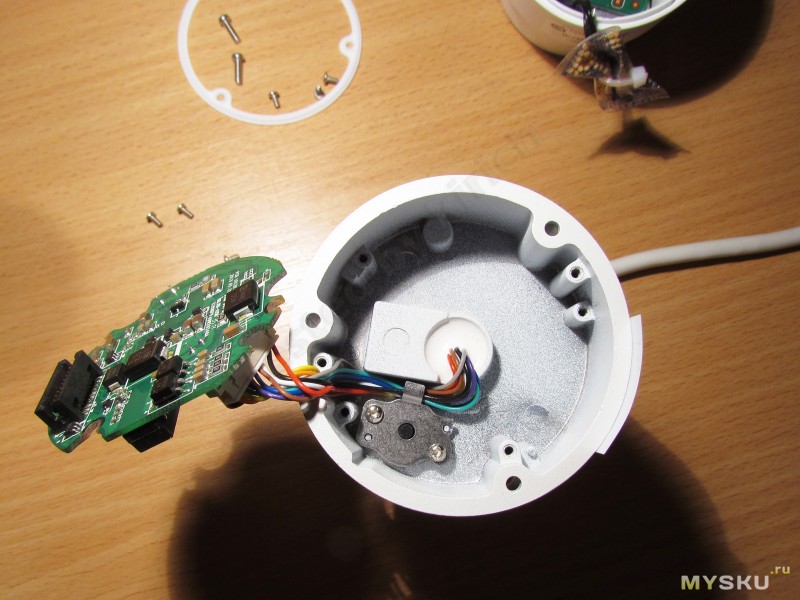
Ну как я мог устоять перед разборкой камеры
Что у нас внутри
А внутри у нас целый «бутерброд» из плат.
Но всему свое время.
При открытии видно, что присутствует и пакет с силикогелем для защиты от влаги, камера герметичная, но для дополнительной защиты от запотевания не помешает.
Электроника в камере разделена на две части, соединенные гибким шлейфом и несколькими дополнительными проводами.
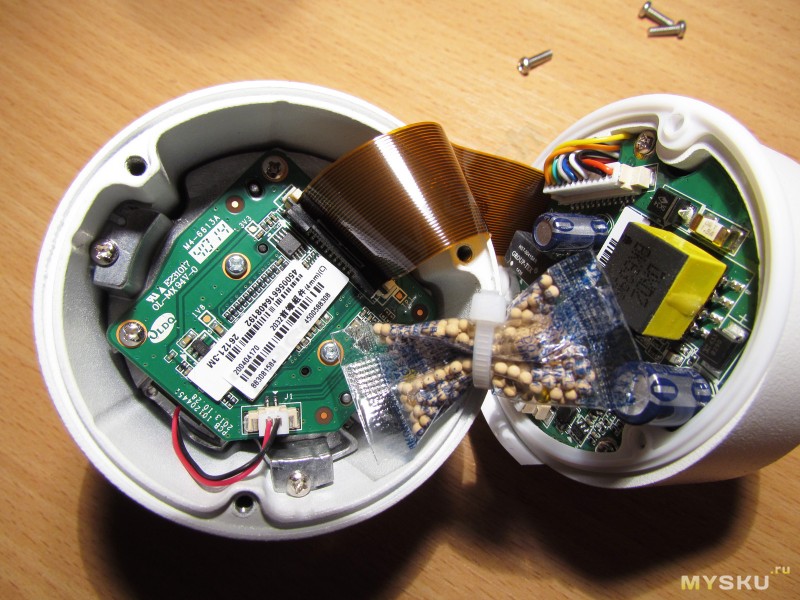
Сам модуль с камерой, объективом и подсветкой представляет собой алюминиевой шасси установленное в корпус.

На тыльной части корпуса расположена плата питания PoE\12В и соединения с локальной сетью (трансформатор сетевой карты).

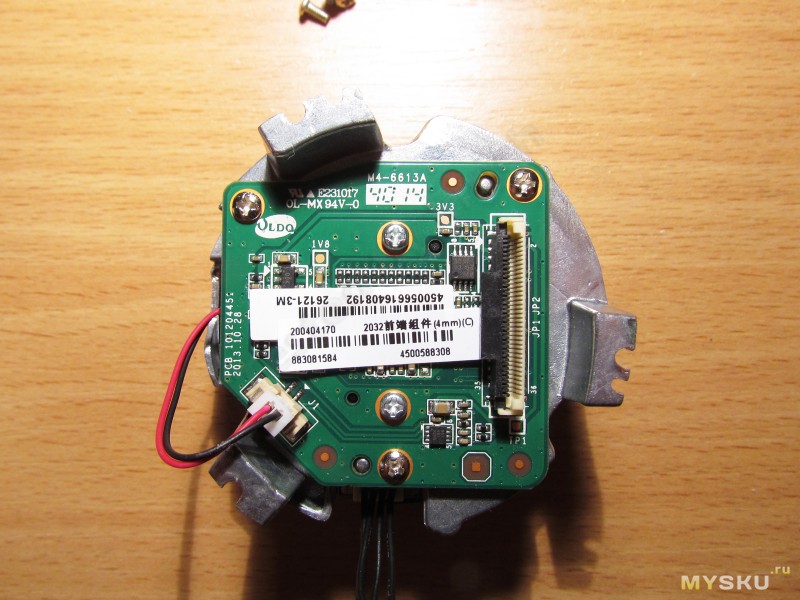
С обратной стороны этой платы расположены защитные элементы, диодные мосты питания, остальные компоненты платы питания, а так же разъем для соединения с платой процессора.
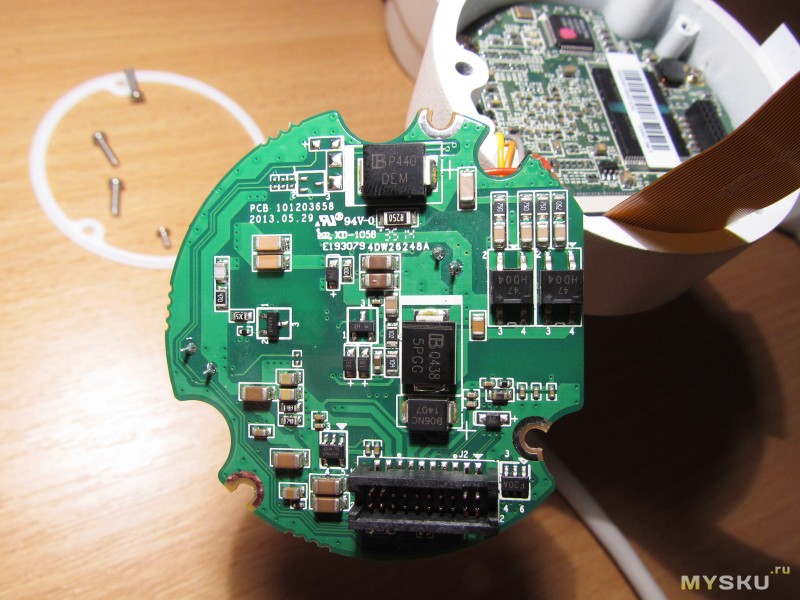
Как я писал выше, платы установлены по типу «бутерброда». Одна плата вставляется в другую.
На плате процессора элементов куда как больше.
сразу бросается в глаза микросхема флеш памяти и чип сетевой карты.

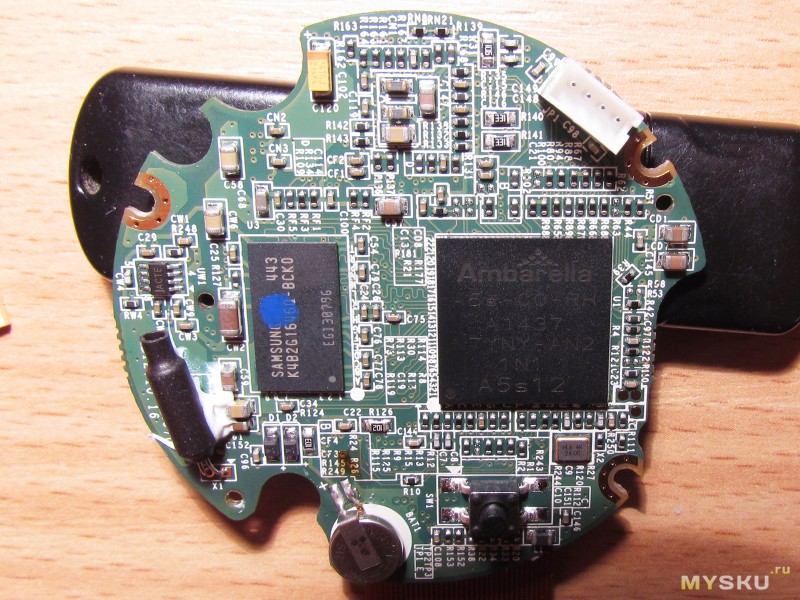
С обратной стороны платы находится процессор, микросхема оперативной памяти, батарея питания часов, кнопка сброса и остальные мелкие компоненты.
Тепло от процессора отводится на алюминиевый корпус через помощи теплопроводящую резинку.
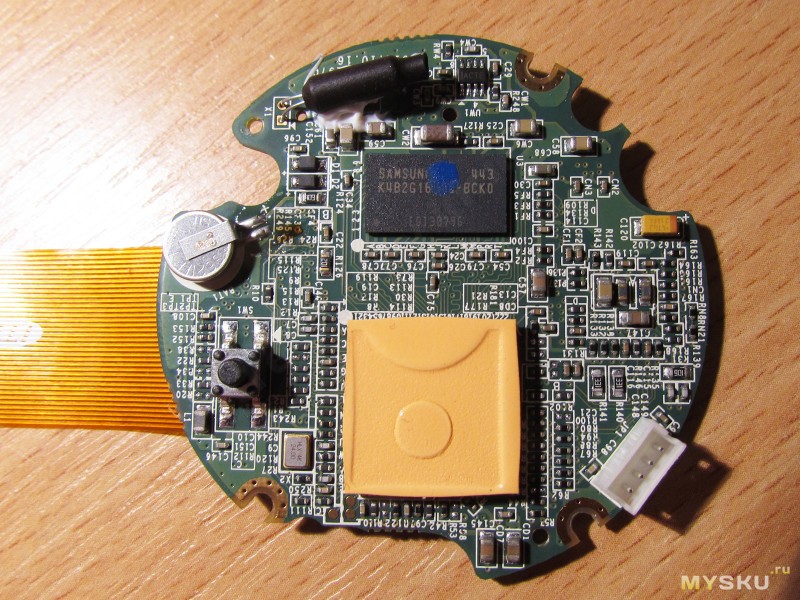
Процессор камеры — ambarella a5s-c0-rh основанный на 528 МГц ARM ядре. В данной камере используются не все его возможности, например процессор поддерживает работу с картами памяти, а в данной камере такого нет.
Кнопка сбросе имеет герметичную конструкцию, так же и кабель залит твердым герметиком.
Слева от кабеля виден выступ корпуса, на него отводится тепло от процессора.
В работе камера нагревается, но не очень сильно. Данные камеры проверены в работе под прямыми солнечными лучами летом и в -25 зимой, проблем обнаружено не было.
Хотя я встречал упоминания о прецедентах замерзания шторки ИК фильтра, у меня такого не было.
Дальше я добрался до модуля с матрицей и объективом, собственно камерой.
Как я и писал, вся эта часть смонтирована на отдельном алюминиевом шасси.
Спереди расположена плата ИК подсветки, работать она может в разных режимах, так же ее можно программно отключить при необходимости.

Если снять плату подсветки, то открывается доступ к самому шасси, оно довольно прочное, но присутствует небольшой нюанс, при очень низких температурах фокус камеры немного ухудшается, но такой же глюк присутствует и во многих других камерах.
От себя скажу, что я такого не замечал, возможно мне просто везло.
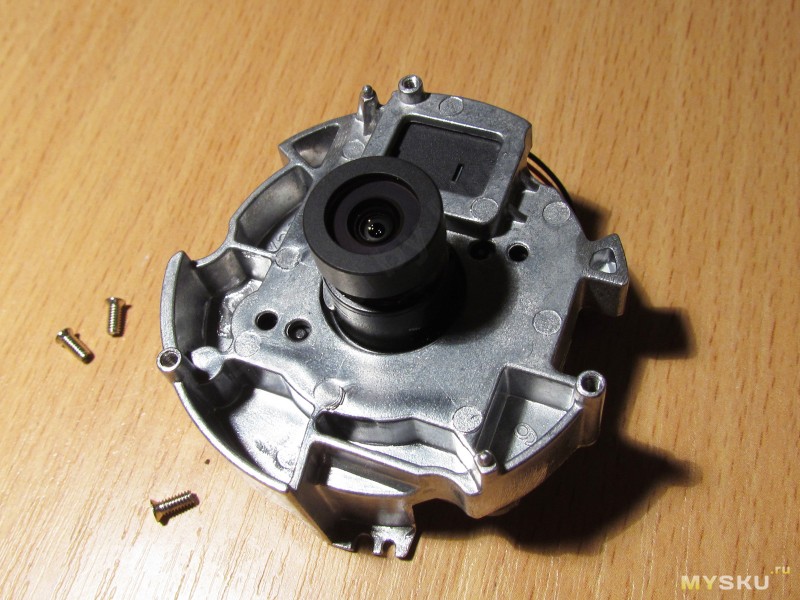
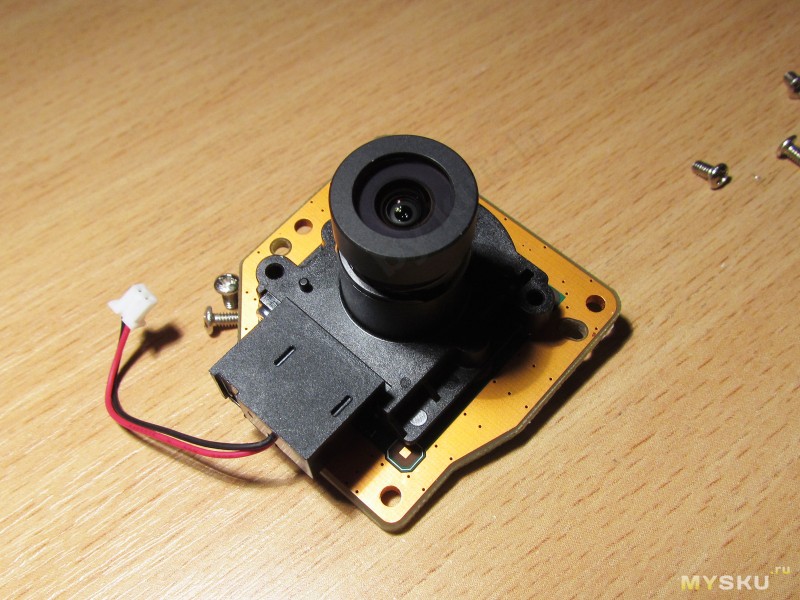
Плата камеры поближе. Под наклейкой ничего нет, несколько конденсаторов и резисторов, все общение матрицы с платой процессора происходит через плоский шлейф.
Дальше я разбирать не стал, решил остановиться на этом.
Видно объектив камеры и провод шторки ИК фильтра.
Вообще, разбирается вся эта конструкция довольно удобно, впрочем как и собирается обратно.
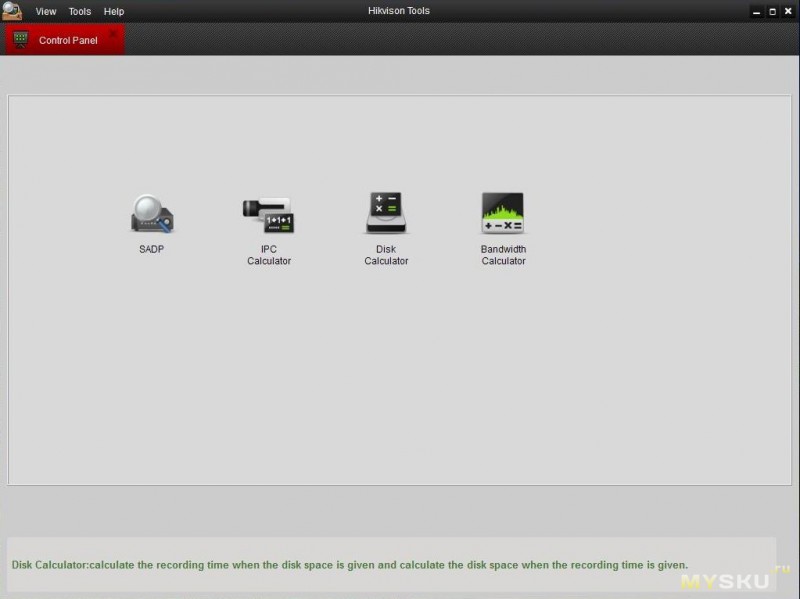
Некоторую часть обзора я выделю для описания ПО.
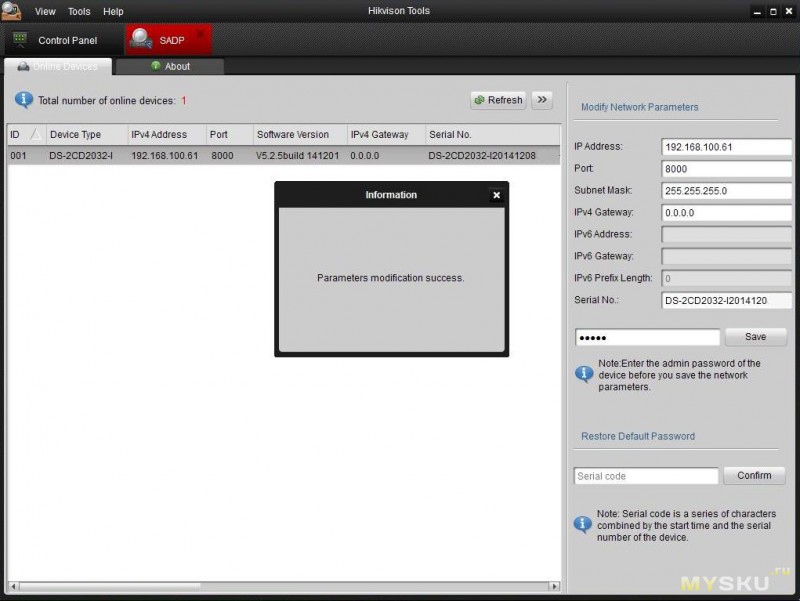
Для начала ПО для начальной работы с камерами Хиквижн — Hikvision Tools.
Еще существует ПО для выбора правильного фокусного расстояния IPCTool, все упомянутое в обзоре ПО будет выложено для скачивания.
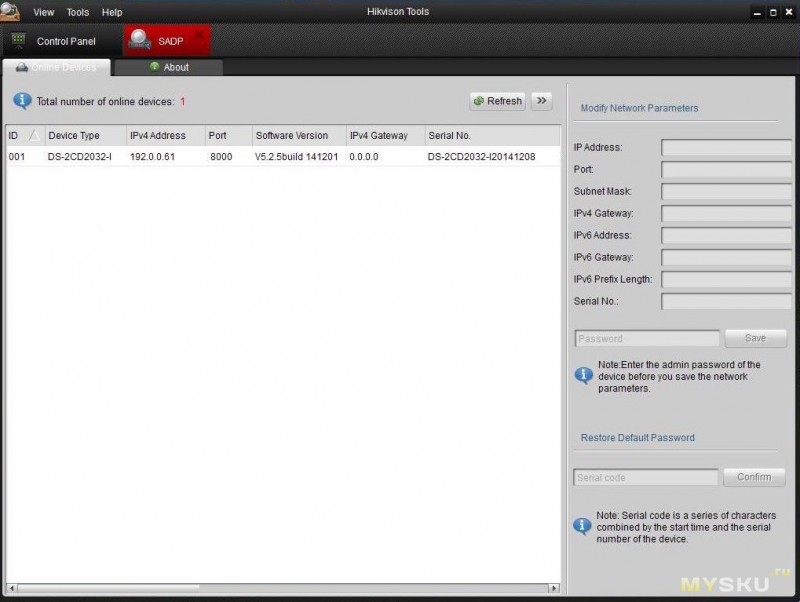
Описание
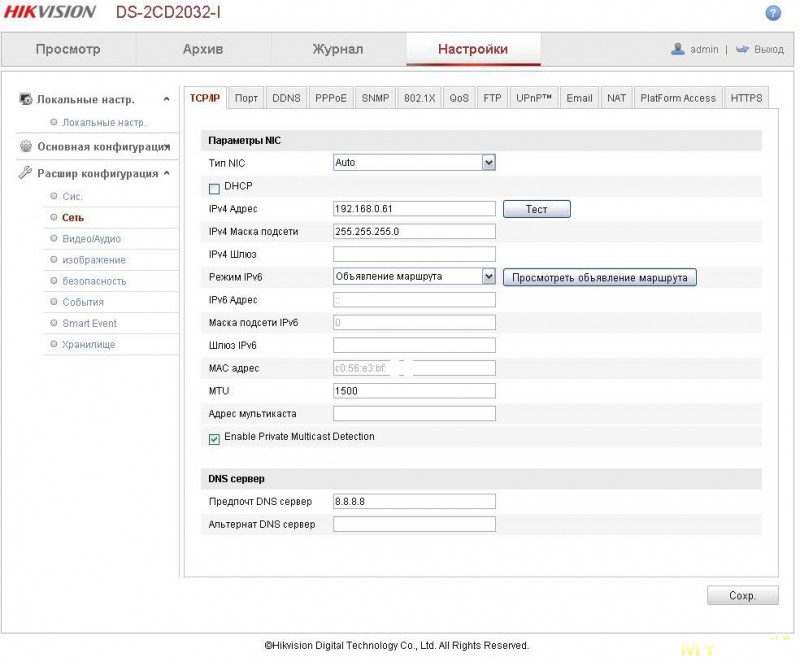
При первом включении камера обычно определяется под айпи адресом 192.0.0.61
Но айпи адрес не имеет значения, ПО найдет камеру под любым айпи, даже если камеры будут иметь одинаковый адрес.
Кроме того, существует ПО Hikvision TFTP Server позволяющее обновить ПО даже камере, которая не отвечает.
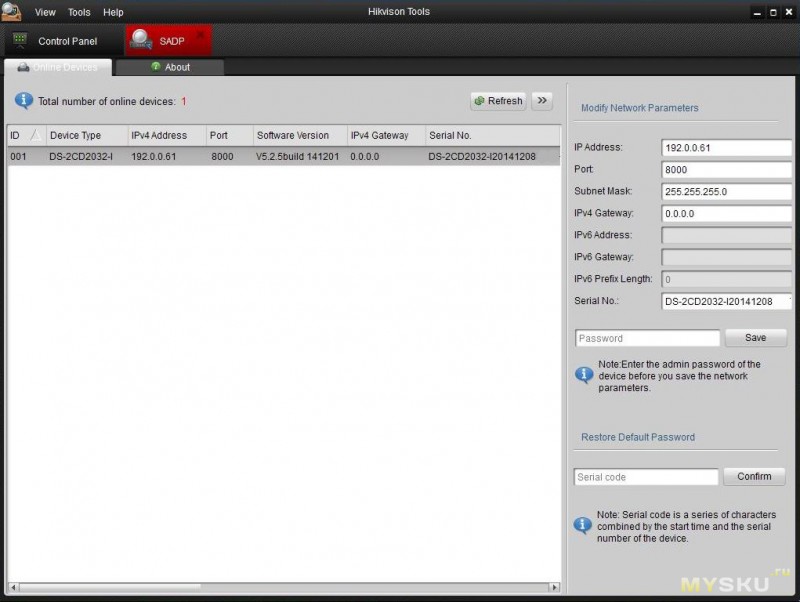
Кстати, при старте камера всегда имеет исходный айпи адрес, его и «подхватывает» TFTP Server для обновления прошивки. Для этого надо в папку с TFTP положить актуальный файл прошивки, запустить ПО и либо перезагрузить камеру либо включить\выключить ее питание.
Не стоит делать это с группой камер, так как обновление может пойти сразу на все камеры, а прошивки у них могут быть несовместимыми.
кроме того один раз производитель подложил свинью, в виде того, что после обновления менялся формат серийного номера и ПО, которое его использует, не хотело работать с камерами, пришлось перепрошивать обратно. Подробнее я описывал на форуме.
В этом окне меняем айпи на необходимый, вводим логин/пароль и нажимаем — сохранить.
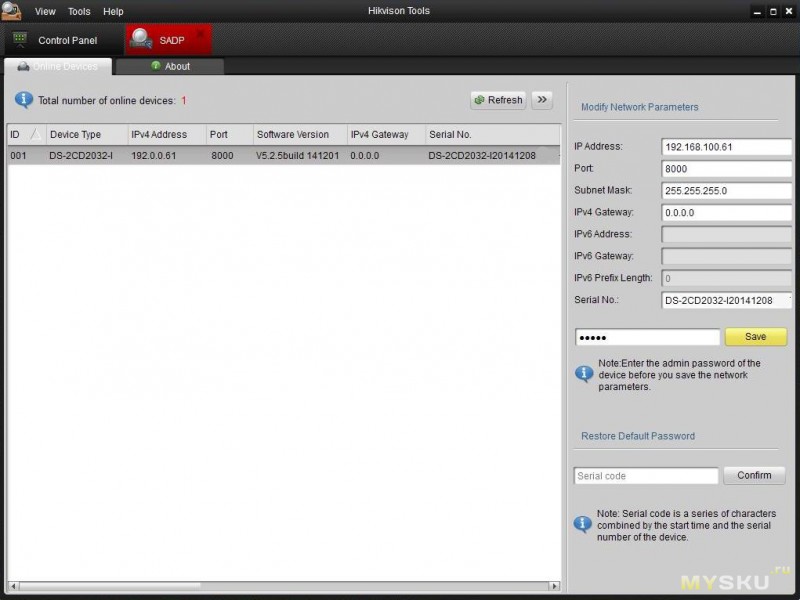
Дальнейшие возможности ПО описывать не буду, там есть расчет необходимой скорости потока и требуемого размера жесткого диска, желательно для этого иметь подключенную и настроенную камеру.
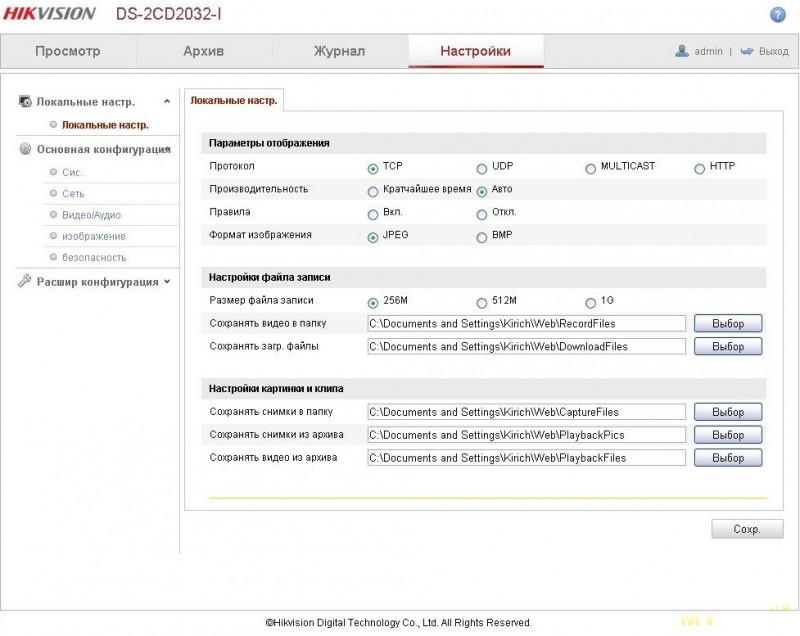
Все управление камерой можно производить через Веб интерфейс.
Описание части особенностей и настроек я спрятал так же под спойлер.
Описание веб интерфейса
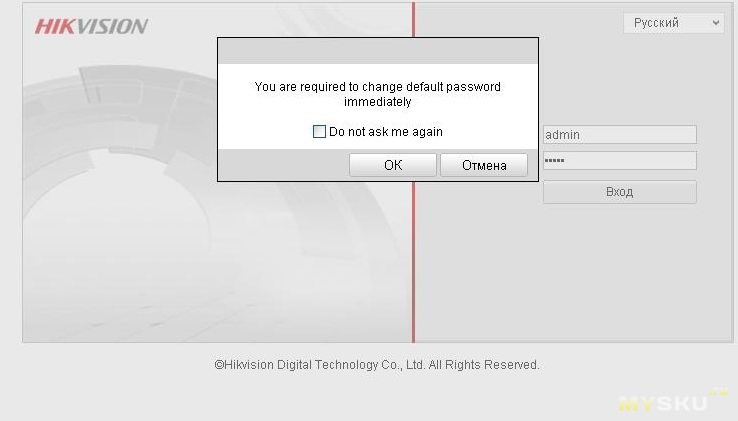
При первом подключении к камере попадает в окно ввода логина/пароля, а так же выбора языка.
По умолчанию камеры пришли с включенным русским языком, мелочь, а приятно.

После этого вбиваем логин admin, пароль 12345 и при попітке зайти камера нас сразу уведомляет, что использован пароль по умолчанию и рекомендует его сменить. Раньше такого не было, это уже добавили в новое ПО.
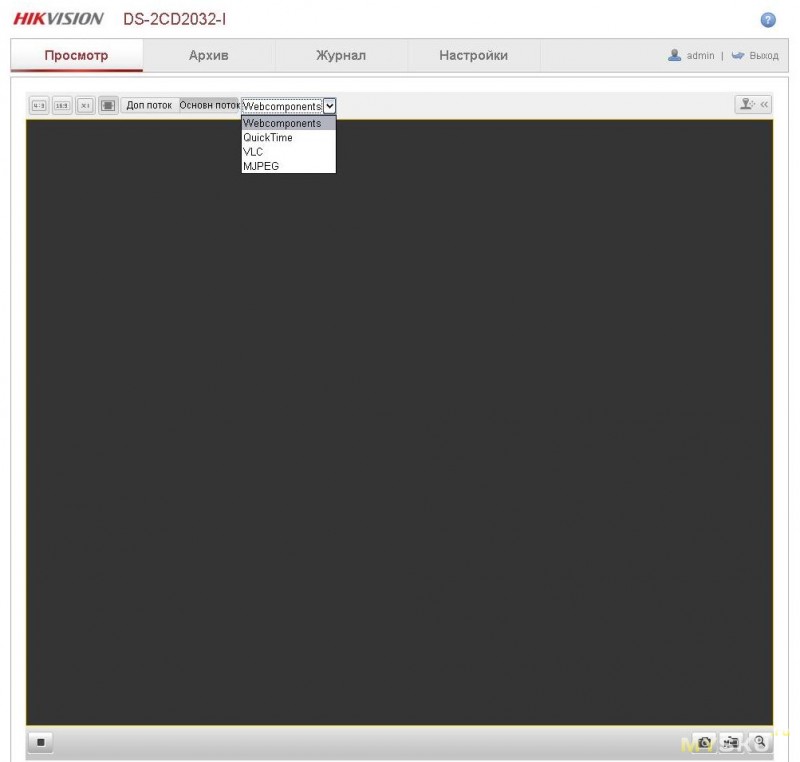
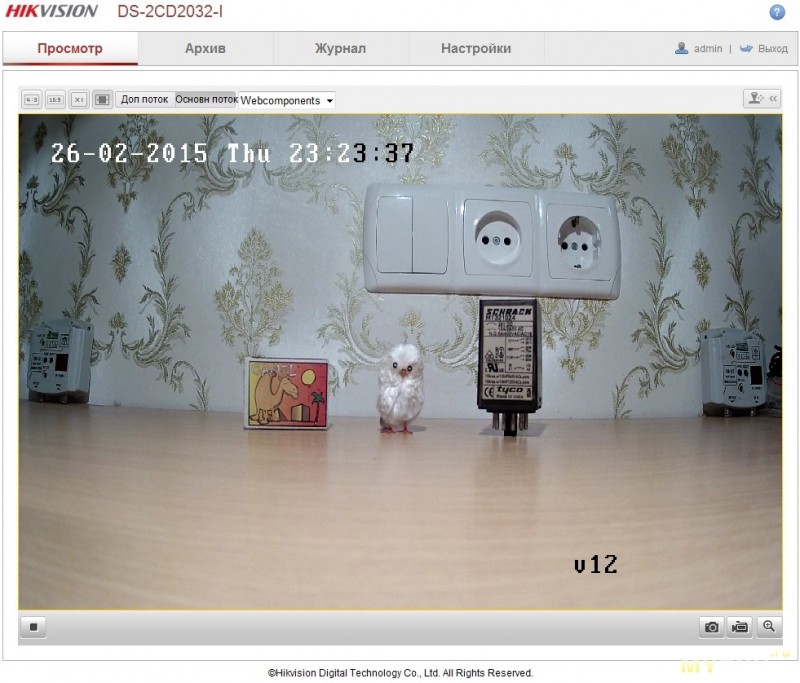
При первом включении изображения скорее всего не будет, а камера камера предложит скачать и установить пакет WebComponents.
Вообще камера позволяет выбирать режим отображения. Даже если вы не обновите WebComponents, то все настройки все равно будут доступны, но изображения в веб интерфейсе не будет.
Окно проверки версии прошивки, а так же версии кодера камеры.
Камера пришла с последней, на момент продажи, версией 5.2.5, хотя на наклейке стояло 5.2.3, еще один приятный момент.
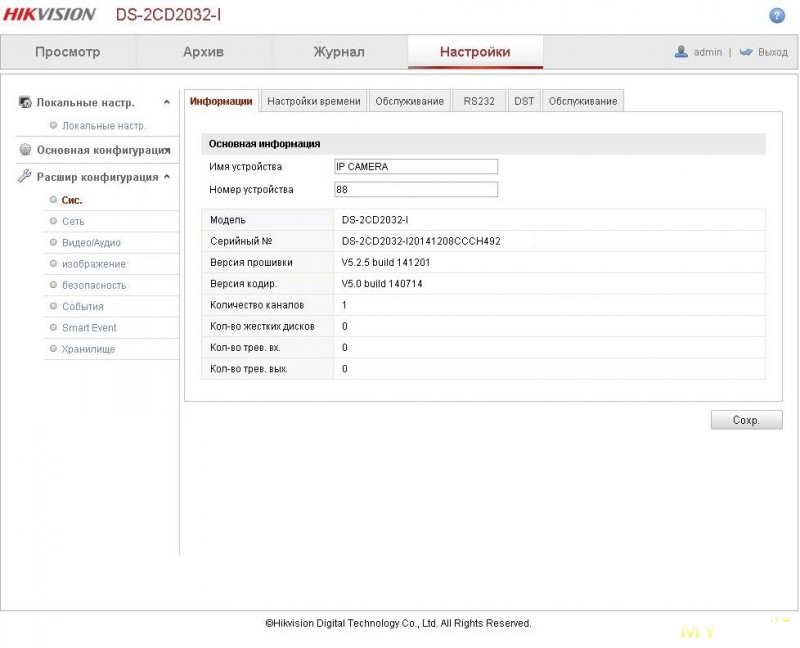
Вкладка обслуживания, отсюда можно обновить прошивку, сбросить камеру на исходные установки (полностью или все кроме айпи адреса), сохранить файл настроек.
Рекомендуется после перепрошивки произвести все настройки заново.
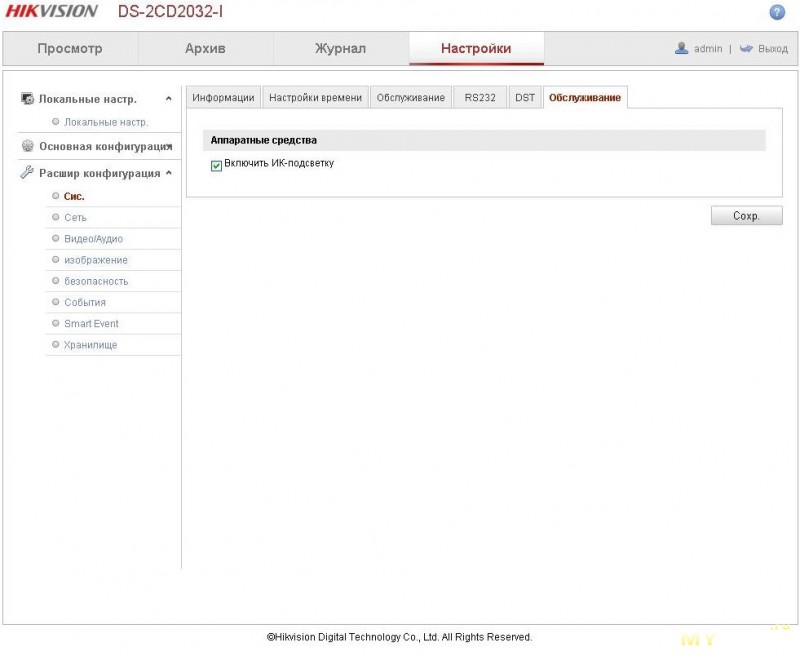
Кстати перевод на русский язык сделан отлично.

Вторая вкладка обслуживание дает доступ к возможности отключения ИК подсветки.
Во вкладке настройки подключения опций довольно много, не буду их описывать, так как вкладок очень много и это заняло бы много места и времени. Кстати камера умеет синхронизироваться и через интернет и от компьютера, к которому подключена. Но настроить синхронизацию от внутрисетевого NTP сервера у меня почему то не получилось, сейчас сервера синхронизируются централизованно, а камеры уже привязаны к ним.
Во вкладке Видео\Аудио выбирается разрешение, тип сжатия, качество сжатия, скорость потока, количество кадров в секунду, причем все это можно делать для основного потока и дополнительного независимо.
Микрофона в данной камере нет, так же нет возможности его подключения (на некоторых камерах можно подключить микрофон и динамик к отдельному шлейфу), потому вкладка Аудио отсутствует.
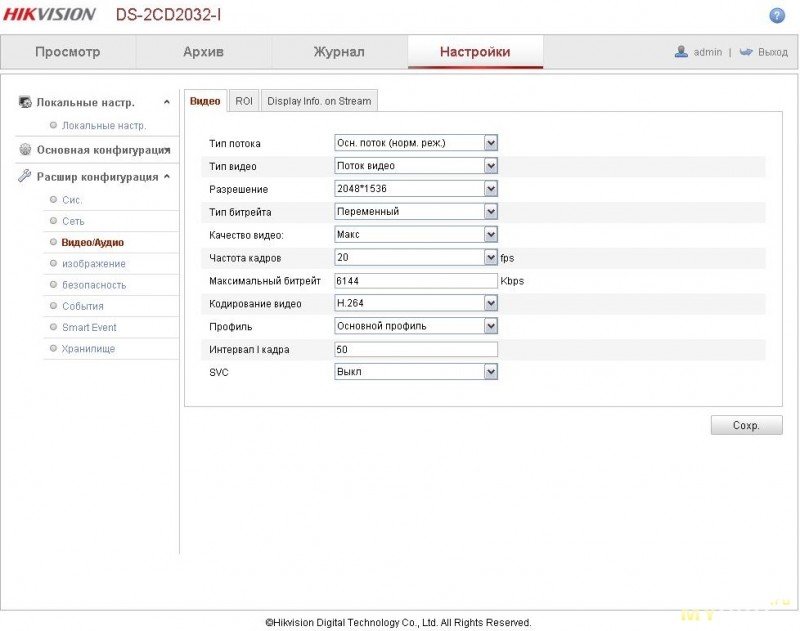
Камера поддерживает работу в трех основных разрешениях.
Максимальное 2048х1536, но при этом максимальная частота кадров ограничена 20 к/сек.


Стандартное 1920х1080, сразу видно, что изображение расширилось вбок, но при этом стало уже сверху и снизу.
В режиме 1280х720 формат кадра остается таким как и в 1920х1080, но меняется качество изображения.


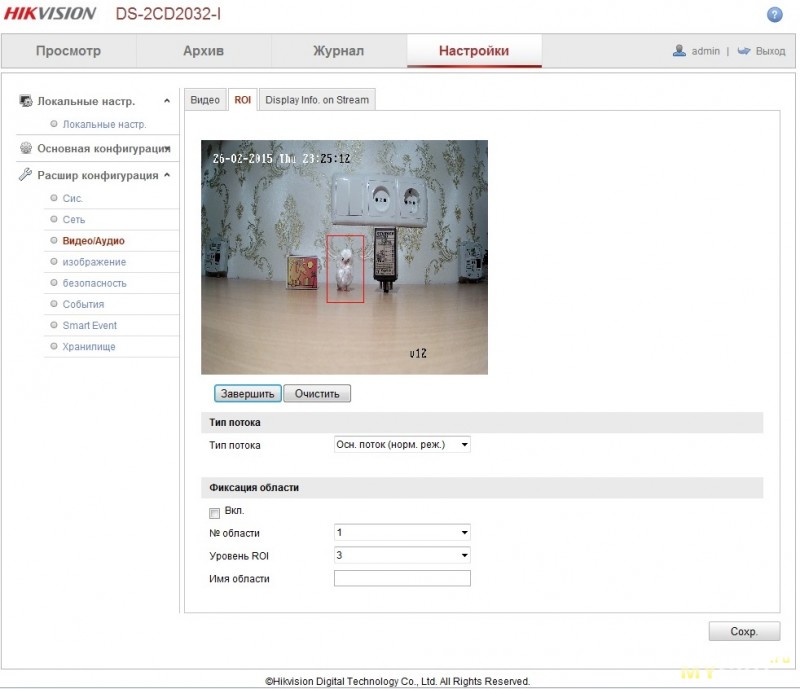
Так же в камере есть очень удобная опция. Это возможность увеличения качества изображения в определенных областях, задаваемых пользователем, при сохранении неизменной скорости потока.
Наверняка многие сталкивались с ситуацией, когда надо иметь выше качество изображения например на лестнице, но хотели бы снизить качество на неважных областях. Здесь такое возможно, правда на скриншоте этого видно не будет, просто привел для примера.
Окно настроек изображения, видеобработки, подавления шумов и т.п.
Заметил, ч в этой версии прошивки недоступна опция автоматического выбора времени экспозиции, хотя сама функция работает корректно, странно.
Стоит отметить отлично работающую функцию компенсации засветки, мне удалось настроить камеру даже так. что в одном кадре было и отраженное от полированного металла солнце и помещение с не очень ярким искусственным светом. Зону компенсации можно выбирать.

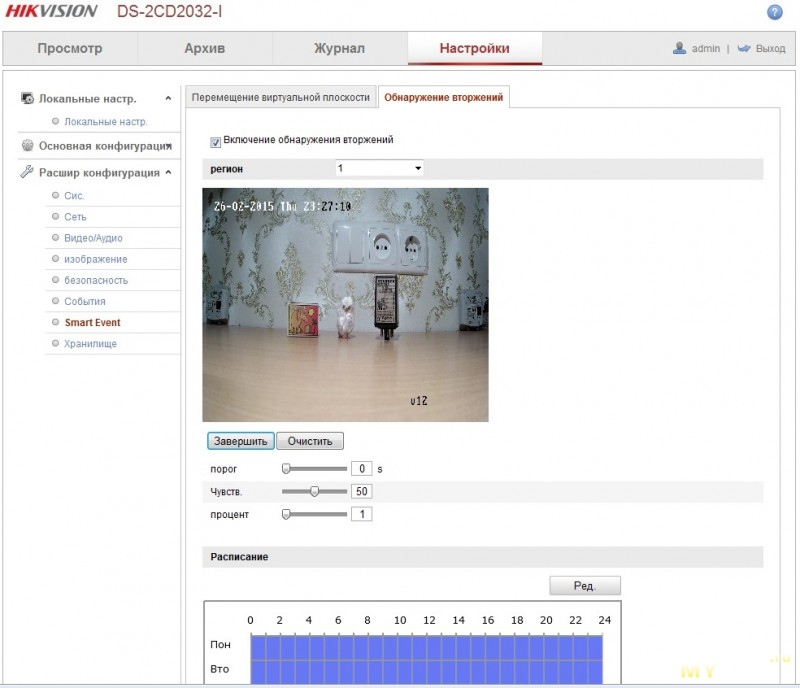
Функция обнаружения вторжений, не путать с режимом обнаружения движения.
Насколько я понял, работает она аналогична функции поиска оставленных вещей, еще не испытывал. Камеры уехали на объект, но дома осталась одна камера на том же процессоре, думаю испытать новую прошивку на ней.
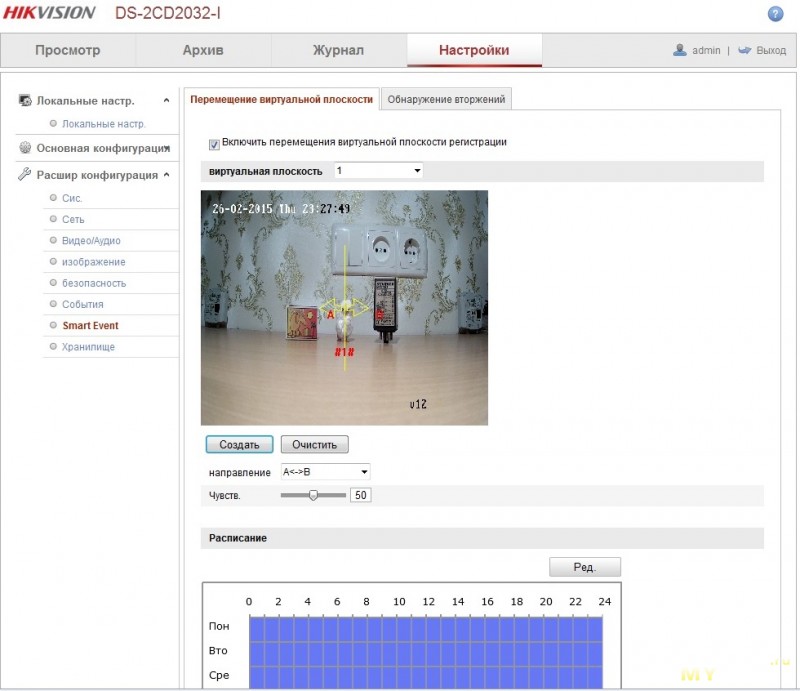
Функция определения перемещения объекта в виртуальной плоскости. Может использоваться на определение все людей, которые движутся вдоль стрелок, а так же только влево или вправо.
Данная функция так же используется для подсчета количества людей (при помощи отдельного ПО)
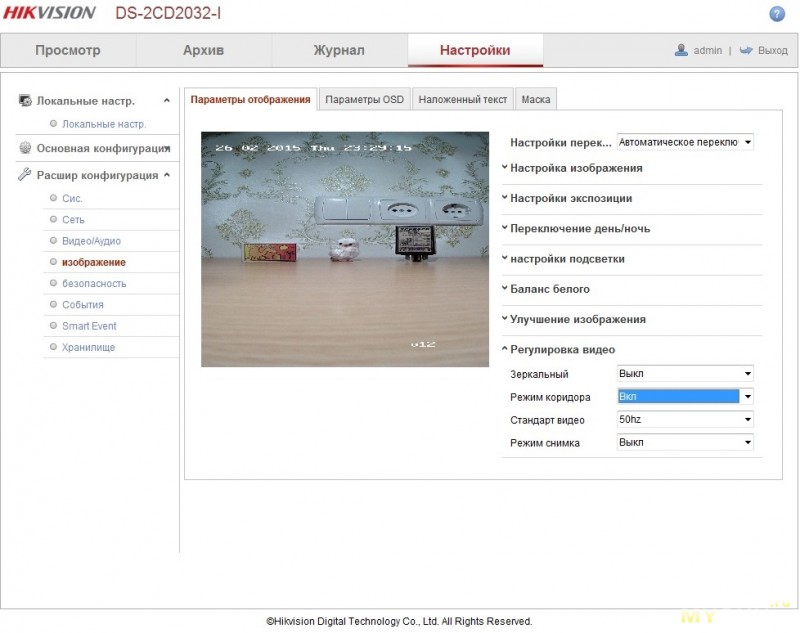
А вот еще одна удобная особенность, режим коридора.
Наверняка часто можно встретить ситуацию, когда камера смотрит вдоль длинного коридора, а так как все знают, что камера в горизонтальной плоскости видит шире чем в вертикальной, то мы получаем качественно видимые боковые стены, а сам коридор просматривается не очень хорошо.
В этом режиме поворачиваем камеру на 90 градусов, а после активирования опции «коридор» получаем корректное отображение коридора. Очень удобная вещь.
Детектор движения, здесь все просто, выделяем необходимые нам зоны, выставляем чувствительность детектора, а так же график работы детектора (при необходимости).

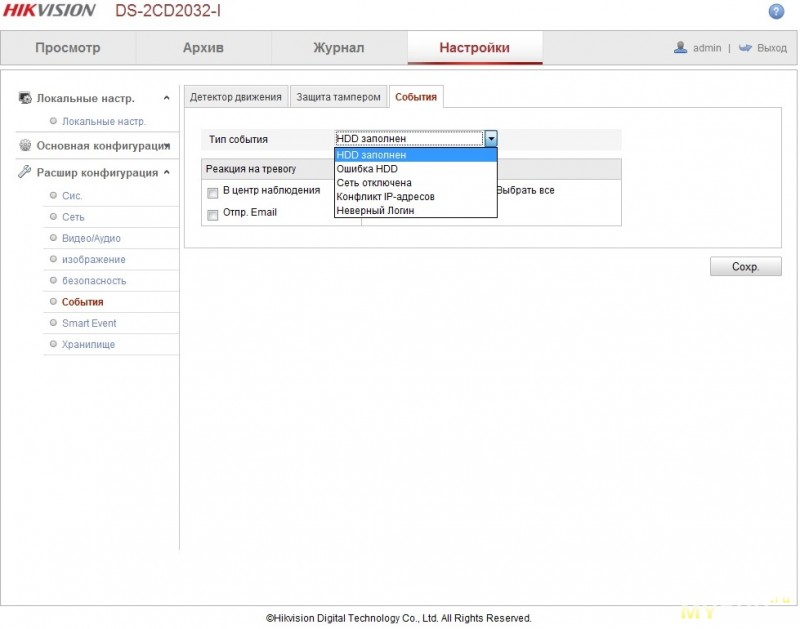
Все эти данные могут передаваться в ПО системы наблюдения, на емейл или оба варианта сразу. так же туда может передаваться уведомление о переполненности жесткого диска.
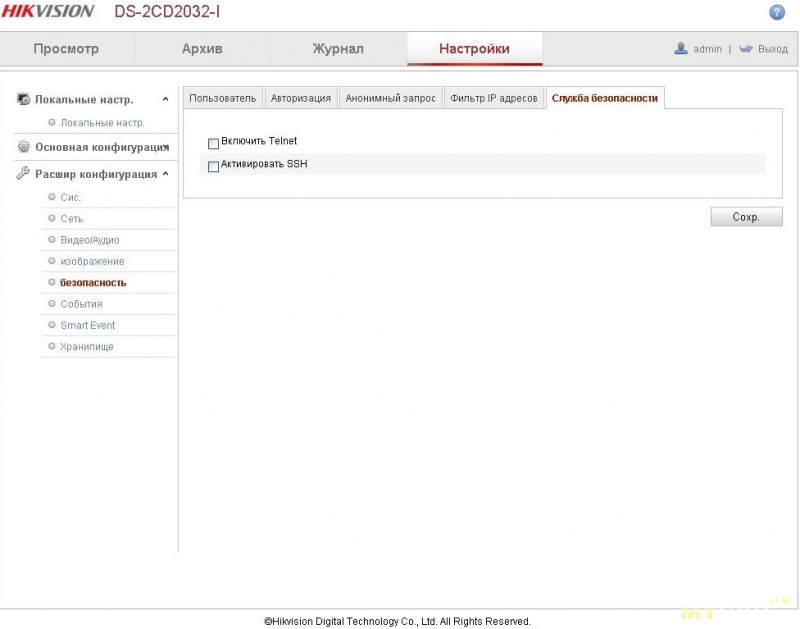
Одна из вкладок настроек безопасности.
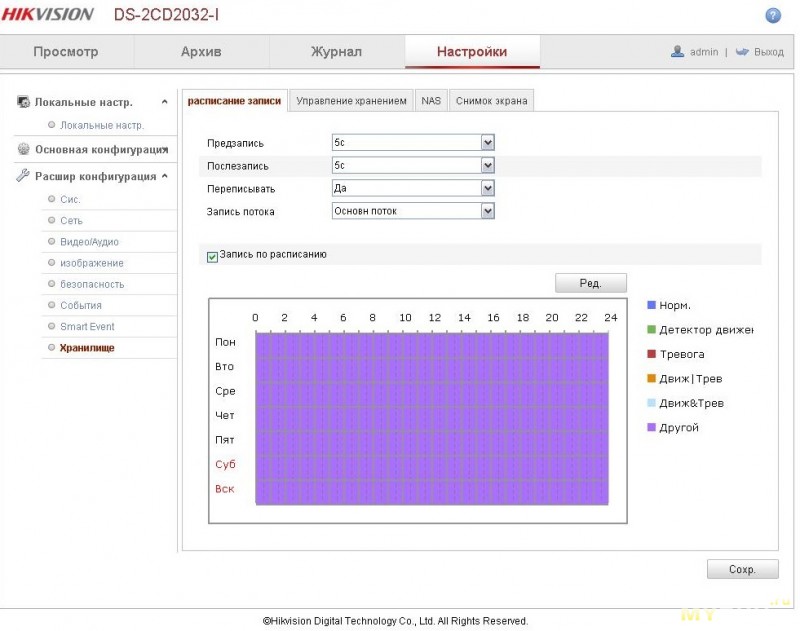
Вкладки установок записи, если камера сама пишет на сетевой накопитель, я данной функцией не пользуюсь.
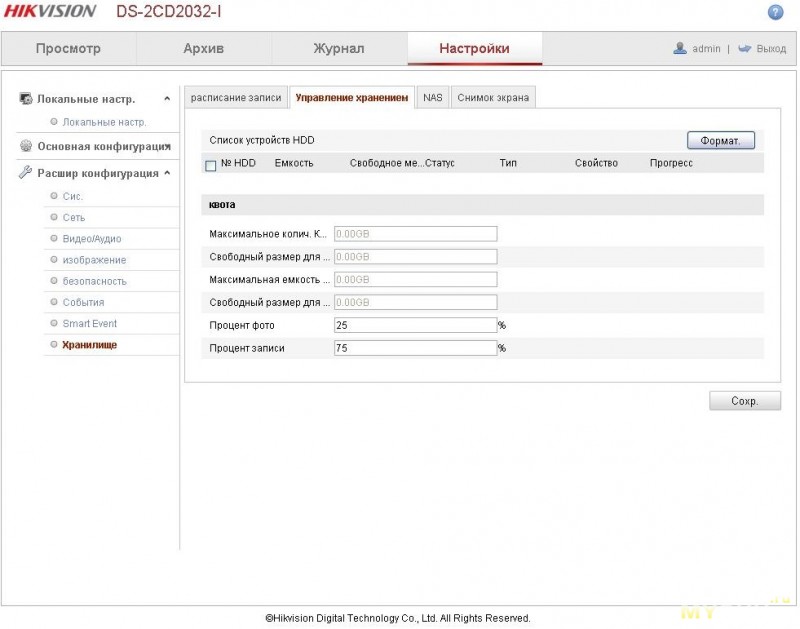
Настройки сохранения снимков и параметров отображения, если честно, часть настроек мне непонятна. Цели разобраться пока не стояло.
Окно просмотра архива из веб интерфейса, этим режимом я так же никогда не пользовался, так как все камеры пишутся на выделенные для этого сервера.
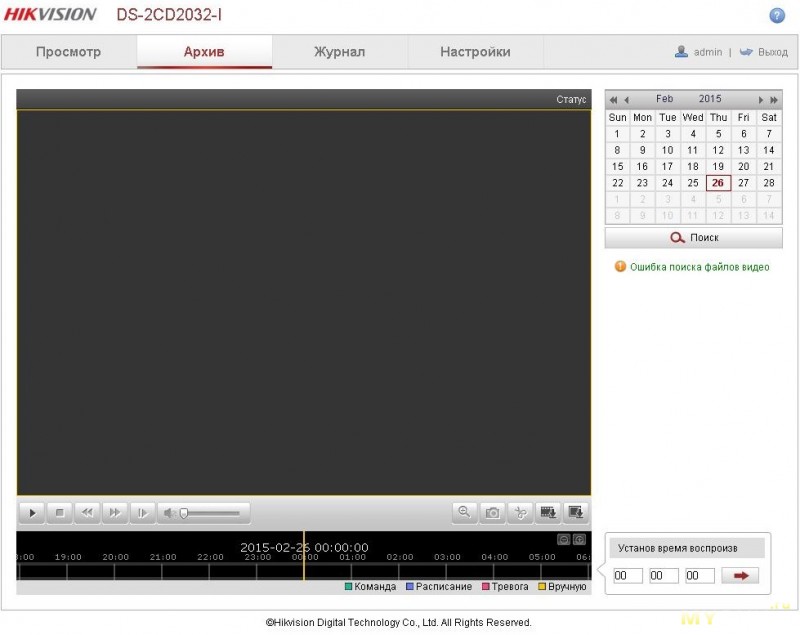
Как видно, настроек ОЧЕНЬ много, я даже не пытался охватить их все, но постарался показать ключевые.
Обычно камеры Hikvision используют с их родным ПО iVMS4200, но на мой личный взгляд это ПО довольно убогое. Описывать его я не буду, несколько скриншотов есть в этом обзоре. Если кому то будет очень интересно, то могу показать и родное ПО.
Существует и более «навороченное» ПО, такое как TRASSIR, с кучей опций и подключаемых модулей (все за отдельные деньги), я же использую нечто среднее под названием ILDVR.
С этим ПО я работаю около 10 лет, начинал еще на версиях 7.хх, сейчас популярна версия 10.хх.
ПО часто и регулярно обновляется, имеется русскоязычный интерфейс.
Как и положено ПО работает имеет серверную и клиентскую часть.
Я опишу только серверную. Клиентская отличается упрощенным интерфейсом, но при этом позволяет получить удаленный доступ к большинству настроек серверной части (кроме настроек безопасности), а так же развитую часть для просмотра записей (например работа с информацией от POS терминалов). Клиентская часть так же может производить запись полученного видео в автоматическом режиме.
Но для того, что бы эти камеры работали с этим ПО полноценно, надо покупать лицензию на каждую камеру. Без нее сервер можно только отображать видео, запись вестись не будет.
Стоимость лицензии соизмерима со стоимостью недорогой китайской айпи камеры, но даже это бывает выгодным. К слову, камеры ILDVR так же могут работать с ПО Hikvision, но так же при условии покупки лицензии.
С родными камерами все ПО работает бесплатно, но в Хике мне не нравится ПО, а в ILDVR камеры, вот и приходится делать такие гибриды.
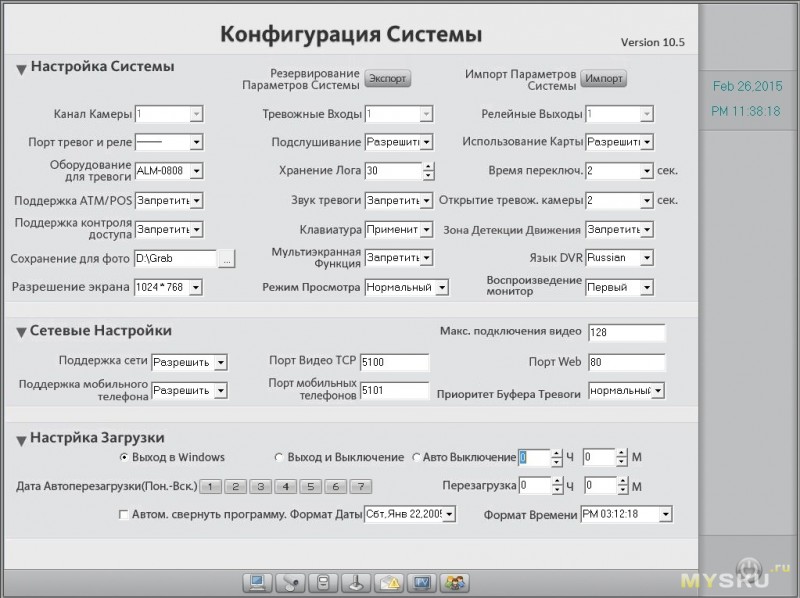
Краткое описание ПО ILDVR
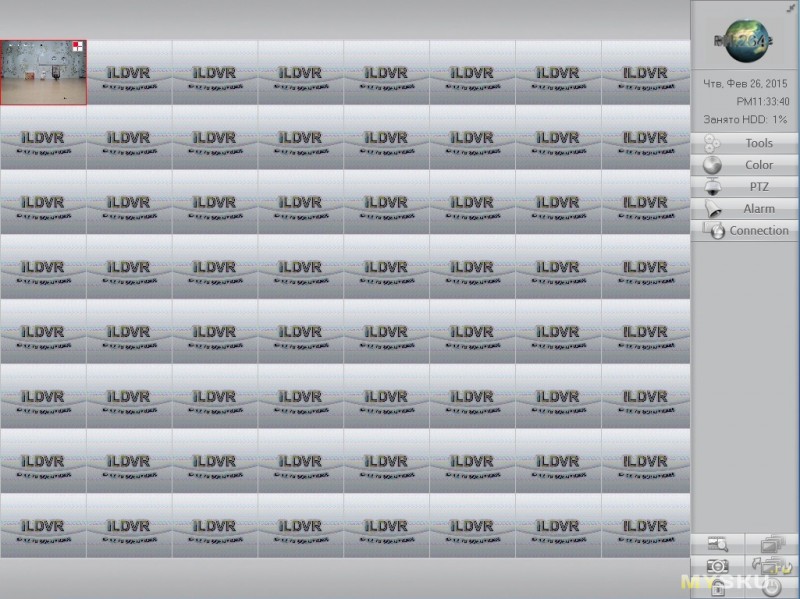
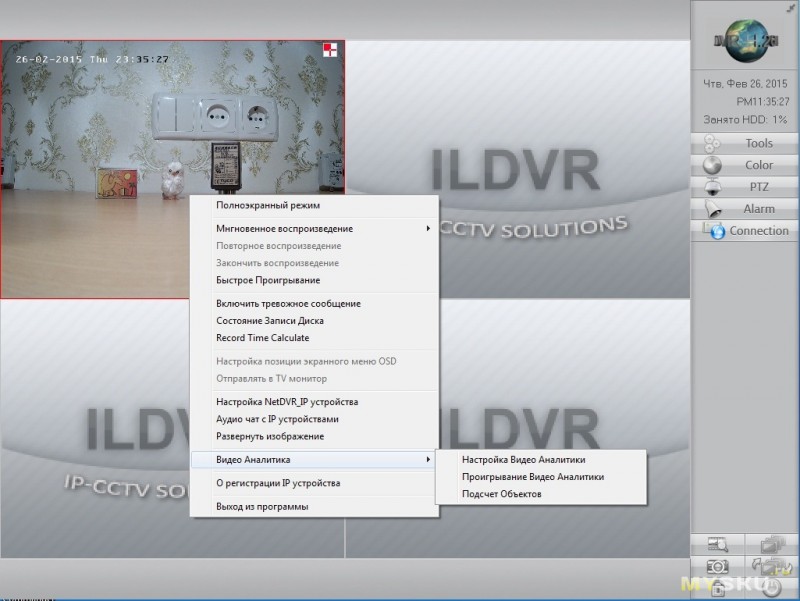
Главное окно программы, справа меню доступа к разным настройкам, есть еще вкладки, но там интересного куда меньше :).
На скрине включен режим непрерывной записи.
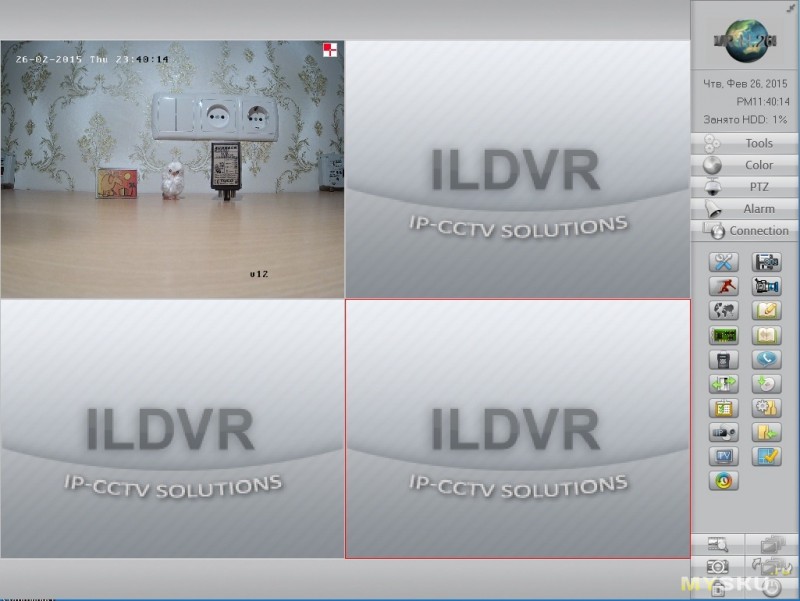
В ПО можно настроить отображение до 64 камер, и поверьте, такие системы у меня есть, есть и системы. где и пары таких окон мало. Такой режим обычно не используется на клиентских компьютерах, так как оптимально оператор может следить за 9 камерами, даже за 16 камерами СЛЕДИТЬ почти нереально. Т.е. оператор будет их видеть, но воспринимать уже тяжело.
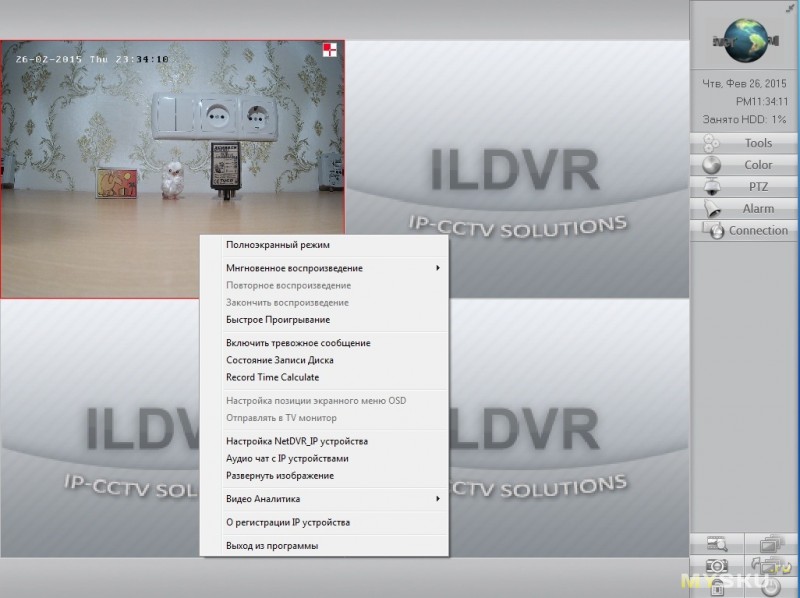
При правом клике на выбранной камере выскакивает меню, где можно получить дополнительные возможности.
Полноэкранный режим — видео окно разворачивается на весь экран, кнопки будут не видны.
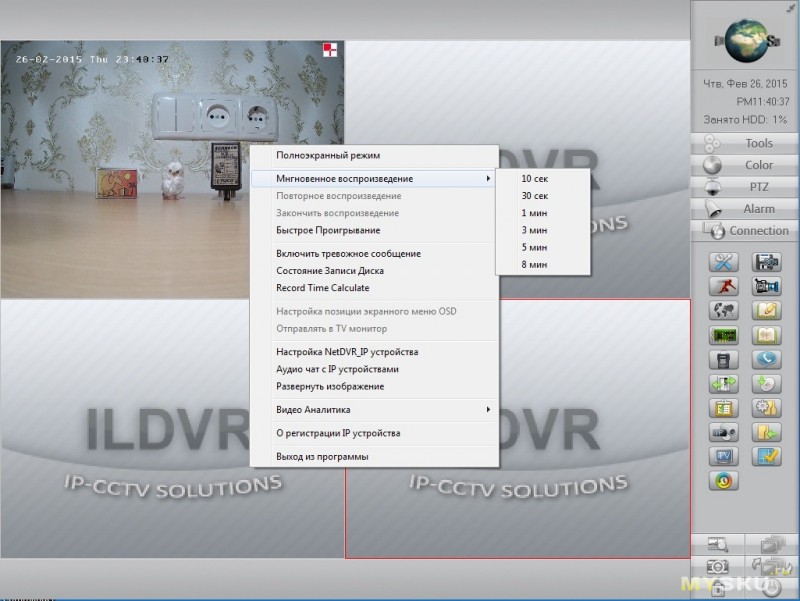
Мгновенное воспроизведение — выборочное проигрывание последних 10 секунд (до 8 минут) записи без необходимости запуска отдельного плеера.
Тревожное сообщение, сервисная функция уведомления оператора.
Состояние записи диска и расчет времени записи, покажу отдельно.
Развернуть изображение, на самом деле на сервере не работает, на клиенте позволяет увеличить произвольно выделенную зону изображения, работает на нескольких камерах независимо.
Видео аналитика, опишу отдельно.
Выбор времени мгновенного отображения, после окончания времени ПО переходит в режим реального отображения, так же можно прервать режим принудительно.
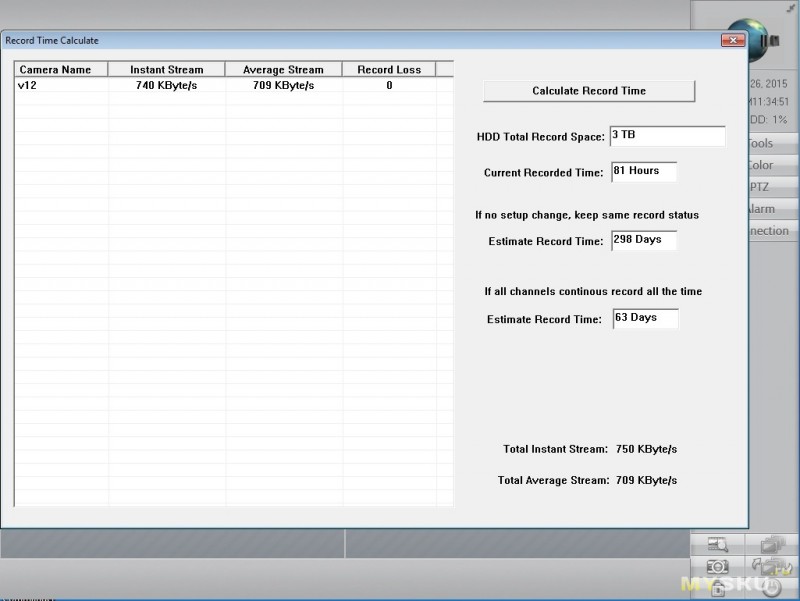
Окно расчета времени записи.
Здесь отображаются все рабочие камеры, скорость потока от них, а так же по этим данным рассчитывается глубина архива, так же из-за того, что камеры могут писать по детектору, то указывается глубина архива если даже все камеры будут писать непрерывно.
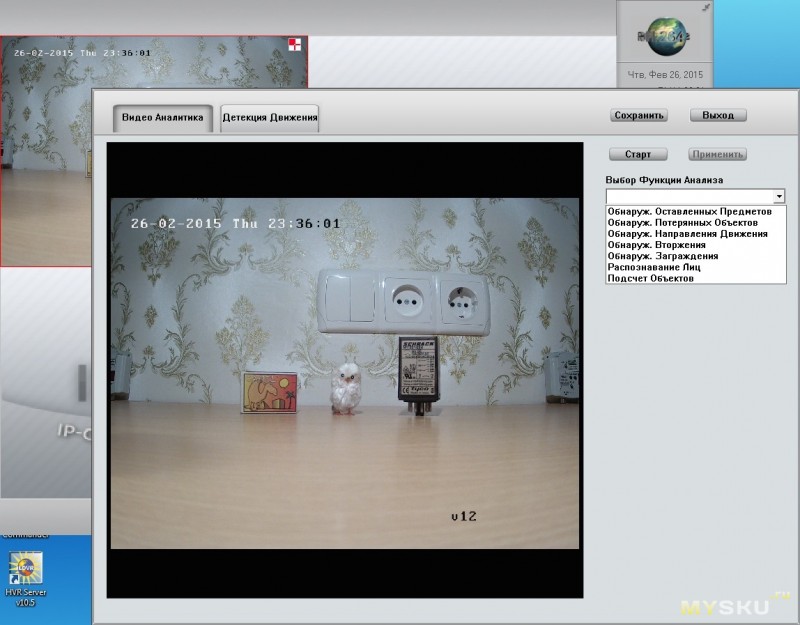
Отдельно стоит сказать о режиме видео аналитики.
Часть можно понять даже из выпадающего меню.
А вот здесь все доступные режимы, но предупрежу, пока софт только в процессе отладки, эти опции появились не так давно, потому возможны нюансы, но программа постоянно развивается и обновляется.
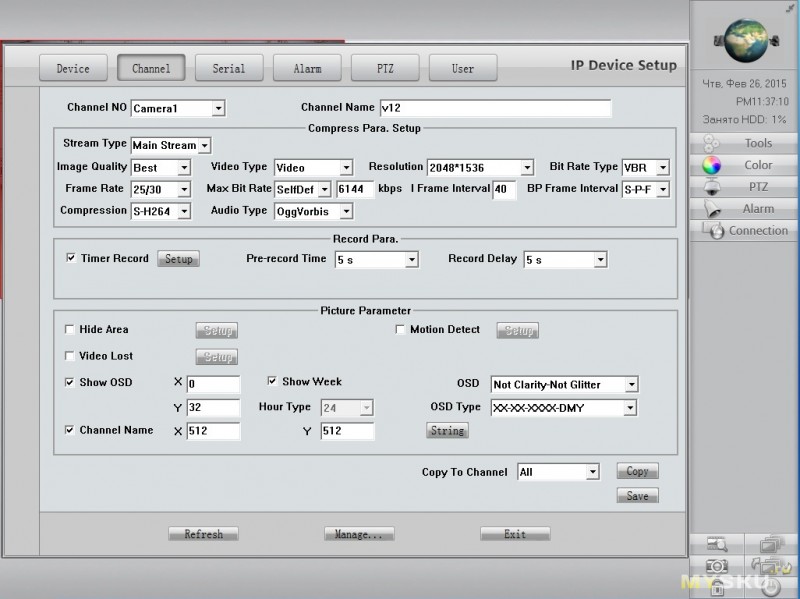
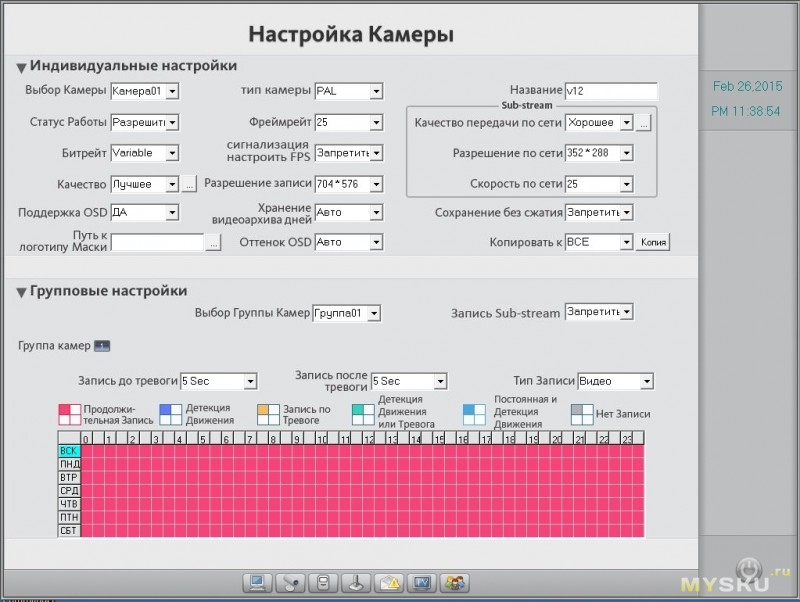
При клике на необходимой нам камере можно попасть в ее настройки.
Так выглядит меню работы с камерой со стороны ПО видеонаблюдения.

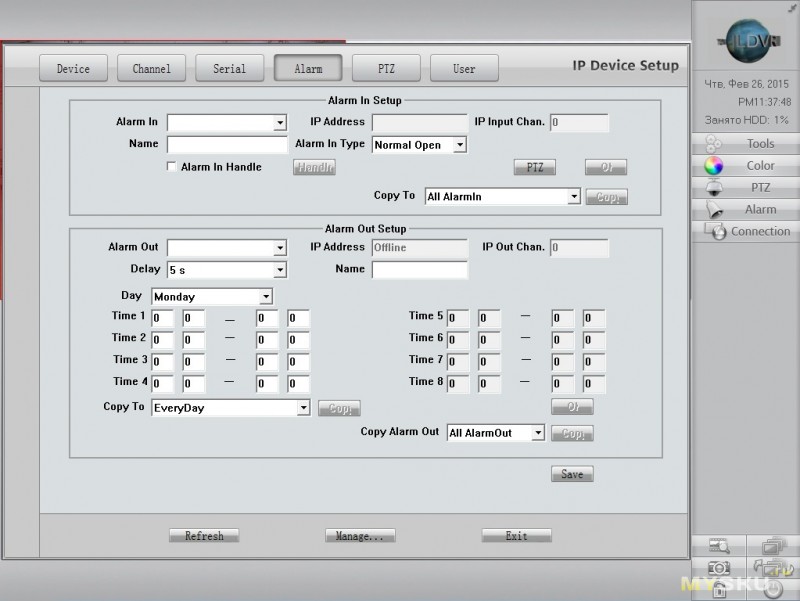
А это некоторые настройки ПО видеонаблюдения, опять же, все приводить не буду, если кому интересно, объясню и сделаю необходимые скриншоты.
Окно плеера. Возможно просматривать до 16 камер одновременно (причем даже с разных серверов), при этом можно включить синхронизацию времени по любой из камер. Т.е. остальные камеры подстроятся к выбранной и будут отображать происходящее синхронно. Ну и естественно стандартные вещи, сохранение записи (на жестком диске ПО автоматически создаст папку, где будет папка с номером камеры и файлами плеера для проигрывания на любом компьютере, очень удобно, плеер запускается прямо из папки и смотрим файл без установки кодеков и т.п.

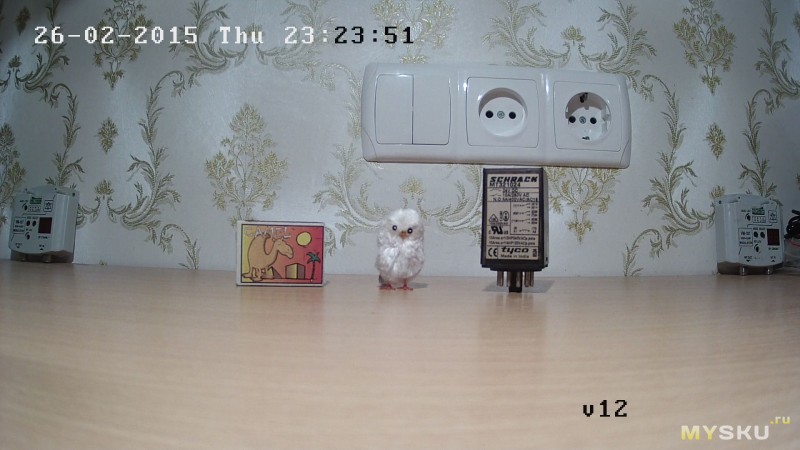
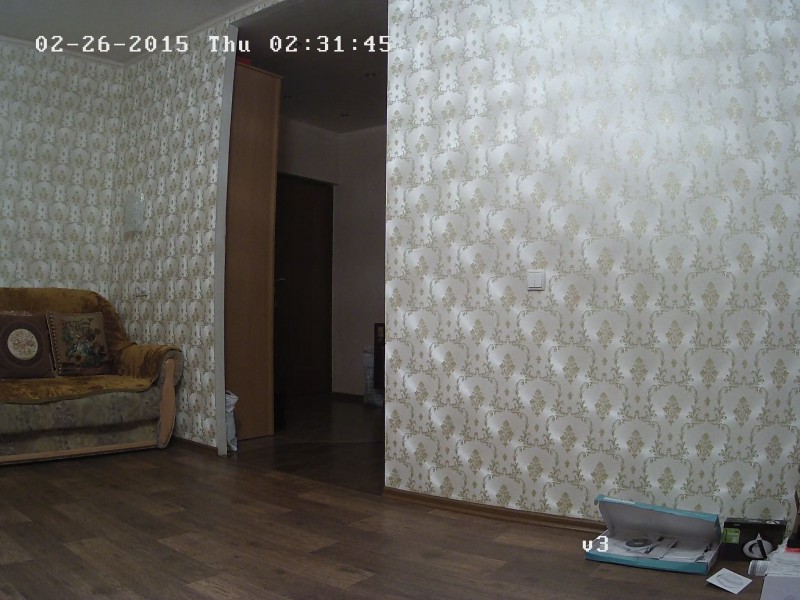
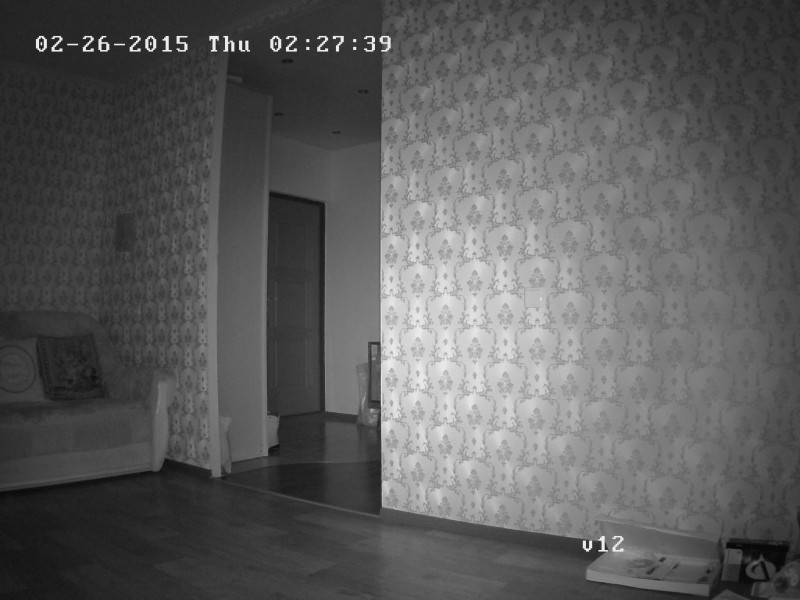
Все таки я решил выложить пару скриншотов, на одном включен верхний свет 180 Ватт, на втором только ИК подсветка.
Скрины
Резюме.
Плюсы
Отличное качество изображения
Большие функциональные возможности ПО камеры
Компактные размеры
Крепкий корпус, влагозащищенность.
Два варианта питания, 12 Вольт и PoE.
Цена.
Минусы.
Кроме непродуманности защиты разъема питания 12 Вольт, не обнаружены.
Мое мнение, отличная, хорошо отлаженная камера с качественным изображением и доступной ценой. Установил я их довольно много, особых проблем не обнаружил, работают вполне надежно.
Меня несколько раз спрашивали, почему почему я не беру на обзор камеры других производителей, отвечу здесь, мне пока не попадались камеры, которые по описанию имеют сходные характеристики и возможности. Возможно я еще возьму что-то на обзор, но 1мр камеры мне просто неинтересны, а 3мр стоят уже не так дешево. У меня есть хорошие кадры сравнения 1.3мр камеры и 3мр, установленных на одном месте (да, мы уже меняем 1.3 на 3), но опять же, по ряду причин я не могу их публиковать.:(
Надеюсь, что мой миниобзор был полезным, хотя допускаю, что и не очень интересным.
Я не смог уместить в нем все возможности, менюшки и т.п., а так же не описал родное ПО, но если кому то будет интересно, то с удовольствием все это добавлю в обзор или в комментарии.
Дополнительные материалы
В этот раз я просто создал папку на яндекс диске, где выложил всякое ПО для этих камер.
Если будут вопросы, то могу дополнить еще, выложил самый минимум.
Скачать
Вместо котика
Сегодня вместо котика я покажу видео одного ограбления. Это видео снималось очень давно, еще аналоговым наблюдением. У меня есть еще интересные ролики, но по ряду причин я не могу их публиковать.
Заодно на этом видео хорошо видно, как кепка с козырьком закрывает лицо, даже при условии, что камера стоит не очень высоко.
Кроме того, курьезная ситуация еще в том, что на видео ограбили точку, торгующую изделиями из золота, при этом камера наблюдения установлена просто в магазине. Хозяин магазина предлагал хозяину этой точки поставить и ему камеру отдельно (войти в долю по установке наблюдения), но он отказался. Позже, когда я готовил видео для следователя, он сказал, что это единственное видео с серии грабежей.
Видео поганого качества, камера аналоговая и довольно недорогая, видео перекодировалось.
В качестве сервера выступал десктоп на целероне 800МГц, обслуживал 8 камер в реалтайме.
-
Hikvision DS-2CD2032-I — page 1
Netw ork Camer a U ser Manual V5.0 UD .6L0201D1001A01 Hikvision Digital T echnolog y Co., L td. http ://www .hikvision.com …
-
Hikvision DS-2CD2032-I — page 2
User Manual of Network Camera 1 This manual is applied to the following camera models: T ype Model Bo x camera I DS -2CD883F-E(W), DS-2CD855(F)-E, DS-2CD854F(WD)-E(W), DS -2CD853F-E(W), DS-2CD864F(WD)-E(W), DS -2CD863PF(NF)-E(W), DS-2CD893PFWD(NFWD)-E(W), DS -2CD833F-E(W), DS -2CD893PF(NF)-E(W) Dome camer a I DS -2CD733F-E(I)(Z), DS-2 CD793PF(NF)-E …
-
Hikvision DS-2CD2032-I — page 3
User Manual of Network Camera © Hikvision Dig ital T echnology Co. , Ltd. All Rights R eserve d. 2 Thank you for purchasing our product. If t here are any questions, or requests, plea se do not hesitate to contact the dealer. This manual applies to Network Camer a. This manual may cont ain sever al technical incorre ct places or printing err or s, …
-
Hikvision DS-2CD2032-I — page 4
User Manual of Network Camera © Hikvision Dig ital T echnology Co. , Ltd. All Rights R eserve d. 3 R egulatory In format ion FCC Inf ormation FCC compliance: This equipment has been tes te d and fou nd to comply with the limits for a digi tal device, pur suant to p art 15 of the FCC Rules. These limits are de signed to provide r eas onable prot ec …
-
Hikvision DS-2CD2032-I — page 5
User Manual of Network Camera © Hikvision Dig ital T echnology Co. , Ltd. All Rights R eserve d. 4 Saf ety W arnings and Cautions Plea se pay a tten tion to the f ollowing warnings and cautions : Haz ardous V oltage ma y be presen t: Special measur es and precautio ns must be tak en when using this devic e. Some potentials (voltag es) on the devic …
-
Hikvision DS-2CD2032-I — page 6
User Manual of Network Camera © Hikvision Dig ital T echnology Co. , Ltd. All Rights R eserve d. 5 P ower Cord Requi rement s: The connec tor that plugs in to the wall o utlet must be a grounding-type male plug desig ned f or use in y our region. It mus t have cer tification marks showing certi fication by an ag ency in your r egion. The connector …
-
Hikvision DS-2CD2032-I — page 7
User Manual of Network Camera © Hikvision Dig ital T echnology Co. , Ltd. All Rights R eserve d. 6 determine d by turning the equipmen t on and of f , the user is requir ed to t ak e measur es t o eliminate the in terf erence or dis con tinue the use of this equipment. Lea d Content: Please recy cle this device in a responsible manner . Ref er to …
-
Hikvision DS-2CD2032-I — page 8
User Manual of Network Camera © Hikvision Dig ital T echnology Co. , Ltd. All Rights R eserve d. 7 Saf ety Ins truction These instructions are intende d to ensure that the user can use the p r oduct corr ectly to av oid danger or pr operty loss. The prec aution measure is divided in to ‘W arnings’ and ‘Cautions’: W arnings : Serious injury …
-
Hikvision DS-2CD2032-I — page 9
User Manual of Network Camera © Hikvision Dig ital T echnology Co. , Ltd. All Rights R eserve d. 8 Cautions: Mak e sure the pow er supply volt age is corr ect bef ore using the camera. Do not drop the camera or subject it to phy sical s hock. Do not touch sensor module s with fin ger s. If cleaning is necessary , use a clean cloth with …
-
Hikvision DS-2CD2032-I — page 10
User Manual of Network Camera © Hikvision Dig ital T echnology Co. , Ltd. All Rights R eserve d. 9 Cont ent s CHAPTER 1 S YSTEM REQUIREMENT ……………………………………………………………………………….. 12 CHAPTER 2 NETWORK CONNECTION ………………………………………………………………………… …
-
Hikvision DS-2CD2032-I — page 11
User Manual of Network Camera © Hikvision Dig ital T echnology Co. , Ltd. All Rights R eserve d. 10 6.4 C ONFIGUR ING V IDEO AND A UDIO S ETTINGS …………………………………………………………………………. 46 6.4.1 Configuring V id eo Settings ……………………………………………………………………. …
-
Hikvision DS-2CD2032-I — page 12
User Manual of Network Camera © Hikvision Dig ital T echnology Co. , Ltd. All Rights R eserve d. 11 A PPENDIX 2 P OR T M APPING ……………………………………………………………………………………………………… 92 …
-
Hikvision DS-2CD2032-I — page 13
User Manual of Network Camera © Hikvision Dig ital T echnology Co. , Ltd. All Rights R eserve d. 12 Chapter 1 Sy st e m Re quir emen t Oper ating S yst em: Microso ft W indows XP SP1 and abov e ver sion / V ista / W in7 / Server 2003 / Server 2008 32bits CPU : Intel P entium IV 3.0 GHz or higher RAM: 1G or higher Display: 1024× 768 resol ution or …
-
Hikvision DS-2CD2032-I — page 14
User Manual of Network Camera 13 Chapter 2 Network C onnection Before you s tart: If y ou wan t to set the netw ork c amera via a L AN (Local Are a Network), please re fer to Se ction 2.1 Setting the Network Camer a over the L AN . If you want to set the network camera via a W AN (W ide Area Network), please re fer to Se ction 2.2 Setting t …
-
Hikvision DS-2CD2032-I — page 15
User Manual of Network Camera © Hikvision Dig ital T echnology Co. , Ltd. All Rights R eserve d. 14 2.1.2 De tecting and Changing the IP A ddre ss You need the IP address to visit the network camera. Steps: 1. To get the IP address, you can cho ose either of th e following methods : Use SADP, a software too l which can automatically detect the …
-
Hikvision DS-2CD2032-I — page 16
User Manual of Network Camera © Hikvision Dig ital T echnology Co. , Ltd. All Rights R eserve d. 15 2.2 Setting the Net work Camer a ov er the W AN Purpose: This section explains how to connect the networ k camer a to t he W AN with a s tatic IP or a dynamic IP . 2.2.1 St atic IP Con nection Before you s tart: Please apply a s tatic IP from an I S …
-
Hikvision DS-2CD2032-I — page 17
User Manual of Network Camera © Hikvision Dig ital T echnology Co. , Ltd. All Rights R eserve d. 16 2.2.2 Dynamic IP Con nection Before you s tart: Please apply a dynamic IP from an ISP . W ith the dynamic IP addre ss, you can connect the network c amera to a modem or a r outer . Con necting the ne twork came ra via a router Steps: 1. Connect …
-
Hikvision DS-2CD2032-I — page 18
User Manual of Network Camera © Hikvision Dig ital T echnology Co. , Ltd. All Rights R eserve d. 17 Figure 2-7 Normal Domai n Name Re solution Steps: 1. Apply a domain name fr om a domain name provider . 2. Configure the DDNS settings in the DDNS Set tings interf ace of the network camer a. R efer to Section 5.3.4 Configuring DDNS Settings f or de …
-
Hikvision DS-2CD2032-I — page 19
User Manual of Network Camera 18 Chapter 3 Acce ss t o the Ne twor k Camer a 3.1 Accessi ng by W eb Browser s Steps: 1. Open the web browser. 2. In the address field, input the IP addre ss of the network camera , e.g., 19 2.0.0.64 and press the Enter key to enter the login interface. 3. Input the user name and passwo rd and click . Note: The defaul …
-
Hikvision DS-2CD2032-I — page 20
User Manual of Network Camera © Hikvision Dig ital T echnology Co. , Ltd. All Rights R eserve d. 19 Figure 3-2 Downlo ad and Install Plug-in Figure 3-3 Ins tall Plug-in (1) Figure 3-4 Ins tall Plug-in (2) …
-
Hikvision DS-2CD2032-I — page 21
User Manual of Network Camera © Hikvision Dig ital T echnology Co. , Ltd. All Rights R eserve d. 20 Figure 3-5 Ins tall Plug-in (3) Note: You may h ave to close th e web browser to install the plug-in. Please reopen the web browser and log in again after installing the plug -in. 3.2 Accessi ng by Client Soft war e 3.2.1 Acce ssing by iVMS-4200 So …
-
Hikvision DS-2CD2032-I — page 22
User Manual of Network Camera © Hikvision Dig ital T echnology Co. , Ltd. All Rights R eserve d. 21 Figure 3-6 iVMS-4 200 Live V iew Figure 3-7 iVMS -4200 Configura tion Pan el Note: F or detailed inf orma tion about iVMS-4200 client softw are, please ref er t o the user manual of the iVMS-4200 so ftware. 3.2.2 Acce ssing by iVMS-4500 So ftwar e T …
-
Hikvision DS-2CD2032-I — page 23
User Manual of Network Camera © Hikvision Dig ital T echnology Co. , Ltd. All Rights R eserve d. 22 4.1 Configuring Wi -F i Connection in Manage and Ad -hoc Mode s Before you s tart: A wireless network must be configur ed . W ireless Connection in Manage Mode Steps: 1. Enter the W i-F i configur ation in terf ace. Configur ation> Adv ance d Con …
-
Hikvision DS-2CD2032-I — page 24
User Manual of Network Camera © Hikvision Dig ital T echnology Co. , Ltd. All Rights R eserve d. 23 If you choose the Ad -hoc mode, you don ’ t nee d to c onnect the wirele ss camer a via a rout er . The scenario is the same as yo u connect the camer a and the PC direct ly with a network c able. Steps: 1. Cho ose Ad-hoc mode. Figure 4-3 Wi -F i …
-
Hikvision DS-2CD2032-I — page 25
User Manual of Network Camera © Hikvision Dig ital T echnology Co. , Ltd. All Rights R eserve d. 24 Y ou can choose the Security Mode as not – encrypte d, WEP , WP A-per sonal, WP A-ent erprise, WP A2-per sonal, WP A2-enter prise. WEP mode: Au thentic ation — Select O pen or Shar ed Key Sys tem Authentic ation, dep ending on the method u se …
-
Hikvision DS-2CD2032-I — page 26
User Manual of Network Camera © Hikvision Dig ital T echnology Co. , Ltd. All Rights R eserve d. 25 WP A- en terprise and WP A2-enter prise Mode: Choose the type of client/server authent ication being used by the acce ss point; EAP -TLS or EAP — PEAP . EAP -TLS Ident ity — En ter the user ID to pr esent t o the netw ork. Pr iva te k ey p a …
-
Hikvision DS-2CD2032-I — page 27
User Manual of Network Camera © Hikvision Dig ital T echnology Co. , Ltd. All Rights R eserve d. 26 4.2 Ea sy W i -F i Connection with WPS function Purpose : The setting o f the wirele ss network c onnection is never e a s y . T o a void the comple x setting o f the wireless connection you c an enable the WPS function. WPS ( Wi -F i Pro tecte d Se …
-
Hikvision DS-2CD2032-I — page 28
User Manual of Network Camera © Hikvision Dig ital T echnology Co. , Ltd. All Rights R eserve d. 27 If there is n ot a WPS button on the camera, y ou can also click the virtual button to enable the PBC function on the web in terface . Click butt on. When the PBC mode is both enabled in the ro uter and the camer a, the camera and the wireless netwo …
-
Hikvision DS-2CD2032-I — page 29
User Manual of Network Camera © Hikvision Dig ital T echnology Co. , Ltd. All Rights R eserve d. 28 Y ou can gener at e the PIN code on th e camer a side. And the expire d time for the PIN code is 120 secon ds. 1. Click 2. Enter the co de to the rou ter , in the e xample, e nter 4816 7581 to the r outer . 4.3 IP Property Set tings f or W ireless N …
-
Hikvision DS-2CD2032-I — page 30
User Manual of Network Camera 29 Chapter 5 Live V iew 5.1 Live V iew P ag e Purpose: The live video page allows you to view live video, capture images, realize PTZ control, set/call presets and configure video parameters. L og in the n etwork camera to enter the live view page, or you can click on the menu bar of the main page to enter the live vie …
-
Hikvision DS-2CD2032-I — page 31
User Manual of Network Camera © Hikvision Dig ital T echnology Co. , Ltd. All Rights R eserve d. 30 pan/tilt unit has been ins talled ). Live View Parameters: Configure the image size and stream type of the live video. 5.2 Starting Live V iew In the live view window as sh own in F igure 5-2, click on the t oolbar t o start the live view of the cam …
-
Hikvision DS-2CD2032-I — page 32
User Manual of Network Camera © Hikvision Dig ital T echnology Co. , Ltd. All Rights R eserve d. 31 click to recor d the live video . The saving paths of t he captur ed pictur es and clips can be set on the Configur ation > Local Configuration page. T o con figure remote schedule d recor ding, p lea se re fer to Section 6.2 . Note : The capture …
-
Hikvision DS-2CD2032-I — page 33
User Manual of Network Camera © Hikvision Dig ital T echnology Co. , Ltd. All Rights R eserve d. 32 Focus ne ar/far Iris open/ close Light on/ off W iper on/off One-t ouch focus Initializ e lens Adjus t speed of pan /ti lt movements 5.4.2 Sett ing / Calling a Pre set Setting a Preset: 1. In the PTZ control panel, select a preset number from th …
-
Hikvision DS-2CD2032-I — page 34
User Manual of Network Camera © Hikvision Dig ital T echnology Co. , Ltd. All Rights R eserve d. 33 Figure 5-4 Calling a Pr ese t 5.5 Configuring Live V iew P ar amet er s Purpose: Y ou can select the st ream type and a djust the image siz e on the live view page. Click , or tab under the menu bar of the live view interf ace to select the str …
-
Hikvision DS-2CD2032-I — page 35
User Manual of Network Camera © Hikvision Dig ital T echnology Co. , Ltd. All Rights R eserve d. 34 Figure 6-1 Loc al Configura tion Inter face 2. Con figure the fol lowing setti ngs: Live V iew Par amete rs : Set the pro tocol type and liv e view performance. Prot ocol T ype: TCP , UDP , MUL TICAST and HTTP are selectable. TCP: Ensures co …
-
Hikvision DS-2CD2032-I — page 36
User Manual of Network Camera © Hikvision Dig ital T echnology Co. , Ltd. All Rights R eserve d. 35 pictures in playback mod e. Sav e clips to: Set the savi ng path of the clipped vi deo fil es in pla yback mode. Note : Y ou can click to change the direct ory for saving the clips and pictures. 3. Click to save the settings. 6.2 Configuring T i …
-
Hikvision DS-2CD2032-I — page 37
User Manual of Network Camera © Hikvision Dig ital T echnology Co. , Ltd. All Rights R eserve d. 36 Figure 6-3 T ime Sync by NTP Server Note : If the camera is connecte d to a p ublic network, you should use a NTP server that has a t ime s ynchro nization function, such as the server at the N a tional T ime Center (IP Addr ess: 210.72.145.44). If …
-
Hikvision DS-2CD2032-I — page 38
User Manual of Network Camera © Hikvision Dig ital T echnology Co. , Ltd. All Rights R eserve d. 37 6.3 Configuring Network Set tings 6.3.1 Configuring T CP /IP Set tings Purpose: TCP /IP set tings must be pr operly configur ed bef or e you oper ate the camer a over network. The camera su pports both the IPv4 and IPv6. Both versions may be configu …
-
Hikvision DS-2CD2032-I — page 39
User Manual of Network Camera © Hikvision Dig ital T echnology Co. , Ltd. All Rights R eserve d. 38 3. Click t o save the above settings . Note : it will ask f or a re boot for the settings to tak e ef fect. 6.3.2 Configuring P ort Settings Purpose: Y ou can set the por t No. of the camera, e.g. HTTP port, RTSP port and HTTPS port. Steps: 1. Enter …
-
Hikvision DS-2CD2032-I — page 40
User Manual of Network Camera © Hikvision Dig ital T echnology Co. , Ltd. All Rights R eserve d. 39 Figure 6-8 PPP oE Se ttings 2. Check the En able PPPoE checkbox to enable this feature. 3. Enter User Name , Password , and Confirm password for PPPoE access. Note: The User Name and Password should be assigned by your ISP. 4. Clic k to save and exi …
-
Hikvision DS-2CD2032-I — page 41
User Manual of Network Camera © Hikvision Dig ital T echnology Co. , Ltd. All Rights R eserve d. 40 3. Select DDNS Type . Three DDNS types are selectable: HiDDNS, IPServer and DynDNS. DynDNS: Steps: (1) Enter Server Address of DynDNS (e.g. members.dyndns.org). (2) In the Domain text field, enter the domain name obtained from the DynDNS website …
-
Hikvision DS-2CD2032-I — page 42
User Manual of Network Camera © Hikvision Dig ital T echnology Co. , Ltd. All Rights R eserve d. 41 (2) Enter the Server A ddress www .hiddns.com. (3) Enter the Domain name o f the camer a. The domain is the same with the device alias in the HiDDNS server . (4) Click to sav e the new setti ngs. Note : It will ask f or a reboo t for the set tings t …
-
Hikvision DS-2CD2032-I — page 43
User Manual of Network Camera © Hikvision Dig ital T echnology Co. , Ltd. All Rights R eserve d. 42 Figure 6- 12 SNMP Set tings 2. Check the corresponding version checkbox ( , , ) to enable the feature. 3. Configure the SNMP settings. Note: The settings of the SNMP software should be the same as the settings you configure here. 4. Click t o save a …
-
Hikvision DS-2CD2032-I — page 44
User Manual of Network Camera © Hikvision Dig ital T echnology Co. , Ltd. All Rights R eserve d. 43 Configur ation > Adv anced Conf igurat ion > Network > 802. 1X Figure 6- 13 802.1X Se ttings 2. C heck the En able IEEE 80 2.1X checkbo x to enable the f ea ture. 3. Con figure the 802.1X settings, including EAPOL ver sion, u ser name and p …
-
Hikvision DS-2CD2032-I — page 45
User Manual of Network Camera © Hikvision Dig ital T echnology Co. , Ltd. All Rights R eserve d. 44 3. Clic k to sav e the settings. Note : it will ask f or a re boot for the settings to tak e ef fect. 6.3.8 Configuring FTP Set tings Purpose: Y ou can configur e the FTP ser ver relat ed inf ormation to enable the uploading of the captur ed picture …
-
Hikvision DS-2CD2032-I — page 46
User Manual of Network Camera © Hikvision Dig ital T echnology Co. , Ltd. All Rights R eserve d. 45 6.3.9 Configuring UPnP ™ Set tings U niver sal Plug and Play (UPnP ™ ) is a networking architecture th a t p r ovides compa tib ility among netw orking equipment, softwar e and other h ar dwar e devices. The UPnP p r otoc ol allows devices to co …
-
Hikvision DS-2CD2032-I — page 47
User Manual of Network Camera © Hikvision Dig ital T echnology Co. , Ltd. All Rights R eserve d. 46 3. Clic k to sa ve the set tings. 6.4 Configuring V ideo and Audio Set tings 6.4.1 Configuring V ideo S et tings Steps: 1. En ter the V ideo Settings interf ace: Configur ation >Basic Con figurat ion > V ideo / Audio > V ideo O r Configurat …
-
Hikvision DS-2CD2032-I — page 48
User Manual of Network Camera © Hikvision Dig ital T echnology Co. , Ltd. All Rights R eserve d. 47 Fram e Rate: Set the frame ra te to 1 / 16~25 fps. The f rame rat e is to describe the frequency at which the video stream is updat ed and it is measured by frames per second (fps). A higher frame rate is advantageous when there is movement in the v …
-
Hikvision DS-2CD2032-I — page 49
User Manual of Network Camera © Hikvision Dig ital T echnology Co. , Ltd. All Rights R eserve d. 48 Audio Encoding: G.711 ulaw , G.7 11alaw and G.72 6 are selectabl e. Audio Input: MicIn and Linein are selectable for the connecte d micro phone and pickup re spectively . 3. Clic k to save the se ttings. 6.4.3 Configuring R OI Encoding Note: O nly 4 …
-
Hikvision DS-2CD2032-I — page 50
User Manual of Network Camera © Hikvision Dig ital T echnology Co. , Ltd. All Rights R eserve d. 49 1. En ter the Display Se ttings int erface: Configur ation > Basic Con figurat ion> Im age > Displa y Settings Or Configur at ion > Adva nced Configur ation> Imag e > Display Se ttings 2. Se t the image par ameter s of the camer a. …
-
Hikvision DS-2CD2032-I — page 51
User Manual of Network Camera © Hikvision Dig ital T echnology Co. , Ltd. All Rights R eserve d. 50 The mirror function enable s you to view another a spect of the image. Y ou c an flip the image horizon tally and vertically . It can be u se d to view the image in the wa y you see it directly using your eye s. WDR: W ide dynamic r ange can be used …
-
Hikvision DS-2CD2032-I — page 52
User Manual of Network Camera © Hikvision Dig ital T echnology Co. , Ltd. All Rights R eserve d. 51 Y ou can cus tomize the camer a name and time on the scree n. Steps: 1. Enter the OS D Settings in terface : Configur ation > Adv anced Conf igurat ion > Image > OSD Set tings Figure 6- 20 O SD Settings 2. Check the corre sponding checkbox …
-
Hikvision DS-2CD2032-I — page 53
User Manual of Network Camera © Hikvision Dig ital T echnology Co. , Ltd. All Rights R eserve d. 52 6.5.3 Configuring T ext O verla y Set tings Purpose: Y ou can cus tomize the te xt overla y . Steps: 1. Enter the T ex t Overla y Setti ngs interf ace: Configur ation > A dvance d Configura tion > Image > T ext O verla y 2. Check the checkb …
-
Hikvision DS-2CD2032-I — page 54
User Manual of Network Camera © Hikvision Dig ital T echnology Co. , Ltd. All Rights R eserve d. 53 3. Clic k . Figure 6- 23 Priv acy Mask Set tings 4. C lick and drag the mouse in the live vi deo window to dr aw the mask area. Note: Y ou a re allowe d to dr aw up to 4 are as on the same imag e. 5. C lick to finish drawing or click to clear all of …
-
Hikvision DS-2CD2032-I — page 55
User Manual of Network Camera © Hikvision Dig ital T echnology Co. , Ltd. All Rights R eserve d. 54 2. Click button to add a picture fr om your PC. 3. Click button to uploa d it. 4. Check the checkbox t o enable the function. X Coordinate and Y Coordina te value s are for the loca tion of the pic ture on the image. And the Picture width and Heigh …
-
Hikvision DS-2CD2032-I — page 56
User Manual of Network Camera © Hikvision Dig ital T echnology Co. , Ltd. All Rights R eserve d. 55 (2) Check the checkbo x of Enable Motion Det ection. Figure 6- 24 Enable Mo tion Detection (3) Click . Click and dr ag the mouse on the live video i mage to draw a motion detectio n area. Note: Y ou c an draw up to 8 motion det ection are as on the …
-
Hikvision DS-2CD2032-I — page 57
User Manual of Network Camera © Hikvision Dig ital T echnology Co. , Ltd. All Rights R eserve d. 56 Figure 6- 25 Arming T ime (1) Click to edit the arming schedule. The F igure 5- 28 shows the editing int erface of the arming schedule. (2) Choose the da y you wan t to se t the arming schedule. (3) Click to set the time period f or the arming sche …
-
Hikvision DS-2CD2032-I — page 58
User Manual of Network Camera © Hikvision Dig ital T echnology Co. , Ltd. All Rights R eserve d. 57 Y ou can specify the link age method when an even t occurs. The following cont ents ar e about how to c onfigure the dif fe rent types of lin k age method. Figure 6- 27 Link age Method Steps: (1) Check the checkbox t o select the linkage met hod. Au …
-
Hikvision DS-2CD2032-I — page 59
User Manual of Network Camera © Hikvision Dig ital T echnology Co. , Ltd. All Rights R eserve d. 58 Y ou can configure th e camer a to t rigger the alarm when t he lens is cov ere d and tak e alarm re sponse action . Steps: 1. En ter the T amper -pro of Setti ngs interf ace: Configur ation > A dvance d Configura tion > Ev ents > T amper-p …
-
Hikvision DS-2CD2032-I — page 60
User Manual of Network Camera © Hikvision Dig ital T echnology Co. , Ltd. All Rights R eserve d. 59 6.6.3 Configuring Ext ernal Al arm Input Steps: 1. En ter the Alarm Input Settings i nterf ace: Configur ation > A dvance d Configura tion> Ev ents > Alarm Input: 2. Choose the alarm input No. and the Alarm T ype. The alarm type ca n be NO …
-
Hikvision DS-2CD2032-I — page 61
User Manual of Network Camera © Hikvision Dig ital T echnology Co. , Ltd. All Rights R eserve d. 60 Figure 6- 30 Link age Method 6.6.4 Configuring Alarm Out put Steps: 1. En ter the Alarm Ou tput Settings in terface: Configur ation>Adv anced Configur ation> E ven ts > Alarm O utput 2. Select one alarm output channel in the Alarm O utput d …
-
Hikvision DS-2CD2032-I — page 62
User Manual of Network Camera © Hikvision Dig ital T echnology Co. , Ltd. All Rights R eserve d. 61 Figure 6- 31 Alarm O utput Setti ngs 6.6.5 Hand ling Ex ception The ex ception type can b e HDD full, HDD error , network disconnect ed , IP addr ess conflict ed and illegal login to the c ameras. Steps: 1. En ter the Ex ception Settings in terf ace …
-
Hikvision DS-2CD2032-I — page 63
User Manual of Network Camera © Hikvision Dig ital T echnology Co. , Ltd. All Rights R eserve d. 62 6.6.6 Emai l Sending T riggere d by Alarm Purpose: The system can be configured t o send an Email notif ication to all d esignated receivers if a n alarm event is detected, e.g., motion d etection event, video l oss, tamper-proof, etc. Before you s …
-
Hikvision DS-2CD2032-I — page 64
User Manual of Network Camera © Hikvision Dig ital T echnology Co. , Ltd. All Rights R eserve d. 63 And the SSL SMTP port is 465. Enable SSL: Check the checkbo x to enable SSL if it is require d by the SMTP server . A ttache d Image: Check the checkbox of A t tached Image if you wan t to send emails with a ttache d alarm images. Interv al: The int …
-
Hikvision DS-2CD2032-I — page 65
User Manual of Network Camera © Hikvision Dig ital T echnology Co. , Ltd. All Rights R eserve d. 64 details to con figure FTP par ameter s. 2) Check the En able T iming Snapsho t checkbox. U pload ev ent -triggere d snapshots t o FTP Steps: 1) Con figure the FTP settings and check checkbox in FTP Settings inte rface . Please ref er to Section …
-
Hikvision DS-2CD2032-I — page 66
User Manual of Network Camera © Hikvision Dig ital T echnology Co. , Ltd. All Rights R eserve d. 65 Steps: 1. En ter the face detection se ttings int erface: Configur ation > Adv ance d Configura tion > E vent s > Face De tection 2. Check the Enable Face D etection to check box to enable the function . 3. ( Optional)Y ou can check th e En …
-
Hikvision DS-2CD2032-I — page 67
User Manual of Network Camera © Hikvision Dig ital T echnology Co. , Ltd. All Rights R eserve d. 66 Figure 6- 35 R emote Con trol Se ttings 2. Study the code of the remote c ontr ol or the wirele ss alarm. T o study a r emote control, select Remote Co ntrol fr om the Study dr op -down list , and click ; and then pre ss any o f the buttons o n the …
-
Hikvision DS-2CD2032-I — page 68
User Manual of Network Camera © Hikvision Dig ital T echnology Co. , Ltd. All Rights R eserve d. 67 R emote Contr ol: Figure 6- 36 R emote Con trol Remo te Control Description: Sta tus Indicator Indicating the sta tus of the remo te; when you press the butt on on t he remo te, the indicator flicks in r ed. Arm Press the button to arm the camer a. …
-
Hikvision DS-2CD2032-I — page 69
User Manual of Network Camera © Hikvision Dig ital T echnology Co. , Ltd. All Rights R eserve d. 68 T o s tudy the wirele ss alarms, e.g. the access control device, select W ireless Alarm f r om the Study drop-down list, a nd select the device serial nu mber (1-
from the d r op-down list, and click ; and then send the signal f r om the wire … -
Hikvision DS-2CD2032-I — page 70
User Manual of Network Camera © Hikvision Dig ital T echnology Co. , Ltd. All Rights R eserve d. 69 Note: DS -2CD8464F -EI(Z)(W) camer a supports wireless audi ble and visual alarm as the wirel ess alarm output for the wireless alarm. Check the check box of W ireless audi ble and visual alarm to activ ate th e alarm output. Figure 6- 39 W ireless …
-
Hikvision DS-2CD2032-I — page 71
User Manual of Network Camera © Hikvision Dig ital T echnology Co. , Ltd. All Rights R eserve d. 70 Manual Alarm/Emergen cy Alarm Certain series o f c amer a su pport manual alar m by th e remote con trol. It can be manually t rigger ed and link ed to t he audio warning if any emergency happens. Y ou can p r ess and hold th e man ual alarm butt on …
-
Hikvision DS-2CD2032-I — page 72
User Manual of Network Camera © Hikvision Dig ital T echnology Co. , Ltd. All Rights R eserve d. 71 Y ou can also press the Arm/Disarm butt o n on the remote contr ol to arm/disarm the camer a if the camer a has alr ea dy studied the r emote c ontr ol. The arming indicat or glow s red when the camera is armed and glows blue when it ’ s d …
-
Hikvision DS-2CD2032-I — page 73
User Manual of Network Camera 72 Chapter 7 Stor age Set tings Before you s tart: T o configure rec ord se ttings, plea se mak e sure th at you ha ve the netw ork st orag e device within the netw ork or the SD car d inserte d in your camer a. 7.1 Configuring N AS Settings Before you s tart: The network disk should be av ailab le within the network a …
-
Hikvision DS-2CD2032-I — page 74
User Manual of Network Camera © Hikvision Dig ital T echnology Co. , Ltd. All Rights R eserve d. 73 Figure 7-3 Initiali zing When the initializa tion complet ed, the sta tus of disk will become Normal. Figure 7-4 V iew D isk St atus Note s : U p to 8 NA S disks can be connected to the camer a. T o initializ e and use the SD card a fter ins …
-
Hikvision DS-2CD2032-I — page 75
User Manual of Network Camera © Hikvision Dig ital T echnology Co. , Ltd. All Rights R eserve d. 74 Figure 7-5 R ec ording Schedule In terface 2. Check the checkbox o f Enable Record Sche dule to enable sc hedule d reco rding. 3. Set the rec ord par ameter s of the c amera. Figure 7-6 R ec ord Par ameter s Pre-rec ord: The time you set to star …
-
Hikvision DS-2CD2032-I — page 76
User Manual of Network Camera © Hikvision Dig ital T echnology Co. , Ltd. All Rights R eserve d. 75 Figure 7-7 R ec ord Schedule 5. Choose the day to set th e record sc hedule. (1) Set all-day rec ord or segment recor d: If you w ant to c onfigur e the a ll -day rec ordi ng, please check the All Da y checkbox . If you want to recor d in di …
-
Hikvision DS-2CD2032-I — page 77
User Manual of Network Camera © Hikvision Dig ital T echnology Co. , Ltd. All Rights R eserve d. 76 Section 5.6.4 . Record T riggere d by Motion & Alarm If you select Motion & Alarm , t he video will be rec orded when the motion and alarm are trigger ed a t the same time. Besides configuring the rec ording sche dule, you ha ve to confi …
-
Hikvision DS-2CD2032-I — page 78
User Manual of Network Camera © Hikvision Dig ital T echnology Co. , Ltd. All Rights R eserve d. 77 Figure 7-8 E dit Rec ord Sched ule (3) Check the checkbox and click to copy set tings of this day to the whole week. Y o u can also check an y of the checkbo x es be for e the date and click . (4) Click to sa ve the set tings and exit the Edit Recor …
-
Hikvision DS-2CD2032-I — page 79
User Manual of Network Camera 78 Chapter 8 Pla yback Purpose: This section explains how to view the remo tely record ed video files store d in the network disk s or SD cards. Steps: 1. Click on the menu bar to enter playback in terface. Figure 8-1 Pla yback Inter face 2. Select the dat e and click . Figure 8-2 Se arch V ideo 3. Click to play the vi …
-
Hikvision DS-2CD2032-I — page 80
User Manual of Network Camera © Hikvision Dig ital T echnology Co. , Ltd. All Rights R eserve d. 79 proce ss. Figure 8-3 Pla yback T oolbar Table 8-1 Description of the bu ttons Button Operation Button Operation Play Capture a pictur e Pause / Start/Stop clipping vide o files Stop / Audio on and adjust volume/Mute Speed down Download video files S …
-
Hikvision DS-2CD2032-I — page 81
User Manual of Network Camera 80 Chapter 9 Log Sear ching Purpose: The o per ation, alarm, ex ception and inf ormation of the camer a can be store d in log files. Y ou can also e xport the log files on y our demand. Before you s tart: Please c onfigure netw ork stor age f or the camer a or insert a SD card in the camera. Steps: 1. Click on th e men …
-
Hikvision DS-2CD2032-I — page 82
User Manual of Network Camera 81 Chapter 10 Other s 10.1 Managing U ser Accoun ts Enter the U ser Management in terface: Configur ation >Basic Con figurat ion> Security > U ser O r Con figura tion > Adva nced Configur ation> Security > U ser The a dmin user has access to creat e, modify or delete other accounts. U p to 15 user acc …
-
Hikvision DS-2CD2032-I — page 83
User Manual of Network Camera © Hikvision Dig ital T echnology Co. , Ltd. All Rights R eserve d. 82 Figure 10-2 Add a U ser Modify a U ser Steps: 1. Left -click to select the user from the lis t and c lick . 2. Modify the U ser Name , Level or P assword . 3. In the Basic Permission field and Camer a Configura tion field, you can check or unc h …
-
Hikvision DS-2CD2032-I — page 84
User Manual of Network Camera © Hikvision Dig ital T echnology Co. , Ltd. All Rights R eserve d. 83 Delete a U ser Steps: 1. Left — cl ick the user name you w ant to delet e and click . 2. Click on the pop-up dialogue box to delet e the user . Figure 10-4 Delete a U ser Anonymous V isit 10.2 Configuring RT SP Authentica tion Purpose: Y ou …
-
Hikvision DS-2CD2032-I — page 85
User Manual of Network Camera © Hikvision Dig ital T echnology Co. , Ltd. All Rights R eserve d. 84 Enabling this function allows visit for whom doesn ’ t hav e the user name and passw ord of the device. Steps: 1. Enter the Anon ymous V isit interf ace: Configur ation> Adv anced Configur at ion> Security > Anonymous V isit Figure 10-6 A …
-
Hikvision DS-2CD2032-I — page 86
User Manual of Network Camera © Hikvision Dig ital T echnology Co. , Ltd. All Rights R eserve d. 85 Figure 10-8 IP Addr ess F i lter I nterf a ce 2. Check the checkbox o f Enable IP Address F i lter . 3. Select the type of IP Addr ess F i lter in the drop -down list, Forbidden and Allowed are selecta ble. 4. Set the IP A ddress F ilter lis t. …
-
Hikvision DS-2CD2032-I — page 87
User Manual of Network Camera © Hikvision Dig ital T echnology Co. , Ltd. All Rights R eserve d. 86 Figure 10- 10 Modify an IP (3) Click the bu tt on to finish modifying. Delete an IP A ddress Left -click an IP addr ess fr om filter list and click button. Delete all IP A ddress es Click button to dele te all the IP addr sses. 5. Click butt …
-
Hikvision DS-2CD2032-I — page 88
User Manual of Network Camera © Hikvision Dig ital T echnology Co. , Ltd. All Rights R eserve d. 87 10.6 Maint enance 10.6.1 R ebooting the Camer a Steps: 1. En ter the Mainte nance inter face: Configur ation > Basic Configur at ion > S yst em > Mainte nance Or Configura tion > Adv anced Configu ratio n> Sy st em > Maintenance: 2 …
-
Hikvision DS-2CD2032-I — page 89
User Manual of Network Camera © Hikvision Dig ital T echnology Co. , Ltd. All Rights R eserve d. 88 start importi ng con figura tion file. Note : Y ou nee d to r eboot the camer a after importin g con figura tion fi le. 2. Clic k and set the saving pat h to save the configura tion file in loc al stor age . Figure 10- 14 Import/Export Configur atio …
-
Hikvision DS-2CD2032-I — page 90
User Manual of Network Camera © Hikvision Dig ital T echnology Co. , Ltd. All Rights R eserve d. 89 1. Enter R S-232 Port Setting int erface: Configur ation> Adv anced Configur at ion> Syst em > RS 232 Figure 10- 16 RS -232 Settings Note: If you wan t to connect the camer a by the RS- 232 port, the par ameter s of the RS -232 should be ex …
-
Hikvision DS-2CD2032-I — page 91
User Manual of Network Camera © Hikvision Dig ital T echnology Co. , Ltd. All Rights R eserve d. 90 Appendix Appendix 1 SADP So ftwar e Intr oduction Descripti on of S ADP V 2.0 SADP (Searc h Activ e Devices Pro tocol) is a kind of user-frie nd ly and in s tallation-fr ee online device sea rch tool. It sear ches the active online devices withi …
-
Hikvision DS-2CD2032-I — page 92
User Manual of Network Camera © Hikvision Dig ital T echnology Co. , Ltd. All Rights R eserve d. 91 Note: Y ou c an click or on e ach column heading to order t he informa tion; you c an c lick to expa nd the device table and hide the network par ameter panel on the right side, or click to show the network par amet er panel. Modify netwo rk par …
-
Hikvision DS-2CD2032-I — page 93
Appendix 2 P ort Mapping The following setti ng s are for TP -LINK router (TL-R410) . The settings vary d epending on diff eren t models of ro uters. Steps: 1. Select the W AN Connection T ype , as s hown below: F igure A.2.1 Select the W AN Connection T ype 2. Set the L AN par amet ers of the r outer as in the following figure, incl uding IP addre …
-
Hikvision DS-2CD2032-I — page 94
User Manual of Network Camera © Hikvision Dig ital T echnology Co. , Ltd. All Rights R eserve d. 93 ports of another camera as 81, 8001, 555, 8201 with IP 192.168.1.24. R ef er to the ste ps as below: Note : The 8200 port changes with the 80 00 port with a constan t value of 200. E.g. if the 8000 port is changed to 8005, then the 8200 po rt should …
-
Hikvision DS-2CD2032-I — page 95
First Choice for Security Professionals …