-
Contents
-
Table of Contents
-
Bookmarks
Quick Links
Chapters
-
Table of Contents
7 -
Features of Your Hyundai
13 -
Driving Your Hyundai
106 -
What to Do in an Emergency
122 -
Corrosion Prevention & Appearance Care
135 -
Vehicle Maintenance Requirements
141 -
Do-It-Yourself Maintenance
150
Related Manuals for Hyundai 2004 Accent
Summary of Contents for Hyundai 2004 Accent
-
Page 1
2004… -
Page 2
A020A01A-AAT RESPONSIBILITY FOR MAINTENANCE The maintenance requirements for your new Hyundai are found in Section 5. As the owner, it is your responsibility to see that all maintenance operations specified by the manufacturer are carried out at the appropriate intervals. -
Page 3: Specifications
Specifications A030A01A All information in this Owner’s Manual is current at the time of publication. However, Hyundai reserves the right to make changes at any time so that our policy of continual product improvement may be carried out. This manual applies to all Hyundai models and includes descriptions and explanations of optional as well as standard equipment.
-
Page 4
Your Hyundai should not be modified in any way. Such modifications may adversely affect the performance, safety or durability of your Hyundai and may, in addition, violate conditions of the limited warranties covering the vehicle. Certain modifications may also be in violation of regulations established by the U.S. Department of Transportation and other federal or state agencies. -
Page 5
Your Owner’s Manual will introduce you to the features and operation of your new Hyundai. It is suggested that you read it carefully because the information it contains can contribute greatly to the satisfaction you receive from your new car. -
Page 6
A090A01A-AAT SAFETY AND VEHICLE DAMAGE WARNING This manual includes information titled as WARNING, CAUTION and NOTE. These titles indicate the following: WARNING: This indicates that a condition may result in harm, serious injury or death to you or other persons if the warning is not heeded. -
Page 7: Table Of Contents
TABLE OF CONTENTS FEATURES OF YOUR HYUNDAI DRIVING YOUR HYUNDAI WHAT TO DO IN AN EMERGENCY CORROSION PREVENTION & APPEARANCE CARE VEHICLE MAINTENANCE REQUIREMENTS SECTION DO-IT-YOURSELF MAINTENANCE EMISSION CONTROL SYSTEMS CONSUMER INFORMATION & REPORTING SAFETY DEFECTS VEHICLE SPECIFICATIONS INDEX…
-
Page 8: Instruments And Controls
INSTRUMENTS AND CONTROLS B250A01A-AAT B250A01A-1…
-
Page 9
1. Panel Brightness Control Knob (Rheostat Switch) 2. Rear Wiper/Washer Switch (If Installed) 3. Multi-Function Light Switch 4. Instrument Cluster 5. Horn and Driver’s Airbag 6. Windshield Wiper/Washer Switch 7. Digital Clock (If Installed) 8. Rear Window Defroster Switch (If Installed) 9. -
Page 10
YOUR VEHICLE AT A GLANCE B255A01A-AAT INDICATOR SYMBOLS ON THE INSTRUMENT PANEL SRS (Airbag) Service Reminder Indicator ABS Service Reminder Indicator (If Installed) O/D OFF Indicator (Automatic transaxle only) Turn Signal Indicator Lights High Beam Indicator Light Low Oil Pressure Warning Light Parking Brake/Low Brake Fluid Level Warning Light * More detailed explanations of these items will be found begining on page 1-38. -
Page 11
Hyundai Warranty. 3. How can you tell if you are purchasing Hyundai Genuine Parts? Look for the Hyundai Genuine Parts Logo on the package (see below). Hyundai Genuine Parts exported to the United States are packaged with labels written only in English. -
Page 12
A000A01A-AAT This Owner’s Manual should be considered a part of the car and remain with it when it is sold for the use of the next owner. ORIGINAL OWNER ADDRESS CITY DELIVERY DATE DEALER NAME ADDRESS CITY OWNER’S I.D. STATE ZIP CODE (Date Sold to Original Retail purchaser) DEALER NO. -
Page 13: Features Of Your Hyundai
FEATURES OF YOUR HYUNDAI Fuel Recommendations … 1-2 Breaking in Your New Hyundai … 1-3 Key … 1-3 Door Locks (Keyless Entry System) … 1-4, 1-6 Window Glass (Power Windows) … 1-8, 1-9 Seat … 1-10 Seat Belt … 1-15 Child Restraint System …
-
Page 14: Fuel Recommendations
B010D01A-AAT Do Not Use Methanol Fuels containing methanol (wood alcohol) should not be used in your Hyundai. This type of fuel can reduce vehicle performance and damage components of the fuel system. CAUTION: Your Hyundai’s New Vehicle Limited Warran-…
-
Page 15: Breaking In Your New Hyundai
Emission Control System. B010F01A-AAT Operation in Foreign Countries If you are going to drive your Hyundai in another country, be sure to: o Observe all regulations regarding registra- tion and insurance.
-
Page 16: Key
Record Your Key Number B030B01E A code number is stamped on the number plate that came with the keys to your Hyundai. This key number plate should not be left with the keys but kept in a safe place, not in the vehicle.
-
Page 17
B040E03A-AAT CHILD-PROTECTOR REAR DOOR LOCK (If Installed) HLC2005 Your Hyundai is equipped with a «child-protec- tor» rear door lock assembly. When the lock mechanism is engaged, the rear door cannot be opened from the inside. Its use is recom- mended whenever there are small children in the rear seat. -
Page 18
FEATURES OF YOUR HYUNDAI B040G02A-GAT Central Door Lock (If Installed) B040G01A-1 The central door locking is operated by pushing the driver’s door lock switch toward the front or rear of the vehicle. If the passenger and rear doors are open when the switch is pushed, the door will remain locked when closed. -
Page 19
CAUTION: Avoid trying to start the engine while the system is armed. FEATURES OF YOUR HYUNDAI B070D02A-AAT Disarmed Stage The system will be disarmed when the following step is taken: The driver’s or passenger’s door is unlocked by depressing the «UNLOCK»… -
Page 20: Window Glass (Power Windows)
FEATURES OF YOUR HYUNDAI B070E02HP-AAT Replacing the battery When the transmitter’s battery begins to get weak, it may take several pushes on the button to lock or unlock the doors, and the LED will not light. Replace the battery as soon as possible.
-
Page 21
To revert to normal operation, press the window lock switch a second time. FEATURES OF YOUR HYUNDAI Auto-Down Window (Driver’s Side) (If Installed) The Auto-Down window is moved to its fully open position by pushing the switch. -
Page 22: Adjustable Front Seats
FEATURES OF YOUR HYUNDAI ADJUSTABLE FRONT SEATS B080A01A-AAT WARNING: Never attempt to adjust the seat while the vehicle is moving. This could result in loss of control, or an accident which may cause death, serious injury, or property damage. B080B02A-AAT…
-
Page 23
To raise the headrest, pull it up. To lower it, push it down while pressing the lock knob. FEATURES OF YOUR HYUNDAI WARNING: o For maximum effectiveness in case of an accident, the headrest should be… -
Page 24: Lumbar Support Control
FEATURES OF YOUR HYUNDAI B080E01O-AAT Lumbar Support Control (Driver’s Seat only) (If Installed) To adjust the lumbar support, turn the handle on the outboard or left side of the seat. To increase the amount of lumbar support, pull the lever forward. To decrease it, push the lever toward the rear.
-
Page 25
To raise the headrest, pull it up. To lower it, push it down while pressing the lock knob. FEATURES OF YOUR HYUNDAI WARNING: o For maximum effectiveness in case of an accident, the headrest should be… -
Page 26
FEATURES OF YOUR HYUNDAI B110A03A-AAT Folding Rear Seatbacks (If Installed) B110A01A-1 B110A02A-1 WARNING: The purpose of the fold-down rear seatbacks is to allow you to carry longer objects than could otherwise be accommodated. Never allow passengers to sit on top of the folded-… -
Page 27: Seat Belts
In addition, follow the other instructions provided in this section. FEATURES OF YOUR HYUNDAI B150B02A-AAT Infant or Small Child All 50 states have child restraint laws. You should be aware of the specific requirements in your state.
-
Page 28
FEATURES OF YOUR HYUNDAI B150C02A-AAT Larger Children Children who are too large for child restraint systems should always occupy the rear seat and use the available lap/shoulder belts. The lap portion should be fastened snug on the hips and as low as possible. Check belt fit periodically. -
Page 29: Care Of Seat Belts
This should be done even if no damage is visible. Additional ques- tions concerning seat belt operation should be directed to your Hyundai Dealer. FEATURES OF YOUR HYUNDAI B170A04A-AAT HEIGHT ADJUSTABLE FRONT SEAT…
-
Page 30
Combination retractor type seat belts are in- stalled in the rear seat outboard positions to help accommodate the installation of child re- straint systems. Hyundai strongly recommends that children always be seated in the rear seat. NEVER place any infant restraint system in the front seat of the vehicle. -
Page 31
Be careful not to damage the belt web- bing or hardware. If the belt webbing or hardware is damaged, replace it. FEATURES OF YOUR HYUNDAI B200A01A-AAT Adjusting Your Seat Belt B200A01L WARNING:… -
Page 32
FEATURES OF YOUR HYUNDAI B210A01A-AAT To Release the Seat Belt The seat belt is released by pressing the re- lease button in the locking buckle. When it is released, the belt should automatically draw back into the retractor. If this does not happen, check the belt to be sure it is not twisted, then try again. -
Page 33: Child Restraint System
Follow all the instructions provided by the manufacturer when installing the child restraint system. FEATURES OF YOUR HYUNDAI WARNING: o A child restraint system must be placed in the rear seat. Never install a child or infant seat on the front passenger’s seat.
-
Page 34
If the seat belt will not properly fit the child, Hyundai recommends the use of an approved booster seat in the rear seat in order to raise the child’s seating height so that the seat belt will properly fit the child. -
Page 35
Front of Vehicle B230C02A-1 2. Route the child restraint seat strap over the seatback. FEATURES OF YOUR HYUNDAI For vehicles with adjustable headrests, route the tether strap under the headrest and between the headrest posts, otherwise route the tether strap over the top of the seatback. -
Page 36: Seat
FEATURES OF YOUR HYUNDAI B230E04A-AAT Installing a Child Restraint Seat with the «Tether Anchorage» System (3 Door) Three child restraint hook holders are located on the vertical back panel. (behind rear bumper bar) To install the child restraint seat 1. Route the child restraint seat strap over the seatback.
-
Page 37: Securing The Child Restraint Seat With The «Isofix» System
Attach the ISOFIX or ISOFIX-compatible child seat only to the appropriate loca- tions shown. o Always follow the installation and use instructions provided by the manufac- turer of the child restraint. FEATURES OF YOUR HYUNDAI ISOFIX Anchor ISOFIX Position Indicator Anchor B230D02A-1…
-
Page 38: Seat Belt
FEATURES OF YOUR HYUNDAI Follow the child seat manufacturer’s instruc- tions to properly install safety seats with ISOFIX or ISOFIX-compatible attachments. Once you have installed the ISOFIX child re- straint seat, assure that the seat is properly attached to the ISOFIX and tether anchors.
-
Page 39: Child Restraint System
B180C02A-AAT Pre-Tensioner Seat Belt Your Hyundai vehicle is equipped with driver’s and front passenger’s pre-tensioner seat belts. The purpose of the pre-tensioner is to make sure that the seat belts fit tightly against the occupant’s body in certain frontal collisions.
-
Page 40
Do not attempt to inspect or replace the pre-tensioner seat belts yourself. This must be done by an authorized Hyundai dealer. o Do not strike the pre-tensioner seat belt assemblies. -
Page 41: Dual-Stage Supplemental Restraint (Airbag) System
RESTRAINT (AIRBAG) SYSTEM (SRS) B240A01A-AAT Driver’s Airbag B240A03A Your Hyundai is equipped with a Dual-stage Supplemental Restraint (Airbag) System. The indications of the system’s presence are the letters «SRS AIRBAG» embossed on the airbag pad cover in the steering wheel and the passenger’s side front panel pad above the glove box.
-
Page 42
If the airbags deploy, they must be replaced by an authorized Hyundai dealer. o Do not tamper with or disconnect SRS wiring, or other components of the SRS system. -
Page 43
SRSCM detects a considerable impact to the front of the vehicle, it will automatically deploy the airbags. B240B02L FEATURES OF YOUR HYUNDAI Upon deployment, tear seams molded directly into the pad covers will separate under pres- sure from the expansion of the airbags. Fur- ther opening of the covers then allows full inflation of the airbags. -
Page 44
FEATURES OF YOUR HYUNDAI Passenger’s Airbag B240B01A CAUTION: When installing a container of liquid air freshener inside the vehicle, do not place it near the instrument cluster nor on the in- strument panel surface. If there is any leak- age from the air freshener onto these areas (instrument cluster, instrument panel or air ventilator), it may damage these parts. -
Page 45
B990B04Y-GAT Side Impact Airbag (If Installed) B990B02Y Your Hyundai is equipped with a side impact airbag in each front seat. The purpose of the airbag is to provide the vehicle’s driver and/or the front passenger with additional protection than that offered by the seat belt alone. The side… -
Page 46
The SRS is virtually maintenance free and there are no parts you can safely service by yourself. The entire SRS system must be inspected by an authorized Hyundai dealer in 10 years after the date that the vehicle was manufactured. -
Page 47
If your car was flooded and has soaked carpeting or water on the floor, you shouldn’t try to start the engine; have the car towed to an authorized Hyundai deal- FEATURES OF YOUR HYUNDAI… -
Page 48: Instrument Cluster And Indicator Lights
FEATURES OF YOUR HYUNDAI INSTRUMENT CLUSTER AND INDICATOR LIGHTS B260A03A-AAT 16 17 18 B260A02A-A…
-
Page 49
14. Seat Belt Warning Light 15. Low Oil Pressure Warning Light 16. Trip Odometer Reset Switch / Trip Computer Reset Switch (If Installed) 17. Low Fuel Warning Light 18. Trunk Lid/Tail Gate Open Warning Light 19. Malfunction Indicator Light (MIL) FEATURES OF YOUR HYUNDAI… -
Page 50: Warning And Indicator Lights
ABS. If this occurs, have your vehicle checked by your Hyundai dealer as soon as possible. The normal braking system will still be operational, but without the assistance of the anti-lock brake system.
-
Page 51
If the light stays on with the engine running, turn the engine off immediately. In any in- stance where the oil light stays on when the engine is running, the engine should be checked by a Hyundai dealer before the car is driven again. B260H03A-AAT PARKING BRAKE/… -
Page 52
If it illuminates while driving, or does not illuminate when the ignition key is turned to the «ON» position, take your car to your nearest authorized Hyundai dealer and have the system checked. B260E02O-AAT SEAT BELT REMINDER LIGHT… -
Page 53
It may also be heard when the brake pedal is pushed down firmly. Expensive rotor damage will result if the worn pads are not replaced. See your Hyundai dealer immediately. B900A01A-AAT LIGHTS ON WARNING SOUND The warning chime sounds when the tail lights are on and the driver side door is open. -
Page 54
Then open the hood and, after the engine has cooled, check the coolant level and the water pump drive belt. If you suspect cooling system trouble, have your cooling system checked by a Hyundai dealer as soon as possible. B330A03A-AAT TACHOMETER (If Installed) HLC2050-D The tachometer registers the speed of your engine in revolutions per minute (rpm). -
Page 55: Trip Computer
1 second while the trip odometer is being displayed. o If your vehicle is equipped with a trip com- puter, refer to the explanation of the trip computer (See page 1-44, tripmeter) FEATURES OF YOUR HYUNDAI TRIP COMPUTER B400B01A-AAT (If Installed) Odometer…
-
Page 56
FEATURES OF YOUR HYUNDAI Reset Switch B300A01A-E Reset Switch o The reset switch is used to zero the multi- functional display mode. o Pushing in the reset switch built in right side of speedometer changes the display as fol- lows;… -
Page 57
When the battery has been reinstalled after being discharged or disconnected, drive more than 20 miles for an accurate distance to empty. FEATURES OF YOUR HYUNDAI NOTE: o If the distance to empty is less than 30 miles, a blinking «—-» symbol will be displayed. -
Page 58: Turn Signal Operation
Check for a burned- out fuse or bulb or see your Hyundai dealer. B340B01A-AAT Lane Change Signal…
-
Page 59: Windshield Wiper And Washer Switch
If there is only a light layer of snow or ice, operate the heater in the defrost mode to melt the snow or ice before using the wiper. FEATURES OF YOUR HYUNDAI B350B01A-AAT WINDSHIELD WASHER OPERATION B350B01A-1 To use the windshield washer, pull the wiper/ washer lever toward the steering wheel.
-
Page 60: Rear Window Wiper And Washer
FEATURES OF YOUR HYUNDAI Mist Wiper Operation B350B02A-1 If a single wipe is desired in mist, move the windshield wiper and washer control lever up. B350C01O-GAT Adjustable Intermittent Wiper Opera- tion B350C01A-1 To use the intermittent wiper feature, place the wiper switch in the «INT»…
-
Page 61: Hazard Warning System
B410A01A-AAT B410A01A-1 The instrument panel lights can be made brighter or dimmer by turning the instrument panel light control knob. FEATURES OF YOUR HYUNDAI HAZARD WARNING SYSTEM B370A01A-AAT B370B01A The hazard warning system should be used whenever you find it necessary to stop the car in a hazardous location.
-
Page 62
FEATURES OF YOUR HYUNDAI B380A01HP-AAT REAR WINDOW DEFROSTER SWITCH (If Installed) B370A01A The rear window defroster and heated outside rearview mirrors are turned on by pushing in the switch. To turn the defroster off, push the switch a second time. -
Page 63
Do not hold the cigarette lighter pressed in. This can damage the heating element and create a fire hazard. If it is necessary to replace the cigarette lighter, use only a genuine Hyundai replacement or its approved equivalent. FEATURES OF YOUR HYUNDAI ASHTRAY… -
Page 64: Drink Holder
FEATURES OF YOUR HYUNDAI B440A01E-AAT Rear Ashtray (If Installed) The rear ashtray may be opened by pulling it out by its top edge. To remove the ashtray to empty or clean it, press down on the spring- loaded tab inside the ashtray and lift the ash- tray upward and pull it all the way out.
-
Page 65
This light produces a spot beam for convenient use as a map light at night or as a personal light for the driver and the passen- ger. FEATURES OF YOUR HYUNDAI B490A03A-AAT Interior light Type A (If Installed) -
Page 66: Glove Box
FEATURES OF YOUR HYUNDAI o ON In the «ON» position, the light stays on at all times. Do not leave the switch in this position for an extended period of time when the ve- hicle is not running. o OFF In the «OFF»…
-
Page 67
Use an approved spray de-icer (not radiator antifreeze) to release the frozen mechanism or move the vehicle to a warm place and allow the ice to melt. FEATURES OF YOUR HYUNDAI B510B01Y-AAT Electric Type (If Installed) HLC2114 The outside rearview mirrors can be adjusted… -
Page 68
FEATURES OF YOUR HYUNDAI B510B01A CAUTION: o Do not operate the switch continuously for an unnecessary length of time. o Scraping ice from the mirror face could cause permanent damage. To remove any ice, use a sponge, soft cloth or ap- proved de-icer. -
Page 69: Mirror
DAY/NIGHT INSIDE REARVIEW MIRROR B520A01A-AAT HLC2112 Your Hyundai is equipped with a day/night inside rearview mirror. The «night» position is selected by flipping the tab at the bottom of the mirror toward you. In the «night» position, the glare of headlights of cars behind you is re- duced.
-
Page 70: Hood Release
FEATURES OF YOUR HYUNDAI HOOD RELEASE B570A03A-GAT B570A01A-1 1. Pull the release knob to unlatch the hood. B570A01A 2. Push the safety catch lever to the left and lift the hood. 3. Hold the hood open with the support rod.
-
Page 71
Gasoline vapors are dangerous. Before refueling, always stop the engine and never allow sparks or open flames near the filler area. If you need to replace the filler cap, use a genuine Hyundai replace- ment part. FEATURES OF YOUR HYUNDAI WARNING:… -
Page 72
FEATURES OF YOUR HYUNDAI TRUNK LID (4 DOOR) B540A01E-AAT Remote Trunk Lid Release B540D01A To open the trunk lid without using the key, pull up the lid release lever. To close, lower the trunk lid, then press down on it until it locks. To be sure the trunk lid is securely fastened, try to pull it up again. -
Page 73
HYUNDAI recommends that cars be kept locked and keys be kept out of the reach of children, and that parents teach their children about the dangers of playing in trunks. -
Page 74: Cargo Area Cover
Type A Type B B580A01A Your Hyundai is equipped with sun visors to give the driver and front passenger either frontal or sideward shade. To reduce glare or to shut out direct rays of the sun, turn the sun visor down.
-
Page 75
FEATURES OF YOUR HYUNDAI HORN B610A01A-AAT B610B02A Press the pad on the steering wheel to sound the horn. -
Page 76: Heating And Cooling Control
FEATURES OF YOUR HYUNDAI HEATING AND COOLING CONTROL B710A01TB-GAT (If Installed) 1. Side Defrost Nozzle 2. Side Ventilator 3. Windshield Defrost Nozzle 4. Center Ventilator B710B01S-AAT CENTER VENTILATOR The center ventilators are located in the middle of the dashboard. The direction of air flow from the vents in the center of the dashboard is adjustable.
-
Page 77: Heating And Ventilation
The blower fan speed, and therefore the volume of air delivered from the system, may be con- trolled manually by setting the blower control between the «1» and «4» position. FEATURES OF YOUR HYUNDAI B670C01A-AAT AIR INTAKE CONTROL HLC2087 This is used to select fresh outside air or recirculating inside air.
-
Page 78: Air Flow Control
FEATURES OF YOUR HYUNDAI NOTE: It should be noted that prolonged opera- tion of the heating system in mode will give rise to misting of the windshield and side windows and the air within the passen- ger compartment will become stale. In ad-…
-
Page 79
If the «Floor-Defrost» mode is selected, the air conditioning will be turned on automatically. And if you want to turn off the air conditioning, push the A/C button. FEATURES OF YOUR HYUNDAI B670D05A-1 Defrost-Level Air is discharged through the windshield de- froster nozzle, side defroster nozzle, side ventilator. -
Page 80: Bi-Level Heating
«Warm». BI-LEVEL HEATING B700A01A-AAT B690A01A Your Hyundai is equipped with bi-level heating controls. This makes it possible to have cooler ) position. air from the dashboard vents and warmer air from the floor outlets at the same time. To use…
-
Page 81
( position, fan speed to the desired position, turn on the air conditioning system, and adjust temperature control to desired tem- perature. FEATURES OF YOUR HYUNDAI AIR CONDITIONING SYSTEM B740A01A-AAT Air Conditioning Switch (If Installed) -
Page 82
FEATURES OF YOUR HYUNDAI B740B02A-AAT AIR CONDITIONING OPERATION Cooling To use the air conditioning to cool the interior: o Turn on the fan control switch (1). o Turn on the air conditioning switch (4) by pushing in on the switch. -
Page 83
(The air conditioning will be turned on automatically.) o Set the temperature control to warm. o Set the fan speed control to position «3» or «4». ) or defrost level ( FEATURES OF YOUR HYUNDAI B720B02A-1 ) position. ) position. -
Page 84
FEATURES OF YOUR HYUNDAI AIR CONDITIONER FILTER (For Evaporator and Blower unit) B760A05A-GAT (If Installed) Outside air Inside of a vehicle Filter Inside air Blower Evaporator core B760A01Y The air conditioner filter is located in front of the evaporator unit behind the glove box. -
Page 85: Stereo Sound System
In addition, they curve around ob- structions so that they can provide better signal coverage. FEATURES OF YOUR HYUNDAI FM radio station Mountains Unobstructed area…
-
Page 86
FEATURES OF YOUR HYUNDAI B750A04L o Fading — As your car moves away from the radio station, the signal will weaken and sound will begin to fade. When this occurs, we suggest that you select another stronger station. o Flutter/Static — Weak FM signals or large… -
Page 87: Audio System
FEATURES OF YOUR HYUNDAI AUDIO SYSTEM H210A01O-AAT STEREO RADIO OPERATION (H215) (If Installed) 2. FADER Control Knob 5. TUNE/SEEK Select Button 4. BAND Selector 6. PRESET Station Select Button 3. BASS/TREBLE Control Knob 1. POWER ON-OFF, BALANCE, VOLUME, SCAN Control Knob…
-
Page 88
FEATURES OF YOUR HYUNDAI H210B04O-AAT 1. POWER ON-OFF/VOLUME Control Knob The radio unit may be operated when the igni- tion key is in the «ACC» or «ON» position. Rotate the knob clockwise to switch the radio unit on and to increase the volume. -
Page 89
Do not place beverages close to the audio system. The audio system mecha- nism may be damaged if you spill them. o Do not impact on the audio system, or the audio system mechanism could be damaged. FEATURES OF YOUR HYUNDAI… -
Page 90
FEATURES OF YOUR HYUNDAI H240A01O-GAT STEREO RADIO OPERATION (H245) (If Installed) 5. BAND Selector 3. TREBLE/FADER Control Knob (TREB/FAD) 6. PRESET Buttons 2. BASS/BALANCE Control Knob (BASS/BAL) 7. SCAN Button 4. TUNE/SEEK Select Button 1. POWER ON/OFF, VOLUME Control Knob… -
Page 91
Press the TUNE select button 0.5 sec or more. Releasing it will automatically tune to the next available station with a beep sound. FEATURES OF YOUR HYUNDAI When the ( ) side is pressed longer than 0.5 second, releasing will automatically tune to the… -
Page 92
FEATURES OF YOUR HYUNDAI o Press band selector to set the band for AM, FM1, and FM2. o Select the desired station to be stored by seek or manual tuning. o Determine the preset station select button you wish to use to access that station. -
Page 93
FEATURES OF YOUR HYUNDAI H240C01O-GAT CASSETTE TAPE PLAYER OPERATION (H245) (If Installed) 3. TAPE PROGRAM Button 6. TAPE SLOT 2. AUTO MUSIC SELECT Button 4. EJECT Button 1. FF/REW Button 5. DOLBY SELECT Button H240A01O… -
Page 94
FEATURES OF YOUR HYUNDAI H240A03O-AAT 1. FF/REW Button o The FF (fast forward tape winding) starts when the button is pressed during PLAY or REW. o PLAY starts when the button is press- ed again during FF. o REW (rewinding) starts when the is pressed during PLAY or FF. -
Page 95
FEATURES OF YOUR HYUNDAI H260A01O-AAT STEREO RADIO OPERATION (H265) (If Installed) 3. BASS/TREBLE Control Knob 4. SCAN Button 6. BAND Selector 7. PRESET Button 5. TUNE/SEEK Select Button 1. POWER ON-OFF/VOLUME/BALANCE Control Knob H260A01A 2. FADER Control Knob… -
Page 96
FEATURES OF YOUR HYUNDAI H260B05O-AAT 1. POWER ON-OFF Control Knob The radio unit may be operated when the igni- tion key is in the «ACC» or «ON» position. Press the knob to switch the power on. The LCD shows the radio frequency in the radio mode or the CD track indicator in the CD mode. -
Page 97
Do not place beverages close to the audio system. The audio system mecha- nism may be damaged if you spill them. o Do not impact on the audio system, or the audio system mechanism could be damaged. FEATURES OF YOUR HYUNDAI… -
Page 98
FEATURES OF YOUR HYUNDAI H260B01O-AAT COMPACT DISC PLAYER OPERATION (H265) (If Installed) 4. SCAN Button 1. Playing CD 3. TRACK UP/DOWN 6. EJECT Button 2. FF/REW Button H260A01A 5. REPEAT Button… -
Page 99
6. EJECT Button When the EJECT button is pressed with a CD loaded, the CD will eject. FEATURES OF YOUR HYUNDAI NOTE: o If the CD does not operate properly or if the ER2 fault code is displayed, use one of two methods to reset the CD deck function. -
Page 100
FEATURES OF YOUR HYUNDAI o This unit is made of precision parts. Do not attempt to disassemble or adjust any parts. o When driving your vehicle, be sure to keep the volume of the unit set low enough to allow you to hear sounds coming from the outside. -
Page 101: Audio Fault Code
If you see any error indication in the display while using the system in CD or Tape mode, find the cause in the chart below. If you cannot clear the error indication, take the car to your Hyundai dealer. INDICATION…
-
Page 102: Care Of Disc
FEATURES OF YOUR HYUNDAI CARE OF DISC B850A02F-AAT Proper Handling Handle your disc as shown. Do not drop the disc. Hold the disc so you will not leave fingerprints on the surface. If the surface is scratched, it may cause the pickup to skip signal tracks.
-
Page 103
If this does not correct the problem, do not continue to use the tape in your vehicle. FEATURES OF YOUR HYUNDAI Head Cotton applicator B860A02L… -
Page 104: Antenna
FEATURES OF YOUR HYUNDAI B860A03L NOTE: Look at a tape before you insert it. If the tape is loose, tighten it by turning one of the hubs with a pencil or your finger. If the label is peeling off, do not put it in the player. It may cause the tape to jam in the drive mechanism when you try to eject it.
-
Page 105
Before entering an automatic car wash or a place with a low height clearance, be sure that the antenna is retracted and stored. o If the antenna is dirty, be sure to clean it in order to avoid an operation malfunc- tion. FEATURES OF YOUR HYUNDAI… -
Page 106: Driving Your Hyundai
DRIVING YOUR HYUNDAI Before Starting the Engine … 2-3 Key Positions … 2-3 Starting … 2-4 Operating the Manual Transaxle … 2-5 Automatic Transaxle … 2-7 Good Braking Practices … 2-10 Anti-Lock Brake System … 2-11 Driving for Economy … 2-12 Winter Driving …
-
Page 107
Hyundai dealer. o Do not run the engine in an enclosed area. -
Page 108: Before Starting The Engine
«ON» position. TO START THE ENGINE C030A01A-AAT COMBINATION IGNITION SWITCH o If your Hyundai is equipped with a manual transaxle, place the shift lever in neutral and depress the clutch pedal fully. o If your Hyundai has an automatic transaxle, place the shift lever in «P»…
-
Page 109: Starting
DRIVING YOUR HYUNDAI o «ON» When the key is in the «ON» position, the ignition is on and all accessories may be turned on. If the engine is not running, the key should not be left in the «ON» position. This will discharge the battery and may also damage the ignition system.
-
Page 110: Operating The Manual Transaxle
OPERATING THE MANUAL TRANSAXLE C070A02A-AAT C070A01A Your Hyundai’s manual transaxle has a con- ventional shift pattern. This shift pattern is also imprinted on the shift knob. The transaxle is fully synchronized in all forward gears so shifting to either a higher or a lower gear is easily accomplished.
-
Page 111
DRIVING YOUR HYUNDAI o If you’ve come to a complete stop and it’s hard to shift into 1 or R(Reverse), put the shift lever in N(Neutral) position and release the clutch. Press the clutch pedal back down, and then shift into 1 or R(Reverse) gear position. -
Page 112: Automatic Transaxle
Never exceed posted speed limits. AUTOMATIC TRANSAXLE C090A01A-AAT C090A01A The highly efficient Hyundai automatic transaxle has four forward speeds and one reverse speed. It has a conventional shift pattern as shown in the illustration. At night, with the multi-function switch turned on to the…
-
Page 113
DRIVING YOUR HYUNDAI C090C01A-AAT o R(Reverse): Use for backing up the vehicle. Bring the car to a complete stop before shifting the selector lever to «R» position. C090D02A-AAT o N (Neutral): In the «N» position, the transaxle is in neutral position, which means that no gears are en- gaged. -
Page 114
«P» (Park) position. Then, reinstall the cap. Have the system checked by your Hyundai dealer. -
Page 115: Good Braking Practices
If the braking action does not return to normal, stop as soon as it is safe to do so and call your Hyundai dealer for assis- tance. o Don’t coast down hills with the car out of gear.
-
Page 116: Anti-Lock Brake System
Do not hold the vehicle on the upgrade with the accelerator pedal. This can cause the transaxle to overheat. Always use the brake pedal or parking brake. DRIVING YOUR HYUNDAI ANTI-LOCK BRAKE SYSTEM C120A02A-AAT (If Installed) The Anti-Lock Brake System (ABS) is de- signed to prevent wheel lock-up during sud- den braking or on hazardous road surfaces.
-
Page 117: Driving For Economy
(see Sec- tion 5 for details). o Keep your car clean. For maximum service, your Hyundai should be kept clean and free of corrosive materials. It is especially impor- tant that mud, dirt, ice, etc. not be allowed to accumulate on the underside of the car.
-
Page 118: Winter Driving
Remember, your Hyundai does not require extended warm-up. As soon as the engine is running smoothly, you can drive away. In very cold weather, however, give your en- gine a slightly longer warm-up period. o Don’t «lug» or «over-rev» the engine. Lug- ging is driving too slowly in too high a gear resulting in the engine bucking.
-
Page 119
C160C01A-AAT Use High Quality Ethylene Glycol Coolant Your Hyundai is delivered with high quality eth- ylene glycol coolant in the cooling system. It is the only type of coolant that should be used because it helps prevent corrosion in the cooling system, lubricates the water pump and prevents freezing. -
Page 120
DRIVING YOUR HYUNDAI HIGHER SPEED MOTORING C170A01A-AAT Pre-Trip Inspections 1. Tires: Adjust the tire inflation pressures for highway driving. -
Page 121: Trailer Towing
TRAILER TOWING C190A01A-AAT C190A02A Your Hyundai should not be used to tow a trailer. It is designed to be compact and light for good fuel economy, and is not designed as a trailer-towing vehicle. Damages or malfunc- tions caused by towing may not be covered by the limited warranties applying to your Hyundai.
-
Page 122: What To Do In An Emergency
WHAT TO DO IN AN EMERGENCY If the Engine Will Not Start … 3-2 Jump Starting … 3-3 If the Engine Overheats … 3-4 Spare Tire … 3-5 If You Have a Flat Tire … 3-6 Changing a Flat Tire … 3-6 If Your Car Must Be Towed …
-
Page 123: What To Do In An Emergency
Reconnect any that may be disconnected or loose. 3. Check the fuel line in the engine room. 4. If the engine still refuses to start, call a Hyundai dealer or seek other qualified assis- tance.
-
Page 124: Jump Starting
Move cautiously off the road to a safe place. 2. Turn on your emergency flashers. 3. Try to start the engine again. If your vehicle will not start, contact a Hyundai dealer or seek other qualified assistance. JUMP STARTING D020A02A-AAT…
-
Page 125: If The Engine Overheats
(Page 6-7) to bring the fluid level in the reservoir up to the halfway mark. 7. Proceed with caution, keeping alert for fur- ther signs of overheating. If overheating hap- pens again, call a Hyundai dealer for assis- tance.
-
Page 126: Spare Tire
CAUTION: Serious loss of coolant indicates there is a leak in the cooling system and this should be checked as soon as possible by a Hyundai dealer. SPARE TIRE D040A01A-AAT The following instructions for the temporary spare tire should be observed: 1.
-
Page 127: If You Have A Flat Tire
WHAT TO DO IN AN EMERGENCY D040B01A-AAT Handling the Spare Tire Remove the installation bolt to remove the spare tire. To replace the spare tire in its storage compartment, tighten the bolt firmly with your fingers until there is no more play in the spare tire.
-
Page 128
D060K01A-AAT Wheel Cap (If Installed) Notch HLC4009-1 1. Wrap a piece of cloth around the tip of the wrench bar to avoid scratching. 2. Insert the wrench bar into the notch of the wheel cap and pry gently to remove the wheel cap. -
Page 129
WHAT TO DO IN AN EMERGENCY D060C01A-AAT 2. Block the Wheel Flat tire Block the wheel that is diagonally opposite from the flat to keep the vehicle from rolling when the car is raised on the jack. D060D01A-AAT 3. Loosen Wheel Nuts HTB156 The wheel nuts should be loosened slightly before raising the car. -
Page 130
D060F02E-AAT 5. Raising the Car Wrench bar Wheel nut wrench HFC4022 After inserting a wrench bar into the wheel nut wrench, install the wrench bar into the jack as shown in the drawing. To raise the vehicle, turn the wheel nut wrench clockwise. As the jack begins to raise the vehicle, double check that it is properly positioned and will not slip. -
Page 131
WHAT TO DO IN AN EMERGENCY D060G02A WARNING: Wheels and wheel covers may have sharp edges. Handle them carefully to avoid pos- sible severe injury. Before putting the wheel into place, be sure that there is nothing on the hub or wheel (such as mud, tar, gravel, etc.) that interferes with the wheel fitting solidly against the hub. -
Page 132: If Your Car Must Be Towed
Your car can be damaged if towed incor- rectly! If your car has to be towed, it should be done by your Hyundai dealer or a commercial tow truck service. This will help assure that your car is not damaged in towing. Also, professionals are gen- erally aware of state and local laws governing towing.
-
Page 133: Emergency Towing
WHAT TO DO IN AN EMERGENCY D080C02A-AAT TOWING A CAR WITH AUTOMATIC TRANSAXLE o NOT OK FOR AUTOMATIC TRANSAXLE EQUIPPED VEHICLE o OK FOR MANUAL TRANSAXLE D080C01A CAUTION: A car with an automatic transaxle should never be towed from the rear with the front wheels on the ground.
-
Page 134: If You Lose Your Keys
IF YOU LOSE YOUR KEYS D120A01A-AAT If you lose your keys, many Hyundai dealers can make you a new key if you have your key number. If you lock the keys inside your car and you cannot obtain a new key, many Hyundai dealers can use special tools to open the door for you.
-
Page 135
CORROSION PREVENTION & APPEARANCE CARE Corrosion Protection … 4-2 To Help Prevent Corrosion … 4-2 Washing and Waxing … 4-3 Cleaning the Interior … 4-5… -
Page 136: Corrosion Protection
Protecting Your Hyundai from Corro- sion By using the most advanced design and con- struction practices to combat corrosion, Hyundai produces cars of the highest quality. However, this is only part of the job. To achieve the long term corrosion resistance your Hyundai can deliver, the owner’s cooperation and assistance is also required.
-
Page 137: Washing And Waxing
Use a good quality car-washing solution and follow the manufacturer’s directions on the package. These are available at your Hyundai dealer or auto parts outlet. Don’t use strong household deter- gents, gasoline, strong solvents or abrasive cleaning powders as these may damage the finish.
-
Page 138
To protect the paintwork of the car against corrosion, you must clean your Hyundai (at least once a month). Give special attention to the removal of salt, mud and other substanc- es on the underside of the splashboards of the car. -
Page 139: Cleaning The Interior
Maintaining Bumpers Special precautions must be observed to pre- serve the appearance of the bumpers on your Hyundai. They are: o Be careful not to spill battery electrolyte or hydraulic brake fluid on the bumpers. If you do, wash it off immediately with clean water.
-
Page 140
CORROSION PREVENTION AND APPEARANCE CARE ANY QUESTIONS? E050A01A-AAT If you have any questions about the care of your car, consult your Hyundai dealer. -
Page 141
VEHICLE MAINTENANCE REQUIREMENTS Maintenance Intervals … 5-2 Scheduled Maintenance … 5-4 Maintenance Under Severe Usage Conditions … 5-6 Explanation of Scheduled Maintenance Items … 5-7… -
Page 142: Vehicle Maintenance Requirements
F010D01A-AAT General Checks These are the regular checks you should per- form when you drive your Hyundai or you fill the fuel tank. A list of these items will be found on page 6-3. F010E01A-AAT Do-It-Yourself Maintenance…
-
Page 143: Scheduled Maintenance
F010F01A-AAT A Few Tips Whenever you have your Hyundai serviced, keep copies of the service records in your glove box. This will help ensure that you can docu- ment that the required procedures have been performed to keep your warranties in effect.
-
Page 144: Scheduled Maintenance
VEHICLE MAINTENANCE REQUIREMENTS SCHEDULED MAINTENANCE F030A01A-AAT The following maintenance services must be performed to assure good vehicle control and performance. Keep receipts for all vehicle services to protect your warranty. Where both mileage and time are shown, the frequency of service is determined by whichever occurs first. F030B02A-AAT R : Replace I : Inspect and, after inspection, clean, adjust, repair or replace if necessary MILES X 1000…
-
Page 145
F030C11A-AAT R : Replace I : Inspect and, after inspection, clean, adjust, repair or replace if necessary MILES X 1000 KILOMETERS X 1000 DESCRIPTION MONTHS GENERAL ITEMS DRIVE BELT (WATER PUMP, ALTERNATOR AND A/CON) COOLANT TIMING BELT MANUAL TRANSAXLE OIL AUTOMATIC TRANSAXLE FLUID BRAKE FLUID BRAKE HOSES AND LINES… -
Page 146: Maintenance Under Severe Usage Conditions
VEHICLE MAINTENANCE REQUIREMENTS F040A08A-AAT The following items must be serviced more frequently on cars normally used under severe driving conditions. Refer to the chart below for the appropriate maintenance intervals. R : Replace I : Inspect and, after inspection, clean, adjust, repair or replace if necessary MAINTENANCE ITEM ENGINE OIL AND FILTER AIR CLEANER FILTER…
-
Page 147: Explanation Of Scheduled Maintenance Items
F060H01A-AAT o Air Cleaner Filter A Genuine Hyundai air cleaner filter is recom- mended when the filter is replaced. F060J01A-AAT o Spark Plugs Make sure to install new spark plugs of the correct heat range.
-
Page 148
Check the automatic transaxle fluid level with the engine running and the transaxle in neutral, with the parking brake properly applied. Use HYUNDAI GENUINE ATF, DIAMOND ATF SP-III or SK ATF SP-III when adding or changing fluid. -
Page 149
F070L01A-AAT o Suspension Mounting Bolts Check the suspension connections for loose- ness or damage. Retighten to the specified torque. F070M01A-AAT o Steering Gear Box, Linkage & Boots/Lower Arm Ball Joint With the vehicle stopped and engine off, check for excessive free-play in the steering wheel. Check the linkage for bends or damage. -
Page 150: Do-It-Yourself Maintenance
Do-It-Yourself Maintenance Engine Compartment… 6-2 General Checks … 6-3 Checking the Engine Oil … 6-4 Changing the Oil and Filter … 6-5 Checking and Changing the Engine Coolant … 6-6 Spark Plugs … 6-8 Changing the Air Cleaner Filter … 6-10 Checking the Transaxle Oil (manual) …
-
Page 151: Engine Compartment
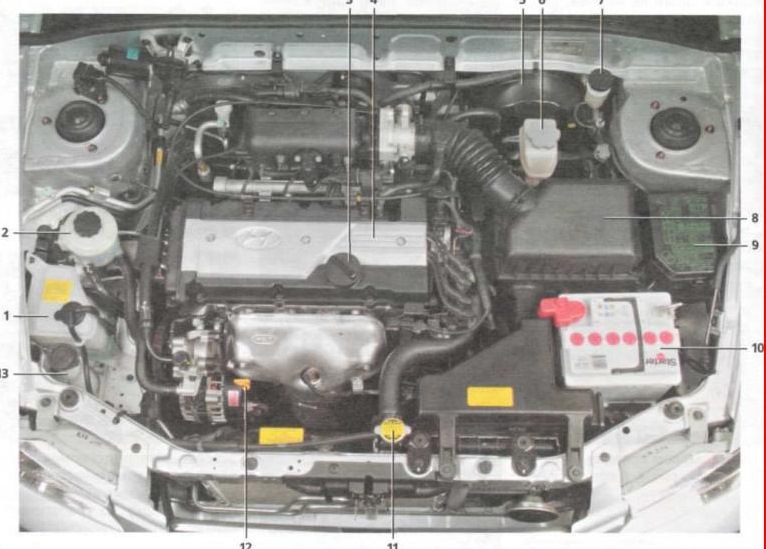
DO-IT-YOURSELF MAINTENANCE ENGINE COMPARTMENT G010C01A-GAT (1.6 DOHC) 1. Engine coolant reservoir 2. Power steering fluid reservoir (If Installed) 3. Rocker cover 4. Engine oil filler cap 5. Brake booster 6. Brake fluid reservoir 7. Clutch fluid reservoir 8. Air filter element 9.
-
Page 152: General Checks
Seat control condition and operation o Seat belt condition and operation o Sun visor operation If you notice anything that does not operate correctly or appear to be functioning correctly, inspect it carefully and seek assistance from your Hyundai dealer if service is needed.
-
Page 153: Checking The Engine Oil
DO-IT-YOURSELF MAINTENANCE CHECKING THE ENGINE OIL G030A01A-AAT Engine oil is essential to the performance and service of the engine. It is suggested that you check the oil level at least once a week in normal use and more often if you are on a trip or driving in severe conditions.
-
Page 154: Changing The Oil And Filter
CHANGING THE OIL AND FILTER G040A03A-AAT Oil filler cap Oil filter Drain plug F040A02TB The engine oil and filter should be changed at those intervals specified in the maintenance schedule in Section 5. If the car is being driven in severe conditions, more frequent oil and filter changes are required.
-
Page 155: Checking And Changing The Engine Coolant
«L» mark, add engine coolant to bring it up between «L» and «F». If the level is low, inspect for coolant leaks and recheck the fluid level frequently. If the level drops again, visit your Hyundai dealer for an inspection and diag- nosis of the reason.
-
Page 156
G050D02A-AAT To Change the Coolant The coolant should be changed at those inter- vals specified in the vehicle maintenance sched- ule in Section 5. CAUTION: Engine coolant can damage the finish of your car. If you spill engine coolant on the car, wash it off thoroughly with clean water. -
Page 157: Spark Plugs
When spark plugs are replaced, always use spark plugs recommended by Hyundai. The use of other spark plugs can result in loss of perfor- mance, radio interference or engine damage.
-
Page 158
3. To remove the spark plug cable, pull straight up on the insulated connector, not the cable. Pulling on the cable may damage the carbon core conductor. WARNING: It is recommended that the engine be cool or cold when changing the spark plugs. If the engine is hot, you could burn yourself on the insulated connector, the spark plug or the engine itself. -
Page 159: Changing The Air Cleaner Filter
If the wipers continue to streak or smear the glass, replace them with genuine Hyundai re- placement parts or their equivalent. CAUTION: o Do not operate the wipers on dry glass.
-
Page 160: Checking The Transaxle Oil (Manual)
Transaxle lubricant in the manual transaxle should be checked at those intervals specified in the vehicle maintenance schedule in Section Recommended Oil Use only HYUNDAI GENUINE PARTS MTF 75W/90 (API GL-4) or equivalent in the manual transaxle. Manual Transaxle Oil Capacity The oil capacity of the manual transaxle is 2.27…
-
Page 161: Checking The Transaxle Fluid (Automatic)
5. G110B03A-AAT Recommended Fluid Your Hyundai automatic transaxle is specially designed to operate with HYUNDAI GENUINE ATF, DIAMOND ATF SP-III or SK ATF SP-III. Damage caused by a nonspecified fluid is not covered by your new vehicle limited warranty.
-
Page 162
G110D02A-AAT To Check the Transaxle Fluid Level C090A01A Park the car on level ground with the parking brake engaged. When the transaxle fluid level is checked, the transaxle fluid should be at normal operating temperature and the engine idling. G110D03A While the engine is idling, apply the brakes and move the gear selector lever from «P»… -
Page 163: Checking The Brakes
CAUTION: Because brakes are essential to the safe operation of the car, it is suggested that they be checked and inspected by your Hyundai dealer. The brakes should be checked and inspected for wear at those intervals speci- fied in the vehicle maintenance schedule in Section 5.
-
Page 164: Checking The Clutch Fluid
«MAX» and «MIN» level markings on the fluid reservoir. Fill as required. Fluid loss indicates a leak in the clutch system which should be inspected and repaired immediately. Consult your Hyundai dealer. G130B02A-AAT To Replace the Fluid Recommended brake fluid conforming to DOT 3 or DOT 4 specification should be used.
-
Page 165: Changing The Air Conditioner Filter
Pressing with your finger, you should not be able to deflect this belt anymore than 1/3 of an inch. If the belt is too loose, have it adjusted by your Hyundai dealer. CHANGING THE AIR CONDITIONER FILTER…
-
Page 166
Use very light finger pressure and be sensitive to changes in resistance that mark the limits of the free-play. If the free-play is greater than specified, have it inspected by your Hyundai dealer and adjusted or repaired if necessary. -
Page 167
This is the clutch pedal free-play. The free-play should be within the limits specified in the illustration below. If it is not, have it inspected by your Hyundai dealer and adjusted or repaired if nec- essary. G170A01A-AAT Brake Pedal 0.12 ~ 0.31 in. -
Page 168: Checking Drive Belts
(This could be caused by a short in the system drawing too much current.) If this ever happens, have a Hyundai dealer determine the cause, repair the system and replace the fusible link. The fusible links are located in a relay box for easy inspection.
-
Page 169
The fuse should be a snug fit. If it is not, have the fuse clip repaired or replaced by a Hyundai deal- er. If you do not have a spare fuse, you may… -
Page 170
CHECKING THE BATTERY G210A01A-AAT D010B01A WARNING: When working with batteries, carefully ob- serve the following precautions to avoid se- rious injuries. The fluid in the battery contains a strong solution of sulfuric acid, which is poisonous and highly corrosive. Be careful not to spill it on yourself or the car. -
Page 171: Power Steering Fluid Level
DO-IT-YOURSELF MAINTENANCE CHECKING ELECTRIC COOLING FANS G220A01A-AAT WARNING: The radiator fan is controlled by engine cool- ant temperature and may sometimes operate even when the engine is not running. Use extreme caution when working near the blades of the cooling fan, so that you are not injured by a rotating fan blade.
-
Page 172
YOUR HYUNDAI If you desire additional information about main- taining and servicing your Hyundai, you may purchase a factory Shop Manual at your Hyundai dealer’s parts department. This is the same manual used by dealership technicians and while it is highly technical it can be useful in obtaining a better understanding of your car and how it works. -
Page 173
DO-IT-YOURSELF MAINTENANCE G290B02A-AAT Adjustment After Headlight Assembly Replacement Vertical line 0.8 in. (21mm) Horizontal line 0.55 in. (14mm) Cut-off line Ground line G290B01A-1 If the vehicle has had front body repair and the headlight assembly has been replaced, the head- light aiming should be checked using an aiming screen as shown in the illustration. -
Page 174
G270A03A-AAT Headlight Bulb 1. Allow the bulb to cool. Wear eye protection. 2. Open the engine hood. 3. Always grasp the bulb by its plastic base, avoid touching the glass. HLC5033 4. Using a socket wrench of the correct size, remove the headlight assembly mounting bolts. -
Page 175
DO-IT-YOURSELF MAINTENANCE 8. Remove the protective cap from the replace- ment bulb and install the new bulb by match- ing the plastic base with the headlight hole. Re-attach the bulb spring and install the dust cover. Reconnect the power cord. 9. -
Page 176
HLC5012 2. To replace the front turn signal light (1) or position light (2), take it out from the bulb holder by turning it counterclockwise. 3. Install the new bulb. G270D01TB-AAT Rear Combination Light 4 Door G270D01A 3 Door HLC5015 1. -
Page 177
DO-IT-YOURSELF MAINTENANCE 3. To replace the rear combination light (stop/ tail light, turn signal light or back-up light), take it out from the bulb holder by turning it counterclockwise. (1) Stop/Tail Light (2) Turn Signal Light (3) Back-up Light 4. Install the new bulb. G270C01TB-AAT Luggage Compartment Light (If Installed) -
Page 178
G270G01A-AAT Interior Light (Map Light) (If Installed) HLC5017 1. Remove the cover with a flat-head screw- driver. HLC5018 2. Replace with a new bulb. DO-IT-YOURSELF MAINTENANCE G270H01A-AAT Interior Light HLC5019 1. Remove the cover with a flat-head screw- driver. -
Page 179
DO-IT-YOURSELF MAINTENANCE HLC5020 2. Replace with a new bulb. -
Page 180: Bulb Wattages
BULB WATTAGES G280A03A-AAT Part Name Front Position Light Headlight (High/Low) Front Turn Signal Light Interior Light (Map Light) (If Installed) Interior Light Front Fog Light (If Installed) Front Side Marker Light 4 DOOR Wattage Part Name Rear Combination 60/55 Light High Mounted Rear Stop Light (If Installed) Rear Side Marker Light Luggage Compartment Light (If Installed)
-
Page 181: Fuse Panel Description
DO-IT-YOURSELF MAINTENANCE FUSE PANEL DESCRIPTION G200C02A-GAT Engine Compartment NOTE: Not all fuse panel descriptions in this manual may be applicable to your vehicle. It is accurate at the time of printing. When you inspect the fuse box on your vehicle, refer to the fuse box label. DESCRIPTION FUSE RATING 120A…
-
Page 182
DESCRIPTION FUSE RATING Radiator fan, Condenser fan, ECM, Oxygen sensor, Purge control valve, ECU #1 SMATRA, Glow plug relay, Heater relay, Stop lamp switch A/C relay A/CON COMP Horn relay HORN Illumination lamps, Left rear combination lamp, License lamp, DRL control, TAIL LH Position lamp, H/LP washer relay Right rear combination lamp, License lamp, Position lamp… -
Page 183
DO-IT-YOURSELF MAINTENANCE G200E01A-GAT Inner Panel FUSE FUSE RATING Hazard warning, Back-up lamp switch, Transaxle range switch, A/T shift & key lock control module ETACM, Pre-Excitation resistor, Instrument cluster, Seat belt timer Instrument cluster Air bag ECM, A/T shift lever, Transaxle range switch, Mass air flow sensor, Vehicle speed sensor, Water sensor Power door lock Hazard warning, ETACM… -
Page 184: Emission Control Systems
EMISSION CONTROL SYSTEMS Emission Control System … 7-2 Catalytic Converter … 7-3…
-
Page 185
In order to ensure the proper function of the emission control systems, it is recommended that you have your car inspected and main- tained by an authorized Hyundai dealer in ac- cordance with the maintenance schedule in this manual. H010B01A-AAT 1. -
Page 186
WARNING: o Remember that your Hyundai dealer is your best source of assistance. o Do not stop your Hyundai over any com- bustible material such as grass, paper, leaves or rags. These materials might contact the hot catalytic converter and a… -
Page 187
Tire Chains … 8-4 Tire Rotation … 8-4 Tire Balancing … 8-5 Tire Traction… 8-5 When to Replace Tires … 8-5 Spare Tire and Tools … 8-6 Warranties for Your Hyundai Vehicle … 8-6 Consumer Information … 8-7 Reporting Safety Defects … 8-9… -
Page 188: Engine Number
ENGINE NUMBER I010B01A-AAT F040A02TB-1 The engine number is stamped on the engine block as shown in the drawing. TIRE I020A01A-AAT Tire information The tires supplied on your new Hyundai are chosen to provide the best performance for normal driving.
-
Page 189: Recommended Inflation Pressures
I030A02A-AAT RECOMMENDED INFLATION PRESSURES I030A01A The tire label located in the glove box gives the tire pressures recommended for your car. RECOMMENDED INFLATION PRESSURE-COLD PRESSURE, kPa (PSI) TIRE SIZE Up to 2 persons Up to MAX. load Front Rear Front Rear 207(30) P175/70R13…
-
Page 190: Tire Chains
Tires should be rotated every 7,500 miles (12,000 km). If you notice that tires are wear- ing unevenly between rotations, have the car checked by a Hyundai dealer so the cause may be corrected. After rotating, adjust the tire pressures and be sure to check the wheel nut torque.
-
Page 191: Tire Balancing
I070A01A-AAT TIRE BALANCING A tire that is out of balance may affect handling and tire wear. The tires on your Hyundai were balanced before the car was delivered but may need balancing again during the years you own the car.
-
Page 192: Spare Tire And Tools
Spare tire and wheel Wheel nut wrench, Wrench bar Jack I110A01A-AAT SHOP MANUAL A Hyundai Shop Manual is available from your authorized Hyundai dealer. It’s written for pro- fessional technicians, but is simple enough for most mechanically-inclined owners to under- stand.
-
Page 193: Consumer Information
U.S. Department of Transportation. It provides the purchasers and/or prospective purchasers of Hyundai automobiles with infor- mation on uniform tire quality grading. Your Hyundai dealer will help answer any questions you may have as you read this information. I130B03A-AAT Tire Quality Grading…
-
Page 194
«WARNING». If, after reading this manual, you have any questions regarding the operation of your vehi- cle, please contact your nearest Hyundai Motor America Regional Office as listed below: Eastern Region : Connecticut, Delaware, Maine, Maryland, Massachusetts, New Hampshire, New Jersey, New York, Pennsylvanina, Rhode Is- land, Vermont, Virginia, West Virginia. -
Page 195: Reporting Safety Defects
How- ever, NHTSA cannot become involved in individual problems between you, your dealer, or HYUNDAI MOTOR AMERICA. To contact NHTSA, you may either call the Auto Safety Hotline toll-free at 1-888-327-4236 or write to: NHTSA, U.S.
-
Page 196: Vehicle Specifications
VEHICLE SPECIFICATIONS Measurement … 9-2 Engine … 9-3 Lubrication Chart … 9-4…
-
Page 197
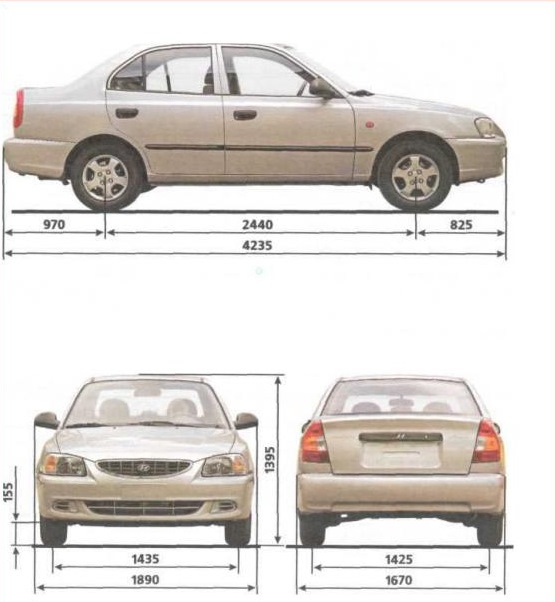
VEHICLE SPECIFICATIONS J010A01A-AAT MEASUREMENT Item Overall length 167.7 (4260) Overall width 66.1 (1680) Overall height (unladen) 54.9 (1395) Wheel base 96.1 (2440) Wheel tread Front 56.5 (1435) Rear 56.1 (1425) J020A01A-AAT POWER STEERING Type Rack and pinion Wheel free play 0 ~ 1.18 in (0 ~ 30 mm) Rack stroke 5.3 in. -
Page 198
ENGINE J070A04A-AAT ITEMS Engine Type Bore x Stroke Displacement (cc) Idle Speed (RPM) Spark plug CHAMPION Spark plug gap Valve Clearance Intake valve (warm engine) Exhaust valve Ignition timing (Base) Firing order Oil grade (API) SPECIFICATIONS 1.6 MPI 4-Cylinder in-line DOHC 76.5 x 87 1,599 800 ±… -
Page 199
SG/CD Cold Climate : SAE 5W-30, 5W-40 (BELOW 100°F OR 38°C) Transaxle Manual HYUNDAI GENUINE PARTS MTF 75W/90 (API GL-4) Auto HYUNDAI GENUINE ATF, DIAMOND ATF SP-III or SK ATF SP-III Power steering PSF-3 Brake fluid DOT 3, DOT 4 or Equivalent… -
Page 200: Index
INDEX…
-
Page 201
Headlight switch … 1-46 High-beam switch … 1-47 Lane change signal … 1-46 Turn signal operation … 1-46 Cooling Fans … 6-22 Corrosion Protection Cleaning the interior … 4-5 Protecting your Hyundai from corrosion … 4-2 Washing and waxing … 4-3… -
Page 202
Defrosting/Defogging … 1-71 Door Central door lock … 1-6 Door locks … 1-4 Locking, unlocking front door with a key … 1-4 Drink Holder … 1-52 Drive Belts … 6-19 Driving Economical driving … 2-12 Smooth cornering … 2-13 Winter driving … 2-13 Dual-Stage Supplemental Restraint (AIRBAG) System … -
Page 203
INDEX Heating and Ventilation Air flow control … 1-66 Air intake control … 1-65 Bi-level heating … 1-68 Defrosting/Defogging … 1-71 Fan seed control (Blower control) … 1-65 Temperature control … 1-68 High-Mounted Rear Stop Light … 1-57 Hood Release … 1-58 Horn … -
Page 204
Spark Plugs … 6-8 Speedometer … 1-42 Starting Procedures … 2-5 Steering Wheel Free-play … 6-17 Stereo Sound System … 1-73 Sun Visor … 1-62 Tachometer … 1-42 Tailgate … 1-61 Theft-Alarm System … 1-6 Tires Balancing … 8-5 Chains … 8-4 Changing a flat tire … -
Page 205
Apply the parking brake, with the engine running, shift the selector lever through all ranges and return to «N» (Neutral) position. Then check the level of fluid on the dipstick. Use only HYUNDAI GENU- INE ATF available at your dealer, DIAMOND ATF SP-III or SK ATF SP-III.
Стандартное руководство идет в комплекте с машиной.
Однако, лично у меня, от долгого томления в бардачке — книжка изрядно истрепалась. Современные гаджеты, аля планшеты, смартфоны — давно позволяют читать PDF, поэтому бумажный вариант я отправил в архив, а на смартфоне всегда при мне электронная версия руководства.
Такое руководство в формате PDF можно найти на сайте Тагаза.
на случай недоступности Тагаза, продублировал.
Руководство отлично подходит для рядовых и начинающих водителей Hyundai Accent.
Но наступает момент первого обращения в Сервисный центр или авторемонтную мастерскую, бюджет изрядно худеет и… появляется интерес к самостоятельному ремонту. В этом случае необходимо уже Руководство по ремонту и обслуживанию.
Это руководство тоже всегда со мной в электронном виде и выручало не раз. Рекомендую.
Бумажная версия уже непригодна для использования…
———————————————————-
P.S. Руководство, приведенное выше, довольно исчерпывающее. В большинстве случаев, руководства и доступа к сайту Drive2.Ru — более чем достаточно.
Для особо любознательных имеется много другой технической документации. Если кого-то что-то конкретно интересует, пишите в личку.
Цена вопроса: 1 000 000 ₽
Пробег: 75 000 км
Руководство на английском языке по ремонту электрооборудования Hyundai Accent 2005 года выпуска.
- Автор: —
- Издательство: Hyundai Motor Company
- Год издания: 2004
- Страниц: —
- Формат: PDF
- Размер: 49,8 Mb

Мультимедийное руководство по эксплуатации и ремонту автомобиля Hyundai Accent.
- Автор: —
- Издательство: —
- Год издания: —
- Страниц: —
- Формат: —
- Размер: 87,8 Mb
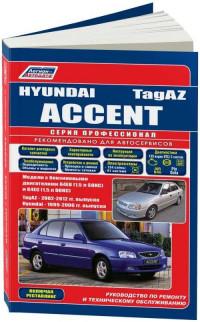
Руководство по техническому обслуживанию и ремонту + каталог расходных запчастей Hyundai Accent 1999-2006 и Tagaz Accent 2002-2012 годов выпуска с бензиновым двигателем объемом 1,5 л.
- Автор: —
- Издательство: Легион-Автодата
- Год издания: 2014
- Страниц: 450
- Формат: —
- Размер: —
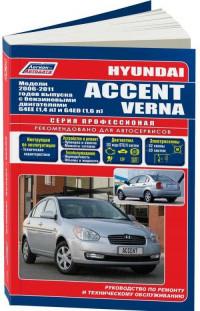
Руководство по эксплуатации, техническому обслуживанию и ремонту автомобилей Hyundai Accent и Hyundai Verna 2006-2011 годов выпуска с бензиновыми двигателями объемом 1,4/1,6 л.
- Автор: —
- Издательство: Легион-Автодата
- Год издания: —
- Страниц: 334
- Формат: —
- Размер: —
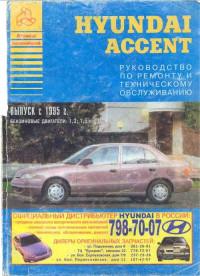
Руководство по техническому обслуживанию и ремонту автомобиля Hyundai Accent с 1995 года выпуска с бензиновыми двигателями объемом 1,3/1,5 л.
- Автор: —
- Издательство: Атласы автомобилей
- Год издания: 2004
- Страниц: 224
- Формат: TIF
- Размер: 35,4 Mb
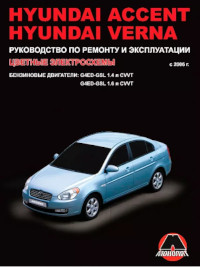
Руководство по эксплуатации и ремонту автомобилей Hyundai Accent и Hyundai Verna с 2006 года выпуска с бензиновыми двигателями объемом 1,4/1,6 л.
- Автор: —
- Издательство: Монолит
- Год издания: —
- Страниц: 220
- Формат: —
- Размер: —

Руководство по эксплуатации и ремонту автомобилей Hyundai Accent и Hyundai Verna с 2006 года выпуска с дизельным двигателем объемом 1,5 л.
- Автор: —
- Издательство: Монолит
- Год издания: —
- Страниц: 262
- Формат: —
- Размер: —

Руководство по эксплуатации и ремонту автомобилей Hyundai Accent, Hyundai Solaris и Hyundai Verna с 2010 года выпуска с бензиновыми и дизельными двигателями.
- Автор: —
- Издательство: Монолит
- Год издания: —
- Страниц: 386
- Формат: —
- Размер: —
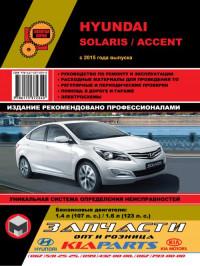
Руководство по эксплуатации и ремонту автомобилей Hyundai Accent и Hyundai Solaris с 2015 года выпуска с бензиновыми двигателями объемом 1,4/1,6 л.
- Автор: —
- Издательство: Монолит
- Год издания: —
- Страниц: 402
- Формат: —
- Размер: —

Руководство по эксплуатации и ремонту автомобилей Hyundai Accent и Hyundai Solaris с 2015 года выпуска с бензиновыми двигателями объемом 1,4/1,6 л.
- Автор: —
- Издательство: Монолит
- Год издания: —
- Страниц: 402
- Формат: —
- Размер: —

Руководство на испанском языке по техническому обслуживанию и ремонту автомобиля Hyundai Accent с 1995 года выпуска.
- Автор: —
- Издательство: —
- Год издания: —
- Страниц: 1181
- Формат: PDF
- Размер: 25,9 Mb
Руководство по эксплуатации автомобилей Hyundai Accent и Hyundai Verna.
- Автор: —
- Издательство: Hyundai Motor Company
- Год издания: 2006
- Страниц: 282
- Формат: PDF
- Размер: 11,0 Mb
Руководство по эксплуатации автомобиля Hyundai Accent.
- Автор: —
- Издательство: Hyundai Motor Company
- Год издания: —
- Страниц: 134
- Формат: PDF
- Размер: 2,4 Mb
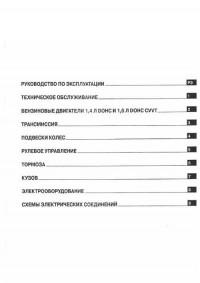
Руководство по эксплуатации и техническому обслуживанию автомобиля Hyundai Accent.
- Автор: —
- Издательство: —
- Год издания: —
- Страниц: 299
- Формат: PDF
- Размер: 96,8 Mb
Руководство по эксплуатации, техническому обслуживанию и ремонту автомобиля Hyundai Accent с 1999 года выпуска.
- Автор: —
- Издательство: —
- Год издания: —
- Страниц: 230
- Формат: PDF
- Размер: 14,0 Mb
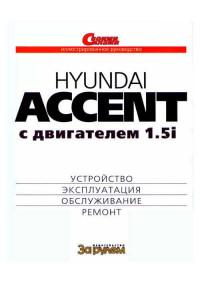
Руководство по эксплуатации, техническому обслуживанию и ремонту автомобиля Hyundai Accent с двигателем 1,5i.
- Автор: —
- Издательство: За рулем
- Год издания: 2005
- Страниц: 232
- Формат: PDF
- Размер: 41,7 Mb
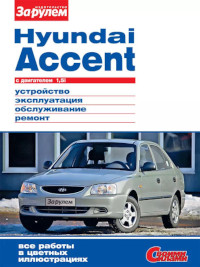
Руководство по эксплуатации, техническому обслуживанию и ремонту автомобиля Hyundai Accent с двигателем 1,5i.
- Автор: —
- Издательство: За рулем
- Год издания: 2012
- Страниц: 232
- Формат: —
- Размер: —
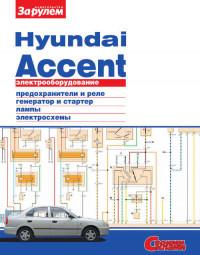
Руководство по ремонту электрооборудования автомобиля Hyundai Accent.
- Автор: —
- Издательство: За рулем
- Год издания: 2010
- Страниц: 49
- Формат: PDF
- Размер: 3,4 Mb
Рабочее место водителя
1. Рычаг замка капота 2. Выключатель передних и задних противотуманных фар 3. Регулятор положения светового пучка фар 4. Комбинация приборов 5. Комбинированный…
Комбинация приборов, тип А
Комбинация приборов, тип А. Световые и цифровые индикаторы. Аналоговые указатели 1. Тахометр 2. Световой индикатор указателя поворотов 3. Световой индикатор незакрытых…
Комбинация приборов, тип В
Комбинация приборов, тип В. Световые и цифровые индикаторы. Аналоговые указатели 1. Тахометр 2. Световой индикатор указателя поворотов 3. Световой индикатор давления…
Контрольные и сигнальные индикаторы
Световой индикатор указателя поворотов. Мигающие зеленые стрелки на приборной панели показывают направление, которое указывают показатели поворотов. Если стрелки…
Бортовой компьютер (опция)
Бортовой компьютер — прибор, который отображает на дисплее ряд параметров (температуру наружного воздуха, пробег, время поездки, расход топлива, среднюю скорость…
Спидометр
Стрелка прибора указывает скорость движения автомобиля в километрах в час (км/час).
Тахометр
Стрелка прибора указывает частоту вращения коленчатого вала двигателя в оборотах в минуту (об/мин). Старайтесь не допускать работы двигателя на высоких оборотах (стрелка…
Одометр
Одометр показывает суммарную величину пробега автомобиля, а также используется для соблюдения периодического сервисного обслуживания.
Путевой одометр
После нажатия кнопки TRIP при включенном зажигании начинают отображаться два путевых одометра. Переход между режимами TRIP А и TRIP В осуществляется нажатием кнопки…
Ключи от автомобиля
К автомобилю прилагаются три ключа. Два «мастер-ключа» и один «сервис-ключ». При помощи «мастер-ключа» можно открыть все замки автомобиля. «Сервис- ключ» позволяет…
Иммобилайзер (опция)
Иммобилайзер — противоугонное приспособление. При помощи «мастер-ключа» можно открыть все замки автомобиля. На одну из сторон ключа нанесен символ М. «Сервис-ключ»…
Положения ключа в замке зажигания
Положение START: в этом положении происходит запуск двигателя. Положение ON: в этом положении включается зажигание. Подается питание на все приборы. Во избежание…
Пуск двигателя. Подсветка замка зажигания
Пуск двигателя Если автомобиль оборудован механической коробкой передач (далее МКПП), установите рычаг переключения передач в нейтральное положение и нажмите до конца на…
Переключатель указателей поворотов
При перемещении рычага переключателя из среднего положения вниз включаются указатели левого поворота, а при переключении рычага вверх — указатели правого поворота. После…
Переключатель света фар
Для переключения режима работы фар поверните наконечник рукоятки переключателя. В первой позиции включаются подфарники, задние габаритные фонари и подсветка панели…
Дневные габаритные огни (опция)
Ваш автомобиль Hyundai оборудован системой дневных габаритных огней. Габаритные огни в таком случае включены все время, пока работает двигатель. Это происходит и в том…
Переключатель дальнего света фар
Для включения дальнего света фар переместите рычаг переключателя от себя. При этом должен загореться контрольный индикатор дальнего света.
Подача сигналов дальним светом фар
Для кратковременного включения дальнего света потяните рычаг переключателя на себя (в нефиксируемое положение) из положения ближнего света. Подача сигналов дальним…
Регулировка работы щеток
Включение щеток на один ход Для включения щеток на один ход потяните рычаг переключателя вверх. Регулировка работы щеток в прерывистом режиме Для включения прерывистого…
Переключатель противотуманных фар
Выключатель передних противотуманных фар (опция) Передние противотуманные фонари включаются нажатием верхней клавиши. Они будут функционировать при установленном во…
Механическая коробка передач
МКП имеет классическую схему переключения передач. Схема изображена на ручке переключения передач. Коробка передач полностью синхронизирована. Перед включением задней…
Автоматическая коробка передач
АКПП имеет четыре передние и одну заднюю скорости. При переключении передач в зависимости от выбираемого диапазона нужно либо нажать педаль тормоза одновременно с…
Стояночный тормоз
Перед выходом из автомобиля всегда включайте стояночный тормоз. При включенном зажигании о включенном состоянии стояночного тормоза предупреждает соответствующий…
Освещение салона
Лампы направленного освещения (опция) Для включения направленного индивидуального освещения нажмите на выключатель. Плафон освещения салона В положении «DOOR» свет…
Система отопления и вентиляции
1. Боковые верхние дефлекторы обдува 2. Боковые дефлекторы обдува 3. Дефлекторы обдува ветрового стекла 4. Центральные дефлекторы обдува
Переключатель режима притока воздуха
При помощи этого переключателя (две клавиши) осуществляется переход между режимом подачи свежего воздуха снаружи автомобиля и рециркуляции воздуха в салоне.
Регулятор воздушного потока
Регулятор позволяет изменять направление потока воздуха. Режимы распределения потоков воздуха Режим «Максимальный уровень кондиционера» (опция) (МАХ А/С) Воздух подается…
Управление системой отопления
В обычном режиме работы системы устанавливают регулятор режима притока воздуха в положение подачи свежего воздуха, а регулятор воздушного потока — в положение «пол». Для…
Двухуровневая подача воздуха
Это режим дает возможность подавать прохладный воздух из дефлекторов приборной панели и теплый воздух на уровне пола одновременно. Установите регулятор режима притока…
Вентиляция салона
Для включения вентиляции установите регулятор режима притока воздуха в положение «свежий воздух». Для подачи воздуха только через дефлекторы приборной панели установите…
Кондиционер (опция)
Выключатель кондиционера Кондиционер включается нажатием переключателя «А/С» на панели управления системой. Охлаждение воздуха Включите вентилятор. Включите кондиционер,…
Переключатель управления подачей воздуха
Для выбора между подачей воздуха снаружи автомобиля или циркуляцией воздуха в салоне нажмите соответствующую кнопку. При включении режима должен загореться световой…
Фильтр системы вентиляции салона(опция)
Фильтр находится во впускном патрубке вентилятора за вещевым ящиком. Он предназначен для очистки воздуха, который подается в салон. 1. Воздух в салон 2. Фильтр 3….
Вещевой ящик
Вещевой ящик расположен в передней панели салона перед передним пассажиром.
Наружные зеркала заднего вида
Положение наружных зеркал заднего вида регулируется изнутри салона. Регулирование может осуществляться как механическим приводом вручную, так и электромеханическим…
Внутреннее зеркало заднего вида
Внутреннее зеркало заднего вида имеет механизм, изменяющий его положение для предотвращения ослепления водителя светом фар автомобилей, едущих сзади. Это положение…
Открывание капота
1. Для открывания капота нужно потянуть за рукоятку его замка, расположенную слева от рулевой колонки 2. Предохранительный рычаг находится слева от замка капота (если…
Крышка багажника и задние двери
Для открывания крышки багажника 4-дверной модели нужно повернуть ключ по часовой стрелке и открыть крышку вручную. Для открывания задней двери 3-дверной модели нужно при…
Дистанционное открывание крышки багажника
Рычаг дистанционного открывания крышки багажника расположен рядом с рычагом открывания лючка горловины топливного бака и помечен пиктограммой в виде автомобиля с…
Звуковой сигнал
Клавишей включения звукового сигнала является центральный элемент рулевого колеса.
Системы безопасности
Ремни безопасности с креплением в 3-х точках и блокирующим натяжным устройством Ремни безопасности с креплением в 2-х точках для среднего заднего сиденья (опция) Ремни…
Регулирование фар
Перед началом регулирования фар нужно выполнить следующие действия. 1. Отрегулировать давление во всех шинах. 2. Установить автомобиль на ровной площадке на расстоянии…
Замена ламп. Задние комбинированные фонари
1. Откройте крышку багажника. 2. Снимите крышку лючка для обслуживания задних фонарей. 3. Открутите гайки. 4. Снимите задний фонарь. 5. Поверните нужную лампу против…
Типы и мощность ламп
Применение Тип лампы Мощность, Вт Тип лампы по IEC Изображение 1. Дальний — ближний свет фар Н4 60/55 P43t-38 2. Передние указатели поворотов R21W 21 BAU15S Передние…
Блок предохранителей в моторном отсеке
Описание предохранителей, описанных в руководстве, может не соответствовать панели предохранителей вашего автомобиля. Все приведенные данные верны на момент публикации….
Блок предохранителей в салоне
Предохранитель Номинал Защищаемый компонент электрооборудования 1 RR WIPER 15A Комбинированный переключатель фар, привод заднего стеклоочистителя 2 Н/LP(LH) 10A Левая…
Технические характеристики
Габаритные размеры, мм Четырехдверный Трехдверный Длина 4280 мм 4045 мм Ширина 1695 мм 1695 мм Высота 1470 мм 1470 мм База 2500 мм 2500 мм Колея передних колес 1470 мм…
Технические характеристики. Двигатели
Бензиновые двигатели Дизельный двигатель 1,4L 1,6L 1,5L Тип двигателя 4-цилиндровый, рядный, DOHC Диаметр и ход поршня 75,5×78,1мм 76,5×87 мм 75×84,5 мм Рабочий объем…
Ссылка в разных форматах на этот раздел
TextHTMLBB Code
Hyundai Accent 2004 Owner’s Manuals and Service Manuals for online browsing and download. View HYUNDAI Accent Manuals online for free. CarManualsOnline.info is the largest free online database of HYUNDAI Owner’s Manuals and HYUNDAI Service Manuals.
HYUNDAI, Select Model Year:
All, 2000, 2002, 2003, 2004, 2005, 2006, 2007, 2008, 2009, 2010, 2011, 2011.5, 2012, 2013, 2014, 2015, 2016, 2017, 2018, 2019, 2020, 2021, 2022, 2023
HYUNDAI 2004, Select Model:
- Hyundai Accent 2004
- Hyundai Coupe 2004
- Hyundai Elantra 2004
- Hyundai Getz 2004
- Hyundai Grandeur 2004
- Hyundai H-1 (Grand Starex) 2004
- Hyundai Matrix 2004
- Hyundai Santa Fe 2004
- Hyundai Sonata 2004
- Hyundai Super Aero City 2004
- Hyundai Terracan 2004
- Hyundai Tiburon 2004
List of Hyundai Accent 2004 Manuals:
Recent Searches in HYUNDAI Manuals
jump start Hyundai Sonata, display Hyundai Santa Fe 2019 Betriebsanleitung (in German), engine Hyundai Sonata, oil temperature Hyundai Azera 2008 User Guide, fuel Hyundai Santa Fe 2015 Owner’s Manual, heater Hyundai Santa Fe 2013 Betriebsanleitung (in German), Tempomat Hyundai Kona EV 2020 Betriebsanleitung (in German), remote control Hyundai Creta 2019 Owner’s Manual, suspension Hyundai Santa Fe 2015 Owner’s Manual


